
Fine single-needle guitar necks and tiny headstocks look gorgeous on a saved board, but they often blur where skin stretches or friction is constant. Choose slightly bolder linework for the parts that take daily wear and keep the single-needle work for the accents. With the right placement and a touch-up plan, a guitar piece can read like an heirloom instead of a smudge after a few years.
1. Fine-Line Mini Headstock on Inner Forearm
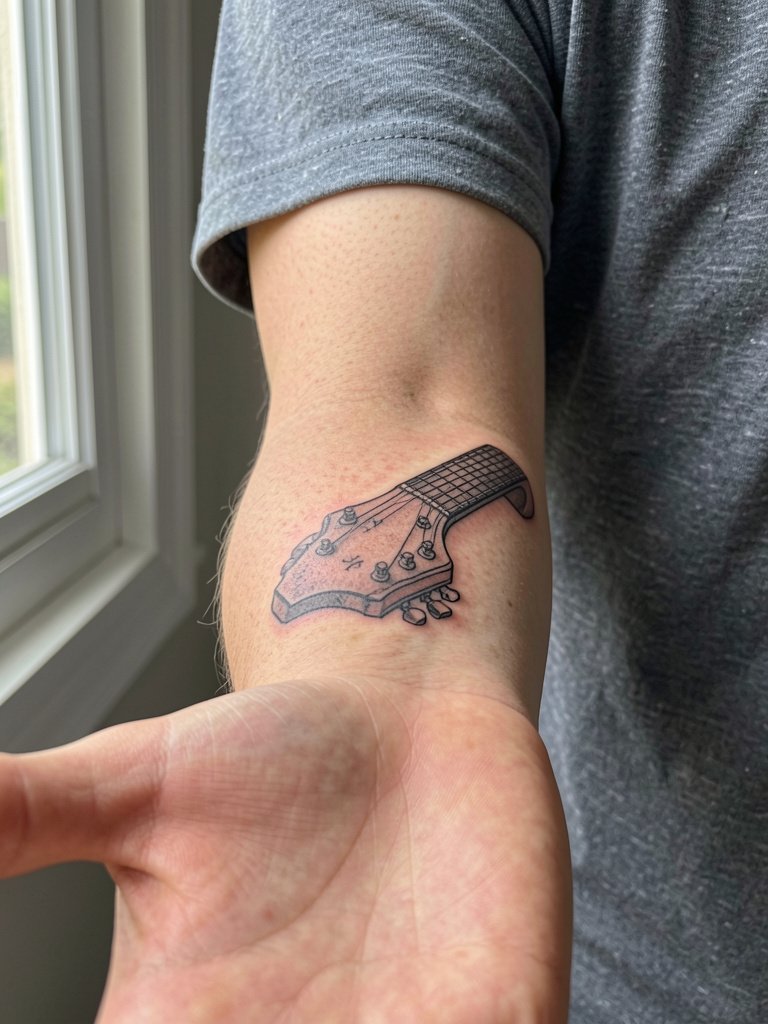
Tiny headstocks demand careful lineweight planning. I recommend slightly heavier single-needle work than the Pinterest reference so the tuning pegs do not smear into a blob at year two. Talk specifics with your artist about exact line thickness and spacing, and bring a printed reference scaled to the length you want. The inner forearm sits in a low-friction zone so touch-ups are usually only needed once after a couple of years. For showing it off, a rolled-sleeve button shirt pairs well with the placement and you can link to a similar short-sleeve linen shirt to frame the piece.
2. Micro-Realism Acoustic F-Hole on Chest
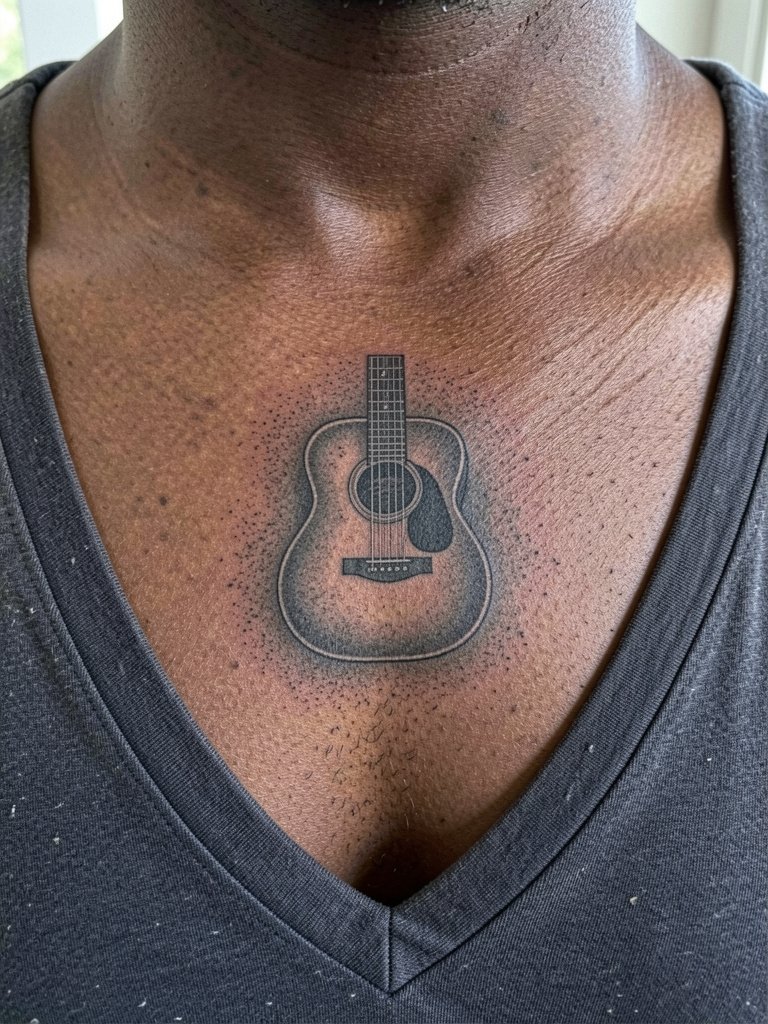
Micro-realism works beautifully on the chest if you want a hint of detail without a large piece. The sternum and collarbone area move and flex, so plan for slightly larger contrast between dark and mid-tones. Tell the artist you want stipple shading to suggest wood grain rather than hard photographic detail. Sessions here are moderate on pain and usually fit into a single two- to three-hour block. Wear a wide V-neck or scoop top for the appointment, like this wide V-neck tee so the artist has unobstructed access.
3. Headstock Wrapping Small Around Wrist
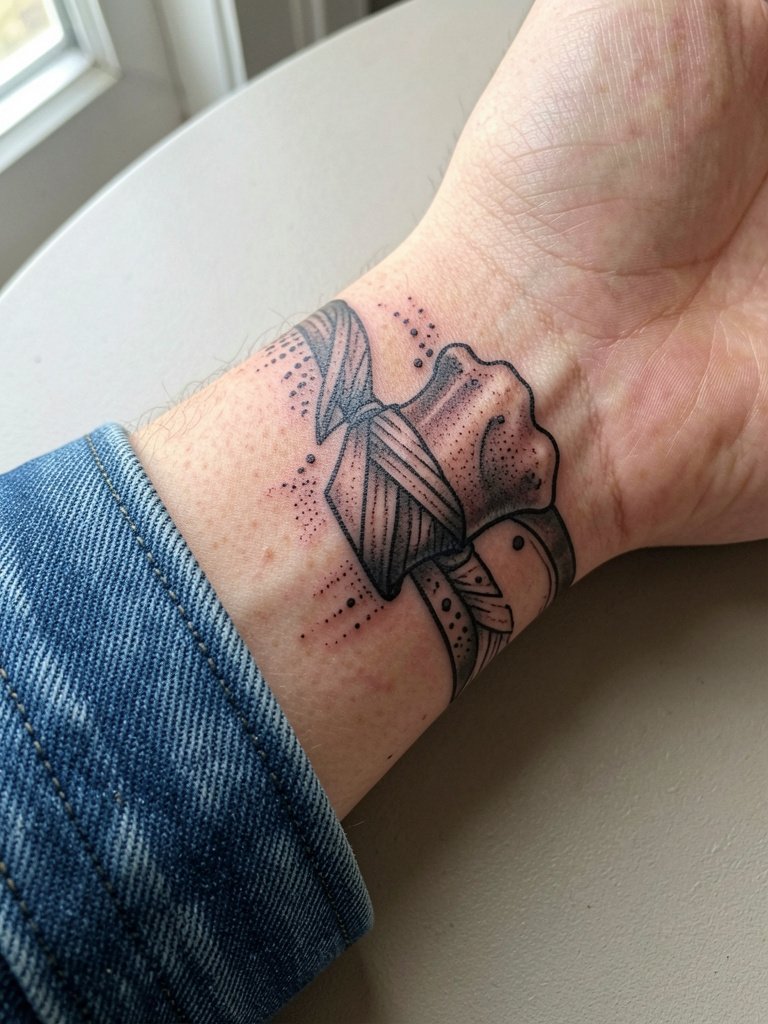
Wrist wraps are high friction points, and the common mistake is going too small with thin script or tiny pegs. For a wrist piece, increase the outline thickness slightly and accept a simplified headstock silhouette. Discuss with your artist how the design reads at two inches versus three inches so you pick the size that holds up. Expect more frequent touch-ups than on the forearm, often around year two. For evenings out, a rolled cuff or a short-sleeve shirt highlights the wrap and pairs nicely with a minimalist leather cuff bracelet.
4. Neo-Traditional Electric on Upper Arm
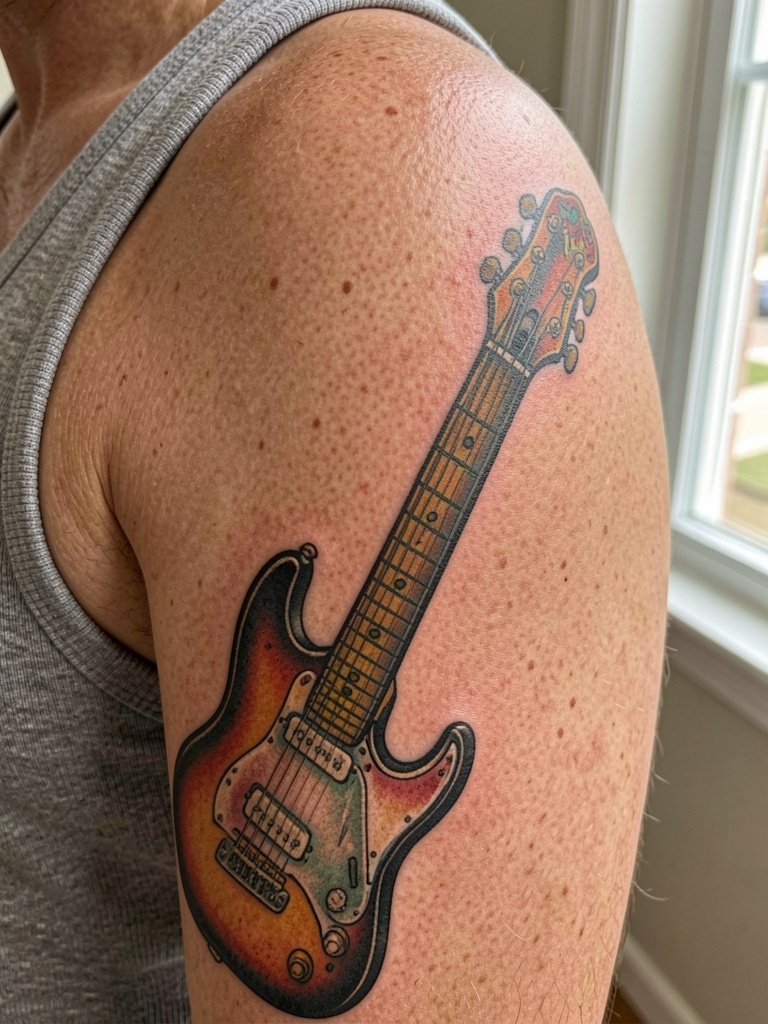
The upper arm allows for bold neo-traditional treatment with color and heavy outlines that age gracefully. I often recommend this over micro-realism when you want longevity without frequent touch-ups. Mention color saturation and edge thickness in the consultation so the artist prioritizes saturation now rather than hoping to fill later. Session time is usually two to four hours depending on color. For show-off looks, short sleeves and rolled cuffs work, and a fitted sleeve roll shirt complements the bold palette.
5. Minimalist Guitar Silhouette on Ribcage
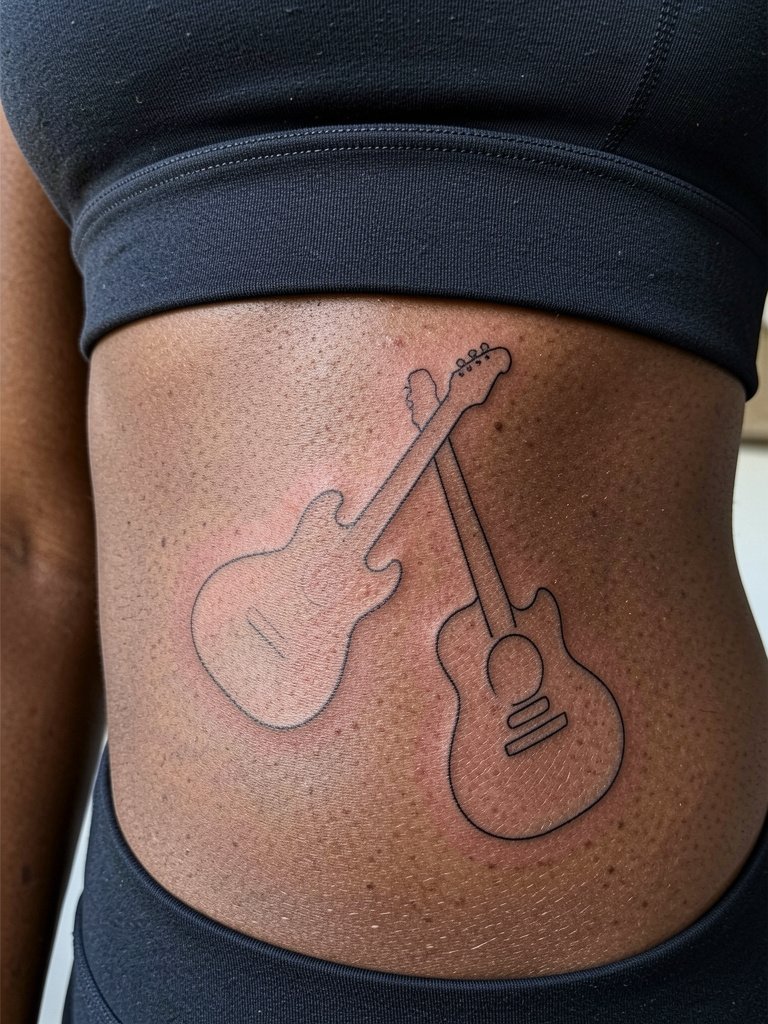
Ribcage placements age differently because the skin stretches with movement and weight changes. One camp of artists warns that fine line on ribs blurs within two years under the constant flex. The other camp argues that with slightly deeper placement and wider spacing the lines settle and remain readable. Name the expected change in your consultation so the artist can adjust spacing and depth to your goals. Sessions here are higher on the pain scale and often require breaks. For the session, wear a fitted cropped top you can remove easily, such as this fitted sports bra or equivalent to grant access without shifting fabric.
6. Guitar Neck Tattoo Running Up the Side of the Hand
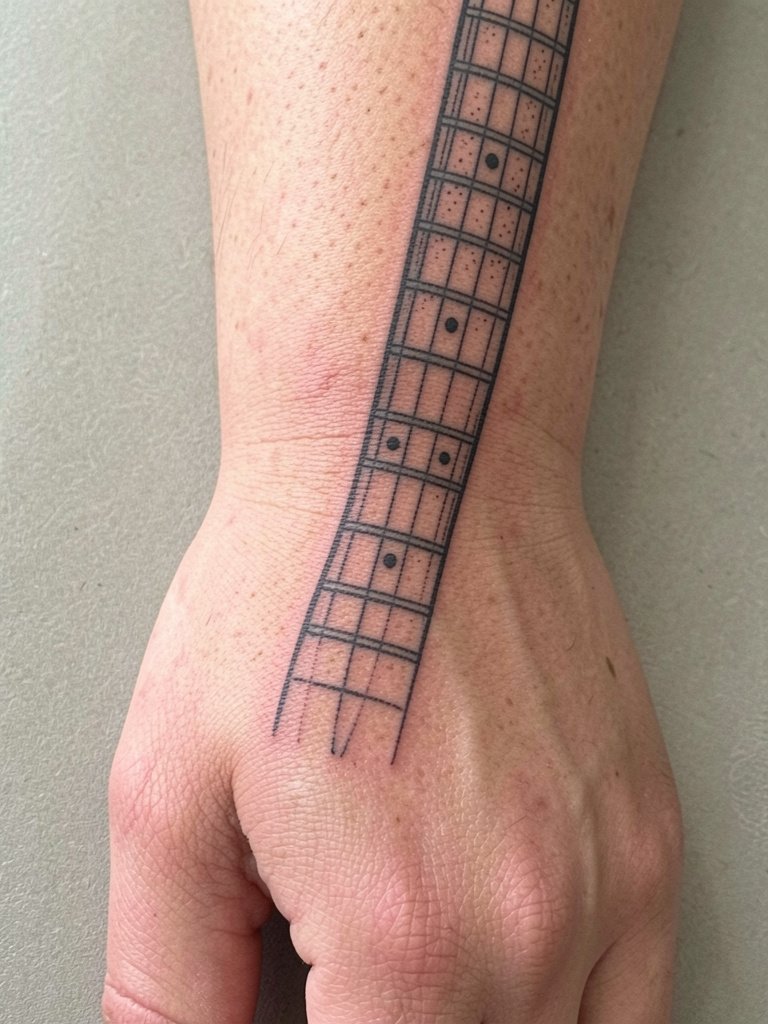
Hand tattoos are visible and wear faster due to constant washing and use. One group argues hand pieces limit professional opportunities and fade quickly because of constant friction. The other group points out that proper placement, bolder linework, and a commitment to touch-ups keep the design crisp. Be candid about how often you work with your hands and plan for touch-ups at year one or two. For the appointment choose clothing that keeps the forearm free and bring a fitted short-sleeve top so the artist can work without obstruction.
7. Classic Acoustic Soundhole on Upper Back
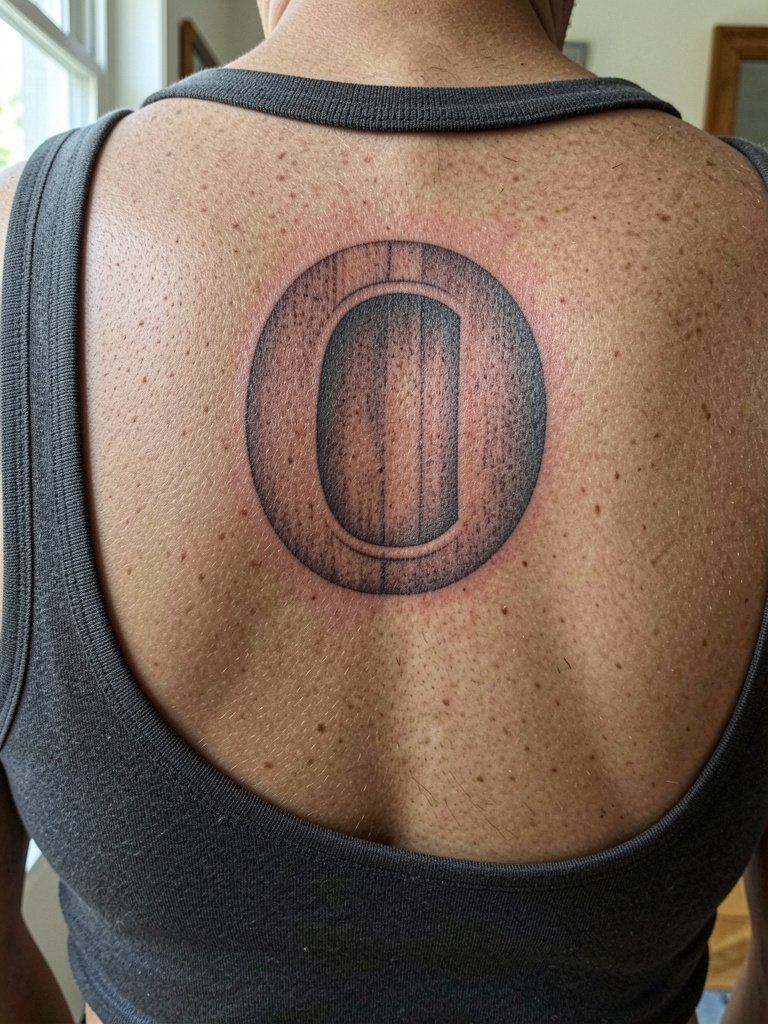
Upper back pieces let you scale up detail without worrying about daily abrasion. I prefer this for realistic wood grain or soundhole detail rather than fine-line work. Tell the artist you want stipple shading for texture rather than continuous greys to prevent early flattening. Sessions are comfortable and often split between two sittings for larger detail. To show the piece off, a low-back shirt or an open-back knit pairs well, and a casual open-back tee makes the tattoo the focal point.
8. Scripted Song Title Along Collarbone
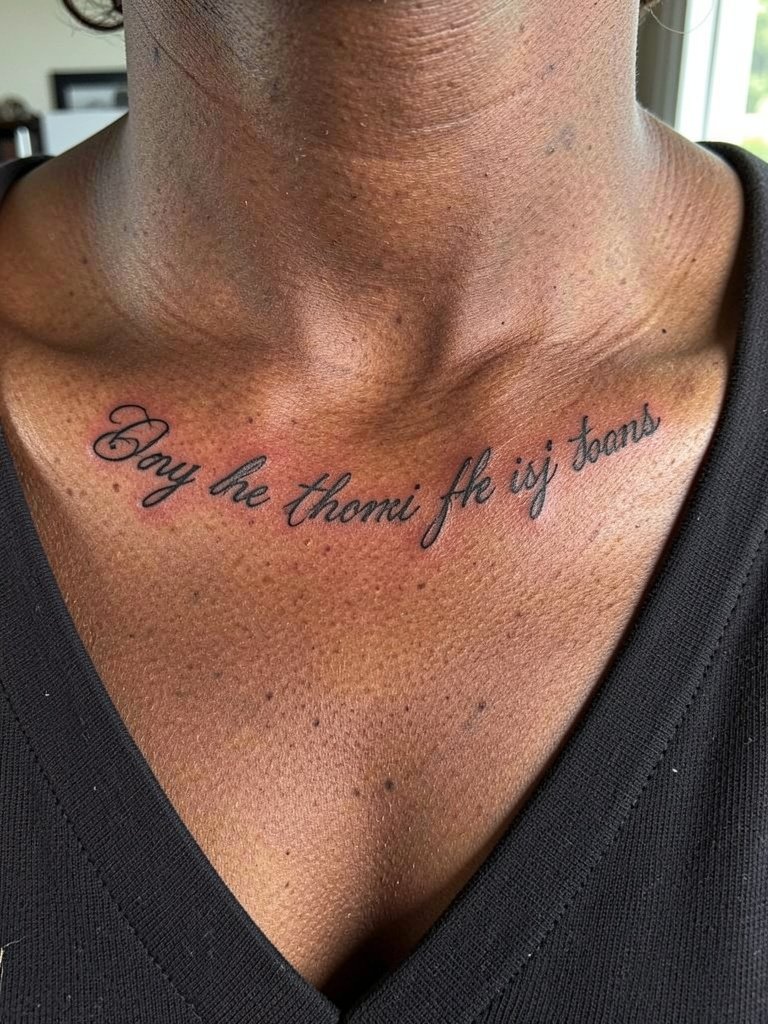
Script along the collarbone is intimate and reads well when spaced for breathing room. A common error is requesting ultra-fine script without accounting for the surface movement from breathing. Ask for a slightly heavier stroke and test the scale printed across the chest so you can see how spacing affects legibility. Plan for a one to two-hour session depending on length. For the outing after healing wear scoop necks or open collars, and consider a subtle accessory like a thin chain necklace to frame the lettering, for example this minimal chain necklace.
9. Guitar and Floral Hybrid Sleeve Accent
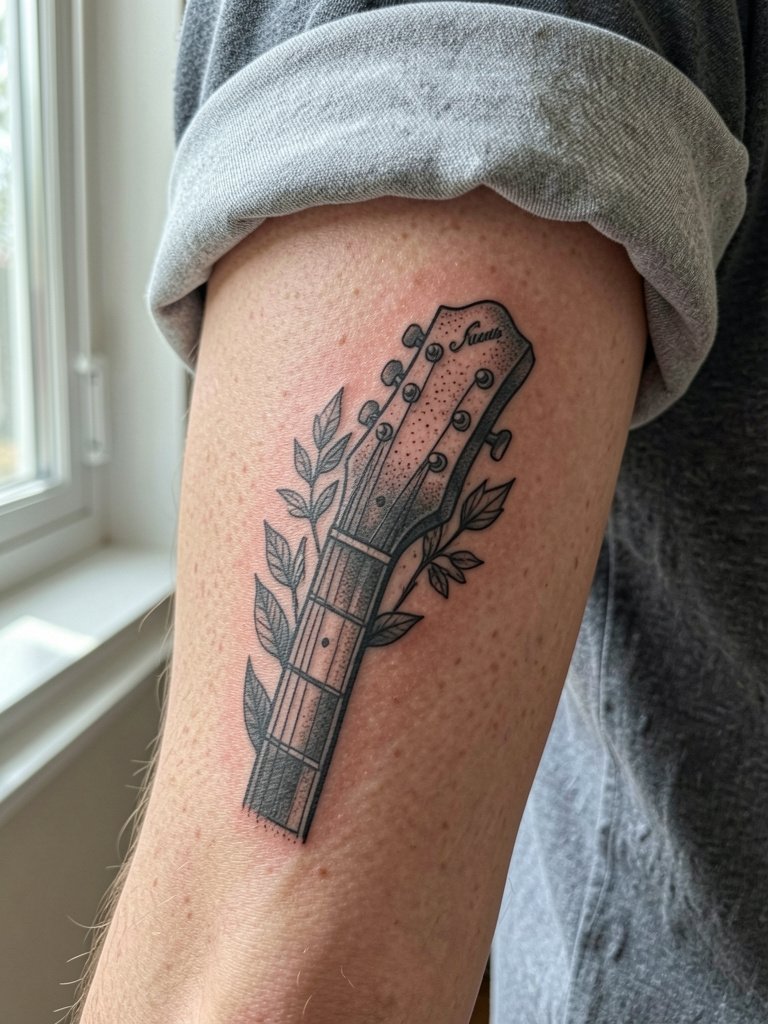
Mixing guitars and flora makes for a design that can grow into a sleeve. I suggest stipple shading to marry the botanical texture to the instrument without muddying the negative space. When you consult, bring images showing how the botanical wraps and specify where you want high contrast so the guitar silhouette reads at distance. Forearm sleeves are visible and tolerate touch-ups well, often needing a top-up at year three. For day-to-day styling rolled sleeves or a short-sleeve cotton shirt keep the sleeve visible, try this rolled-sleeve casual shirt.
10. Geometric Fretboard Along the Rib Line
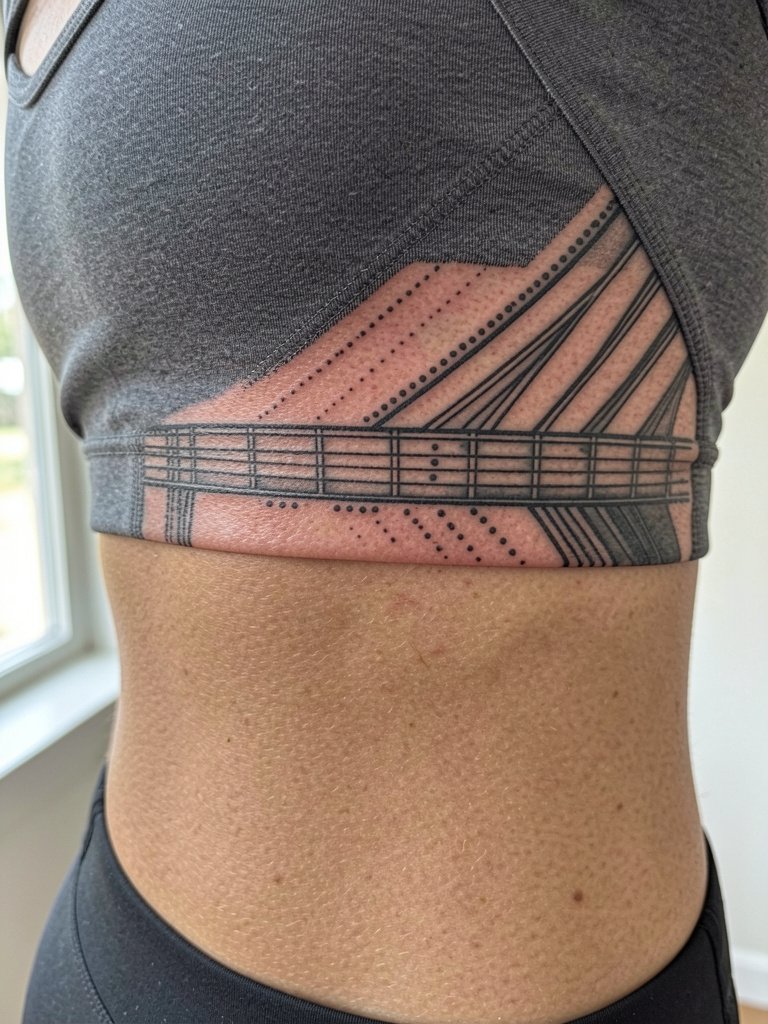
Geometric fretboards rely on spacing to avoid visual merging. The ribs move frequently so the mistake is squeezing elements too close. Request slightly wider spacing and strong anchors at either end so the geometry holds. Pain is higher here and most people split the session. Expect a touch-up window around year one for any lines that migrate. This placement is concealed easily for work, and a cropped top or fitted tee during summer will reveal it on demand.
11. Vintage Amp Knob and Small Guitar on Calf
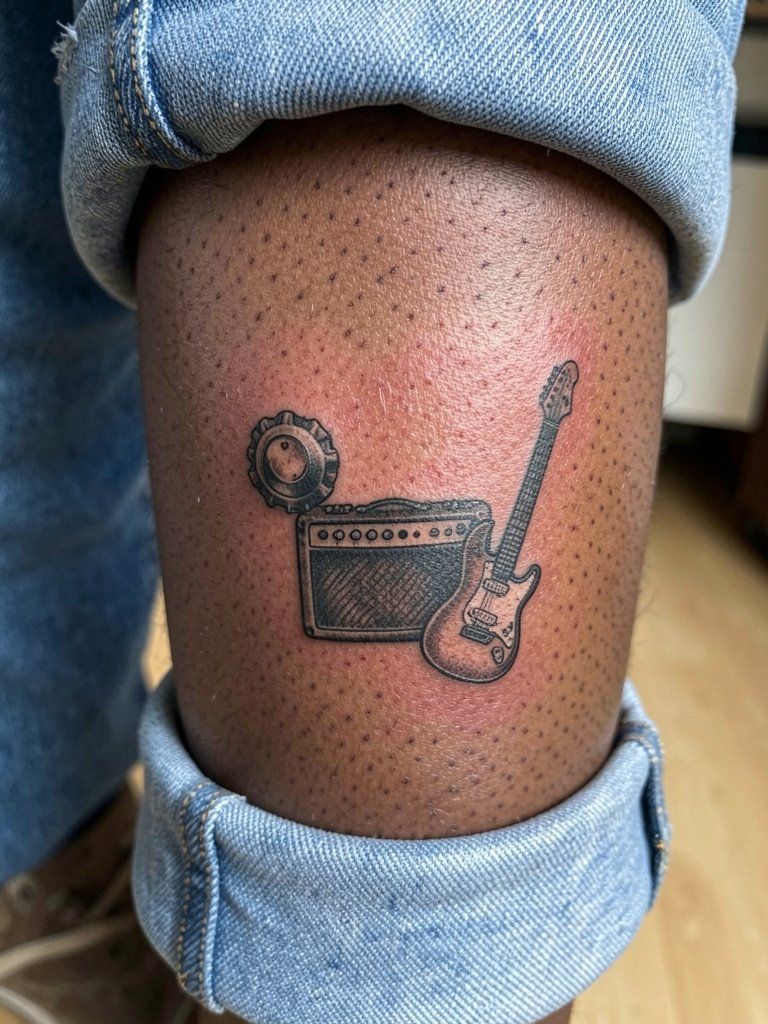
Calf pieces are low risk for blowout and hold saturated blacks well. They are a good choice if you want bold shapes paired with small iconography. Discuss scale with the artist so the knob markings remain distinct when you wear jeans or socks. Sessions are low on pain and usually done in a single appointment. For showing the calf, roll the cuff of your jeans or wear mid-length shorts, and consider a relaxed chino short to frame the piece.
12. Vintage Pickguard Linework on Upper Thigh
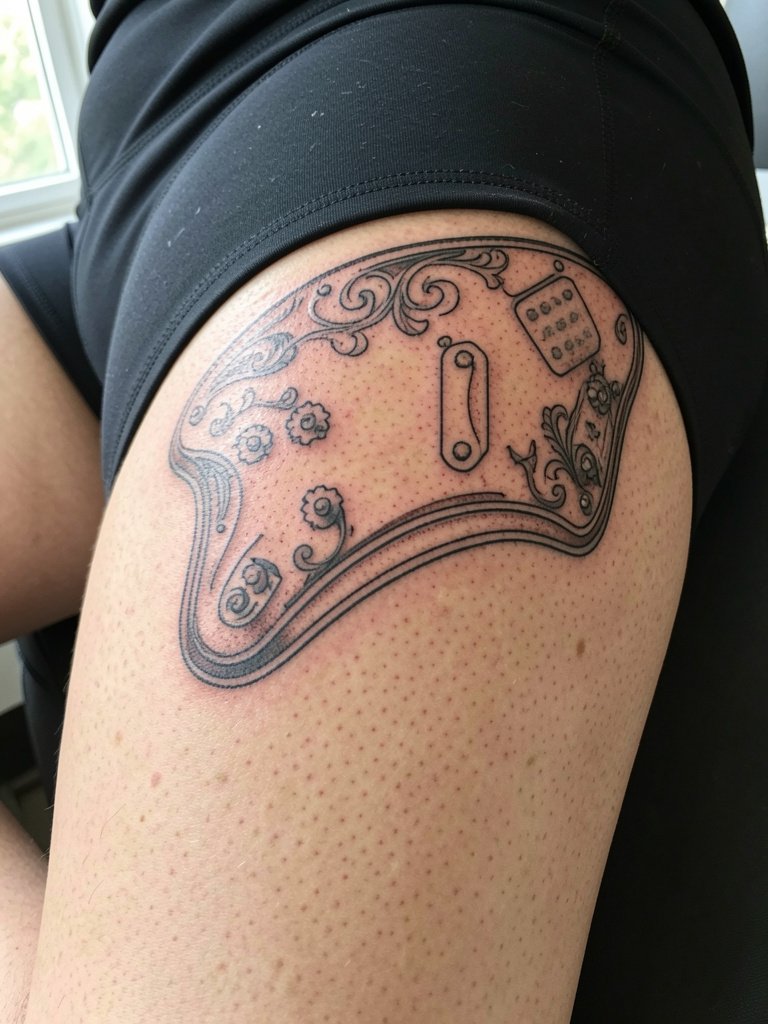
Upper thigh canvas lets you include ornate engraving without compromise. Because the skin here is softer, the typical mistake is overloading fine filigree into a small area. Ask for a layout sketch scaled to the intended size so you can see how the details breathe. Expect moderate discomfort and plan a longer session or two sittings for denser linework. For the appointment wear fitted shorts that sit below the area like these bike shorts so the artist can access the thigh without fabric shifting.
13. Guitar Fret Coordinates in Roman Numerals on Inner Wrist
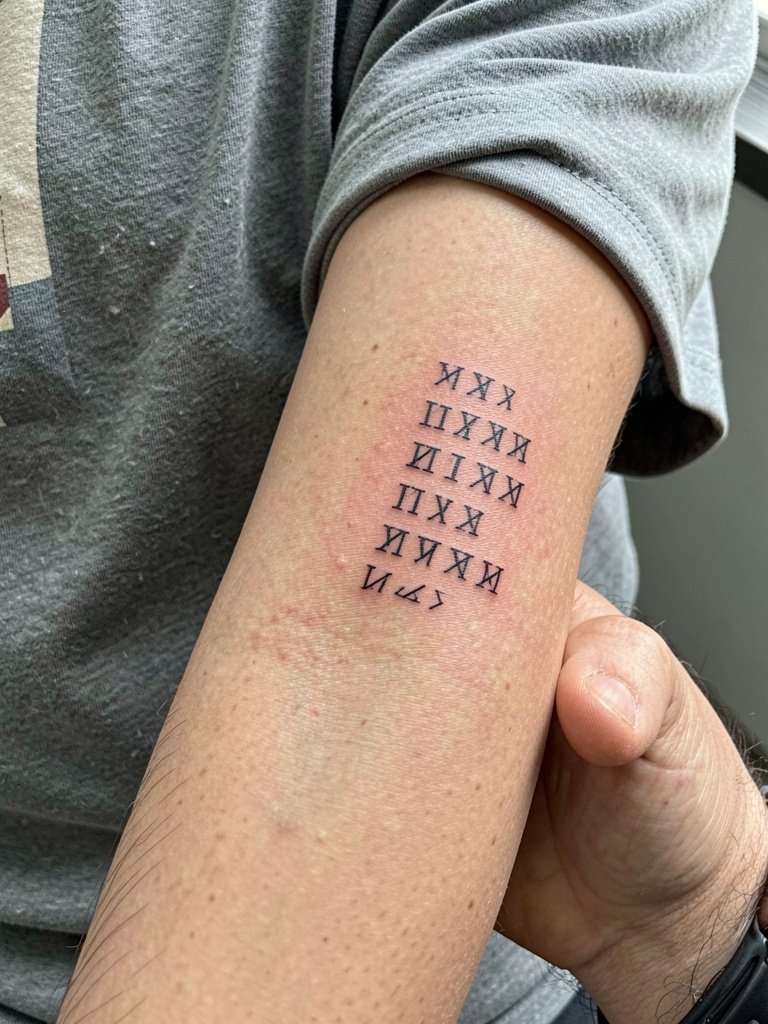
Small numeral pieces look crisp initially but can blur on high-motion spots like the wrist. I suggest using a slightly bolder serif and spacing the numerals to avoid overlap. When you consult, have the exact numerals printed in the font size you want so the artist can preview. Wrist tattoos need gentle care early and may benefit from a touch-up at year one. To highlight the wrist pair this with a slim watch or bracelet like this slim metal watch band.
14. Wrapped Cable and Jack on Ankle
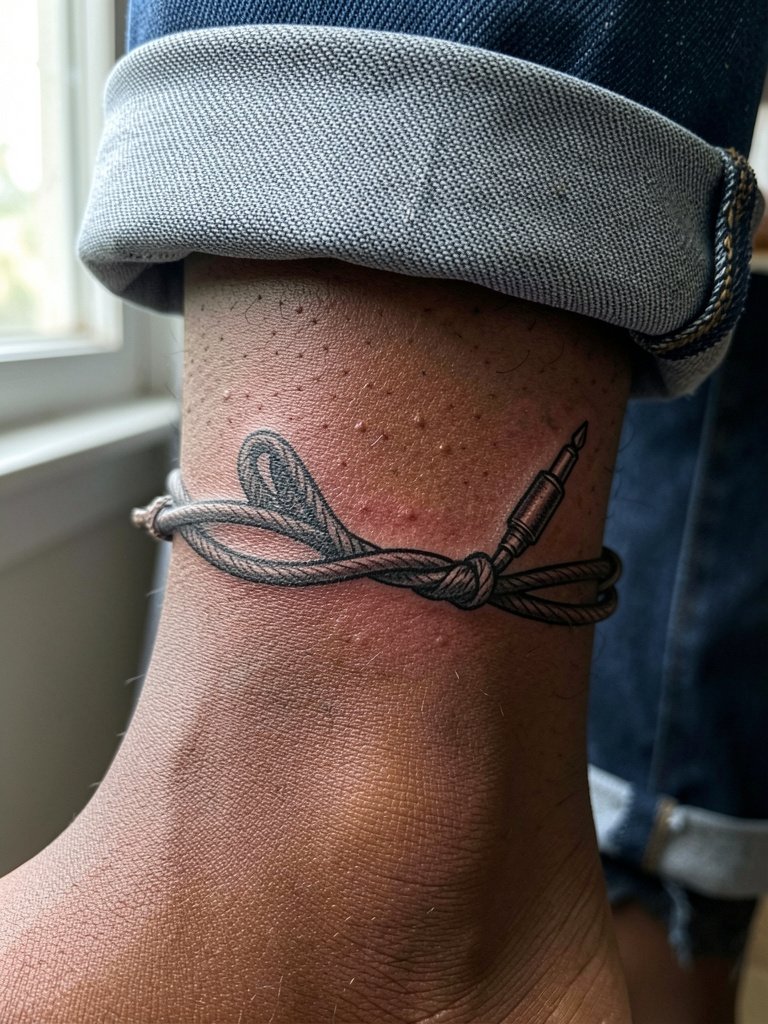
Ankle tattoos face constant friction from socks and shoes. The common error is using ultra-thin lines that break apart under that stress. Ask for a cable texture that reads at a distance and a slightly heavier jack outline. The session is quick but expect more frequent touch-ups than on less mobile skin. For the session wear jeans with the cuff rolled up as shown or slip-on shoes so you do not compress the fresh ink, something like these low-profile slip-on shoes.
15. Mandala Soundboard Around the Shoulder Blade
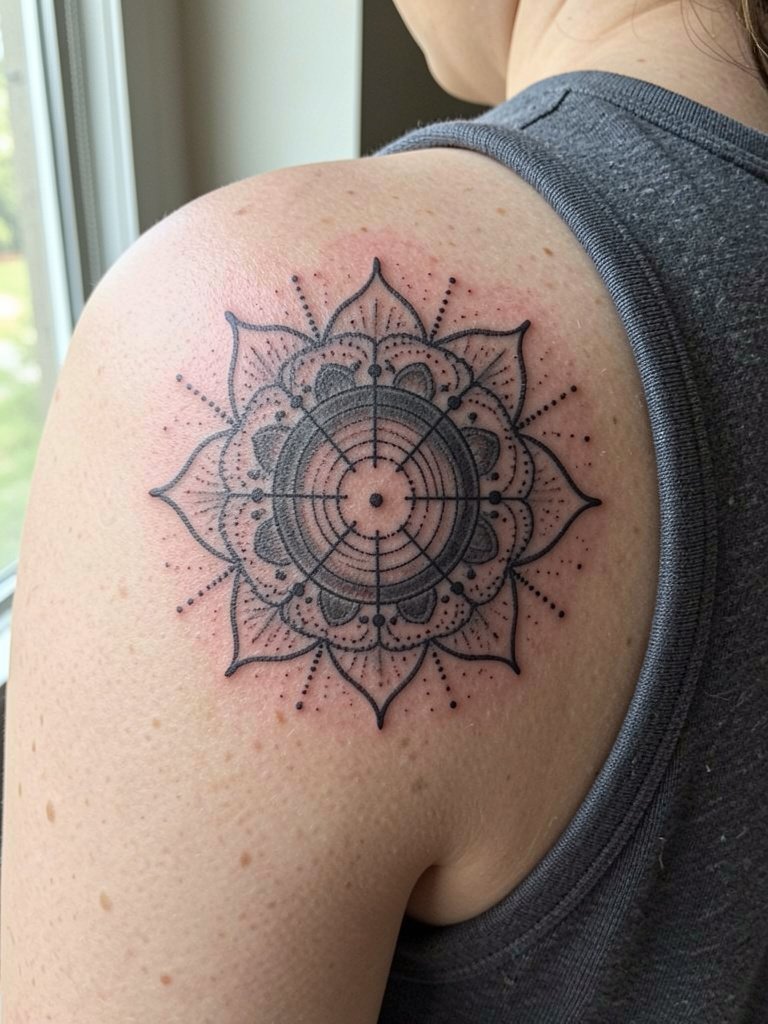
When combining mandala geometry with instrument motifs, be mindful of cultural origins. Honor the pattern by asking your artist about source inspiration and whether adaptations are appropriate. The shoulder blade tolerates dot work and radial motifs well and usually requires moderate session time. If you want the mandala to remain crisp, request defined negative space and avoid overly dense stippling in small areas. A loose tank top will let the artist reach the shoulder blade easily.
16. Small Bass Clef and Mini Bass Guitar on Collarbone
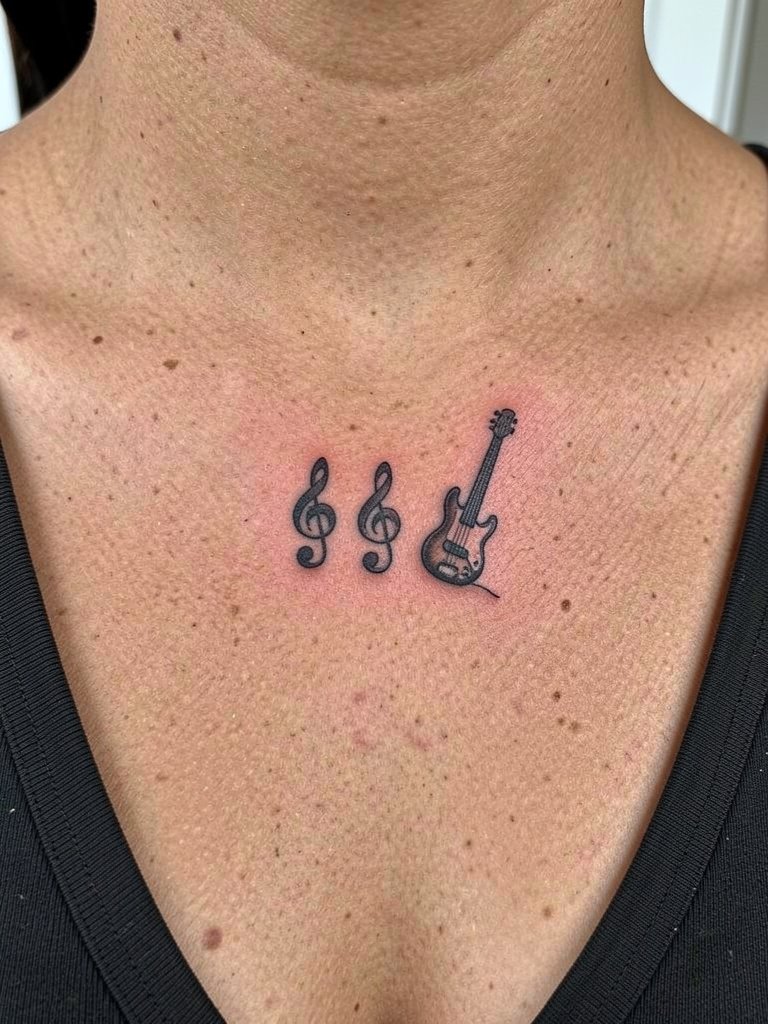
Collarbone work is highly visible and flattering for small musical icons. The usual mistake is compressing two motifs too close so neither reads. Specify the space you want between the clef and the mini guitar and bring photos scaled to your collarbone. Expect a shorter, relatively low-pain session. For visible outfits, open collars and layered necklaces complement this area, and a minimal pendant like this thin pendant necklace frames the piece without competing.
17. Neo-Tribal Guitar Motif on Upper Chest
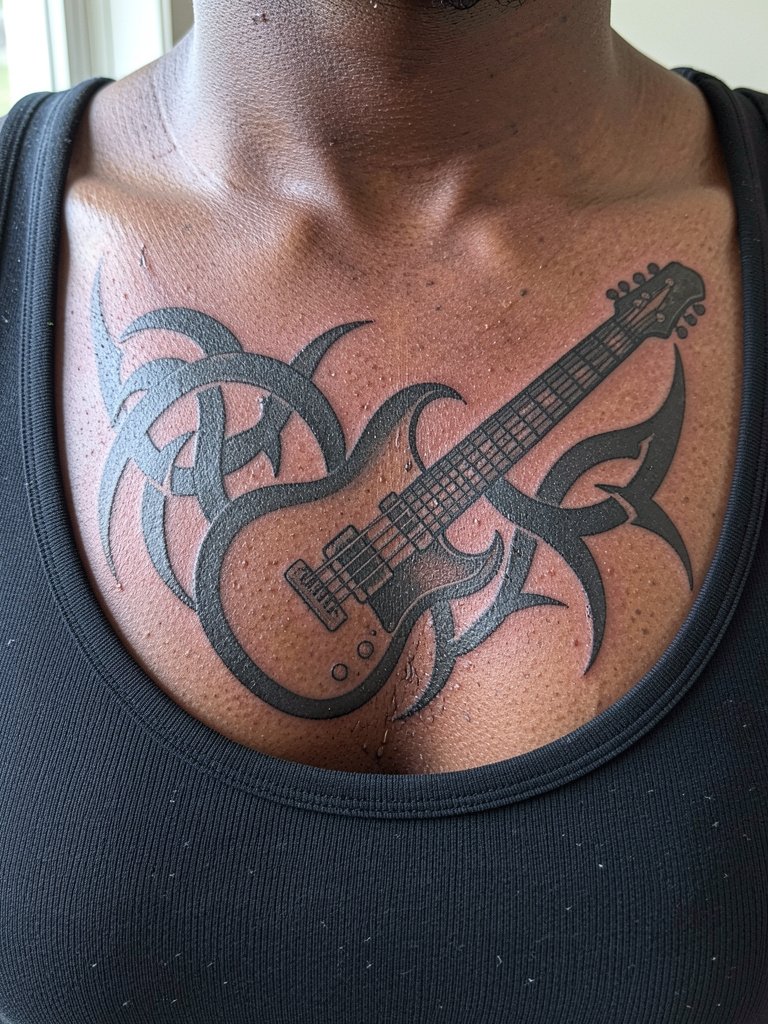
Tribal-inspired designs require sensitivity to cultural origin. If a pattern is rooted in a specific culture, ask the artist for context and consider alternatives that avoid appropriation. Bold neo-tribal shapes hold well on chest skin and age predictably. Sessions here can be medium in length depending on coverage. Wear a scoop-neck top for the session and choose the shape placement carefully so it complements the collarbone and sternum lines.
18. Micro Portrait of a Favorite Guitar on Inner Bicep
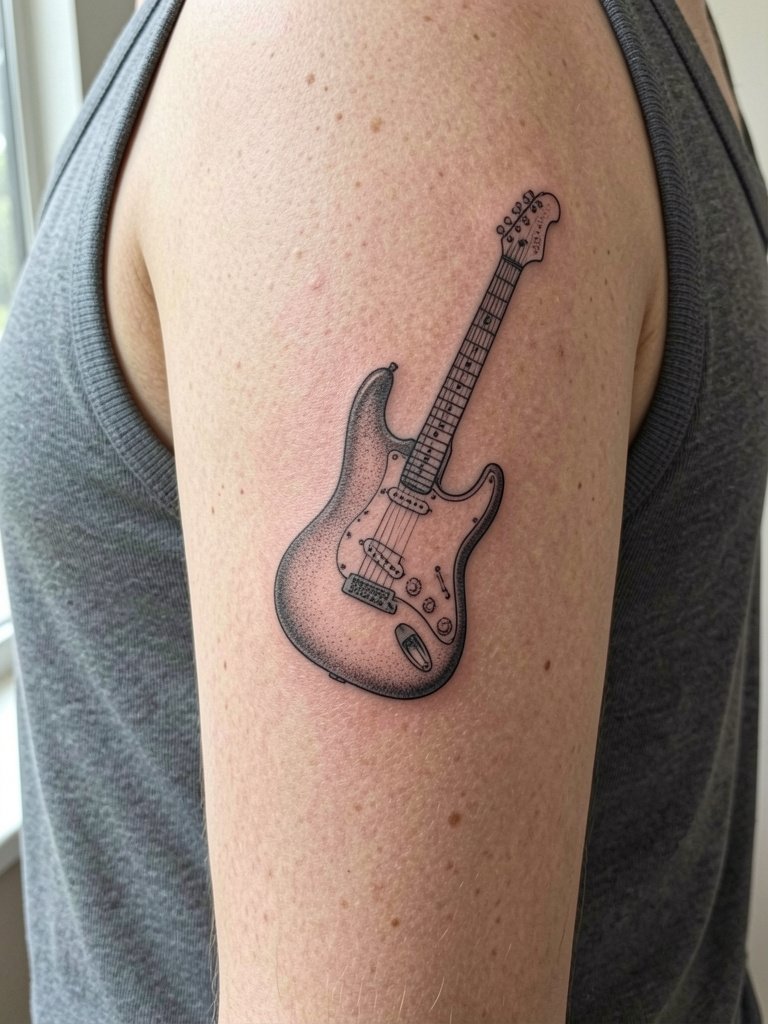
Inner bicep pieces are protected from constant wear but the skin is delicate. The mistake is pushing too much ultra-fine detail into a small span. When you sit down with the artist, specify the level of detail you want visible at arm's length and request test placement. Session time is moderate and pain is usually lower than ribs. For easy access during the appointment wear a tank top so the artist can work without moving clothing.
19. Pick and Soundwave Hybrid on Lower Forearm
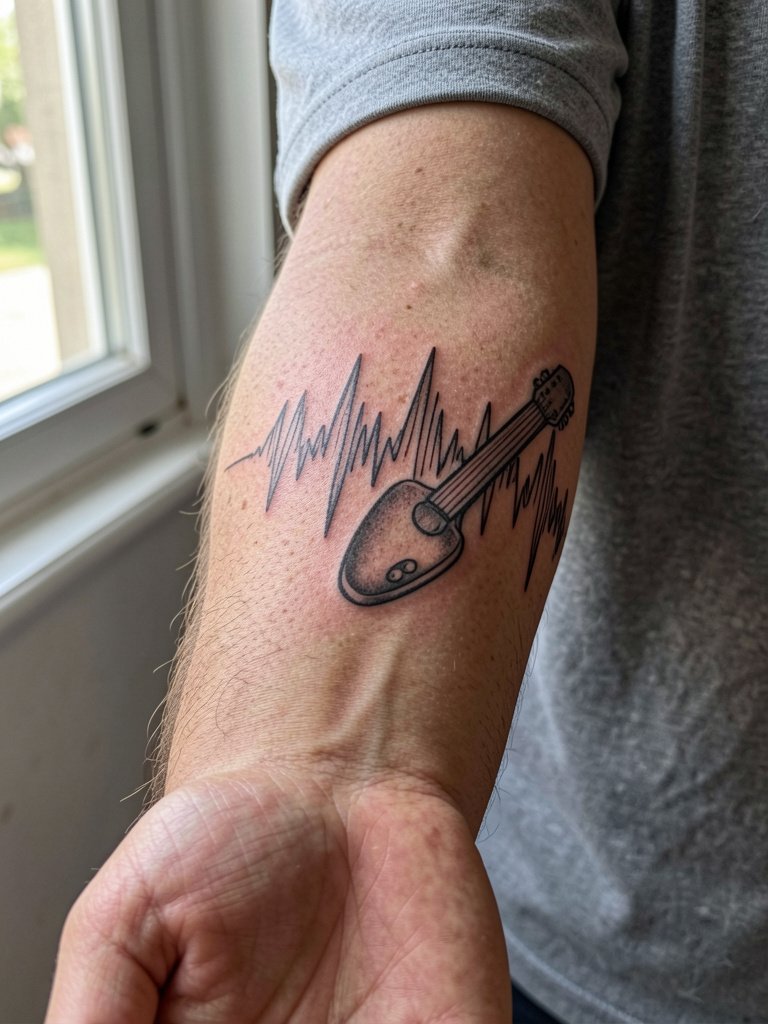
Combining iconography with a soundwave feels personal and modern, but most people underestimate the scale needed for wave detail. Request a layout mock at full scale and ask the artist to thicken any wave lines that sit near the wrist. Lower forearm tattoos are easy to show and touch up cycles are predictable, often at two to three years. For the session wear a short-sleeve tee that stays out of the way, like this short-sleeve cotton tee.
20. Watercolor Neckpiece Guitar Splash
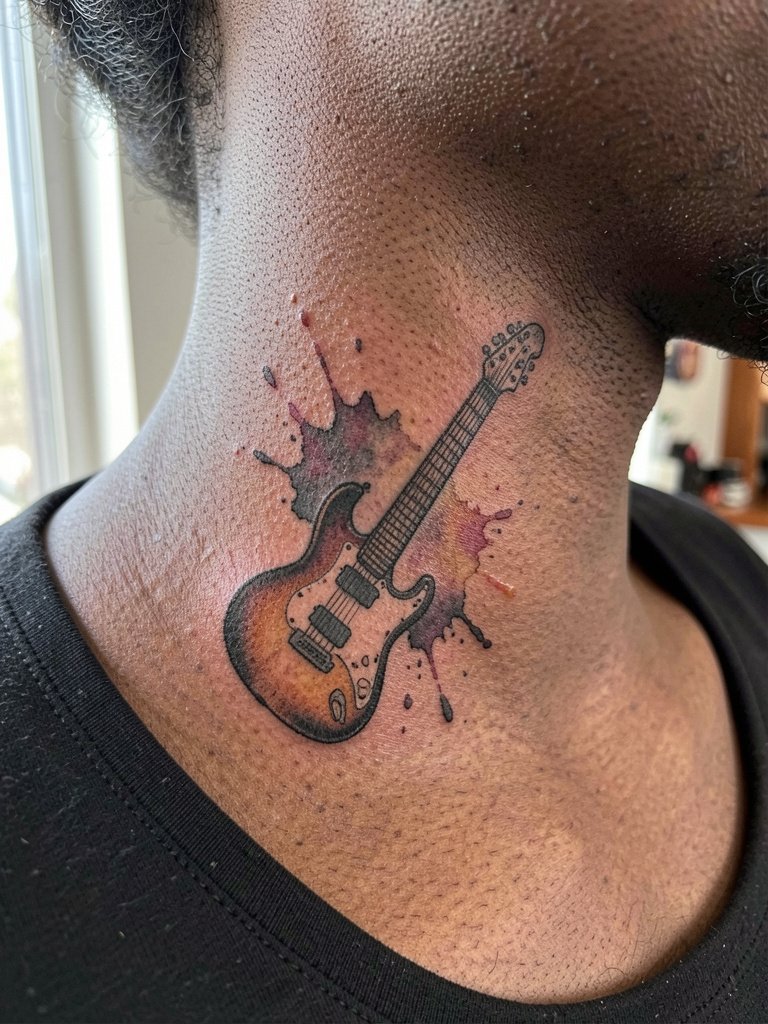
Watercolor approaches on the neck are striking but they can blur faster than solid black due to lighter saturation. One side of the debate says watercolor loses definition quickly on thin neck skin. The other side says careful layering and heavier anchoring lines make it last. Ask your artist how they plan to anchor the colors with linework so you know what to expect at one and three years. Neck sessions are sensitive and shorter. Wear a wide-neck top that does not need to be pulled down or adjusted during the session.
21. Sleeve-Scale Guitar Blueprint on Full Upper Arm
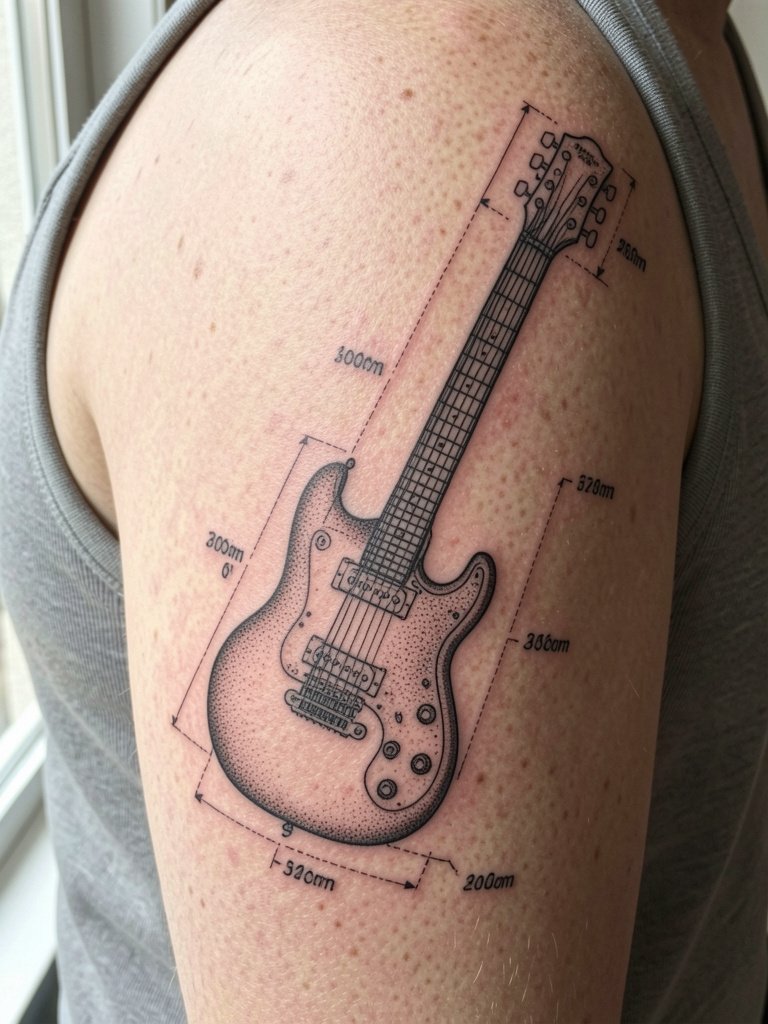
Blueprint-style sleeves look technical and intentional, but the trap is packing too many tiny labels that fade. Tell the artist which labels you want legible at arm's length and which can be decorative lines. Upper-arm pieces take longer and may be scheduled over multiple sessions. For wardrobe choices that show the arm, sleeveless shirts and tanks work best, try this sleeveless muscle tank.
22. Tiny Guitar Outline Behind the Ear
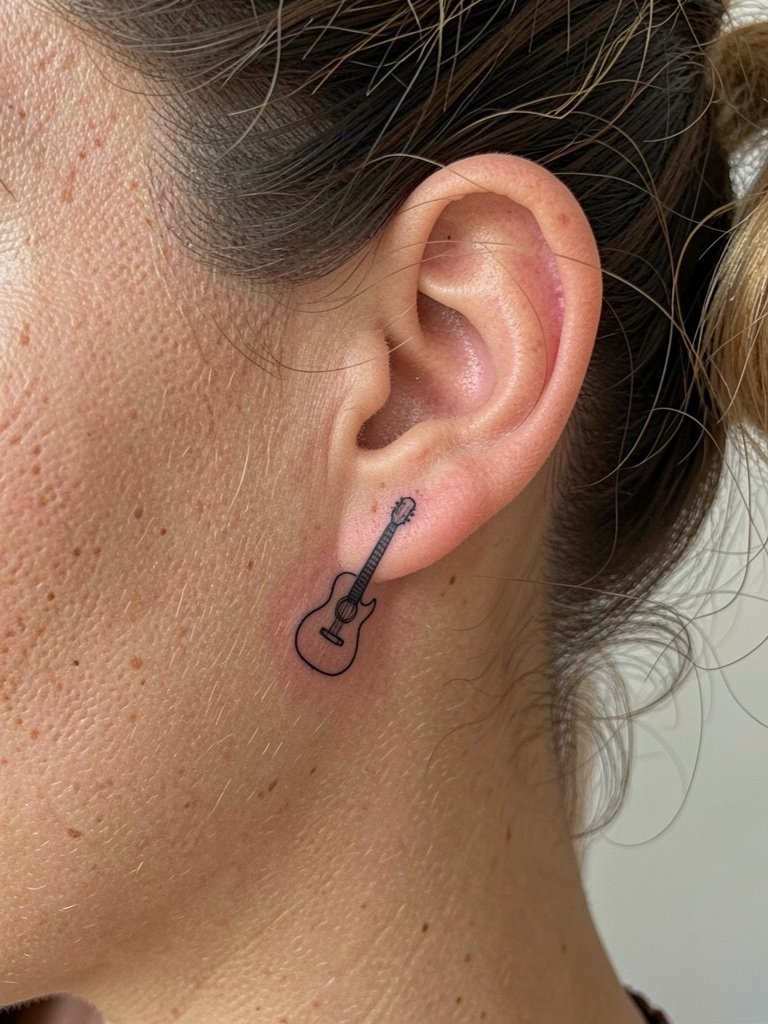
Behind-the-ear work is discreet and charming, but the skin there is thin. The usual mistake is asking for intricate detail in a tiny footprint. Ask your artist for a simplified silhouette and preview the scale against your hairline. Sessions are short and healing is quick. For the appointment pull your hair into a natural updo so the area is fully exposed without touching the fresh ink.
23. Full Back Guitar Collage With Portrait Elements
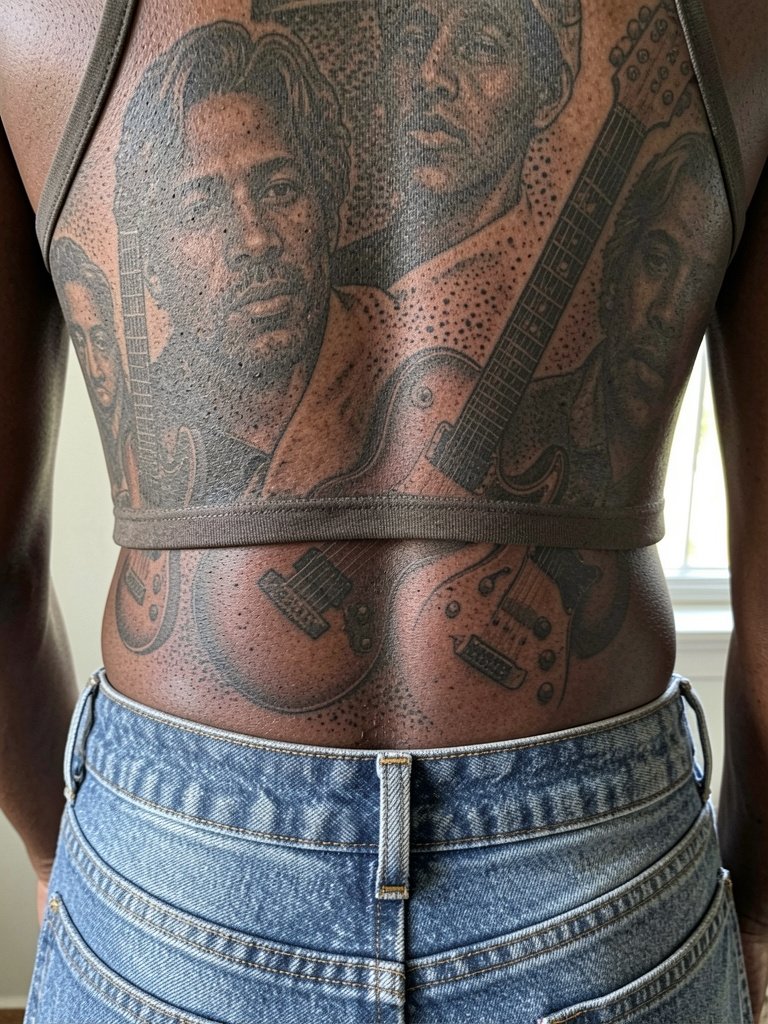
Large back collages let you combine portraiture and instrument imagery but require a design hierarchy so the eye lands where you want. A common error is crowding too many portrait elements without clear negative space. During consultation provide printed references and ask the artist to map focal points. Sessions are long and usually split across multiple visits. For showing the piece off a low-back top or open-back dress works well once healed.
Session Day Picks
These small items help with the practical issues raised in the wrist, hand, rib, and throat placements above.
-
Stencil transfer paper kit. Lets you preview lineweight and placement directly on skin before the needle starts, especially useful for tiny headstock and fretboard designs in ideas 1 and 13.
-
Topical numbing cream. Applied per directions about 30 to 45 minutes before the session it helps with higher-pain zones like ribs and the inner bicep without changing the artist's hand.
-
Thin protective film roll. Useful for ankle and hand placements to reduce irritation from socks and daily washing in the first 48 hours.
-
Fragrance-free gentle body wash. Cleanses the healing area without stripping saturation, which matters for fine-line and micro-realism pieces in the early weeks.
-
Aquaphor healing ointment. A widely used choice for the first 48 to 72 hours that helps lock in moisture for detailed linework without clogging the needle channels.
Frequently Asked Questions
Q: Will a fine-line guitar tattoo on the ribs hold up over time?
A: It depends on placement and spacing. Some artists say ribs blur quickly because the skin flexes and moves a lot. Other artists say that spacing lines slightly wider and anchoring them with small blocks of saturation lets fine-line work settle and stay legible. When you book, ask for a mock stencil at the size you want so you can see how breathing and movement affect the layout.
Q: How should I dress to show a new forearm or upper arm guitar tattoo?
A: Short sleeves, rolled cuffs, and sleeveless tops reveal forearms and upper arms without competing with the ink. For a cleaner framing consider a rolled-sleeve button shirt or a fitted tank, for example these rolled-sleeve shirts that keep the arm visible while still feeling casual.
Q: Where can I find healed guitar tattoo examples without naming specific artists?
A: Search social platforms with targeted hashtags and location filters. Use tags focused on the style plus the instrument like #GuitarTattooBlackwork or #GuitarTattooFineLine and add your city to find local healed shots. Browse tattoo forums and portfolio aggregators for keyword searches such as "guitar headstock healed" so you can compare how different placements age across skin tones.
Q: Are hand and neck guitar tattoos career risky long term?
A: Some people worry about visibility and potential professional impact, and that concern informs one perspective that warns against hand and neck placements for people who need a conservative appearance at work. The other perspective treats visible tattoos as personal expression and points to careful placement and bolder linework as ways to keep the design crisp and acceptable in more settings. Consider your industry and talk through placement trade-offs with the artist.
Q: How often will a tiny wrist or pick tattoo need a touch-up?
A: Tiny wrist and pick designs often need a touch-up around year one to two, especially if they sit on high-use areas. I have seen wrist pieces that held for years with a small line refresh and others that needed earlier work when they were placed too small. Plan a touch-up window and size your original accordingly so the artist can maintain the clarity.
