
Tiny matching tattoos look effortless in photos. In practice the small choices you make now decide whether those pairs still read as the same design in two years. Fine-line splits need spacing. Red ink needs a different aftercare plan than black. Finger wraps can disappear fast. Read the first idea for a split-phrase approach that solves symmetry, then move through texture, placement, and real-session tips so both of you come out with designs that age the way you expect.
1. Split-phrase script on inner forearm
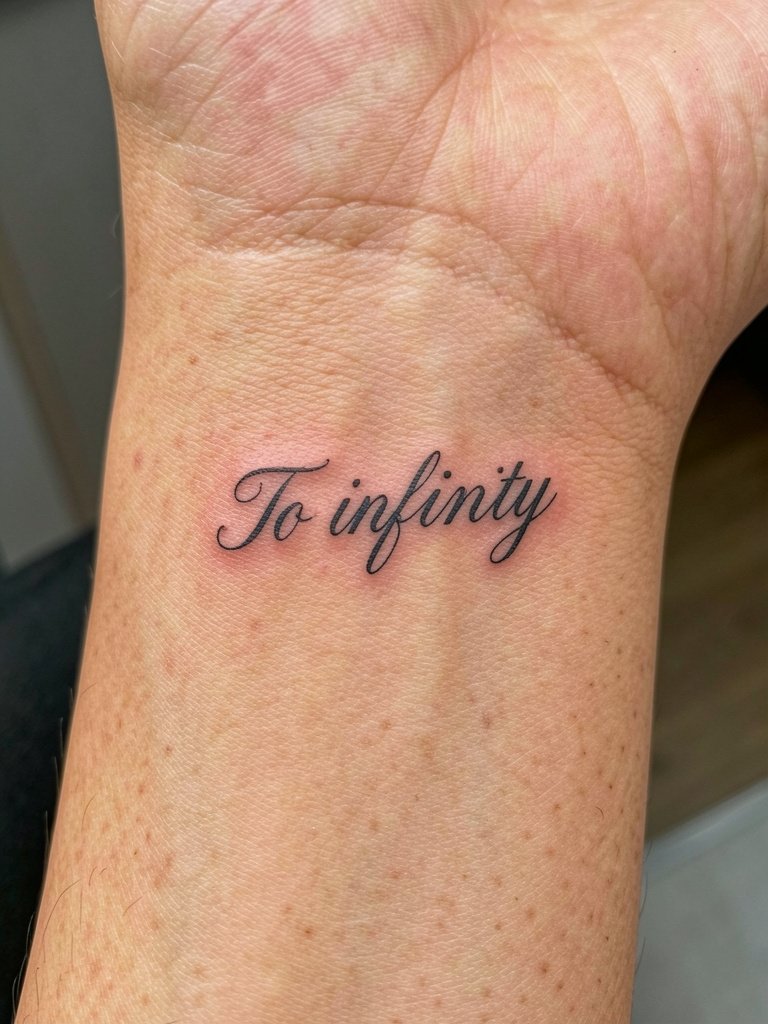
A split-phrase looks best when both halves are measured and stenciled together on the same arm positions. Bring a printed template with the exact spacing and font at scale so the artist can mark the midpoint on each forearm. Expect one session that runs 30 to 60 minutes depending on length, with low pain on the inner forearm. A common mistake is trusting memory for scale. That causes one friend to end up with a larger word than the other. Over the first two years a single-needle script will soften. Slightly thicker line weight up front keeps the phrase legible without losing the fine look. For showing it off, wear a rolled-up linen shirt so the split reads when you bring forearms together.
2. Thin red line finger wrap
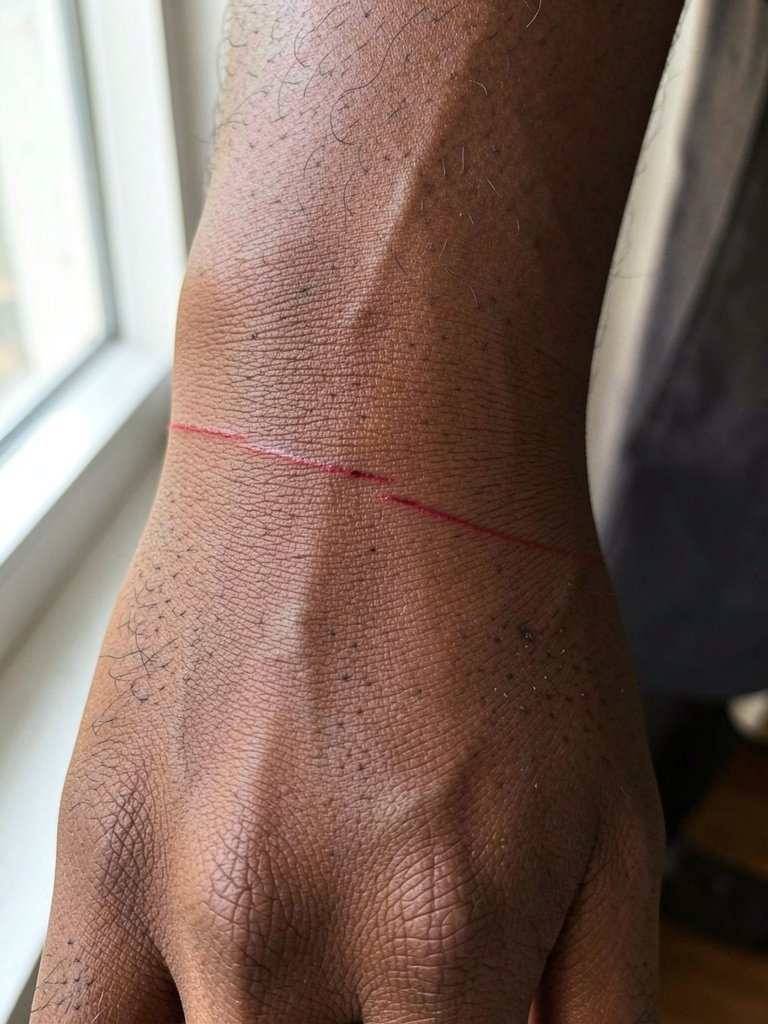
Finger wraps are visually satisfying but they face heavy friction and constant handwashing. One camp argues finger tattoos fade to near invisibility within six to twelve months because the skin there regenerates quickly. Another camp says modern pigments and regular touch-ups make them a valid, low-commitment option. If you want longevity, pick the outer finger band with slightly heavier line weight so the wrap reads after a touch-up window. Expect higher touch-up frequency, often within six to twelve months. For the appointment wear no rings and bring loose sleeves. Consider pairing the look with a delicate thin ring set on other fingers to balance the hand without crowding the wrap.
3. Red knot on the wrist
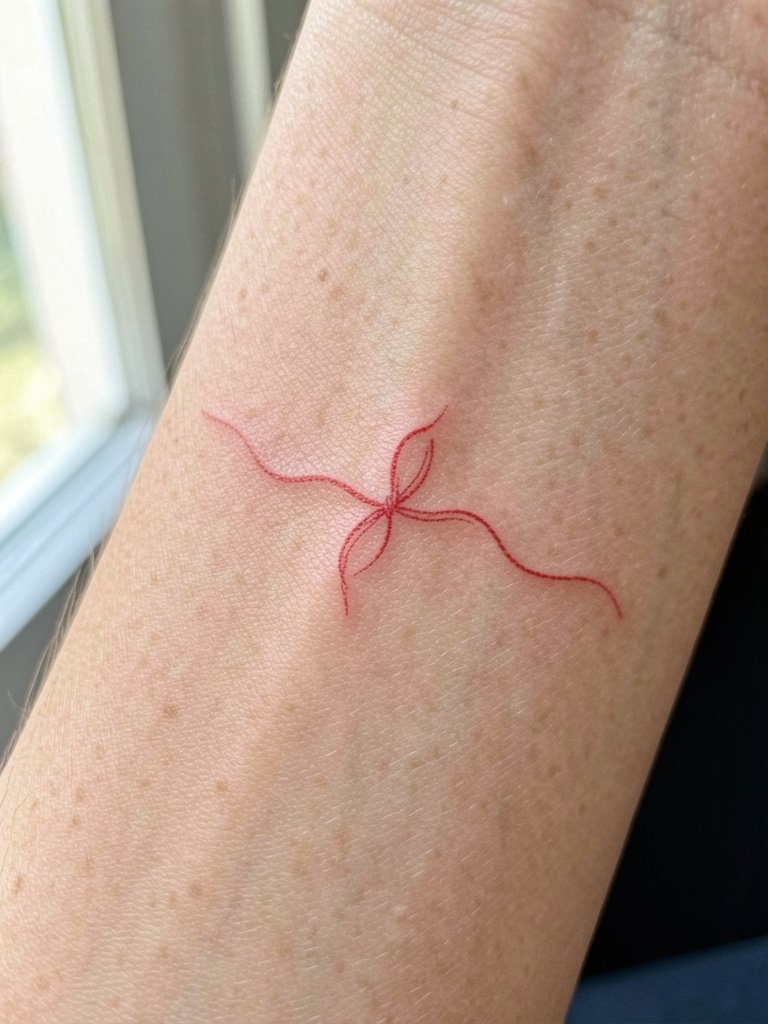
A small red knot reads as connection without spelling anything out. One camp warns that red pigments oxidize and can shift toward brown or black within one to two years on some skin tones if not sealed properly. The opposing camp says newer pigment formulations and careful early healing keep red vivid longer. If you choose red, ask the artist to confirm pigment brand stability and use a thin application rather than heavy saturation. Wrist placement shows off a knot well but gets sun exposure, so plan for sunscreen after healing. Session time is short, about 20 to 30 minutes, and pain on the inner wrist is mild to moderate. For show-off outfits, go with dainty gold stacked bracelets on the opposite wrist so the knot remains the focus.
4. Infinity symbol and tiny star duo
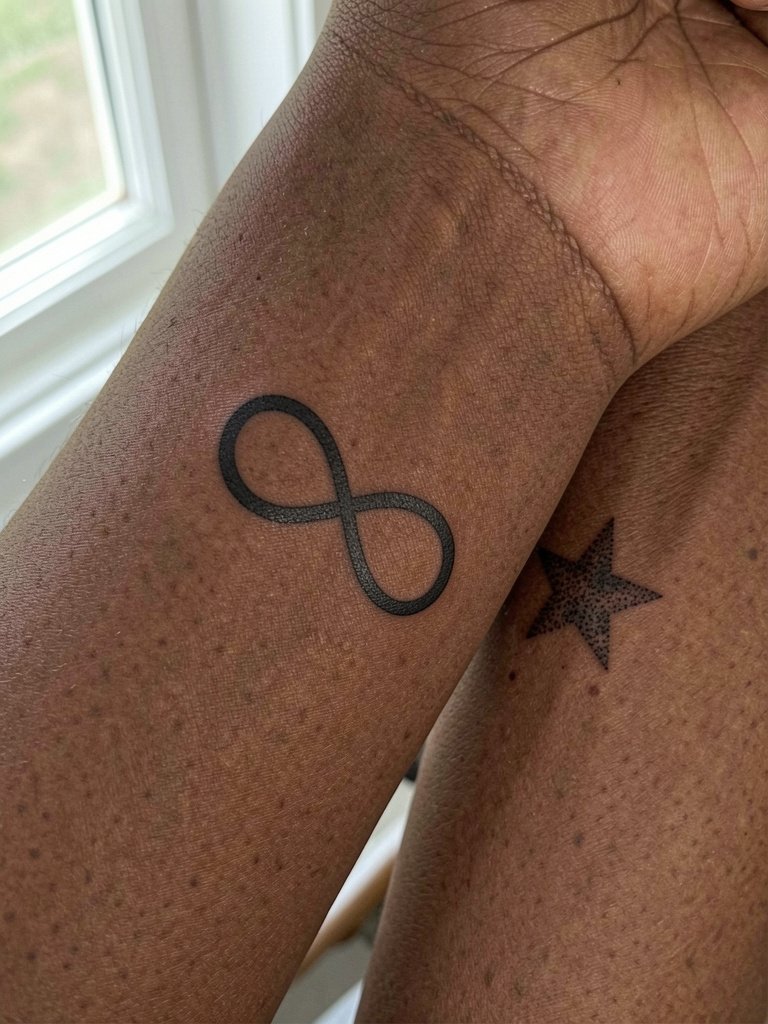
Split symbols like an infinity and a small star keep the message understated. The star benefits from dot-work stippling because that texture maintains its sparkle better than a thin solid outline. Discuss exact scale in the consult and have the artist show you a mockup on your wrists so the loop and the star feel visually balanced. These pieces heal cleanly on the wrist with low blowout risk if the lines are not micro-thin. Session time is brief. For photos, rolled cuffs and a minimalist gold chain necklace keep the look editorial without competing for attention.
5. Sun and moon duo on upper arm
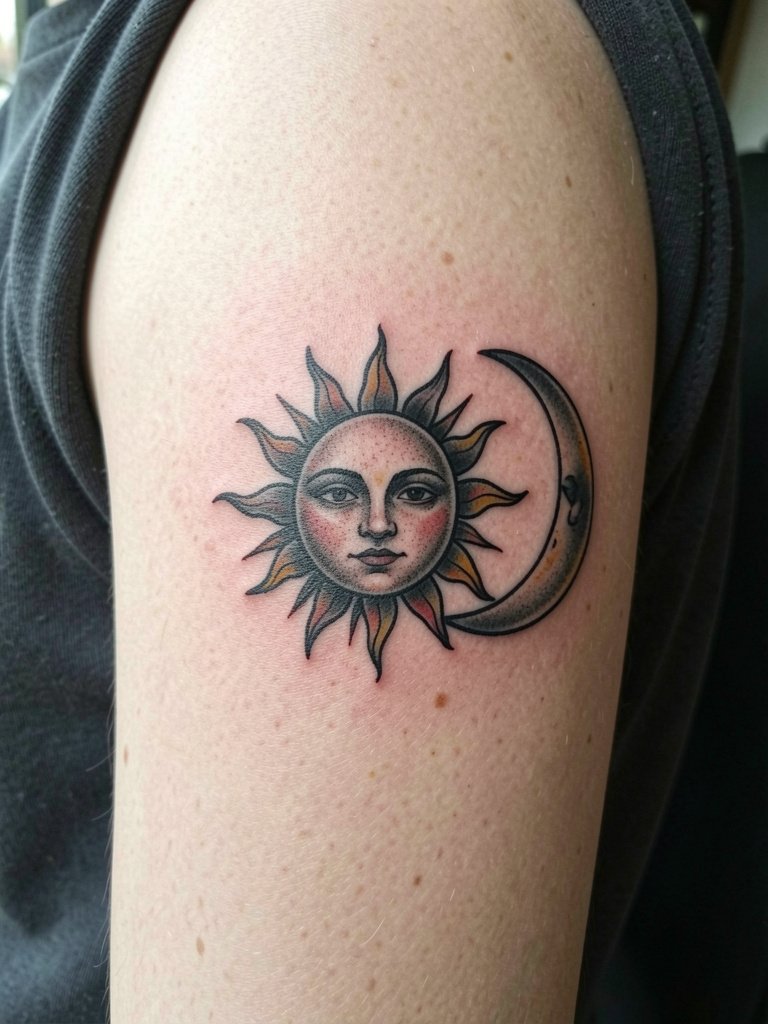
Sun and moon pairs let each friend take one half of a visual whole. The inner upper arm gives the design room to breathe and shields it from constant sun, which helps color hold. A common aging issue is cramming too many small details into a compact circle. Ask for simplified fills and slightly larger negative space so the halves remain legible at two and five years. Pain is low on the inner upper arm and sessions run 45 to 90 minutes depending on color. Show it off with tank tops and statement earrings. A tank top solid color keeps the art visible without distraction.
6. Yin and yang with customized fill
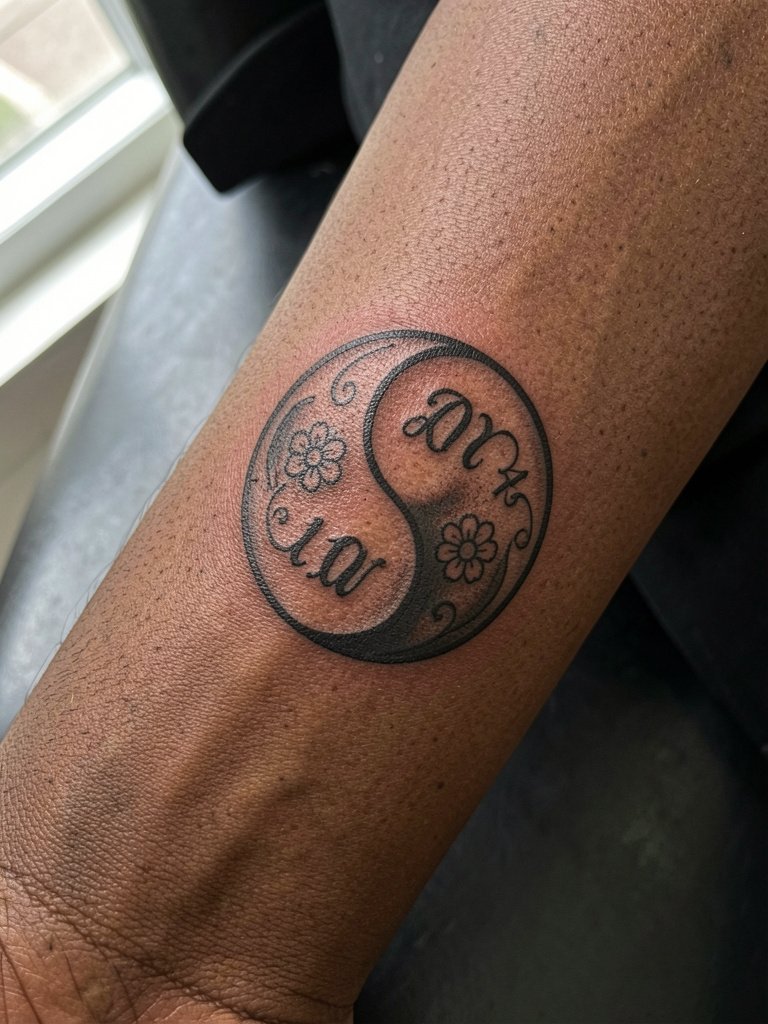
Yin and yang tattoos let you personalize the internal shapes. Bring clear reference images for any micro-icons you want inside the halves. A consultation should cover what stays as negative space and what becomes filled so neither side blurs into the other over time. Inner forearm placement is durable and shows the pair when your palms face up. Expect one session for a small version and two sessions for more ornate fills. For session day wear a loose button-down shirt so the artist can access your forearm easily without tight cuffs.
7. "Promise" text and hidden dot-work symbol
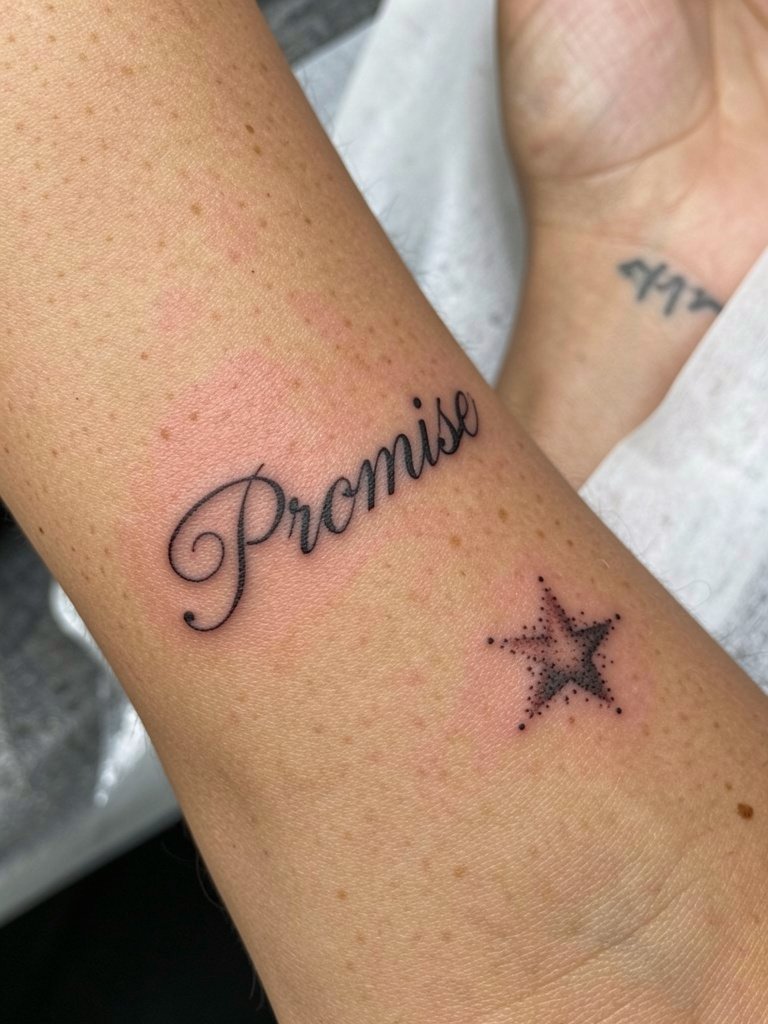
One friend gets a short word and the other gets a micro symbol that references the same idea. The hidden dot-work inside the symbol adds texture that stays visible longer than a thin outline. Avoid placing the dot-work symbol on the finger if you want longevity. Ask your artist to show you a healed mockup of the dot density so you can see how the texture reads at six months. The session is quick for small script and symbol, but fine line on sensitive skin can react differently. For the appointment pick a minimalist gold chain necklace to style the negative space on your chest if you keep the script closer to the wrist.
8. Continuous red string looping into a heart
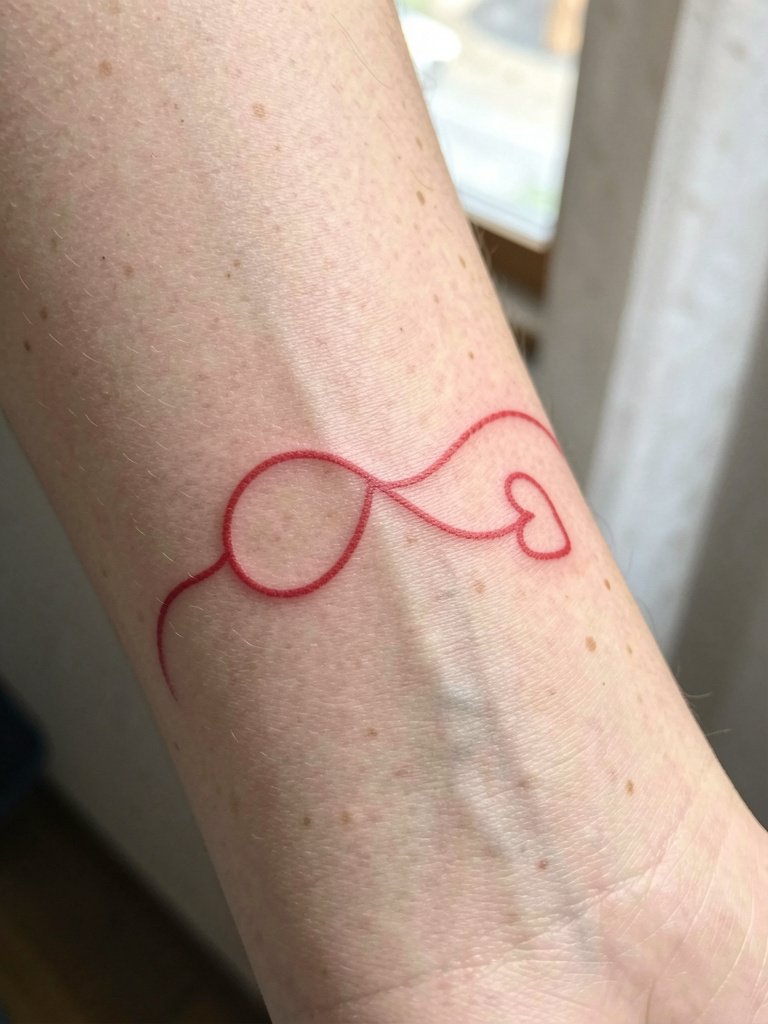
A continuous red line that turns into a heart looks organic and reads nicely when both friends place arms together. Because it uses red pigment, name both sides of the red-ink debate before you commit. One view says red oxidizes and shifts color on many skin tones if not protected. The other view holds that modern pigments and careful early healing make red viable for years. If you choose red, use a thinner application and a tattoo-safe balm in the first week to minimize oxidation risk. Pair this on casual days with rolled-up linen sleeves and a rolled cuff linen shirt for natural visibility.
9. Tiny "Always" script on wrist
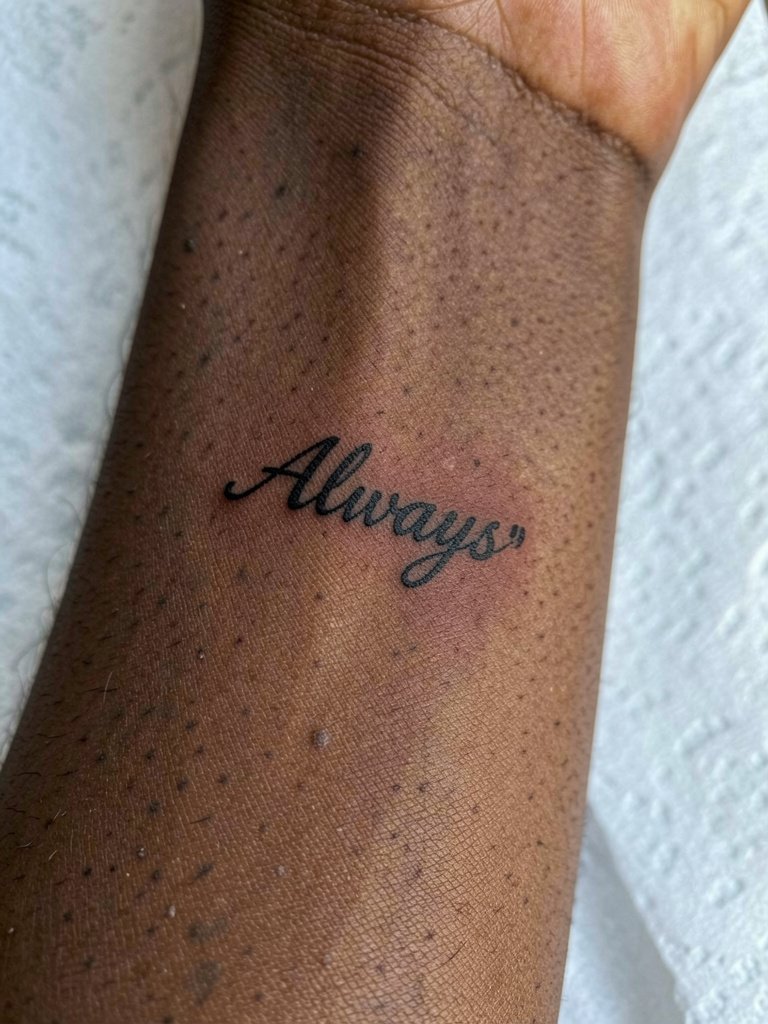
Single-word scripts carry emotional weight and they read well in small scales when you increase line weight just enough. The wrist is easy to show but it sees sun and friction. Opt for slightly bolder contour lines and ask for a mockup showing three different widths. A typical session is short and pain is mild. Over two to five years a too-thin script will blur, so plan a light touch-up early if clarity matters. For styling, stack a slim leather bracelet on the opposite wrist or add a dainty gold bracelet that complements without crowding the script.
10. "You Are My Person" inner forearm phrase
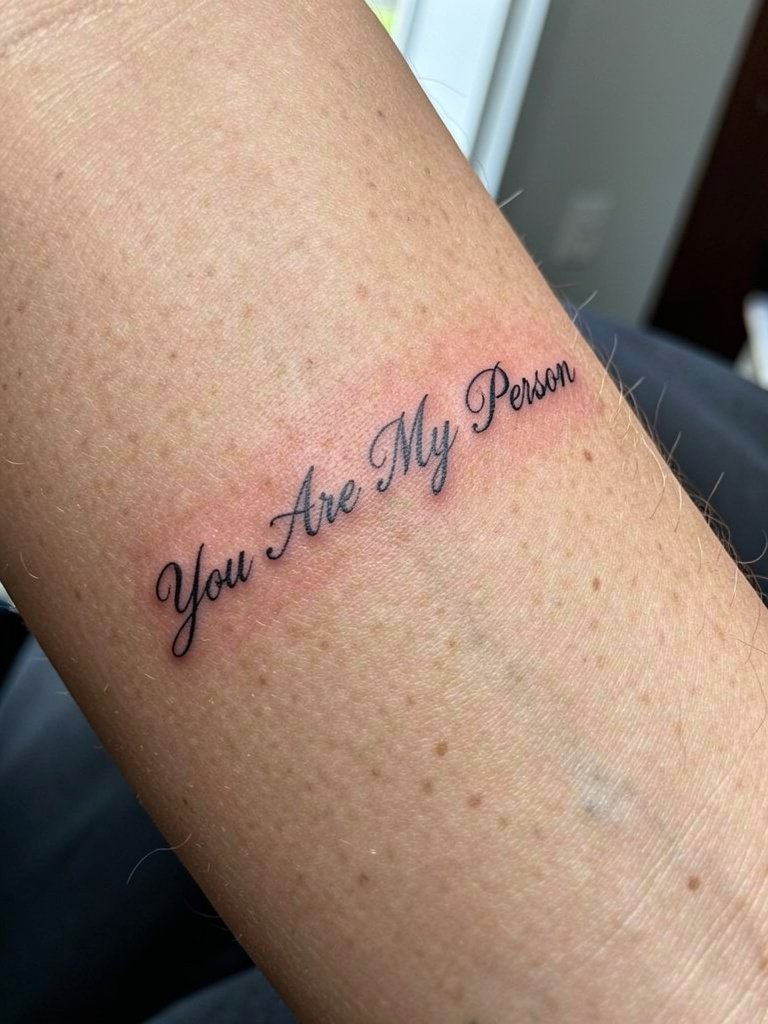
Longer phrases need length to remain legible. Inner forearm placement lets the phrase sit naturally when your palm is up. Ask for a layout that keeps the word spacing consistent across both arms so the rhythm matches when you hold hands. Longer text may require two short sessions to avoid fatigue for you and the artist. Expect that micro-cursive will soften with time, so a slightly larger font size preserves readability. For photos and events pair this placement with a rolled-up linen shirt so the line is visible without overexposing the rest of the arm.
11. "No Matter Where, No Matter What" wrap script
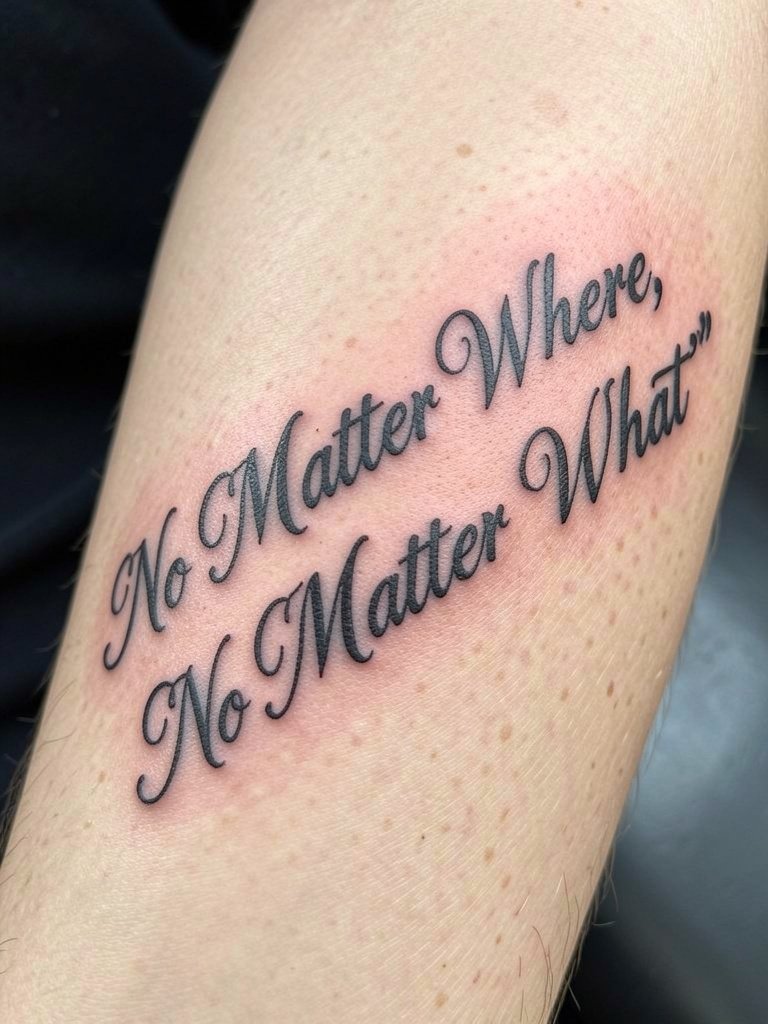
Long wrap phrases need planning for line breaks and how they look when the wrist turns. Ask for a layout that shows the phrase at rest and with the arm rotated so the text never bunches on a single crease. This design often requires two sessions if it wraps around the wrist or crosses muscle curves. Pain is similar to other forearm script work. For outfit pairing choose a minimalist gold chain necklace and rolled cuffs so the phrase can be photographed cleanly.
12. Dot-work star on the wrist
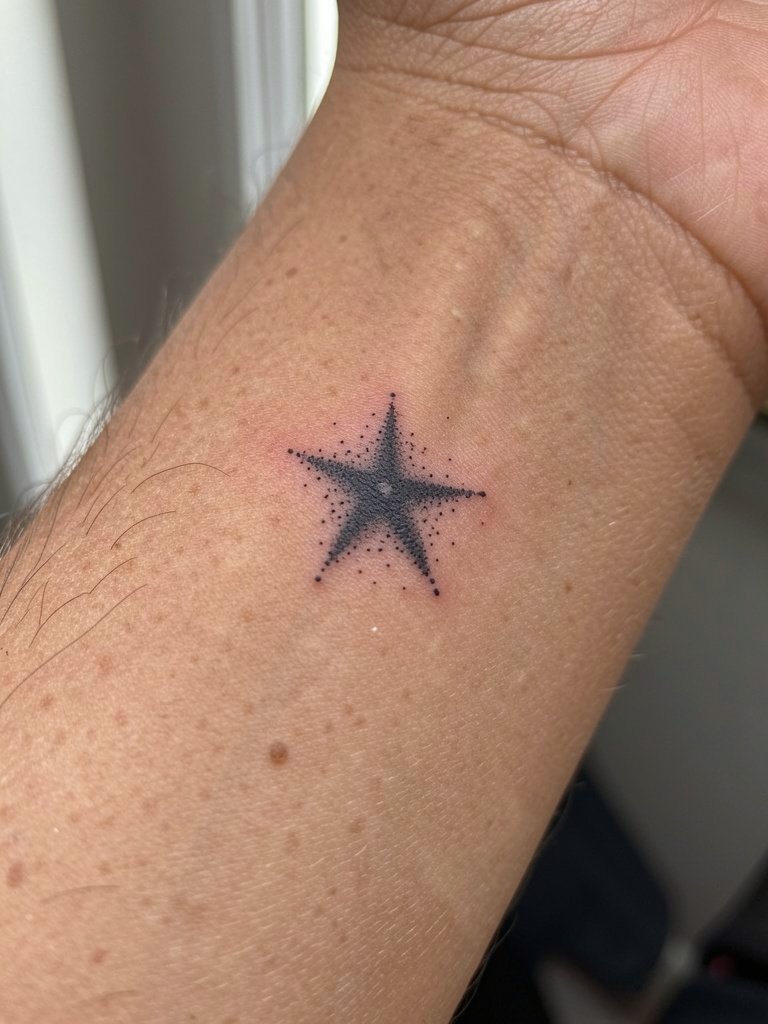
Stippled stars keep texture where solid lines would age into a flat spot. Dot-work preserves sparkle because individual points of pigment sit separately in the skin. The wrist is a great stage for micro dot-work but avoid going smaller than a quarter inch or the dots will merge. Session time is short and pain is mild. If you want to hide the tattoo at work, place a tiny star on the outer ankle instead. For a look that complements daily outfits, wear a dainty gold stacked bracelet opposite the star.
13. Matching Roman numerals
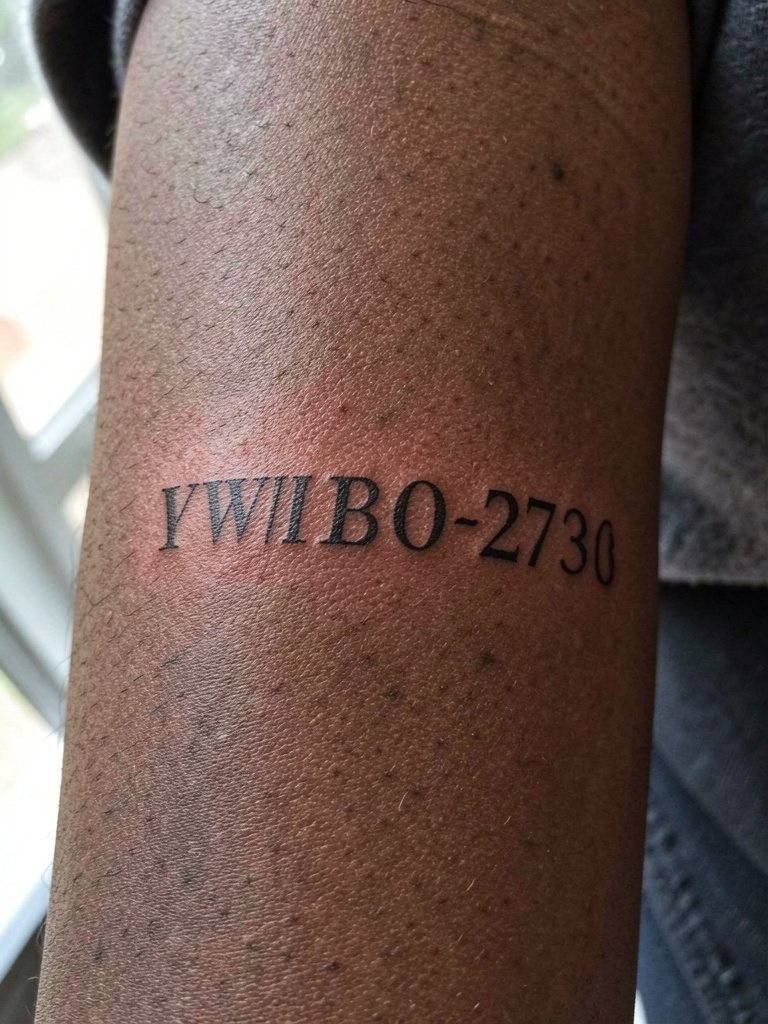
Roman numerals are compact and discreet for commemorating a date. Use consistent type and spacing so both friends' numerals match at glance. A common error is getting one set in a slightly condensed font and the other in a wide version. Ask the artist to show the numerals at the final skin scale before inking. Inner forearm or wrist placement reads well and ages predictably. For session wear choose a loose button-down shirt so cuffs do not press on fresh ink.
14. Ankle hideable symbols

The ankle is easy to hide in conservative settings and easy to show in summer sandals. Outer ankle bone placement deals with shoe straps and socks, so expect some friction during the first month. Session pain ranges from low to moderate. For professional contexts this placement is a smart choice because you can cover it with shoes or boots in winter. Style it with summer sandals neutral when you want it visible.
15. Matching heart dot on the same spot
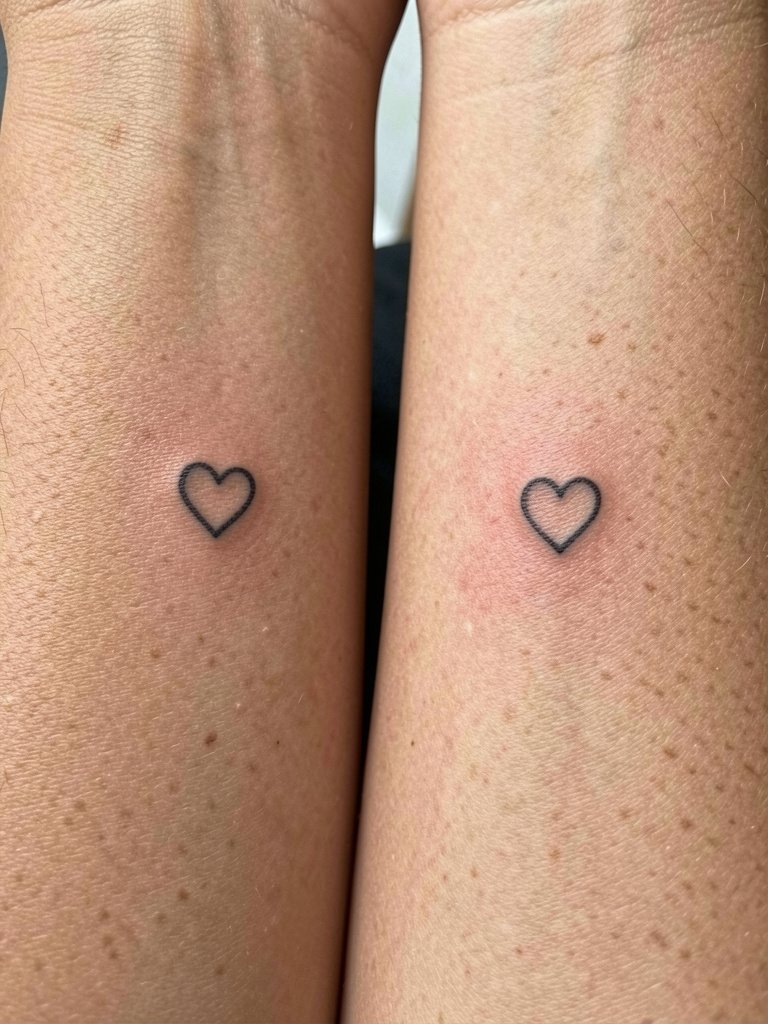
Tiny single-image marks are the quiet way to share a code. The key is placement precision. Insist the artist draw the point and check alignment with your friend so the dots match when arms are held side by side. These micro pieces usually take under 15 minutes each but still fall under shop minimums. For subtle styling use a minimalist gold chain bracelet on the opposite wrist so the tiny mark stays the focal point.
16. Matching coordinates on inner forearm
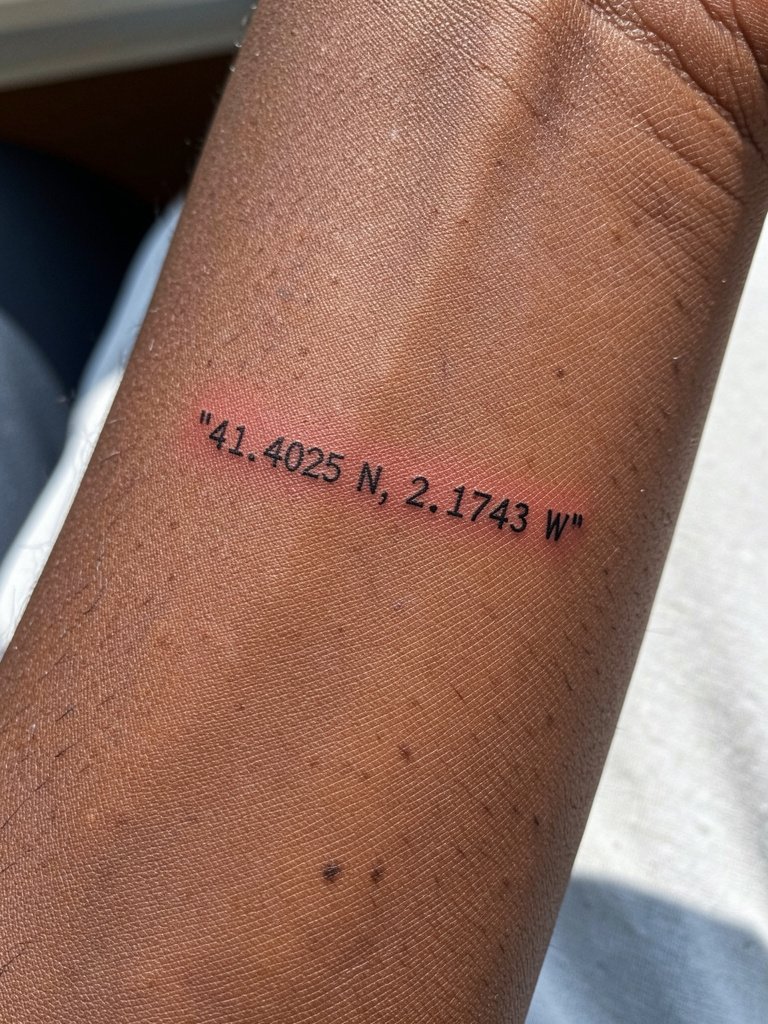
Coordinates are an unobvious way to mark a shared place and they age like text. Use a monospace or thin serif so numbers remain legible at small sizes. If the location includes commas or degrees, have the artist stencil exact punctuation and spacing. Inner forearm placement shows the coordinates when palms are up and keeps them out of sun most of the time. For session day wear a loose button-down shirt so the artist can roll the sleeve without compressing the ink.
17. Puzzle halves that align
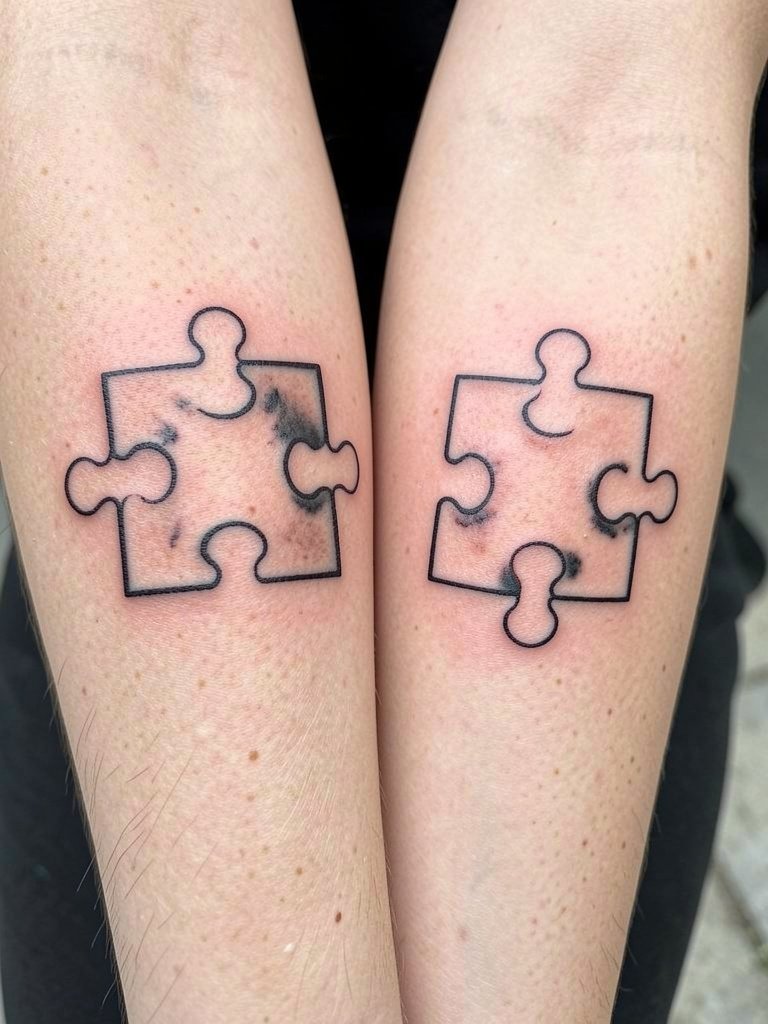
Cut puzzle halves are literal but effective. Each half needs clear negative space so the pieces still read when arms are side by side or slightly rotated. The main mistake is making the tabs too small, which causes the edges to blur over time. Ask the artist to draw the puzzle halves on both arms before inking so scale matches. Session time is short and pain is mild on the forearm. For an outfit that highlights alignment, choose a rolled-up linen shirt so both halves can be shown together without fuss.
Pre-Session Essentials
The wrist and finger pieces above need different care during the first 72 hours than larger forearm or chest pieces. A few targeted products smooth the session and early healing.
-
Haku-style thin aftercare balm. Thinner than heavy ointments, this kind of balm helps with fine-line work on sensitive skin without clogging pores during the initial healing window.
-
Australian-style low-oil tattoo soap. A less oily soap reduces red-ink oxidation risk while gently cleansing wrist and finger areas.
-
UK red-ink stabilizer alternative. Specialized sealants like this are designed to reduce early pigment shift with fresh red work.
-
Thin tattoo-specific balm. A commonly recommended thin balm preserves pigment and soothes fine-line pieces without heavy residue.
-
Saniderm second-skin bandage. A single-film option protects the wrist or finger from friction in the first seven days and helps stop scabbing that can pull pigment.
Frequently Asked Questions
Q: Which placements from this list last longest without touch-ups?
A: Inner forearm pieces and upper-arm sun/moon duos generally hold saturation and line clarity the best because those skin zones see less daily abrasion. Finger wraps and top-of-hand work require touch-ups more often. Expect a realistic one-year check for finger work and a touch-up at two to three years for most fine-line forearm pieces.
Q: How should I plan a split-phrase so sizes match perfectly?
A: Bring a printed template at final scale and ask the artist to stencil both halves on your skin before any needles touch ink. Have the artist mark a shared pivot point such as the outer wrist crease so both words align when measured. Also photograph both stencils together before the session so you have a record.
Q: Where can I find healed examples and nearby artists without naming accounts?
A: Search hashtags like #friendshiptattoo, #matchingtattoo, and #redstringtattoo on Instagram and TikTok, then filter by location to surface local portfolios. Use Tattoodo to search keywords such as "fine line knot" or "split phrase script" and review healed images. Reddit communities like r/tattoos and r/tattooadvice also surface peer photos and booking tips across skin tones.
Q: If I choose red ink, what practical steps increase its longevity?
A: Prefer a thinner pigment application rather than heavy saturation, use a tattoo-safe thin balm during the first week, and avoid heavy scented soaps while it heals. Early sealing with a second-skin film for the first five to seven days reduces oxygen exposure that can speed oxidation in red inks.
Q: Any wardrobe tips for session day per placement?
A: For wrist and forearm work wear a loose button-down or a tank top so sleeves do not press on fresh ink. For ankle pieces choose low-rise pants or shorts that can be rolled up without tugging. For hands and fingers remove all rings and wear a top with open, loose sleeves. A rolled-up linen shirt is a versatile session and show-off option.
Q: Why do some tiny tattoos look raised after healing?
A: Raised or lumpy healed texture often comes from skin that scars easily or from overly aggressive needle depth. If you have a history of raised scars, ask for slightly bolder line weight or avoid ultra-fine single-needle pieces in high-risk zones.
Q: How do shop minimums affect ordering tiny matching pieces?
A: Many studios set a minimum to cover prep and sanitation. For micro designs that fall below the minimum, adding a small extra element or accepting the minimum cost is common. Another approach is to book the same artist on the same day and ask if they can schedule both clients back to back under one deposit arrangement.
