
I spent months narrowing down dotwork ideas because the style looks simple from a distance but holds so much texture up close. I learned that the trick isn't just picking a pattern—it's choosing a placement that lets the stippling breathe and age well. These 23 dotwork designs lean into geometry, nature, and subtle realism so the ink still reads clearly after healing.
Quick context: This list focuses on dotwork—stippling and blackwork built from thousands of tiny dots. These designs work well on arms, ribs, thighs, and the back of the neck. Dotwork pairs nicely with fine lines and geometric mandalas, and it’s a top search trend for people wanting texture without heavy color. According to Statista, roughly 30% of U.S. adults report having at least one tattoo (Statista, 2021), and many choose black/gray dotwork because it holds up well over time. Surface healing is typically 2–3 weeks, full healing 2–3 months (NHS). Keep those timelines in mind when planning sessions.
Blackwork Geometric Mandala on Spine
Style/Technique: Blackwork / Geometric Mandala
Pain Level: High (7/10)
Session Time: Multiple sessions (2–4 hours each)
Best For: Statement piece, central back coverage
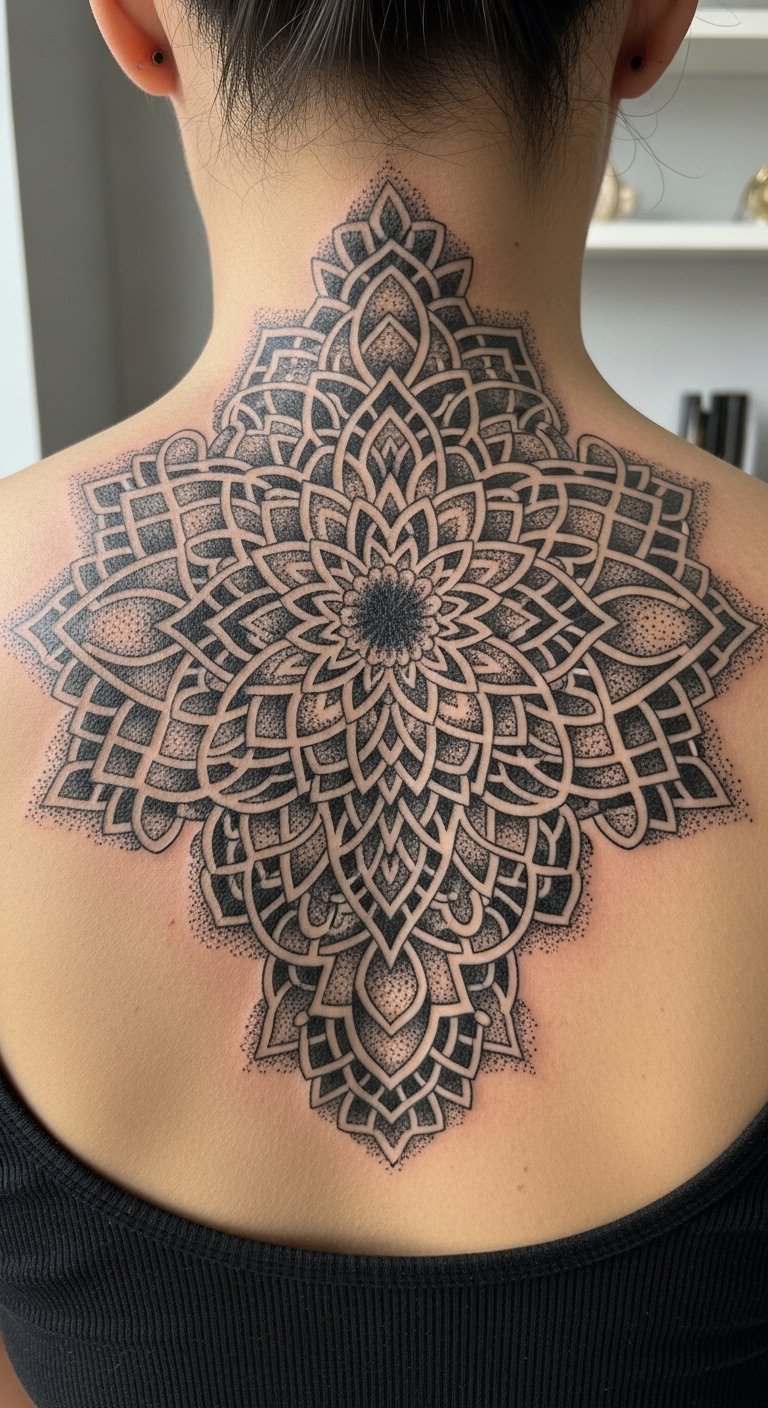
I love mandalas in dotwork because the density of dots creates depth without color. On the spine the vertical composition reads like a column—great for symmetry in photos and clothing. Expect higher pain because the spine has less flesh; sessions need to be spaced so the skin can recover between dense stippling passes. Healing usually peels within the first week but the full saturation settles over months. Dotwork mandalas age well if the artist spaces dots intentionally—too-tight stippling can blur together as skin stretches. Ask your artist about contrast planning (areas of heavy vs. light stippling) and look for portfolios that show healed mandalas. Common mistake: asking for excessive fine detail near the spine; scale up details so the pattern remains readable after a year.
Concentric Circle Sleeve on Upper Arm
Style/Technique: Geometric / Blackwork
Pain Level: Medium (3–5/10)
Session Time: 2–4 sessions, 2–3 hours each
Best For: Sleeve starter, visible but coverable
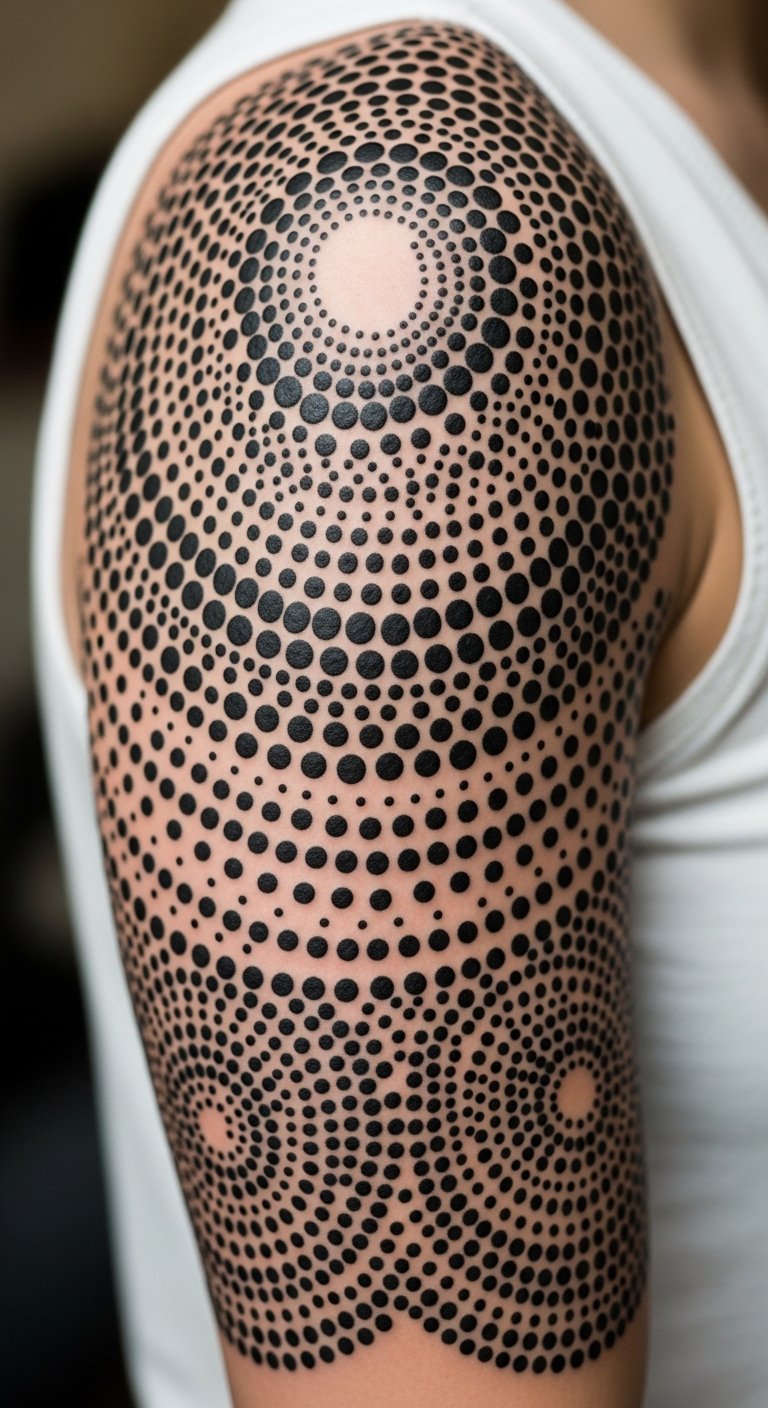
A concentric circle sleeve uses dot density to form gradients and implied shading. On the upper arm it wraps neatly and moves with muscle, so the design breathes when you flex. Pain is moderate here because the area has muscle and tissue. Sessions let you build depth gradually. In real life the crispness you see fresh will soften: the outer edges of tiny dots blend, which I actually like because it creates a dusty gradient. Common mistake: making circles too small—keep scale bold so the stippling doesn’t become a grey blur over time. Ask for healed photos of sleeves from the artist. Aftercare emphasis: gentle cleansing and light moisturizing to preserve crisp dots while skin regenerates.
Micro Dot Sacred Geometry Behind Ear
Style/Technique: Micro Dot / Fine Line Hybrid
Pain Level: High (6-7/10)
Session Time: 1–2 hours
Best For: Subtle placement, easy to hide
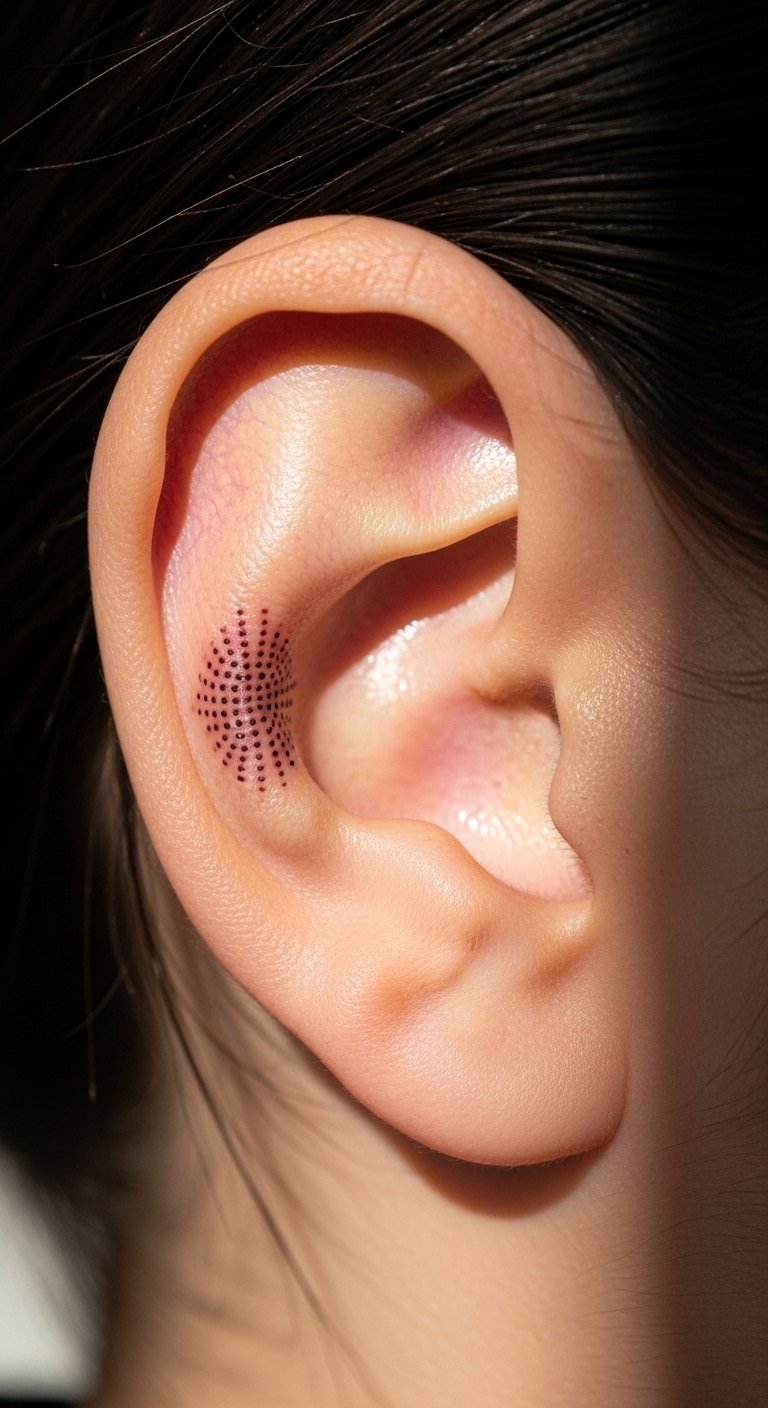
Behind the ear is tricky—small, discrete, and a real pain spot because of cartilage. Micro dotwork here looks hypnotic when placed right, like a tiny star field when hair parts. I’d call this for someone comfortable with short, sharper pain and wanting low visibility. Healing is faster for small spots but watch for scabbing near hair and natural oils. The main mistake is trying to cram too much geometry into a tiny area; simplify and use negative space. Ask your artist if they’ve done healed micro dotwork on cartilage—this placement needs steady hands and healed photos to trust the outcome.
Dotwork Botanical Forearm Band
Style/Technique: Botanical / Dot Shading
Pain Level: Low-Medium (3/10)
Session Time: 1–2 sessions (1–3 hours)
Best For: First-timers, daytime visibility
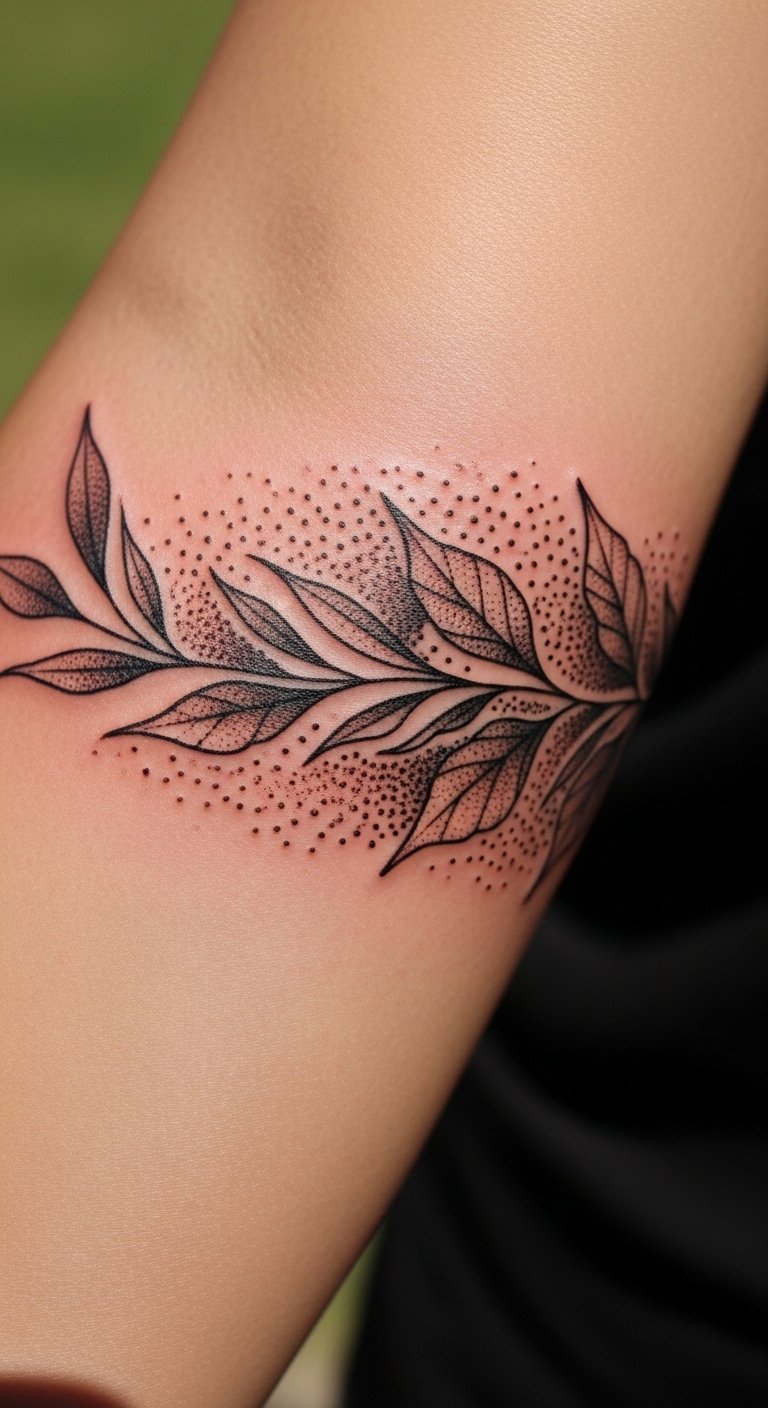
A botanical band uses stippling to create soft shadows and lifelike leaf textures without full graywash. On the forearm it sits where you can admire it daily and it's easy to hide with long sleeves. Pain is lower here thanks to decent flesh, and small sessions work fine. Dotwork really shines when you want dimension but not solid black fill. Healing shows early dullness while scabs fall—don’t over-moisturize or you’ll lose that stippled texture. Common mistake: asking for photorealistic leaves at micro scale; dotwork suggests texture rather than photo detail, so scale up key shapes and let stippling do the rest. Ask the artist for healed botanical examples rather than only fresh photos.
Stippled Wolf Half-Sleeve on Outer Arm
Style/Technique: Animal Portrait / Dotwork Realism
Pain Level: Medium (4/10)
Session Time: 3–5 sessions
Best For: Statement realism, strong visual impact
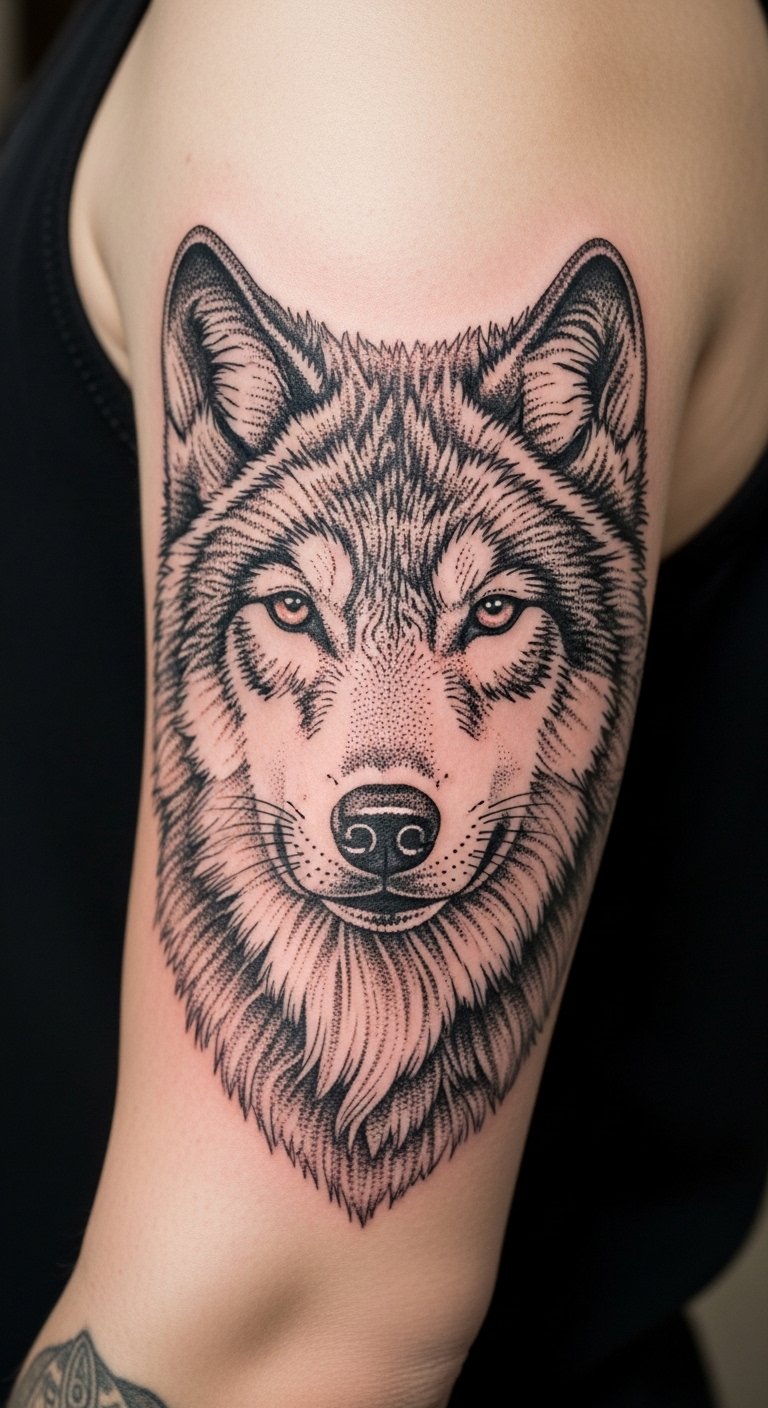
Dotwork portraits, like a wolf, are about texture. Instead of solid shading, thousands of dots build fur and depth. On the outer arm this reads bold from a distance but holds detail up close. Pain is manageable; longer sessions are needed for gradual saturation. In my experience, dotwork realism keeps contrast longer than graywash because there's less solid gray to fade flat. The common mistake is expecting photographic clarity; dotwork portraits read like textured illustrations, not photos. Ask for artists who combine stippling with subtle fine lines around eyes and snout—the hybrid approach maintains expression. During healing, avoid direct pressure and long sleeves that rub the piece.
Dotwork Crescent Moon Ribcage
Style/Technique: Minimal Dotwork / Fine Shading
Pain Level: High (8/10)
Session Time: 1–2 hours
Best For: Intimate, hidden pieces
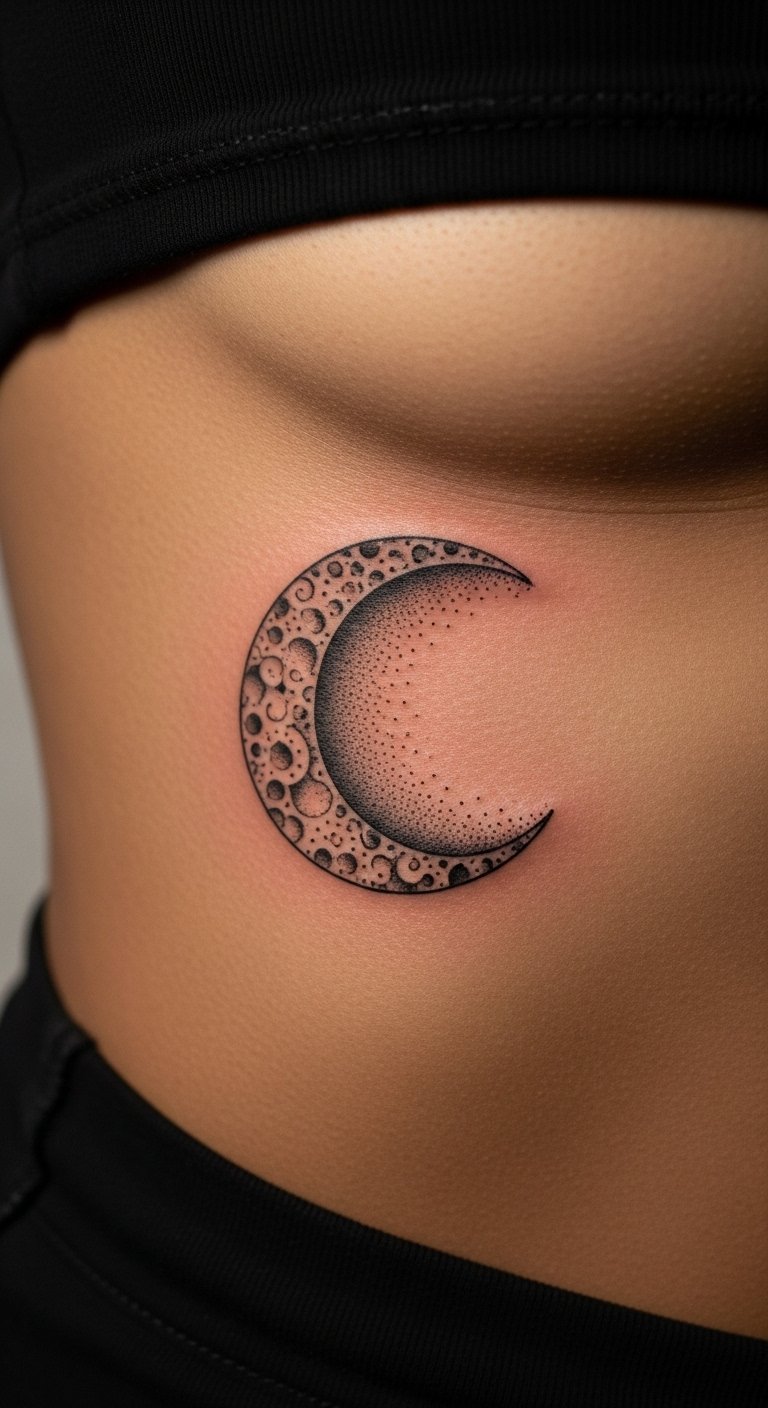
Ribcage dotwork is stunning because the curvature of the body adds natural flow to stippling. It’s a high-pain zone—expect sharp stings during the session—but the result hugs your rib shape and looks ethereal. Healing on ribs can feel tight when you breathe; plan for slower activity and loose clothing. Dotwork holds well here because the skin doesn’t get much sun exposure unless you’re often shirtless. Common mistake: requesting extremely thin dot density; the skin on ribs can make tiny dots fade into a haze if spacing is too close. Ask the artist how they manage saturation on rib skin and request healed photos of rib dotwork.
Interlocking Triangle Chest Piece
Style/Technique: Geometric / Blackwork
Pain Level: Medium-High (6/10)
Session Time: 2–3 hours
Best For: Center chest statement, symmetrical looks
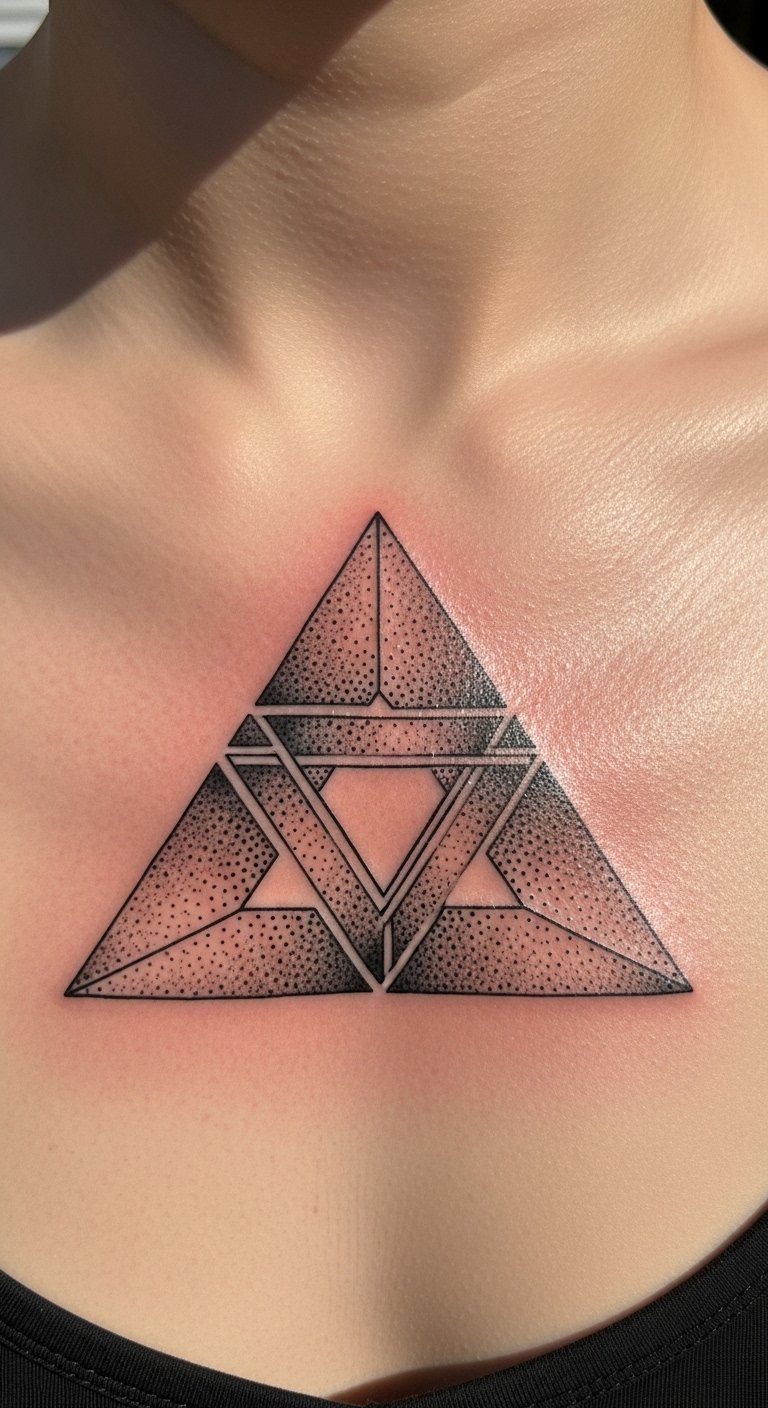
Triangles and interlocking shapes are hypnotic when stippled—density creates implied gradients and optical depth. Center-chest placement reads strong under clothing and works with collarbones. Pain varies: near the sternum is sharper, outer chest less so. Sessions can be done in one sitting if the piece is moderate size, but spacing ensures even saturation. Real-life aging: chest tattoos take sun well if you use SPF; otherwise the high-contrast blackwork can flatten with repeated sun exposure. Avoid overly tight dot patterns; leave breathing room between shapes. Ask to see healed chest geometrics so you know how dots settle across the sternum and ribs.
Floral Dot Pocket on Upper Thigh
Style/Technique: Organic Dotwork / Illustrative
Pain Level: Low (2–3/10)
Session Time: 1–2 hours
Best For: Hidden piece, sensual placement
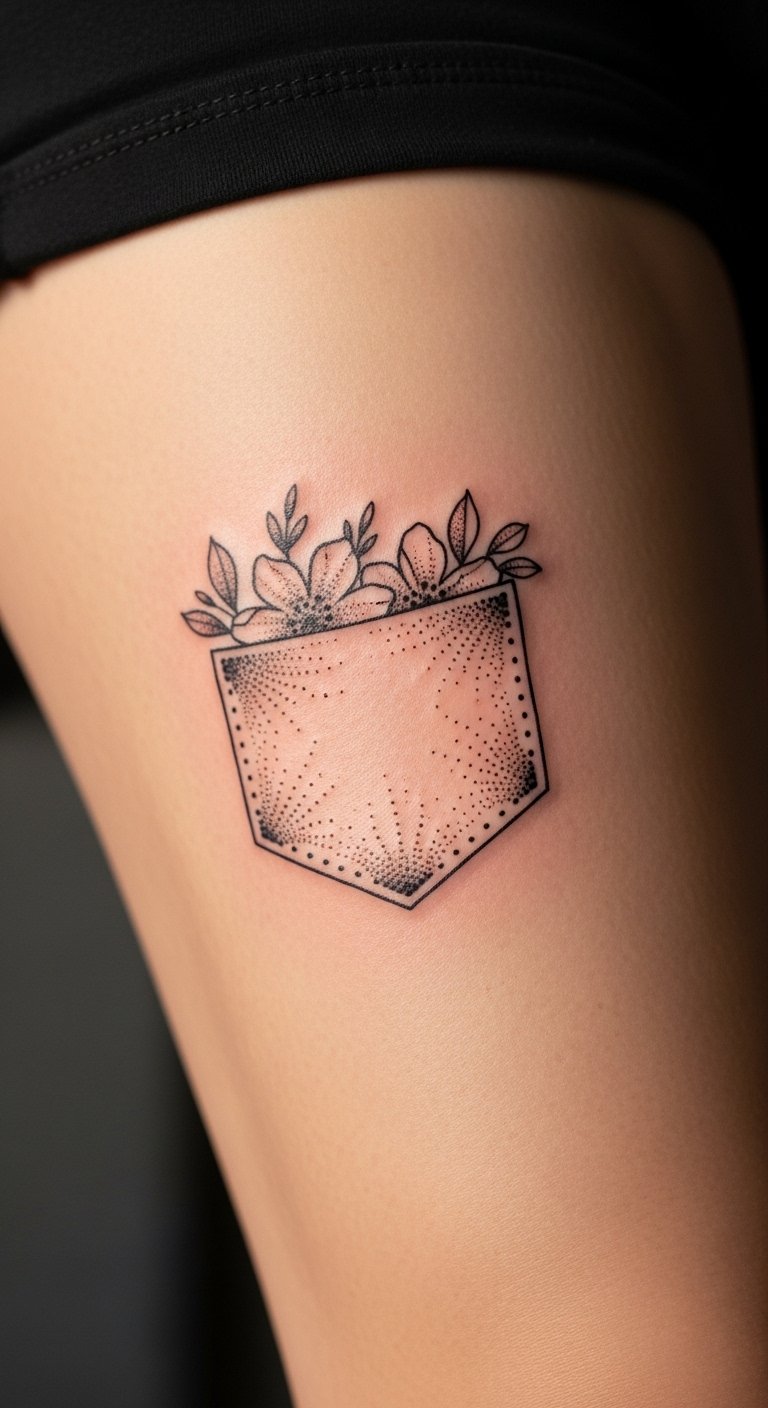
The upper thigh is forgiving and great for dotwork florals—soft curves and flesh allow for subtle stippling that reads like watercolor without color. Pain is low and healing is private, which I like for first-timers or intimate pieces. Dotwork here ages nicely since sun exposure is limited, keeping contrast intact. Watch out for friction from pants during healing; loose clothing helps. A common mistake is placing very small petals too close together—scale matters. Ask your artist for healed thigh florals to understand how dots soften and how the design looks when you sit or walk.
Dotted Compass on Collarbone
Style/Technique: Minimal Geometric / Dot Emphasis
Pain Level: Medium (5/10)
Session Time: 1–2 hours
Best For: Visible minimalism, travel-themed pieces
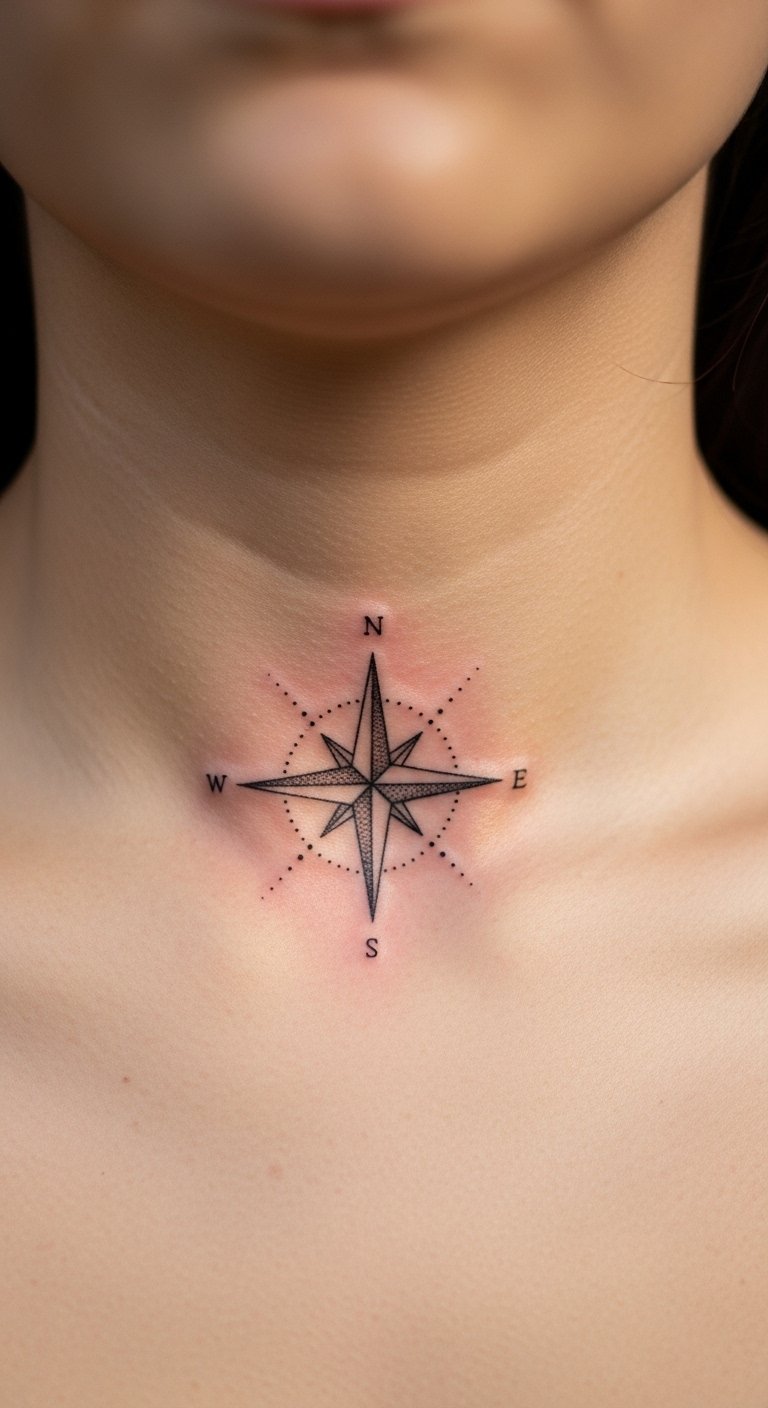
A compass in dotwork gives directional symbolism without heavy ink. Collarbone placement looks elegant but can be uncomfortable; the bone is shallow and the session stings more. The short sessions are doable—good for beginners who want statement placement without long sittings. Dotwork softens a bit after healing, so keep the directional points bold enough to read from a distance. Common mistake: tiny compass points that vanish into skin texture—ask your artist to slightly exaggerate main lines. Post-care should include sunscreen whenever collarbone is exposed to protect contrast.
Stippled Botanical Ankle Wrap
Style/Technique: Botanical / Wrap Dotwork
Pain Level: Medium-High (6/10)
Session Time: 1–3 hours
Best For: Decorative ankle detail, discreet in shoes
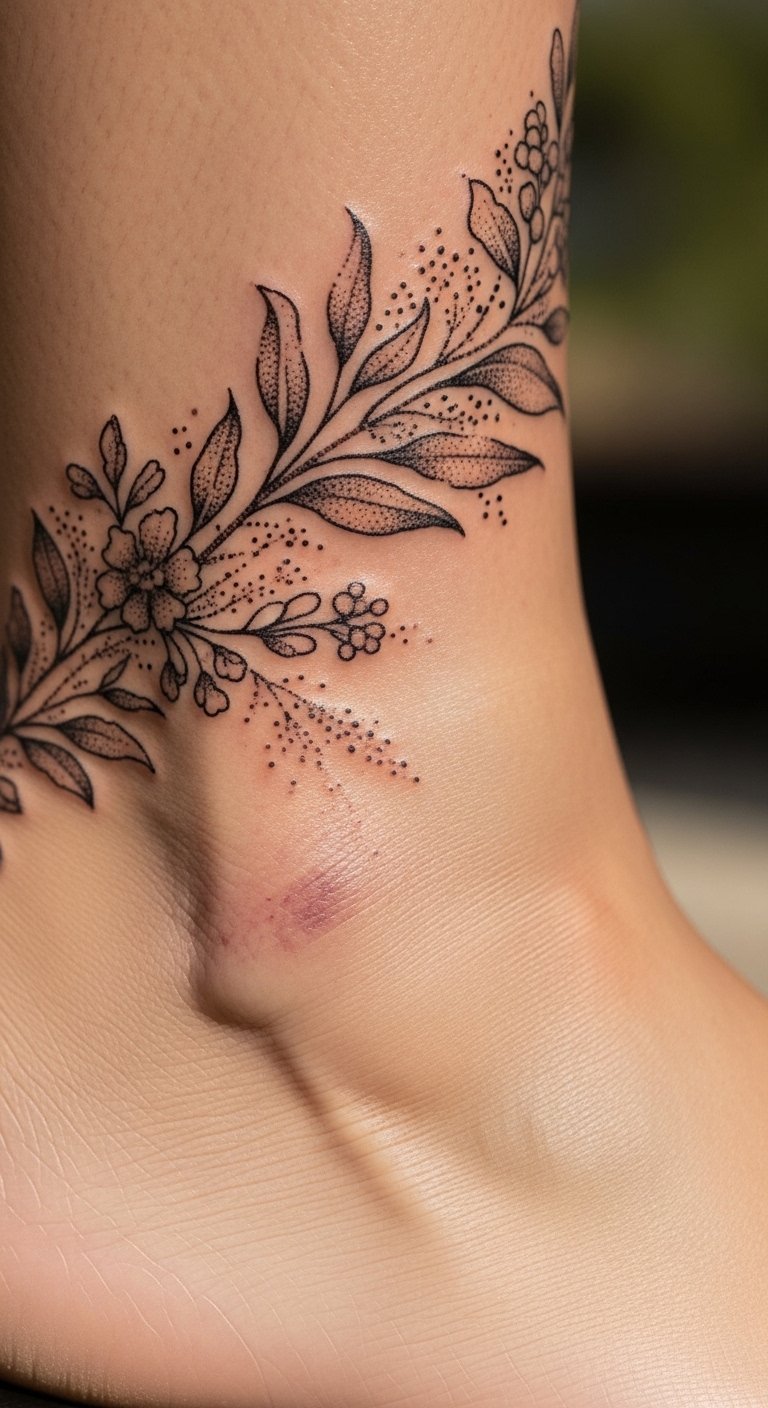
Ankle dotwork looks delicate but stings because bone is close to skin. A wrap design lets dots flow around the joint; when healed it reads like lace. Because ankles flex and move, expect scattered dot softness over time; heavier dots at key anchor points keep the design readable. Mistake to avoid: filling the entire wrap with micro-dots—balance negative space so the piece remains crisp. During healing, avoid tight socks and rigid shoes that rub the area. Ask artists for healed ankle wraps—they show how dots shift with movement and time.
Full Back Dot Constellation
Style/Technique: Minimal Dotwork / Scattered Composition
Pain Level: Medium (4–6/10)
Session Time: Several sessions, short increments
Best For: Large canvas, storytelling constellations
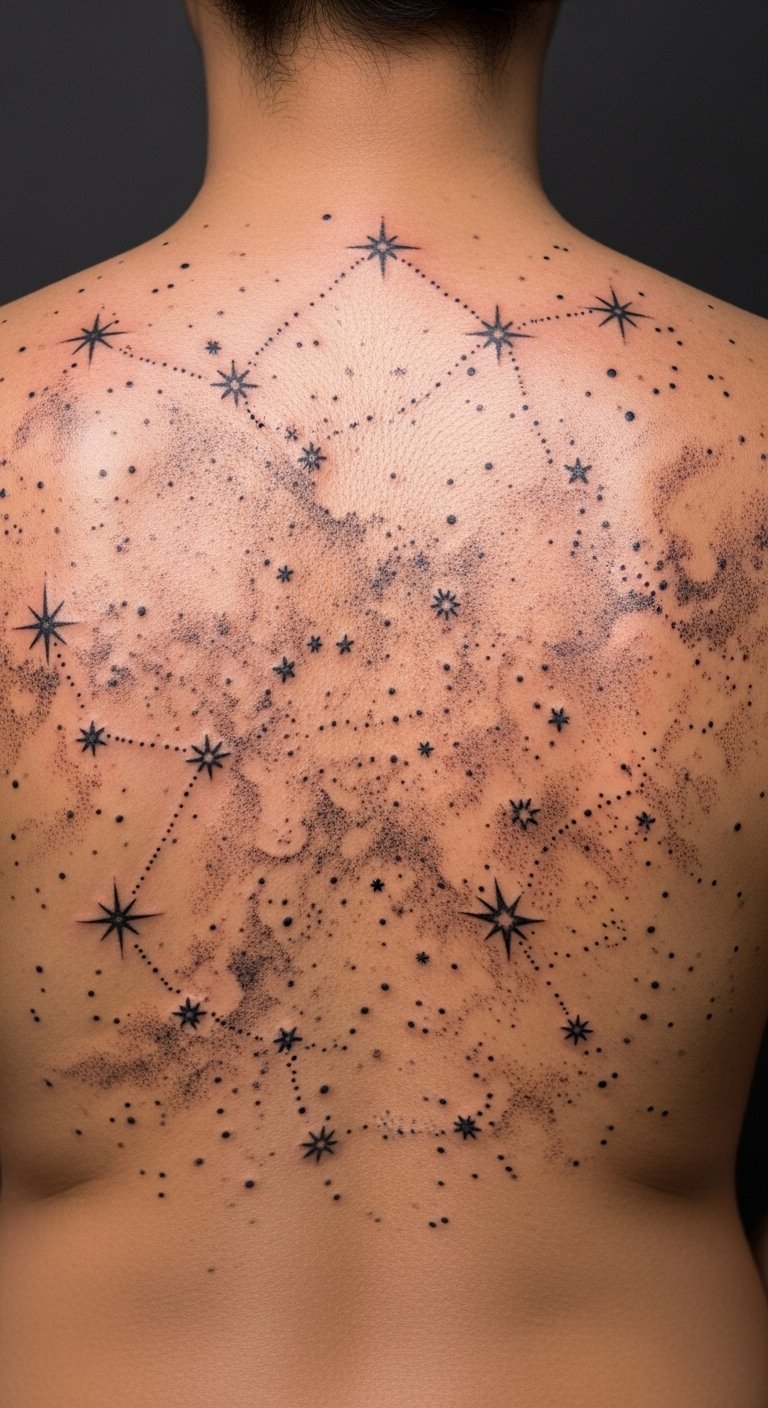
A scattered constellation piece across the back uses dot density to suggest nebulae and star clusters. The back is a generous surface, so you can play with scale and spacing. Pain ranges because the back has mixed zones—near scapula can be more sensitive. Sessions are usually shorter and staged so you can rest between dot-heavy passes. I like this design because it invites additions over time: new clusters, shading, or small constellations. A frequent mistake is over-detailing tiny stars; keep stars varied in size and let negative space mimic distance. Ask for healed back constellations to see how the lighter stippling looks after one year.
Stippled Sacred Eye on Forearm
Style/Technique: Symbolic Dotwork / Fine Line Mix
Pain Level: Low-Medium (3/10)
Session Time: 1–2 hours
Best For: Symbolic visibility, forearm display
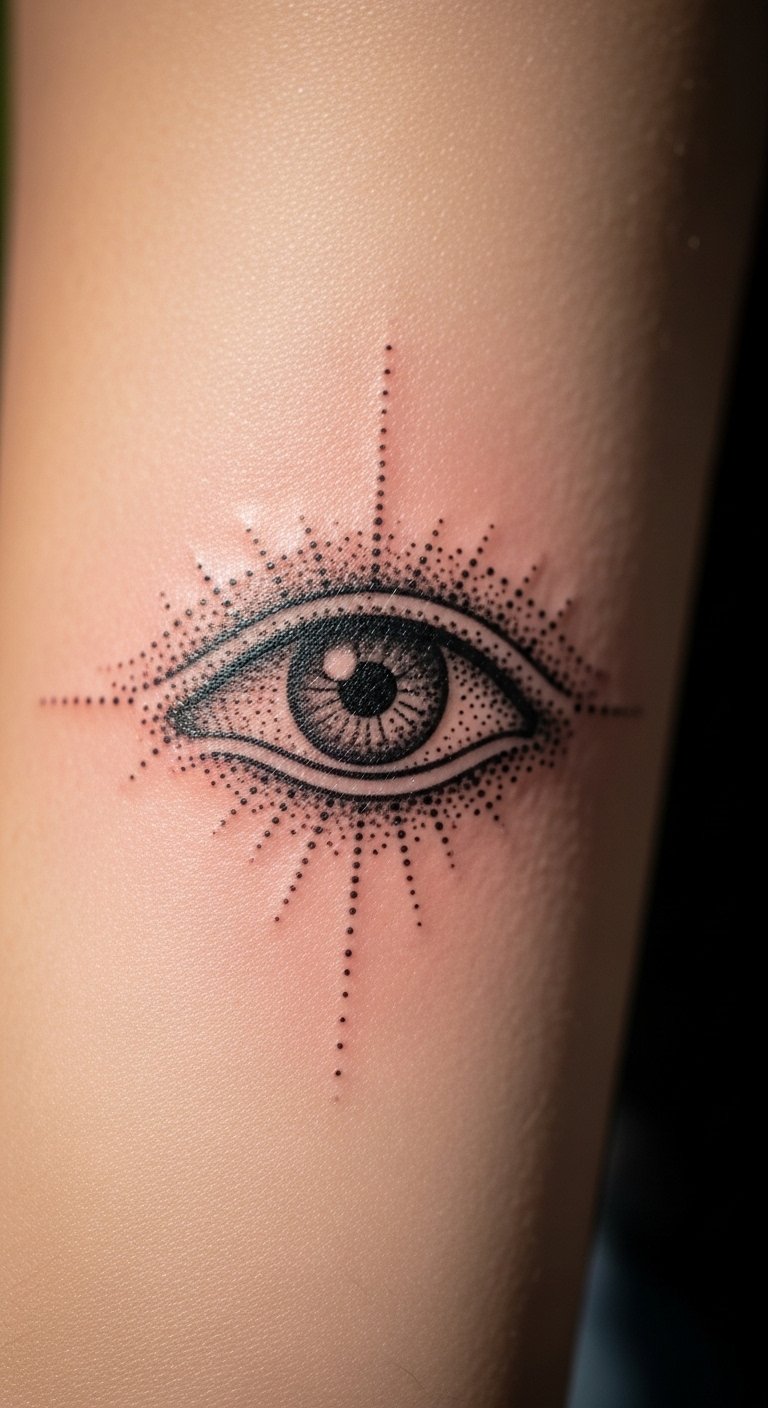
A sacred eye in dotwork feels meditative—dots around the iris and lashline create a smoky halo without heavy black fill. The inner forearm is an ideal canvas: low-to-moderate pain and easy to show or cover. Healing is straightforward; watch for stretched skin if you work out frequently. Beware of asking for too many micro details—opt for bold contrasts to keep the symbol readable. Look for artists who pair dotwork with delicate linework around features to maintain clarity. This placement is great if you want a daily reminder motif that ages predictably.
Dotwork Crescent Landscape on Calf
Style/Technique: Landscape / Stipple Shading
Pain Level: Low (2–4/10)
Session Time: 1–2 hours
Best For: Vertical placement, visible in shorts
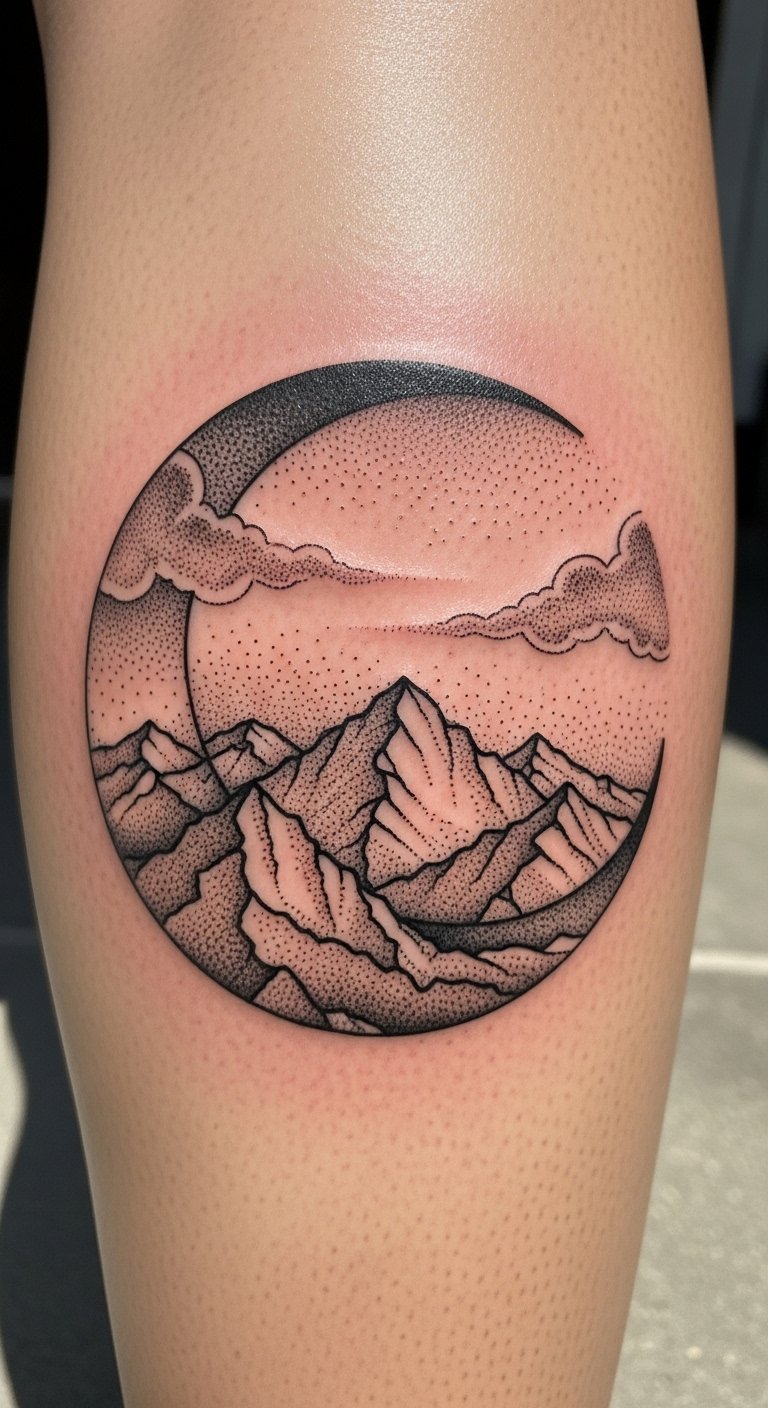
The calf holds vertical compositions well—the muscle gives natural curvature to small landscapes. Stippling creates atmosphere: fog, moonlight, and mountain texture without heavy black blocks. Pain is tolerable; sessions are short and recovery is easy. In my experience, calf dotwork keeps good contrast because it’s easily protected from sun. Mistake to avoid: packing tiny elements too close; scale features for distance. Ask for healed calf landscapes to see dot gradation over time—artists who photograph healed work are a big plus here.
Symmetric Dot Collar Necklace
Style/Technique: Decorative Dotwork / Ornamental
Pain Level: Medium (4/10)
Session Time: 1–2 hours
Best For: Jewelry-mimicking, fashion-forward placement
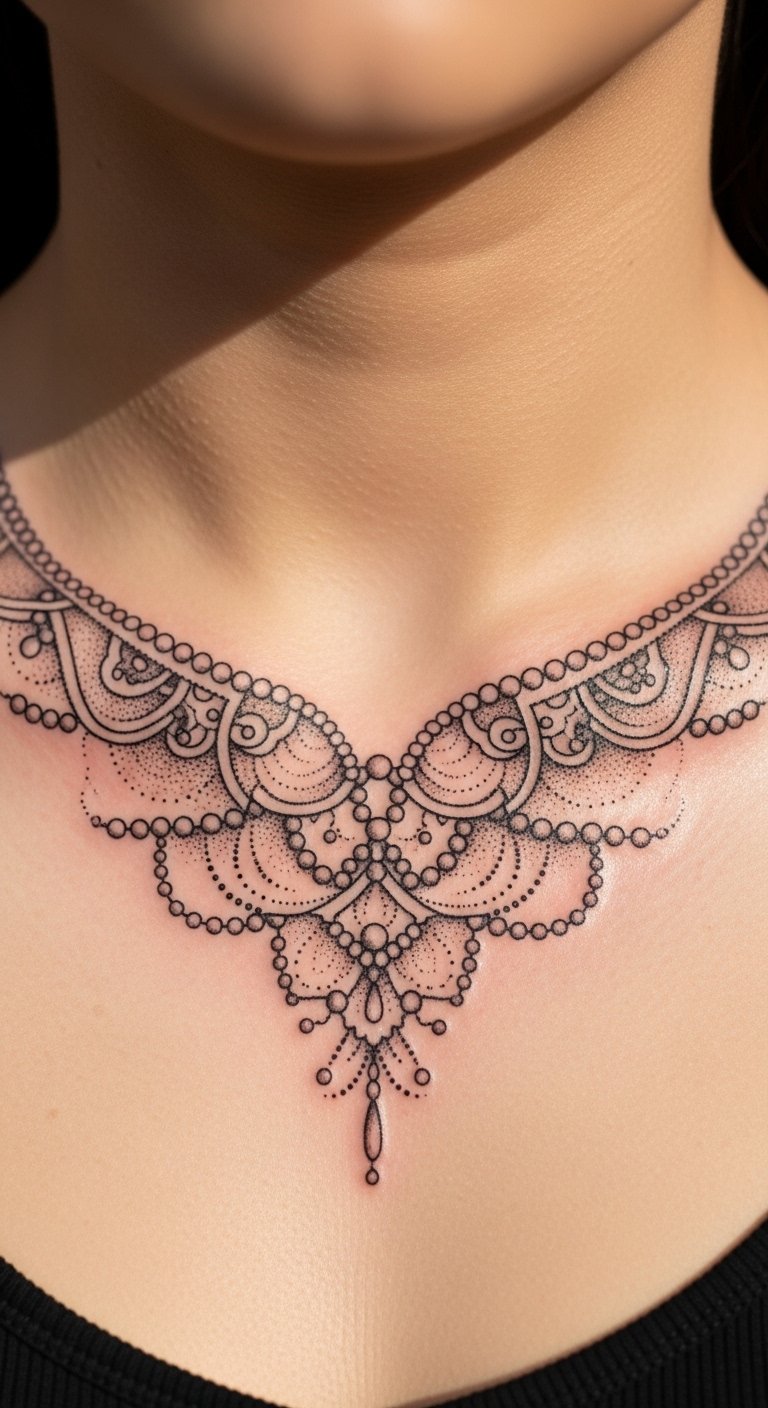
A collar necklace tattoo frames the neckline with repeating dot elements and small negative-space chains. It reads like jewelry but is permanent, so spacing and symmetry are critical. Expect light-moderate discomfort over the upper chest and near clavicles. The design ages well if dots are sized for long-term visibility—tiny beads tend to blur over time. Artists who use stencil placements and photographs of healed collar pieces are worth seeking out. During healing, avoid heavy necklaces that could tug at scabs and delay proper settling.
Dotwork Snake Coiling on Thigh
Style/Technique: Neo-Traditional Hybrid / Dot Shading
Pain Level: Low (3/10)
Session Time: 2–3 hours
Best For: Bold, adjustable scale, coverable
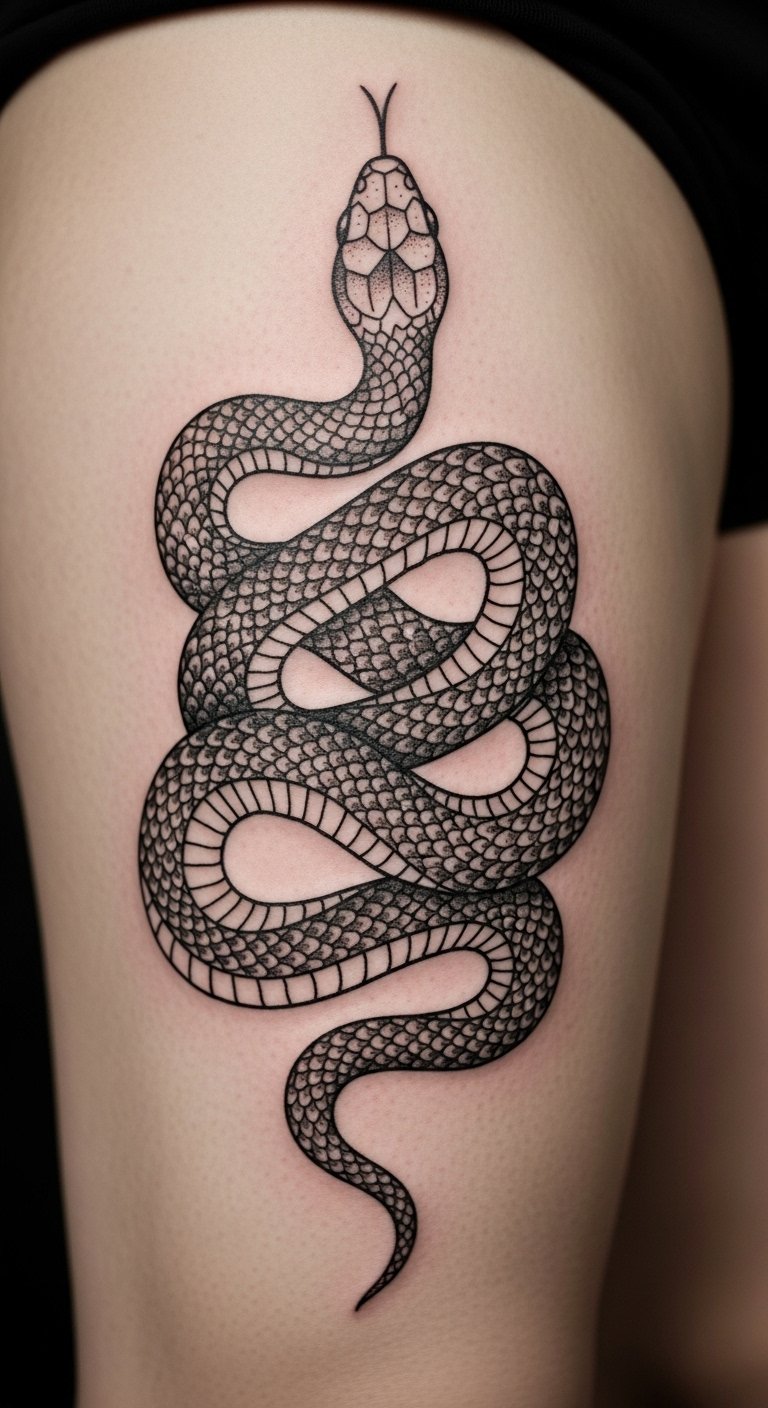
A snake rendered with stippling and negative space feels tactile without full color. The thigh’s flesh handles long sessions well and the piece can be large or modest. Pain is mild; bleeding and swelling are minimal here. Dotwork scales hold texture beautifully over time but keep pattern scale large enough so individual dots don’t merge. Common mistake: over-detailing each scale; artists usually simplify to imply texture. Ask to see healed thigh snake pieces to understand how stippling reads after movement and months of wear.
Mandala Finger Band (Minimal)
Style/Technique: Micro Dotwork / Tiny Geometry
Pain Level: High (7/10)
Session Time: 30–60 minutes
Best For: Tiny statement, ring replacement
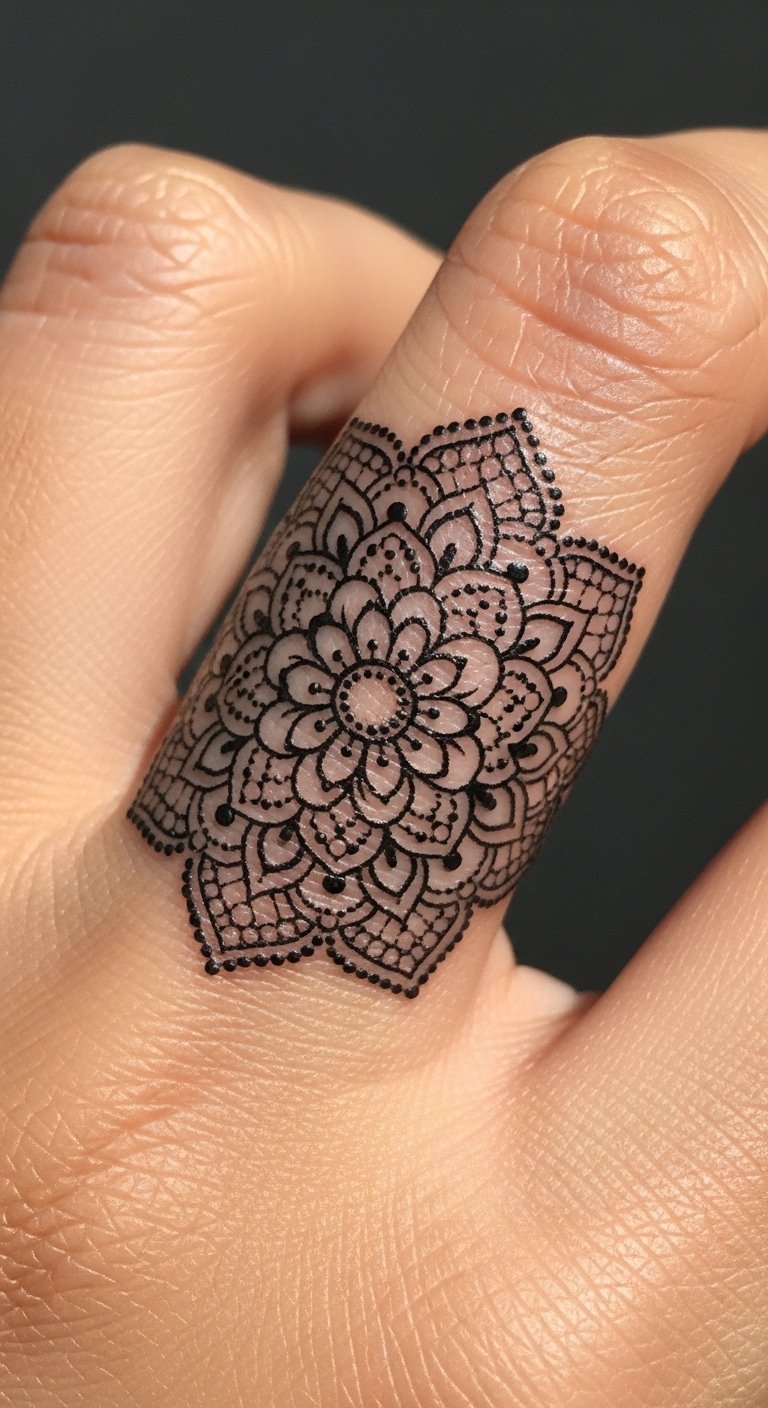
Finger tattoos are small but painful and prone to faster fading because of constant use. A mandala-style ring in dotwork looks delicate but requires bold dot anchors to survive wear. Expect touch-ups: fingers live a rough life. My advice is to accept that the ring may need refreshes; avoid hairline dots only. Also avoid overly tight stippling that blends into a gray smudge. Ask the artist about their finger-healed portfolio and follow strict aftercare—no heavy hand washing for the first week helps.
Stippled Skull on Elbow Flank
Style/Technique: Blackwork / Dot Contour
Pain Level: High (8/10)
Session Time: 1–3 hours
Best For: Bold statement on joint areas
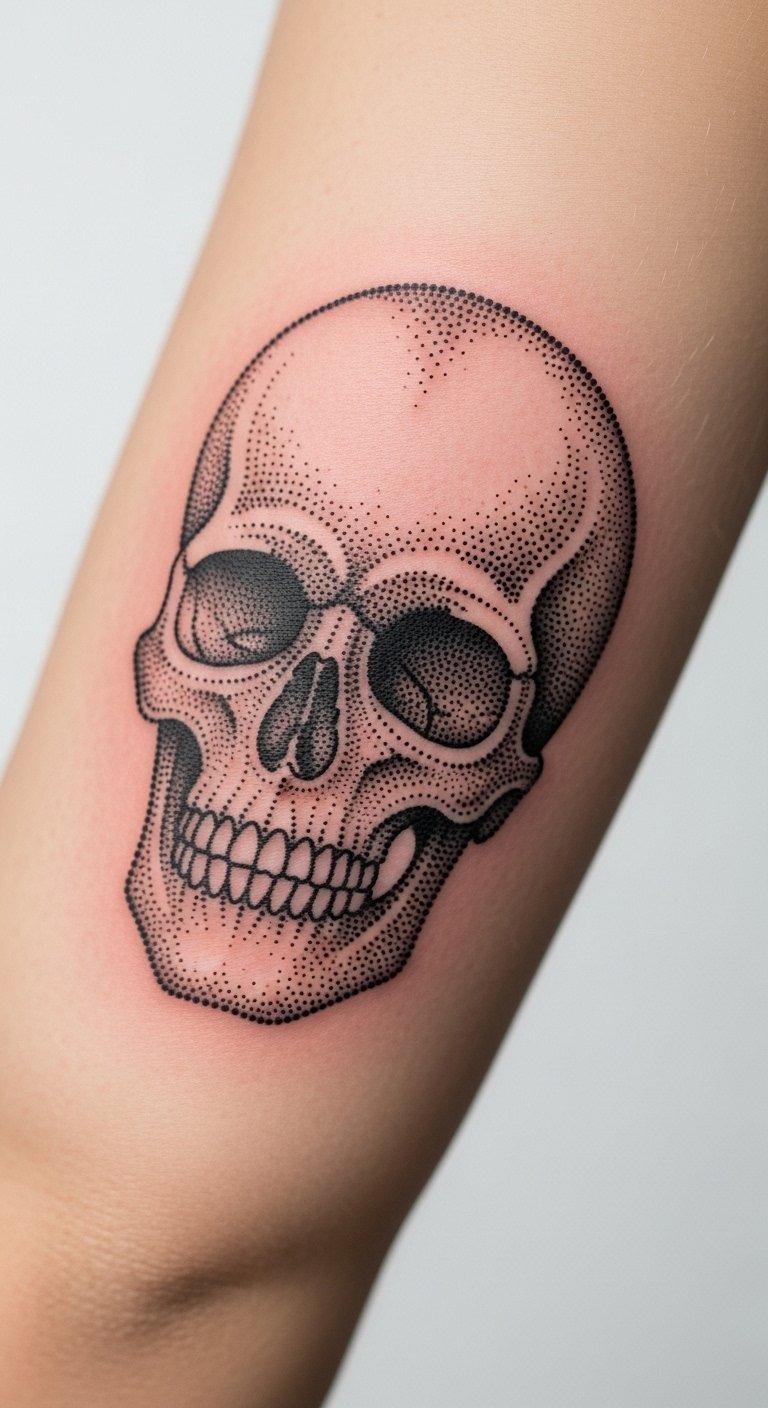
Elbow-adjacent pieces are notorious for pain and tricky healing because of constant movement. A skull rendered in dotwork around the elbow can wrap and read from multiple angles if scaled properly. Expect strong discomfort and potential for longer healing due to stretching. Dotwork survives here only if the artist plans heavier anchor dots and leaves breathing space. Common mistake: trying to cram small details onto a moving surface. Bring photos of how you use your arm during the consultation and request healed elbow examples from the artist.
Dot Negative-Space Fleur on Sternum
Style/Technique: Ornamental Dotwork / Negative Space
Pain Level: High (7/10)
Session Time: 1–2 hours
Best For: Center-chest ornament, feminine placement
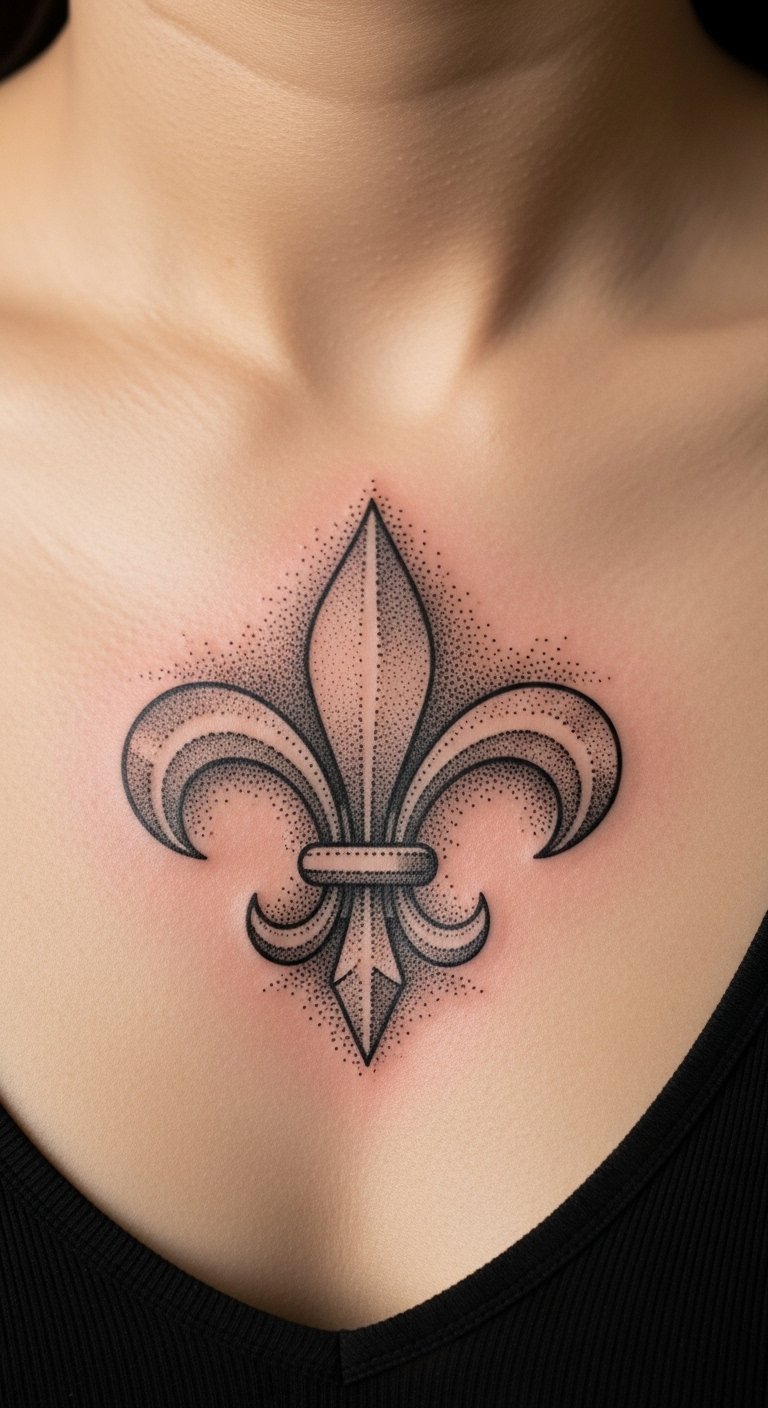
Negative-space dotwork is clever for chest ornaments: the skin shows as the design’s "color" while stippling outlines and shades the motif. Sternum placement is sensitive, so pain is higher, but the ornamental result is striking. The main aging concern is sun exposure; protect it if you’re often shirtless. A common mistake: making the negative areas too thin—ensure the shape has enough breadth to remain visible as the skin changes. Ask the artist for healed sternum negative-space pieces to ensure long-term readability.
Stippled Geometric Half-Sleeve with Fine Lines
Style/Technique: Geometric / Dot + Fine Line Hybrid
Pain Level: Medium (4/10)
Session Time: Multiple sessions, 2–3 hours each
Best For: Full-arm visual cohesion, mix of textures
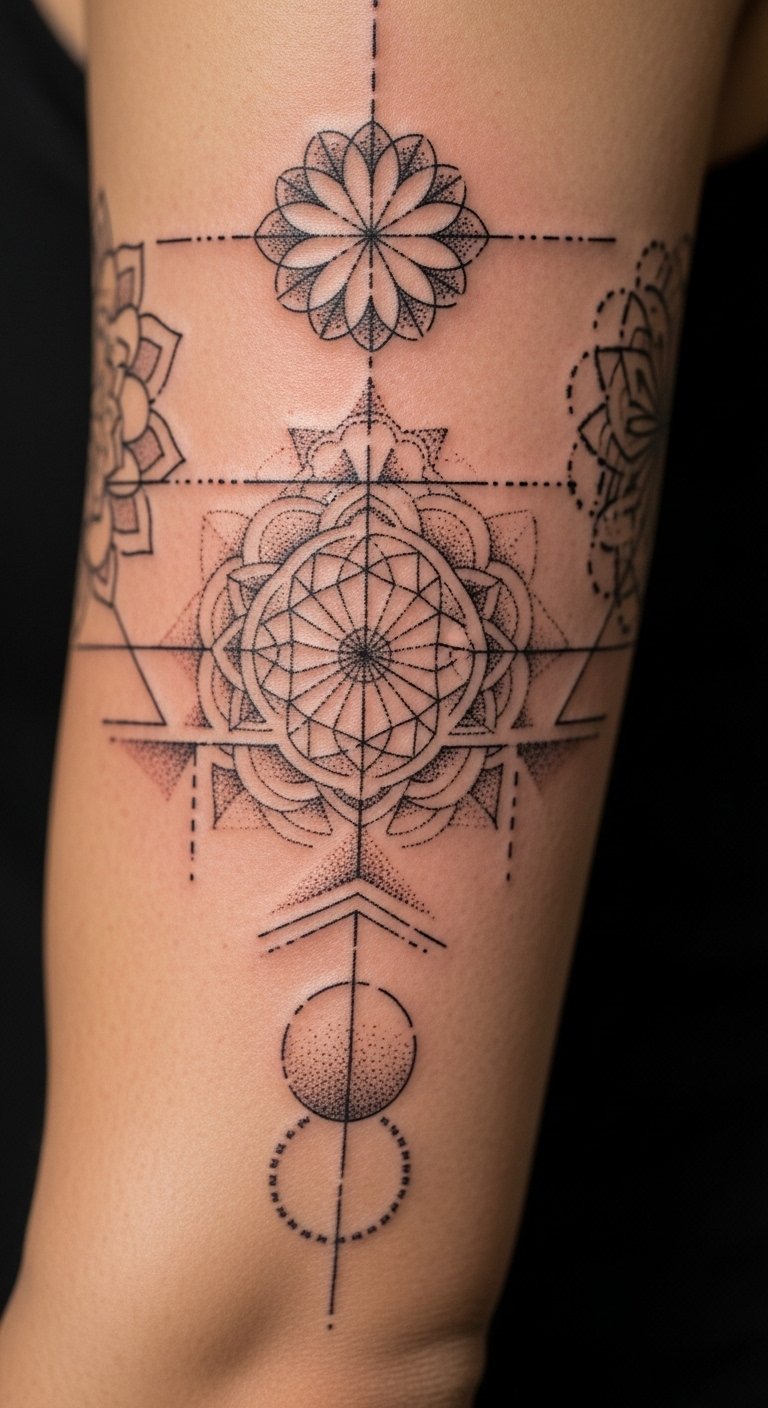
Half-sleeves that combine dot gradients and fine lines keep your arm interesting from every angle. The dotwork provides volume while fine lines define structure. Sessions are staged to layer density correctly. In my experience, the hybrid ensures the sleeve retains clarity longer than solid shading alone. Common mistake: relying too much on micro dots instead of mixing dot sizes for durability. Ask for artists who photograph sleeves both fresh and healed; that’s how you can judge true longevity.
Dotwork Hamsa on Palm Edge
Style/Technique: Symbolic Dotwork / Small Placement
Pain Level: Very High (9/10)
Session Time: 45–90 minutes
Best For: Symbolic, rarely visible
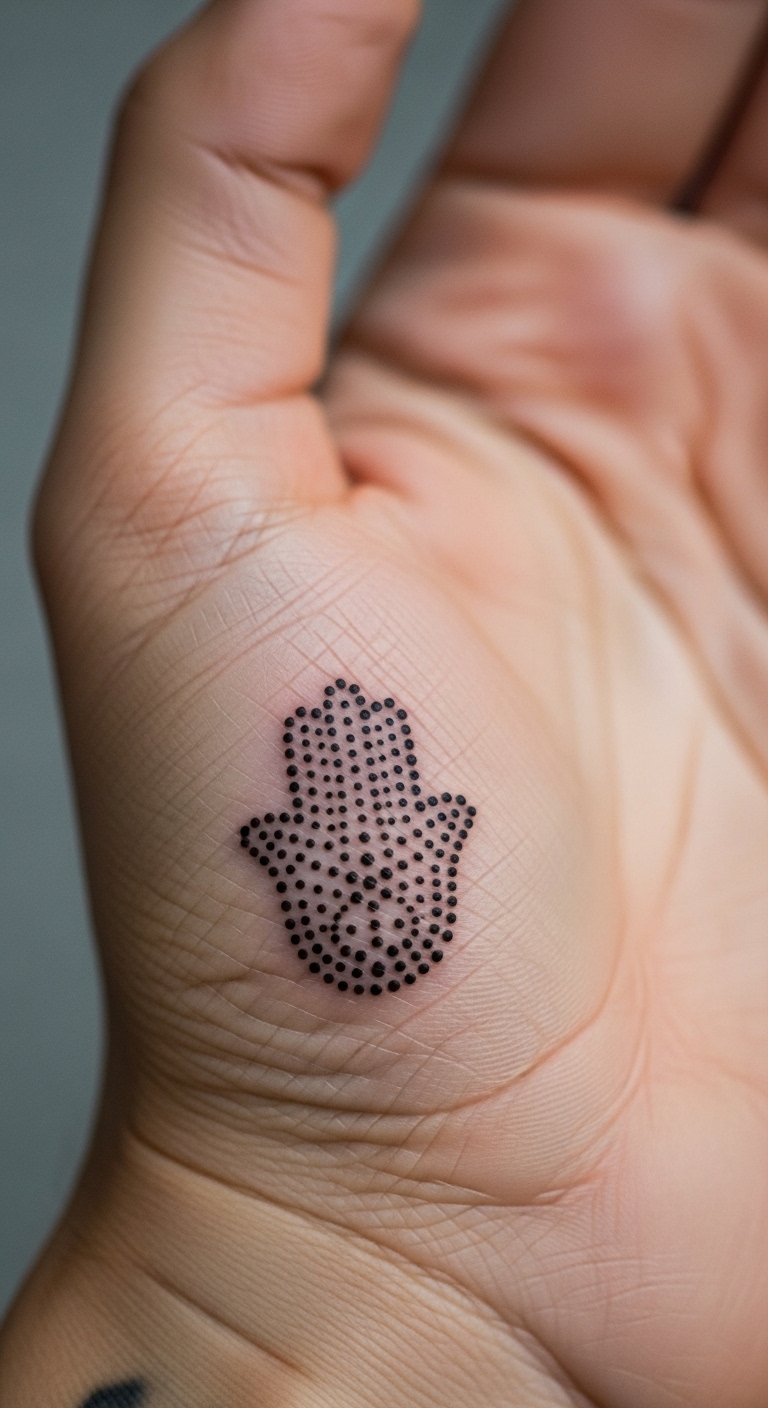
Tattooing near the palm is painful and often fades quickly because of constant use. A tiny Hamsa along the palm edge or heel of the hand can hold for a while but expect touch-ups. I only recommend this placement if you accept that it may need refreshes. The artist should advise on ink depth and dot size—bolder anchors help. Mistake: insisting on ultra-fine stippling here; that approach ages poorly. Consider slightly larger dots and accept maintenance.
Dotwork Owl on Shoulder Blade
Style/Technique: Illustrative Dotwork / Animal Motif
Pain Level: Low (2–4/10)
Session Time: 1–3 hours
Best For: Back placement, nocturnal themes
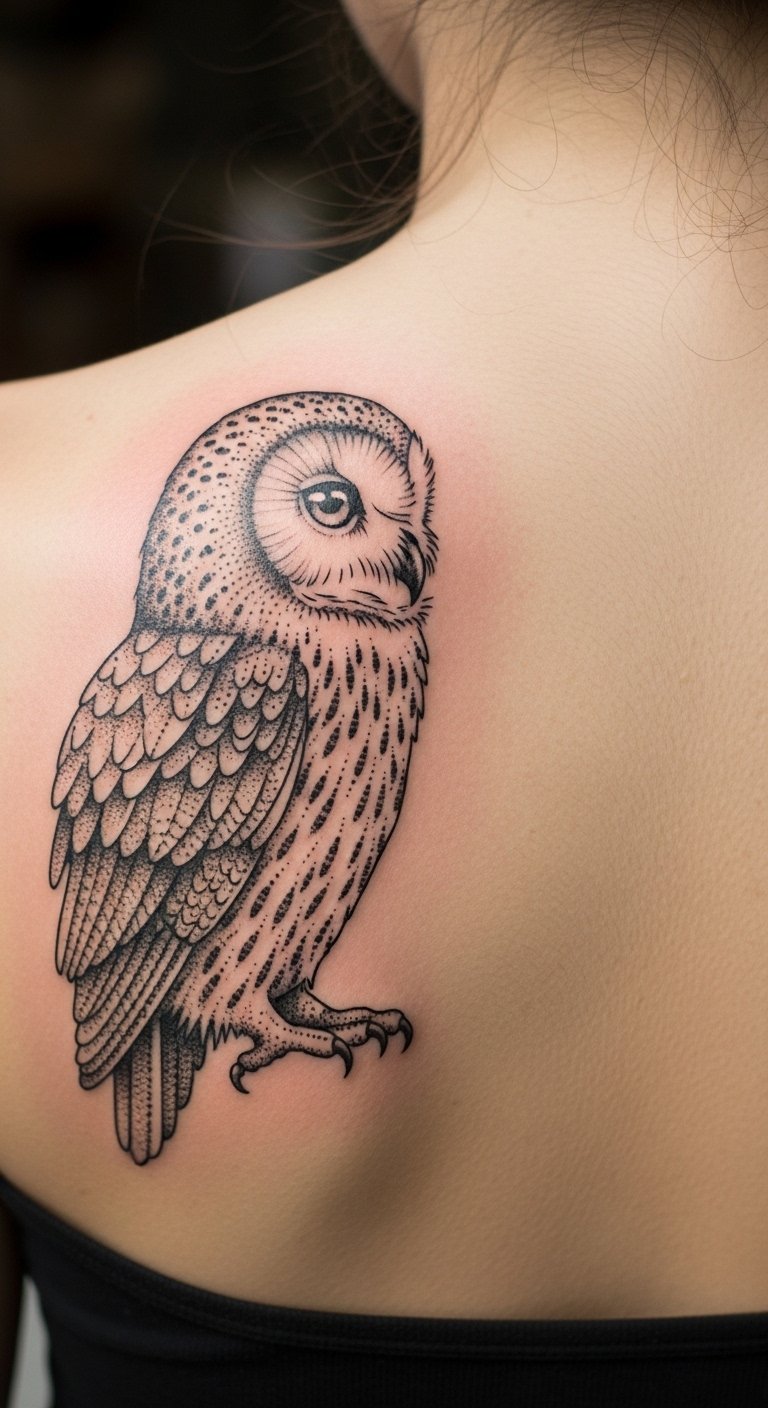
The shoulder blade is an artist-friendly surface: flat, noticeable, and low-pain. An owl in dotwork benefits from feather texture made with stippling and negative space for eyes. The area is easy to keep out of the sun and heals reliably. I often tell people this is a forgiving spot for first-time larger dotwork pieces. Avoid overfilling the wing detail—let the dots and voids suggest feathers rather than attempting photo realism. Ask to see healed shoulder blade birdwork so you can judge feather texture longevity.
Tiny Dot Constellation Behind Knee
Style/Technique: Minimal Dotwork / Micro Composition
Pain Level: High (7/10)
Session Time: 30–60 minutes
Best For: Playful hidden spot, movement-friendly
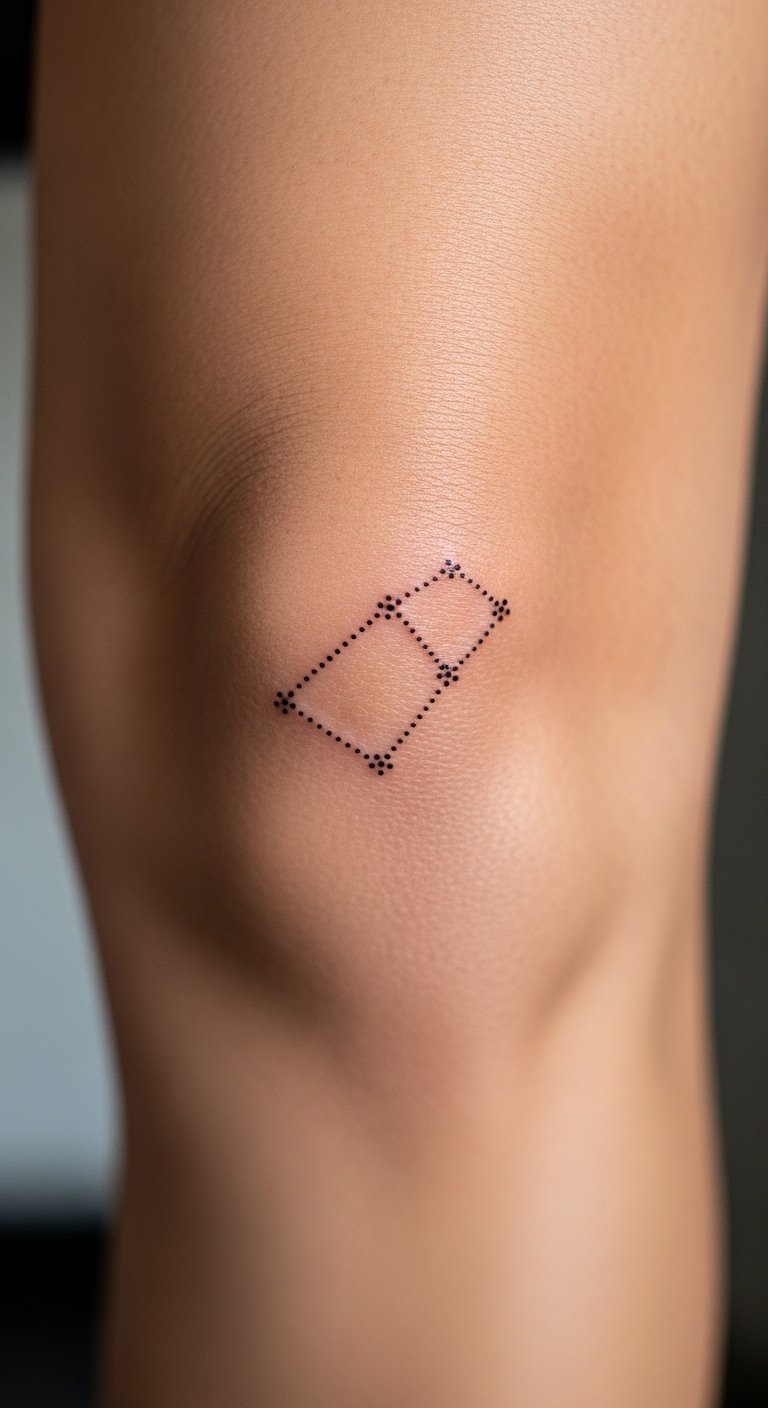
Behind-knee placements are secretive and move with your body, which can make a tiny constellation seem alive. It’s surprisingly painful and the skin here is finicky during healing due to constant bending. Micro dot constellations can survive if dots are spaced for the area’s motion. Common mistake: placing too many dots close together—allow space. Keep the design simple and plan for careful aftercare during the first week to manage scabbing and movement.
Dotwork Iris on Upper Arm (Eye Motif)
Style/Technique: Symbolic Dotwork / Focused Detail
Pain Level: Low (2–3/10)
Session Time: 1–2 hours
Best For: Visual focus, easy to hide under sleeves
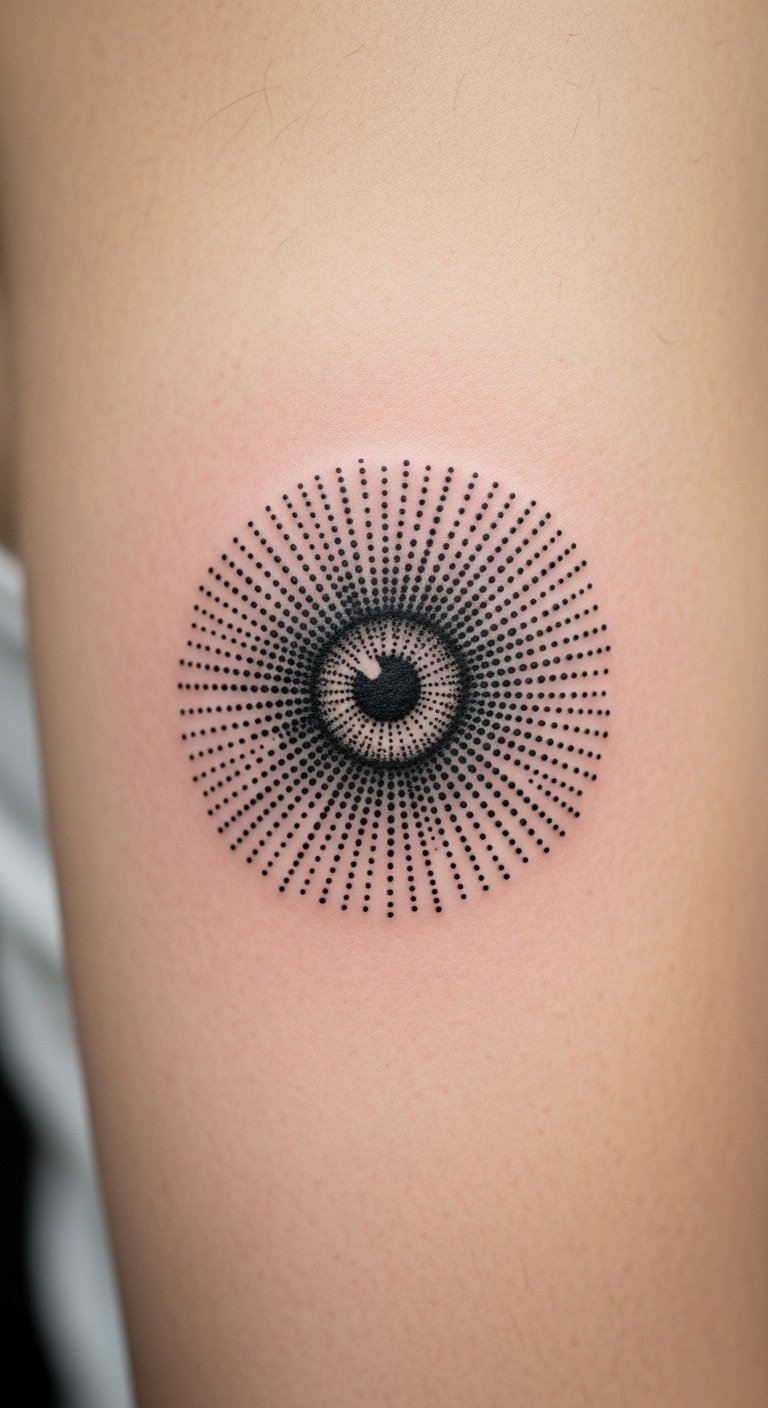
An eye motif built from dots is hypnotic without being busy. Upper arm placement is comfortable and ages well with minimal sun exposure if you cover up occasionally. It’s subtle and meaningful, and the stippling gives a textured iris that glows when healed. Avoid microhatching that competes with stippling—let the dot pattern define the iris. Ask for healed eye motifs in portfolios to know how pupil contrast holds.
Dotwork Seashell on Wrist
Style/Technique: Nautical / Dot Shading
Pain Level: Medium (5/10)
Session Time: 1 hour
Best For: Small visible motif, beach themes
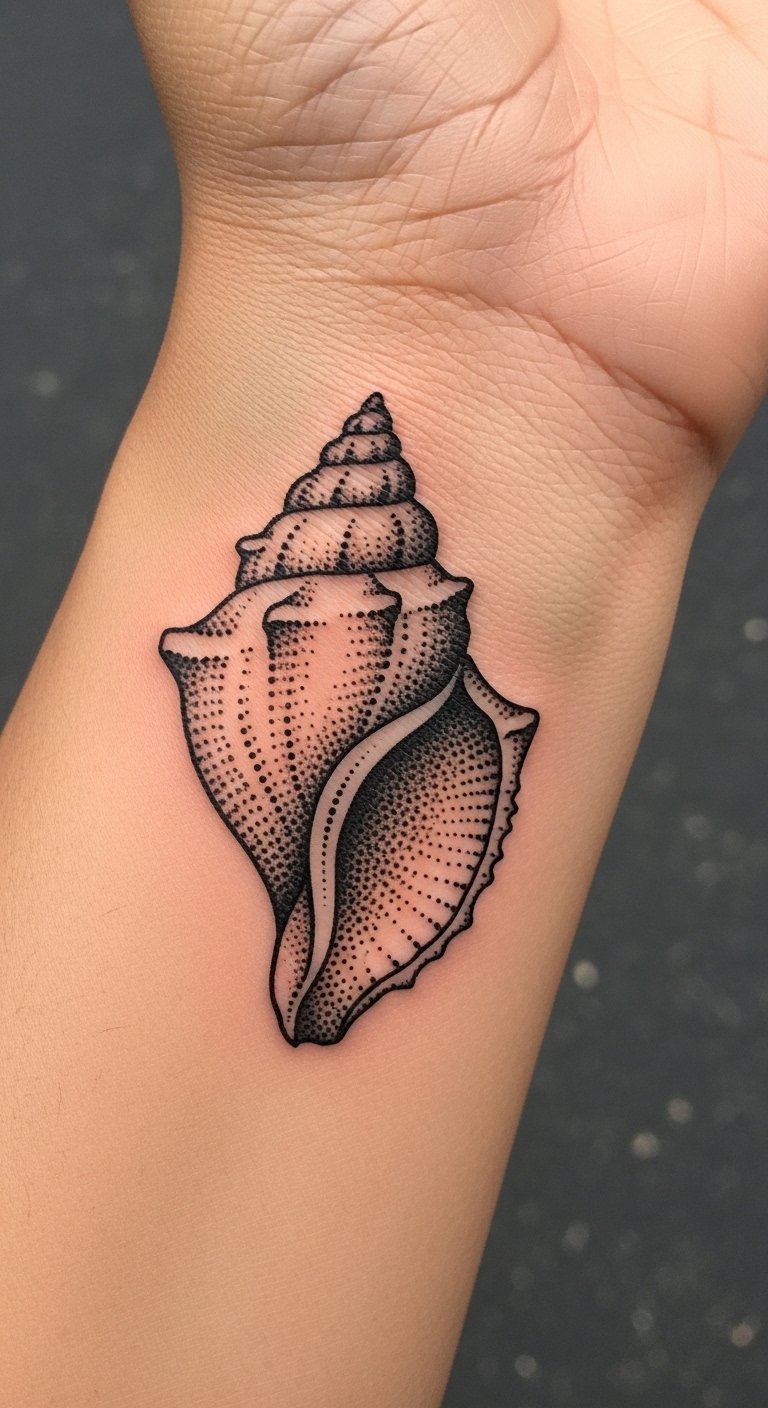
A wrist seashell reads like a keepsake—dot shading creates ridges and pearlescent texture without color. The wrist is moderately painful and the area sees lots of washing and sun, so expect more touch-ups than thigh or back pieces. The trick is scale: too small and ridge dots merge; slightly larger grain keeps the shell readable. During healing protect from friction and sunscreen once healed. Inspect artist portfolios for healed wrist pieces to see how stippling endures.
Dotwork Floral Sternum-to-Rib Cascade
Style/Technique: Organic Dotwork / Cascading Composition
Pain Level: High (7/10)
Session Time: Multiple sessions, 2–3 hours each
Best For: Dramatic chest-to-side flow, feminine placements
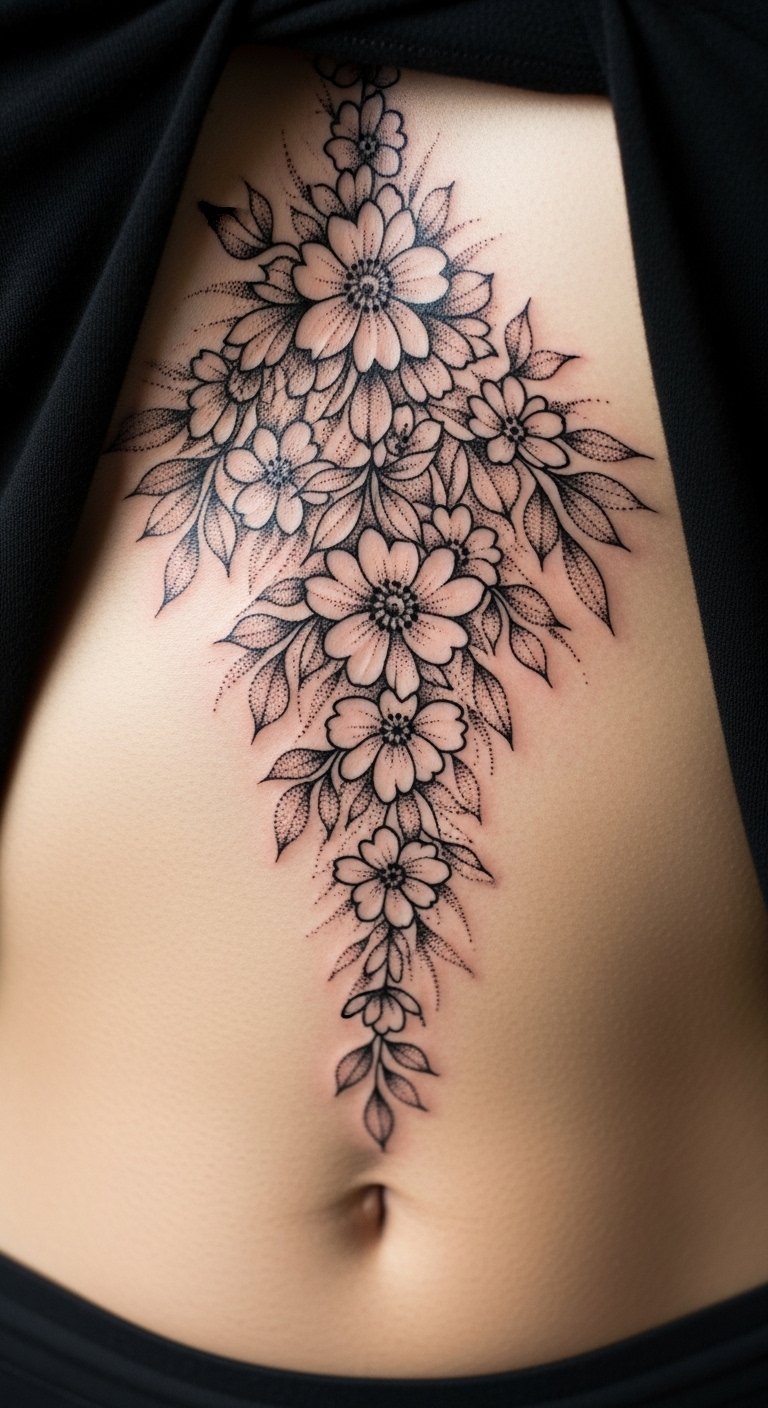
A cascade that runs from sternum to ribs uses dotwork to imply motion—petals melting into negative space down the side. This is a sensitive area with mixed pain levels; ribs hurt more than sternum centers. Sessions staged over time allow you to tolerate the work and let skin rest. In practice, the cascade shows beautiful aging if you protect it from sun and moisture. Common mistake: too many tiny buds close to the rib edge—scale and spacing preserve longevity. Ask for healed cascade photos so you know how dots settle across curved torso areas.
Tattoo Prep and Aftercare Essentials
Aftercare Essentials:
- Aquaphor Healing Ointment, 14oz — Use first 3–5 days to protect fresh ink
- Saniderm Transparent Adhesive Bandage, 6-inch roll — Second-skin method many artists recommend
- CeraVe Fragrance-Free Moisturizing Lotion, 12 oz — For longer-term daily moisture
Before Your Appointment:
- Tattoo Numbing Cream with 5% Lidocaine — Ask your artist before use
- Stencil Transfer Paper (tattoo) — For DIY layout work or mockups
Cleaning & Healing Tools:
- Dr. Bronner's Unscented Castile Soap, 32 oz — Gentle daily wash
- Hydrocolloid Bandages (large) — Small-area alternative to Saniderm
Long-Term Maintenance:
- SPF 50 Sunscreen Stick for Tattoos — Daily protection to prevent fading
- Mad Rabbit Tattoo Balm, 2 oz — For healed skin hydration
- Hustle Butter Deluxe, 8 oz — Vegan aftercare alternative
Comfort & Extras:
- Tattoo Numbing Spray — For sensitive touch-ups
- Disposable Gloves (box) — For clean application when doing home care
I included options artists often recommend (Saniderm, Aquaphor) plus alternatives I’ve used personally. Sizes noted where relevant help you pick the right starter.
Frequently Asked Questions
Q: How bad does a dotwork tattoo actually hurt?
A: Pain is placement-based. Outer arm/thigh = around 2–4/10. Ribs/spine/ankle = 7–9/10. Dotwork itself isn’t more painful than other shading; it’s dense work so longer sessions can feel tiring. For sensitive spots consider numbing cream with 5% lidocaine after checking with your artist.
Q: How long until a dotwork tattoo heals?
A: Surface healing is usually 2–3 weeks; full healing up to 2–3 months (NHS). The first week is the most critical: keep it clean with gentle soap and protected—Saniderm can simplify that period.
Q: Will dotwork fade faster than other styles?
A: No—black/gray dotwork is durable if placed well and protected from UV. Heavy sun exposure accelerates fading; daily SPF 50+ sunscreen is essential for longevity.
Q: Should I get a small dotwork test to check my pain tolerance?
A: Only if you actually want a small tattoo. Finger or behind-ear tests can be misleading—pain varies by placement more than size. Consider a low-pain area like outer thigh or upper arm for a first piece.
Q: What do healed dotwork tattoos look like versus fresh?
A: Fresh dotwork is high-contrast and crisp. As it heals, small dots soften and form subtler gradients—the overall design keeps texture but looks less “stippled” from the first week onward. Ask your artist for healed photos.
Q: Do tattoos look different on different skin tones?
A: Yes. Black and gray dotwork shows well across tones, but saturation may need adjusting. Some colors read differently; black retains best contrast. Seek artists who regularly tattoo your skin tone and can show healed examples.
Q: Can I work out after getting dotwork?
A: Wait 48–72 hours at minimum and longer for high-sweat or flex areas. Sweat and friction can cause scabbing and ink loss. Keep sessions short if you need multiple days to recover.
Q: What common mistakes should I avoid with dotwork?
A: Avoid micro-scale details on high-movement or high-friction spots (fingers, palms, elbows). Don’t overcomplicate tiny designs; scale up or simplify. Ask artists for healed work, not just fresh photos.
Conclusion
Do your research and sit with a design before committing. Dotwork rewards thoughtful placement and patience—proper aftercare like Aquaphor in the first days and daily sunscreen afterward will keep your stippling looking crisp for years. Which dotwork idea are you leaning toward?
