
Dotwork can feel fragile without the right spacing and needle decisions, and the pieces that still read crisp at five years usually started with deliberate density, not the tiniest dots. Small stippling that is too close together collapses into a gray wash on soft skin. Readable, delicate dotwork depends on scale, placement, and what to wear the day of the session to avoid rubbing. Below are concrete ideas that balance delicacy with longevity, plus styling tips so the work looks intentional on and off the chair.
1. Petite Floral Wreath on Inner Wrist
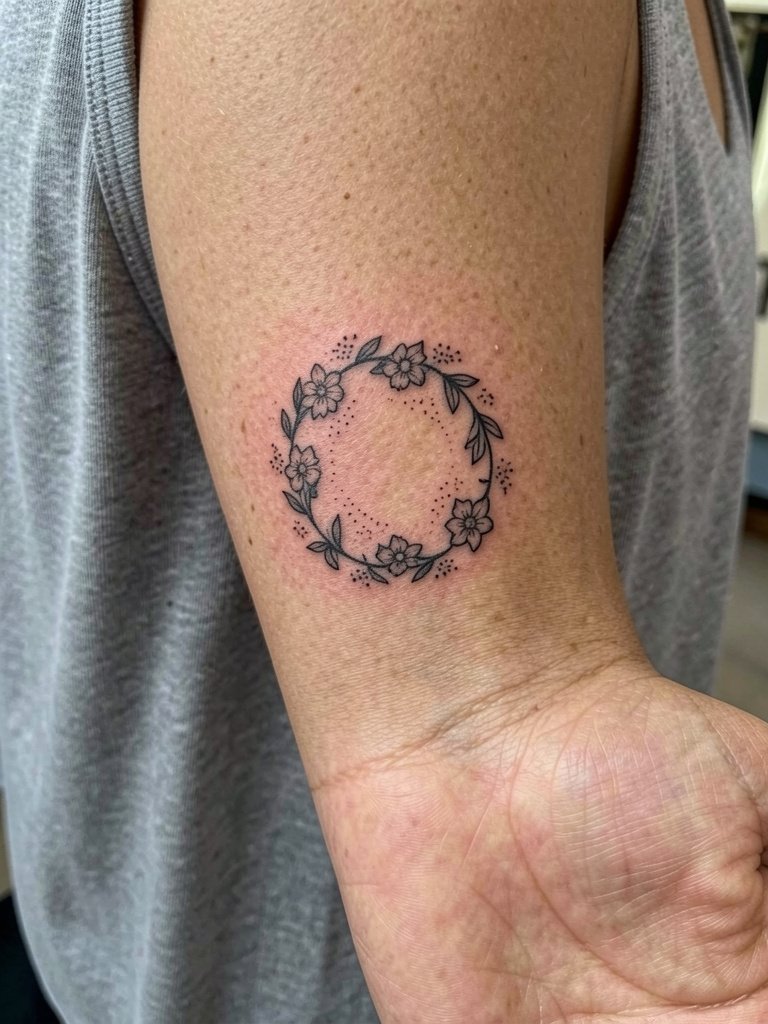
A tiny wreath reads best when the dots have breathing room. For wrists I recommend scaling the outer diameter to at least two inches so each petal and stipple retains shape. Request slightly heavier linework for the outer circle and stippling that fades toward the center so the piece keeps contrast as it heals. Wrist skin moves a lot, so plan for a six-month check and a likely touch-up around year two if you want crisp negative space. For the session wear a loose tank top so the artist has clear access to the underside of the forearm and you avoid sleeve friction during the first week.
2. Vertical Stipple Vine on Inner Forearm
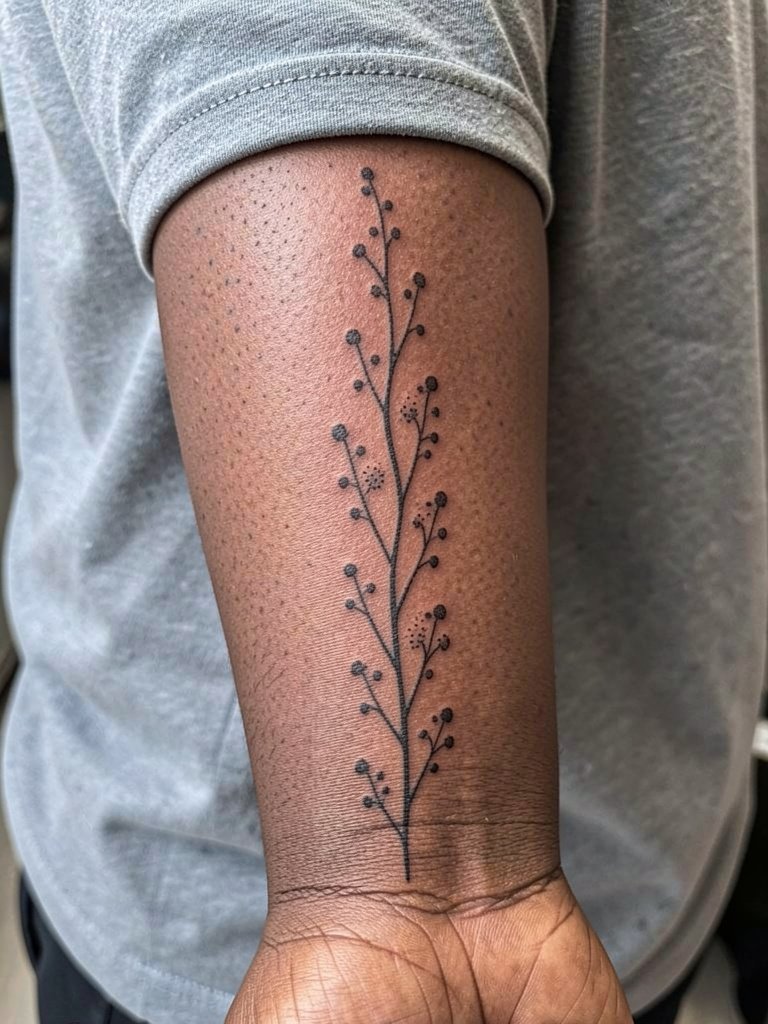
The inner forearm offers flat skin that reads stippling really well, but the common mistake is asking for clusters too dense for the scale. Ask for stipple spacing mapped out on the stencil so you can see negative space before the needle hits skin. Expect a one to two hour session and moderate discomfort along the distal forearm where nerves are closer to the surface. Stipple tends to soften into gray over a few years if too compact, so plan a slightly looser dot pattern from the start. For showing it off, a cuff bracelet or a linen button-up shirt with rolled sleeves frames the vine without covering the ink.
3. Mini Mandala at the Collarbone
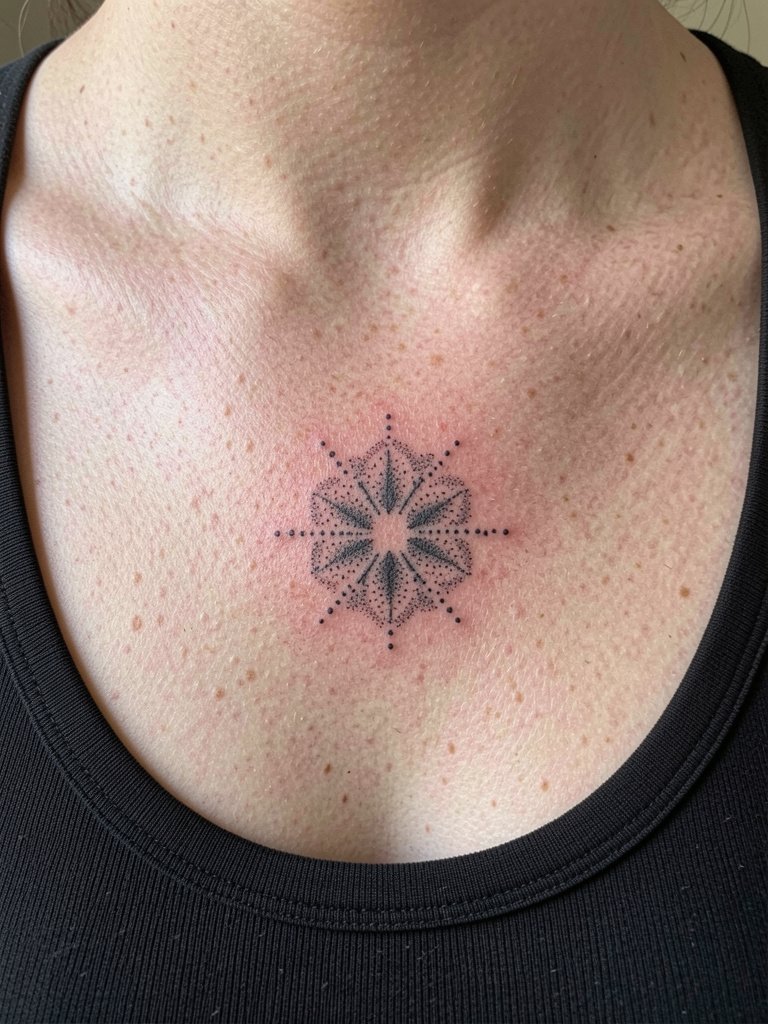
The collarbone is a high-visibility spot that flatters concentric dotwork, but it also sees stretching from shoulder motion. During consultation bring a reference shot and ask the artist to map where the radial dots will sit relative to the bone. A typical session is one to one and a half hours. Tiny central dots can blur if placed too near the bone edge, so request that the densest stipple sit over stable, fleshy skin rather than the sharp collarbone ridge. For evenings out, pair this with a wide V-neck blouse so the mandala sits confidently in the neckline.
4. Tiny Ankle Crescent with Micro Dots
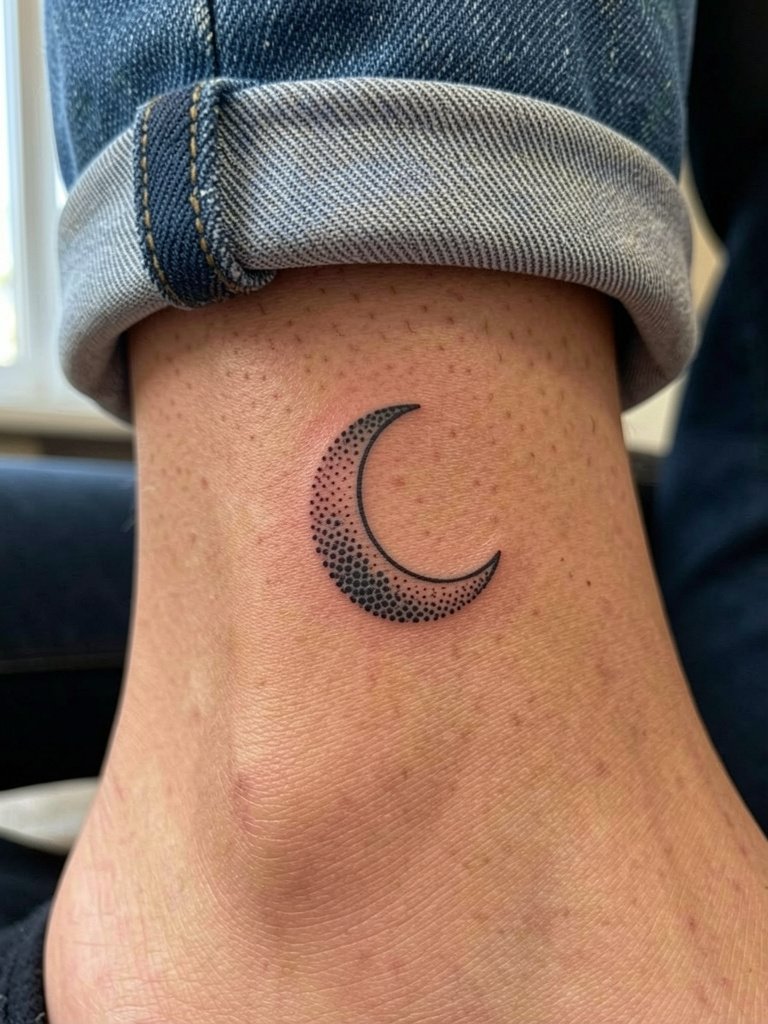
Ankle pieces suffer from friction with socks and footwear, so a crescent with spaced dotwork outperforms ultra-fine continuous stippling here. A common mistake is placing the densest stipple where shoe straps rub. Ask the artist to keep the heaviest dots on the lateral superior edge, away from the shoe contact area. The session is short and sharp, with moderate pain over the bone. For showing the work off, cuffed jeans or ankle boots with the hem above the design offer a nice contrast. Try roll-up skinny jeans that reveal the ankle without extra rubbing.
5. Shoulder Blade Crescent with Stipple Halo
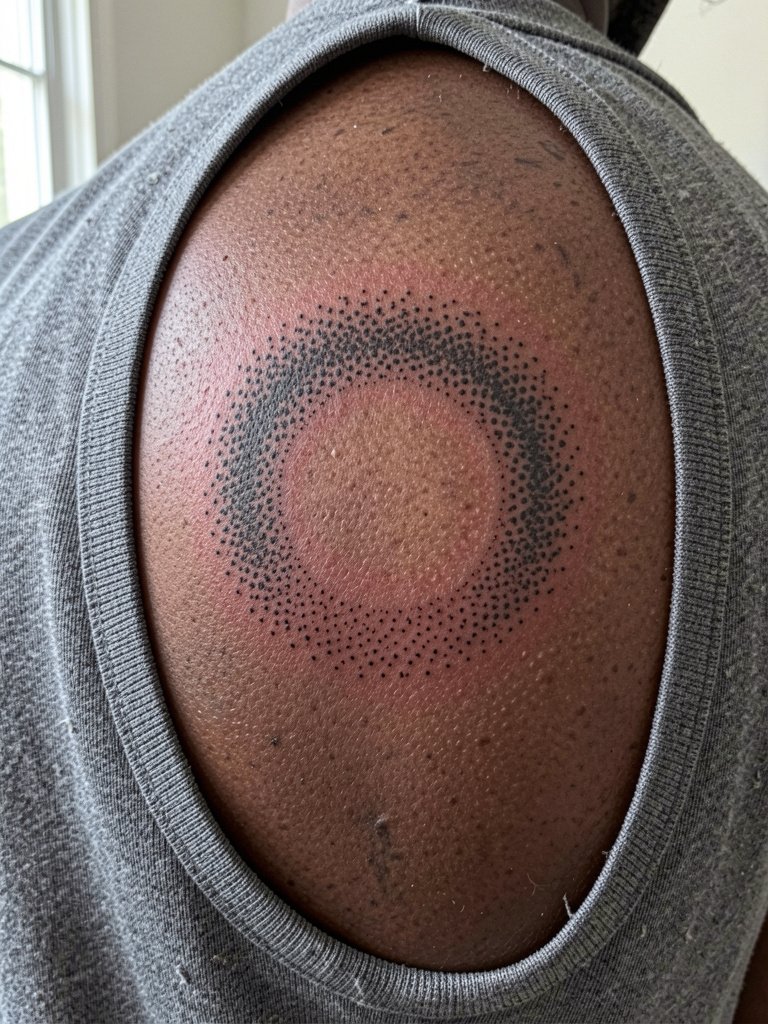
The shoulder blade is forgiving for dot gradients because the skin is thicker and moves less than forearm skin. A mistake people make is asking for too tight a gradient close to the spine. Ask the artist to keep the highest saturation toward the lateral edge where it reads against clothing. Sessions run one to two hours and the pain is low to moderate. Stipple here keeps shape well, and touch-ups tend to be less frequent than on hands or wrists. For styling that frames the arc, a low-back dress or a wide-back tank shows the halo without distraction.
6. Ribcage Lace Panel in Dotwork
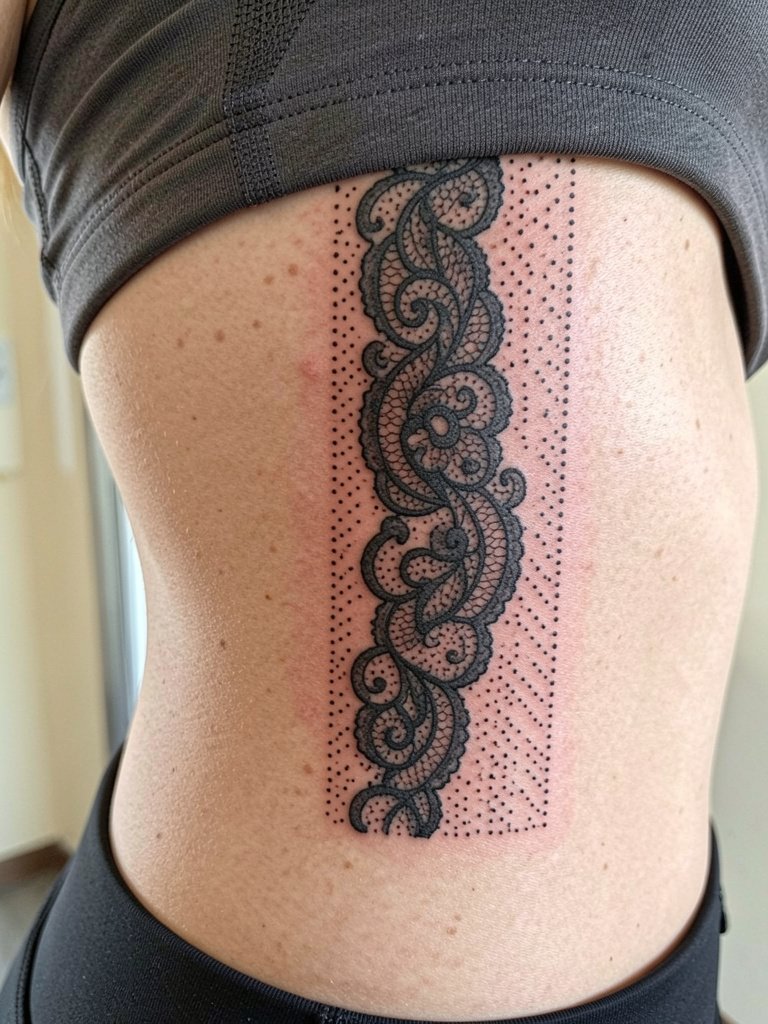
Fine dotwork on the ribs is controversial among artists. One camp argues that the skin stretch and frequent movement blur ultra-fine stipple within two years, especially near the soft flank. The other camp says that with slightly wider spacing and controlled needle depth the dots settle and maintain readable contrast. If you choose the ribs, request a stencil mockup on the body so you can see how the lace falls with breathing. Expect a longer, intermittent session and higher pain. For the appointment wear a fitted sports bra that the artist can roll down slightly without adjusting during breaks.
Session Day Picks
The delicate wrist, forearm, and rib pieces above need small practical items to make the session and the first week smoother.
-
Stencil transfer paper kit. Lets you preview the line weight on skin before committing, which helps avoid overly dense stippling for the wrist and collarbone pieces above.
-
Topical numbing cream. Applied 30 to 45 minutes before can take the edge off rib and inner thigh sessions without altering the artist's work.
-
Thin protective film roll. Useful for short-term friction protection on ankle and hand tattoos when you are moving around a lot the first week.
-
Fragrance-free gentle body wash. Mild cleansing keeps dotwork clean during showers without stripping natural oils.
-
Aquaphor healing ointment. A thin layer in the first two to three days helps lock in moisture for fine stippled work without oversaturating the area.
7. Micro-Sunburst Behind the Ear
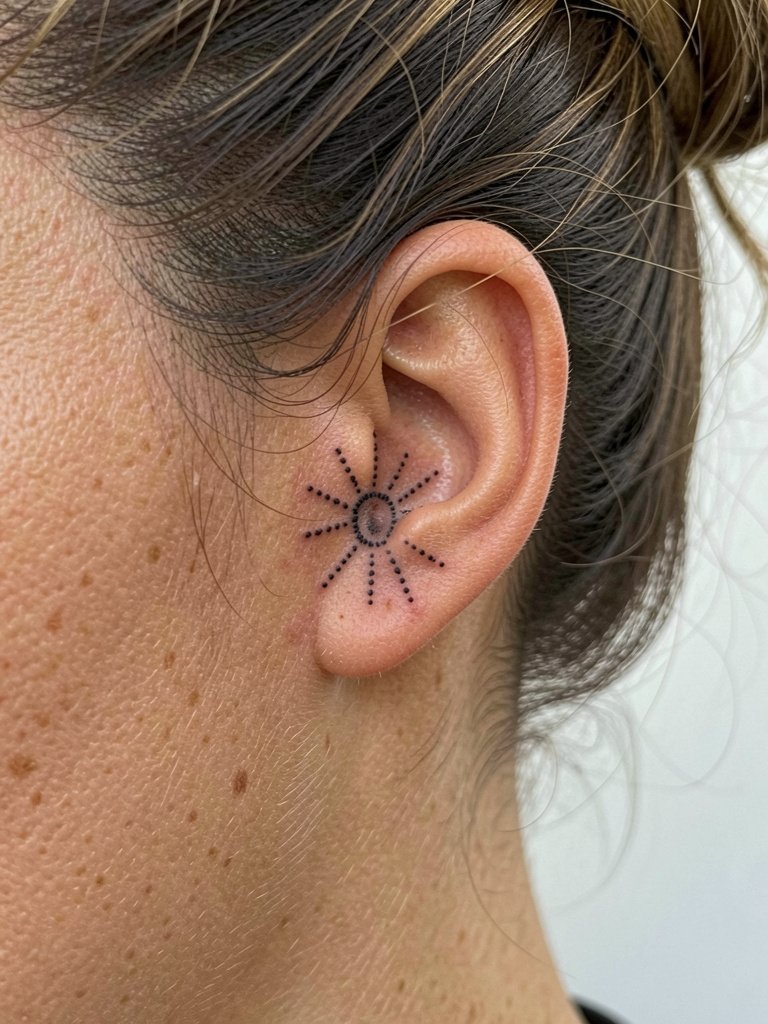
Behind-the-ear pieces are small and intimate, so prioritize higher contrast dots at the outer radii to avoid total loss of shape over time. The area heals quickly but the skin is thin, which can make single-needle work appear faint after a year. Ask the artist to show healed examples on similar skin tones and to place the densest stippling just below the hairline for longevity. Session time is short and pain is low to moderate. For showing off this spot, tuck hair into a low bun or use a delicate earring that draws attention to the nape area. Consider a silk hair claw to keep hair away during healing and in photos.
8. Laced Hip Motif with Spaced Dots
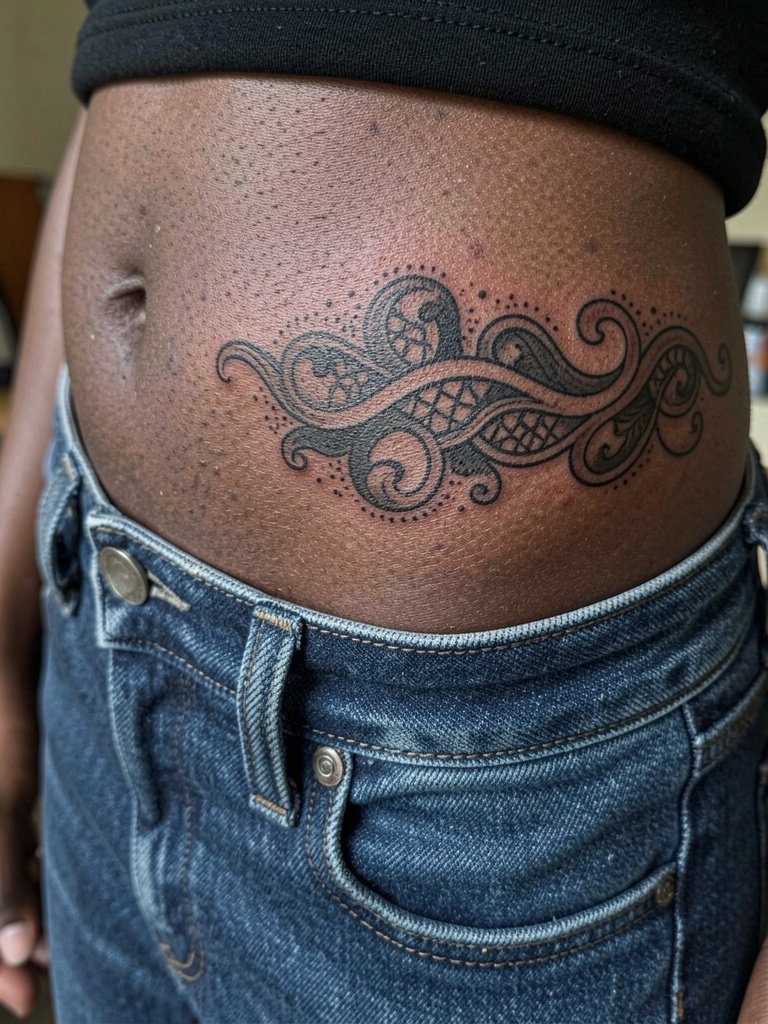
Hip placements tolerate more dense stippling than ankles, but they still face friction from waistbands. The common error is centering the heaviest dots directly where jeans sit. During the consult specify the exact distance from the waistband that will keep the densest work clear of fabric contact. Sessions are one to two hours and often done over two sittings if the area is large. For evenings or beachwear, a cropped tee or low-rise skirt highlights the motif. Pair with low-rise fitted jeans that sit below the design so the tattoo reads cleanly.
9. Calf Band of Delicate Dots
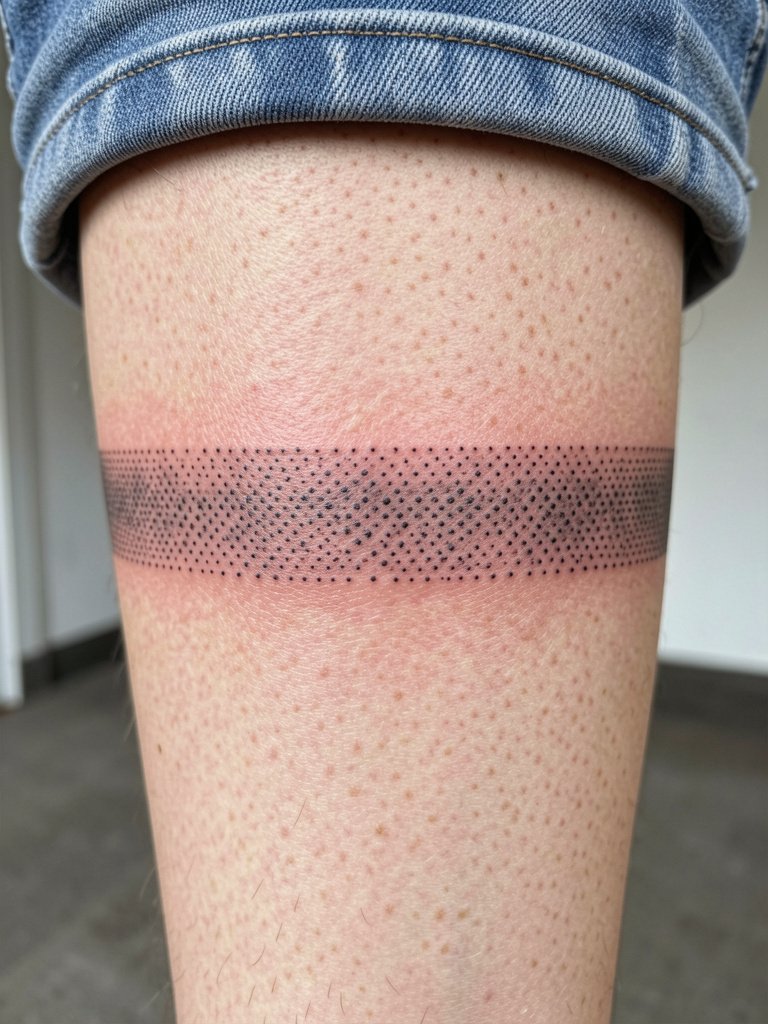
Calf skin is robust and shows stipple patterns well over time, but the lazy choice is to make the band too thin. Request a band width that gives the pattern room to breathe and keep the heaviest stippling toward the outer curve so it is visible from the side. Sessions are usually under two hours and the pain is mild to moderate. Calf work tends to need a touch-up later than hand tattoos, often around year three if you want the darkest values restored. For footwear pairing, low-cut sneakers or heeled sandals keep the band visible and balanced.
10. Sternum Dotwork Keyhole
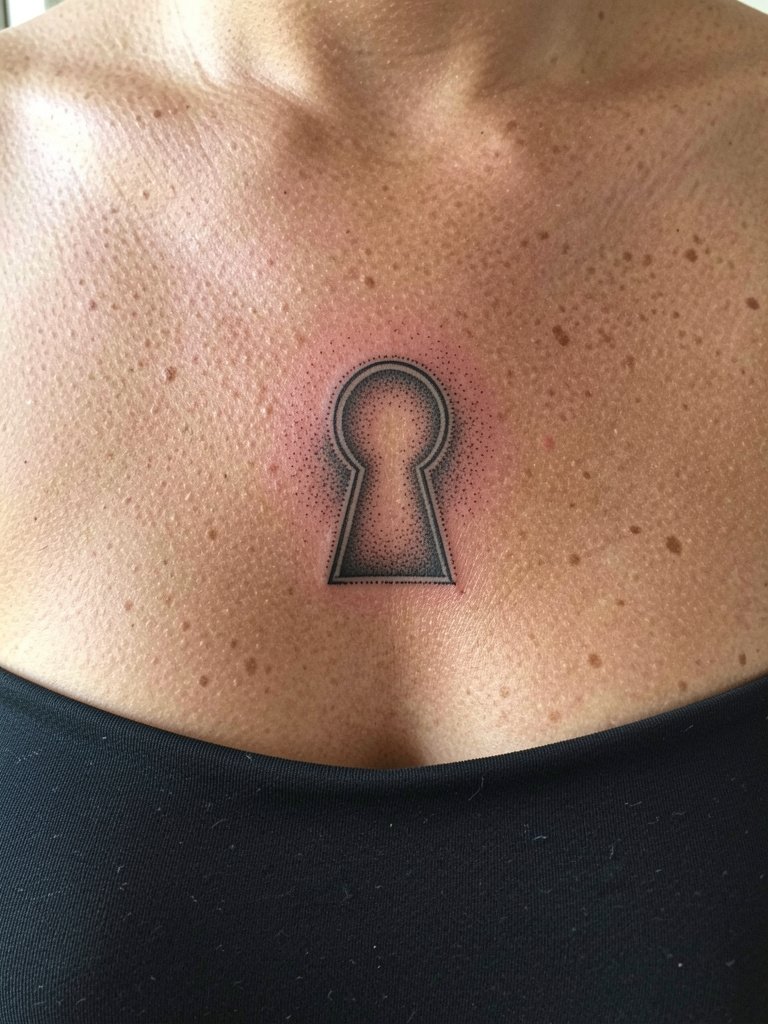
Sternum placements are sensitive and require an artist experienced with chest contours. Fine dotwork here can look ethereal initially but the area flexes with breathing and chest movement. One camp of artists avoids single-needle stipple across the sternum because it can soften into a blur. The other camp will accept the challenge and propose slightly wider spacing plus strategic darker anchor points so the design preserves its shape. Expect a fairly painful session and a realistic touch-up plan at six months. For appointment comfort wear a fitted bandeau or sports bra that can be lowered and raised without fidgeting.
11. Finger Tip Micro Dot Trio
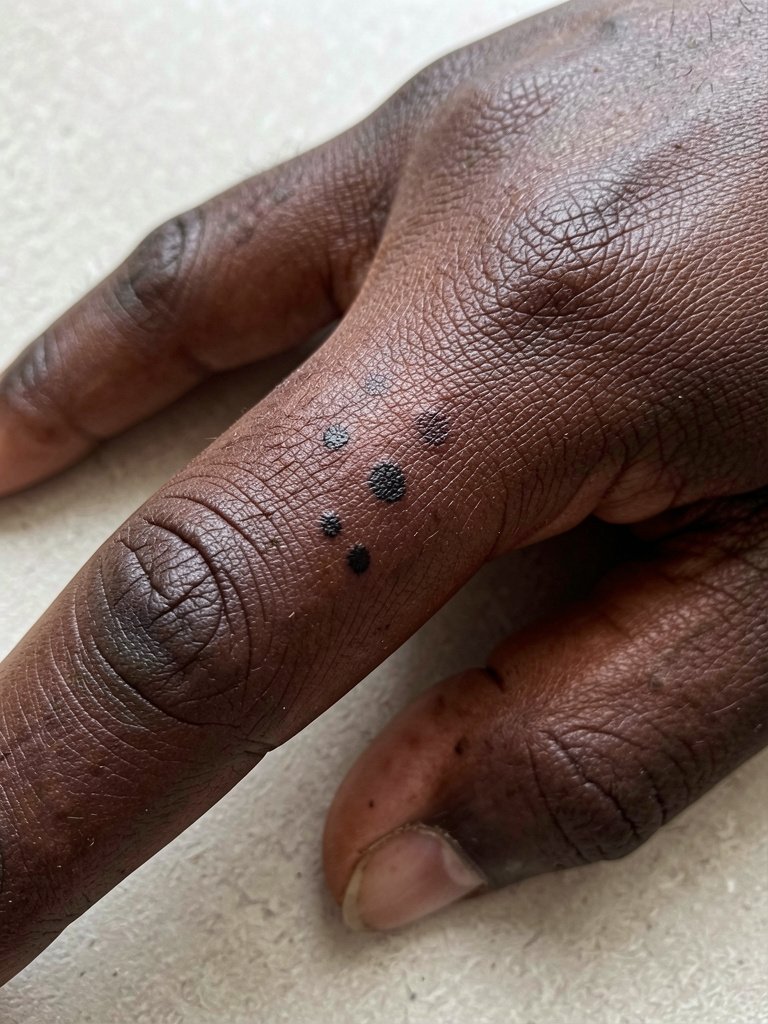
Fingertip and side-of-finger placements are high-maintenance because of constant washing and abrasion. The usual mistake is requesting dense stipple on the finger pads. Instead, keep clusters small and spaced, and plan for more frequent touch-ups. Sessions are quick but feel sharper because of thin skin and proximity to bone. For showing finger work without speeding fading, choose rings and open-finger gloves that do not rub the tatt too much. If you plan frequent handwashing for work, consider a slightly larger dot cluster placed away from the pad itself.
12. Inner Thigh Botanical Sprig
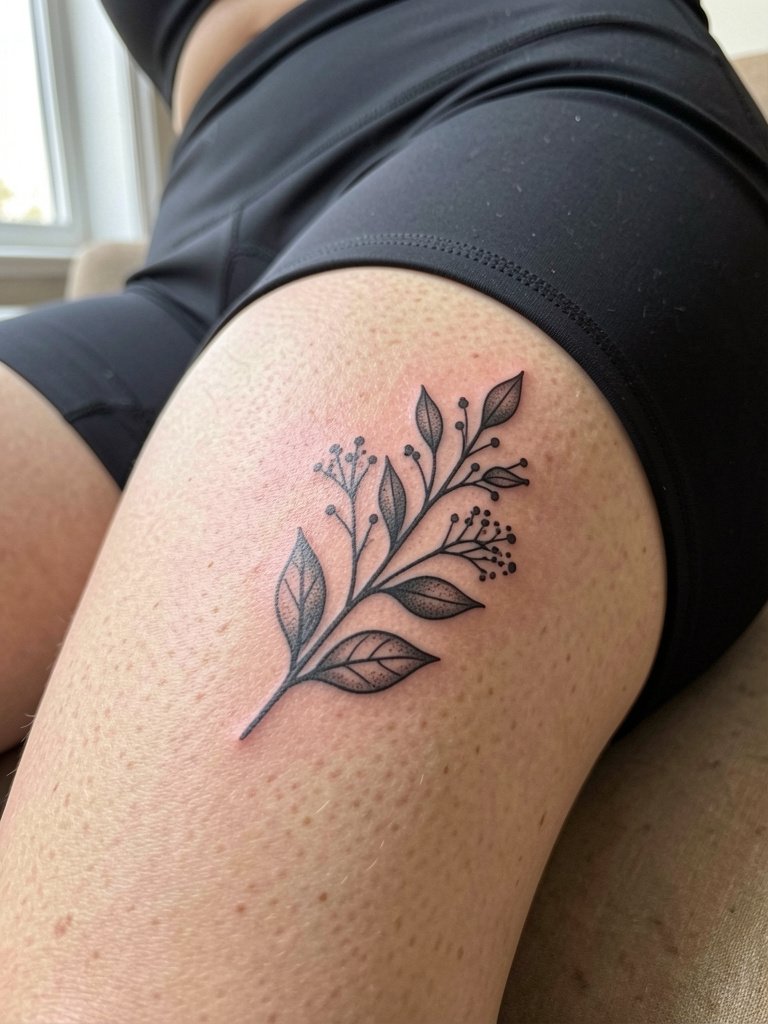
Inner thigh skin is protected from sunlight which helps dotwork hold, but friction from legs meeting can blur dense stippling. The right move is to ask for a sprig with more negative space within leaves and stipple that softens toward the stem. Sessions can be moderately painful and typically require careful positioning for the artist. For healing wear breathable fitted bike shorts that do not chafe the area. A fitted bike short pair helps protect the tattoo during the first two weeks.
13. Upper Back Miniature Compass
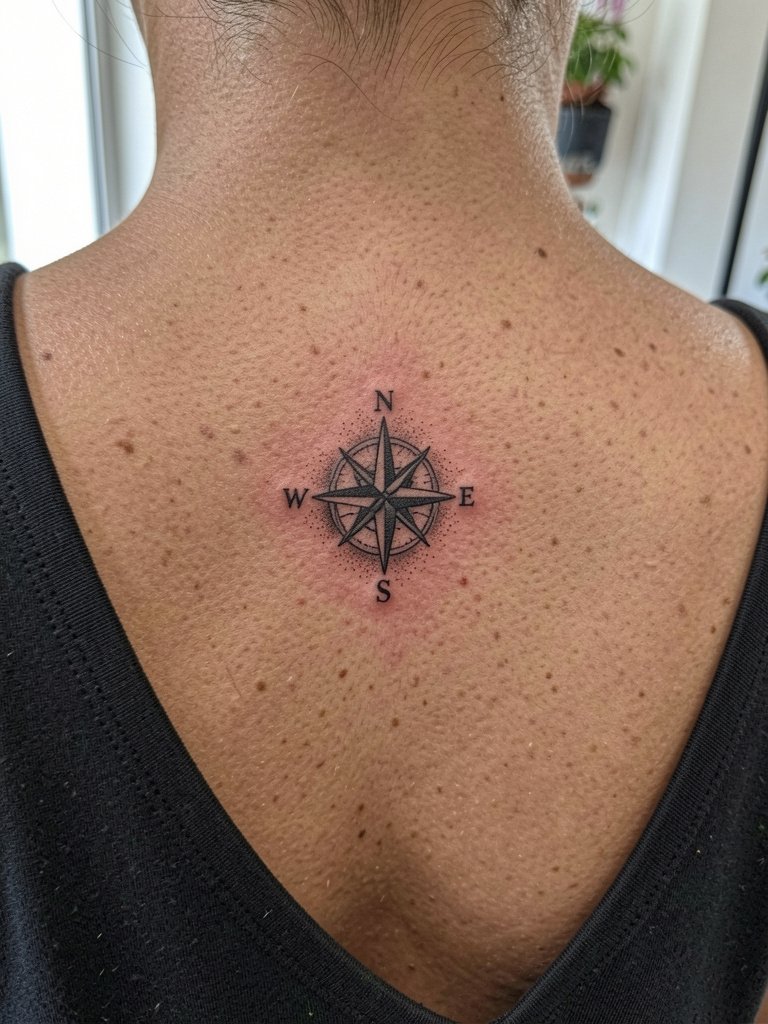
The upper back provides a broad canvas for small dotwork but beware of placing tiny central details too close to the spine. Request that the densest stippling sit just lateral to the midline so shoulder movement does not distort the focal point. The session is low to moderate pain and touch-ups are rarely needed before year two. This placement pairs well with low-back or open-neck shirts for photos, and a wide-back top keeps the area visible without exposing too much skin.
14. Thin Neck Curve at the Side
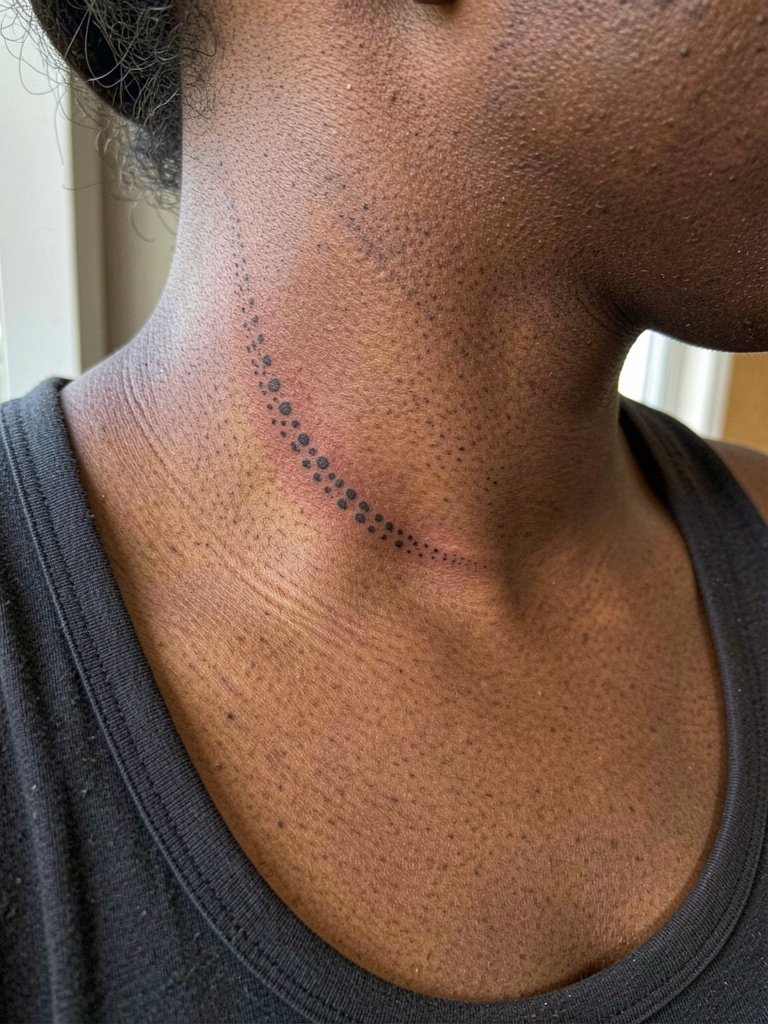
Neck skin is thin and highly visible, so dotwork must be bolder in spacing than you might expect. Artists split on single-needle neck pieces. One camp cautions that thin stipple blurs within a year due to frequent motion and sun exposure. The other camp will accept the placement and compensate with slightly wider dot spacing and anchor points. If you decide on a side-neck curve, ask for a mapped stencil showing how the dots fall with normal head tilt. Healing is quick but sun protection matters. For styling, a scoop or wide-neck top frames the area without interfering.
15. Small Back-of-Arm Crescent Near Tricep
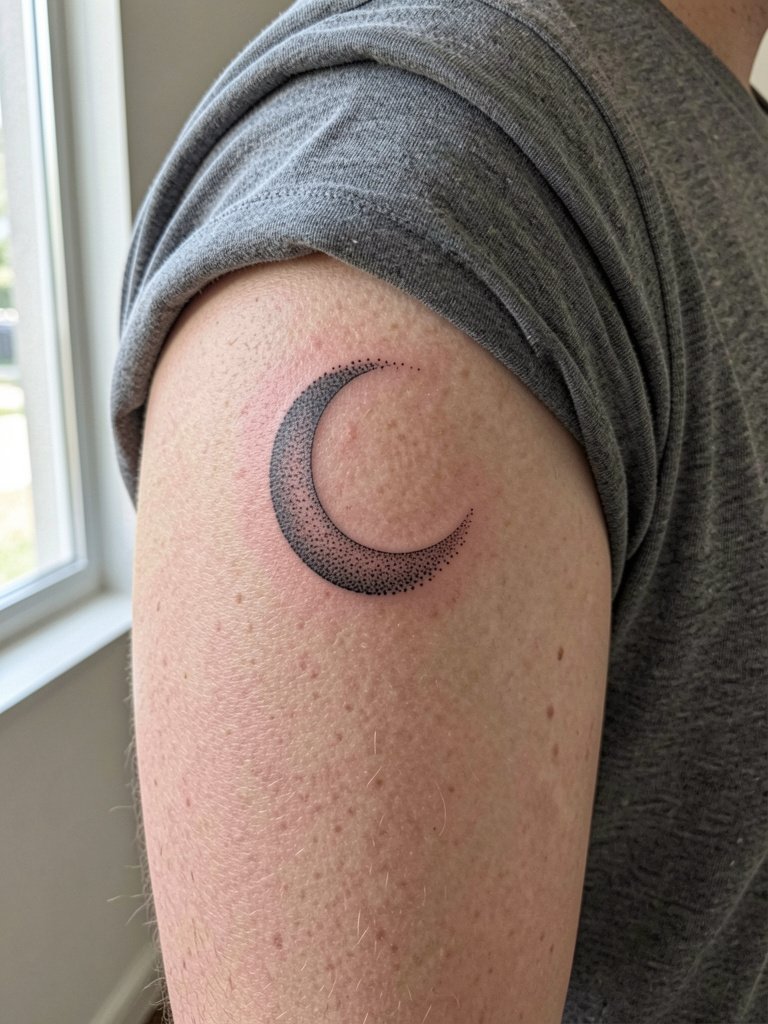
The back of the arm sits between the shoulder and elbow and handles stippling well if the design has a clear outer edge. Common mistakes include centering the darkest dots where sweat and friction collect under sleeves. Ask the artist to place the heaviest values higher toward the shoulder to avoid constant contact with shirt seams. Sessions are short and the pain is mild to moderate. For wearing and showing the piece, short-sleeve shirts or rolled sleeves reveal the curve cleanly.
Frequently Asked Questions
Q: How long does dotwork stay crisp on different placements?
A: Dotwork longevity depends on scale and placement. Visible, high-motion areas like fingers and wrists usually soften faster and often need touch-ups around year two. Protected areas such as the hip or upper back can hold crisp stippling longer, commonly three years or more before a touch-up feels necessary.
Q: What should I bring to a consultation for stipple-heavy designs?
A: Bring two images at different scales and a printed or phone-ready stencil you like. Ask the artist to show you where the densest stipple will sit on your body and request a test transfer so you can check spacing. Be specific about which lines should anchor darker and which areas should remain airy.
Q: How should I dress for my appointment for various placements?
A: Wear clothing that gives the artist clear access without you having to awkwardly undress. For shoulder and upper back work wear a wide-back tank. For hips choose low-rise bottoms that sit below the design. For ribs or sternum a fitted sports bra or bandeau is easiest. Comfortable, easily adjusted garments speed the session and reduce fabric rubbing during healing.
Q: Where can I find healed portfolios and discovery pathways without naming artists directly?
A: Search platform hashtags and location filters to find healed shots and local portfolios. Use targeted tags on image platforms and browse community threads for "healed dotwork" plus a placement keyword. Reddit threads and portfolio collections are especially helpful for seeing the same design on different skin tones. This approach helps you vet which artists show consistent healed work rather than just fresh photos.
Q: Are touch-ups more common with single-needle dotwork than with small blackwork pieces?
A: In my observation, single-needle dotwork often requires more frequent touch-ups on high-friction spots. Small blackwork with heavier line anchors tends to read longer on wrists and fingers. Planning slightly wider stipple spacing and anchor points reduces touch-up frequency while keeping a delicate look.
