
The quiet Hangul script that still reads clear after five years is usually the version that started slightly bolder than most Pinterest examples, not the whisper-thin single-needle copy. If you want delicate Korean motifs that age honestly, think about spacing, contrast, and placement before you love the stencil. I’ll walk through traditional motifs, modern micro ideas, and practical notes to give your artist a precise brief that holds up.
1. Hangul Single-Word Collarbone Script
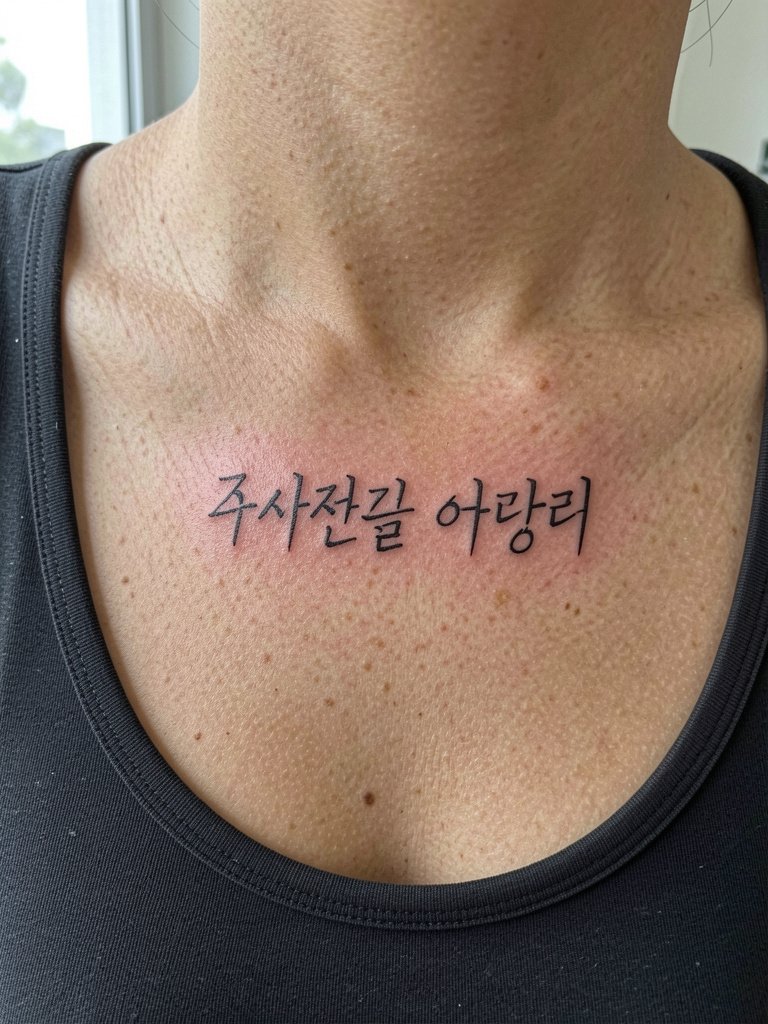
A single Hangul word in delicate script makes a discreet collarbone piece that still reads like type rather than a smudge. Recommend the artist set line weight a hair heavier than a pure single-needle reference and increase spacing between characters so the strokes do not merge over time. Expect moderate pain on the collarbone and short sessions of about 30 to 45 minutes. Common mistake is asking for the smallest possible sizing, which leads to loss of clarity by year three. For evenings out, this piece pairs with wide scoop-neck tops that frame the collarbone and let the script sit in negative space.
2. Micro Hanja Wrist Mark
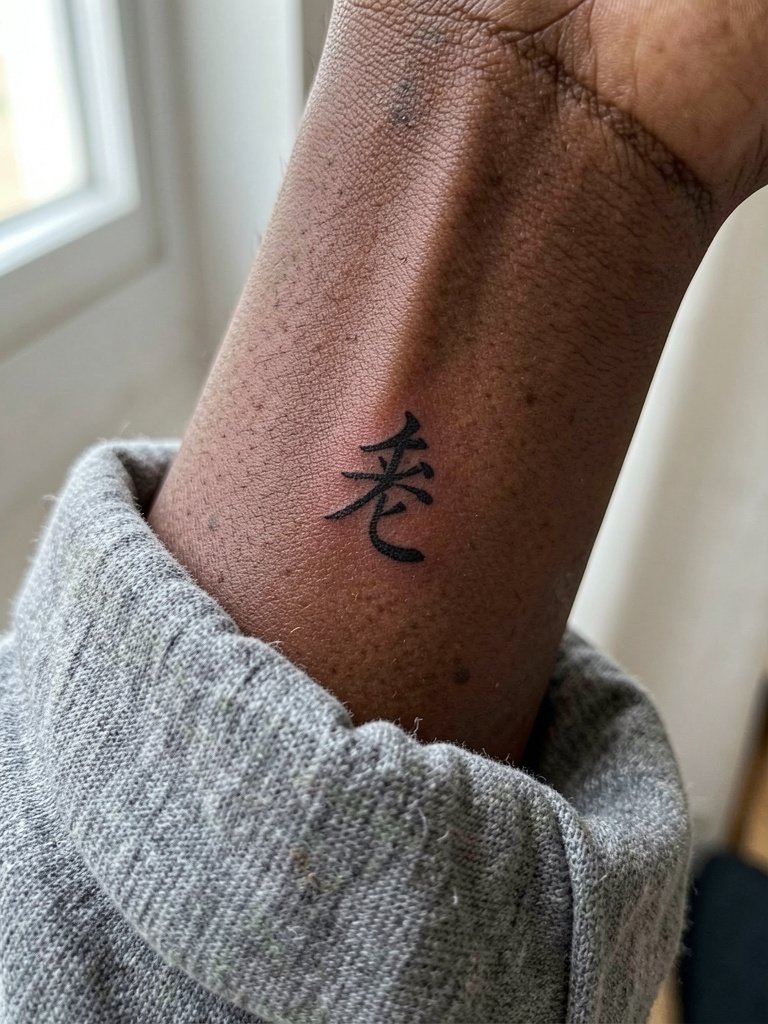
A single Hanja character on the inner wrist works as a micro emblem when planned with bold, confident strokes. Ask the artist to thicken the vertical strokes very slightly and to test a 1.5-inch stencil on your wrist so you see how the spacing reads at life size. The inner wrist heals quickly but suffers from constant washing and friction, so expect a touch-up within 12 to 18 months for crispness. For showing it off, cuff a lightweight linen shirt and roll the sleeve to the forearm.
3. Tiny Lotus at the Ankle
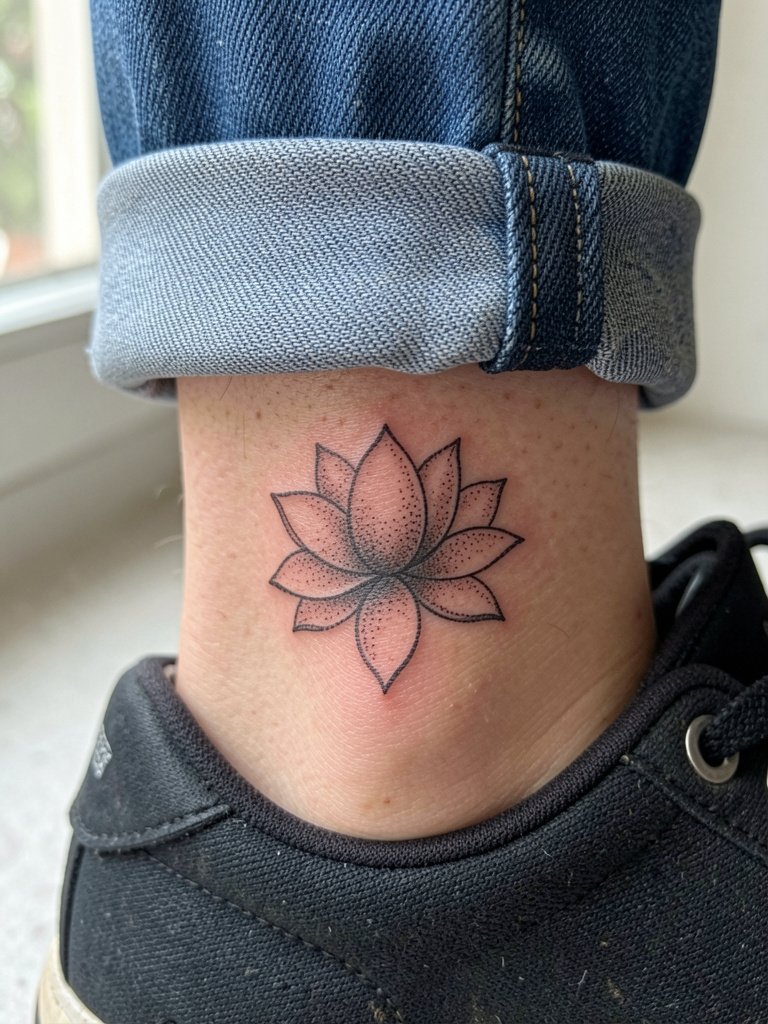
A small lotus with stipple shading reads best on the ankle when the dots have room to breathe. The ankle faces a lot of abrasion from socks and shoes, so suggest spacing the dot work a touch wider than a forearm piece. The session is short and earns a 20 to 40 minute slot, but expect slower dot retention and a likely touch-up at the 18-month mark. A common mistake is packing too many tiny dots into a palm-sized area, which can wash into a grey patch. Show-off tip: pair it with rolled chinos or cropped denim so the ankle remains visible.
4. Hanbok Sleeve Motif on Upper Arm
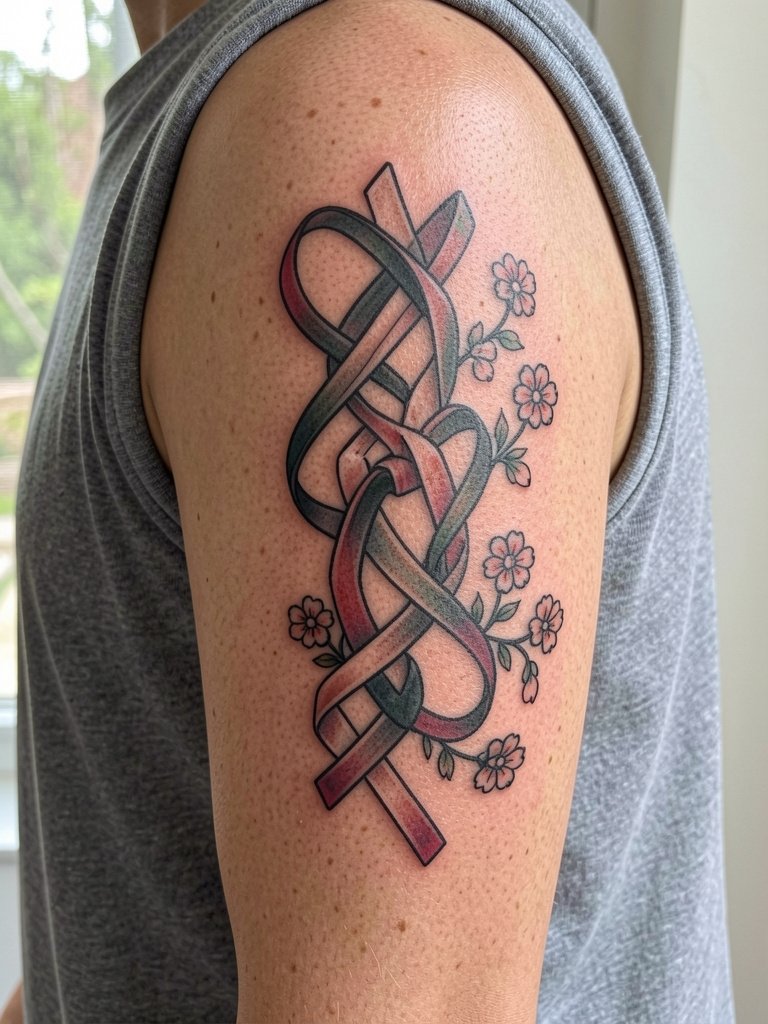
A repeating hanbok ribbon motif looks great wrapped on the upper arm because the shape follows the deltoid curve. For this placement the session time runs one to two hours depending on color. Discuss with your artist how the pattern flows across muscle when you lift the arm and whether to increase black outlines where the design will get stretched. The mistake most people make is treating the motif as a flat sticker; instead, pick a version with subtle curvature so it ages into the muscle area. For outfits, this reads well with sleeveless linen tops that echo the soft fabrics the motif references. Cultural note: these textile motifs have roots in traditional dress, so mention that you want the pattern handled respectfully and not caricatured.
5. Tiny Crane Mid-Back
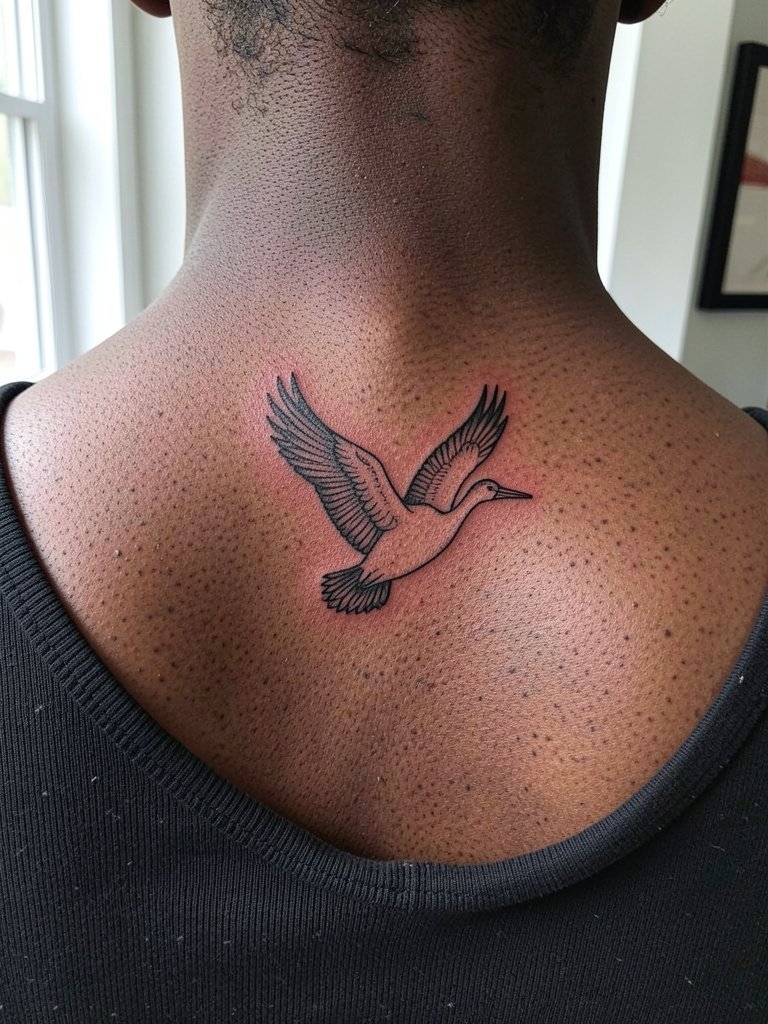
A small crane mid-back is a low-pain placement with a surprising visual payoff when you wear open-back or scoop-neck tops. Ask your artist to draw the crane at the scale you want and then hold the stencil against your back so you can check shoulder movement and alignment. The main aging risk here is movement across shoulder blades that can slightly distort wings over years, so avoid overly thin wing filaments. Session time is brief, around 30 minutes. Style it with open-back dresses that let the silhouette breathe.
6. Miniature Hanok Roofline on Inner Forearm
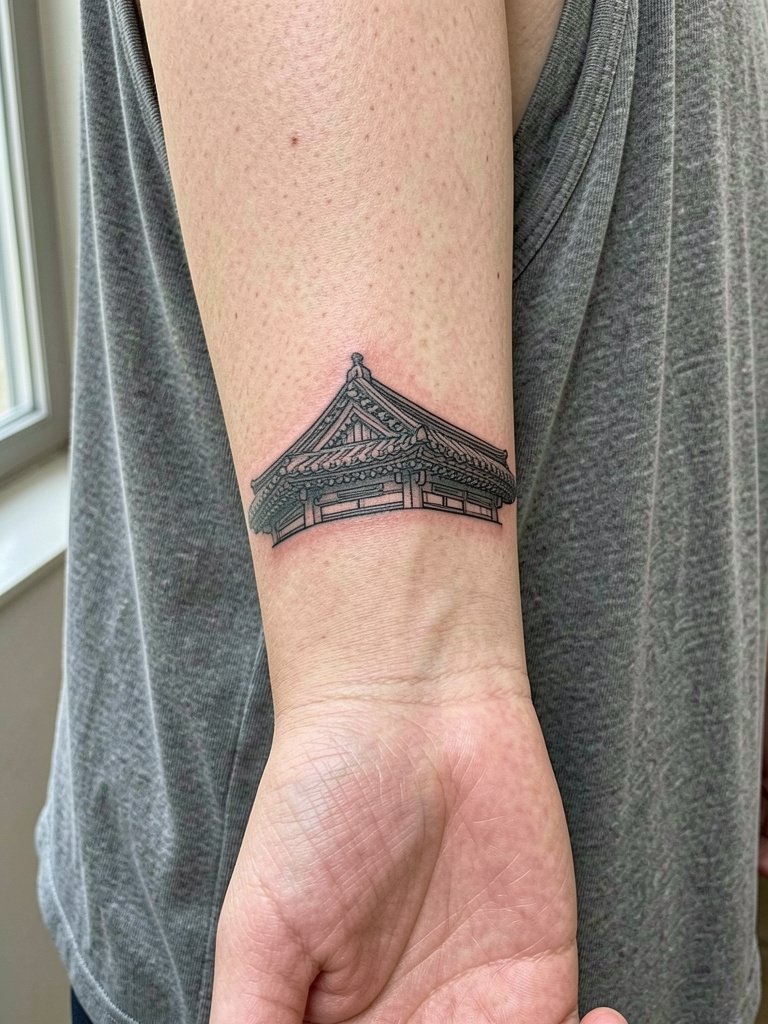
A tiny hanok roofline reads like architecture when it is drawn with slightly bolder roof edges and lighter interior texture. The inner forearm is forgiving for single-word or micro-architecture work, but the popular mistake is asking for hairline roof tiles that disappear by year two. Request the artist test the line weight on your skin under natural light and check how it looks at three inches. Forearm sessions feel like steady vibration and take 45 to 90 minutes depending on detail. For session comfort, wear a loose tank top which lets the artist access the palm-up surface easily.
Session Day Picks
The first six ideas include a lot of fine line work around the wrist, collarbone, and forearm, so products that protect the stencil and reduce friction make the session and early healing much smoother.
-
Stencil transfer sheets. Lets you preview how Hangul and micro-architectural linework sit on skin before the needle touches the area, which is especially useful for precise collarbone and wrist placements.
-
Cooling topical numbing cream. Applied 30 to 45 minutes before can ease wrist and inner forearm sensitivity without changing the artist's line feedback.
-
Thin protective film roll for small areas. Keeps ankle and wrist tattoos cleaner during the first days when friction from socks and watches causes scabbing.
-
Stipple practice stencil pads. Handy for checking dot spacing and contrast before committing to stipple-heavy lotus or textile patterns.
-
Aquaphor healing ointment. A thin layer for the first two to three days helps fine line areas retain moisture without suffocating the needle channels.
7. Crescent Taegeuk Minimalist Wrist Band
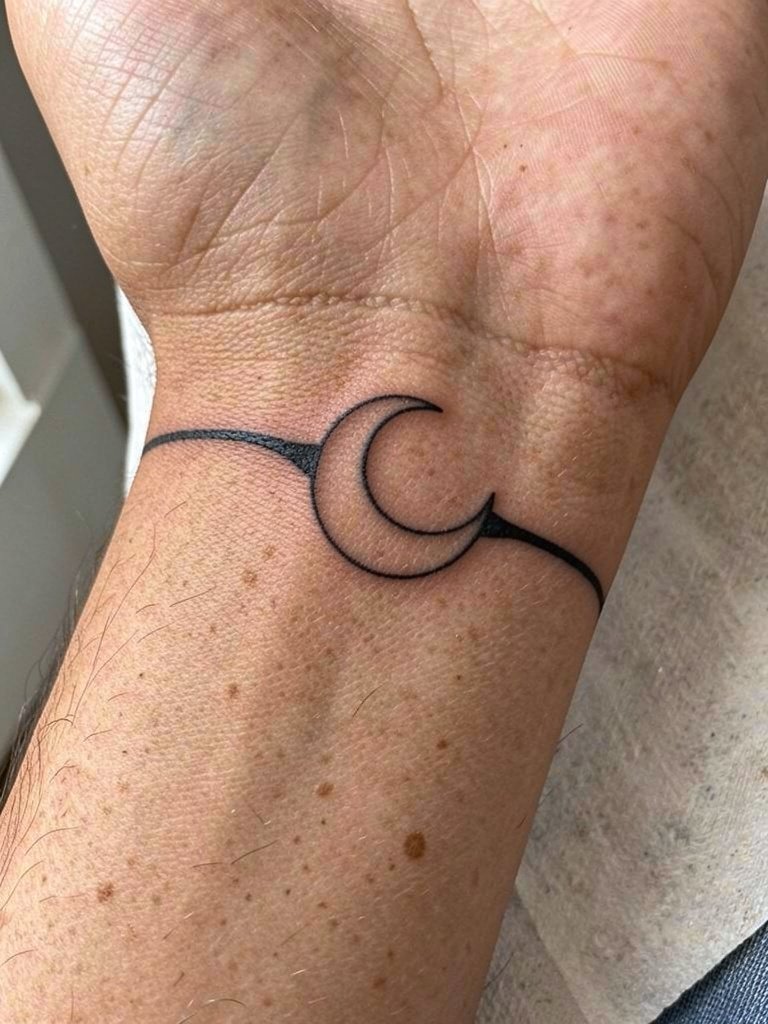
A minimalist crescent band echoes traditional motifs while staying modern. For a wrist band, make sure the curved breaks are spaced enough so they keep shape after routine hand washing. Discuss exact band width during consultation and ask for a mirror check with your wrist bent to see how it flows over tendons. The inner wrist heals fast but sees high friction, so expect a possible touch-up at year one. Wear simple bracelets or slim cuff rings to complement the band without covering it.
8. Micro Plum Blossom Behind the Ear
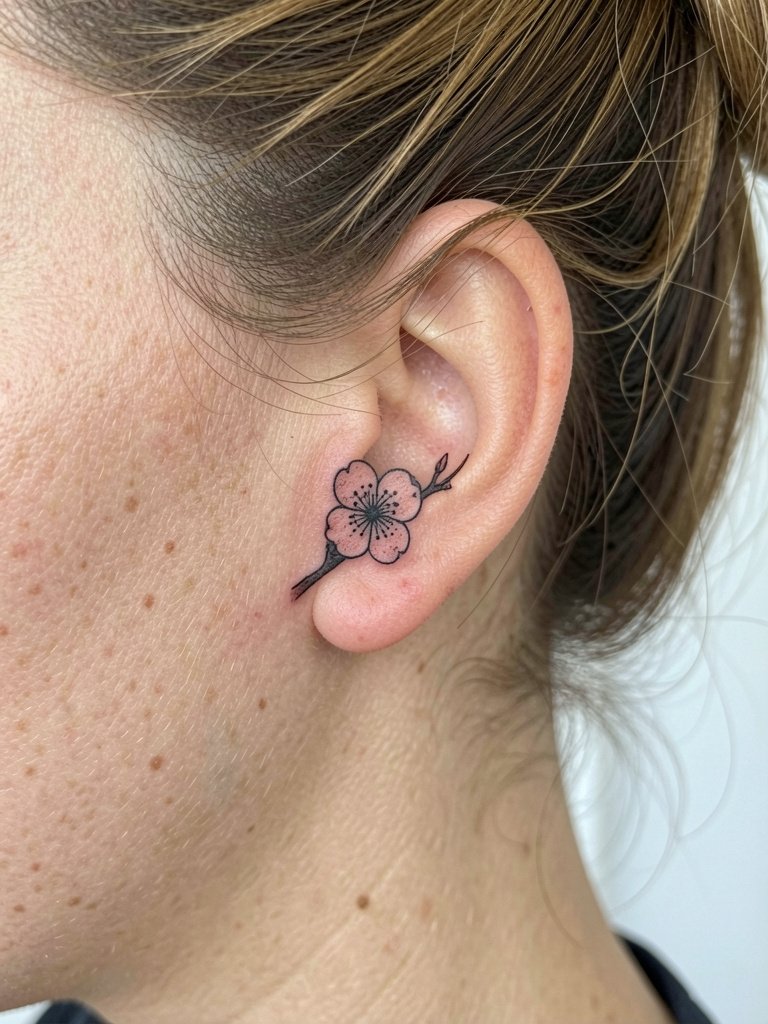
Behind-the-ear florals are a great micro placement for those who want a hint of motif rather than a statement. The area is bony and the session feels sharp but short, ten to twenty minutes. Ask your artist to use slightly heavier petal outlines to avoid blowout against thin neck skin. A mistake is expecting long-term precise stipple; stippling there tends to soften and may need a light refresh after two years. For styling, choose updos that expose the nape when you want to show it and wear light hair clips that keep the area visible.
9. Fine Line Mountain Range on Outer Ribcage
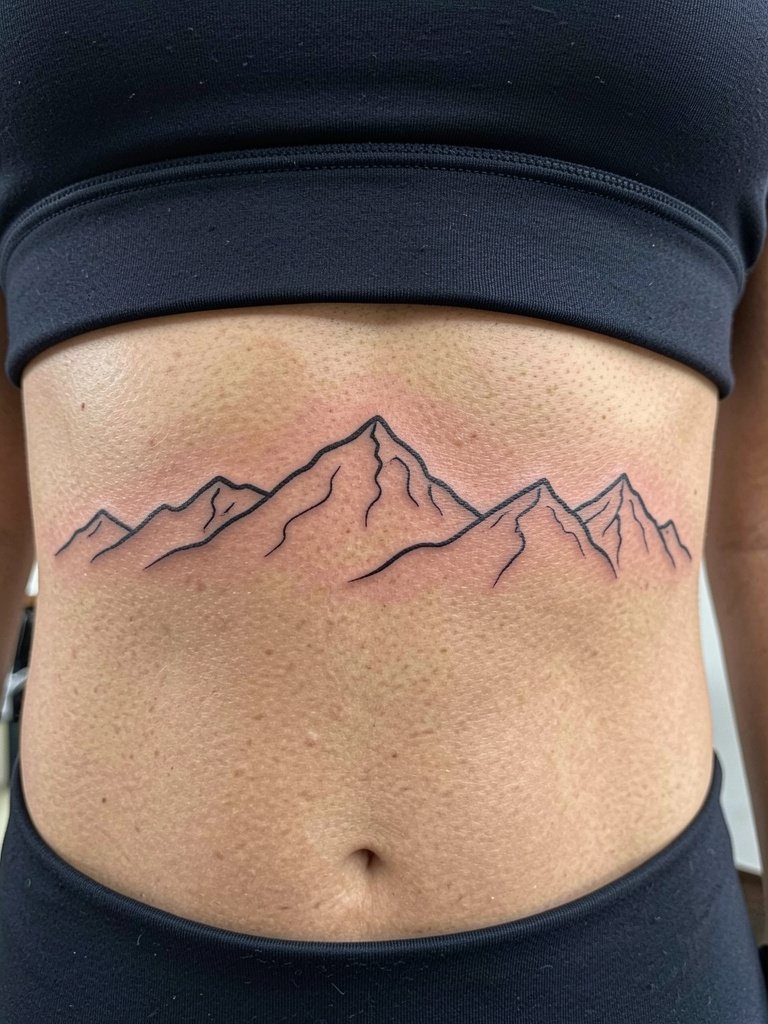
Rib pieces give a soft, intimate read but demand consideration about aging and pain. Fine line mountains on the ribs sit on skin that stretches with breath and movement, so one camp of artists warns that single-needle ribs blur within two years. The other camp says with measured needle depth and slightly wider spacing it can settle well, and they will show healed photos to back that claim. Be explicit about depth and spacing in the stencil review, and plan for a longer session with breaks; many clients need a white-knuckle tolerance test mid-way. For session wear, a fitted sports bra or bandeau that stays put is ideal.
10. Blackwork Fan Motif on Shoulder Blade
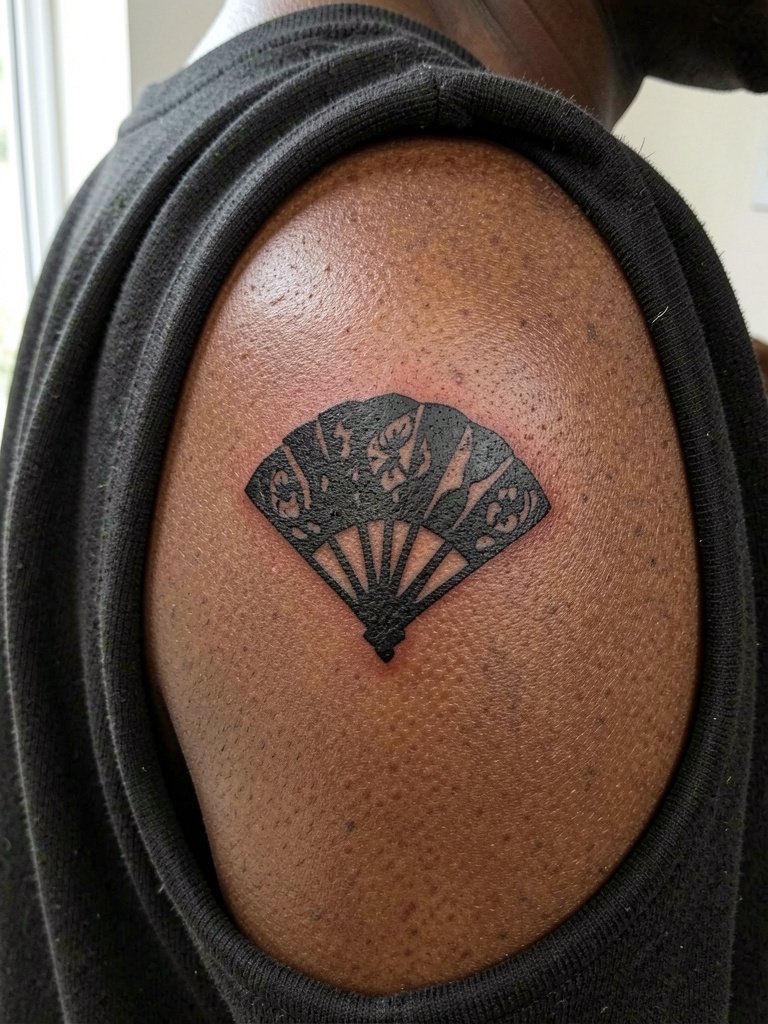
A bold blackwork fan reads from a distance and ages differently than fine-line pieces. It is less prone to line fade but requires heavier saturation and therefore a longer first session for full fill. Discuss realistic touch-up timing with your artist because saturated black fields sometimes need a second pass after initial healing. The common mistake is shrinking the fan too small, which makes the negative space lose contrast. Pair this with off-shoulder tops to reveal the motif on occasion.
11. Delicate Bamboo Stem on Inner Thigh
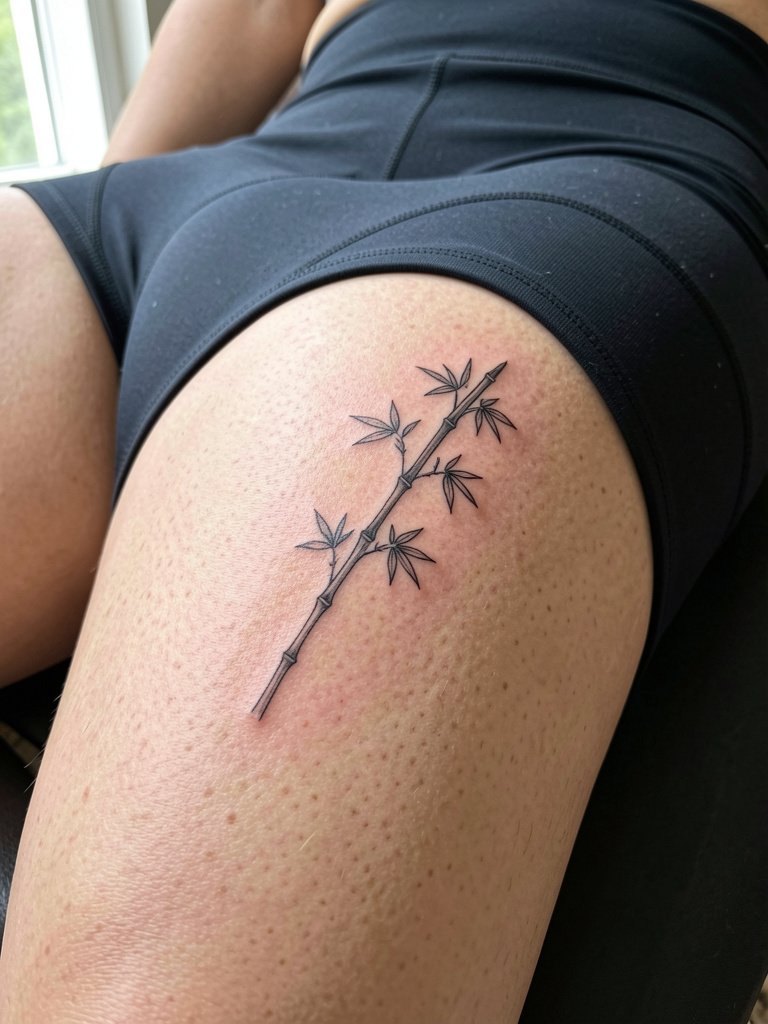
Inner thigh bamboo feels private and elongating when placed vertically. The skin here is softer and can hold fine lines well early on, but friction from clothing can dull detail if the piece is too low near the underwear line. Request a placement check while seated and standing so the artist can choose a zone that avoids constant rubbing. Sessions can be moderately uncomfortable depending on position and take 45 to 90 minutes. For healing and modest showing, pick garments like mid-thigh bike shorts that do not press directly on the tattoo.
12. Micro Calligraphy Brushstroke on Back of Hand
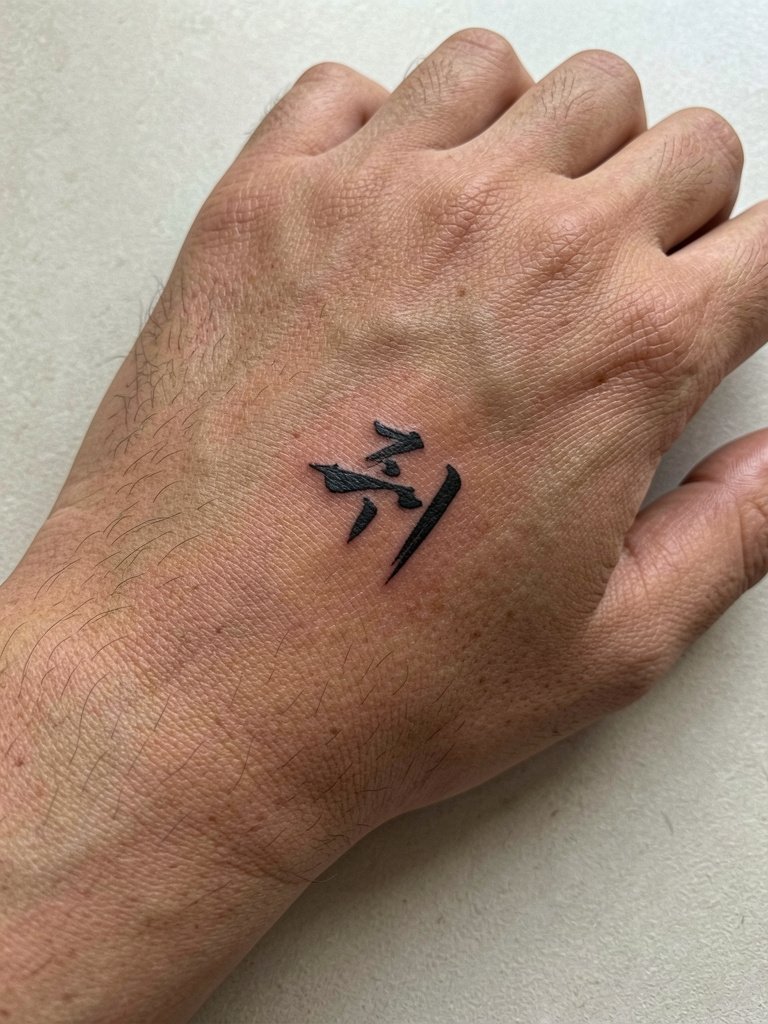
Hand tattoos have high visibility and a higher blowout risk, so micro calligraphic strokes should be bolder than they look on screen. The two camps on hand placement argue about longevity. One camp says hands are a high-fade zone and micro strokes will soften fast. The other camp says denser ink and strategic placement between tendon lines can keep form longer. Be realistic about touch-ups and expect faster fading than a forearm piece. Wear minimal rings during healing and consider thin mesh gloves for light protection in the first days if needed.
13. Stippled Chrysanthemum on Upper Arm
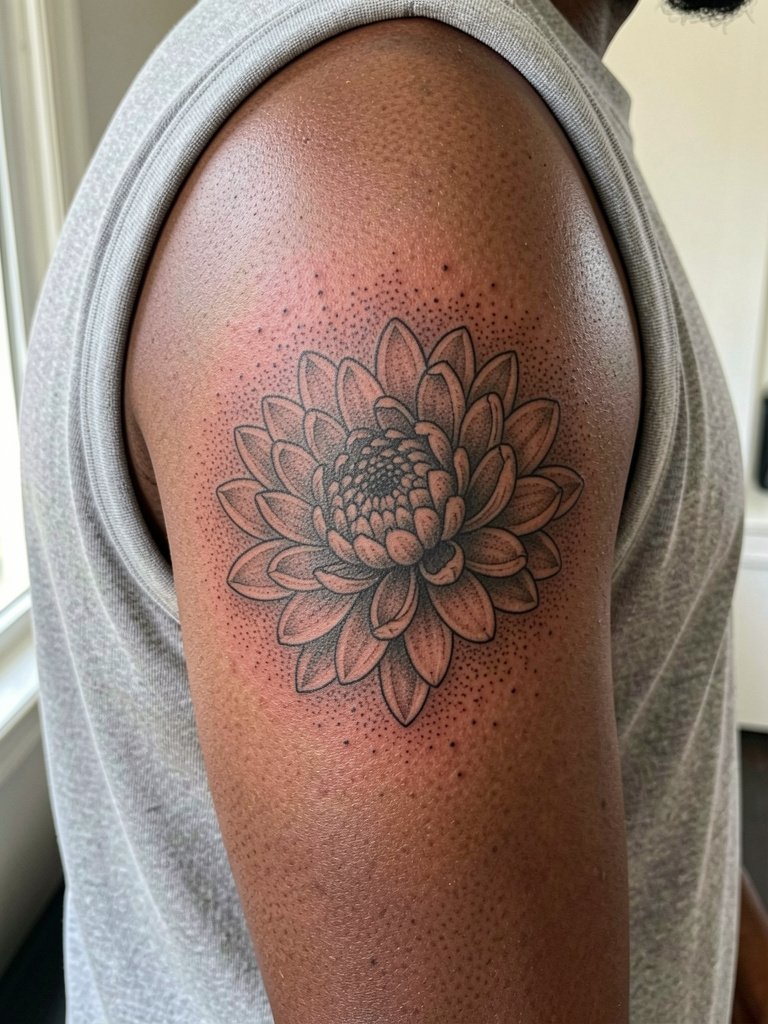
Chrysanthemum stipple work ages nicely when the dots are spaced to allow fade without losing petal separation. Ask for draft shading to check how the stippling reads at arm scale and whether the darkest values hit the right contrast. Mistakes include packing stipple too densely, which can merge into a cloudy fill on oily or thicker skin. This area is low to moderate pain and usually fits a one-to-two hour slot. Style pairing: wear sleeveless linen dresses that highlight the outer upper arm silhouette.
14. Small Geometric Wave on Side Hip
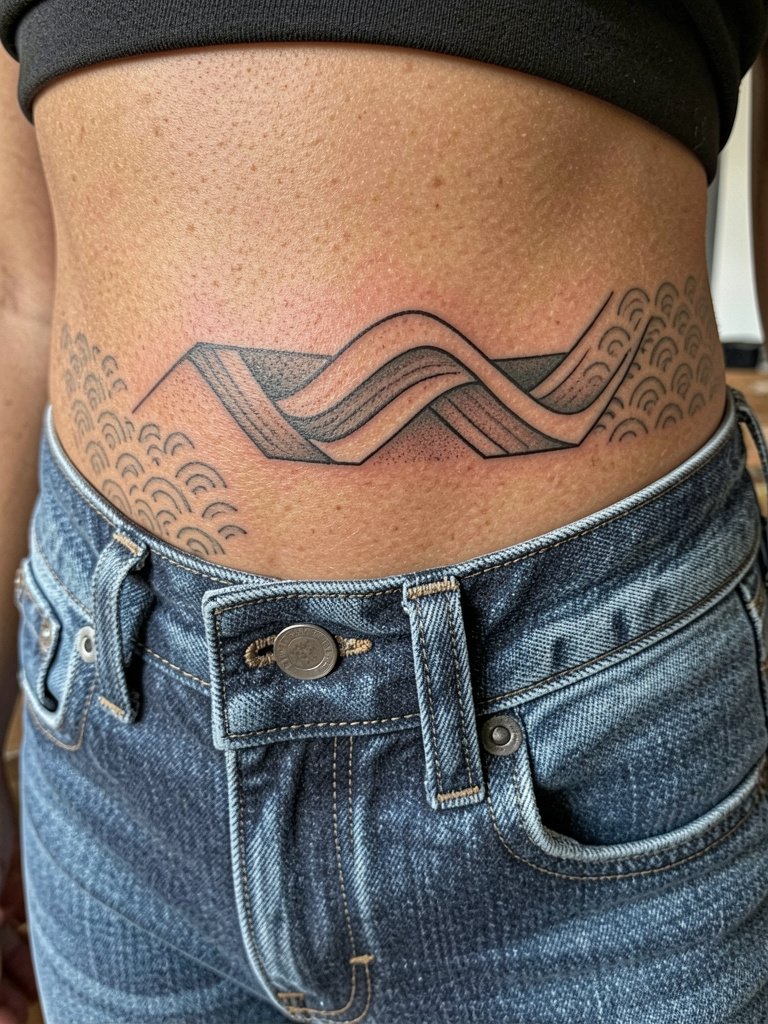
Hip tattoos can be playful and discreet. Geometric waves work here when you map how the curve hits the waistband in different outfits. A common mistake is centering the design too close to the waistband where movement and pressure from low-rise jeans can blur edges. Ask the artist to place the stencil and then sit, stand, and bend so you see how the pattern behaves. Session time is moderate and can be split if needed. For showing the piece, low-rise jeans with a cropped top reveal the motif naturally.
15. Tiny Scripted Date on Side Rib
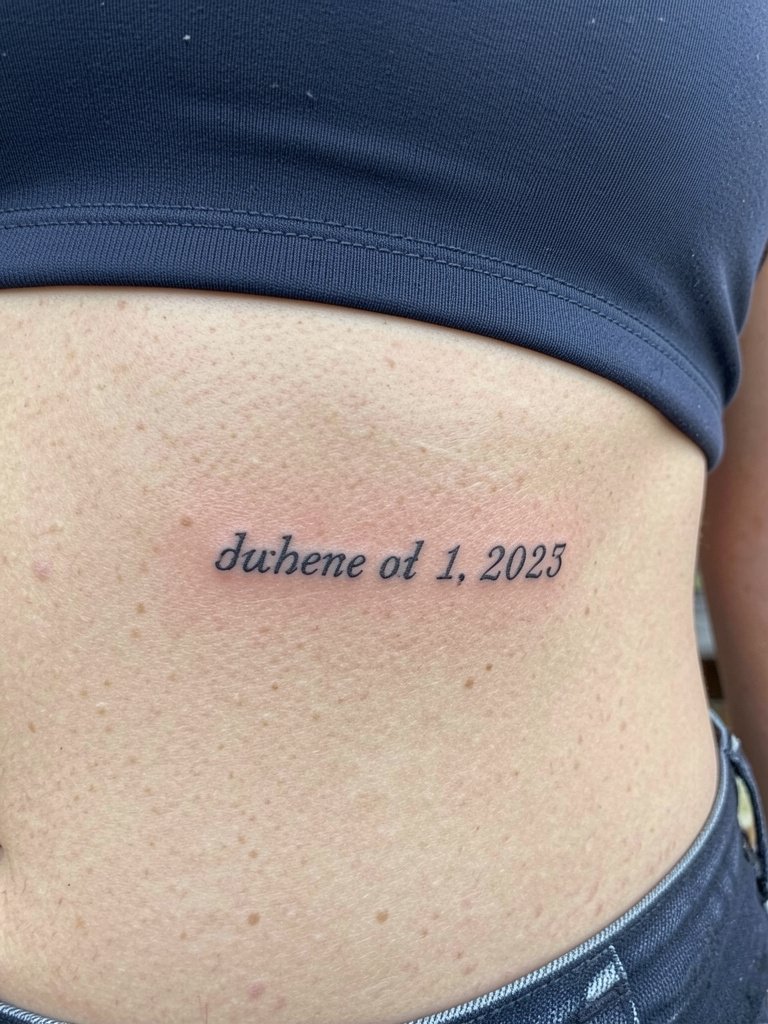
Rib script is intimate but anatomically challenging. One camp of artists warns that rib skin shifts and lines thin into blur within a couple of years. The opposing camp argues that slightly bolder strokes and careful depth control make it stable and lasting. Ask for a mock stencil with the same line weight and then breathe through a few full inhales and exhales to see how the typography stretches. Pain is higher than the forearm with likely breaks of ten minutes in a single session. For comfort, wear a well-fitted bandeau or sports bra that does not shift during the appointment.
16. Minimal Fan Doodle on Ankle Side
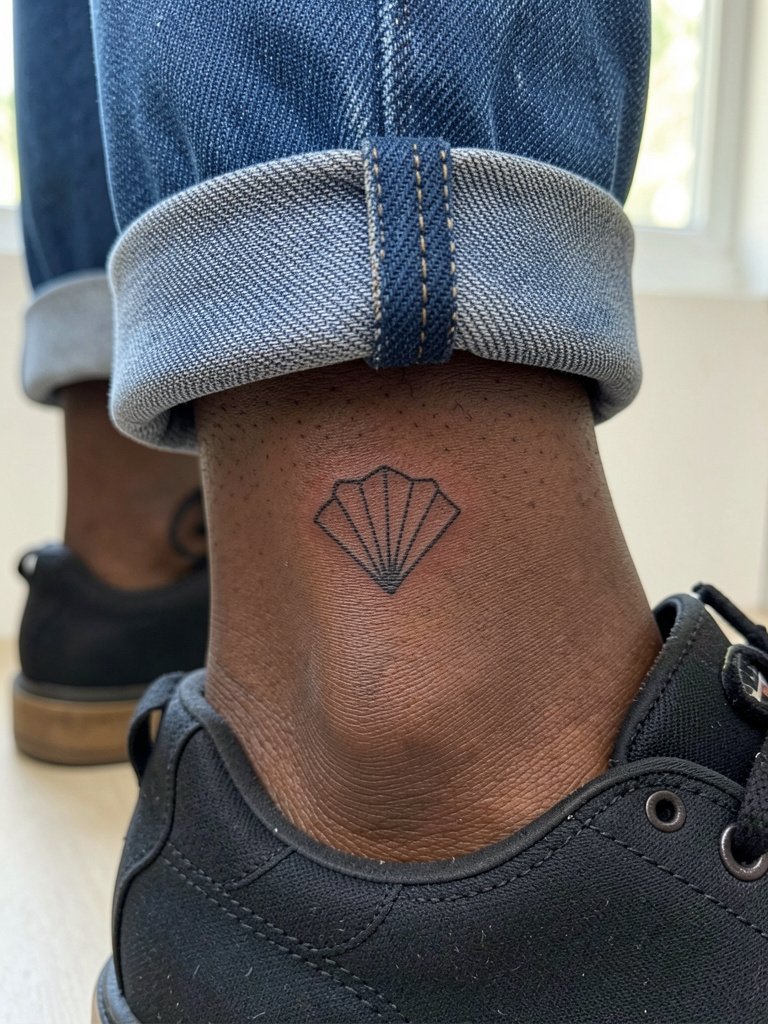
A small fan doodle on the ankle gives you a subtle nod to Korean design language in an easy-to-hide spot. The ankle endures shoe friction, so ask the artist to test how the fan sits under a sock and whether a touch-up will likely be needed at a year. The session is brief and feels like intermittent vibration. For footwear that shows the piece, cuffed jeans or strappy sandals are ideal.
17. Little Crescent Moon with Stars on Sternum
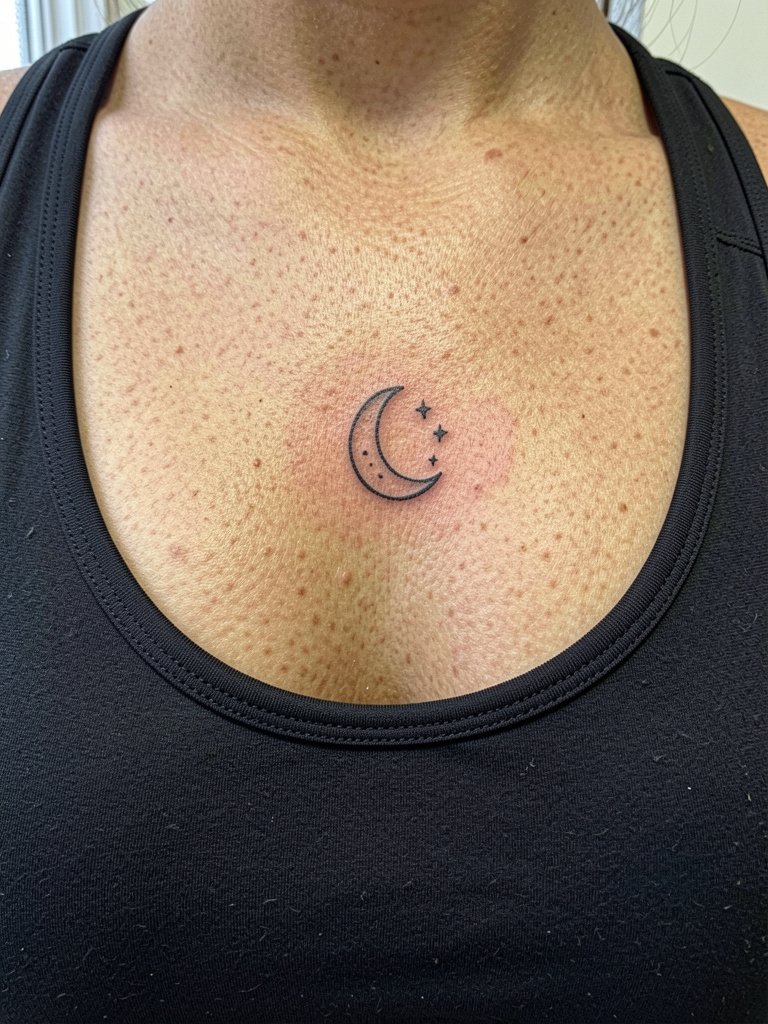
Sternum pieces need an artist who understands curvature and sensitivity. The skin is thin and pain is higher for many clients, so plan for shorter passes and a longer overall appointment window. A regular mistake is crowding the area with several tiny stars that merge when the piece heals; instead pick three well-spaced star points. Discuss how the piece looks with your chosen bra styles and whether the placement will be visible when you wear certain necklines. Many people prefer a fitted sports bra for the session so nothing shifts mid-ink.
18. Tiny Folk Mask Tal on Outer Calf
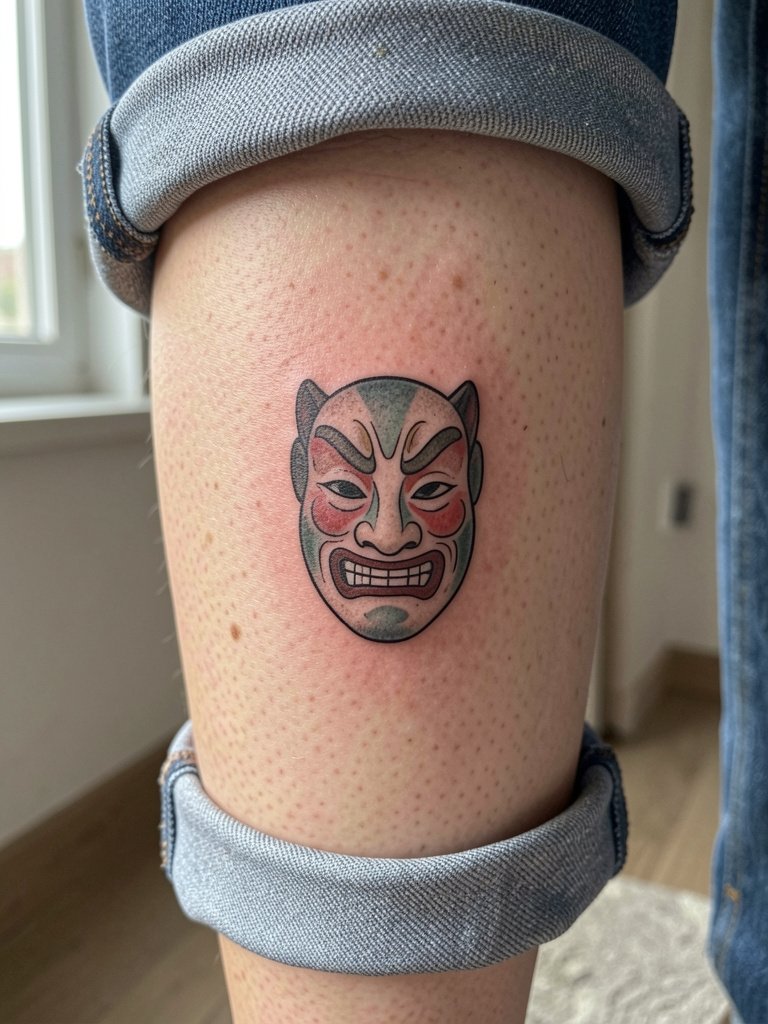
Traditional mask imagery connects to a long performance culture and should be handled with care. One camp welcomes contemporary reinterpretation as homage and cultural continuation. The other camp cautions that symbols with ritual meaning need context and permission from communities when used decoratively. Respect origins by asking your artist to treat the motif with accuracy and to avoid caricature. The outer calf is a comfortable spot with moderate pain and good longevity for bold black lines. For showing it off, roll cuffed jeans or wear mid-calf boots.
19. Subtle Wave Line on Side Neck
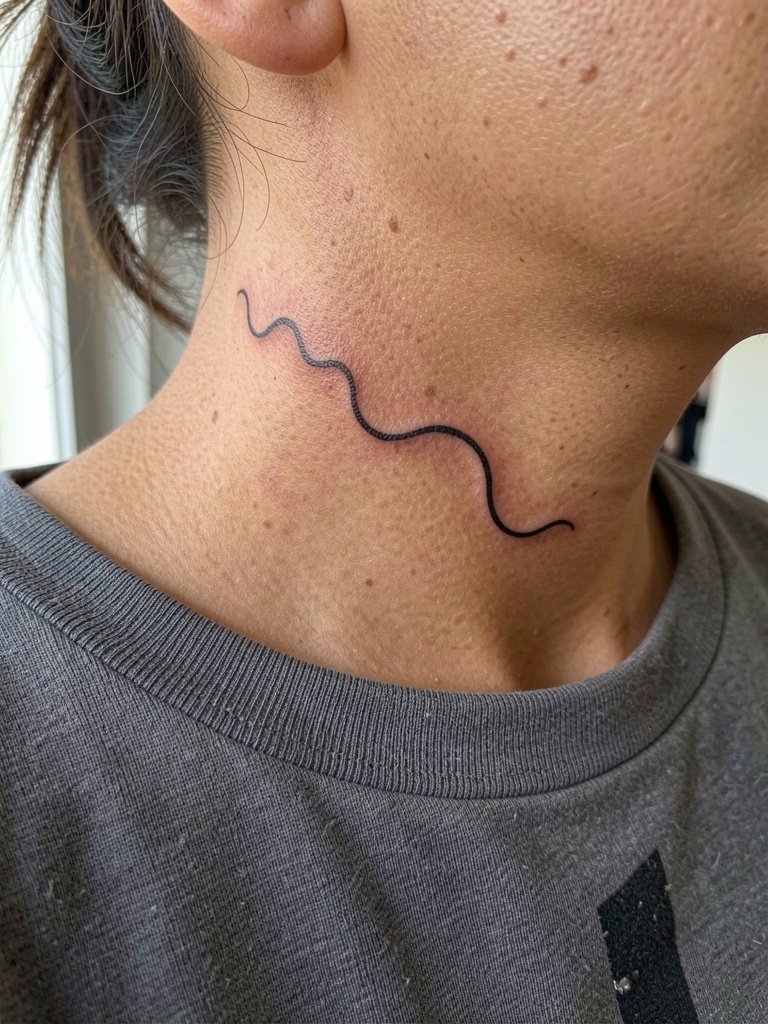
Side-neck work reads intimate and is visible in short hair or updos. The area is more sensitive than the upper arm and needs shallow, confident lines. A common mistake is choosing an ultra-thin single-needle stroke which can blur against neck movement. Talk through how the line follows the lateral neck curve and whether a faint stipple anchor would improve longevity. For visibility, choose wide-neck tops that sit naturally without pulling.
20. Petite Brushstroke Portrait on Inner Bicep
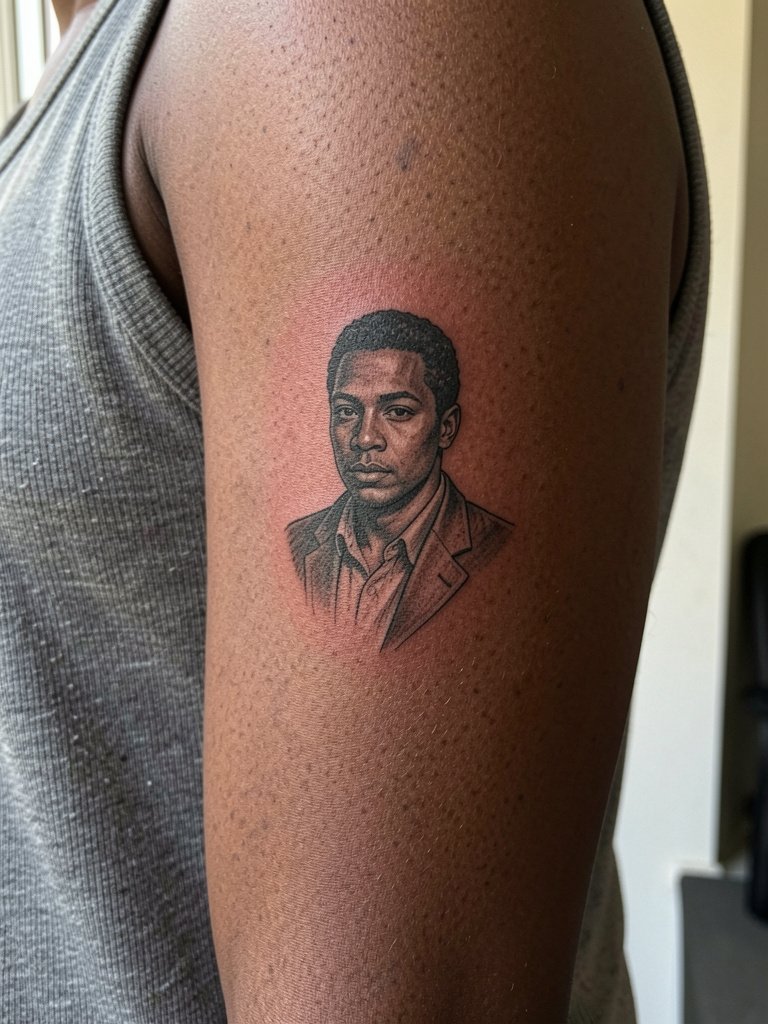
Inner bicep portraits can stay crisp when the artist uses balanced contrast and avoids hairline detail. The inner upper arm skin is soft and forgiving, but a common error is packing too much micro detail that the skin will not hold. Ask the artist to simplify facial features into bold brushstrokes and preview how the portrait reads at a three-inch scale. Session time is moderate and tip breaks are common because the area can be tender. For ease on the appointment day, wear a loose tank top so the arm can rest naturally.
21. Small Floral Sprig Along Side Waist
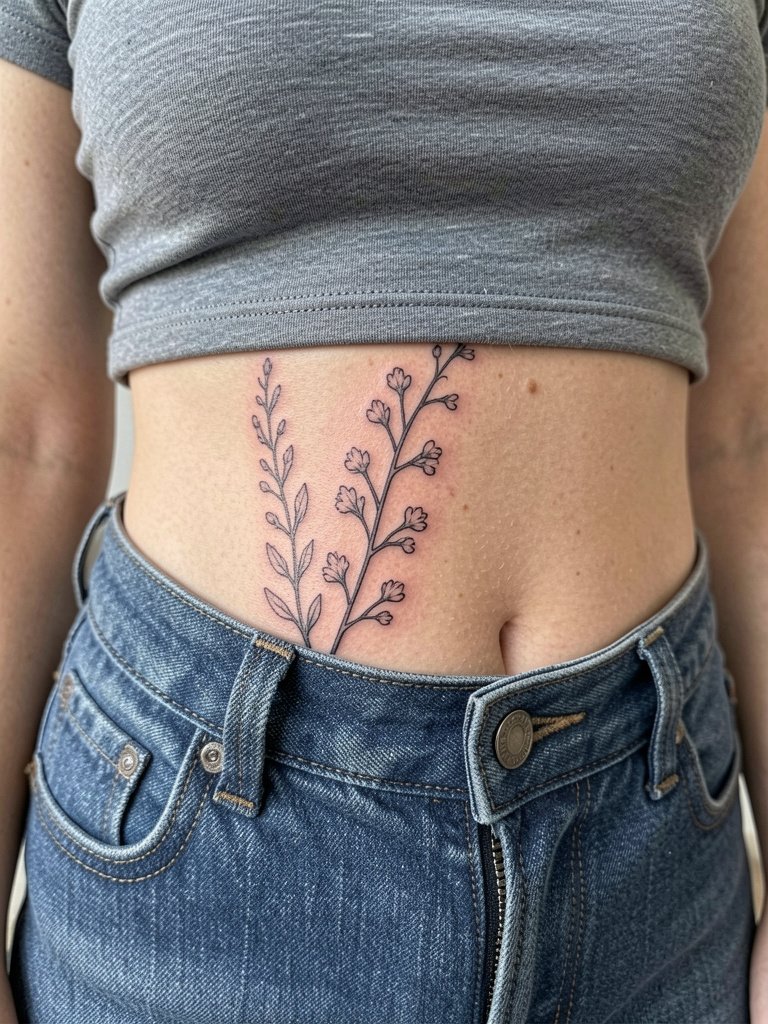
A vertical floral sprig along the waist elongates the torso and is easy to conceal when needed. The skin here moves with twisting and bending, so tell the artist you want the stem drawn with slight elasticity to avoid a kink when you bend. Mistakes include centering the sprig too close to high movement zones where it blurs faster. Sessions are short and healing is straightforward. For showing it off, cropped tops plus high-waisted jeans create a clean frame.
22. Tiny Ink Seal on Finger Side
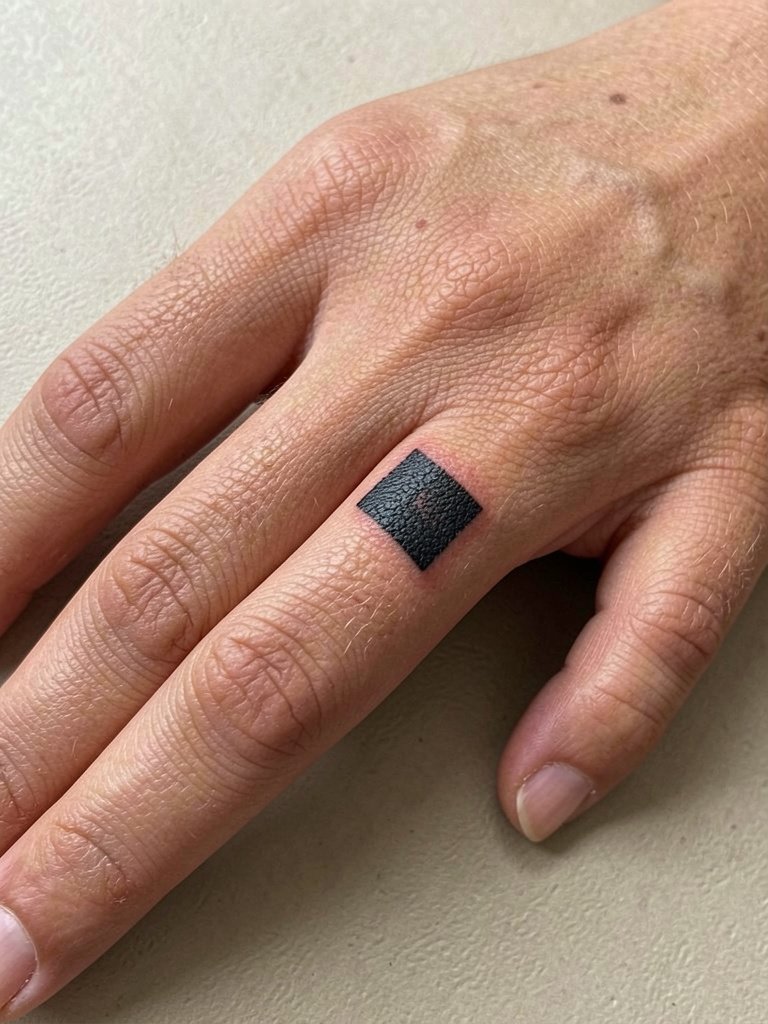
Finger tattoos are high-maintenance but deliver immediate personality. A micro seal on the finger needs bold, simple shapes rather than small serifs. The typical mistake is requesting intricate detail which the friction and frequent washing will erode quickly. Expect a higher fade rate and plan for touch-ups every 9 to 18 months. Sessions are fast but feel intense. For minimizing wear, limit ring stacking on that finger and consider thin ring guards to avoid constant rubbing.
23. Minimal Hanok Roof Silhouette on Calf
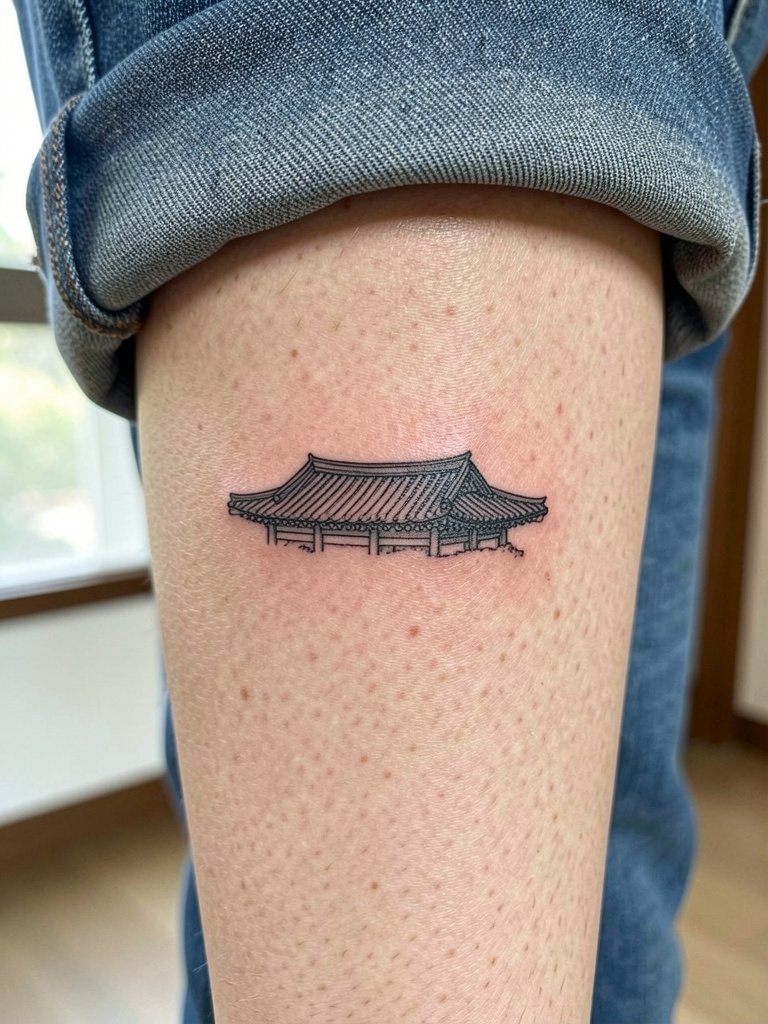
A minimal roof silhouette on the calf is durable and easy to conceal with pants. The calf holds ink well and the design will keep its crisp edges longer than thinner placements. A real mistake is shrinking architectural details to a scale that loses identity after healing. Ask your artist to render the silhouette at life scale before inking so you can confirm readability at a glance. Session time is short to moderate and generally tolerable. For casual reveal, wear cuffed jeans or mid-calf boots.
Frequently Asked Questions
Q: How do I find healed examples of delicate Korean tattoo work without naming specific artists?
A: Search platform tags and location filters for portfolios and healed shots. Try targeted hashtags like #KoreanFineLineTattoo, #HangulInked, and #HanokTattoo on image platforms. Use location filters on short-video apps to see recent healed examples near you, and browse curated portfolio sites that let you filter by keyword and skin tone.
Q: Will fine-line Hangul or Hanja blur faster than bolder work?
A: It depends on placement and line weight. Thin single-needle Hangul on the inner wrist or hand tends to soften quicker because of constant motion and washing. Slightly increasing line weight and spacing during the stencil review gives the work more staying power while keeping a delicate feel.
Q: Are there cultural considerations for using Korean motifs like hanbok patterns or folk masks?
A: Yes. One camp sees contemporary use as respectful homage that keeps traditions visible. The other camp warns against decorative use without context, especially for ritual objects. To be mindful, ask your artist to preserve stylistic features accurately and avoid caricature, and mention that you want the motif handled with cultural respect.
Q: What should I wear to a session for a rib, sternum, or inner thigh piece?
A: Pick fitted yet stable garments that expose the area without shifting. For ribs and sternum, a fitted sports bra or bandeau works well. For inner thigh, mid-thigh bike shorts or modest athletic shorts keep fabric pressure off the area during the session. Comfortable, loose bottoms help for longer appointments and reduce readjusting.
Q: How often should I expect touch-ups for micro Korean script and micro symbols?
A: Micro scripts and finger or hand marks tend to need touch-ups sooner than larger work. Plan for a realistic touch-up window between nine months and two years depending on placement, your skin type, and daily friction. Artists often advise a small seasonal refresh rather than dramatic reworking.
Q: Can I find an artist experienced with these motifs locally without naming names?
A: Look for portfolios with healed photos that showcase fine line, stipple shading, or small blackwork across the placements you want. Keywords like "micro script," "stipple floral," and "hand healed" combined with your city or region on portfolio platforms help narrow the search. Viewing healed images in different skin tones gives a clearer sense of an artist's retention and technique.
