
Dark gothic tattoos often read sharper when you treat them like small black sculptures, not delicate sketches. Thicker silhouettes and deliberate negative space keep motifs legible as skin settles and seasons change. Expect some design choices to look bold at a glance and soft at five years, and plan spacing and saturation around that reality before the needle touches skin.
1. Raven Crescent on the Inner Forearm
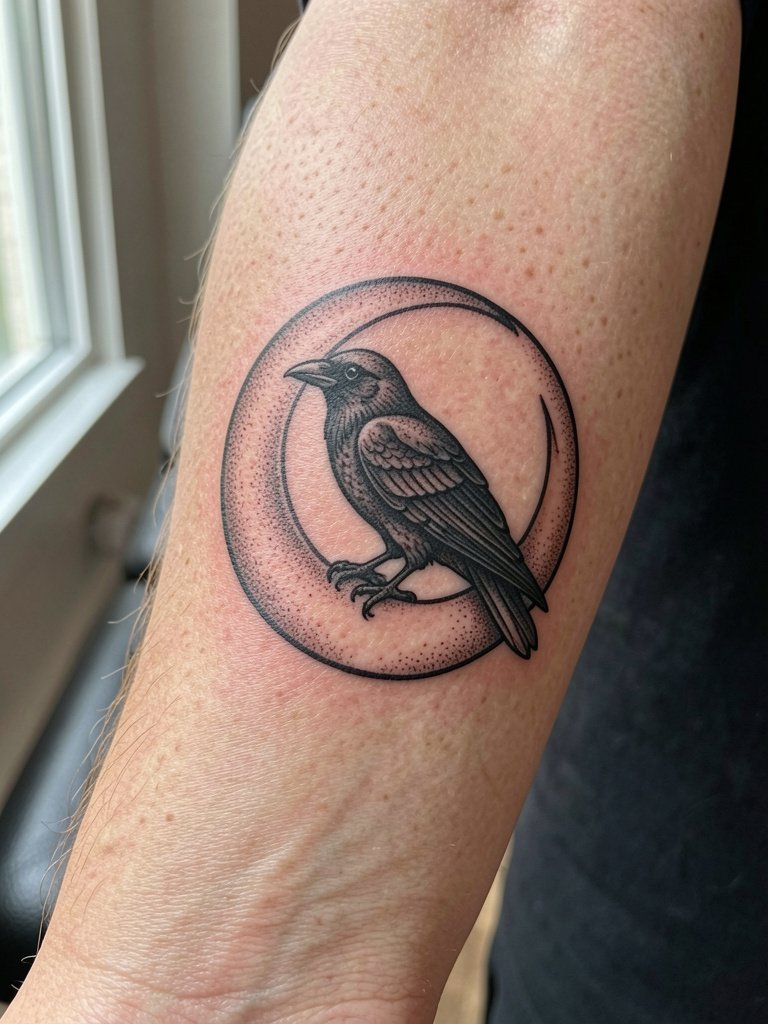
A raven and crescent work well on the inner forearm when you want dramatic shape that still reads at a distance. Recommend a single session at moderate machine speed so the black saturates without overworking the skin. Ask for slightly heavier linework than a pencil-thin reference, because the inner forearm tends to soften in the first two years. Keep negative space inside the moon to avoid it filling in. The session feels like a steady three to four hour sit depending on size, with light vibration in the wrist and forearm. For showing it off, pair with rolled-up linen shirts that expose the underside of the arm.
2. Stained-Glass Cross on the Ankle
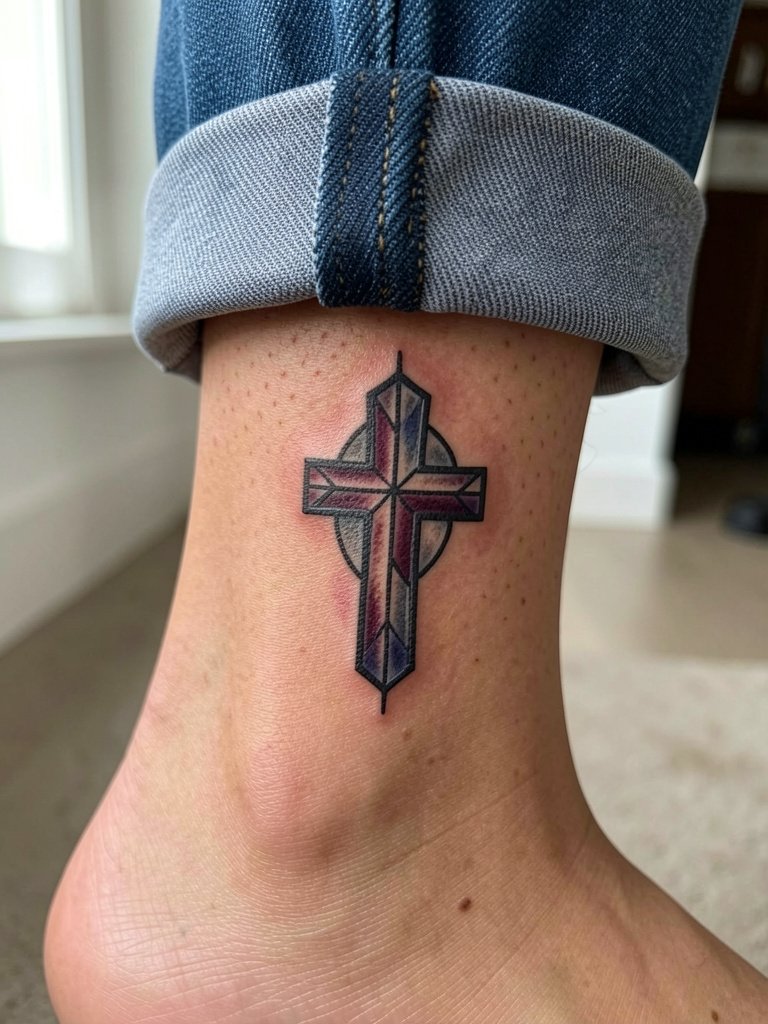
An ankle cross in stained-glass style gives you gothic geometry without needing full black saturation. For this placement the main concern is abrasion from socks and shoes, so keep the central line weight a touch thicker and the colored washes sparse. Plan for a short touch-up window at six to twelve months to refresh the color edges. The session is usually under two hours for a palm-sized piece and the ankle can sting more than the calf. When you want it visible, cuffed jeans or low-rise ankle boots frame the area and let the lead lines do the visual work.
3. Victorian Cameo on the Collarbone
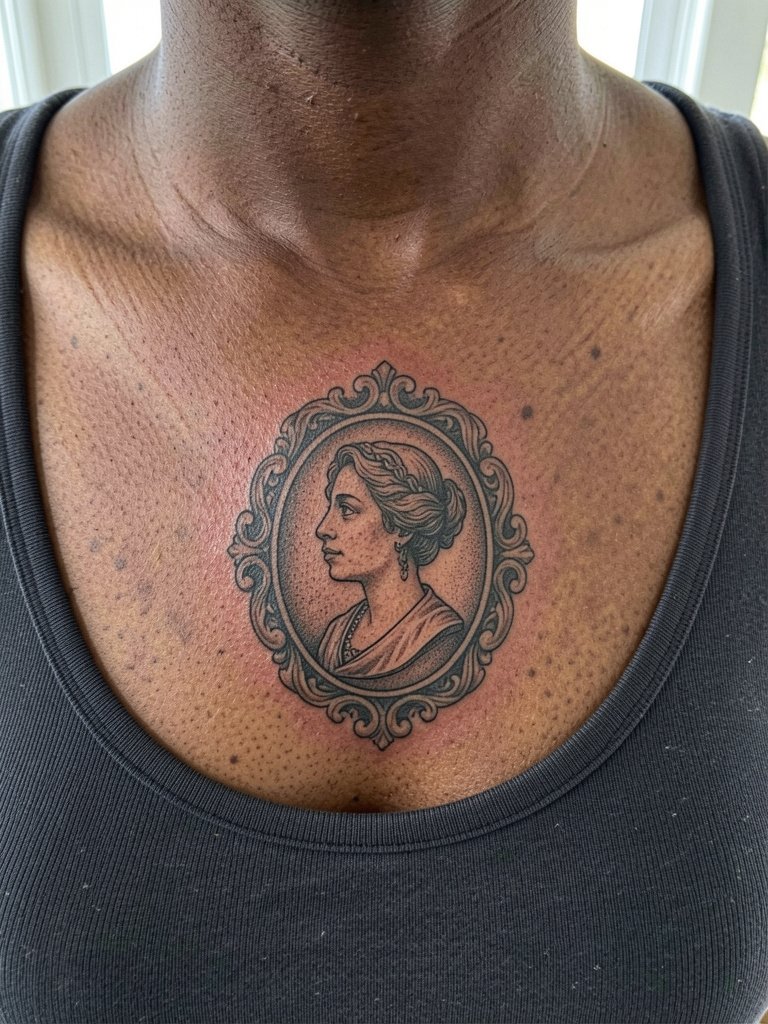
A collarbone cameo looks deliberate and antique when the frame is bolder than the portrait lines. For long-term legibility, compromise on portrait detail at small scale, and request stipple shading instead of thin cross-hatching. The biggest mistake is trying to cram too many facial details into a two-inch oval. Expect a one to two hour session and mild tenderness under shirt straps for a few days. To show it off pair the placement with off-the-shoulder blouses that reveal the frame without crowding the neckline.
4. Gothic Script on the Ribcage
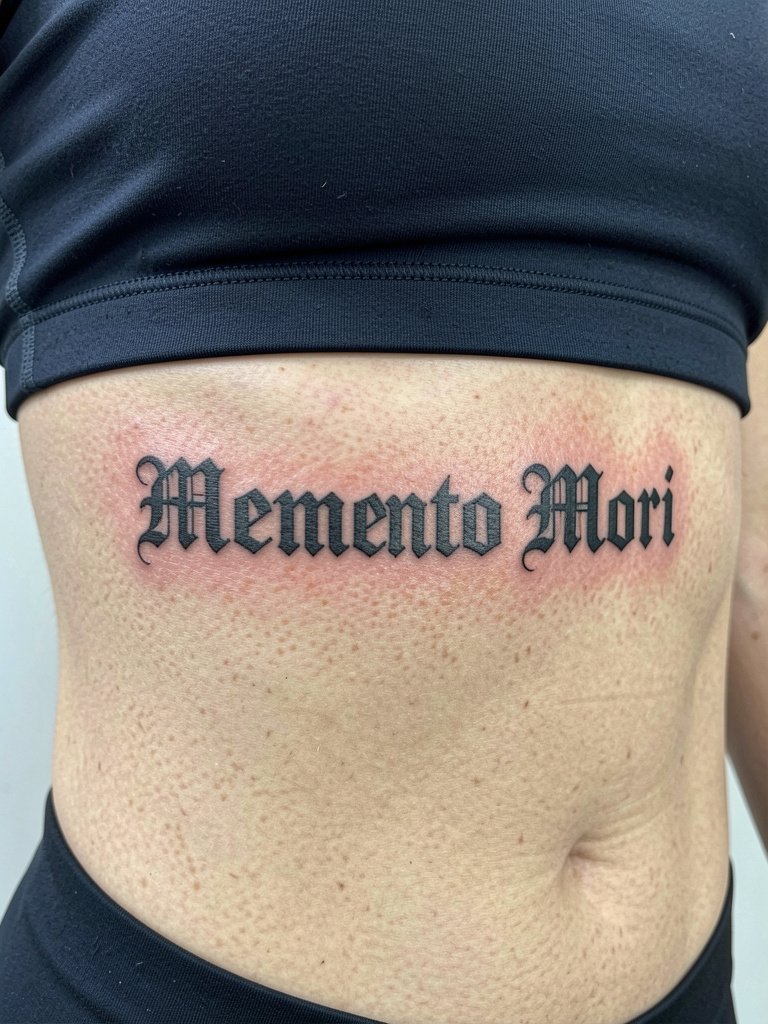
Fine script on the ribs splits artists into two camps. One camp argues that the skin there stretches and compresses too much so thin blackletter blurs within two years, especially where the torso flexes. The other camp says wider spacing and slightly heavier stroke weight let the lettering settle and remain readable, and they will point to three-year healed photos to show it. If you favor bold Gothic wording, plan for deeper saturation and a measured spacing study in your consultation. Expect high pain in this area and a longer single session with breaks. For session comfort wear a fitted cropped top that the artist can move into place without tugging.
5. Thorned Anatomical Heart on the Upper Arm
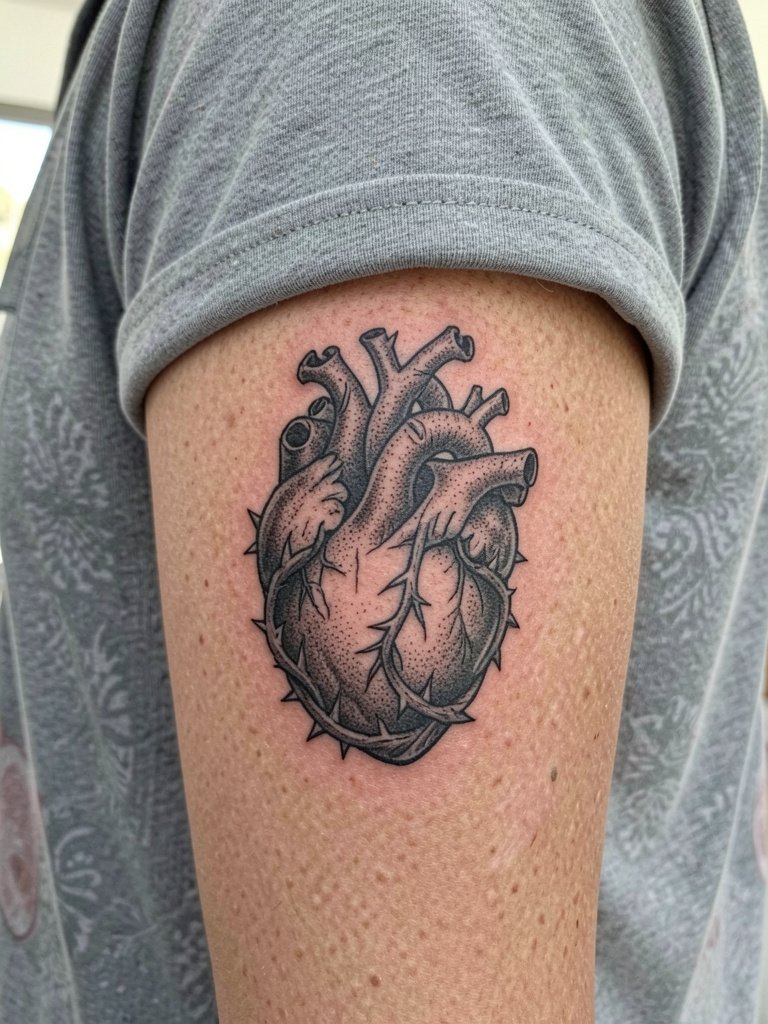
An anatomical heart with thorns reads like a small narrative when placed on the upper arm. I usually suggest a two-tone approach where the heart has dense black core shading and the thorns are left more linear, because the arm has enough canvas for contrast. A common error is insisting on ultra-fine thorn lines at small scale, which disappear after a year. Session time ranges from two to four hours and the outer arm is forgiving on pain. Pair this design with short-sleeve vintage tees that keep the upper arm visible without constant sun exposure.
6. Coffin and Roses on the Back of the Hand
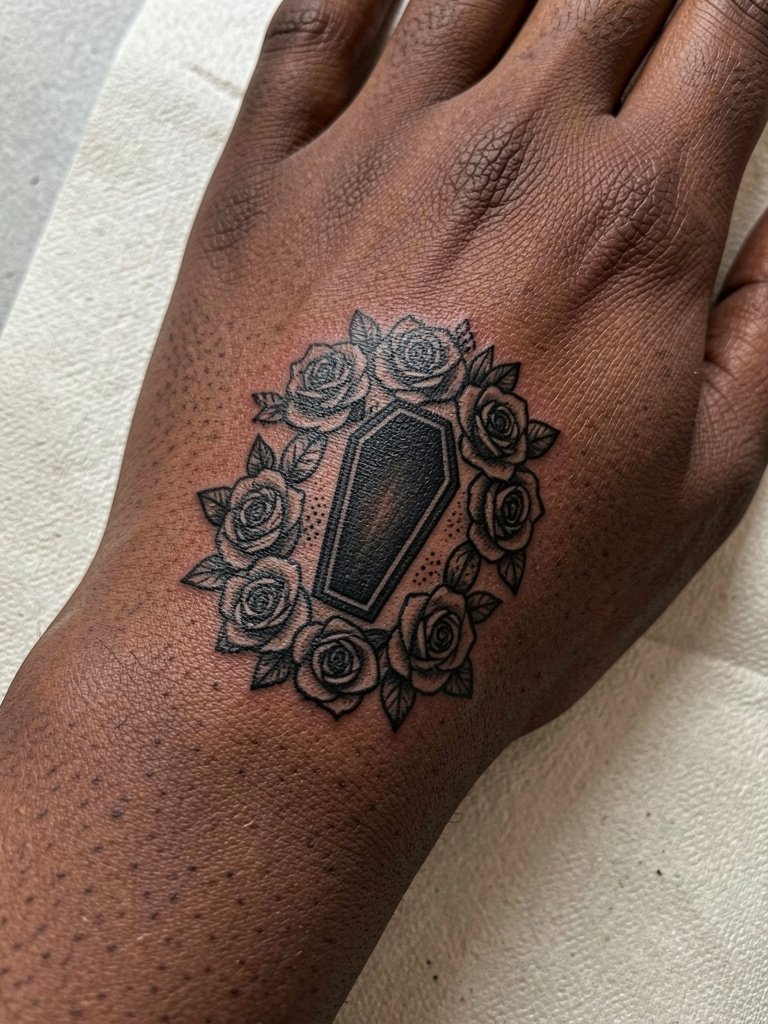
Hand tattoos demand planning because the skin there sheds and moves so much. For a coffin and roses expect faster fading and potential early touch-up windows at six months. One mistake is ordering tiny petals with microstrokes; bold silhouettes survive washing and sun better. The session is quick but intense on pain and swelling. Because of higher blowout risk on the hand ask for slightly heavier outlines and plan a touch-up at the three to nine month mark. Hands are visible constantly, so consider accessories like minimal leather bracelets that frame the design without rubbing it raw.
Session Day Picks
Those first six pieces include wrists, hands, and ribs which heal differently from larger surfaces, so a few items make the session and the first week smoother.
-
Stencil transfer paper kit. Lets you preview line placement on skin before the needle and is useful when you test spacing for collarbone and rib text.
-
Topical numbing cream. Applied according to the product directions it eases the bite on sensitive zones like the ribs and hand without interfering with linework.
-
Thin protective film roll. Ideal for covering small wrist and ankle pieces during the first few days of heavy movement.
-
Fragrance-free gentle body wash. Cleanses healing skin without stripping the ink or irritating delicate stitches and lines.
-
Aquaphor healing ointment. A thin layer can lock in moisture during the initial healing window and helps fine blackwork recover without scabbing excessively.
7. Baroque Lace Filigree on the Shoulder Blade
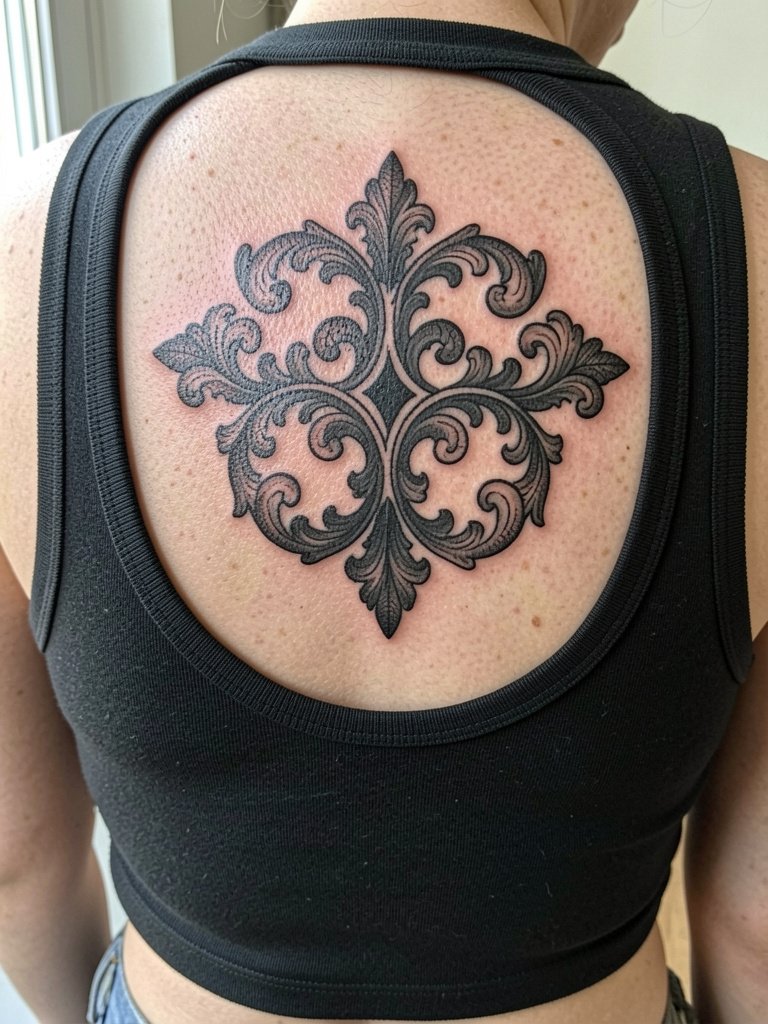
Shoulder blade filigree ages well because the area moves less than limbs. I advise moderate saturation for the outermost curls and finer stippling inside to keep the piece luminous without a flat black block. A frequent mistake is over-detailing the edges where shirts rub. Sessions run from two to three hours depending on spread. For wardrobe consider slip dresses with thin straps that let the lace sit against bare skin and make the negative space read.
8. Moonlit Gargoyle on the Calf
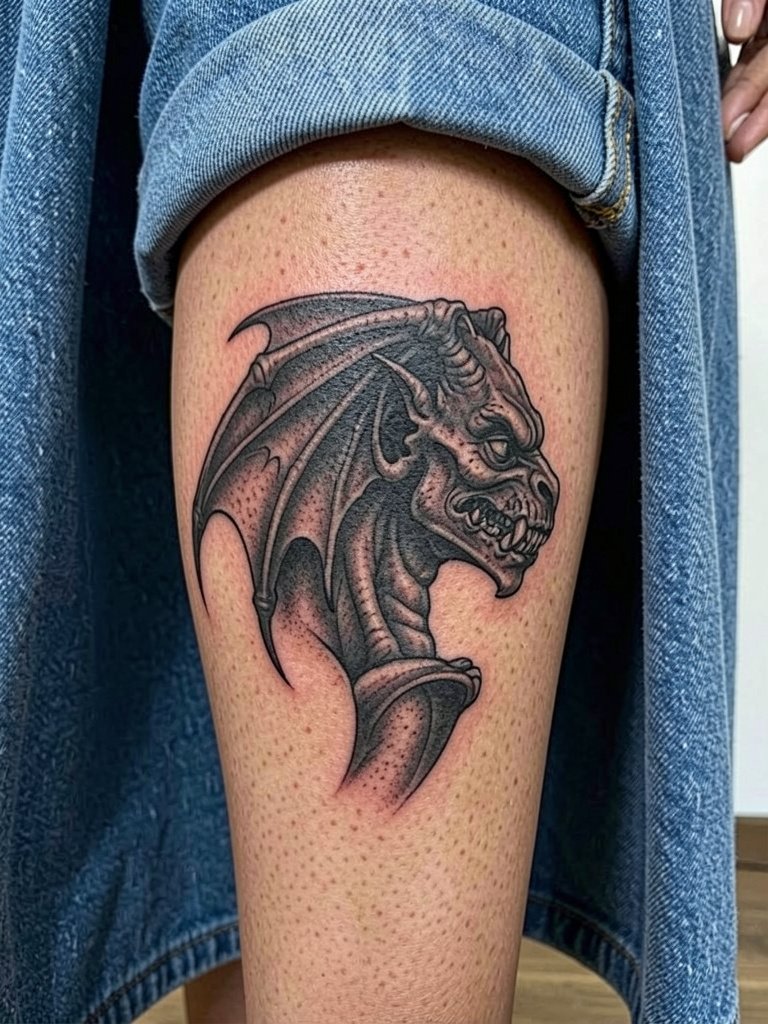
A calf gargoyle benefits from heavier black blocks to anchor the silhouette at a distance. The muscle here stretches less in everyday life so small textures tend to hold better than on hands. Discuss with the artist how the shading will read when you flex, and plan for a two to three hour session. If you want occasional flash of the piece on nights out, pair it with midi skirts that hit below the knee to let the profile peek without constant sun exposure.
9. Minimalist Arc with Flying Bats on the Inner Thigh
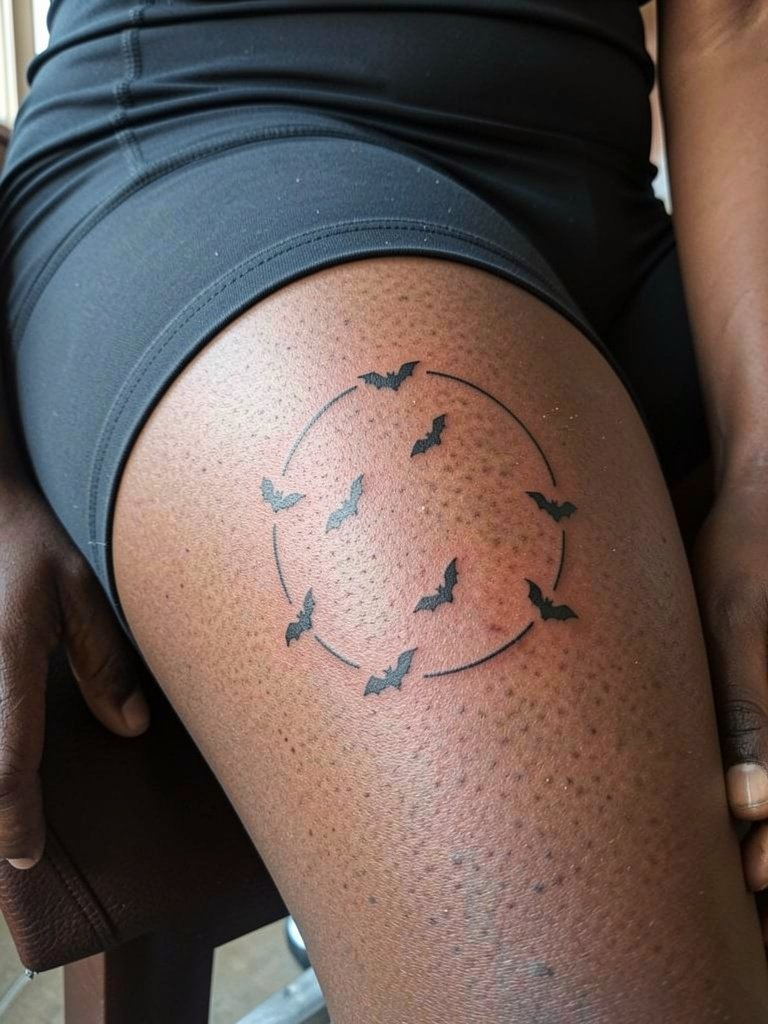
Inner-thigh placements are intimate and need tact. One group of artists warns that thin line clusters there can blur quickly because of friction and moisture. Another group argues that with slightly heavier single-needle spacing and longer rest periods before touch-up the lines stay crisp. If you pick an inner-thigh bat cluster, set expectations for at least one touch-up between six and twelve months. The session can be tender because the skin is soft and moves with leg position. For showing it off choose eveningwear like wrap minis that reveal the inner thigh thoughtfully.
10. Stitched Skull on the Lower Back
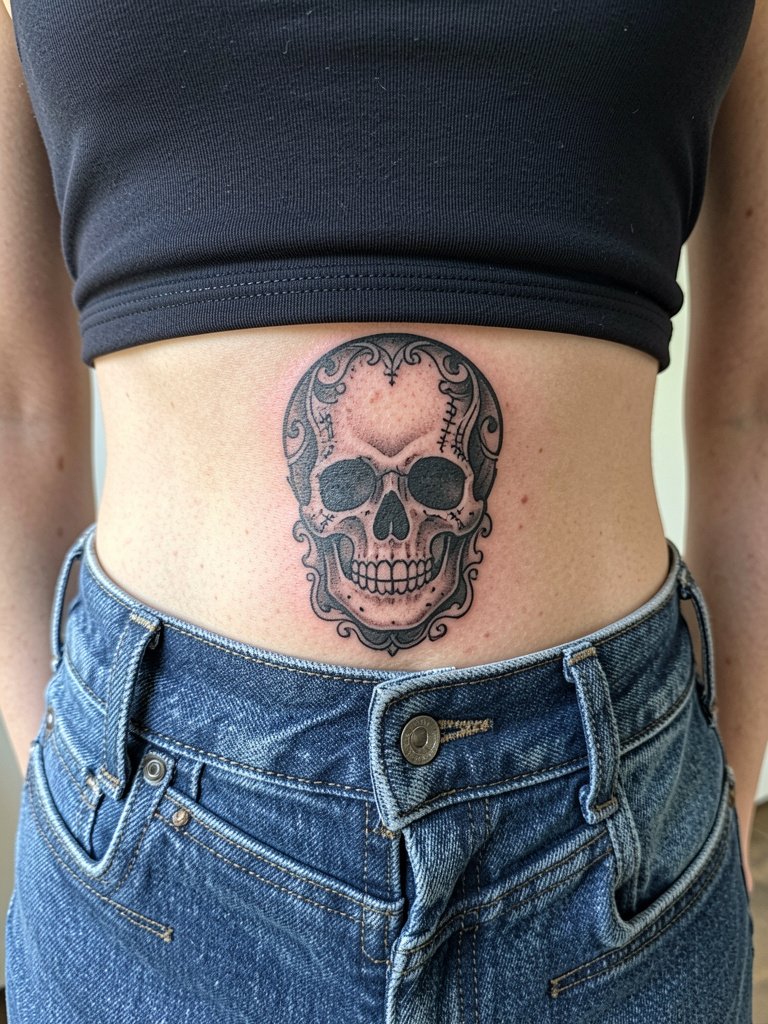
Lower-back skulls can be dramatic as a central anchor for larger compositions. I recommend strong outlines around the skull with interior stipple instead of dense black fills, to avoid a single sunburn-prone block that fades oddly. The lower back tolerates heavier work but can be sensitive near the spine. Charge time is typically two to three hours. If you plan more pieces around it, coordinate scale and corner spacing so later additions do not crowd the central skull.
11. Candle and Smoke on the Sternum
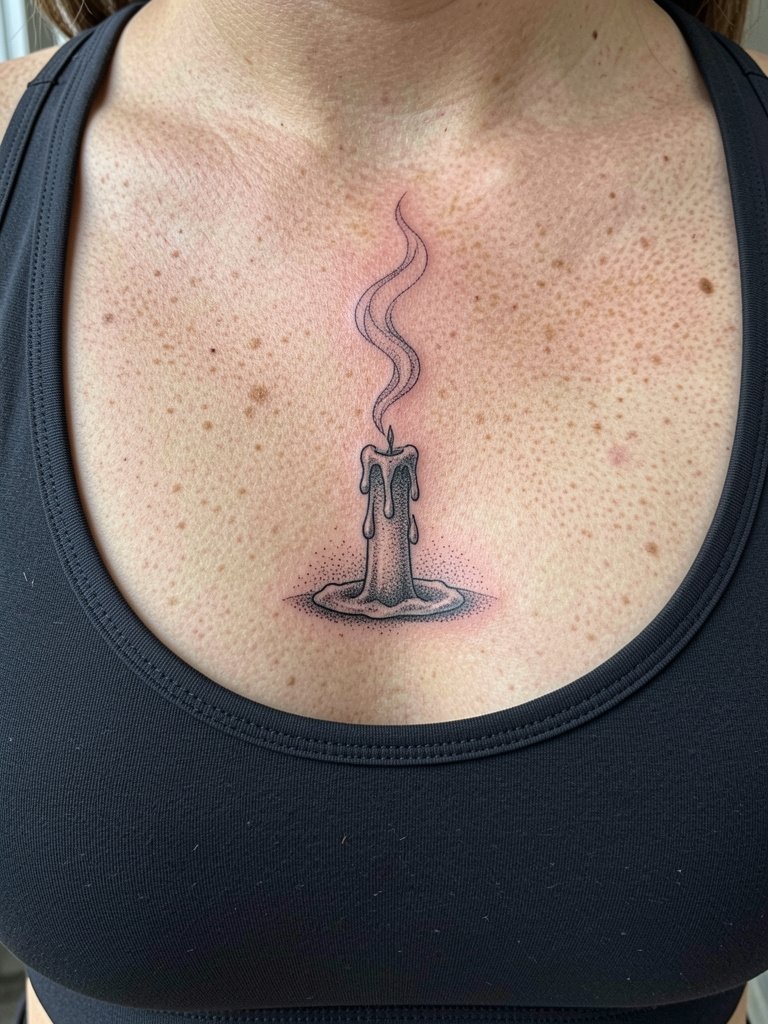
Sternum pieces require a specialist touch because the area crosses soft tissue and banded breast shadows. For a candle motif choose slightly bolder smoke lines and allow the flame to be negative space so it reads as the body shifts. One common mistake is requesting ultra-thin trailing smoke that disappears after healing. Pain here depends on proximity to the bone and breast tissue and many people book breaks into the session. For session comfort wear a supportive fitted top you can remove or keep in place depending on the artist's preference.
12. Black Lace Mandorla on the Back
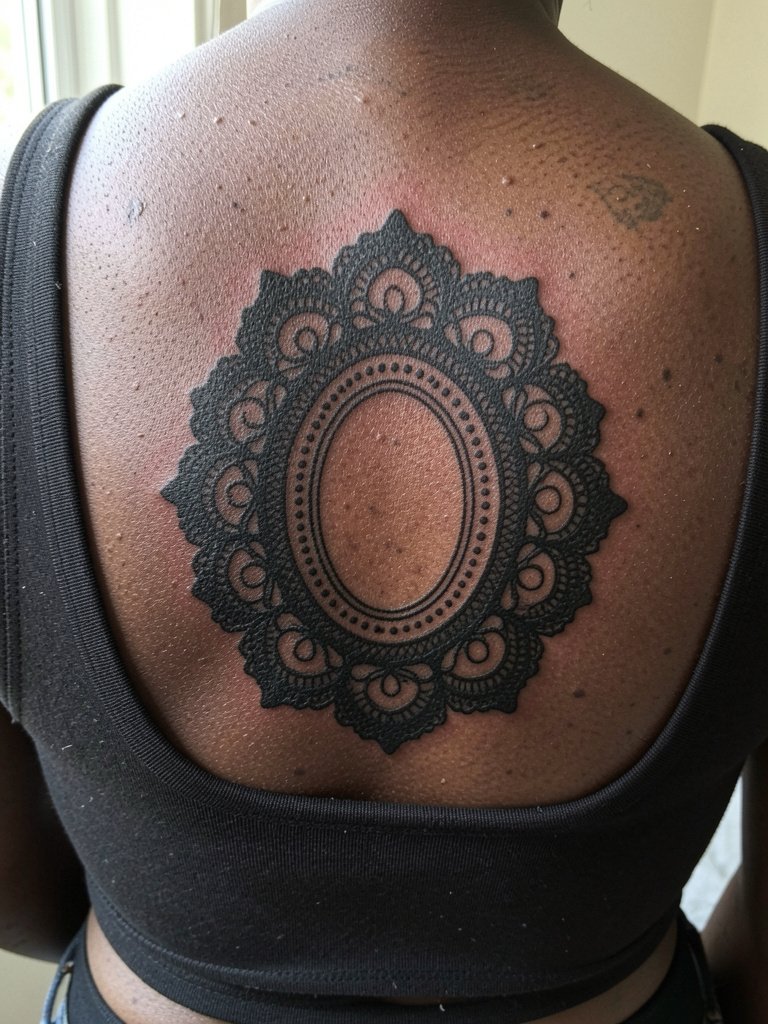
Large back mandorlas are statements best executed with a balance of heavy borders and airy internal negative space. The advantage of the back is low everyday abrasion, so fine dot work holds longer than on limbs. A typical error is packing concentric details too tightly; leave breathing room in the center. Sessions may be split into multiple sittings for large pieces. Because of the scale, plan a realistic timeline for touch-ups at one year to tidy small dot work.
13. Clock Face with Thorned Hands on the Inner Forearm
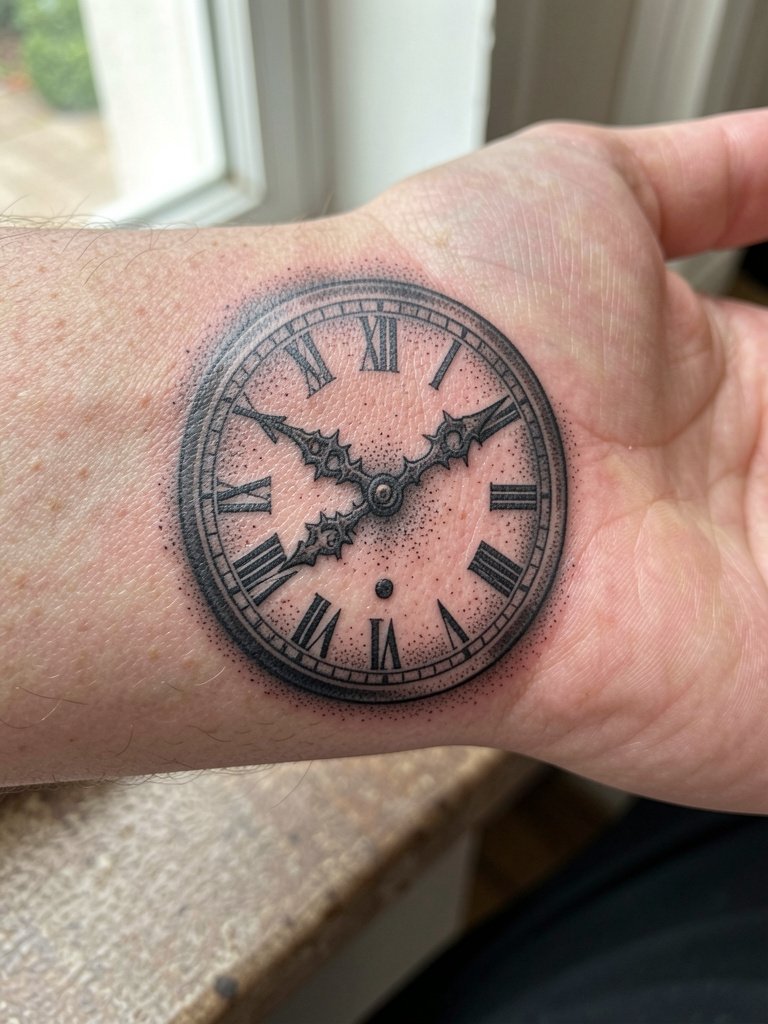
A clock face works on the inner forearm when the numerals are spaced outward and the hands are thick enough to survive wash and wear. Discuss placement of the hands in relation to wrist movement so they do not end up in a crease. The inner forearm usually needs a touch-up after the first year if the piece uses fine numerals. Sessions are comfortable for most people and typically last two to three hours for a medium clock. For nights out pair the forearm with rolled-sleeve button-ups that draw the eye to the timepiece.
14. Occult Sigil in a Wreath
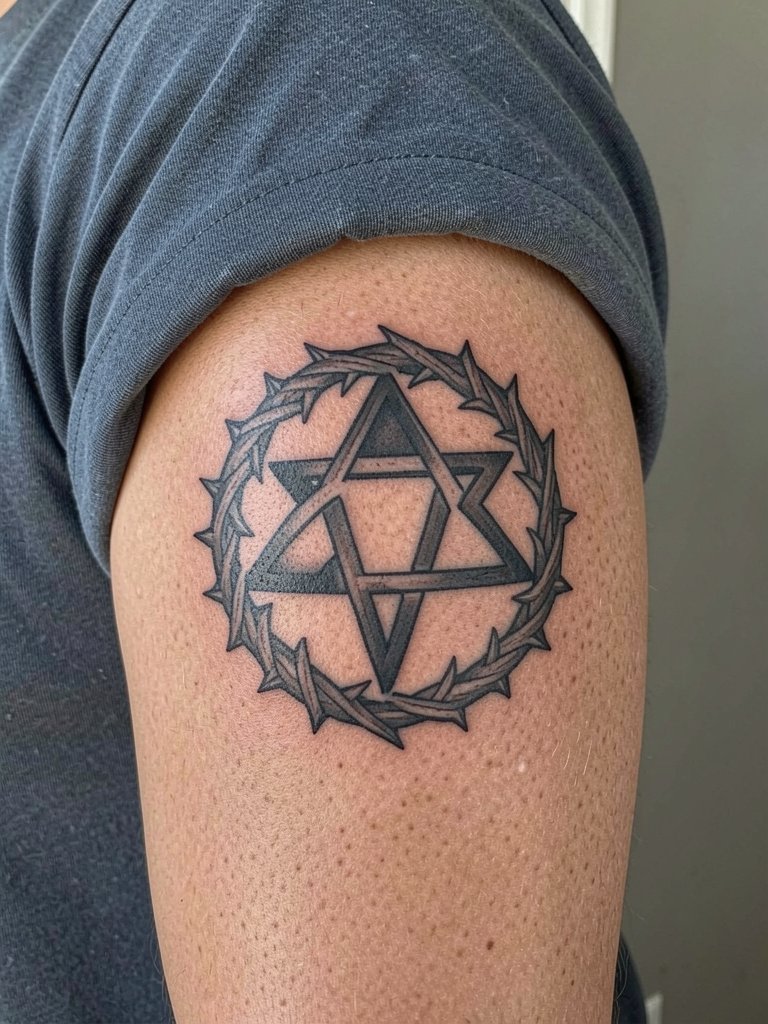
Symbolic occult imagery prompts debate in the community. One camp advises caution and restraint, arguing that displaying certain sigils without context can offend or mislead observers with ties to the symbol's origin. The other camp treats geometric sigils as purely aesthetic forms that can be adapted responsibly with clear respect for origin and intent. If you choose a sigil, name its origin and ask for simplified lines that read cleanly at a distance to avoid misinterpretation. Outer bicep work tolerates heavier lines and is forgiving for touch-ups.
15. Broken Moon and Chain on the Ankle
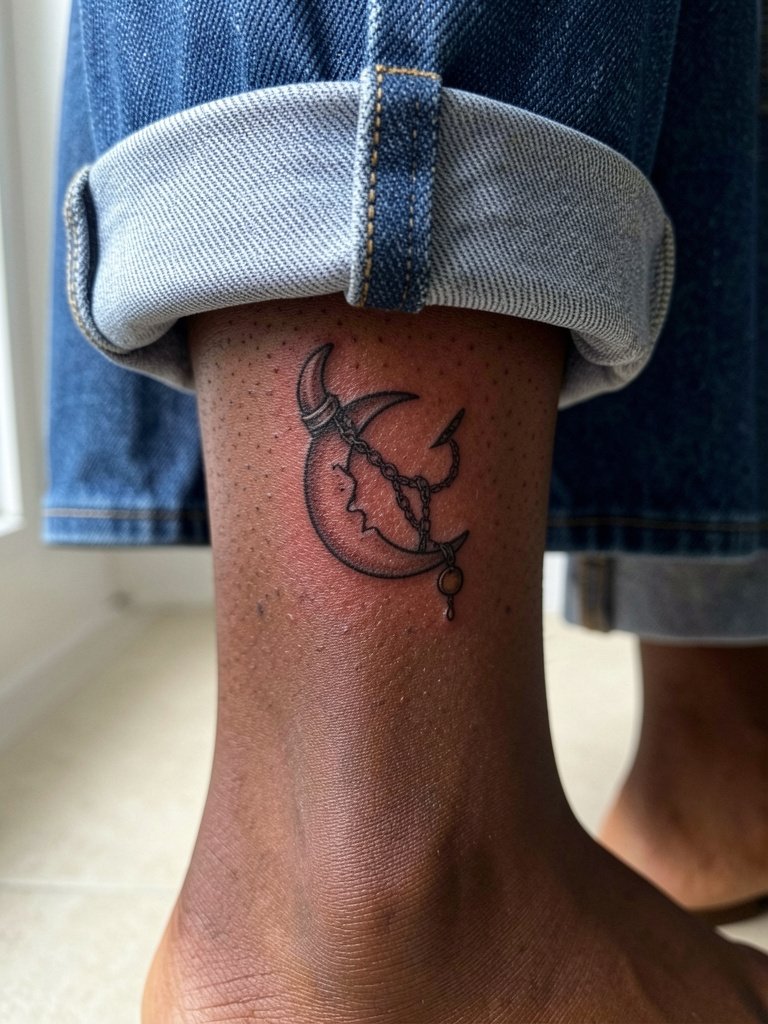
Ankle charm pieces are charming because they move with footwear, but the location is prone to rubbing. Keep chain links slightly bolder than an actual chain link and place the charm so it avoids the area that typically contacts socks. A common error is super-fine chainwork that becomes a gray smudge within a year. Anticipate a touch-up around the first winter after healing if you wear closed shoes a lot. For nights out try delicate ankle straps or rolled-jean styling to let the charm read.
Frequently Asked Questions
Q: How painful are dark gothic tattoos compared by placement and style?
A: Pain varies by placement and by how dense the artist packs the black. Expect ribs, sternum, and hands to register higher on most scales. Outer arm, calf, and shoulder blade are easier for longer sessions. Plan breaks in your booking if you schedule a dense blackwork piece on a sensitive zone.
Q: Which gothic designs need a touch-up most often and when?
A: High-friction skin like hands, fingers, and ankles usually ask for touch-ups in the first year. Fine single-needle scripts on ribs may require a touch-up in the six to twelve month window. Large back pieces hold saturation longer but still sometimes need minor dot-work cleanup at year one.
Q: Where can I find healed examples and portfolios without naming specific artists?
A: Search hashtags like #DarkGothicInk and #GothicBlackwork on social platforms and filter by location. Look for posts tagged with "healed" or "6monthhealed" to see real skin progression. Forums and community threads often link to shop portfolios that show multi-year healed shots across skin tones.
Q: Are there cultural considerations when choosing gothic motifs like sigils or religious imagery?
A: Yes. Some symbols have historical or sacred meanings that communities still observe. One approach is to research and adapt motifs respectfully or choose motifs inspired by the aesthetic rather than direct replications. Another approach is to discuss provenance with a knowledgeable artist who can suggest culturally appropriate alternatives.
Q: What should I wear to a session for chest, ribs, or inner thigh placements?
A: For chest and ribs a fitted cropped top or sports bra in its normal worn position gives easy access without constant readjusting. For inner thigh wear modest bike shorts or shorts that the artist can move within normal wear. Comfortable, easy-to-remove layers help during longer sessions.
