
Tiny couple tattoos can look effortless in photos and still read clean after years if you plan line weight, placement, and wardrobe from day one. Fine single-needle scripts will blur fast on fingertips unless you give them room to breathe. The sections below pair 27 small designs with placement notes, what to ask for in the consult, realistic healing expectations, and outfit tips that actually help the ink last.
1. Minimalist Double Heart on the Inner Wrist
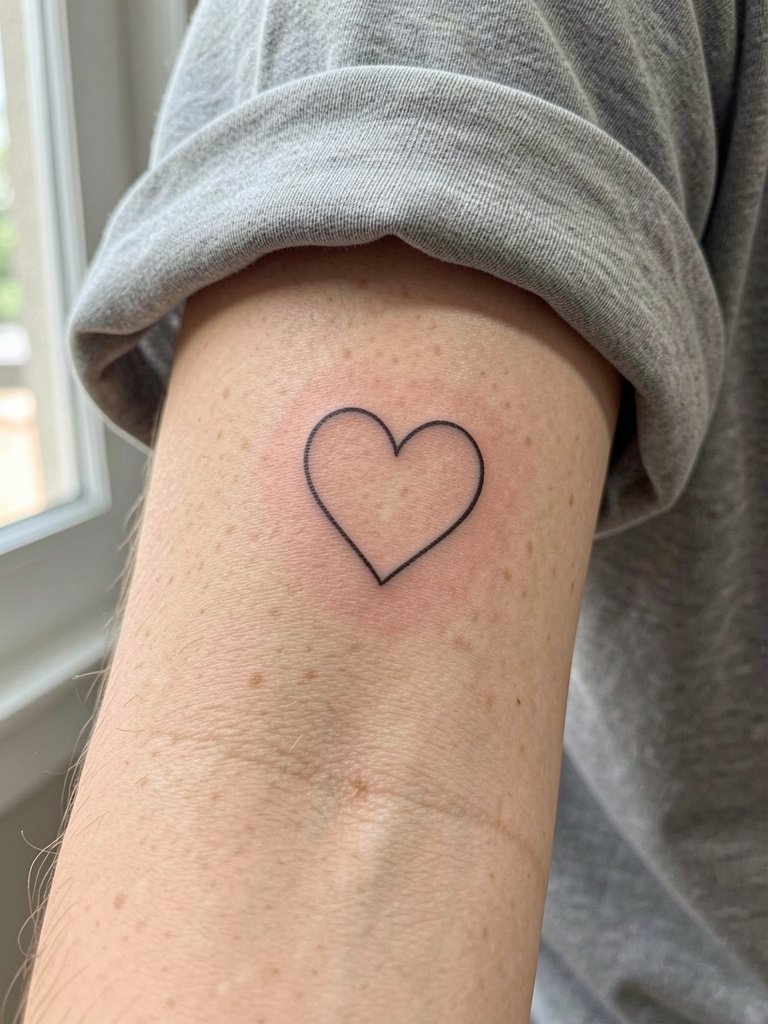
A tiny double heart works because the silhouette reads even after softening. For wrist placement pick a slightly heavier single-needle line so the two lobes do not merge over time. Bring two reference photos at different scales so the artist can show how the hearts read at one inch versus two inches. Expect a touch-up window around 9–14 months for most wrist work. For showing it off, pair with a rolled-up linen short sleeve shirt in cream or olive and a thin gold bracelet on the opposite wrist. For the session wear a short sleeve or sleeveless top so the artist has clear access.
2. Sun and Moon Icons on Inner Forearm
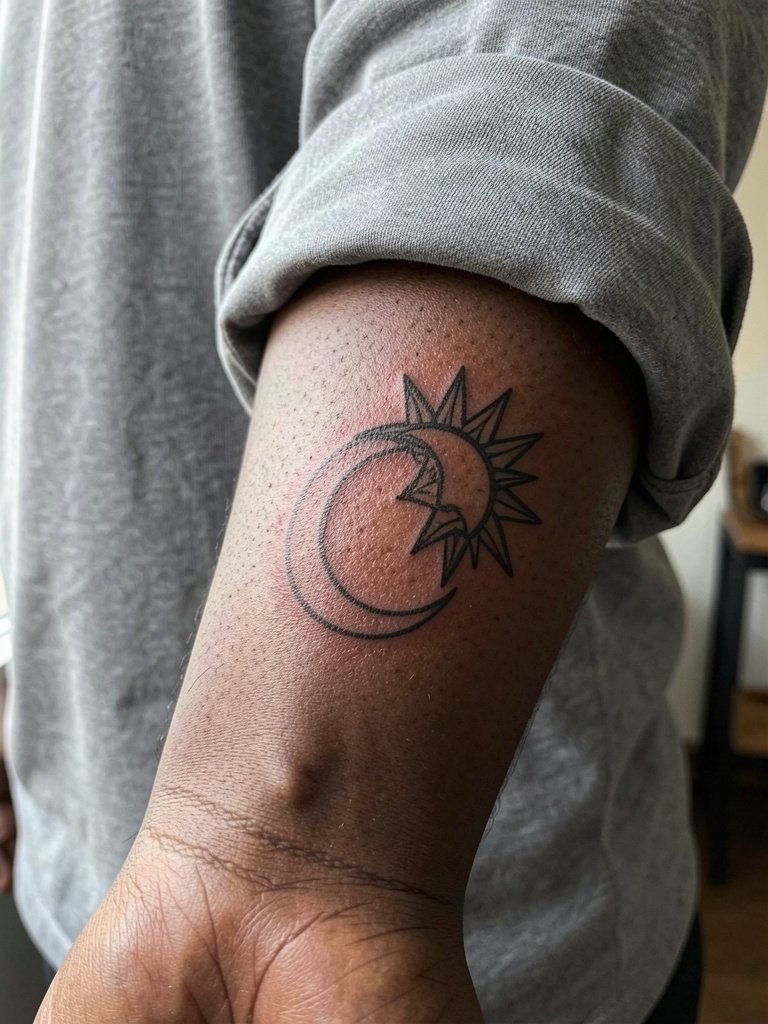
These paired icons read as a single idea when you stand side-by-side. Ask for 2–3 mm of clear negative space inside the designs to avoid early merging of interior lines. The inner forearm tolerates fine detail better than fingers, but avoid ultra-micro dot shading if you want clean contrast on darker skin tones. Healed at six months you should see crisp outlines, at two years expect light softening around junctions. Show the design with a three-quarter sleeve linen shirt rolled up so the artwork sits in the frame.
3. Lock and Key on the Ring Finger
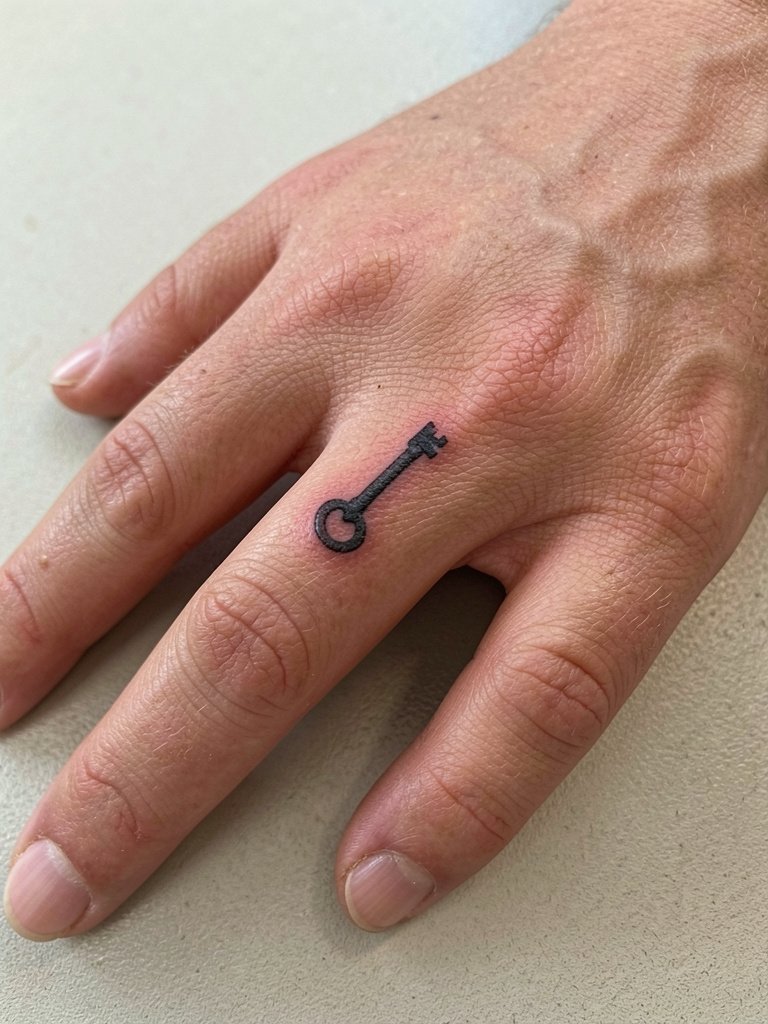
Fingers are a special case. One camp says fine line on fingers blurs within 12 to 18 months because constant movement, washing, and friction break down thin detail. The opposing camp says fine line can hold if the artist sets slightly heavier line weight and spaces the work more, and they will point to two-year healed examples to support that. My practical take is to plan for touch-ups and pick a lock and key that reads bold enough to survive daily wear. During the consult, show photos of your daily routine so the artist can adjust placement away from high-wear zones. For session wear remove all rings and wear short sleeves. Avoid necklaces and don’t plan heavy hand work for a few days while the ink settles.
4. Continuous Infinity Loop on Inner Wrist
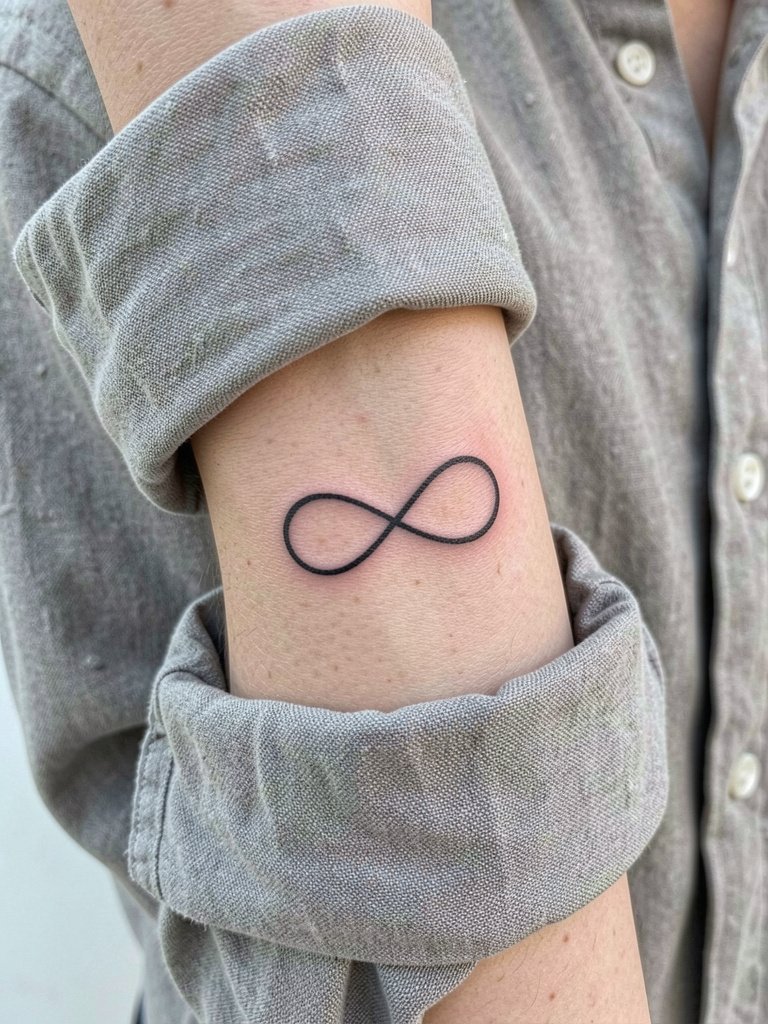
An infinity loop is forgiving because the continuous curve is easy to repeat across two people. The common mistake is asking for razor-thin lines and then expecting long-term clarity on a wrist. Request a single-needle line that is a touch thicker than your reference and confirm spacing around curves. At six months the loop should look steady, by three years thin loops can soften into a blur if placed over the wrist crease. Show it with a rolled cuff linen shirt that frames the wrist without rubbing the fresh ink.
5. Matching Puzzle Pieces on Shoulder
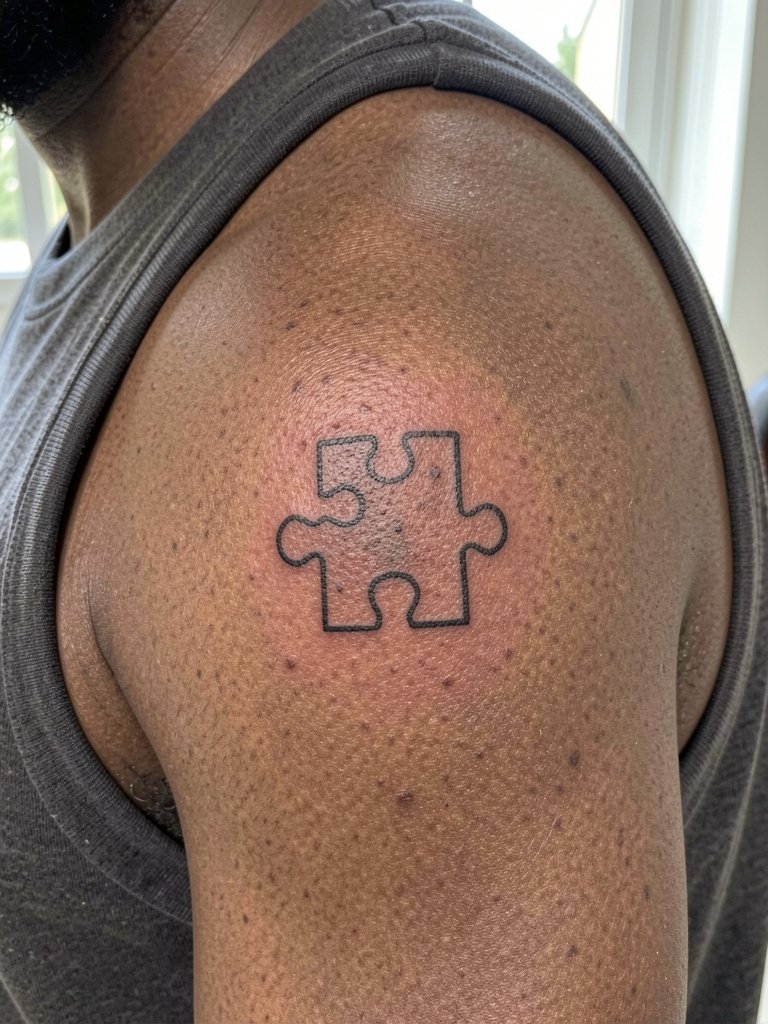
The shoulder gives enough room for clean geometry and it ages well if the lines have breathing room. A frequent error is shrinking puzzle pieces too small for the shoulder cap, which makes the interlock read like a blob after a year. Have the artist sketch the negative space as part of the stencil so you can see how the pieces fit while standing and wearing a tank top. For sessions wear a sleeveless top and bring a sleeveless tank top to change into. The shoulder handles short sessions of 25 to 40 minutes with moderate soreness.
6. Lowercase Initials Behind the Ear
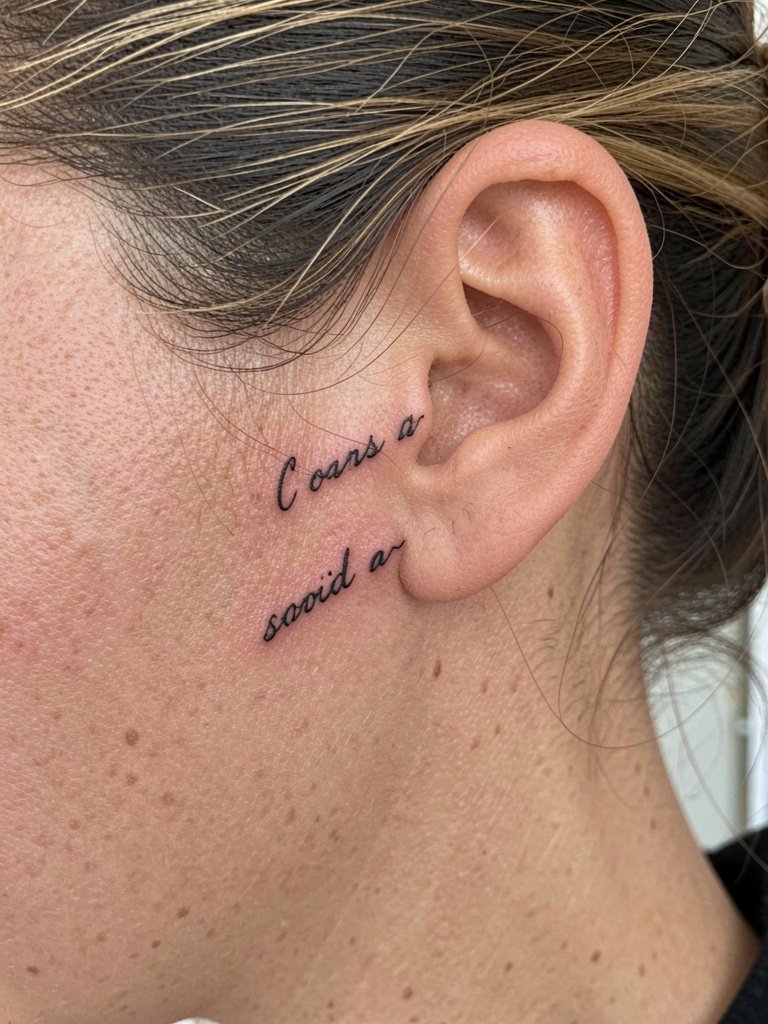
Lowercase initials sit discreetly and age predictably because the area is low friction. Bring a simple font sample and ask the artist to scale it so the counters do not close up after healing. Expect a light touch-up chance since the skin there can blur if letters are jammed tight. For the session pull your hair into a ponytail and avoid earrings on the tattoo side. A small note on behind-the-ear work, some studios request extra hygiene steps because of hair products near the site, so confirm shop requirements ahead of time.
Heal Smart
Those first-week needs differ for small wrist and behind-the-ear pieces compared with shoulder or ankle work, so a few niche items make the first five days easier.
- Ever Aftercare balm search. Thin consistency that many users prefer for fine-line work, helpful for inner wrist and behind-the-ear pieces where heavy ointments can feel greasy.
- Hikari tattoo balm search. Noted by users for keeping line contrast on darker skin tones, which helps tiny initials and micro icons stay visible.
- TattooVAPE natural balm search. Fragrance-free option that suits sensitive skin after small sessions.
- Luna Balm thin healing balm search. Indie balm with a light texture that works for micro tattoos and keeps scabbing minimal.
- Hustle Butter Original search. Widely used alternative to thicker ointments for the initial healing window, popular for first-week comfort on fine line pieces.
7. Complementary Arrows on Inner Forearm
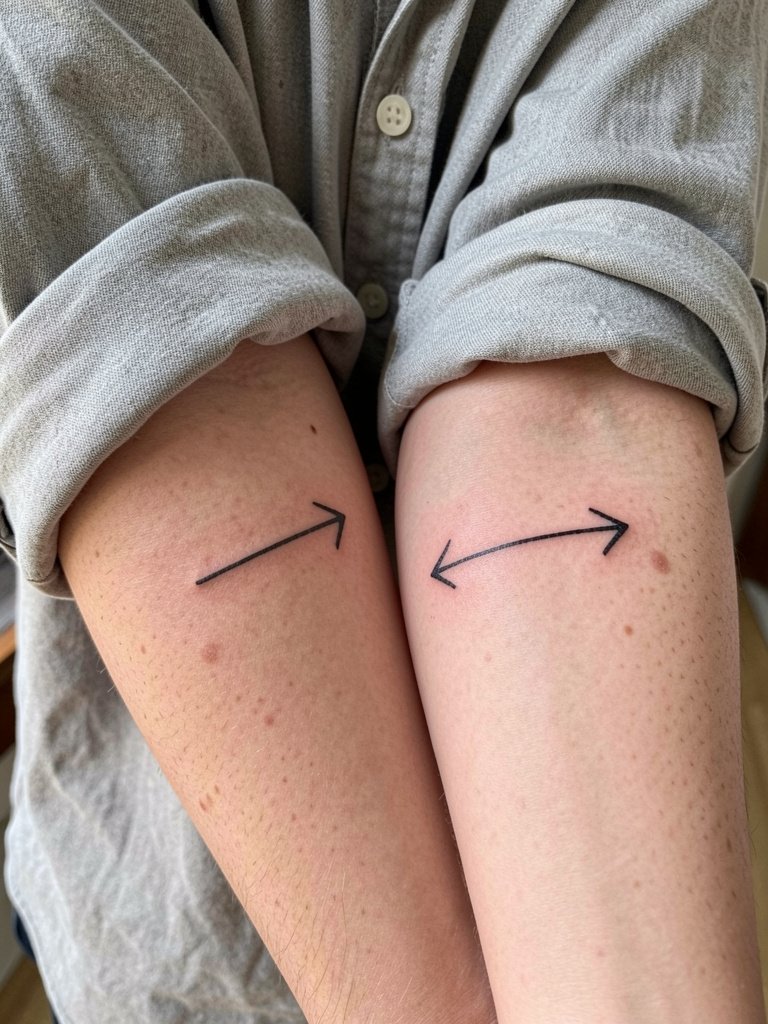
Arrows read well because they suggest direction and alignment. Avoid micro-feathering and ask for an uninterrupted shaft with a modest head so the tips stay defined. If you want to show it off, wear a loose button-down shirt with sleeves rolled just above the ink. A 20 to 30 minute session is typical and the forearm handles touch-ups better than fingers.
8. GPS Coordinates on the Inner Wrist
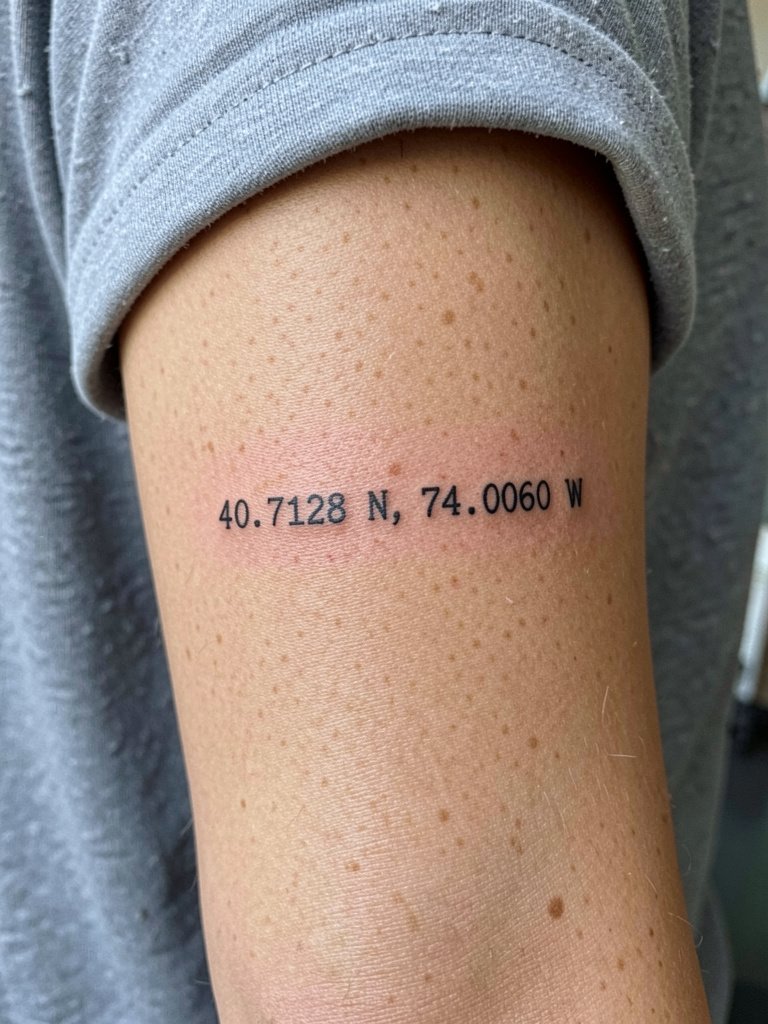
Coordinates are truly private symbolism because only you know the place they mark. Insist on monospace or simple sans serif and confirm exact spacing to avoid optical blurring. For darker skin tones pick slightly thicker numerals so the digits photograph well. Expect a short 15 to 25 minute session for a single line of numbers. For showing it off, neutral rolled cuffs highlight the typography and keep attention on the wrist.
9. Tiny Dinosaur Behind the Ear
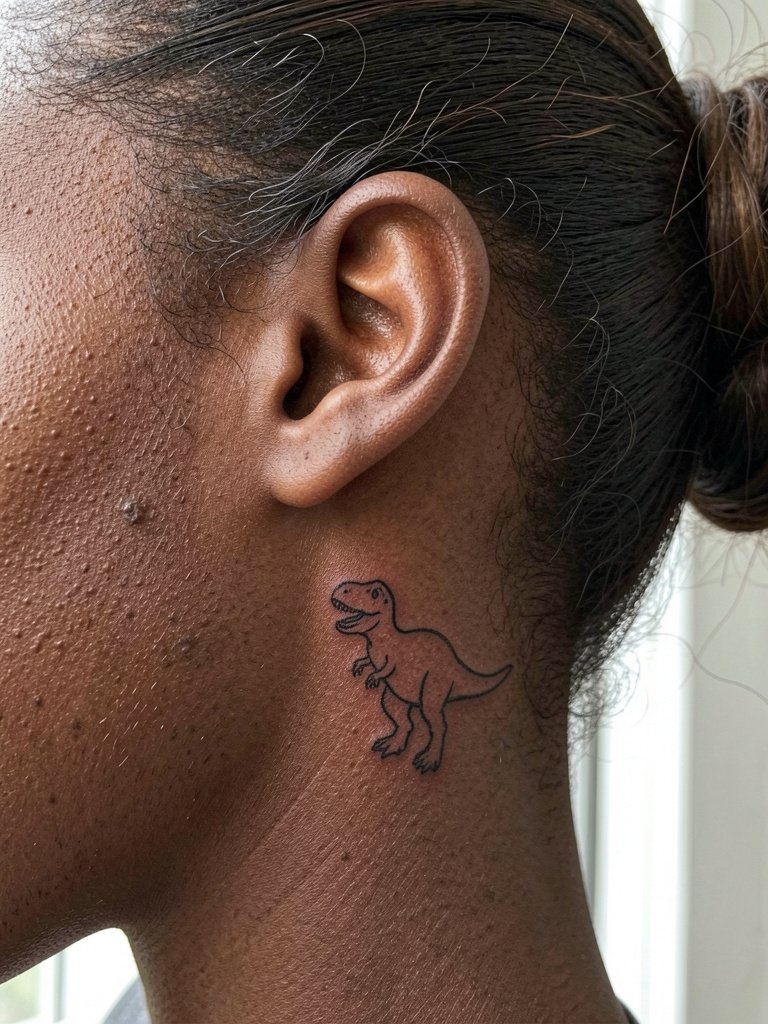
A small playful creature reads as a personal wink when tucked behind the ear. Keep the silhouette simple with one continuous outline so it keeps identity after softening. Because the area is close to hair and products, plan clothing and hair that keeps oils off the site for the first week. For the session, pull hair back with a hair clip so the artist has clear access. Tiny pieces here take 15 to 20 minutes and may need a small touch-up depending on placement.
10. Five-Point Star on the Ankle
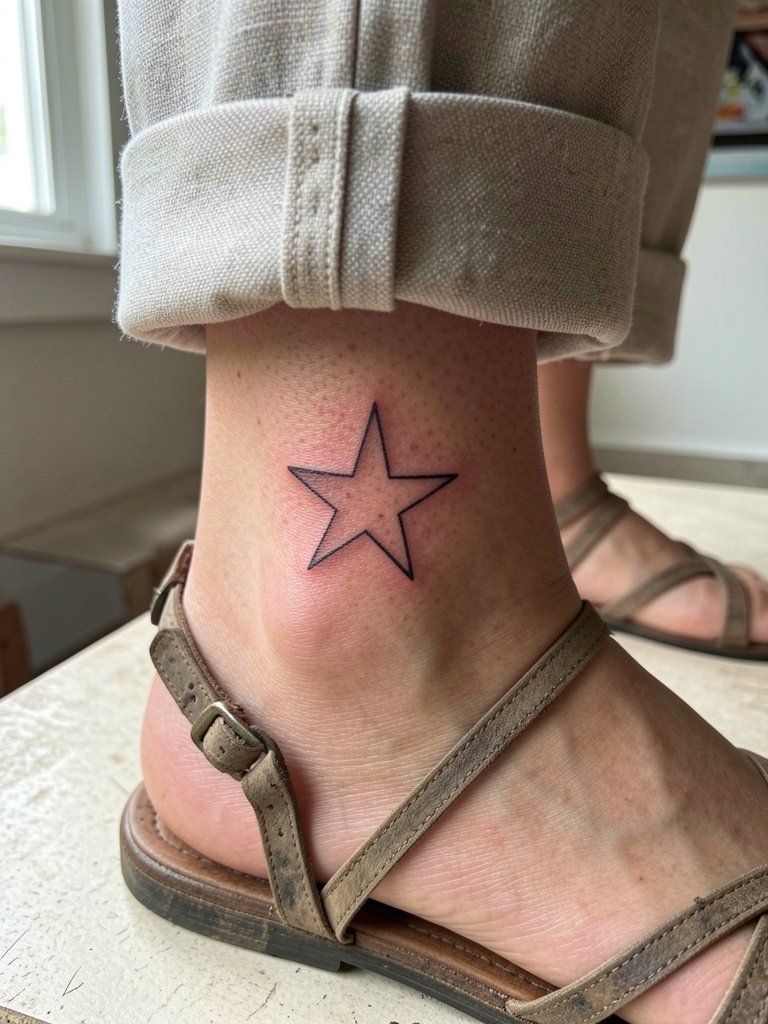
Ankle tattoos photograph well when they are simple and high-contrast. Avoid tiny interior linework because socks and shoes add friction during healing. Pick shoes that keep the area exposed for the first week, like strappy sandals, and roll pant cuffs during the session. Healing is usually straightforward but keep in mind that tight boots or high socks will cause rubbing that can fade line clarity.
11. Roman Numeral Date on Inner Forearm
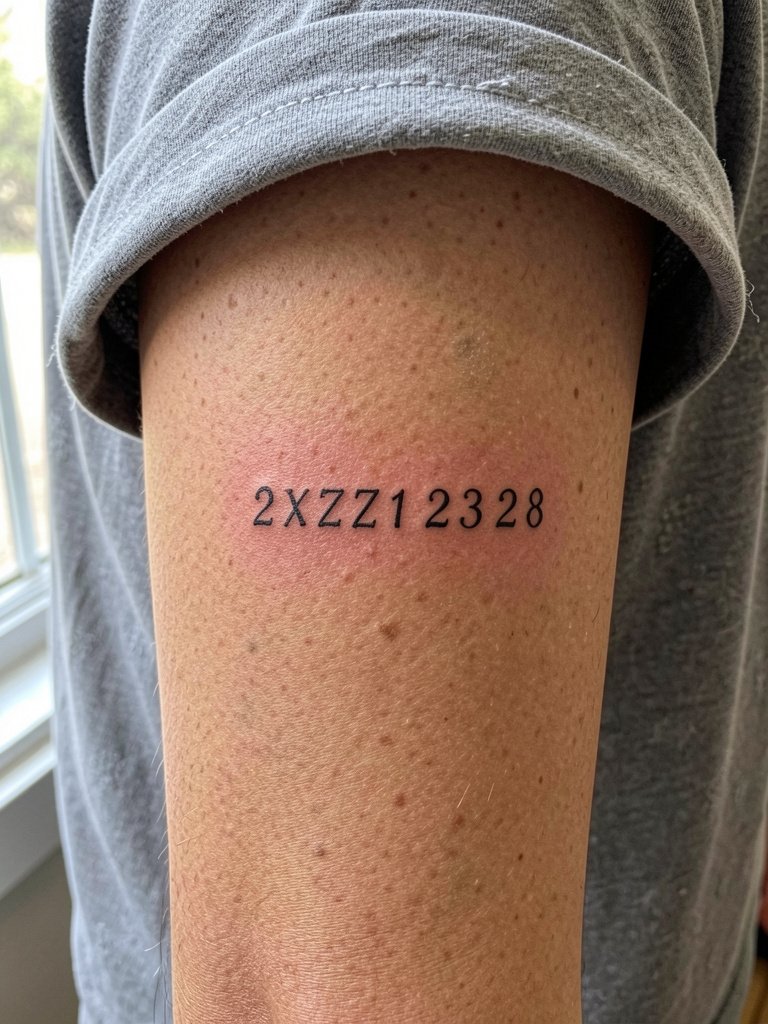
Roman numerals look restrained but require precise spacing to stay legible at small scale. Ask the artist to stencil the numerals at the size you want and to show you how each character reads at arm length. Clean vertical spacing prevents stacked lines from blurring together at the waistline. To stage it, wear a v-neck top or short sleeves that let the forearm sit naturally in photos.
12. Heart Plus Arrow Crossing on Inner Wrist
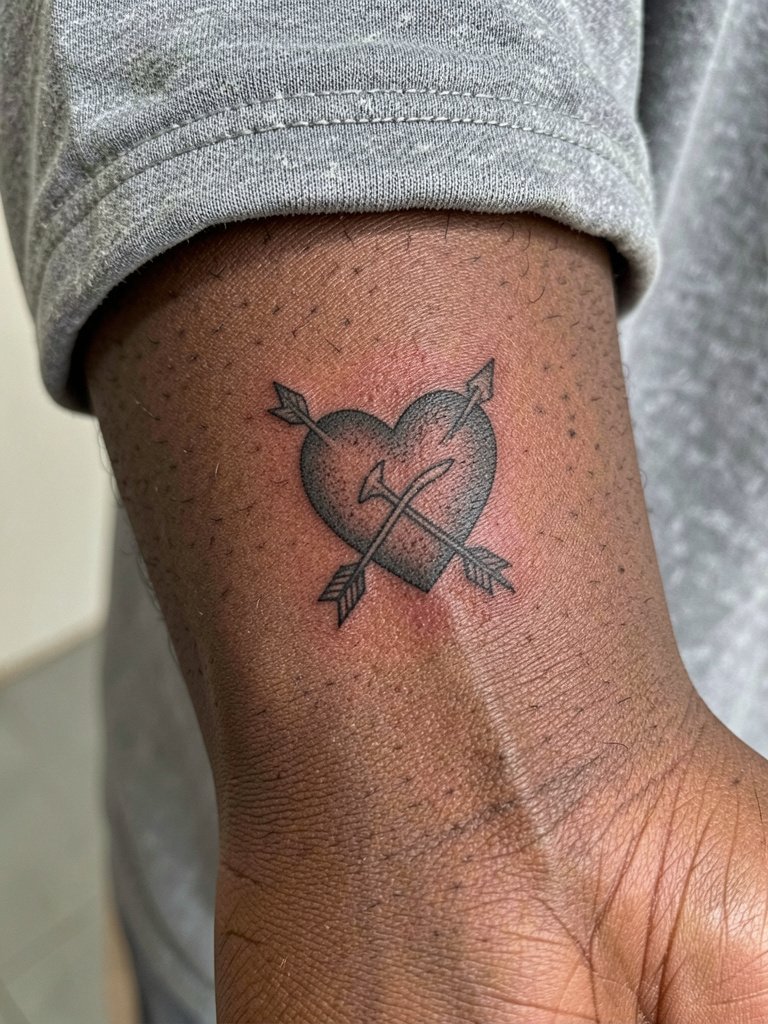
Combining a heart with an arrow gives clear visual interest while staying small. At tiny scale avoid internal shading that can bleed; a thin crossing arrow and an open heart outline hold up best. If you have darker skin, request slightly thicker arrow shafts so the contrast reads in photos. Show it with neutral rolled cuffs and a thin bracelet on the opposite wrist to balance the frame. Session time is brief and the healing timeline mirrors other wrist work.
13. Micro Geometric Triangle on Shoulder
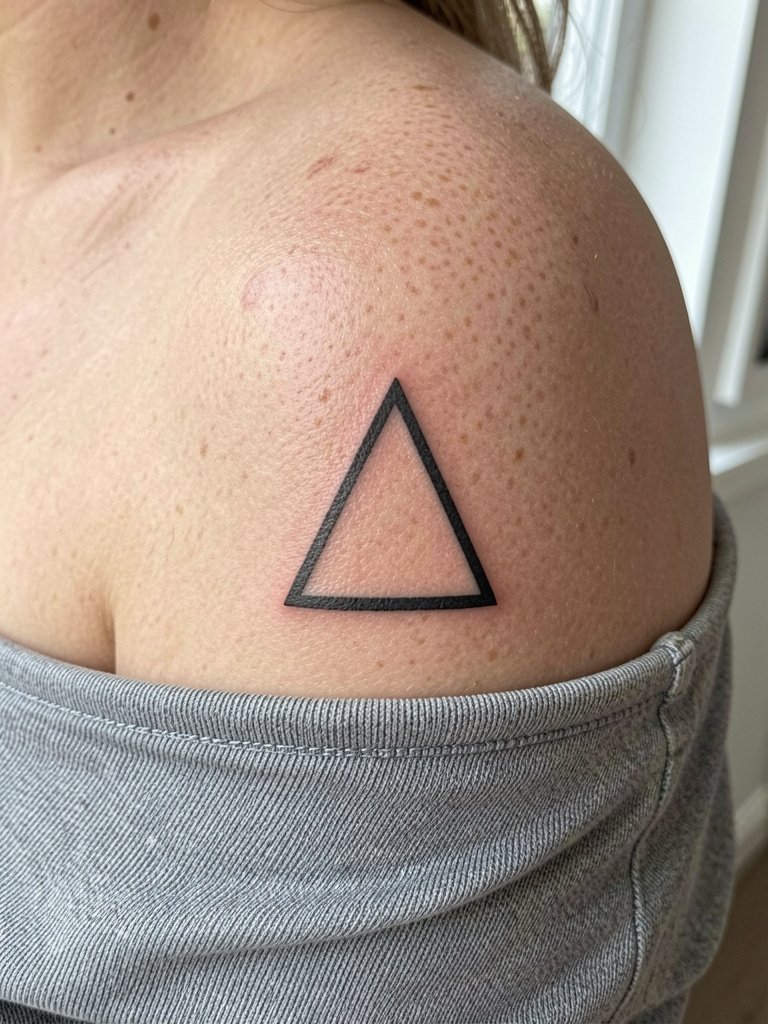
Triangles are modern and very forgiving on the shoulder because of size options. The key mistake is going so small that the corners soften. Ask the artist to show the stencil in position while you stand and try clothing that frames the shoulder. For evenings out, an off-shoulder dress or tank top keeps the shape visible and crisp. Shoulder sessions are short and the area tolerates a small touch-up if needed.
14. Tiny Leaf on the Ankle
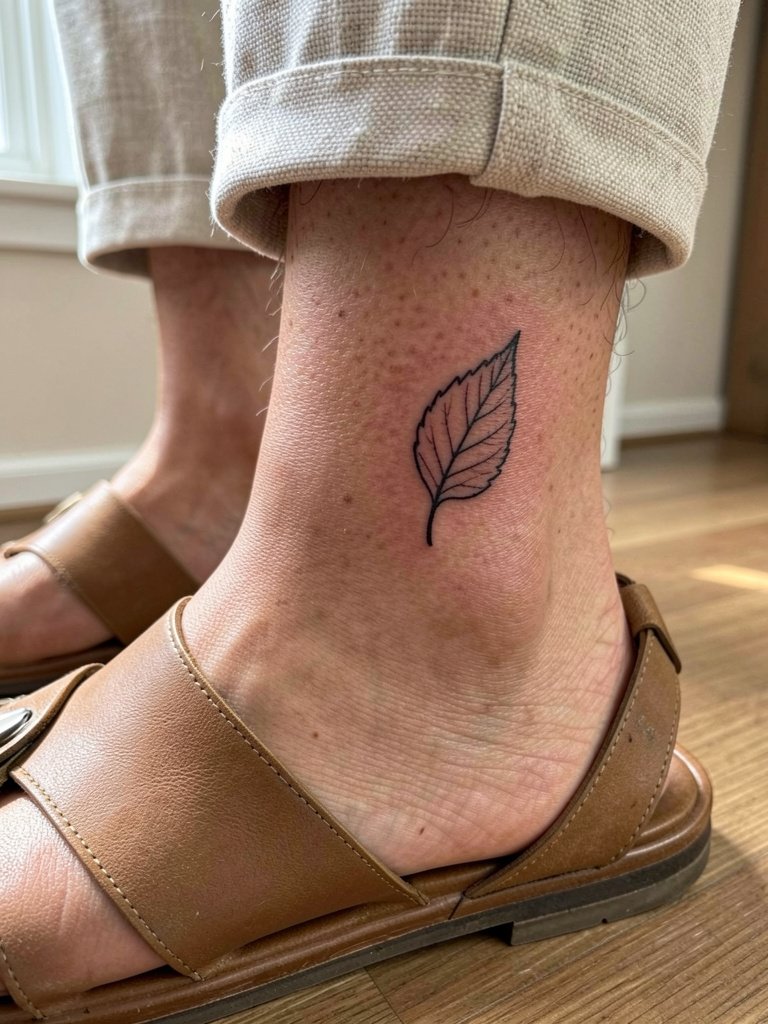
A nature motif like a leaf is easy to pair and tends to age gracefully if the vein lines are kept minimal. Avoid micro stippling that can blur on the ankle. For summer show-off, wear cropped linen pants and sandals so the leaf reads in photos. Ankle areas face occasional rubbing, so plan low-friction footwear in the first week.
15. Lowercase "love" Script on Inner Upper Arm
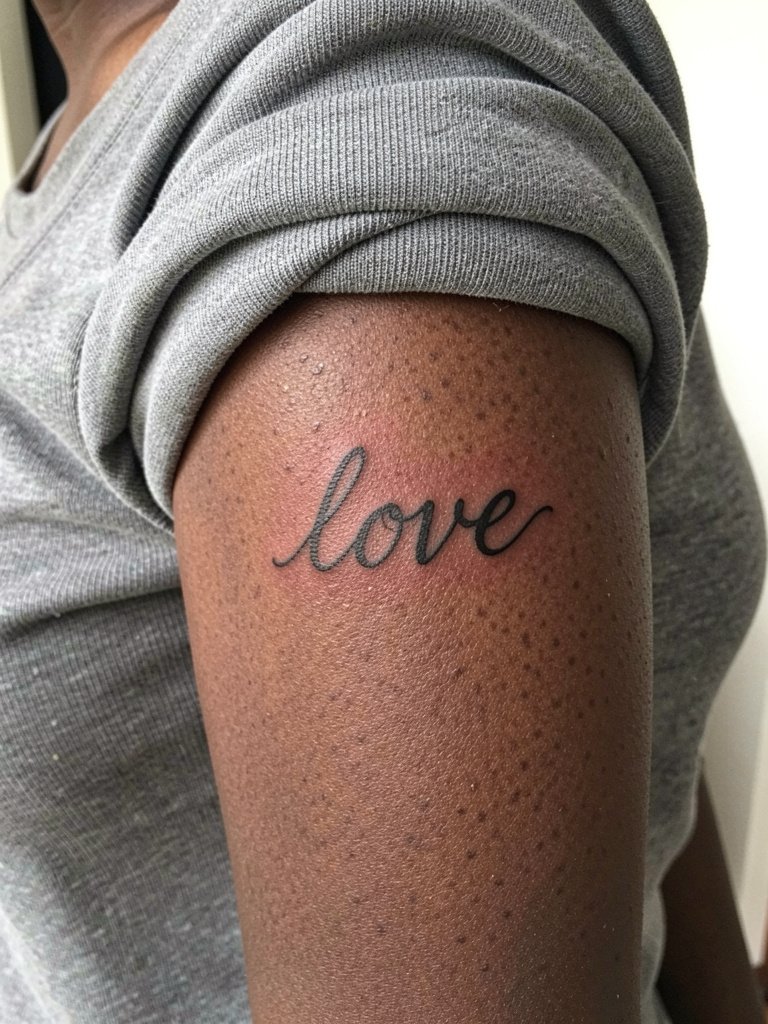
Lowercase script tends to age more predictably than heavy uppercase because counters are open and letters have room. The common error is choosing a font with tiny hairlines. Bring a legible sample and ask the artist to thicken the downstrokes slightly for the inner arm surface. For show-off looks try rolled sleeves or an off-shoulder top that frames the inner arm. Inner arm sessions are moderate on pain and usually finish in 15 to 25 minutes.
16. Tiny Compass on the Rib Side Torso
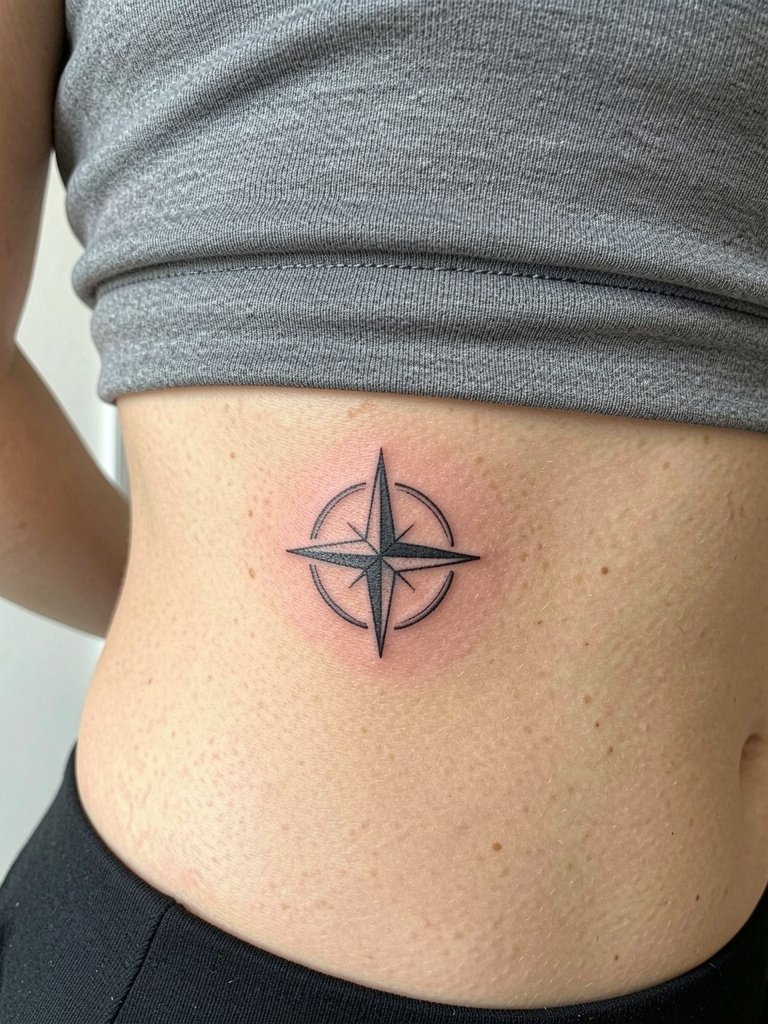
Rib pieces carry a pain and longevity conversation. One camp recommends numbing cream for ribs because it helps first-timers complete the session without bailing. The other camp worries numbing creams change skin texture and can make ink sit unevenly, and some artists will refuse to work if numbing is used. If you choose ribs, plan a short appointment window and discuss pain management specifics like timing for topical numbing and scheduled breaks. For the session bring a two-piece outfit such as a crop top and loose pants to allow easy access without disrobing.
17. Tiny Wave Curve on Inner Ankle
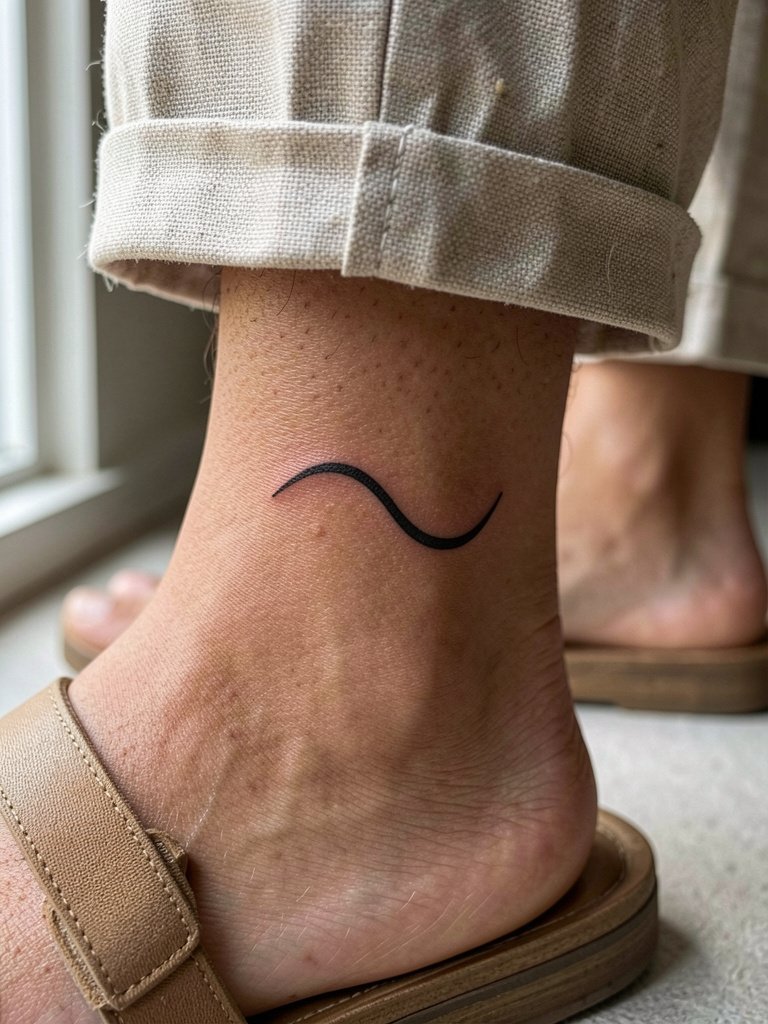
A single wave curve is whimsical without being trendy and it photographs nicely at the ankle. Keep the line continuous and avoid tiny filler marks that will blur against socks and shoes. Plan footwear that does not rub the site for the first few days, and during the session wear pants that can roll up easily. Short ankle tattoos usually take under 20 minutes and heal cleanly when protected from rubbing.
18. Tiny Anchor on the Lateral Hip
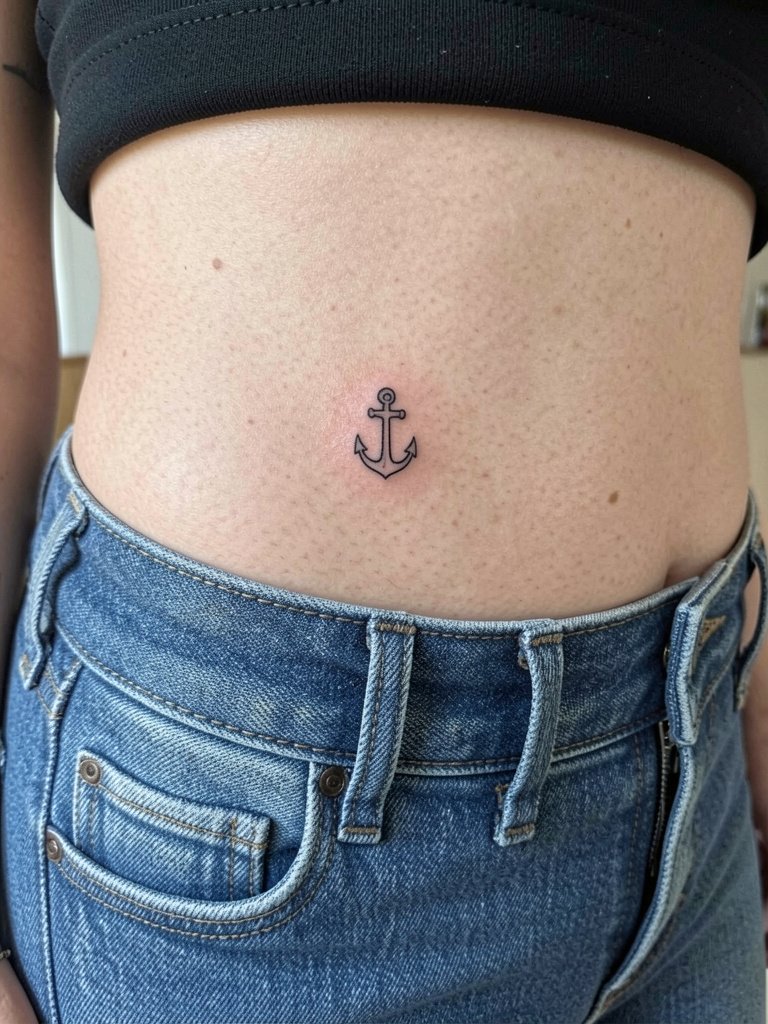
Hip tattoos are discreet and pair nicely with swimwear or crop tops. The main mistake is placing the anchor too close to the waistband, which causes extra friction and faster fading. For the consult ask for placement sketches while wearing the clothing you plan to show it with so you know how it sits above the waistline. For session wear a two-piece outfit so you can adjust without fumbling, and plan for a quick touch-up if weight fluctuates.
19. Tiny Paw Print on the Ankle or Wrist
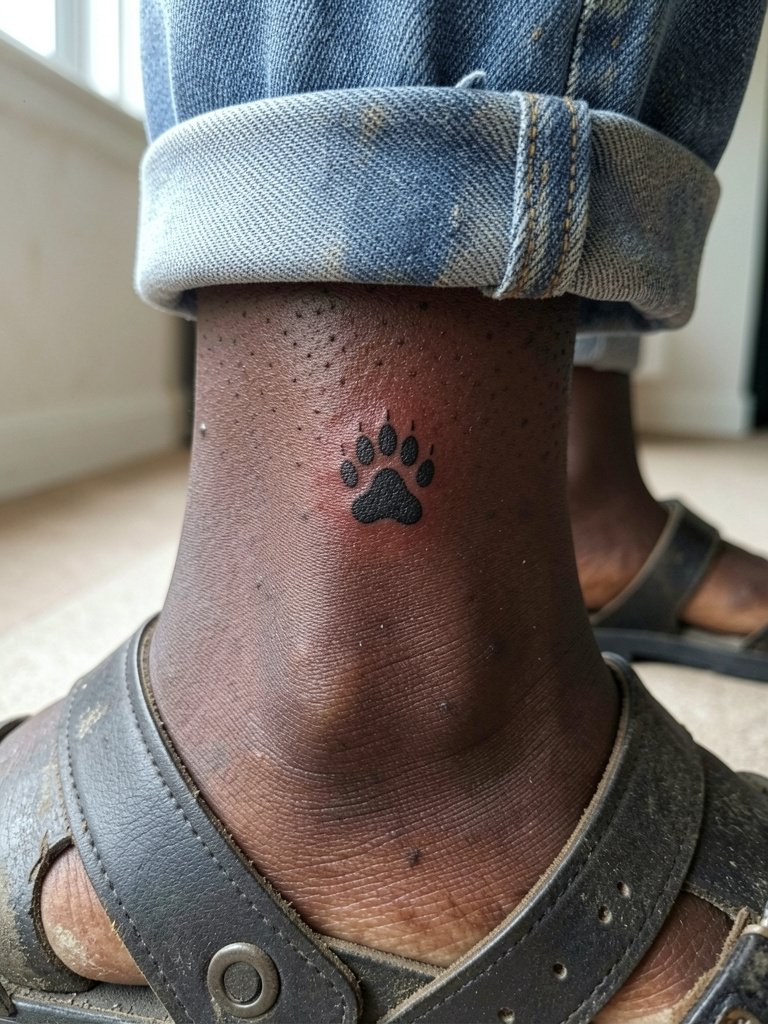
Paw prints are small statements that work well as matching micro tattoos. Ask the artist to simplify the pad shapes so they stay identifiable after healing. If placed on the ankle pick shoes that avoid rubbing for the first week. A quick session and a single thin touch-up usually keeps the pad crisp on all skin tones.
20. Tiny Anchor on the Collarbone
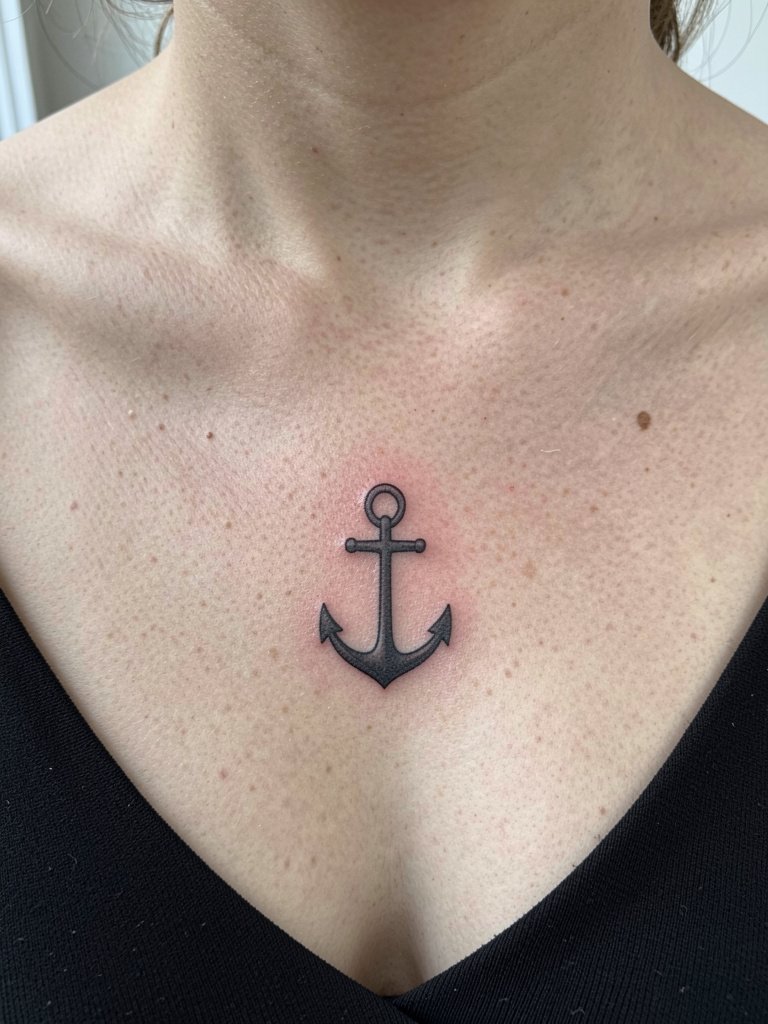
Collarbone placements are visible and photograph great with minimalist motifs. The common error is placing the motif too close to the clavicle line where natural movement and sun exposure speed fading. For the appointment wear a strapless or V-neck top that exposes the area without tugging. During consultation test the exact spot while standing so the anchor aligns with your neckline.
21. Tiny Phrase or Word Below the Collarbone
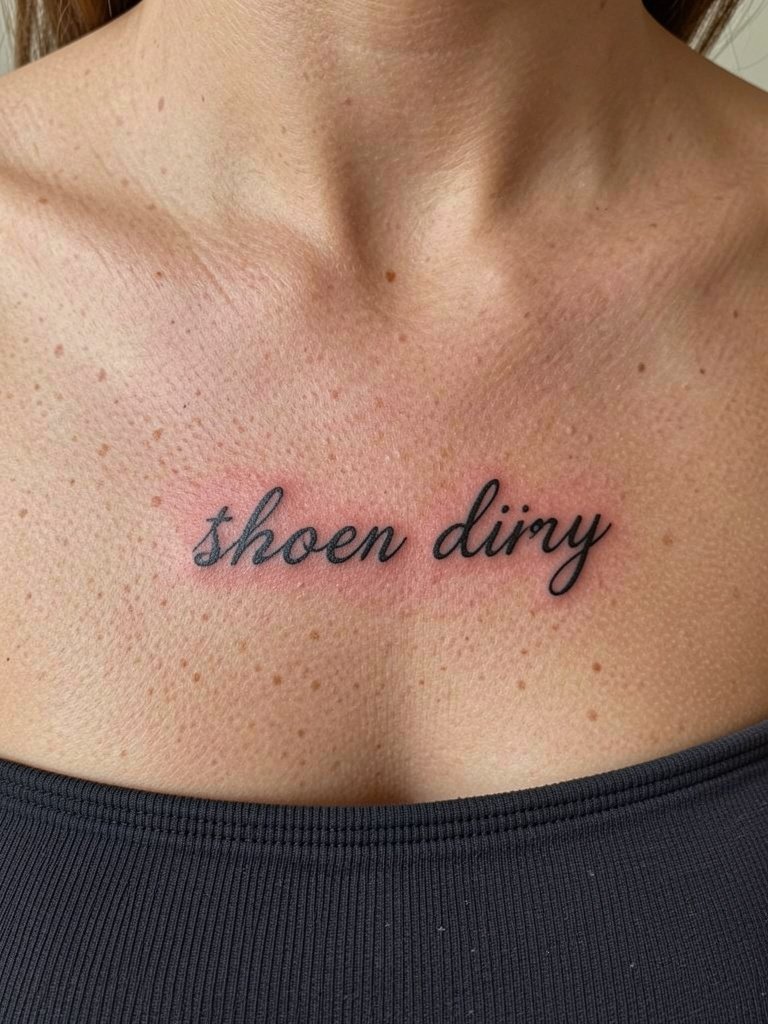
A single-word script under the clavicle is an intimate but visible choice. Choose letterforms with open counters and ask the artist to place letters slightly apart to avoid crowding. For special occasions pair the piece with a strapless top or off-shoulder dress so the area frames the text. Expect minimal soreness and plan sunscreen after the healed period to preserve contrast.
22. Tiny Stippling Star on the Sternum
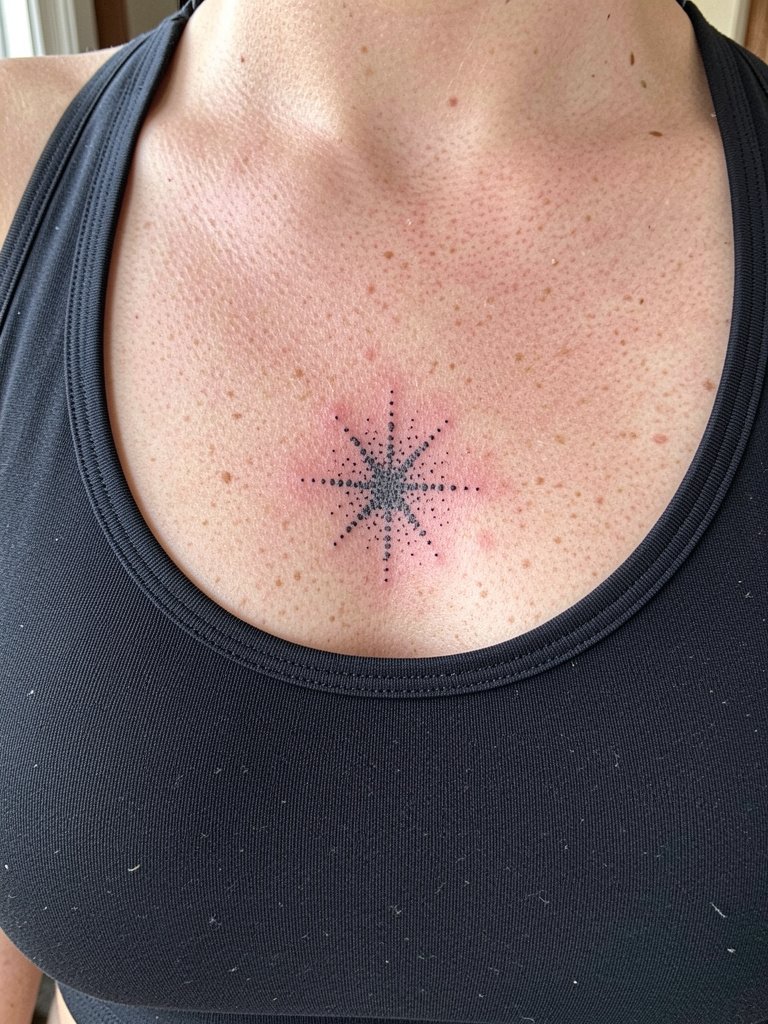
Sternum placements require careful sizing so the dots do not merge with movement. The biggest mistake is asking for dense micro-stippling in a small area. If you choose stippling, ask for a low-density pattern and plan for a longer initial healing period where moisture control is key. Wear a fitted sports bra or bandeau to keep fabric from rubbing the fresh ink.
23. Tiny Compass Point on the Back of the Neck
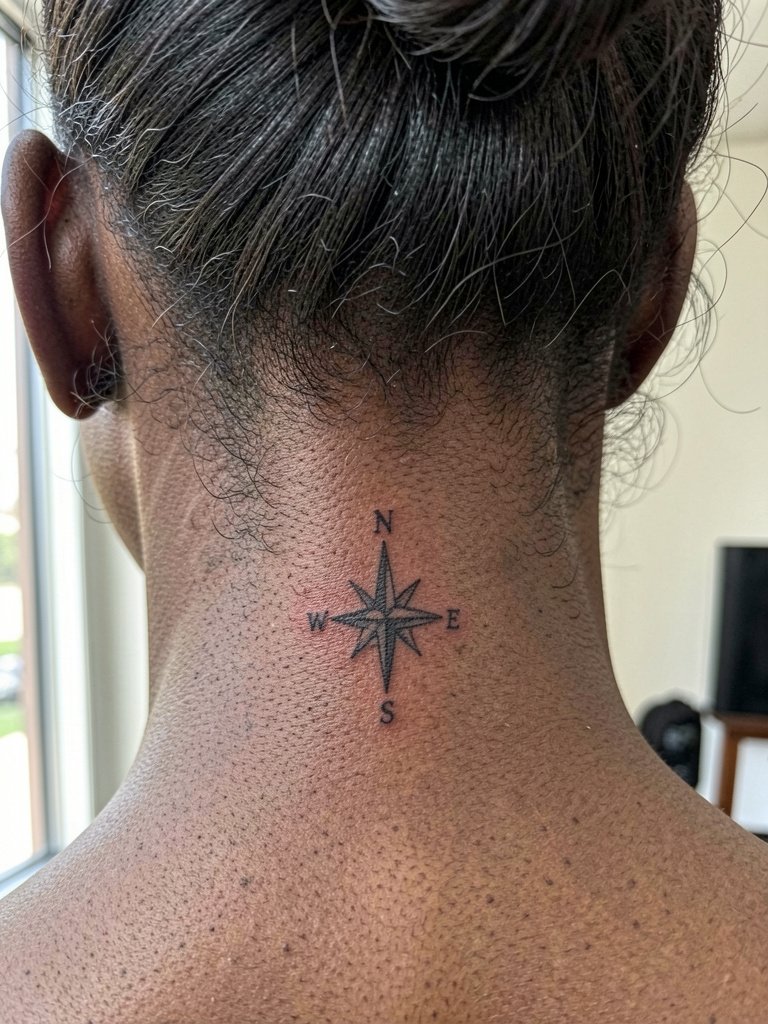
Nape tattoos look intentional when hair is up. Keep the motif simple so it reads when the hair falls or is tied. The artist may suggest a slightly heavier outline than your reference to maintain contrast on darker tones. For the session pull hair away with a ponytail holder silk and avoid necklaces during healing.
24. Tiny Semicolon on the Finger or Wrist
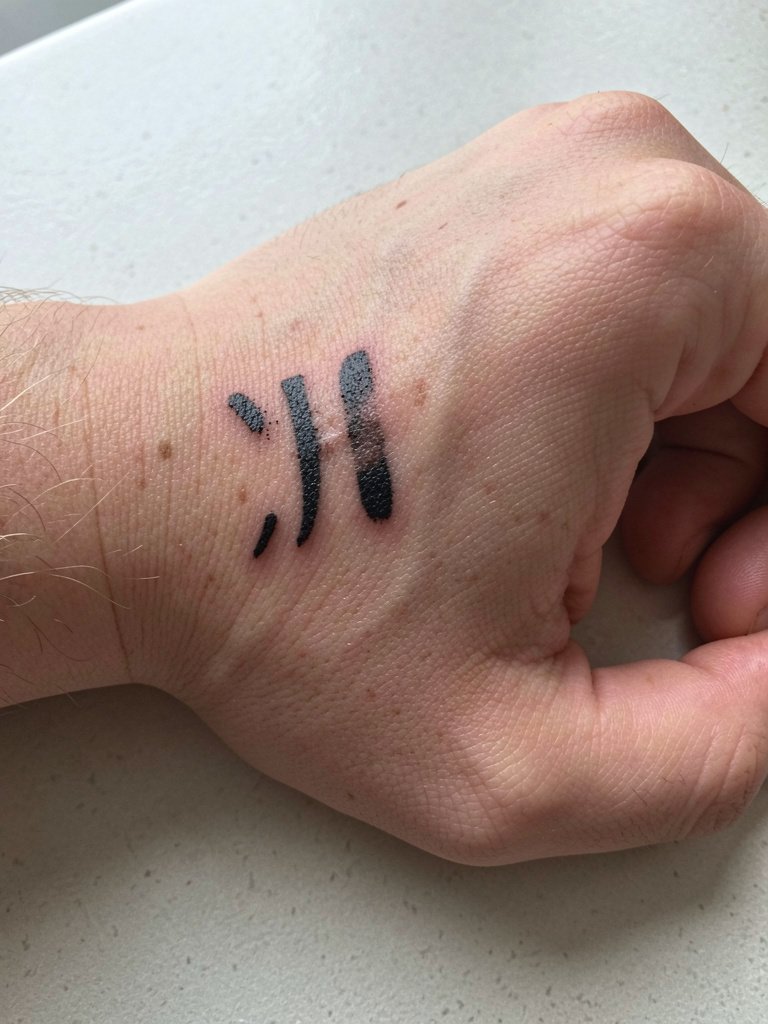
Semicolons are compact and readable, but fingers are high-friction. If you pick a finger placement, accept that touch-ups are likely. On the wrist you can keep the mark micro and expect better longevity. For a quick session wear short sleeves and remove rings. The semicolon takes minimal healing time but plan for occasional touch-ups on hands.
25. Tiny Arrow Knot Behind the Arm
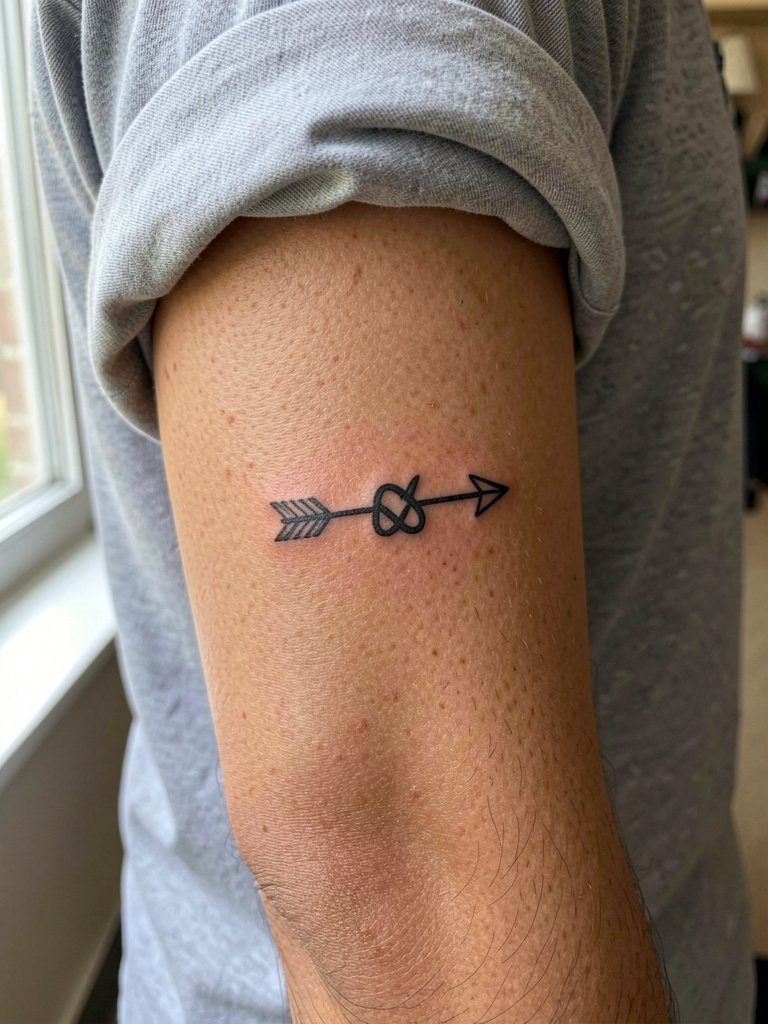
Inner-arm motifs are pleasantly private and show up when you want them to. A frequent misstep is over-detailing a tiny interlace so the knot reads as a smudge after healing. Ask the artist to simplify intersections and to check how the knot sits while your arm rests naturally against your torso. For session wear a rolled sleeve shirt so the artist can access the area without tugging.
26. Tiny Comet or Shooting Star on the Collarbone
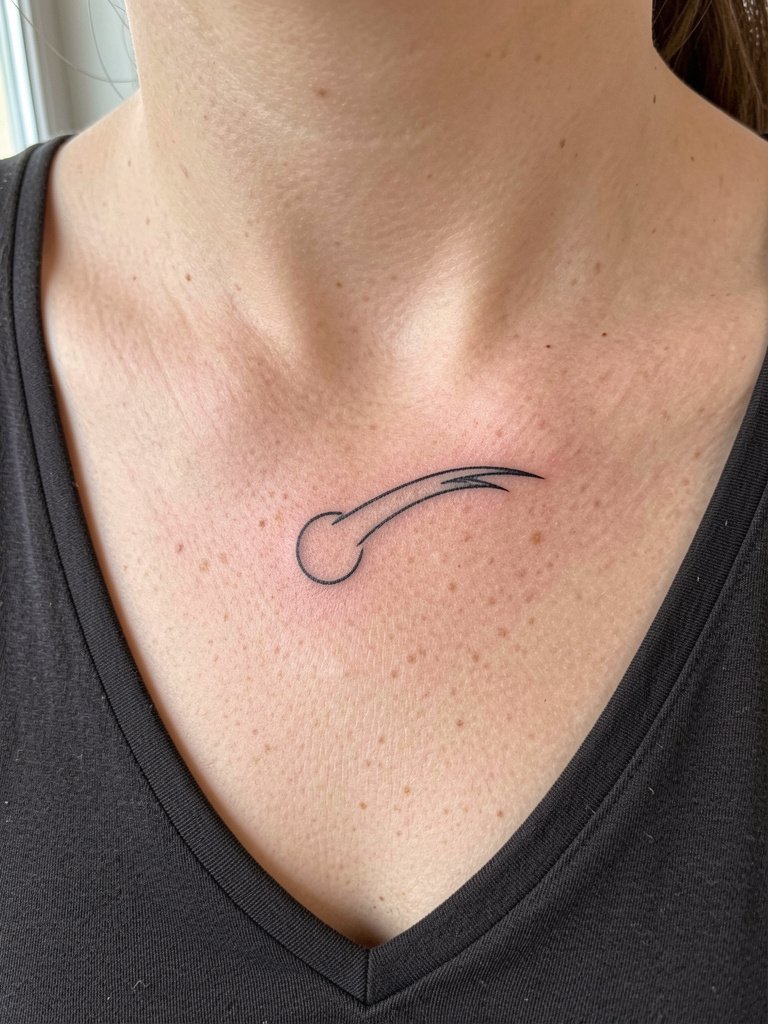
A tiny comet is dynamic and photographs well when placed just below the collarbone. Keep the tail sparse and linear rather than full shading so it ages cleanly. Try a V-neck or scoop neckline to show the piece without competing jewelry. The session is short and aftercare is straightforward provided you avoid sun until fully healed.
27. Matching Dot Pair on the Nape or Behind the Ear
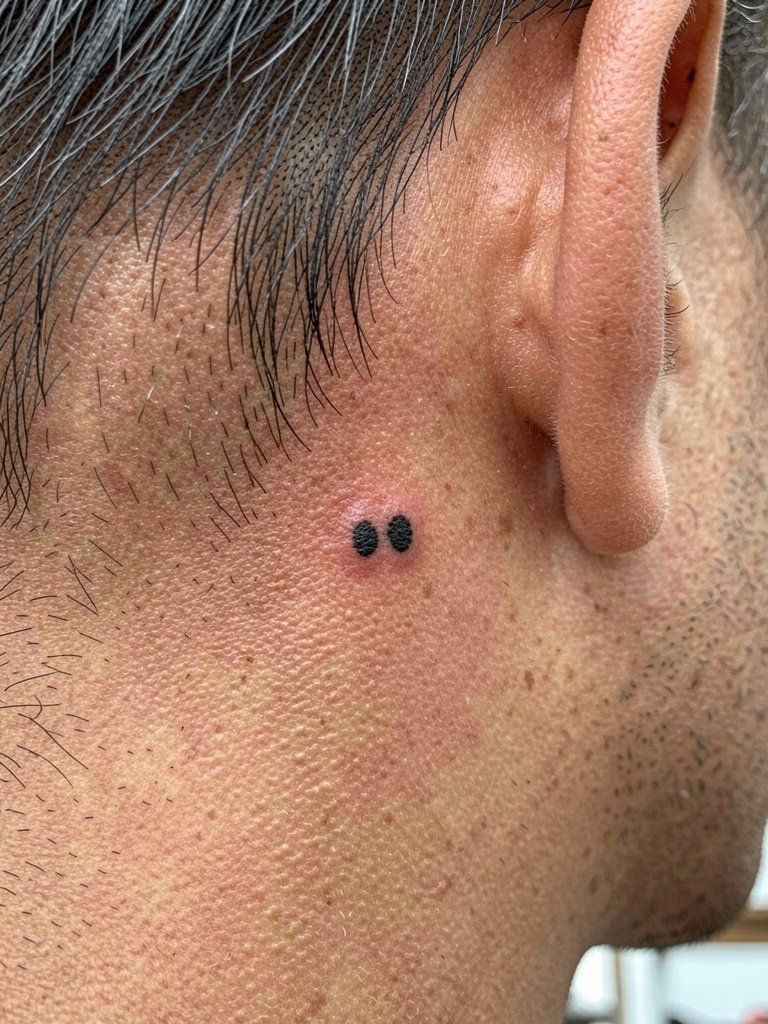
Two tiny dots can act as a quiet pair signal. The important part is spacing; dots placed too close can blur into a single mark. Request 3 to 4 millimeters between dots and confirm placement with hair up so you know how they look in real life. Session is very brief and the nape choice keeps the pairing private unless you show it.
Frequently Asked Questions
Q: How much should I budget for a small couple tattoo?
A: For small single-needle pieces most reputable shops in the United States start in a range of about $120 to $200 for a small 1 to 3 centimeter design. That range covers shop minimums and an experienced artist who can place and space tiny work correctly. Plan for a touch-up budget as well, especially for fingers or high-friction sites.
Q: Which placements need bolder lines to last, and why?
A: Fingers and ring areas need slightly bolder lines because washing, movement, and skin regeneration there break down thin filaments faster. Wrists see similar wear if they sit over the crease. The solution is to agree on a line weight that is a hair heavier than the Pinterest sample so the piece still reads after a year.
Q: How do I find local artists who show healed small work without relying on a single name?
A: Search hashtags like #coupletattoo, #smallcoupletattoo, and #finelinetattoo with your city name on Instagram and TikTok, and filter by location. Tattoodo and Booksy let you search for keywords and often surface healed portfolio examples. Reddit communities such as r/tattoos and r/tattooadvice can point to recent healed shots and local recommendations in your region.
Q: I have darker skin. Which small couple designs photograph best?
A: High-contrast black ink with slightly thicker linework photographs more reliably on medium and dark tones, so favor simple silhouettes or slightly increased stroke weight over ultra-fine filigree. Avoid tiny internal textures that depend on subtle shading. If you want a script, pick open lettering and test a stencil in natural light before inking.
Q: What should I wear to the appointment for different placements?
A: Match clothing to access needs. For inner forearm or wrist pick a short sleeve or loose button-down. For shoulder or collarbone select a sleeveless or strapless top. For rib or hip work, choose a two-piece outfit like a crop top and loose pants so you can expose the area without feeling exposed. Bringing a spare garment that is loose and clean helps during the healing window.
Q: Do small couple tattoos on ribs need numbing cream or not?
A: Opinions split. One group finds topical numbing cream helpful for rib sessions because it reduces pain and helps first-timers sit through the appointment. The other group cautions that numbing can change skin texture temporarily and increase the chance of uneven ink uptake, and some artists will not work on numbed skin. If you are nervous, ask about the exact numbing timeline and the artist’s protocol so you know how it will affect both comfort and ink settling.
Q: How soon will a small wrist or finger tattoo need a touch-up?
A: Expect a first touch-up window between 9 and 14 months for high-friction sites like fingers and sometimes wrists. Other placements such as collarbone, shoulder, and inner arm often do not need touch-ups until later, if at all. Plan your budget around one small touch-up for fingers and ring locations.
