
A lot of people assume a tiny compass will age like a charm. In practice the smallest pieces on the forearm either need clever spacing or heavier line weight to keep their pointers readable after two years. Below I break down 27 compass treatments that actually work on forearm skin, how they heal, what to wear to the session, and which versions to avoid so your next ink still reads clean on day 700.
1. Minimalist Fine Line Compass on Inner Forearm
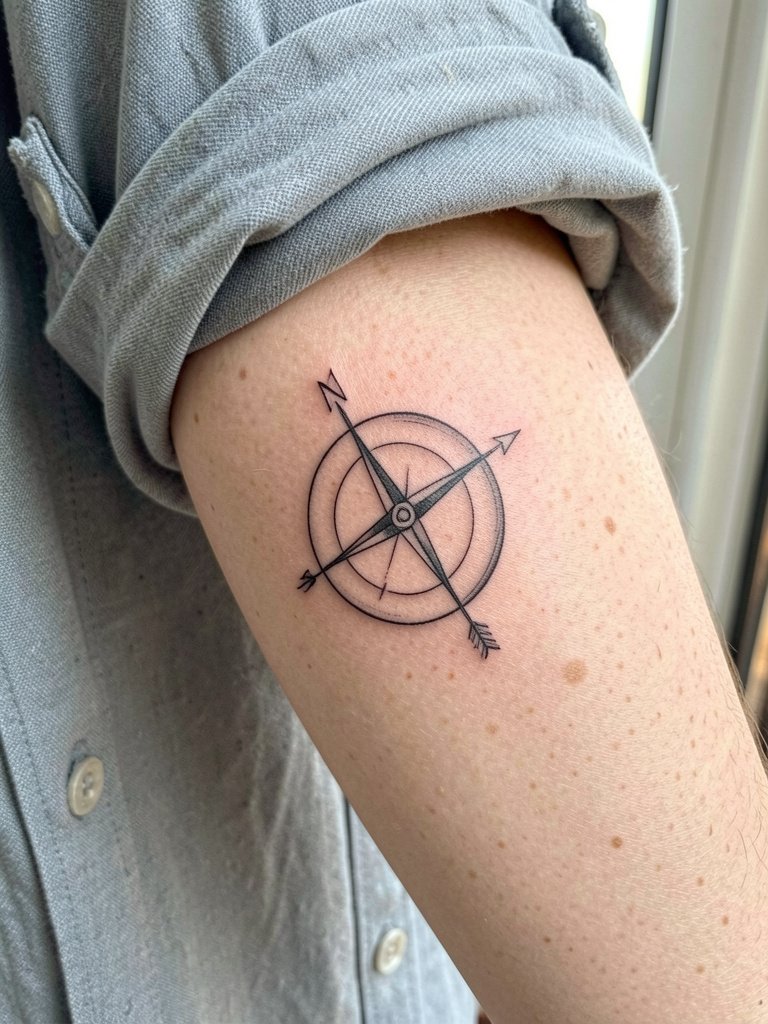
A tiny single-needle compass on the inner forearm reads crisp at first and needs careful planning to stay that way. One camp says fine line compasses on the forearm blur within two to three years because the skin stretches and daily movement softens needle channels. The other camp argues fine line can hold for five years or more if the artist uses slightly heavier line weight and wider spacing between details. For longevity, increase the diameter to around two inches, keep the circle clear of tiny degree marks, and specify a single-needle with a touch thicker line weight than the reference. Pain level is low to moderate and a one-session piece takes about 30 to 60 minutes. For showing it off, roll the sleeve and pair with a linen button down shirt to keep the arm visible.
2. Geometric Modern Compass on Outer Forearm
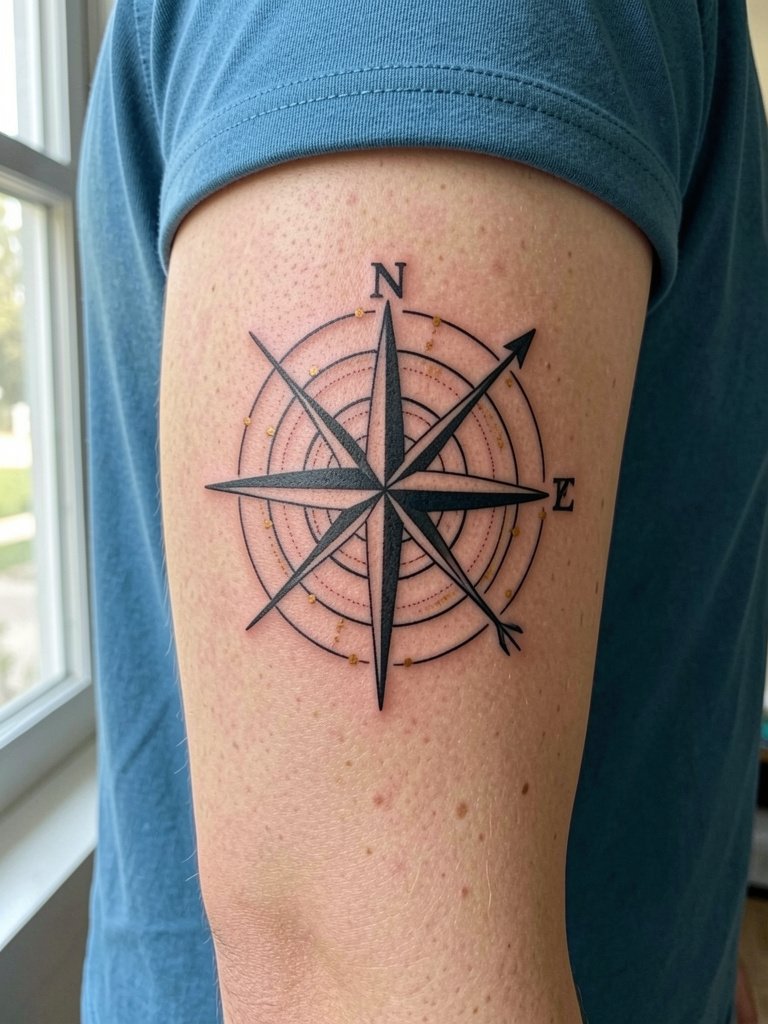
Choose geometric when you want precision and crisp angles that read from a distance. This style benefits from slightly larger scale, around two to three inches, so the parallel lines do not blink together as they age. In the consult bring a print of the exact line spacing and ask for a stencil preview scaled to three inches. Expect a one-session sit of 45 to 90 minutes and low-to-moderate pain on the outer forearm. A common mistake is copying tiny gallery comps and shrinking them; the fix is spacing and a bold outer ring. For outfits, a solid color t-shirt or vintage denim jacket complements the clean geometry.
3. Vintage Nautical Compass, Outer Forearm
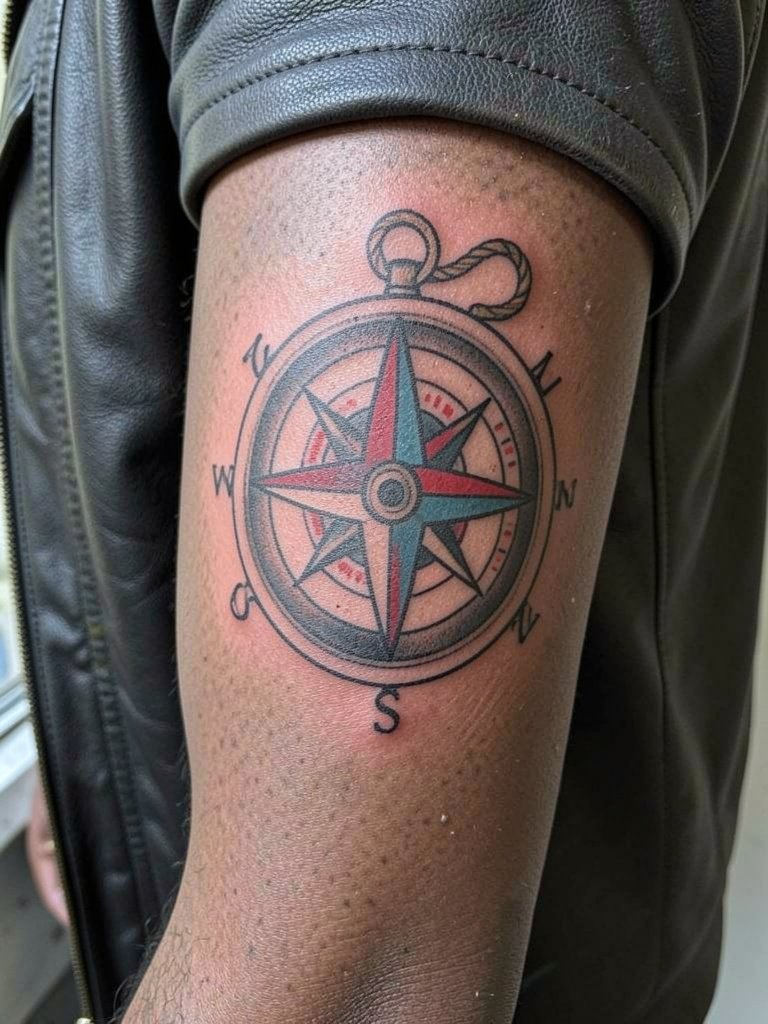
If you want a compass that ages into character, American Traditional bold work is a safe bet. Thick outlines and saturated fills keep their shape through touch-ups and years of movement. Expect one session between 60 and 120 minutes depending on color blocks, and plan a touch-up at year one if you live in a sunny climate. The usual mistake is trying to miniaturize the flash palette; keep the compass at least three inches to preserve color fields. Wear a vintage denim jacket to frame the artwork when you want it visible.
4. Whip-Shaded Map Compass, Inner Forearm
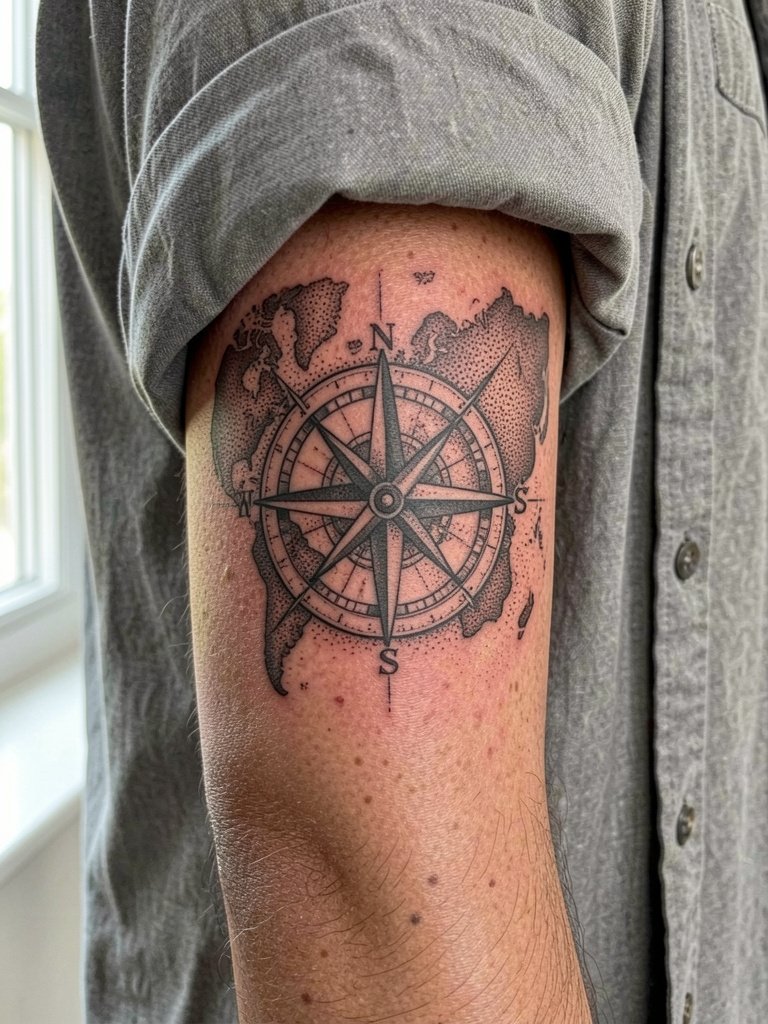
This approach solves the common problem where solid grey map fills age into a bruise-like patch. One camp defends solid grey map backgrounds as a smooth modern look if the artist controls depth. The opposing camp points out solid grey often blurs and looks muddy; they recommend stippling or whip shading for texture that ages like parchment. If you want a map under the compass, insist on stippling for landmasses and ask the artist to simulate healed contrast on the stencil. Expect one to two sessions, moderate pain on the inner forearm, and a likely touch-up window at six to twelve months for dot density. For the session wear a loose button-down so the artist can roll the sleeve cleanly.
5. Ornamental Mandala Compass, Outer Forearm
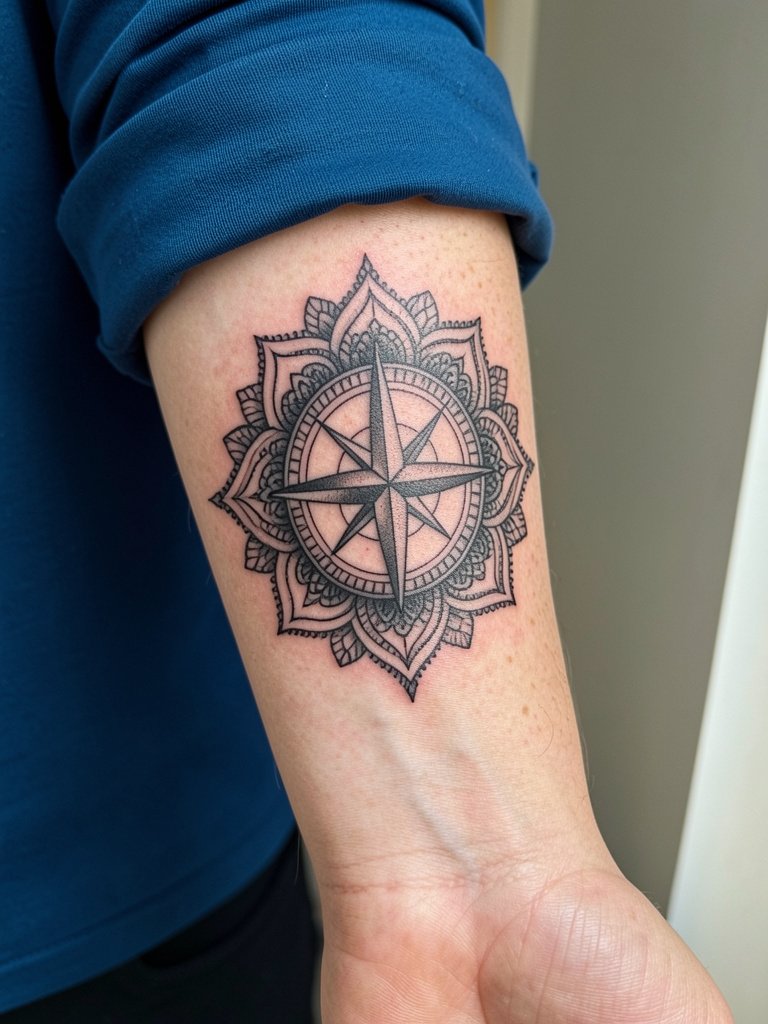
A mandala-combined compass fills space and balances symmetry with directional symbolism. It works well when scaled to four to six inches so the repeating motifs do not crowd. Tell the artist to increase spacing between petals and to avoid ultra-fine filigree at the outer edge. Sessions are typically 60 to 150 minutes and the outer forearm tolerates color or blackwork well. A common mistake is over-detailing near the wrist which ages poorly. For evening looks, pair this with a black short-sleeve tee or cuffed sleeves to show the radial design.
6. Micro-Compass with Negative Space, Inner Wrist
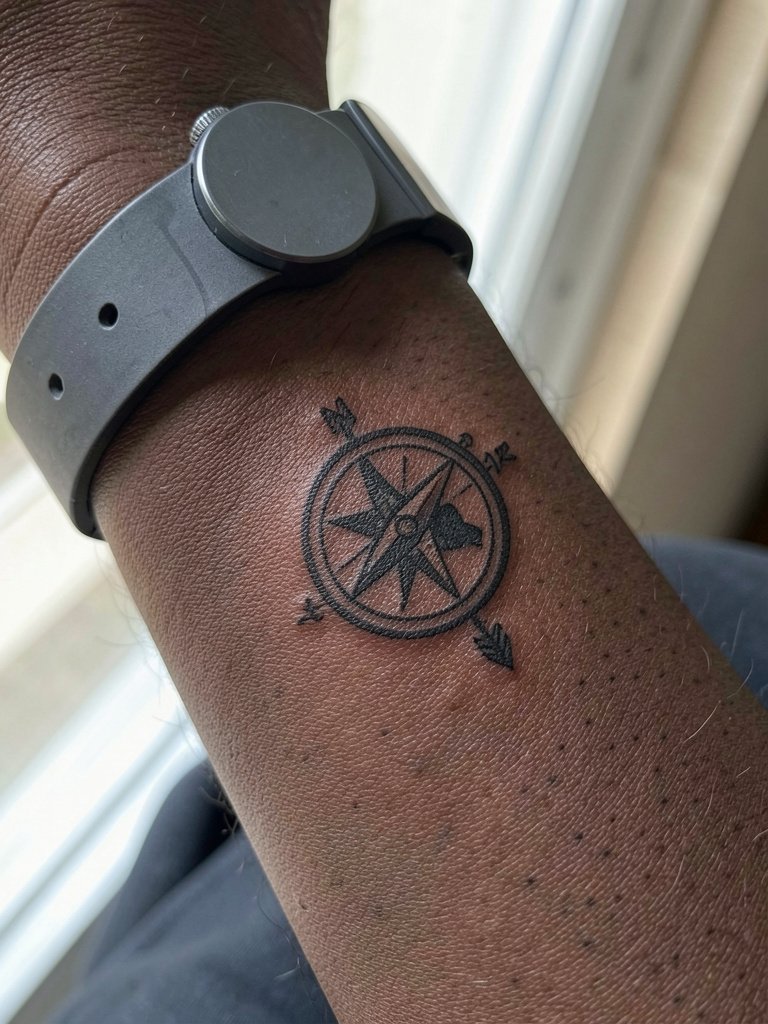
Micro compasses can work if you design around the skin's tendency to blur small details. Negative space is the key here, leave tiny skin breaks inside points and letters so they do not close. Expect a quick 20 to 40 minute session with low pain but know the inner wrist is mobile and often needs a touch-up in the first year. The big mistake is shrinking a full compass flash down to sub-inch scale. For a simple daytime look, wear a minimalist watch on the opposite wrist to balance the tiny piece.
Pre-Session Essentials
The inner and outer forearm options above need different session prep, so a few targeted items make the day easier and protect fine detail in the first week.
- Japanese dotwork ink options. Favored by dotwork specialists for subtler stipple texture that holds better than standard black for map backgrounds and stippling work in ideas above.
- Vintage parchment balm. A niche balm some dotwork artists recommend to keep stippled pieces looking like aged paper during healing.
- Single-needle cartridge pack. Useful if your artist uses cartridges; request single-needle cartridges for micro and fine-line setups noted above.
- Stippling needle set. Helpful for artists who prefer discrete dot clusters for map or texture work rather than solid grey fills.
- Minimalist black tattoo ink. A stable black choice for clean fine line work and geometric compasses in the first six ideas.
7. Blackwork Solid Compass, Outer Forearm
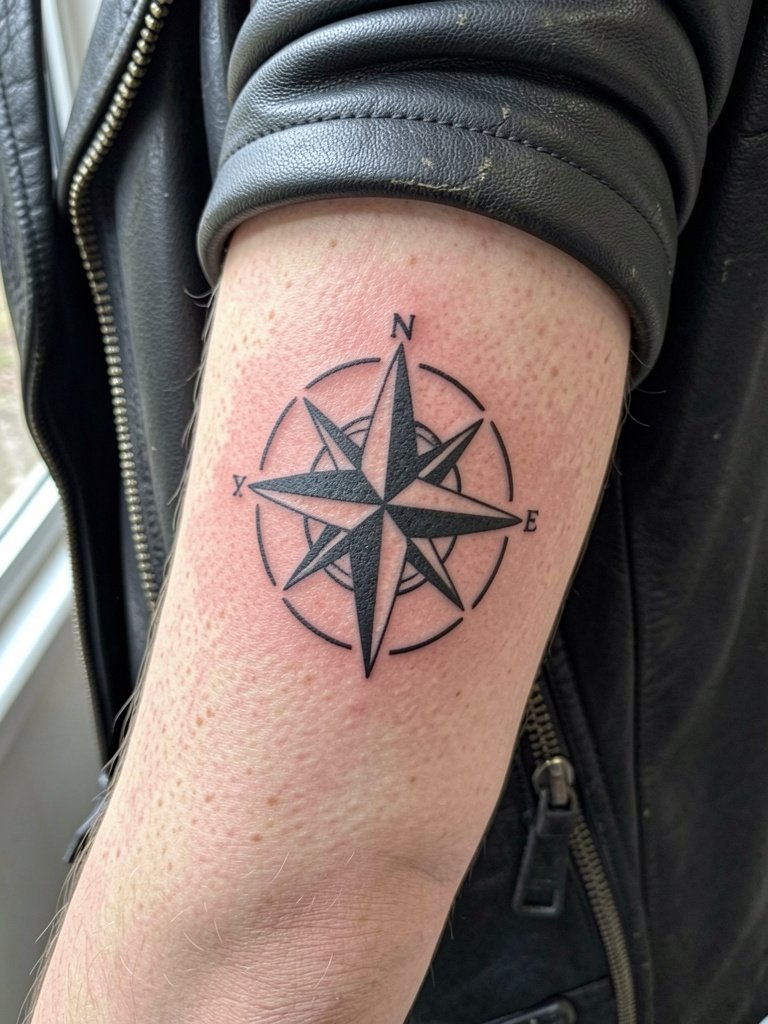
High-contrast blackwork is excellent when visibility matters and you want minimal aging impact. Solid fills mask small blowouts and retain a graphic presence that can be seen from across a room. This is a one-session 60 to 120 minute piece with moderate pain on the outer forearm. Common mistakes include leaving thin hairline gaps inside the black mass which invite patchy healing. Ask for crisp negative shapes cut into the black and plan for a one-year touch-up for saturation. Pair it with a leather jacket or solid tee for a classic look.
8. Coordinate-Based Compass, Inner Forearm
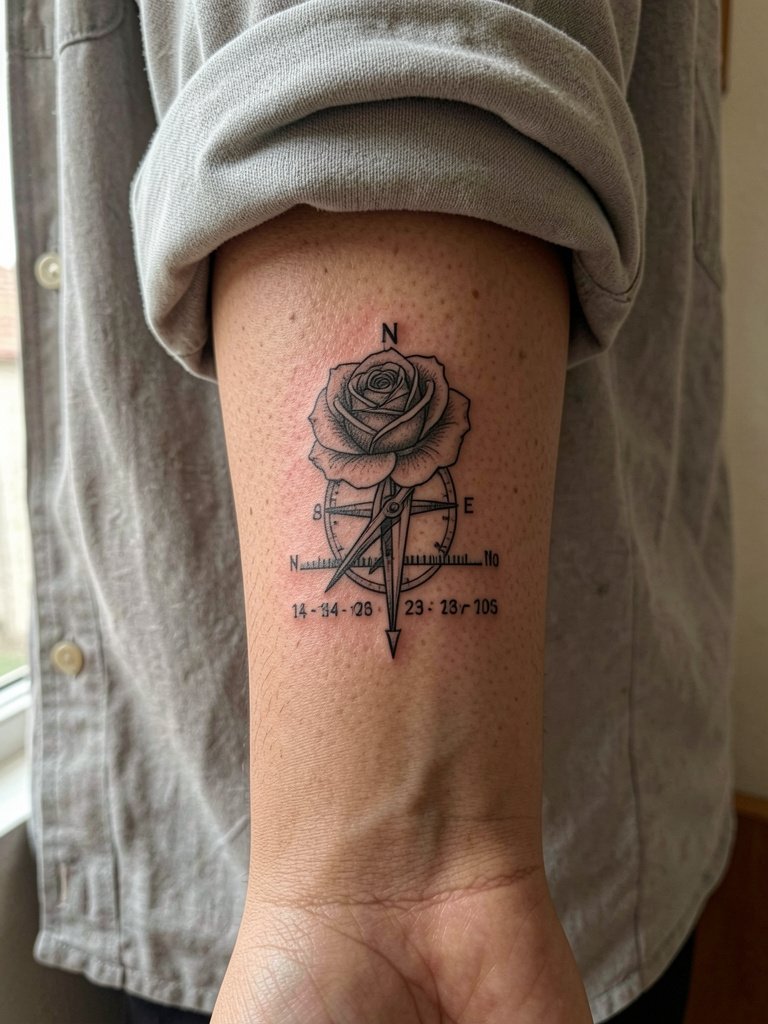
Using coordinates gives the compass a specific reference without cliché phrasing. When adding numbers, insist the font be monospace so each digit has even weight and spacing. For longevity keep the coordinates in a single line beneath the rose and scale so the digits are at least 0.5 cm tall. Session time is about 45 to 80 minutes and expect low pain on the inner forearm. A common mistake is cramming long strings of coordinates too small. Bring the exact coordinate text and ask for a stencil preview scaled to life size.
9. Watercolor Compass with Outline Warning, Outer Forearm
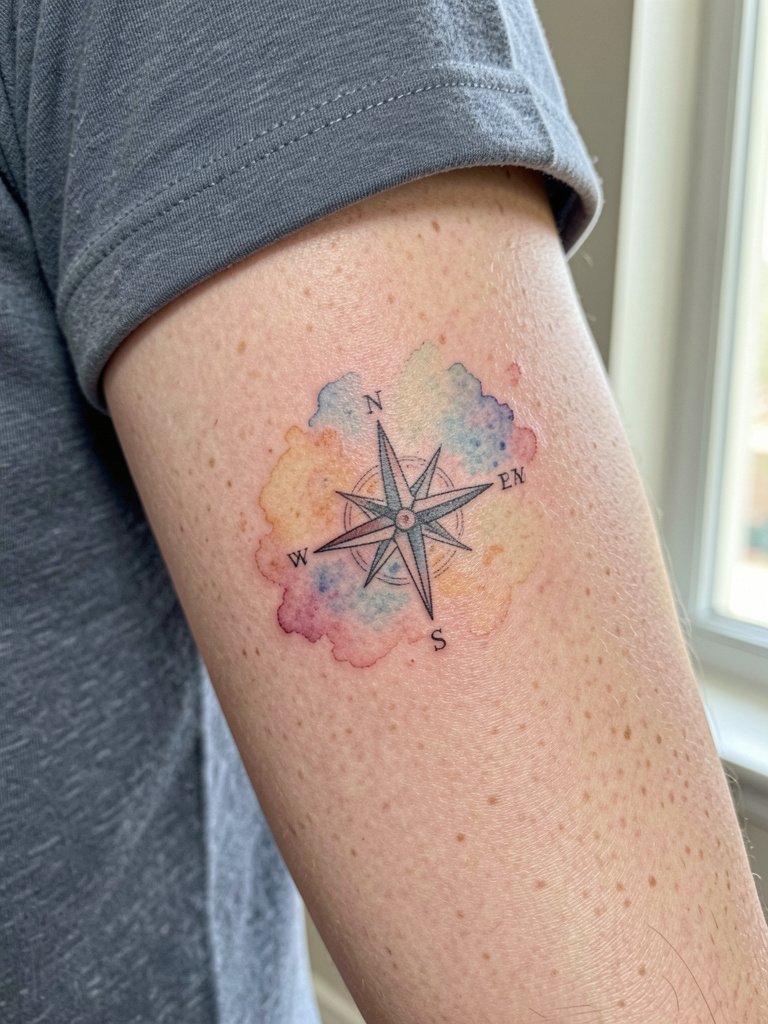
Watercolor compasses look painterly but spark debate about longevity. One camp loves the soft washes and accepts faster fading. The other camp warns watercolor loses definition quickly and recommends bold outlines to preserve shape. If you choose watercolor, ask for a thin protective outline around the rose and plan for color refreshes at two to three years. Sessions run 60 to 120 minutes depending on color layers and you should expect a touch-up sooner than with blackwork. For show-off outfits, soft tones pair well with open-back summer dresses that keep the focus on the wash.
10. Retro Old School Compass, Outer Forearm
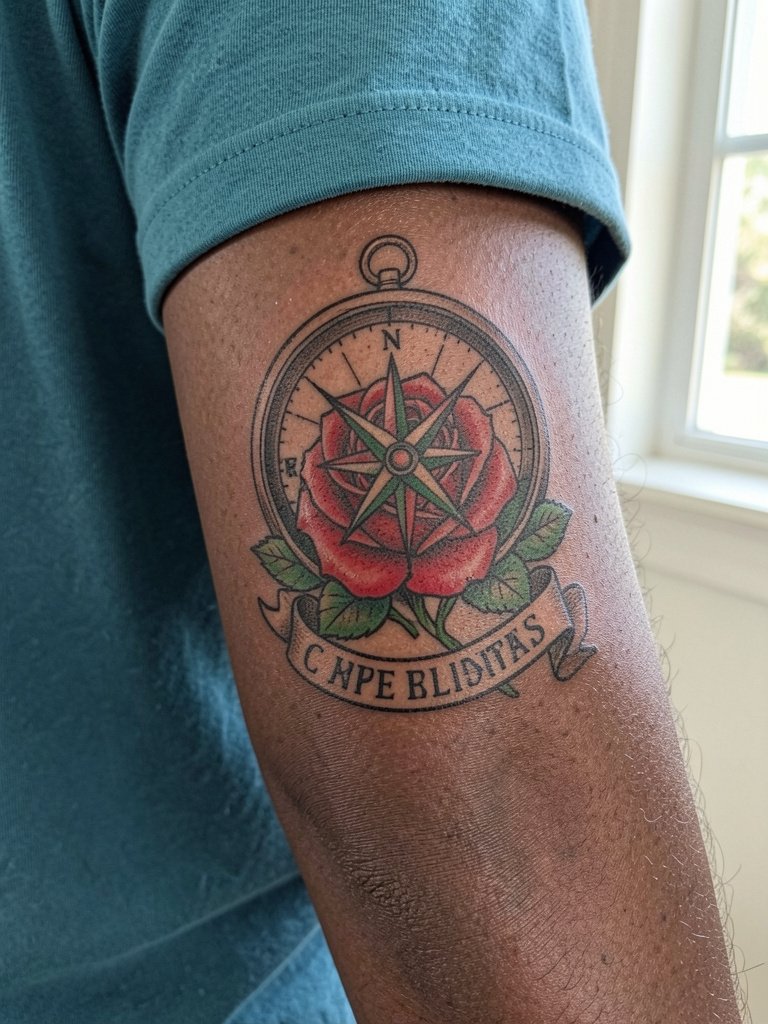
Old school flash is built to last because of thick outlines and restrained palettes. Keep the compass at three inches or more so the banner and serif type stay legible. Expect a single session around 60 to 90 minutes and a touch-up at one year if you want saturation refreshed. The common error is shrinking flash art into a micro that loses its punch. Match this with a vintage denim jacket for the classic look.
11. Stippled Dotwork Compass, Inner Forearm
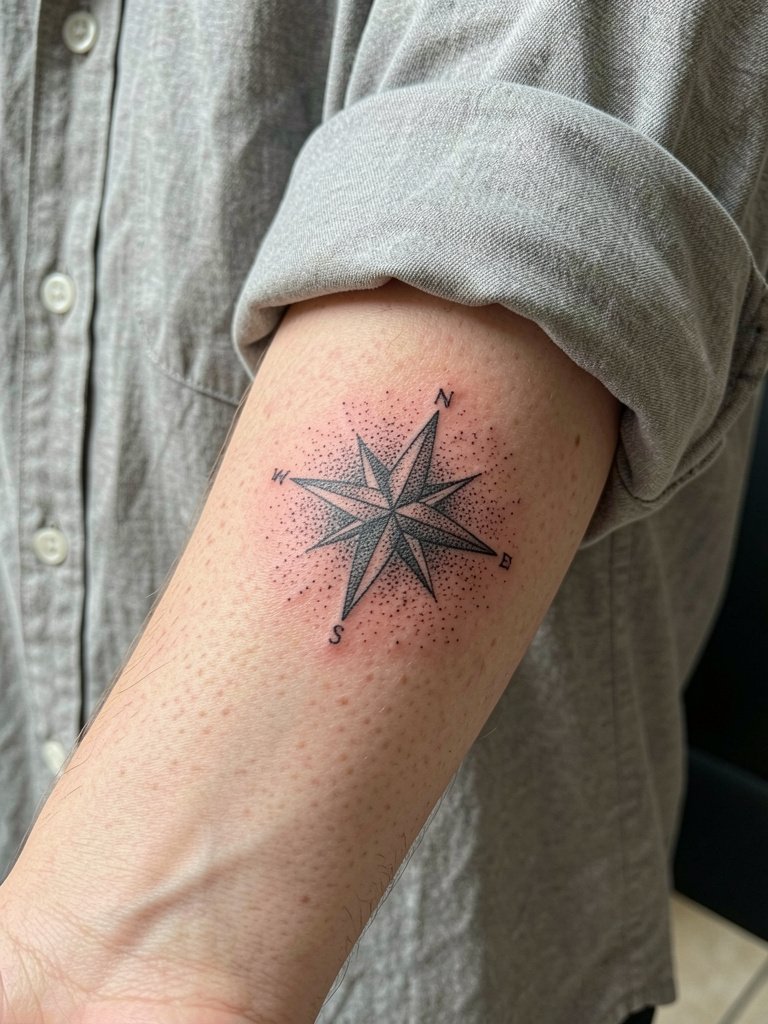
Dotwork gives a textured, vintage feel and avoids the uniform grey problem. It ages by keeping granularity rather than merging into a patch. Tell the artist you want varying dot scales and ask them to show healed dotwork samples on similar skin tones. Sessions are one to two hours depending on density and pain is low to moderate for the inner forearm. A typical mistake is asking for solid grey over a dotwork design; that choice loses the vintage depth. For jewelry, delicate chains on the opposite wrist complement the stippled texture and a dainty gold stacked bracelet set pairs well.
12. Minimalist Line-Art Compass with Long Arrow, Inner Forearm
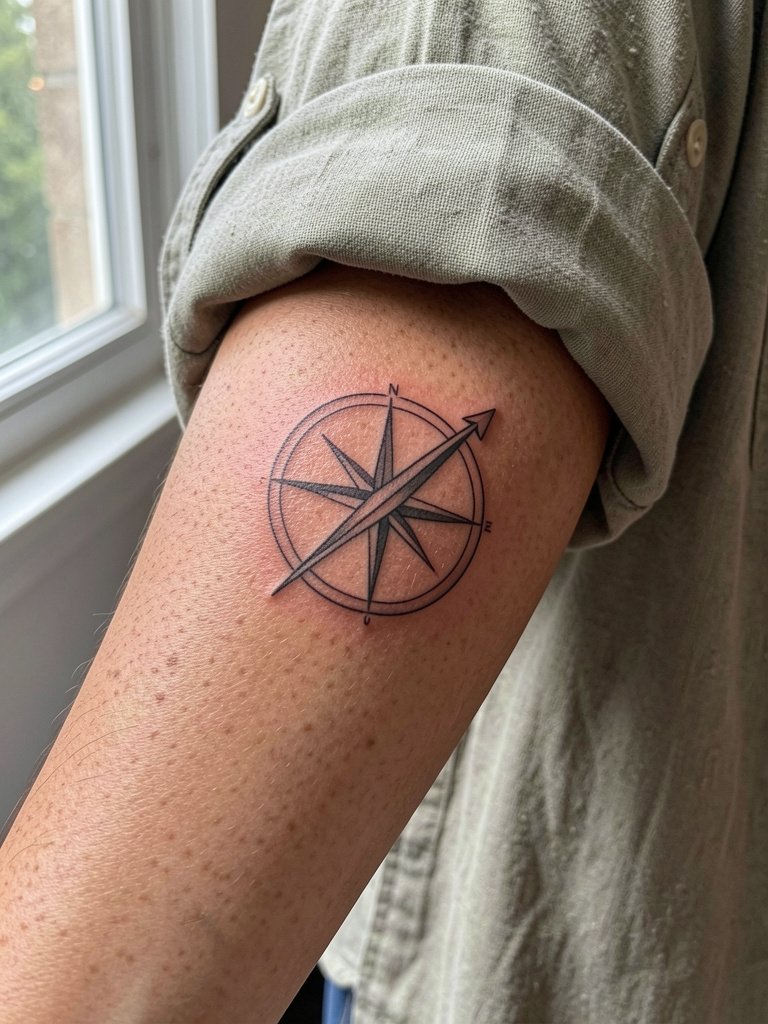
Single-line compasses are elegant but need deliberate spacing so the arrow remains distinct. Ask the artist to draft the arrow at actual length on the skin to confirm balance. This piece is quick, usually 30 to 60 minutes, and the inner forearm handles it with low pain. The common mistake is making the arrow too thin; request a hair heavier line weight than a typical reference image. For in-session comfort wear a loose button-down that allows the artist to roll your sleeve without pressure on fresh skin.
13. Dual-Compass Patchwork for Mini Sleeve, Outer Forearm
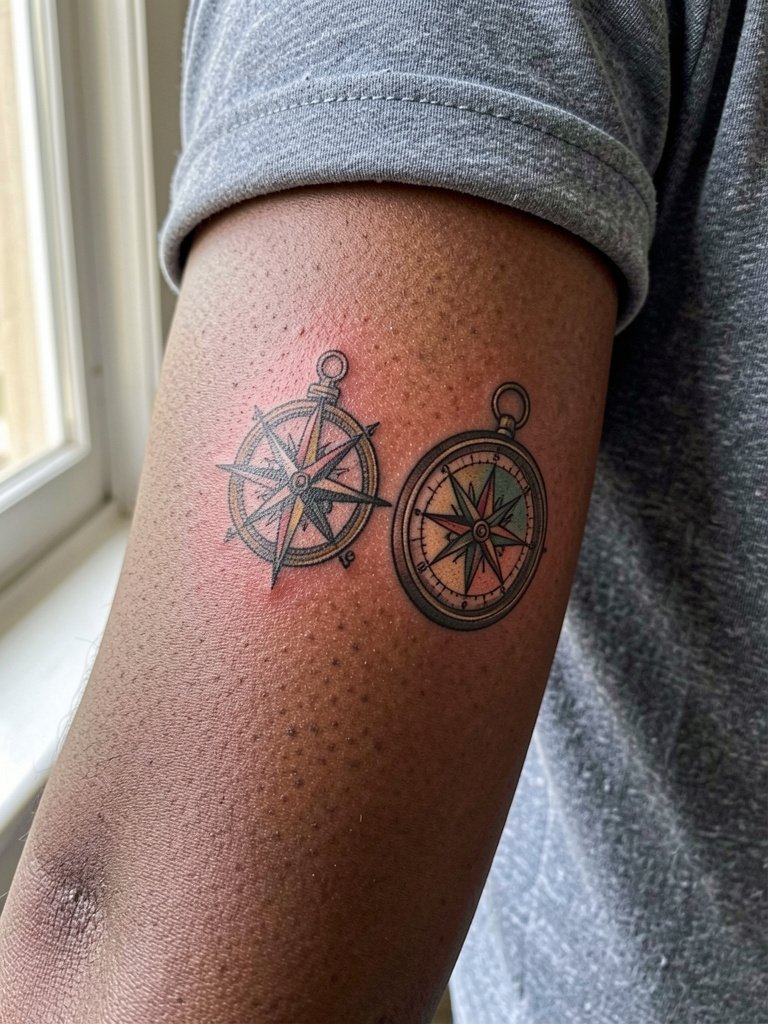
Patchwork compasses let collectors get contrast and movement on a forearm mini-sleeve. Plan the negative space between the two to prevent odd merging as the skin moves. This usually runs one session for layout and another for color, totaling two to four hours across appointments. A clear mistake is matching two highly detailed small pieces; give each compass room. Styling-wise pair the patchwork with rolled sleeves and a vintage denim jacket for layered texture.
14. Compass with Rose or Floral Vine, Inner Forearm
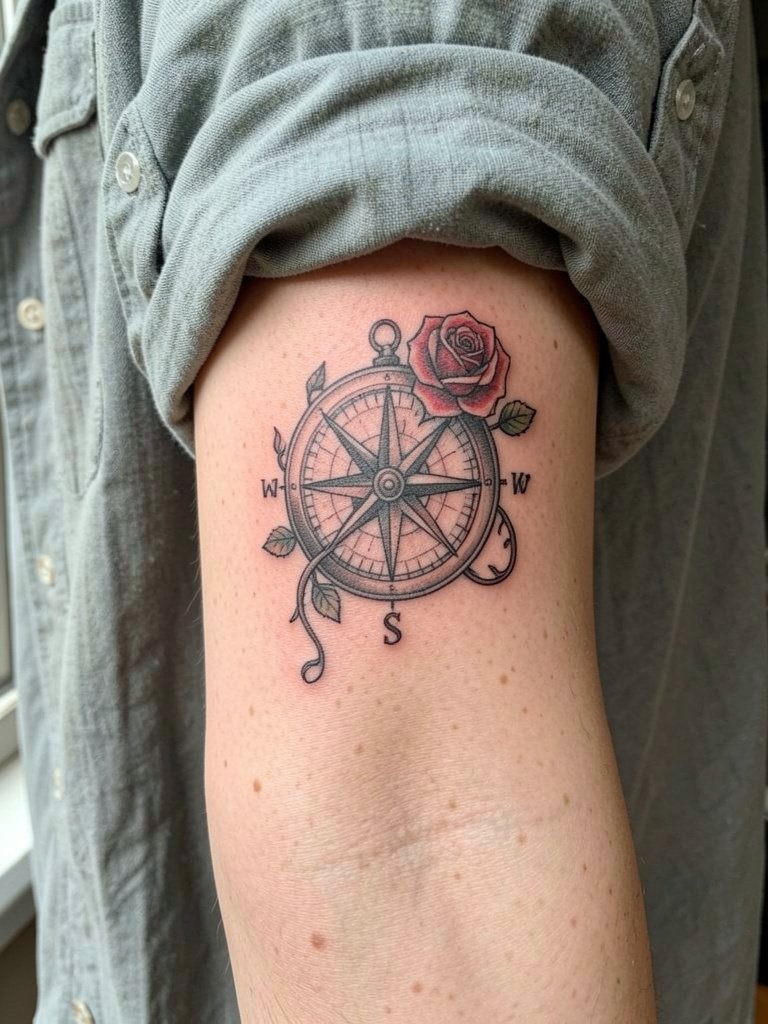
Combining floral elements softens the navigation symbol and fills length along the forearm. Ask for the vine to be drawn long enough to curve around muscle movement so petals do not sit on a natural crease. Expect 60 to 120 minutes and moderate pain on the inner forearm. A common error is crowding small petals into the compass ring. For visibility pair the piece with rolled sleeves and a dainty gold stacked bracelet set on the opposite wrist to balance feminine lines.
15. Minimalist Compass on Inner Upper Arm (Secret Placement)
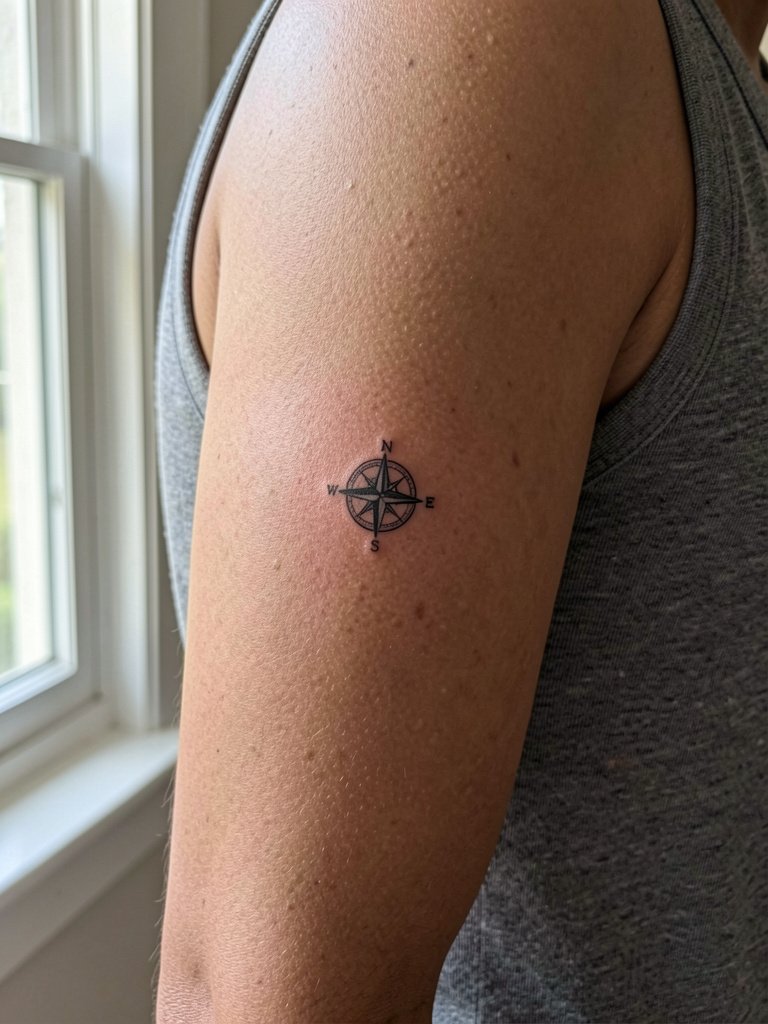
The inner upper arm is a great spot for a "secret" compass that only shows when you lift your sleeve. The smooth skin here holds detail better than the wrist and is lower pain than many expect. Keep a micro compass under one inch and request a stencil test in sitting so placement hides under normal shirts. Plan a single short session and a possible touch-up at year one. For session wear bring a sleeveless tank top so the artist can expose the area without tugging.
16. Compass Wristband Wrap, Outer Forearm to Wrist
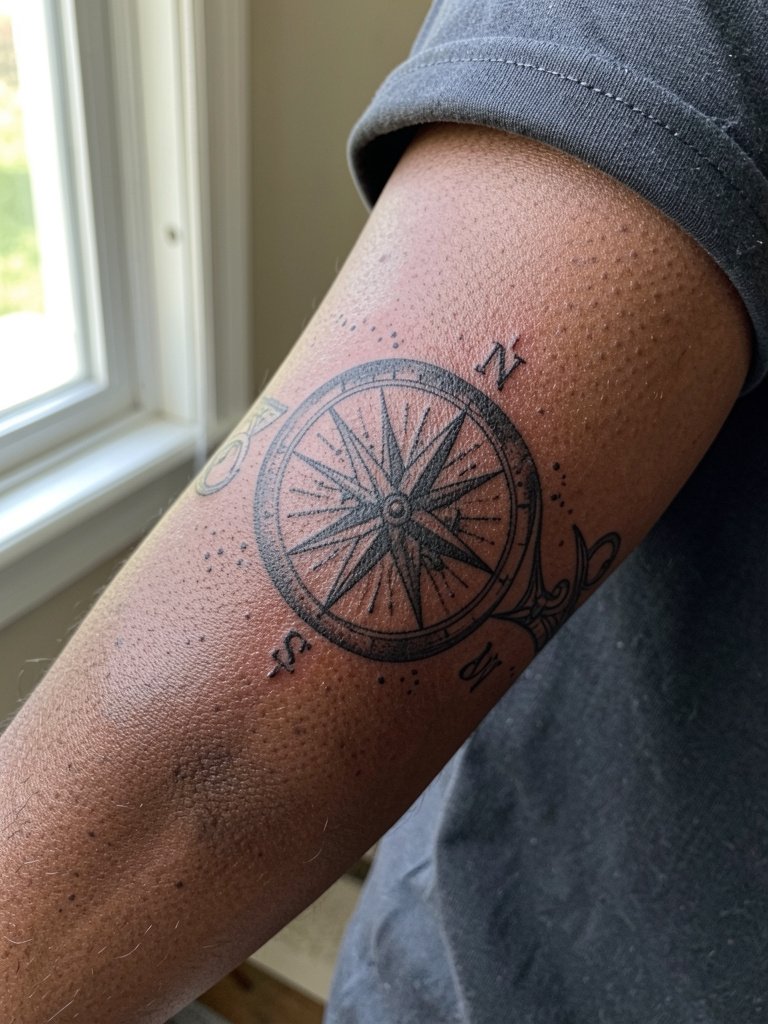
Wrap designs read like jewelry so they need precise spacing so the pattern does not buckle with wrist movement. Ask to see how the band sits when you flex your wrist and test a few stencils. Sessions typically take 60 to 120 minutes and the wrist area is sensitive, so expect moderate pain. Common mistakes are making the wrap too tight around the wrist where motion causes faster wear. For daily styling consider thin chain bracelets on the opposite wrist which do not crowd the band.
17. Latitude Compass with Tiny Map Pin, Inner Forearm
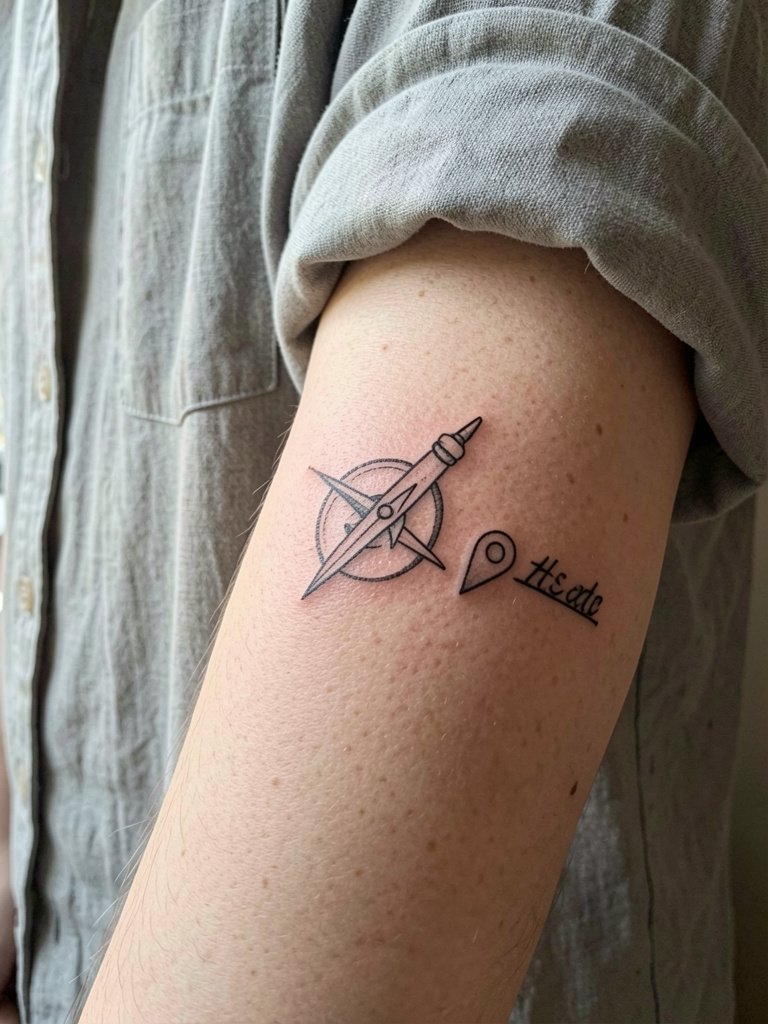
Adding a tiny map pin gives narrative without heavy text. For clarity pick a slightly larger scale than you think you need and place the pin just outside the compass to avoid clutter. Session time is short, around 30 to 60 minutes, and the inner forearm heals predictably. Avoid dense script next to the icon which will blur; instead use a short coordinate line in monospace if you need text. For reveal looks, cuff a linen button down shirt to show off the icon.
18. Compass Rose with Shadow Play, Outer Forearm
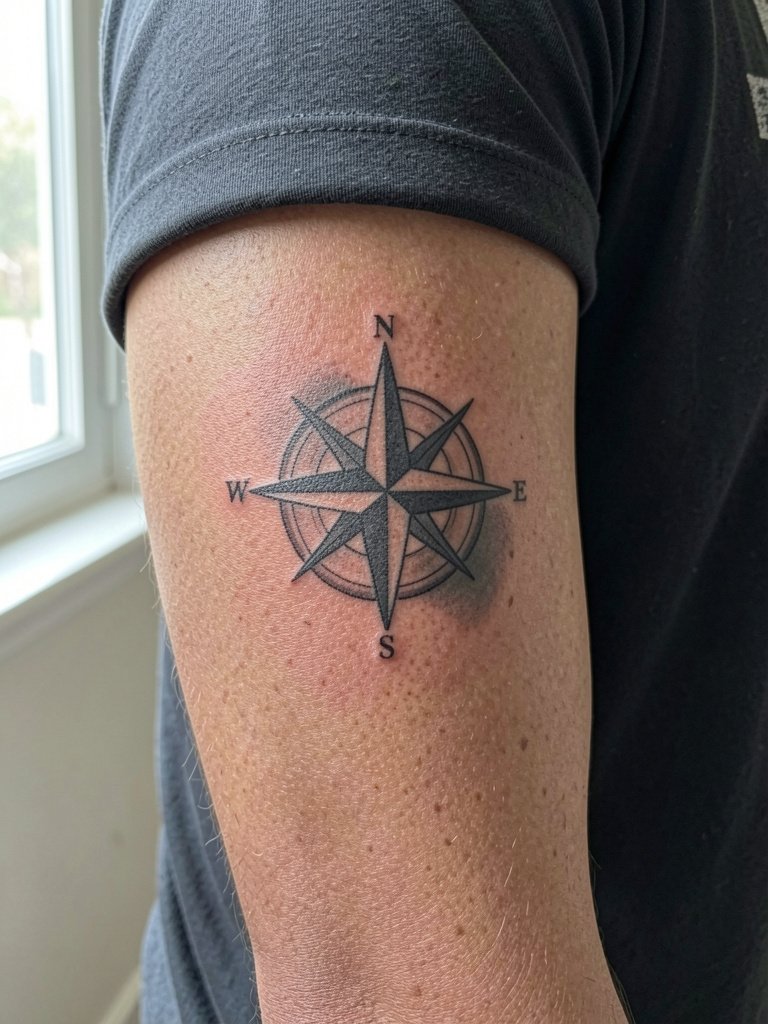
A shadowed compass reads with more dimensionality without color. When discussing composition, ask the artist how the shadow will read at six months so it does not merge into the main points. Expect a single session of 45 to 90 minutes and low-to-moderate pain. The mistake people make is requesting heavy soft shading right against fine points; request a thin buffer to keep the points readable. Pair this piece with a solid color t-shirt to emphasize contrast.
19. Minimal Geometric Compass with Map Coordinates, Outer Forearm
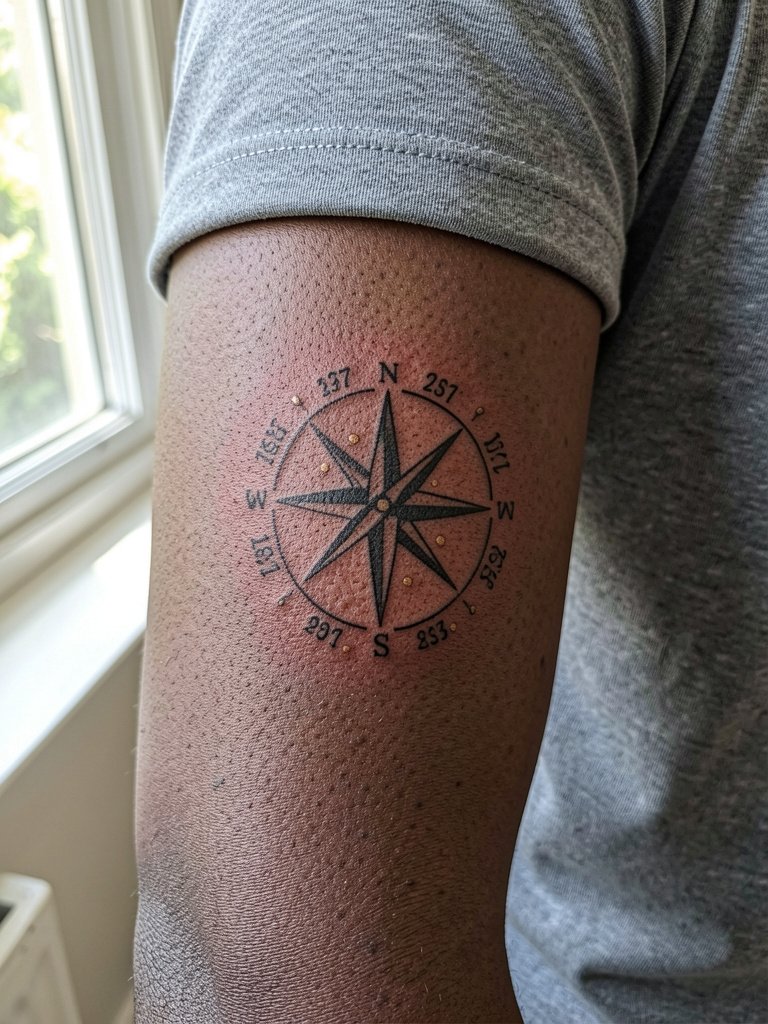
This hybrid keeps geometric clarity while adding a personal coordinate line. Make sure the coordinates are spaced evenly around the outer ring and that each digit is at least 0.5 cm tall so legibility survives healing. Sessions generally run 60 minutes and outer forearm pain is low. A common error is placing coordinates too close to the compass points which blurs them over time. For outfits, this design pairs with a vintage denim jacket.
20. Tiny Compass with Negative Space Lettering, Inner Forearm
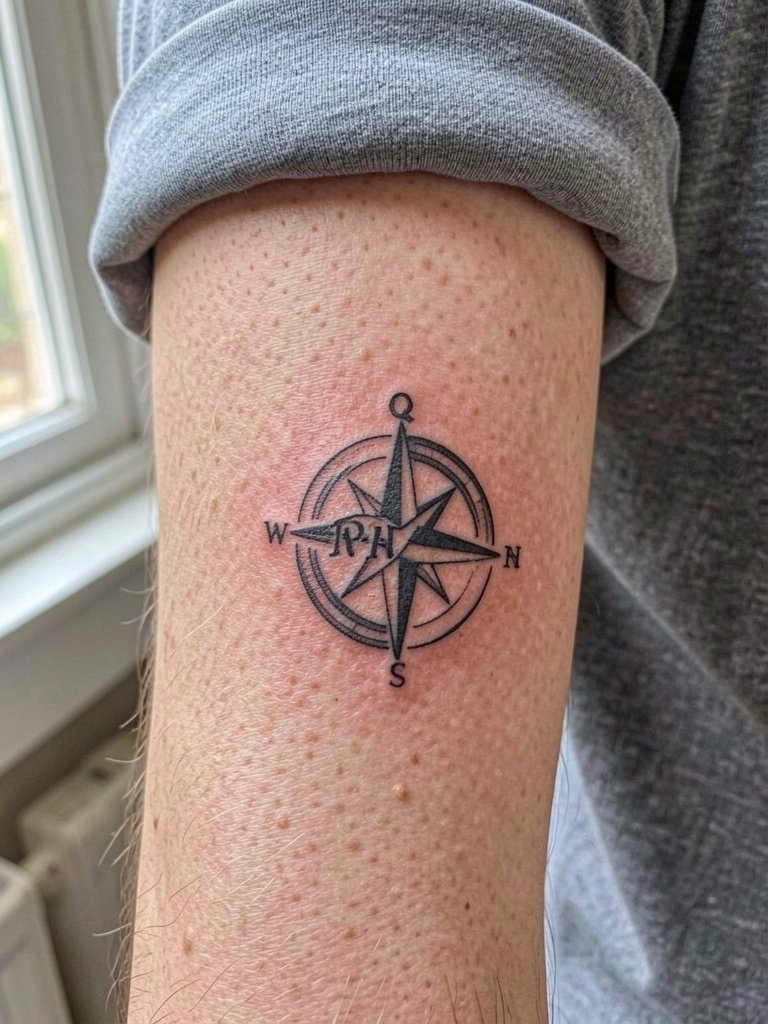
Negative-space lettering inside a small compass reads cleaner than inked letters because skin breaks avoid closure. Keep letters wide and simple, avoid script, and ask for a stencil check at actual size. This takes about 30 to 60 minutes and heals like other inner forearm fine-line pieces. The mistake is requesting ornate fonts that merge. For accessorizing try a thin chain bracelet set on the opposite wrist.
21. Compass with Nautical Rope Frame, Outer Forearm
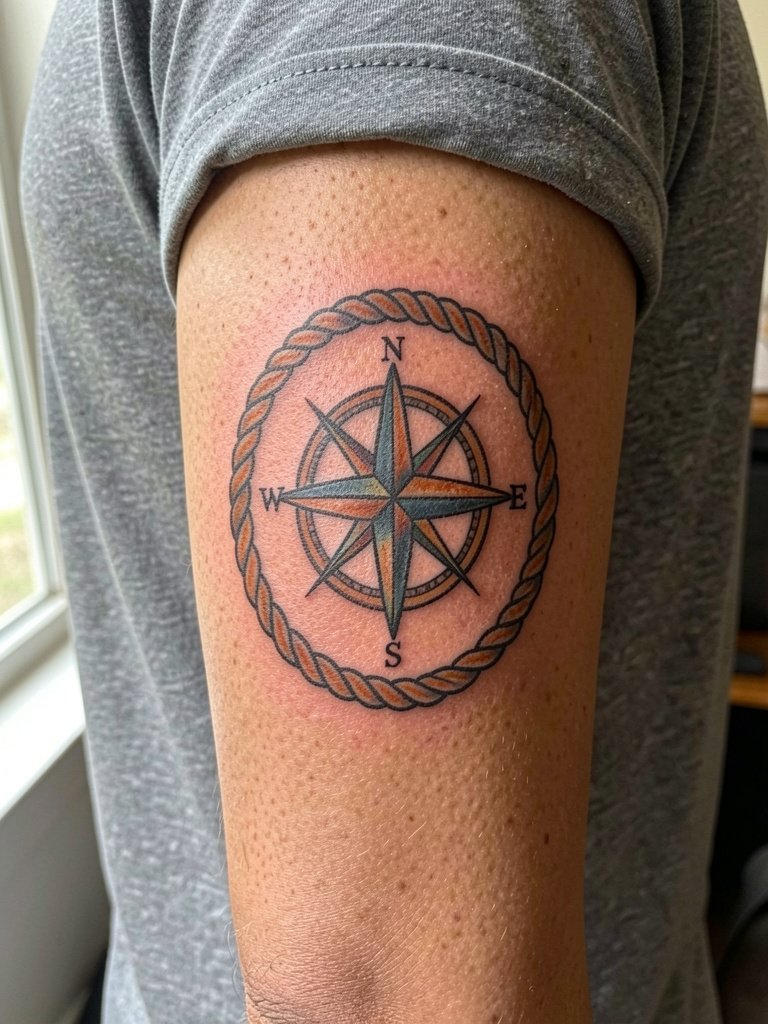
A rope frame anchors the compass visually and adds classic maritime context. Keep the rope fairly thick so texture remains distinct as the skin moves. Expect a 60 to 120 minute session and low-to-moderate pain on the outer forearm. People sometimes place too many tiny rope loops; simplify the braid for clarity. Style with rugged layers like a vintage denim jacket.
22. Black and Grey Illustrative Compass with Landscape, Inner Forearm
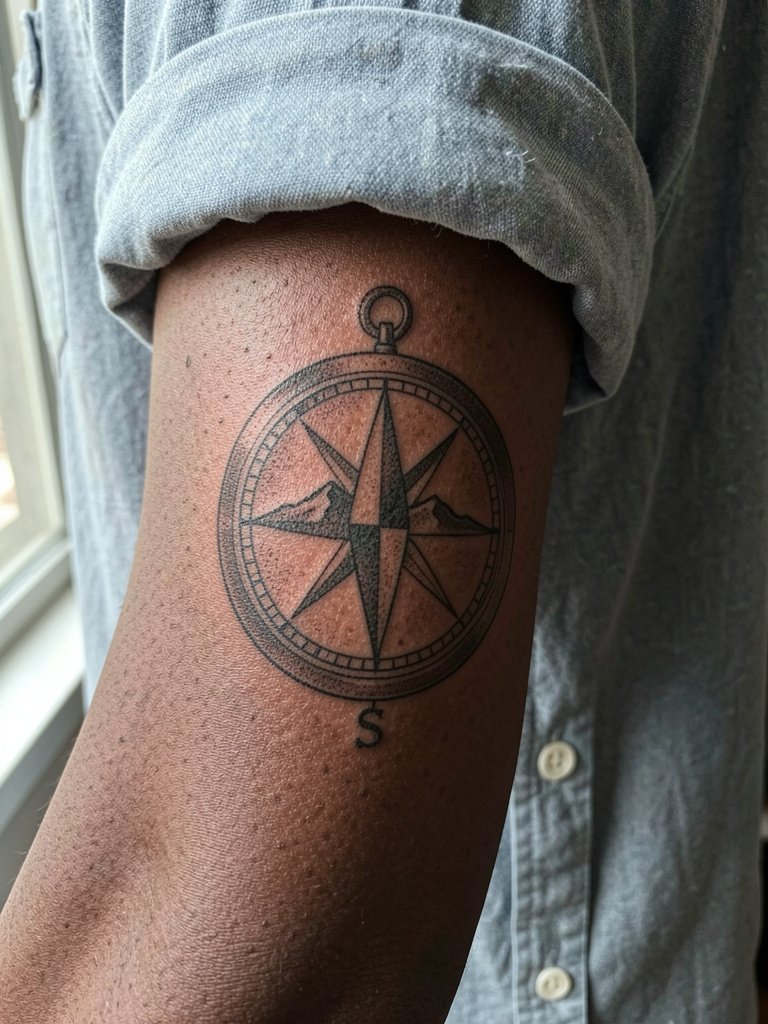
Embedding a small landscape in the compass makes the idea literal and personal. Request the horizon sit below the central axis so the peaks do not interfere with directional markers. Sessions can be one to two hours depending on shading complexity and expect moderate pain. A mistake is crowding tiny landscape detail that blurs into a block. For an everyday look wear a rolled cuff linen shirt that keeps the forearm visible without distraction.
23. Negative Space Blackwork Compass, Outer Forearm
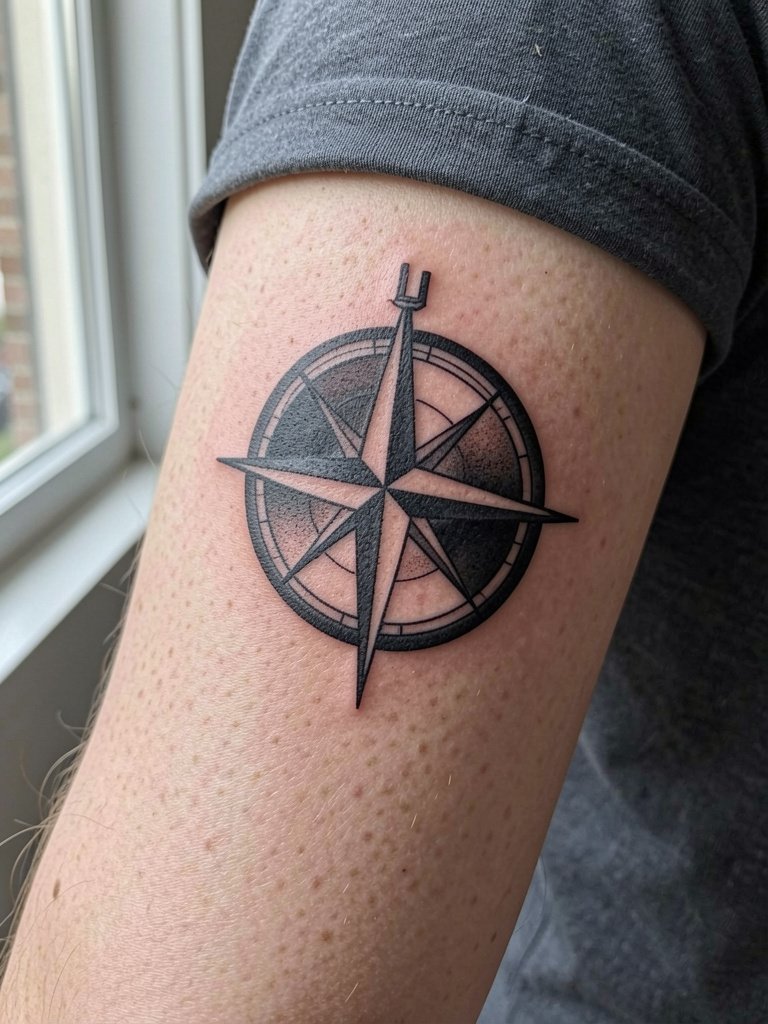
Negative space within a black field reads modern and holds well because the solid black resists blowout visibility. Discuss with the artist where to place thin uninked veins for highlights so the compass remains readable. Session time is 60 to 120 minutes and outer forearm pain is low. Avoid expecting tiny internal details inside the negative shapes; keep them open. Pair with a black short-sleeve tee for a strong graphic look.
24. Compass with Subtle Color Accents, Inner Forearm
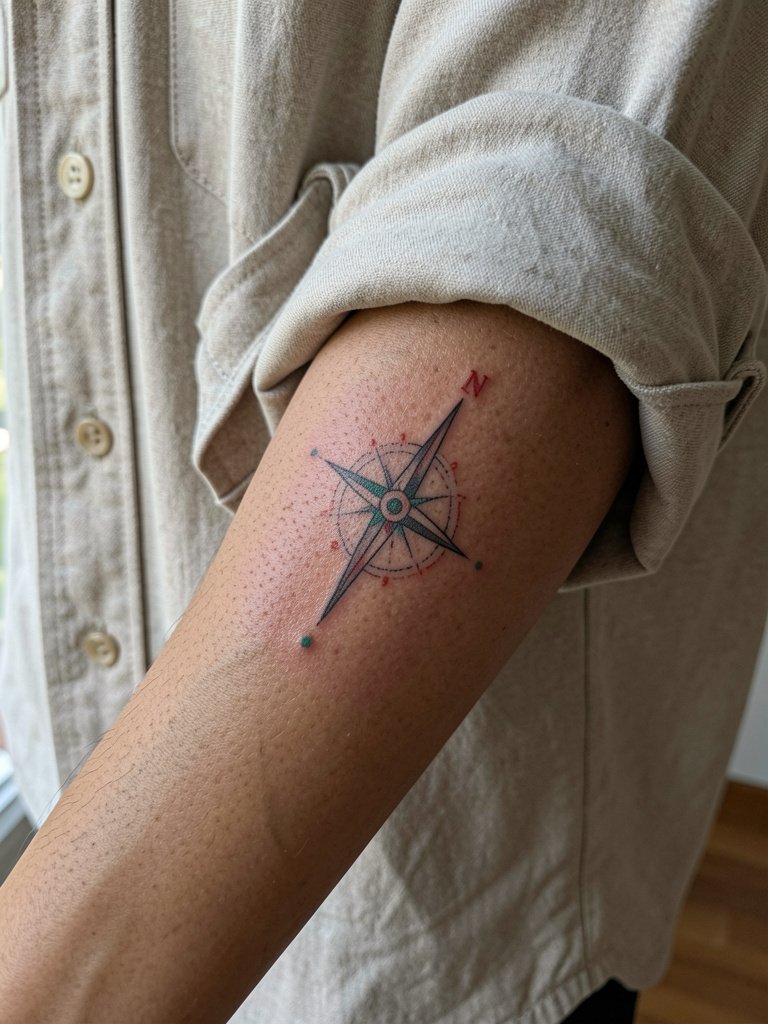
Small accents can give a compass personality without risking a watercolor fade. Limit color to tiny dots or a single filled needle tip and use high-quality pigment for saturation. Expect a 45 to 90 minute sit and low-to-moderate pain. A common mistake is asking for multiple washed colors that will require frequent refreshes. For subtle evenings pair with neutral tones like cream and a dainty gold stacked bracelet set.
25. Compass Sleeve Anchor for Future Additions, Outer Forearm
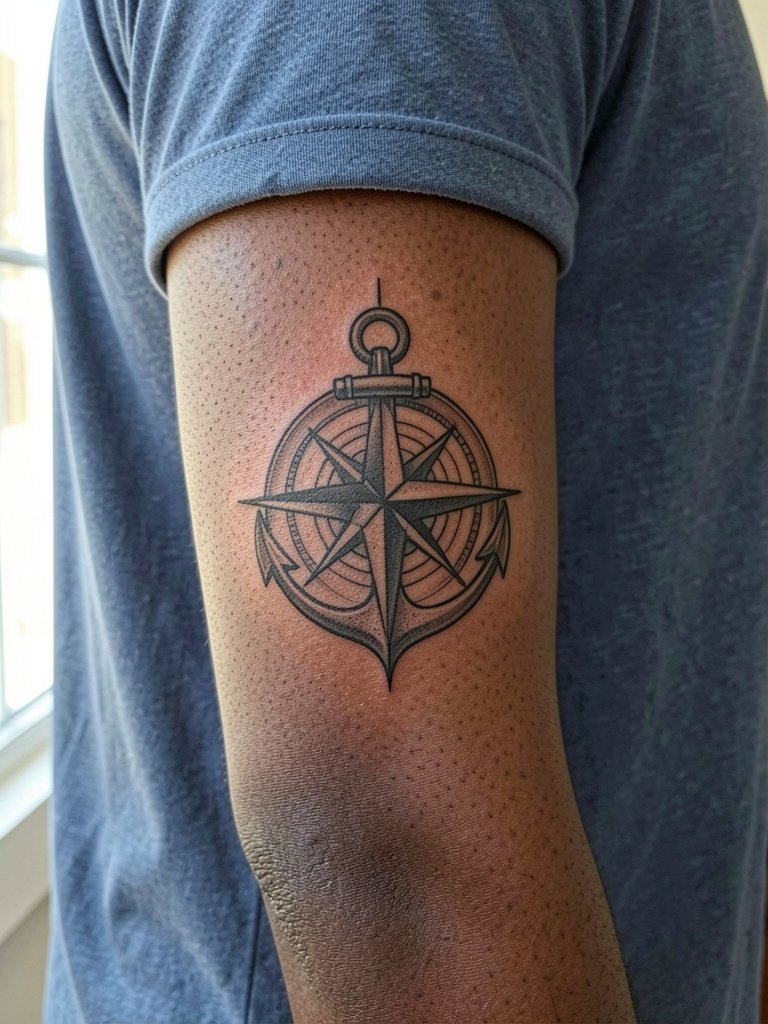
If you plan to expand into a sleeve, design the compass with clear surrounding negative space and think about future flow. Ask the artist for a mock-up showing how the piece interacts with potential sleeve elements. Sessions vary but assume at least 90 minutes and moderate pain. The mistake is treating an anchor like a standalone; plan for continuity. For session comfort wear a short-sleeve tee that allows easy access and no cuff pressure.
26. Mini-Sleeve of Tiny Nautical Symbols with Compass, Outer Forearm
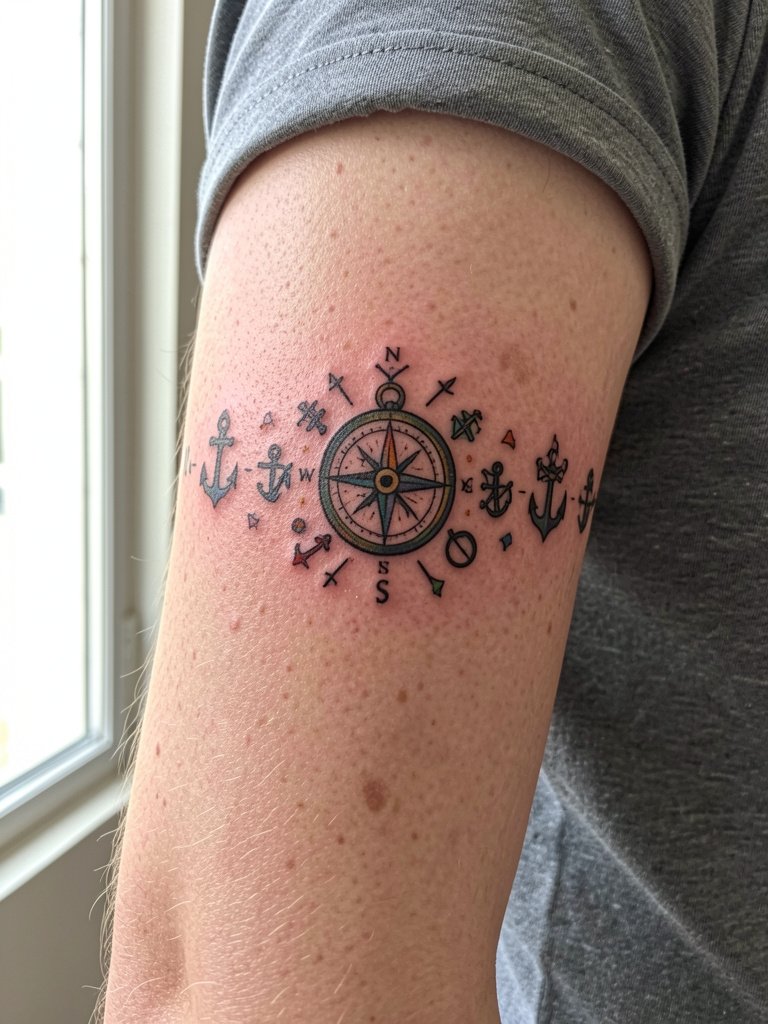
Mini-sleeves let you combine icons without the commitment of a full sleeve. Space each element at least one finger-width apart so blowouts do not merge symbols. Plan two to four sessions depending on density and expect low-to-moderate pain. Common mistakes are tight grouping and inconsistent line weights. For casual styling layer with a vintage denim jacket for contrast.
27. Compass with Thin Arrow Extension Toward Elbow, Inner Forearm
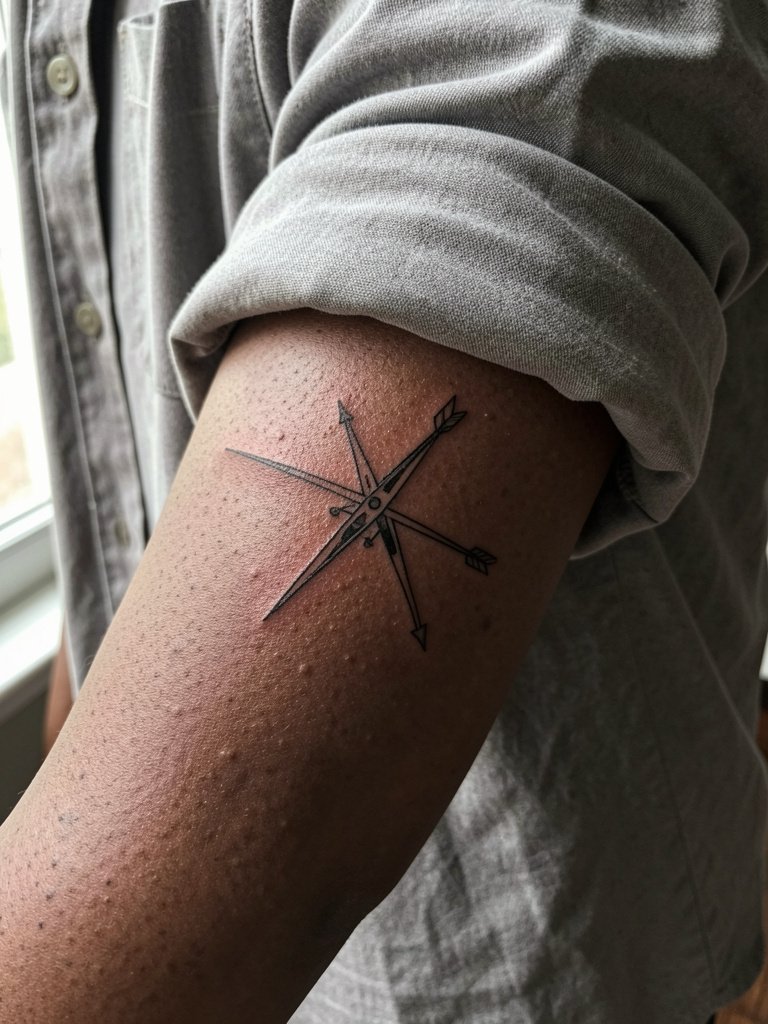
An arrow extension creates directionality and adds length to a compact compass. Ask your artist to preview the arm with the arrow drawn at actual length so it follows muscle contours. Sessions are generally 45 to 90 minutes with low-to-moderate pain on the inner forearm. A frequent error is angling the arrow into a crease at the elbow; ensure the tip stops short of the crease. For show-off styling roll sleeves and wear neutral tones so the arrow reads cleanly.
Frequently Asked Questions
Q: How much should I budget for a forearm compass tattoo?
A: Expect small fine-line compasses to start in the low hundreds and more detailed work or color to rise into the mid hundreds or beyond. Prices vary by studio tier and city. Plan a cushion for touch-ups at six to twelve months if your design has fine detail.
Q: Where can I find healed portfolio examples and travel-friendly artists without naming people directly?
A: Search hashtags like #compass tattoo, #finelinetattoo, and #geometriccompass on Instagram and TikTok while filtering by your city. Tattoodo and booking apps let you search by keywords and show healed shots. Reddit threads on r/tattoos often surface peer-shared healed examples across different skin tones.
Q: Will a fine-line compass blur on the inner forearm and when should I schedule a touch-up?
A: Fine line on the inner forearm can blur faster if lines are too thin or details are crammed. If you choose fine line, size up slightly and ask for extra spacing between points. Expect a touch-up window around six to eighteen months for most fine-line pieces depending on your skin and sun exposure.
Q: What should I wear to the session for an inner forearm or wrist tattoo?
A: Wear a loose button-down or short-sleeve shirt so the artist can roll the sleeve without pressure on fresh skin. For wrist work avoid watches on the tattoo wrist. A loose button-down is an easy go-to for access and comfort.
Q: How do I avoid solid grey maps that age like bruises?
A: Ask for stippling or whip shading for map textures instead of flat grey fills. Request to see healed dotwork examples on similar skin tones and ask the artist to show how the map reads at three years. Choosing dotwork over solid grey is a practical aging decision, not just an aesthetic one.
