
A tiny collarbone mark can read like a whisper or a clear line depending on the artist, the placement, and how you dress for the session. Many people expect a micro design to sit untouched for years, but the clavicle area moves with breathing and sees necklace friction, so choices made before the first needle matter more than most realize. The sections below jump straight into 25 small collarbone ideas with what holds up, what to bring to the chair, and how to show the work off.
1. Fine-Line Dainty Leaf Stem
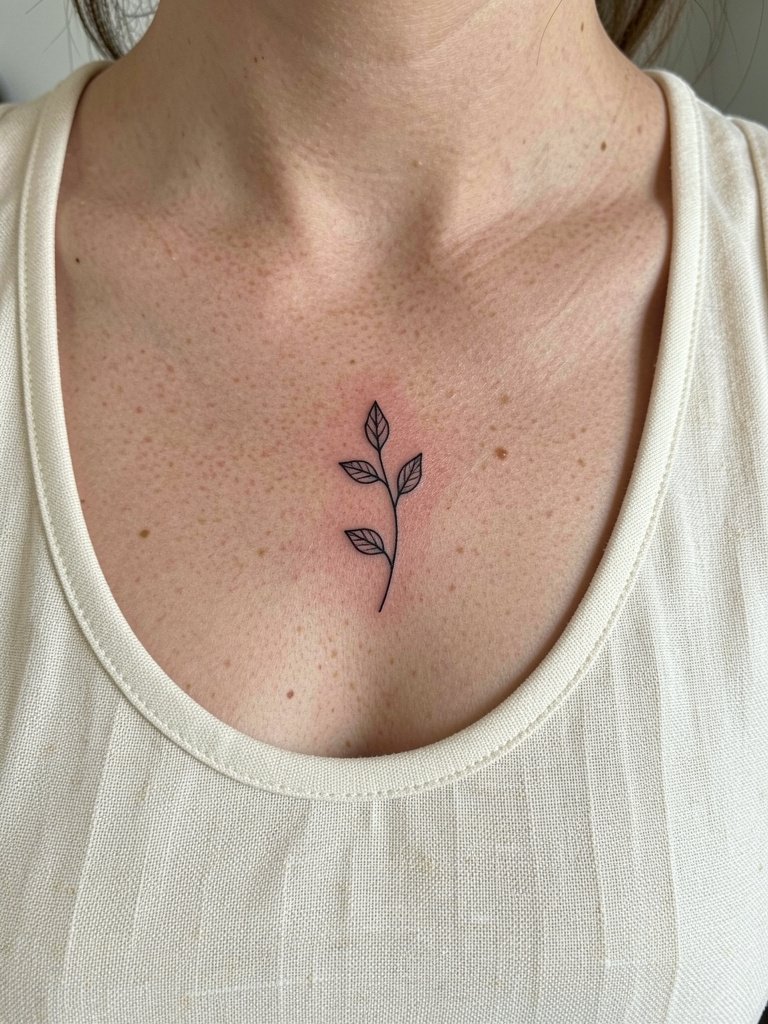
A single-needle leaf stem is the classic collarbone starter. It reads delicate across the bone and scales well if you want it slightly larger later. One group of artists warns that ultra-fine single-needle leaf stems often blur within 12 to 24 months on the clavicle because the skin is thin and moves with breathing. Another group says fine-line holds when the artist spaces the lines a hair wider and plans the spacing for healed tissue, and they point to healed examples at year three. For the session wear a strapless or open-button top so the artist can place the stencil flush against the tripod of the bone. Try linen tank tops in neutral tones to frame the piece for casual wear.
2. Little Fine-Line Hearts
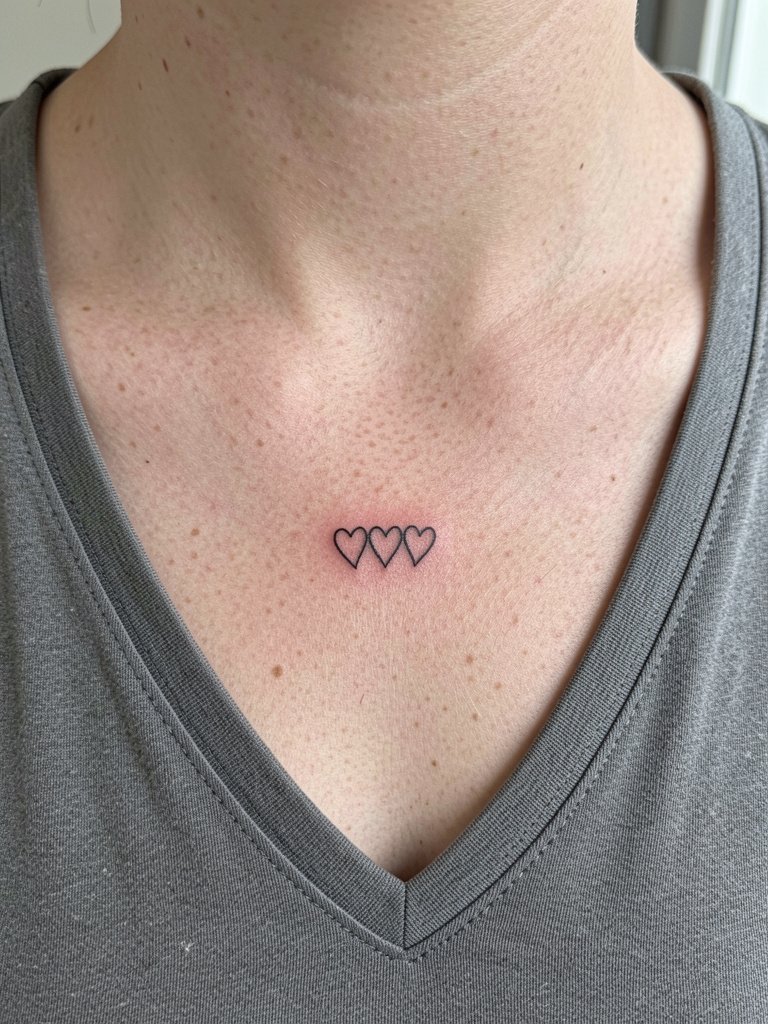
Tiny hearts feel low-commitment and photograph well on camera. The common mistake is asking for a 0.25 inch heart with single-needle lines, then expecting it to read crisp after a year. Plan for a slightly larger spacing between hearts and bring reference photos that show healed pieces at the intended scale. Expect a quick 20 to 30 minute session and a likely light touch-up in one to two years. For outings, these read best with a clean V-neck or camisole. Pair with a minimalist V-neck top for a neat frame.
3. Snake Wrapping the Clavicle
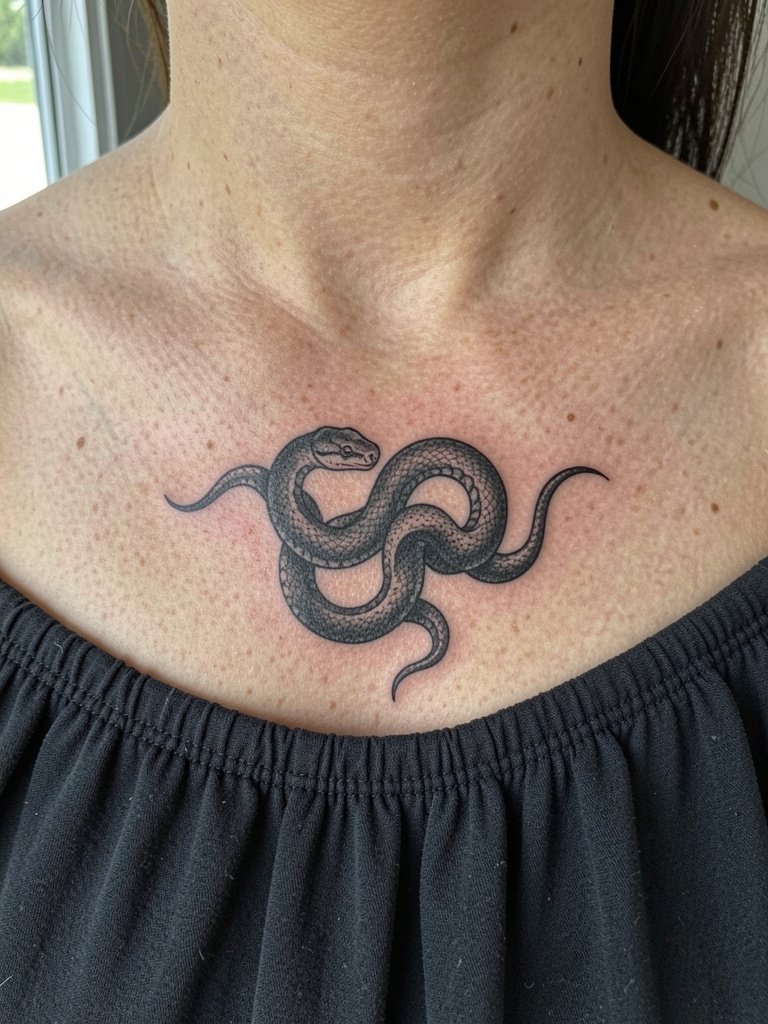
Snake wraps use the bone as a compositional line and look striking when the curve reads continuous. Expect a longer session than a dot or tiny heart because of shading and curvature mapping. The collarbone can be a painful spot for some. One camp of people ranks the clavicle among the top pain zones because the needle sits close to bone and transfers vibration sharply. The other camp reports it is manageable with paced breathing and short pauses, and they say many clients finish small wraps without numbing. Wear a strapless or off-shoulder top so the artist can wrap the stencil around the bone without fabric interference. For nights out, a dark off-shoulder blouse makes the silhouette pop.
4. Ribbon or Flower Wraparound
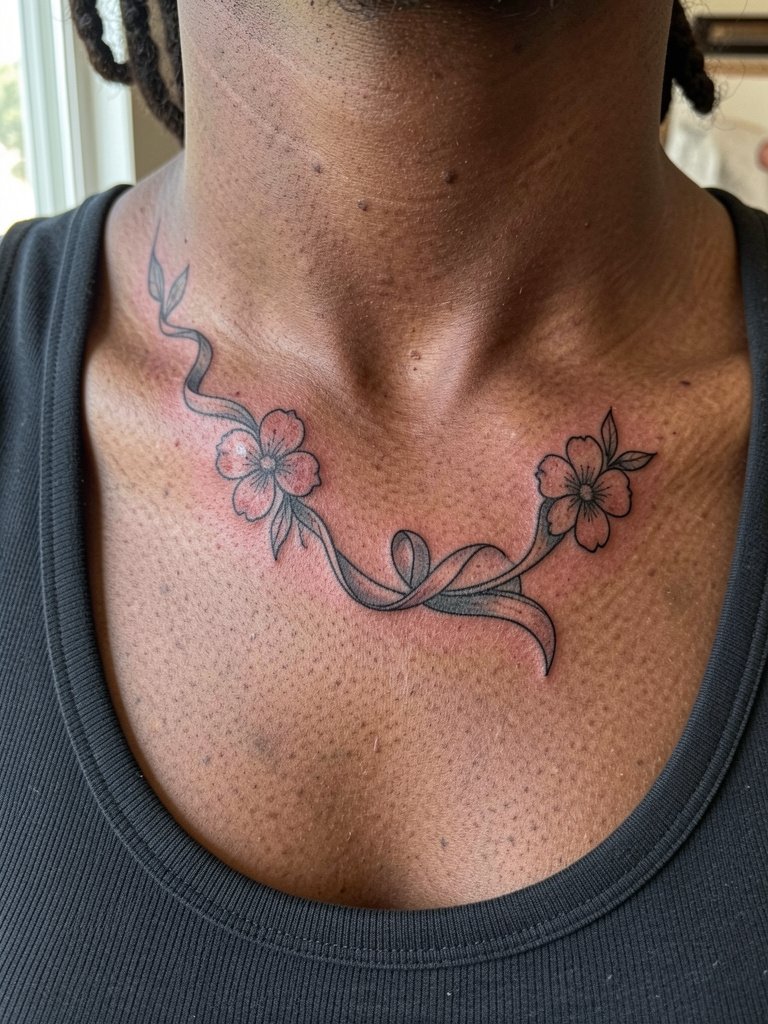
A ribbon or floral wrap softens the bone-following look without the edge of a snake. The mistake is overloading the wrap with tiny petals that merge when the tattoo settles. Instead request an open ribbon spine and one clear blossom focal point. Expect two to three hours for precise placement and a small shading pass. If you plan color, note that pale watercolor washes can read clearer for the first year but need touch-ups to keep saturation bright. For showing off, pair this with a fitted tank top in a solid color to keep attention on the curve.
5. Single Blossom or Bud (No Stem)
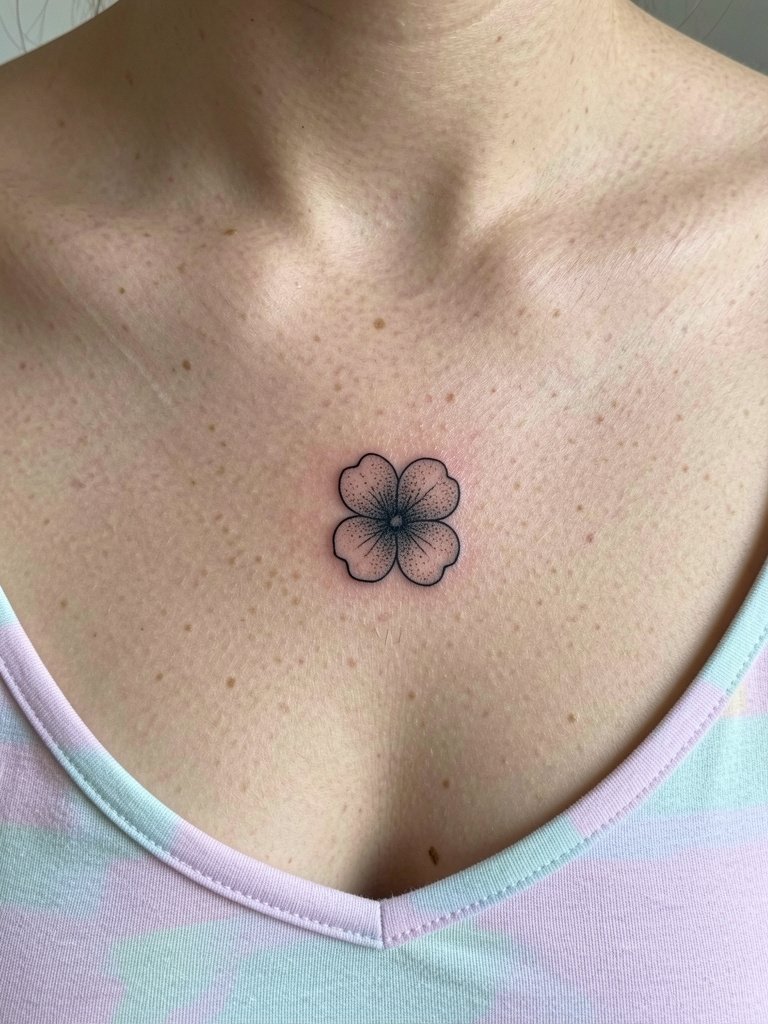
A single blossom is compact and forgiving. If longevity matters, avoid ultra-thin petal edges and ask for small areas of stipple shading to give the piece structure when it heals. A typical session runs 30 to 45 minutes and most people see minor softening by year two, with a potential touch-up at that mark. For session day wear pick a strapless or scoop-neck so the artist can place the stencil without fabric bunching. For dressing up try a pastel camisole that complements any color wash.
6. Fine-Line Script, One Word
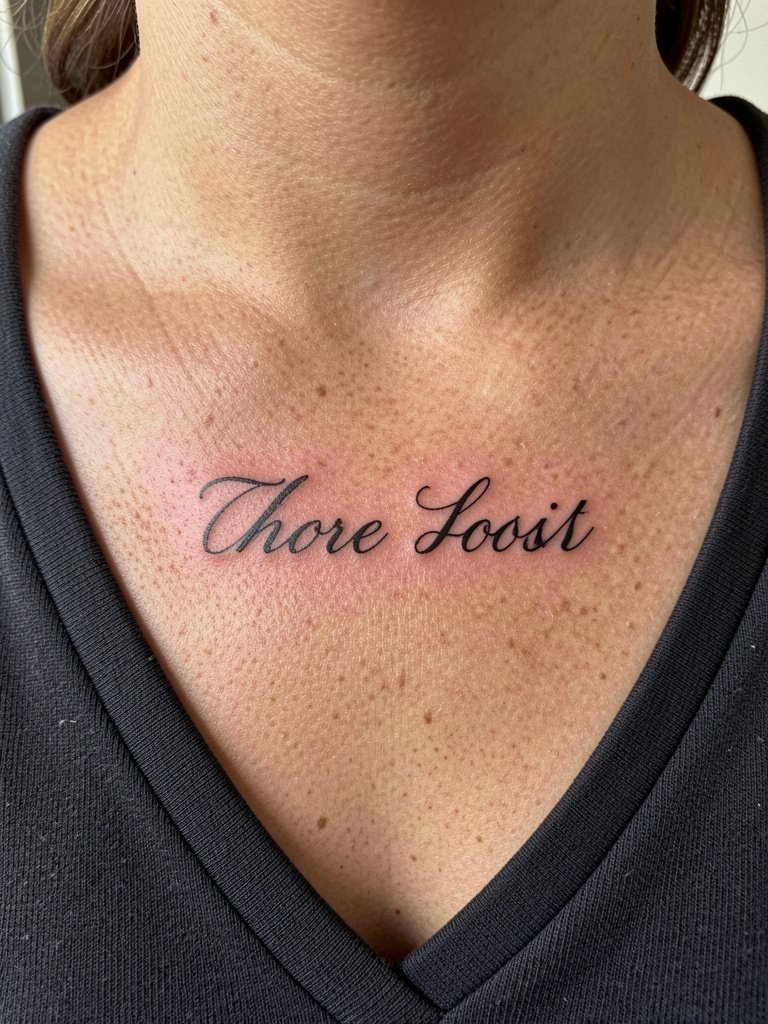
Single-word script is popular for its clean visual balance along the clavicle. There is a longevity debate. One group says ultra-fine cursive blurs within one to two years on collarbone skin because of surface motion and necklace abrasion. Another group maintains that slightly bolder single-needle spacing and simple curves keep text legible longer, and they recommend showing healed photos at the same scale. For the consultation bring the exact font sample and ask the artist to redraw the word at the intended size so you can preview spacing. Wear a button-down you can open for stencil placement, and frame the final look with a thin chain necklace placed on the opposite side so the text remains unobstructed.
7. Geometric Shape, Small
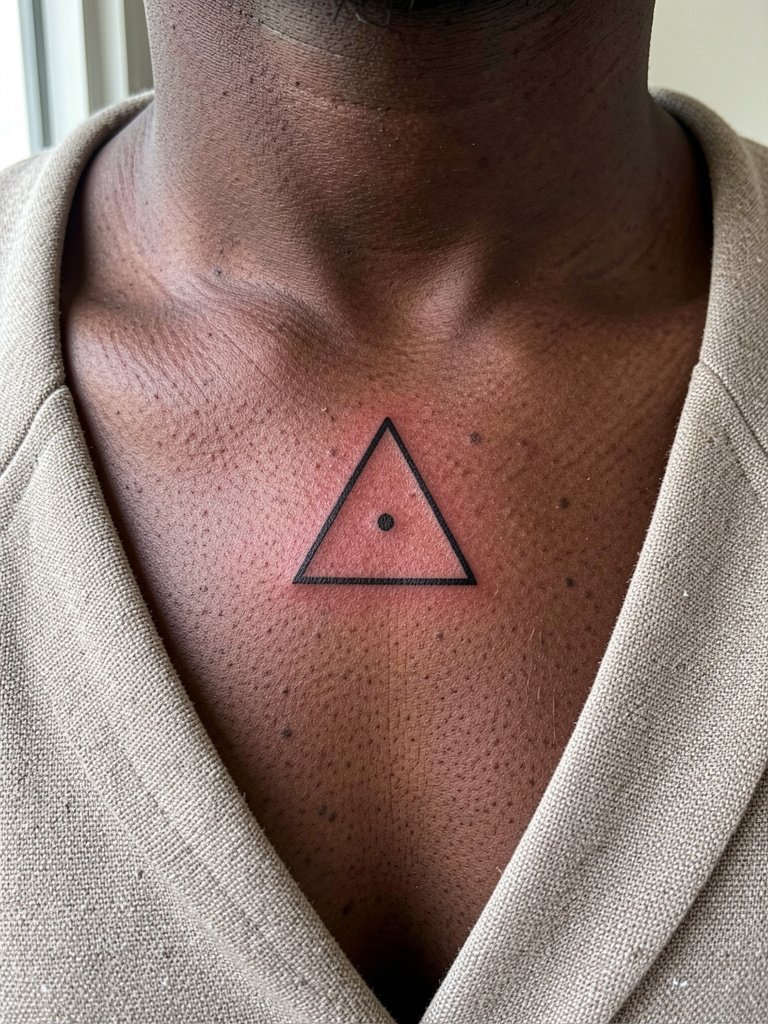
Geometric shapes need breathing room. The biggest mistake is making a triangle so small the interior corners join when the skin settles. Ask the artist for a mockup that shows the negative space at the expected healed size. These take 15 to 30 minutes and usually need a one-year check for any migration. For everyday wear choose structured neutrals like cream or taupe that echo the clean geometry. A structured cream top keeps the aesthetic minimal and modern.
8. Small Wispy Feather, Black Ink
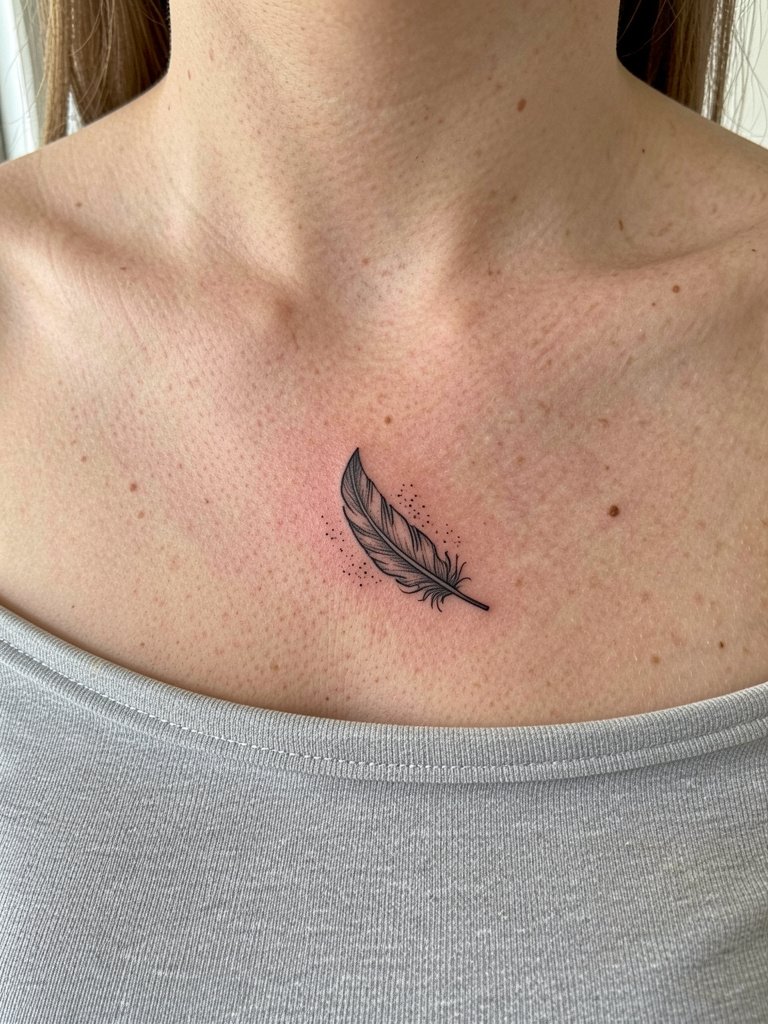
Feathers photograph beautifully because of the implied motion. The common error is over-detailing the barbs at tiny scale. Instead pick a strong central quill and suggest sparse barbs that will still read at one to two years. The session is typically 30 to 50 minutes. For showing off choose off-shoulder tops in soft tones to echo the feather’s motion and pair with a soft off-shoulder top for an airy look.
9. Watercolor Feather Accent
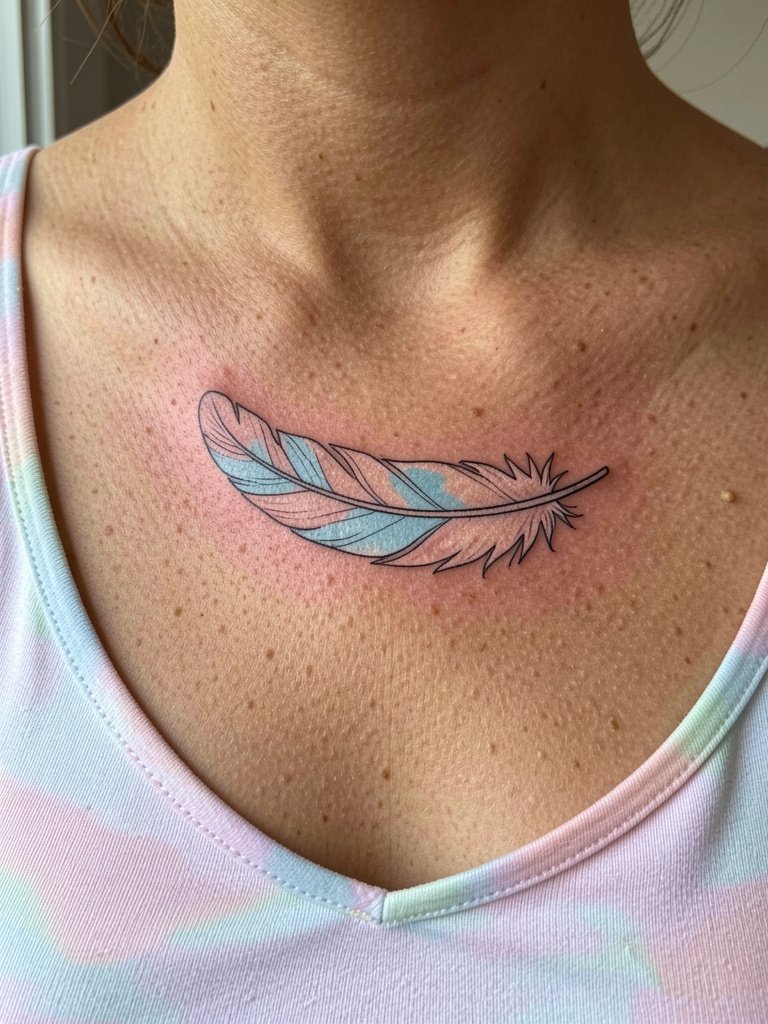
Soft color washes add whimsy without heavy saturation. Be clear in the consultation about how much pigment you want. A common mistake is asking for pastel washes without expecting fade, so plan touch-ups for color at year one or two. This design feels seasonal in summer, and it pairs well with light camisoles or pastel tops. For a quick outfit upgrade try a pastel camisole that matches the wash.
10. Stenciled Simple Design
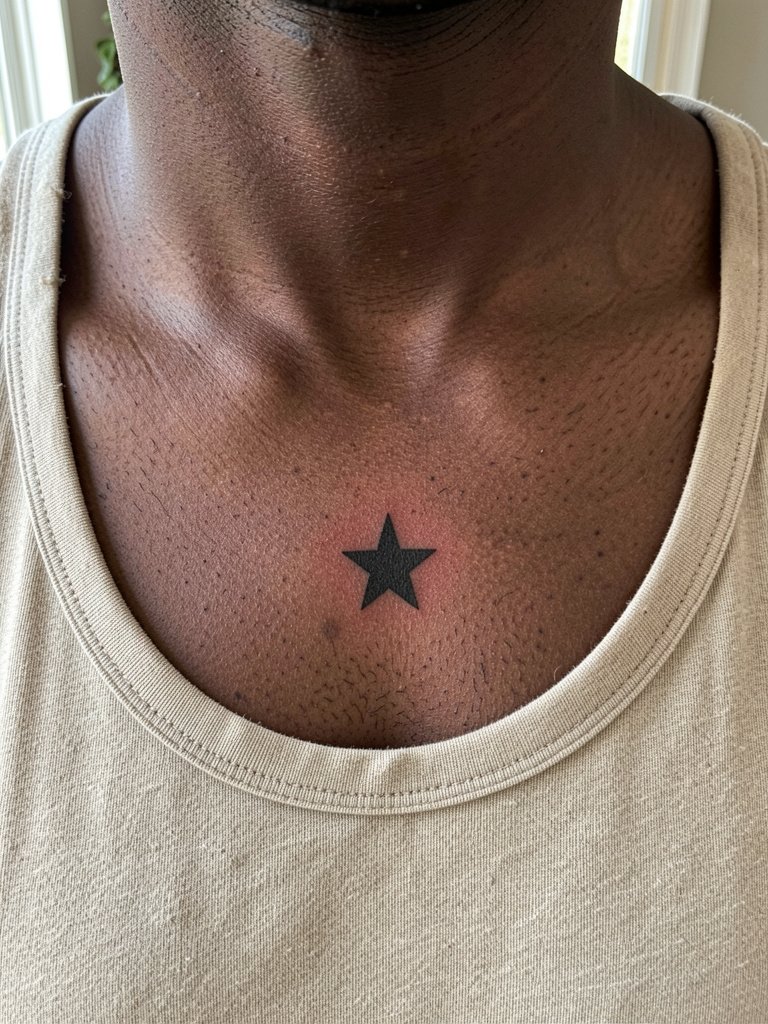
Stenciled icons are quick, low-cost options that read reliably when the outline is solid. The risk is asking for a textured fill that will not hold at micro scale. Keep the silhouette bold and simple. Sessions run under 30 minutes and touch-ups are rare for stout stencils. For everyday looks, a neutral camisole or off-shoulder top frames the icon. Try a neutral cotton tank for casual styling.
11. Stick Figure Love Symbol
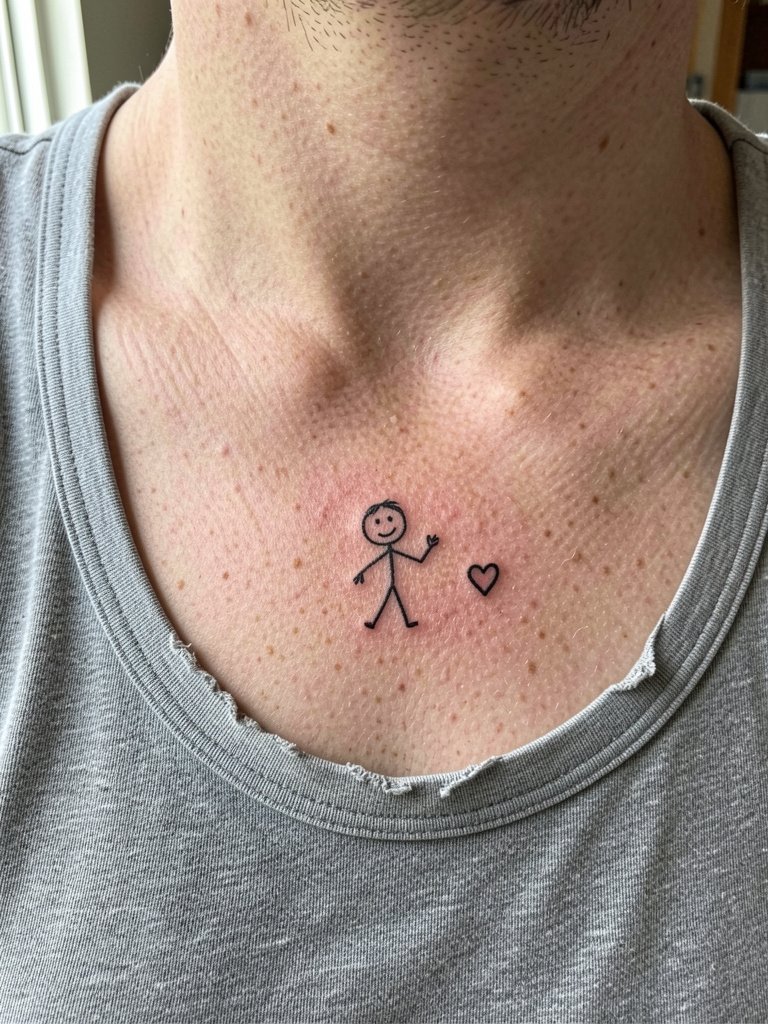
Hand-drawn stick figures read as intimate and playful. The real mistake is trying to copy a scribble from a tiny photo that becomes illegible. Bring the sketch at full size and ask for a redraw scaled to one inch so the limbs retain distance. The session is short and usually low risk for blowout if the lines are not micr0-fine. For a relaxed vibe pair the piece with a cotton tank in earth tones and a simple leather cord necklace on the opposite side.
12. Heart Plus Tiny Symbol Combo
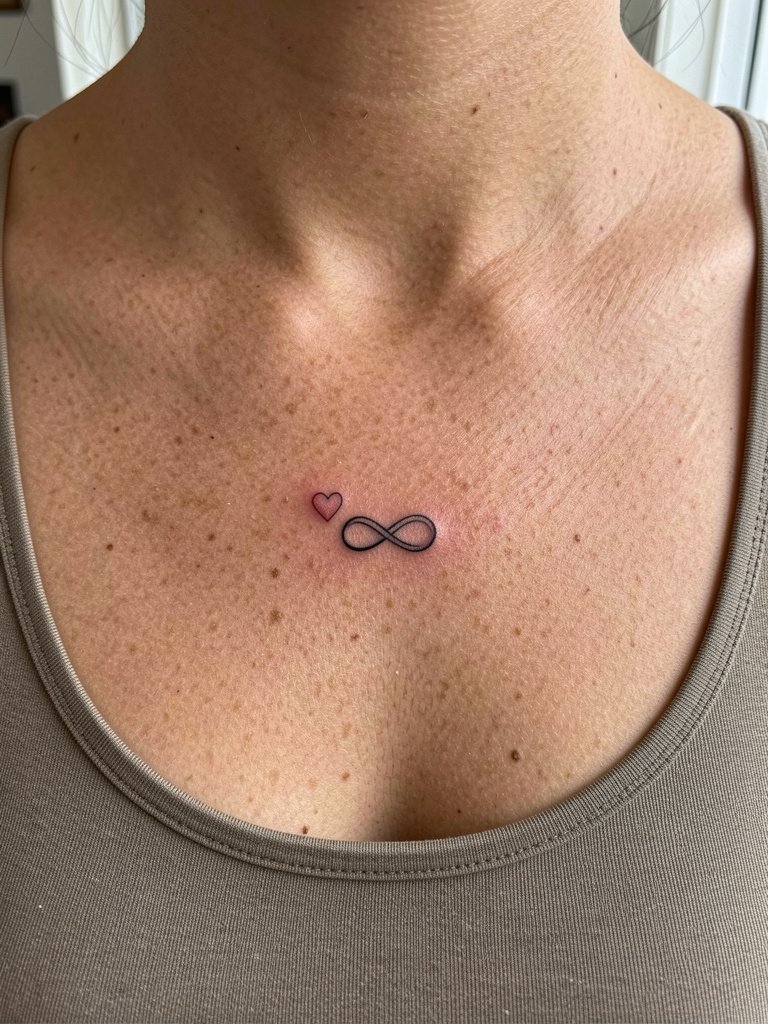
Combos work best when each element has clear negative space between them. A common aging problem is grouping symbols too tight so they merge as the skin settles. Ask the artist to show the spacing at the scale you want and pick one focal shape to keep crisp. Sessions are brief and a small touch-up within two years is common. For balance wear a scoop-neck in a single tone to keep focus on the small duo.
13. Barely-There Stem with Multiple Leaves
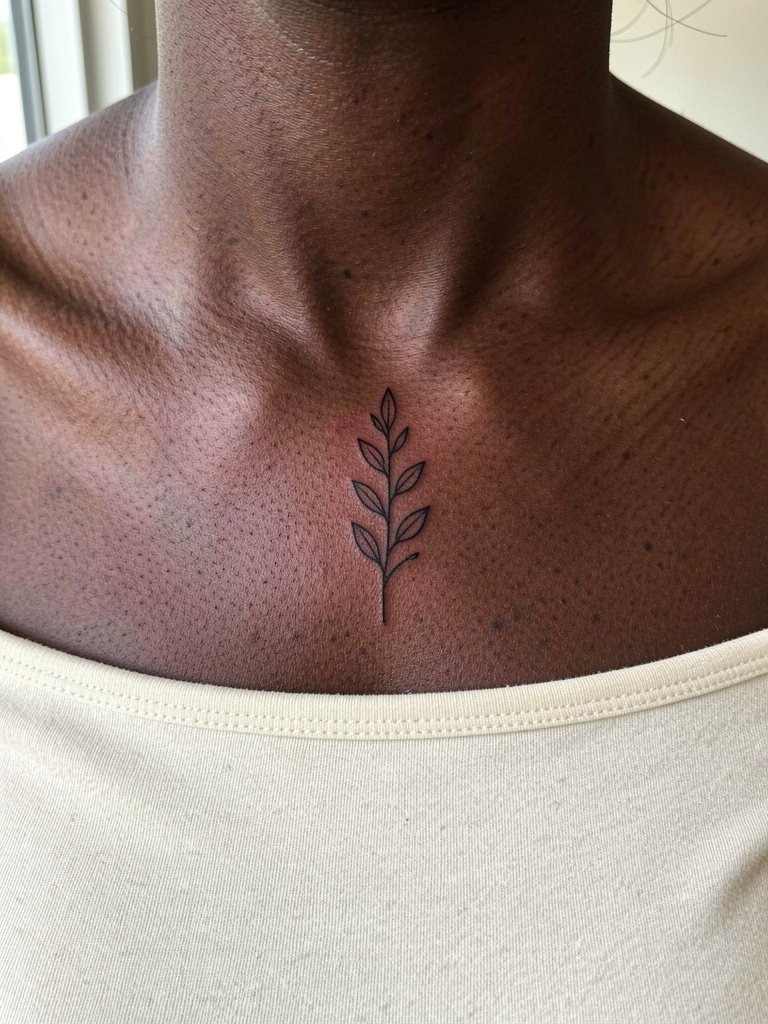
A spaced leaf stem scales well if you want to expand later. The aging mistake is crowding the leaves so there is no breathing room. Request slightly heavier main stem weight while keeping the leaf details light so the silhouette holds. Sessions will run under an hour and many people schedule a touch-up at year two. For showing the design try a cream off-shoulder top that places the piece front and center.
14. Tiny Crescent Moon
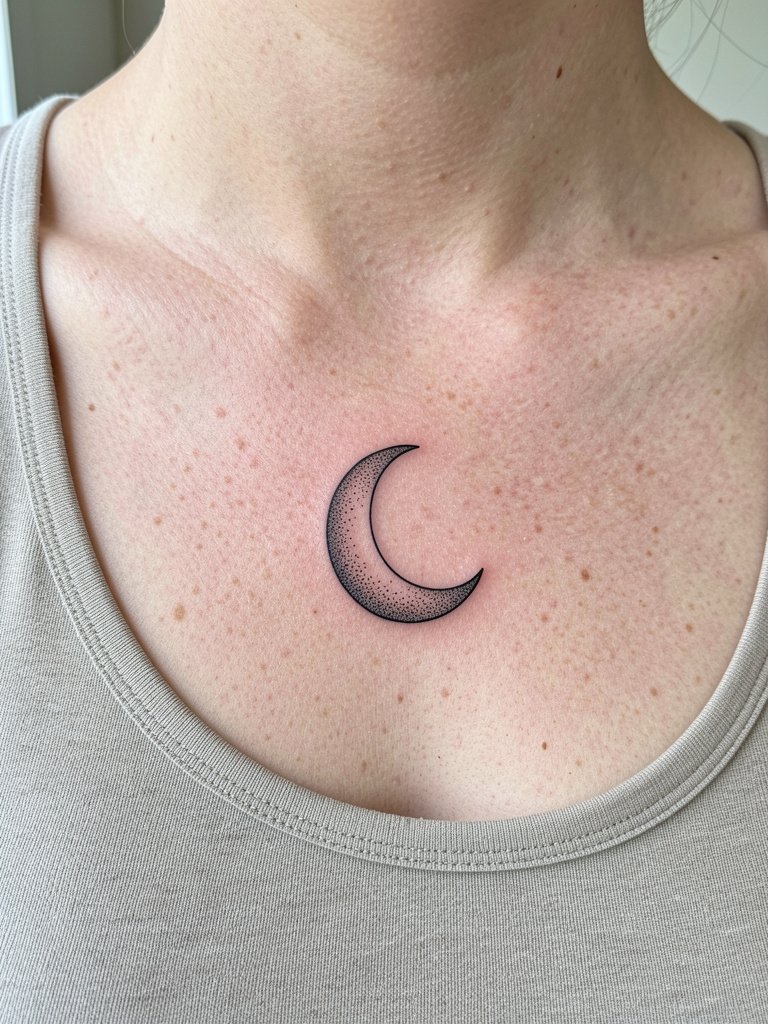
A small crescent is readable and timeless. Avoid tiny internal dots that can fill in. Ask the artist to design a crescent with one clean outer edge and a small stippled shadow if you want depth. The session is brief and touch-ups are seldom needed unless the client sleeps on the area during early healing. For subtle evenings try a neutral scoop-neck top that keeps the curve visible.
15. Mini Constellation Line
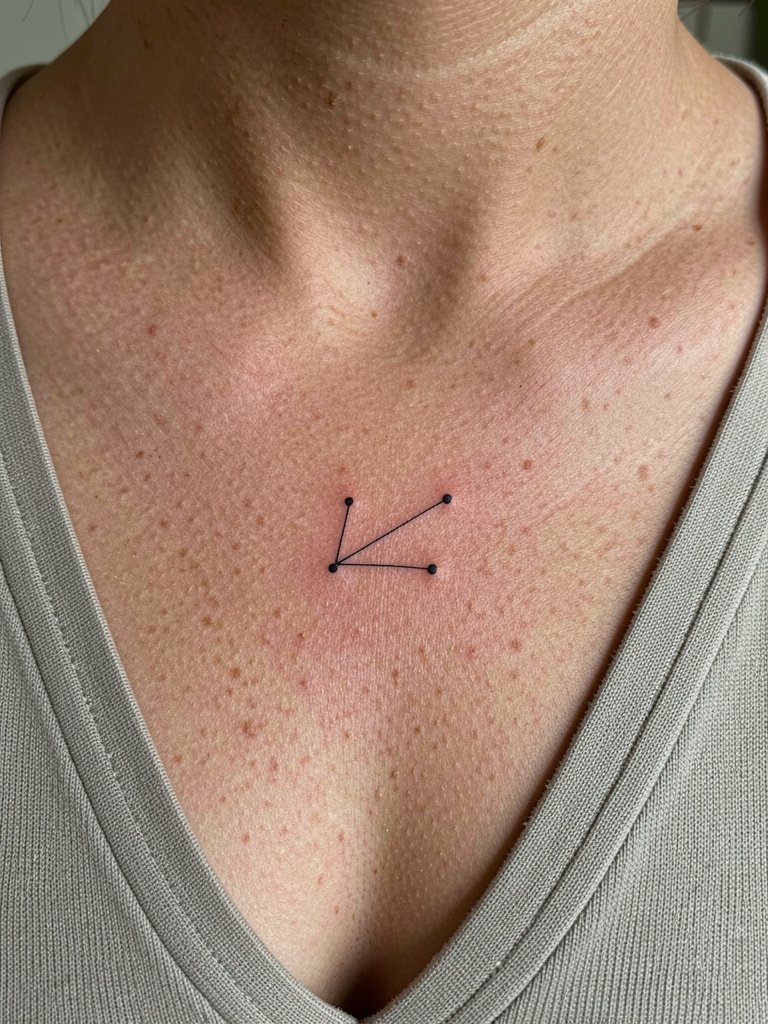
Constellations need clear dot spacing. The common error is placing dots too close so the connector lines look crowded after healing. Bring a layout with measured spacing and ask for the dot diameter to be large enough to resist migration. Sessions are short, but dot work can fade unevenly on high-motion areas. For outfit pairing a simple V-neck shirt offers a clean frame.
16. Micro Arrow
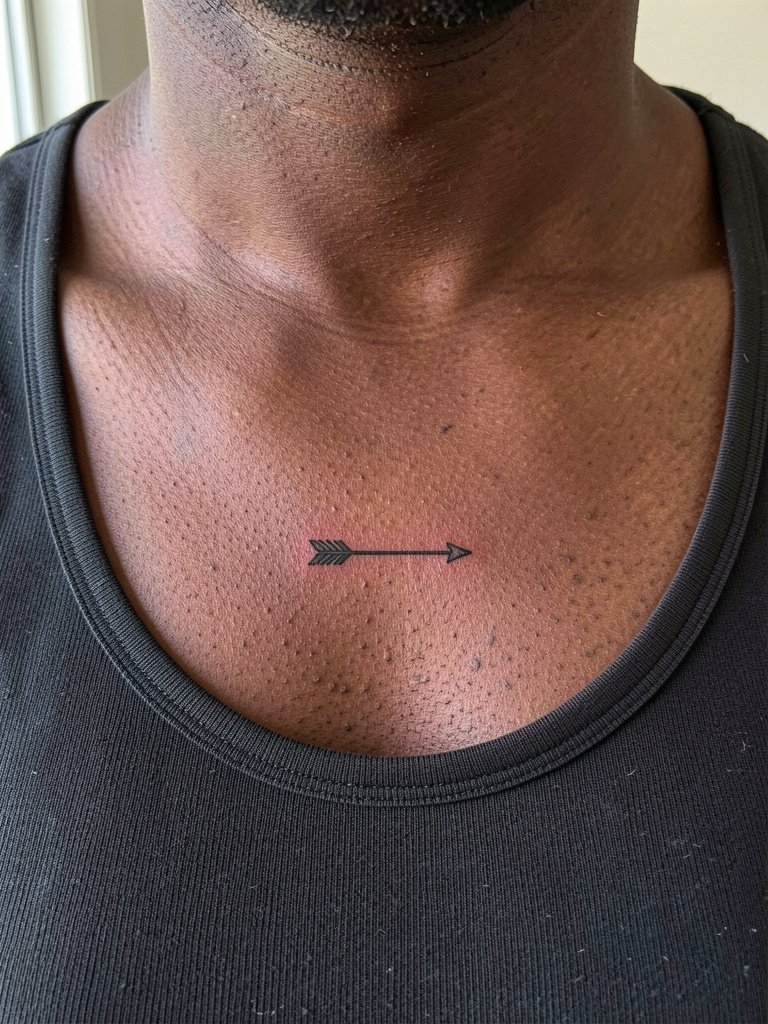
Arrows read well when their shaft is straight and the head is solid. A frequent mistake is making the shaft too thin so the line softens after a year. Ask for a modest shaft weight and a compact head. Sessions are quick and touch-up needs vary. Pair with a fitted tank top to keep the linear motif visible.
17. Tiny Mandala Dot Cluster
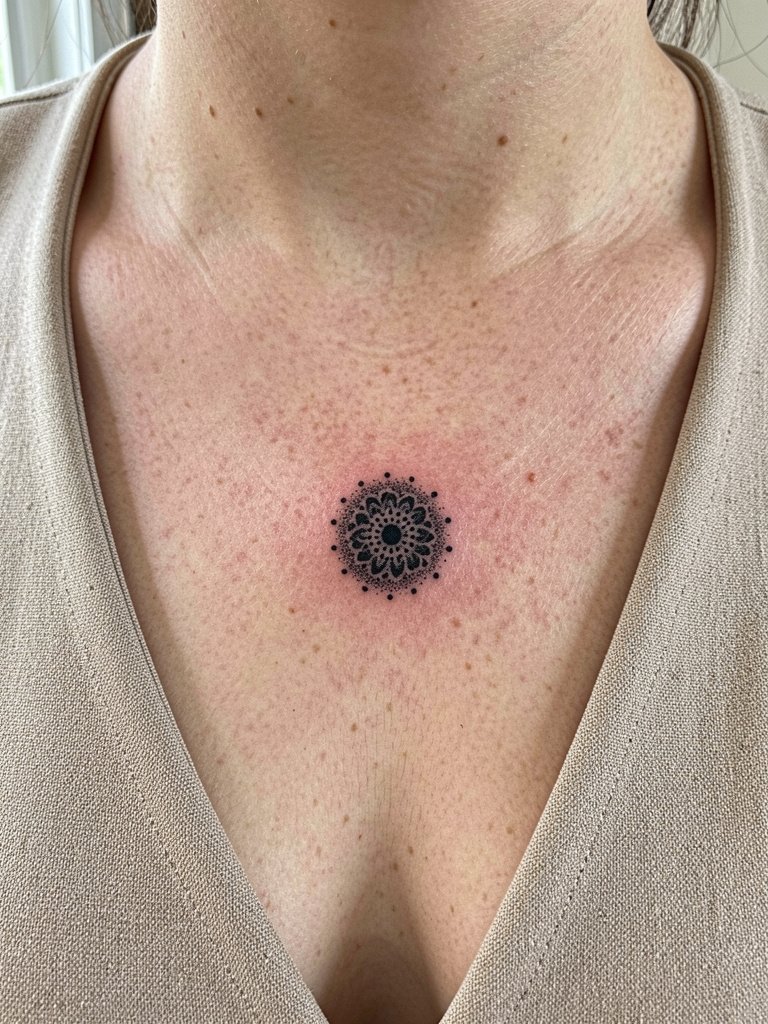
Micro mandala dots depend on crisp negative space. The typical mistake is packing too many layers into a tiny circle so the pattern melts. Ask the artist to simplify the nearest rings and concentrate detail in the center. Sessions vary but expect an hour for a tiny symmetric piece. For showing off, pick a neutral structured top to echo the mandala’s geometry.
18. Tiny Botanical Sprig with Minimal Shading
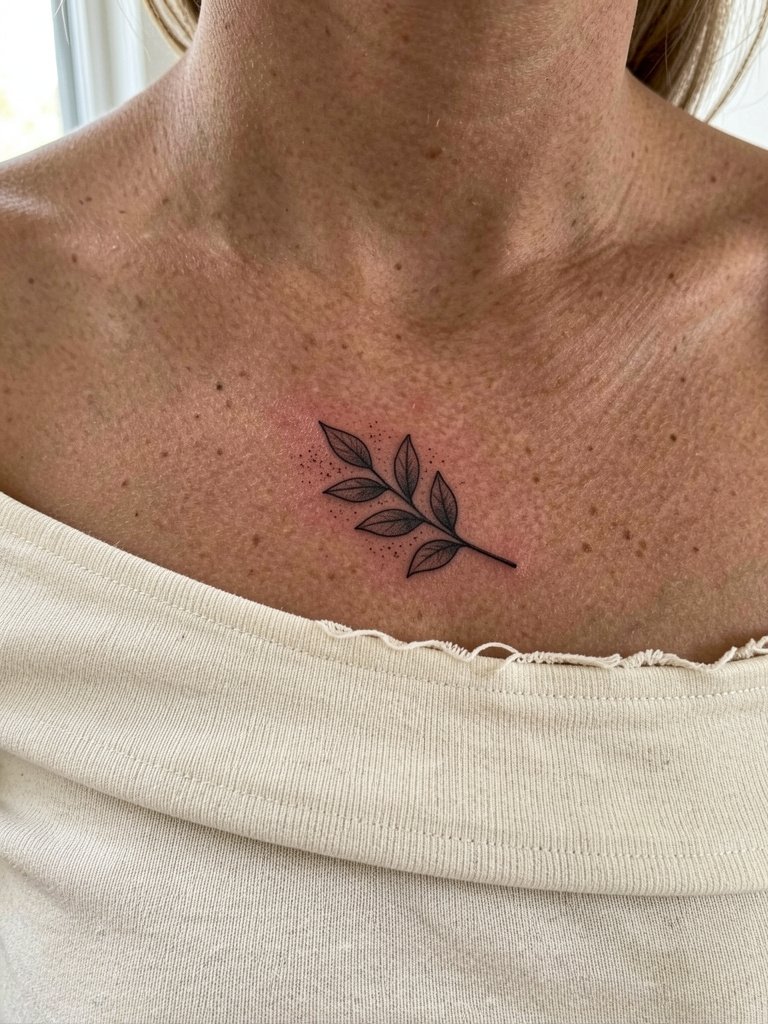
A sprig with light shading reads like an elevated botanical. Ask the artist to place stipple clusters rather than continuous shading so tone remains legible as the piece ages. Sessions usually take under an hour and many clients request a one-year check. For a curated look try a cream off-shoulder top that keeps the chest area open.
19. Tiny Anchor Outline
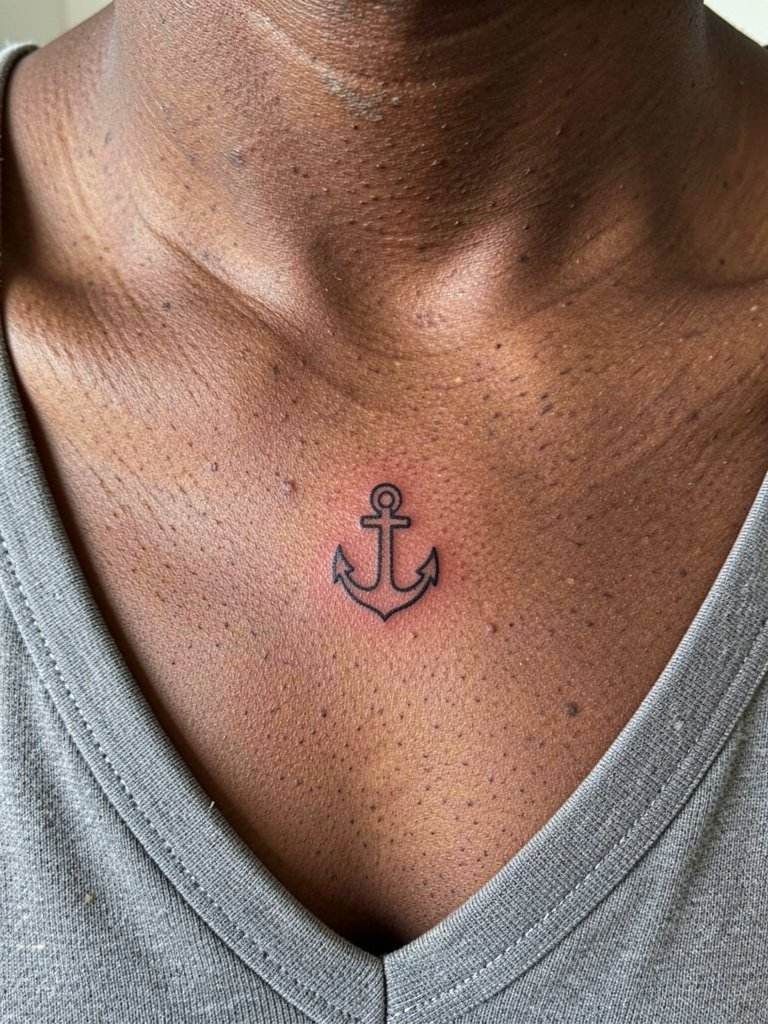
Minimal anchors need an open interior to resist filling. The common mistake is a filled interior that eats detail over time. Ask for an outlined anchor with crisp negative space. Session time is short and touch-ups depend on daily abrasion from necklaces. For a maritime vibe pair it with a simple V-neck tee.
20. Tiny Script Initials
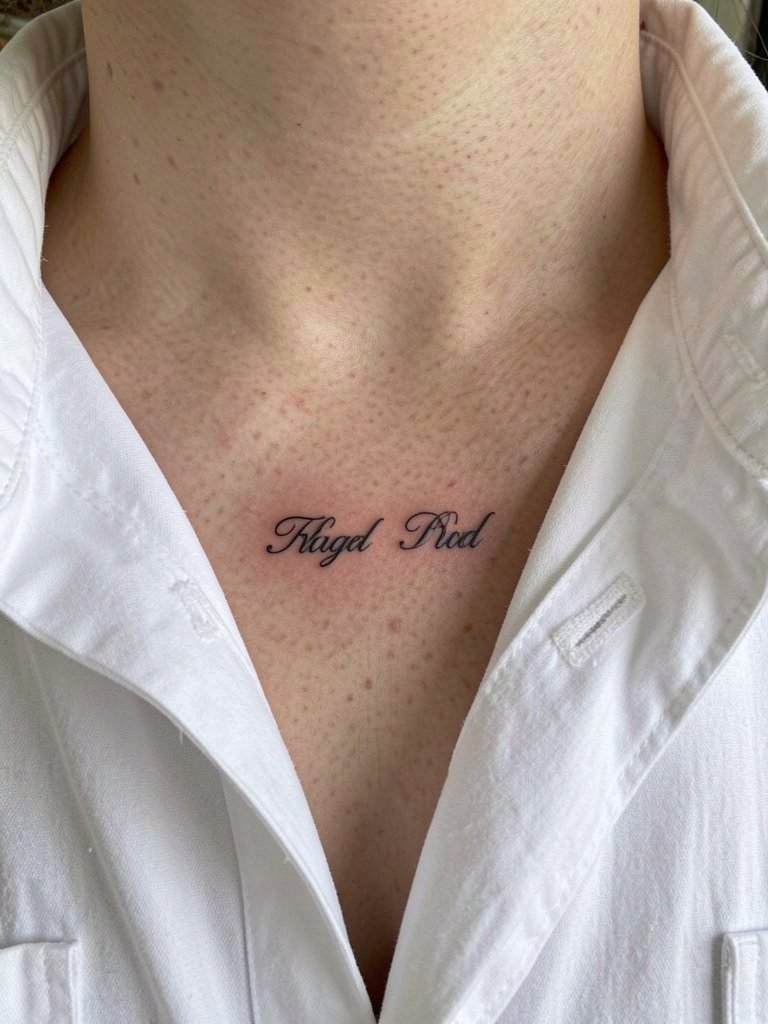
Initials are compact and personal. Make sure the letterforms have a small counter or interior space so they do not close up as they heal. A measured mockup helps decide exact spacing. Sessions are very brief but check the healed look at six months before adding extras. For a crisp frame wear a white cotton button-down left open during cool evenings.
21. Small Wave Line
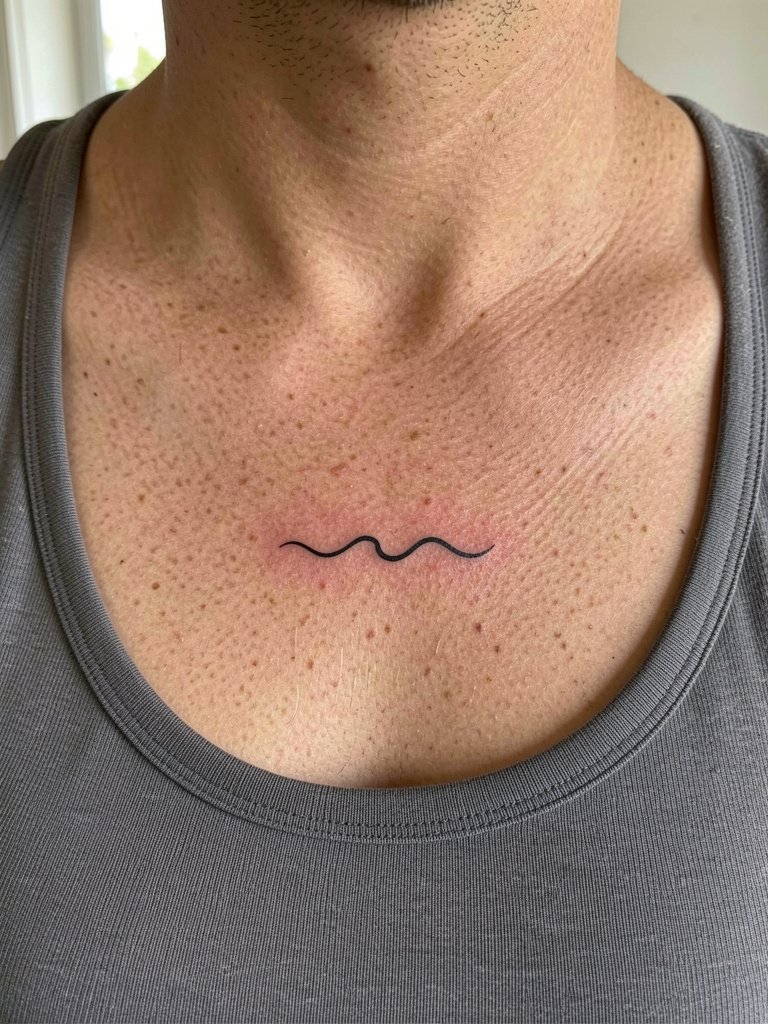
A single wave is a subtle nod to movement. The frequent error is asking for a waveline too thin so the crest blurs. Instead request a slightly rounded crest and tapered tails. The session is short and most clients report comfort similar to nearby fine-line pieces. For a coastal look choose a fitted tank top in navy or white.
22. Tiny Keyhole Outline
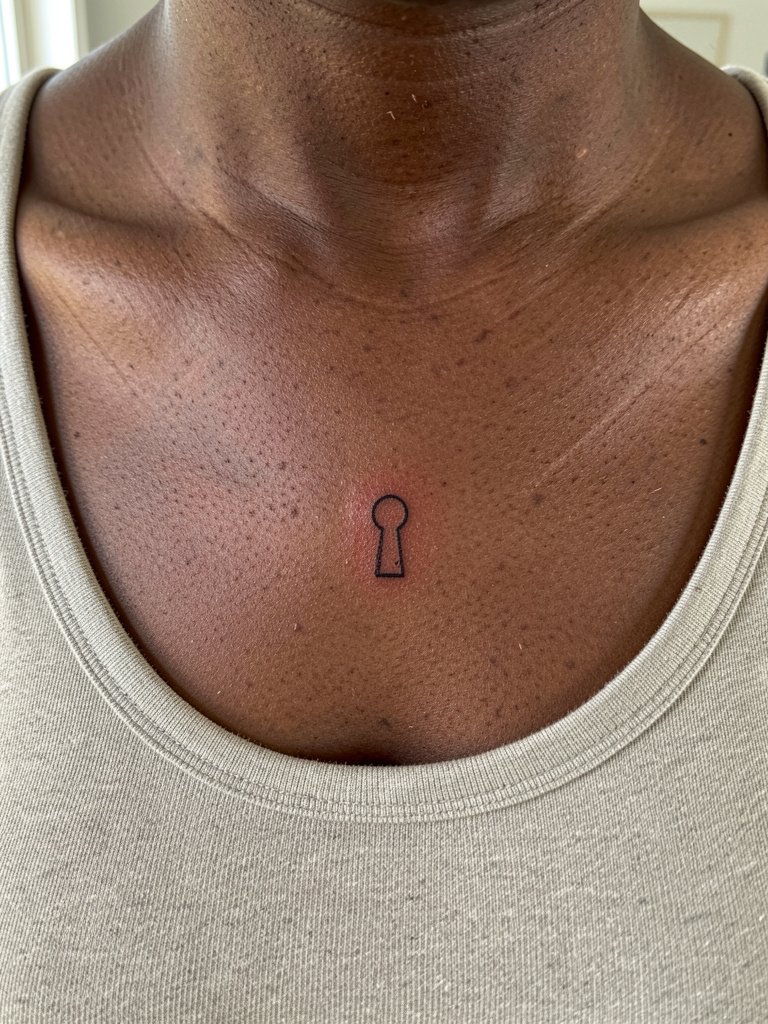
Keyhole outlines are graphic and compact. Avoid tiny interior circles that can fill. Ask for a slightly larger circular top so the shape stays legible. Sessions are quick. For an evening frame a neutral scoop-neck top that keeps the silhouette clean.
23. Little Pinecone or Acorn
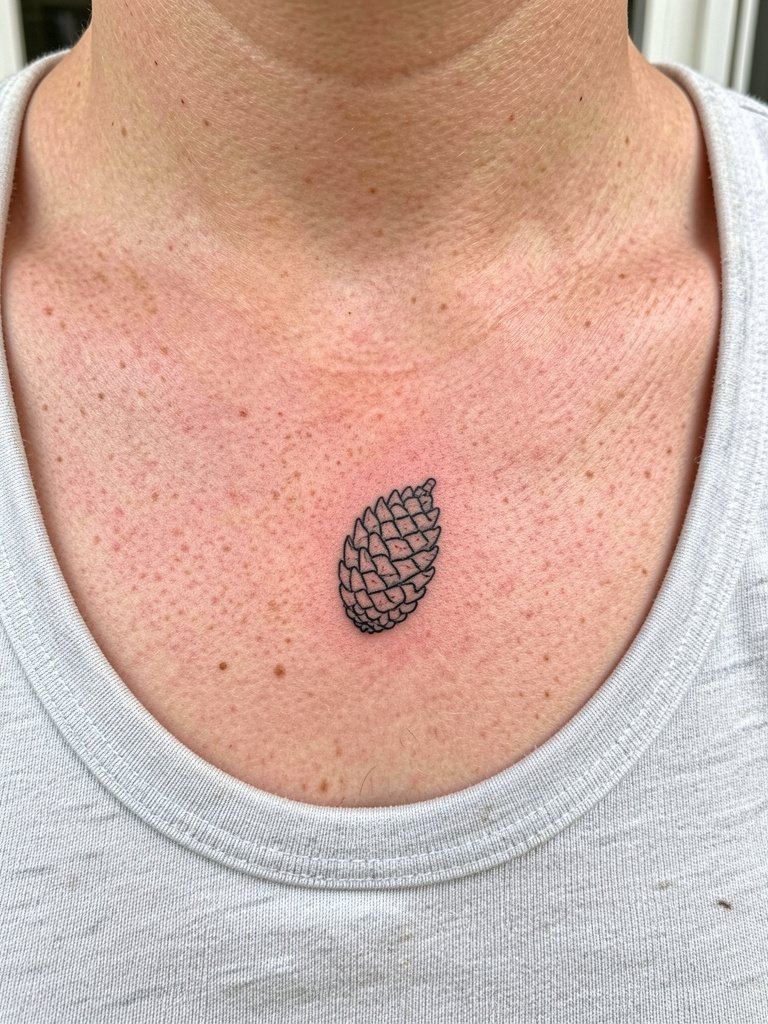
Nature icons like pinecones need simplified scale to hold. The usual mistake is over-texturing the scales at micro size. Ask for a stylized silhouette with two or three defining scale lines. Sessions take under an hour. For a rustic look wear an earth-tone cotton tank.
24. Tiny Music Note
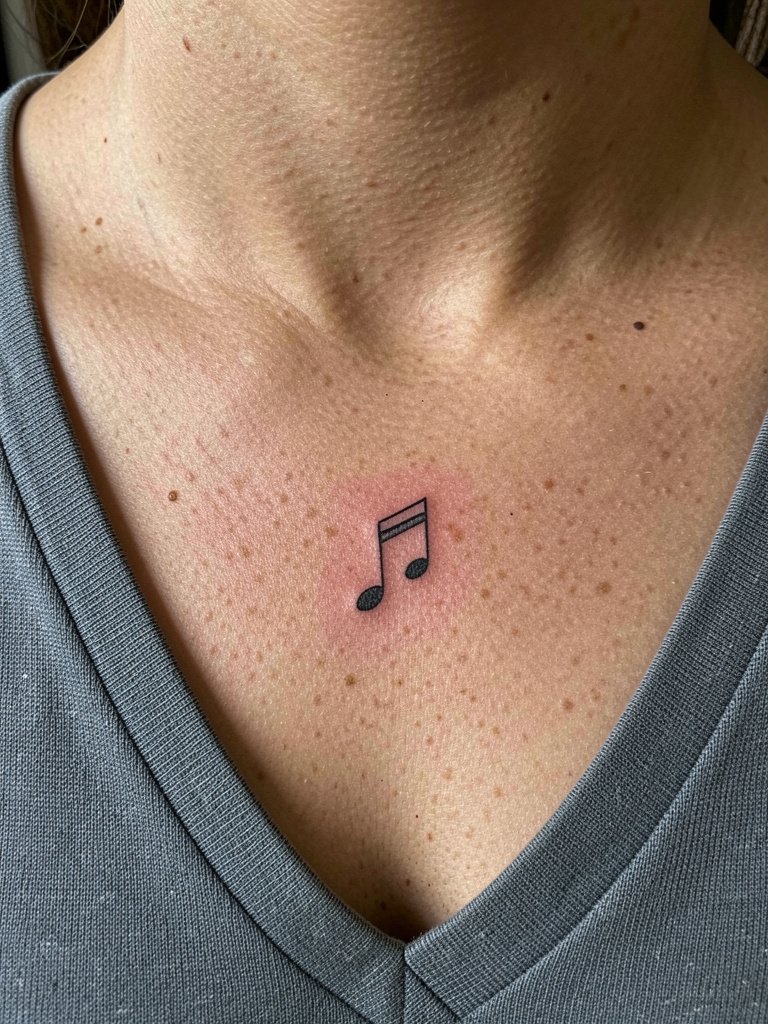
Music notes are small and iconic. The main error is making stems too thin so they fade into hairline marks. Ask for a compact head and a slightly bolder stem. Sessions are very short and usually hold well for years. For a night out try a simple V-neck that gives the note a clean frame.
25. Tiny Compass Point
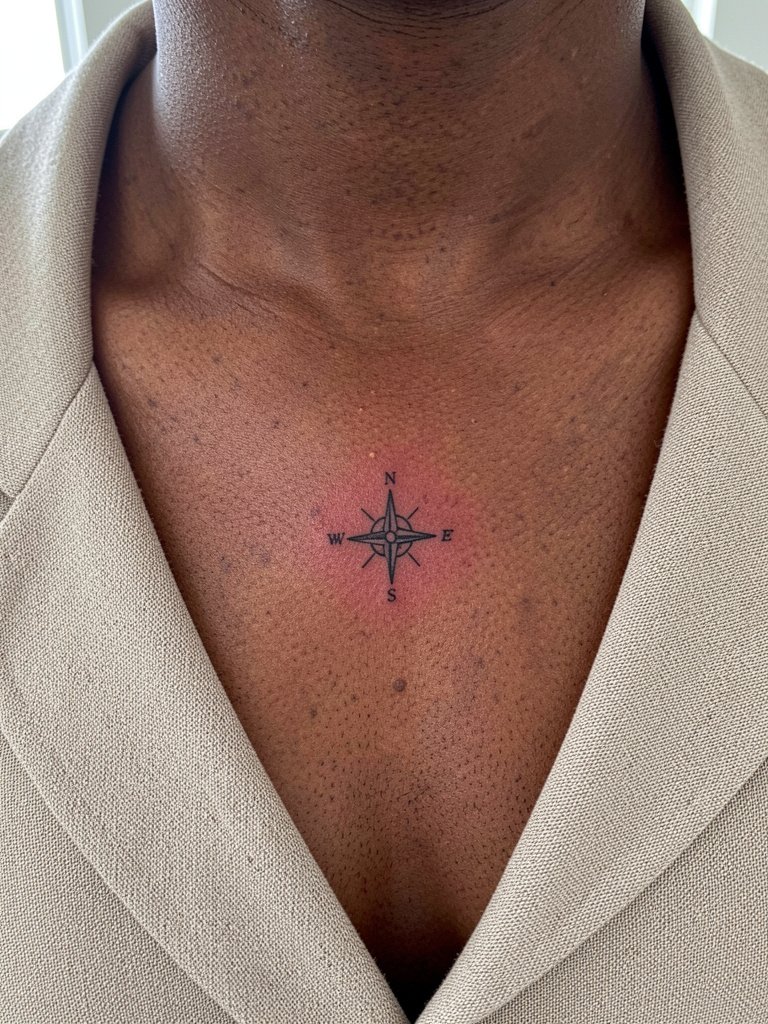
Tiny compass points read best when each arm has room to breathe. The mistake is compressing four arms into a dot. Instead have the artist space each arm and mark a square millimeter of clear center. Sessions take under an hour and many clients ask for a one-year tweak. For travel-ready styling pick a neutral structured top that mirrors the compass geometry.
Pre-Session Essentials
These items smooth the first week for collarbone placements and match common needs in the ideas above.
-
Hana no Mai Japanese aftercare balm. A thinner balm option mentioned by chest-area healers for less pore clogging while keeping fine-line work moist during the first few days.
-
Tattoo Grime gentle soap. A milder cleansing option for sensitive chest skin that some people prefer over harsher soaps during the initial healing window.
-
Hey Honey healing oil. Lightweight oil people report as non-greasy for collarbone areas where heavy ointment feels sticky under necklaces.
-
Full-coverage non-comedogenic concealer. For healed pieces that need temporary coverage for special events, choose a non-comedogenic formula and wait until the tattoo is fully healed.
-
Cetaphil fragrance-free moisturizer. Gentle daily moisturizer for chest skin after the initial sealed stage to avoid irritation and help even tone.
Frequently Asked Questions
Q: How long will a fine-line collarbone tattoo stay crisp?
A: Expect visible softening over time. Some people see blur as early as 12 to 24 months on the clavicle because the skin there is thin and moves with breathing and clothing. Other people see clean lines at three years when the initial spacing and slight extra weight in primary strokes were planned. Realistic planning for touch-ups at year one or two is the safest approach.
Q: Is the collarbone more painful than other chest spots?
A: Pain varies. Many report sharp, high-frequency vibration on the bone which feels intense; other clients say short sessions and pacing make it manageable and that ribs or sternum felt worse. For small designs the total time is short, and applying a topical numbing 30 to 45 minutes before can help if you are nervous. Plan for short breaks during the session and wear a top that the artist can adjust without pinching the fresh area.
Q: Can I cover a fresh collarbone tattoo with makeup for work?
A: Covering a fresh tattoo is not recommended during the open healing period. One side argues you should never cover fresh ink because it can trap bacteria and interfere with healing. Another side of the debate notes some artists permit high-coverage non-comedogenic concealer after a few days once the area has sealed. If coverage is essential, wait until the piece is fully healed, then use a non-comedogenic full-coverage concealer and set with powder. Plan shifts in scheduling so you do not have to cover a fresh wound.
Q: Where can I find healed collarbone portfolios and local artists?
A: Search hashtags like #collarbonetattoo, #finelinetattoo, and #tinytattoo on Instagram and TikTok and filter by location. Tattoodo lets you search by keyword combinations like "fine line collarbone leaf" and shows healed portfolio examples. Reddit threads on r/tattoos and r/finelinetattoos surface peer recommendations and healed shots across skin tones. Booksy and the Inked App both filter studios by specialty if you want a local search path.
Q: What should I wear to the appointment for a collarbone piece?
A: Wear a top that gives the artist full access without tugging fabric across the clavicle. Good options include strapless tops, wide V-necks, or open button-downs in their normal worn positions. For post-session styling pick camisoles or off-shoulder tops that do not rub the fresh area while it seals. A specific suggestion is a loose button-down shirt you can easily open for stencil placement.
Q: How do collarbone tattoos behave on darker skin tones?
A: Healed contrast depends on saturation and line weight. Fine-line work can still read on medium and dark skin, but the lines may need slightly heavier weight and clearer negative space planning to maintain long-term legibility. If you have darker skin, show the artist healed examples on similar skin tones so you can set expectations for contrast and future touch-ups.
