
Someone I know spent a full summer hunting for a collarbone tattoo that would still look good after years of sun, sweaters, and shoulder straps. The real problem was not picking a pretty image. It was knowing which styles hold up on bone, what to ask at a consult, and how to heal around constant movement. Below are 25 collarbone tattoo ideas with real-world tips on pain, aging, and what to tell your artist.
1. Fine Line Lavender Sprigs Flowing Along the Bone

Someone I know copied this from a sketch and it ended up better than expected because the sprigs follow the bone like a guide. Expect a higher pain level where the needle crosses the clavicle itself, and plan for a short one-session appointment. Tell your artist you want 1.5 to 2 mm spacing between stems so lines do not merge as the ink heals. A common mistake is asking for ultra-thin single hairlines that disappear by year two. At six months the stems hold up well. By year three lightening may show, and a small touch-up restores crisp linework.
2. Cherry Blossom Branch Draped Over One Collarbone

Fair warning about placement. The upper collarbone moves when you turn your head, which makes steady linework essential. Bring reference photos that show delicate petal shading rather than dense color. Ask for soft stipple shading on petals so the pink fades naturally without patchiness. One mistake people make is packing too much color into small petals, which ages into blotchy spots. At six months the blossoms look soft and intact. Expect a possible touch-up around year two if you spend a lot of time outdoors without protection.
3. Organic Ivy Vines Wrapping Across Both Collarbones
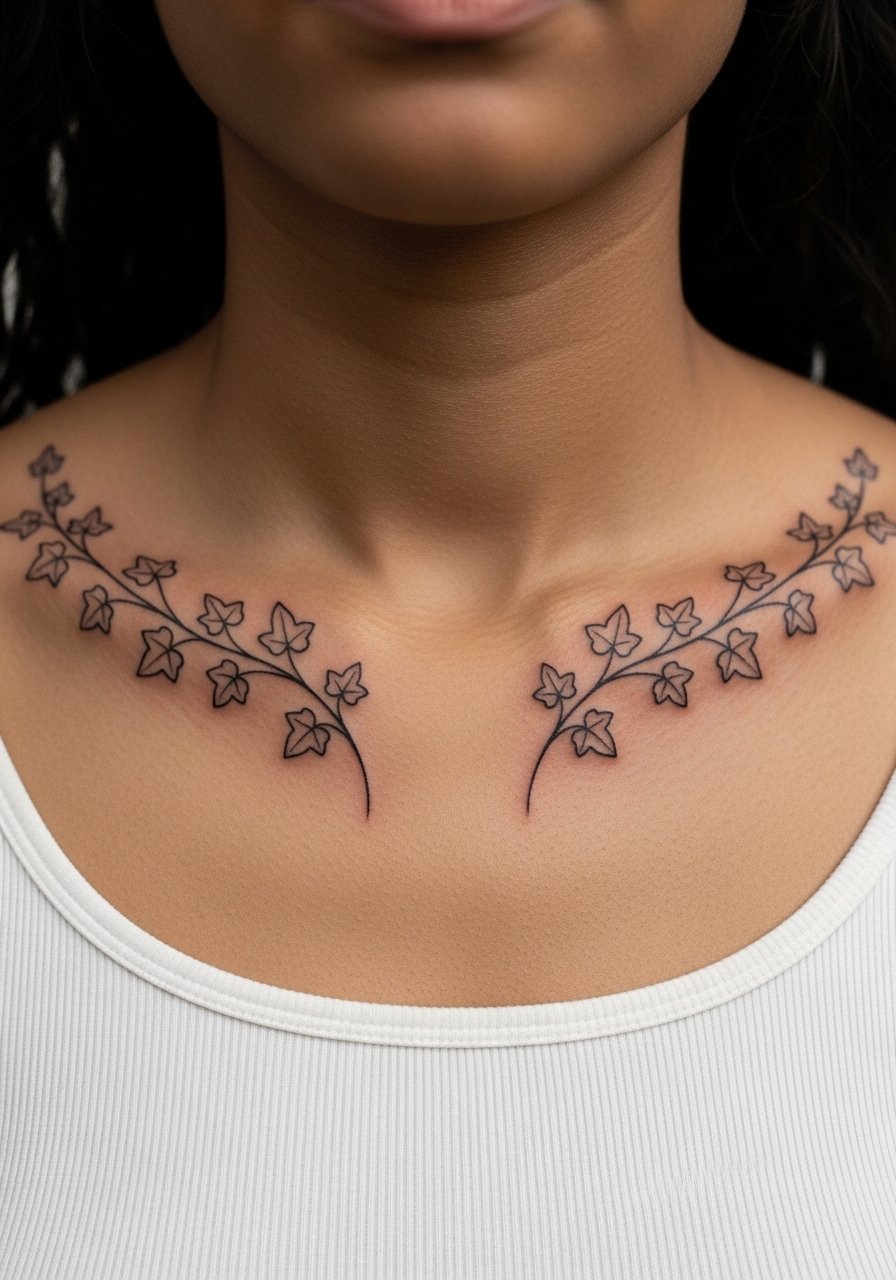
Ivy that links both collarbones reads like motion even when you are still. This design is best for someone who plans to expand into a shoulder or chest piece later. During consultation say you want slightly thicker anchor stems with finer trailing leaves to protect against blowout. Artists sometimes make every leaf the same size, and that flattens the motion. Expect two short sessions if you do bilateral work. Healed at one year the vines keep their shape, but thin lines near the inner clavicle can require touch-up at year three.
4. Single Stem Wildflower Cluster Above the Collarbone

This is a go-to for first collarbone tattoos because it is small and easy to hide under clothing. The pain is sharp where the needle crosses the bone, but the session time is short. Tell your artist you want slightly undersized leaves so the whole cluster breathes on the bone. A common error is requesting tiny petals with heavy shading, which ages into a muddy patch. At six months the cluster should read clearly. If you prefer near-invisible aging, pick slightly bolder linework and plan a touch-up at year three.
5. Classic Rose Outline Tracing the Collarbone Curve

There is a reason the rose keeps coming back. It works along the clavicle's arc and can be scaled without losing form. When you sit down with the artist mention you want the outline crisp with minimal fill so the petals retain shape over time. The mistake I see often is asking for heavy color in a small rose. That color can age unevenly on the thin skin near bone. Expect a one-session appointment for a small rose. Two to three years later a light touch-up can restore saturation if needed.
6. Flowing Script Quote Arched Over the Collarbone

When you commit to script on a moving bone, plan how long the letters should be so they do not compress when you move. I tell people to bring exact font samples and the full text. One common mistake is choosing ultra-tiny lettering. That looks elegant for a week and then blurs. During your consult, ask for slightly thicker downstrokes and for line spacing that accounts for swelling during healing. Expect a 45- to 90-minute session depending on length. Healed script at one year reads smoothly. Touch-up may be needed sooner if the lines softened.
7. Intricate Floral Mandala Spanning One Collarbone

Mandala work near the collarbone needs precise centering because asymmetry is obvious on the chest. Artists split into two camps on fine detail here. One camp warns that tiny mandala details blur with skin movement and prefer bolder spacing. The other camp says careful stipple shading and measured line weight keeps detail intact. Ask directly where your artist stands. Plan for two sessions for medium-length mandalas. At six months the stippling settles nicely. Expect a touch-up around year two for very fine elements.
8. Tiny Heart Motif Near the Collarbone Dip

Micro motifs like a small heart are a low-commitment option that still reads as intentional. The session is short and pain sharp but brief. Tell the artist you want a slightly thicker outline than you think you need, so it does not feather into a gray blob later. A frequent mistake is asking for a hairline outline. At six months a bold micro heart still reads. If you want it to remain poppy on darker skin, request solid saturation at the consult. Touch-ups are fairly simple for micro work.
9. Vine and Leaf Botanical Sleeve Starter on the Collarbone
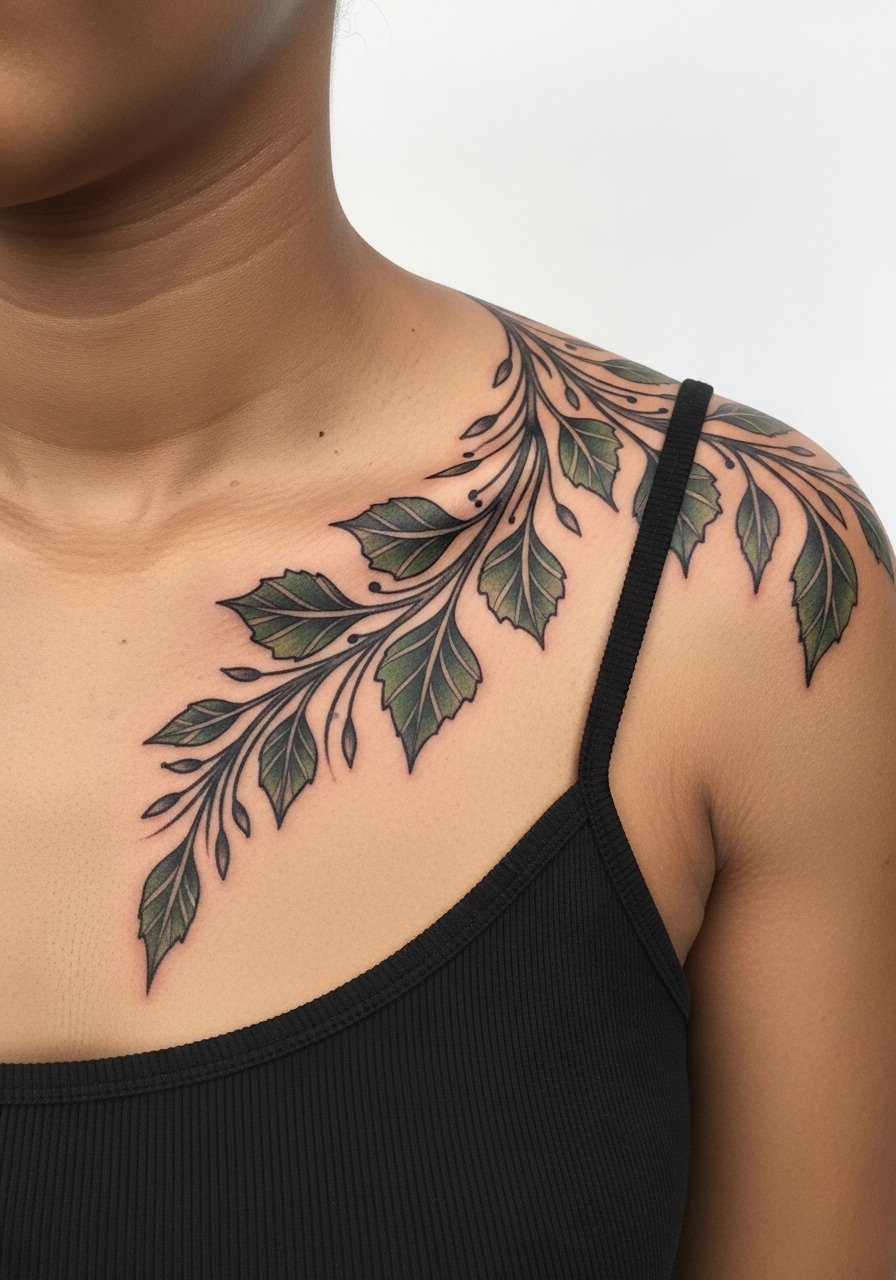
This is for people who want a future sleeve without committing to full chest pieces right away. Expect multiple sessions because the piece crosses high-motion zones. Tell your artist you want anchor stems placed where future pieces can join, and mark expansion points during the consult. A common mistake is treating the collarbone portion as an afterthought. If you plan long-term, have the artist sketch the continuation. Healed sections at six months show where spacing and saturation may need change before adding more work.
10. Minimalist Cross Silhouette Above the Collarbone

A small faith symbol sits discreetly and is easy to conceal under shirts. Because of the simple geometry, precise placement matters. Tell your artist if you prefer a vertical or slight diagonal tilt to follow your neck line. One mistake is going too small in height, which makes the cross lose definition over time. Expect a short session and low maintenance. If the cross is meant to be visible from a distance, ask for slightly bolder linework to maintain shape as it heals.
11. Poetic Daisy Chain Linking Both Collarbones

A bilateral daisy chain looks intentional and architectural when spaced correctly. When you consult, point out whether you want mirrored blooms or a staggered run. Many people ask for mirrored copies, which can read too forced on uneven bone placement. A better approach is intentional asymmetry with repeating elements. Expect one to two sessions. At one year the chain keeps flow, and small touch-ups at year three restore any soft petals. This design ages well if you avoid heavy fill.
12. Elegant Peony Bloom at the Collarbone Peak

Watercolor approaches can look luminous on clavicle skin but they require careful color saturation. Tell your artist you want defined black anchors with watercolor wash rather than pure floating color. The common mistake is too much diluted pigment that fades into a bruise-like patch. Expect a one-session appointment if the bloom is small. After healing, the black linework holds the shape while the watercolor tones mellow. Plan on a color touch-up by year two if you regularly sunbathe.
13. Tiny Star Cluster Near the Collarbone

Star clusters are low-risk for blowout if done with precise spacing. When you book, ask for dot work that uses single-pin stippling for the smallest stars. A common error is packing stars too tightly. That limits negative space and leads to merging over time. Session time is brief. At six months the dots should retain crispness. If you want a specific constellation, provide the exact coordinates or star count so the artist can reproduce it accurately.
14. Crescent Moon with Stipple Shading Above the Collarbone
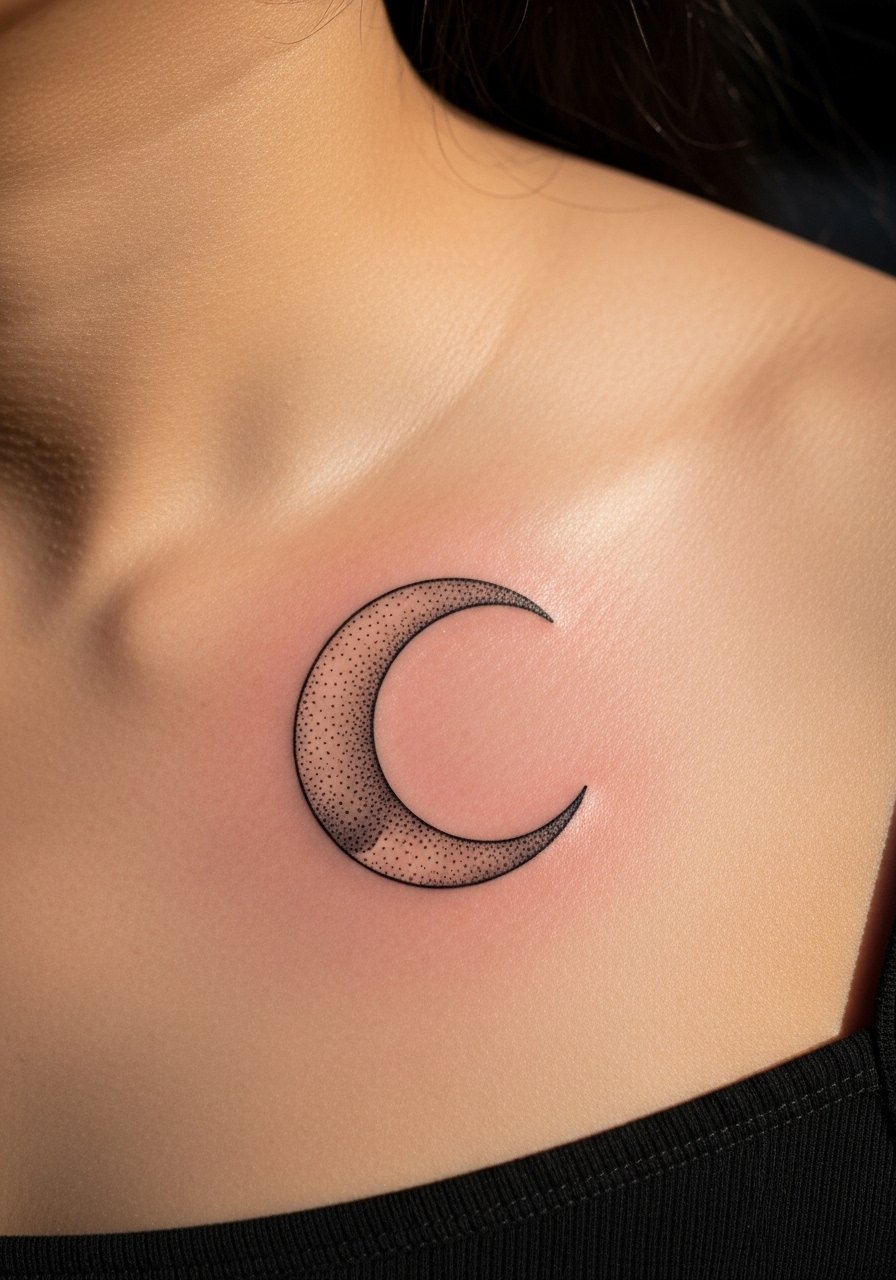
The stipple shading here gives depth without heavy saturation, which suits thin clavicle skin. During consult ask for stipple density that reads at arm's length rather than micro stipple that risks blur. A mistake I see is asking for full black fill when the area needs breathable texture. Expect a short session. Healed stipple holds well at one year but very fine dots can soften over time, which is a good candidate for a targeted touch-up.
15. Small Swallow or Dove Landing on the Collarbone

Birds placed on the collarbone read like motion frozen in place when wings align with the bone. Tell your artist the wing span you prefer so the bird sits naturally. One common mistake is placing the bird too flat against the bone which breaks the illusion of flight. Expect one session for a small piece. Healed wings maintain line clarity. If you plan to add background elements later, mark connection points during the initial consult.
16. Geometric Mandala Segment Curving with the Clavicle

Geometric pieces need breathing room for lines to age correctly. Ask for slightly larger negative space between repeating elements to prevent eventual blur. The mistake is compressing too many angles into a small area. Expect 60 to 120 minutes depending on complexity. Over time the geometric contrast holds if spacing is adequate. Consider stipple shading instead of heavy black fills to retain visual texture long term.
17. Tiny Anchor Near the Collarbone for Travel Lovers

Anchors are small, symbolic, and easy to hide. They hurt briefly where the needle hits bone, but session time is minimal. When you ask for placement, specify whether the anchor should sit vertical or tilt to match collarbone slope. A typical error is requesting overly ornate anchors that do not translate well at micro scale. Expect a simple touch-up after the first year if lines soften. This is an ideal starter piece for someone wary of longer sessions.
18. Thin Arrow Following the Clavicle Line

An arrow that runs parallel to the bone reads directional and clean. When you consult, request a slightly thicker shaft near the center with tapered ends to prevent ghosting. The mistake is asking for an ultra-fine arrow that is too small to hold. Session time is short. Over time the arrow keeps its silhouette if the linework has moderate density. Ask about touch-up timing if you anticipate frequent sun exposure.
19. Tiny Coordinates in Minimal Monospace Along the Collarbone

When you pick coordinates, bring the exact numbers and specify font. The image generator needs precise text to render accurately. The pain is brief, and the session is quick. A common error is choosing an ornate script for coordinates which reduces legibility. At six months the numbers should stay crisp if linework is done deliberately. If you plan to move the text onto different skin tones, ask the artist about slight bolding for darker complexions.
20. Wave Line That Mirrors the Collarbone Curve
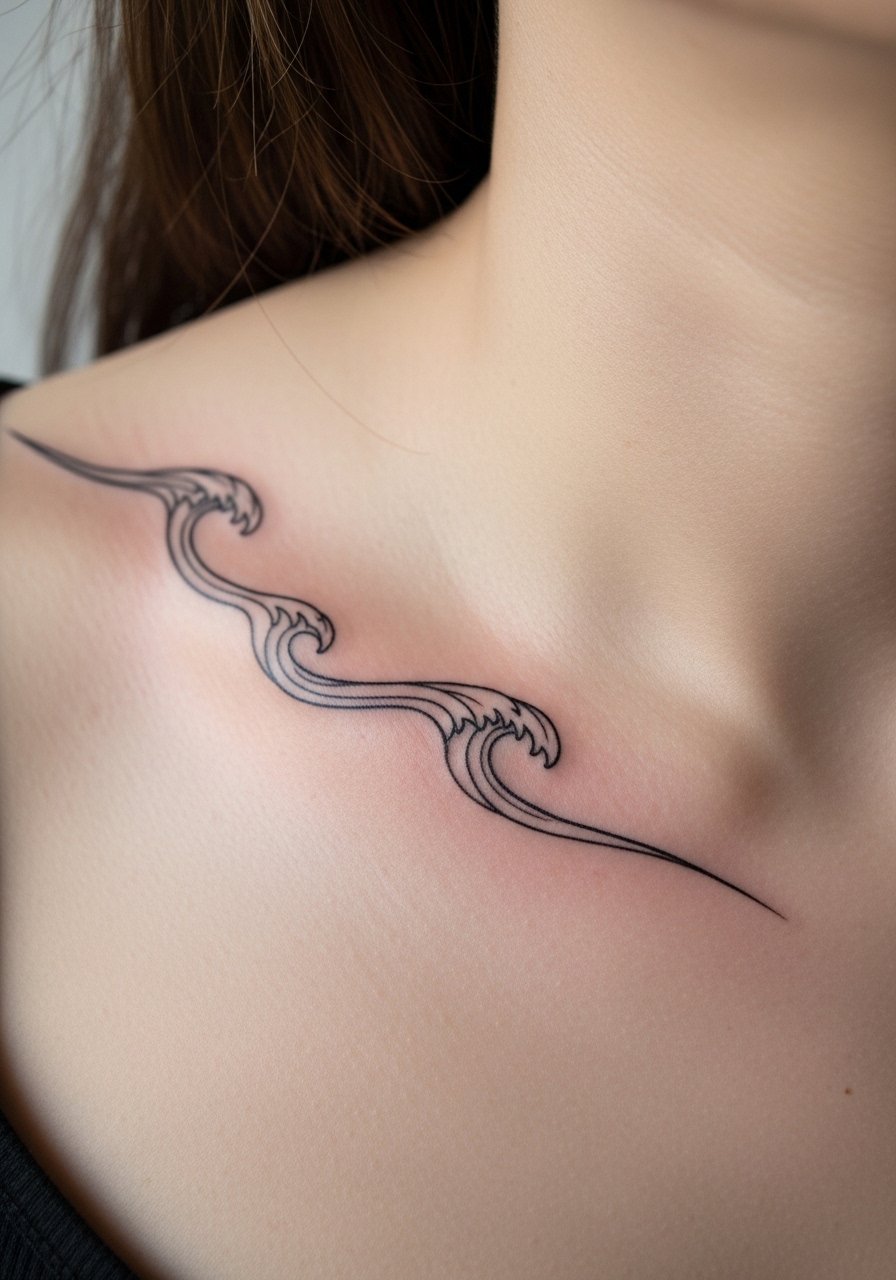
A simple wave can be arresting because it imitates the body's lines. Ask for a single confident pass rather than multiple overworked strokes so the line stays fluid. Many people ask for excessively thin waves which do not last. Expect a short appointment and mild tenderness afterward. Healed at one year the curve reads well. If you later want to extend into a larger ocean scene, have the artist leave room for joining elements.
21. Tiny Roman Numerals Along the Collarbone

Roman numerals carry personal dates without overt lettering. Provide the exact numeral string to the artist and confirm spacing. The complaint I hear most is cramped numerals that blur into one another. Tell your artist you prefer slightly increased kerning to avoid that. Session time is brief. At one year the numerals hold better when the lines were done at a steady depth. Touch-ups are straightforward.
22. Thorny Branch That Wraps Slightly Under the Collarbone
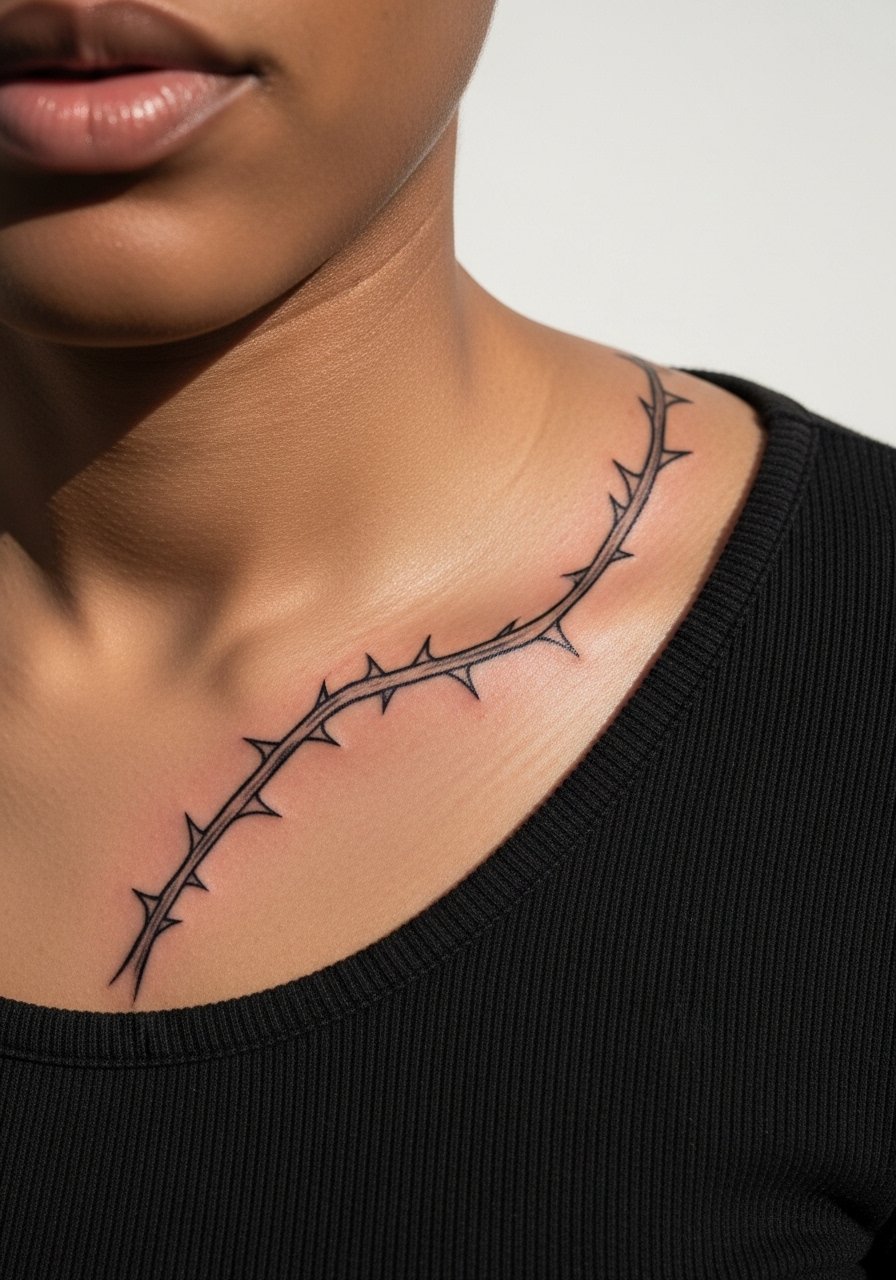
Thorns add edge and texture while still reading minimal. When you discuss this design, note whether you want thorns pointed inward toward chest or outward toward shoulder. A common misstep is making the thorns too dense, which creates a heavy visual block. Expect a short session. Healed thorns retain contrast if spacing between spikes is deliberate. This piece also makes for a striking addition if you later expand into a sleeve.
23. Minimalist Compass Rose Near the Collarbone Tip

A compass works well as a small directional motif. Ask for a slightly simplified rose rather than a crowded one to keep the piece legible over time. The mistake is packing in too many directional points into a micro scale. Expect a one-hour session. At six months the compass retains form. If you plan travel tattoos, have the artist suggest placement that allows a future map or route to connect.
24. Tiny Anatomical Heart Outline Along the Collarbone

An anatomical heart reads more personal than a simple symbol because of its subtle detail. When you bring references, state which anatomical features matter to you. Many clients ask for tiny anatomical hearts without realizing the tiny vessels can blur. Ask for slightly bolder primary contours and reduced micro detail. Session time is brief. Healed at one year the outline maintains character, with small details possibly needing a touch-up later.
25. Micro Mountain Range Nestled Above the Collarbone

This compact landscape reads well against the bone because the peaks follow the clavicle slope. Tell your artist how many peaks you want and whether you want tiny stipple shading for depth. A common error is compressing too many peaks into small space which flattens the design. Expect a short session and mild soreness in the area. At six months the silhouette holds, and small dot shading may soften, which can be refreshed during touch-up.
Tattoo Prep and Aftercare Essentials

Someone I know who healed a collarbone badly learned the hard way that friction from straps defeats poor aftercare. Plan for three phases. First, pre-appointment prep including a gentle exfoliant the week before and loose clothing on the day. Second, immediate healing where thin breathability matters. Third, long-term maintenance focused on sun protection and touch-ups. I have found that a thin breathable balm for friction, a cooling gel for soreness, and daily SPF after the peel are the most practical steps for collarbone-specific challenges.
Shopping list
No Pain Tattoo Numbing Cream. Use for pre-session numbing if you and your artist agree. Helpful for keeping still on bone so linework stays precise.
No Pain Tattoo Soothing Gel. Cooling gel for the first 48 hours to reduce inflammation and shoulder ache.
No Pain Tattoo Aftercare Balm. Thin coverage that reduces clothing chafing during the peel phase.
Fragrance-free gentle foaming cleanser. Use for daily cleaning to avoid irritants and scented ingredients.
Medical-grade second skin bandage 6-inch roll. Useful for protecting the area during the first night or when straps might rub.
Thin breathable fragrance-free balm stick. Keeps friction low without suffocating the tattoo during movement.
Lightweight mineral SPF 50+ sunscreen stick. Use daily after the tattoo has fully healed to prevent fading from UV exposure.
Disposable cooling gel pads. For post-session shoulder and neck soreness relief.
Every tattoo is different. Always follow your artist's specific aftercare instructions. Consult a dermatologist if you have skin concerns or unusual healing issues.
Frequently Asked Questions
Q: Will fine line botanical work on the collarbone blur faster than bolder styles?
A: From what I have seen, very fine single-hair lines can soften faster on thin clavicle skin because of constant movement and thin tissue. Choosing slightly stronger line weight and a bit of spacing between elements helps the piece age cleaner. Expect a light touch-up by year two or three depending on exposure and skin type.
Q: How should I manage pain for a first collarbone tattoo without ruining the linework?
A: Many people use a topical numbing cream before their session to stay still through the sharp moments. There is a debate in the community about numbing. One camp says it is a helpful tool for precision, especially on bone where flinching ruins work. The other camp worries about uneven numbing affecting depth control. Talk to your artist about product choice and application timing so lines stay crisp.
Q: Do watercolor peony pieces need different aftercare than black linework?
A: Watercolor tones rely on softer saturation which can fade unevenly if you over-moisturize or frequently expose the area to sun. I recommend a thin breathable balm during the peel, and strict daily SPF after full healing. If color starts to look patchy, a targeted color touch-up restores balance.
Q: How long should I expect between initial collarbone work and a touch-up for linework or color?
A: It depends on style and sun exposure. For fine line pieces plan on checking the work around year two to three. For small micro pieces a touch-up may be needed sooner if the lines were ultra-thin. If you avoid direct sun and keep up with sunscreen, touch-ups often stretch to year three or later.
Q: Can I hide a collarbone tattoo for professional situations?
A: Yes. Supra-collarbone and inner-clavicle placements can be covered by collared shirts, scarves, or a camisole. Placement planning helps. If concealability is important, ask your artist to suggest slightly higher or lower placement options during the consult so clothing covers the area cleanly.
