
Collarbone tattoos look intentionally placed because the bone gives a natural frame, but that also means tiny choices matter. Expect more sensitivity than a forearm piece, think about how a scoop tank or bra strap will sit, and plan scale so the design still reads at one and five years healed. Below you will find curated ideas with placement tips, what to tell your artist, and outfit pairings that actually work.
1. Fine-Line Butterfly Just Below the Clavicle
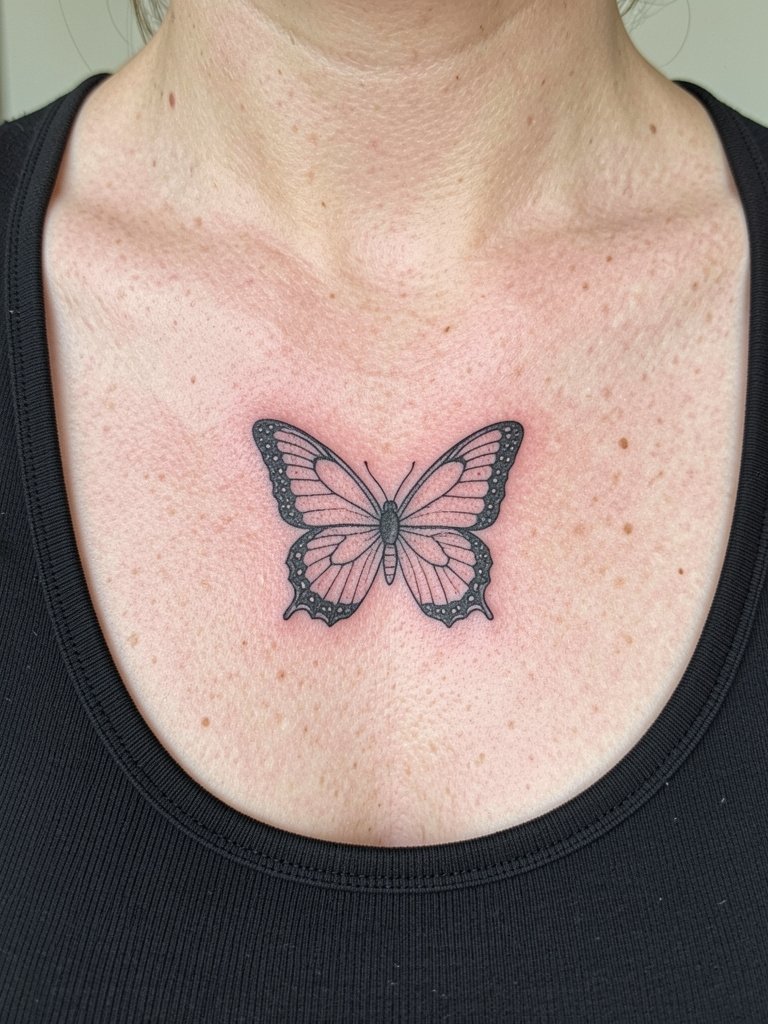
A small butterfly reads delicate on a collarbone because its wings can mirror the clavicle line. Pain sits at moderate for most people since the skin is thin there, so expect short single-session time, often 30 to 60 minutes. Tell your artist you want slightly heavier primary linework and open negative space inside the wings so it keeps shape as it heals. The common mistake is going ultra-micro with single hairlines that blur into a grey patch by year two. For showing it off, a scoop-neck tank keeps the silhouette readable while staying effortless.
2. Single-Word Script Centered Under the Collarbone
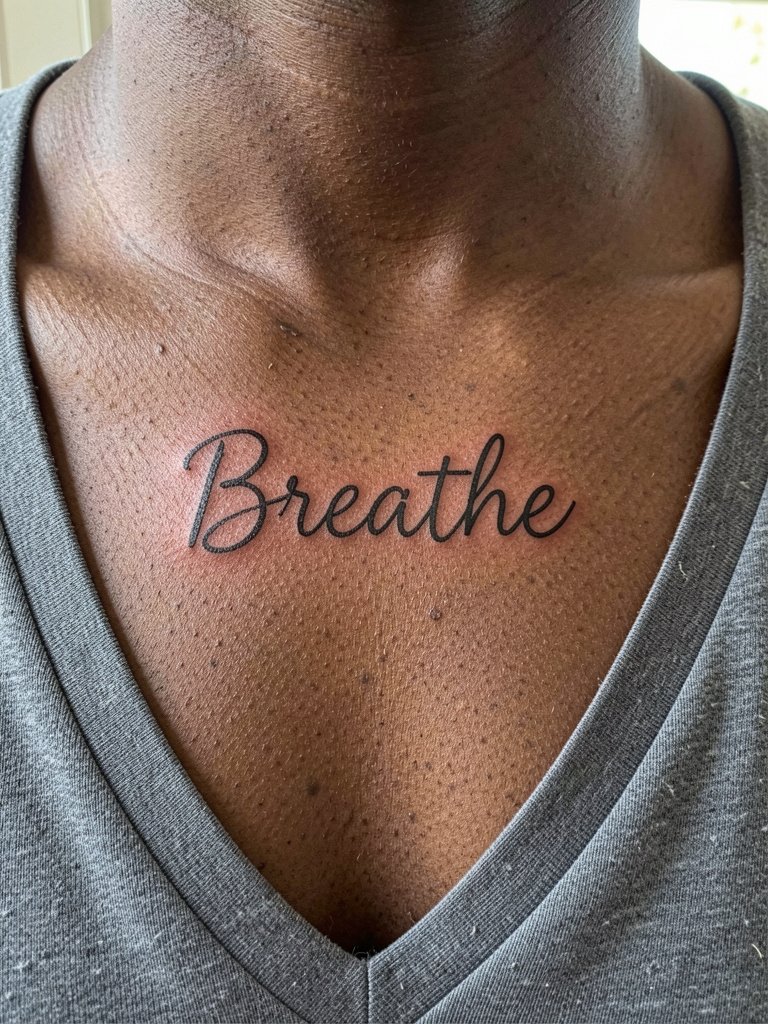
A short script fits the horizontal clavicle line beautifully, but legibility depends on spacing and line weight. Expect a quick appointment under an hour for a single-word piece. Ask for a standing stencil check so posture does not shift the word off the midline. The aging risk here is cramped letterforms that merge as the tattoo softens; request slightly wider letter spacing to avoid that. If you prefer a subtle jewelry effect, pair it with a thin pendant or a delicate layered necklace to balance attention.
3. Slender Leafy Branch That Follows the Clavicle Curve
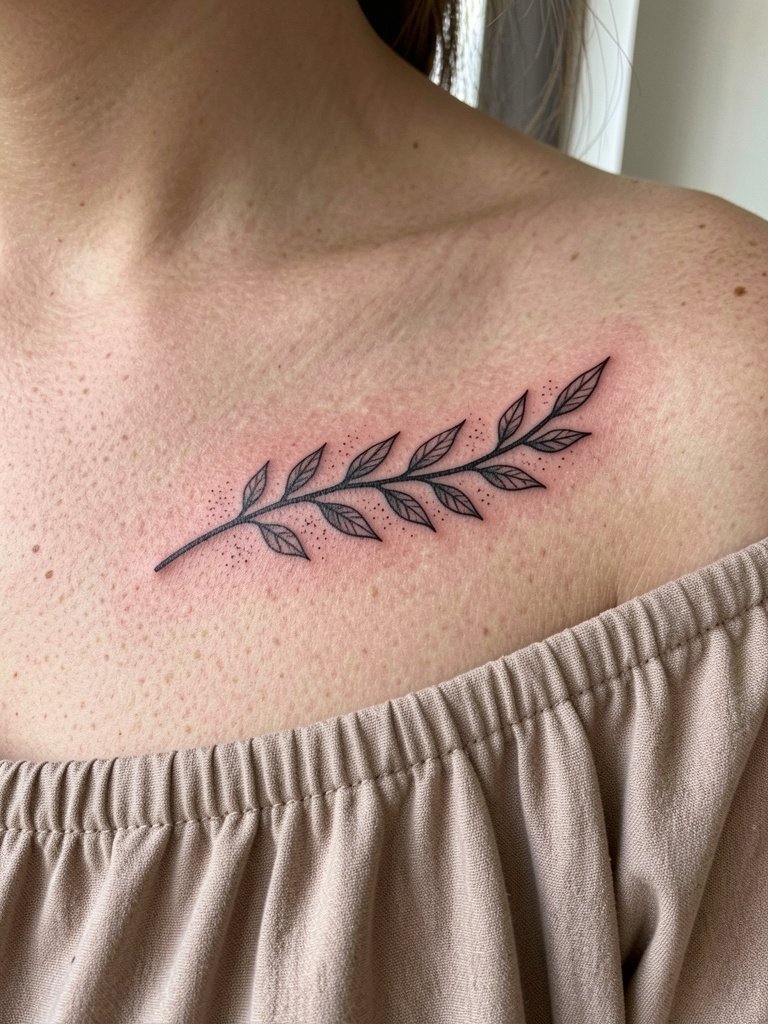
A branch that arcs with the clavicle reads custom to the body and hides slight asymmetry in posture. Session time is typically 45 to 90 minutes depending on length. Ask the artist for a gentle taper at each leaf and a slightly bolder main stem so the linework retains contrast as it settles. A common mistake is wrapping too tightly to the bone ridge, which can cause uneven healed saturation and pronounced blowout risk. For outings, an off-shoulder blouse frames the curve without covering the art.
4. Color-Accent Floral Sprig Near the Collarbone
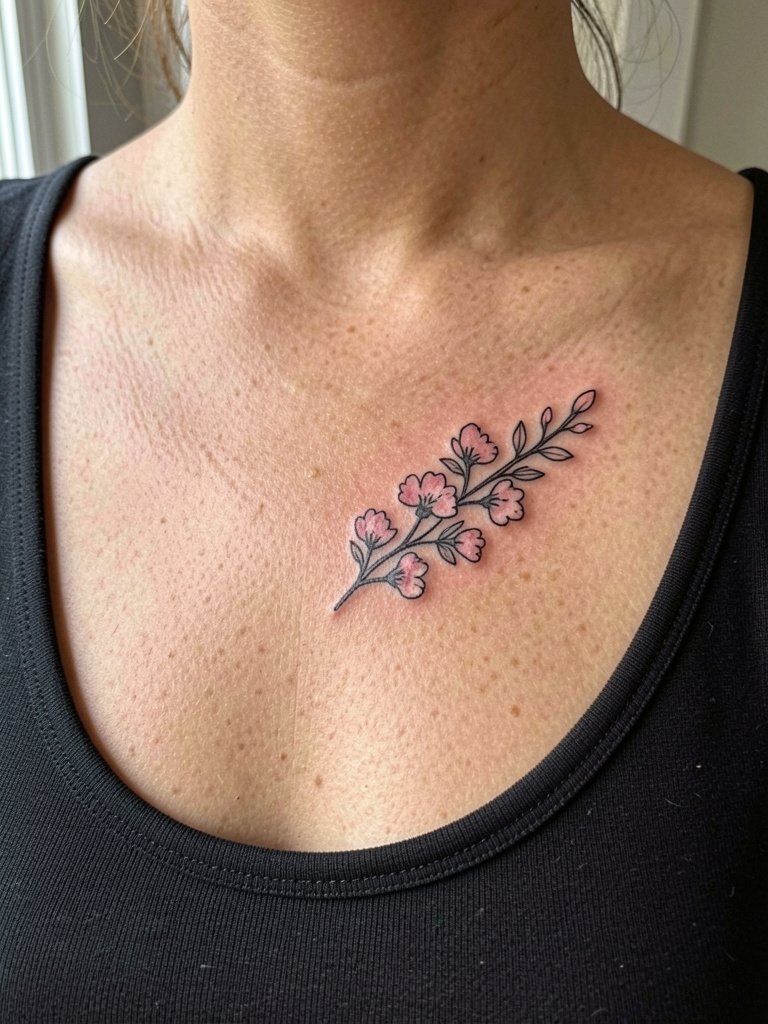
A splash of muted color helps florals pop against skin that might otherwise absorb fine black detail. Expect a single session for a small sprig but plan on touch-ups earlier than pure black pieces. There is a split opinion on color here. One camp argues color livens the area and prevents the design from reading faint, especially on paler skin. Another camp cautions that color fades unevenly on exposed chest skin and needs more maintenance while black and gray reads more predictably over time. If you want a low-effort show-off look, layer a delicate gold pendant that sits above the spray.
5. Dragonfly Aligned with the Bone
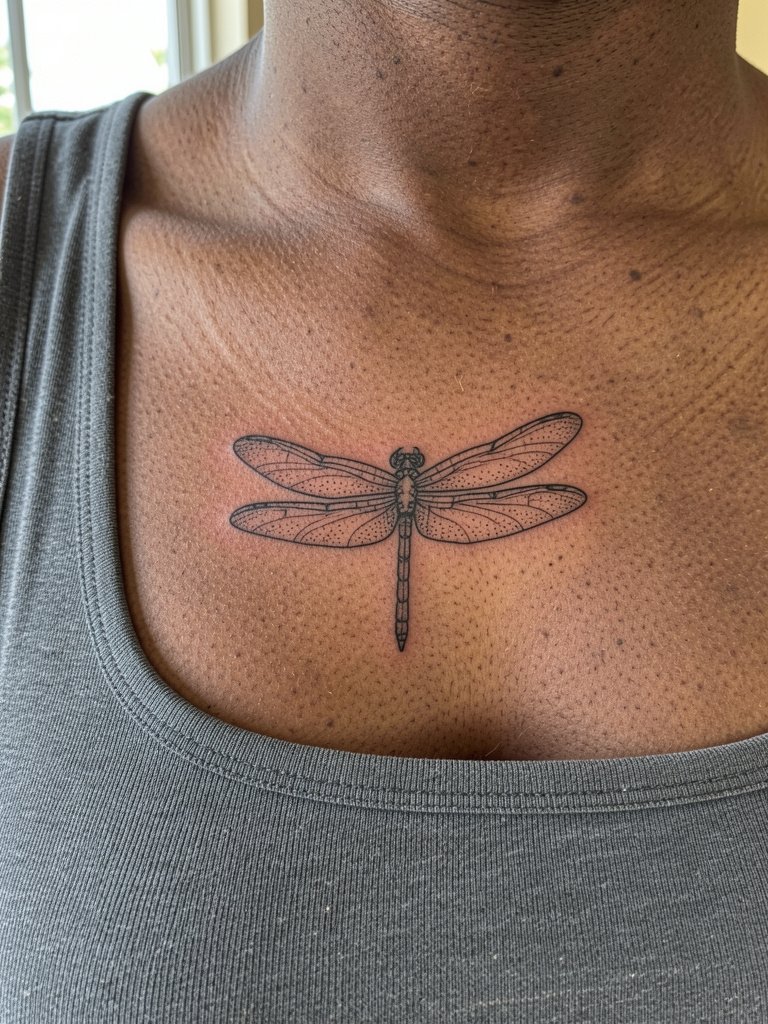
A dragonfly reads like motion across the collarbone and works well with slender wings that follow the bone. The session feels similar to other collarbone work, often a 45-minute sit with moments of sharp sensitivity directly over the ridge. Tell the artist you want wing veins with spacing, not microscopic crosshatching, to reduce line spread risk. The frequent mistake is packing too much wing detail into a small scale, which turns into muddy shading at year two. For an easy outfit match, a square-neck top presents the insect cleanly.
6. Mirrored Mini Florals on Both Sides
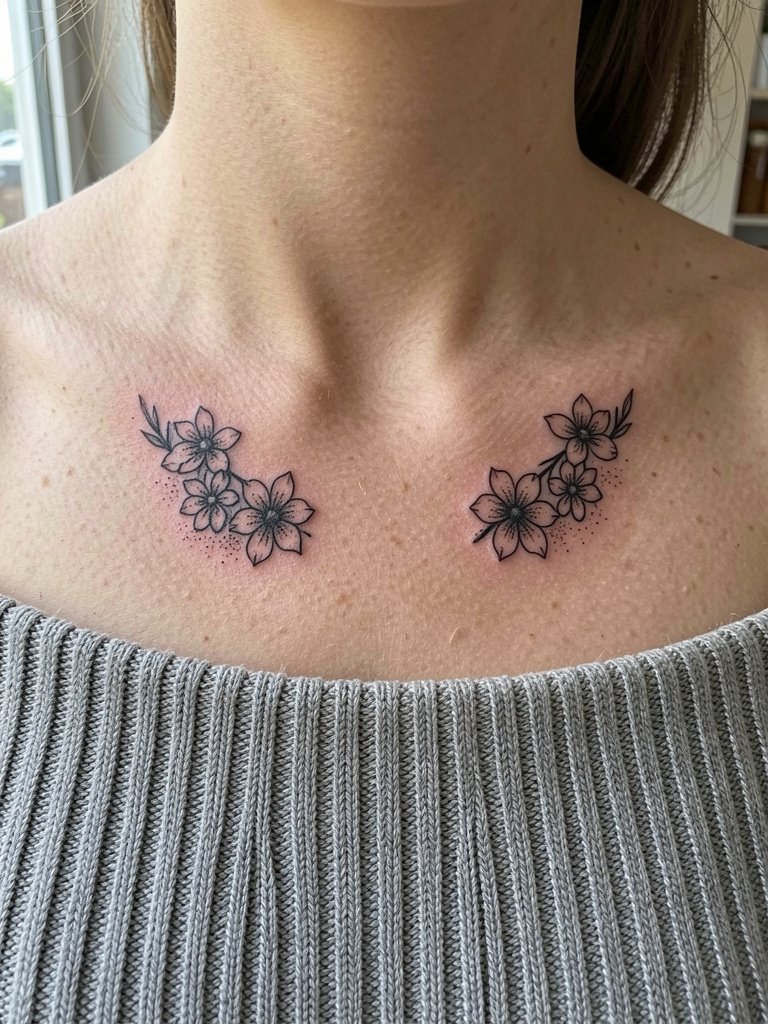
Mirrored florals create a jewelry-like frame for open necklines and read polished on photos. Plan for two matching stencils to ensure symmetry, and ask for a single appointment window so the ink saturates similarly on both sides. One debate around one-sided versus mirrored work exists. One camp prefers one-sided pieces because they feel modern and less fussy. The other camp prefers mirrored or paired designs because symmetry reads intentionally styled and can balance a neckline. Decide which aesthetic matters more to you and bring images showing scale on both small and medium chest widths.
Pre-Session Essentials
A few small items smooth the collarbone experience, especially for fine-line and scripted pieces on the upper chest.
-
Stencil transfer paper kit. Lets you preview the exact curvature and size against the clavicle so you avoid a too-small script choice.
-
Topical numbing cream. Applied per instructions before the session eases the sharp twinge over the bone without changing linework when used correctly.
-
Thin protective film roll. Useful when the design sits low and might rub a bra strap during the first 48 hours.
-
Fragrance-free gentle body wash. Cleanses the healing area without stripping fresh pigment or irritating the skin.
-
Aquaphor Healing Ointment. A thin layer helps lock moisture at the start of healing for fine line work without clogging pores.
7. Detailed Floral Cluster Extending Toward the Shoulder
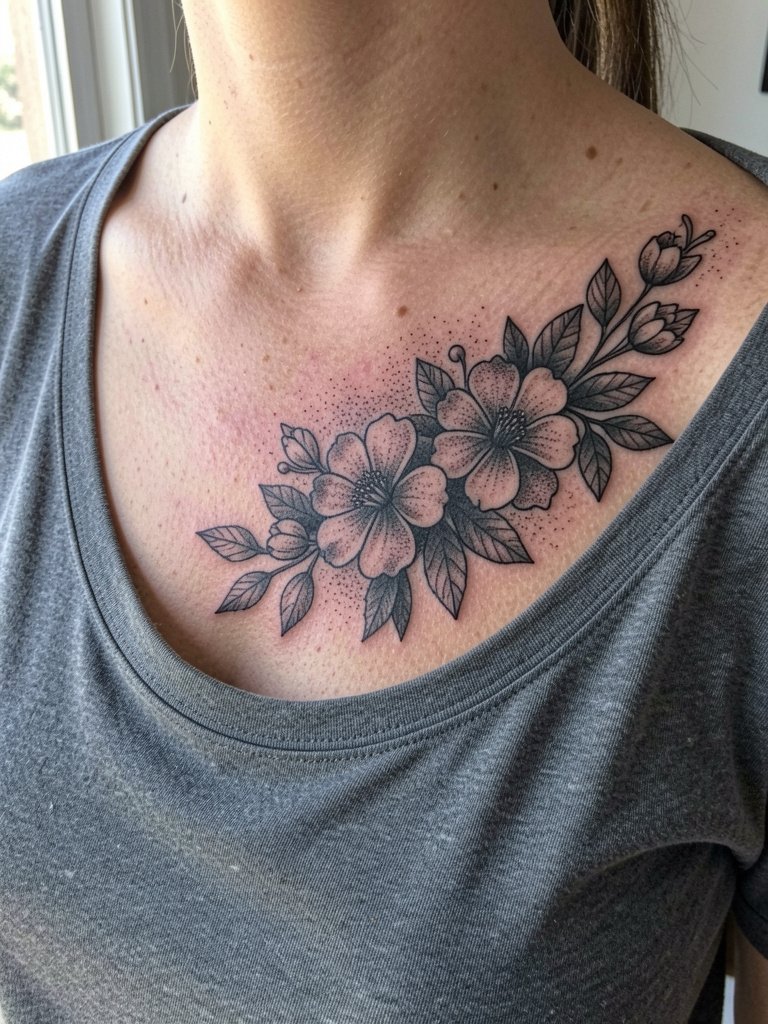
A larger floral piece gives the collarbone presence without needing multiple separate tattoos. Expect longer session time, often two hours or more, and plan for a touch-up if shading needs settling. Tell the artist you want clear negative space between blooms and a strong anchor line where the flower mass meets the clavicle. The mistake is overfilling the area with tiny filler dots that age into a grey wash. For outfits, a wide-neck tee shows the span elegantly while keeping the piece readable.
8. Subtle Ribbon Wrap Across the Collarbone
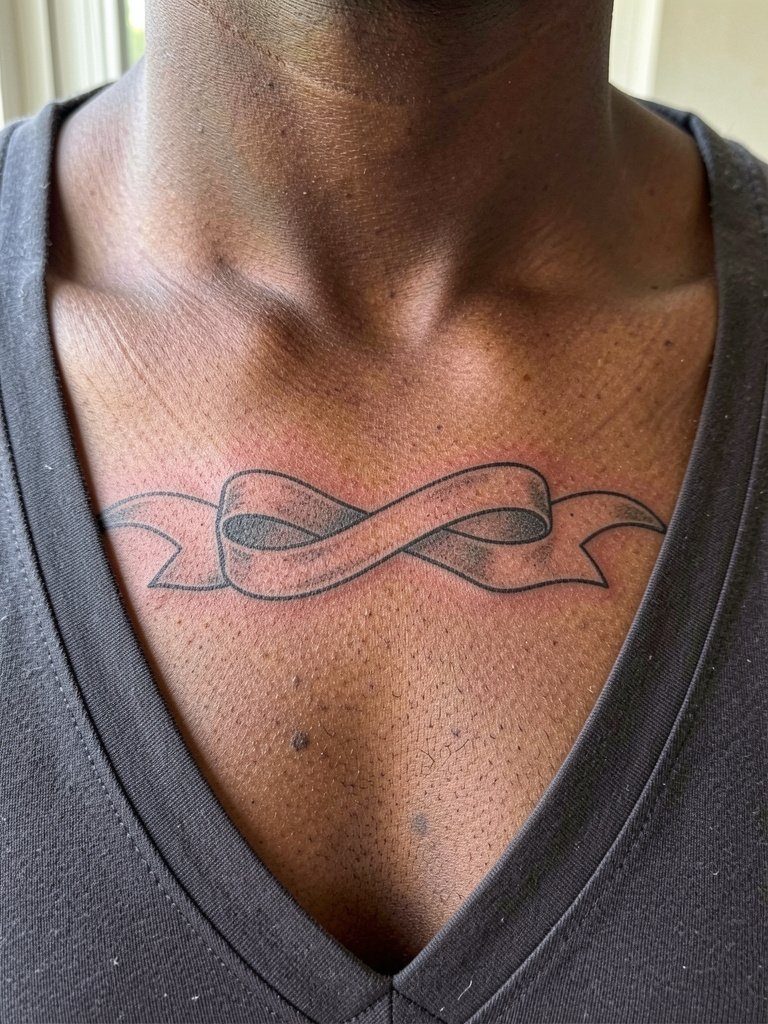
A ribbon-style piece mimics jewelry and can soften the clavicle line while staying ornamental. It tends to be low-pain but requires careful stencil placement so the loops sit naturally with posture. A frequent error is centering the ribbon on the bone ridge where the skin stretches differently, which can distort the loops when you move. This version reads well with simple chains, but avoid heavy layered necklaces that compete with the curves.
9. Small Lotus Centered Between the Clavicles
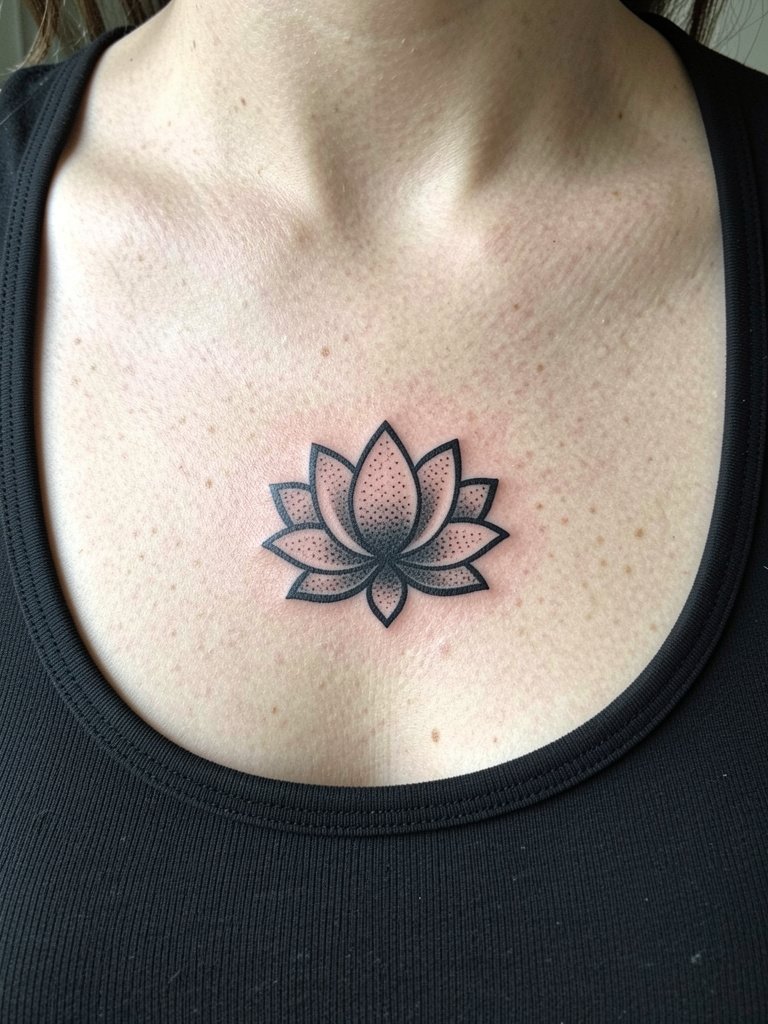
A centered lotus can act like a focal medallion that bridges both collarbones. Because the sternum has thin skin, pain is moderate to high and sessions are often stopped for short breaks. Ask for wider petal spacing than you might think, because tightly packed blackwork can merge after a few years. The common session mistake is underestimating sensitivity and trying to finish in one pass; plan for a paced approach and a possible touch-up to restore saturation.
10. Wraparound Snake That Follows the Clavicle Line
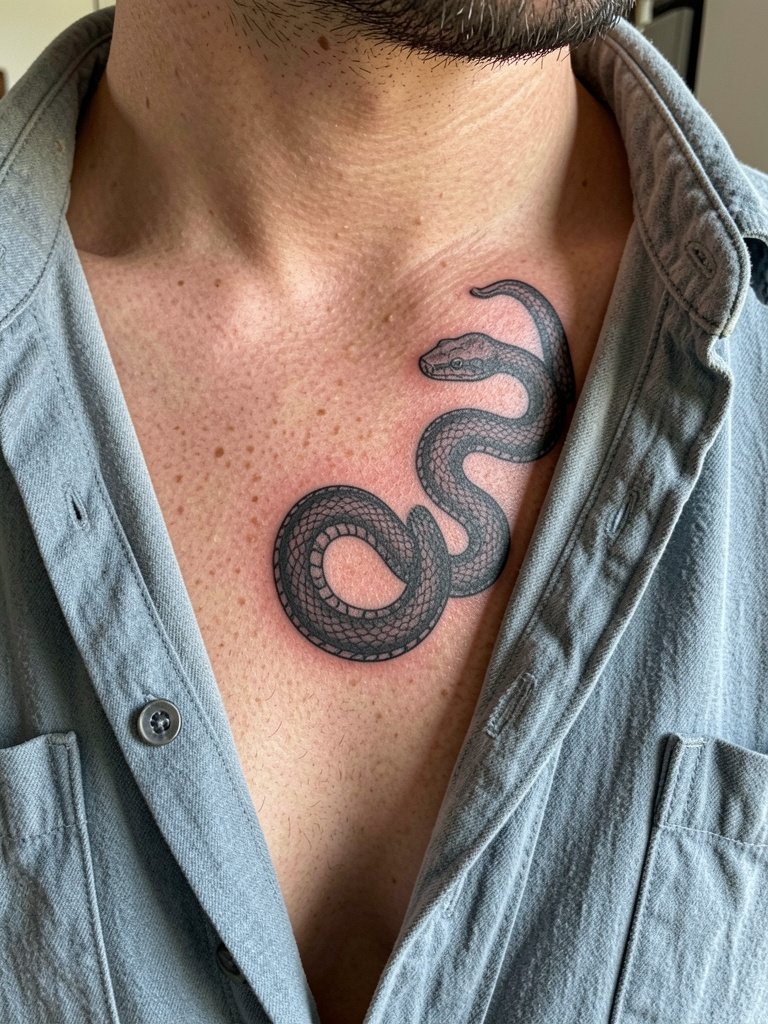
Snakes use the bone like a compositional guide and make the tattoo feel custom to the body. This style is moderate in pain and usually requires a longer single session depending on length. Tell the artist the bend points where the snake should narrow so it does not look pinched once the skin settles. A mistake is adding tiny scales across the whole body at small sizes; instead, plan for scale suggestion near the head and texture along the spine. Clean necklines or a simple chain complement the motion.
11. Tiny Seasonal Cluster with Birds or Bees
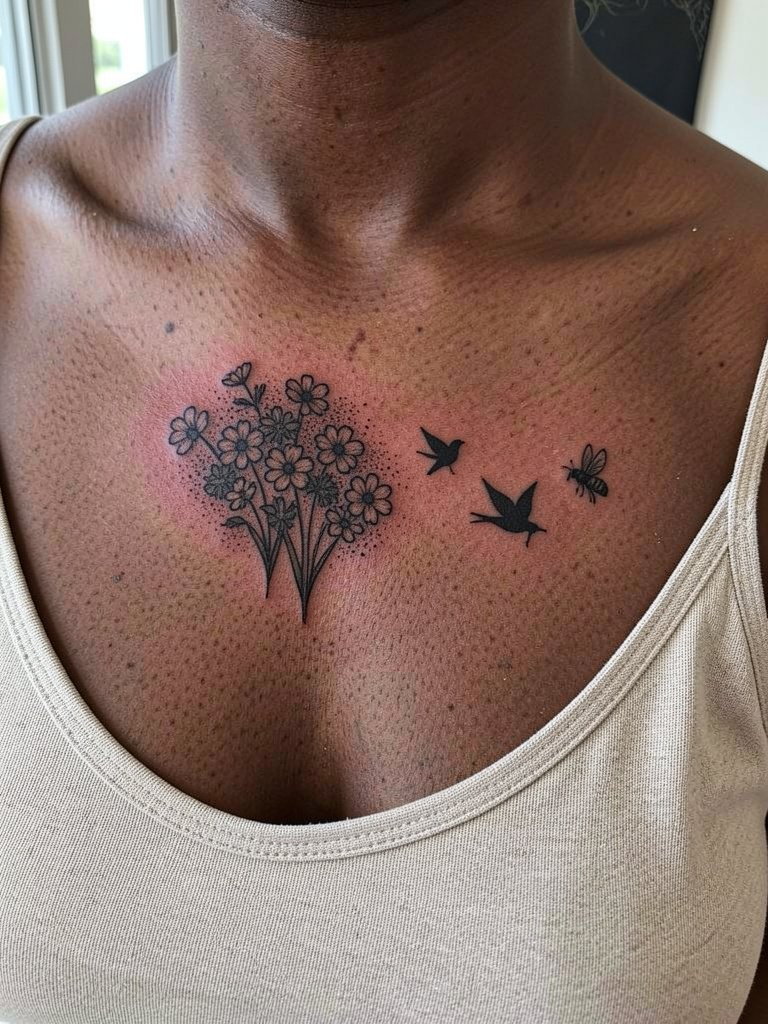
Small animal-plus-flower clusters create movement and seasonal charm without dominating the chest. These are short sessions of 30 to 60 minutes, but tiny details need breathing room to avoid blurring. One error is packing multiple small motifs too close, which turns distinct birds and bees into a single smudge. For styling, linen shirts and tiny stud earrings give an editorial, low-contrast look that keeps focus on the composition.
12. Minimal Single-Stroke Leaf for a First Collarbone Piece
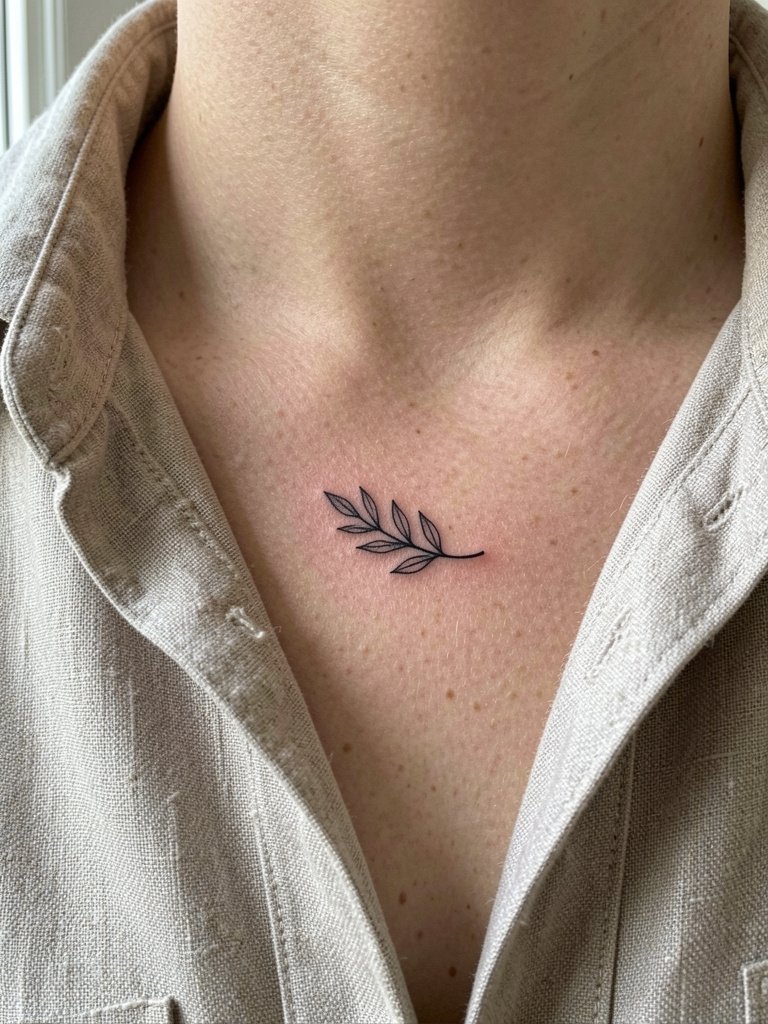
For first-timers who want visibility with restraint, a single-stroke leaf is low-commitment and heals clean when done at the right scale. Pain is moderate and session time is short. Ask your artist for a slightly thicker main line than your reference so the leaf keeps profile after a year. The classical mistake is shrinking the design too much to save money, which risks it disappearing on textured skin. Session wear that helps access is a loose button-down shirt you can unbutton without tugging fabric across fresh ink.
13. Geometric Arc with Small Bird Silhouette
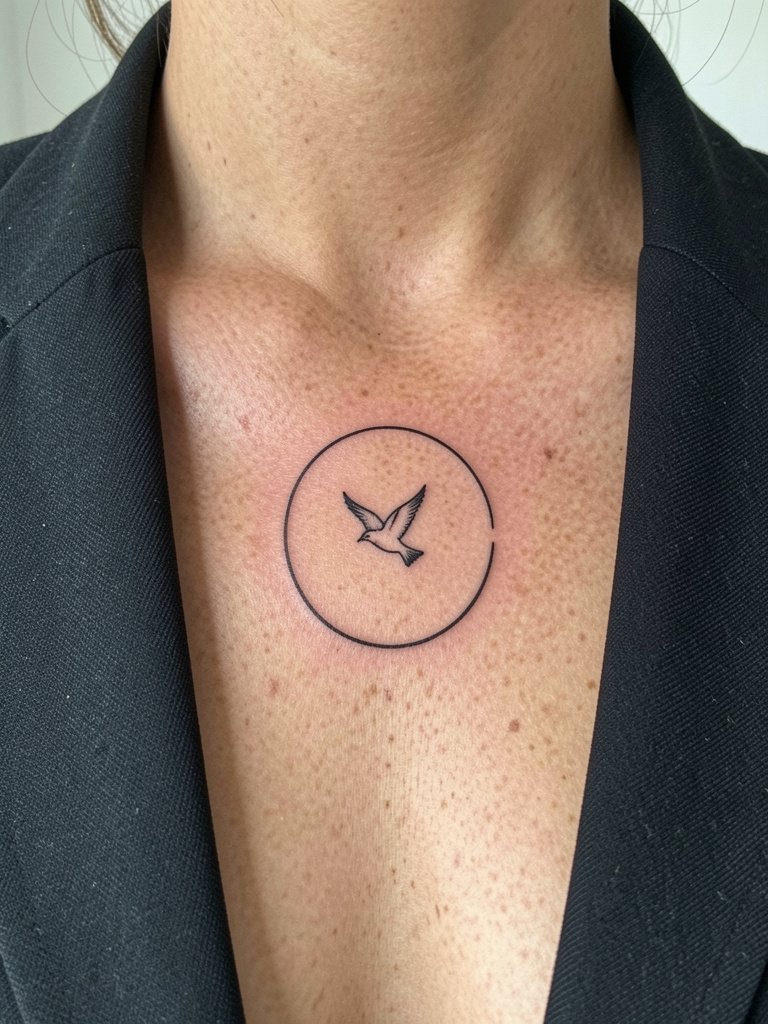
Geometric accents give a modern edge and help small silhouettes read from a distance. The piece usually takes under an hour and benefits from crisp consistent linework. A common mistake is mismatched scale where the arc is too small to contain the bird in a way that still looks intentional. Wear open-front blazers or wide-neck tops to keep the negative space clear when showing it off.
14. Asymmetric Chain of Tiny Stars Along the Collarbone
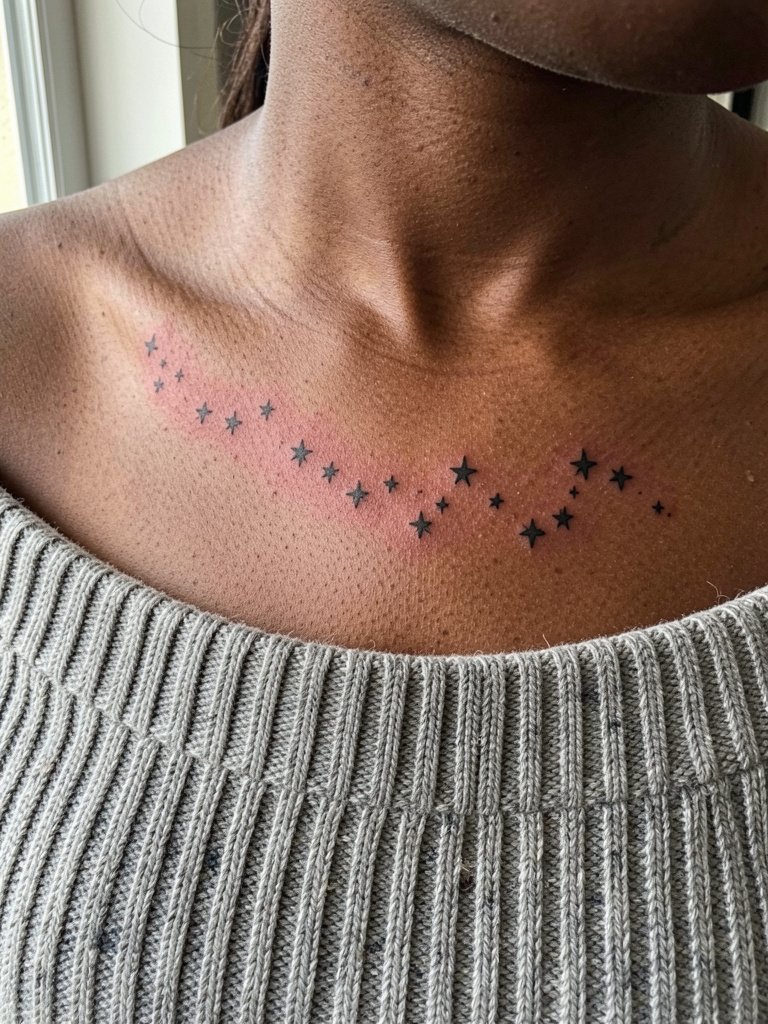
Tiny repeated motifs form a subtle band that feels modern without being fussy. Because each star is a small shape, ask for modest size increases from your reference so each point stays defined after healing. People often request the thinnest possible points and then need a touch-up when the tips soften. This placement looks great with an off-shoulder sweater and small hoop earrings for low-key nights out.
15. Collarbone-to-Shoulder Extension for a Statement Piece
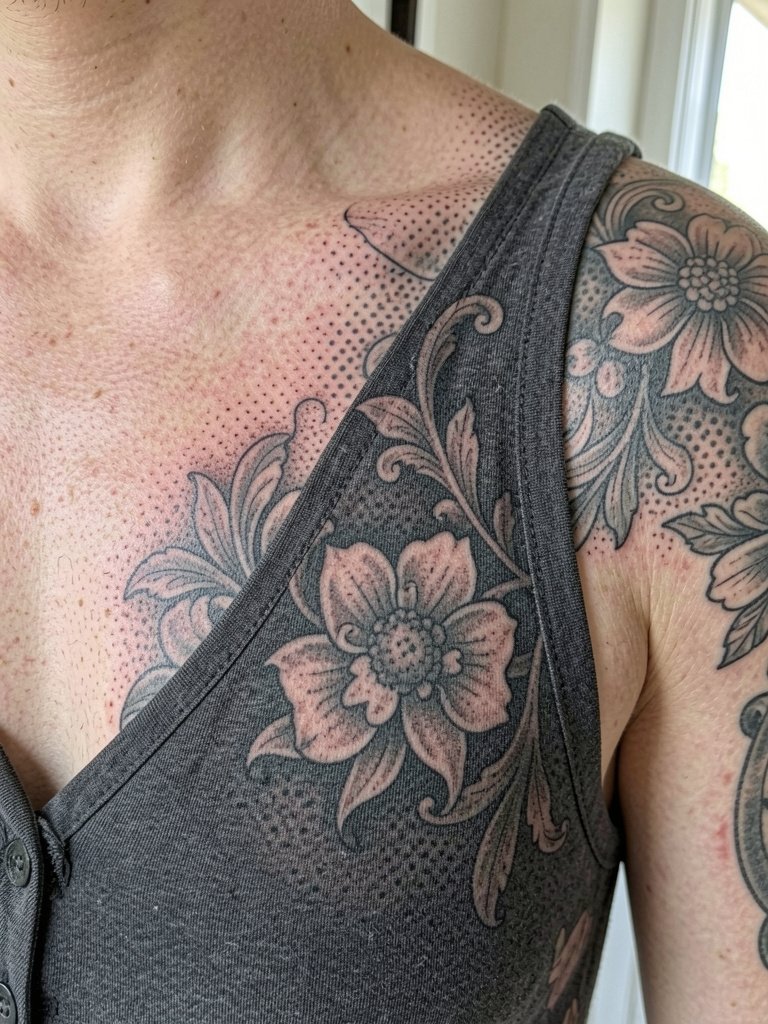
If you want presence, this composition uses the collarbone as an entry point into a larger shoulder piece. Sessions run longer and may be split across appointments, so discuss realistic pacing and touch-up timing. A frequent error is starting too small and attempting to add on later without a plan, which can make extensions feel pasted on. For appointments, wear a sleeveless vest or a button-down you can lower without pulling fabric across the fresh ink.
Frequently Asked Questions
Q: How much will a small collarbone tattoo cost?
A: Prices vary widely by shop and region, but the main drivers are studio minimums, the artist's specialty in fine line work, and appointment time. Ask the studio for their minimum fee upfront and for how long they expect the session to run so you can compare apples to apples.
Q: Will a fine line collarbone piece blur faster than a bolder design?
A: Artists disagree on this. One camp says ultra-thin single-needle work on the clavicle often softens quickly because the area sees sun exposure and frequent movement. The other camp says proper needle depth and slightly wider line spacing make fine line hold up well, and they back that claim with healed photos showing good longevity. If longevity matters most, request slightly heavier primary lines and plan a touch-up window at 12 to 18 months.
Q: How should I plan the tattoo in relation to my bra straps and favorite tops?
A: Mark your most-worn bras and tops at home and hold printed stencils against your body so you can see where the design will sit relative to straps. If you live in scoop necks, place the art fully above the bra line. For off-shoulder looks, a one-sided piece can be easier to style. A practical shopping keyword is "off shoulder sweater" or "scoop neck tank" when planning outfits to show your piece.
Q: Where can I find real healed examples and local artists who post them?
A: Search hashtags like #collarbonetattoo, #finelinetattoo, and #chesttattoo on Instagram and TikTok and use location filters to narrow to your city. Browse booking platforms and studio websites that show both fresh and healed shots, and check Reddit threads in r/tattoos or r/tattooadvice for first-person healing threads.
Q: What should I wear to the appointment and in the first 48 hours?
A: For access during the session, wear a loose button-down or a sleeveless vest that you can lower without tugging over fresh ink. Post-session, choose tops that do not rub the area and avoid tight straps that press against the collarbone for several days. If you need a quick shopping option, search for "loose button down shirt women" or "scoop neck tank women" to find easy session wear.
