
Bold blackwork sleeves look like a trend you can swipe and forget, yet the pieces that age best are built around spacing, saturated fills, and bold negative space. Expect honest tradeoffs in session time and touch-up rhythm when you move from flashy single-session designs to a fully saturated sleeve that stays readable for years. Below are sleeves that lean into longevity while still making an immediate visual statement.
1. Upper-Arm Solid Panel Sleeve
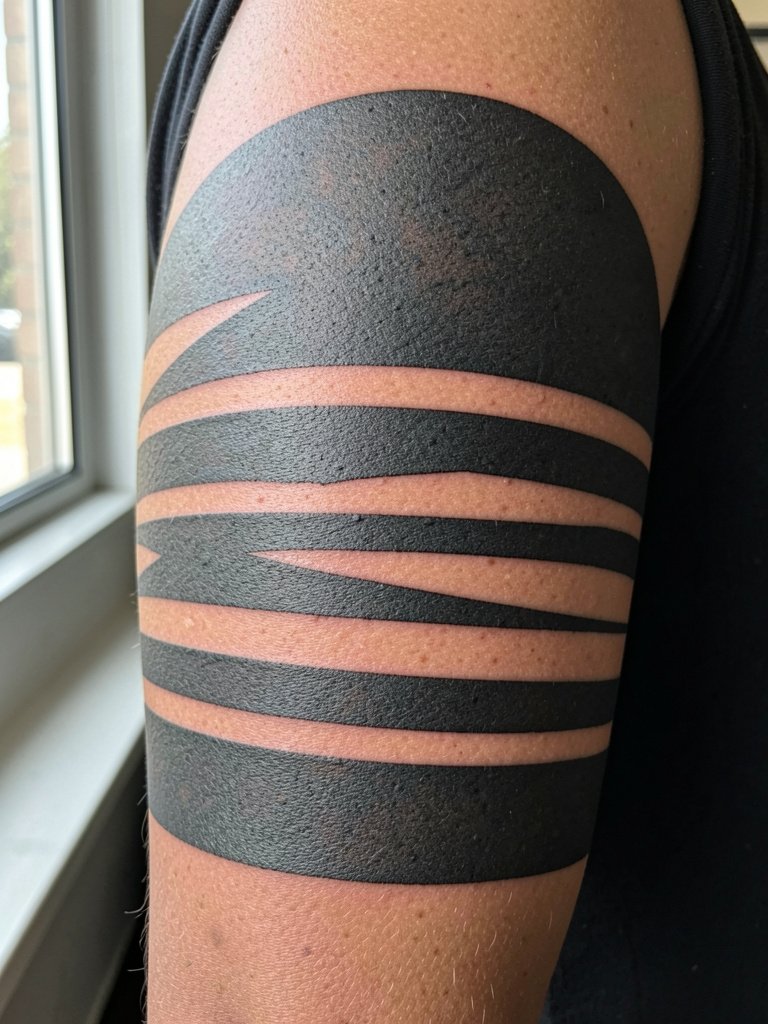
A dense upper-arm panel is the fastest way to get a bold black silhouette that reads from a distance. It works best for people who want a high-contrast statement without relying on fine detail that will soften over time. Expect a two- to three-session build for saturation and edge cleanup, and plan a touch-up at year two if you want wall-to-wall black to stay even. A common mistake is packing in tiny decorative elements inside the panels. Leave pockets of negative space so the silhouette keeps its shape as skin moves. For showing it off, roll up sleeves and pair with a mens linen short-sleeve shirt in muted tones so the dark canvas reads clearly.
2. Full-Sleeve Botanical Blackwork Wrap
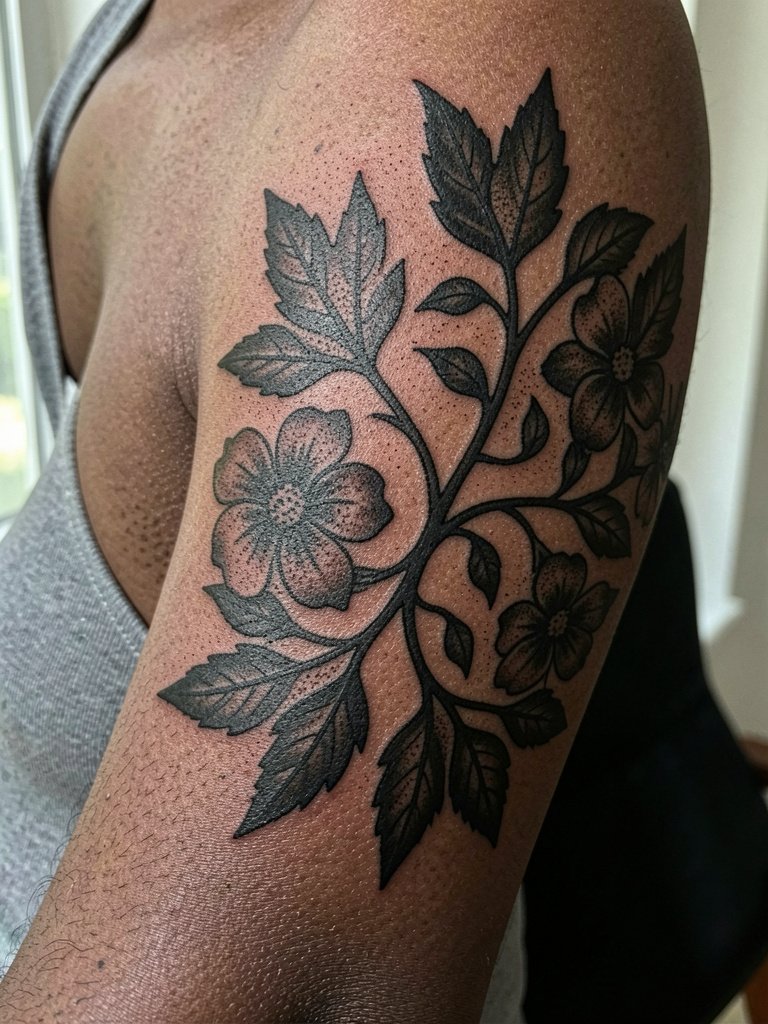
Botanical motifs scale beautifully in blackwork because you can translate leaf veins into negative-space shapes rather than fragile thin lines. For a full sleeve, plan for staged sessions that focus on silhouette first and texture later. If you want movement, ask for stipple shading in the shadow zones and wider linework on the outermost leaves so the imagery keeps direction when the arm twists. Blowout risk is low on the fleshy parts of the arm, but insist on medium-deep saturation rather than ultra-thin passes. This sleeve pairs especially well with a lightweight chambray shirt left unbuttoned at the top to frame the shoulder art.
3. Negative-Space Geometric Sleeve
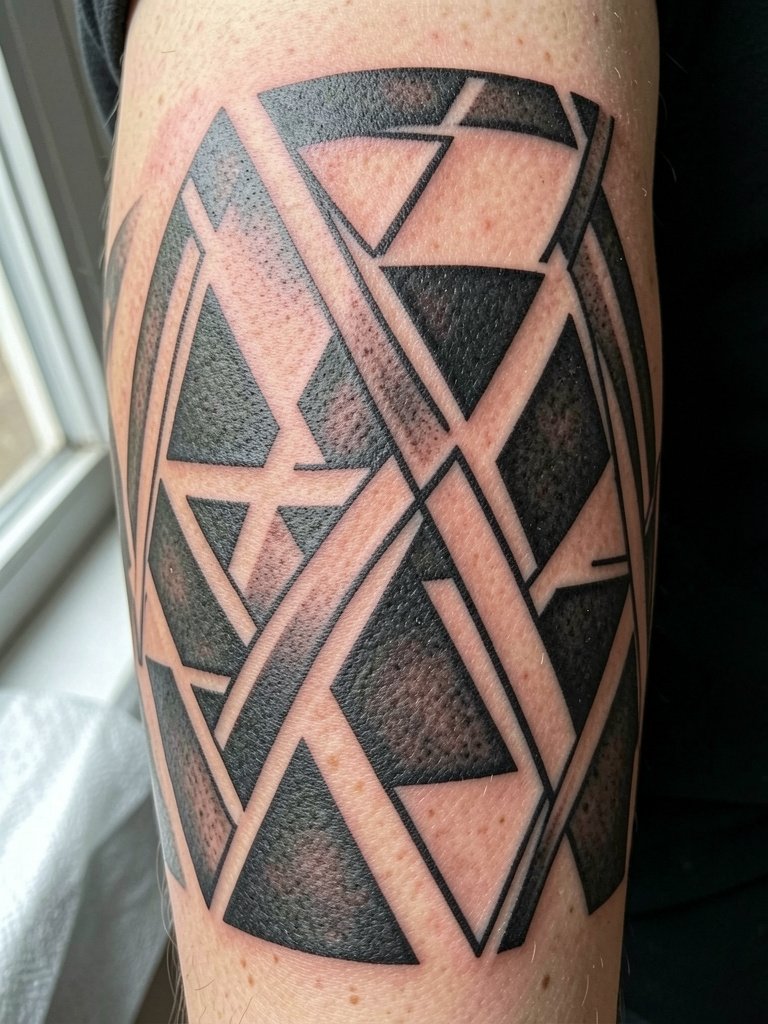
Geometric sleeves rely on spacing more than detail, so they age with consistent readability if you give the shapes breathing room. For forearm wraps, the most common mistake is compressing too many angles into a small band. Ask for mockups at full scale so you can see how edges interact at different arm positions. Expect moderate session time per panel because crisp edges require careful layering. At six months the black will soften slightly at the edges, and at two years the negative space is what will keep the geometry legible. For outfits, a rolled-sleeve linen shirt displays the forearm planes without competing with the pattern.
4. Half-Sleeve Portrait in Heavy Black Silhouette
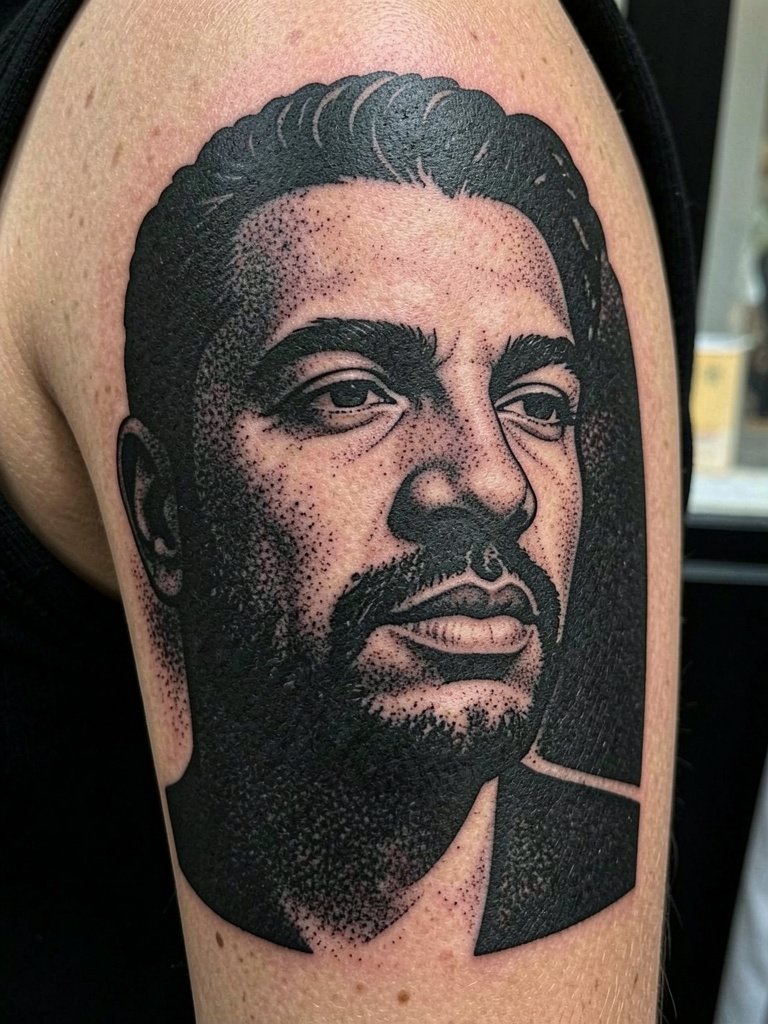
Portraits translated into heavy black silhouettes avoid the fragile single-needle realism that blurs with time. Choose contrast between the silhouette and surrounding stipple so features remain readable at a distance. A common mistake is asking for tiny facial details inside a dense black field. If you want recognizability, scale the portrait larger and set it against negative-space elements, rather than micro-detail. Session pain is mild to moderate on the outer arm, and you can expect two longer sessions for saturation and texture. For evening wear, this approach looks cohesive with a structured blazer with short sleeves that frames the upper arm.
5. Full-Arm Occult and Symbolic Blackwork
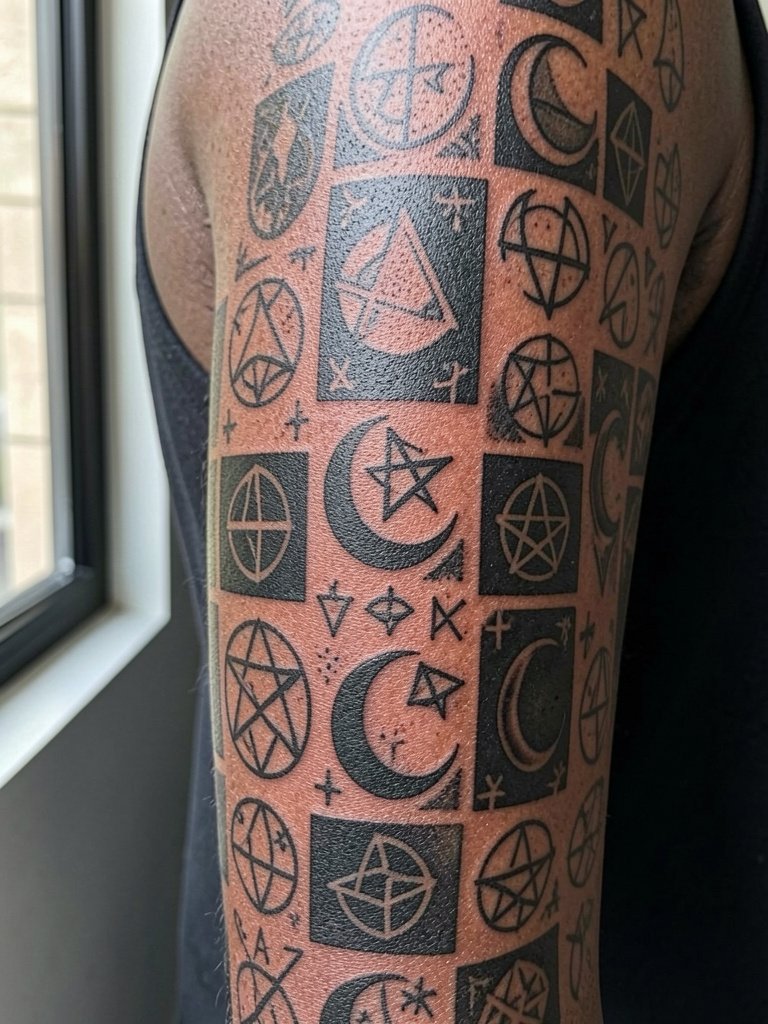
Symbol-driven sleeves read strongly in blackwork because icons rely on silhouette recognition rather than fine script. When exploring culturally specific motifs, describe the origin and intended use so the design respects context and form. Many people try to cram tiny sigils into the wrist area and then lose legibility. Scale each symbol so it can be identified when the arm moves. Touch-ups at year one keep crisp edges intact for dark-saturated sections. For layering with jewelry, a simple matte cuff bracelet allows the black fields to remain the focal point.
6. Seamless Elbow-Integrating Sleeve
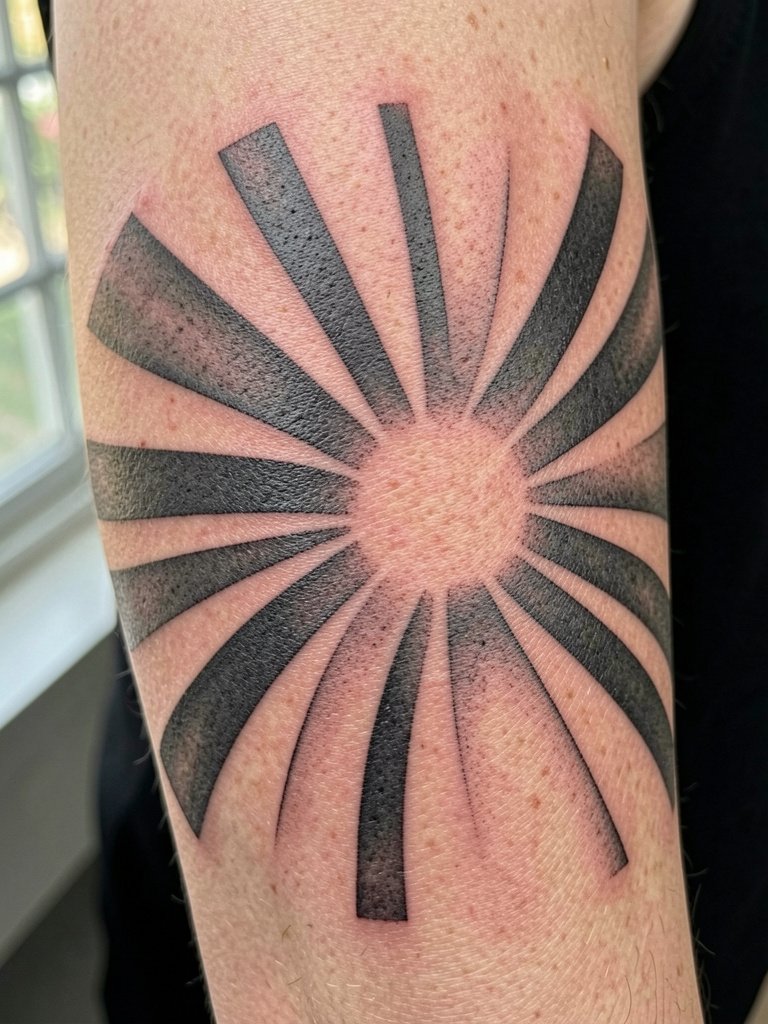
Elbow areas need composition that works with folding skin. The smart approach is to place bold bands and arcs that read when the arm bends, rather than small details that will warp. A common session mistake is treating the elbow like a flat canvas. Instead, request a wrap pattern that uses thicker linework across the joint and finer texture off to the sides. Expect sharper discomfort over the bony ridge, so break the elbow work into a separate shorter session if you tolerate pain less. For daily wear, elbow-integrated sleeves look great under three-quarter sleeve shirts that reveal the joint movement.
Studio Day Picks
The saturated fills and joint work in ideas 1 through 6 benefit from a few practical items that make the session and early healing smoother.
-
Stencil transfer paper kit. Lets you preview how bold panels and negative-space elements align on the arm before the first pass.
-
Topical numbing cream. Applied according to instructions eases the sharper spots around the elbow and inner arm during long saturation sessions.
-
Disposable arm rest cover. Keeps the workspace clean while you move through extended sittings for full sleeves.
-
Compression sleeve for travel. Worn after initial healing checks reduces swelling and protects inked skin during flights or long commutes.
-
Aftercare balm variety pack. A small selection helps you compare what your skin prefers during the first two weeks.
7. Inner-Arm Linear Sleeve
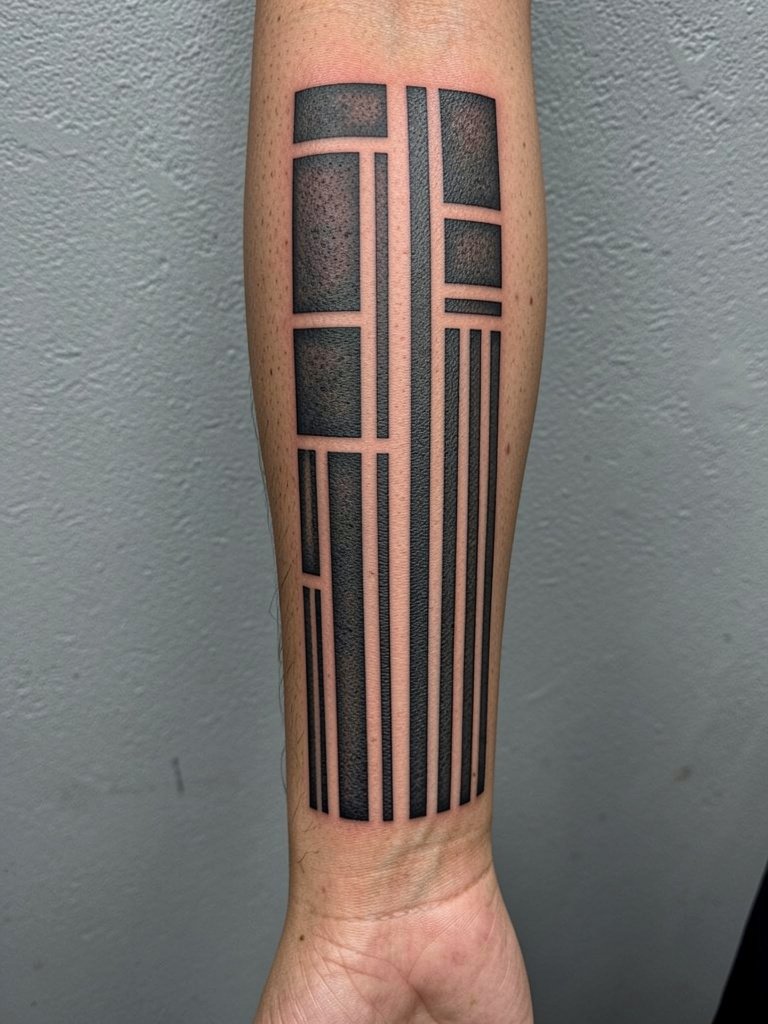
Inner-arm sleeves need extra spacing because the medial skin sees friction and slight stretching when the arm rests. A thin single-needle approach here is the wrong call for long-term readability. Recommend medium-thick linework and deliberate areas of pure black with breaks for breathing. The session feels more sensitive than the outer arm, so many clients split the inner-arm into shorter passes. Blowout risk increases if lines are placed too shallowly in this area, so insist on confident saturation. For session comfort, wear a loose tank top so the artist can access the inner arm without you adjusting clothing, and consider a soft cotton tank top that slides on easily.
8. Sleeve of Interlocking Bands and Chains
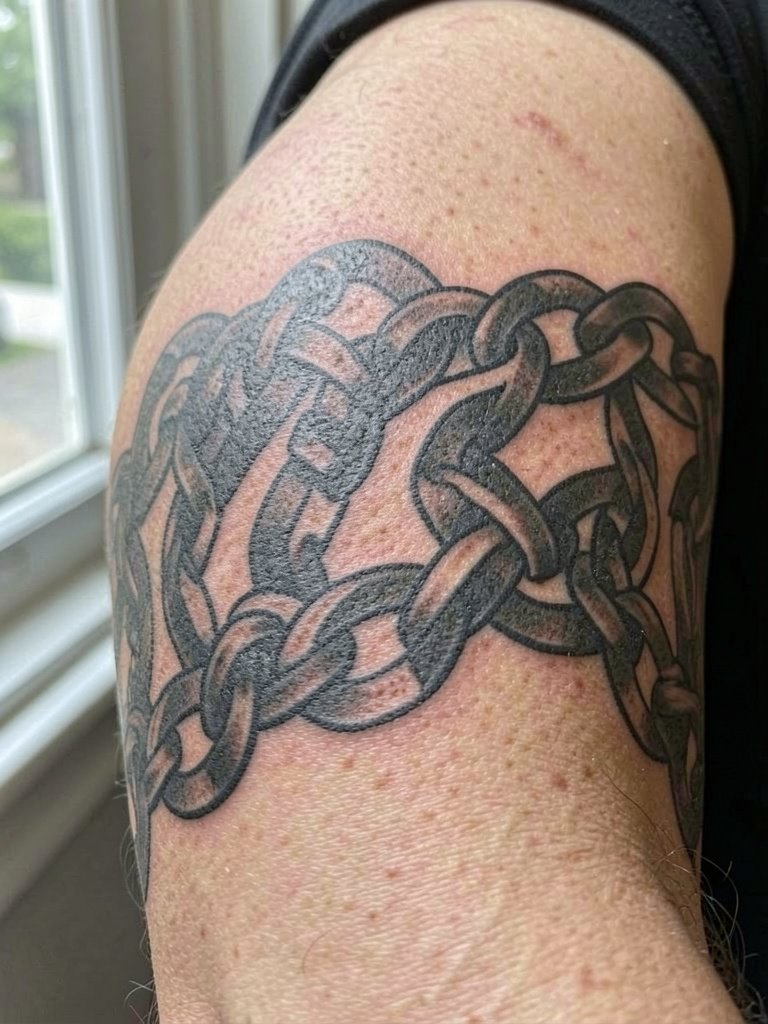
Band-based sleeves create rhythm along the arm and are forgiving as skin moves. The typical error is over-detailing the chain links so they vanish into a blur by year two. Ask for wider link outlines and spaced internal negative shapes to preserve the pattern. Session time is moderate because each band needs crisp edges, and you may want a planned break after every two bands to evaluate how saturation is settling. For showcasing this motif, cuffed sleeves or a rolled denim jacket keeps the focus on the repeating pattern without visual noise.
9. Abstract Smoke and Negative-Space Gradient Sleeve
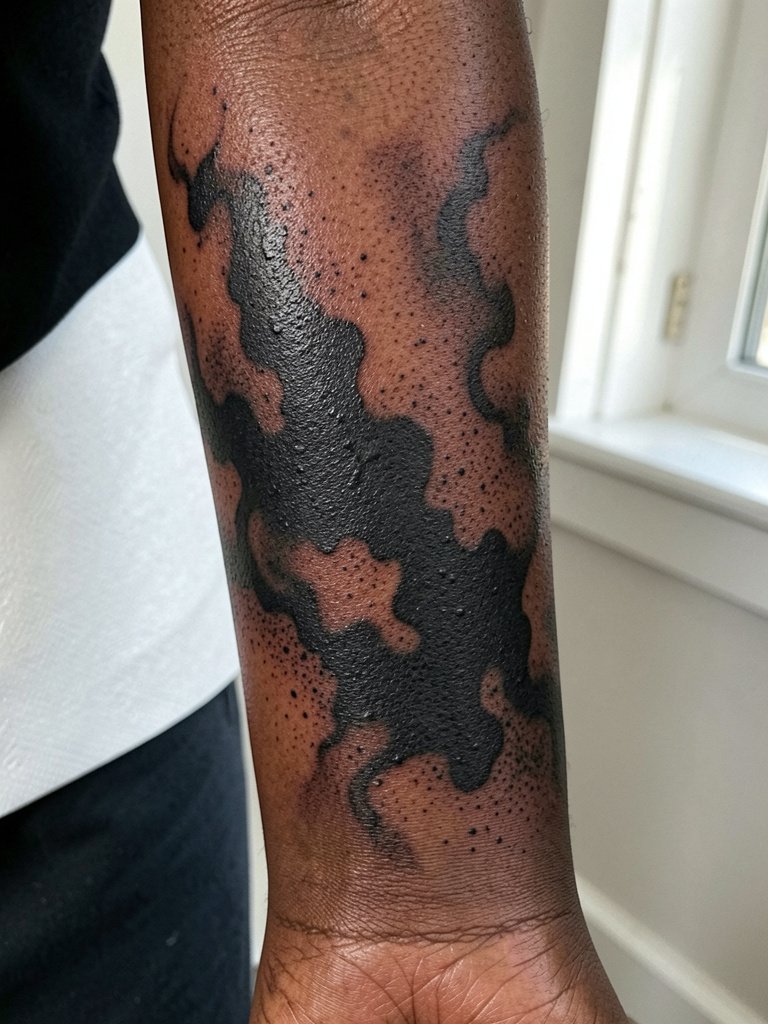
Abstract smoke sleeves use dot work and stipple to create soft gradients without relying on color. The trick is to avoid overworking the stipple into a muddy field. When you review the stencil, ask how the artist will transition from saturated black to dispersed dots so the gradient reads in motion. Pain varies by placement, but forearm stippling is generally tolerable with breaks. Expect a touch-up session at the one-year mark to refresh the darkest patches. Pair this sleeve with a short-sleeve knit top in neutral tones that lets the soft transitions breathe visually.
10. Japanese-Inspired Blackwork Sleeve
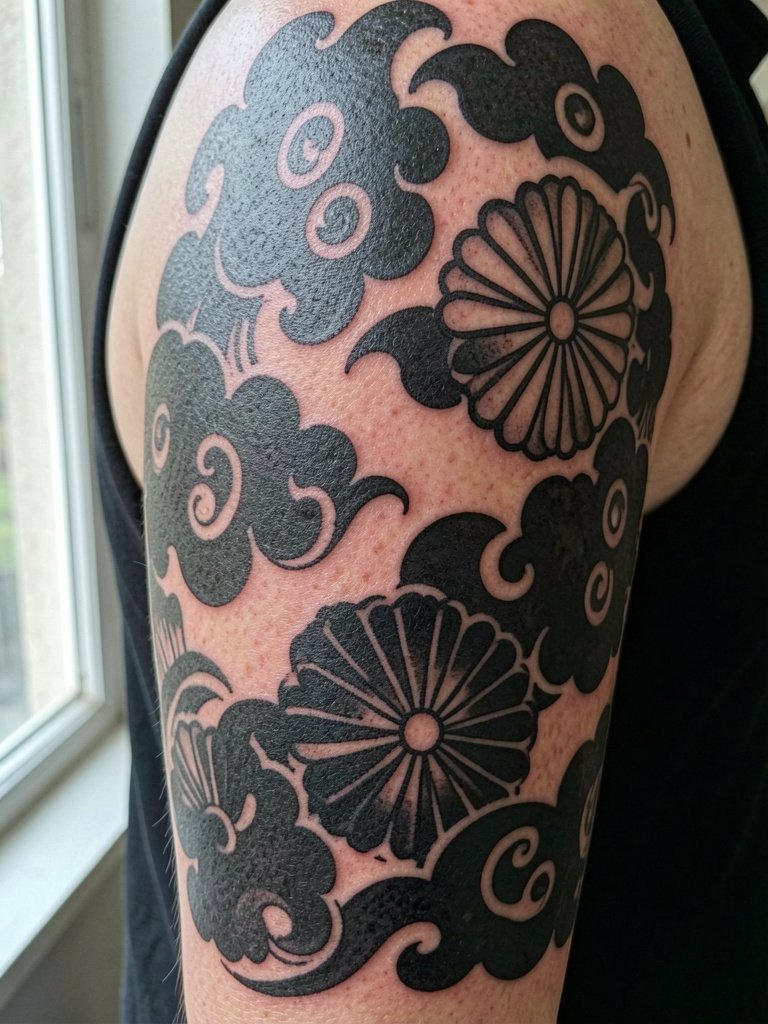
Traditional Japanese elements map well to blackwork by emphasizing large forms and rhythmic negative space. Cultural sensitivity matters here. Research the motifs and explain whether you want a modern blackwork take or an authentic composition rooted in tradition. A frequent mistake is shrinking classic elements into tiny panels that lose their narrative flow. Sessions are longer because composition must wrap the arm naturally, so budget time for layout and multiple saturation passes. For style pairings, a short-sleeve bomber jacket keeps the shoulder and upper-arm narrative visible.
11. Horror-Illustration Blackwork Sleeve
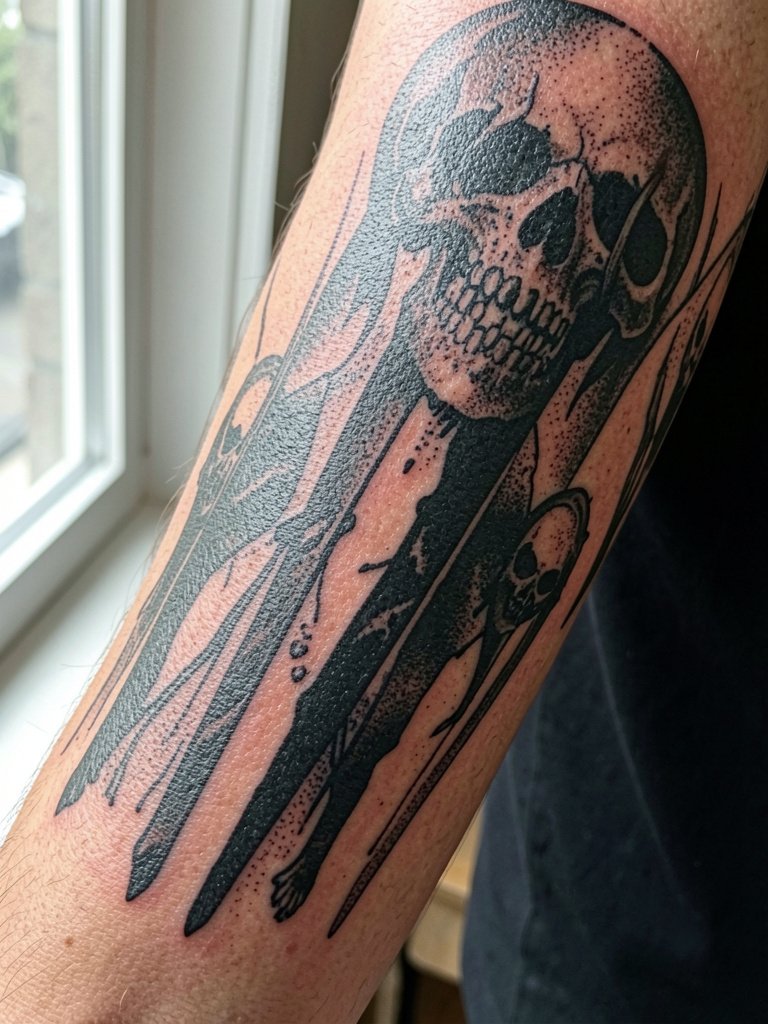
Illustrative horror pieces lean on contrast to feel ominous rather than relying on fine scratch detail that fades. When requesting this style, give the artist a mood board of large compositions that emphasize silhouettes and texture. People often try to cram micro-horror elements into tight spots and then lose the impact after healing. Expect several sessions because the composition needs to breathe and the darkest blacks take multiple passes. For nights out, a black long-sleeve mesh top can create layered visuals that play off the sleeve’s negative space.
12. Stipple Portrait Sleeve with Heavy Black Ground
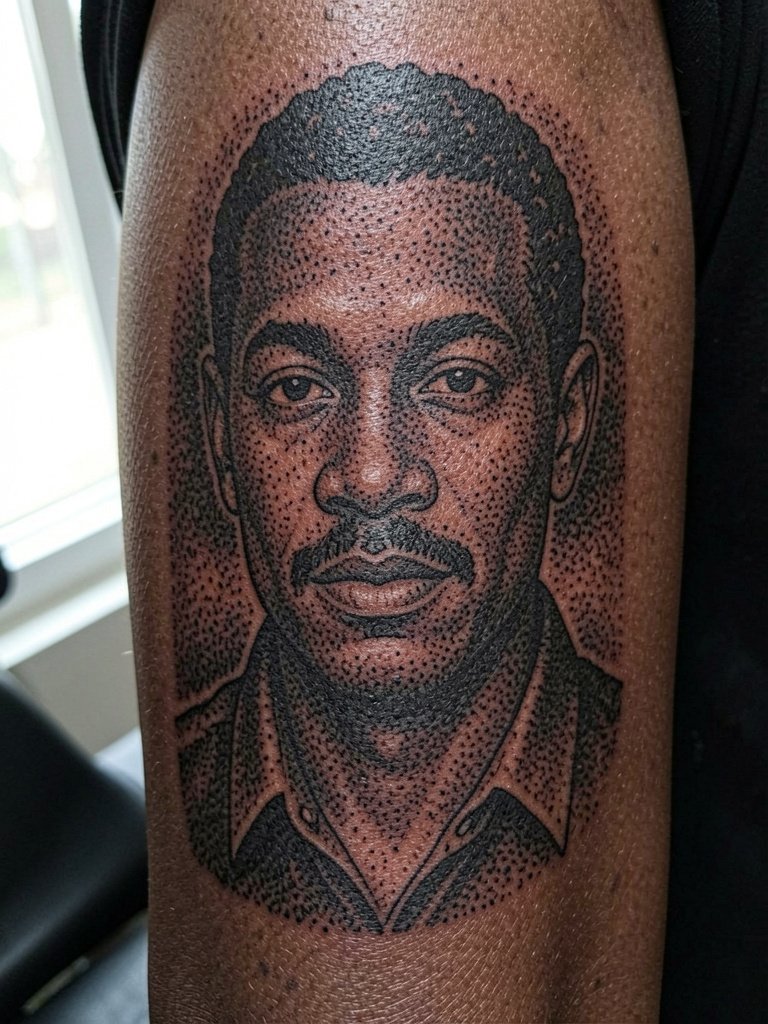
Stipple portraits inside blackwork fields make realism readable at scale, and they give artists options to protect detail with surrounding solid fills. Some artists argue that stipple on arms holds beautifully. One camp says stippling loses clarity over time because dots spread. The other camp contends that with proper dot spacing and strong black backgrounds, stipple portraits remain crisp. If you prefer long-term legibility, ask the artist for larger-than-expected facial planes and contrast zones. Sessions are detail-heavy and slower than pure silhouette work, and a planned touch-up keeps the stipple crisp in year two.
13. Script and Lettering Wrapped Sleeve
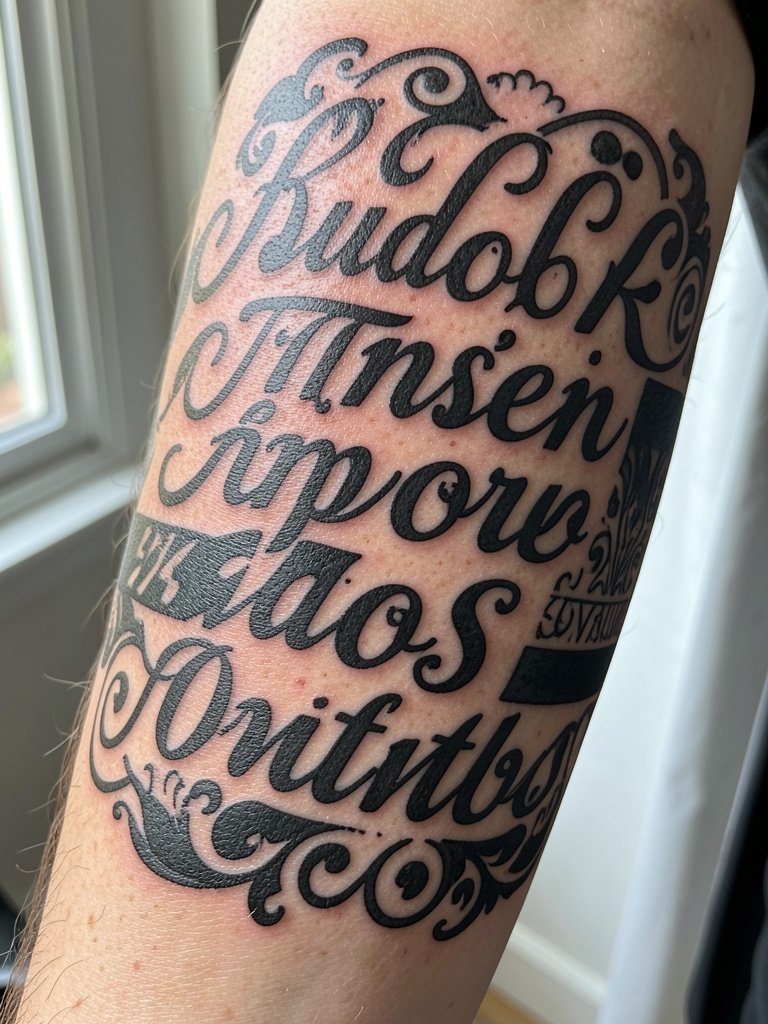
Large script that is part of a sleeve reads better than multiple tiny words squeezed into joints. The biggest mistake is requesting very thin cursive for a wrapped-sleeve where skin texture will soften the strokes. Instead, choose bold letterforms with internal counters and leave a buffer of black field around each word. For healing, wrist-adjacent script will need more protection from hand washing in the first two weeks. Wear a loose long-sleeve on the travel home and choose clothing like a lightweight hoodie that you can remove without rubbing the forearm.
14. Animal Silhouette Sleeve in Blackwork
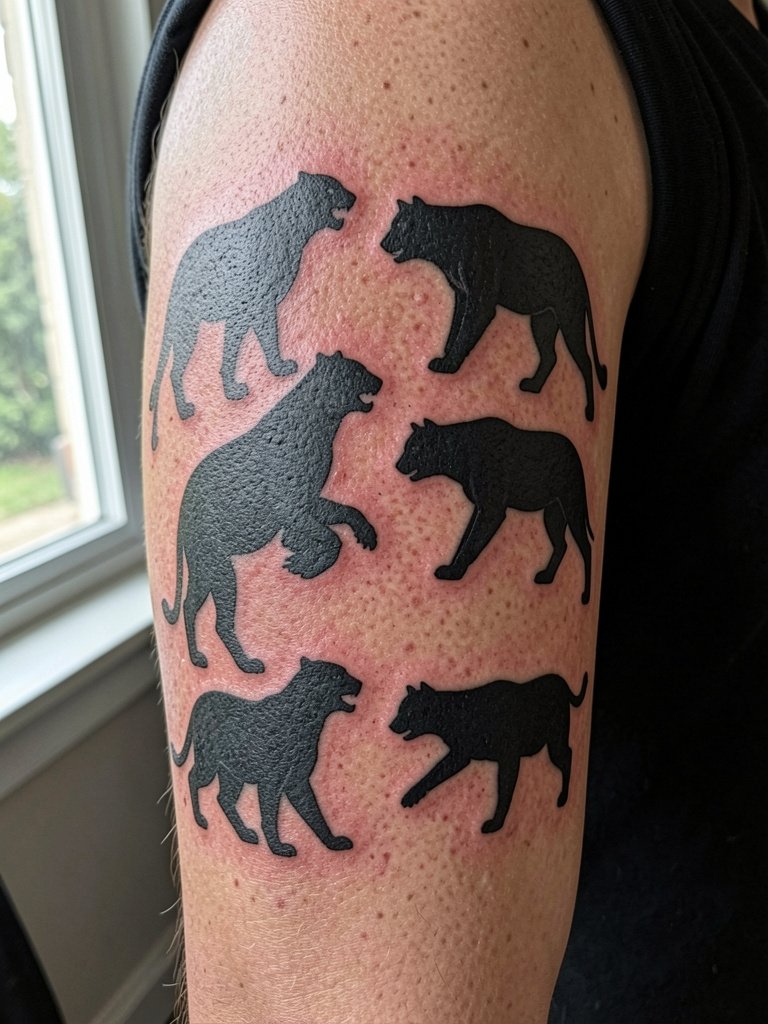
Silhouetted animals create immediate visual stories and age well because shape is prioritized over micro-texture. A real mistake is trying to represent fur texture with tiny lines inside a silhouette. Instead, use negative space or subtle stippling to suggest texture while keeping the outer edges bold. Session time depends on how many animals you include, but plan multiple sittings for composition flow. If you want to showcase this sleeve on warm days, a sleeveless vest will frame the shoulder-to-bicep narrative.
15. Full-Arm Architectural Blackwork Sleeve
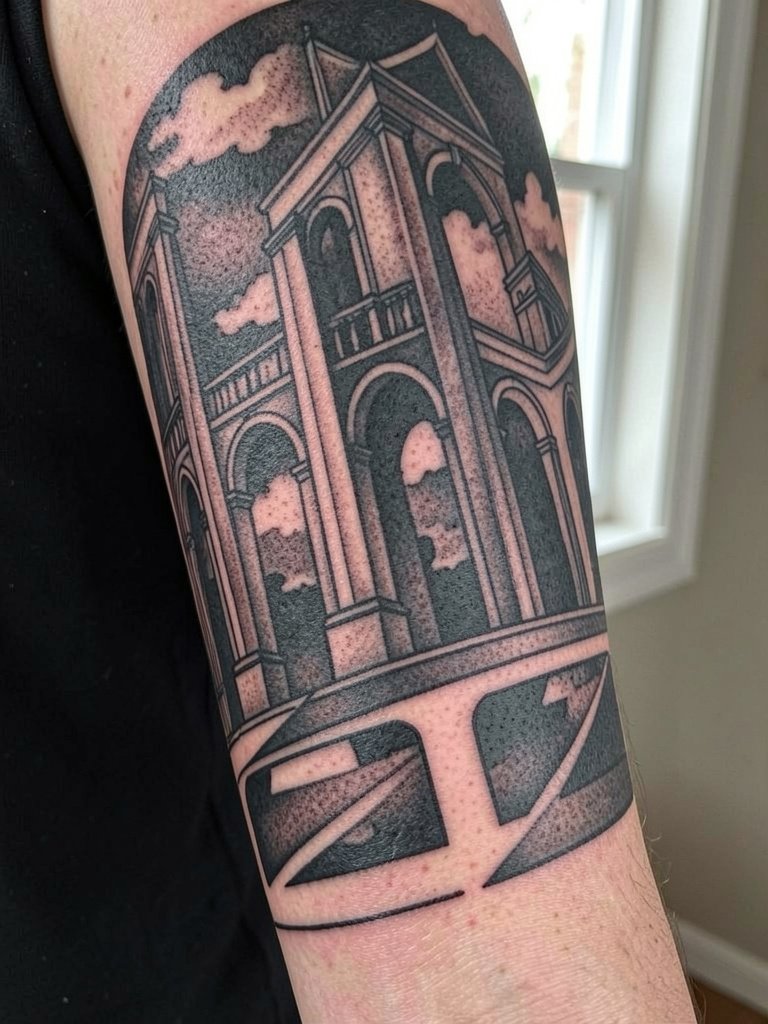
Architectural sleeves read like a cityscape in silhouette and play to blackwork strengths by converting detail into bold planes. The common error is stacking too many tiny architectural elements that blur together when healed. Request clear focal points and large frames that anchor the eye, rather than minute window details. Touch-ups help maintain the darkest sky fields. Sessions are predictable but long, so bring comfortable padding for the chair. For evening events, pair the composition with a fitted short-sleeve button-up that keeps the arm unobstructed.
Frequently Asked Questions
Q: How long do bold blackwork sleeves take to heal and when will they need a touch-up?
A: Expect initial surface healing in two to three weeks and deeper settling over three to six months. Most saturated blackwork benefits from a minor touch-up around year one or two to even out any areas that lightened during healing.
Q: Are there placements on a sleeve more prone to blowout or fading?
A: Inner arm folds and wrist-adjacent skin see more friction and faster softening, while the outer bicep and shoulder usually hold crisp edges longer. Planning wider linework and negative-space buffers in those higher-friction zones reduces blowout risk.
Q: How do I find healed examples and portfolios without naming artists?
A: Search platform tags and location filters on social apps for phrases like "blackwork sleeve healed" and "heavy blackwork sleeve progress" to find recent healed photos in different skin tones. Local tattoo shop pages and community threads will often show multi-session progress shots that reveal real aging.
Q: What should I wear to a long blackwork sleeve session and to show the work afterward?
A: Wear loose, comfortable clothing that provides easy arm access, such as a zip-up sweatshirt you can take off without pulling across fresh ink. For showing off finished sleeves, short-sleeves and rolled cuffs frame the arm without competing with the composition.
Q: Do large black fields hurt more and what is realistic session time?
A: Saturated black fields feel like longer, steady work rather than sharp peaks of pain. Full-sleeve saturation is often scheduled over multiple three- to five-hour sessions to avoid excessive soreness and to let ink settle between passes.
