
Fine-line bird tattoos look fragile on a phone screen but behave very differently on skin. Expect small minimalist bird work to commonly cost $150 to $350 for a walk-in or minimum session. Pick your placement with the long view in mind, and you will get a piece that reads crisp after healing. The first idea below shows how a single-needle silhouette can do that without fuss.
1. Single-Needle Bird Silhouette on Inner Forearm
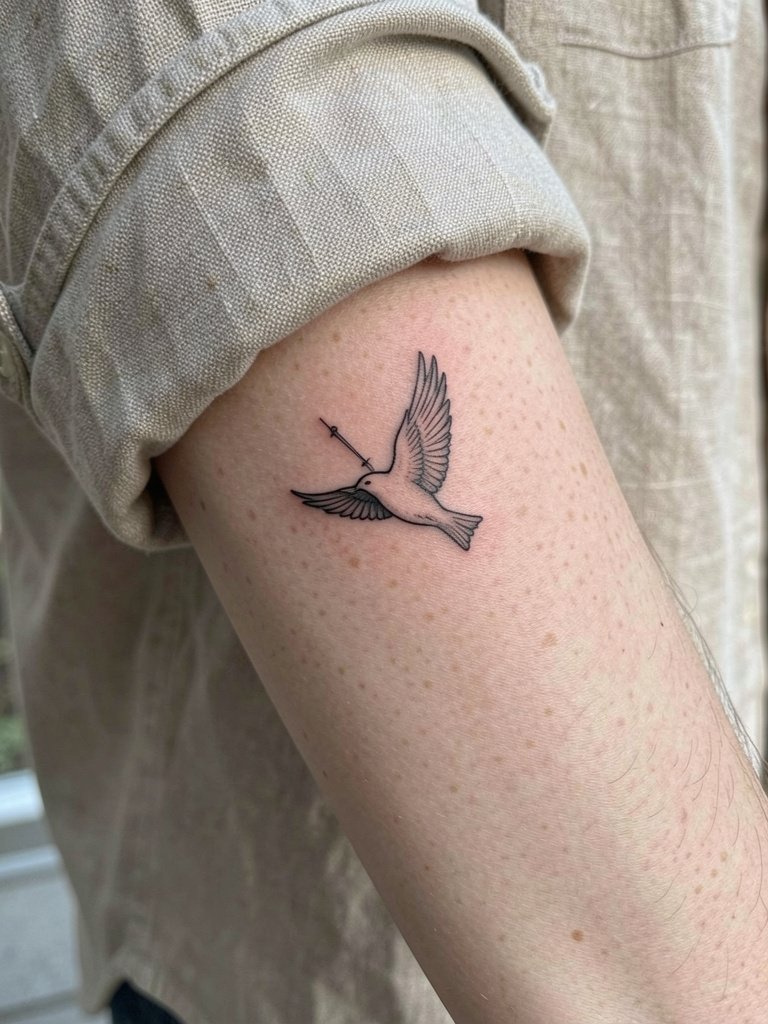
This is the classic entry for people who want a crisp, low-commitment piece. Recommend this over a filled silhouette when the forearm will be photographed often, because ultra-thin fills can soften into a grey wash by year three. During your consultation bring a reference that shows exact stroke width so the artist can match 1–2 mm single-needle linework instead of a hairline script. Expect a short session, usually under an hour, and light to moderate pain on the inner forearm. A common mistake is asking for the smallest possible size, which leaves no room for touch-up. For show-off styling pair with a rolled cuff linen shirt that keeps the wrist visible.
2. Hyperrealistic Botanical Bird on Outer Upper Thigh
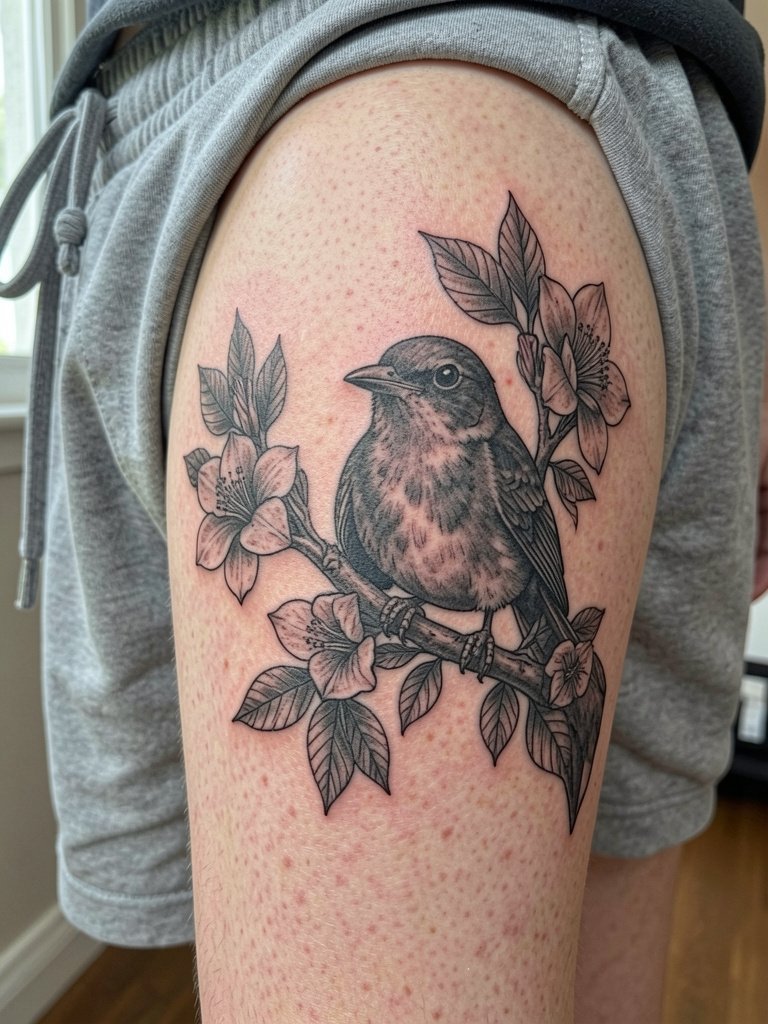
This design is for collectors who want museum-level detail in a small area. It reads better at three to five inches than at one inch, so plan scale with your artist and bring two reference shots at different sizes. Expect two sessions for dense stipple and micro shading, and plan for touch-up in year one once healed. The outer thigh is a forgiving surface for saturation, but avoid designs with too many hairline veins or the detail will merge over time. For sessions wear loose drawstring linen shorts so the artist can roll the leg without pressure. Many people assume a tiny hyperreal bird will cost only a little more than a silhouette, but the level of shading changes session time dramatically.
3. Minimalist Mandala Bird at the Collarbone
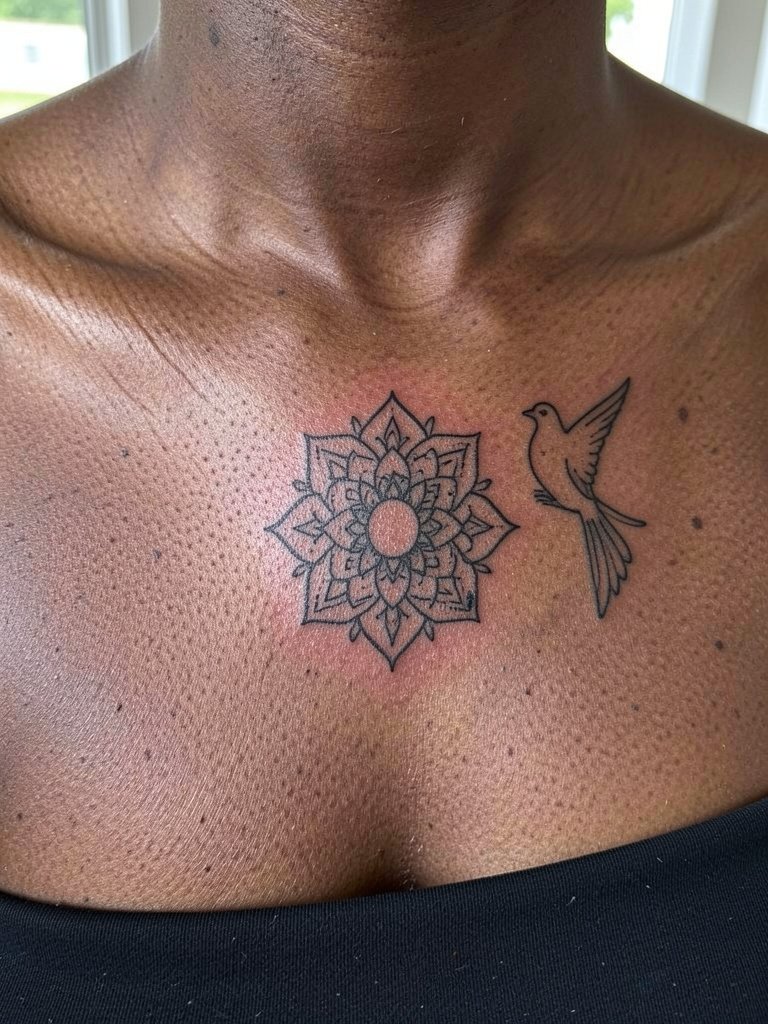
This ornamental option combines geometry with an avian silhouette so the piece reads structured on the chest. The collarbone shifts less than ribcage skin, so spacing can be tighter without lines merging. Bring a photo that shows how the mandala sits relative to your clavicle so the artist can place the center where it flatters your bone structure. Expect moderate pain and a 45 to 90 minute session depending on size. A common error is squeezing too much detail into a two-inch area, which shortens longevity. To highlight this placement wear a layered thin chain necklace set that frames the tattoo without covering it.
4. Watercolor Butterfly-Bird Hybrid on Side Ribcage
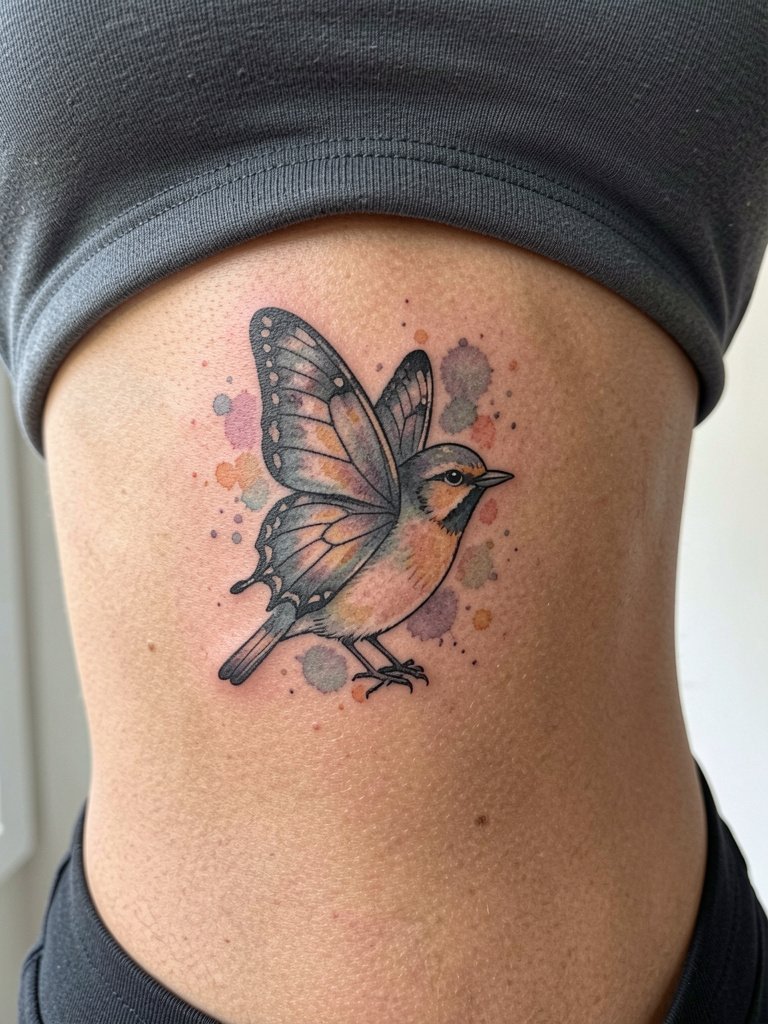
Ribcage work reads beautifully when planned, but this placement is at the center of a major debate in the community. One camp says fine line and watercolor on ribs blur within two years because the skin stretches and shifts under clothing and movement. The other camp argues that with correct needle depth and slightly wider spacing fine line settles fine, and they point to healed three-year examples from experienced micro-realism artists. If you choose the ribs, discuss exact spacing and a modest size so the watercolor has room to age. Expect higher pain and a session that can run two hours. For session wear a loose side-tie top so the artist can access the area without fabric movement.
5. Geometric Bird Optical Illusion on Inner Forearm
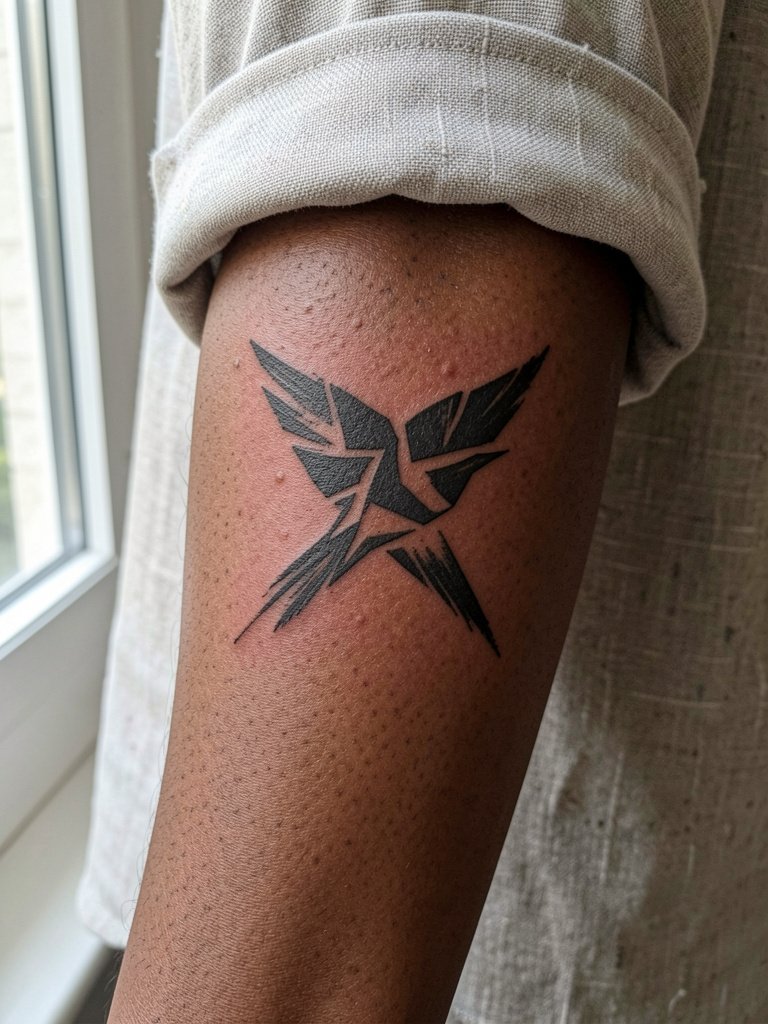
Abstract optical shapes read well on the forearm where movement helps the design read differently from each angle. A common mistake is compressing too many shapes into a small band, which merges over time. Discuss with your artist the negative space proportion you want, and bring photos of the arm in motion so they can test the composition on your skin. Session time is usually under an hour and pain falls in the low to moderate range. For showing it off wear a rolled cuff linen shirt or a short-sleeve top that keeps the sun off while highlighting linework.
6. Tiny Script Bird + Name Behind the Ear
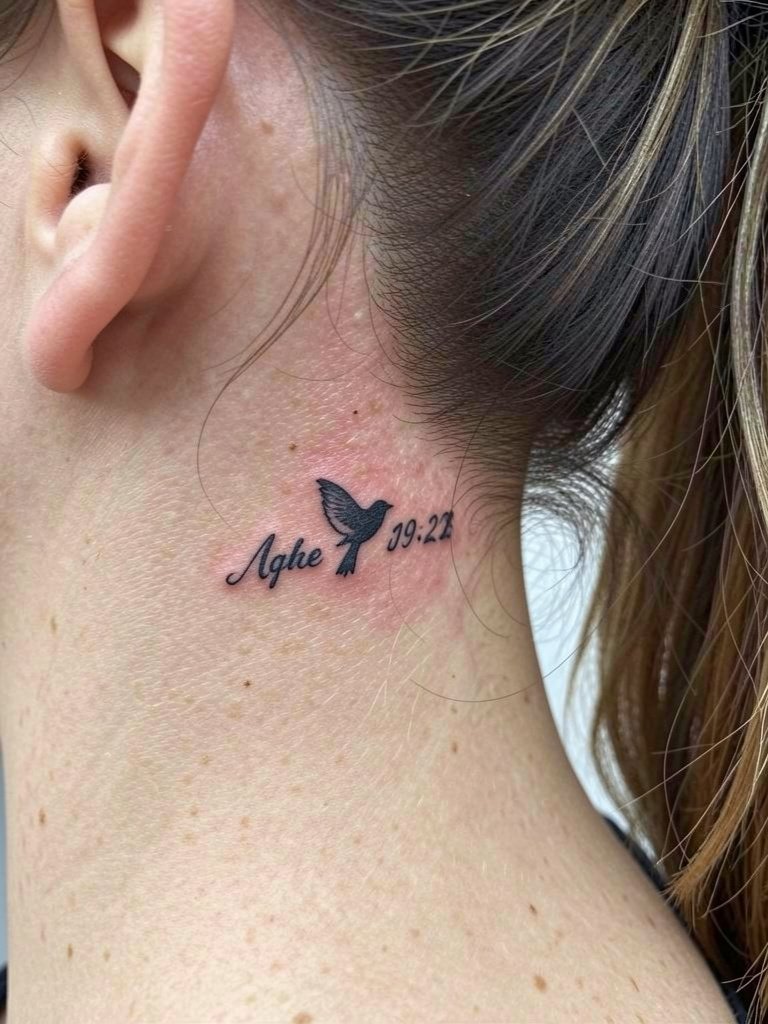
Tiny script behind the ear is a low-visibility memorial or accent piece for people starting a sketchbook patchwork. Ask for the exact font size in millimeters so the artist can test legibility on a stencil. The mastoid area is delicate and heals quickly, but single-needle script can soften, so plan for a touch-up window at six to twelve months. Session time is short and pain is mild. Wear hair up for the appointment, and consider minimalist hair pins for future reveal. For appointment comfort use a thin headband or minimalist hair pin set.
Before You Book
The wrist, forearm, and behind-the-ear pieces above heal differently from heavier shaded work, so a few compact products smooth the session and the first week.
- Dr. Jont's Tattoo Balm. Thinner than heavy ointments, people report less clogging in the first three days which helps tiny script and single-needle lines keep crisp.
- Tattoo Goo Aftercare. Fast-absorbing and non-greasy, useful for areas like behind the ear where a heavy film can trap moisture.
- Hada Labo Hydrating Lotion. A gentle, low-irritant lotion option for those with sensitive skin on larger heal windows like thighs and ribs.
- Inked App Healing Kit. A pre-packaged kit that takes guesswork out of your first 72 hours after a small session.
- Hustle Butter Original. A thinner alternative to thick ointments that some people prefer for initial moisture without heavy residue.
7. Hyperrealistic Lepidoptera Ambiguity on Lateral Hip Bone
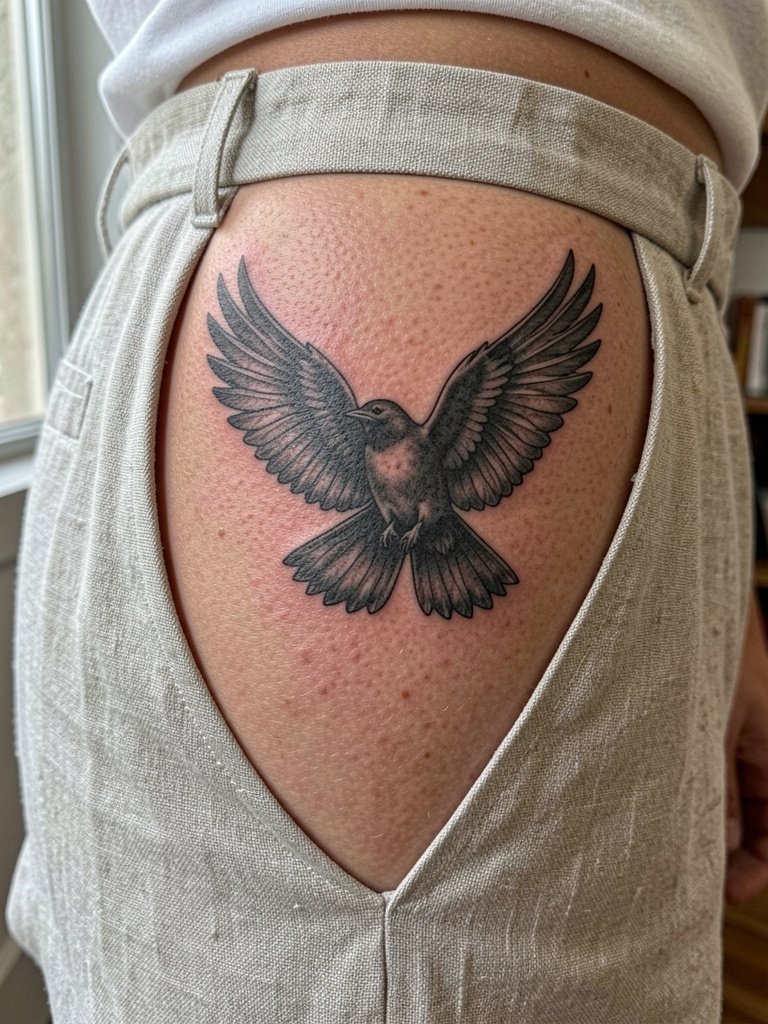
This hybrid works when you want an ambiguous motif that can read as either creature from different distances. For the hip area, avoid excessive filigree that will compress when clothing rubs the site. Tell the artist to test the stencil with your clothing on so the waistband does not sit over the most detailed area. Pain ranges from low to moderate depending on padding. A real mistake is placing the smallest possible wing detail right under the waistband where friction is constant. To show it off wear high-waisted linen shorts that keep the piece visible when you move.
8. Negative Space Bird Silhouette on Sternum
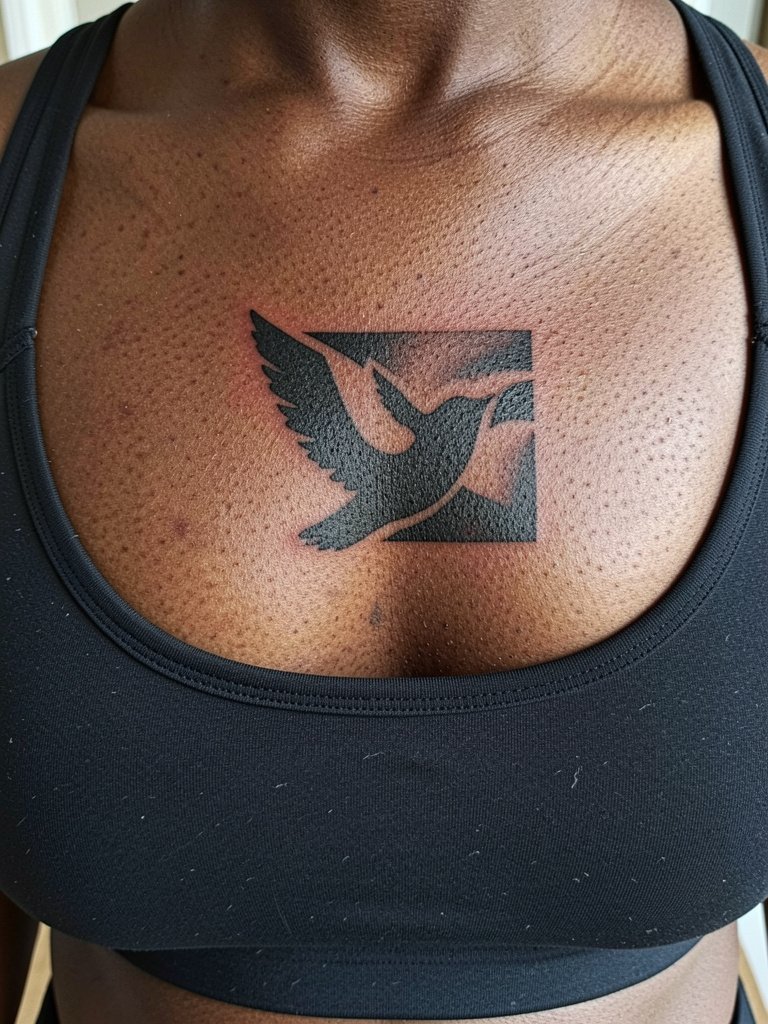
Large blackwork relies on strong negative space to read properly on the sternum. Discuss edge crispness and plan a slightly larger overall block so the negative bird remains bright as the skin settles. Sternum tattoos can be sensitive and may need shorter breaks during a session. A common misunderstanding is expecting a negative-space bird to behave like a small outline; it needs mass to hold contrast. For session wear a strapless or scoop-neck top in normal position to give unobstructed access. Accessorize after healing with a layered thin chain necklace set that sits above the piece.
9. Celestial Birth Chart Bird on Inner Forearm
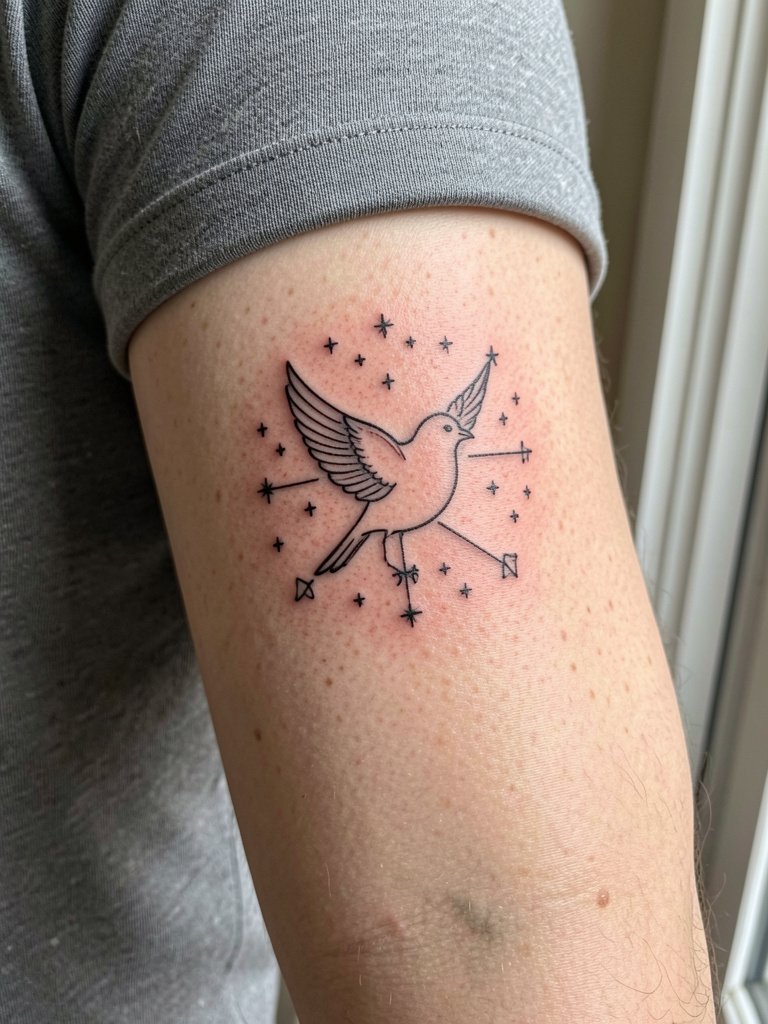
Pairing astrology with a bird silhouette gives the piece personal anchors without heavy shading. Ask the artist to space stars at least a half centimeter apart so dots stay distinct over time. Inner forearm placement photographs well if you set high contrast in camera settings, but avoid over-editing glossy filters that wash thin lines out. Expect a 30 to 60 minute session with low to moderate pain. For showing it off try a dainty gold stacked bracelet set on the opposite wrist to balance the composition.
10. Vintage Antique Bird Illustration on Outer Upper Arm
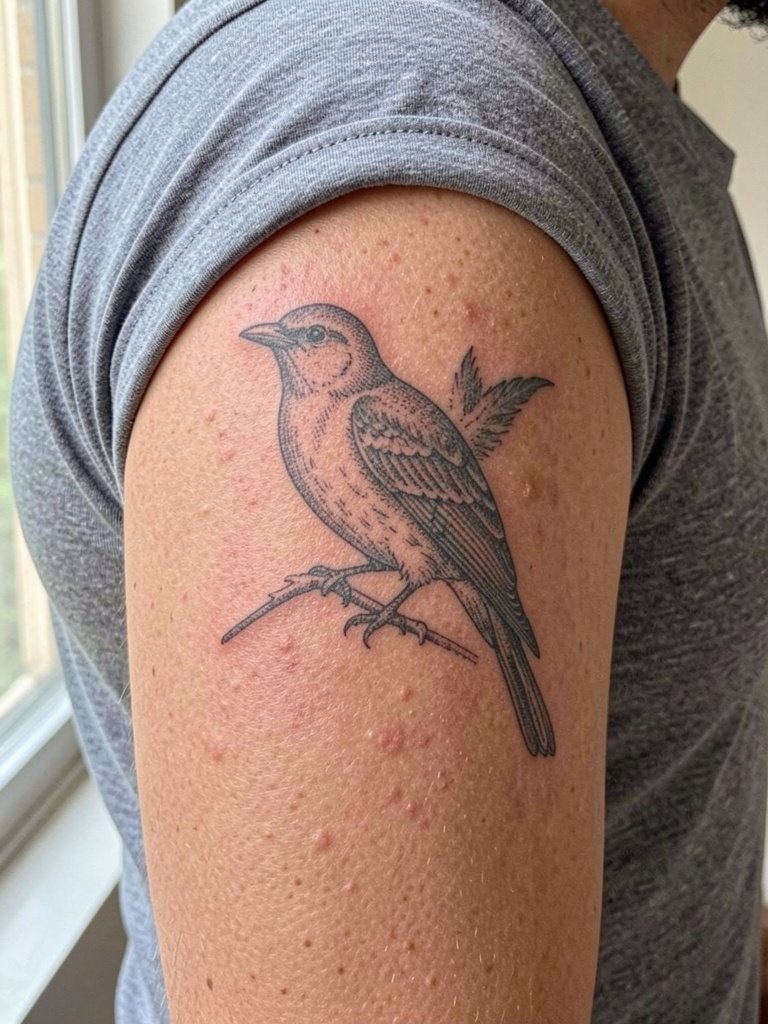
This style benefits from slightly looser line weight than a single-needle piece, because the subtle hatch shading ages into character rather than blur. Ask for a faded color palette if you want the antique feel, and confirm where the "fading" will be placed so the image still reads at arm's length. Outer arm is moderate in pain and supports more elaborate composition. A common mistake is putting micro-texture too close to the edge where movement smudges it. For evenings out, pair this with a flowy midi skirt that reveals the arm when you cross it.
11. Abstract Brushstroke Bird on Lateral Hip Bone
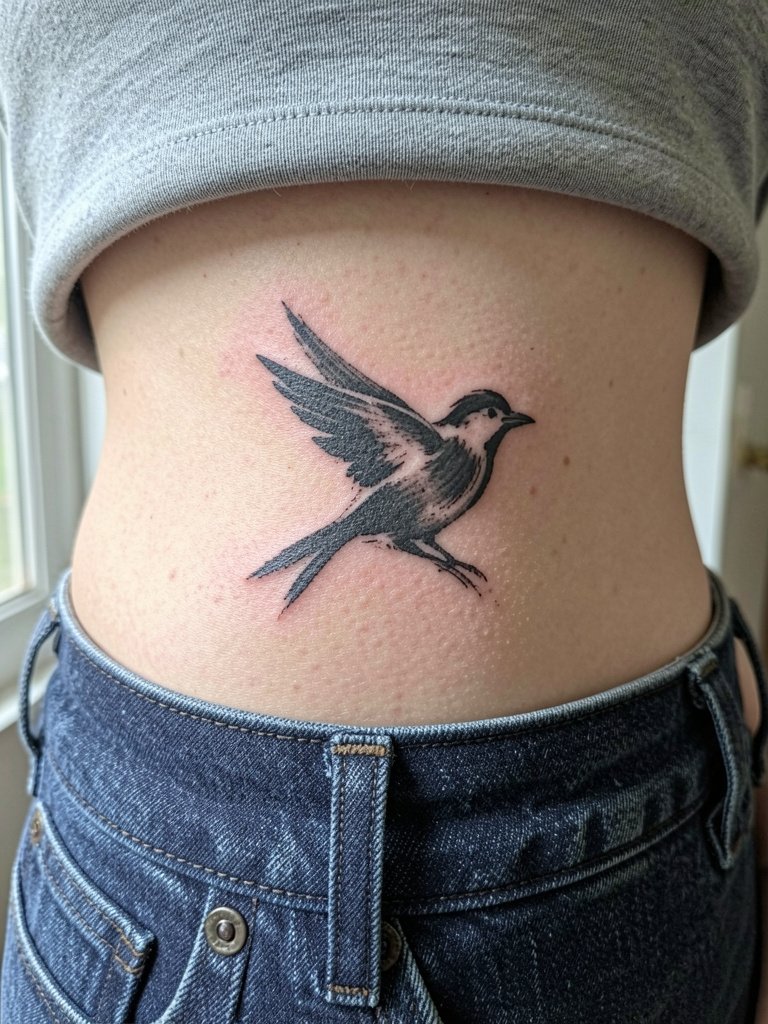
Brushstroke birds favor movement and look great on the hip when scaled to motion. Avoid putting hairline wisps directly under the waistband. For placement stability ask your artist to show the stencil while you stand and sit so you can check how it moves when the hip flexes. Pain is low to moderate, session time under an hour for small pieces. To reveal it, wear cropped tunics or high-waisted linen shorts that keep the area visible.
12. Minimalist Bird Footprint on Behind the Ear
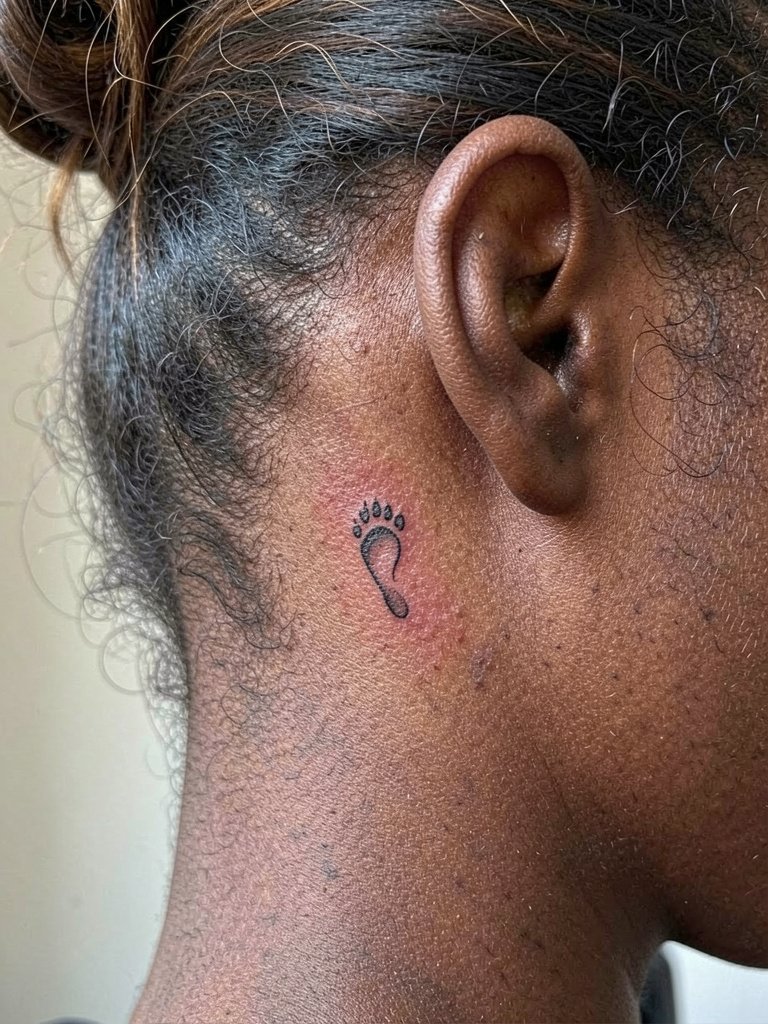
This micro-mark is ideal for first-timers who want near-invisible ink. Discuss exact dot spacing and ask for a slightly bolder dot than the reference so the footprint survives the first few years. The mastoid area often heals cleanly but watch for hair products that can irritate the site. Session time is brief and pain is low. For reveal style wear hair up with minimalist ear cuffs and try a minimalist ear cuff set to draw attention without covering the spot.
13. Bird + Flower Bouquet on Inner Forearm
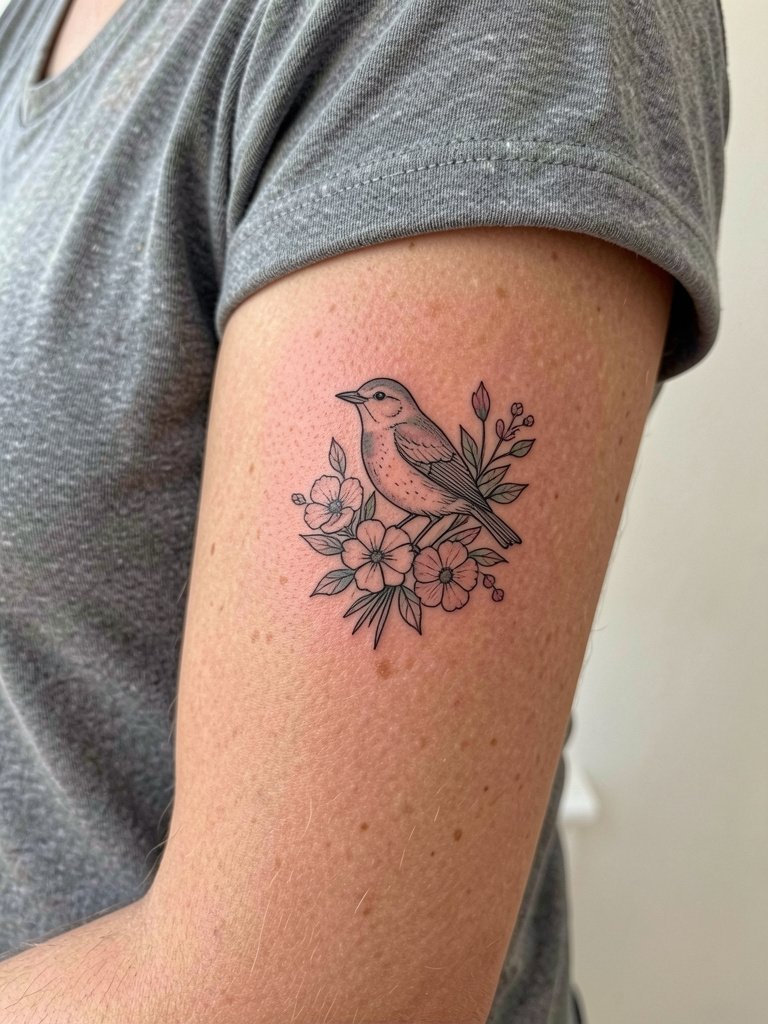
Pairing a birth flower with a small bird gives the piece specific identity without relying on empty descriptors. Bring exact reference photos of the flower and tell the artist which petal detail matters most so they can prioritize clarity. Inner forearm is forgiving for fine detail but plan a touch-up at 12 to 24 months for micro shading. A mistake is using too many color gradients in a tiny bouquet. For show-off wear a dainty gold bracelet stack on the opposite wrist to keep the balance.
14. Y2K Nostalgia Doodle Bird on Ankle
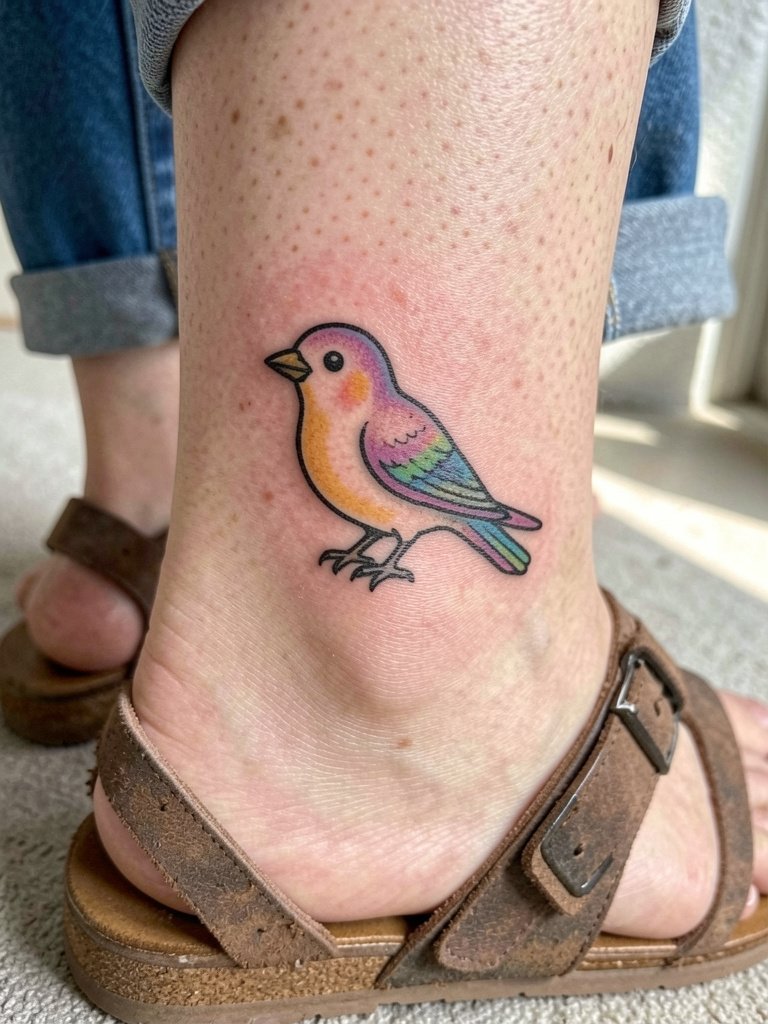
Y2K doodles work if you want playful patchwork ink. The ankle faces friction from footwear, so plan slightly thicker outlines than a wrist script so the doodle retains presence. Ask the artist to show how it looks with low-cut shoes on so the design does not disappear behind straps. Pain is low at the ankle, and session time is short. A common error is choosing an accent color that fades faster than the black, making the bird read off-balance. For footwear pairing go with ankle sandals or low-cut boots that let the tattoo be visible.
15. Silhouette Bird in Flight on Lateral Hip Bone
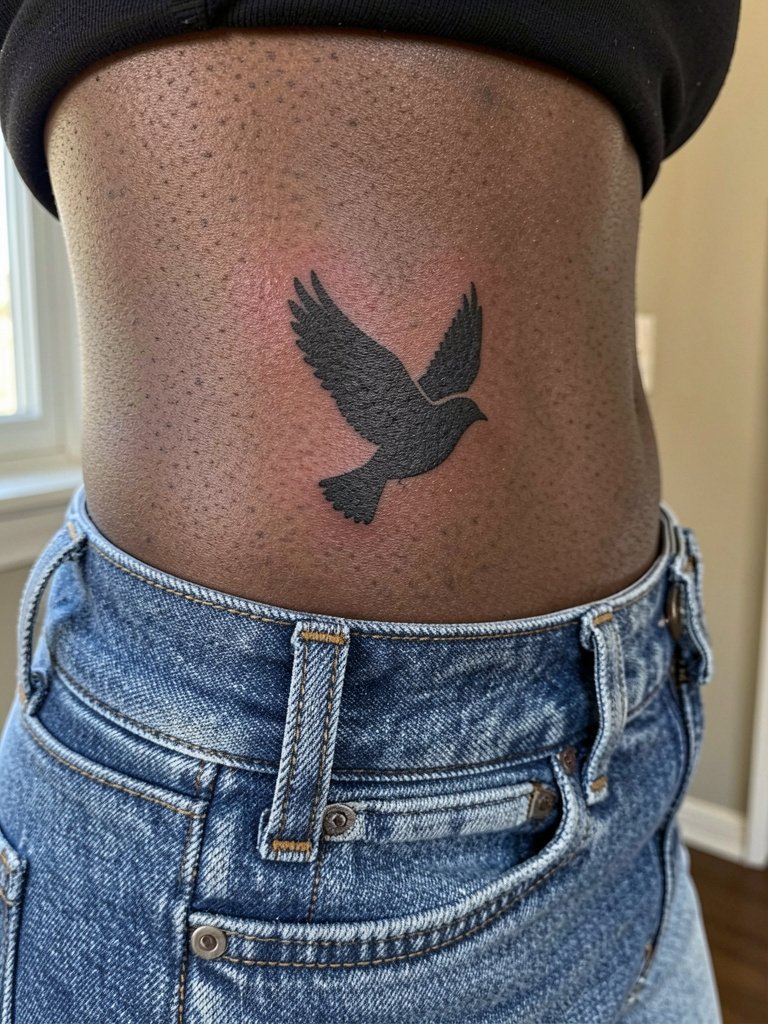
Bold silhouettes are forgiving on the hip and tend to age into solid shapes with minimal fuss. There is a split in opinion about fine-line work on shifting skin. One camp points to fast blurring when the area rubs against waistbands and moves with body weight. The other camp says a slightly heavier line and sensible spacing will keep the silhouette legible for years. If you want this placement, ask for test stencils with your jeans on so the artist can see compression points. Expect low to moderate pain. To expose it, choose high-waisted linen shorts that sit below the tattoo.
16. Micro-Realism Hummingbird on Medial Inner Thigh
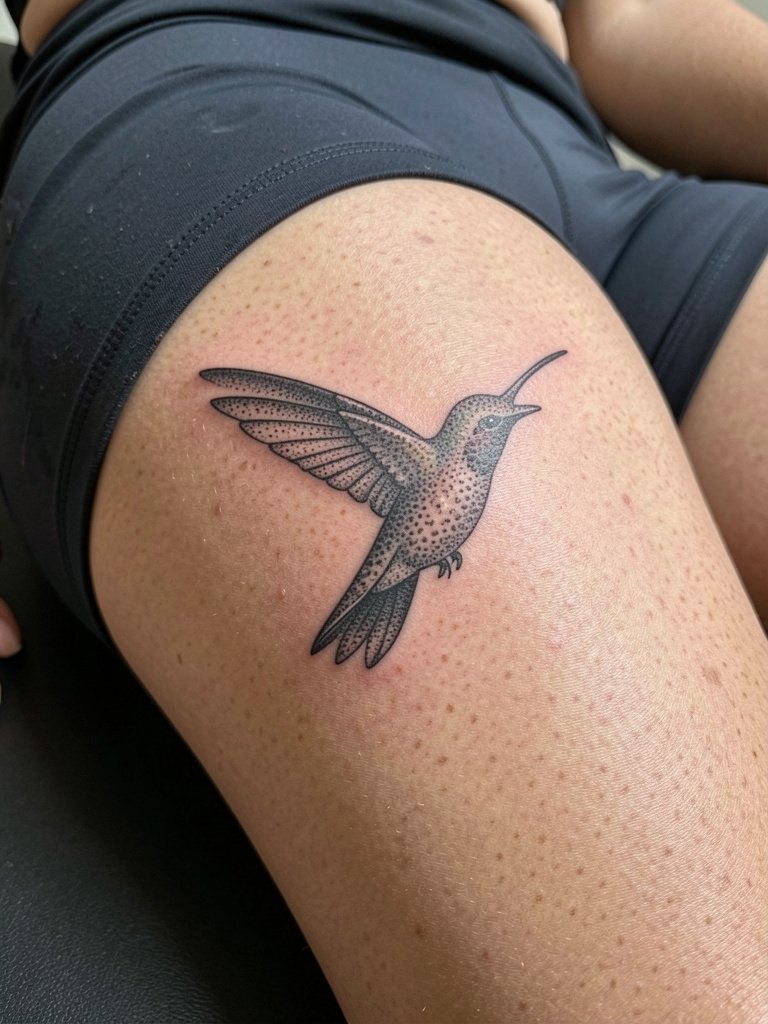
Inner-thigh micro-realism benefits from scale; go slightly larger than your initial instinct so the dot work keeps separation. This area can compress during activity, so ask how the artist maps the image when you are both seated and standing. Pain is moderate and healing requires friction management. Expect a touch-up after initial healing since inner-thigh skin can shift. For session comfort wear loose drawstring shorts so the artist can roll the leg.
17. Minimalist Line Art Sparrow on Outer Calf
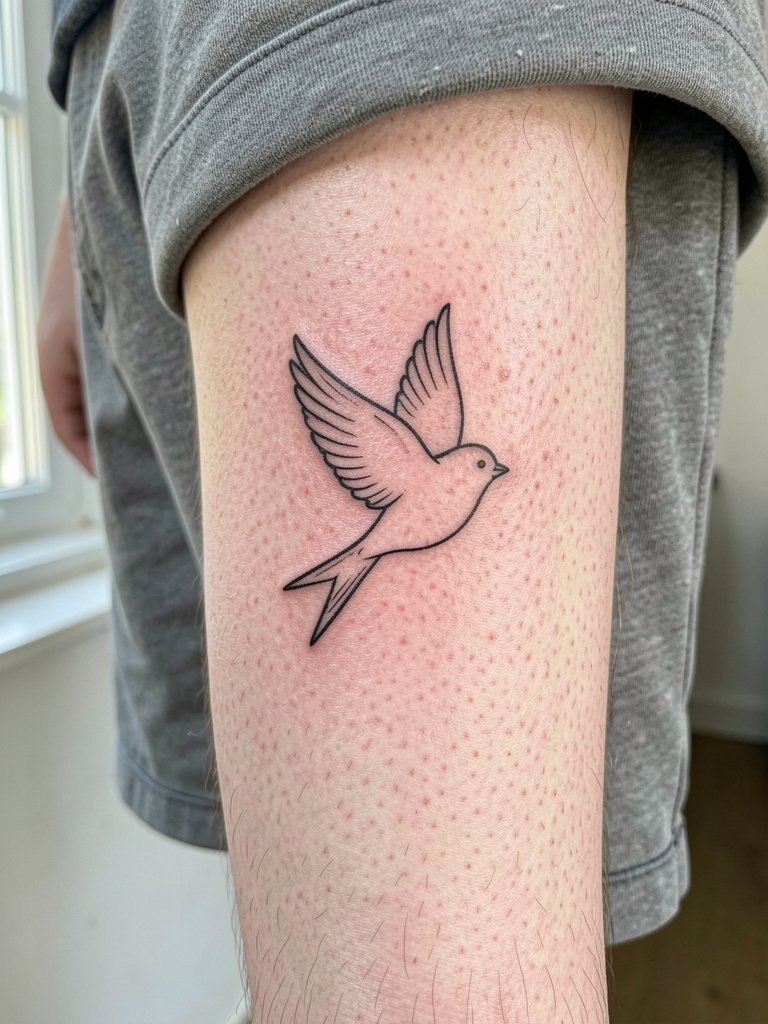
A continuous-line sparrow reads elegantly on the calf where the skin stays relatively stable. Discuss how the line flows with muscle contours so the image does not distort when you walk. Calf sessions are low in pain and heal well, but very thin lines can fade if you suntan frequently. A practical mistake is placing the line too close to the edge where compression from clothing can smear the ink. For wearing, choose a flowy midi skirt or shorts that reveals the design when you move.
18. Dot-Work Avian Crest on Upper Back
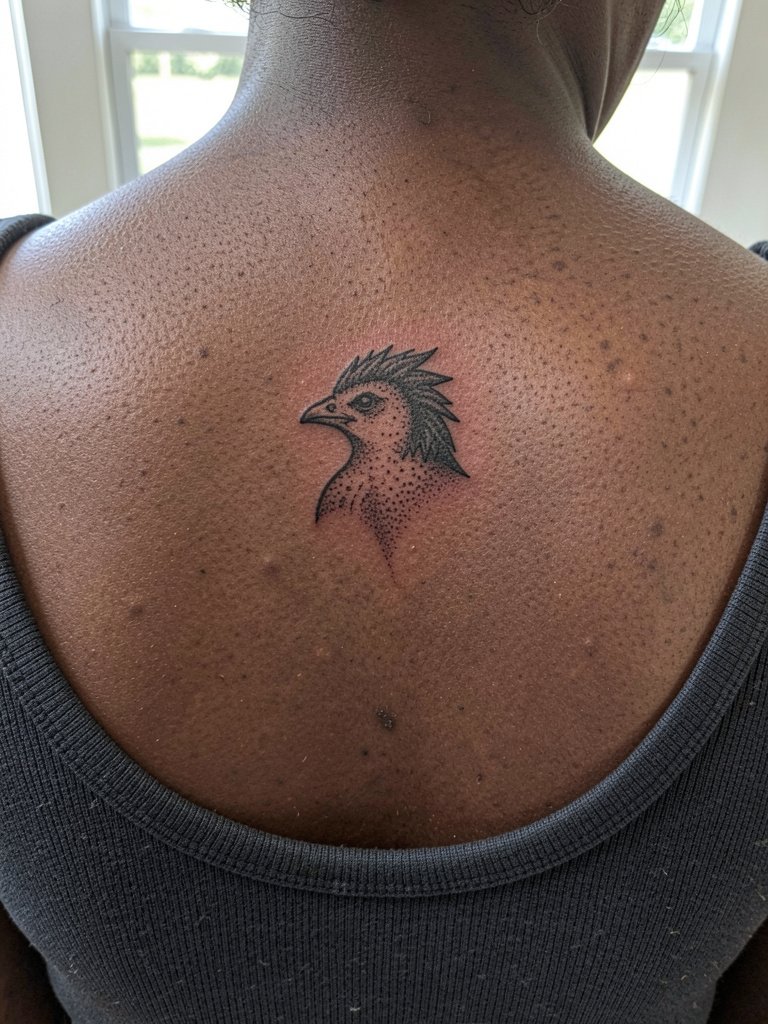
Dot-work holds up well with modest scale because each point keeps separation. For upper-back placement request a midline alignment test during the consult so the crest sits centered with your shoulder blades. Sessions can be slightly longer if the dot density is high. A frequent error is overcrowding the crest with too many tiny dots in a small area. For clothes that show it off pick a strapless or wide-neck top that sits naturally and does not press on the healed ink.
19. Miniature Stipple-Shaded Finch on Outer Wrist
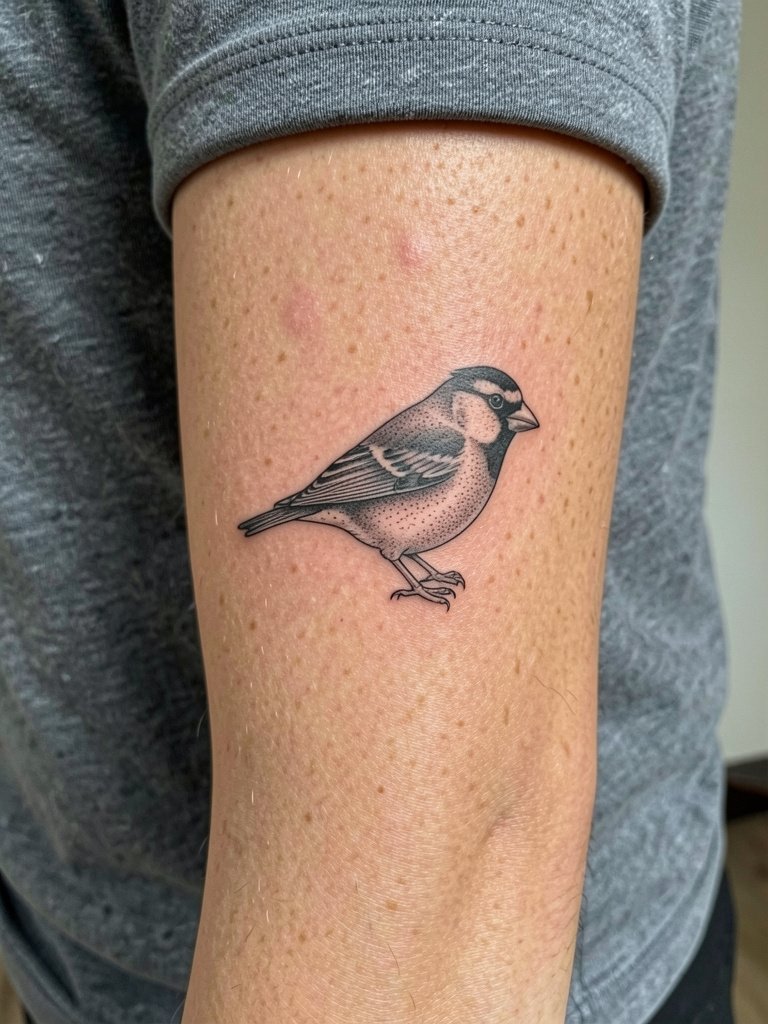
Outer wrist pieces need balanced contrast because bracelets and watches can compete with the view. Ask for a slightly stronger contour line than your reference and request a stencil placement with the watch off so you can see spacing. The wrist tends to fade faster due to hand washing, so plan a touch-up at year one. Session time is brief and pain is moderate. For showing it off try a minimalist watch or thin chain bracelet on the other wrist.
20. Brushstroke Wing on Shoulder Blade
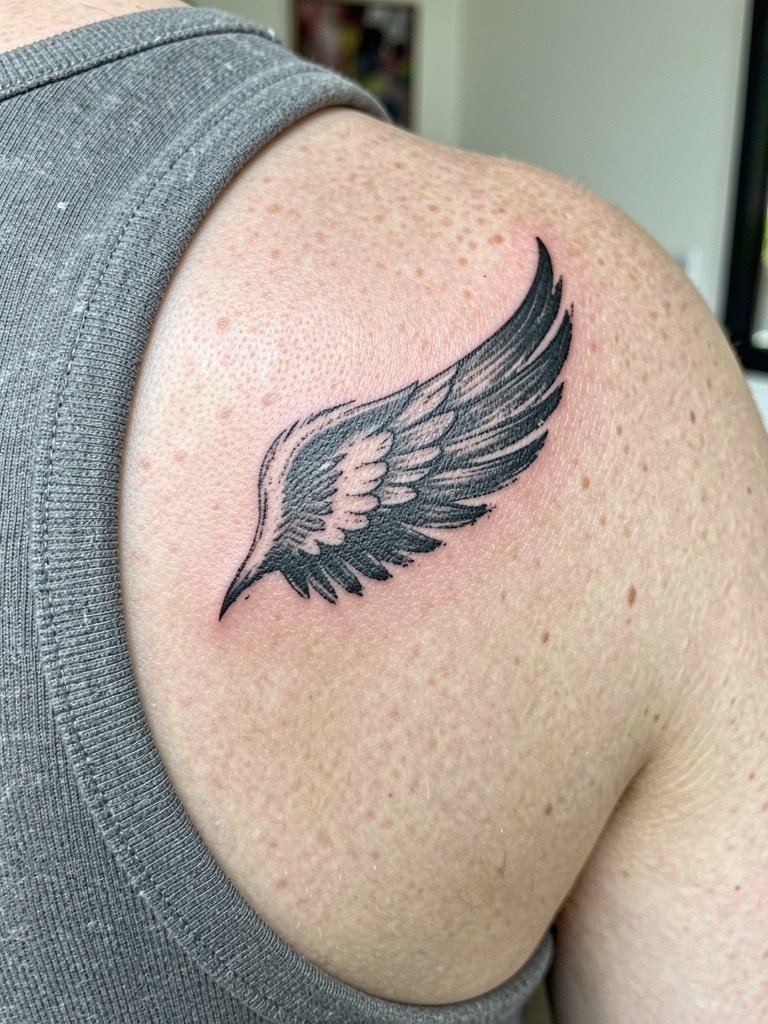
Shoulder-blade brushstrokes read well because the area expands and contracts with breathing without constant waistband friction. Ask the artist how the piece looks when you move your arm to ensure the strokes do not fragment at the scapula edge. Pain is low to moderate and sessions are short for small designs. A mistake is placing strokes where bra straps sit. For session wear a loose tank top so the artist can access the shoulder blade cleanly.
21. Linear Flight Pattern Across Collarbone
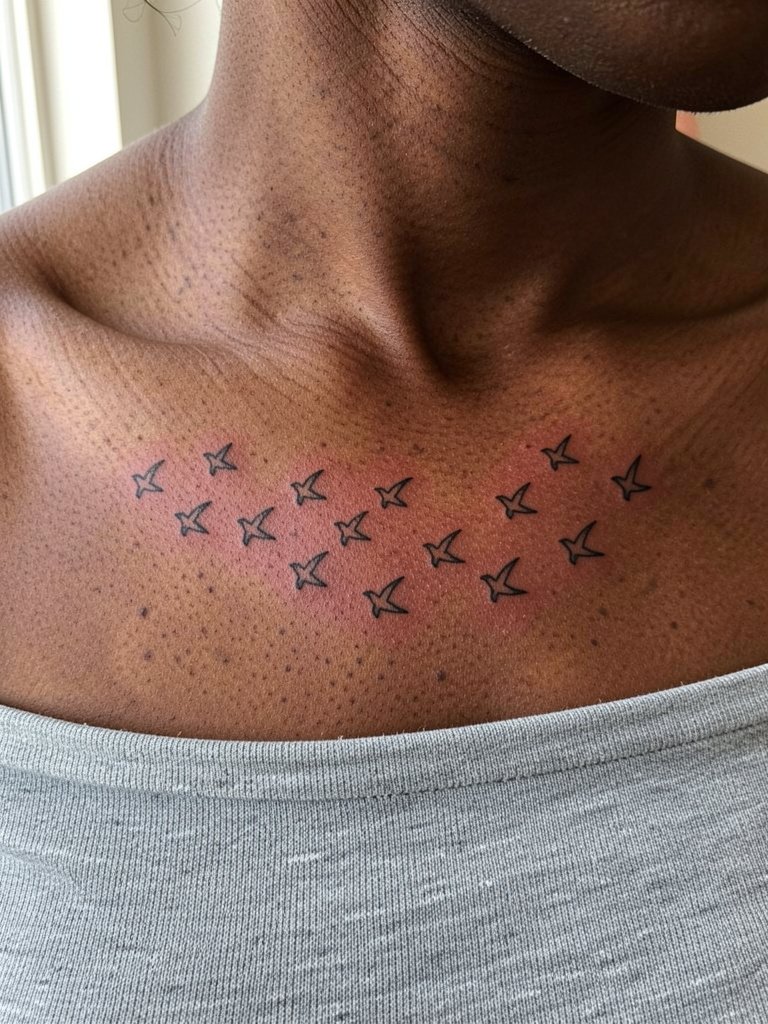
A flight line across the collarbone benefits from consistent spacing and matched silhouettes. Ask the artist to mock the sequence on paper and then on a stencil so you can confirm rhythm across the bone. Collarbone skin remains stable, but keep spacing slightly wider than wrist work so each bird keeps definition in years two to five. Session time is moderate and pain is tolerable. For outfits pick an off-shoulder top that naturally displays the sequence.
22. Small Blackwork Swift on Upper Arm
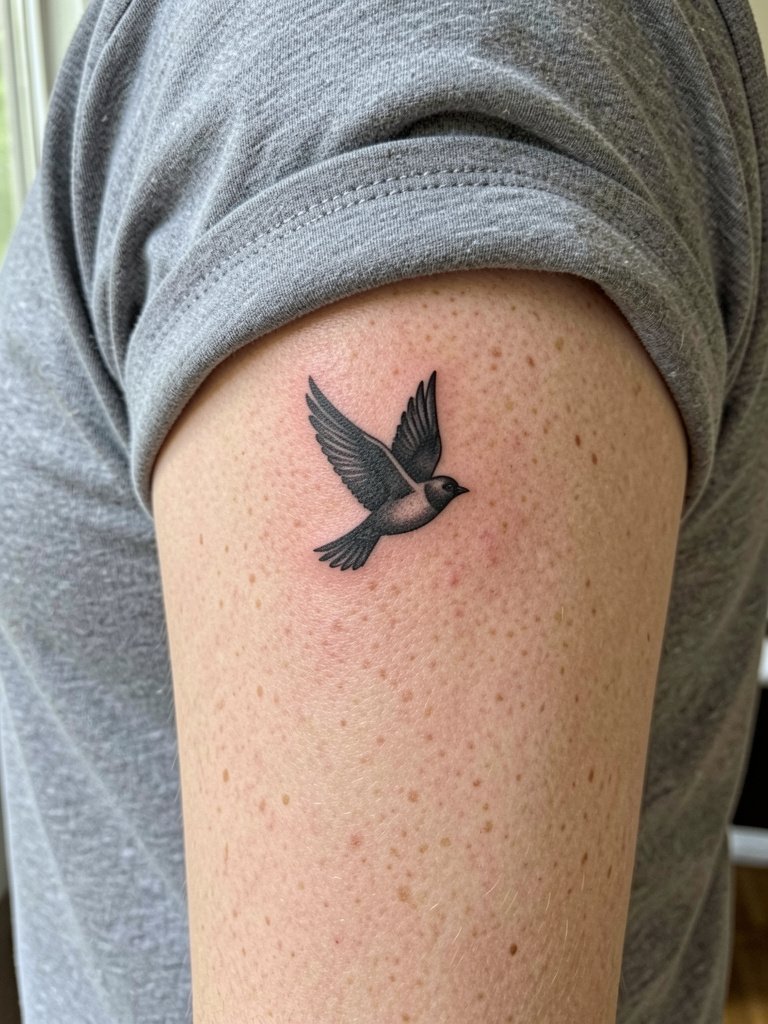
Blackwork maintains contrast on varied skin tones and is forgiving for people who photograph less. Ask for a bold silhouette with clean edges and confirm the artist will backfill evenly to avoid patchiness. Outer upper arm sessions are low in pain and healing is straightforward. A typical mistake is opting for micro details inside a black block, which can get lost. For summer outfits pick short-sleeve tees that let the work peek out.
23. Tiny Origami Bird on Wrist Side
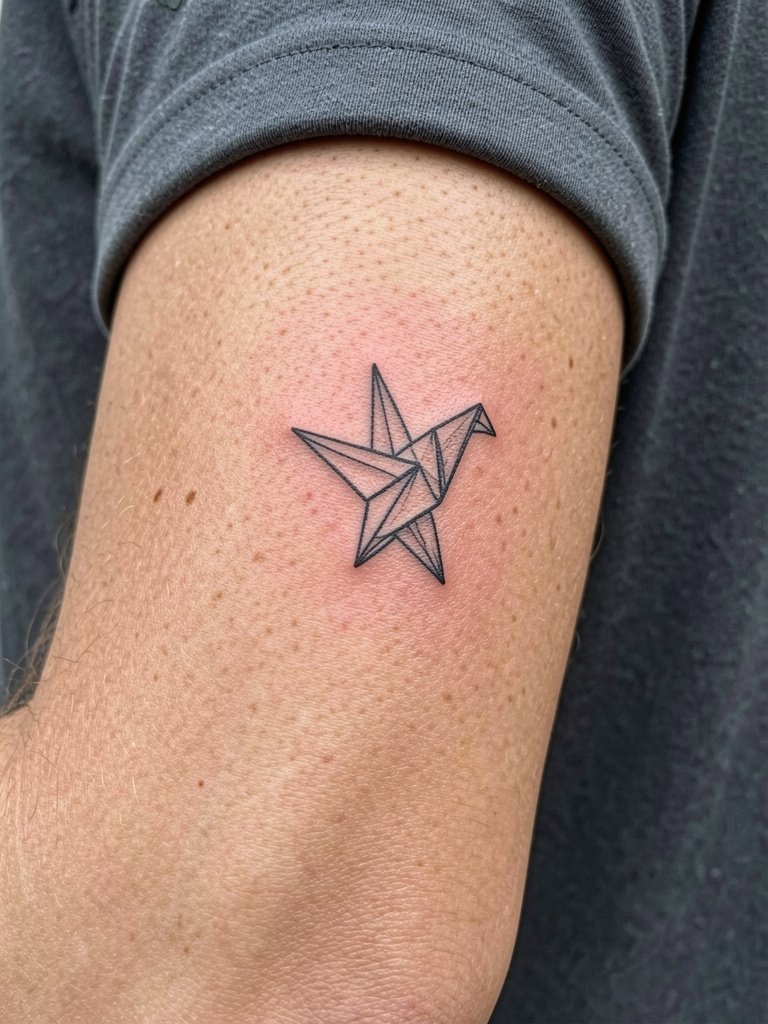
Origami birds read well when given half an inch of breathing room. Tell the artist you want the creases slightly bolder than the reference so negative space survives hand washing and sunlight. The wrist is a high-motion area so expect a touch-up at 12 months for fine geometry. Sessions are quick and pain is moderate. For a minimal accessory pairing try a thin chain bracelet on the opposite wrist.
24. Small Neo-Traditional Bird on Outer Thigh
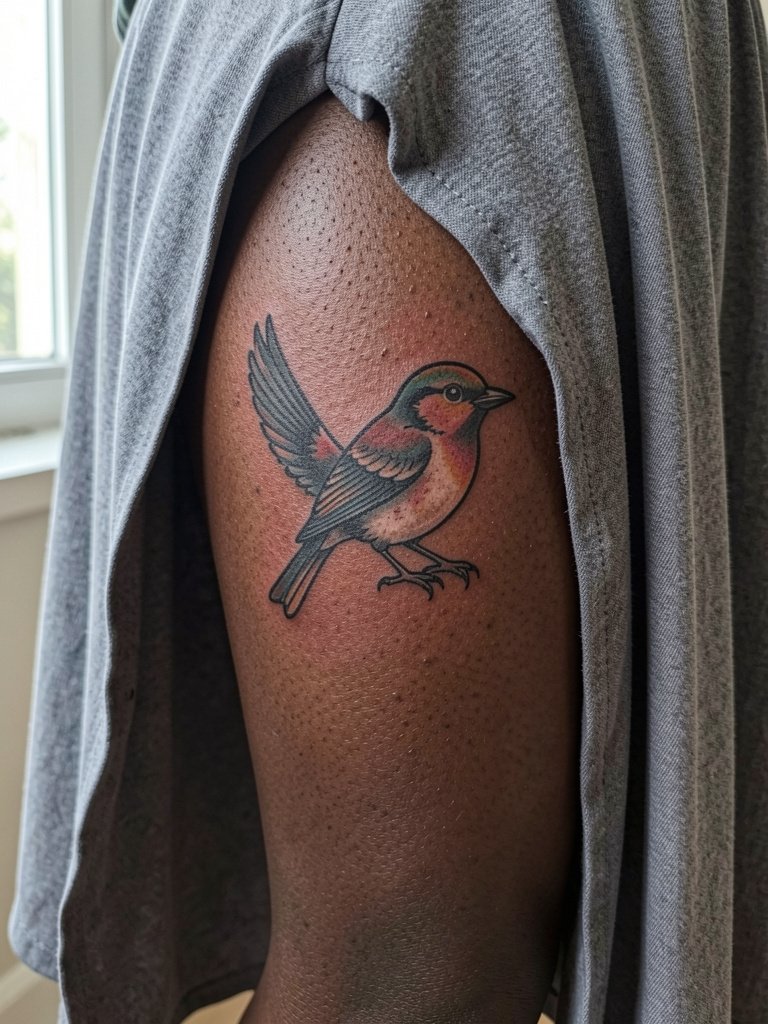
Neo-traditional birds give a small dose of color without the unpredictability of watercolor. For the thigh, ask the artist to place color in areas that do not fall under constant stretch. Thigh skin is forgiving and supports saturation well, but avoid very light color fills near the edge where friction from pants might fade them faster. Session time is moderate. For outings pair the piece with a flowy midi skirt that reveals the design when you walk.
25. Minimalist Winglet Behind the Ear
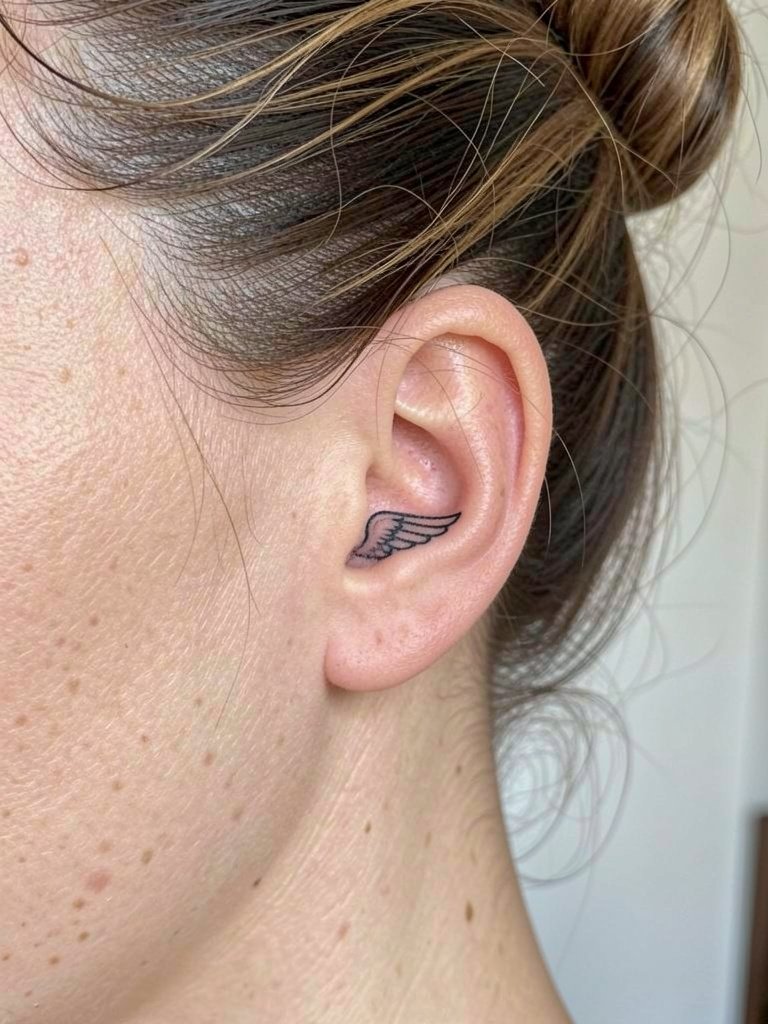
A tiny wing behind the ear is discreet and heals quickly. Because hair products can irritate, ask the artist for aftercare guidance tailored to hair exposure specifically. The mastoid skin is thin so slightly bolder line weight increases longevity. Session time is short and pain is low. For reveal choose minimalist hair pins that lift your hair naturally, and try a minimalist hair pin set.
26. Geometric Negative Space Flock on Sternum
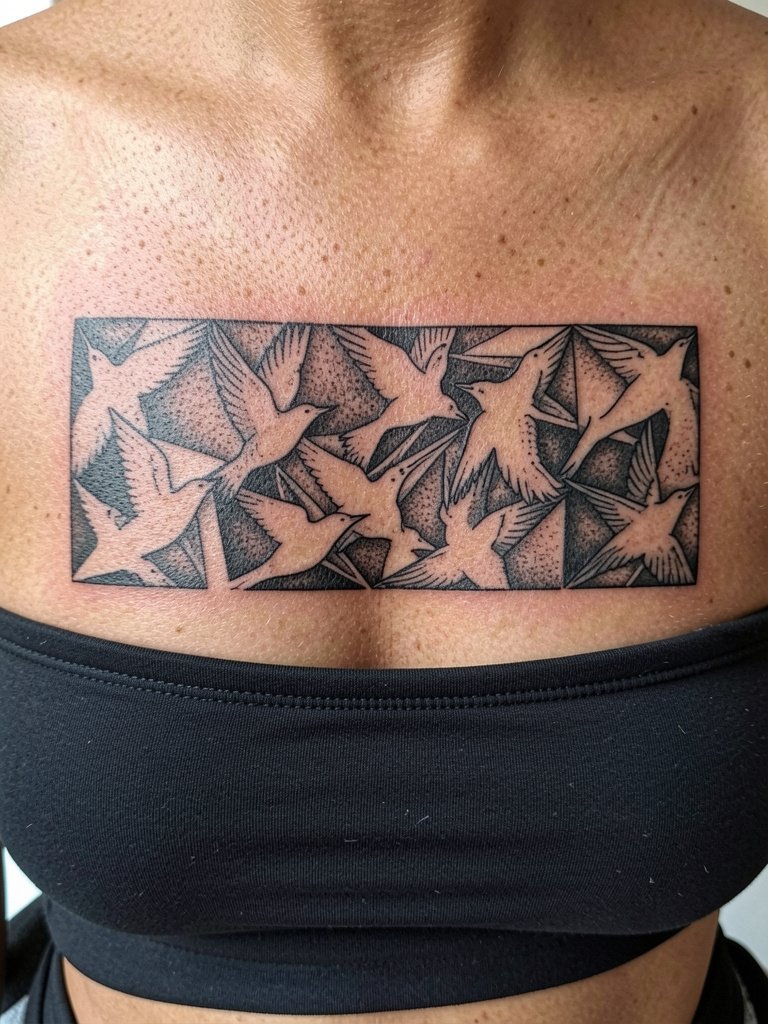
Geometric negative space can be dramatic but it demands clean edges to keep the shapes readable. Discuss scale and how wide the black field should be so the uninked birds stay bright over years. Sternum sessions can be sensitive and may require short breaks. Pair with strapless tops or bandeaus in normal wear to reveal the pattern. Consider a touch-up if edges soften after intense sun exposure.
27. Feathered Linework Along the Collarbone Edge
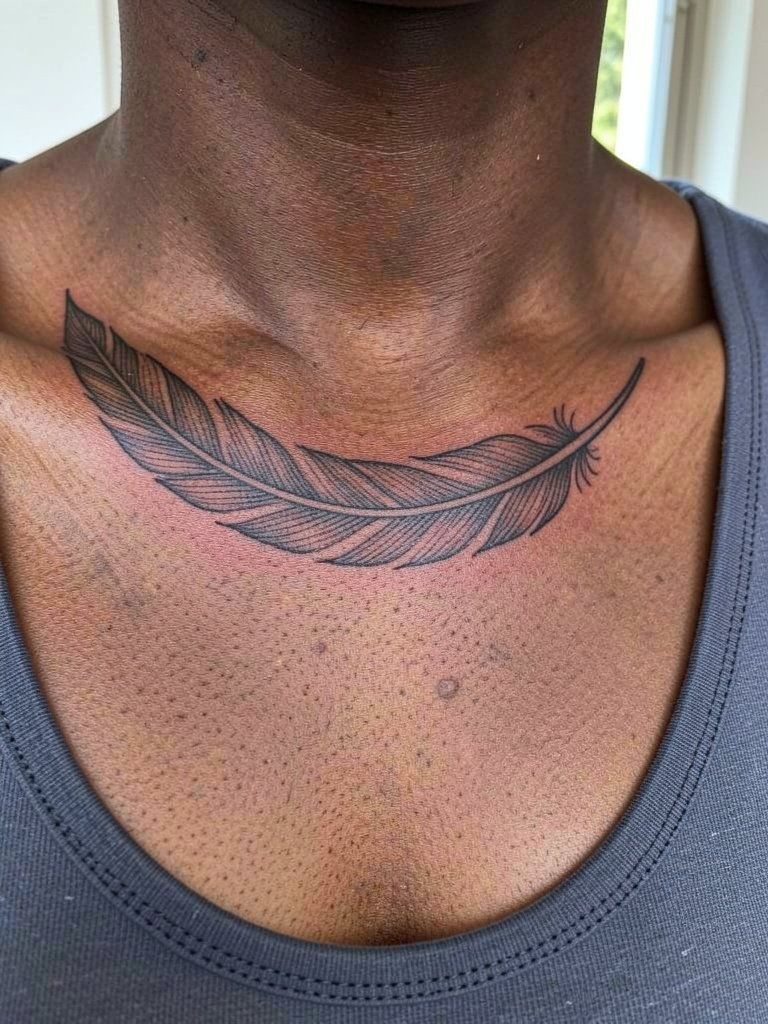
A feathered edge across the collarbone is elegant when the artist spaces strokes to account for slight bone movement. Ask for a mockup that sits on your bone on both sides so the line is symmetrical. The collarbone heals steadily and holds detail if you avoid squeezing too many strokes into one linear inch. Session time is moderate. For styling, layered necklaces will compete, so leave the area free or choose thin pieces that sit above the feathers.
Frequently Asked Questions
Q: How much does a minimalist bird tattoo usually cost?
A: For a small minimalist bird expect a common range of $150 to $350, which covers most single-needle pieces and small silhouettes. More detailed micro-realism or multi-color work on the thigh or ribs can push session time and cost higher. Always ask the studio about their minimum charge before booking so you can budget accurately.
Q: How do minimalist bird tattoos age on different skin tones?
A: Lighter skin tones often show very fine lines clearly for the first year, then soften into grey over time. Medium and darker tones can read wonderfully with higher contrast work or slightly bolder line weight. If you have darker skin, request stencils that prioritize clear negative space and consider asking the artist to space lines a hair wider so the design keeps separation as it heals.
Q: Where can I find healed examples and artists without naming anyone directly?
A: Search hashtags like #minimalistbirdtattoo, #finelinebird, and #singleneedlebird on Instagram and TikTok, and use location filters to find nearby work. Tattoodo and the Inked App let you search by keywords like "minimalist bird silhouette" and show portfolio shots. Reddit communities such as r/tattoos and r/tattooadvice surface peer recommendations and healed photos across skin tones.
Q: Is Aquaphor better than thinner balms for the first few days?
A: Opinions split in practice. One group of practitioners finds Aquaphor locks in moisture well and reduces scabbing. Another group prefers thinner balms because they believe heavy ointments can trap moisture and clog pores if over-applied. If you have acne-prone or sensitive skin, consider a thinner balm and ask the artist how often to reapply in that first 72 hours.
Q: How often will a fine-line bird need a touch-up?
A: Fine-line pieces commonly benefit from a touch-up at around 12 to 24 months to reestablish crisp linework, especially on high-motion areas like wrists or ankles. Less mobile sites such as the outer arm or thigh often keep their edge longer. Planning for a single touch-up is a practical approach rather than treating it as a failure.
Q: I am nervous about pain on the ribs. Are numbing options reasonable?
A: Numbing cream can help with very sensitive ribs but artists differ on its use. Some clients find it allows them to finish longer sessions without bailing. Other artists avoid numbing because swelling can affect line placement. If you consider numbing, discuss application timing and the expected effects clearly so you both understand how it will change the session.
Q: What red flags should I watch for when booking an artist?
A: Watch for repeated last-minute cancellations, a portfolio with only fresh photos and no healed images, or studios that refuse to show healed shots of similar work. Ask for healed examples of fine-line pieces on the same placement and skin tone where possible. A studio that offers a backup artist or clear rescheduling policy usually manages appointments more reliably.
