
The zodiac is a shorthand for personality, memory, and small rituals people wear on their skin. Pick a single glyph or a constellation cluster and you get a quiet emblem that can age into a lifetime stamp. Choose scale, line weight, and placement with an eye for how skin moves and clothing shows the work, and the design will still read clearly at year five.
1. Tiny Glyph on Inner Wrist
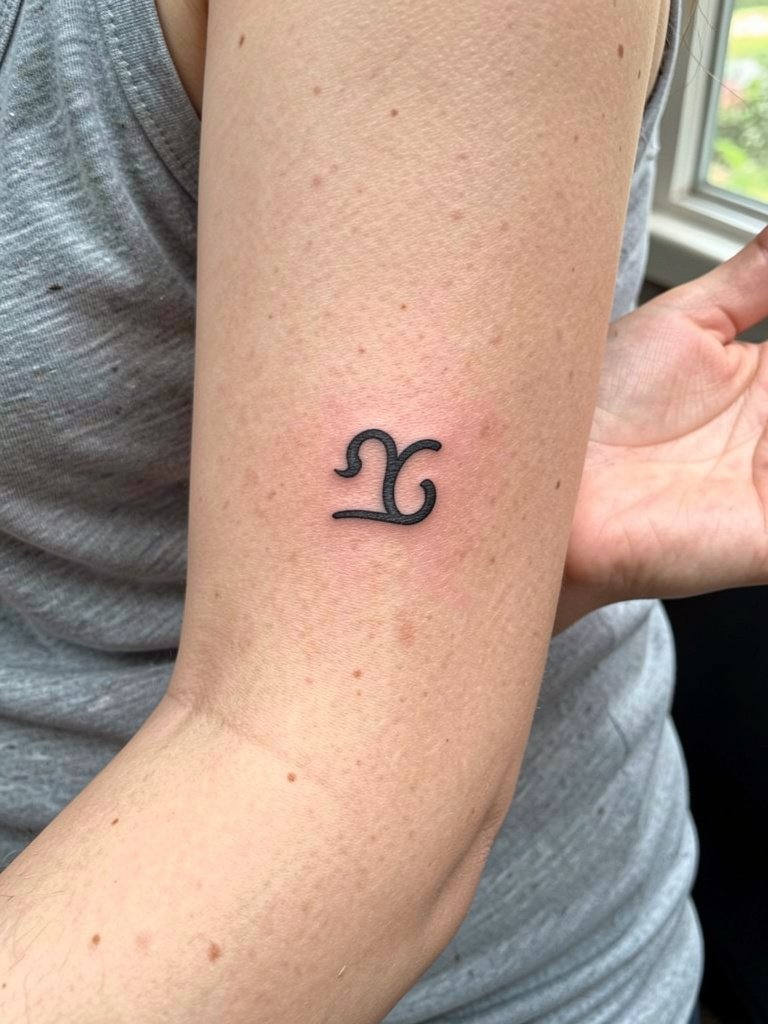
Wrist glyphs read like private shorthand but the inner wrist eats fine single-needle detail. I usually recommend a slightly heavier single-needle with one extra hairline stroke so the symbol still reads at year three. Mention exact finished size and ask for a stencil wrap in session so you see the rotation on your wrist before needles land. Tiny glyphs often fade into a soft blur when drawn too thin at the start. Expect a touch-up around year two rather than waiting five years. This placement is low pain and quick, usually a 20 to 40 minute session, and it pairs well with thin metal bangles worn higher on the forearm, try a simple cuff bracelet look to frame the piece.
2. Constellation Band Around Ankle
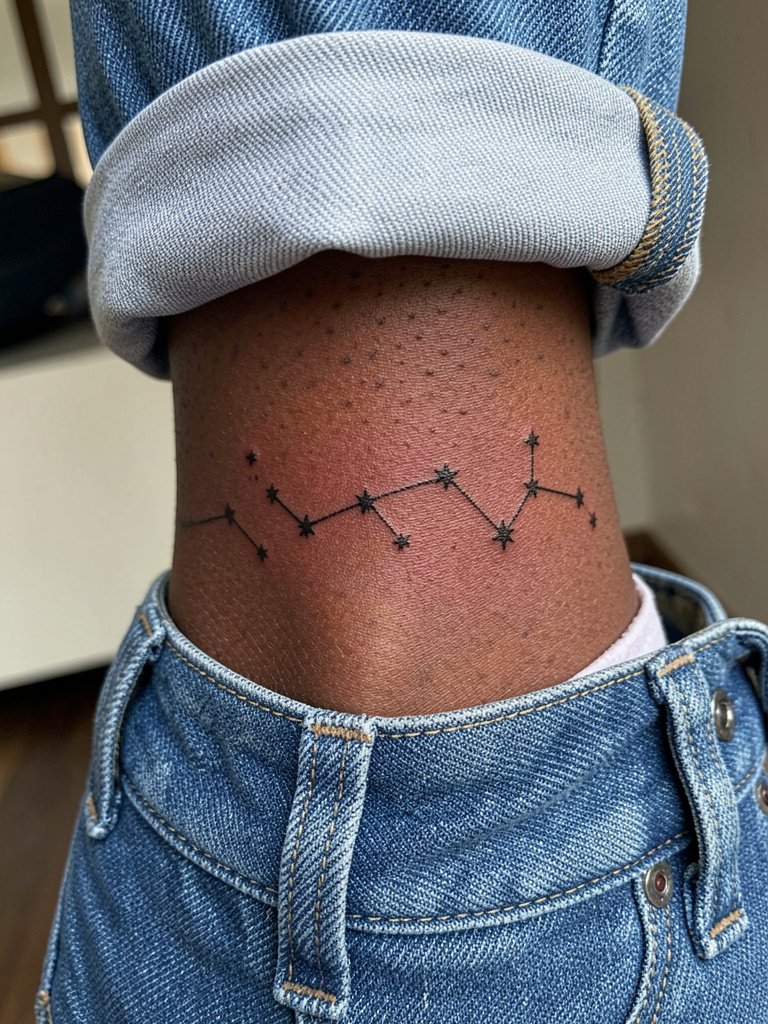
Ankle constellations are friendly for low-visibility choices but they face friction from socks and shoes, which speeds edge loss. Ask for slightly larger dot sizes and a bit more spacing so the stars do not merge. The common mistake is requesting pinprick dots that vanish with footwear abrasion. Six months in the dots are crisp, but by two years the edges thin if spacing is tight. Session time runs short, under an hour, and the ankle tolerates fine line work well. For showing the band off, a pair of rolled-cuff jeans or ankle strap sandals highlights the arc without rubbing the healed skin.
3. Zodiac Portrait Mini on Shoulder Blade
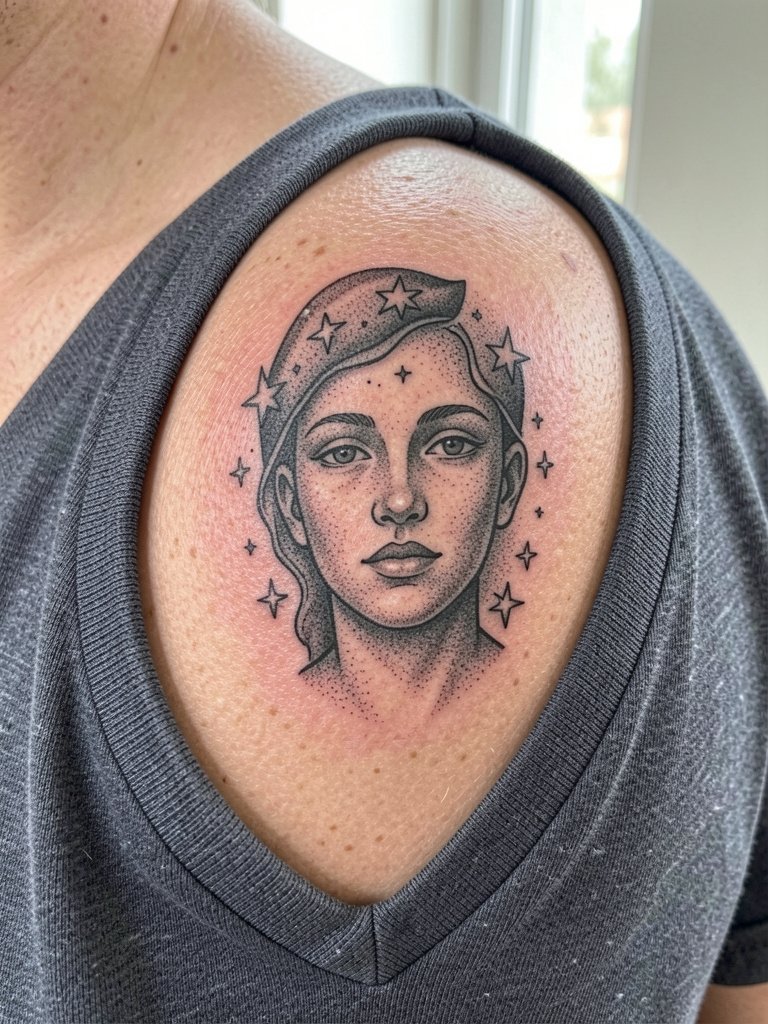
A shoulder blade portrait reads nicely at three to five inches because the shoulder offers a flat canvas. Specify to the artist that you want stipple shading instead of heavy solid fill if you want a soft look that still holds. The mistake I see is shrinking these portraits down too much and losing facial detail. At six months the stippling will soften and blend a touch, by two years small facial lines can blur unless spacing and dot density were planned. This placement is moderate on pain, expect a one to two hour session. Wear an easy slip-on top on the day so the artist can access the upper back comfortably, and consider an open-back dress for evenings when you want the piece to be visible.
4. Geometric Mandala at Sternum
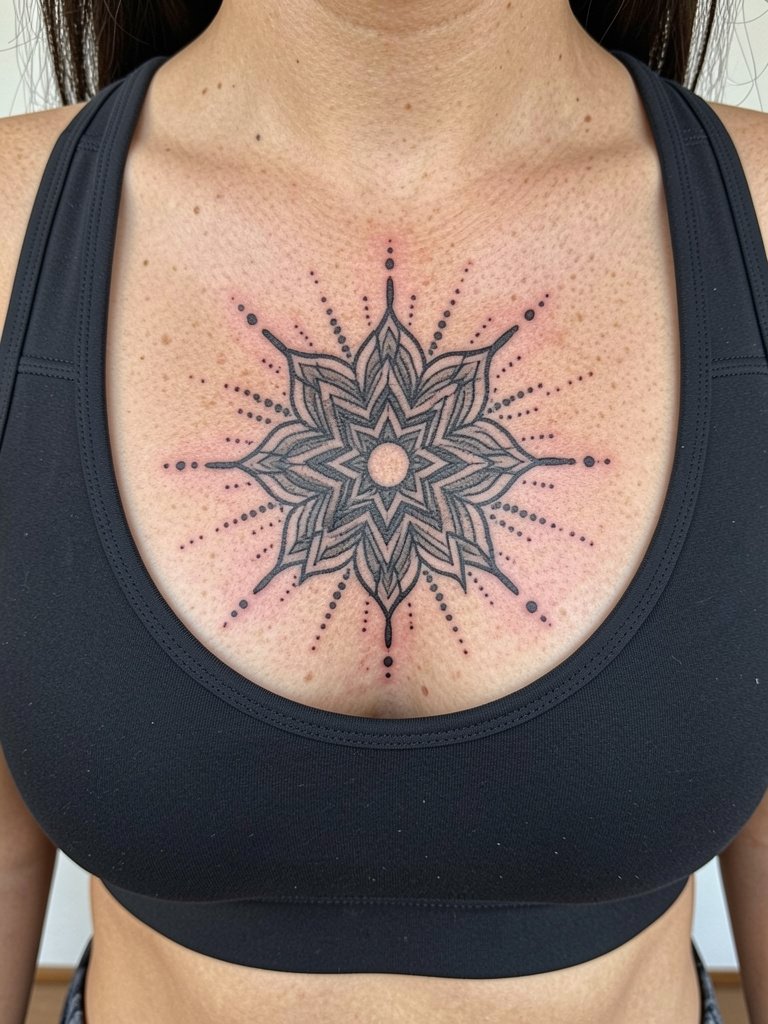
Sternum mandalas can be striking but the stretch and movement of chest skin changes linework over time. Plan for slightly wider spacing between rays and ask for punchier outer outlines so the shape survives a few years. A common error is asking for ultra-fine inner lines that blotch by year two. Session feels intense across the sternum because the bone sits directly under the skin, so break the appointment into multiple passes if needed. Expect a touch-up at 12 to 18 months. This placement pairs with wide V-neck tops for visibility, try a wide V-neck blouse when you want to show the geometry.
5. Tiny Glyph Cluster Behind Ear
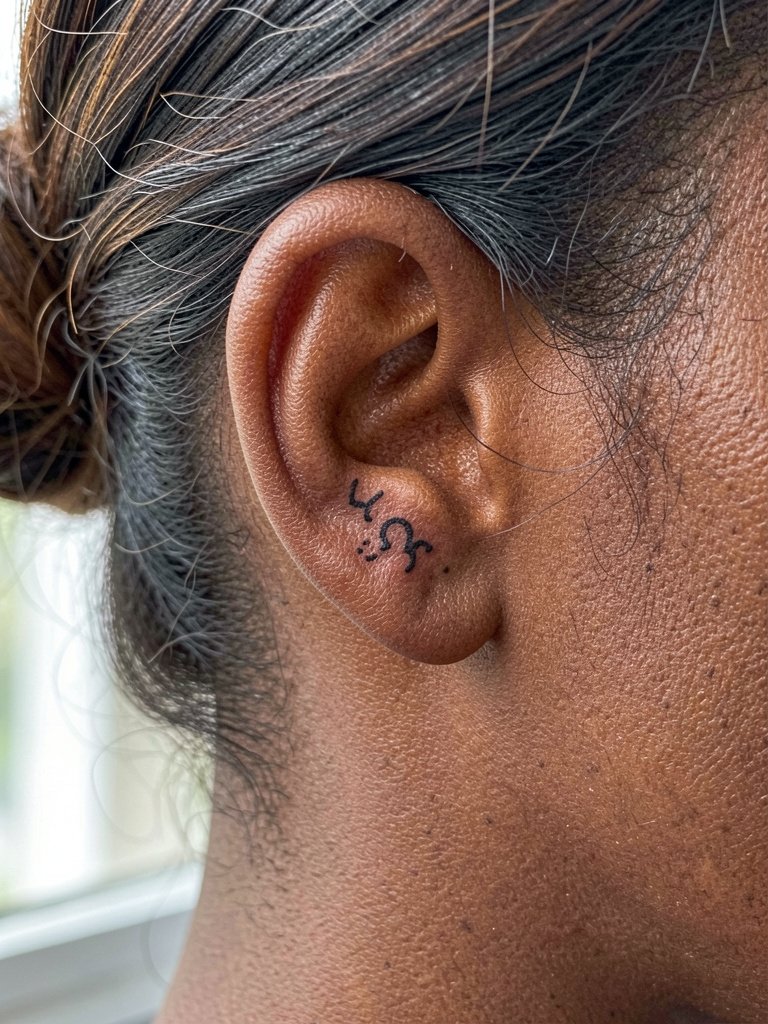
Behind-the-ear glyphs are intimate and often seen as whisper pieces. Because the area gets a lot of movement and hair friction, choose slightly bolder strokes than your saved images. The frequent mistake is mirroring a micro reference exactly and then watching it lose its crispness. Pain is low but the skin is thin so sessions are quick, usually 15 to 30 minutes. For the session, tie hair up and wear a loose-back shirt so the artist can reach the area easily. Consider small stud earrings and a simple necklace to keep the look balanced when showing off the spot with a classic stud pair.
6. Bold Blackwork Crest on Thigh
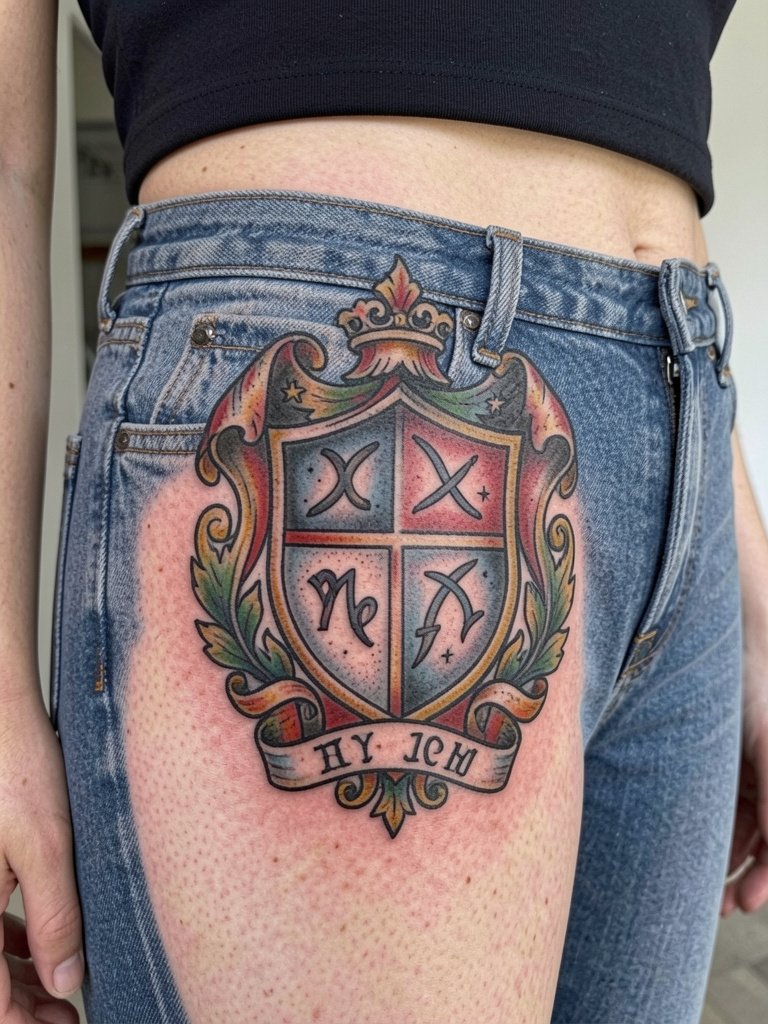
Thigh crests tolerate saturated black and color better than wrists because the flesh is more forgiving of needle depth and saturation. Choose bold blackwork if you want longevity and minimal softening. The mistake here is trying to miniaturize a crest that needs area for negative space. Expect a two to three hour session for a medium crest and a possible touch-up at one year if any edges softened. The thigh is moderate on pain and heals well with minimal scabbing. For evenings out, the crest looks great with mid-thigh skirts or dresses, try a flattering midi skirt that leaves the upper thigh visible.
Session Day Picks
These items support the smaller placements above and the larger saturated pieces that follow in the list.
- Stencil transfer paper kit. Lets you preview line weight and rotation on skin before needles land, especially useful for the wrist and behind-ear glyphs above.
- Topical numbing cream. Applied per product instructions helps with sternum and rib work without interfering with the artist's line control.
- Thin protective film roll. Keeps ankle and finger tattoos clean during the first week of friction from shoes and daily movement.
- Fragrance-free gentle body wash. Cleanses healing skin without stripping ink or irritating fine line work.
- Aquaphor healing ointment. A thin layer for the first few days locks in moisture for detailed blackwork and helps reduce flaking on larger saturated pieces.
7. Minimalist Linework Zodiac on Collarbone
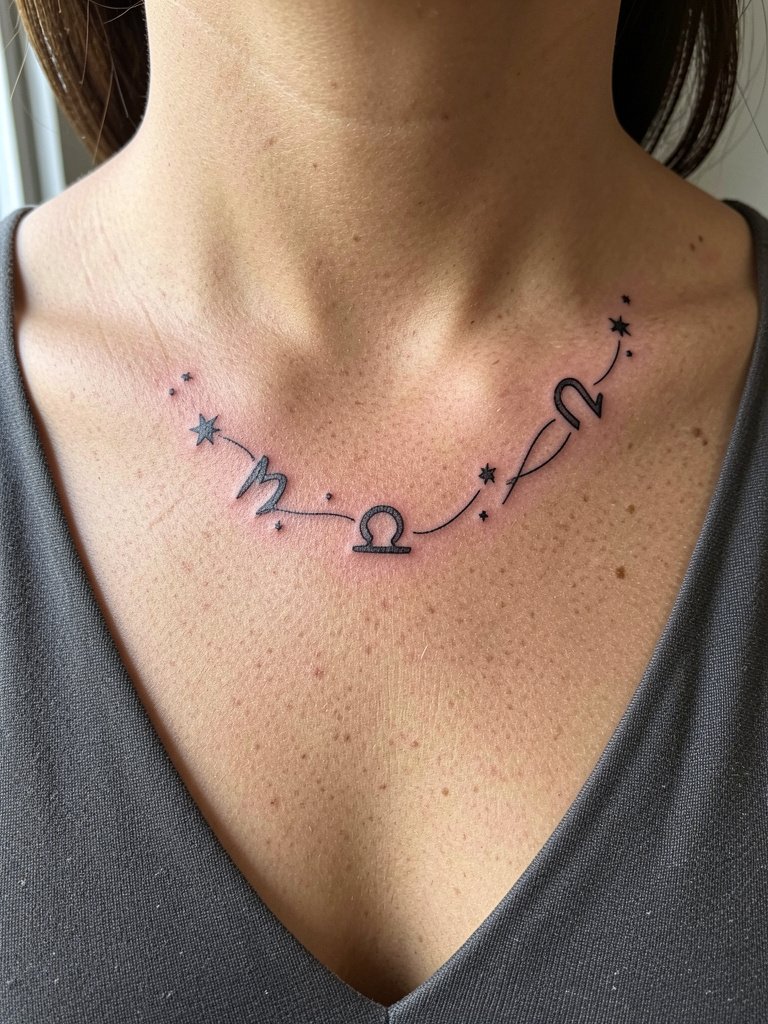
Collarbone pieces show elegantly but the skin shifts with movement. I advise slightly thicker line at the start and ask to see the stencil lying flat along the bone to check curvature. The typical error is requesting an ultra-thin single stroke that fades into the clavicle groove. At six months the line will look fine if spacing was planned, but by three years faint single-needle strokes can soften. Pain is moderate because the bone sits close. Wear an open-neck top on the session day for easier access, and when showing off try an off-the-shoulder top to let the curve read.
8. Tiny Planet Ring on Finger
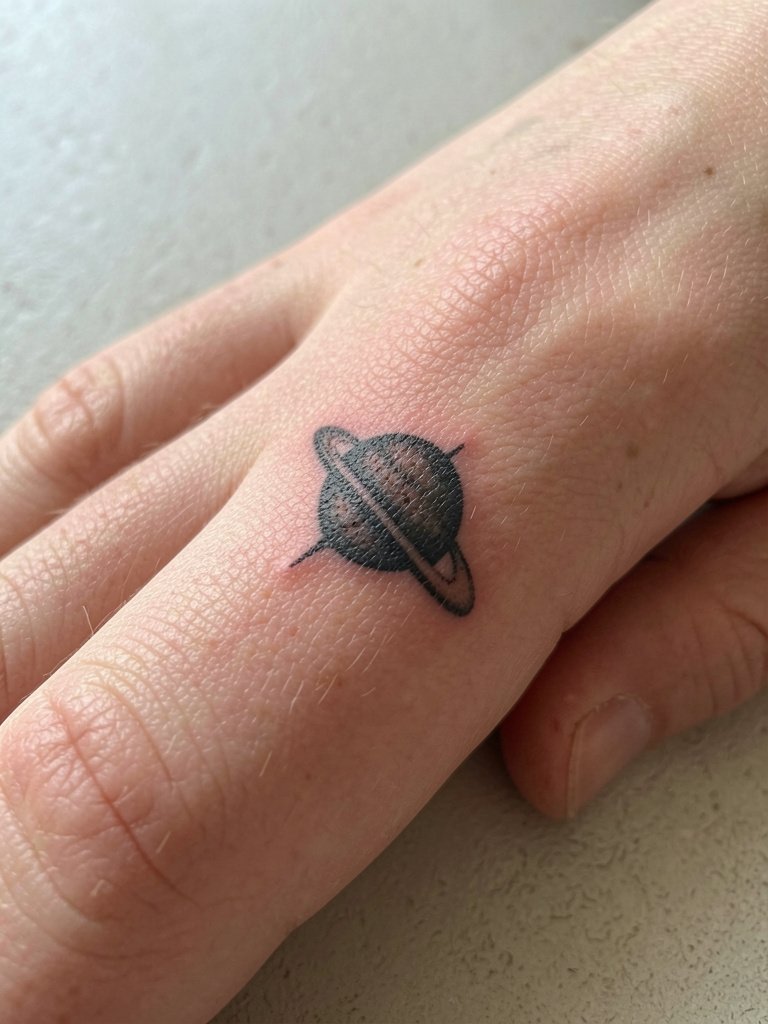
Finger tattoos live in a high-wear zone and the common mistake is expecting single-needle permanence. Ask for a sturdier orbit ring and plan on touch-ups within a year. At six months the ring may still be crisp, but frequent washing and abrasion increase blowout risk. Sessions on fingers are short and stinging, often under 30 minutes, and the touch-up timeline is realistic to mention during booking. For styling, rings over the tattoo can hide or frame the piece, try a thin stackable ring set that complements the planet without rubbing the skin.
9. Watercolor Constellation on Ribcage
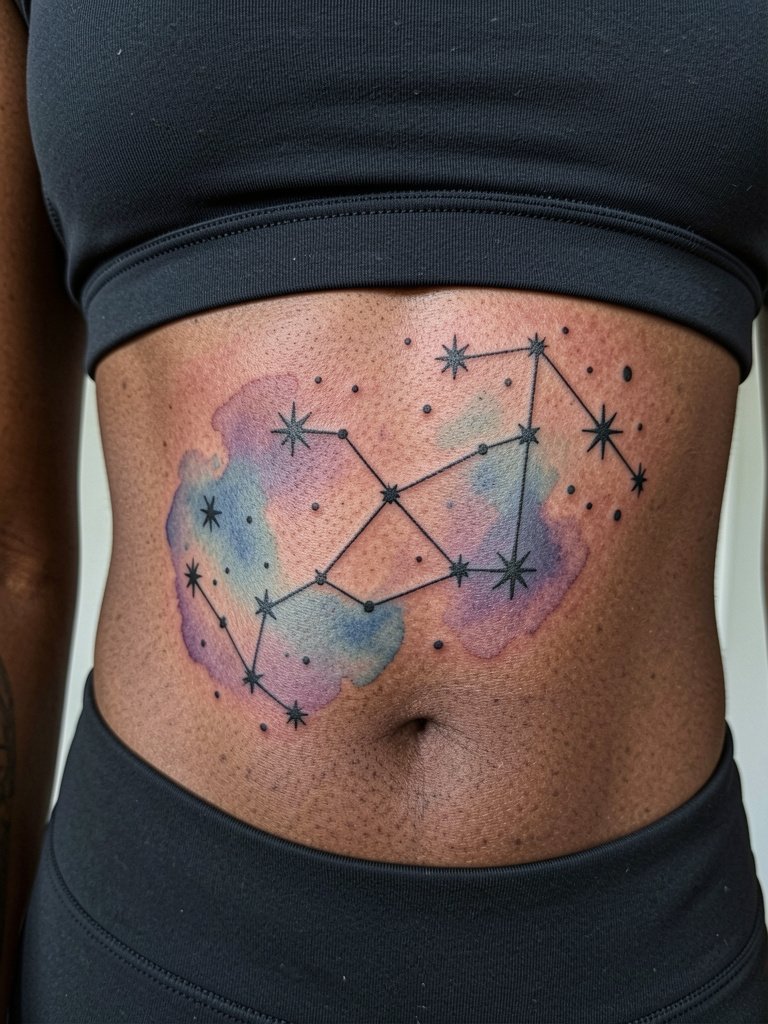
Ribcage watercolor looks ethereal but it is one of the highest movement areas and color washes thin faster. Artists split about fine line versus bold here. One camp argues the skin on the ribs stretches and soft lines blur within two years. The other camp says with proper depth and slightly larger spacing, both fine line and watercolor can settle nicely and they point to healed photos as proof. If you want the watercolor to last, ask for concentrated color saturation near focal points and a slightly bolder constellation outline. Sessions are painful and often broken into multiple passes. Expect a color refresh at two to three years. For session wear, choose a fitted cropped top so the artist can expose the area easily.
10. Neo-Traditional Sun on Calf
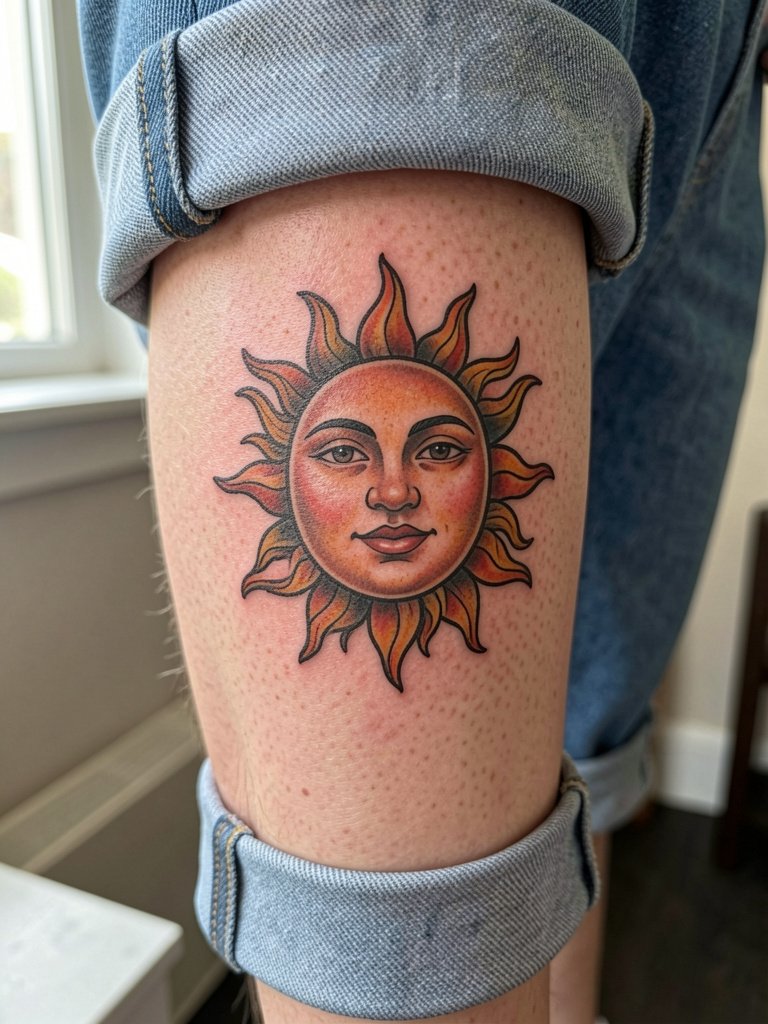
Calf placements accept saturated neo-traditional work and age predictably. Recommend bold outlines and solid color blocks for longevity. A common mistake is asking for too much micro detail that the calf cannot hold if the piece is shrunk. At six months colors settle, and at five years the blackwork will still define the form if saturation was strong. Session time is often one to three hours depending on size. For everyday style, calf pieces pair with low sneakers and cropped pants, try rolled jeans and white trainers to show off the artwork.
11. Scripted Birth Chart Phrase on Ribs
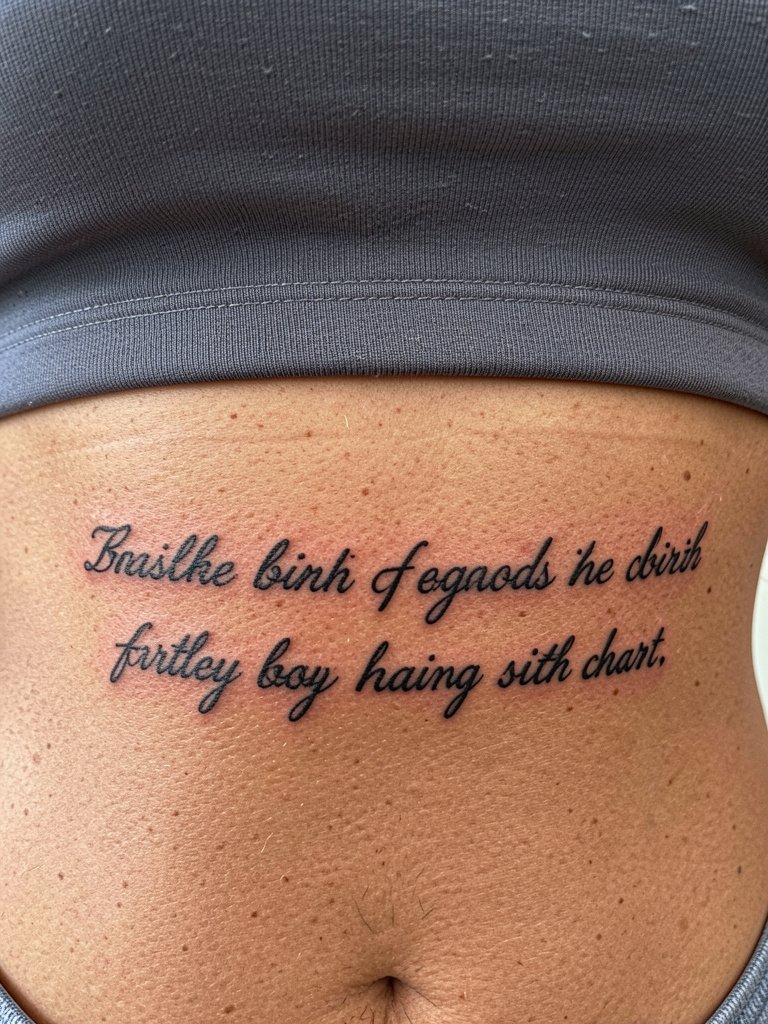
Scripted phrases across ribs look intimate but risk blurring if letters sit too close. For longevity, request slightly larger letter spacing and a sample stencil to check curvature with breathing. The typical error is compressing a long phrase into a narrow arc that then smudges. Rib pain is high and sessions for script often need breaks. Expect a touch-up window around 12 to 24 months. Because ribs are mostly covered, choose session clothing like a fitted bandeau for easy access and modesty during work.
12. Fine Line Sagittarius Arrow on Forearm
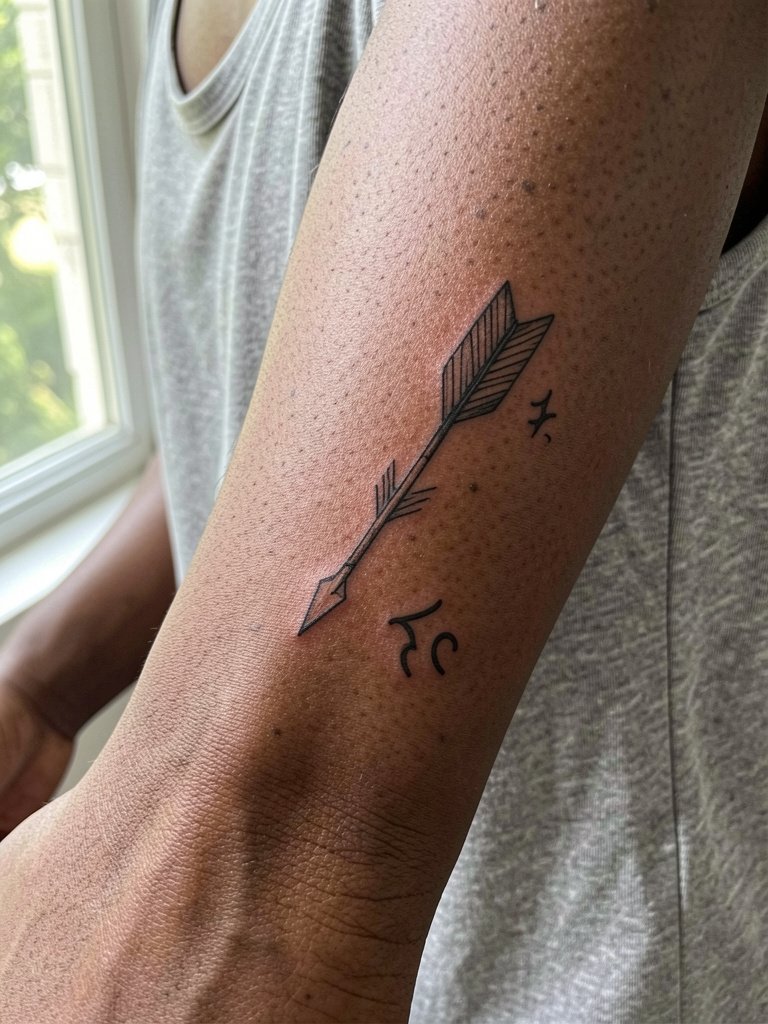
Inner forearm arrows work well as elongated pieces and hold detail if the artist uses slightly reinforced main strokes. The mistake is using the same hairline thickness across the whole arrow and losing presence at distance. After six months the line looks settled, and at two years the reinforced shaft keeps the piece readable. The forearm is low to moderate pain and sessions are comfortable. For daytime showing, roll up sleeves or wear short-sleeve linen shirts, and try a rolled-sleeve linen shirt to frame the arrow.
13. Celestial Band Across Fingers
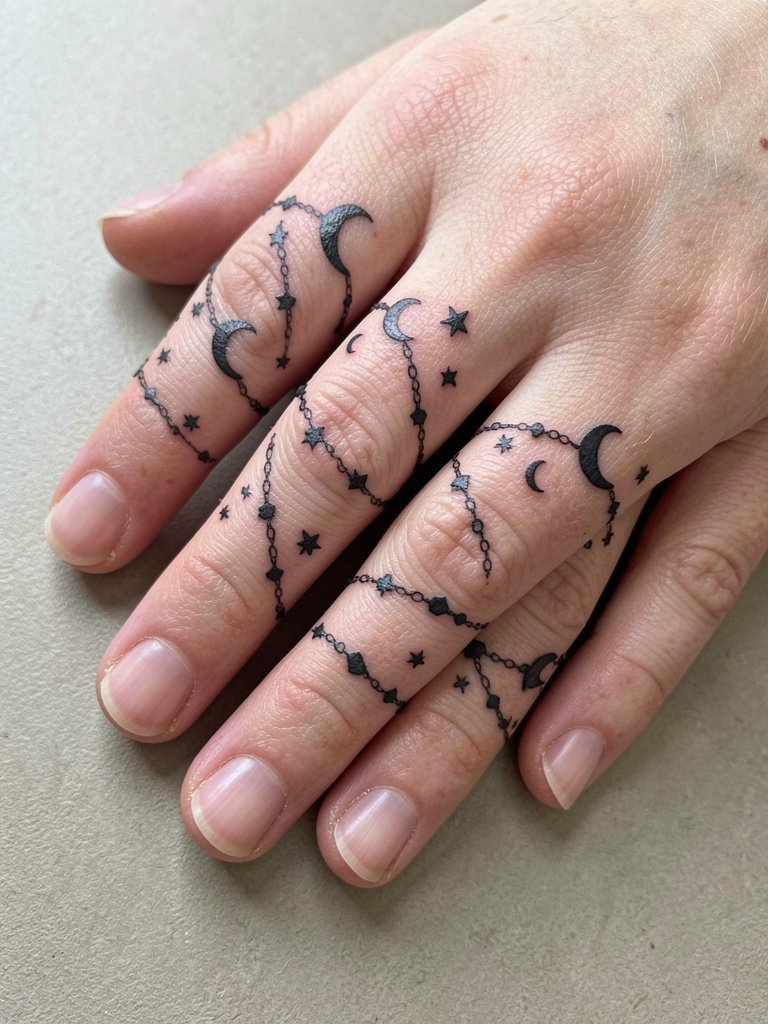
Finger bands can create a ring effect but expect faster fading. Ask for slightly larger node points on moons and stars so the shapes read after repeated washing. The common error is designing tiny filigree links that vanish with time. Sessions are quick but stinging. Plan to budget for touch-ups in the first year. When showing these off, stack with thin ring sets that avoid rubbing directly on the tattoo, and try a thin ring stack for a coordinated look.
14. Ionosphere-Style Shoulder Cap
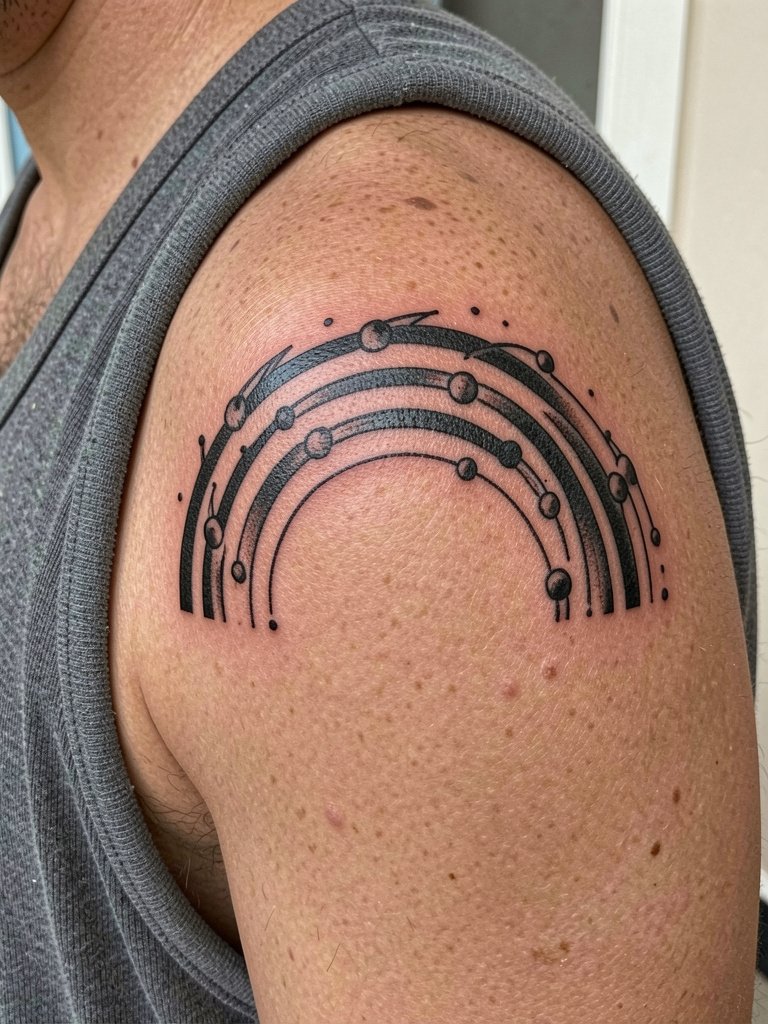
Shoulder caps support bolder graphic work and the skin here keeps heavy black crisp for years. Specify strong outer rims and clear negative space so the arcs remain legible. The mistake is shrinking a graphic that needs area. Sessions can run one to three hours. For summer show-off, sleeveless tops or tank dresses work well, pick an airy tank dress so the graphic reads across the shoulder.
15. Thin Line Leo Glyph on Calf Side
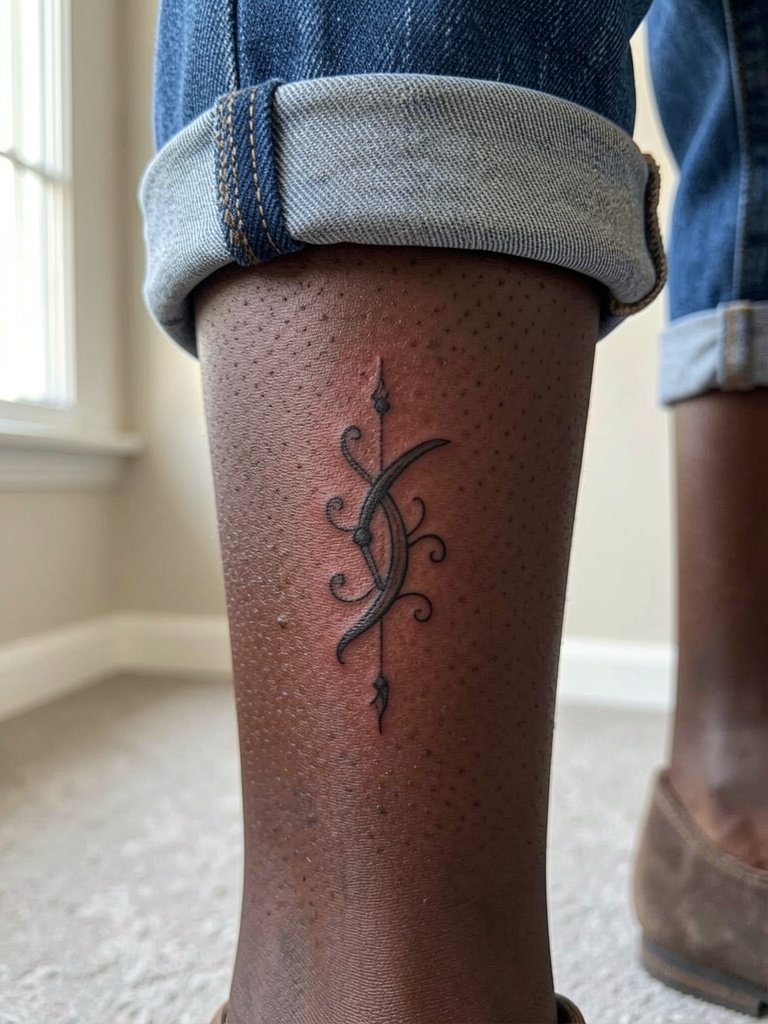
The lateral calf accepts thin glyphs that are slightly bolder than wrist pieces. Ask for reinforced nodes so the glyph keeps its silhouette over time. A common mistake is using a scale intended for the wrist that winds up too small on the calf. Expect a short session and a possible touch-up in the second year. Calf work pairs well with cropped pants and ankle boots, consider rolled cuff chinos for daily styling.
16. Oversized Horoscope Wheel on Back
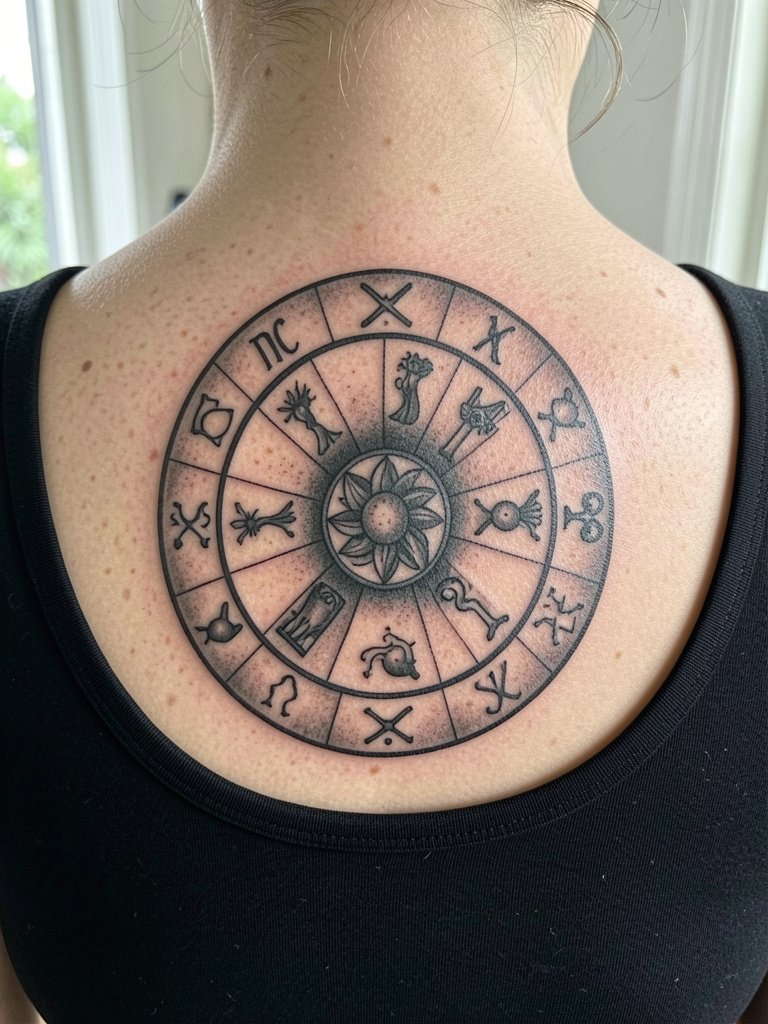
Large back wheels need balance in negative space to avoid a crowded look later. Specify that each symbol has room and request full-size stencils so you can view the composition before work starts. The error to avoid is cramming intricate symbols too closely. Healing is straightforward and touch-ups are typically later than two years if saturation was solid. Sessions are long and may require multiple visits. For showing the top of the wheel, try an open-back top that frames the center piece.
17. Micro-Realism Moon Phase on Side Neck
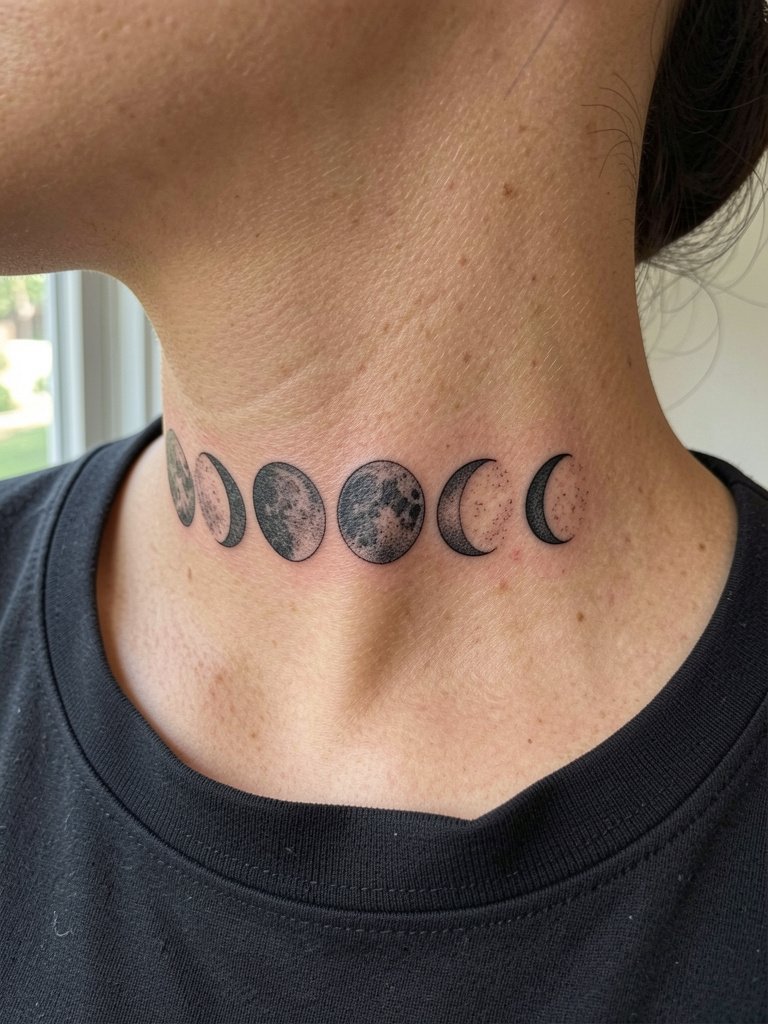
Neck pieces sit in a visible area so plan carefully for long-term legibility. Request slightly bolder crescents and check proportions so small moons do not merge. There is a debate among artists about neck fine-line work. One group insists the thin neck skin will blur rapidly and recommends stronger outlines. The other group argues careful depth and spacing make micro-realism on the neck succeed and will show healed photos as evidence. Expect more frequent touch-ups and a higher session sensitivity here. For session clothing, wide-neck tops give easy access without exposure, and a delicate necklace adds balance when showing the piece.
18. Abstract Line Zodiac Sleeve Accent
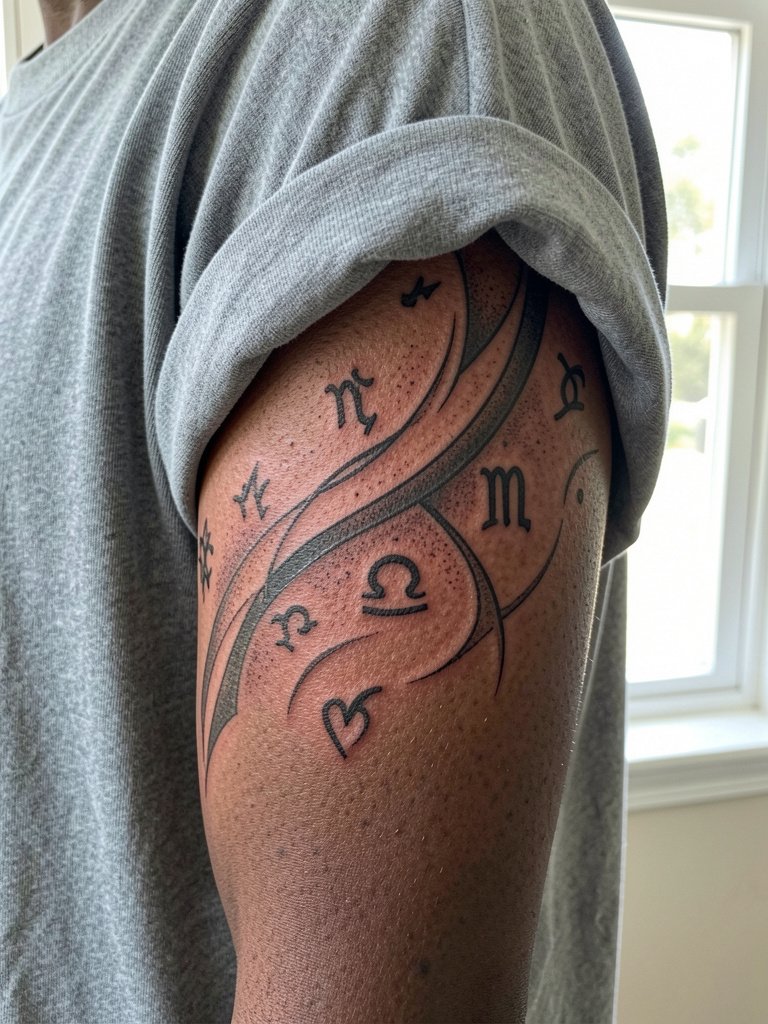
Partial sleeve accents let you blend zodiac motifs into larger compositions. Ask to map how the glyphs will sit with your existing work and request overlap stencils to confirm flow. The common mistake is neglecting negative space and ending up with a crowded sleeve. Expect multi-session work and plan touch-ups along with other inked areas. Wear a short-sleeve top on the day so the artist can access the upper arm easily. For everyday style, mid-length sleeves and layered shirts show off the art in rotation.
19. Dotwork Taurus Bull on Rib Flank
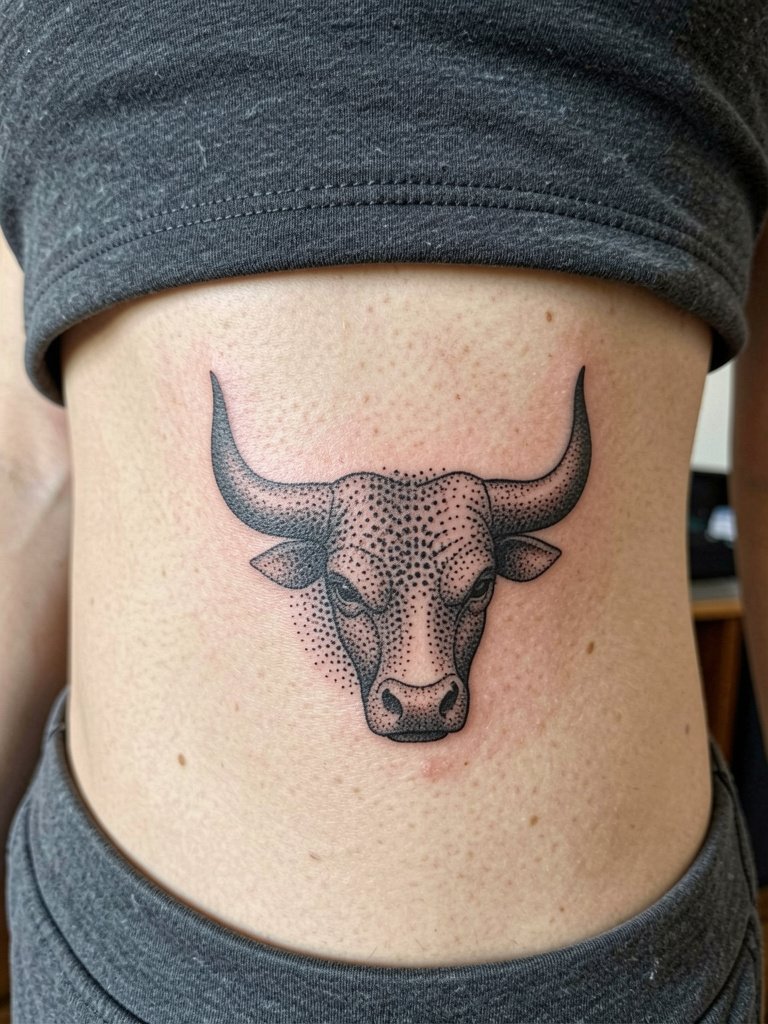
Dotwork on the rib flank creates beautiful texture but the skin movement means dots can soften into washes if applied too densely. I recommend gradated density and spacing so the central motifs stay defined. The prevalent error is packing too many dots and losing contrast. Sessions are high in pain because of ribs so expect breaks. For showing the piece, side-slit dresses or wrap tops work well when you want to reveal the flank subtly.
20. Minimal Constellation on Upper Thigh
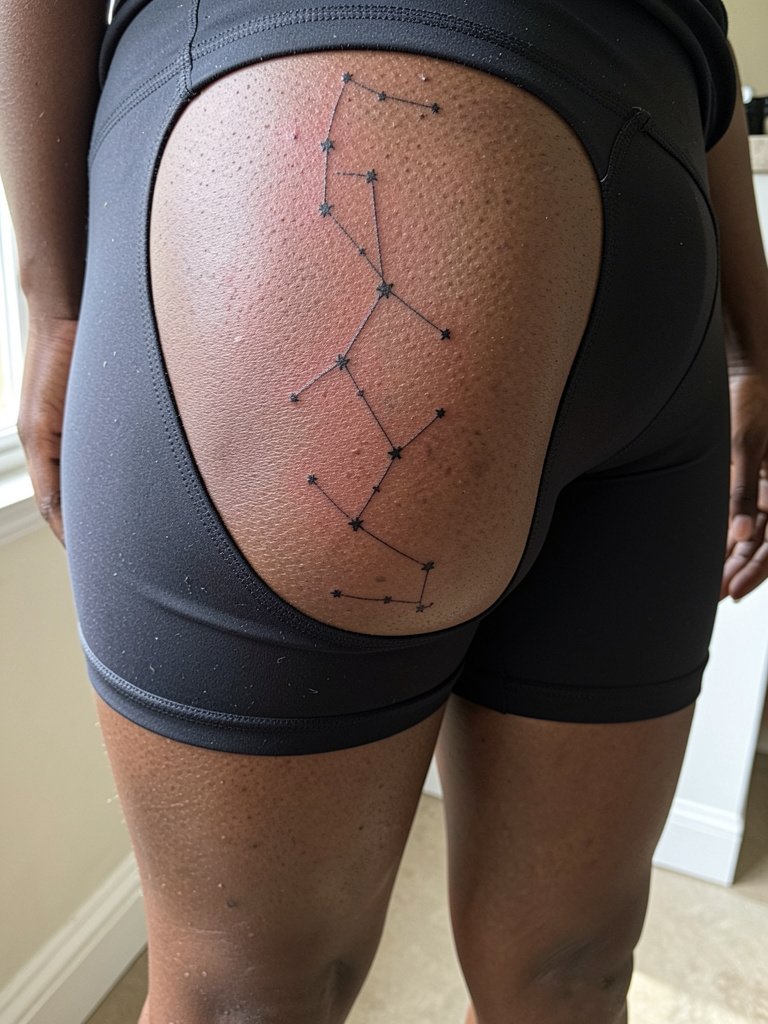
Upper-thigh constellations have low daily abrasion and keep fine lines well when spaced correctly. Ask the artist to preview the piece in a seated and standing stencil to check how the lines sit with muscle movement. The mistake is ignoring how pants and thighs rub during walking. Healing is quick and touch-ups are less frequent than hands or fingers. For summer reveal, midi skirts or shorts work, and a pair of modest bike shorts will keep the area comfortable during sessions.
21. Solid Black Capricorn Goat on Outer Forearm
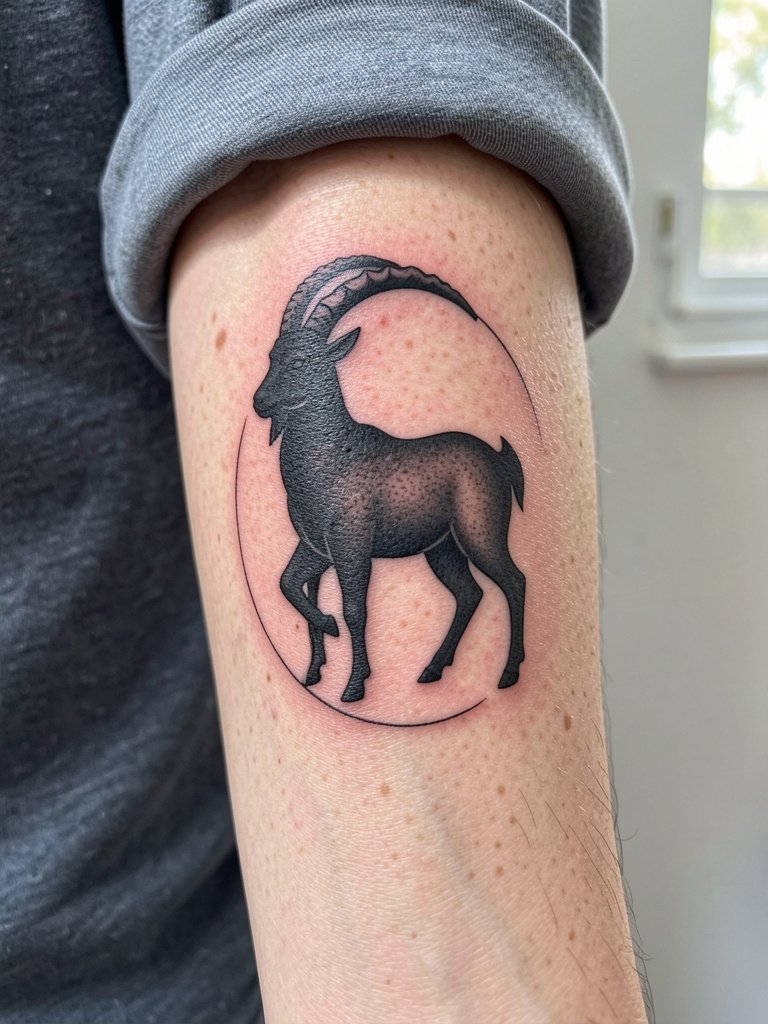
Solid silhouettes age predictably on the forearm because saturation counters softening. Choose solid fills for a bolder statement that still reads across time. The error to avoid is half-saturated fills that patch unevenly. Sessions are moderate and usually completed in one sitting for a forearm piece this size. For showing off, roll sleeves or wear short-sleeve shirts and consider a rolled-sleeve tee to frame the silhouette.
22. Tiny Retro Chart on Inner Wrist
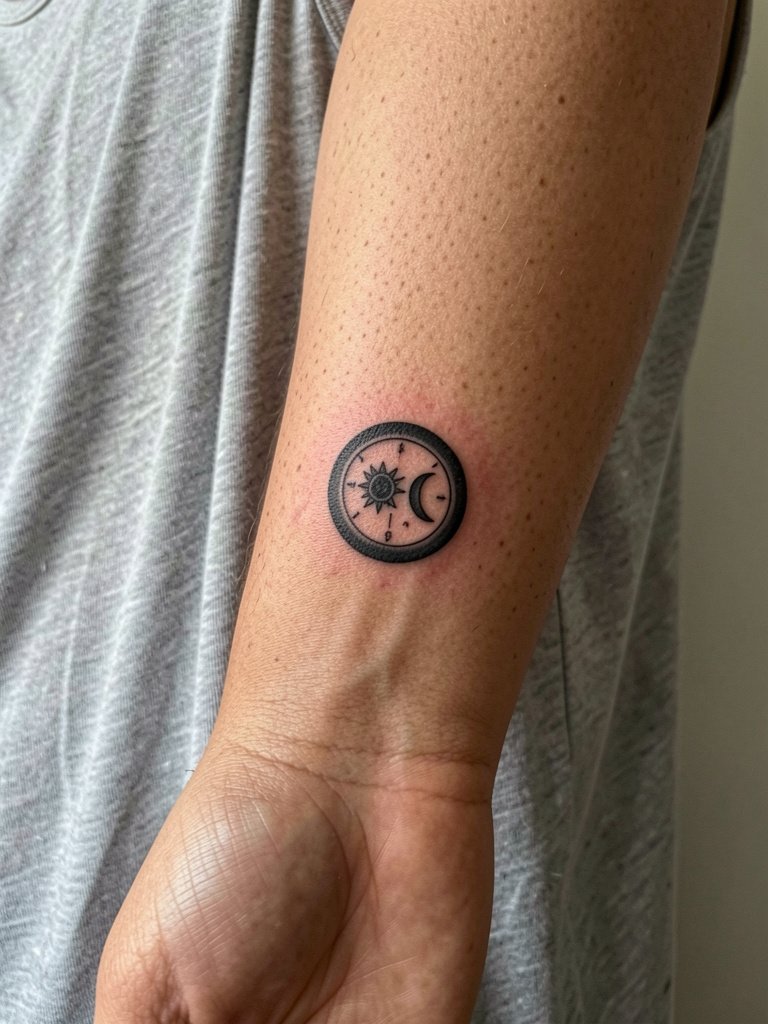
Compact chart icons can be charming if the outer ring is slightly thicker to preserve the circular form. The common mistake is making the outer edge hairline thin. At six months the ring will look settled, but small internal details may soften. This is a low pain, quick session. If you want to wear the wrist piece with jewelry, pick bracelets that sit above the tattoo rather than rubbing directly across it.
23. Stylized Libra Scales on Sternum Edge
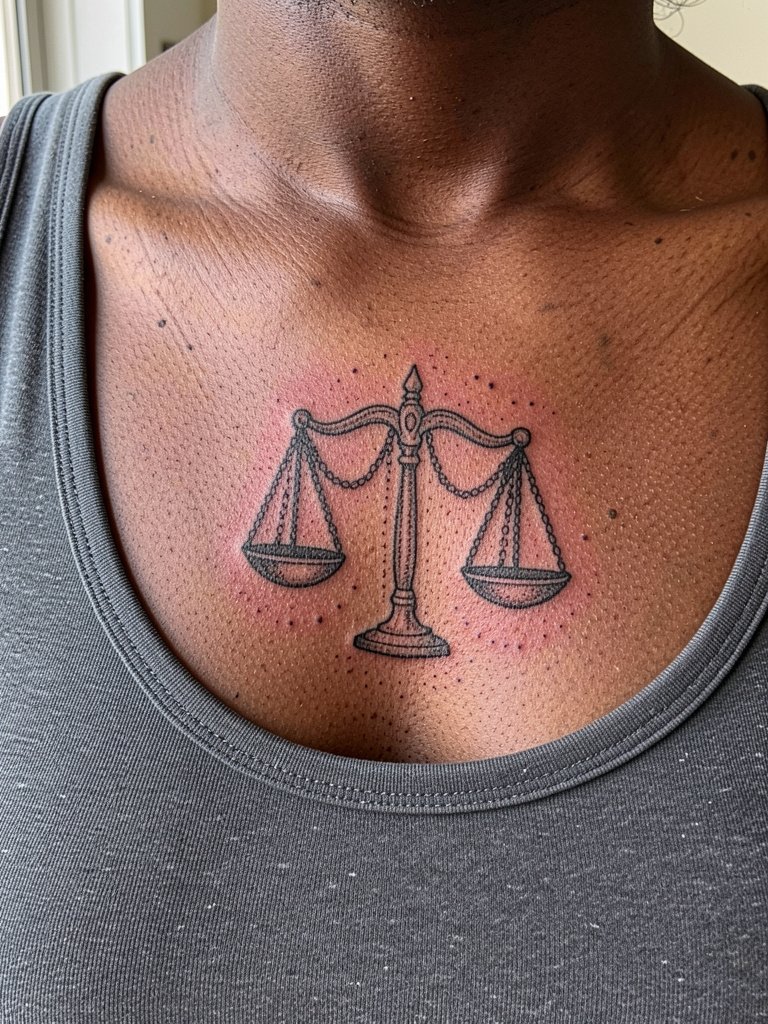
Sternum-edge placements require planning so the chains and scales do not merge into the chest crease. Ask for slightly wider chain spacing and confirm final placement while standing. Errors occur when the tiny chain links are jammed and later blur. Expect more pain here and plan shorter sessions with breaks. For show-off styling, a scoop-neck top highlights the scales, and a delicate pendant can balance the look.
24. Small Virgo Glyph with Laurel on Inner Ankle
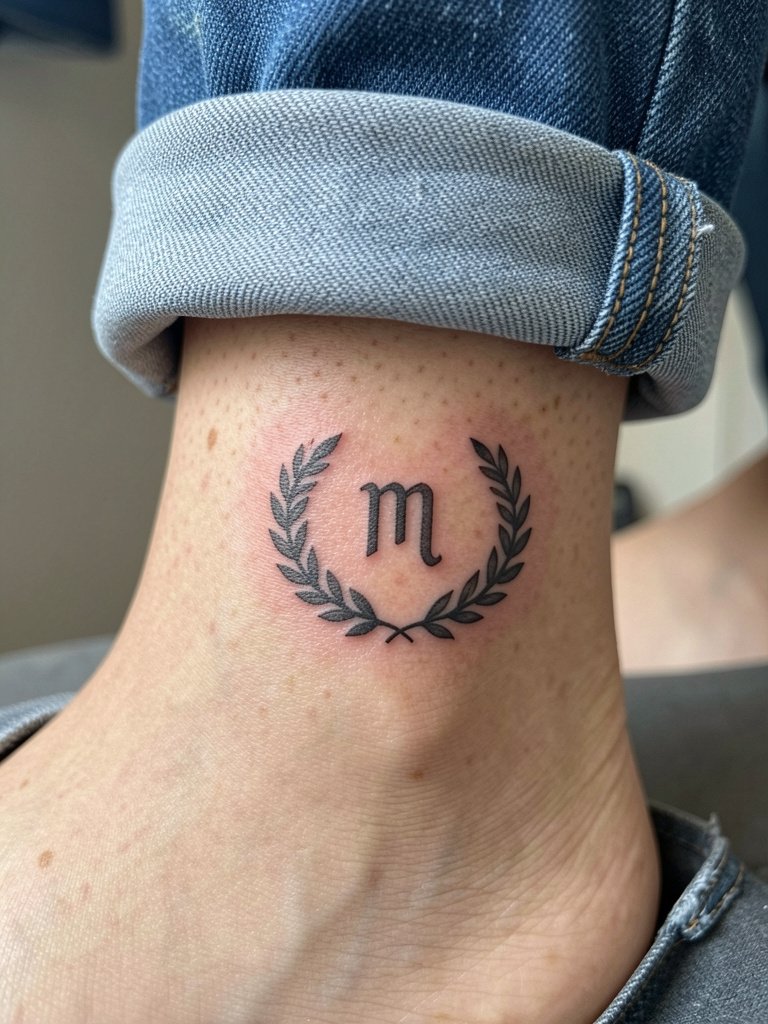
Medial ankle spots are discreet but face shoe friction. Reinforce the laurel tips and allow spacing so leaf edges do not blur. The mistake is shrinking the laurel detail too much. Expect a short session and a likely touch-up within the first two years. Show the ankle with rolled jeans or mules and try simple slip-on mules that do not rub the area.
25. Saturn Ring Around Upper Arm
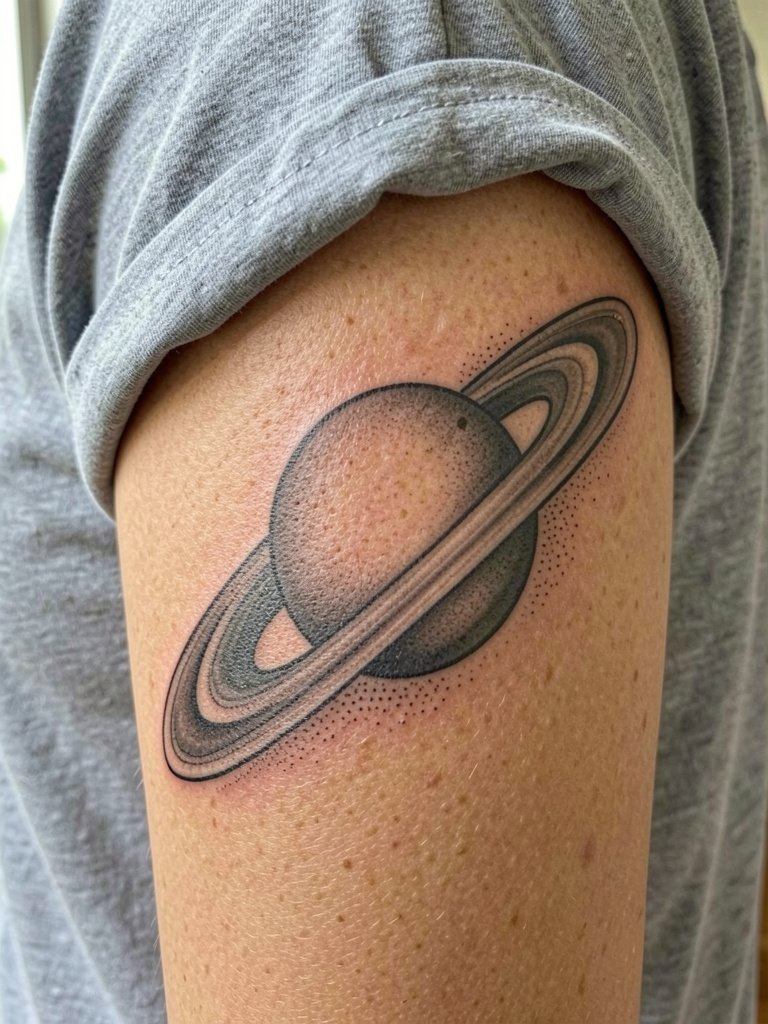
Upper-arm ring motifs sit on a forgiving area that tolerates medium-weight outlines. Ask the artist to map the ring so the shading follows muscle curvature. A frequent mistake is flattening the ring so it reads awkwardly when the arm moves. Sessions are comfortable and usually quick. For styling, rolled short sleeves or muscle tees show the band, and a simple muscle tee works well.
26. Micro-Script of Star Sign on Side Rib
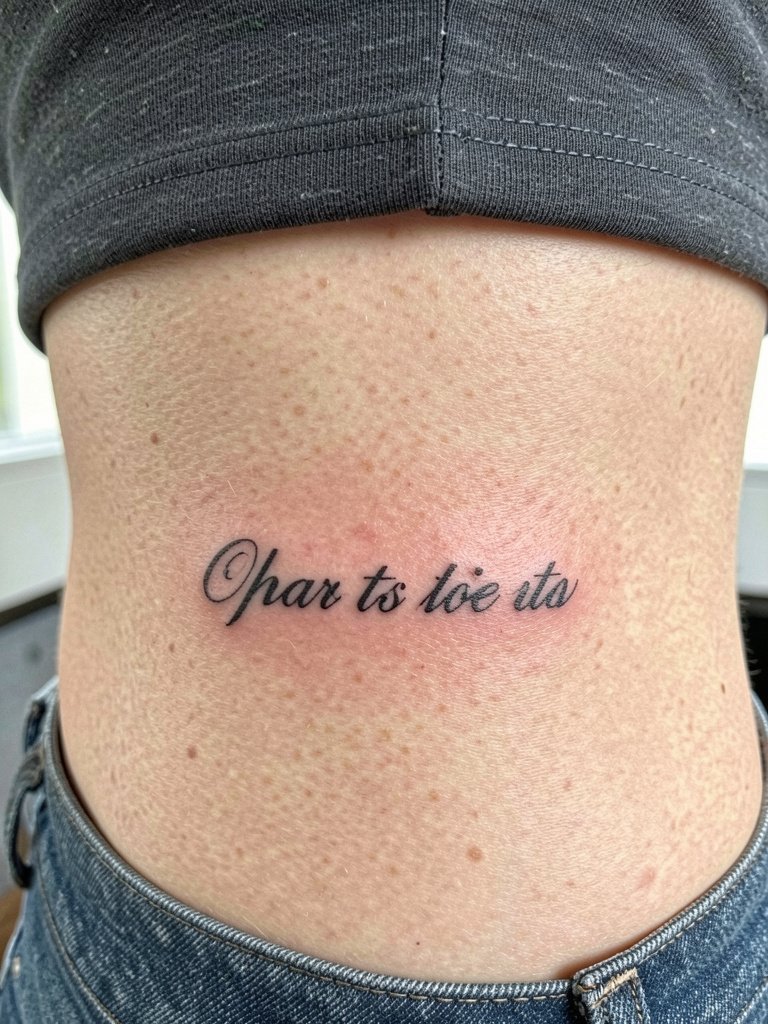
Micro-script on the ribs can be elegant but the skin stretches with breathing and movement. Request slightly heavier downstrokes and review the stencil while breathing to make sure the script remains legible at rest and in motion. The common error is trusting an ultra-thin reference. Rib scripts hurt more and may require shorter sessions. Plan on a possible touch-up at 12 to 18 months.
27. Custom Birth Chart Map on Back Shoulder
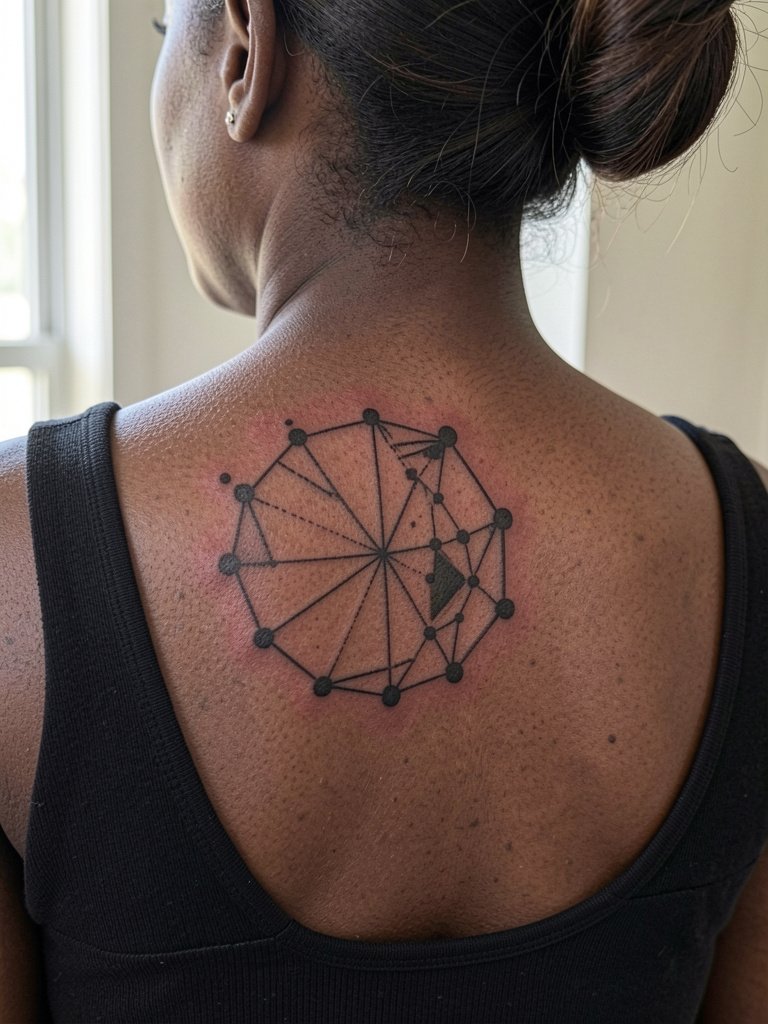
A custom birth chart map needs a clear hierarchy so the main houses and nodes read from a distance. Ask for a labeled stencil layout to verify node placement and scale. The usual mistake is cramming all the natal details into a small area. Healing is straightforward and touch-ups depend on how much linework was used. For showing, wide-back tops reveal the piece, and a low-back dress or top gives a clean frame.
Frequently Asked Questions
Q: How do I choose between a tiny glyph and a larger constellation for my sign?
A: Think about visibility and longevity. Tiny glyphs suit wrists and behind-ear spots but require slightly heavier initial strokes to avoid early blur. Larger constellations work better on the thigh, back, or shoulder where movement and abrasion are minimal, and they often need fewer touch-ups.
Q: What should I wear to a sternum or rib session?
A: Wear fitted, easy-access clothing like a sports bra or fitted bandeau that rests naturally in place, so the artist can expose the area without you disrobing. Bring a loose cover-up for after the session and plan for short breaks if the ribs feel intense.
Q: Where can I find healed examples and discovery pathways without naming artists?
A: Search hashtags and portfolio tags on social platforms with targeted keywords like #ZodiacTattooHealed, #ConstellationInk, and #[YourSign]TattooHealed. Use location filters on short-video platforms and browse tattoo portfolio sites for the term "healed blackwork zodiac" to see variations on different skin tones.
Q: How visible will fine-line zodiac scripts be after two years?
A: It depends on placement and initial line weight. Fine-line scripts on low-friction areas like the outer shoulder can remain crisp longer if the artist slightly reinforces downstrokes. High-wear zones like fingers and wrists usually need earlier touch-ups.
Q: Are there cultural concerns with zodiac imagery I should consider?
A: Some zodiac motifs pull from specific cultural systems and sacred symbols. One group feels these symbols are universal personal markers and comfortable being reinterpreted. The other group cautions about borrowing motifs that carry cultural weight and recommends researching origins and asking for respectful adaptation. When in doubt, choose a stylistic abstraction that honors the source while keeping the design original.
Q: Can I wear jewelry with a new wrist or hand zodiac tattoo?
A: Wait until the initial healing window is complete before wearing rings or bracelets that sit directly on the tattoo. When healed, use thin, non-abrasive pieces that do not rub the ink, and consider stackable designs that sit above the tattoo rather than across it.
