
The smallest arrow you pin to your save folder is rarely the one that still reads clean after five years. Fine single-needle work can look glorious at first and then soften, while a slightly heavier contour often keeps crisp edges on textured or melanin-rich skin. Read these 19 arrow ideas with placement, what to request in consultation, and simple styling tips that actually help the design age as intended.
1. Single Minimalist Arrow (Right-Facing)
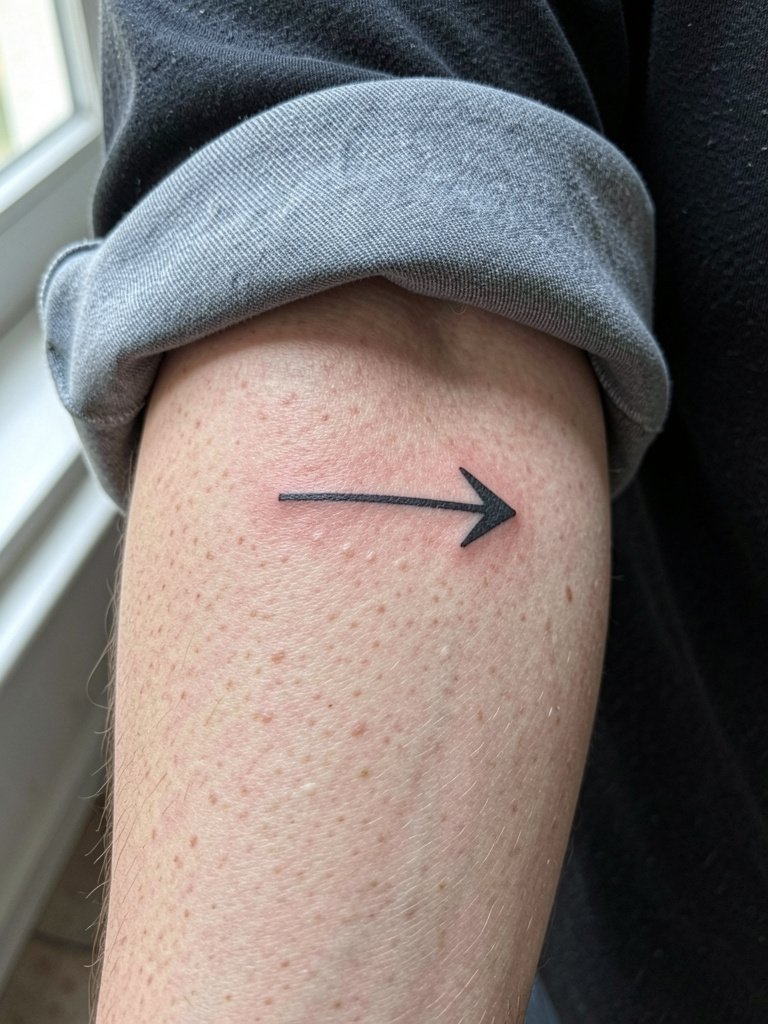
A tiny right-facing arrow on the inner forearm reads as protection and forward motion for many people. Choose a line weight slightly thicker than the micro-reference photo, because the inner forearm moves and light wear can blur single-needle lines by year two. Bring two reference scales so the artist can show how the arrow reads at 2cm versus 5cm. Session time is usually under 30 minutes and pain lands low to moderate. For showing it off, roll a linen button down shirt to the elbow and add a dainty bracelet on the opposite wrist for balance.
2. Feathered Arrow on Inner Upper Arm
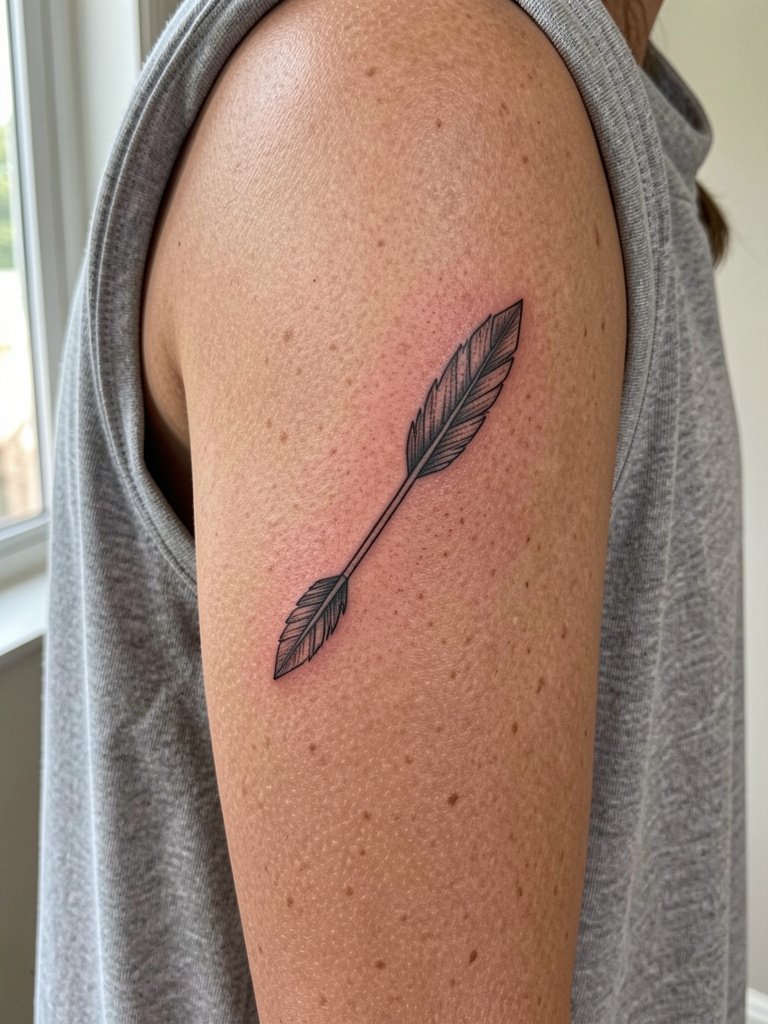
The feathered arrow adds organic texture and softens the geometry of the shaft, which helps the motif feel less sharp on a bicep. Request slight stipple shading in the feather rather than faint grey wash so the detail holds on textured skin. A common mistake is asking for ultra-thin feather lines that vanish after healing. Expect a 45-minute session and moderate pain. Wear a loose, sleeveless top to the appointment. For outfit pairing, a wrap top dress earth tone that reveals the inner arm complements the illustrative detail.
3. Broken Arrow on the Lateral Hip
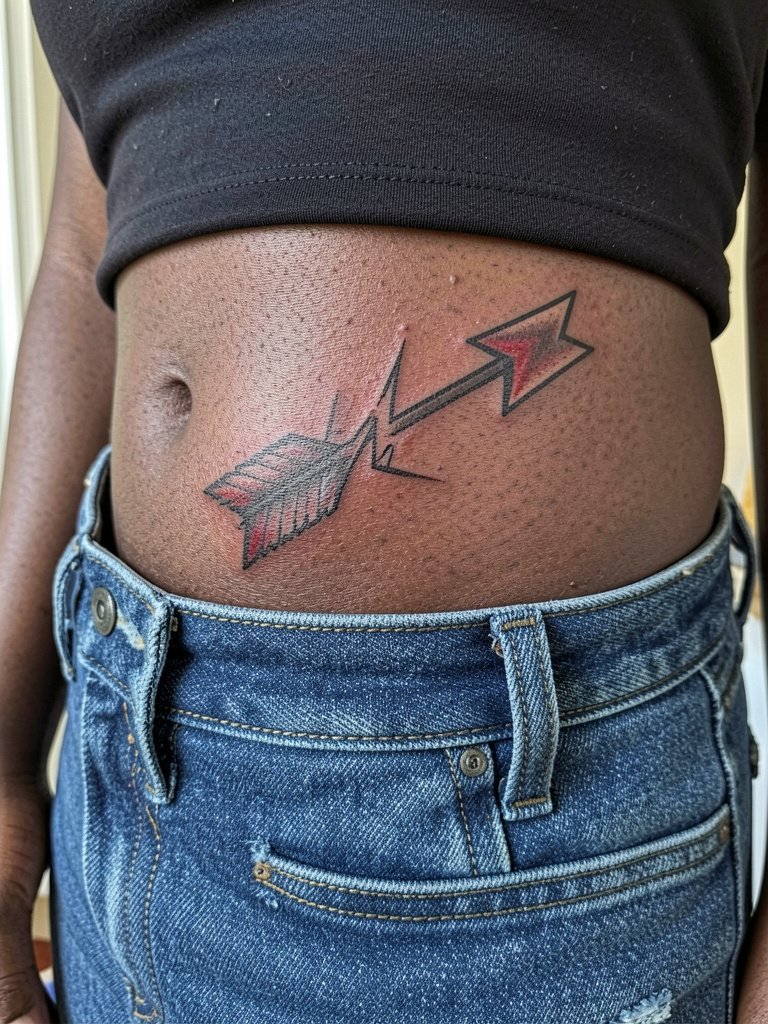
A broken arrow is a clear symbol of forgiveness or closure for some people and a private reset for others. On the hip, choose bolder contours around the break so the red accent stays crisp instead of bleeding into soft greys. Common mistake is placing too much thin shading near the snap, which ages into a muddy patch. Session time can be 45 to 90 minutes depending on color. Wear loose, flowy pants or a skirt you can pull down easily for access. Show it off with high-waisted shorts or denim for a peek of the side hip.
4. Crossed Arrows Below the Clavicle
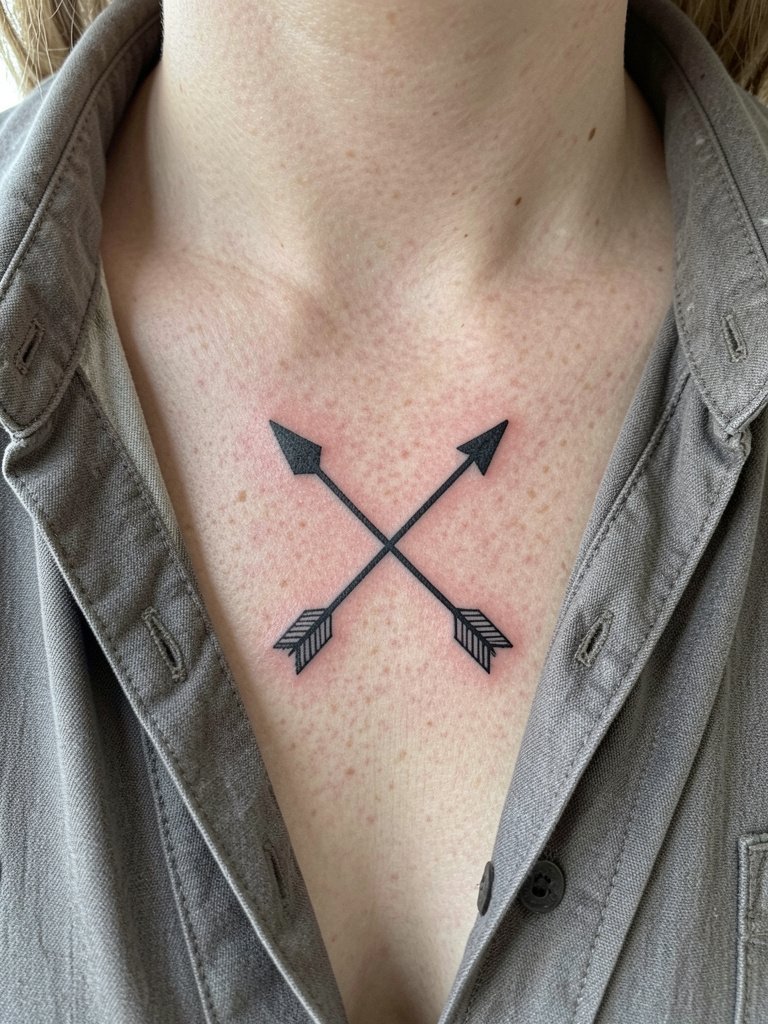
Crossed arrows read as unity and alliance, which makes them a frequent pick for pairs or friend groups. Ask for equal shaft spacing and a mirror check before the first outline so the symmetry stays centered on the clavicle. Bold outlines help here because the chest moves with breathing and can soften thin lines over time. Pain is moderate and the session is often under an hour. For styling, open-collar blouses or a layered pearl necklace frame the design well. Wear a button-down to the session so you can slip it off without tugging on the neckline.
5. Arrow Piercing a Heart on the Sternum
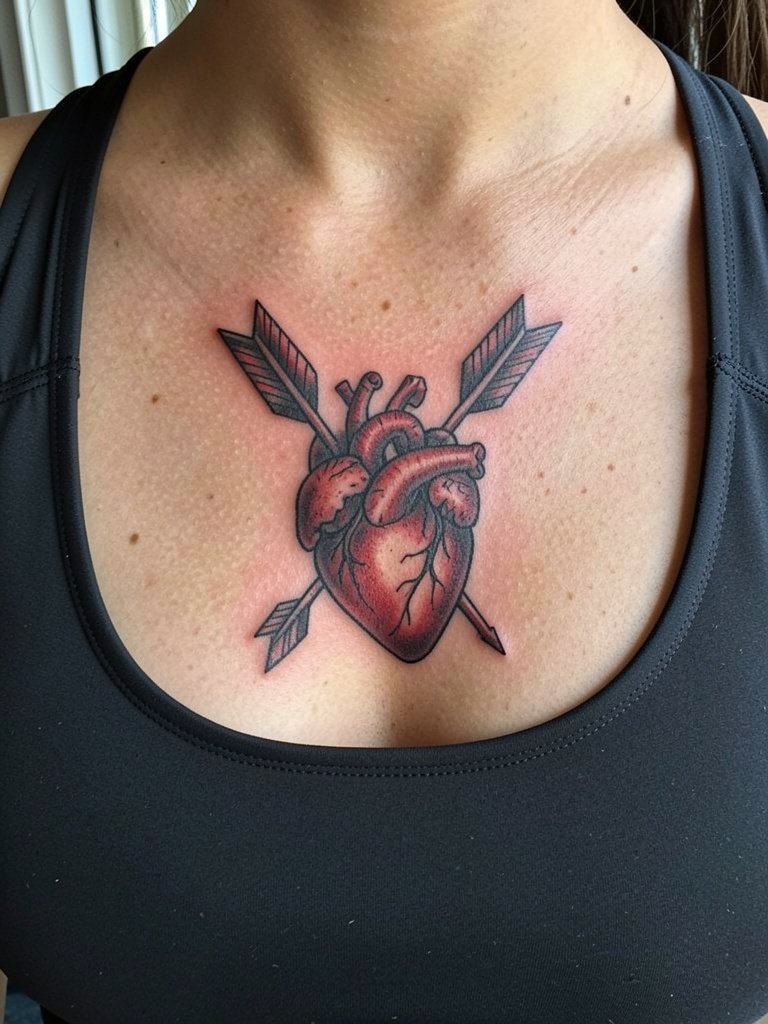
A sternum cupid arrow can be vivid and intimate. The sternum sees stretch while breathing and under clothing, so avoid tiny inner-heart filigree that can merge. Tell the artist you want saturated red fills that are slightly larger than your reference so the heart ages into a readable shape. Expect higher sensitivity and a session that can run one hour or more depending on shading. For showing it off, strapless or halter tops in deep tones keep the focus on the center chest. For the appointment, wear a strapless top or a wide-neck shirt that provides easy access.
6. Arrow Inside a Compass on the Outer Forearm
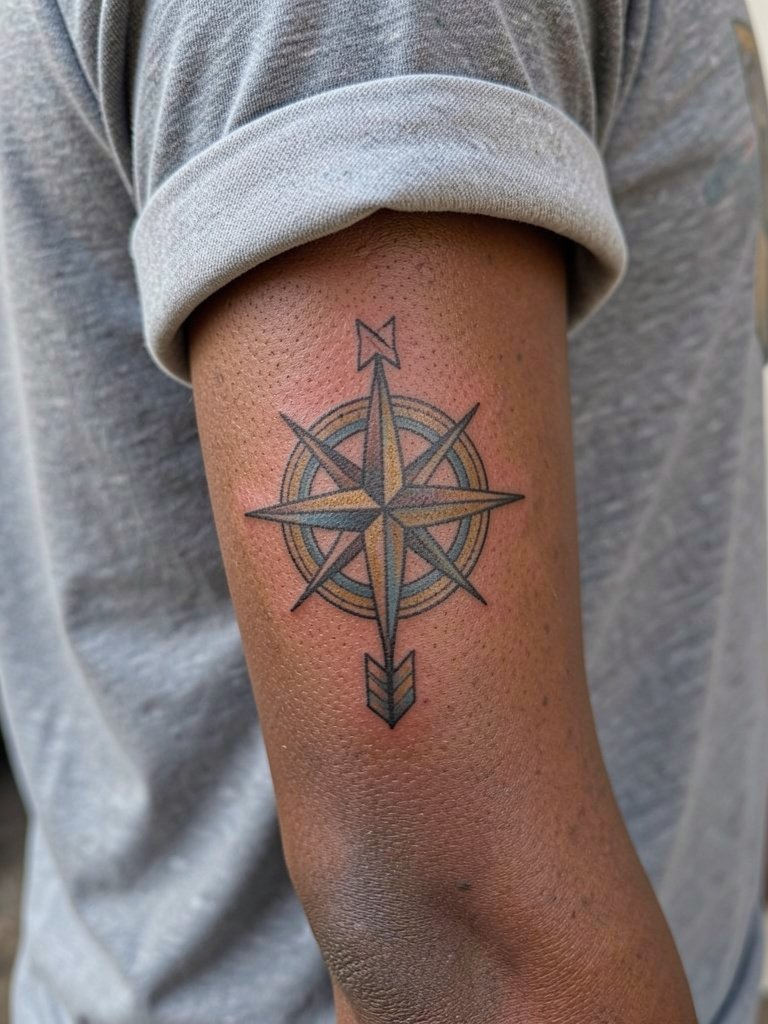
Combining an arrow with a compass signals trust in direction rather than a single destination, which is why travelers choose this motif. Ask the artist to map the compass points at full scale first, because tiny directional ticks usually blur. Multi-color work needs good contrast on darker skin, so request saturated blue and gold with crisp black outlines. Session time runs 60 to 120 minutes depending on color. For everyday wear, a fitted navy tee with the sleeve casually rolled highlights the ornamental detail, and a leather bracelet on the opposite wrist adds a travel-ready feel.
Session Day Picks
The inner forearm and sternum pieces above have different access needs, so a couple of small items smooth the chair day and the first week.
-
Eucalyptus Tattoo Oil (indie). A single-ingredient oil that reviewers praise for not feeling sticky while helping itch in the first week, handy for small linework pieces.
-
Plant-Based Tattoo Vaseline Alternative. A gentler option for folks sensitive to petroleum that still protects fresh ink during short daily activities.
-
Tattoo Soothing Mist (spray). Spray application is useful for hands and fingers where touching the area should be minimized.
-
Hustle Butter Deluxe. A thinner, non-greasy balm many people switch to after the first few days to moisturize without clogging pores.
-
Saniderm Second Skin. Useful for the first 24 to 48 hours to keep fresh work contained, especially on areas that see friction from clothing.
7. Downward Pointing Arrow on the Inner Thigh
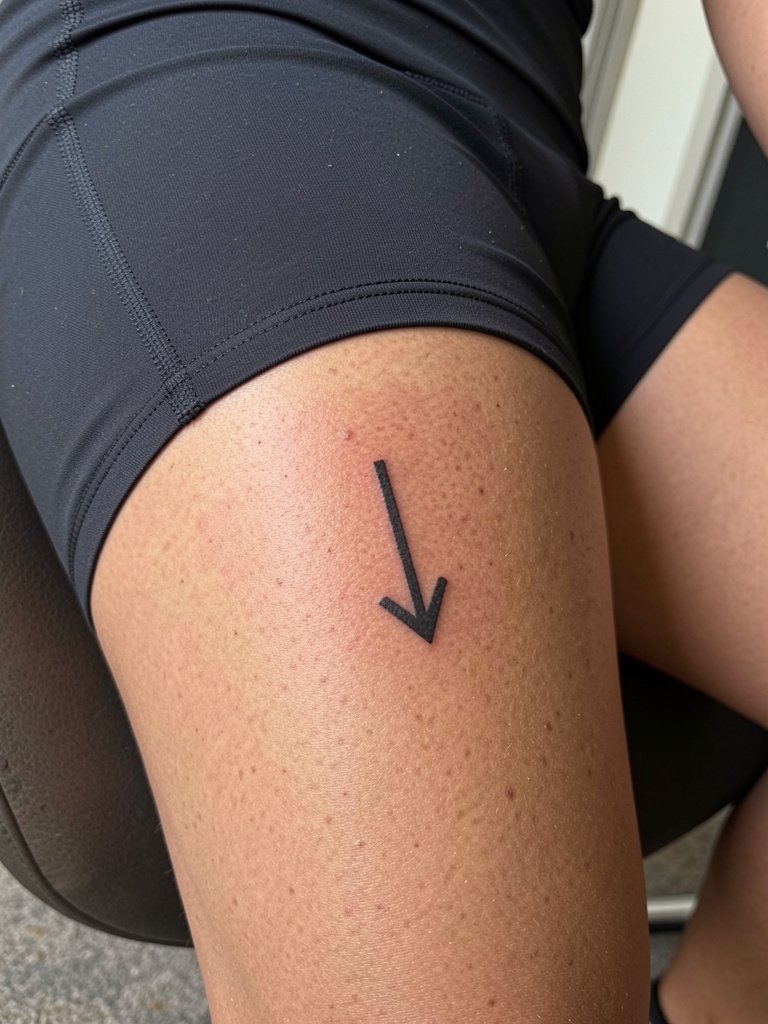
A downward arrow anchors into grounding and rootedness rather than forward motion. Inner-thigh skin stretches with movement and friction, so choose a slightly heavier shaft to protect against early blur. Common mistake is using ultra-fine grey that disappears into the skin tone. Touch-up timelines for this area can be sooner than for forearms, so plan on a follow-up at 12 to 18 months. Session pain is moderate to high depending on padding. Wear loose bottoms that can be easily moved, and for showing off pick high-waisted shorts in neutral tones with a thin anklet to balance the leg.
8. Bundle of Arrows on Inner Upper Arm
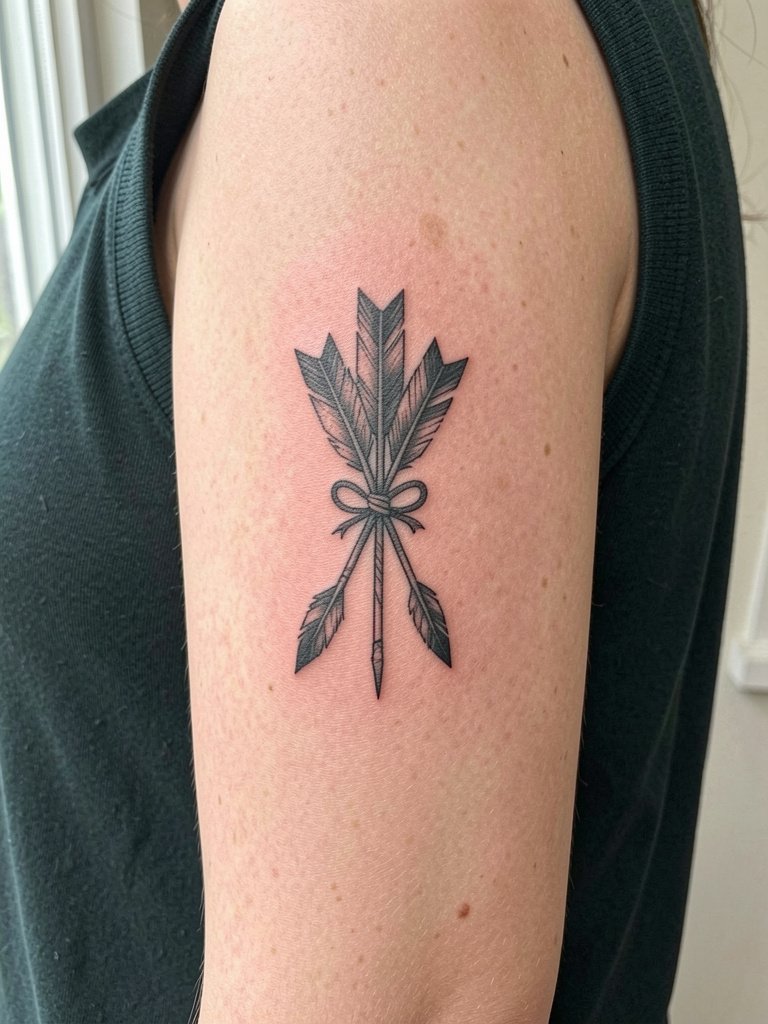
A vertical cluster of arrows reads as family or group strength and looks striking on the inner upper arm. Because the inner arm sees compression from sleeves, avoid tiny negative-space details between shafts. Tell the artist you want slightly raised spacing so the grouping reads at a glance. Expect a one-hour session and moderate pain. For session wear, choose a loose tank with a wide strap. Showing this design pairs well with cropped tops in earth tones and a beaded bracelet on the same arm.
9. Arrow and Diamond on the Ribcage
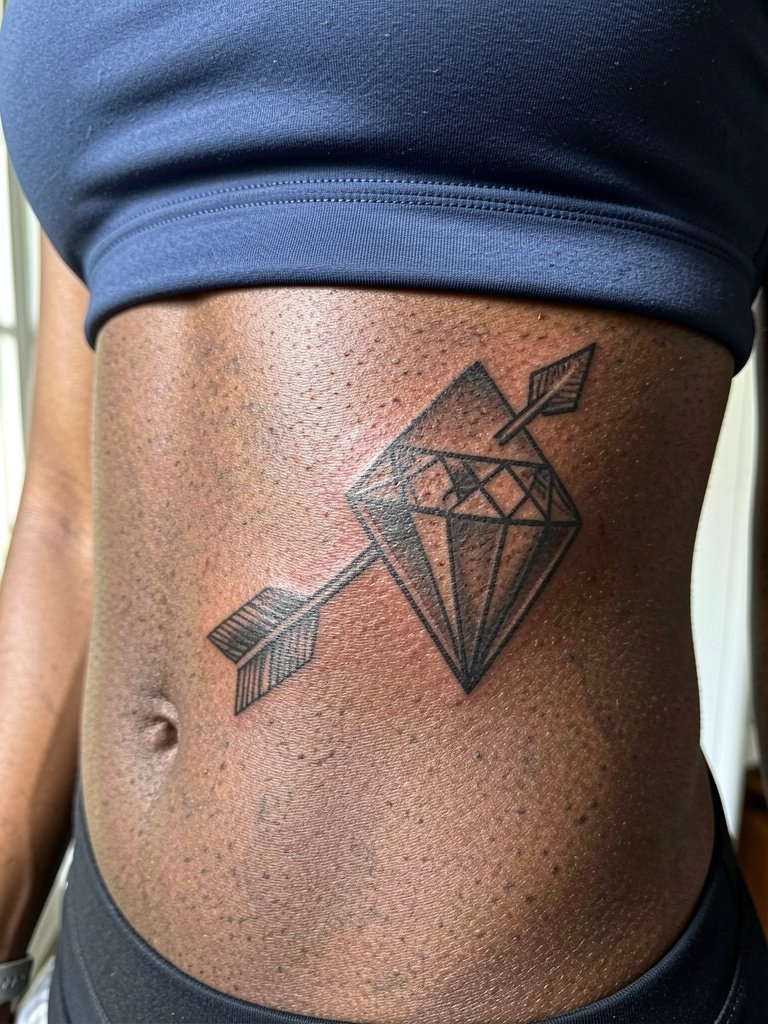
The ribcage is popular for symbolic pieces but presents a longevity debate. One camp says fine line on ribs blurs within two to three years because the skin stretches and moves with breathing and torso shifts. The other camp argues that with correct depth and slightly wider spacing fine line can hold for five years or longer, and they will point to healed photos that back that claim. If you want an arrow-and-diamond here, ask the artist to widen inner angles and use 2-needle linework for the diamond facets so the geometry holds up. Pain is high and sessions can run long. Wear a fitted cropped top and expect to schedule time for breaks.
10. Sagittarius Zodiac Arrow on the Wrist
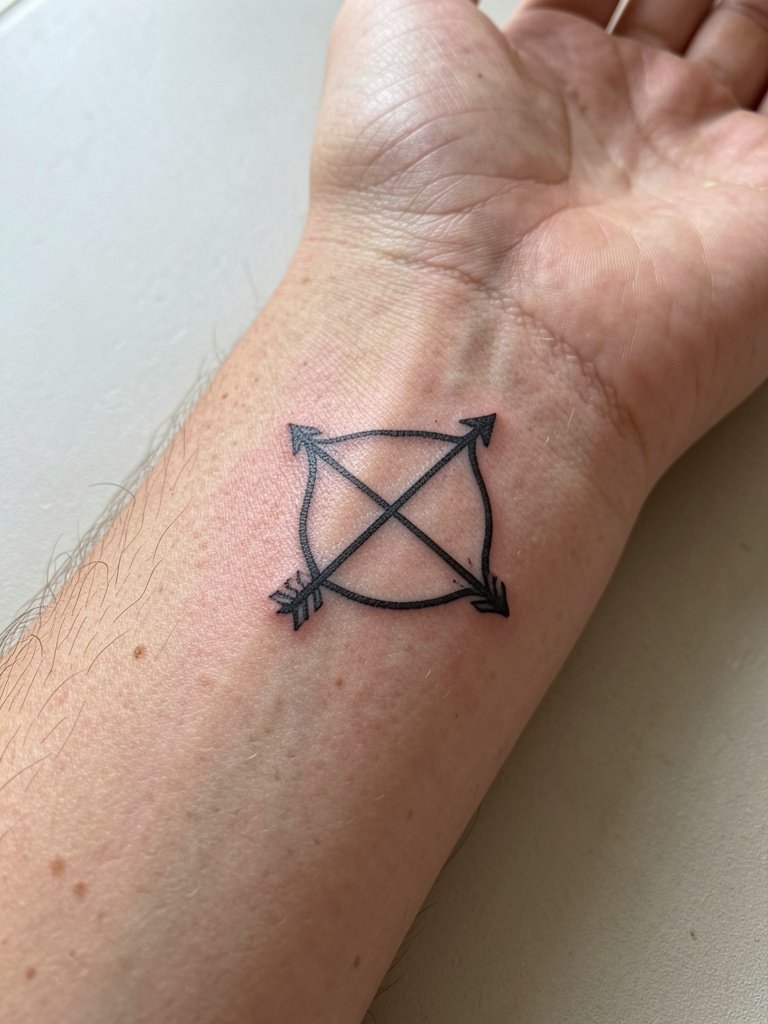
Wrist pieces are a micro canvas and rewards come from proper scale. If you plan a zodiac arrow, pick a slightly wider shaft than the smallest reference so the bow arc ages as a readable motif. The wrist sees frequent sun and friction from watches, so request a touch-up timeline with the artist at booking. Session time is short and pain is low to moderate. For showing off, a minimalist watch on the opposite wrist or a thin bracelet stack pairs nicely, and you can use a minimalist watch to contrast fine line work.
11. Arrow with Directional Text on the Inner Forearm
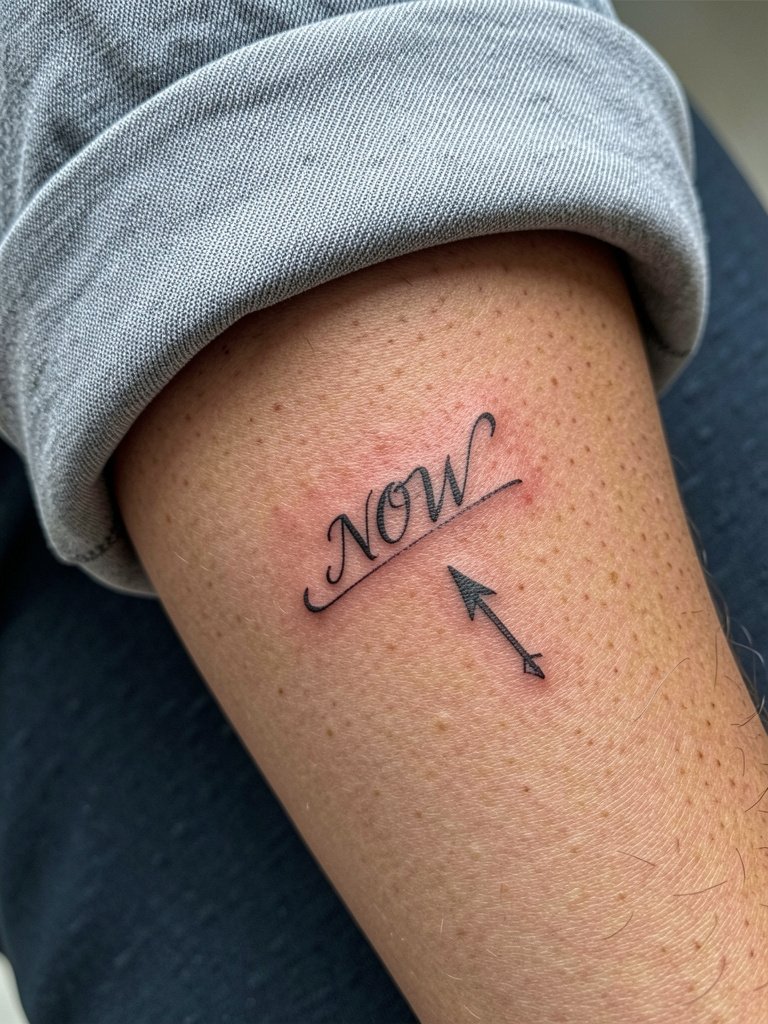
Pairing an arrow with a short word turns a symbol into a specific mantra. Decide on the exact word and font size before the session, and ask the artist to show how the script reads at full scale. A common mistake is using a fancy script that loses counters when shrunk. Plan a 30 to 60 minute appointment and low to moderate pain. For styling, roll a linen button down shirt to the elbow and add stacked dainty bracelets opposite the tattoo for subtle editorial weight.
12. Double Arrow on the Collarbone
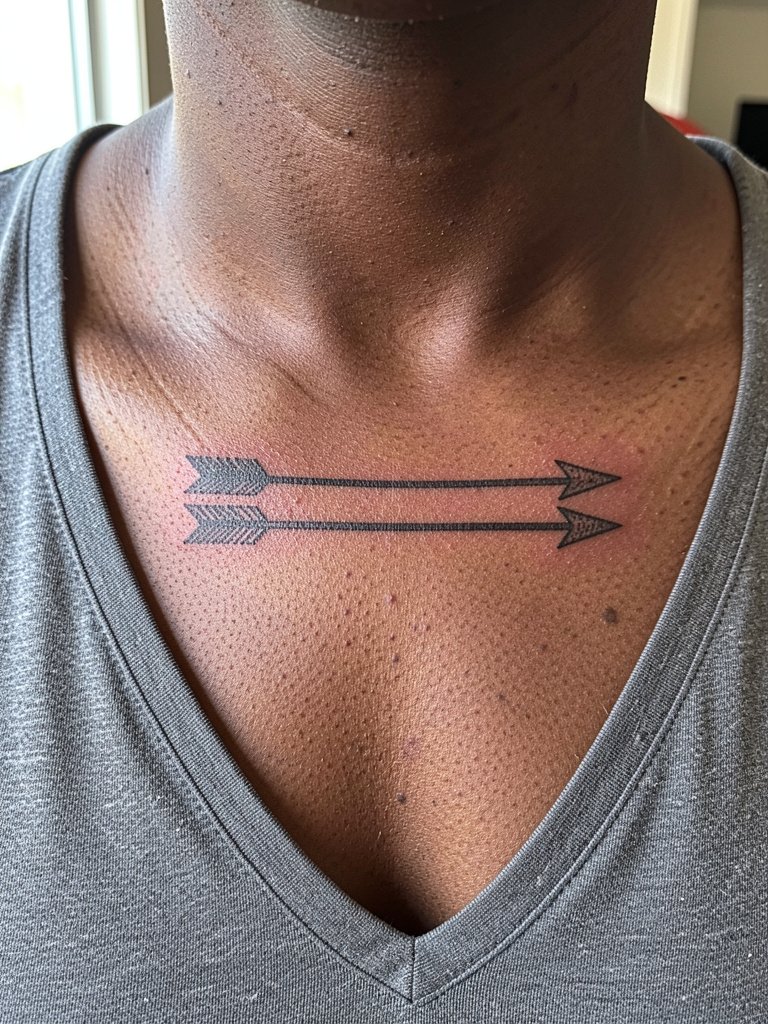
Two-opposite arrows along the collarbone read as balance between choices or directions. Keep shafts parallel and allow 2 to 3 millimeters of negative space so they do not merge over time. A common aging mistake is placing them too close to the clavicle line where constant movement compresses the ink. Session time is 30 to 60 minutes and pain is moderate. For showing the piece, a V-neck top and a thin pendant necklace that sits above the tattoo draws attention without crowding the area.
13. Arrow with Feathers and Beads on the Calf
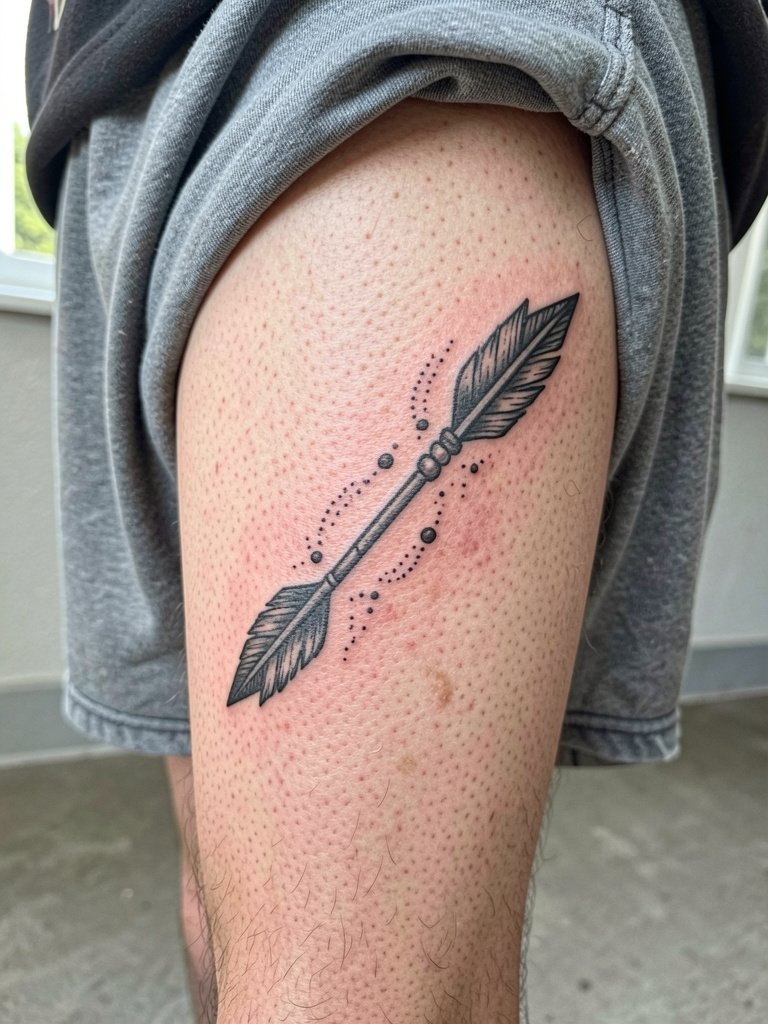
A decorated arrow with beads and feathers suits the calf because the canvas is long and the texture holds stipple and dot work well. Request clear bead spacing and avoid tiny bead dots that flatten in photos. Session time is typically 60 minutes and pain is low to moderate. For showing the work, pair with a cropped top and a flowy skirt in a bold color to echo the tattoo texture. During the appointment, wear loose shorts that can be pulled up without tight seams.
14. Three Arrows Downward on the Nape
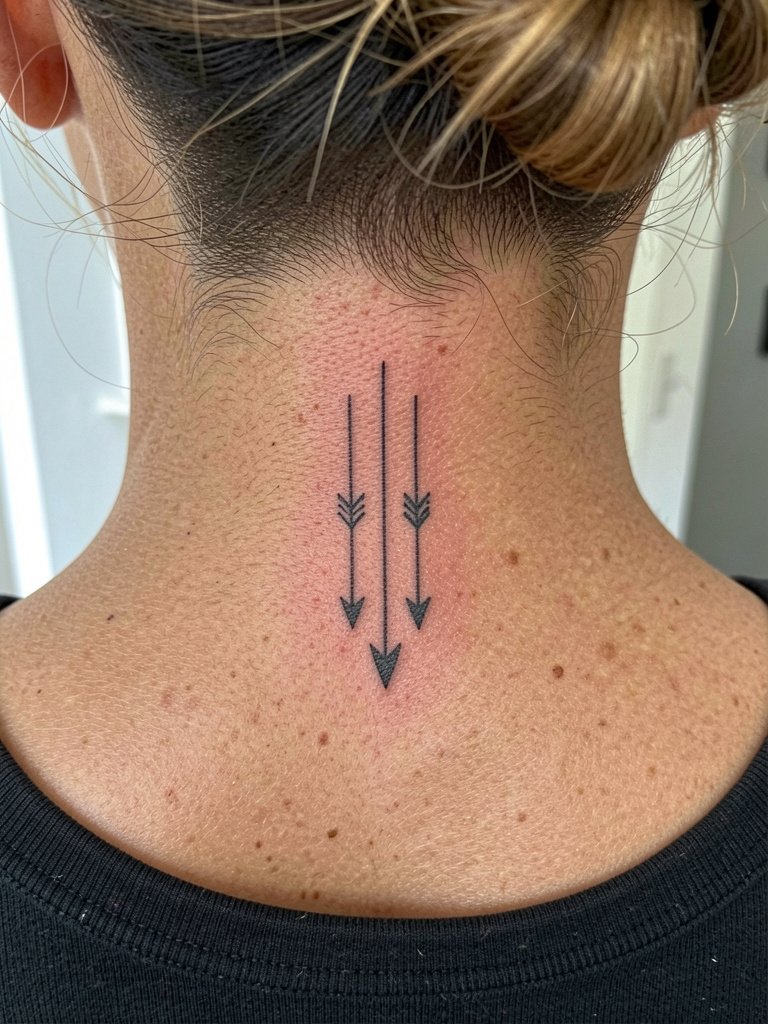
The nape is subtle and personal, which makes a stacked three-arrow motif a good choice for grounding. Artists debate fine-line durability in high-motion areas. One group says fine line on the nape blurs faster because hair movement and collars cause micro-abrasion. The opposing group insists that with proper spacing and healed photos as proof, fine line can remain crisp for several years. If you prefer long-term clarity, ask for slightly thicker shaft spacing and request healed photos of similar nape pieces from the artist before booking. Session time is short and pain is low to moderate. For styling, a sleek bun with a small hairpin highlights the area.
15. Arrow and Feather Behind the Ear
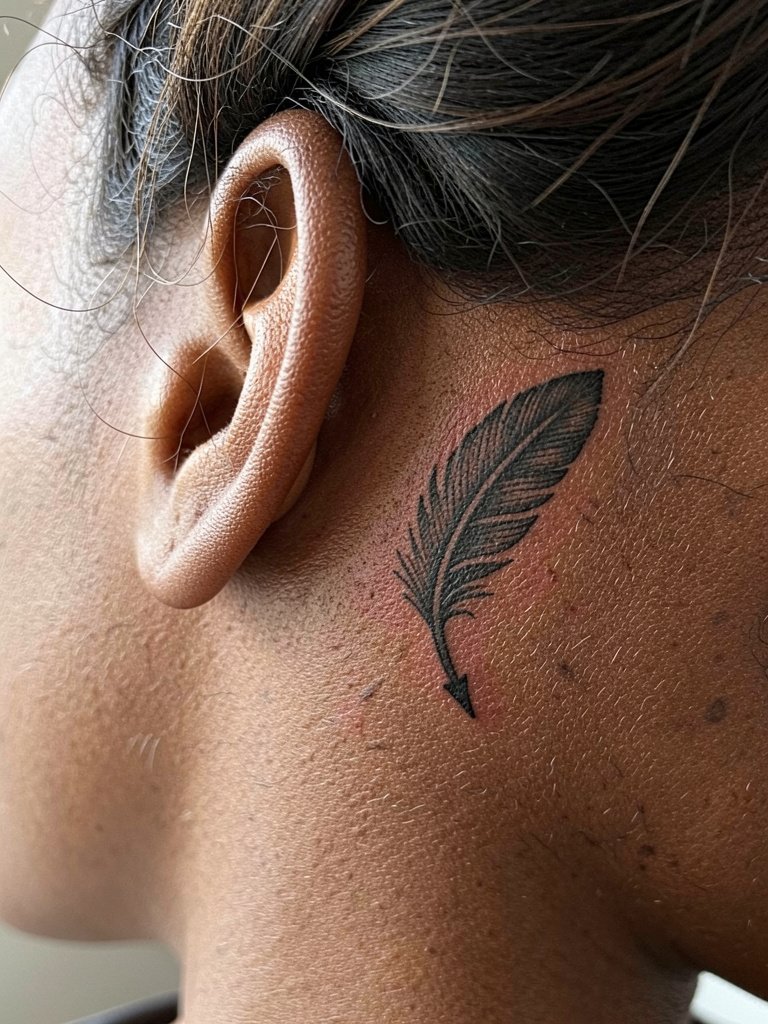
Behind-the-ear tattoos are discreet and age with less sun exposure, but the thin skin there needs confident linework. Ask the artist to hold the feather detail slightly larger than your initial reference so the quill and barbs keep presence in photos. Pain is low and session time is brief. For revealing the piece, try a side-swept hairstyle and a delicate ear cuff on the opposite ear to balance the look. Wear a top with a wide neckline for the appointment so the artist can access the area without hair tugging.
16. Arrow as a Timeline on the Forearm
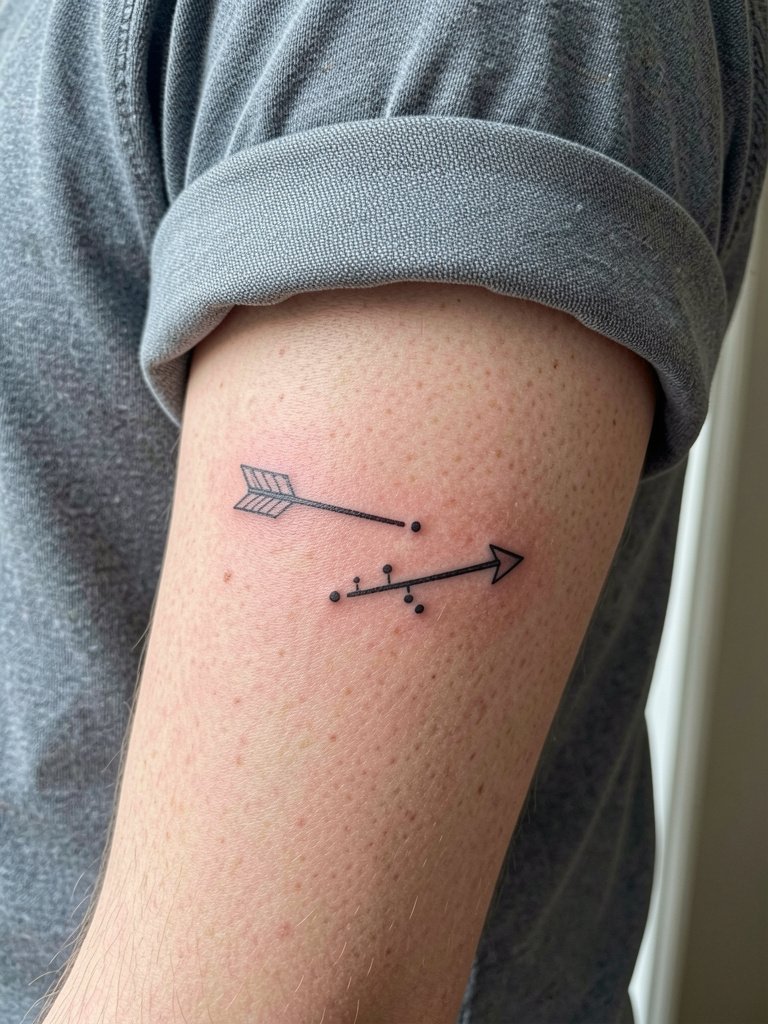
Turning an arrow into a personal timeline with subtle dots or tiny markers along the shaft gives the motif explicit dates without heavy script. Before the session, mark the years you want represented and ask the artist to space markers evenly at full size so they will not crowd once healed. A common error is packing too many tiny marks which blur into a line. Session time is usually 45 minutes and pain is low to moderate. For showing the timeline, roll a cuffed linen sleeve and keep bracelets minimal so the markers are visible.
17. Shadow-Play Arrow on the Hand
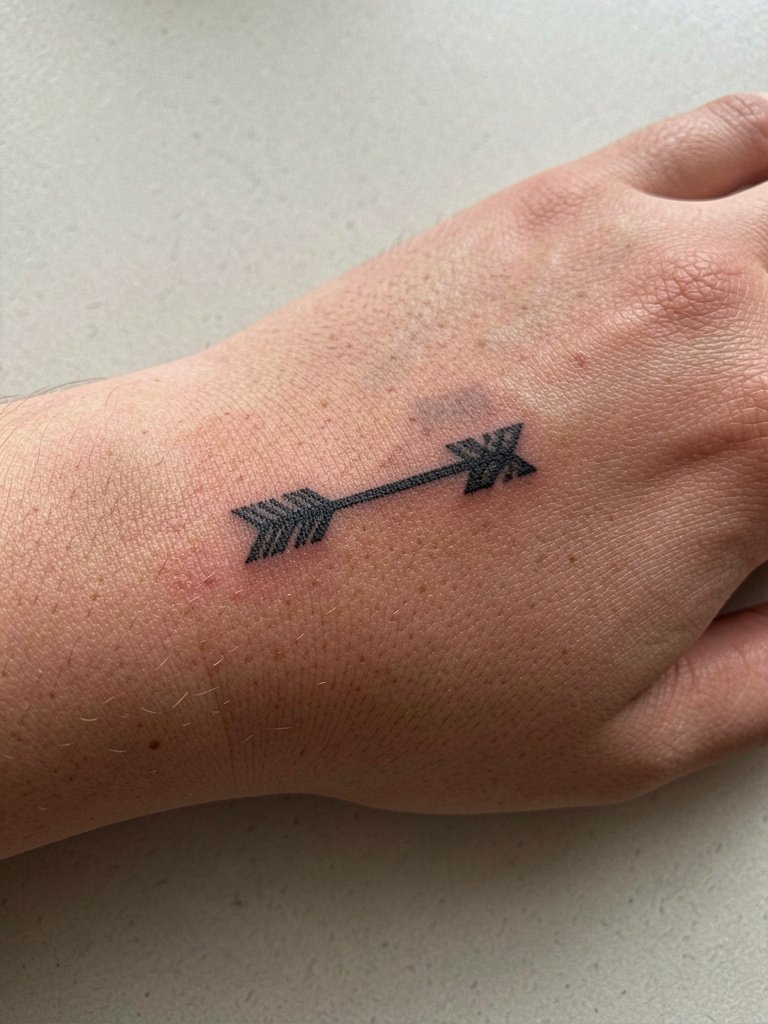
A shadow or blurred duplicate behind an arrow gives the idea a psychological dimension of past selves. Hands and knuckles see heavy wash and frequent washing, so avoid grey wash that fades into a bruise-like appearance. The right approach is crisp primary linework with a muted stipple shadow that heals more predictably. Hand tattoos carry higher touch-up risk and faster fade. For the session, wear a short-sleeve shirt and expect a brief but possibly sensitive appointment. Keep in mind daily handwashing increases early fading, so plan a touch-up window.
18. Broken Chain Plus Arrow on the Hip
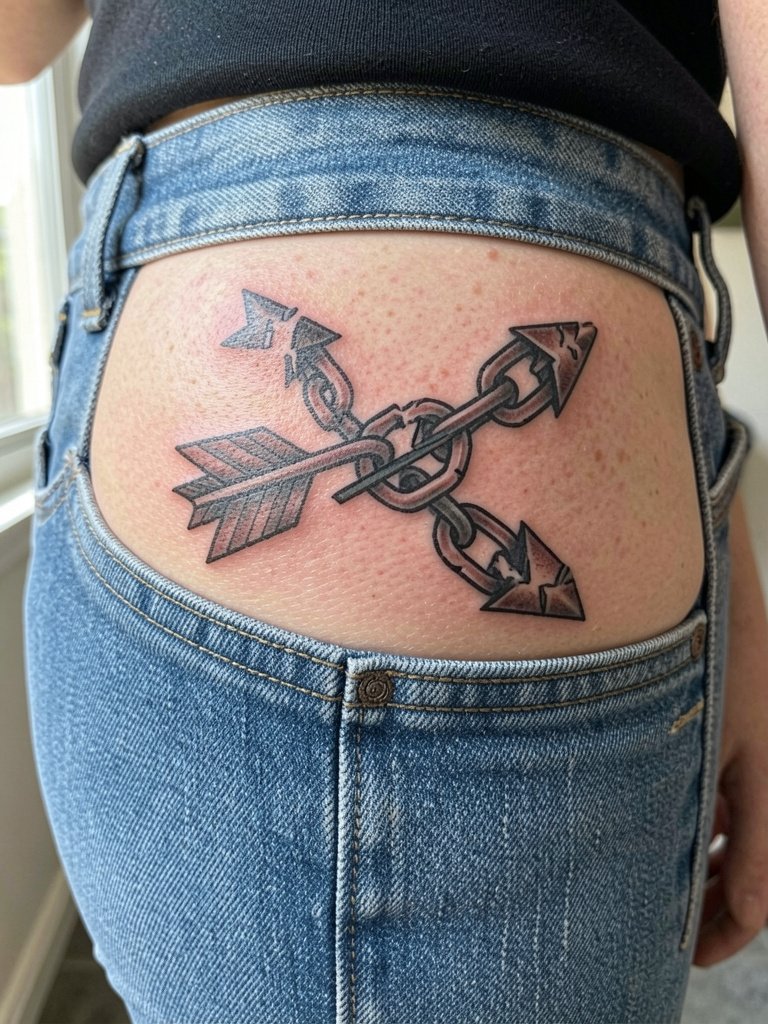
Combining a broken arrow with a broken chain makes the symbol explicitly about breaking cycles rather than neutral peace. On the hip choose bold chain links with clear negative space so they do not smear into the arrow break. A common mistake is over-detailing the chain in small scale. Session pain is moderate and the appointment can be 60 minutes. Wear loose, easy-to-adjust bottoms so the artist has full access. For showing the design, high-waisted shorts and a thin belt create a complementary frame.
19. Arrow Connector for a Patchwork Sleeve
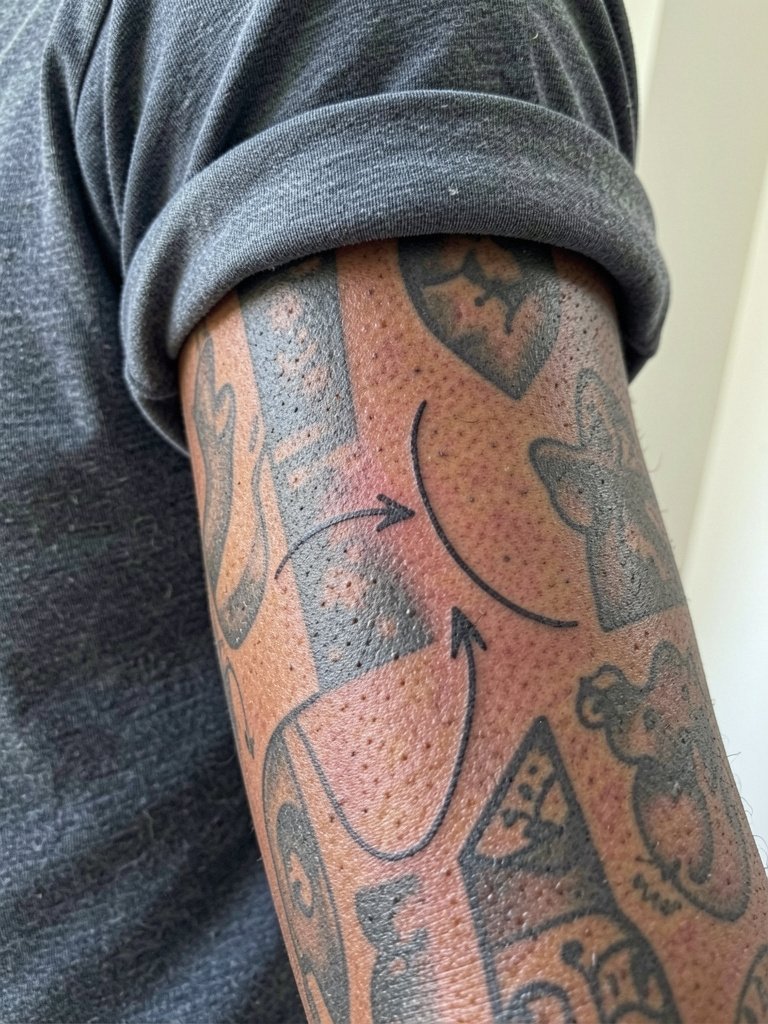
Using arrows as connectors in a sleeve helps lead the eye between unrelated elements, turning disparate tattoos into a visual map. When planning this, bring healed photos of the existing work and ask the artist to map a clean vector line that avoids dense color patches. A planning session where the artist draws the connector at full scale avoids later compositional surprises. Expect 30 to 90 minutes depending on how much touch-up is needed. For showing off, a fitted tee with the sleeve rolled up keeps the arrow line visible.
Frequently Asked Questions
Q: How much does an arrow tattoo cost for a small forearm or wrist piece?
A: Expect a price range for small arrow pieces to fall roughly in the $100–$300 bracket, with many studios enforcing a minimum fee around $100 to $150. That range covers most single-session minimalist work but remember complexity, color, and session time push the price higher.
Q: Will a fine line arrow on the ribs hold up or blur quickly?
A: Artists split on this. One group says the ribcage stretches and moves enough that ultra-fine single-needle lines often blur within two to three years. The other group says with slightly wider spacing and correct needle depth fine line can hold for much longer and they will show healed photos to support that. If you want longevity, request wider spacing and ask to see healed examples of similar rib work during booking.
Q: How do I make an arrow pop on melanin-rich skin?
A: Choose saturated black outlines and avoid pale grey washes that disappear. White highlights can add punctuation on higher-contrast pieces but they are not a substitute for strong black saturation. When you book, ask the artist to plan contrast rather than subtle grey fills.
Q: Where can I find healed arrow portfolios and local artist options without named recommendations?
A: Search hashtags like #arrowtattoo, #finelinetattoo, and #minimalistarrow on Instagram and TikTok while filtering by location for nearby artists. Tattoodo and similar directories let you search keywords like "broken arrow neo-traditional" and surface healed portfolio examples. Reddit communities such as r/tattoos and r/tattooadvice also surface peer recommendations and healed shots across skin tones.
Q: What should I wear to a session for a hip or sternum arrow?
A: For hip work wear loose, flowy pants or a skirt that can be lowered without tugging. For sternum pieces bring a strapless or wide-neck top so the artist can access the center chest without tight straps. A simple accessory tip is to avoid heavy necklaces during the first week to reduce rubbing.
Q: How soon might I need a touch-up for fine line arrow work?
A: Touch-up timelines depend on style and placement, but plan for a possible touch-up around 12 to 24 months for fine single-needle pieces, and later for bolder blackwork. High-motion or high-friction spots typically need attention sooner.
Q: Can an arrow be customized so it does not read as a pop-culture icon?
A: Yes. Add a unique element such as a feather, compass, a break in the shaft, or timeline markers to create a design that is visually distinct. Bringing two or three reference styles helps the artist combine those elements into a custom composition that feels specific to you.
