
Someone I know spent months scrolling before realizing the real problem was picking a design that would still read like a tattoo in five years. Tiny arrows are easy to personalize, and they work with lots of styles and placements. Below are a dozen compact arrow ideas that consider linework, placement pain, and how each choice typically heals, so you can skip the guesswork when you bring references to your consultation.
1. Fine Line Arrow on Inner Forearm
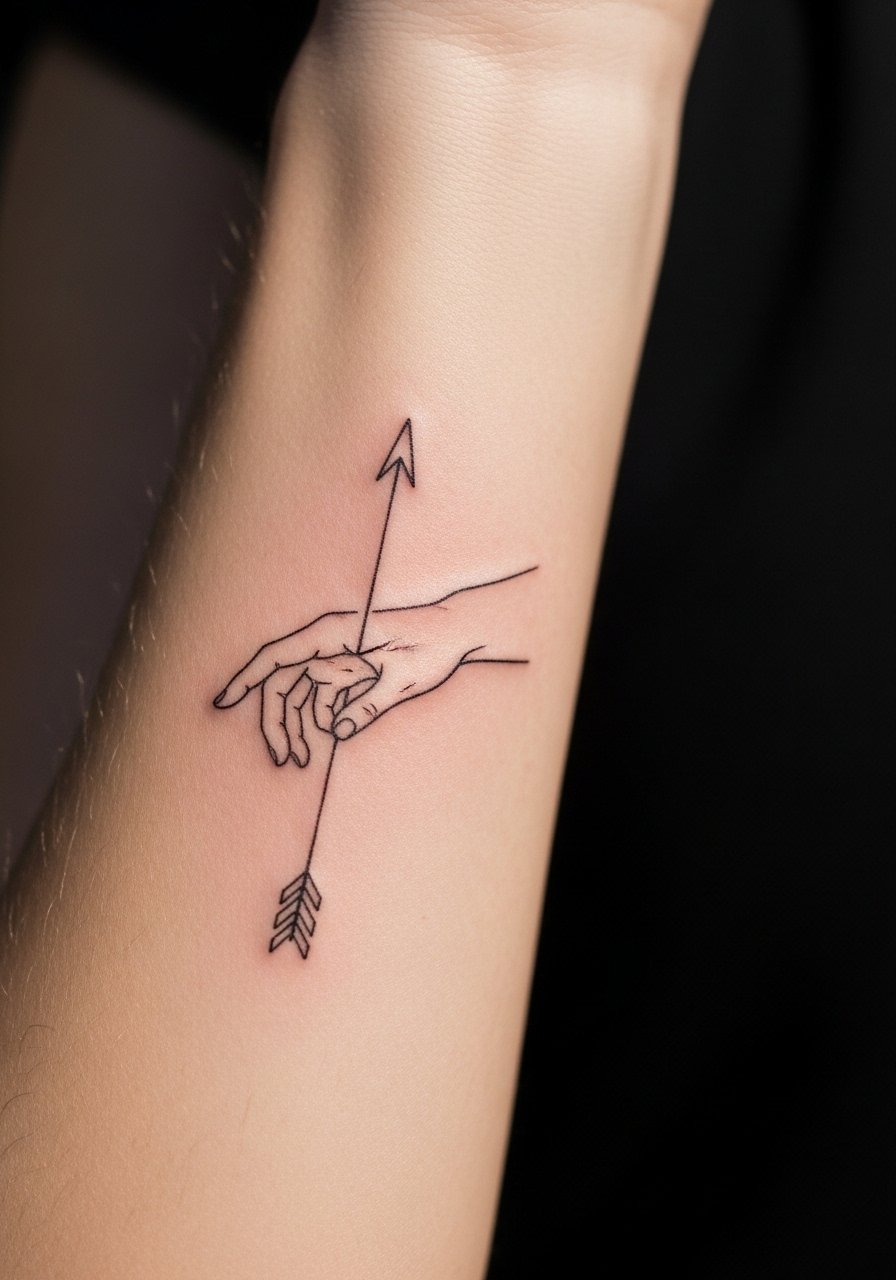
Someone I know first saw this on a friend and booked the same placement. Inner forearm is a low to moderate pain area, and a single session of 20 to 40 minutes usually does the trick. Ask your artist for steady, evenly spaced linework and slightly more spacing between parallel lines so the design does not blur together over time. The common mistake is asking for lines that are too hairline thin on very mobile skin, which speeds fading and increases blowout risk. At six months the arrow should still read crisp, but expect softer edges by year three and a possible touch-up then. Best for people who want visible but low-profile ink and who wear long sleeves sometimes for sun protection.
2. Micro Arrow Behind the Ear
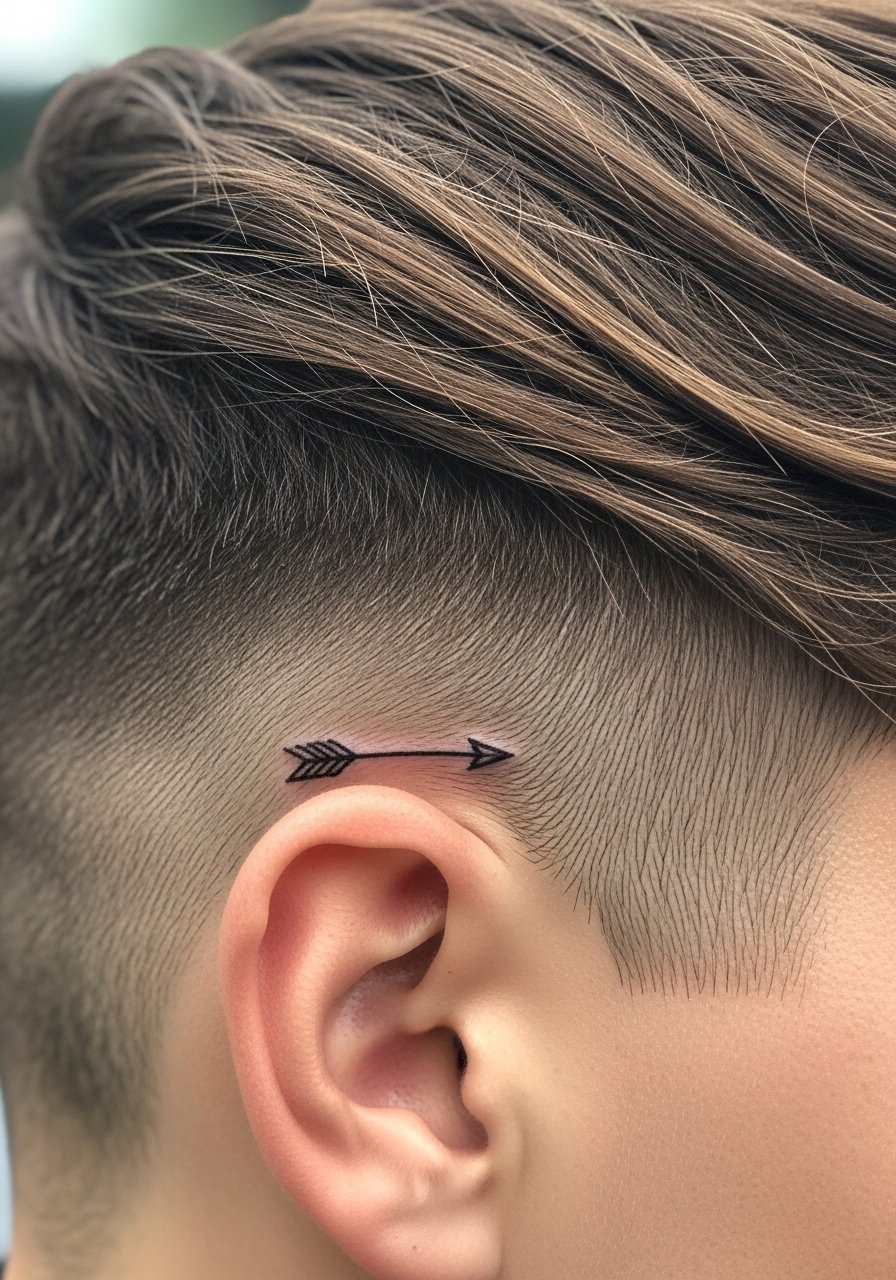
Fair warning, the area behind the ear feels like a 5 on many pain scales because the skin is thin and close to bone. Single tiny arrows here take under 20 minutes, so it is a quick session. This placement reads intimate and hides easily under hair, which helps with sun exposure and long-term saturation. Tell your artist to use a slightly thicker starting point for the shaft so the arrow stays clear as it heals. A common version that ages poorly starts with overly thin shafts and gets patchy after a year. If you work in a conservative environment, consider how visible this will be with shorter haircuts.
3. Feathered Arrow on Ankle with Stipple Shading
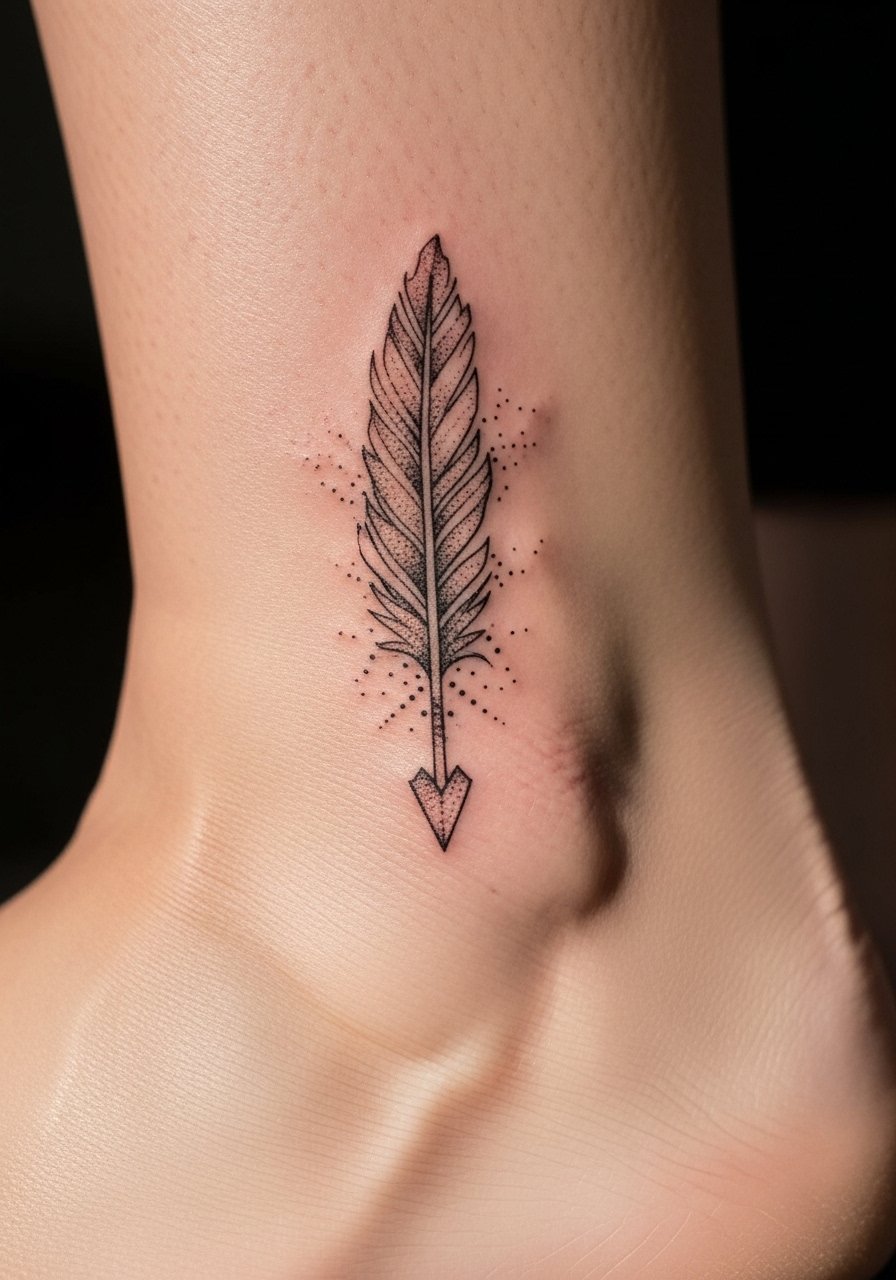
The ankle can be fussy while healing because of shoes and socks rubbing the area, but the result is delicate and wearable. This style mixes linework with stipple shading for the feather, so mention "soft stipple, light saturation" during your consult to get the airy look. Expect moderate pain and a session of 30 to 45 minutes. People often ask for heavy shading here and then complain it muddies up within two years. The feathered version holds up better with light dot work that ages into texture rather than a solid grey patch. Plan on protecting it from friction during the first two weeks.
4. Twin Opposing Arrows Across the Collarbone
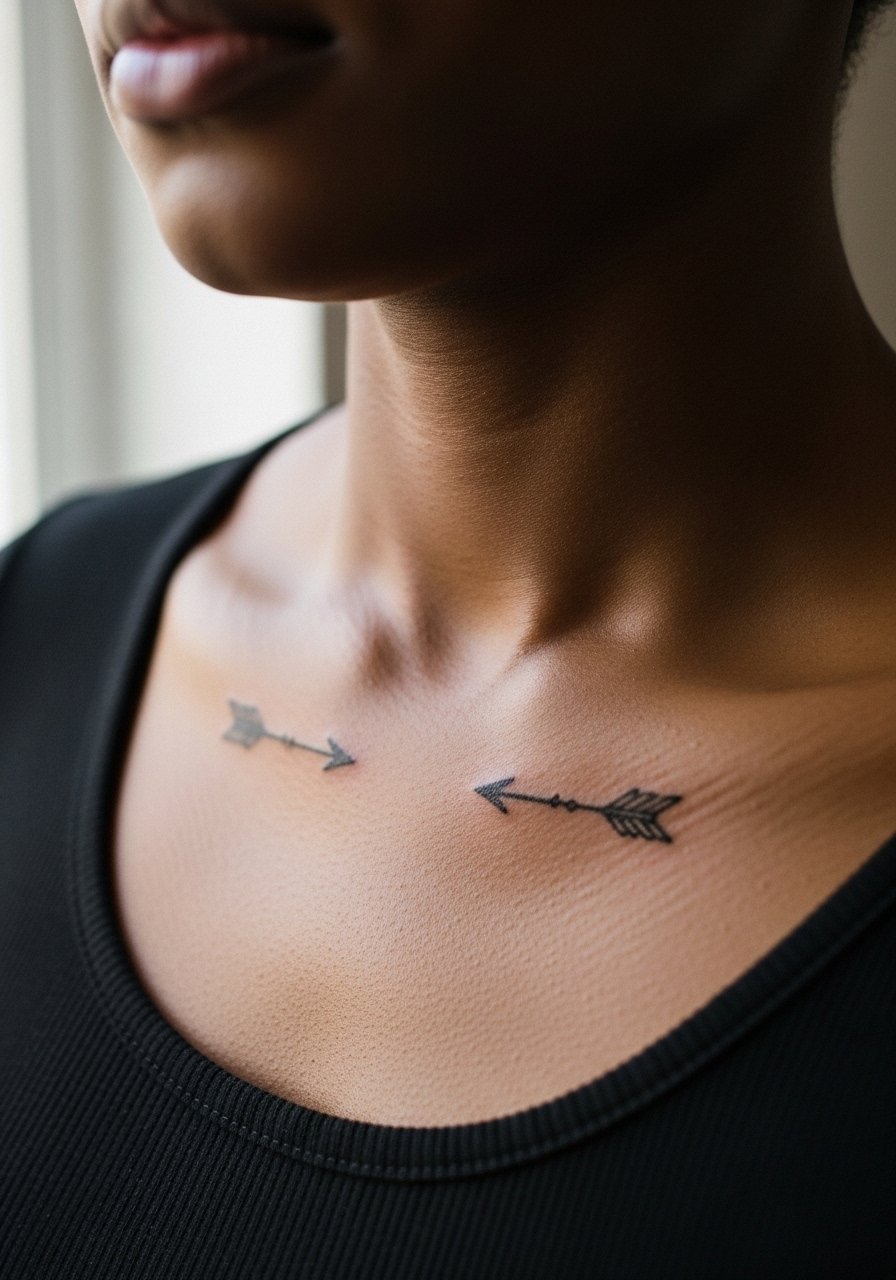
There is a debate among artists about collarbone work. One camp says the collarbone moves and stretches too much, which blurs fine lines faster. The other camp says with correct needle depth and room between elements, fine work can last. Name both camps when you ask for portfolio examples. The collarbone is a 6 to 8 on pain scales, and a small paired arrow piece takes about 30 minutes. A common mistake is placing the arrows too close to the bone, which makes healing scabbing more likely. If you want symmetry, have the artist mark the center while you sit up so placement reads balanced when you move.
5. Coordinates Arrow on the Ribcage
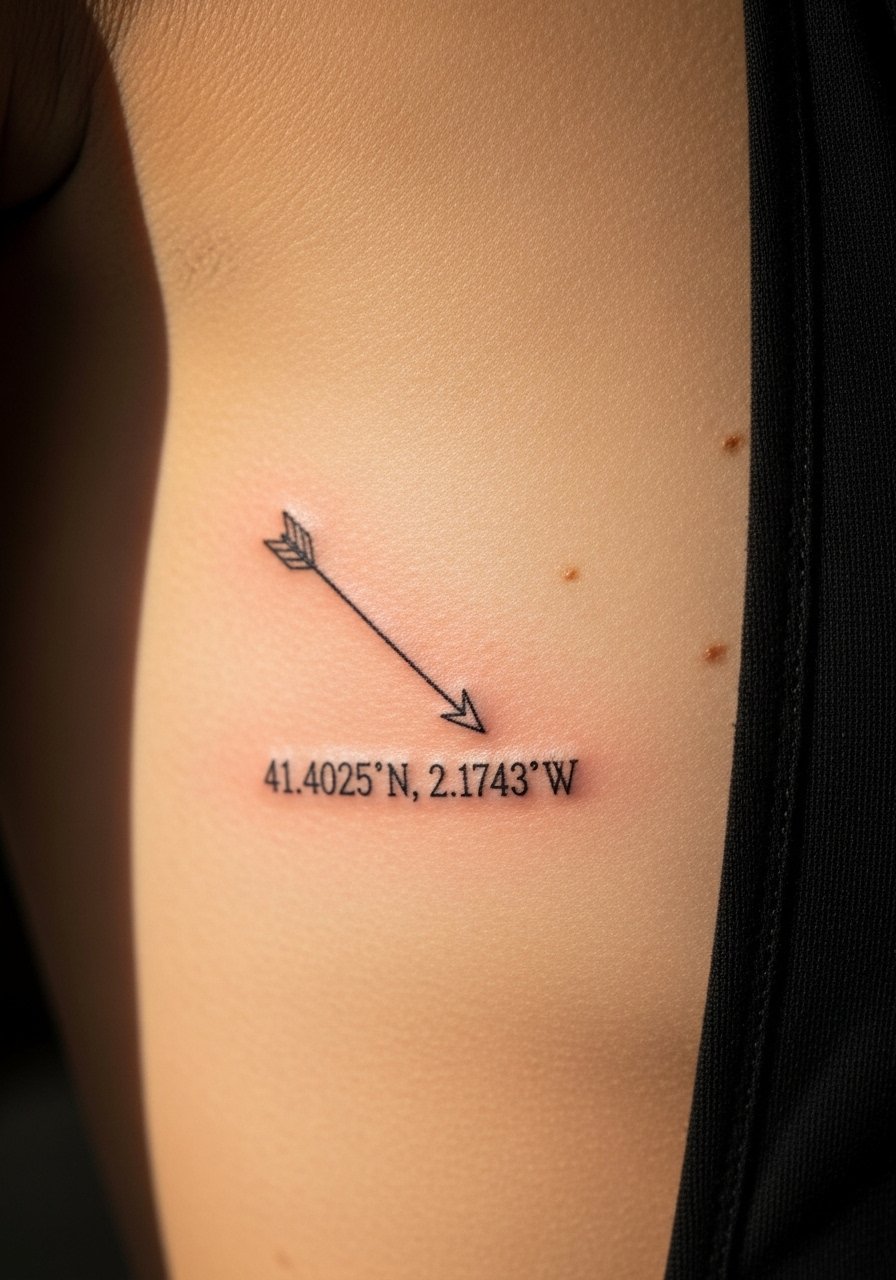
Rib tattoos hurt more than most placements so expect a 7 or 8 out of 10, and plan for a single longer session of 45 to 75 minutes if combined with shading. This layout pairs an arrow with exact coordinates for a place that matters. Tell your artist to use crisp monospace lettering for the numbers and to keep the arrow scale small enough to breathe next to the digits. A common error is crowding the text and arrow together, which causes legibility issues as the ink spreads. Sensitive placements like ribs also need an artist who has experience with breathing techniques and steady linework to avoid wavy letters when you move.
6. Minimalist Arrow Around the Wrist, With a Note About Fine Line Durability
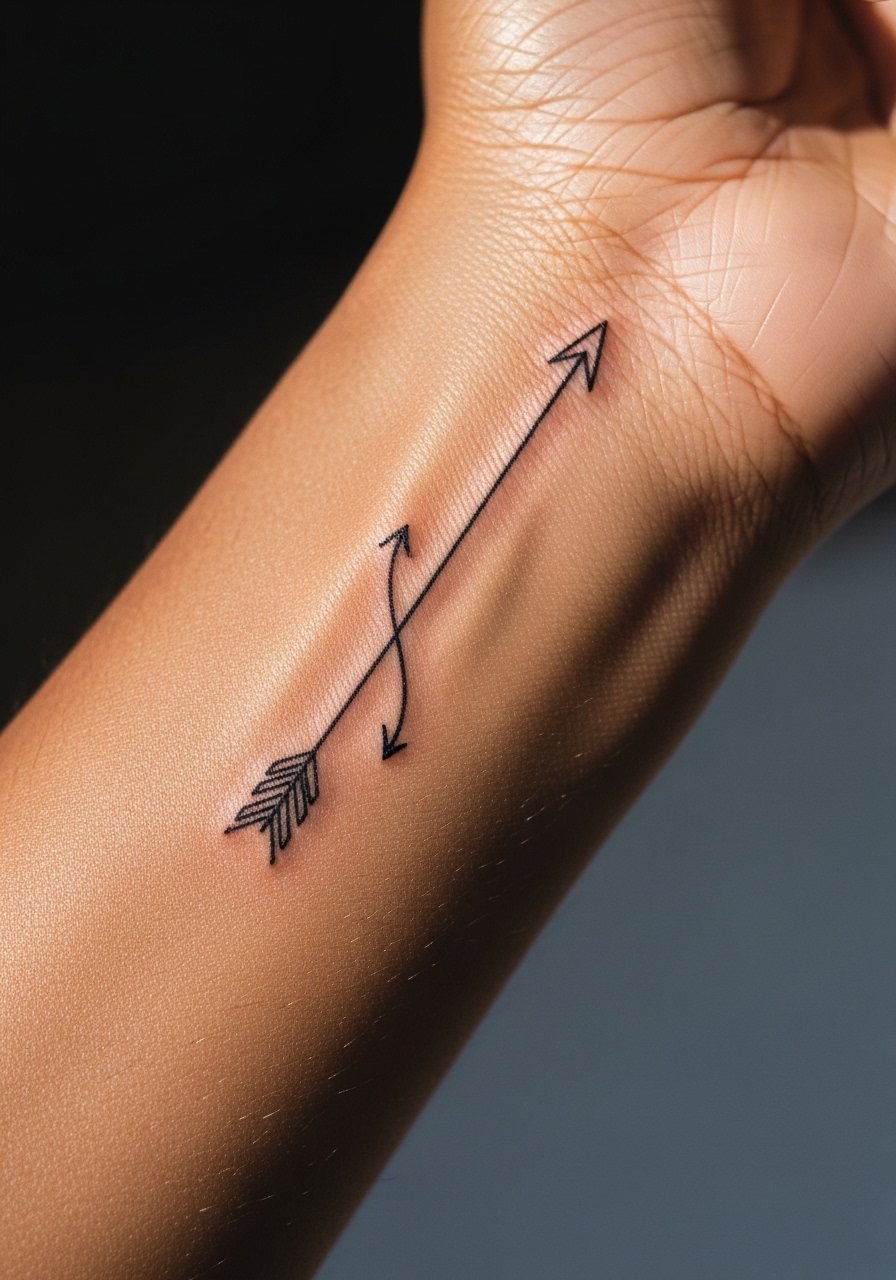
Most wrist pieces are very visible and show wear from sun and washing, so expect a session of 20 to 35 minutes and a pain level around 5. Fine line on wrists has its controversy. One group of artists says wrists blur quickly because of frequent movement and thin skin. The other group says if you allow thicker start and gentle spacing, the lines will remain readable. Ask about their long-term examples before committing. People often request a hairline wrap which fades into an unreadable smudge. The version that lasts uses modest line weight and gives the arrow a small head so the visual language endures over years.
7. Geometric Arrow Cluster on Upper Arm
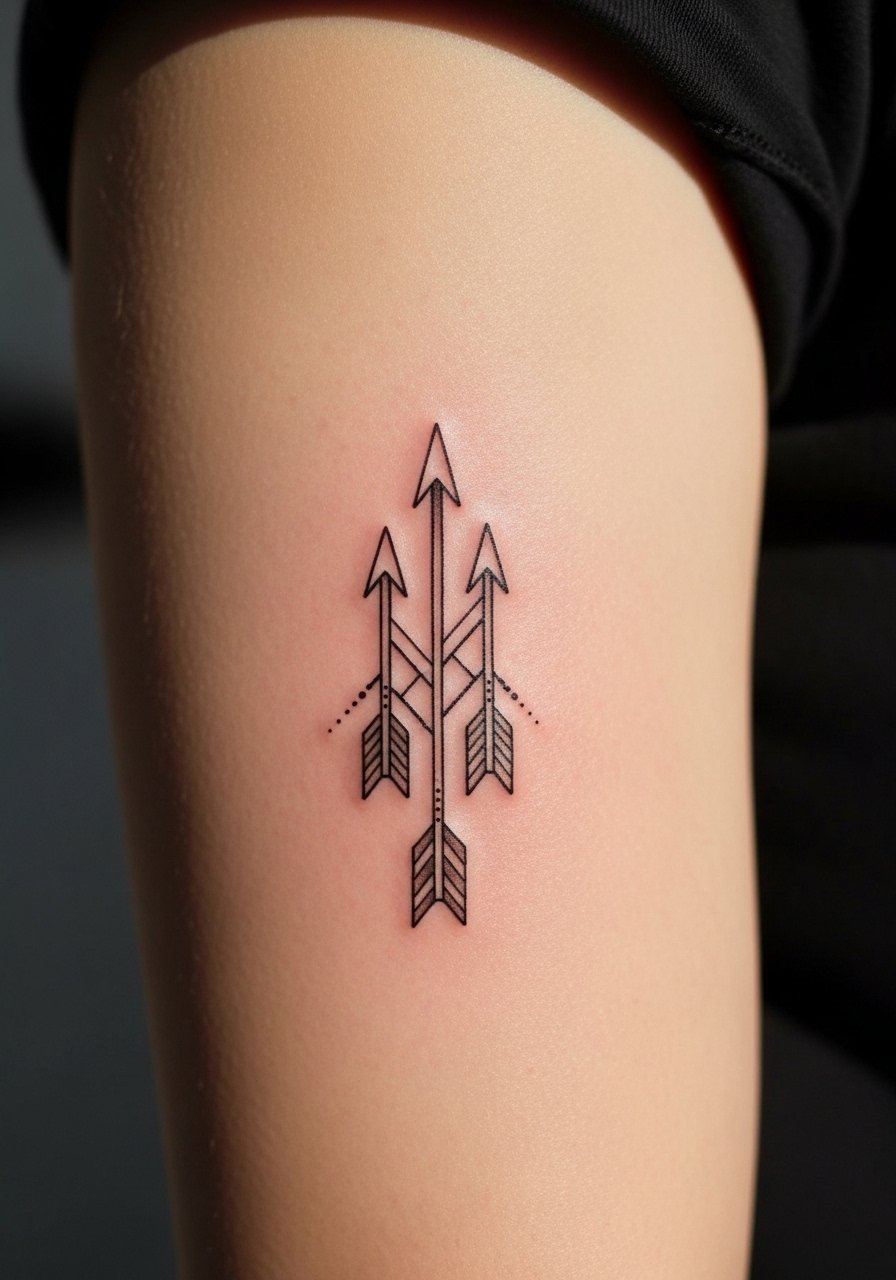
There is something about clustered arrows that reads like a tiny constellation on the upper arm. Upper arm is low pain and ideal for slightly denser work, with sessions usually between 30 and 60 minutes depending on how many arrows you want. Ask for whip shading to keep weight subtle and to avoid heavy blocks of ink that age unevenly. A typical error is cramming too many micro arrows into a small circle, which causes the design to merge after healing. This placement ages well because it gets less sun than forearms, but expect to discuss touch-up around year three if you want the crisp geometric look to remain.
8. Compass Arrow on the Shoulder Blade
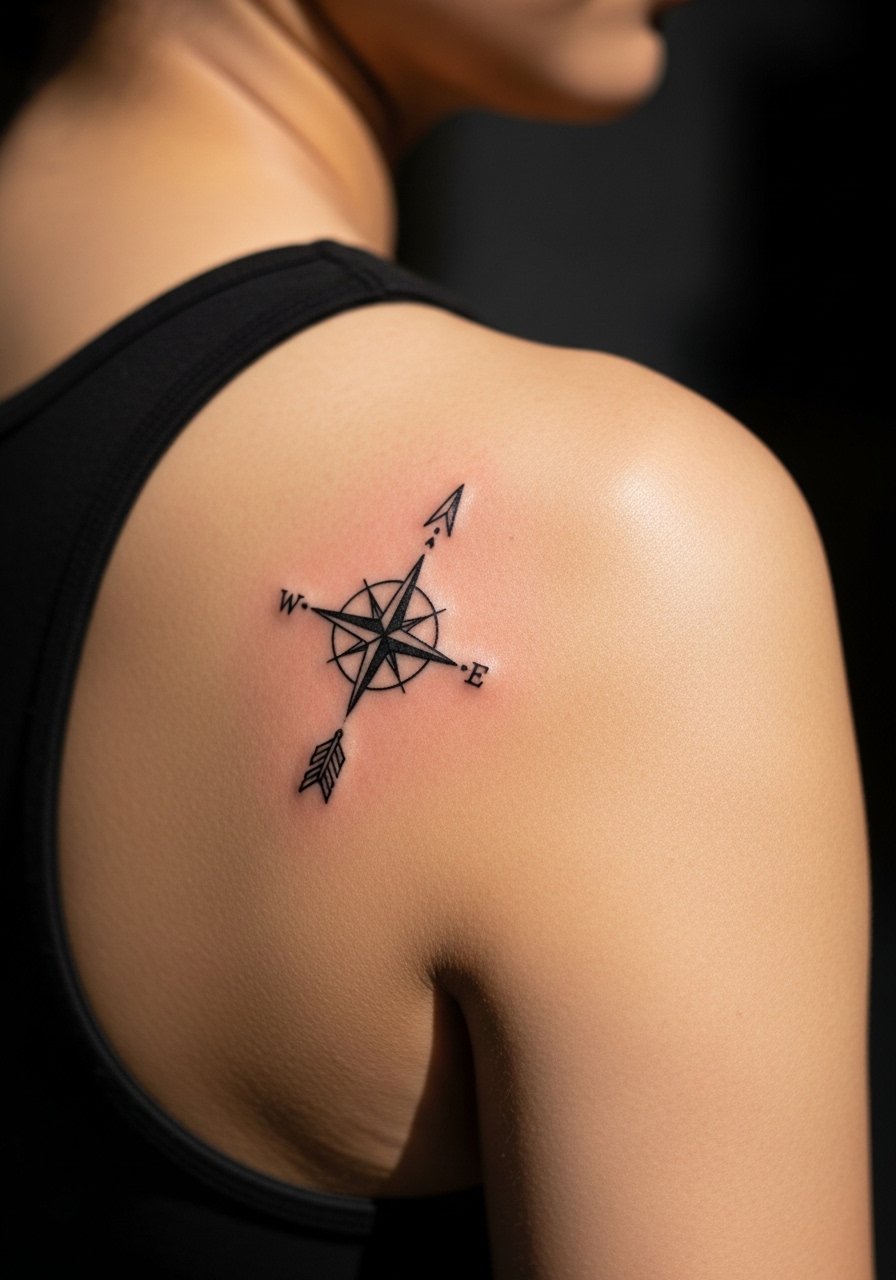
Shoulder blade pieces sit across a broad canvas and tolerate slightly thicker linework, which helps with longevity. Pain is mild to moderate and the session time is typically 30 to 50 minutes. This design pairs an arrow with a tiny compass point and works well when you tell the artist to leave breathing room around the compass rose. People often ask for minute details that later blur, so a common tip is to scale up the central points rather than shrink everything to fit. Also take discovery pathways like tattoo conventions and local portfolios when you search for someone experienced with back placements.
9. Tiny Arrow and Crescent on the Side Finger
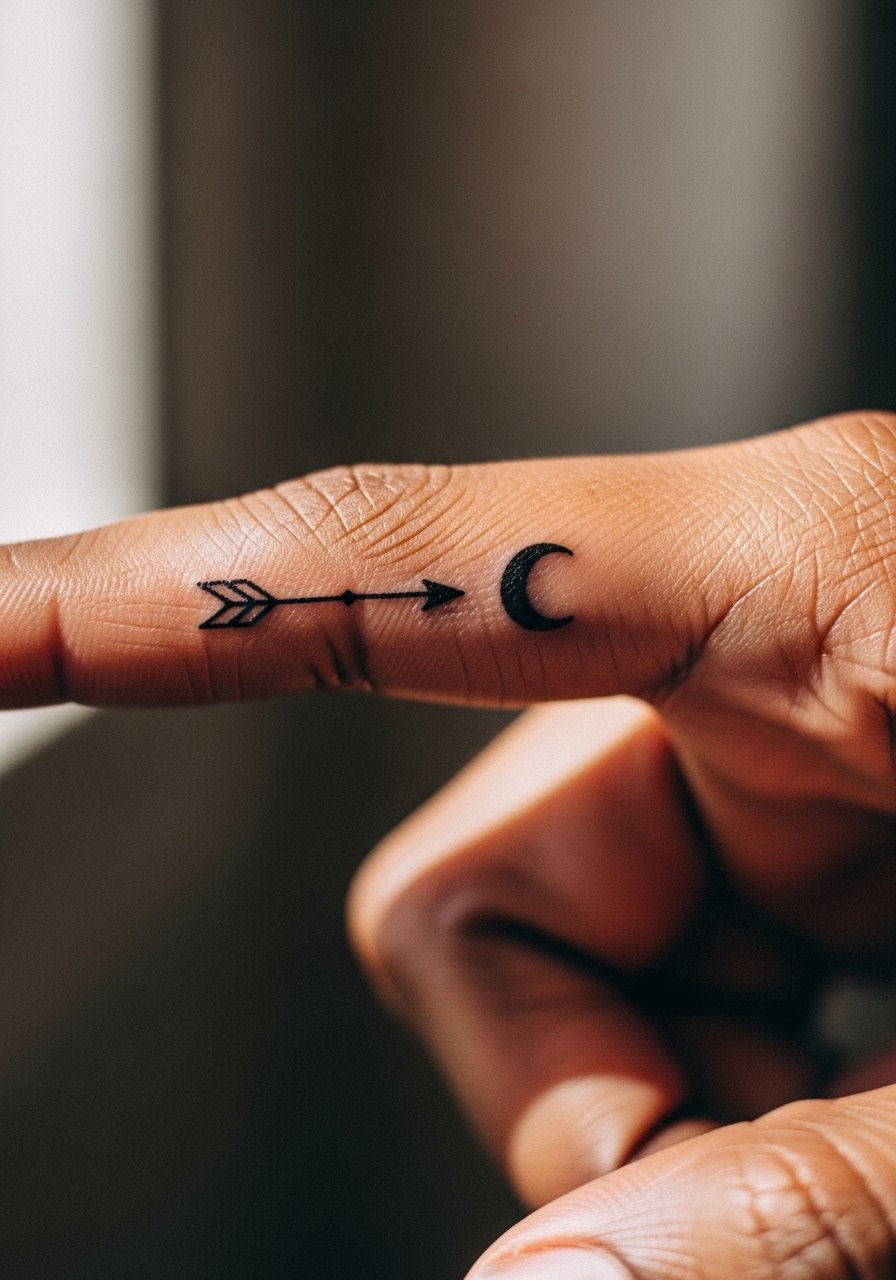
Finger tattoos are highly visible and prone to rapid fading because of constant use and washing. Expect a sharp sting and a short session under 20 minutes. The usual mistake is asking for high detail in a very small space. Recommend keeping both the arrow and crescent bold enough to survive two to three years before a likely touch-up. Be aware that finger placements can affect certain professions, so consider long-term visibility when choosing this spot. If you do go ahead, ask for a plan with realistic touch-up timing and for the artist to explain aftercare steps specific to hands.
10. Broken Arrow Nape Tattoo
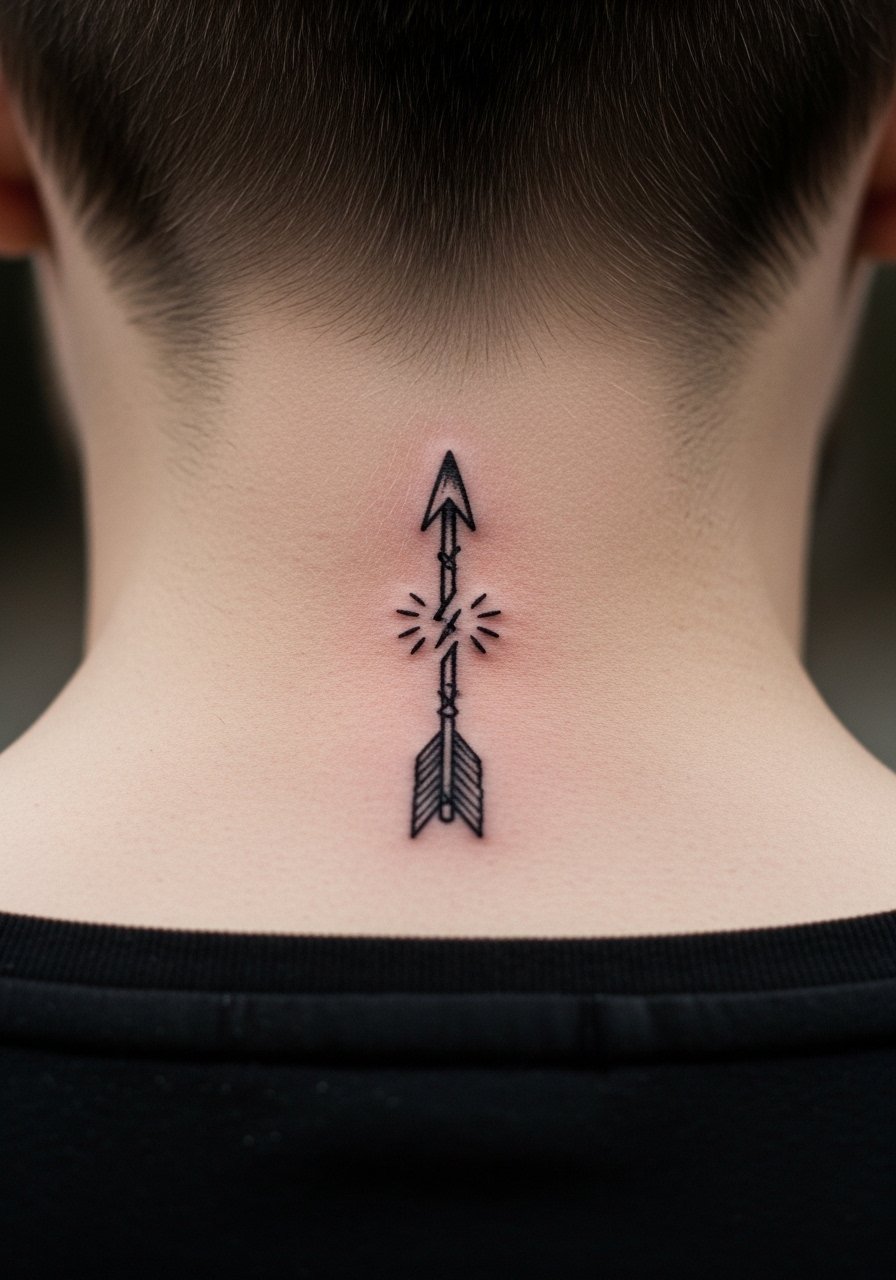
Nape placement is private and shows only when hair is up, which helps with sun protection, and the pain level is typically a 4 to 6. A small broken arrow feels symbolic and takes 20 to 30 minutes. Tell your artist you want the break placed off-center intentionally so it reads like movement rather than damage. A frequent error is perfectly centering the break which looks mechanical on the curve of the neck. Plan for a touch-up if you sleep on your back a lot during the healing window, because pressure can cause scabbing that disrupts linework.
11. Arrow Winding Through a Tiny Floral Vine on the Hip
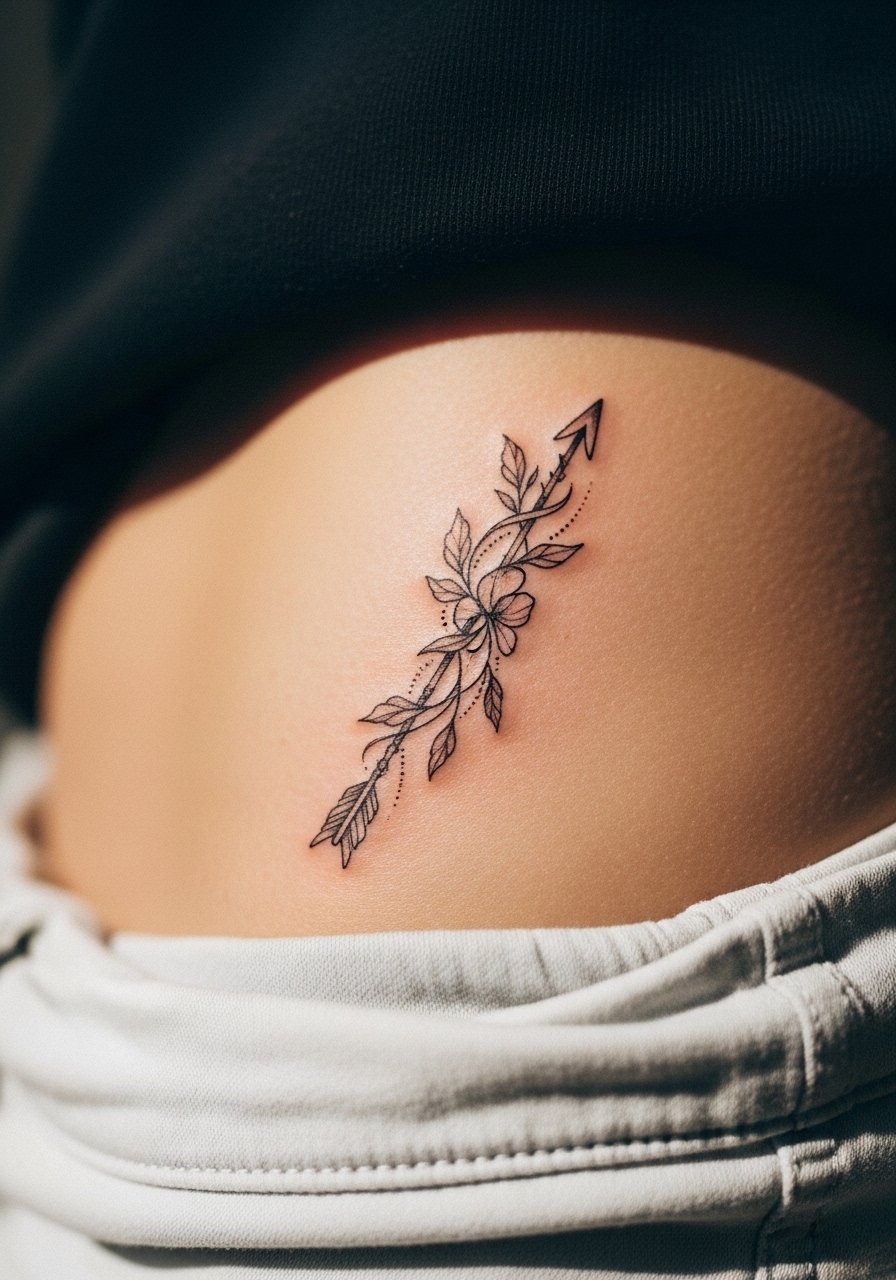
Hip tattoos are a good option if you want something that is mostly private but can peek out with swimwear. Pain varies but often rates a 5 to 7, and the session is 30 to 60 minutes for a small composition. For this piece, request light dot shading and minimal saturation in the blooms to avoid a blotchy look as it ages. People sometimes ask for dense floral fills next to fine arrows and then need a touch-up because the contrast disappears. Also respect the floral style origins if you borrow motifs from specific cultures and consider a slight variation to honor that lineage.
12. Tiny Traditional Arrow on the Calf in Bold Blackwork
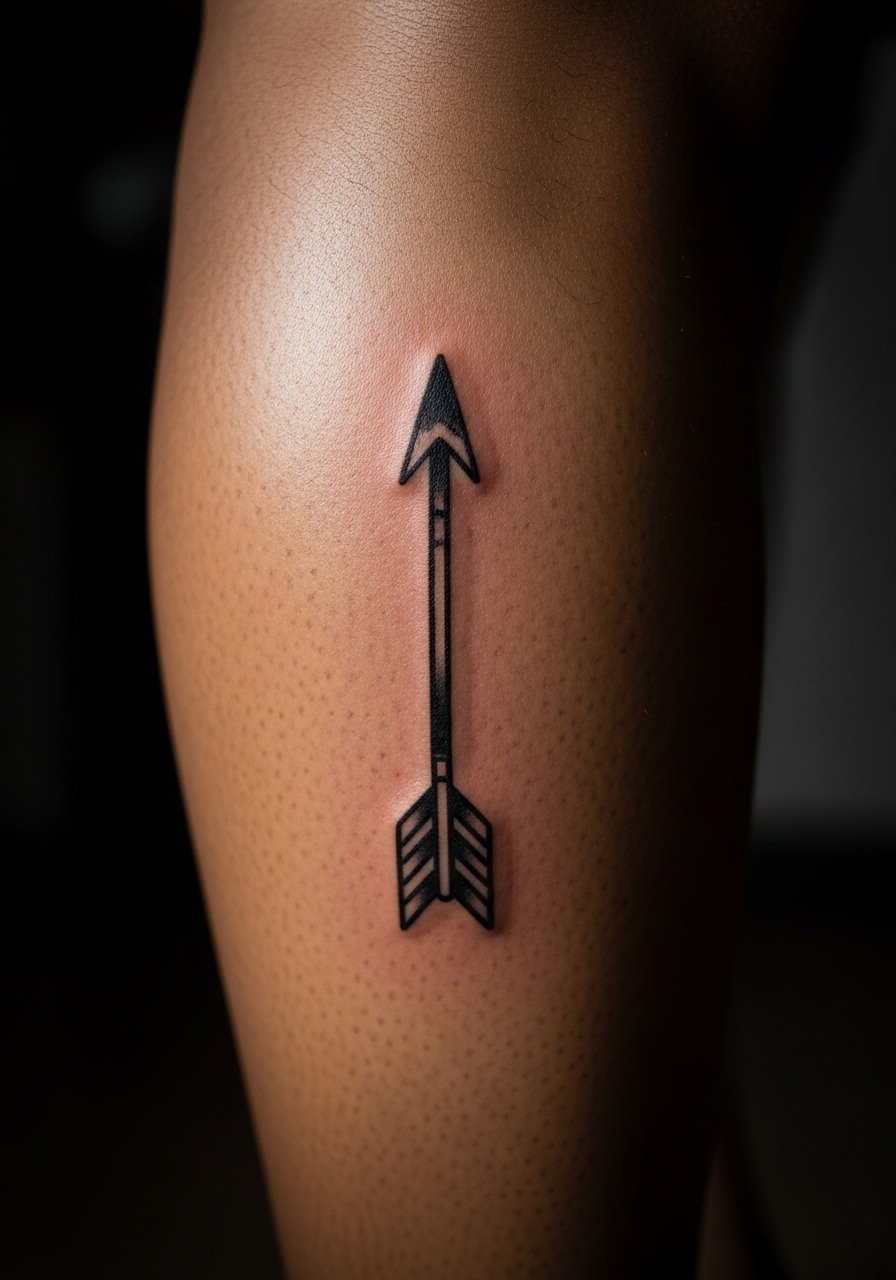
There is visual payoff to choosing a slightly bolder arrow in traditional blackwork when you want durability. Calf placements are low pain and forgiving, usually finished in 30 to 45 minutes. Ask for bold outlines and moderate saturation rather than micro detail so the arrow reads from a distance and keeps its saturation longer. The common mistake is over-detailing a tiny traditional piece which then breaks down into indistinct grey. This choice is best for people who want low-maintenance ink that can hold up without frequent touch-ups.
Frequently Asked Questions
Q: Will fine line arrows on the forearm blur into each other if I get several small pieces nearby?
A: It depends on spacing and line weight. From what I have seen, giving each arrow at least a finger-width of space and asking for modest line weight reduces the chance of merging. Talk to your artist about healed examples in their portfolio to see how their linework settles over time.
Q: Do finger and knuckle arrow tattoos need different aftercare than other placements?
A: Yes, hands and fingers are exposed and wet often, which affects healing. Follow a thorough wash-and-pat routine and avoid submerging in water for long periods during the first two weeks. Expect faster fading and plan for possible touch-ups around year one to two.
Q: Are ribcage arrows more likely to fade or need touch-ups because of skin stretch?
A: Ribs move with breathing and can affect how ink sits while healing. Small pieces can fade unevenly if placed directly over high-motion areas. Ask an artist experienced with rib work to show healed pieces and to advise on scale and depth to minimize early fading.
Q: How much does placement influence the need for a touch-up on arrow designs?
A: Placement is a major factor. Areas with more sun exposure, friction, or movement typically need touch-ups sooner. Calves and upper arms usually fare better than fingers, wrists, and ribs. Plan your design with that in mind and budget for a touch-up if you pick higher-wear spots.
Q: Can a tiny arrow be combined with text like coordinates without losing legibility?
A: Yes, but keep the text simple and sized appropriately. Monospace or thin serif numerals tend to age more predictably than ornate scripts in tiny sizes. Ask your artist to mock up real-scale placement so you can read it at a glance before the needle hits skin.
Q: How do I find an artist who is skilled with tiny arrows and fine-line detail?
A: Use discovery pathways like local tattoo directories, portfolio tags on social platforms, and checking artists at conventions. Look for healed photos rather than fresh work and for examples of small text and linework on similar skin tones or placements. Trust your instincts during the consult and ask about healed touch-ups they have done.
