
Someone I know spent almost a year staring at fine line collars on Instagram, only to get a collarbone wolf that blurred in twelve months. The real problem is picking a style that suits your skin, movement, and patience for touch-ups. These 15 animal tattoos cut through trends and name the tradeoffs so you can choose something that still reads well after a few summers of sun and sneakers.
1. Fine Line Wolf Silhouette on the Collarbone
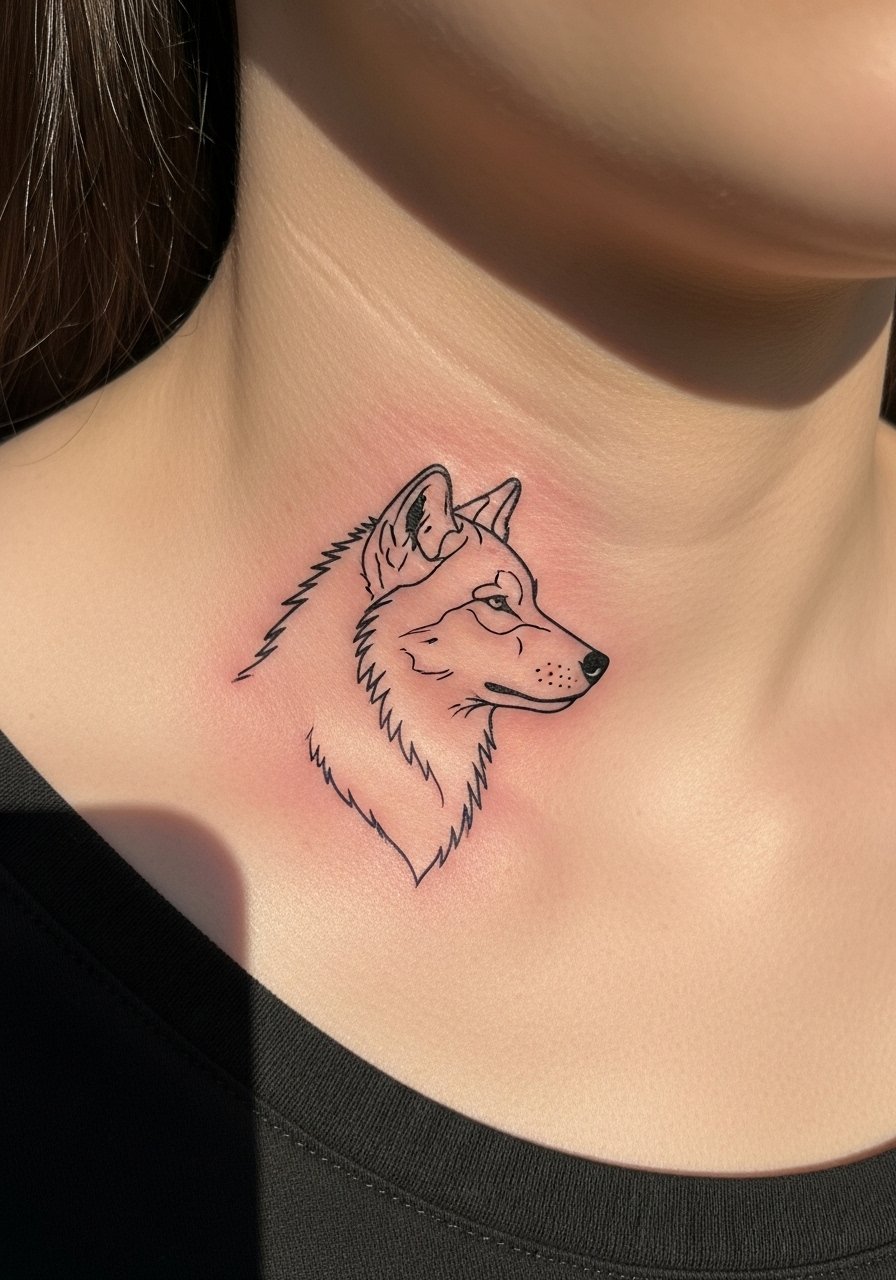
Someone I know booked this after seeing the silhouette on a friend. Fair warning, fine line on a collarbone sits where clothing rubs and movement stretches the skin. Artists split into two camps about fine line longevity. One camp says these lines blur within a year if packed too shallow. The other camp says proper depth and spacing keep the silhouette crisp for years. Tell your artist you want slightly more spacing between parallel strokes and ask about touch-up policy. Pain is moderate for the collarbone and a single short session usually does it. Expect subtle softening at six months and a clearer edge after a touch-up around year two.
2. Watercolor Butterfly on the Outer Forearm
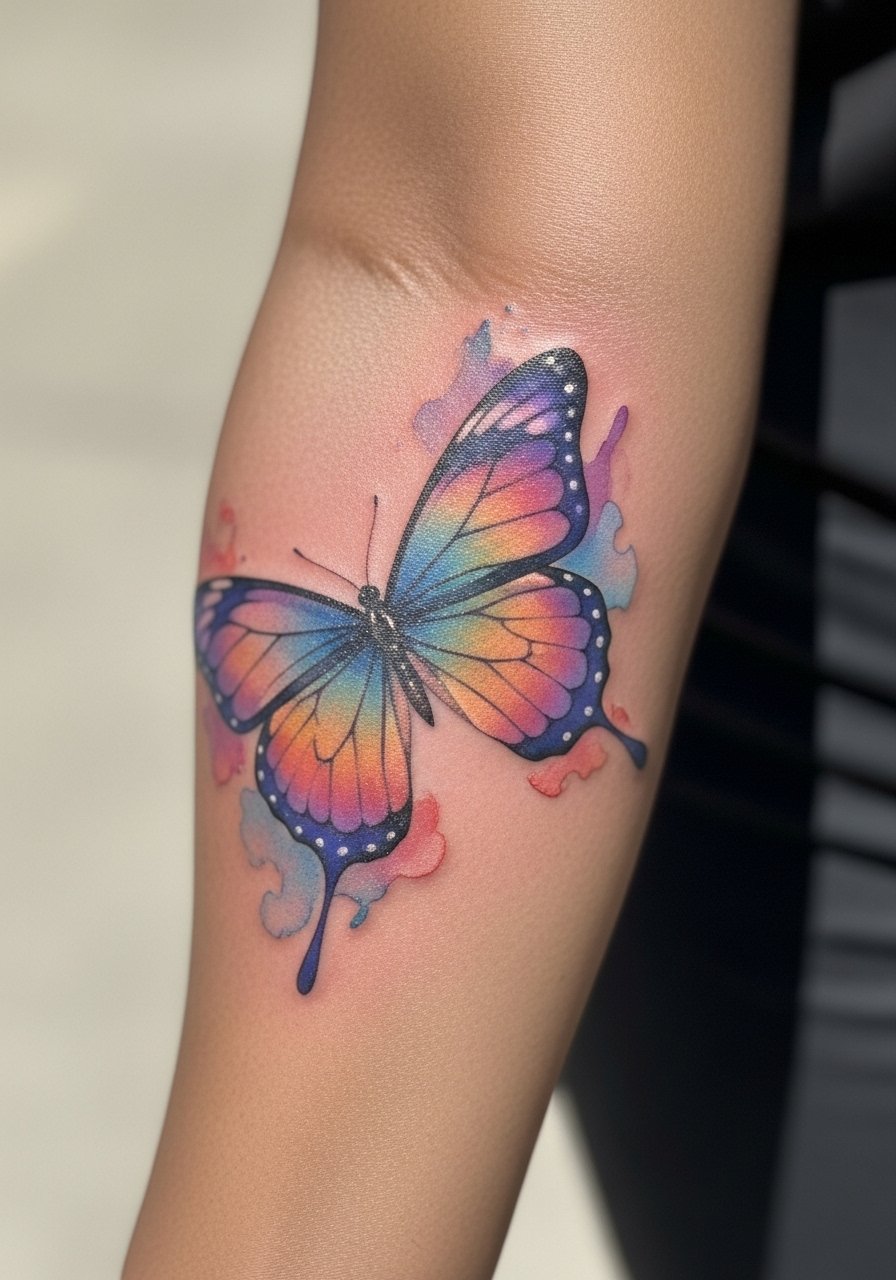
I see this one on forearms during convention season. The airy washes read beautifully from arm movement, but watercolor fades faster than solid black when exposed to sun. Ask for a stronger outline or a black-and-gray underlayer when you want color that lasts. This placement is low on the pain chart and works well for first-timers. Mention during the consult that you plan summer runs and ask about protective touch-ups at year one. A common mistake is letting reference images with washed edges dictate line weight. Bring photos that show where you want anchors so the color keeps a shape as it settles.
3. Neo-Traditional Elephant Mandala on Outer Thigh
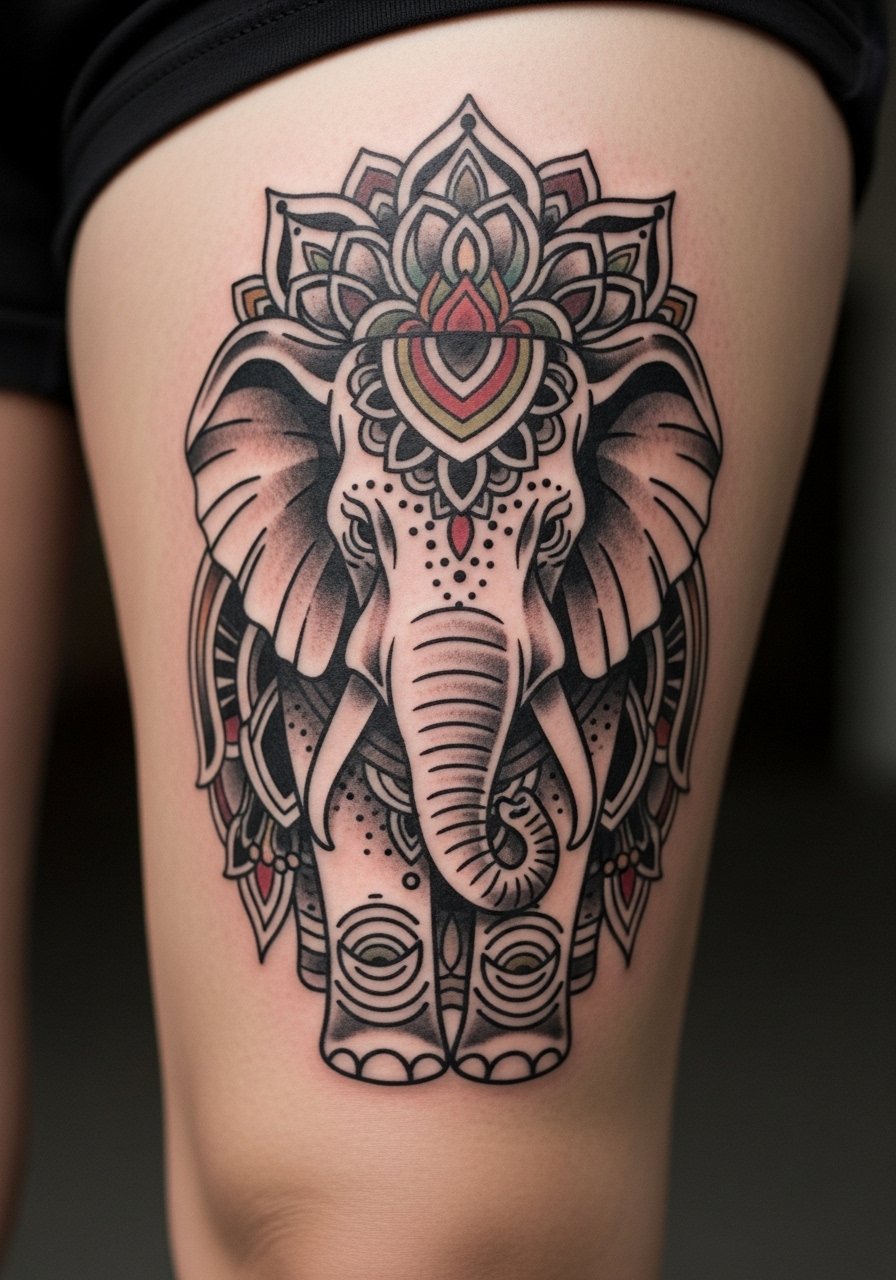
The thigh gives room for ornament and a mandala halo. For darker skin tones, heavier blackwork helps the design read in photos. If you want the familial and wisdom notes this animal carries, ask for high-contrast linework and deeper saturation in shadow areas. Expect a few sessions for a 6–8 inch piece and more tenderness during shading. Thigh tattoos can handle detail well, but a frequent mistake is placing too close to seams where stretching from weight change makes features warp. Talk with your artist about mockups and a temporary placement sticker to see how proportions move with your body.
4. Minimalist Cat Outline on the Inner Wrist
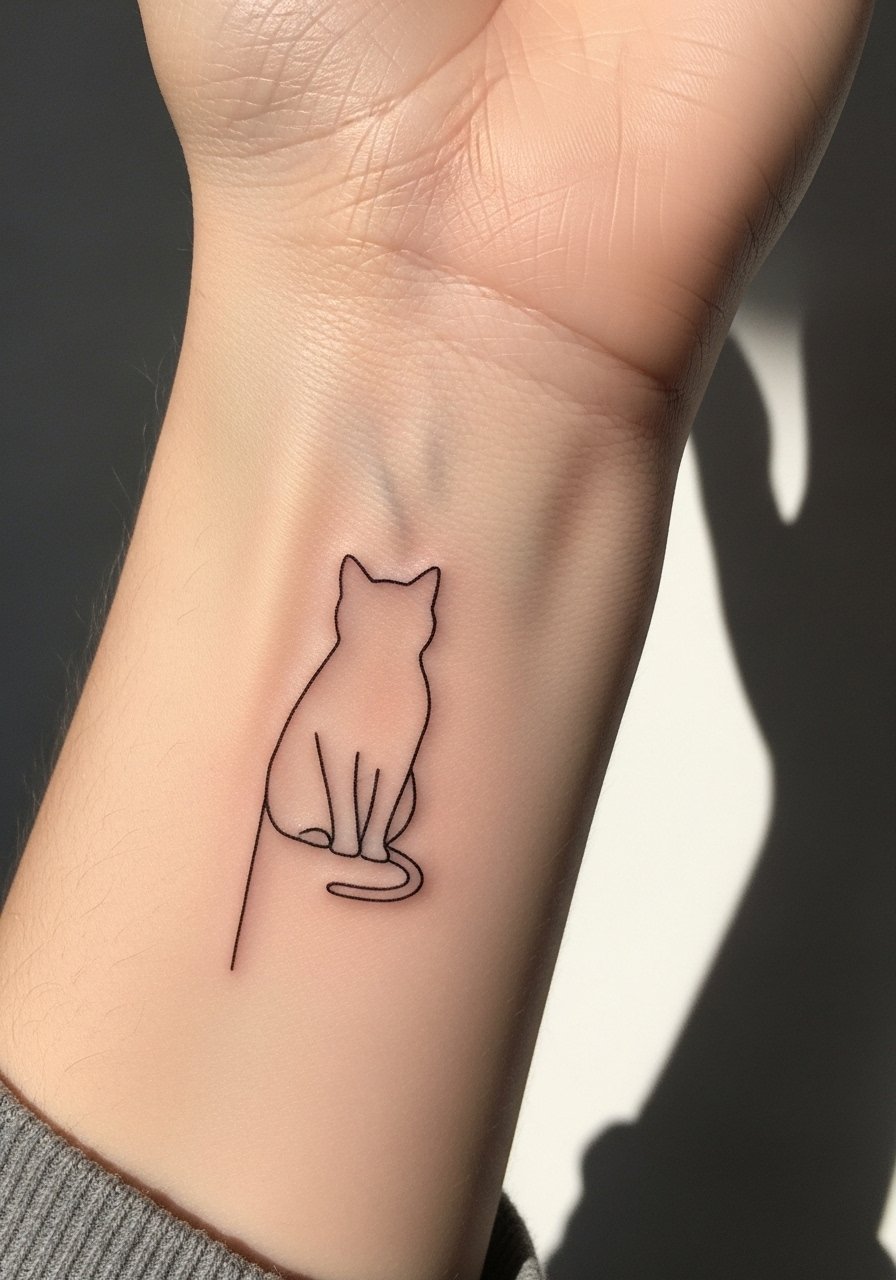
This is a go-to for people who want an everyday reminder without a lot of bulk. The inner wrist heals fast but gets sun and soap exposure, so size matters. Fine line cats here look sweet, but if you work with your hands they can soften into a smudge. Ask for slightly bolder linework than your reference if you want it to last two years without a touch-up. Session time is short and pain is mild. The common mistake is copying ultra-thin Instagram lines and expecting the same hold on active skin. If you prefer a cleaner long-term look, opt for a one-line outline with a small area of blackwork for anchor.
5. Blackwork Owl on the Ribcage
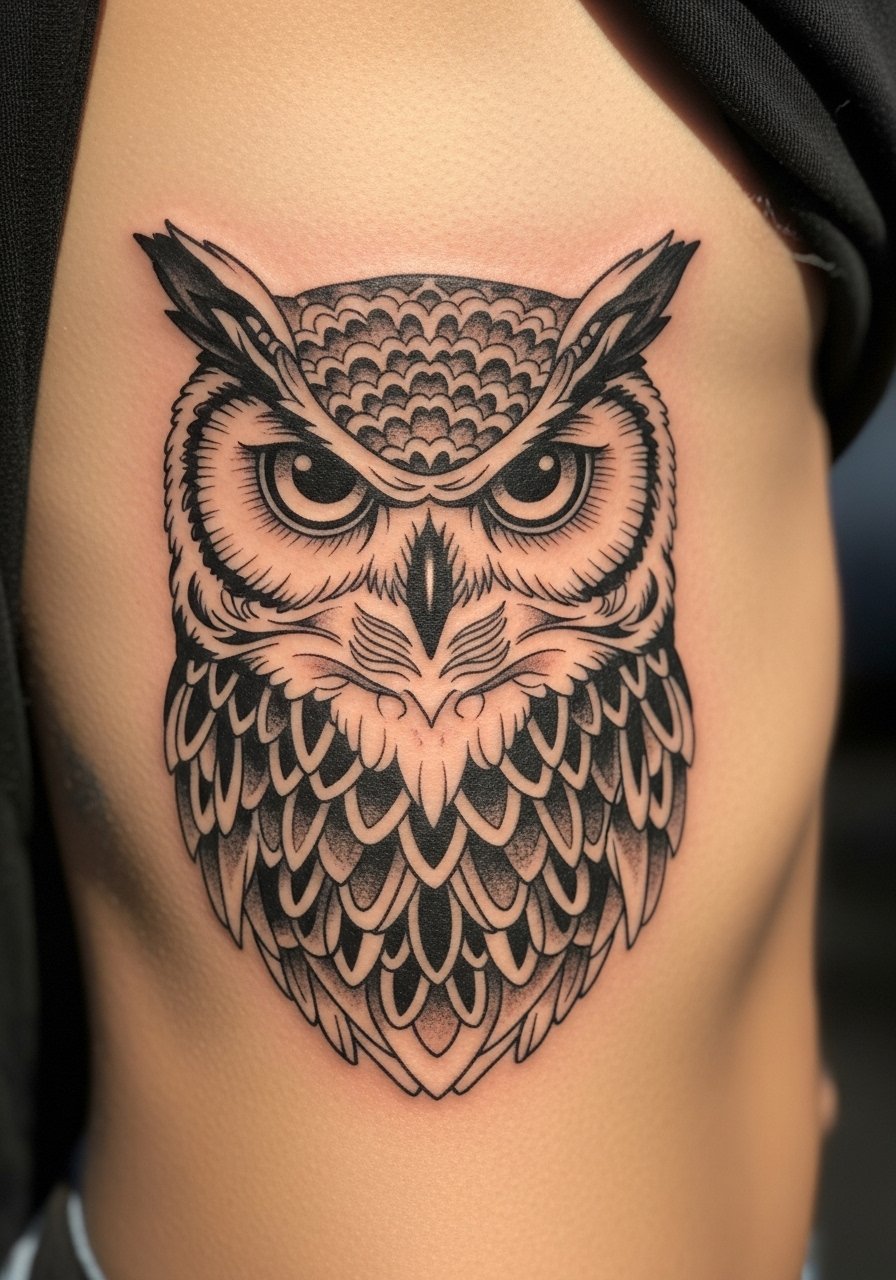
Fair warning, ribs hurt more than arms. The payoff is dramatic contrast. Blackwork reads strongly on curves and suits those who want a piece that holds up against fading. Artists debate whether to use Saniderm or dry healing for large blackwork ribs. One side favors barrier dressings for less scabbing and cleaner lines. The other side prefers dry healing to avoid trapped moisture and dull saturation. Ask which method your artist prefers and why. Two-session projects are common, and a touch-up at three to six months is not unusual to keep saturation even along ribs that flex with breath and movement.
6. Micro-Realism Fox on the Ankle
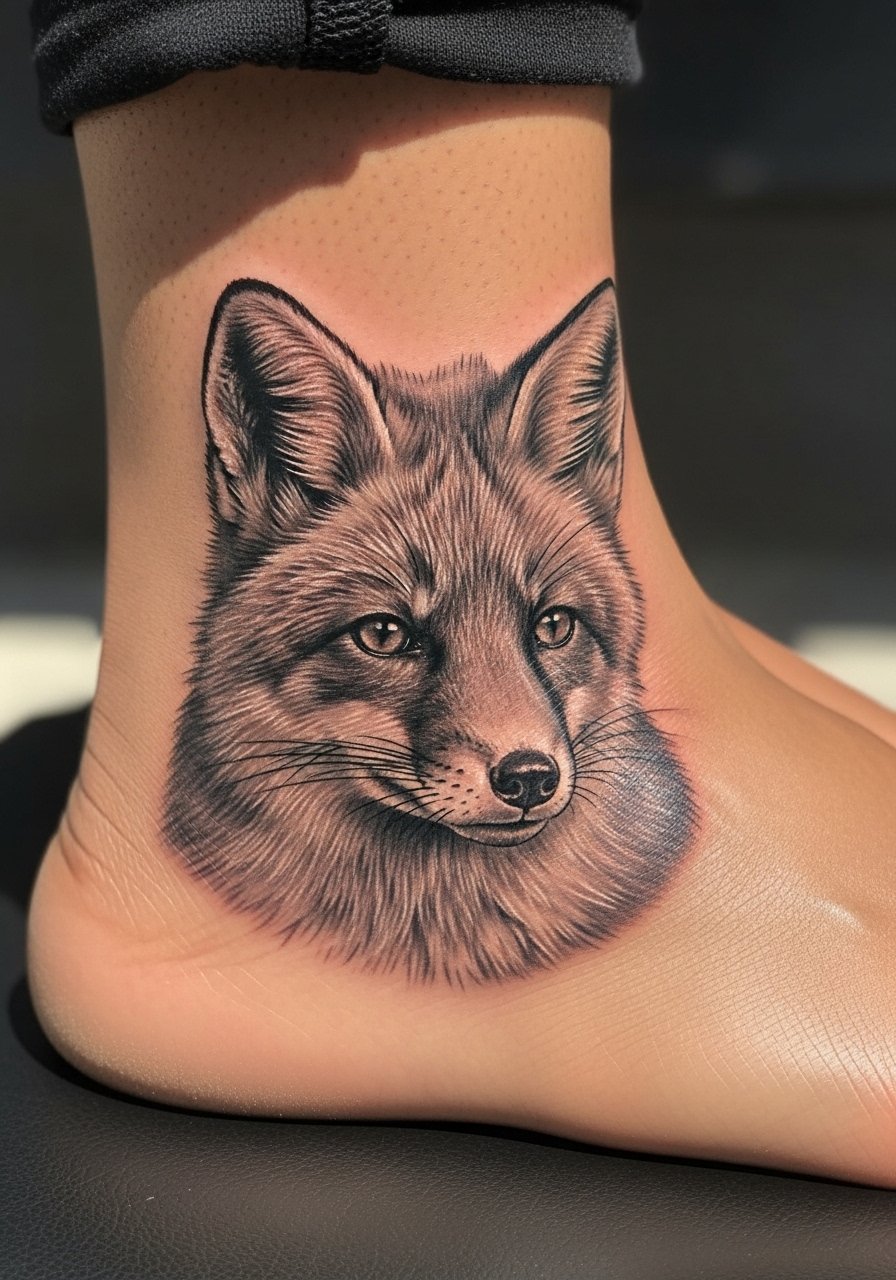
Ankles show detail in small packages but take pedal wear and shoe rubbing into account. Micro-realism needs precise dot work and subtle shading. I recommend anchoring the portrait with a tiny patch of black to prevent the image from flattening over time. Ask for a stencil preview at life size so you can see how the fox will sit over bone. Expect a single session but plan on a six-month check to see if shading needs retouch. A frequent mistake is going too small for the level of detail requested. If you run or wear ankle straps, consider placement slightly above the bone.
7. Ornamental Snake Wrist Cuff
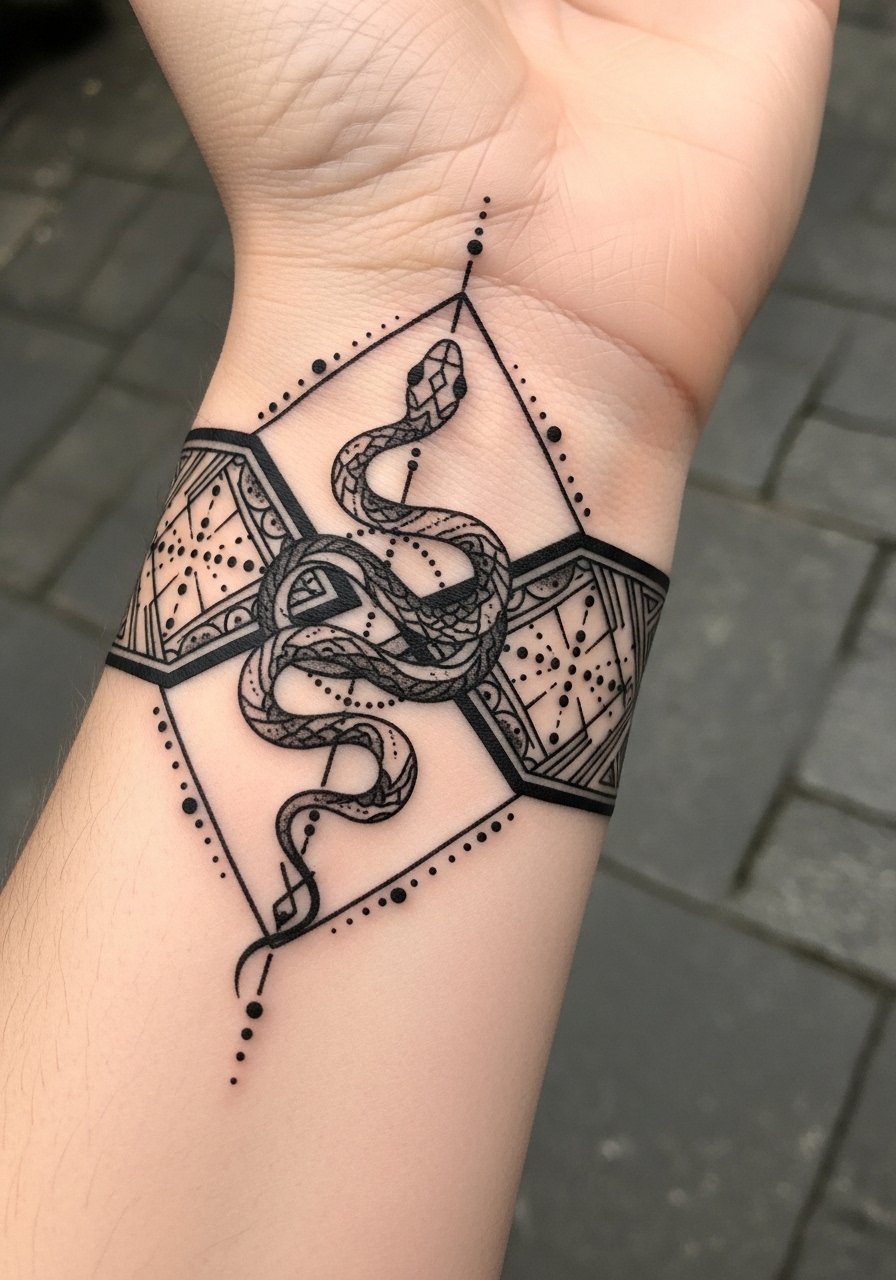
Wrist cuffs wrap elegantly and can be built as a band or extended into a sleeve. The design benefits from solid linework and stipple shading rather than ultra-thin fills. If you love the rebirth theme, ask for a thicker anchor line on the inner band so the shape keeps when the skin moves. Healing here can be fidget-prone because the wrist is used constantly. Expect one to two sessions and brief tenderness. The mistake I see most is insisting on tiny details that later blur when the skin stretches. Ask your artist for a mockup that shows the cuff both relaxed and flexed.
8. Traditional Anchor with Swallow on Upper Shoulder
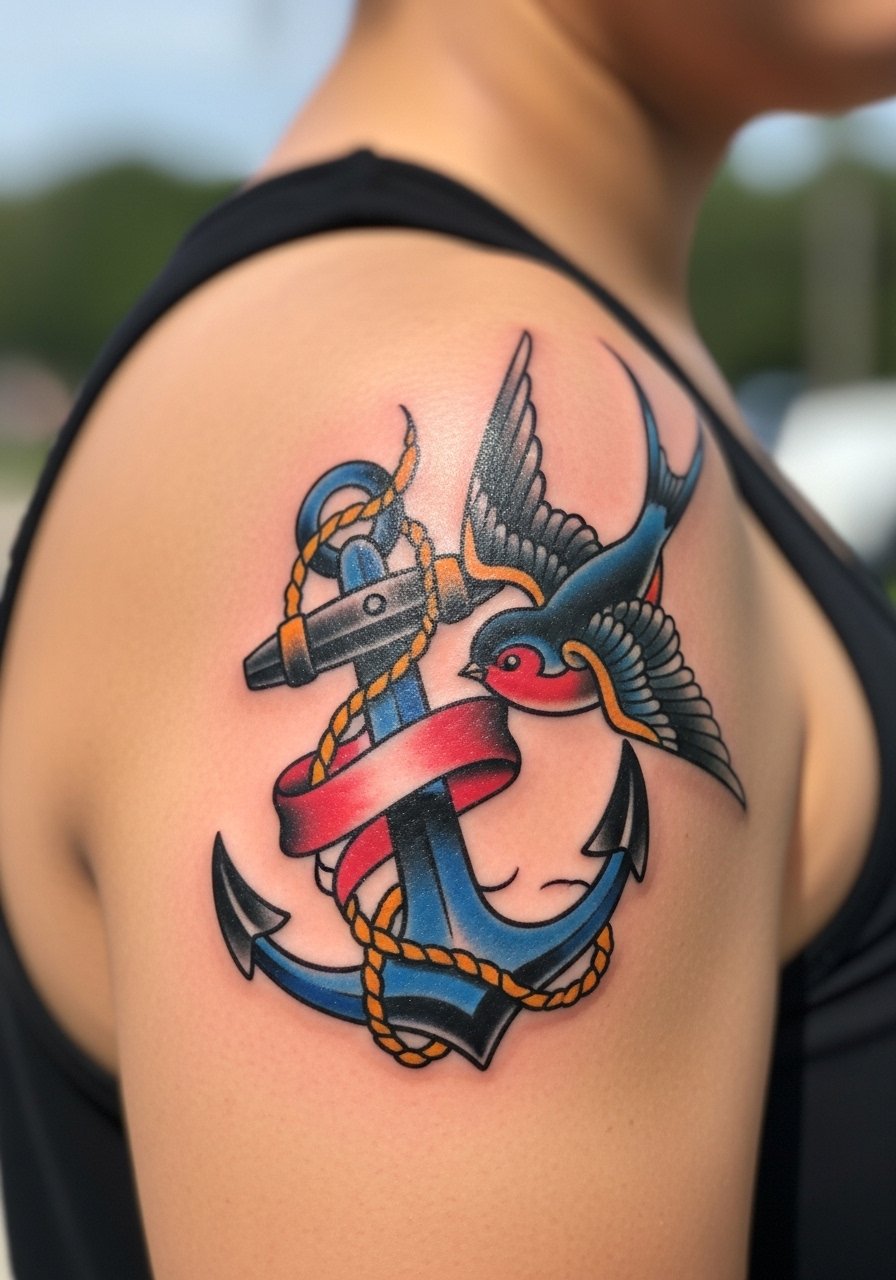
Traditional sailor motifs age predictably because of the strong outlines and saturation. The shoulder tolerates color well and photographs clearly across outfits. If you want a piece that stays true, keep heavy outlines and opt for primary color fills rather than ink washes. Session time is usually a single appointment and pain is low. A common mistake is requesting thin outlines to mimic a vintage photo. For longevity, heavier contour lines help color hold. If you plan future sleeve work, place the swallow where a later composition can tuck around it.
9. Ignorant-Style Rabbit on Inner Bicep
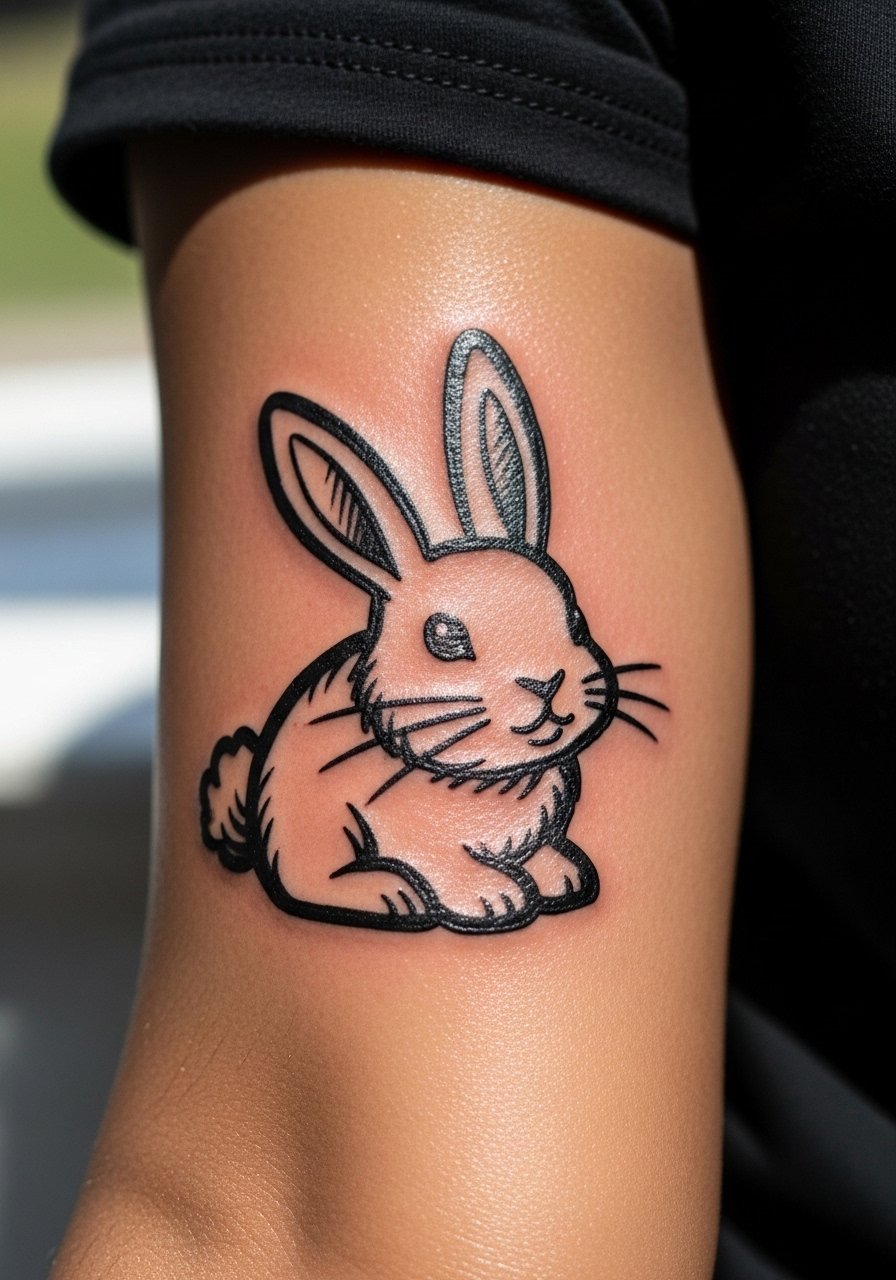
Ignorant style thrives on bold, confident strokes and a bit of imperfection. Inner bicep is a discreet spot that flatters movement but can stretch with muscle changes. Tell your artist you want loose confident lines rather than micro-detail. Sessions are short and the shading minimal. People often ask for added tiny fills that kill the carefree vibe. If you prefer the quirky look to last, resist overcomplication. Also note that inner bicep experiences friction from clothing, so mention your wardrobe during the consult.
10. Fine Line Hummingbird on the Side of a Finger
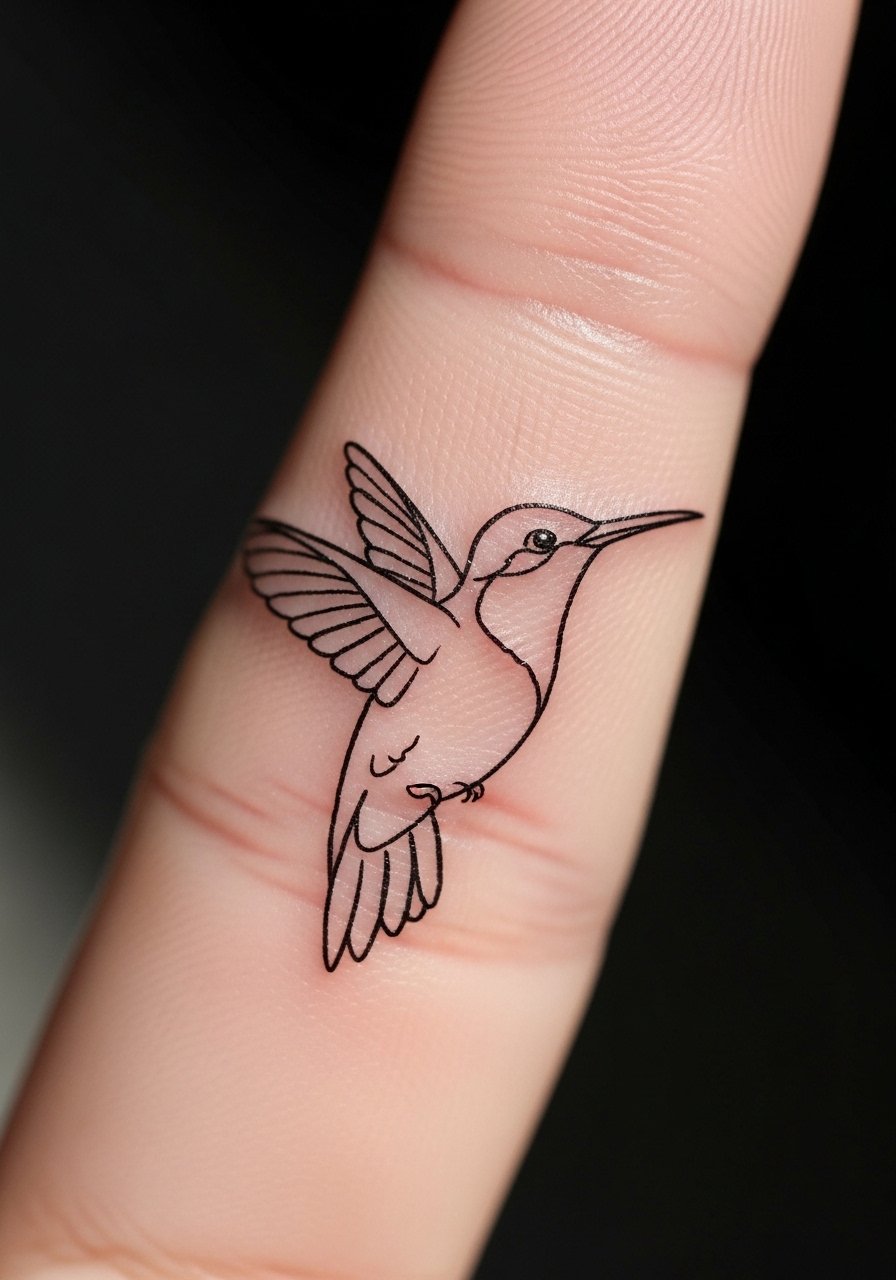
Finger placements look delicate but they are famously high-maintenance. Fine line on a finger divides artists into two camps. Some say fingers blur quickly and need bold outlines to survive. Others say careful depth and spacing can keep fine lines intact for years. If you want the hummingbird to keep its wing definition, ask for slightly more line weight than a typical fineline piece. Expect frequent touch-ups at year one. Also consider a blackwork backbone at the base of the design so it reads from a distance. The skin here renews quickly and constant washing speeds softening.
11. Patchwork Deer Antler as a Forearm Starter
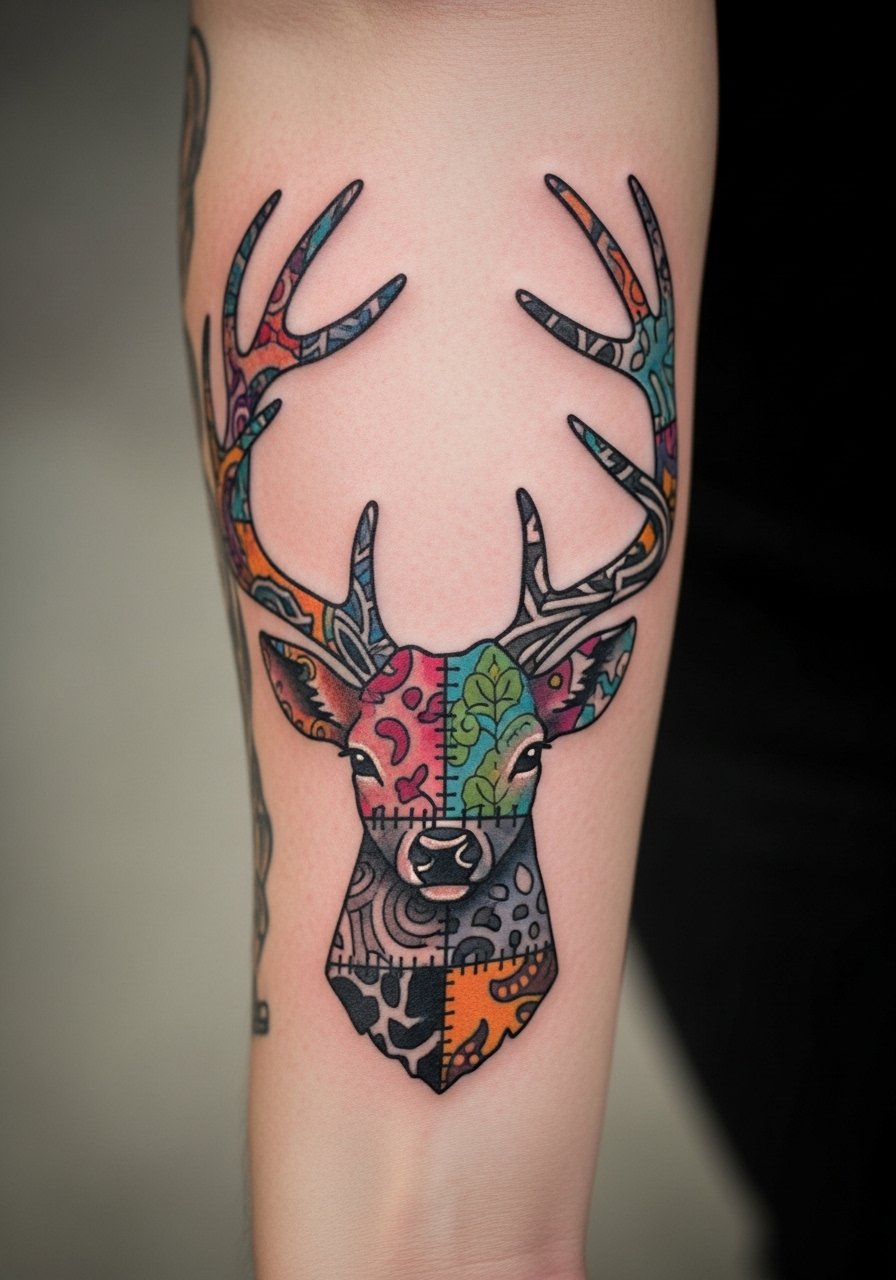
Patchwork pieces give you room to build a sleeve in stages. Start with a strong anchor like a deer antler and add guests or elements around it. Tell your artists you plan for future additions and ask them to leave negative space for flow. Forearm placement reduces stretch-related distortion and is easier for touch-ups. The common mistake is treating a first piece like a final sleeve. Plan spacing and color balance with a loose map. Sessions will be staggered and you should expect a touch-up after the initial healing before adding more.
12. Watercolor Koi Fish on the Back Calf
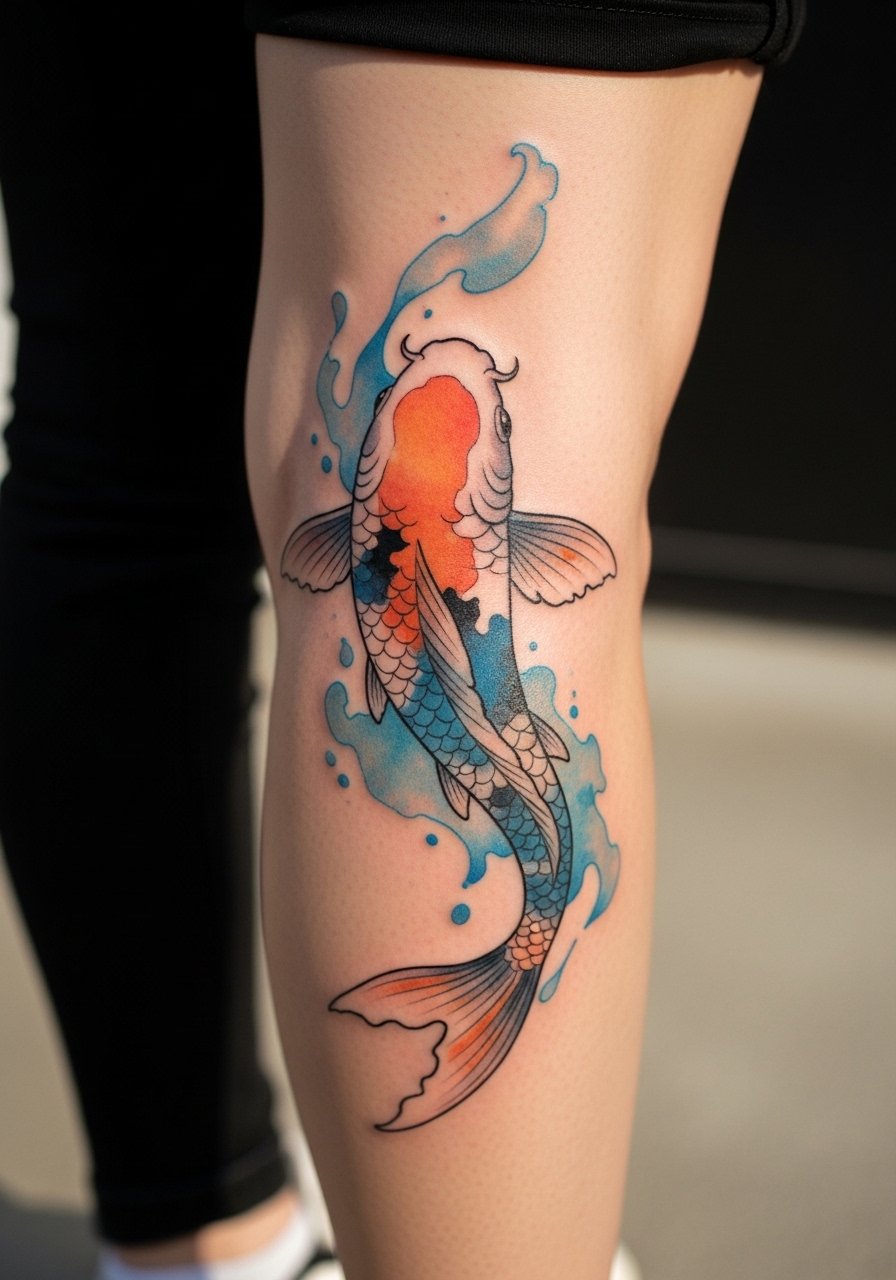
Calf tattoos move with the leg and let long vertical designs breathe. Koi shapes look fantastic in watercolor when the artist anchors the fins with subtle darker veins. Color fade is the main risk if you spend lots of time in the sun. Ask for slightly higher saturation in shadow areas and a faint black outline under the belly so the fish keeps depth as the pigment lightens. Expect two sessions for a tall vertical piece and moderate pain during shading. If you like to run, choose placement a touch higher to avoid calf compression from certain running shorts.
13. Neo-Traditional Lioness on the Upper Arm
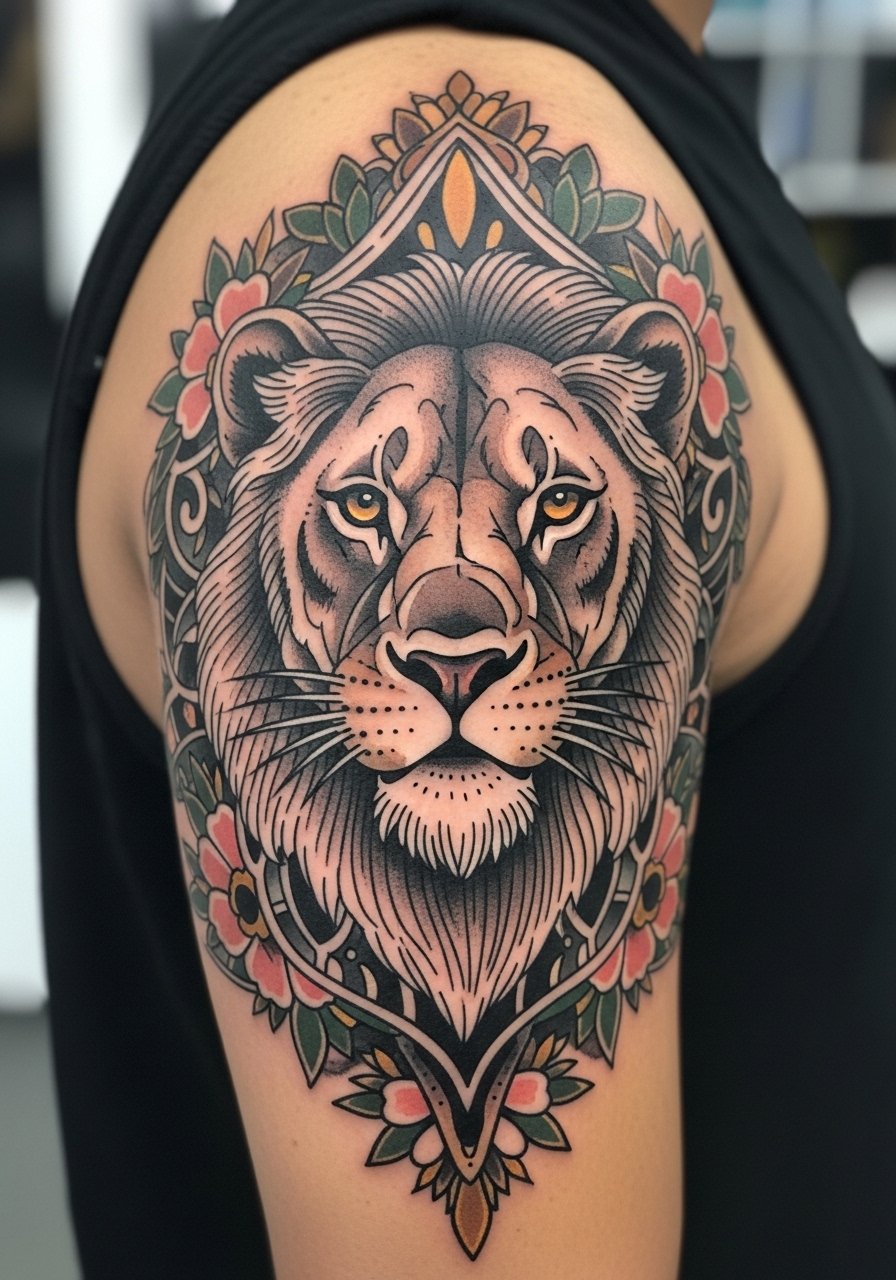
Lioness imagery leans toward courage and protection. Neo-traditional approaches give room for florals and ornament without losing the animal's face. Upper arm placement is forgiving for shading and will age more predictably than the rib area. During the consult ask for strong linework around facial features so the expression stays readable as the piece heals. A common mistake is crowding the mane with too many fine curls. Sessions vary based on size and you can often complete a solid upper arm piece in two appointments with a touch-up later to refine saturation.
14. UV Paw Print on the Side of a Finger
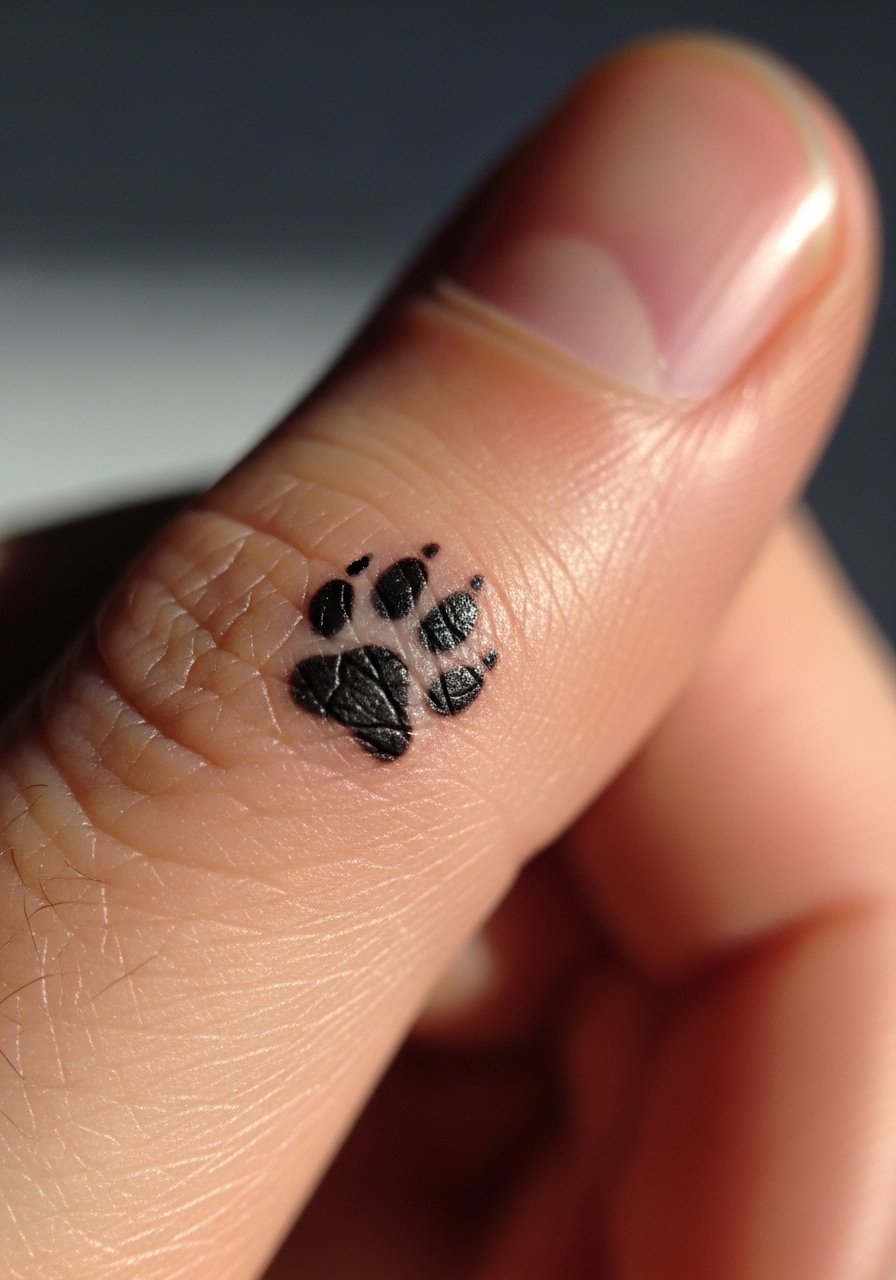
This is a niche option for someone who wants a private pop under club lights or in photographs. UV ink can fade differently than black and often needs a specialist who runs UV-safe ink. Fingers complicate UV longevity. If you choose this, ask your artist about patch tests and realistic expectations for touch-ups. The session is short and pain is mild. Also think about career impact, as UV is subtle in daylight and still visible under certain lighting conditions. A frequent mistake is expecting UV to behave exactly like black ink. It does not.
15. Micro-Realism Pet Portrait on Upper Chest
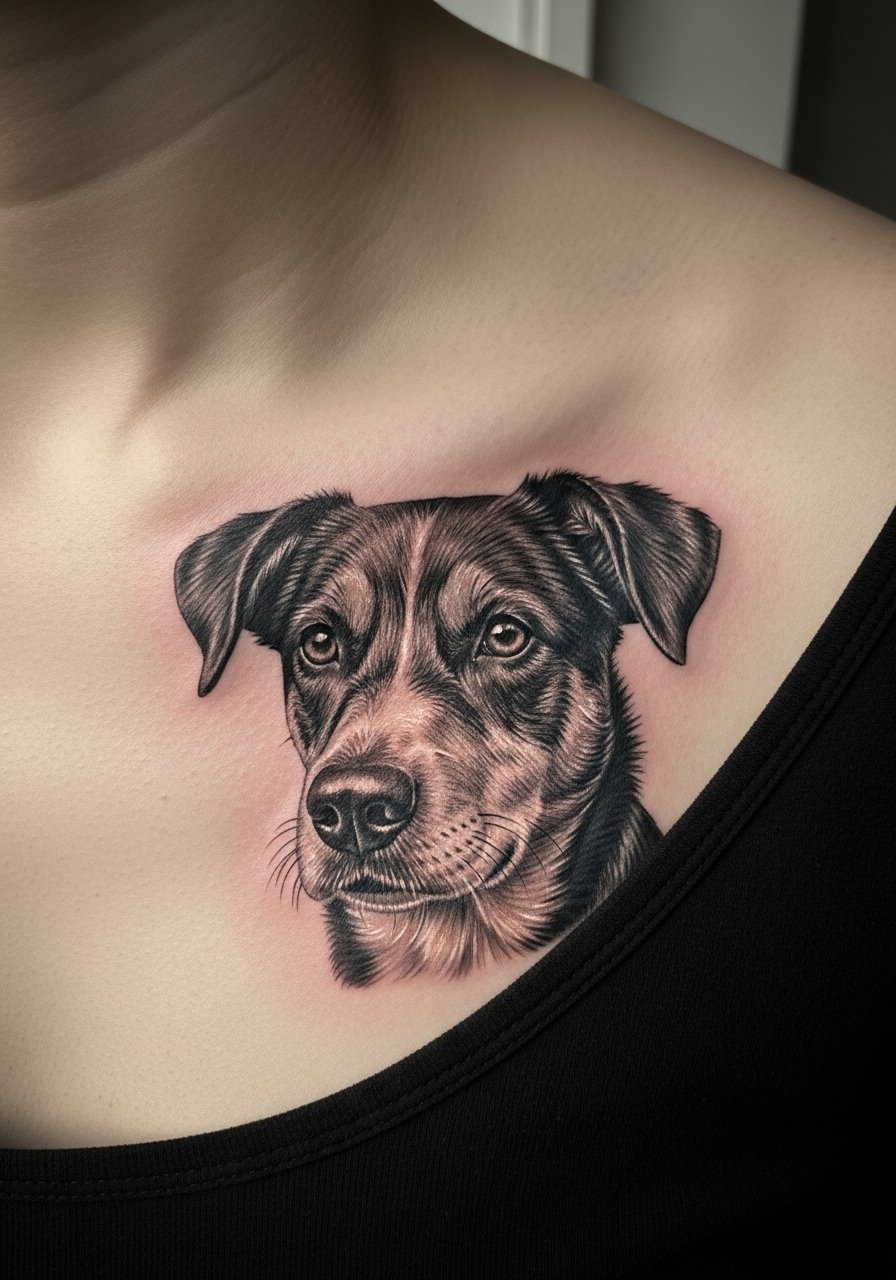
Pet portraits carry emotional weight and require careful reference photos. Upper chest placement reads well and lets the portrait sit near the heart, but chest skin moves with breathing and can affect tiny details. Bring multiple high-resolution photos showing the same expression and clear lighting. Ask for a patch of deeper black in the shadow to anchor features so eyes stay focused as the ink settles. Expect a longer single session and a likely touch-up at six months for tiny areas that soften. Also mention any planned sun exposure since chest tattoos need solid sunscreen after healing.
Tattoo Prep and Aftercare Essentials
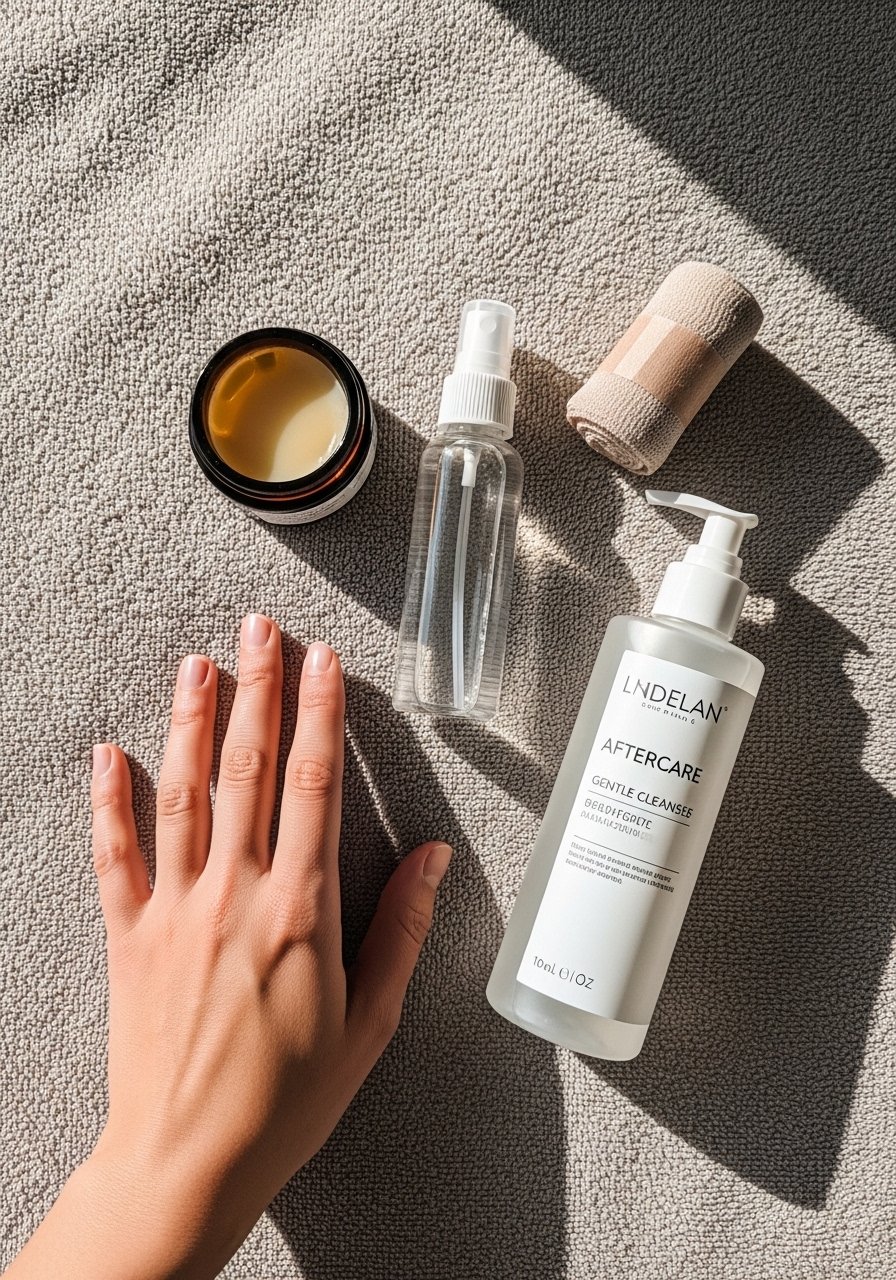
Tea tree balm from UK indie brand, lightweight non-greasy formula. Good for watercolor pieces that feel oily with heavier ointments. Use sparingly after the first few days when scabs are minimal, and avoid over-rubbing the area.
Australian aftercare spray, quick-dry formula favored for humid climates. Helps blackwork heal without staying damp on hot days. Mist briefly and let air dry.
Japanese rice bran oil salve, absorbs quickly and praised for use on darker skin tones. Apply a thin layer to micro-realism portraits to reduce shine without clogging pores.
Indie soy-based moisturizer, fragrance-free and cooling. Great long-term for daily maintenance once the tattoo is fully healed.
Medical-grade second skin bandage, 6-inch roll, breathable occlusive dressing (generic descriptor). Use for the first 24 to 48 hours on areas that rub from clothing or gear.
Saniderm single-use sheet pack. This is the mainstream barrier option some artists use. Mention to your artist if you prefer barrier dressings because preferences vary.
Fragrance-free gentle foaming cleanser for daily wash. Use with lukewarm water during the initial week to keep the area clean without stripping oils.
Lightweight fragrance-free balm for long-term hydration. Apply after the initial healing phase to keep saturation and softness.
Every tattoo is different. Always follow your artist's specific aftercare instructions. Consult a dermatologist if you have skin concerns or unusual healing issues.
Frequently Asked Questions
Q: Will fine line wolf collarbone tattoos blur faster than a bolder wolf?
A: Fine line sits closer to the surface so many artists and clients notice softening sooner, especially on high-movement areas like the collarbone. One group in the community thinks these pieces need touch-ups every one to two years. Another group says careful needle depth and spacing makes them last longer. If longevity matters, ask for slightly stronger anchors in the design and a clear touch-up window from the shop.
Q: Do watercolor-style tattoos need different aftercare than traditional ones?
A: Watercolor pieces need careful sun protection and lighter ointments while healing because pigments rely on delicate gradients. Use a non-greasy balm or the tea tree balm I linked during the later stages of healing and avoid heavy occlusion that traps moisture. If your artist recommends a barrier dressing, follow their plan since methods vary between pro-Saniderm and dry-healing approaches.
Q: How much does a wolf tattoo cost in a typical small fine line placement?
A: Prices vary by region and shop. For a small, fine line wolf on a collarbone you can expect a range based on session time and shop reputation. From what I have seen, small pieces often fall into a lower to mid pricing band, while larger or more detailed wolves that need multiple sessions fall higher. Ask shops for session minimums and whether touch-ups are included.
Q: Are blackwork elephants better for darker skin tones than watercolor versions?
A: Yes, strong blackwork provides contrast that tends to read clearer on medium and dark skin tones. If you love color, ask your artist about saturated accents placed over black anchors. Also consider a healed mockup or temporary to see how the design photographs in different light.
Q: What should I ask about before booking a ribcage owl session given the pain and touch-up risk?
A: Ask the artist how they handle large blackwork heals and whether they prefer barrier dressings or dry healing for ribs. Also confirm touch-up policies and expected session count. Mention any plans for weight change or intense workouts that might affect stretching, and request a timeline for a follow-up touch-up within six months.
Q: Is UV ink safe for finger placements and will it last?
A: UV ink behaves differently and often needs a specialist experienced with UV-safe pigments. Fingers renew skin quickly and wash often so UV placements usually require more frequent touch-ups. Get a patch test and clear expectations for maintenance before committing.
Q: How do I approach building a patchwork deer antler sleeve so future additions fit?
A: Tell your artist you want modular expansion. Ask them to leave breathing room and plan negative space for flow. Use reference boards on discovery platforms like Pinterest or Tattoodo to show the overall mood rather than exact pieces. Schedule a consult to map where future anchor pieces should sit so the initial deer element does not box you in.
