
Pixel tattoos can read crisp for years if you plan the grid, spacing, and placement from day one. Small single-needle pixels often look great in photos but tend to soften on high-movement zones, and color choices matter differently across skin tones. Read these idea-backed options with placement notes and specific things to bring to your consultation so your grid stays readable well past the first touch-up.
1. 8-Bit Mario Mushroom on Inner Forearm
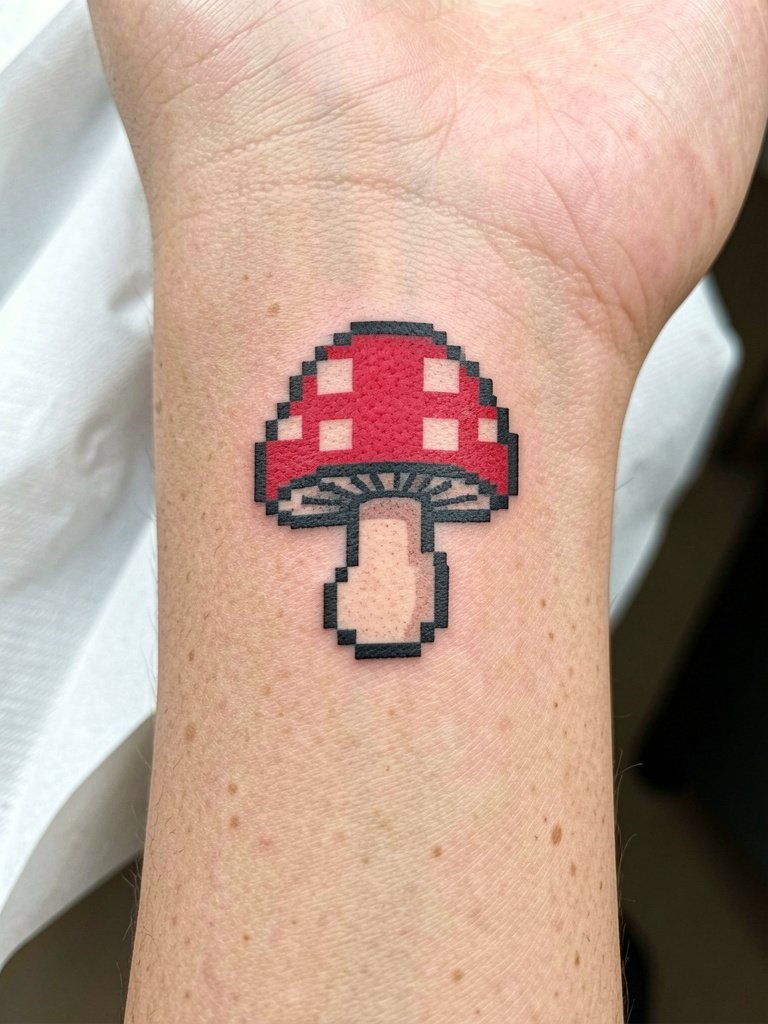
A tiny 8-bit mushroom reads especially well on the inner forearm because the surface is flat and the skin moves less than on the wrist. Request bold pixel blocks rather than single-needle dots so each square keeps its shape as the ink settles. Bring a scaled reference that shows the exact grid you want and ask the artist to mock up the final size on your arm with a temporary stencil so you can see spacing in real life. For showing it off, roll up a linen button-down shirt in cream or olive to let the red pop without competing patterns. Expect one short session and mild forearm soreness that eases within a few days.
2. Minimalist Pac-Man Maze on the Wrist
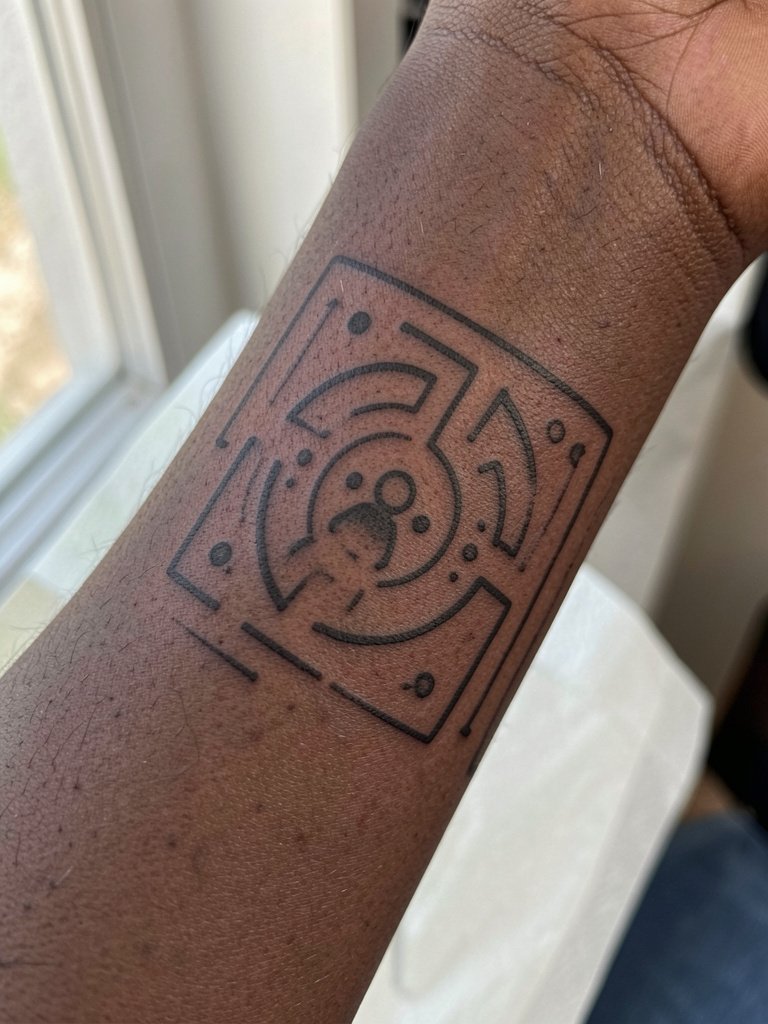
A delicate Pac-Man style maze works when kept very small and simplified for the wrist bone area. The risk is fine-line detail blurring from constant wrist motion and friction. One camp says fine-line pixel work blurs quickly and prefers thicker blocks for longevity. Another camp insists fine-line can hold if the artist spaces pixels slightly wider and monitors needle depth closely. Tell the artist you want slightly more breathing room between grid squares and show a healed example in a similar placement. Avoid bracelets on the tattoo wrist during healing and consider pairing the opposite wrist with a thin chain bracelet when you want to photograph the piece.
3. Triforce Symbol on Inner Upper Arm
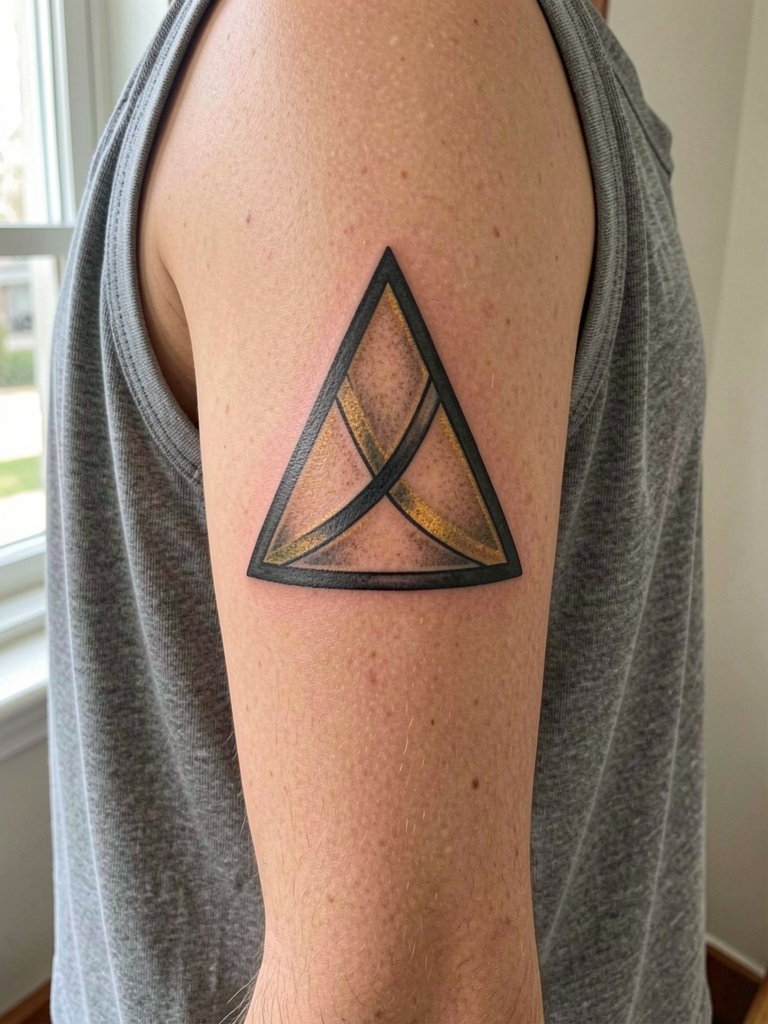
The Triforce-style badge is a smart pick for people who want a discreet gamer nod that hides under short sleeves. Size it so each triangle has room and add a thin gold wash to the interior panels if you want a touch of color. Explain you want a clean geometric black outline and ask the artist to show the stencil while your arm is relaxed so the triangles do not distort when your arm moves. For session wear bring a loose tank top so the artist can work on the medial bicep without tight fabric pressing on freshly inked skin. Inner-arm healing stays comfortable if you avoid tight sleeves for a week.
4. Pixelated Heart of Life Behind the Ear
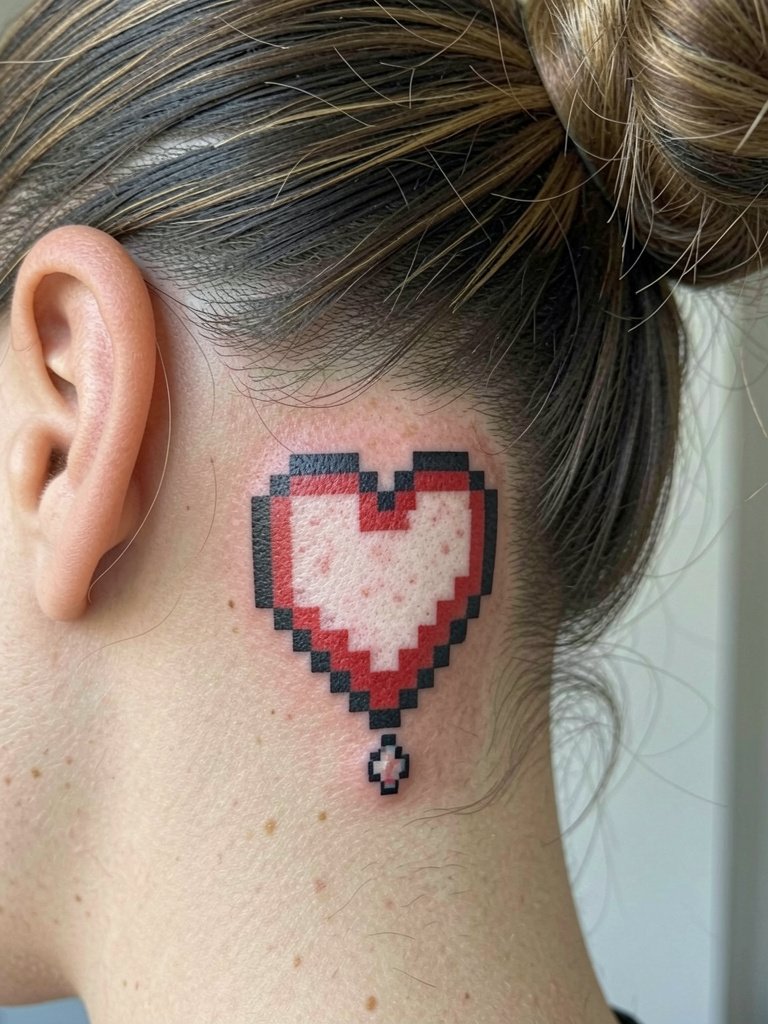
Tiny red-outline hearts are classic micro pixel pieces for the area behind the ear. That skin is thin and sensitive so single-needle work can look clean but it also risks ink spread if the pixels are packed too close. Ask the artist to test a single tiny pixel and check healed examples on similar skin before committing. For session day, wear a top with no collar and pin hair away with a clip so the artist has clear access. When you want to reveal the piece, a loose bun or half-up style frames the spot without tugging at the fresh skin.
5. Minecraft Grass Block on Lateral Hip Bone
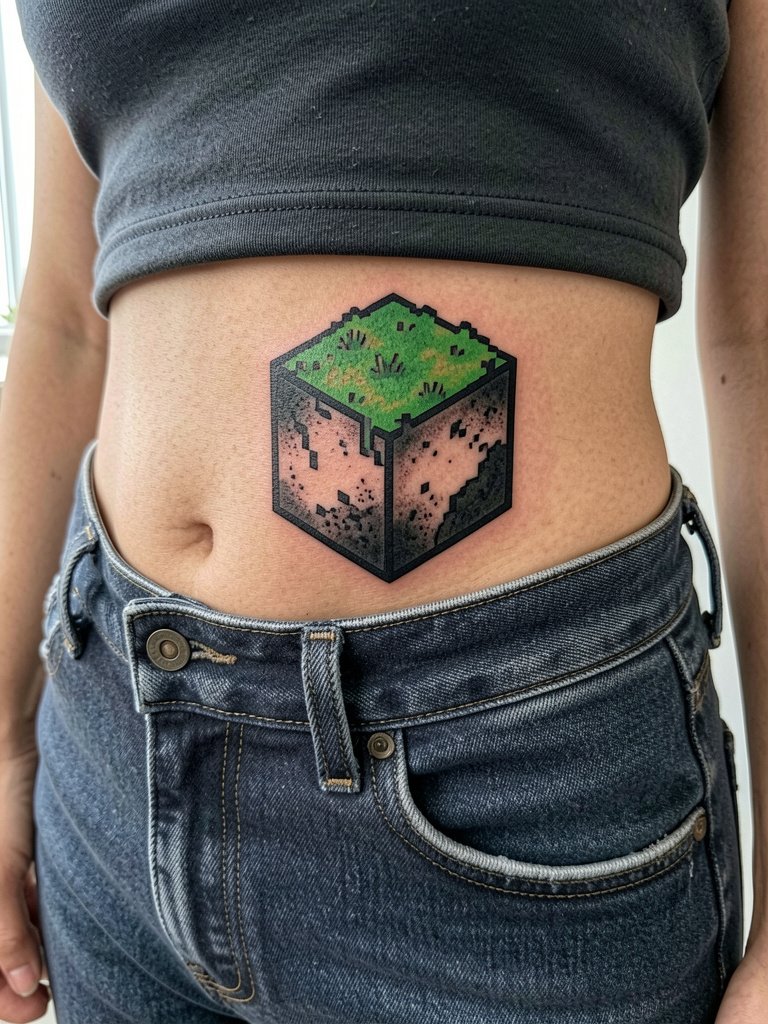
A small 3D grass block reads like a tiny sculpture on the hip thanks to the flat plane and subtle shadow pixels. Because the hip sits near waistbands, size the piece above the waistband line and tell the artist you do not want any detail lost to rubbing. For the session, wear loose drawstring linen pants so the area sits comfortably and the artist can access the lateral hip without the fabric pressing on fresh ink. Expect mild soreness when sitting for the first week and avoid tight waistbands until the scab stage is done.
6. Pixelated Sword on Outer Forearm
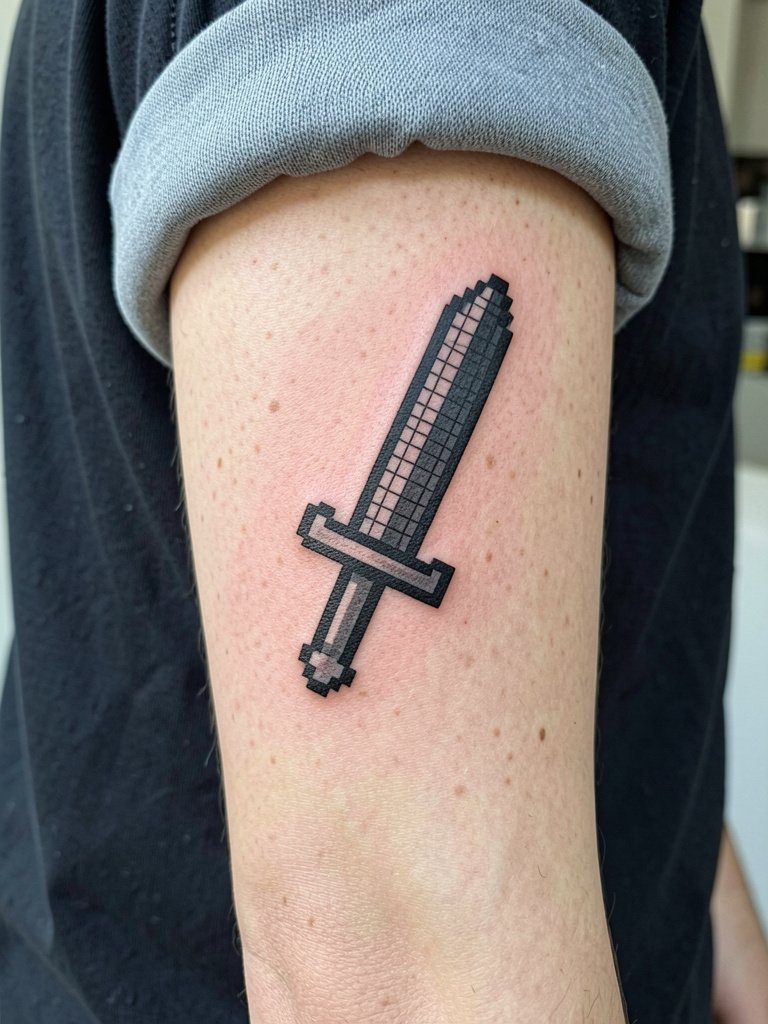
A blocky sword sits naturally on the outer forearm and photographs well for streamers who want visible ink on camera. Ask the artist to keep the grid aligned along the forearm axis so the sword reads straight from wrist to elbow. Mention you want slightly heavier black outlines near the guard to keep contrast in photos. For showing it off, pair the tattoo with a leather wristband on the opposite wrist and roll short sleeves up during shoots. Outer forearm touch-ups are straightforward if the blade loses a pixel or two over the years.
Pre-Session Essentials
The tiny symbols and wrist pieces above share a common healing window where friction matters, so these items smooth the session and the first week.
-
Black & grey tattoo ink mix. A denser black and tailored grey mix helps portraits and small faces hold contrast without going shiny on healed skin, which is useful for the portrait and sword ideas above.
-
Mighty Patch original acne patches. Small hydrocolloid patches help protect tiny wrist and ankle pixels from accidental picking during the first few nights.
-
Kinship soothing gel. A lightweight, non-greasy gel keeps micro pixel work moist without clogging needle channels, handy behind-ear and wrist.
-
Topical numbing cream. For sensitive spots like the sternum or ribs, numbing cream applied with timing guidance can make the session tolerable without interfering with linework.
-
Saniderm second skin. A breathable protective film is especially helpful for wrist and knee-area pixels that face constant movement and friction.
7. Watercolor Ori Forest Scene on Inner Upper Arm
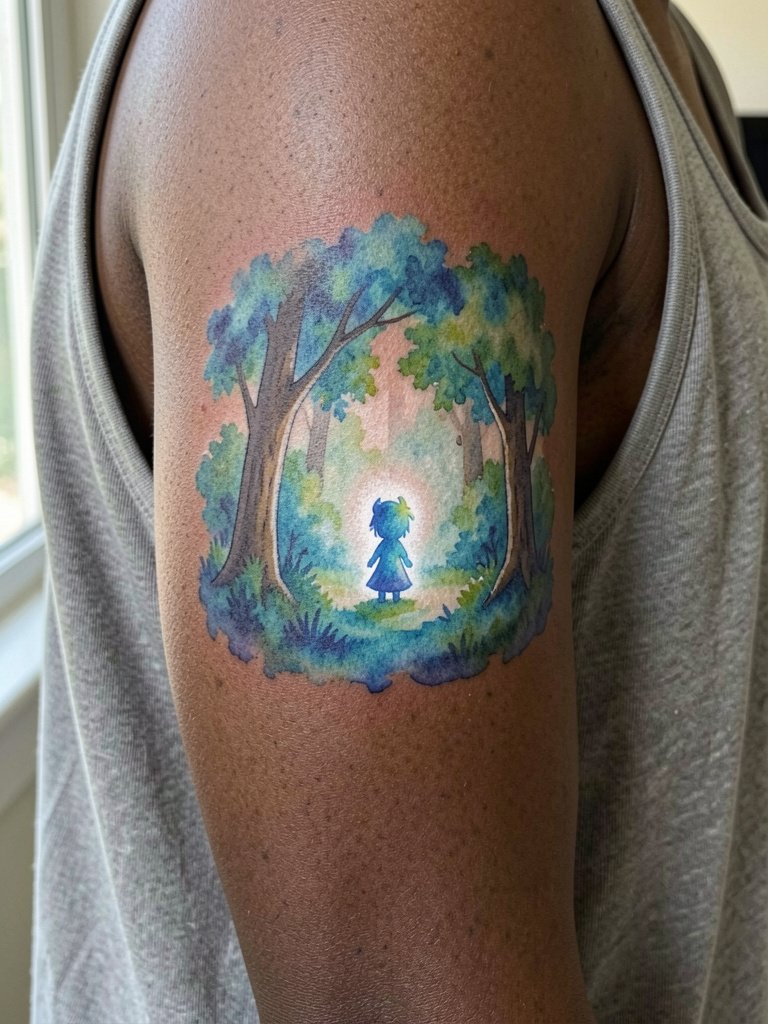
If you love atmospheric games but want pixel references, watercolor pixel hybrids give mood without strict grids. Ask the artist how they will blend soft washes with tiny pixel blocks so the image reads both close up and at arm's length. For the session, wear a flowy sleeveless top to keep fabric away from the inner arm and to preview how the colors look against your wardrobe. Watercolor heals differently than block color and may need a touch-up in year two if you want the glow to stay bright.
8. Pixelated Poké Ball on the Ankle
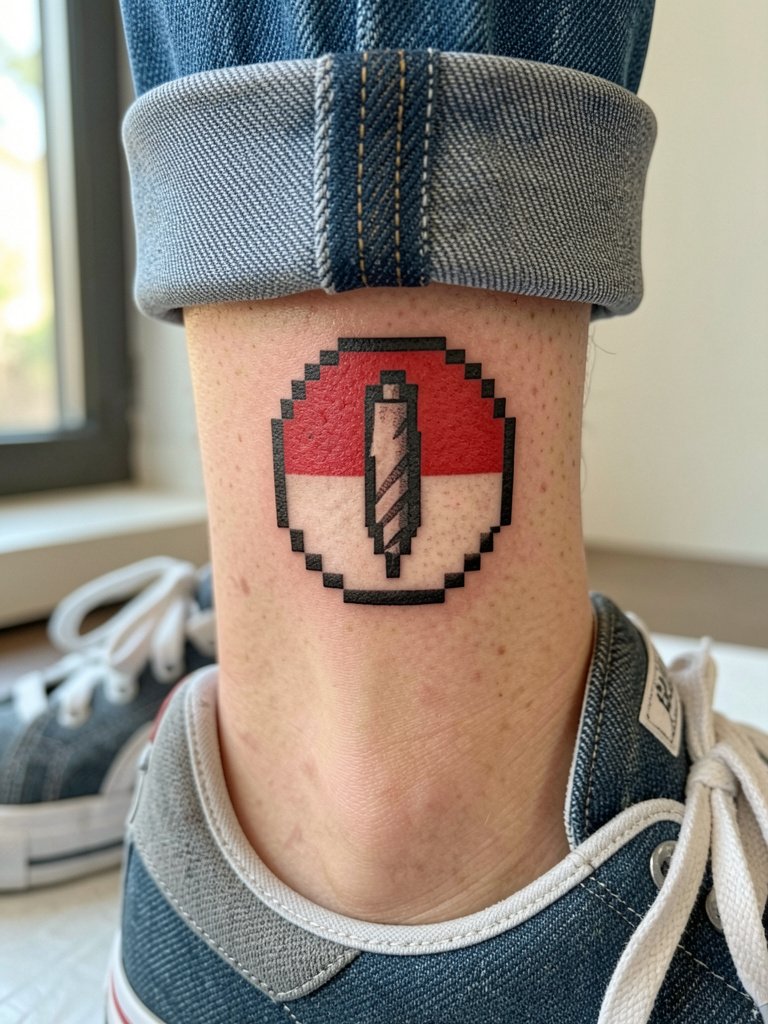
A high-contrast pixel ball sits well on the ankle where viewers get a crisp silhouette. Be mindful that ankle skin takes repeated wear from shoes and socks. Ask for bold black outlines and slightly larger pixel squares so color does not disappear into texture after a year. For showing it off choose low-cut sneakers or sandals and a silver anklet on the opposite foot. During healing avoid tight socks and check fit so straps do not rub the fresh skin.
9. "Press Start" Pixel Script on the Collarbone
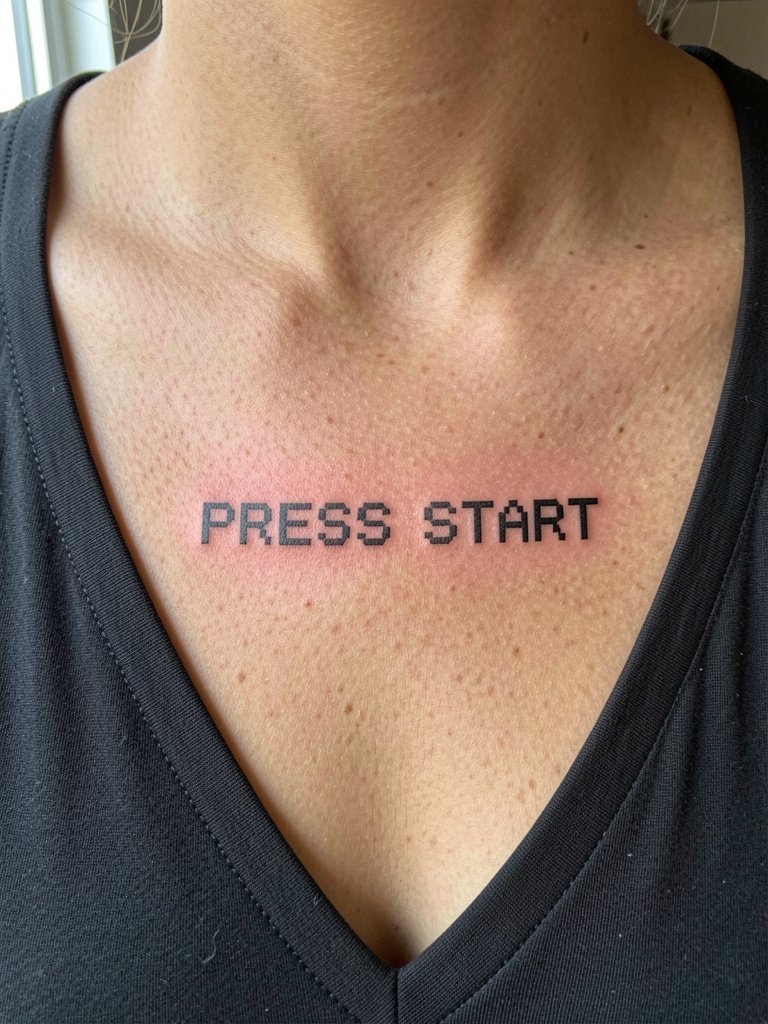
Pixel font across the collarbone is bold visually but vulnerable to distortion if placed too close to the sternoclavicular curve. Have the artist lay the script while you stand naturally so letters sit on the flat plane below the clavicle. Pick a pixel font with square counters and ask to preview different widths so the script still reads at three inches. Pair the look with a v-neck top when you want to photograph the piece. Collarbone sessions feel like moderate discomfort as the needle crosses bone-adjacent tissue, and most people do fine with one short break.
10. Pixelated Dragon on Medial Inner Thigh
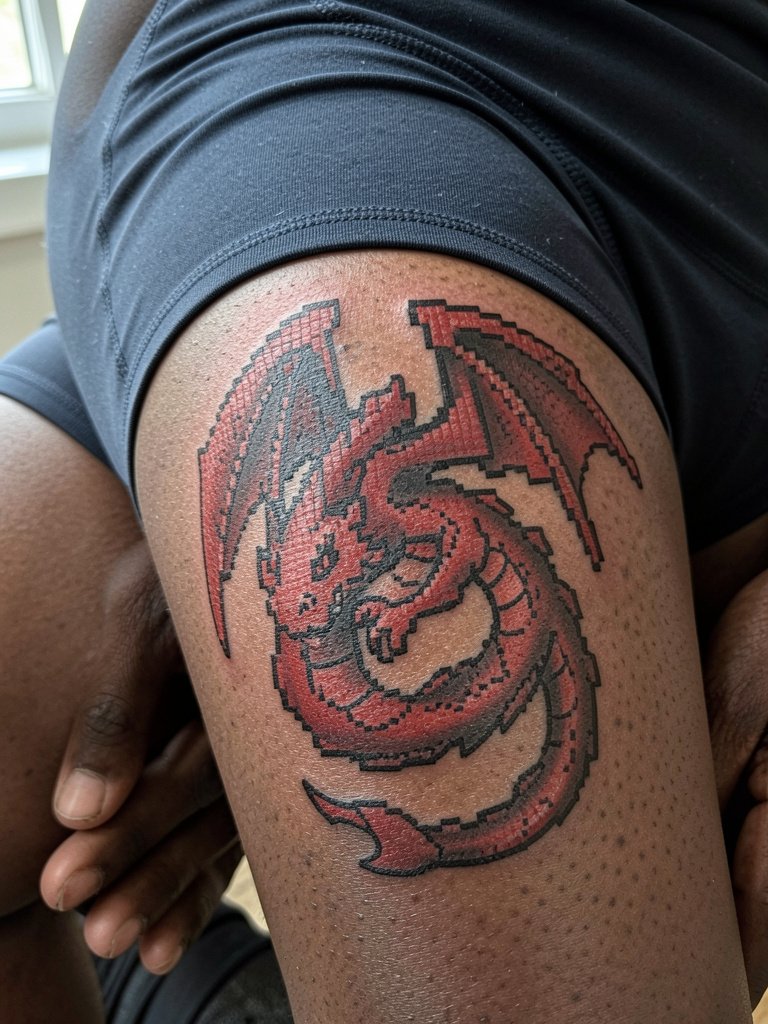
Inner thigh pixel dragons let you hide a bold image in private places. Because the skin there stretches more, ask the artist how the grid will be spaced if you plan weight changes. A common mistake is packing too many tiny pixels into a piece that sits on moving tissue. Wear loose shorts or a skirt to your session and ask for a sketch that shows the design at full size while seated and standing. For nights out pair the reveal with high-waisted skirts or shorts and an understated thigh chain on the opposite leg to balance the composition.
11. QR Code Digital Fusion on the Lumbar Lower Back
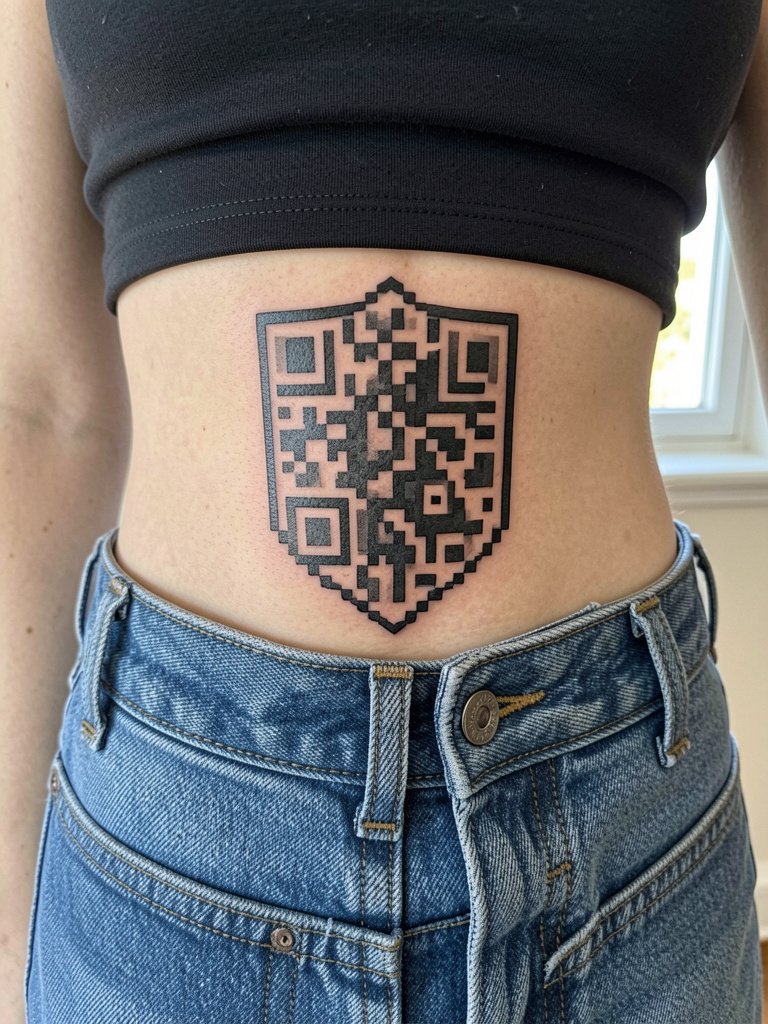
A QR code embedded inside a pixel shield is a tech-forward option that connects ink to digital content. If you want the code to scan reliably, ask the artist about exact pixel proportions and test scans on different phones before leaving the studio. One camp worries that small scanning codes fail after even minor ink spread. The counter view shows that larger grid units and correct contrast make scanning robust for years. Wear low-rise pants to the appointment so the artist can place and test the code against your natural posture, and expect a short session since the design is compact.
12. Micro-Realism Cyberpunk Portrait on Outer Upper Thigh
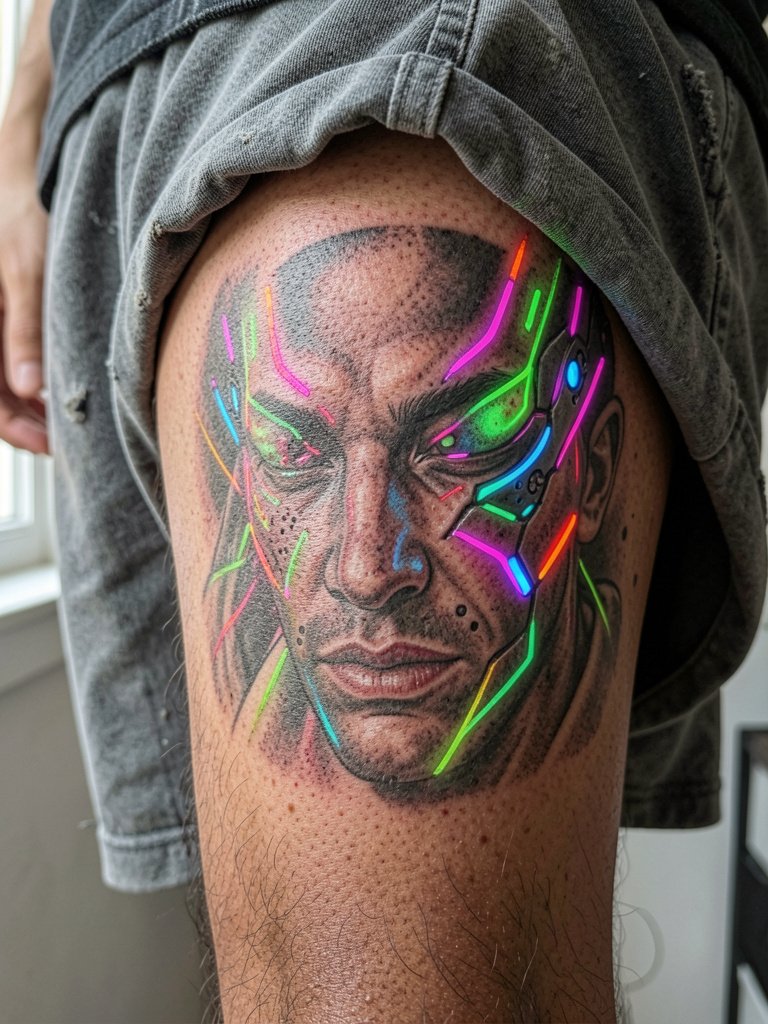
Photorealistic gamer portraits demand more sessions and heavy shading work compared with pixel pieces. If you are choosing between photorealism and pixel translation, expect longer chair time and higher cost for portraits. Discuss reference lighting and which features to prioritize because tiny details matter in photos. For wardrobe, wear loose shorts that let the artist access the outer thigh without fabric pressure on fresh ink. Plan for at least two sessions and a realistic touch-up window after a year.
13. Pixelated Space Invader on the Nape
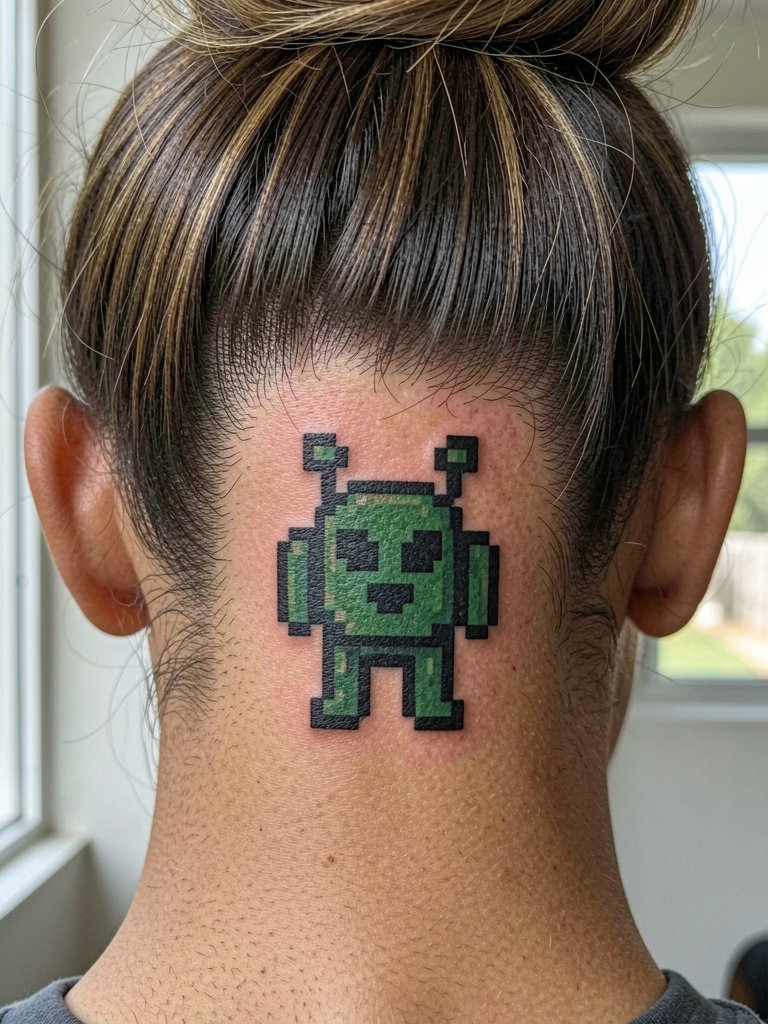
Nape placements are small and dramatic. The skin there is fine, and hair can interfere with healing if not kept off the area. Tell the artist you will keep hair up for the first week and ask for aftercare that minimizes shampoo friction. For nights out consider a simple gold hair chain to draw attention to the nape without rubbing. Expect light sensitivity for the first 48 hours and protect the area from direct sun until fully healed.
14. Abstract Pixel Linework on the Lateral Neck
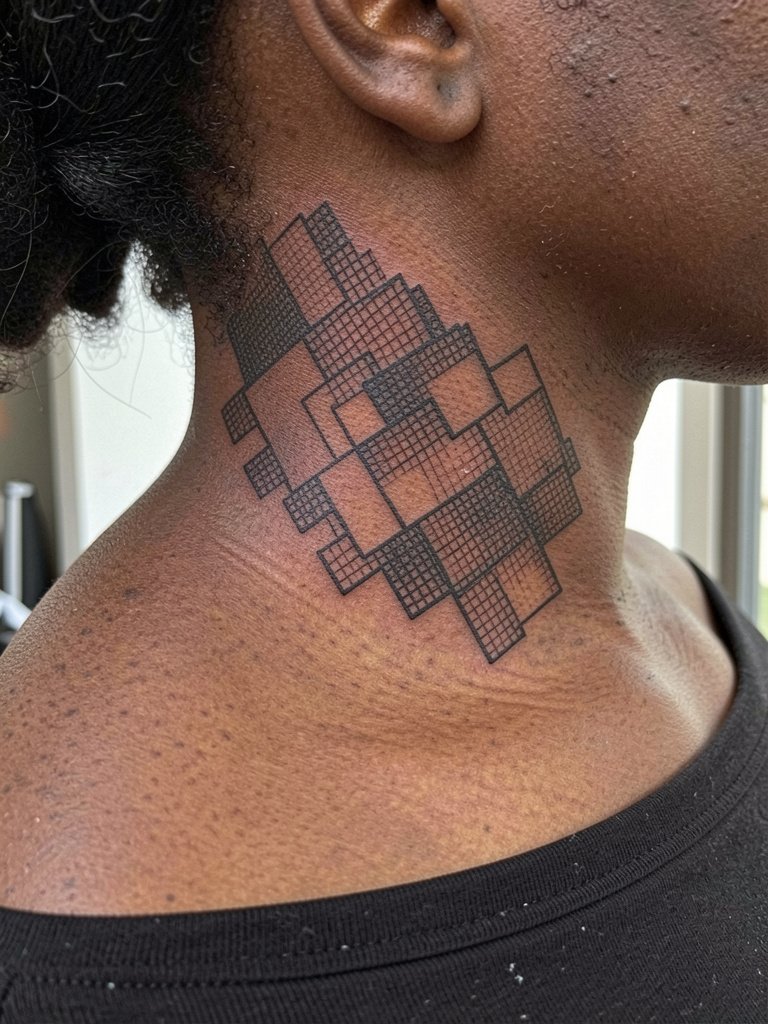
Abstract pixel linework on the side neck can be a tasteful nod to the aesthetic without invoking any single character. There is an active debate about strict grid fidelity versus artistic interpretation. One group insists pixels must be perfectly grid-aligned and sees deviation as inauthentic. The other group favors small artistic tweaks, arguing the skin needs slight rhythm adjustments so the piece does not look blocky as it heals. When you book, bring both a strict grid reference and an interpretation example so the artist knows where on that spectrum to land. Pair the look with an off-shoulder top for an elegant frame.
15. Pixelated Potion Bottle on the Sternum
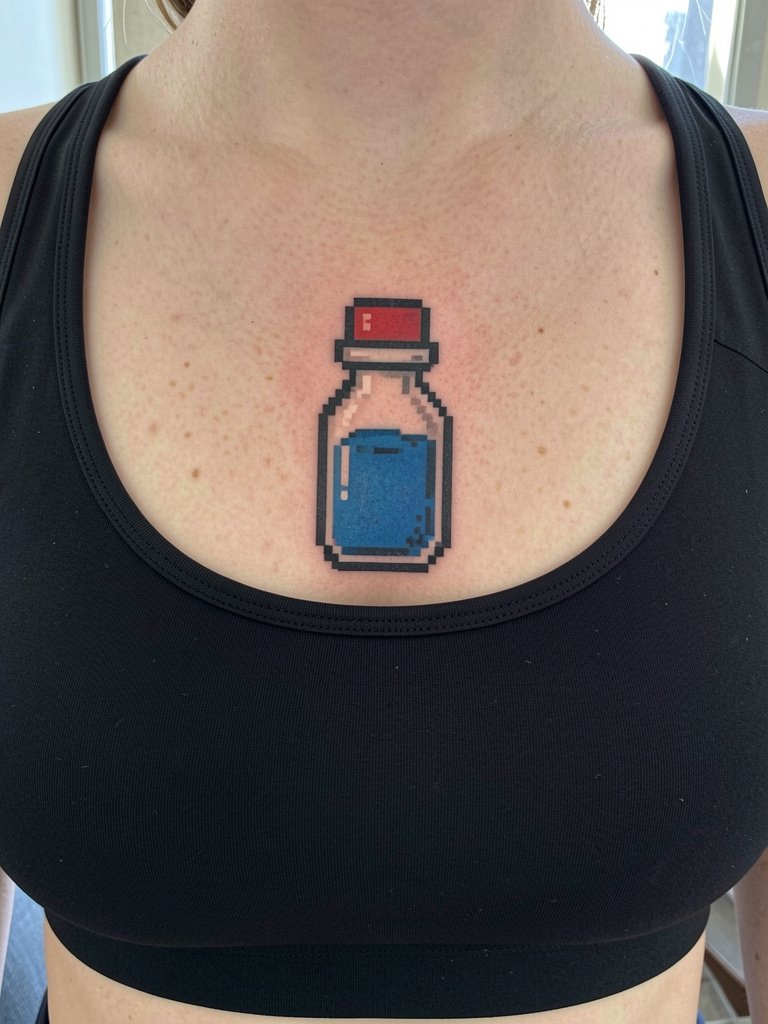
Sternum pixels need careful mapping because the chest moves and breathes. Ask the artist to preview the design while you breathe normally and while you inhale deeply so the bottle reads at rest and in motion. Session wear of a strapless or fitted top makes access easier and reduces fabric rubbing afterwards. Keep in mind the sternum is sensitive; pacing the session with short breaks usually keeps people comfortable. For showing off choose a strapless top or pendant necklace that sits above the piece to avoid visual competition.
16. Tiny Tetris Line on the Finger
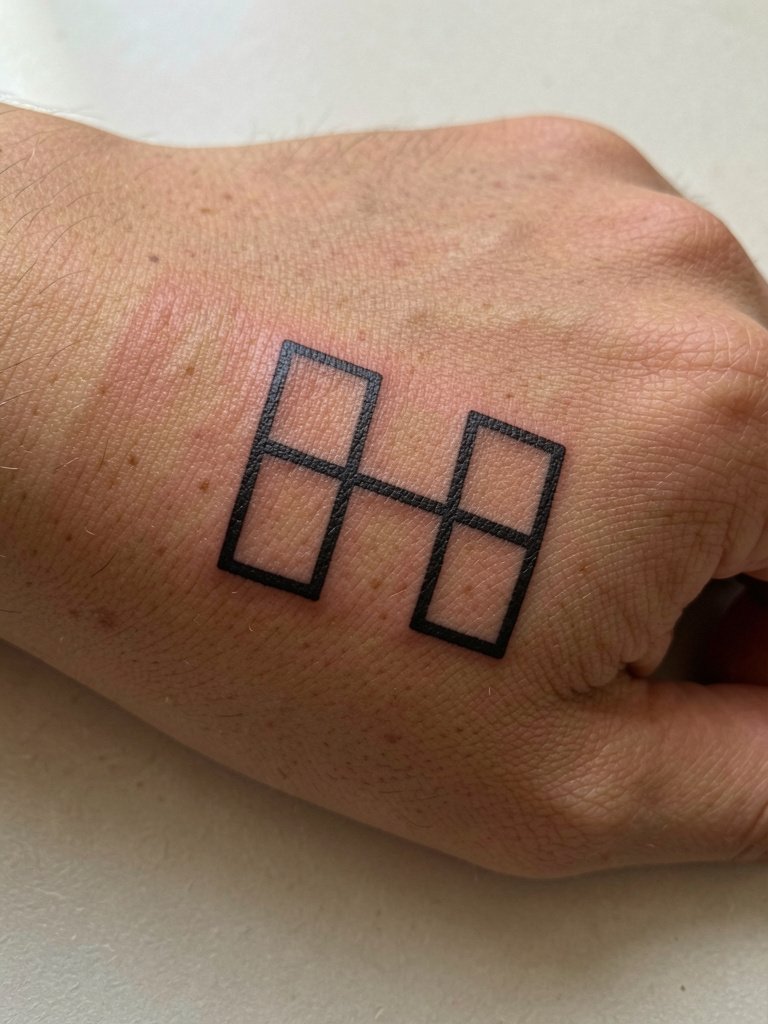
Finger pixels are charming but lose crispness fastest from frequent washing and movement. Ask for slightly larger pixel squares and plan for a realistic touch-up timeline. A common misstep is expecting a single session to last without touch-ups in two years. During the appointment have clean hands and avoid jewelry on that finger for the first two weeks. Finger ink can feel sharp during the session, and most artists recommend short sittings to reduce swelling.
17. Rupee-Shaped Gem on the Ribcage
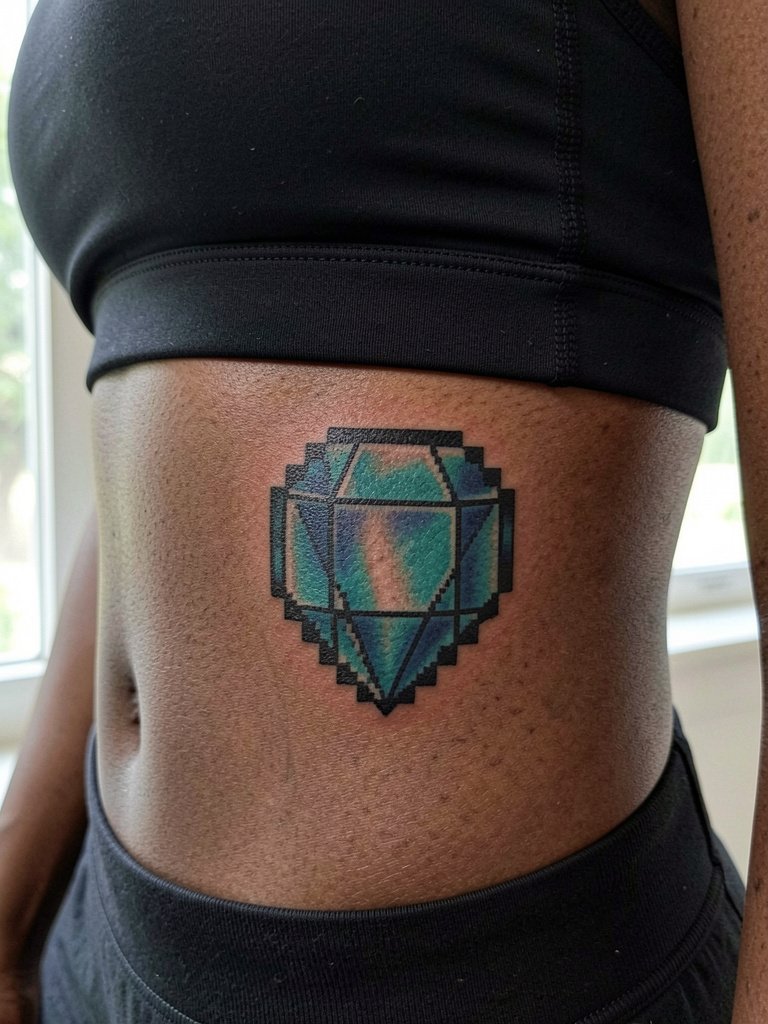
Ribcage pixels face stretching and breathing movement, so go slightly larger and bolder than you might imagine. Artists are split on fine-line ribs. One camp says fine-line pixels blur within two years due to constant expansion and contraction. The other camp counters that with correct needle depth and spacing, fine-line can remain crisp, and they will point to healed examples to prove it. If you choose the ribs, ask for an in-person stencil test while standing and breathing so you see how the grid sits with motion. Sessions on the ribs are higher on the pain scale, so plan your breaks.
18. Retro Handheld Console on the Calf
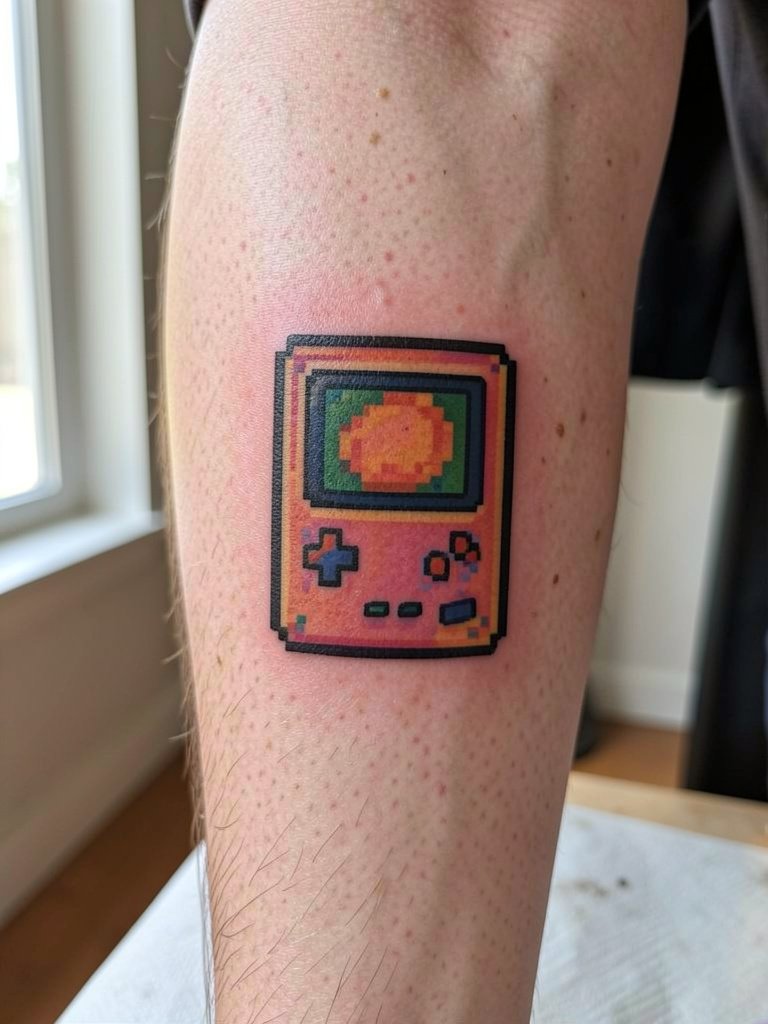
A pixel console on the calf reads large in photos and ages predictably because calf skin is stable. Size the screen pixels so they are readable from a normal viewing distance and ask for black outlines that define small color squares. Session wear of shorts makes access easy and protects fresh ink from sock friction. For showing off pair with cropped trousers or ankle boots. Calf work is moderate discomfort and usually resolves quickly in recovery.
19. Pixel Rupee or Coin on the Ring Finger
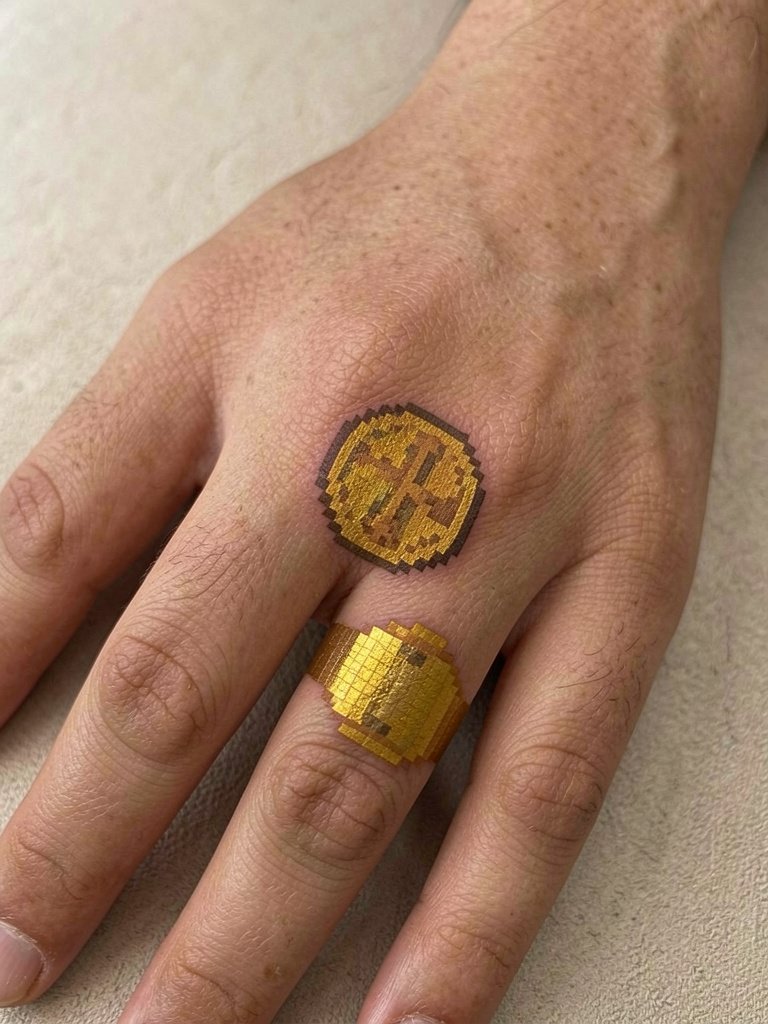
Tiny coins on the ring finger are a subtle nod to in-game currency. Expect frequent touch-ups because finger skin is high-wear. Request slightly larger pixel modules and expect a touch-up within the first year for most people. Avoid rings and wedding bands for the initial two weeks so the metal does not rub the fresh ink. Finger sessions are brief but can be surprisingly tender due to proximity to bone.
20. Pixel Shield on the Shoulder Blade
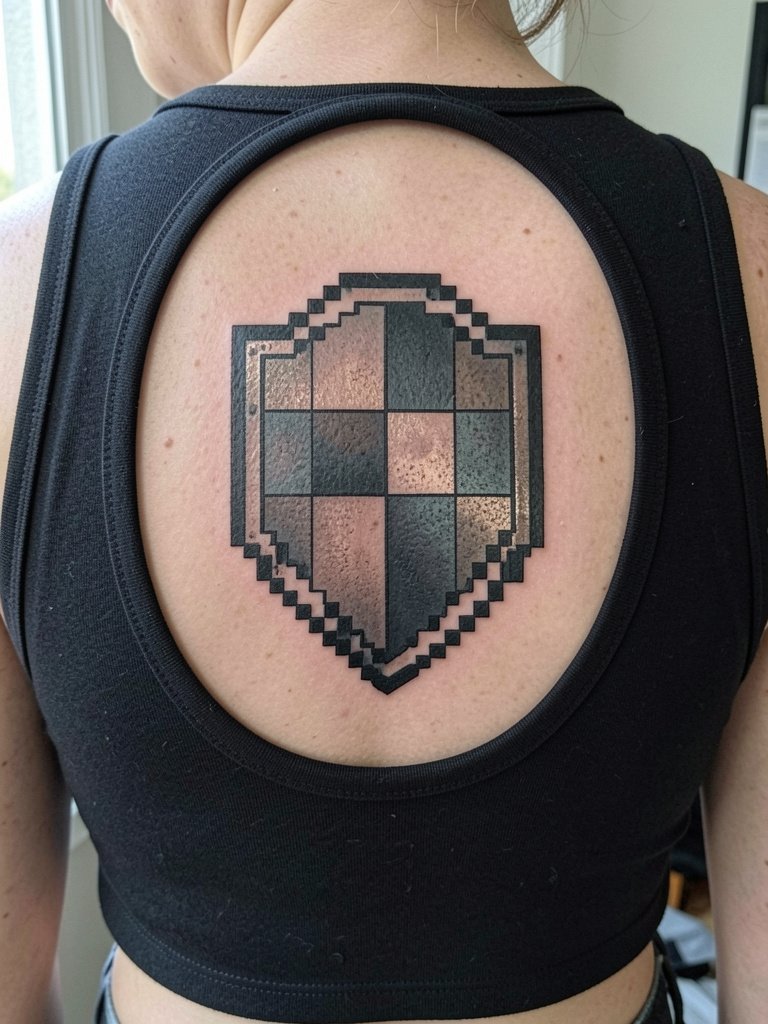
Shoulder blade pixels sit on a broad canvas and tolerate moderate detail well. Ask for the grid to align with the natural curve of the scapula and to preview the design with your shoulder in neutral and rotated positions. For the session wear a tank top with easy arm access and expect low-to-moderate soreness. The shoulder blade responds well to bold outlines and solid fills, which helps the pixel structure last longer without frequent touch-ups.
21. Pixel Ghost Duo on the Chest Pocket Area
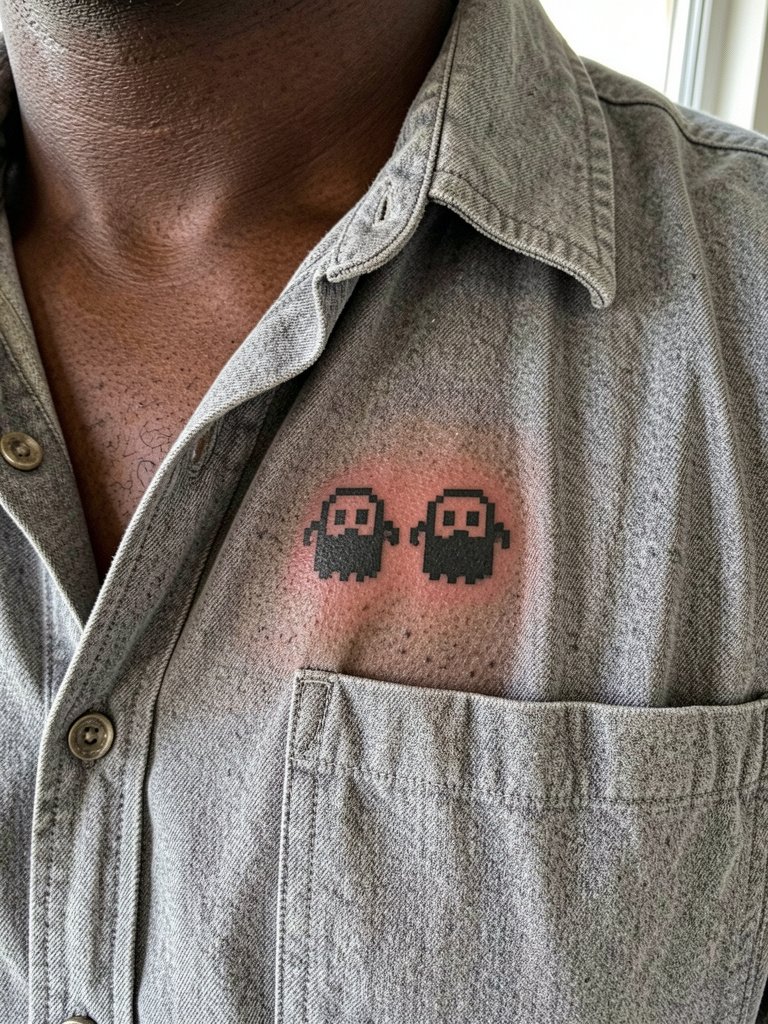
A pair of simple ghosts across the chest pocket area makes for balanced symmetry that reads through shirts with open collars. Keep pixels bold to survive chest movement and occasional friction with straps or necklaces. Wear a button-down that opens easily for the session and consider a pendant that sits below the piece rather than over it. Chest pixel areas can survive with only occasional touch-ups if you keep sun exposure to a minimum.
22. Pixel Compass on the Back of the Hand
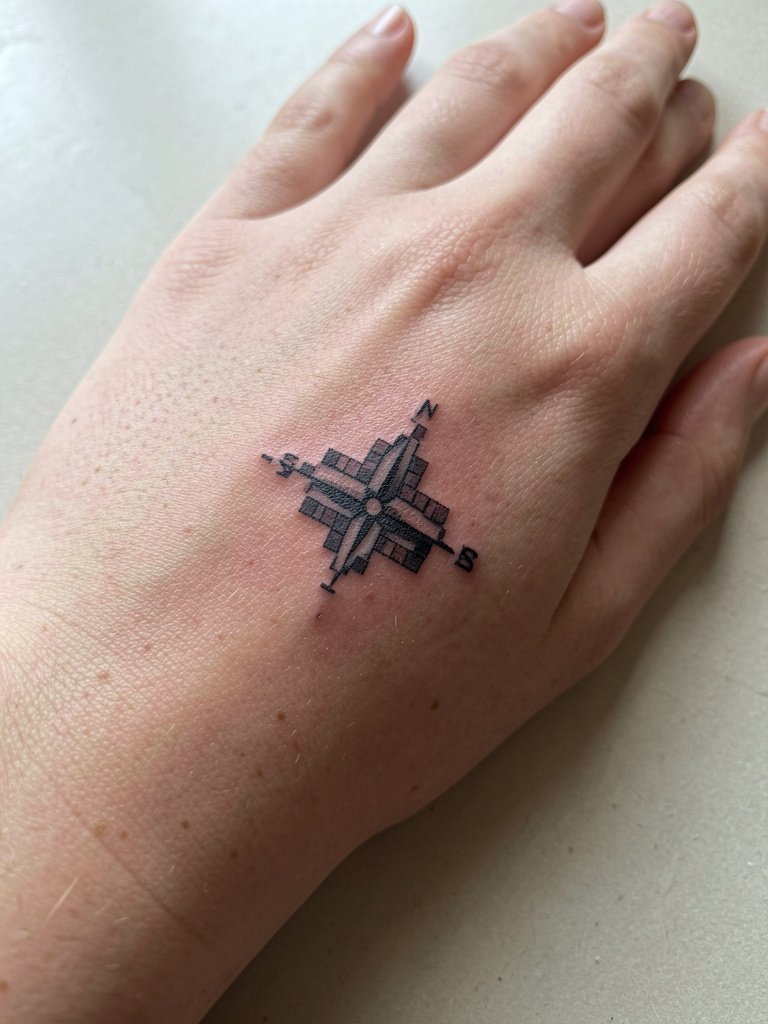
Back-of-hand pixels are highly visible but also subject to heavy wear and sun exposure. Ask the artist to plan for thicker black outlines and a realistic touch-up schedule. A common mistake is expecting hand tattoos to remain untouched for years without maintenance. For the session keep hands relaxed and avoid tight gloves for the first week. Hand work feels sharp to most people but sessions are usually brief.
23. Pixel Ship or Raft on the Calf Lower
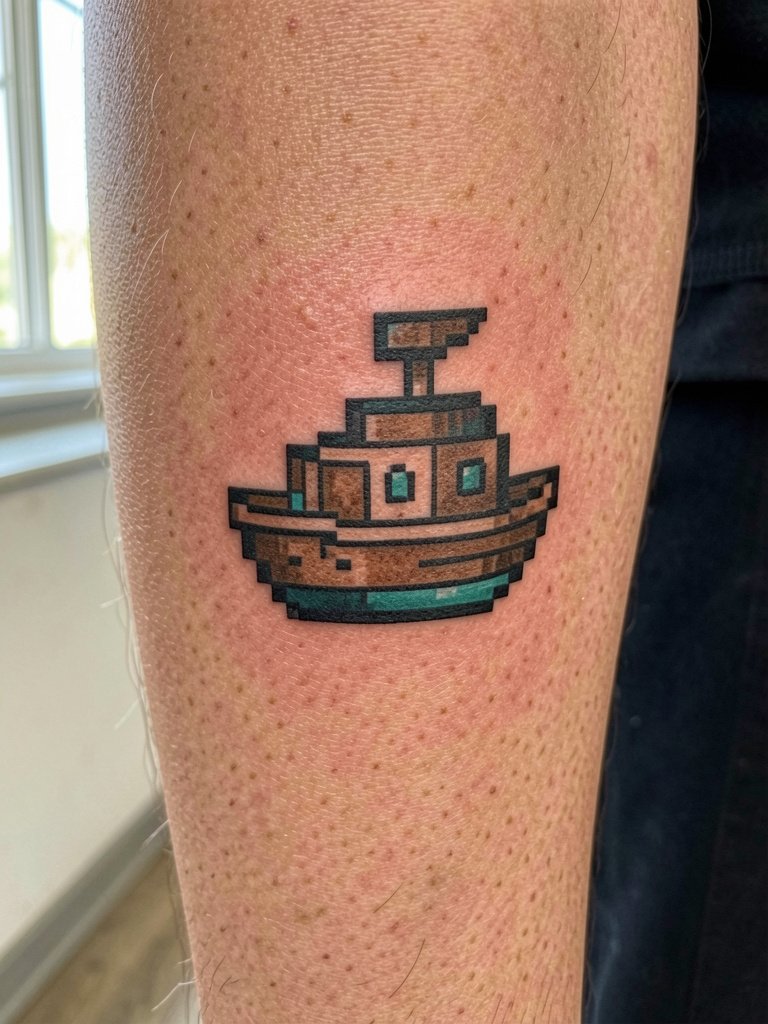
A ship icon is playful and scales well on the lower calf. Because calf skin is steady, pixel grids stay consistent and color saturation holds up well. Ask the artist which pigments show best on your skin tone and request areas of black contrast to anchor small colored pixels. For styling, cropped trousers or sandals make the piece visible and flattering. Calf sessions are usually tolerable and heal reliably.
24. Pixel Potion Trio on the Rib Side
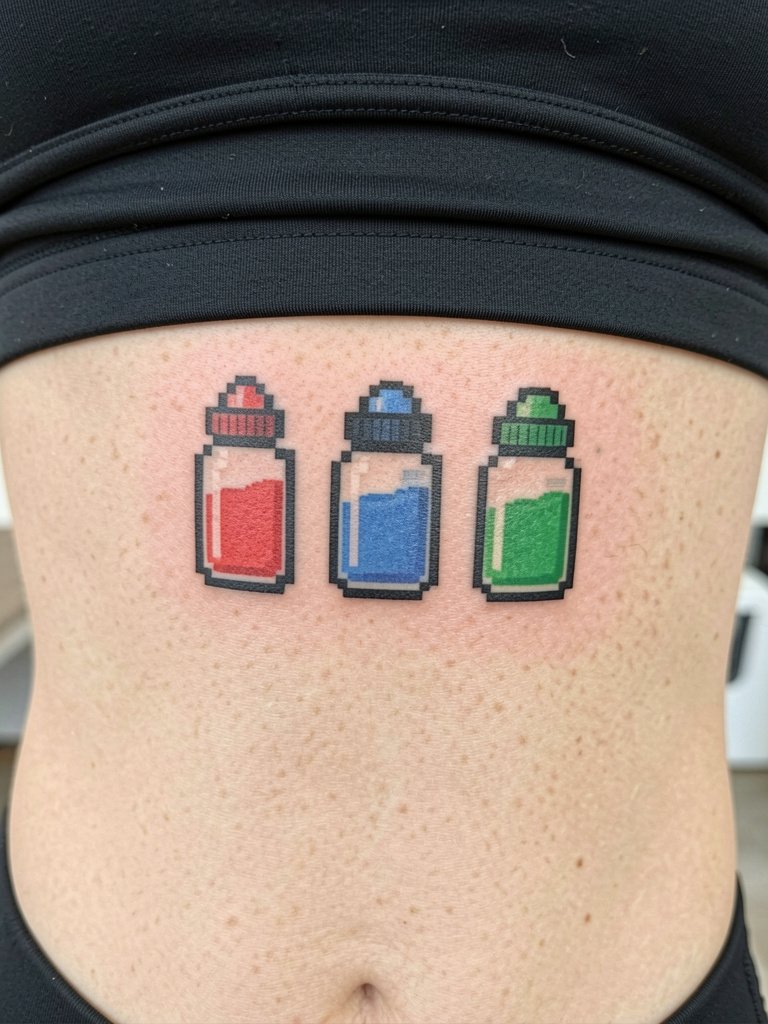
A row of tiny potion bottles reads as playful RPG flair. Because ribs move substantially, slightly enlarging each pixel square extends legibility. Discuss a breathing test during the stencil phase so the artist can set pixel proportions that survive inhalation. Expect higher pain levels on ribs and plan for breaks. For session wear a cropped top that stays in place without shifting.
25. Pixel Minimalist Controller on the Forearm Inner Side
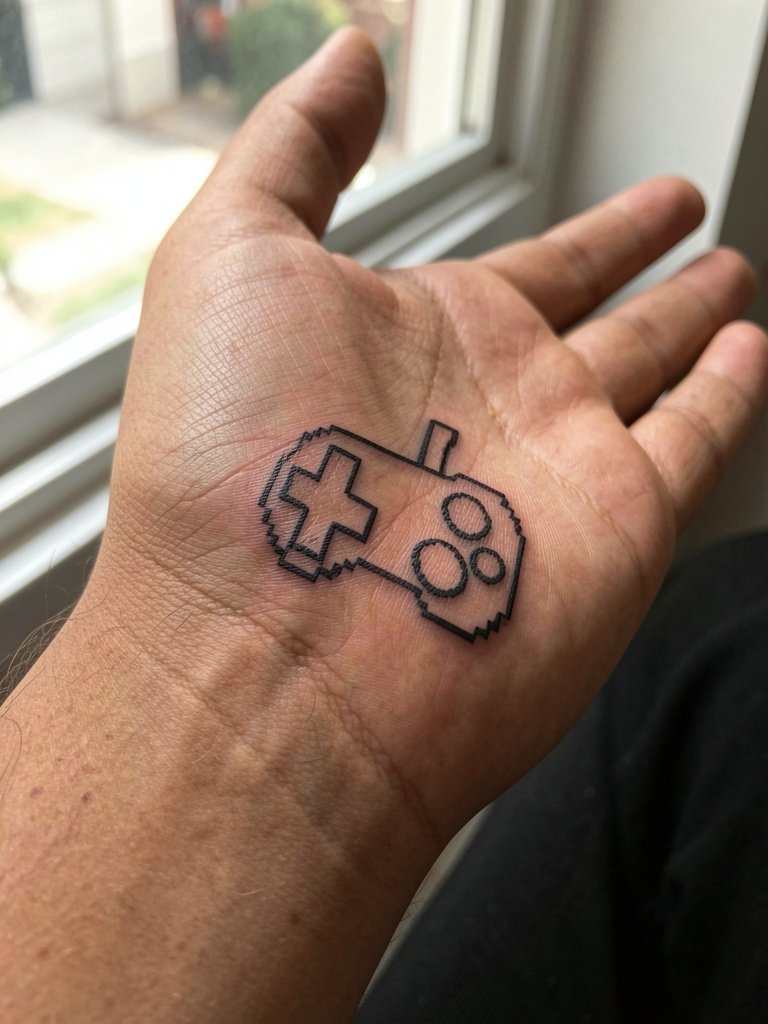
A flat, minimalist controller icon sits well on the inner forearm where it photographs cleanly. Ask for slightly heavier pixel squares on the directional pad to avoid the tiny bits blending over time. For the session wear a short-sleeve or sleeveless top for easy access. Roll sleeves up when you want to show the piece, and consider a dainty bracelet on the opposite wrist for balance.
26. Pixel Life Bar Across the Wrist Crease
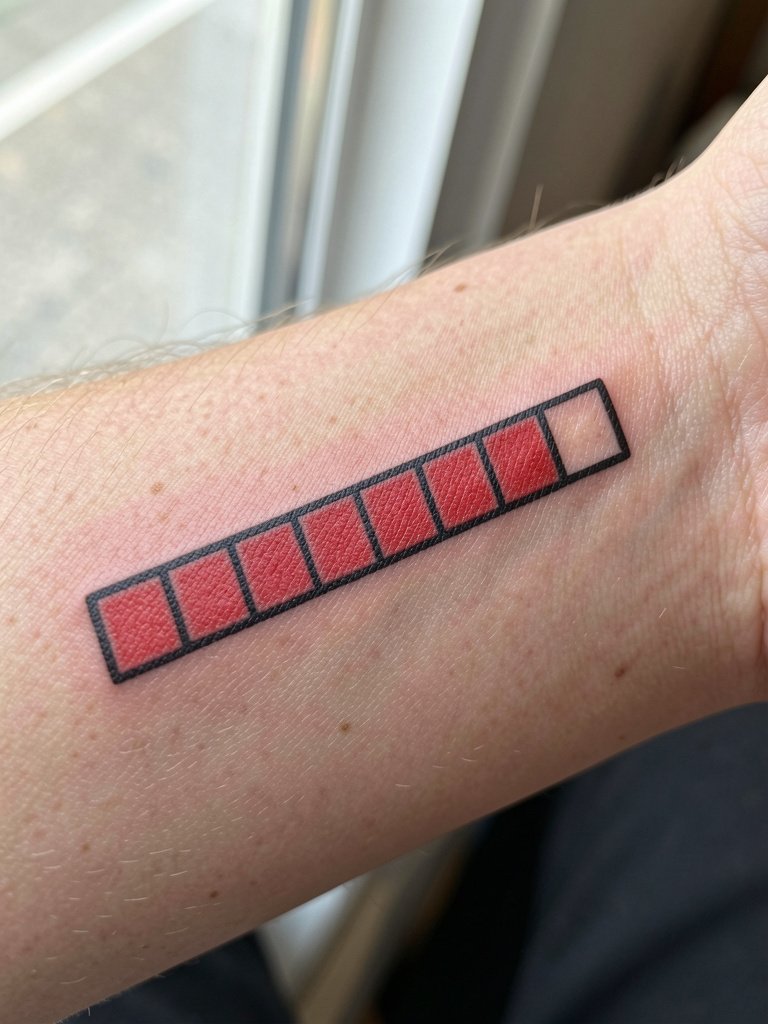
A life bar that crosses the wrist crease needs planning so the pixels do not distort when you bend your wrist. Ask the artist to map the bar while your wrist is in neutral position and slightly bent to preview how the squares will compress during movement. Keep the pixel modules slightly larger than you think they need to be. During recovery avoid wearing watches that press directly on the fresh ink and consider a minimalist watch on the opposite wrist to frame photos.
27. Pixel Potion and Gear Cluster on the Sternum and Rib Junction
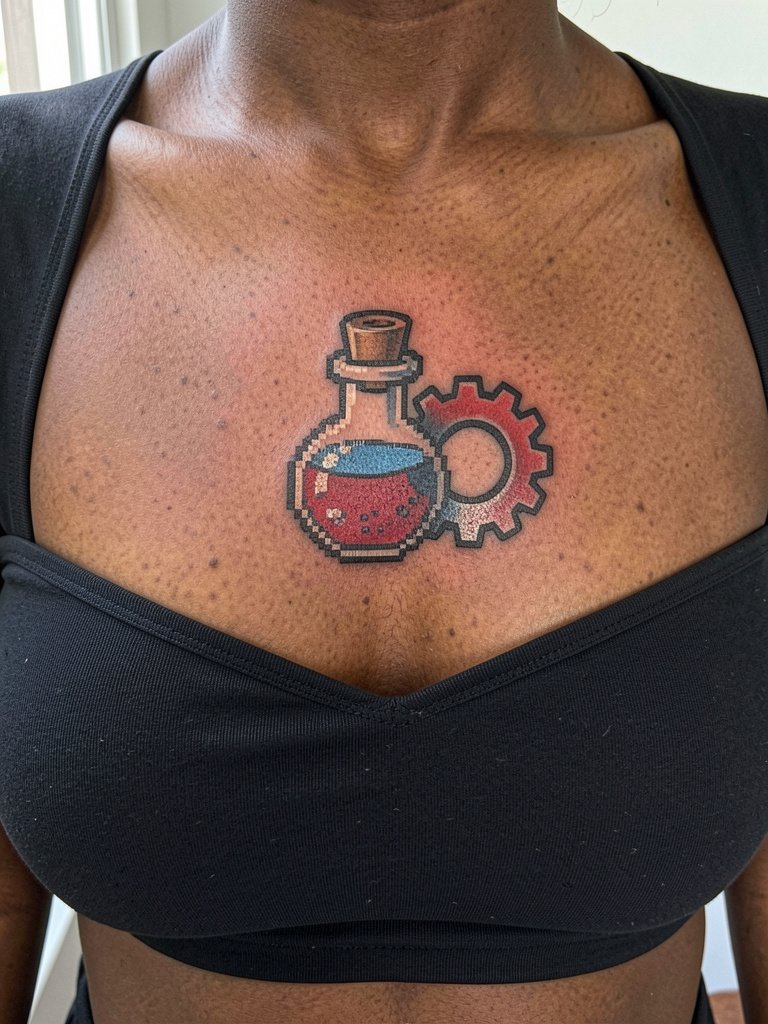
A cluster at the sternum-rib junction has strong visual impact but requires coordination with breathing dynamics. Show the artist where you want the cluster relative to your bra or top so the design does not sit under a strap. Because this is a sensitive area, expect soreness and schedule accordingly. For wardrobe pick strapless or low-cut pieces that avoid pressing on the ink. A one-year touch-up is not unusual for chest clusters that combine color and tight pixel work.
Frequently Asked Questions
Q: What placements should beginners pick for pixel tattoos that age well?
A: Start with flat, low-movement areas like the outer forearm, calf, or shoulder blade because the grid maintains its geometry there. The wrist and fingers look great at first but usually require touch-ups sooner. If you want a small chest or rib piece, increase pixel size slightly and plan for breaks during the session.
Q: How do I find local artists who actually understand strict pixel grids?
A: Search hashtags like #pixelarttattoo, #8bittattoo, and #retrogamingink on Instagram and TikTok while filtering by your city. Use Tattoodo or Booksy to search keywords such as "pixel art neo-traditional" and look specifically for healed photos in portfolios. Reddit threads in r/gamingtattoos and r/tattoos often surface peer recommendations and healed examples across skin tones.
Q: Do bright retro colors show up on darker skin tones?
A: Bright reds and greens can be visible on dark skin if the artist uses high-opacity pigments and strong black outlines rather than relying on color alone. If you have darker skin, ask the artist which pigments they have tested on similar tones and request healed photos from those clients. In some cases a black-and-grey version offers stronger long-term contrast.
Q: How long before I should expect a touch-up for small pixel pieces?
A: Expect a realistic touch-up window of 12 to 24 months for small pixels on high-movement areas like wrists or fingers. Flat placements with bold blocks often stretch the interval to two to three years. Plan for one follow-up and ask the artist to note touch-up timing in your aftercare card.
Q: What's the right thing to wear to a session for these placements?
A: Wear clothing that gives the artist clear access without pulling or tight edges on the tattooed area. For inner arm or shoulder work a loose tank top is ideal. For hip and lower back pieces choose low-rise pants that are zipped and buttoned, and for sternum select a strapless or bandeau top so fabric does not rub the fresh ink.
