
A bold phoenix can mark a real turning point, but the choices you make at the stencil stage determine whether it still reads clearly in three years. Pick the wrong line weight, wrong placement, or a watercolor palette that loses saturation on darker skin and the symbol blurs into background noise. Below you will find focused design options, what to say in consultations, and how each idea usually looks fresh, at six months, and after proper healed time.
1. Fine-Line Single-Stroke Phoenix Outline on Inner Forearm
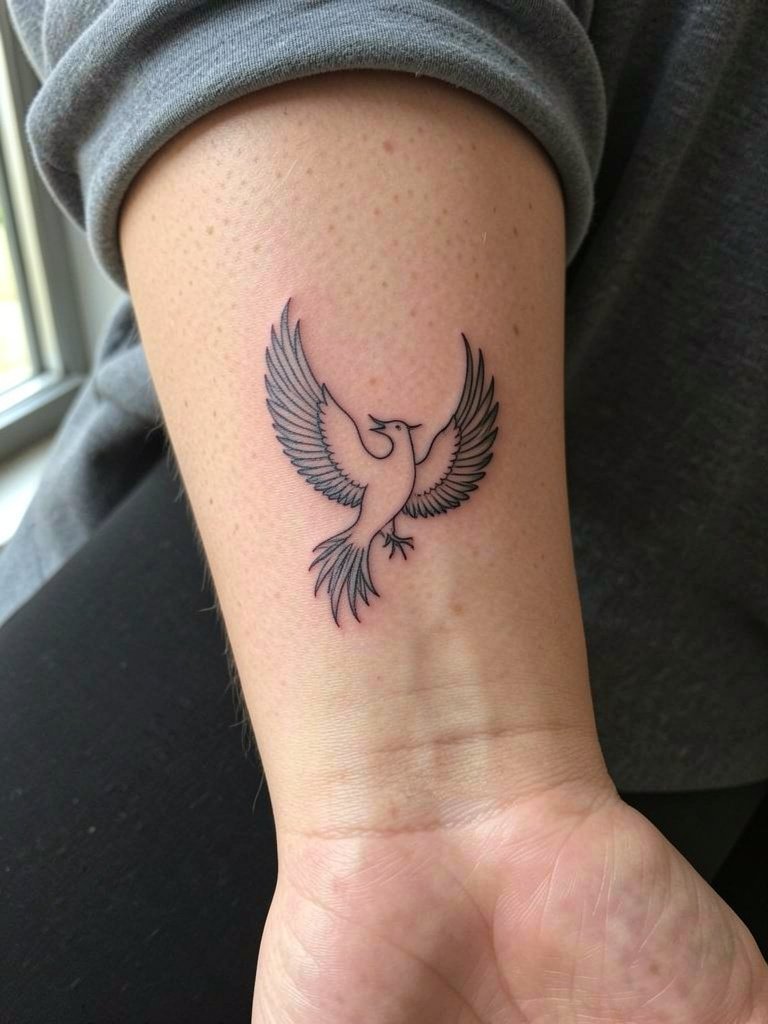
Fine-line single-stroke reads elegant on a forearm that gets rolled up and shown. The usual mistake is going too tiny for the single-needle weight, which causes the linework to dilute at the six-month mark. Plan a hair heavier line weight than your reference so the silhouette keeps contrast at two years. Expect one session and minimal soreness. Six months in the line may soften but still read clean if saturation was solid. After two to five years expect some softening and a likely touch-up. For session day wear a rolled-up linen shirt and layer delicate bracelets to frame the forearm, try a linen button down shirt for the reveal.
2. Geometric Phoenix with Faceted Wings on Outer Shoulder
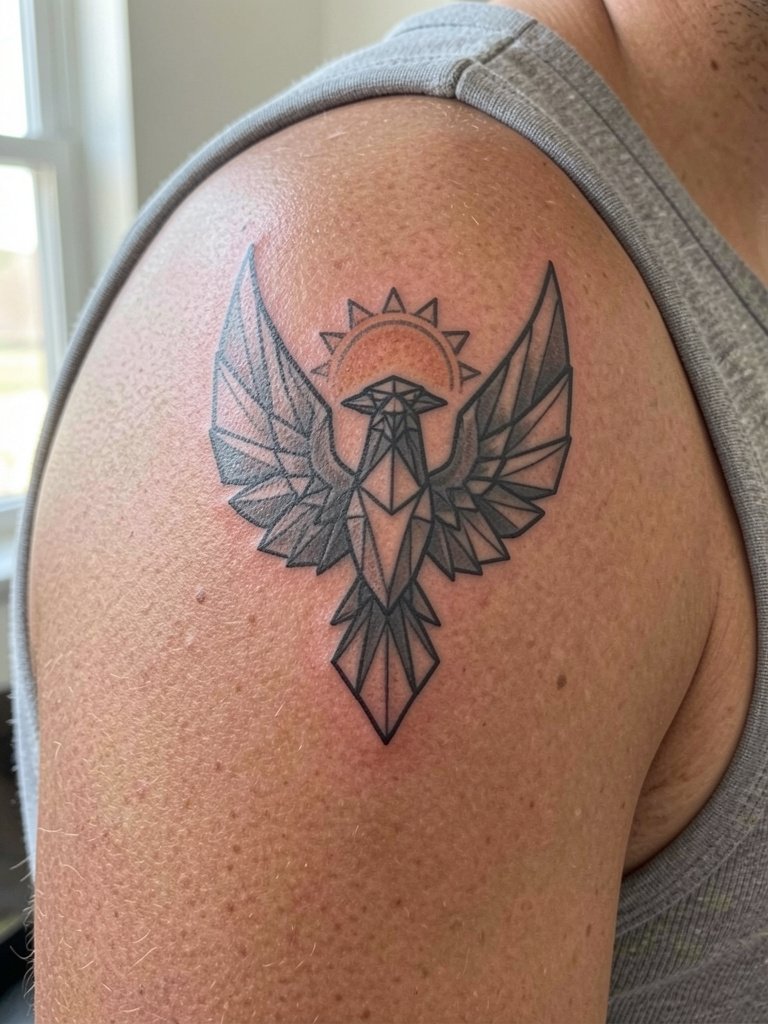
The geometric look benefits from room for each facet to breathe. A common error is shrinking the triangles so lines touch and create a blur after healing. Discuss exact overall scale and how wide you want the halo so the wing facets do not crowd. This placement is a 3 out of 10 on most pain charts and takes one session for a medium-sized piece. At six months the geometry should still pop if spacing was preserved. For showing it off wear a sleeveless tank in solid black to make the shapes read crisp.
3. Watercolor Splash Phoenix with Dripping Embers on Forearm
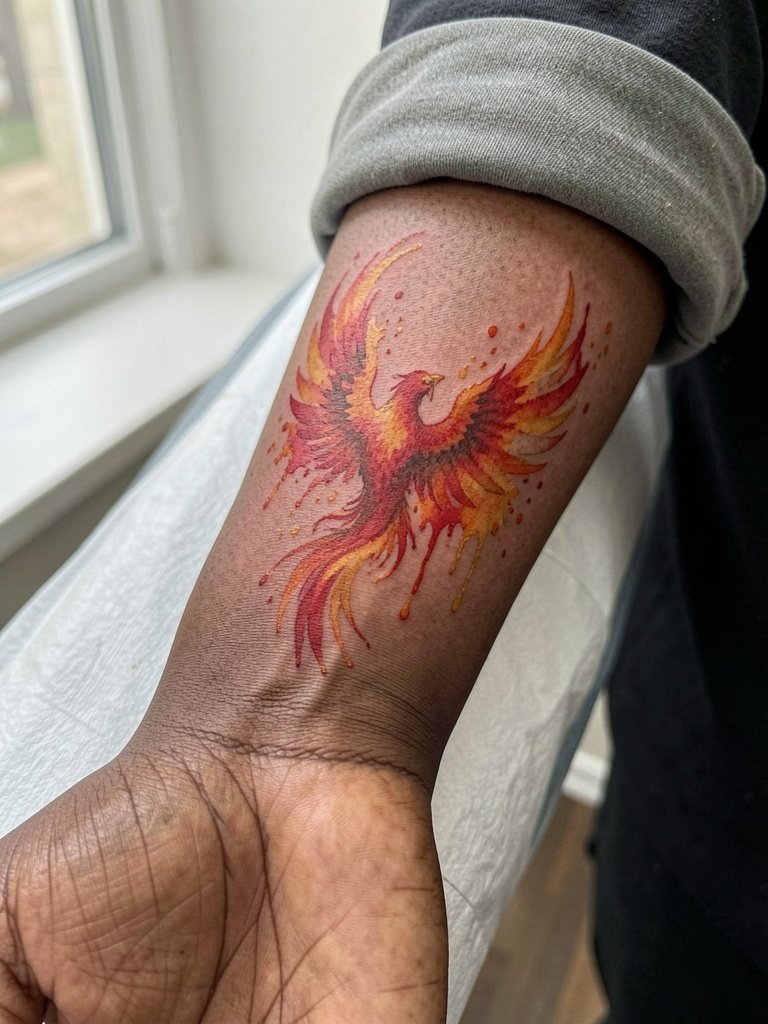
Color wash phoenixes look like paintings at first, but heal differently depending on pigment and placement. Artists and wearers split into two camps. One camp argues watercolor and vivid reds fade or migrate into a muddy tone within a few years on forearms. The other camp says careful pigment choice and solid saturation keep color vibrant for much longer. If visibility over time matters, ask for denser saturation points or thicker anchor lines around key shapes so the composition still reads at year three. For session wear keep sleeves short and bring a neutral top that rolls easily. Pair the healed look with stacked bracelets, and use a dainty gold stacked bracelet set when you show it off.
4. Black-and-Grey Realism Phoenix with Ash Pile on Full Back
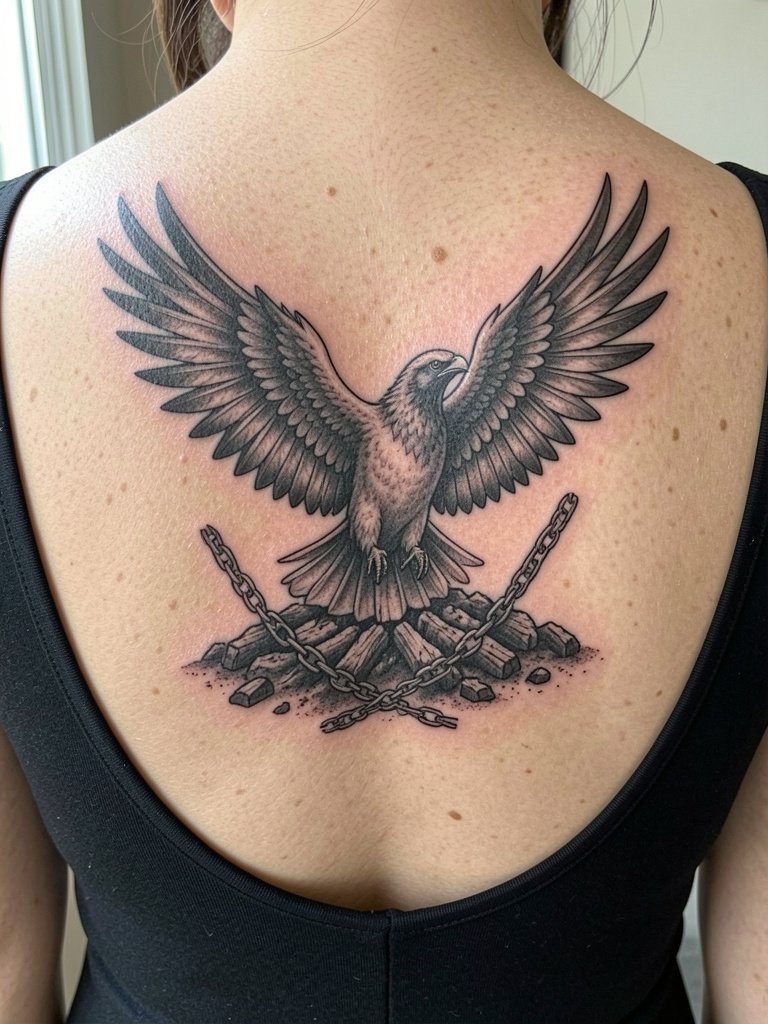
An ash-pile realism piece reads as a deliberate narrative. Expect multiple long sessions and a higher touch-up timeline for fine gradation areas. A frequent debate here touches aftercare choices. One camp says heavy occlusives lock in moisture and prevent infection during the early window. The other camp warns thick ointments clog pores on large color or textured black-and-grey pieces and can cause uneven healing. If the design includes many soft greys, request a thin, breathable aftercare product and ask for a realistic touch-up plan to preserve subtle stipple shading. For a display look choose a backless gown or open-back top to frame the piece.
5. Japanese Ho-Oh Style Phoenix with Traditional Clouds as Full Sleeve
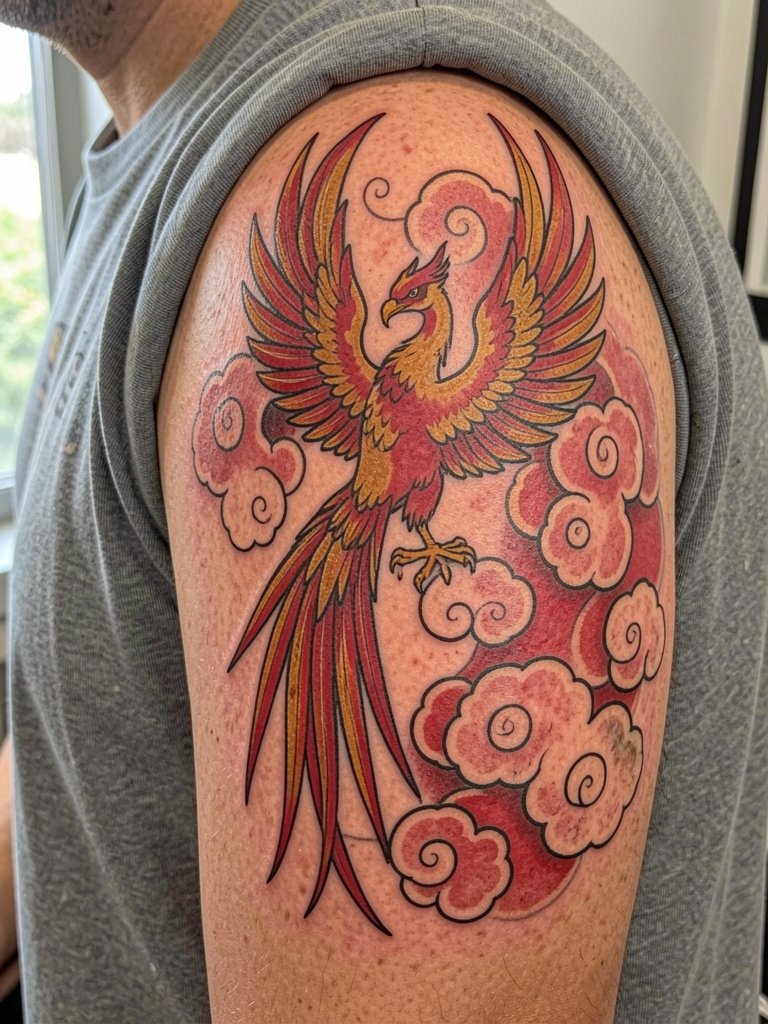
A Ho-Oh style sleeve is ornate and benefits from cultural sensitivity. The phoenix here nods to Japanese iconography and should be treated with respect in composition and motifs. Avoid mixing unrelated cultural symbols without a clear reason. Sleeves age well when artists plan color blocking and allow breathing room between cloud motifs. Discuss how the tail will flow into future work if you plan a back or chest connection. Session comfort is manageable with breaks, expect several long sittings. Pair this sleeve with sleeveless tops to reveal the full flow and try a wide cuff bangle for balance.
6. Split-Composition Phoenix (Ashes to Plumage) on Ribcage
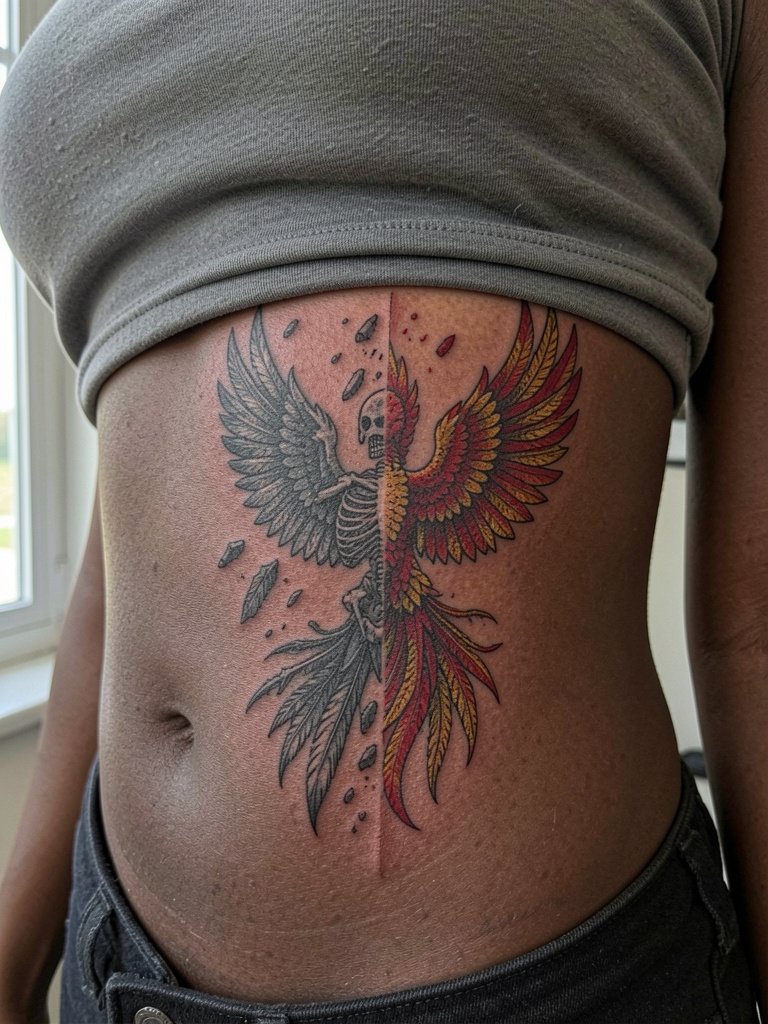
The split-composition makes the metaphor explicit and is popular for recovery milestones. Ribs are a high-pain zone and a common place for fine-line failure. One camp insists fine-line on ribs blurs within two years because motion and stretch affect thin lines. The opposing camp says proper depth and slightly wider spacing make fine-line settle well on ribs and will show healed examples. If you want the split look on ribs, ask for slightly heavier contour lines where the composition needs longevity and plan a two-session strategy so the artist can manage saturation without oversaturating tender skin. For session wear bring loose drawstring pants and a crop top so the artist can access the side without tight waistbands.
Pre-Session Essentials
The forearm and rib placements above have different access needs and aftercare risks, so these products smooth the appointment and the first week.
-
Kure Balm Japanese-style aftercare. A thinner, less greasy balm referenced by some collectors for bold color pieces; helps color phoenix patches avoid clogged pores while still moisturizing.
-
Silicone healing sheets for tattoos. Used by some artists to reduce scabbing on large back pieces and to keep texture flat during the first healing phase.
-
UV protective long-sleeve sun shirt. Blocks sun during early outdoor exposure and reduces early color fade for forearm and chest placements.
-
Tattoo-specific breathable film roll. Protects fresh ink from friction during the first 48 hours without trapping too much moisture.
-
Hustle Butter Deluxe balm. A thinner balm many people switch to after the initial clinic window to avoid heavy occlusives while keeping the skin supple.
7. Phoenix Head with Flame-Crest and Talons on Chest
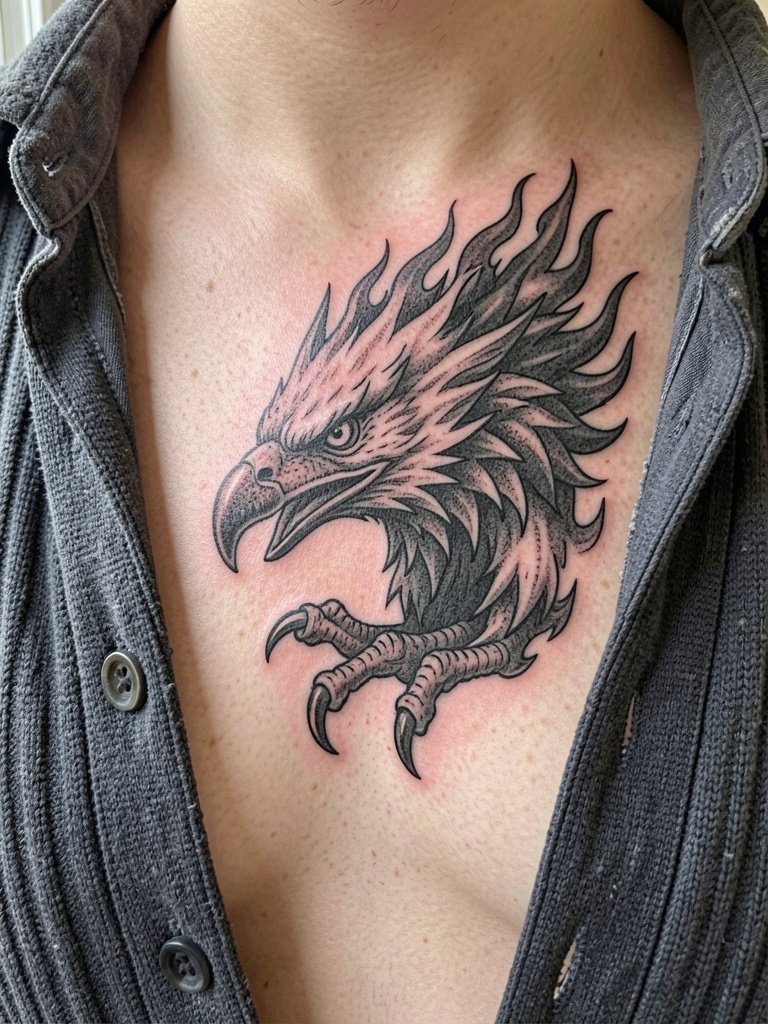
A chest phoenix head reads bold and confrontational. The common mistake is over-detailing in a small pectoral area which later loses crisp contrast. Ask for a test stencil that shows how negative space will hold up at three inches. Pain is moderate to high on the chest for larger fills. Expect one to two sessions for a medium head piece and plan touch-up for edge saturation after healing. When showing it off, layered chains and a cardigan frame the composition. Wear a button-down on session day for easy access.
8. Minimalist Flame-and-Feather Motif Behind the Ear
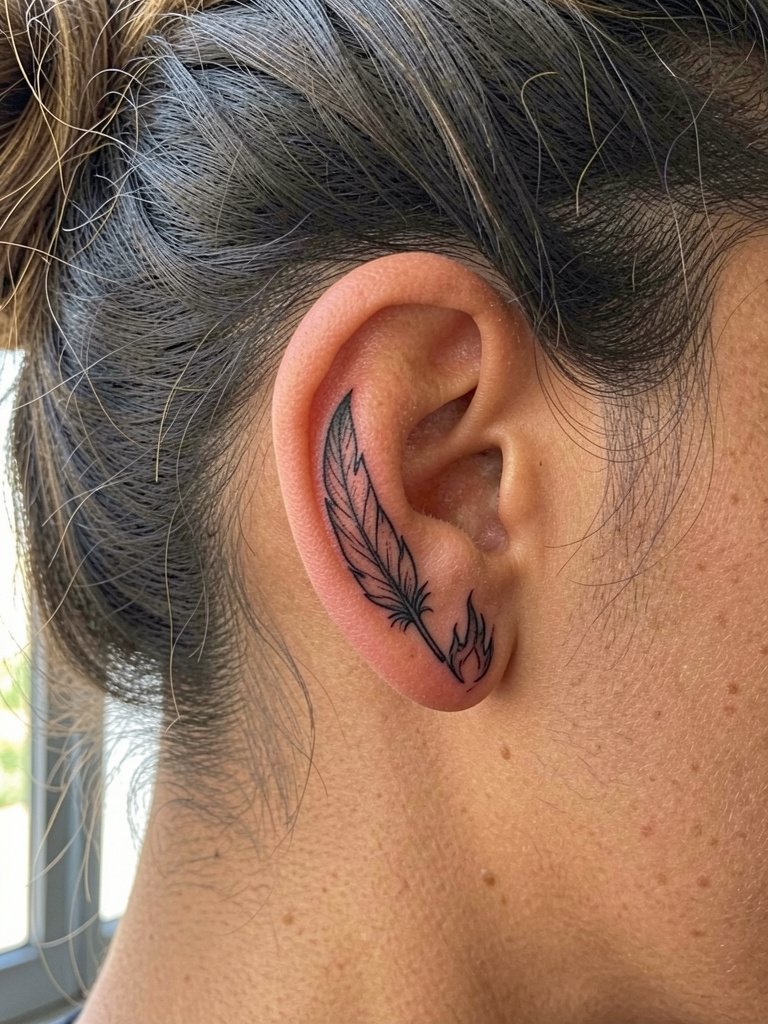
Tiny placements behind the ear favor minimalist cues. The main mistake is choosing too thin a line and not accounting for hairline movement. Discuss exact needle thickness for the script-sized elements and confirm a conservative size so the motif still reads in photos. Healing is quick and less scabby than rib work, but touch-ups are common if lines soften. For the session wear your hair up and avoid heavy necklaces. For the reveal, a high-neck ribbed knit frames the spot and draws attention upward. Add a layered thin chain necklace set to balance the neck area.
9. Phoenix Egg Cracking with Emerging Bird on Wrist
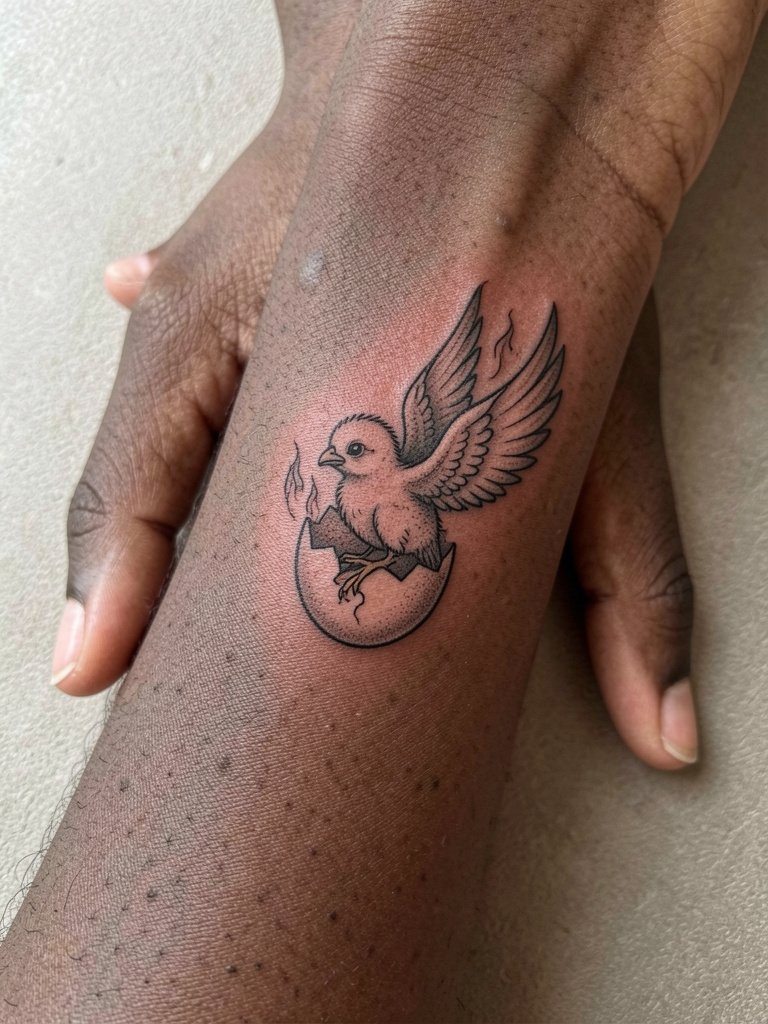
Small wrist pieces read intimate and literal for new starts. The usual error is over-detail in a tiny area, which turns into muddled dots after healing. Ask for a simplified line study that keeps the egg crack readable at three to five centimeters. The wrist sees constant friction, so gentle aftercare and minimal jewelry during healing matter. Expect a touch-up within the first year for crisp crack edges. For session day remove watches and wear short sleeves. For showing it off pair with a minimalist watch on the opposite wrist and a thin chain bracelet on the tattooed side. Try a minimalist watch for balance.
10. Phoenix Wing Patchwork Element for Sleeve on Upper Arm
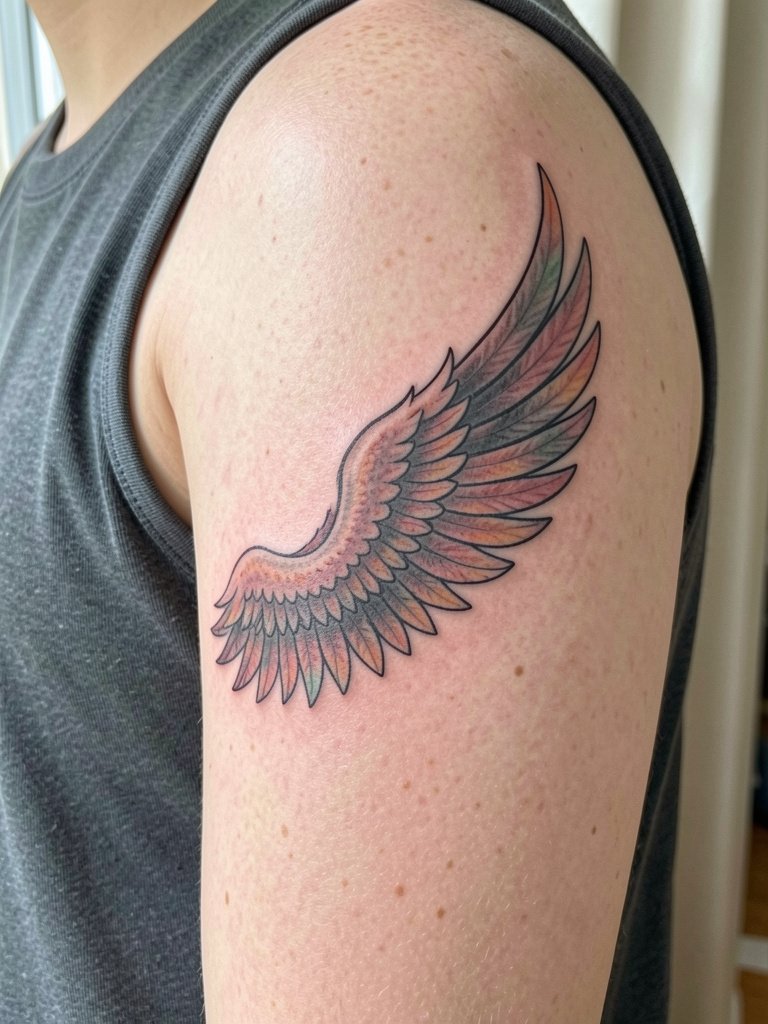
Patchwork wings are perfect for collectors building sleeves over time. The common mistake is matching scale poorly to adjacent pieces, which breaks flow when the sleeve fills out. Bring a mid-sleeve photo so the wing scale aligns with future connectors. Expect one session per wing element and allow separate appointments to blend edges. For the session wear a sleeveless tank that is easy to remove and replace. To style the finished sleeve try a solid tank and a wide cuff on the opposite arm. A sleeveless tank keeps the wing visible.
11. Trash Polka Phoenix with Red Ink Drips on Calf
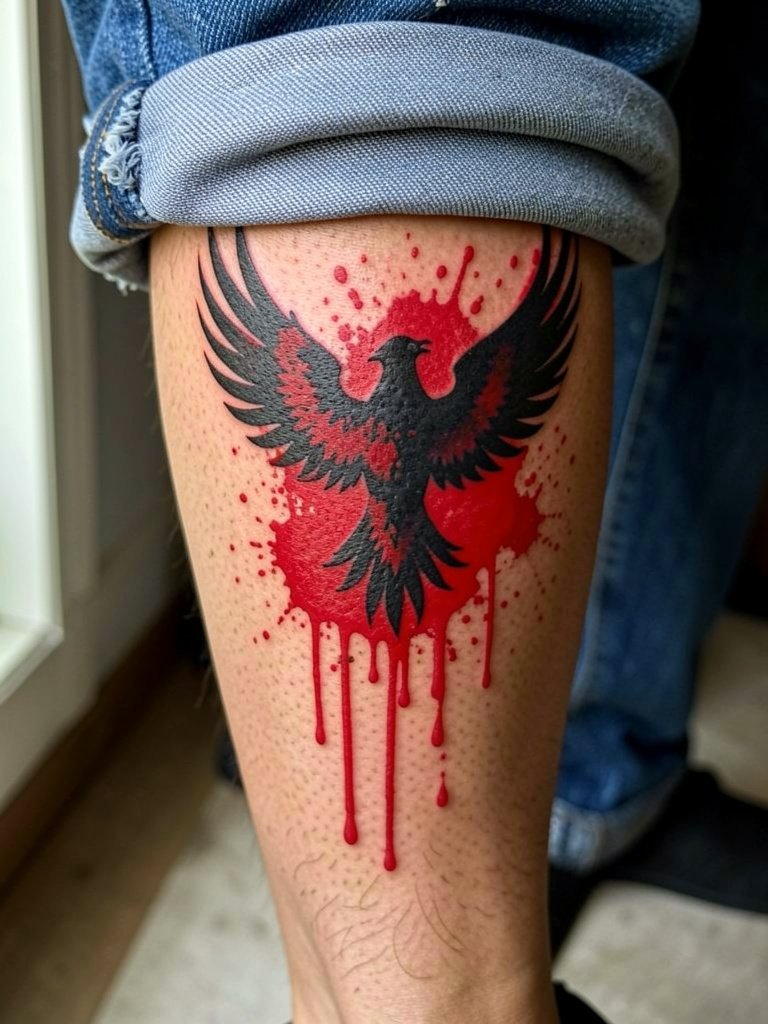
Trash Polka reads loud and reads from a distance, which is the point. Avoid shrinking the red accents so they become blotches against bold blackwork. Talk about exact red placement and ask for healed examples of similar saturation on the shin. Calf pain is moderate and this area handles contrast well. Healed red can fade faster than black, so plan for a color touch-up in a few years depending on sun exposure. For showing it off wear knee-high boots in summer or cropped wide-leg pants. Session wear: loose shorts for easy access.
12. Phoenix Silhouette with Sun Background on Shoulder
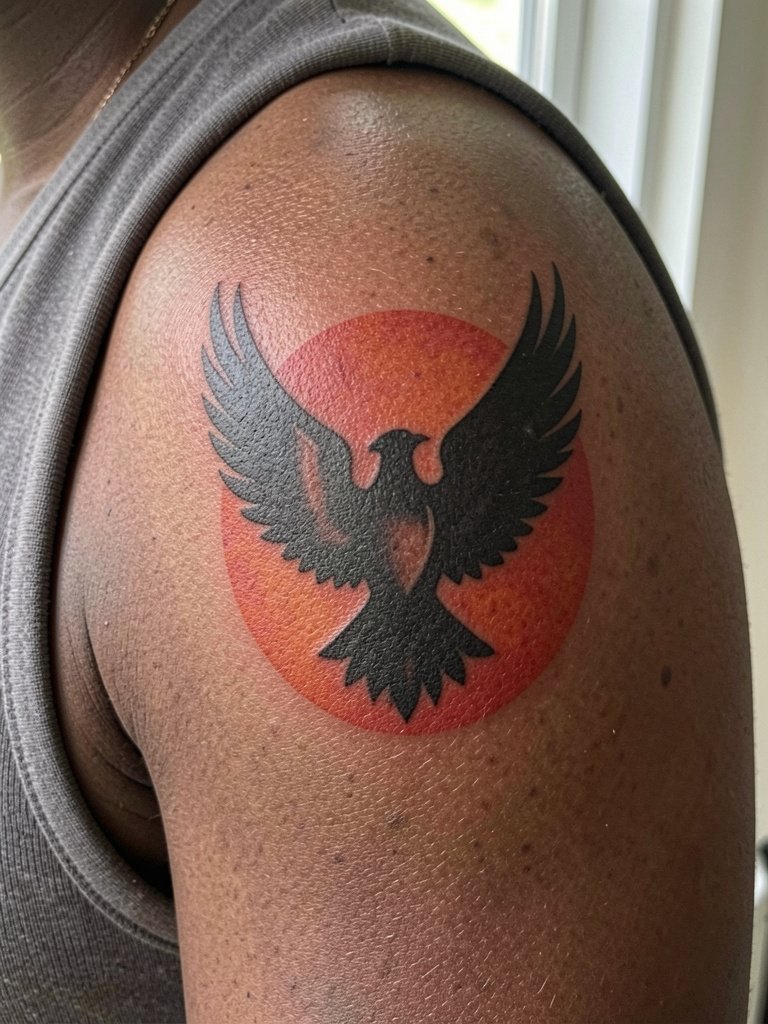
A silhouette inside a sun works when you want immediate legibility. The typical mistake is choosing too small a sun disc, which makes the silhouette lose its presence on the arm. Confirm overall diameter and the negative space around the bird so the shape reads even at a glance. The shoulder cap is low pain and heals predictably. Solid fills tend to outlast delicate color blends on exposed placements. Pair with a sleeveless black tank to showcase the strong graphic. For the session wear a tank or short-sleeve that is easy to slide off without rubbing the area.
13. Phoenix with Flower Vines (Peony or Rose) on Inner Forearm
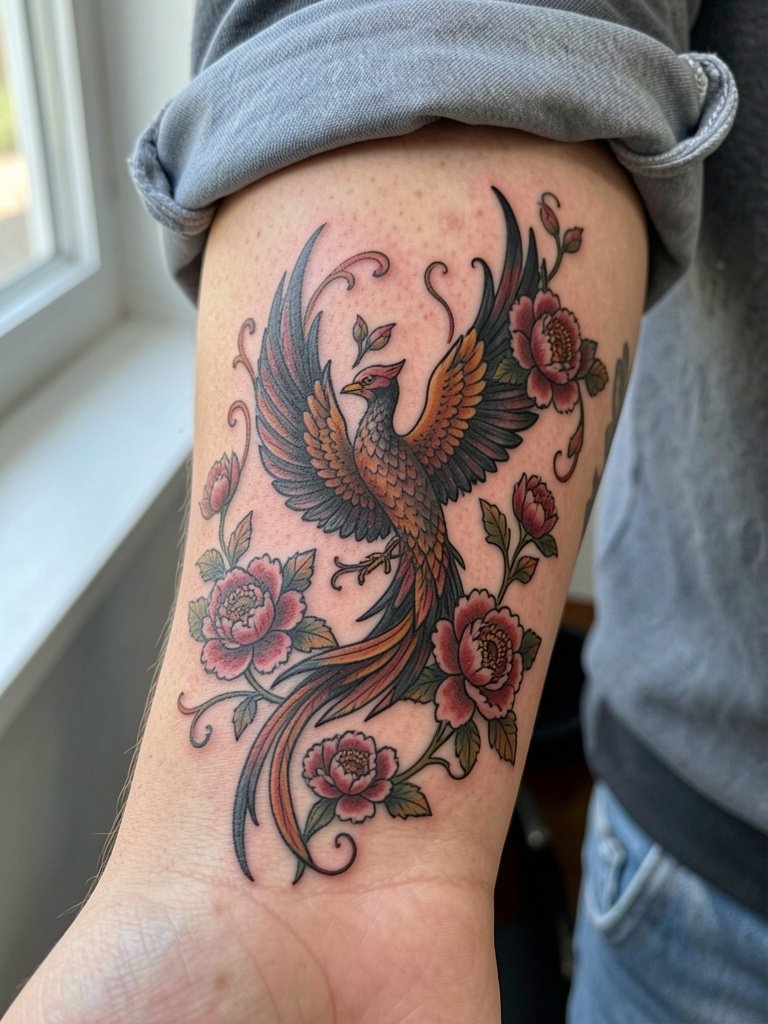
Floral pairings soften the phoenix and introduce narrative detail. A frequent error is crowding flowers too close to fine feather detail, which creates muddy transitions after healing. Discuss negative space and how the vines will curve with your forearm motions. Inner forearm placement is visible and shows color well on lighter tones. For session wear a loose button-down so the artist can roll the sleeve without pressure. Style with a V-neck in cream or sand to frame the inner forearm and try a v neck top cream when you want to show the piece.
14. Phoenix with Broken Chains in Ash Pile on Hip
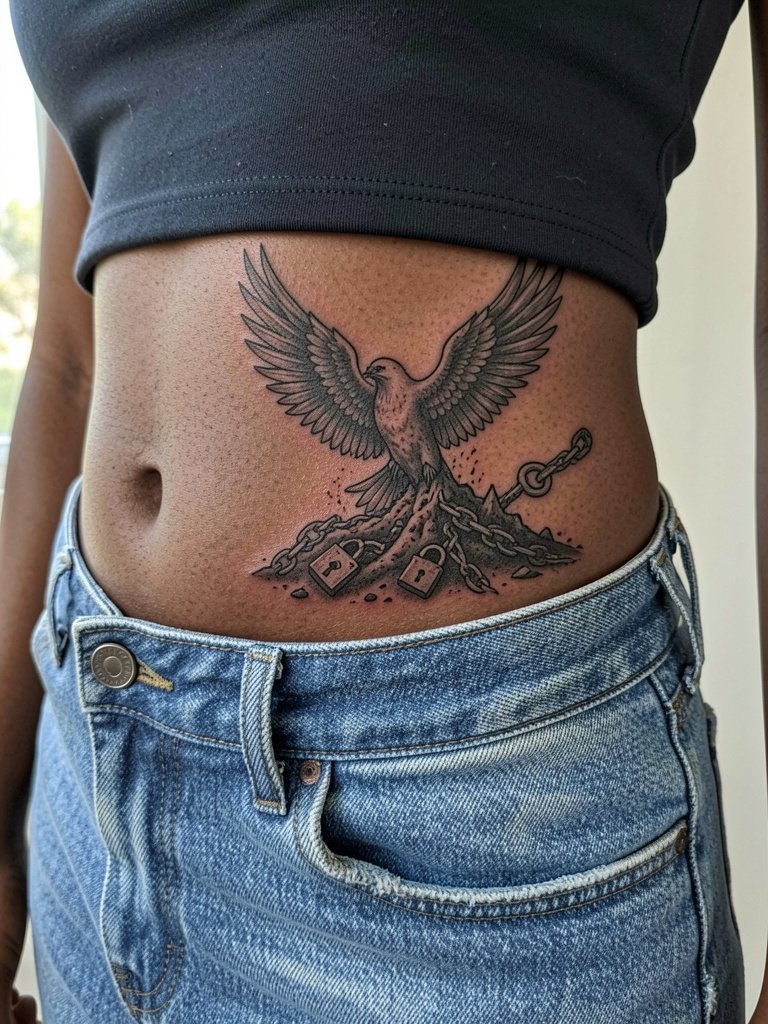
Embedding broken chains in the ash is a direct symbol for liberation. The hip placement is discreet and heals well if you avoid tight waistbands. The mistake is placing too many small metallic bits that lose detail against textured ash shading. Ask for chain elements to be slightly larger than your mockup so they read after healing, and confirm how the design will sit with low-rise clothing. Session wear should be loose drawstring pants to avoid compression. For nights out a low-rise skirt or jeans will reveal the lateral hip area and accent the story.
15. Solar Halo Phoenix on Sternum
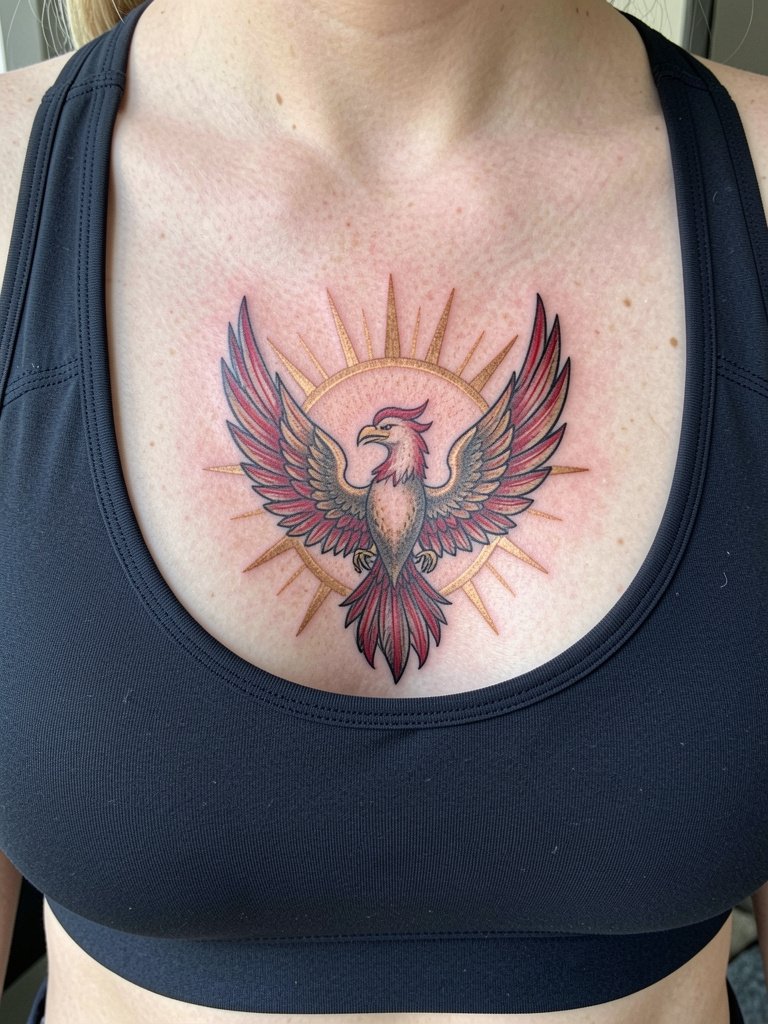
Sternum placement makes a powerful central motif that pairs well with circular compositions. The sternum heals with more sensitivity, so expect higher pain and plan for breaks. A common mistake is overcomplicating radial feather details, which can blur near the center. Confirm the halo diameter and ask how feather tips will be shaded on curved skin. For session day wear a sports bra or fitted bandeau so the artist can work without clothing shifts. For styling choose low-cut tops that keep the circular composition visible.
16. Minimal Negative-Space Phoenix on Ankle
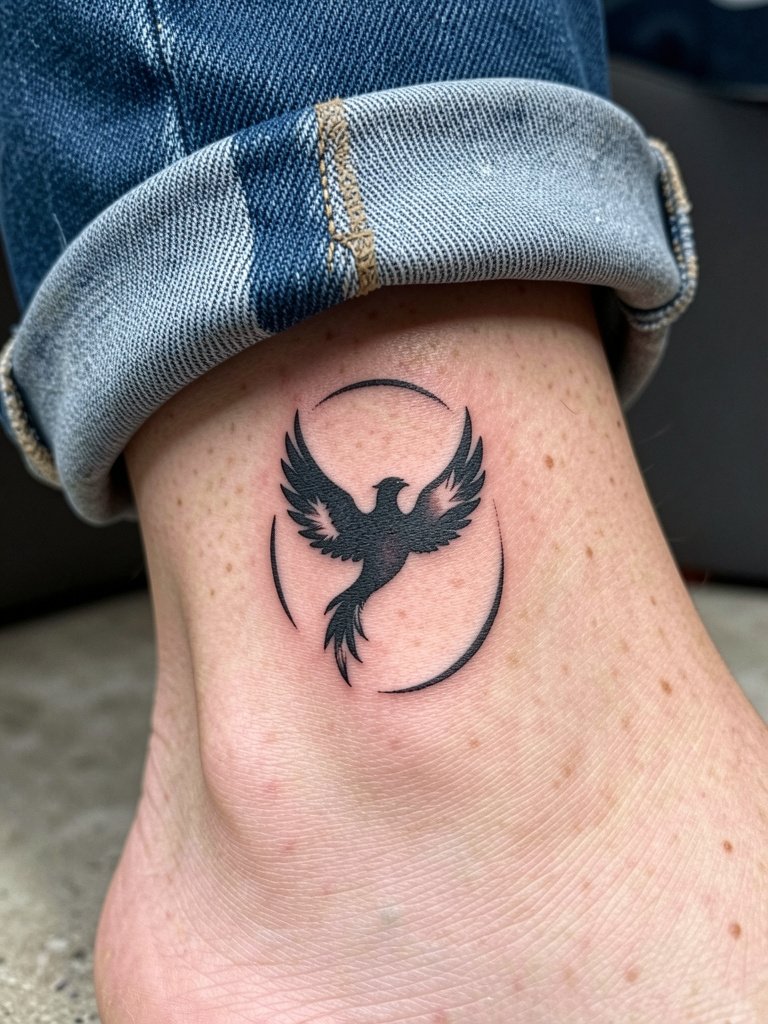
Ankle silhouettes must balance small scale with movement from socks and shoes. The usual error is placing too much fine negative detail that vanishes after the first year. Make sure the negative cutouts are wide enough to survive minor blowout and abrasion. Ankle pieces heal fast if you avoid tight socks and footwear during the first two weeks. For sessions wear loose straight-leg pants that can roll up easily. Show the healed ankle with strappy sandals, pairing with strappy sandals tan.
17. Geometric Tail Wrap that Flows Over Ribs and Hip
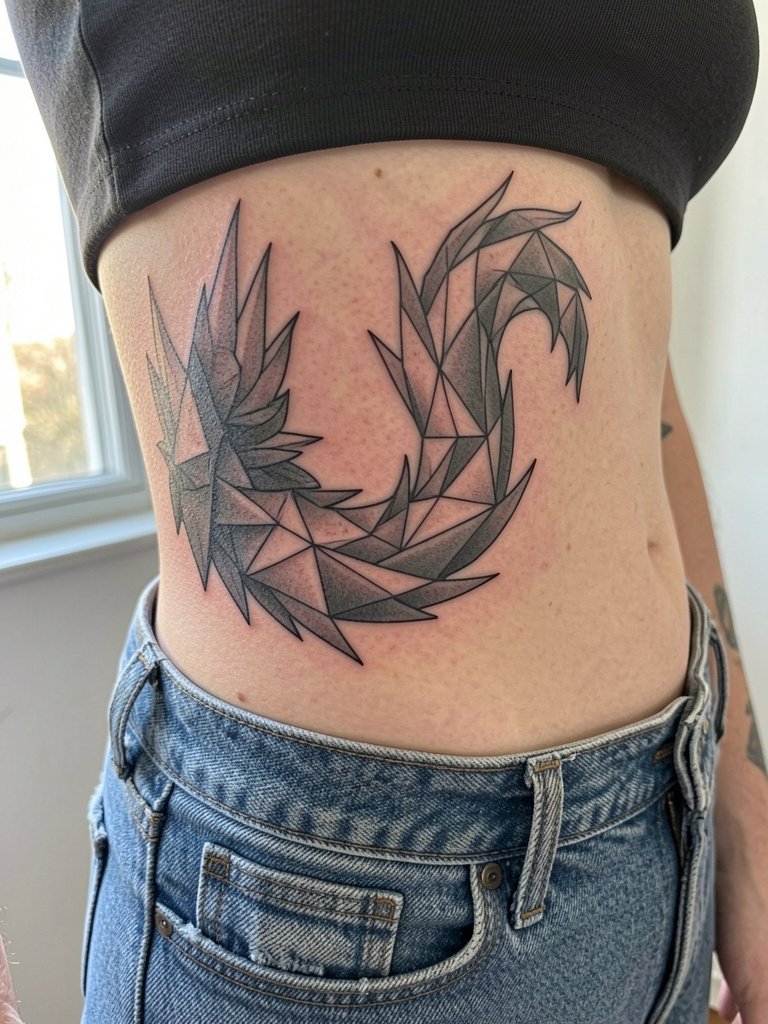
A wrap that crosses two body zones must consider how motion and compression affect line intersections. The mistake is not accounting for the waistline and how jeans will compress facets. Show the artist photos of your typical outfits so they place elements where they will not be pinched. Expect moderate pain on the ribs and mild on the hip. For session wear drawstring linen pants so the artist can work without waistband interference. This design reads well with low-rise crop tops.
18. Dark-Skin Visibility Guide Phoenix on Outer Thigh
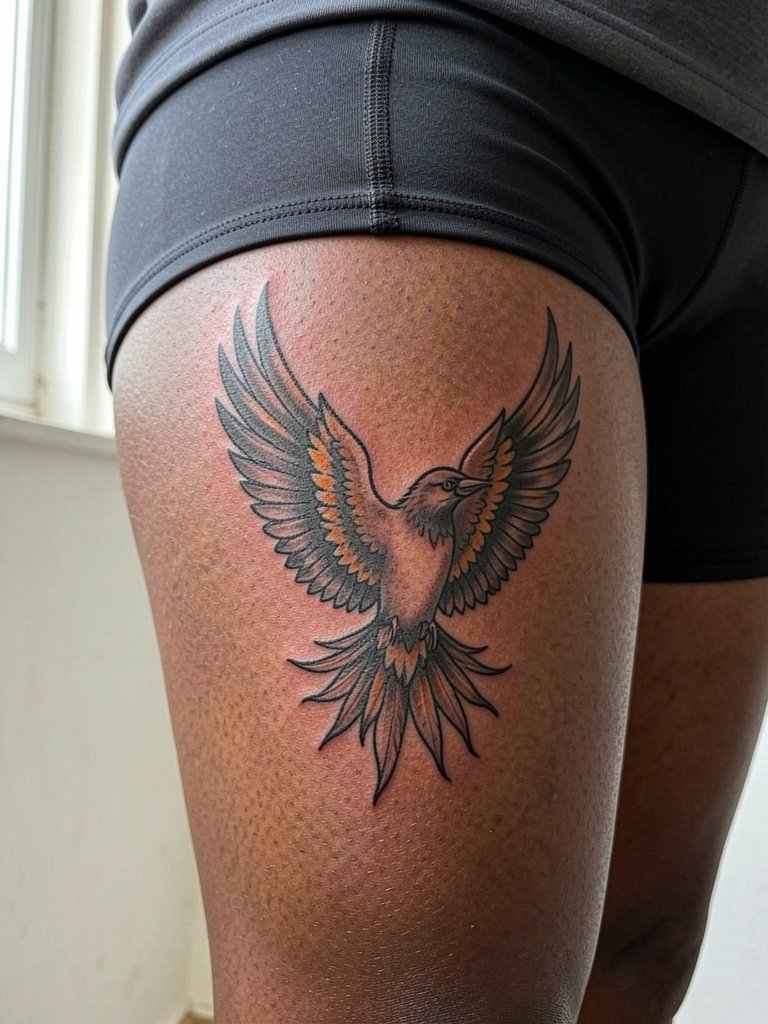
Color visibility on darker skin needs practical planning rather than guesswork. Many people find that saturated black-and-grey or bold outlines maintain the strongest contrast. If you want color, request high-contrast anchor outlines and test small accent patches first so you can photograph the healed result. Avoid watercolor-only approaches on melanin-rich skin unless the artist has documented healed color success. Session wear: modest shorts to keep the thigh accessible and avoid friction. For outings, an open-front skirt or low-rise shorts will reveal the placement without rubbing.
19. Micro-Realism Ember Cluster on Collarbone
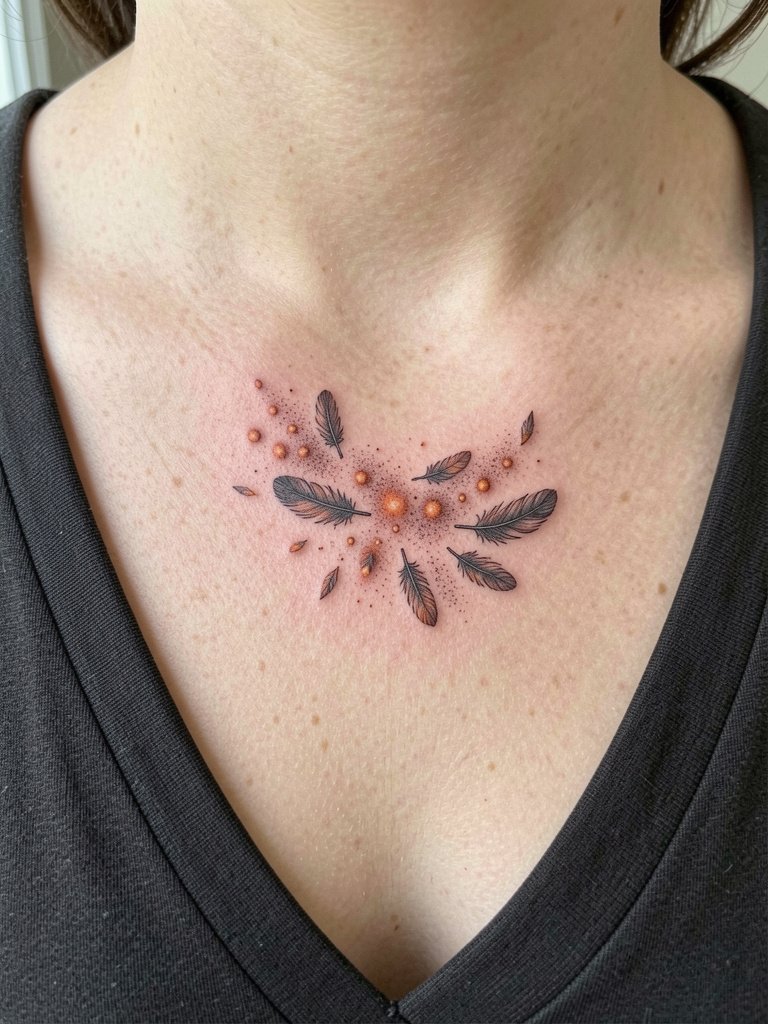
Micro-realism needs dedicated aftercare and cautious scale choices. The most common error is packing too much tiny detail into a thin collarbone strip, which can blur as the skin moves. Ask for a scaled mockup to visualize how the stippling will hold at three sizes. Collarbone skin can be finicky, so expect a one-session piece with a likely touch-up for pinpoint highlights. For showing off, a V-neck cream top frames the collarbone and complements the tiny ember cluster. Try a v neck top cream for outfit pairing.
20. Trash-Polka Minimal Phoenix Segment on Calf Wrap
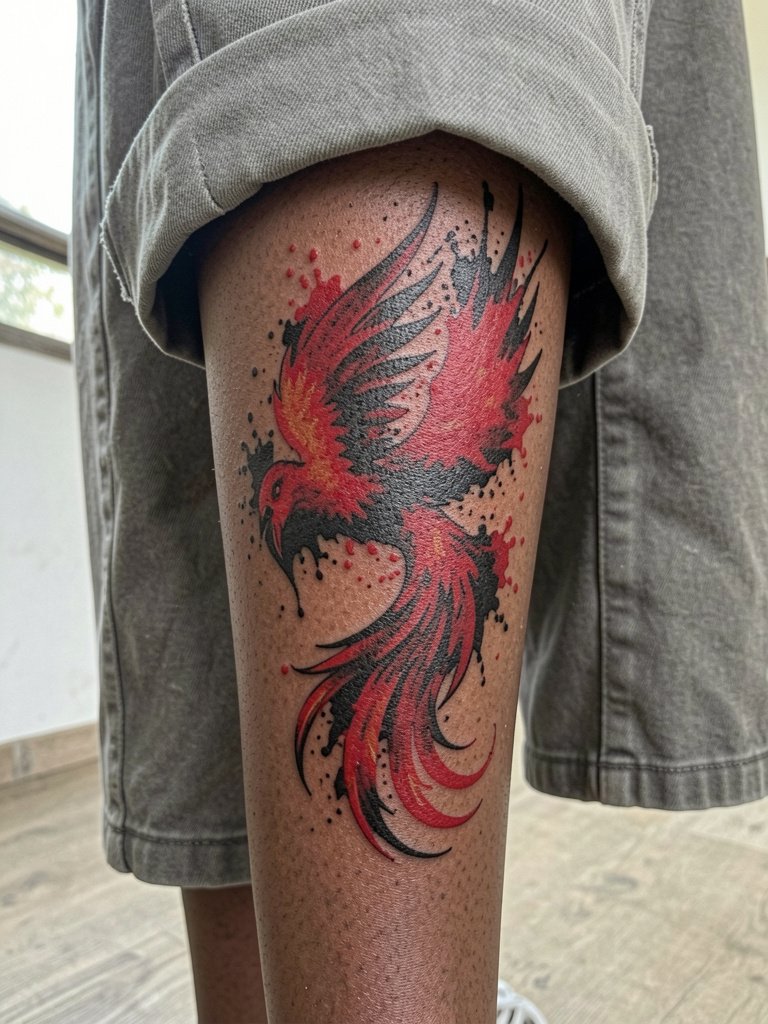
A calf wrap is visible and dramatic. The typical mistake is trying to cram too many drip marks into a narrow vertical band. Instead choose a few decisive red accents and let negative space carry the composition. Calf sessions are comfortable for long sits and the area shows contrast well. For reveal pair the healed piece with cropped pants or summer boots. Session wear: loose shorts for easy access.
21. Stipple-Shaded Phoenix Tail on Upper Thigh
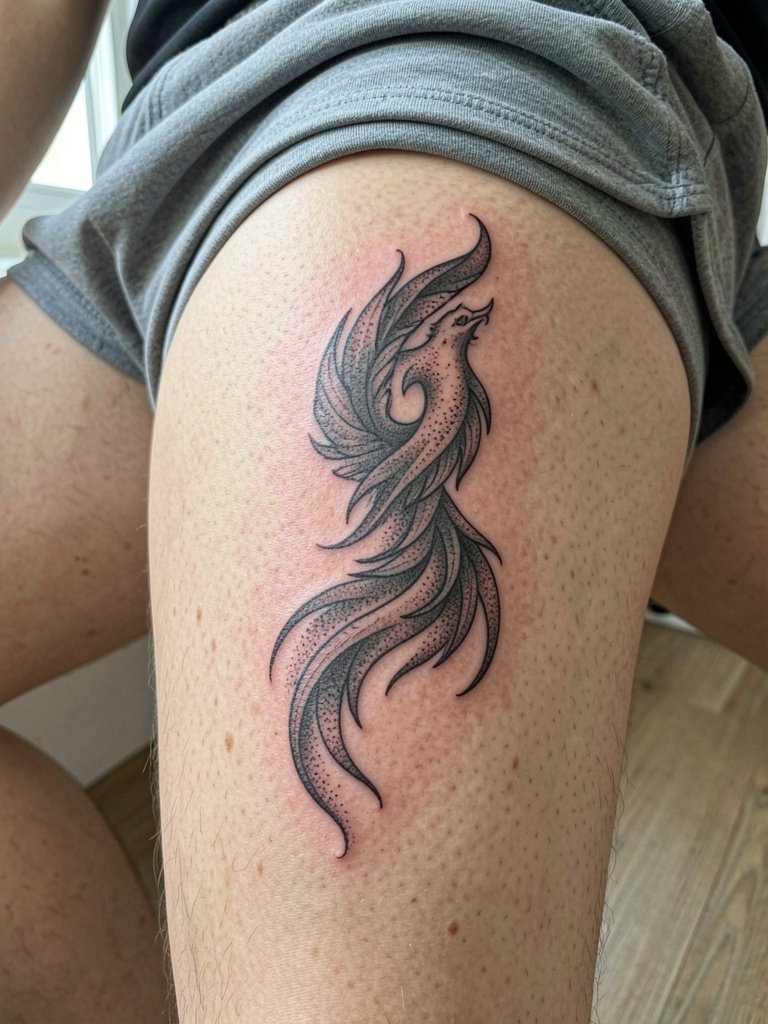
Dot-work tails need patient shading and careful scale. The mistake is compressing stipple into too-tight zones where contrast disappears after healing. Confirm how the dot density will transition across curves and ask for healed examples of stipple shading on the thigh. Sessions are tolerable with breaks and the thigh offers good surface area for detailed work. For the session sit comfortably and wear shorts that let the artist reach the area without fabric rubbing. For evenings out, a skirt or dress reveals the tail flow.
22. Minimal Script Integration with Phoenix Ash on Lower Back
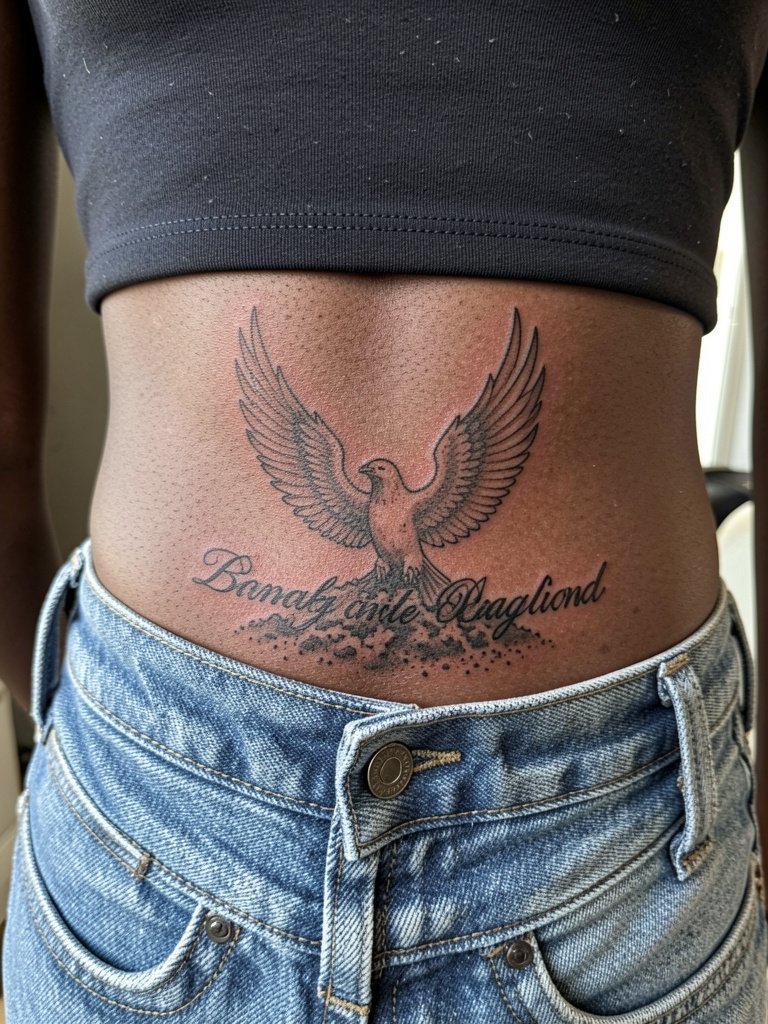
Integrating a single word into ash details can anchor a memory without becoming generic. The key mistake is picking script too thin for a lower-back surface that flexes with movement. Ask for a slightly heavier cursive weight and a layout test to ensure the word remains legible as the ash textures soften. Lower back pain is low and the area allows larger compositions. Session wear: button-down or top that is easy to remove and replace. For nights out a backless gown highlights the lower-back placement.
23. Coordinated Date in Roman Numerals with Small Ember Accent on Wrist
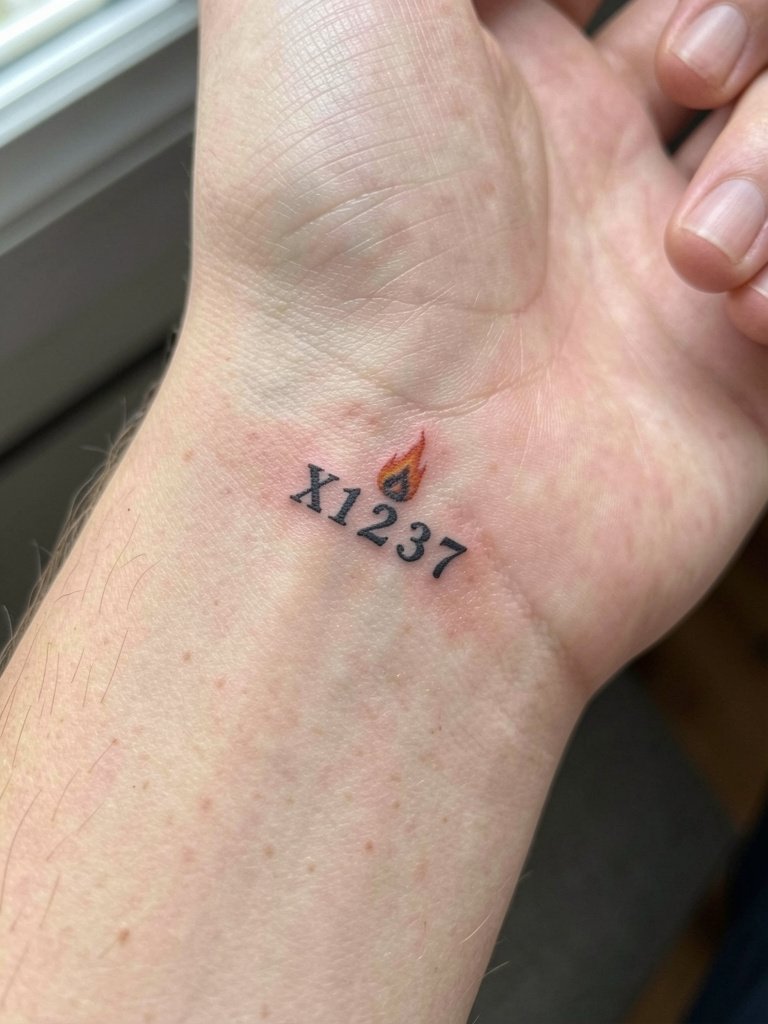
Dates are compact and meaningful, but thin numerals blur if placed too close to the wrist crease. Confirm the exact numerals you want and request a bolded numeral stroke so the date survives daily washing. The wrist sees heavy wear so expect a touch-up in one to two years. For session day remove watches and bracelets. Pair the healed wrist with a thin chain bracelet stack to keep the focus on the small date.
Frequently Asked Questions
Q: How much should I budget for a phoenix tattoo across common placements?
A: Expect wide price ranges based on size and detail. Small fine-line pieces often start in the low hundreds, mid-sized geometric or watercolor work tends to sit in the mid hundreds to low thousands, and large black-and-grey or Japanese full-back pieces commonly require several thousand. Tip artists 15 to 25 percent after the session and plan on a separate touch-up appointment within the first year for most detailed pieces.
Q: Will color phoenixes last on darker skin tones or should I stick to black-and-grey?
A: Bold black-and-grey offers the most reliable contrast on melanin-rich skin. Color can work if the artist uses strong anchor outlines and places saturated pigment in slightly larger patches. If color matters to you, request healed photos from the artist on similar skin tones and consider accent color rather than full watercolor washes for better longevity.
Q: Where can I find artists who specialize in these phoenix styles without naming individuals?
A: Search platform hashtags like #phoenixtattoo and style tags like #finelinetattoo or #blackandgreyphoenix on Instagram and TikTok, then filter by location. Tattoodo and similar tattoo directories let you search by keyword combinations such as "geometric phoenix rib" or "watercolor phoenix forearm" to see portfolio examples. Reddit communities like r/tattoos and r/tattooadvice are good for peer recommendations and healed shots across skin tones.
Q: How soon will a fine-line phoenix on the ribs need a touch-up compared with a blackwork phoenix?
A: Fine-line ribs often require earlier touch-ups because thin linework can blur with skin stretch. A realistic timeline is a possible touch-up within one to three years for single-needle work on the ribs. Heavier blackwork or slightly thicker line weights usually hold longer and may not need attention until year three to five, depending on sun exposure and skin changes.
Q: Are there aftercare products I should avoid or prefer for large color phoenixes?
A: Heavy occlusive ointments sometimes clog pores on large color pieces and can impact how ash textures heal. Some people prefer thinner, breathable tattoo balms after the initial clinic window to support flat healing. Discuss specific product timing with the studio, and remember that aftercare choices matter more for large color saturations than for single-needle black outlines.
