
Fine-line stars look delicate in photos, but the quiet reality is they demand a few trade-offs. Ultra-thin single-needle points read as tiny and precise at first, but on high-friction skin or in hot-weather healing they can soften into a smudge over a couple of years. This guide leans on what holds up, what to ask for in the consultation, and smart wardrobe choices that actually show off the work.
1. Single Five-Point Star on the Wrist
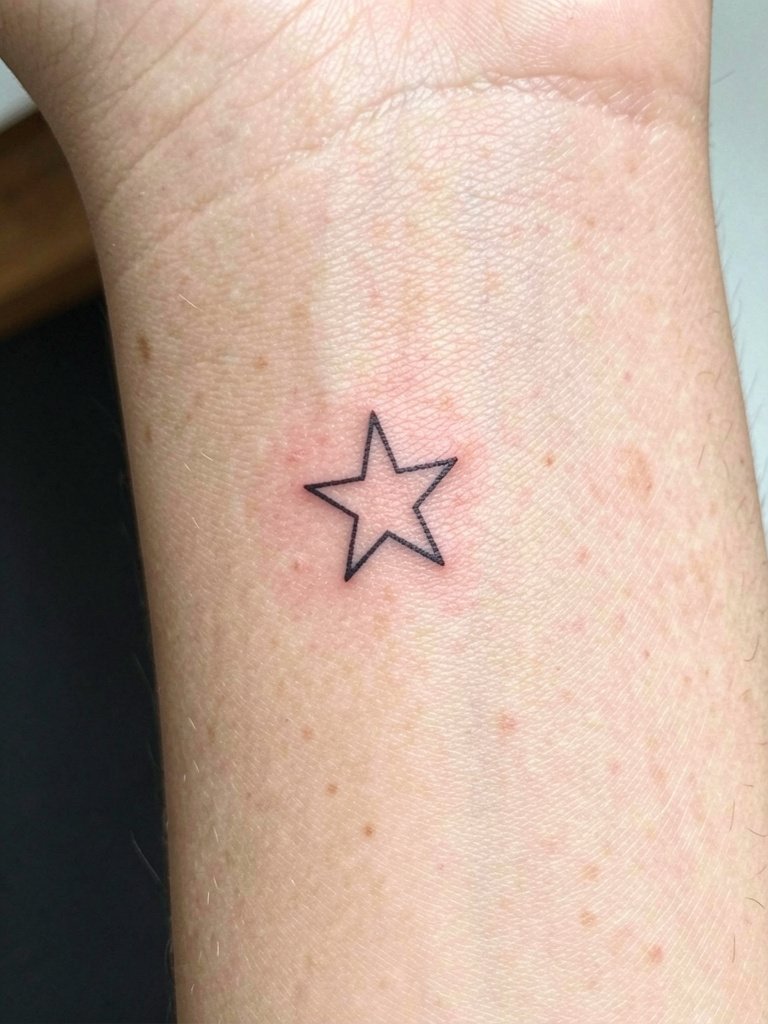
A tiny five-point star on the wrist is the classic starter piece because it is easy to cover and easy to show. I recommend a 2–3 mm outer diameter rather than 1 mm to preserve crispness at year two. During your consultation, show a scaled reference and ask for a slightly bolder hairline so the point tips do not spread out with time. Expect a 20 to 30 minute session and low pain. The wrist sees lots of hand washing and bracelets, so plan for a touch-up around year three if you want the edges surgical-sharp. For showing it off, roll up a linen shirt cuff and pair with a dainty stacked gold bracelet that sits next to the star.
2. Cluster of Three Tiny Stars on the Inner Forearm
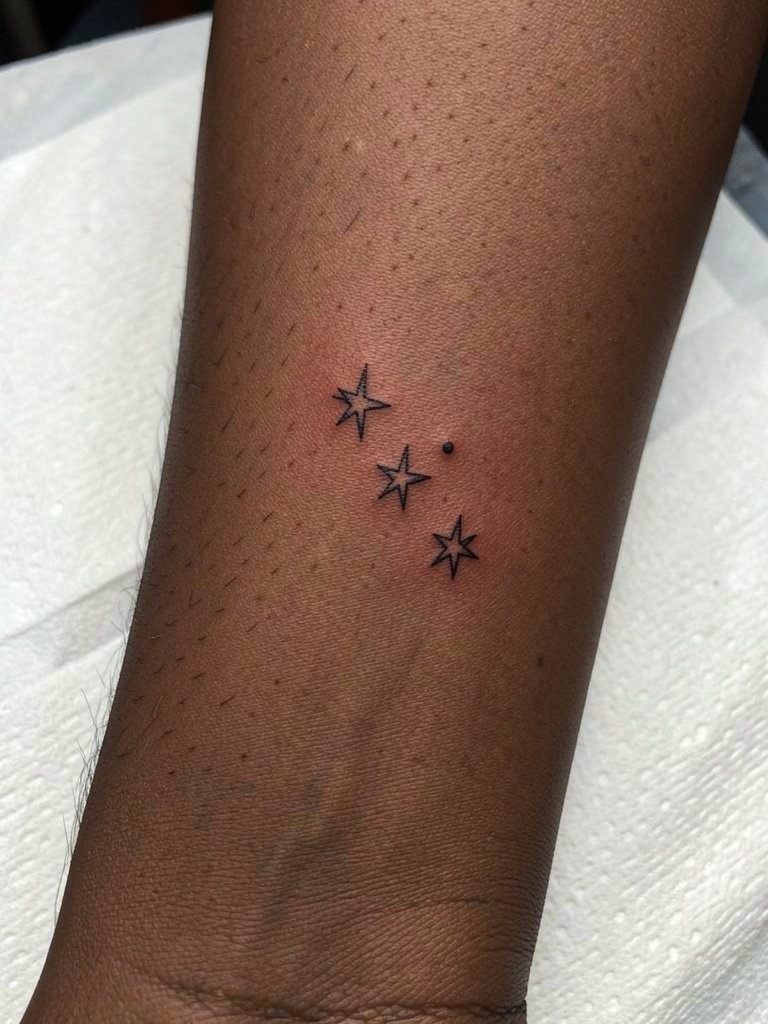
This trio reads like a small constellation and scales well across different arm lengths. I suggest spacing the stars 3–5 mm apart so the cluster keeps its shape as the years pass. Discuss line weight and spacing with the artist, showing a close-up photo printed at actual scale so you both see how large the cluster will be. At six months the cluster should look crisp. At two years, 1 mm lines often fade into a soft blur, so err toward a hair thicker than your favorite reference. Wear rolled-up linen or cotton shirts during show-off moments and add a thin bracelet stack on the opposite wrist for balance. Session time is usually 30 to 45 minutes.
3. Tiny Star Behind the Ear (Mastoid Area)
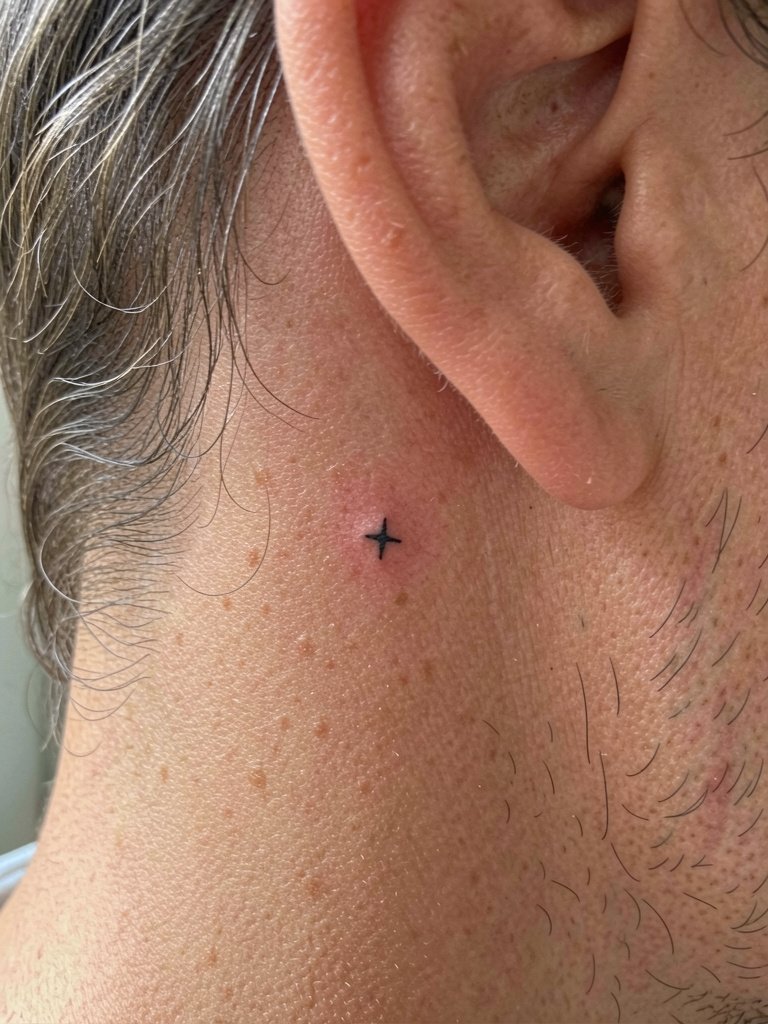
A behind-the-ear star is ideal if you want secretive placement that peeks out with a tucked hairstyle. The area is low on friction and often holds fine work well, but the skin is thin so request shallow but consistent needle depth to avoid trauma. Mention that you want the star to sit just below the hairline so hair growth will not obscure it. Session time is short and the pain is mild to moderate. For showing the piece, pin hair back with a gold hairpin minimal so the tiny star reads in photos. Note that healed photos can look different across skin tones, so expect slight tonal variation.
4. Dainty Star on the Ankle
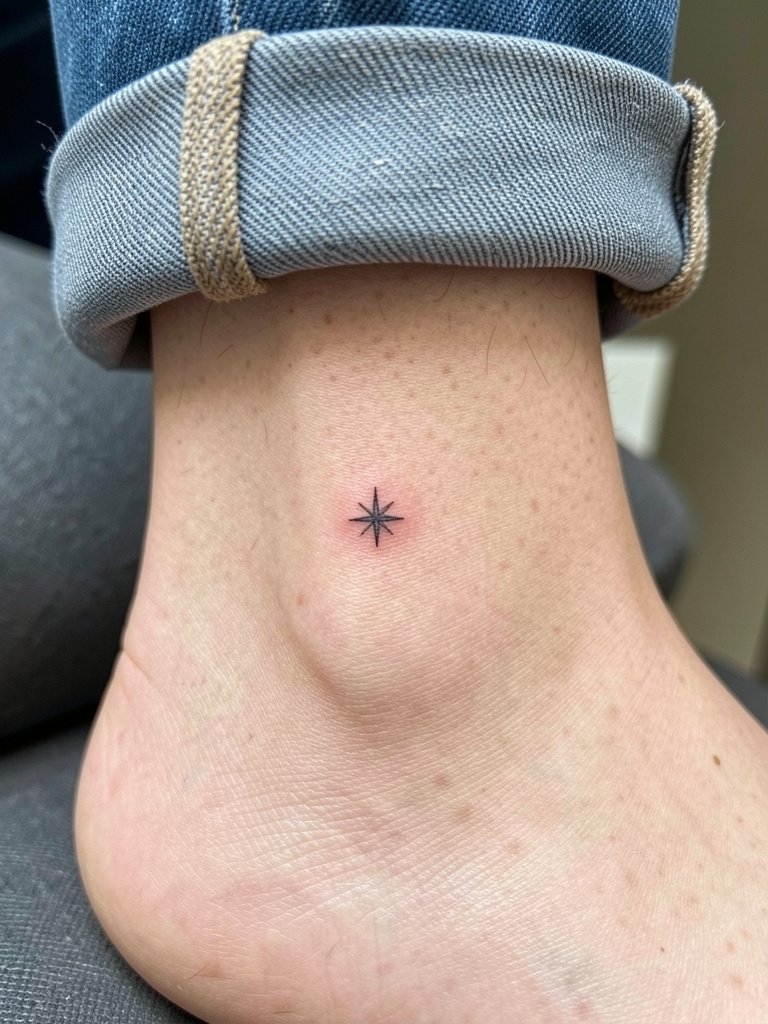
An ankle star is a summer-ready pick that plays well with sandals and cropped pants. The ankle experiences friction from socks and shoes, so opt for a slightly bolder outline than your initial tiny reference. For the session wear loose drawstring pants that roll up easily and do not compress the area during healing. Expect a 25 to 40 minute session and moderate pain from the bony area. If you live in a hot, sweaty climate, consider booking for fall to avoid heavy sweating during the first two weeks. For show-off looks, try strappy nude sandals.
5. Star on the Shoulder Blade
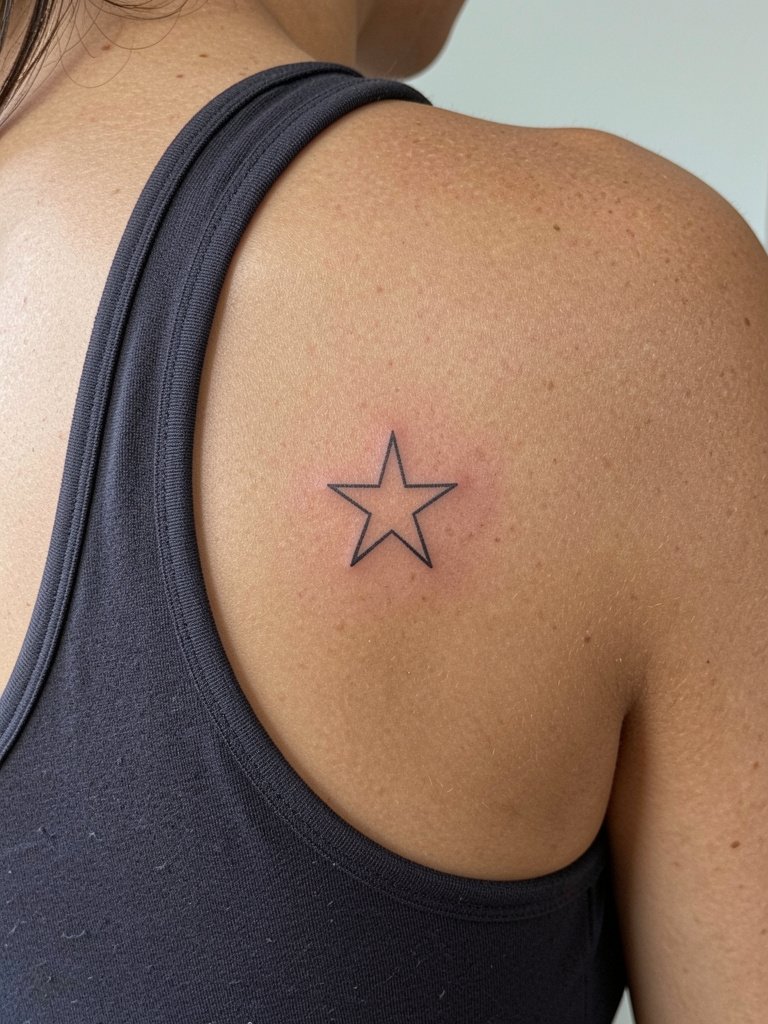
A shoulder blade star is subtle and ages well because the skin there is relatively stable. I prefer 3–6 mm to prevent early softening. When you book, specify how close to the shoulder joint you want the star so it reads when you wear off-shoulder or backless tops. The session feels low to moderate on pain and takes about 30 minutes. Common mistakes include asking for a 1 mm point that loses definition over time. Show it off with backless tops and a delicate backless pendant necklace that frames the spot.
Pre-Session Essentials
The wrist and finger pieces above heal differently from larger back and rib work, so a few small items smooth the session and the first week.
-
Japanese Kosei Aftercare Balm. Thin texture that users report reduces shininess on fine line work while keeping the area moisturized during early healing.
-
TattooGoo Aftercare Salve. Non-greasy balm favored in some threads for preventing overly glossy scabs on delicate lines and improving photographed contrast on darker skin.
-
After Inked Moisturizer. Lightweight formula that soothes and is less likely to leave heavy residue during the first week.
-
Mad Rabbit Aftercare Balm. Thinner than traditional ointments and often recommended when you want minimal shine on fine line pieces.
-
Aquaphor Healing Ointment. Widely used in studios as a first-aid barrier for fresh linework, though application technique matters to avoid excess shine.
7. Horizontal Star Line on the Inner Forearm
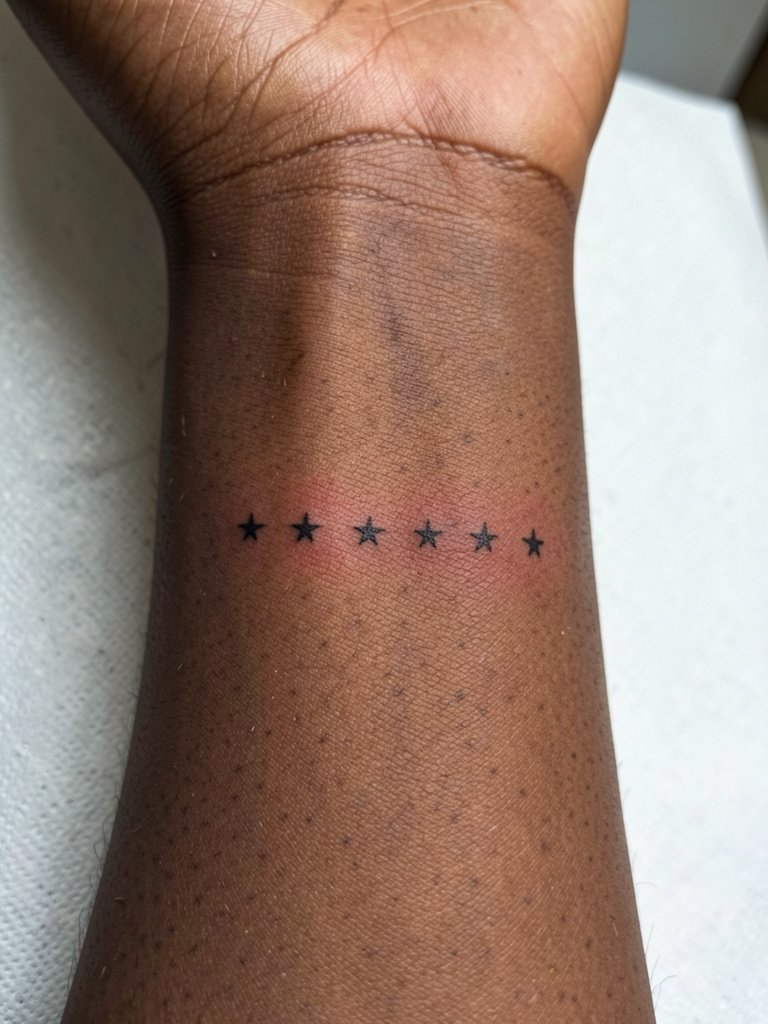
A linear constellation across the inner forearm reads clean and elongates the arm visually. Ask for even spacing and a scale mock-up placed on the inner forearm during the consult so you see the exact length. The ideal line weight here is a hair thicker than single-needle at 1.5–2 mm to resist washing and typing abrasion. At six months the row should still be crisp. By year three, expect some softening and plan a light touch-up if you want perfect points. For wearing, go with rolled-up linen sleeves and pair with a linen button down shirt for photos.
8. Single Star on the Upper Thigh
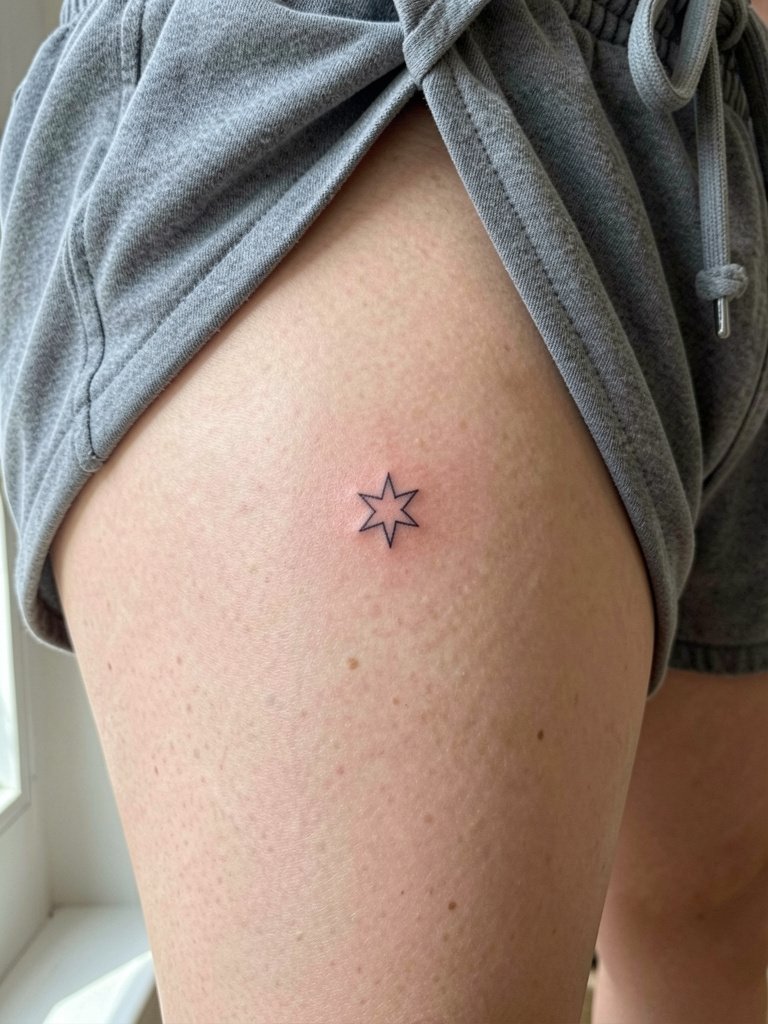
The upper thigh is forgiving and hides well for work or travel. I recommend a 2–5 mm range with slightly rounded tips if you want fewer touch-ups after weight changes. If you expect major body changes, place the design slightly lateral rather than across a muscle belly to reduce distortion. Session wear should be loose drawstring shorts so the artist can access the area without tight fabric. The piece typically lasts with minimal softening for three to five years before a light touch-up may help re-crisp edges. Show it off with high-waisted shorts or skirts and a high waisted shorts neutral.
9. Star with Thin Dot Accent on the Collarbone
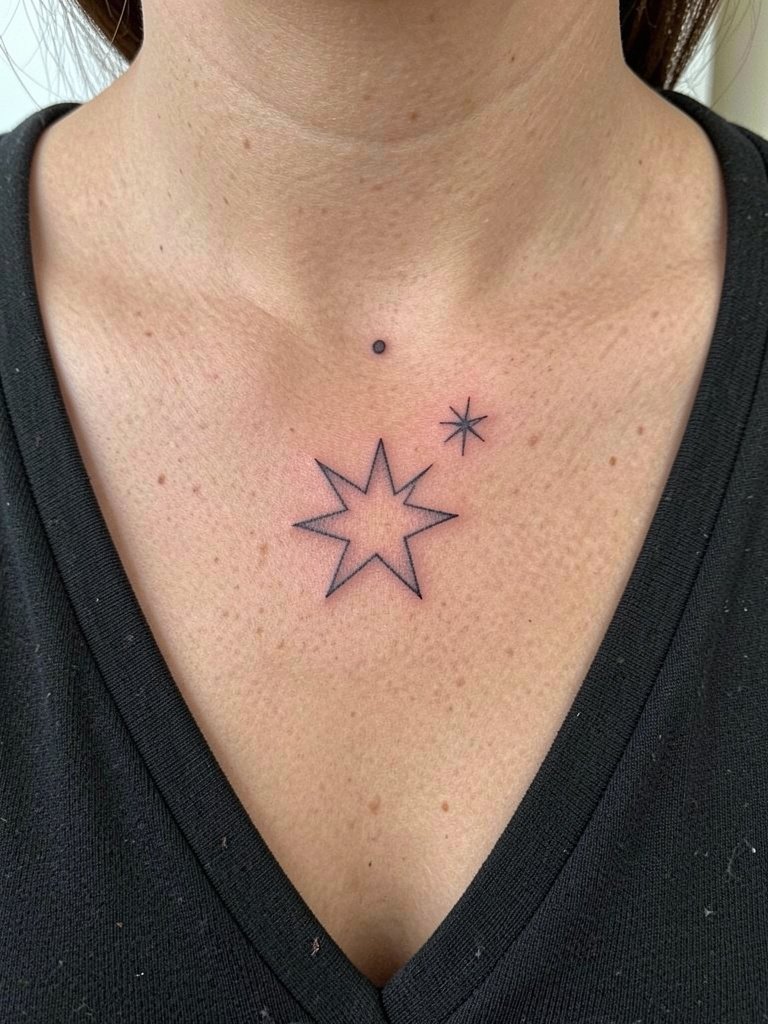
A star plus a millimeter dot adds a little narrative without crowding the collarbone. Specify the dot separation and exact placement relative to the clavicle during the consult so necklaces will not cover it. The sternum and collarbone area can feel tender, and sessions are usually 20 to 40 minutes. A common mistake is asking for the dot and star too close together, which causes the shapes to merge after healing. For outfits, a V-neck in light cream or olive frames the mark well, so try a v neck top cream when you want it visible.
10. Tiny Star Behind the Neck (Nape)
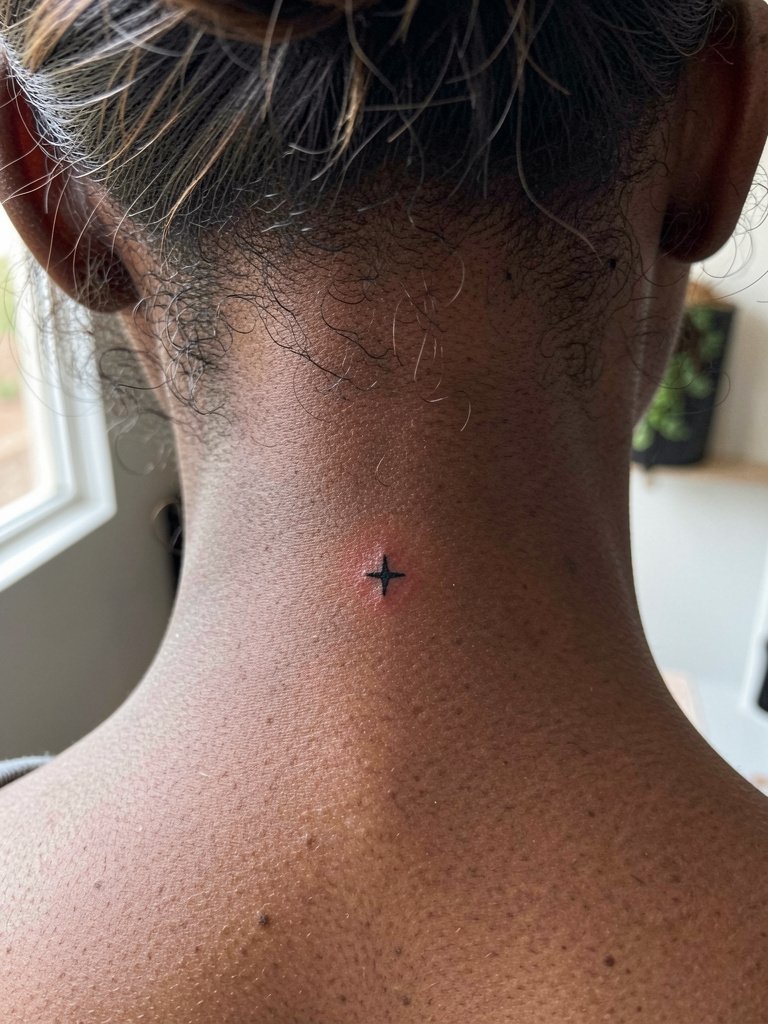
The nape is a favorite for quiet symbolism because it hides under hair until you lift it. Because the area is thin, ask for consistent depth and slightly bolder lineweight than a photo reference. A 10 to 20 minute session usually suffices and pain averages mild. The mistake I see most often is choosing a 1 mm star that disappears in photos on darker skin. A simple fix is to request a fractionally thicker line and test a healed photo sample on similar-toned skin. Wear hair up with a simple hair clip to show the piece.
11. Single Star on the Side of a Finger
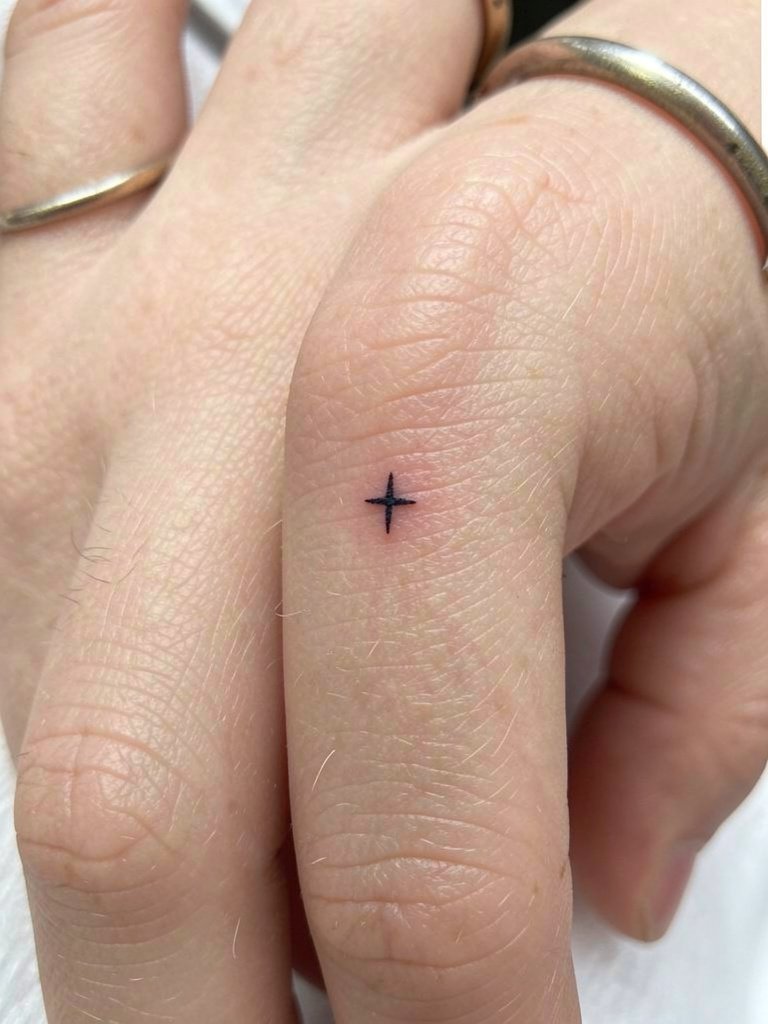
Side-of-finger tattoos are intimate and vulnerable to wear from daily tasks. Expect faster fading here compared with wrist or forearm. Specify a slightly stronger lineweight and budget for a touch-up within one to two years. Avoid placing the star across joint creases. The session is quick but the area bleeds and scabs differently, so follow a thin-moisture aftercare routine. For styling, keep rings minimal on adjacent fingers and try a minimal ring set gold when showing off the piece.
12. Star Cluster on the Calf
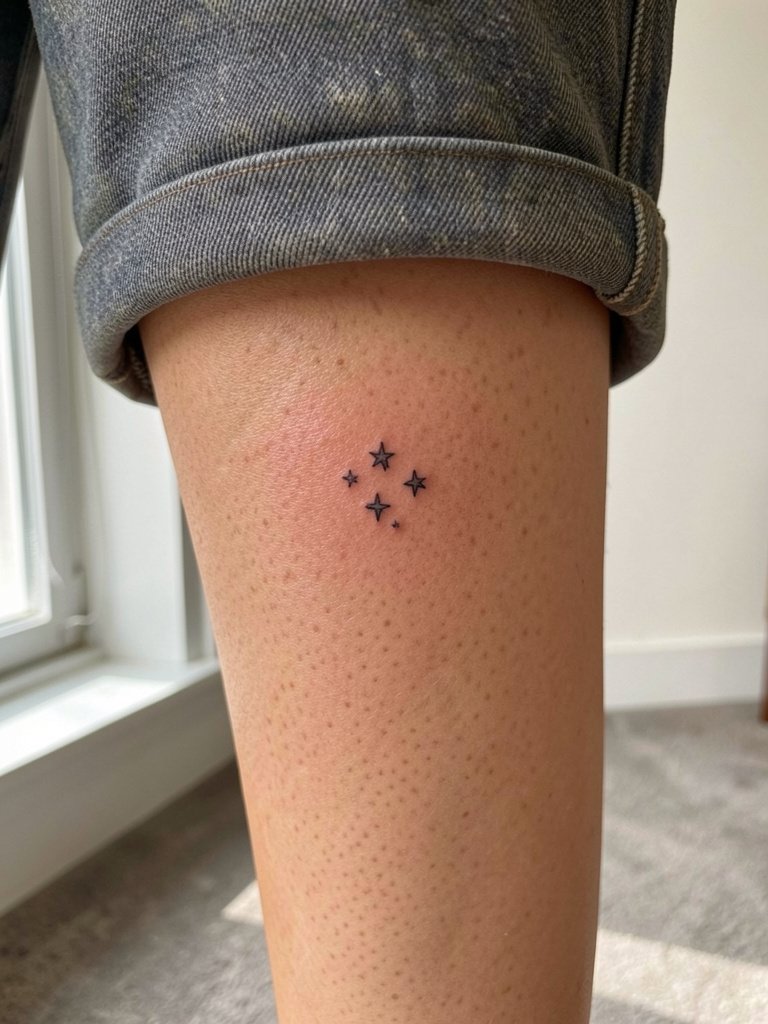
A calf cluster gives you room to play with spacing and density. It ages well because the calf is low-friction most of the year. For runners or heavy gym-goers, note that repeated impact and sun exposure will fade the cluster faster. Plan a 45 to 60 minute session for multiple tiny elements. A common error is crowding too many stars into a small patch where they lose individuality. Show it off with cropped pants and ankle boots, or sandals, using cropped pants neutral.
13. Minimalist Star on the Sternum
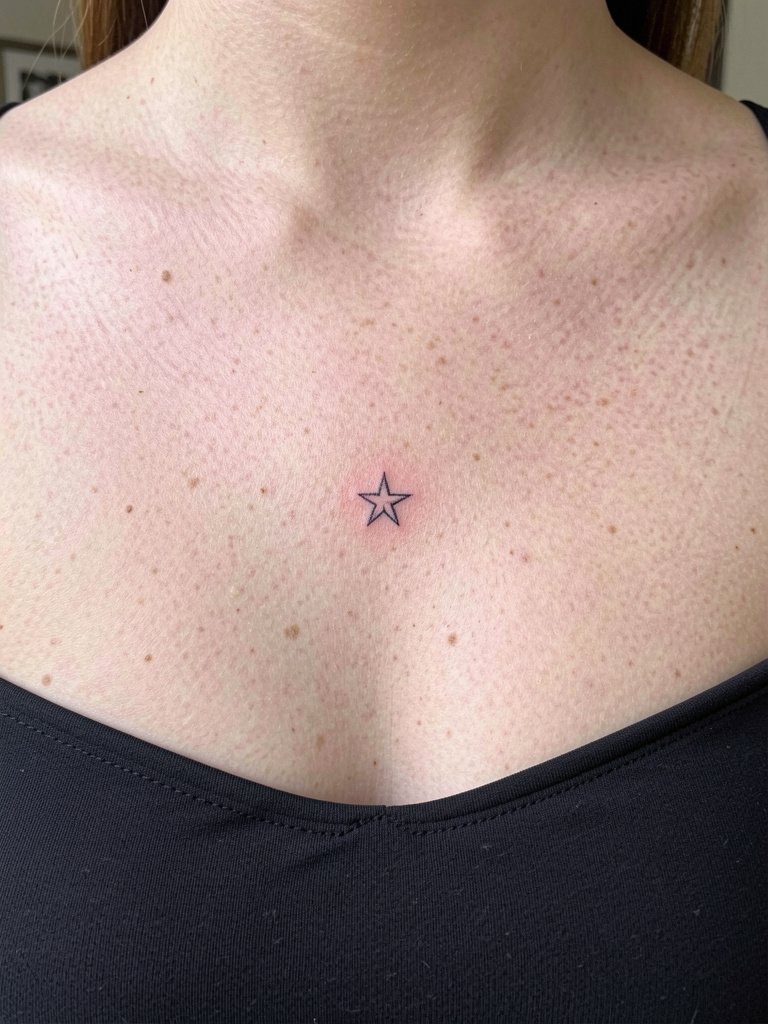
Sternum placements are intimate and tender. If you want a star here, tell the artist exactly how it should sit relative to the breastline so bra lines do not cover it. Pain can be moderate to intense depending on proximity to bone. A typical session is 20 to 40 minutes. Mistakes include placing the star too low where garment lines compress during healing. For revealing necklines, try layered pendant necklaces that frame the sternum rather than hiding the star.
14. Single Star on the Ribcage Side
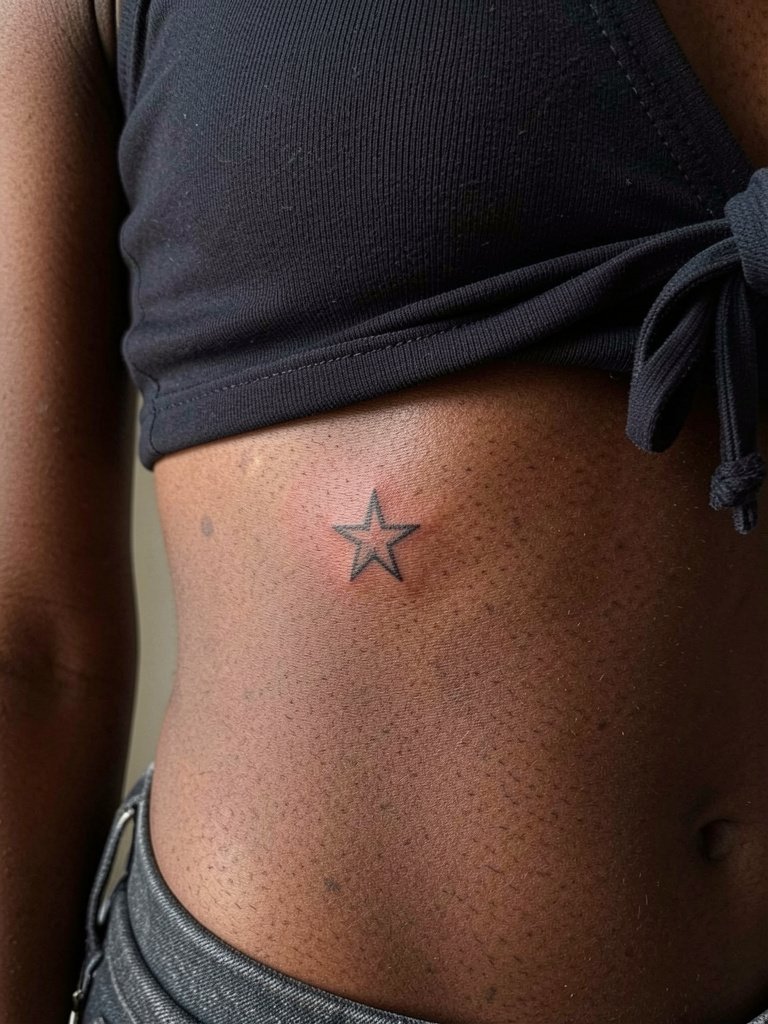
Fine line on ribs is controversial. One camp says thin stars on the ribcage blur within one to two years because the skin stretches and compresses under movement and garments. They point to many user reports of blurring and advise heavier lines for longevity. The other camp argues that with correct needle depth and slightly wider spacing, fine line can settle and remain legible for three years or more. They show healed examples from fine line portfolios to support that claim. If you choose ribs, plan for a slightly bolder hairline and expect a tougher healing window with deep inhalations during the session.
15. Star with Minimal Crescent Accent on the Hip
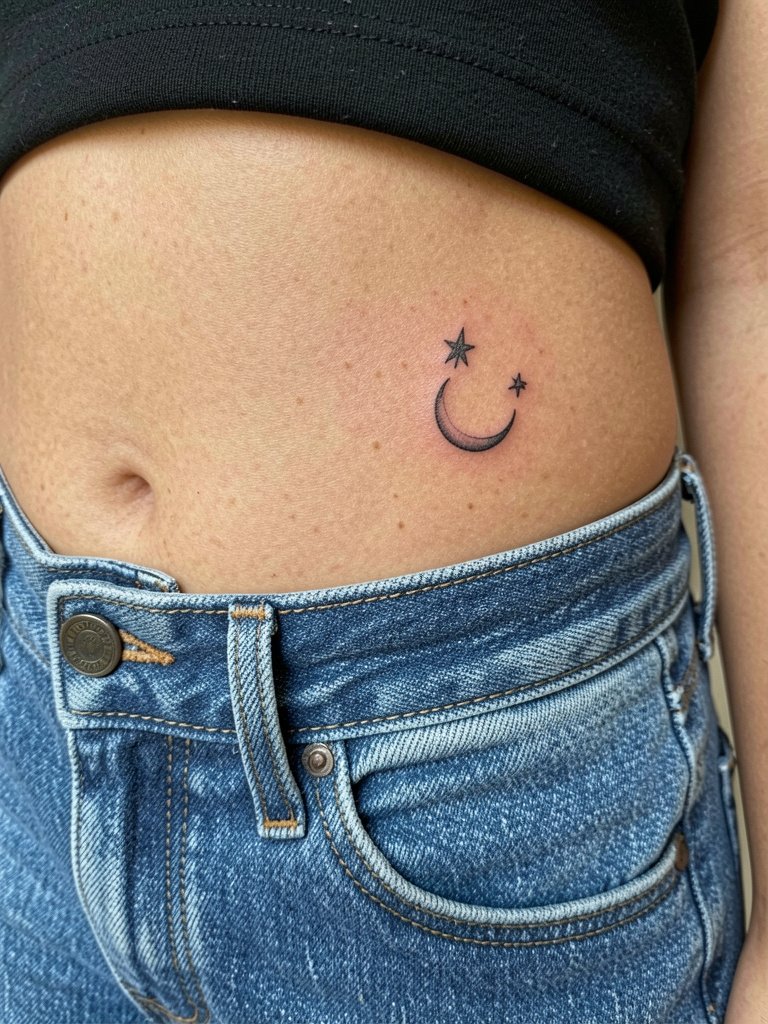
A star plus a crescent reads like night sky shorthand along the hip. Avoid tight waistbands over this area during healing to prevent movement that can distort lines. Specify line weight and crescent radius during the consult so the pair ages together. Sessions take about 30 minutes and pain is mild to moderate depending on your frame. For evenings out, pair the placement with side-tie tops and low-rise pants. When dressing for the session, choose low-rise bottoms that are fully zipped and buttoned so the artist has steady access.
16. Tiny Star on the Inner Thigh
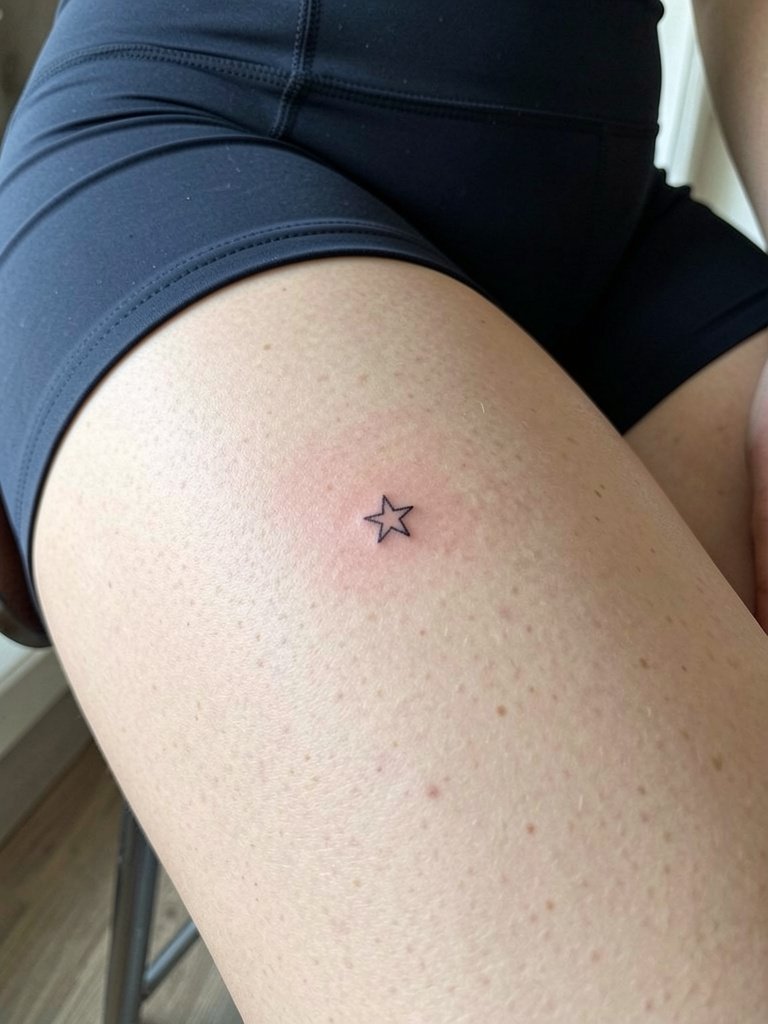
The inner thigh is private and can distort with major weight changes. If you anticipate significant body shifts, place the design slightly higher or more lateral to reduce stretching. The area can be tender and sessions last 30 to 60 minutes depending on size. A common mistake is choosing a 1 mm star that becomes indistinct after weight fluctuations. For the session wear fitted bike shorts so the artist can access the area without awkward adjustments. Recovery benefits from avoiding tight pants for two weeks.
17. Single Star on the Upper Arm Outer Side
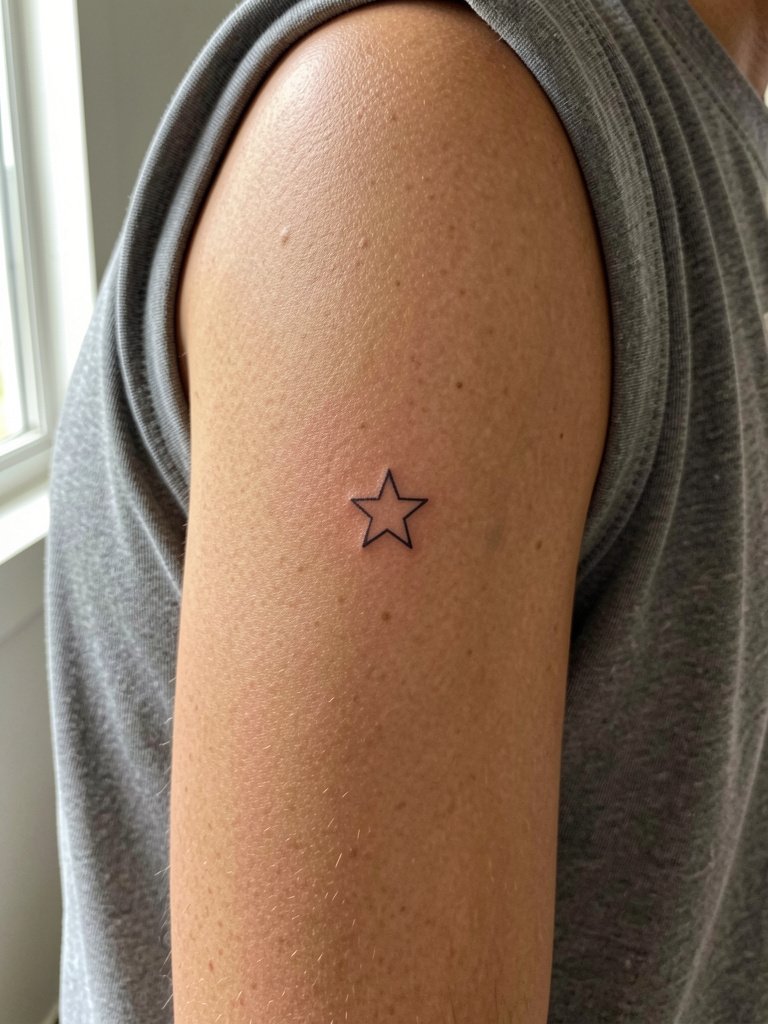
The outer upper arm is forgiving and shows well in short sleeves. Pick a mid-sized star so it reads at arm distance without needing repeated touch-ups. During the consult, have the artist stencil the exact spot while your arm is relaxed so the placement looks natural when you move. Sessions take about 20 to 35 minutes and pain is usually mild. For off-duty looks, a sleeveless tee or tank top in neutral tones keeps the star visible and tasteful. Bring a minimal tank top for the session.
18. Micro-Realism Tiny Star with Subtle Shading
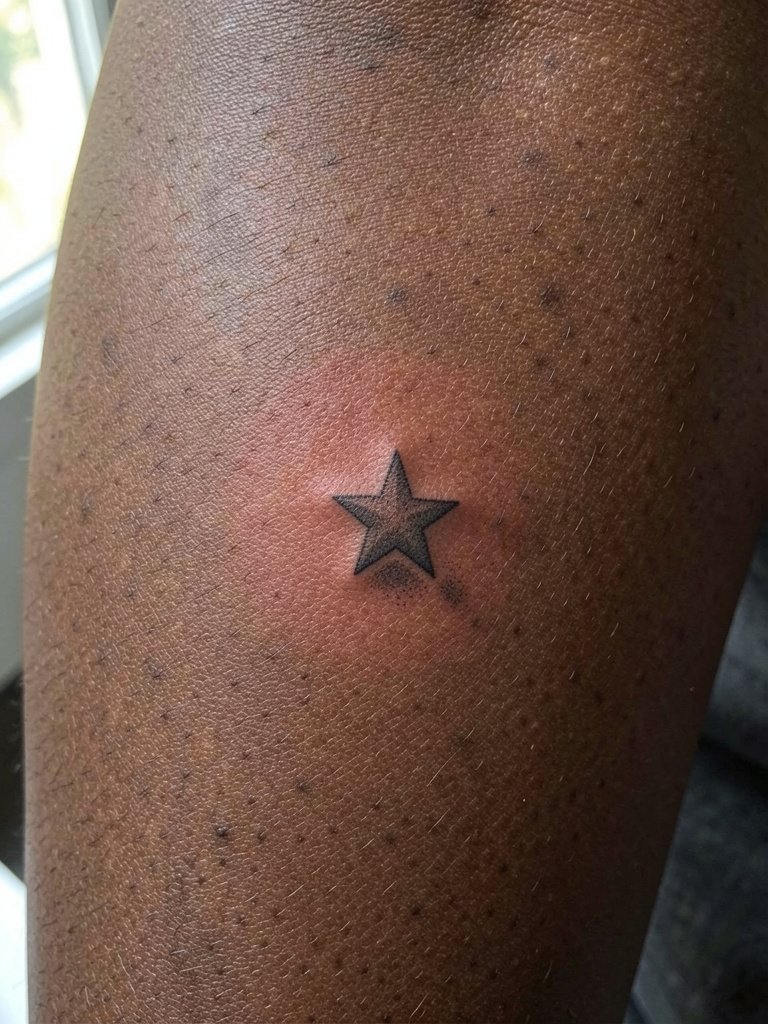
Micro-realism adds a whisper of depth without leaving the minimalist lane. If you want shading, ask for stipple shading rather than saturated grey fill so the star keeps a delicate edge. Discuss exactly how much contrast you want since shading reads differently across skin tones. Expect slightly longer session time, around 45 minutes, and a bit more sensitivity while the artist does shading passes. The main mistake is asking for dense grey in a tiny piece, which can age into a blob. This variation pairs well with minimalist jewelry and monochrome tops.
19. Star with Minimal Wavy Line on the Inner Forearm
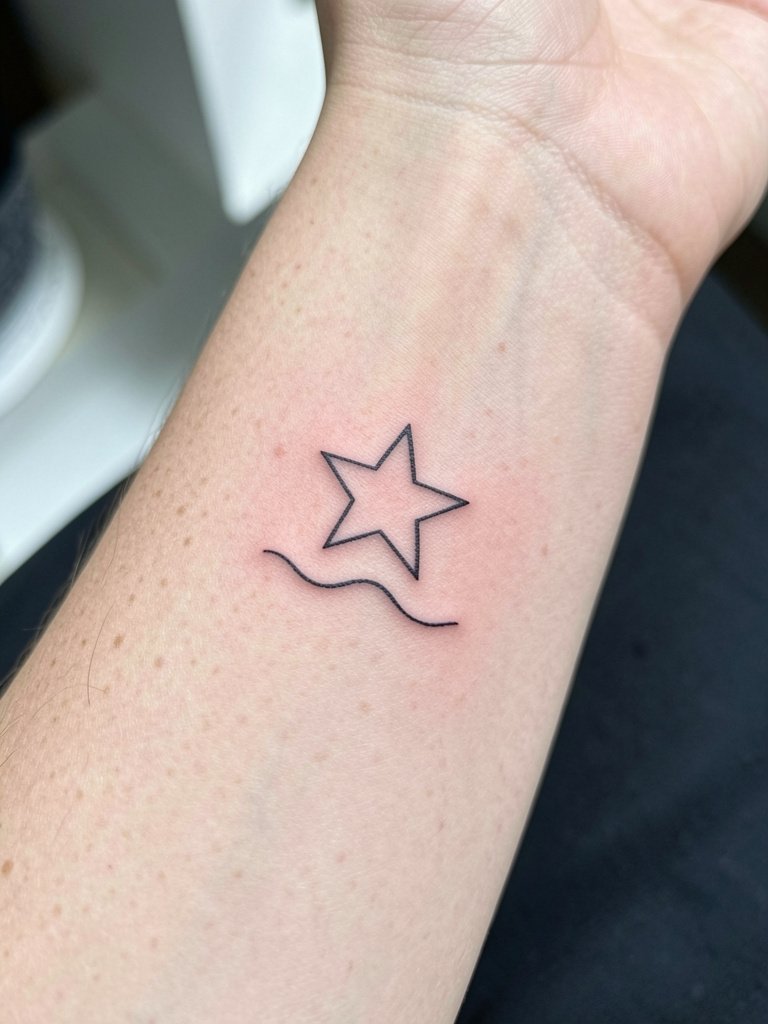
A wavy line adds motion and oceanic vibes to a compact star. For longevity, keep the wave thin but continuous rather than stippled to avoid odd patchiness as the line softens. Ask the artist to show you the wave at actual scale on the arm so you can evaluate the rhythm. Sessions are 30 to 45 minutes and pain is low. If you spend lots of time in the sun, expect earlier fading and plan sun protection. Style with rolled cuffs and a rolled cuff linen shirt for a relaxed look.
20. Single Star on the Calf Inner Side
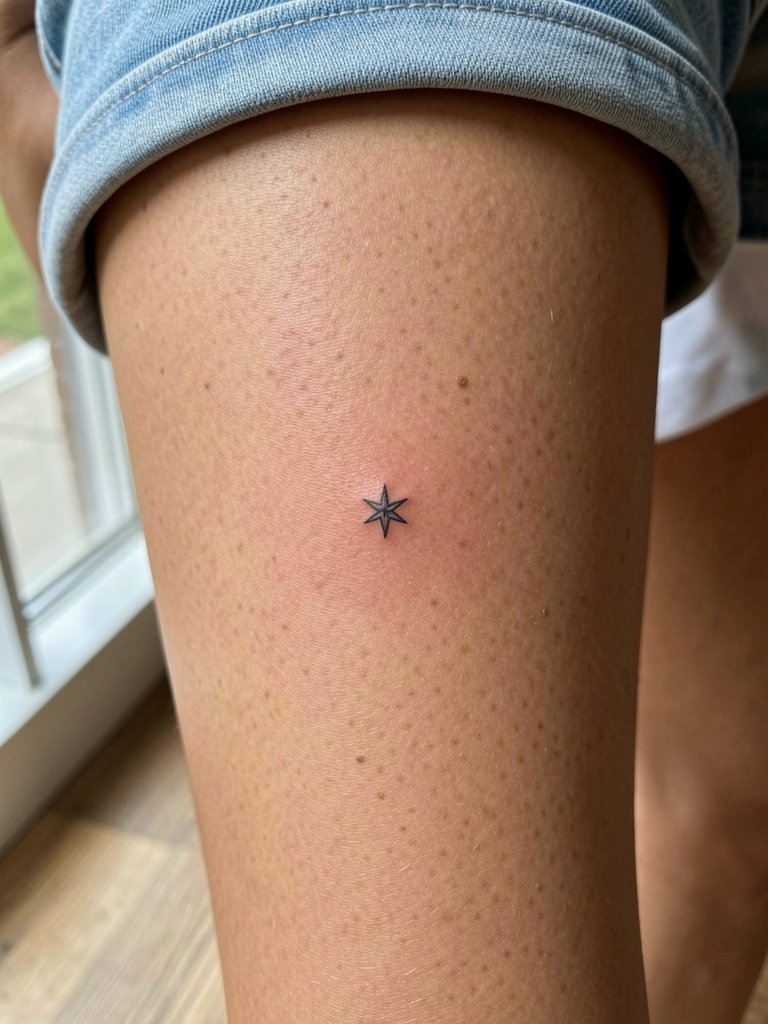
The inner calf is less exposed to friction than the ankle and holds delicate work reliably. If you want discretion, position the star slightly toward the inner calf where it is visible when you cross your legs. A typical session is 20 to 35 minutes and pain is mild. The common mistake is underestimating sun exposure during swim season, which fades fine lines faster. Show it with cropped pants or open-toe sandals and a open toe sandals.
21. Minimal Star with Tiny Line Accent on the Collarbone
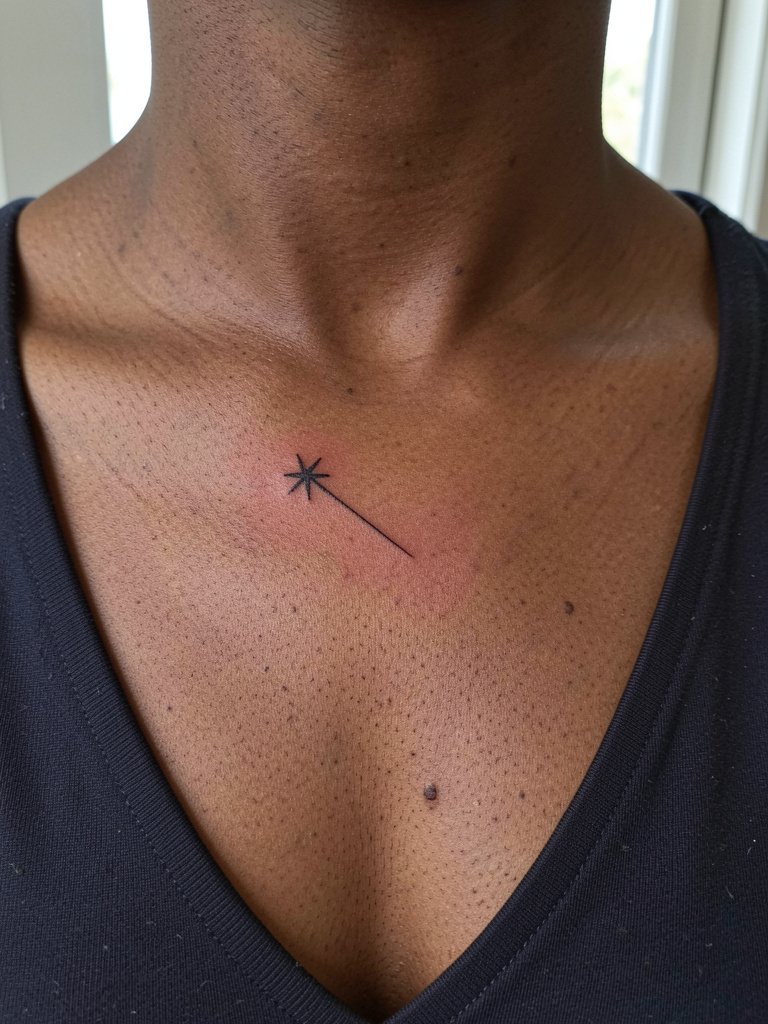
A small radiating line emphasizes direction and adds architectural interest. During the consultation, specify how long the accent line should be so it does not interfere with necklaces. Sessions run 20 to 35 minutes and tenderness is low to moderate. A frequent error is requesting an accent line that is too thin for the skin texture, which fades unevenly. Pair this look with layered chains that frame the collarbone rather than covering it.
22. Tiny Star on the Lower Back
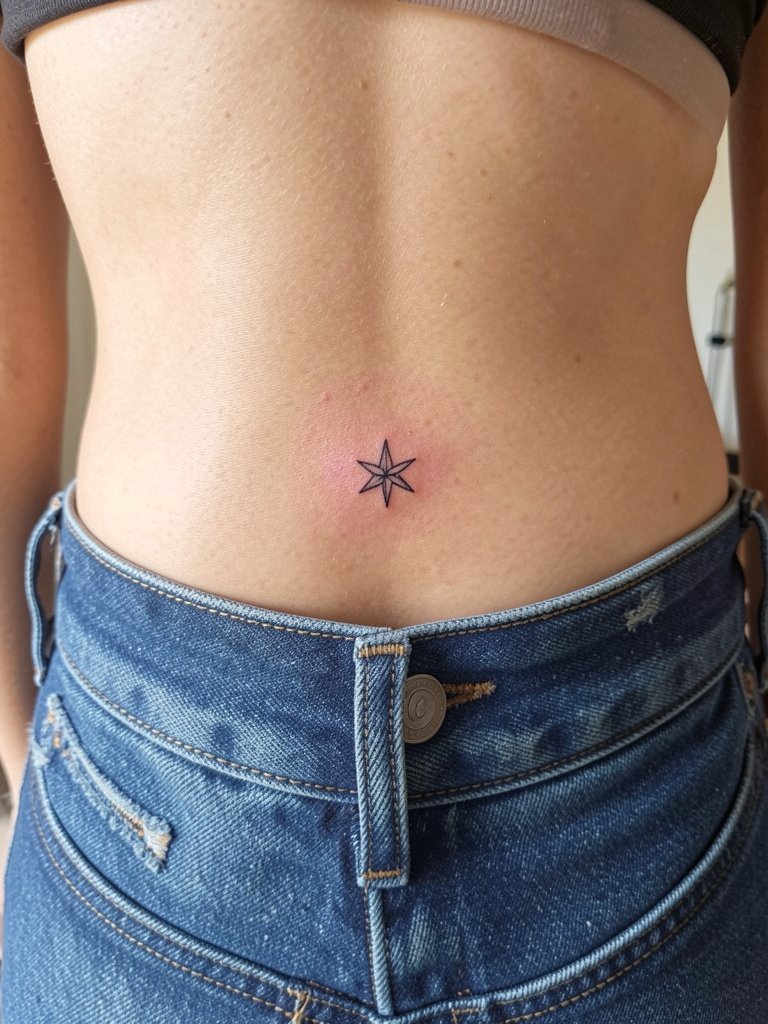
Lower back stars are discreet and hold up well when placed on stable skin above the waistband. When booking, request the stencil while standing so the placement aligns with your preferred pant waist. Sessions are quick and pain is moderate. Avoid tight waistbands for two weeks after the session to prevent pressure on the healing skin. Style with low-rise jeans and a cropped top for nights out.
23. Tiny Star Near the Collarbone with Layered Dots
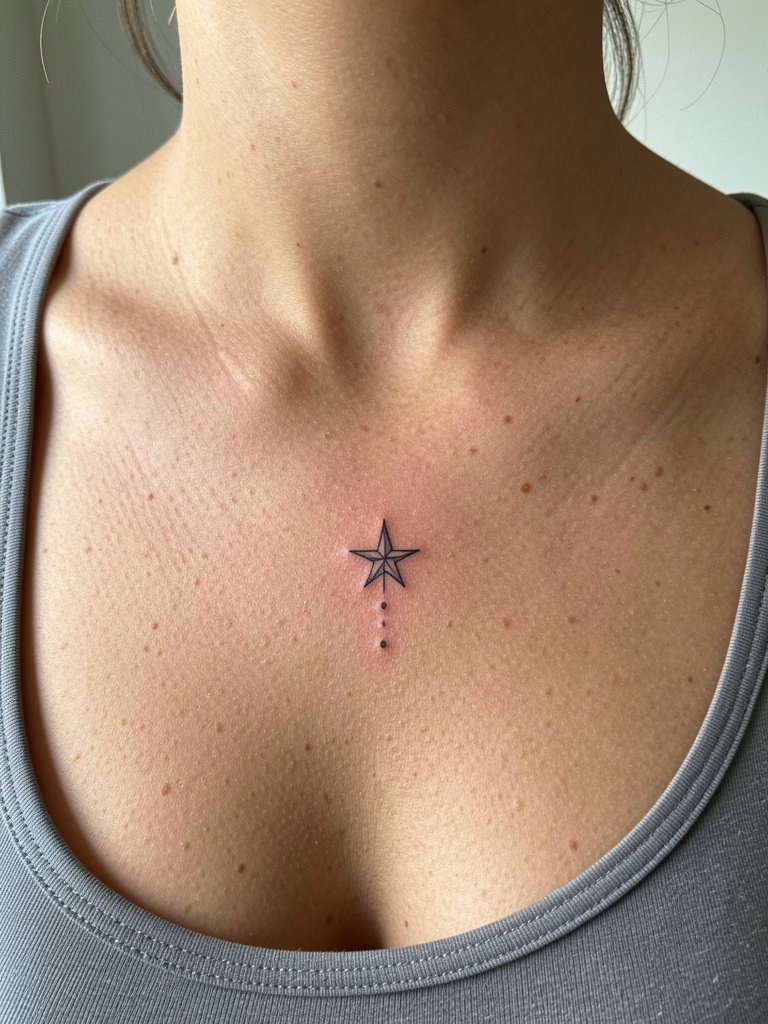
A descending dot ladder creates visual flow from the collarbone inward. Ask for exact dot spacing so they keep separation as the skin ages. A common mistake is allowing dots to be so close they coalesce after a few years. Sessions are short and the area is tender but manageable. For photos, a scoop-neck top keeps the composition visible without overpowering it. Consider a layered chain necklace set that frames rather than covers.
24. Minimal Star Half-Buried in a Tiny Geometric Circle
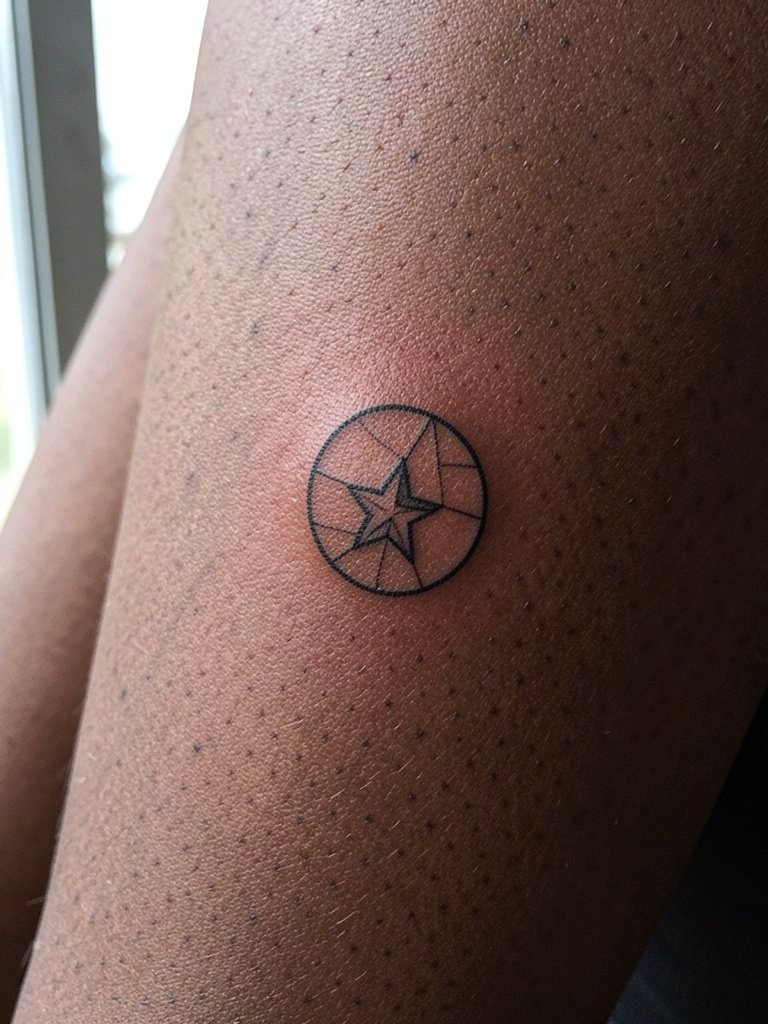
Encasing a star in a thin circle gives it a badge-like presence without bulk. Make sure the circle is wide enough so the star's points do not press into the ring as the ink spreads. The session runs about 30 minutes. A mistake is choosing a circle that hugs the star too tightly. This composition looks great on upper arm placements and pairs well with short-sleeve staples.
25. Single Star with Subtle Dot Trail on the Ankle Rib
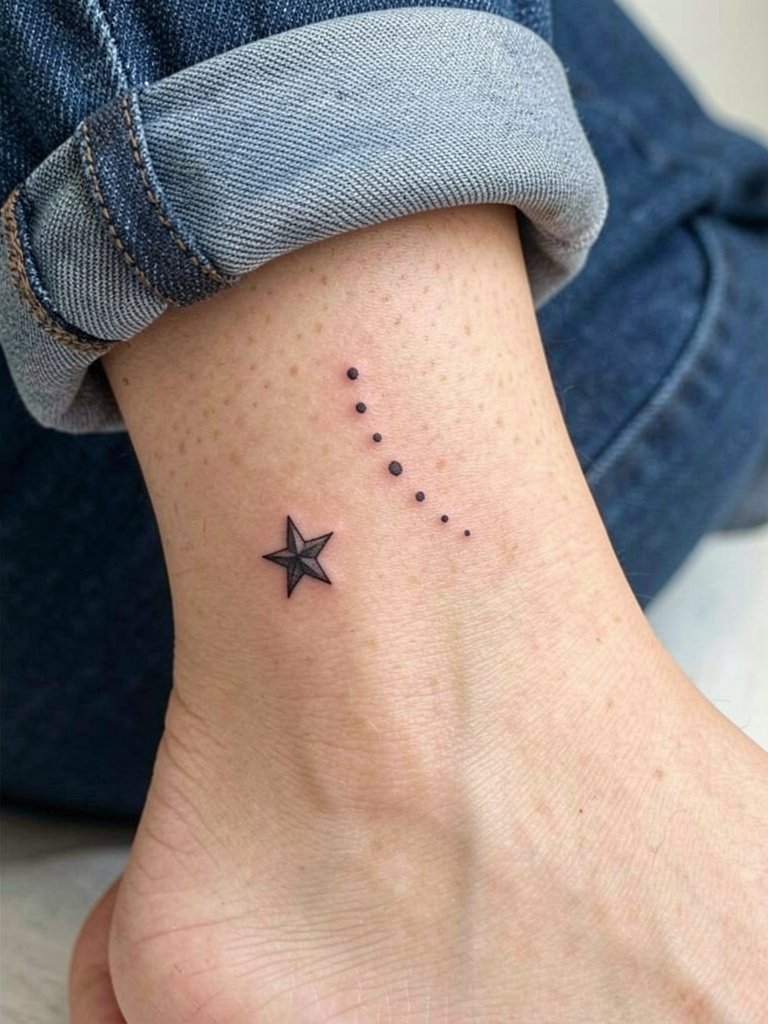
A dot trail adds motion and invites the eye upward from footwear. Keep the dots spaced so they do not merge under sock friction. If you live in a humid climate, consider waiting until cooler months for ankle work to reduce sweat-related healing issues. Sessions are quick. For footwear pairing, choose ankle-strap sandals to let the detail peek through.
26. Micro Star with Tiny Crescent Under the Hip
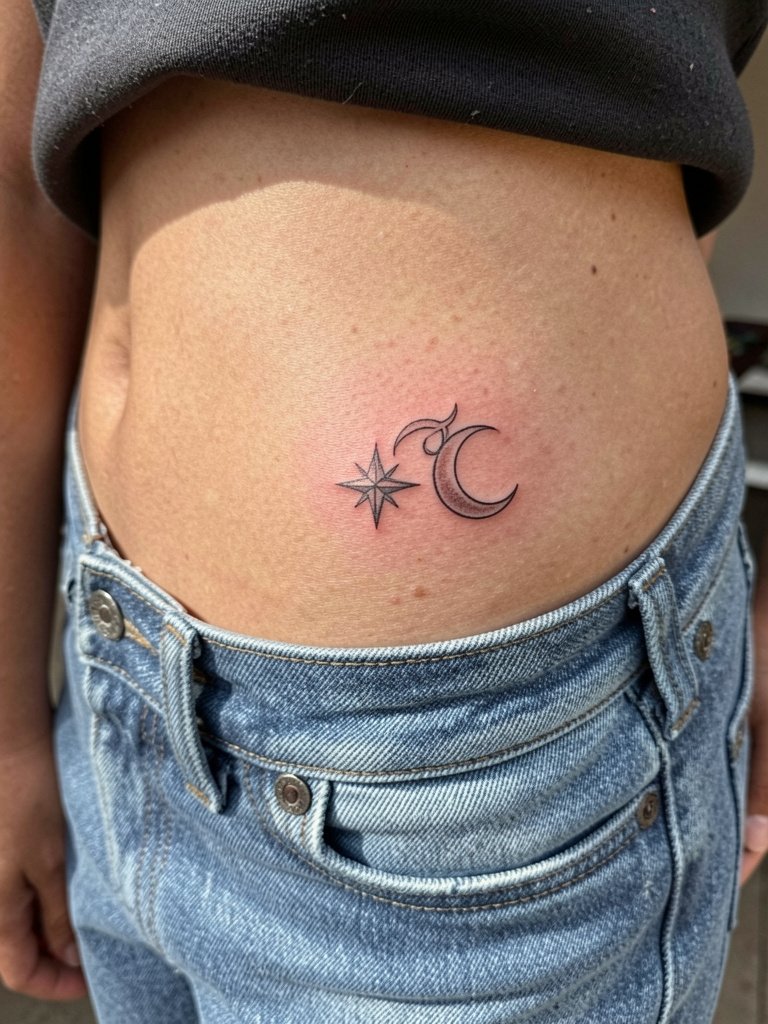
Hip work reads well with swimwear and low-rise styles. Avoid tight belts and waistbands during the first two weeks. Specify the exact offset from the waistband during your consult so normal clothing does not obscure the crescent. Sessions are 25 to 40 minutes with mild pain. For evening looks, side-tie tops and cropped jackets let the accent show.
27. Tiny Star on the Side Torso Near the Rib Edge
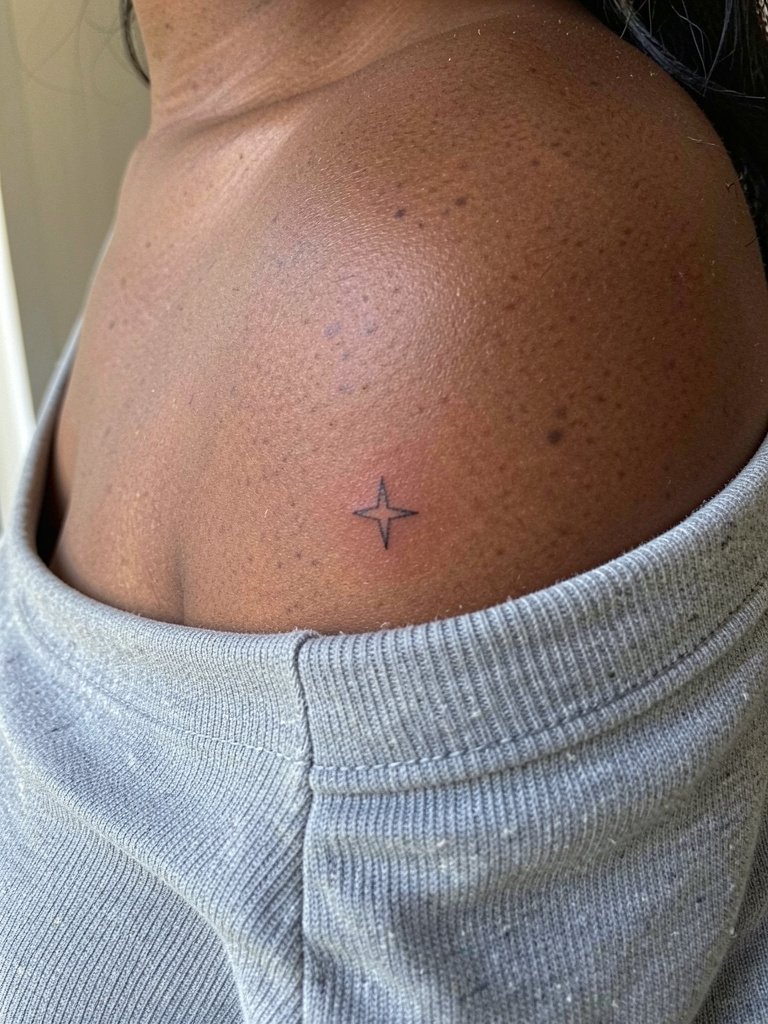
Side-torso stars catch the eye when you wear off-shoulder tops. Because this is a stretch-prone area, one professional view holds that thin stars blur quickly due to motion and compression. Another professional view counters that proper needle depth and slightly wider spacing prevent that fate. Both positions are worth weighing. If you pick this spot, request a marginally bolder outline and be prepared for a touch-up after a couple of years. For show-off outfits, try an off-shoulder blouse in neutral tones.
28. Tiny Star Near the Sternum Offset Toward the Left
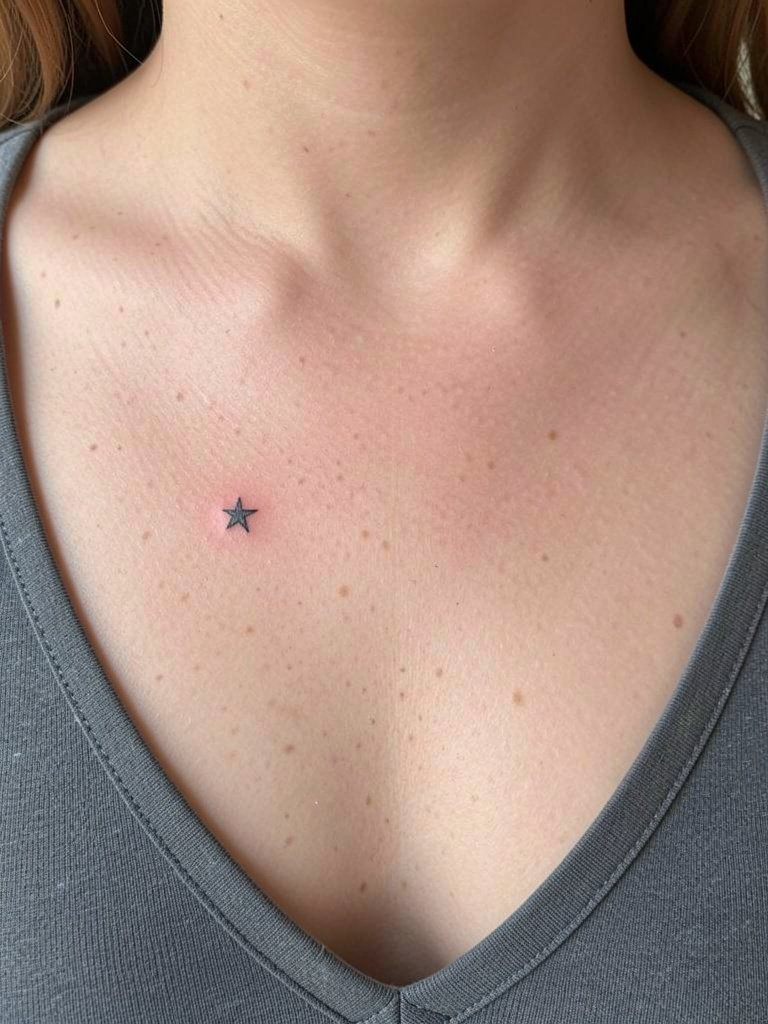
An off-center sternum star feels intimate and asymmetrical in a way that photographs well. Decide on exact offset during the consult so necklaces and bra tops do not compete. These placements can feel tender and sessions are usually 20 to 40 minutes. Avoid layered clothing that rubs the area while it heals. Pair this spot with low-cut tops and a low cut top neutral.
29. Minimal Star Row Along the Collarbone
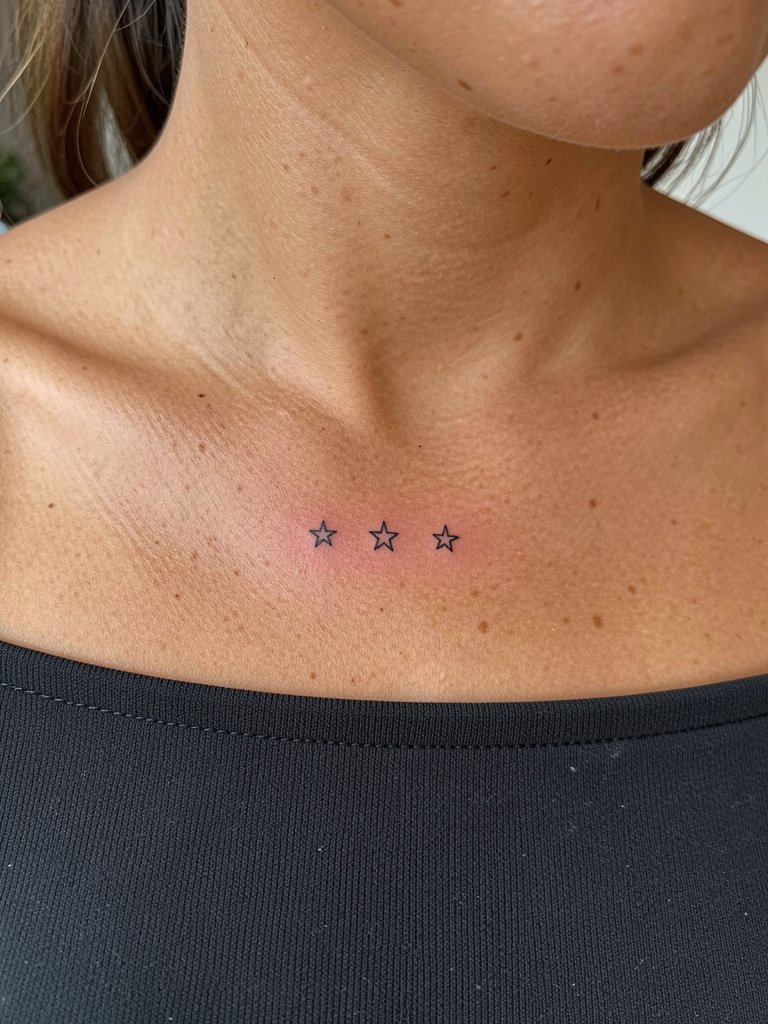
A short star row along the collarbone reads like punctuation across the chest. Space the stars to allow breathing room so they remain distinct as the skin softens. A common mistake is compressing the row to fit a jewelry length, which makes the stars fuse after healing. Sessions run about 30 to 45 minutes. For styling, try an off-shoulder blouse and a delicate pendant that does not cover the row.
Frequently Asked Questions
Q: How small can a star be and still last a few years?
A: Tiny stars under 1.5 mm are likely to blur into a dot within a couple of years on most placements. I recommend 2–3 mm with a hair stronger lineweight if you want legibility at year three. If you insist on micro size, budget a touch-up window at year two.
Q: Where should I look to find fine line star portfolios and healed examples near me?
A: Search hashtags like #minimaliststar and #finelinetattoo on Instagram and TikTok while filtering by your city name. Use Tattoodo with keyword combinations such as "fine line star wrist" to see healed portfolios. Reddit communities like r/tattoos surface real-user healed photos and local studio recommendations.
Q: Which aftercare approach should I pick for fine line stars given the Aquaphor debate?
A: One group of people reports Aquaphor trapping moisture and making delicate lines look shiny and blurry during early healing. They switched to thinner, non-greasy balms and say photos looked crisper. The other group notes studios still recommend Aquaphor and that many healed examples show clean lines when Aquaphor is used carefully and sparingly. The practical middle ground is a thin application, only when the skin needs it, and switching to a lighter balm after a few days.
Q: Do fine line stars on ribs really blur faster than on the forearm?
A: Many users report faster blurring on high-stretch areas like ribs and inner thigh because of constant compression and movement. Others counter that with correct depth and slightly wider spacing, ribs can hold fine line for several years. If ribs are your choice, request a marginally heavier hairline and accept a realistic touch-up plan.
Q: What should I wear to my appointment for an ankle or shoulder blade star?
A: For an ankle piece, bring loose drawstring pants that roll up and do not compress the ankle. For a shoulder blade session, a backless top or strapless shirt in normal worn position helps the artist access the lateral upper back without fabric shifting. Comfortable, normal-fit clothing reduces repositioning during the session.
Q: How do I make a star photo look black instead of gray on darker skin tones?
A: Slightly thicker lineweight and matte photo filters help the ink read darker in photos. Avoid heavy, glossy aftercare during the first two weeks because shine can wash out contrast. A small change in lineweight often makes the biggest visible difference.
Q: If an artist cancels my booking, how do I keep momentum without losing my spot?
A: Ask for written deposit terms and request priority rebooking if the cancellation was artist-initiated. Join the artist's waitlist and check convention guest-spot alerts if timing is critical. Keeping receipts and communications helps when negotiating a quick reschedule.
