
Small, delicate 3D work does not automatically read as realistic when healed. In many shops the tiniest gem or single-needle insect that looks crisp on day one softens into a gray smudge if the lineweight and spacing were undersized for the placement. Expect practical notes about placement, what to show your artist, and photo tricks that preserve the three-dimensional illusion when you scroll or post.
1. Hyper-Realistic Insect Landing on Inner Forearm
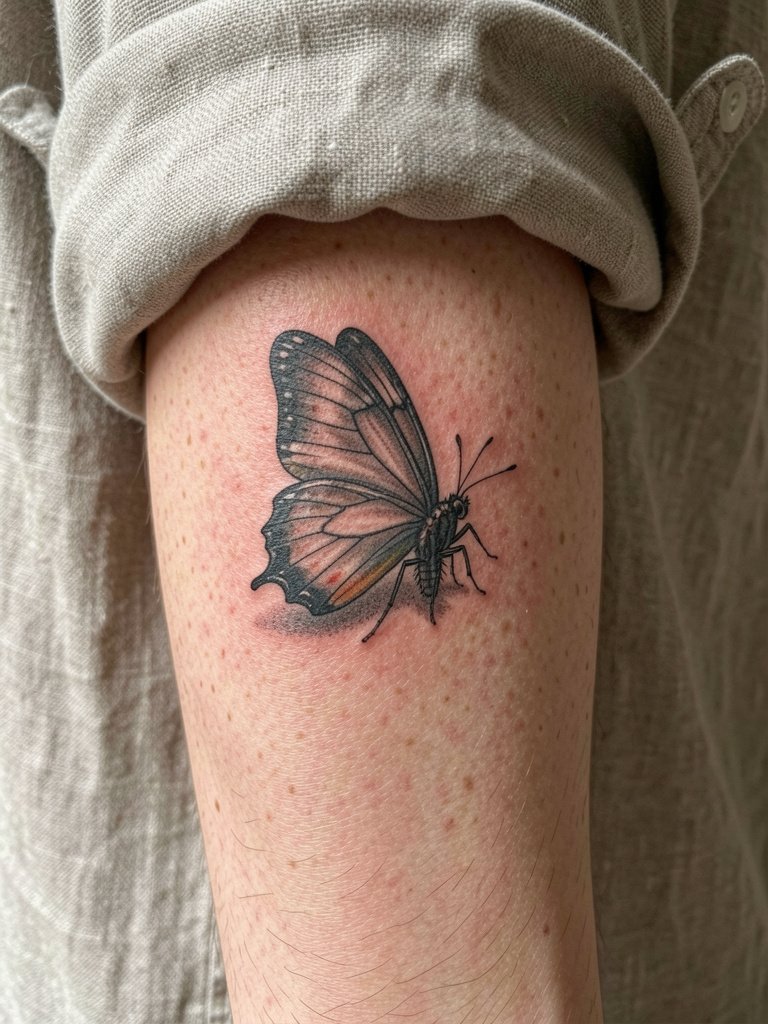
A small insect that appears to perch above the skin depends on two things. One is a crisp drop shadow placed slightly offset and softened with stipple shading. The other is enough lineweight so antennae and legs do not blur with time. Plan for a short single session but expect a touch-up within two to three years for the shadow and fine antennae. For showing it off, a rolled-cuff linen shirt in cream or olive frames the forearm and keeps the focus on the movement. Bring a photo showing the exact wing angle so the artist can scale shadows to your arm curve.
2. "Missing Skin" Biomechanical Gears on the Ribcage
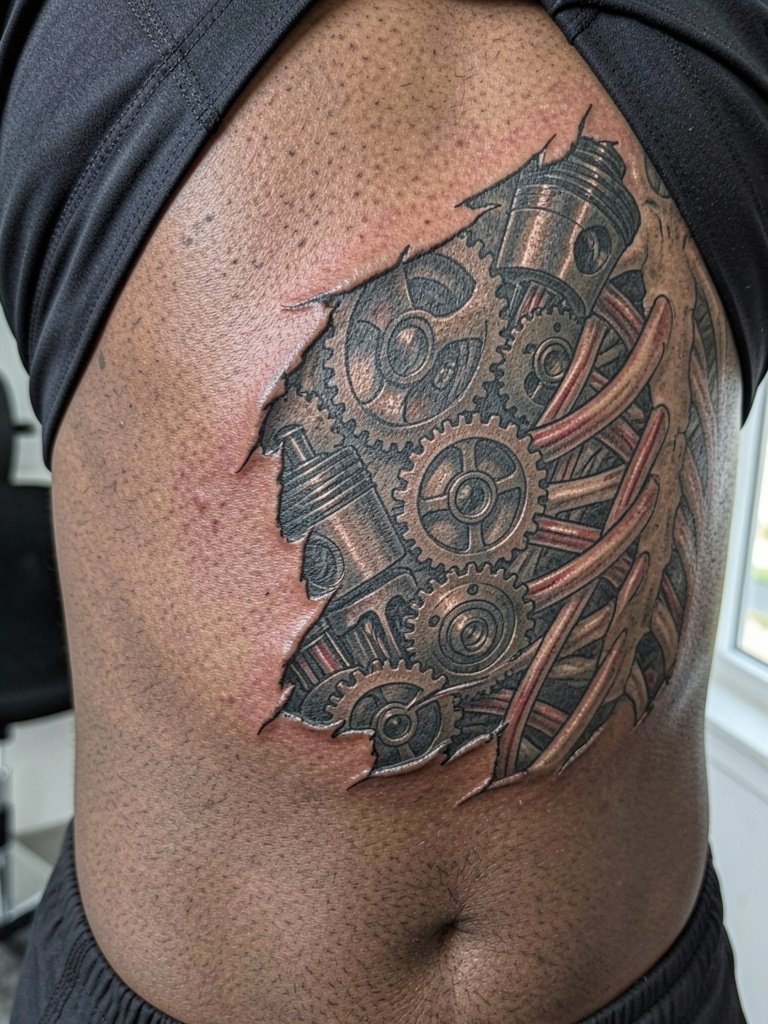
Ribcage biomech pieces give the strongest 3D payoff when scaled correctly and given room to breathe. One camp warns heavy gray gradients on ribs blur into muddy patches within two to three years because the skin stretches and rubs under clothing. Another camp counters that precise needle depth and higher-contrast black-and-gray keep the mechanical illusion intact, and they point to healed five-year examples where plates still read separate. Expect multiple sessions and a realistic touch-up plan. For in-chair comfort wear a button-down or loose top so the artist can expose the side torso without tugging at fabric.
3. Optical "Skin Rip" Gem at the Collarbone
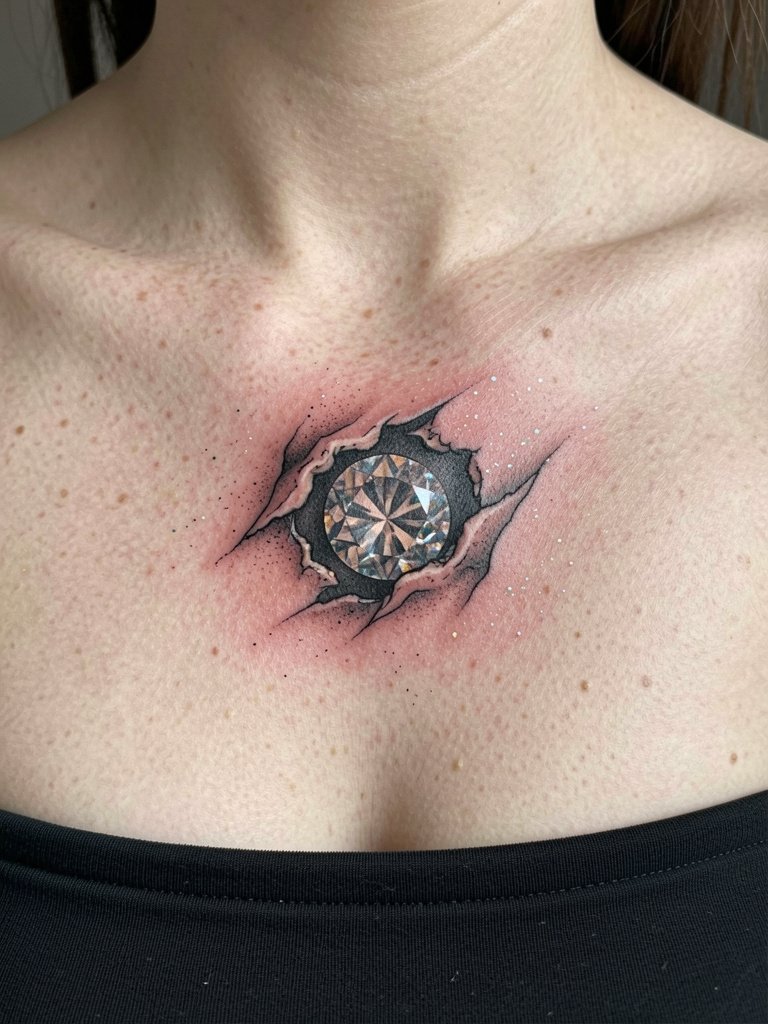
A convincing "skin rip" relies on crisp torn edges and a believable shadow pocket beneath the tear. The common mistake is overdoing the tear with heavy black fill that reads theatrical after healing. A subtler tear with textured stipple shading and a small, high-contrast gem will hold better visually. Pain on the collarbone is moderate and sessions are short. Show-off pairing works best with strapless tops and open-collar shirts, so link your outfit to the placement. When you bring references, include one close-up of torn edges so the artist knows how much negative space you want under the gem.
4. 3D Geometric Cubes on Inner Forearm
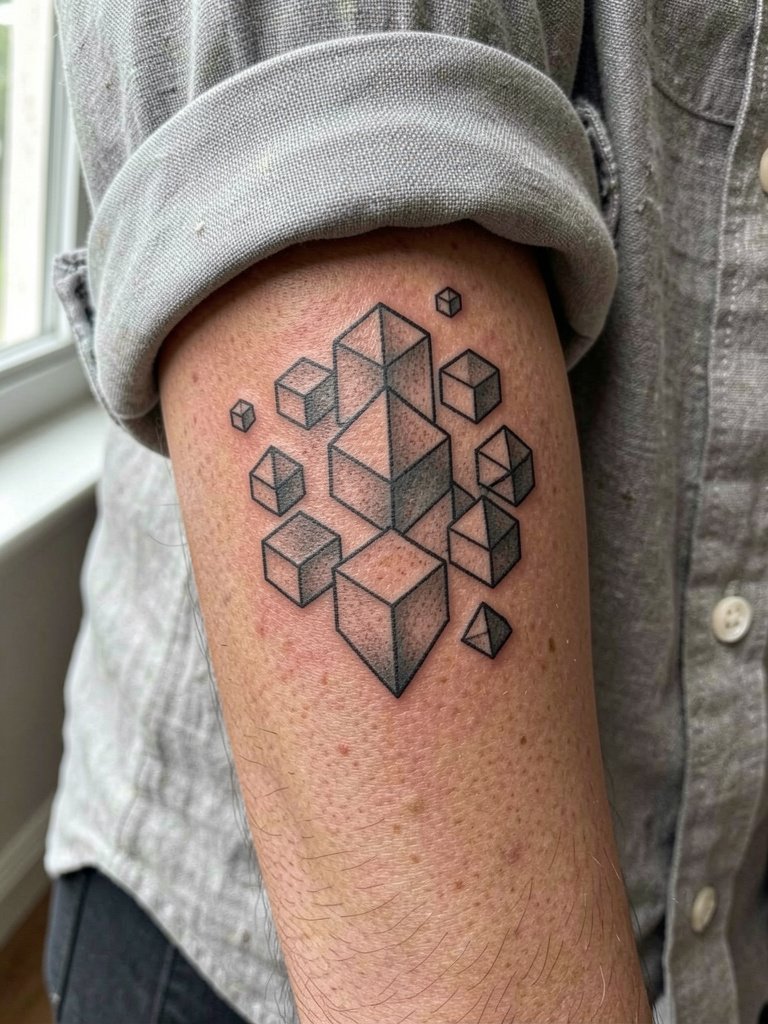
Geometric 3D depends on absolute line accuracy and measured spacing. The biggest mistake is going too small so perspective collapses as it heals. For this inner forearm placement increase the lineweight slightly from your reference so the cubes read at arm length. Session time is usually a single block of one to two hours. The inner forearm can shift with muscle changes so expect a light touch-up around year two. Style it with rolled linen shirts and a dainty bracelet on the opposite wrist to keep visual balance. Bring a grid or ruler photo so the artist can translate angles to your arm curve.
5. Hyper-Realistic Portrait with 3D Shading on Upper Chest
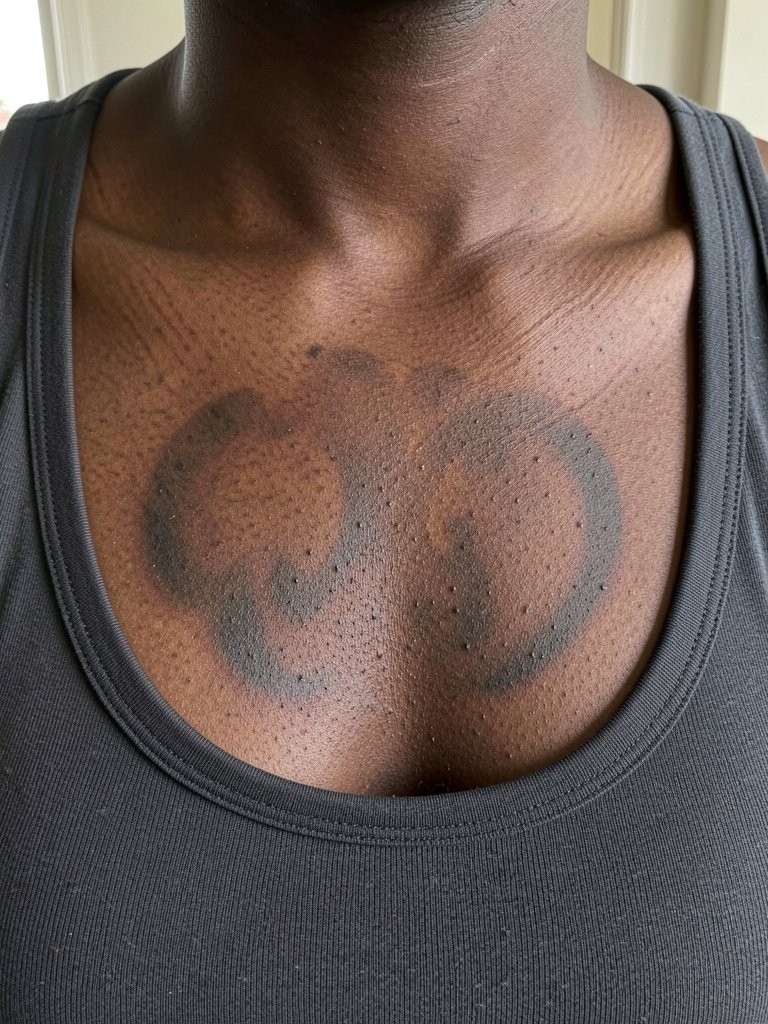
Portraits are technical and demand large scale to preserve facial details. A common regret is shrinking a portrait to fit an awkward spot, which softens eyes and nose into an indistinct patch after a year. Plan for multiple sessions and prioritize healed photos from the artist showing similar skin tones. For pain, the upper chest is moderate and sits in the three to four out of ten range for many people. Sessions feel slow and precise, with lots of micro-adjustments for shading. Specify exact reference photos at different scales so the artist knows how the portrait should read at three inches versus six inches.
6. 3D Watercolor Floating Object on the Shoulder
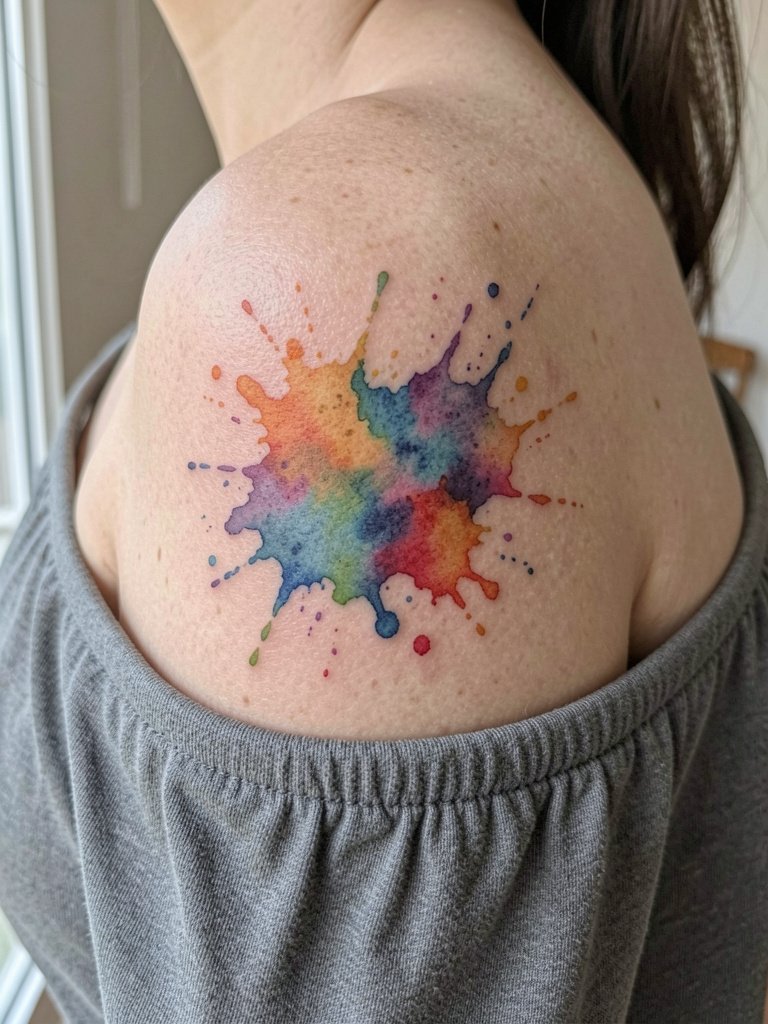
Watercolor plus 3D gives playful motion but the pigments need room and careful saturation. One controversy here is color longevity. One camp says watercolor pigments blur and fade faster in sun-exposed zones. The other camp argues high-quality pigments and conservative blending preserve color for years if you avoid overworking the skin. The shoulder is a good spot because it is stable and photographs well. For sessions wear a sleeveless or off-shoulder top so the artist can reach the deltoid easily. Expect a single or two-session build with a potential color refresh at year two if you want the brightest saturation maintained.
Session Day Picks
These are small items I recommend after seeing the insect, biomech, collarbone gem, geometric forearm, portrait chest, and shoulder watercolor pieces above.
- World Famous Black ink search. A dependable black helps keep high-contrast shading crisp for those black-and-gray under-skin and biomech pieces.
- Matte finish spray search. Matte sprays reduce glare in photos so shadows from insect wings and torn-skin edges read better on camera.
- High-contrast gray wash search. A stronger gray wash preserves the layered plates in biomech and skull work without muddying fine texture.
- Ice pack with gel core search. An ice pack is a safe alternative to numbing cream for long sessions and it lowers surface swelling that can blur fine shading.
- Matte setting spray search. A mainstream matte spray is handy for quick photos after the session to keep contrast consistent across skin tones.
7. Under-Skin Quote Typography on Inner Upper Arm
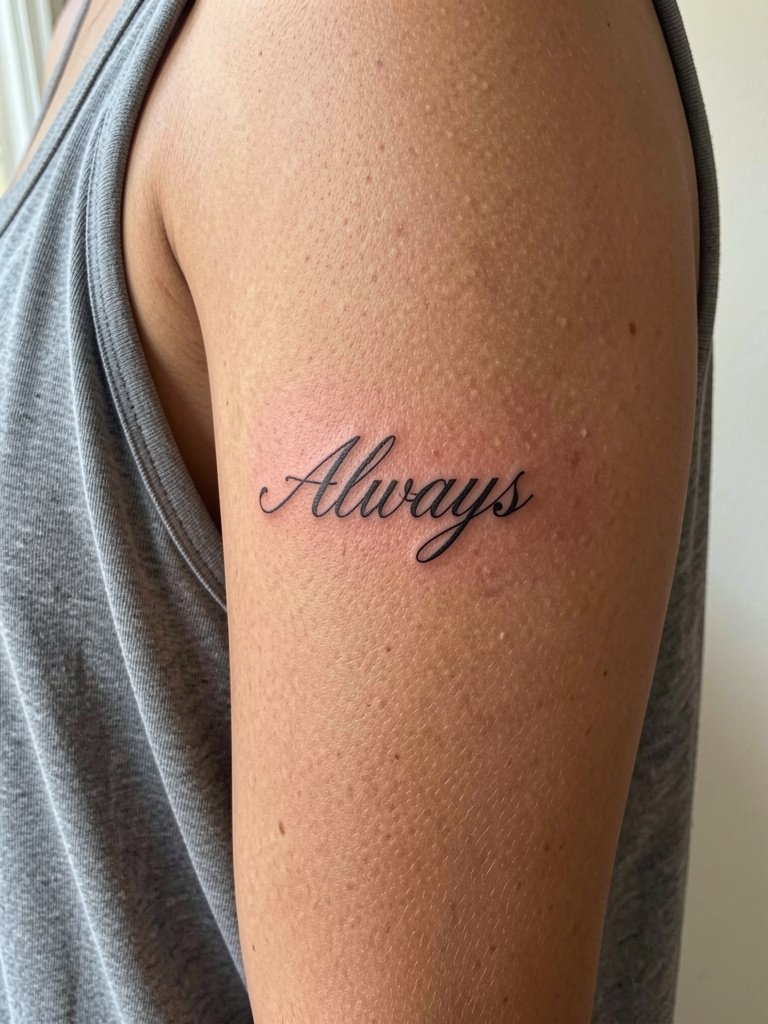
Typography that reads like it lives under the skin needs contrast and a small surrounding shadow. The mistake is matching reference letter thickness exactly without accounting for the inner arm's tendency to soften. Increase the script weight slightly and add a faint shadow so letters keep separation as the piece heals. The inner upper arm is a lower-pain zone but it flexes with daily movement, so expect a touch-up around year two. For the session wear a loose tank so the artist can work without compressing skin. Bring two scale references so the artist can show you how the word looks at different widths.
8. 3D Skull with Cracked Bone Texture on the Nape
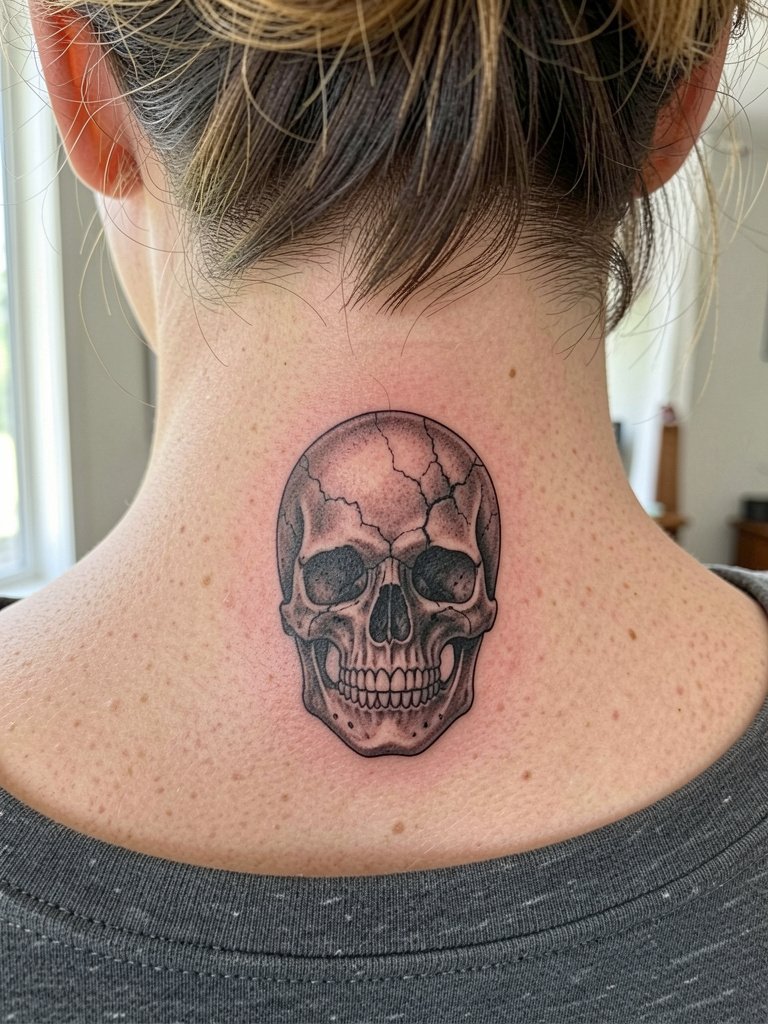
A cracked-bone skull plays with shadow under fractures to appear three dimensional. The nape is a sensitive spot for healing because of movement and hair rubbing, so use slightly bolder contrast than a fresh-shop photo might suggest. Blowout risk is moderate on the nape if lines are placed too shallow, so expect careful needle depth and a one to two year touch-up schedule. Mention hair length in your consultation so the artist can advise about hair pulling during healing. A quality healed portfolio on similar placements is the single best indicator of how the texture will age.
9. Realistic Dragon Scales on Outer Shoulder
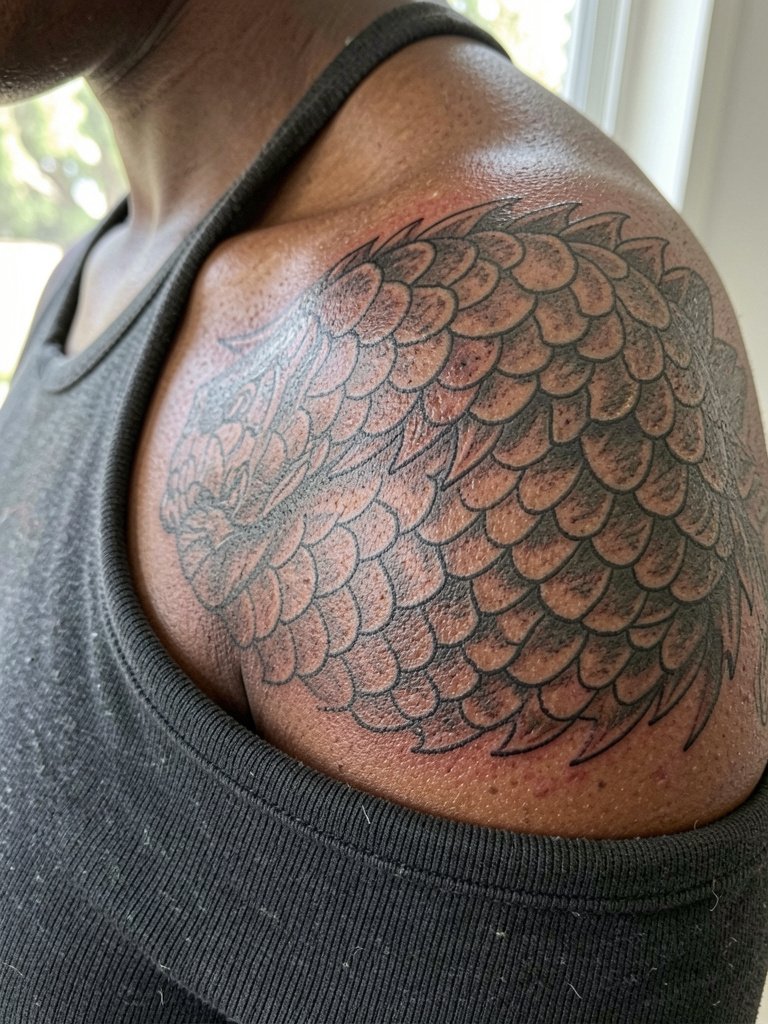
Scale texture reads well where the skin sits flat and stable, so the outer shoulder is ideal. The common error is attempting to compress a back-covering scale field into a single sitting and under-saturating each scale. Expect multiple sessions for layered highlights and subtle color blends. For showing it off choose off-shoulder tops or sleeveless dresses that reveal the deltoid curve. Ask the artist how the highlights will photograph on your skin tone, because contrast needs slight tweaking for medium and dark tones.
10. 3D Rose with Depth Shadowing at the Collarbone
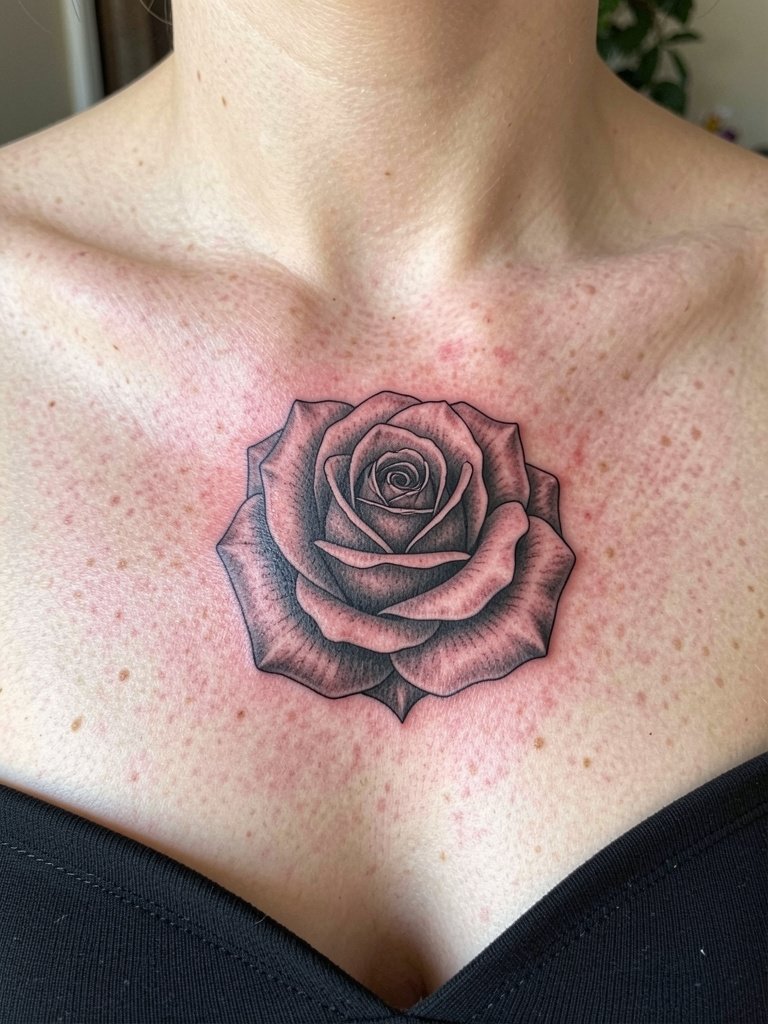
A rose that looks tactile uses layered petal shading and a soft cast shadow under the bloom. The collarbone reads well for this because the bone provides a natural highlight edge, but the placement skews toward moderate pain and thin-skin sensitivity. Small roses can lose petal separation if the artist uses single-needle hairlines without supportive weight. For evenings out pair it with a strapless top and a centered gold pendant. Bring a healed close-up of similar collarbone roses so the artist knows how saturated to make the midtones.
11. Optical Illusion "Floating" Hand on Outer Forearm
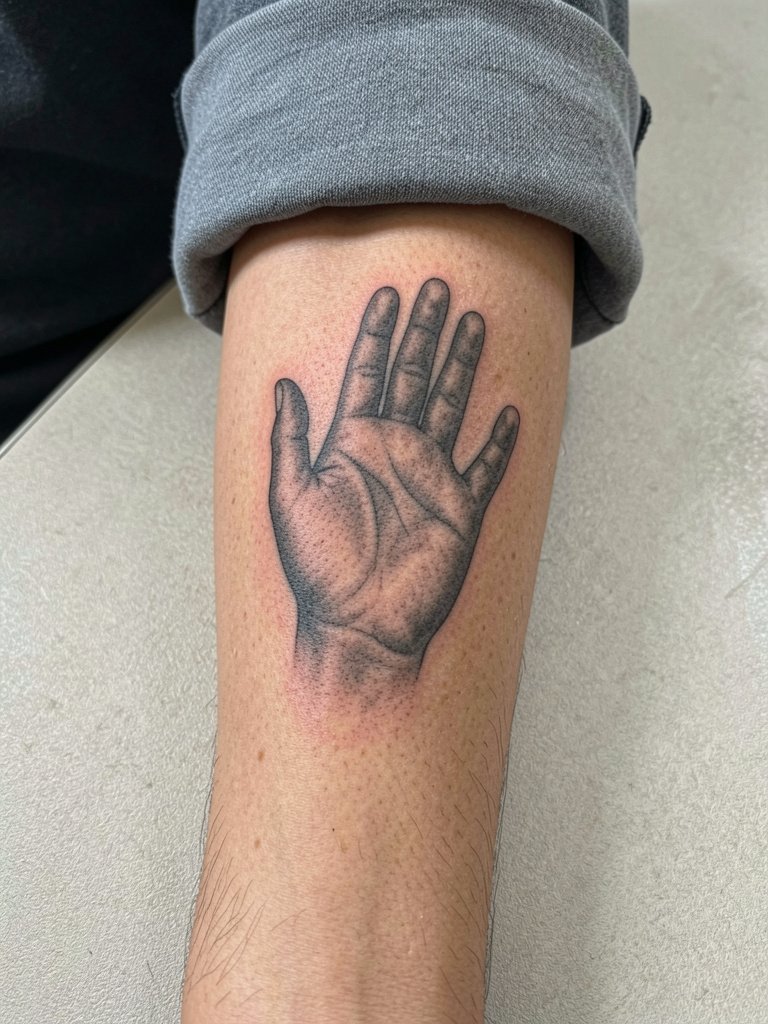
A floating-hand illusion depends on exact shadow placement and perspective consistent with how the arm sits when photographed. Misaligning the shadow by a few degrees is the top reason these read flat in photos. The outer forearm is stable so the illusion can hold for years with a single touch-up around year three. For casual wear roll short sleeves to the elbow so the design reads without obstruction. During the consult bring a phone photo of the arm posed how you intend to show it off so the artist can align vanishing points accordingly.
12. 3D Scorpion with Pinned Texture on Inner Upper Arm
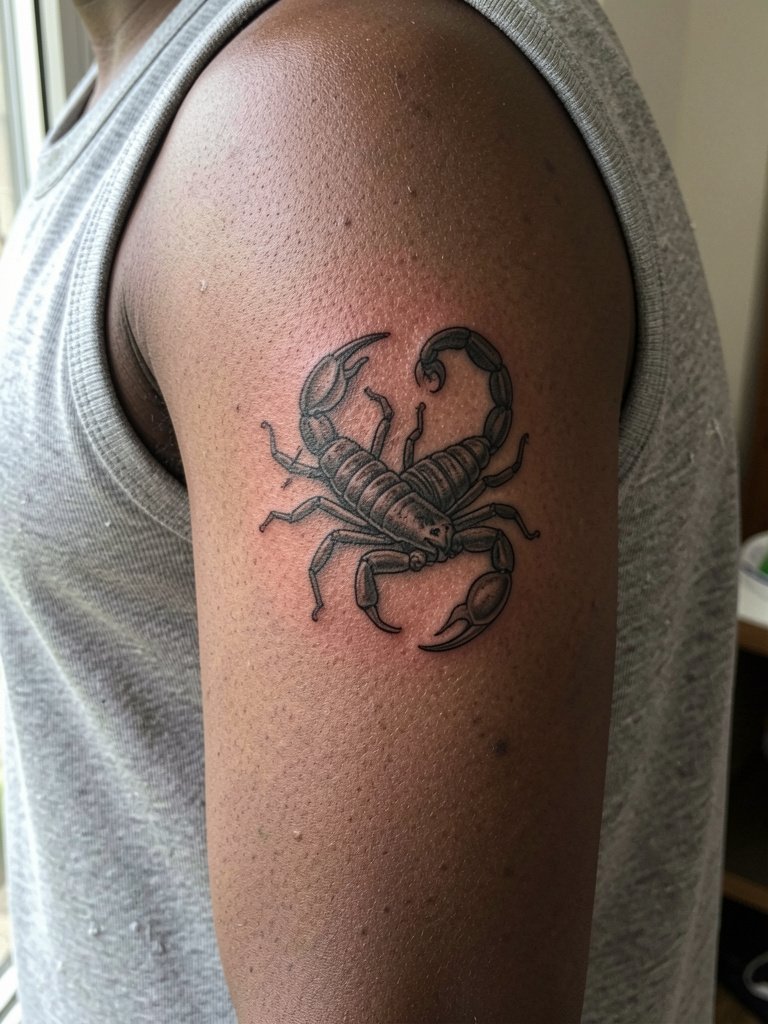
Pinned-specimen pieces need tight texture work and a shallow drop shadow to make the specimen appear attached. The inner upper arm is forgiving but flex can soften tiny leg spines, so ask the artist to thicken micro-legs slightly rather than using ultra-fine linework. Expect a single session and light touch-up within two years since that area sees moderate friction from clothing. For session wear choose a sleeveless tank so the artist can rotate access without compressing the arm.
13. 3D Star or Gem "Under Skin" on the Sternum
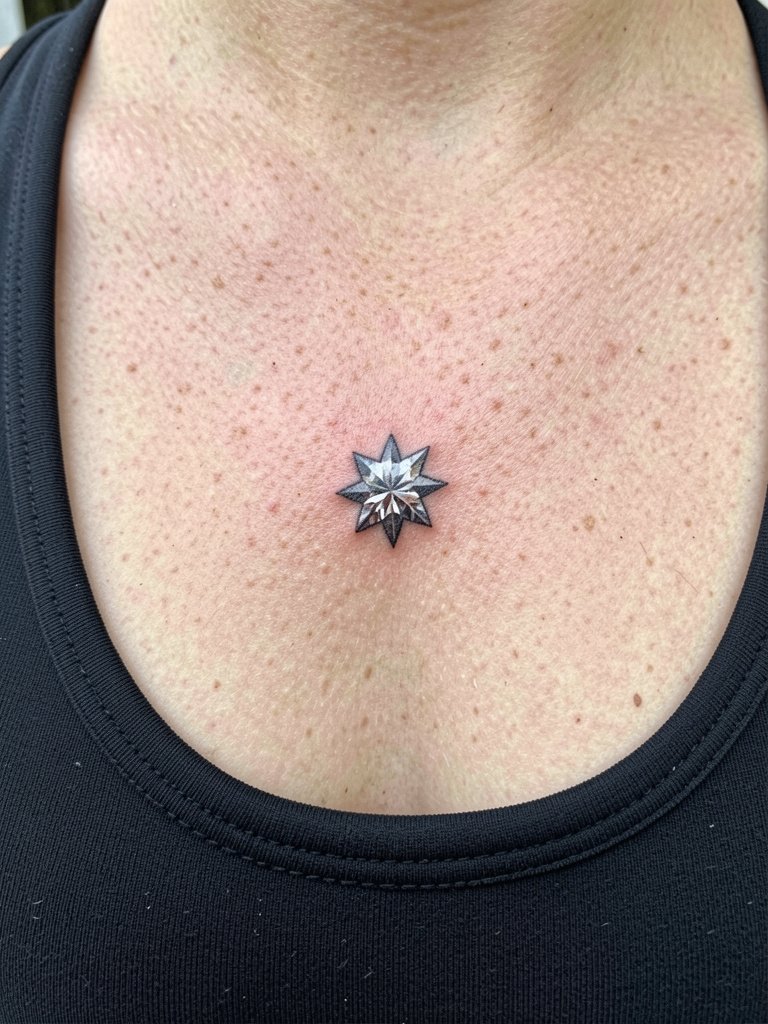
Small under-skin gems work well on the sternum if you accept the sensitivity and intimate healing. The sternum area can be high-friction from clothing, so use slightly higher contrast and avoid overly blended watercolor fills that will lose facet edges. A common mistake is shrinking the gem too small; scale it so the shadow ring still reads at arm length. For outfits choose low-cut camisoles or open-front tops for show-off moments. During the consult specify exactly how close to the breastline you want the piece so the artist can advise on long-term rubbing and touch-up intervals.
14. Realistic Snake with Scale Texture on Outer Forearm
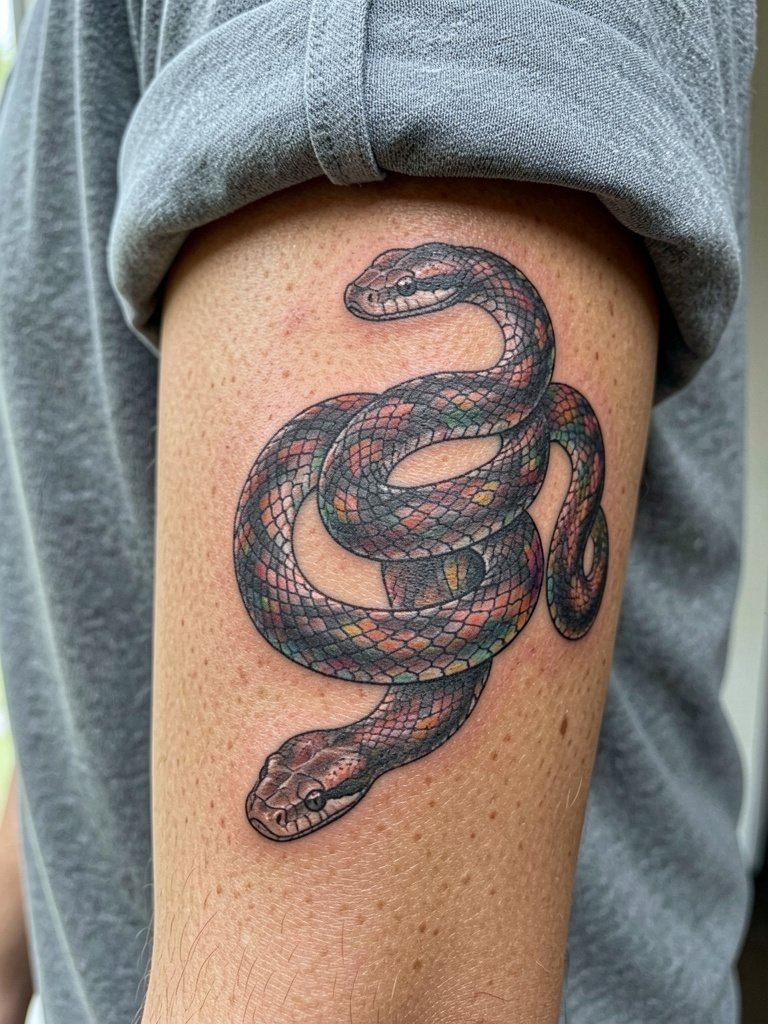
Snakes look alive when scales catch highlight and shadow across a curved surface. The outer forearm lets an artist trace the body across the arm so the scales flow naturally. Mistakes happen when artists compress too many scales into a short band and lose individual texture. Session time is usually one to two hours for a medium piece and touch-ups are predictable at two to three years if you want crisp highlights. Style with short sleeves and a minimalist watch on the opposite wrist to create a clean frame. Ask how the highlight will contrast with your skin tone so the illusion reads in photos.
15. 3D Minimalist Line Art on the Wrist
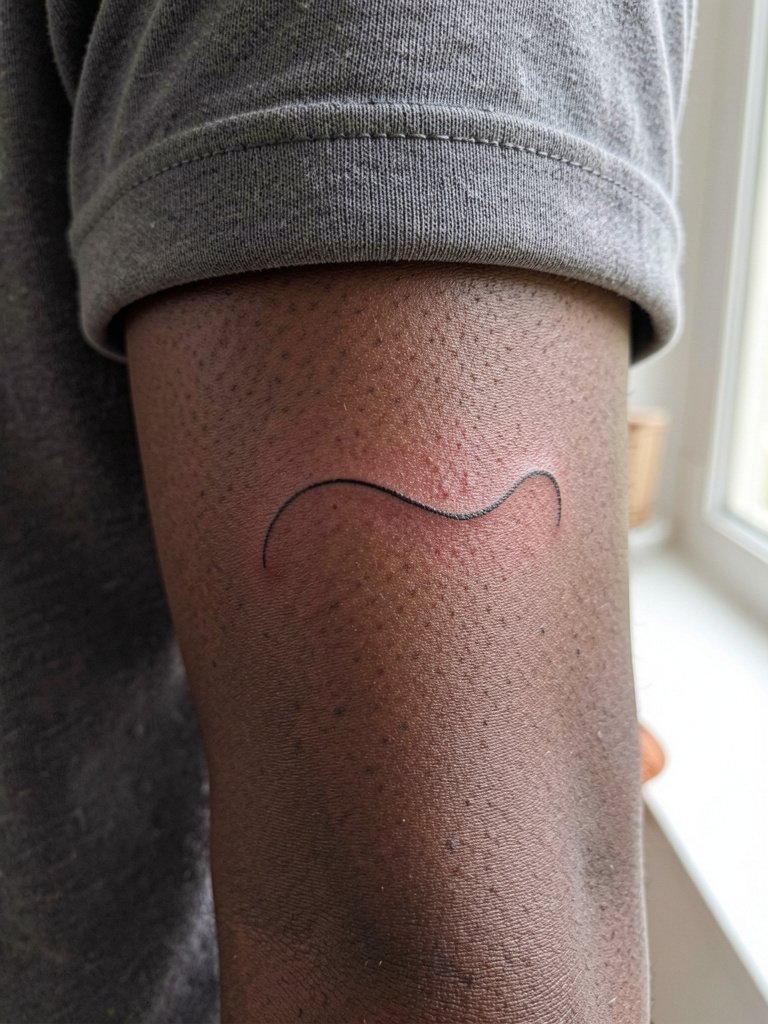
Fine line on the wrist reads clean at first but it is one of the fastest aging places for single-needle work. The wrist sees constant motion and washing that gradually softens single-needle edges. A common course-correction is slightly thicker single-needle weight and a faint supporting shadow to keep that three-dimensional read. Expect a touch-up within one to two years. During the session avoid bracelets on the tattoo wrist day to prevent pressure while the skin seals. If you want an accessory recommendation, a thin chain bracelet on the opposite wrist balances the minimal look without interfering with healing.
16. 3D Scar Camouflage "Missing Skin" Over Mastectomy Scars
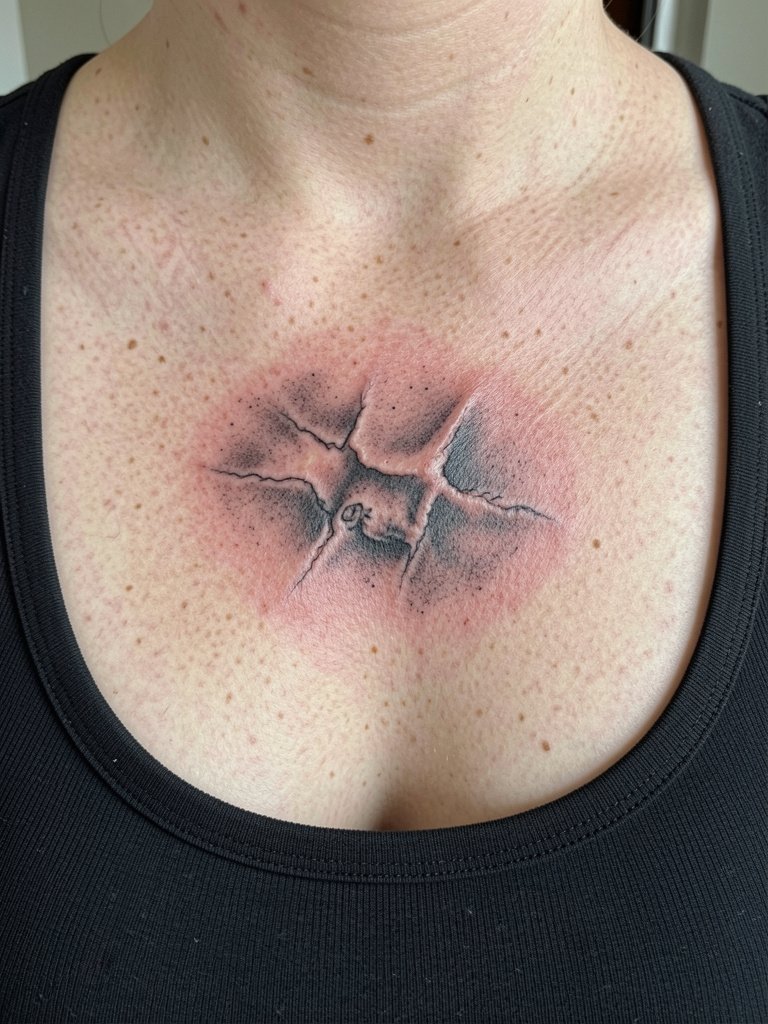
Using 3D illusion to soften or hide scars requires a specialist approach and an honest pre-session conversation about scar texture. The mistake is trying to mask deep puckering with a flat design that calls attention to the scar. Instead, integrate the scar into the composition with shading that follows the scar's contour and skin tone matching. Healing over scar tissue can behave differently, so plan a staged session and expect at least one touch-up. For session wear choose a button-down or loose top so the area can be exposed and re-dressed without tension on the scar.
17. Glow-Accented 3D Accent for Night Effect
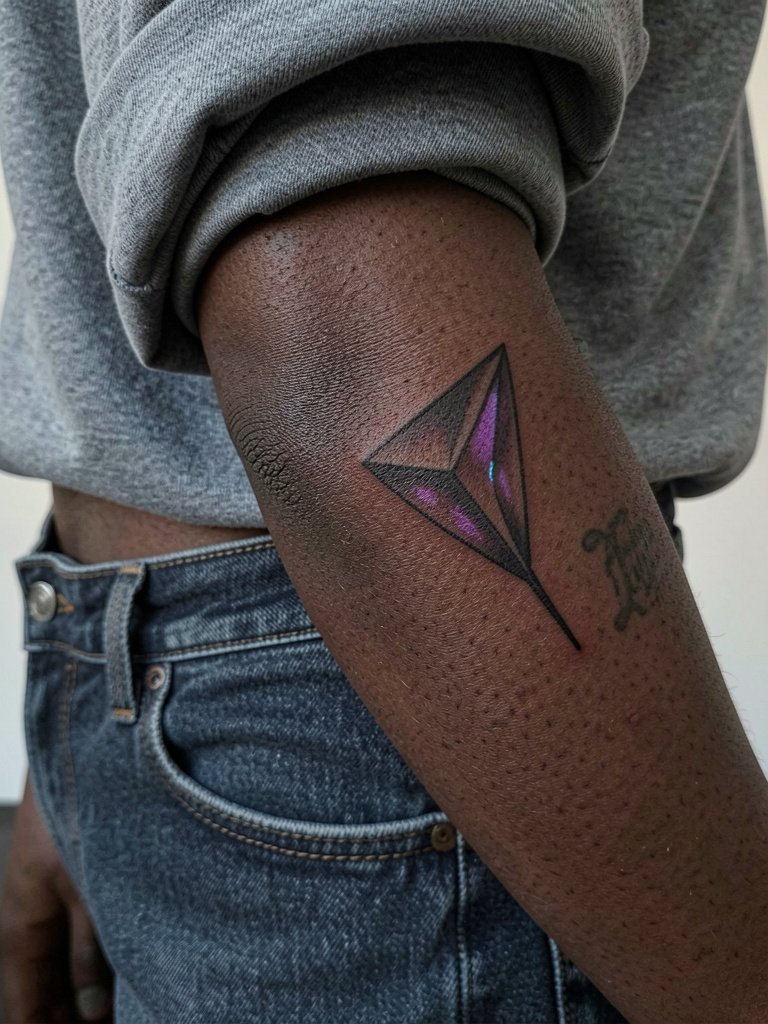
Glow accents create a living-illusion effect at night but they have limits. The experimental camp says glow pigments fade fast and may require careful placement away from high-friction zones. The other camp reports success when glow is used sparingly as an accent and not relied on for the overall 3D read. Choose a placement like the lateral hip or outer forearm where the glow can be shown off without heavy rubbing. Expect this to be a custom consult and to schedule a follow-up touch-up or pigment refresh if you use novelty inks.
Frequently Asked Questions
Q: How much does a small 3D tattoo typically cost?
A: Expect a small 3D piece to fall into a range rather than a fixed price. For many shops small-to-medium 3D tattoos start in the low hundreds and commonly sit between three hundred and nine hundred for a two- to four-inch piece. Large multi-session biomech or back work moves into higher ranges.
Q: Will a 3D tattoo look flat in photos, and how do I prevent that?
A: Some 3D work photographs flatter than it reads in person because glossy finishes and harsh flash wash out shadows. Use matte photo finish spray and natural window light when you photograph a piece. Position the camera so the angle matches the tattoo's shadow direction and avoid direct on-camera flash for the best sense of lift.
Q: Can numbing cream ruin 3D detail?
A: Artists and clients disagree. One group says numbing cream can swell the skin and blur micro-shading, making the final healed gradation appear softer. Another group finds sparse, well-timed use of topical numbing that is removed before shading causes no distortion. If detail is critical, ice and controlled breathing often reduce surface swelling while keeping skin texture stable.
Q: Where should I search to find artists who actually show healed 3D portfolios?
A: Search hashtags like #3dtattoo, #3dillusion, and #photorealismtattoo on Instagram and TikTok and filter by location to find nearby artists. Tattoodo, Booksy, and Inked App let you search by keywords like "3D insect" or "biomech" and often show healed shots. Reddit threads in r/tattoos and r/photorealismtattoos also surface peer recommendations and healed examples across skin tones.
Q: Which placements need the most touch-ups for 3D shading?
A: High-friction or highly flexible areas typically require the most attention. Ribs, inner forearm, hands, and areas near waistbands see blur faster because of movement and rubbing. Stable spots like the outer shoulder and upper back usually hold shading longer and need fewer touch-ups.
Q: How do I dress on the day of a shoulder or collarbone session?
A: For shoulder work wear a sleeveless top or off-shoulder shirt so the artist can reach the deltoid without fabric pressure. For collarbone or sternum pieces bring a strapless or button-down top that you can remove and redress comfortably after the session. One helpful option is a fitted scoop-neck tank that exposes the area but stays on for modesty.
Q: Are there specific red flags that suggest an artist should be avoided for 3D work?
A: Look out for portfolios that show only fresh photos and no healed shots of the same piece. Also watch for overly tiny 3D designs that lack spacing or for examples where single-needle portraits were shrunk to sizes no larger than two inches. Those indicators suggest the shop may not be experienced with long-term 3D readability.
