
Bold forearm mountain pieces that read clearly in photos are usually the ones with stronger linework and room to breathe. Fine single-needle peaks look delicate in the studio but often soften on sun‑exposed forearm skin. If you want a mountain that still reads at year three, start with slightly heavier contour and plan spacing that survives daily movement. The first section below shows how to size and place angular geometry so the peaks stay sharp.
1. Geometric Angular Mountain on Inner Forearm
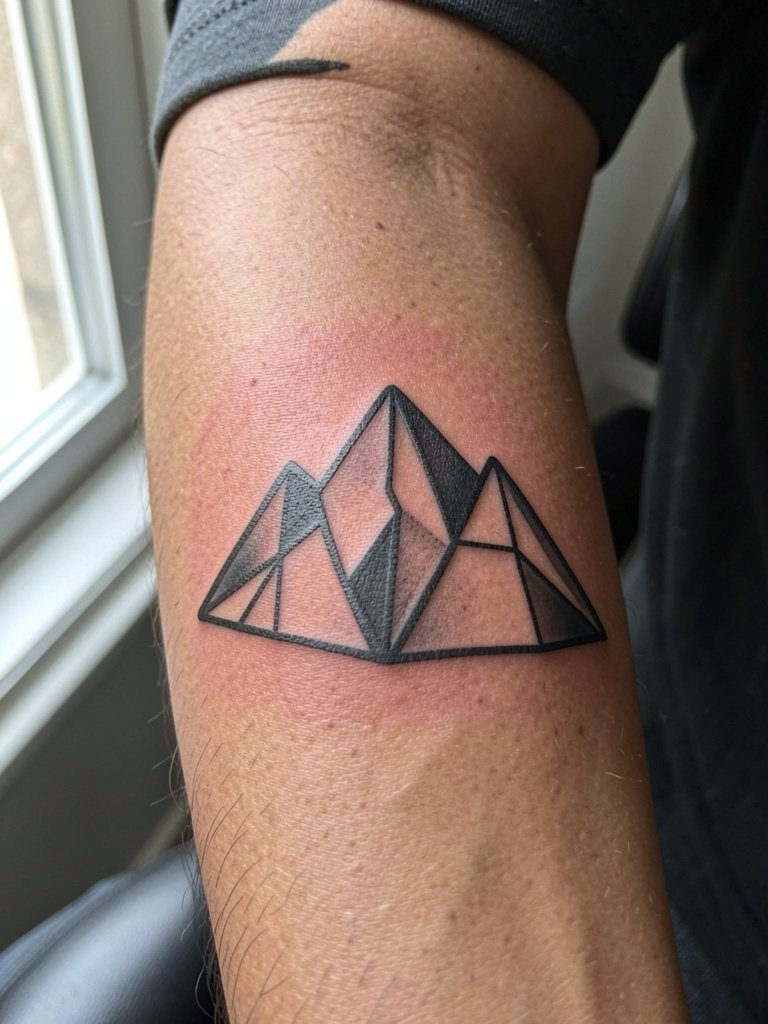
This sharp-angled mountain suits someone who wants a modern, graphic peak that still ages predictably. I recommend slightly heavier linework than a single-needle reference so the facets keep separation after two years. Discuss exact line weight and spacing with your artist by bringing a close-up reference and asking them to show the design at two sizes on your skin so you can see how it reads at three inches versus five. The inner forearm can stretch when you bend, so place the longest runs along the flatter part of the palm-up surface. Session feel is moderate, about 45–90 minutes for a mid-sized patch. Common mistake is shrinking the geometry too small, which causes dot merging and blur. For showing off, roll a linen sleeve and try linen button down shirts that keep the forearm visible.
2. Stylized Abstract Mountain with Vibrant Color, Outer Forearm
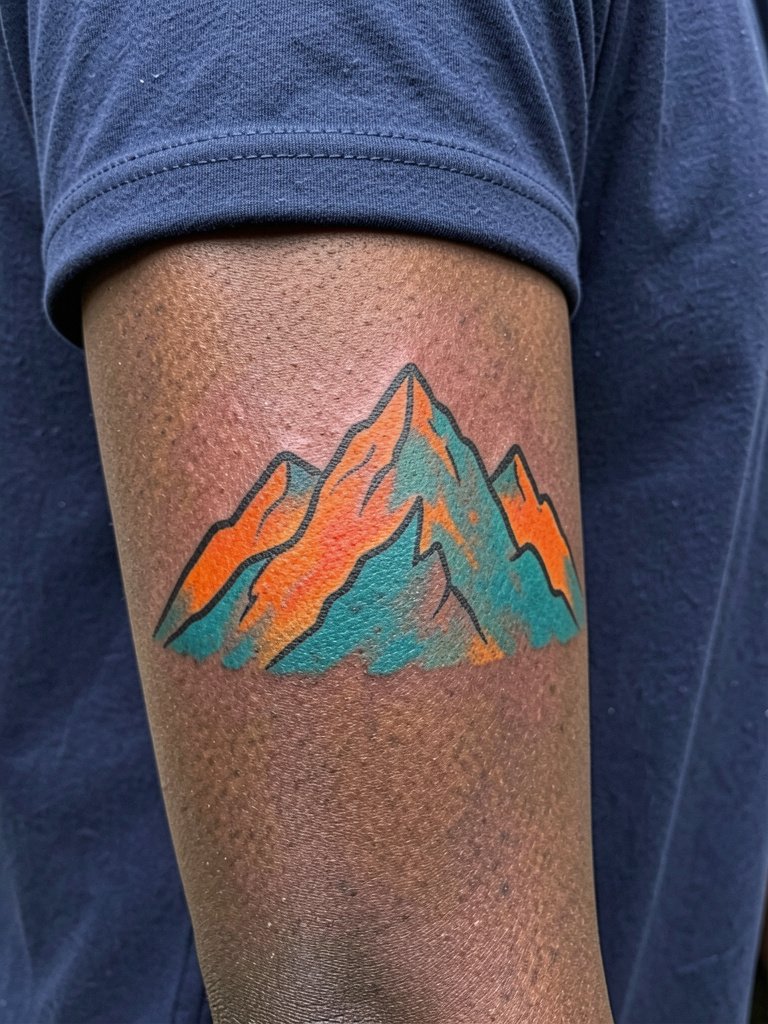
If you want the emotional pop of color, choose bold outlines with saturated fills so the pigments retain shape as they fade. For a forearm wash, ask the artist to edge the color with one to two millimeters of black outline to preserve contrast in bright light. Color sessions usually take longer because of layering, expect two sessions for medium-sized pieces. A common aging issue is soft watercolor that becomes muddy under heavy sun exposure, so plan an SPF routine from day one. Show-off styling works with solid tees in black or navy and chunky silver bracelets on the opposite wrist for balance.
3. Minimalist Three-Peak Line Art, Inner Forearm
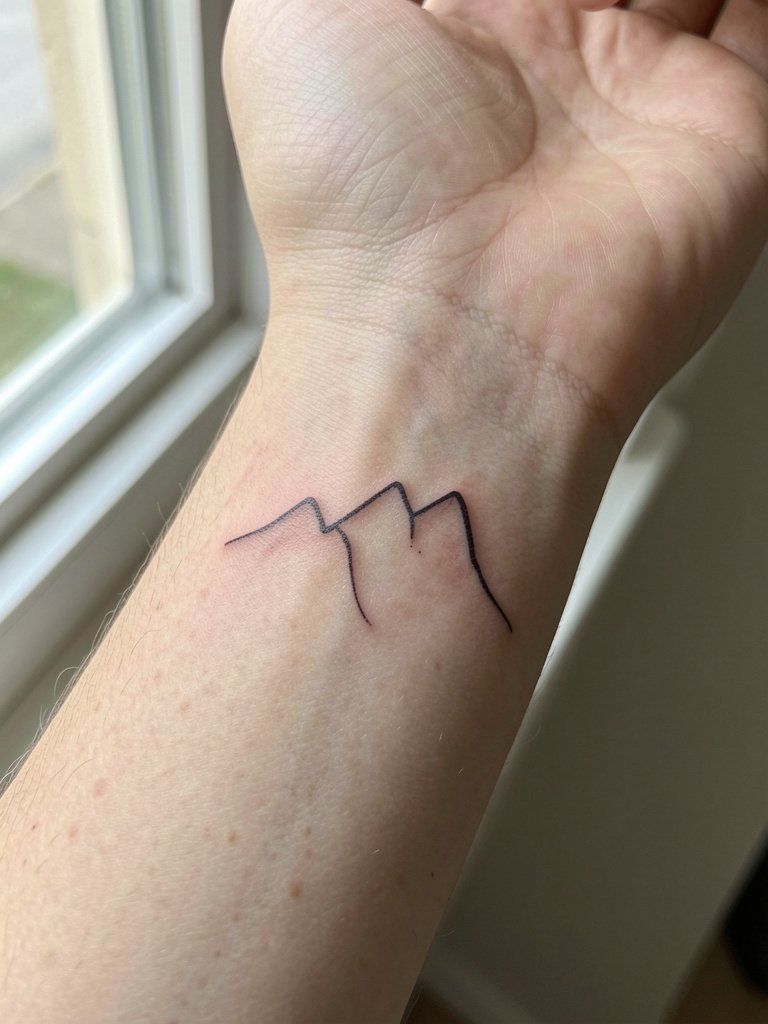
This one reads best small and tall rather than cramped. I advise bumping the reference line weight up a hair so the peaks do not turn into a gray smudge within a year. When you sit with the artist, have them show the same design at two widths drawn on your skin. The inner forearm is more sensitive than the outer side, expect a sharp scratch sensation for a short session of 30–60 minutes. Typical mistake is asking for single-needle scale without accounting for sun and motion. Touch-up is common around year two for fine pieces. Pair with neutral rolled sleeves and a dainty bracelet like dainty gold stacked bracelet set when you want the linework to read in photos.
4. Blackwork Silhouette Mountain Range, Outer Forearm
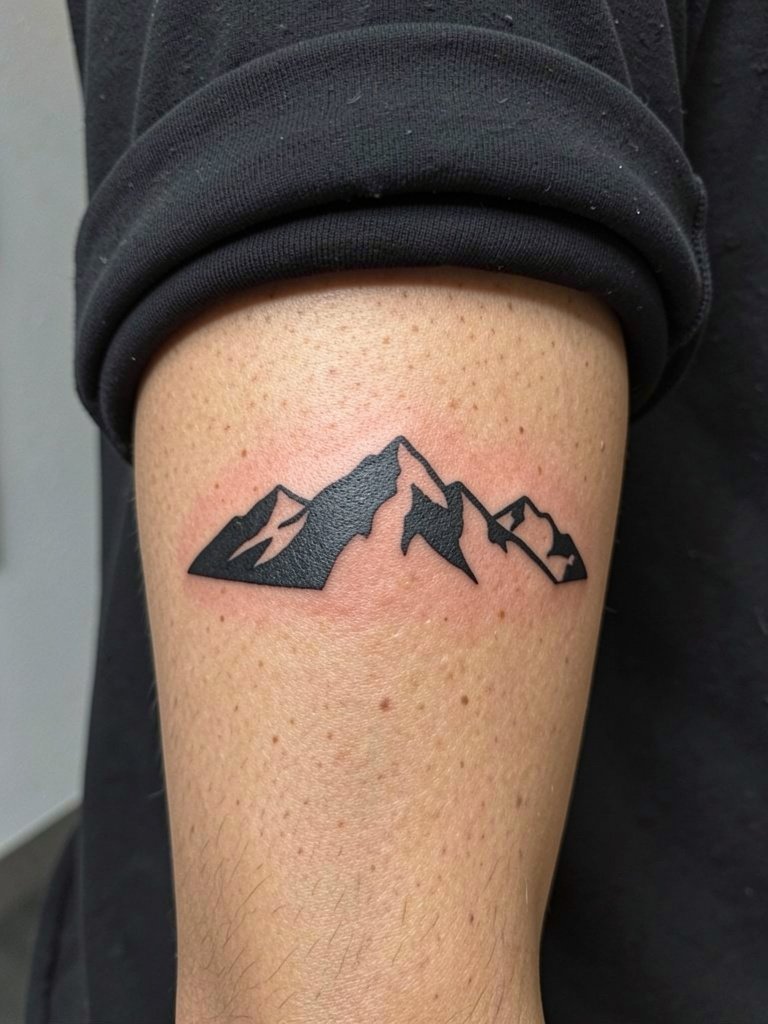
Blackwork silhouettes are great when longevity is the priority. The heavy saturation resists sun-driven wash better than light shading. Discuss edge crispness and how much negative space you want between peaks because that spacing determines whether the range holds as a silhouette after five years. Sessions are straightforward but taxing for saturation, expect 90–150 minutes depending on size. A common mistake is overcomplicating the interior with tiny details that disappear; keep it bold if you want a lasting graphic. For wardrobe, a solid black or navy tee with rolled sleeves makes the silhouette pop and pairs well with black rolled sleeve t-shirts when you want contrast.
5. Watercolor Mountain Wash, Inner Forearm
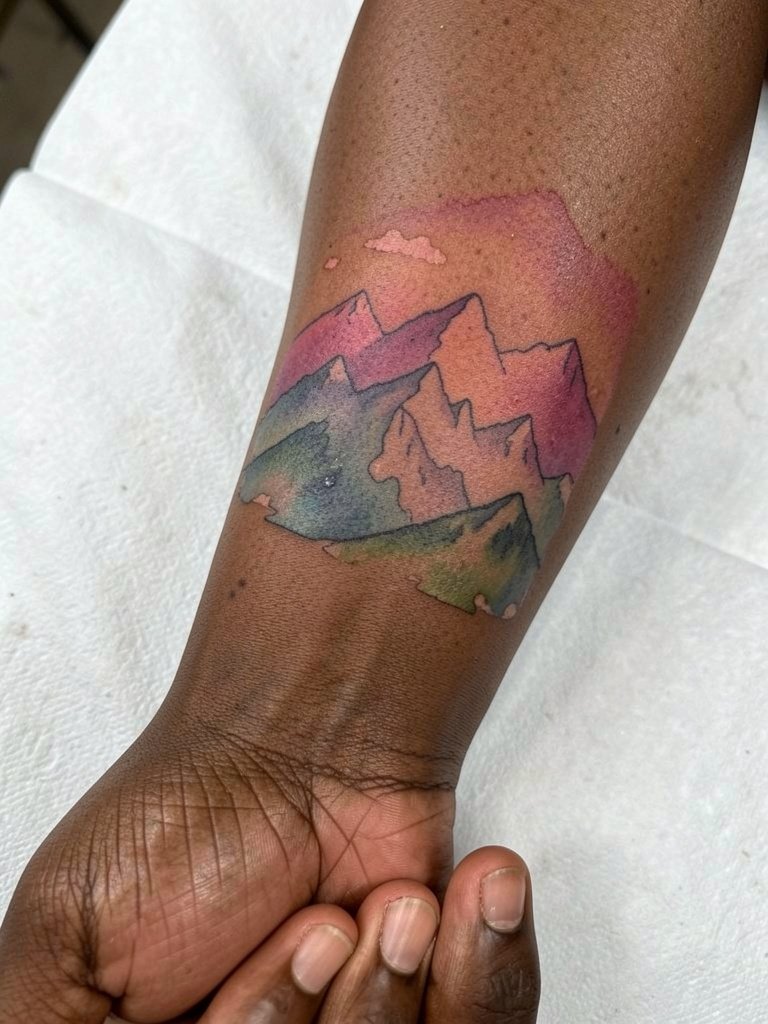
Watercolor pieces look painterly but they require honest tradeoffs for forearm placement. Color diffusion and thin washes fade faster on sun-exposed skin, so one option is to ask for outlined color sections rather than purely open washes. Talk specifics about pigment saturation and how strong the initial layers should be to leave a lasting undertone. Sessions often take longer because the artist layers color slowly. A frequent regret is under-saturating the first pass, then needing touch-ups sooner. Consider pairing this with cream or sand linen shirts for photos and wear a loose button-down to the session so the artist has clear access.
6. Fine Line Rough Peak Detail, Inner Forearm
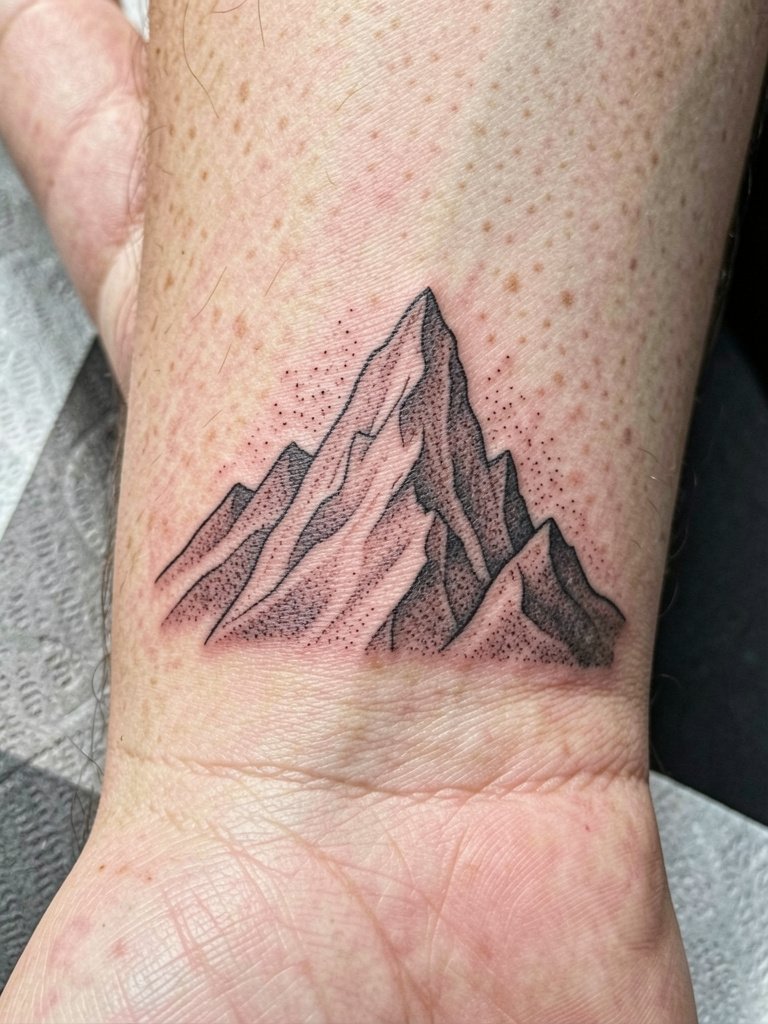
Fine detail focused on a single craggy peak is elegant but risky on the forearm. I recommend using stipple shading rather than long thin hatching to maintain texture over time. Ask the artist to map out stipple density and show a healed-timeline expectation so you know which areas will soften. The session is precise and can take 90–120 minutes for a detailed peak. Common mistakes are asking for ultra-thin cross-hatching that disappears into a gray patch. For showing off, wear a rolled-cuff linen shirt in cream or olive so the texture reads clearly in photos, and try rolled cuff linen shirt.
Pre-Session Essentials
These first six forearm styles cover fine detail, saturated color, and silhouette work, so a few practical items make the chair day smoother.
- Mad Rabbit Tattoo Balm (Advanced). A thinner balm recommended after the first few days to avoid clogging pores on forearm skin during the initial healing window.
- Hustle Butter Deluxe. Non-greasy feel helps with frequent movement zones like the forearm and keeps surface shine manageable while the ink settles.
- Japanese Sumi Black Ink (artist-grade). Used by some blackwork artists for deeper black saturation and crisp edges on silhouette pieces.
- Fragrance-free gentle body wash. Gentle cleansing during showers protects delicate linework without irritating.
- Broad spectrum SPF 50 Sunscreen. Daily protection for forearm pieces preserves color and contrast over the long term.
7. Neo-Traditional Detailed Mountain, Outer Forearm
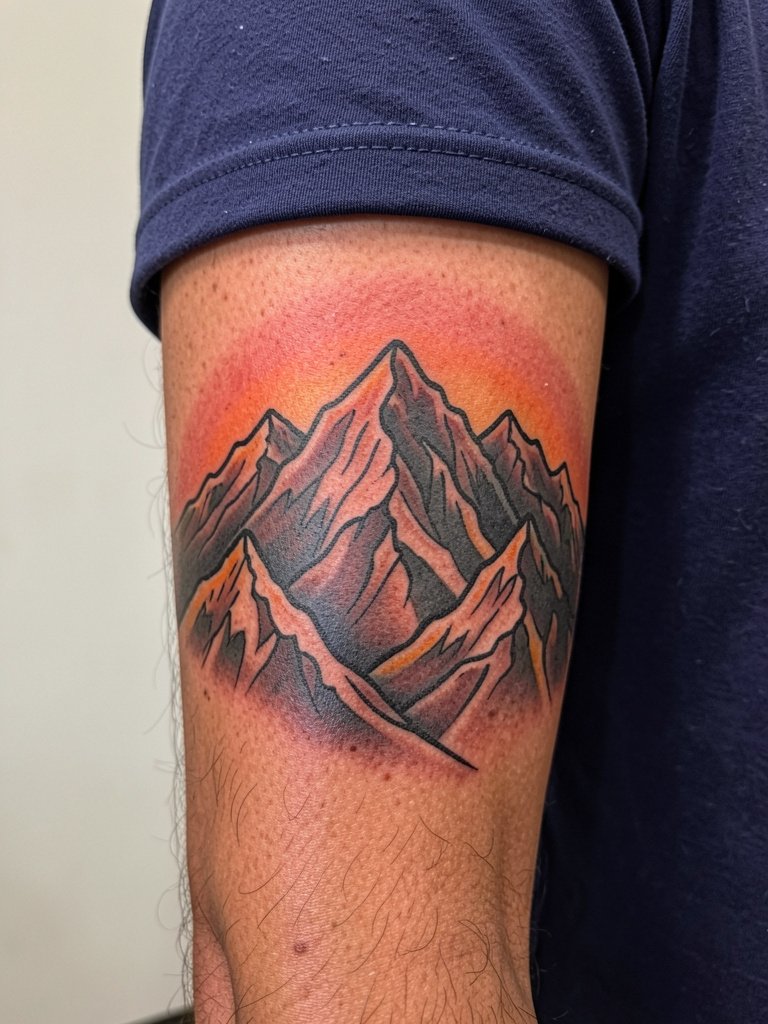
Neo-traditional mountains pair bold outlines with rich internal shading and occasional color accents. When you want both presence and texture, ask the artist to reserve color for focal zones like a sunrise band so the rest remains contrast-driven. This approach helps the piece age more like black-and-gray with sustainable accent points. Sessions can run 2–3 hours depending on complexity. A common error is adding too many small colors that require frequent touch-ups. Wear a short-sleeve tee to the session for easy access and choose a dark tee for photos to make the outlines read crisply. Consider navy short sleeve tee for show-off shots.
8. Dotted Mandala Mountain Base, Inner Forearm
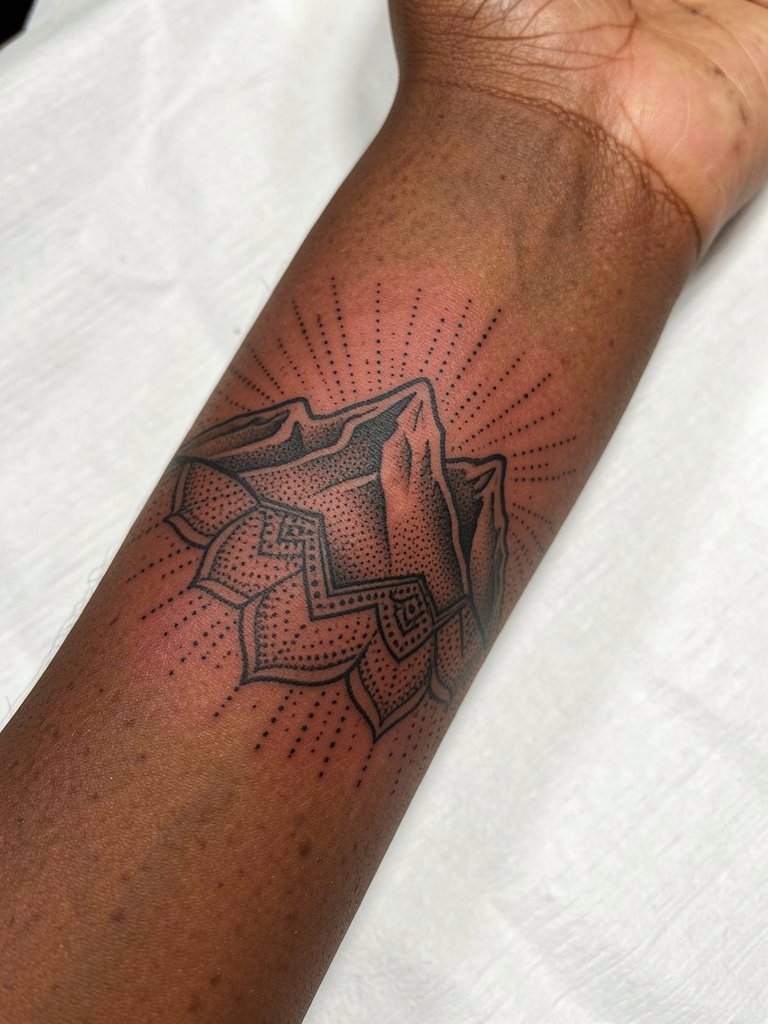
Combining a mandala base with mountains gives ornamental balance while keeping the peaks readable. Dot work is forgiving when spaced correctly, but small dots packed too tightly will blend on forearm skin. When you consult, ask the artist to show the dot gradient scale and point out where density will start to look like shading. Sessions vary by density but plan for 90–180 minutes for full detail. Mistakes include asking for a mandala the same scale as an earring-sized design; give it room. This pairs well with neutral rolled sleeves and stacked bracelets for a more editorial look.
9. Scenic Mountain with Tree Foreground, Outer Forearm
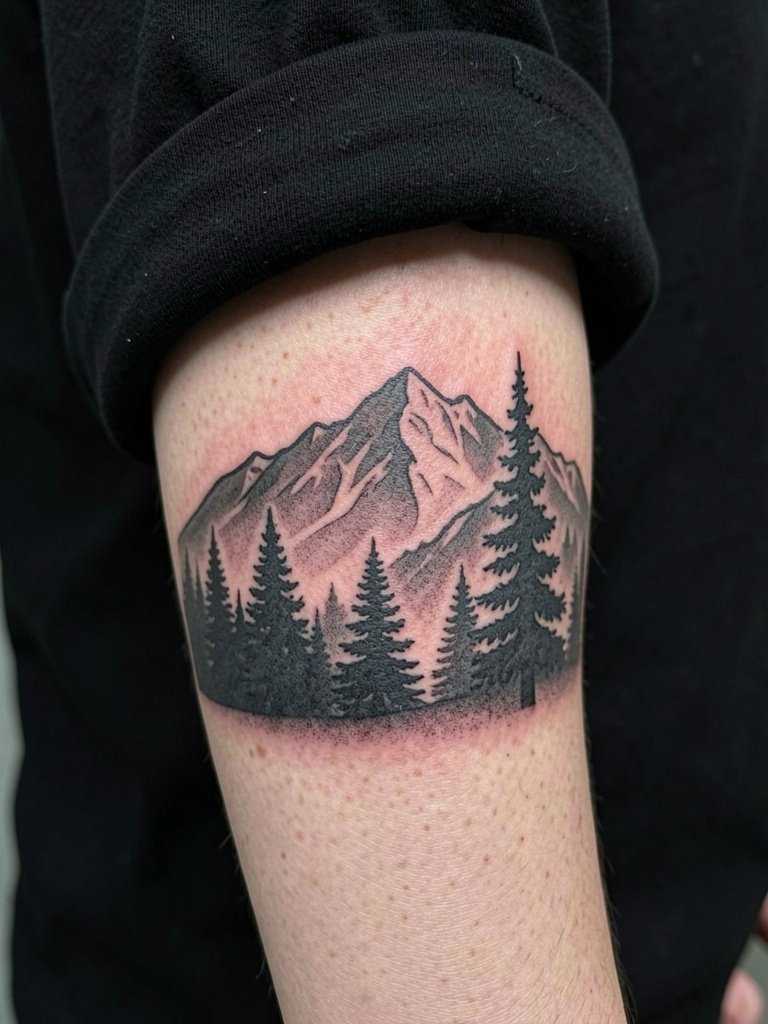
A layered scene with trees in front gives natural depth and reads well on the outer forearm where the skin is flatter. Ask your artist to map the foreground silhouette as the highest-contrast element so the scene keeps structure as the mid-ground softens over years. Expect a session of 2–3 hours for a mid-sized landscape. One mistake is crowding too many tiny trees into a small area where they will blur together. For showing off, a solid tee and a chunky bracelet on the opposite wrist help balance the composition.
10. Abstract Line Mountain with Sun, Inner Forearm
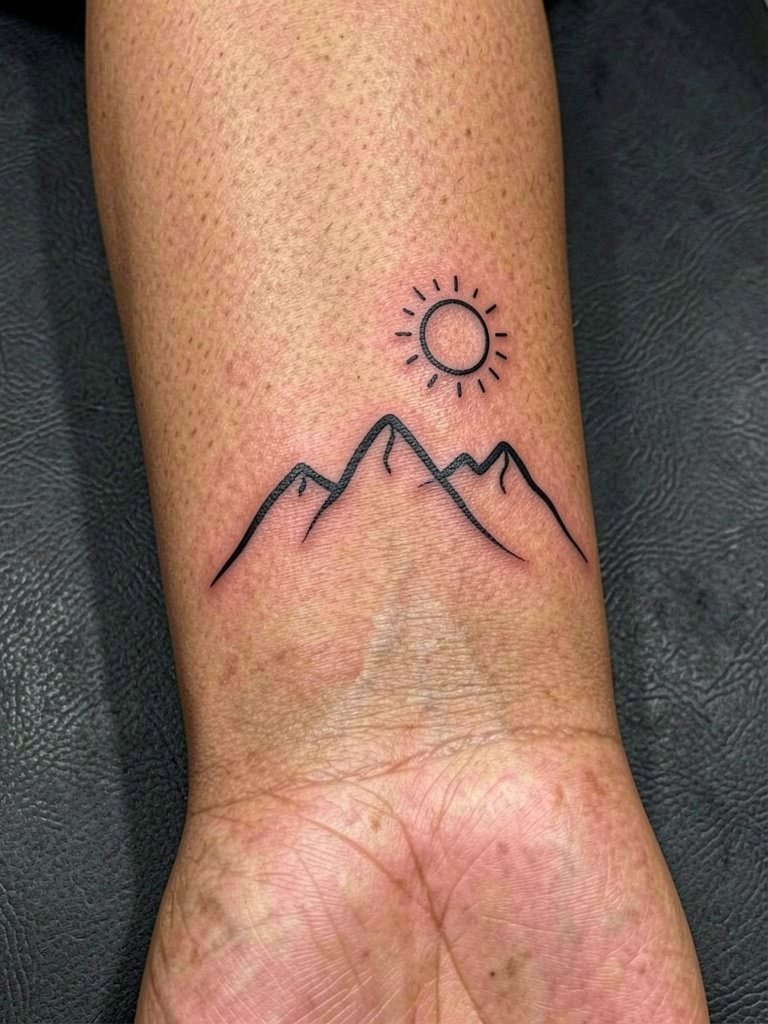
Single-line mountains with a sun are elegant when the line weight is chosen to survive forearm exposure. Tell the artist you want the single stroke drawn with a slightly heavier contour than typical micro-minimalist work and ask them to test it on the area so you can see how the line reads from two feet away. Sessions are short, often under an hour. Common problem is requesting a hairline stroke that disappears by the first anniversary. This design looks great under rolled linen shirts and with dainty bracelets, so bring a rolled cuff linen shirt when you want to show it off.
11. Textured Rock Face Mountain, Outer Forearm
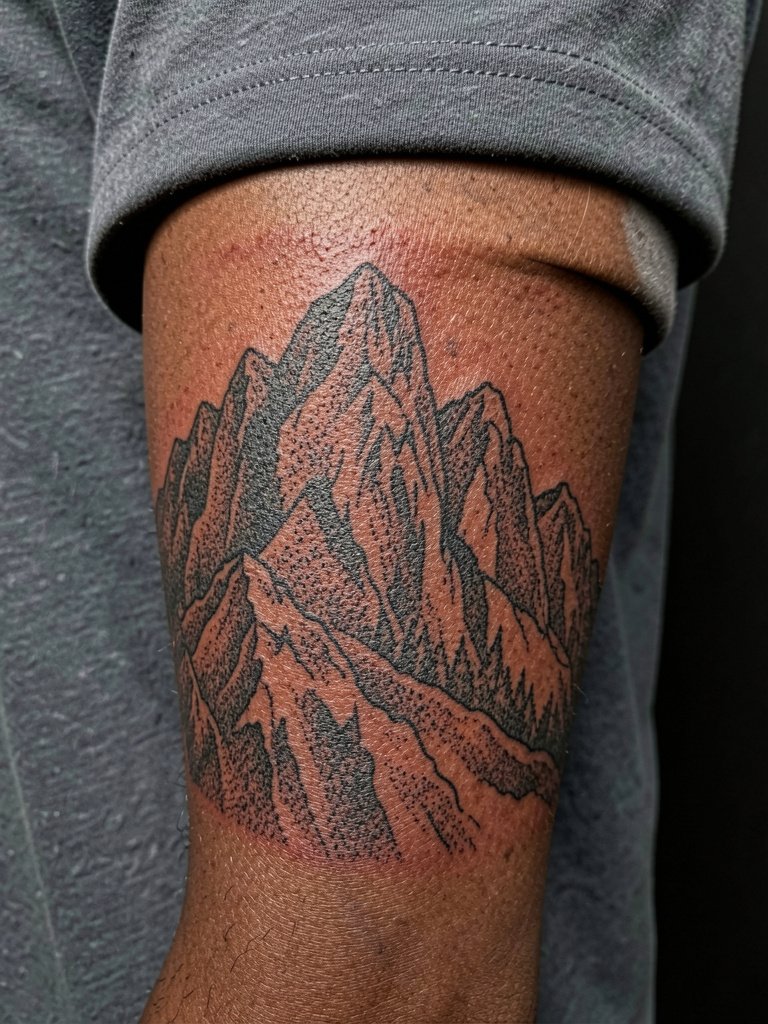
If you want realistic texture, stippling and cross-hatch can simulate rock grain. Ask the artist which shading technique they plan to use and request a small test swatch to show how dense stipple reads after healing. Sessions are detail heavy and often need two passes. Pitfall is too-fine texture in a compact space which blurs into noise. For wardrobe, a fitted short sleeve makes the layered shading show in photos.
12. Geometric Mountain with Dot Gradient, Inner Forearm
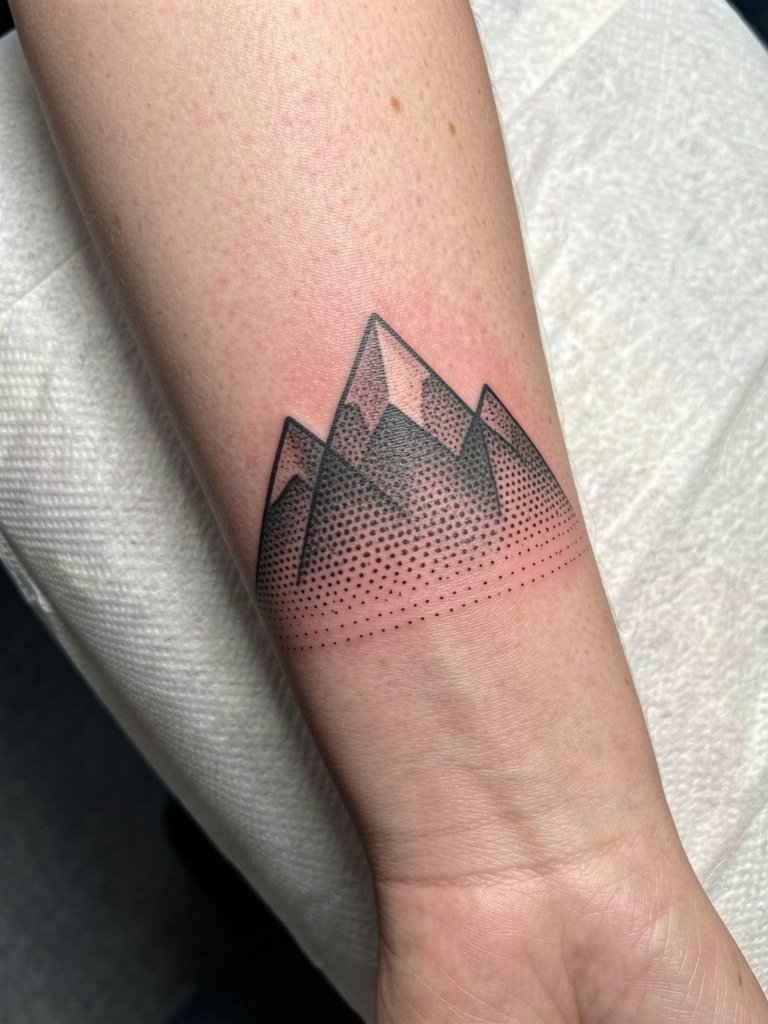
Dot gradients create an almost sculptural sense of volume while remaining graphic. Make sure the artist spaces the dots so the dense area has room and will not compress into a single gray mass. Ask for a healed expectation so you understand where density will start to lose definition. Sessions take moderate time depending on gradient size. A frequent error is compressing the gradient into a tiny triangle. This design pairs with neutral rolled sleeves for a clean editorial look.
13. Minimalist Mountain with Moon, Inner Wrist
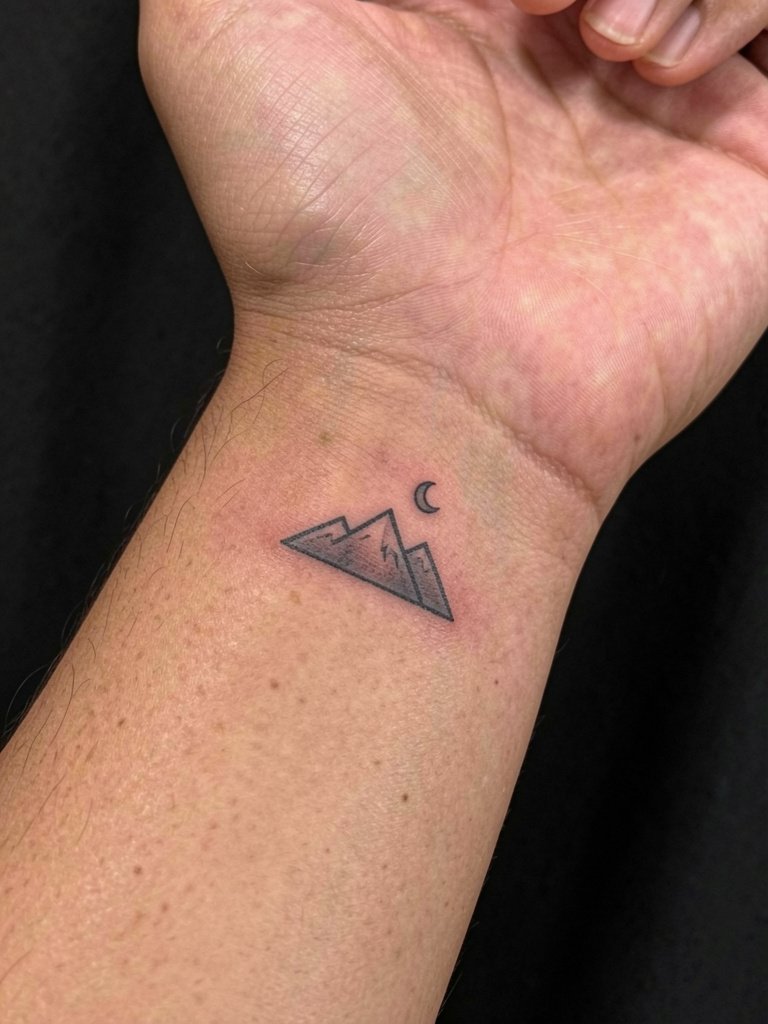
Micro-minimal pieces on the inner wrist are very visible but also vulnerable. For a tiny mountain with moon, ask the artist to slightly enlarge the moon and thicken the peak outline so the negative space remains distinct after wear. The wrist is sensitive; expect a sharp sting and a short session. Touch-ups around year one are common for micro work. For show-off style, dainty stacked bracelets on the opposite wrist balance the small silhouette.
14. Bold Outlined Mountain with Sunrise, Outer Forearm
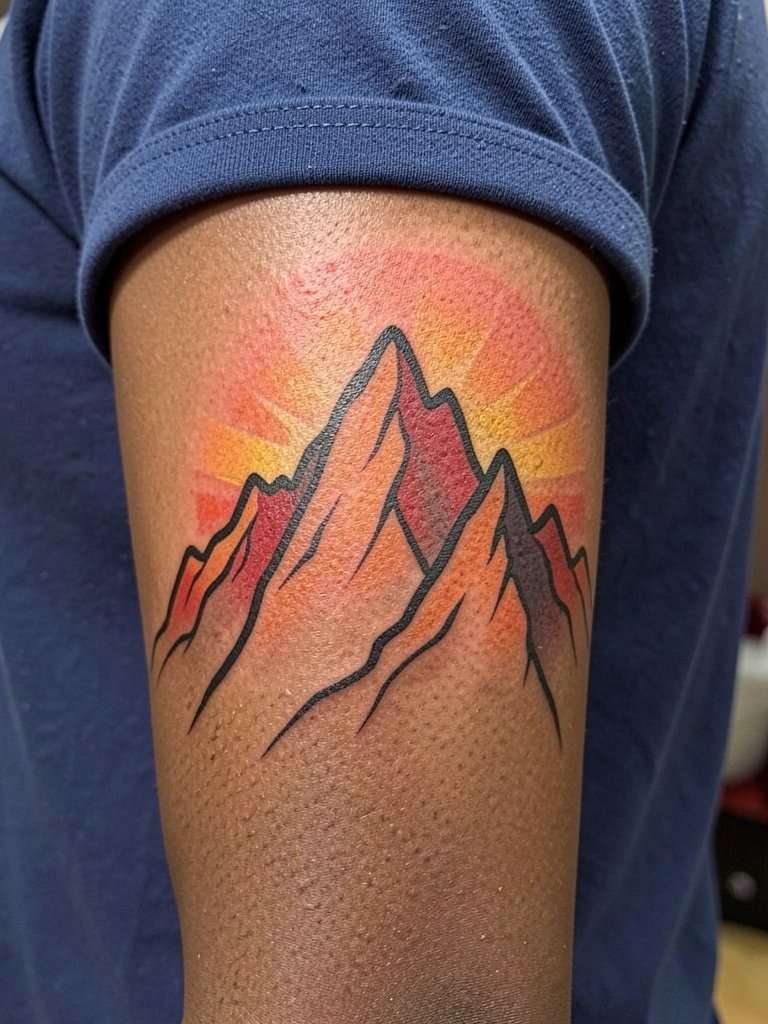
Traditional color gradients framed by thick outlines age well on the forearm when the outline does the heavy reading. Ask for a strong contour and a restrained sunrise band rather than multiple tiny color layers. Sessions that include gradients can be split to allow proper pigment seating. A common misstep is using many small colors that need frequent touch-ups. For photos, a solid tee with rolled sleeves complements the contrast.
15. Abstract Shattered Mountain, Inner Forearm
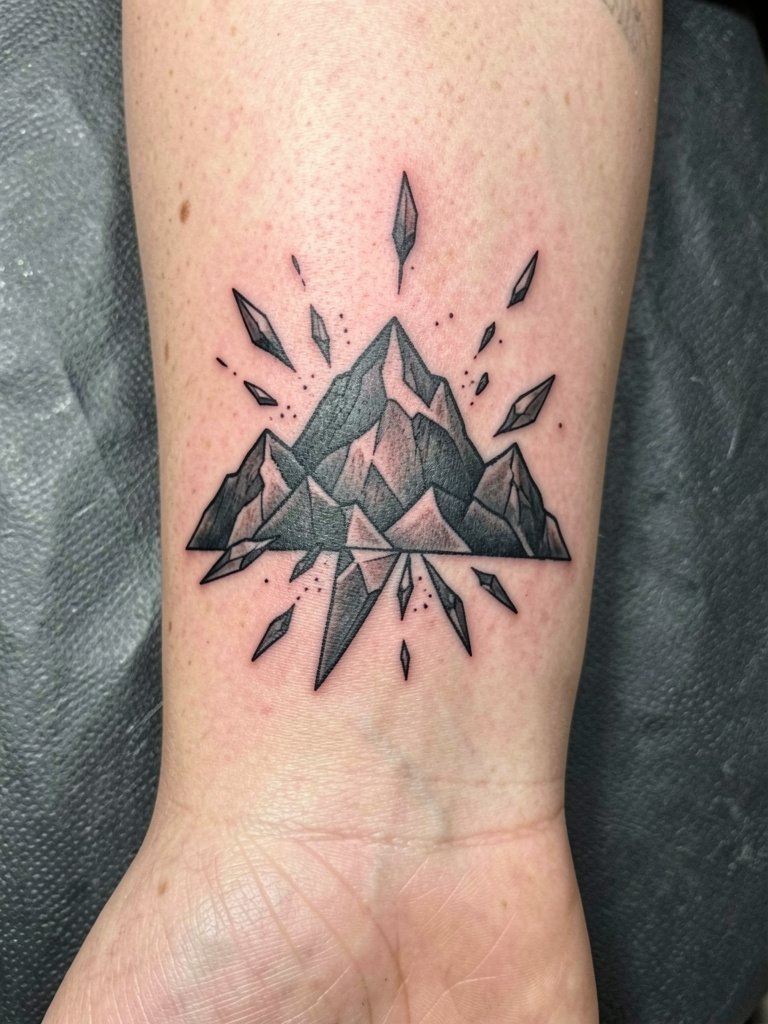
Shattered or fragmented geometry can symbolize recovery and still read well when shards are sized for forearm skin. Have the artist plan negative-space buffers between shards to avoid merging. Expect a 90–150 minute session for mid-sized fragmentation. A common error is making shards too small or adding thin hairlines between them which get lost with movement. Pair with casual rolled sleeves for the best visible contrast.
16. Single Peak Micro-Realism, Outer Forearm
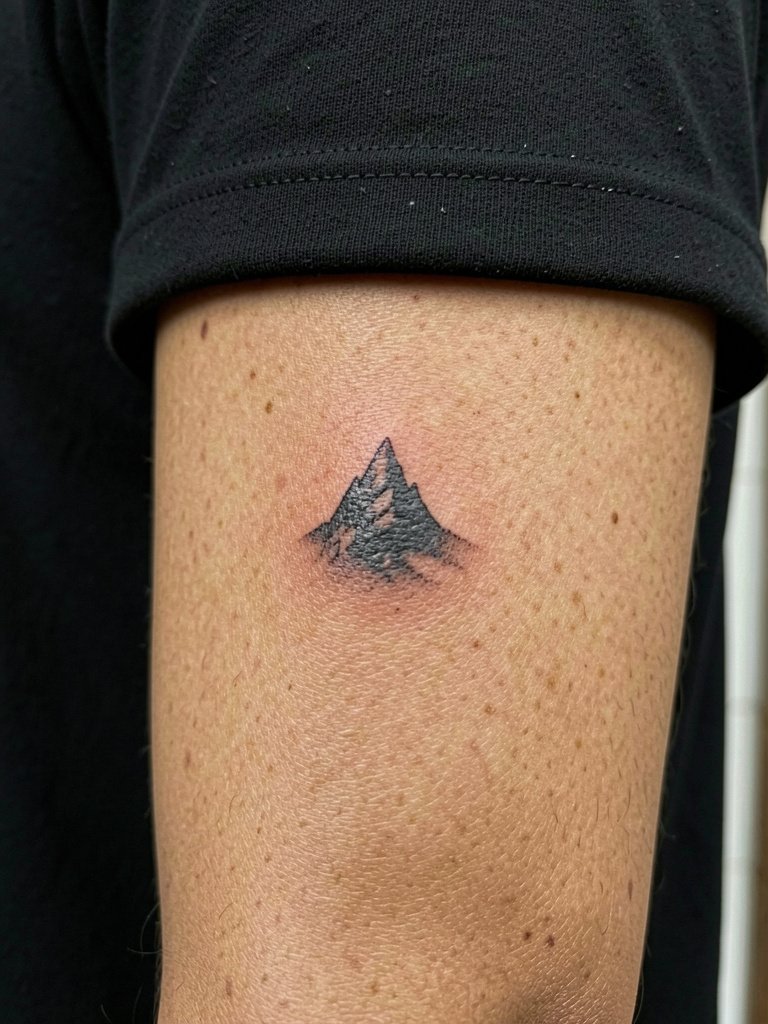
Micro-realism on the forearm looks stunning close up but needs spacing that allows the texture to survive. Ask for a slightly larger overall scale than your photo reference so details do not compress. The session is meticulous and can run multiple hours for high fidelity. Mistake to avoid is insisting on extremely small size that requires overly fine needles. For showing off, black tees with rolled sleeves and a subtle silver bracelet balance the realism.
17. Layered Range with Negative Space, Outer Forearm
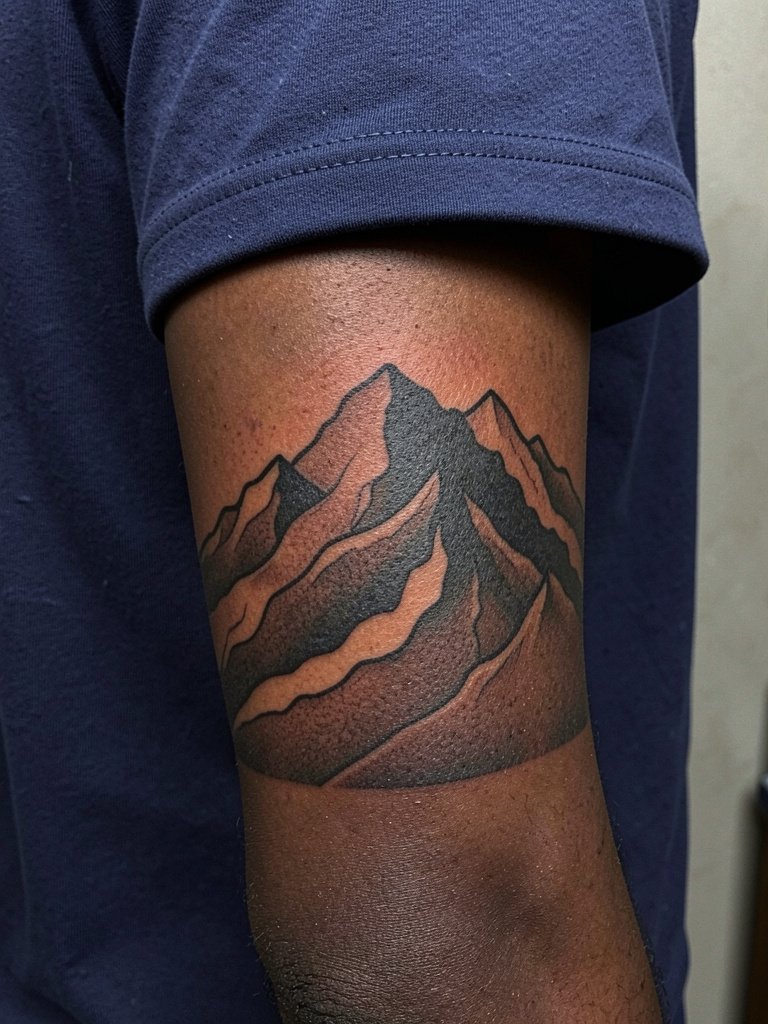
Alternating shaded bands and negative space read well because the empty bands act like built-in contrast. Have the artist sketch how many bands will remain distinct after healing and ask for examples of two-year healed work in similar placements. Sessions vary. A classic mistake is using too many bands in a small vertical span which later compress. For photos, solid dark tops frame layered silhouettes well.
18. Minimalist Compass Peak, Inner Forearm
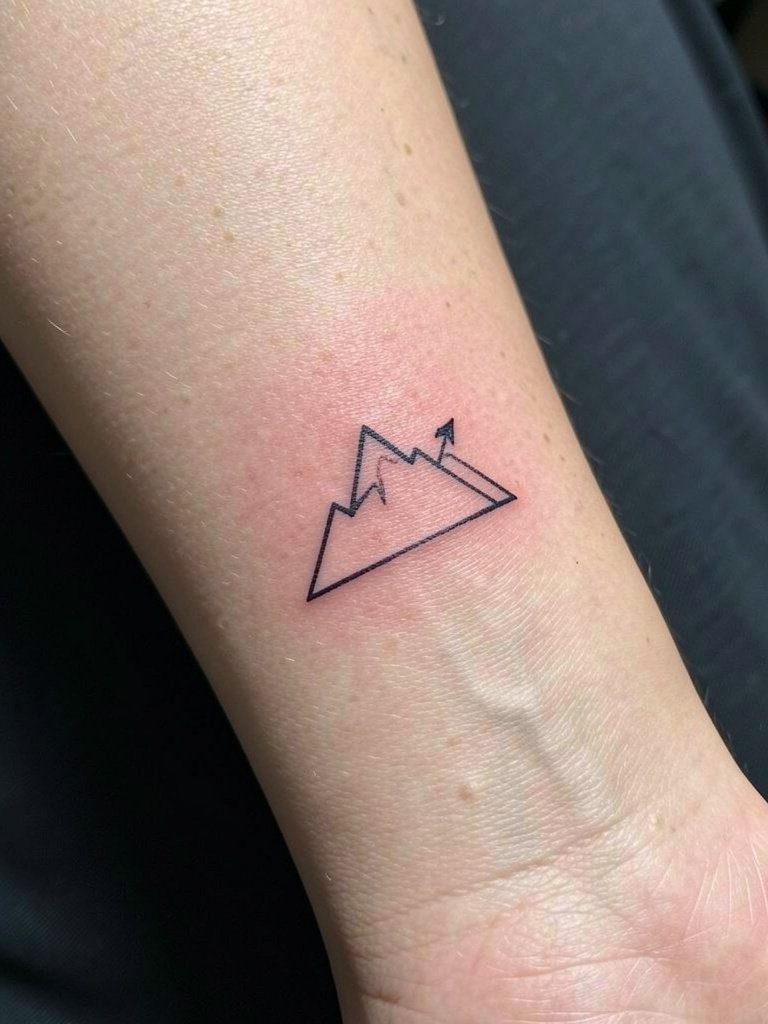
Adding a tiny directional element gives meaning without clutter. Request that the compass lines be bold enough to hold as a unit and ask the artist to show the compass at the recommended scale on your skin. Session is short. Frequent mistake is tiny needle-thin compass lines that blur into the mountain. Wear rolled sleeve shirts for best visibility.
19. Three-Tone Sunrise Mountain, Outer Forearm
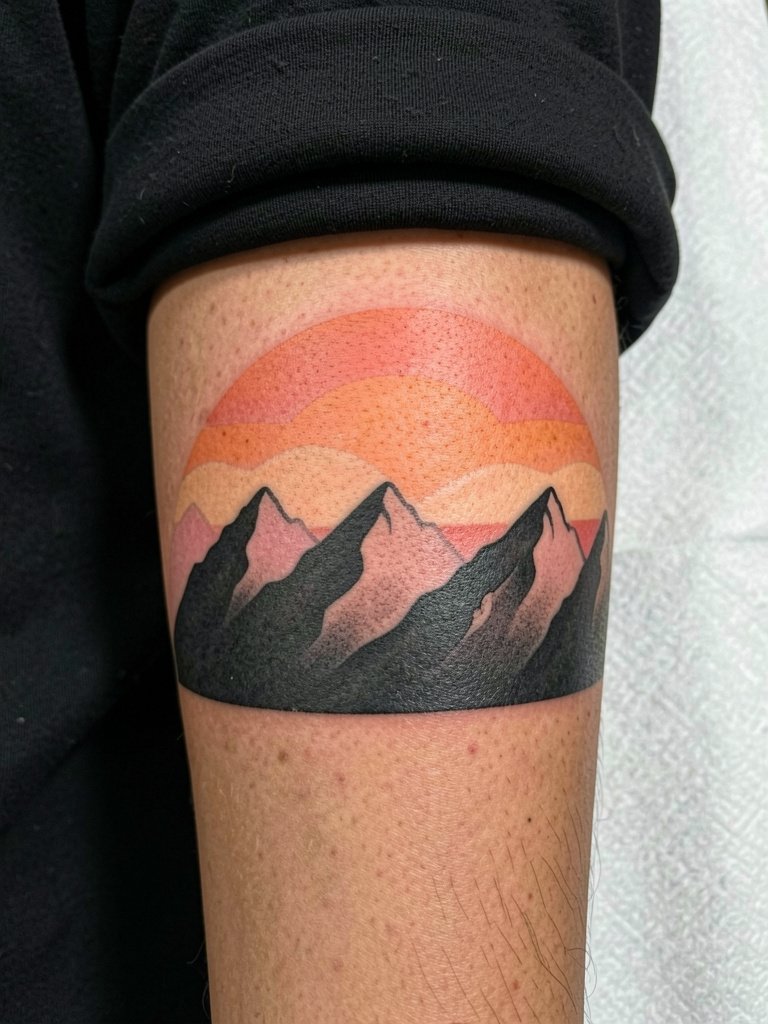
When you want color that still reads, limit the palette and rely on the black outline to preserve form. Ask the artist to place the brightest part of the gradient where the skin gets least sun exposure. Color retention varies by pigment and sun habits. Sessions are longer for layered color. Avoid overcomplicating with micro details inside the color bands that will be lost.
20. Mountain Silhouette Wrist Wrap, Outer Forearm Near Wrist
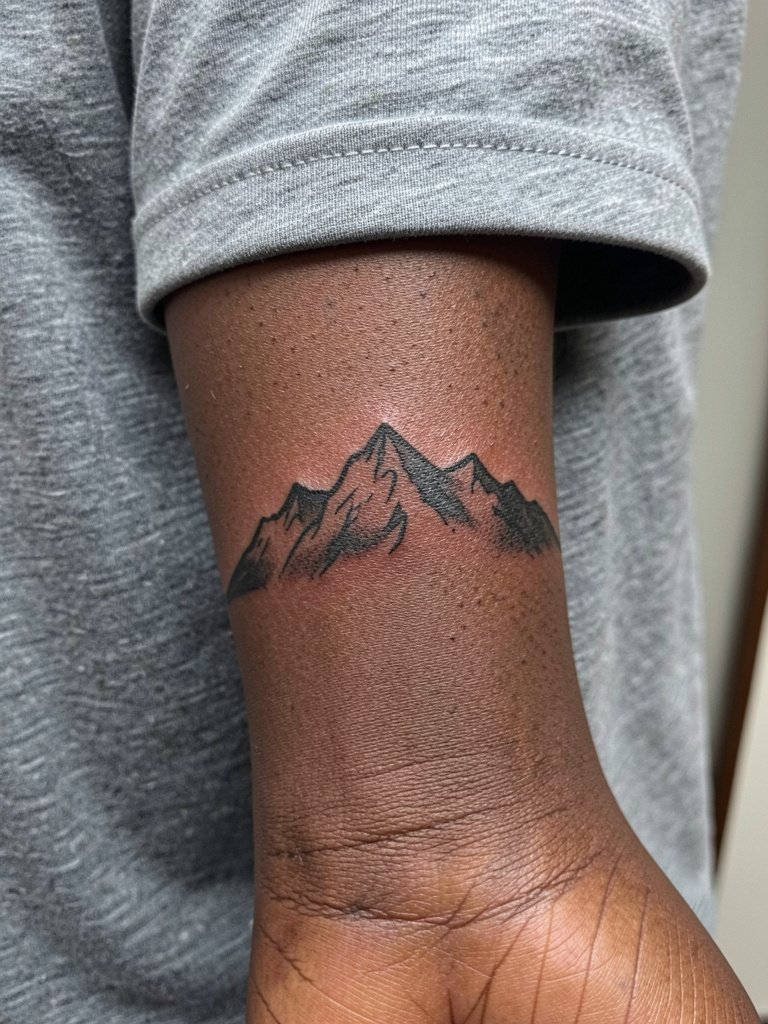
Wraps near the wrist are striking but face extra friction from clothing and watches. Discuss with the artist how much negative space is needed to prevent the wrap from blending into a ring of dark ink. Sessions are quick but healing may feel tight because of wrist movement. Common mistake is underestimating how often the wrist rubs against fabric.
21. Mountain + Tree Foreground Combo, Outer Forearm
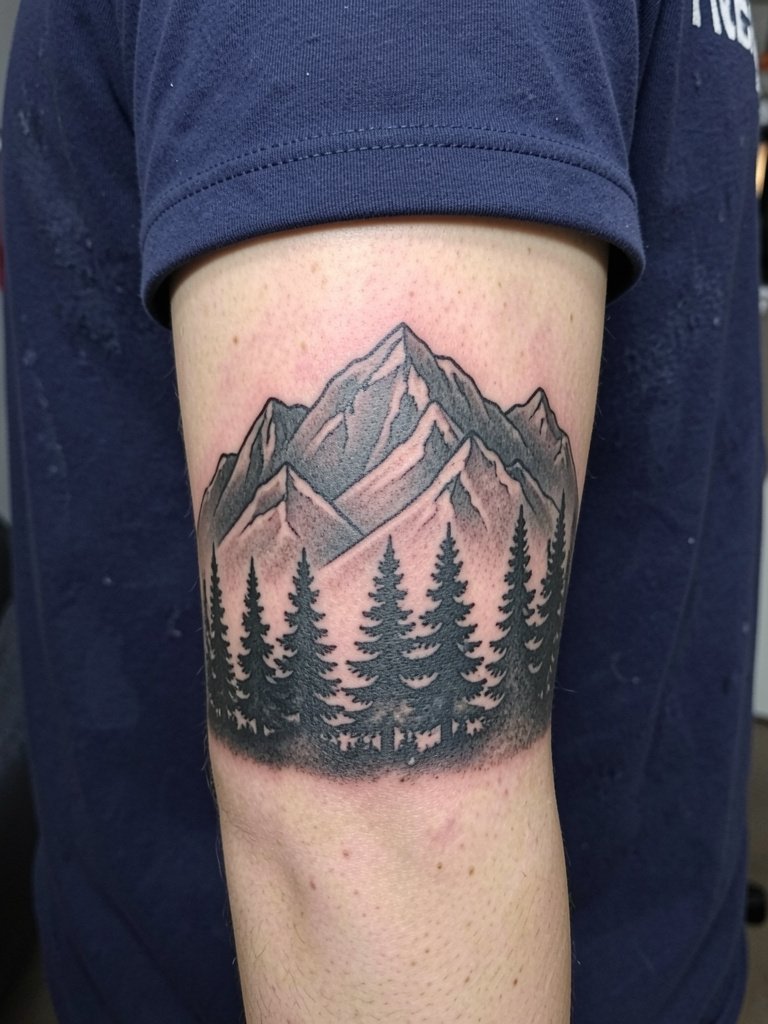
Adding trees in the foreground is a simple trick that gives depth and narrative without adding fragile micro detail. When you meet the artist, ask them to show how silhouette scale changes the perceived distance between trees and peaks. Sessions for this composition are moderate. A usual mistake is cramming too many small trees into a narrow strip which blurs. For show-off, pair with a dark tee and consider a chunky silver bracelet set on the opposite wrist to frame the scene.
22. Linear Ridge with Topographic Lines, Inner Forearm
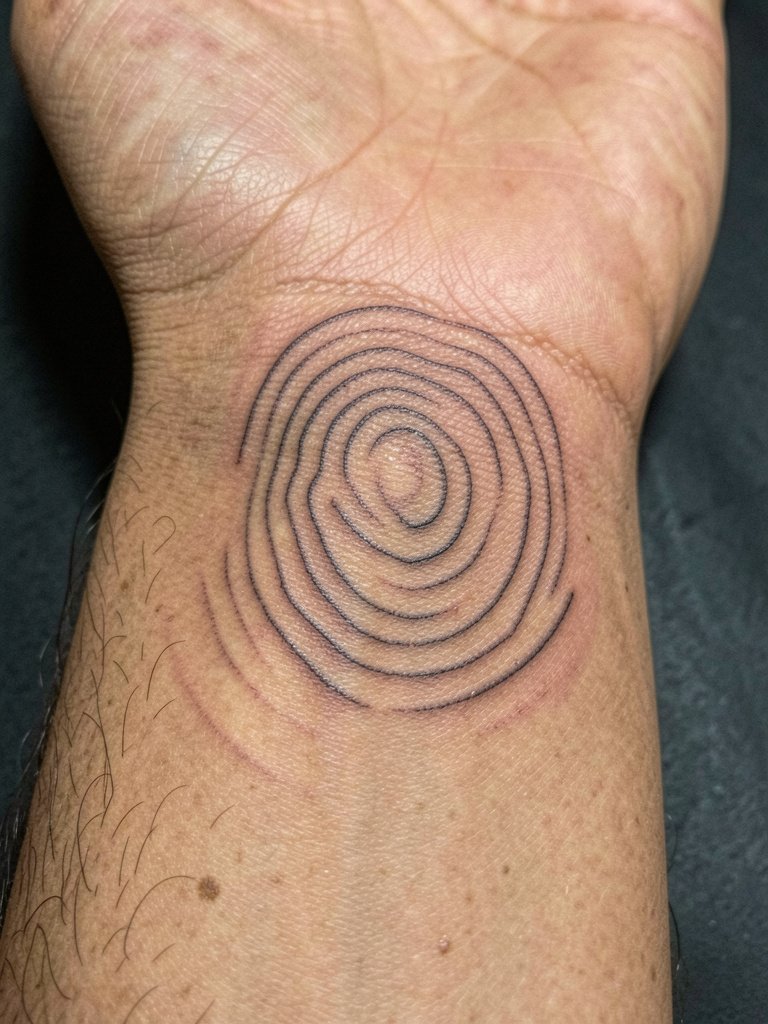
Topographic lines are stylish and meaningful when spaced correctly. Request the artist show how contour spacing will read after a year so you can avoid overly tight lines. Session time depends on length of the ridge. A mistake is making map lines so dense they look like shading from a distance. For a session, wear a loose button-down so the inner forearm is easy to access.
23. Mountain Badge with Negative Space, Outer Forearm
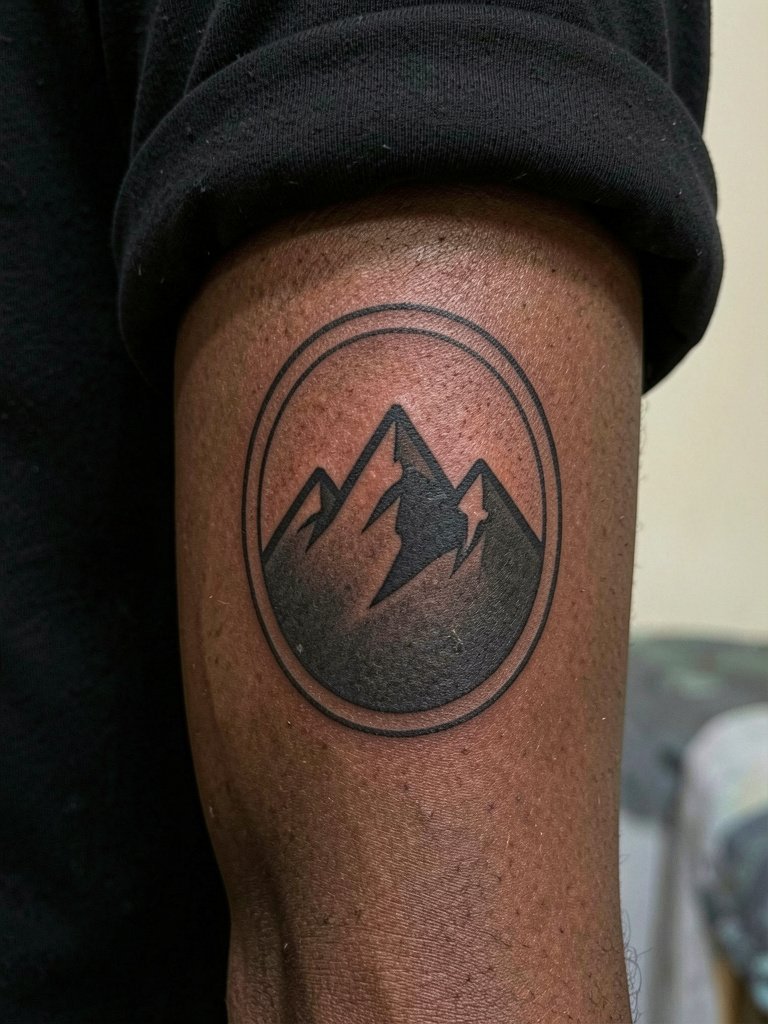
Badge-style compositions fit well on forearms as single, readable units. Ask the artist to increase the frame thickness slightly from the reference so the badge remains a clear silhouette as edges soften. Sessions are usually one sitting for medium badges. Typical problem is making the frame too thin which causes the badge to lose definition over time.
24. Dot-Cluster Peak Accent, Inner Forearm
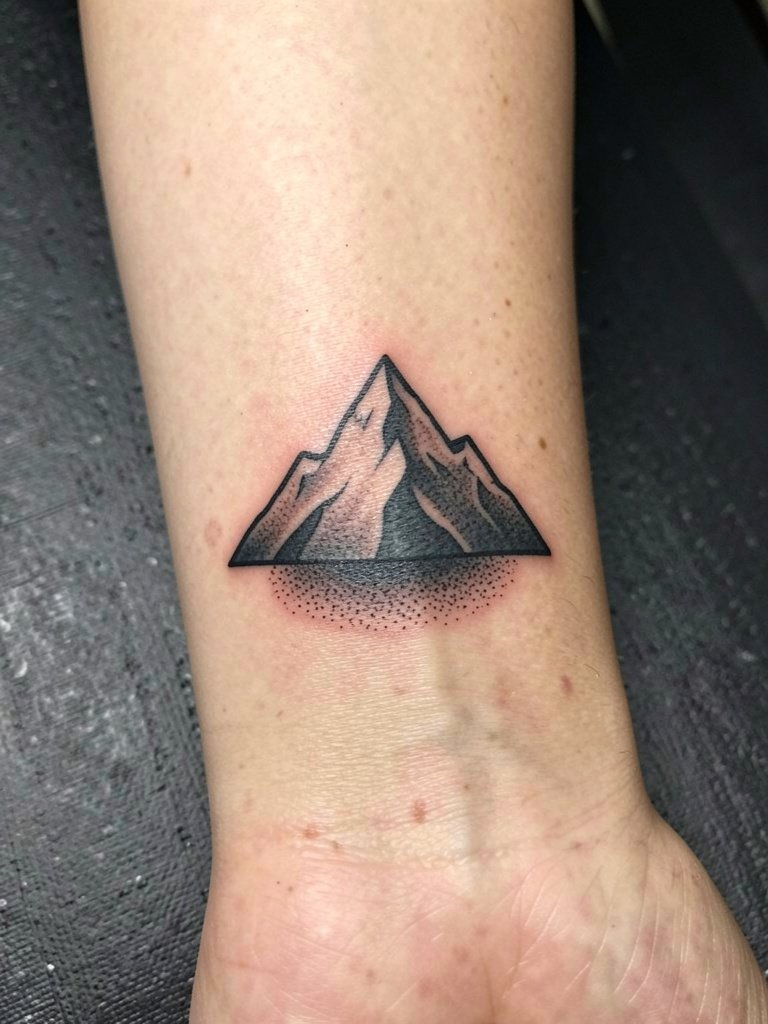
A clustered dot halo draws the eye and offers texture that ages predictably if the dot sizes are chosen with foresight. Ask the artist to show a test cluster so you can see how density transitions look on your skin. Sessions are short to moderate. Misstep is using uniform micro-dots everywhere which compress over time. Keep the halo scale proportional to the peak.
25. Patchwork Geometric Mountain Ready for Sleeve, Outer Forearm
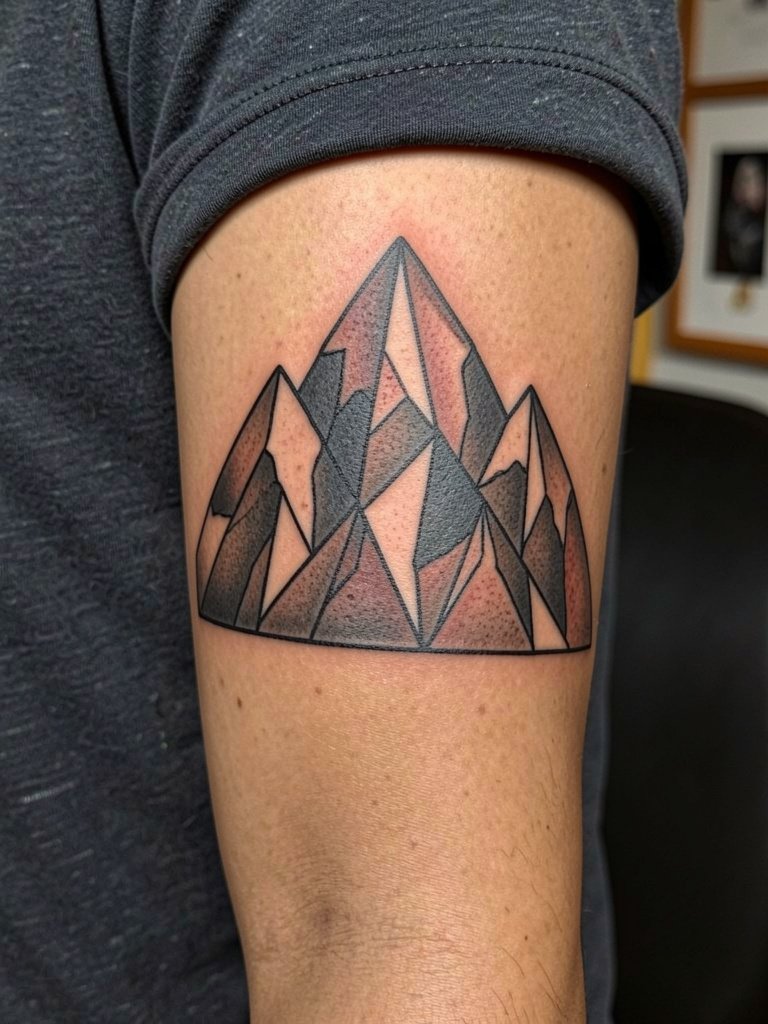
Designing a mountain as an intentionally modular patch is smart if you plan a sleeve later. Ask the artist to leave clean margins that align with future cloud or bird motifs and to sketch how adjacent elements would tuck into the negative space. Sessions depend on the complexity but plan for a full appointment. A common oversight is failing to plan matching line weight for future pieces which forces later redraws. For session clothing, wear a loose tank or short-sleeve so the artist can access the outer forearm without bunching fabric.
Frequently Asked Questions
Q: Fine line or bold line for a forearm mountain?
A: The debate splits into two clear camps. One camp insists fine line achieves the delicate, contemporary look people want and says careful depth and spacing can make it last on forearm skin. The other camp argues forearms see sun and motion and that fine line often blurs into gray within two to three years, so heavier contour is the safer choice. Decide based on how visible you want the piece to remain and ask the artist to show healed examples in similar scale.
Q: Should I pick color or black-and-gray for a forearm mountain?
A: One group favors color because it adds emotional tone and looks striking in photos, especially with sunrise accents. The opposing group prefers black-and-gray, pointing out that black ink retains contrast far longer on sun-exposed skin and that color can fade unevenly. If you want color, plan for stronger outlines and daily SPF to slow fading.
Q: How do I find artists who do geometric or blackwork mountain tattoos near me?
A: Search platform hashtags and filter by location on social apps, and use tattoo directories to narrow by specialty. Try keywords like #mountaintattoo, #geometricmountain, and #blackworktattoo and then filter results by city or studio. Reddit threads on tattoo communities also surface healed photos and venue recommendations.
Q: How often will a forearm mountain need a touch-up?
A: Touch-up timing depends on line weight, placement, and sun habits, but plan mentally for a potential touch-up between year one and three for fine pieces and less frequent work for bold silhouettes. If your design uses lots of tiny detail or watercolor fills, expect earlier touch-ups.
Q: What should I wear to my forearm tattoo session?
A: For inner forearm work, wear a loose button-down or tank so the artist has clear access and no tight cuffs. For outer forearm pieces, a short sleeve or sleeveless tee keeps the area exposed and avoids fabric pressure. Pack clothing that the artist can move without tugging on the inked area.
Q: Any special notes for dark skin tones and mountain tattoos?
A: Darker skin tones often benefit from stronger contrast using bold outlines or selective color accents and occasional white-ink highlights to add pop. Discuss pigment choices with the artist and ask to see healed examples on similar skin tones to set realistic visibility expectations.
