
The 3D optical-illusion tattoo that still fools people after a year is rarely the most fragile, single-needle version on your saved board. Lighting, placement, and shading choices matter more than sheer detail. If you care about photos that read right, long-term contrast, and avoiding a tattoo that blurs into a smudge when your body moves, start with these practical, show-ready 3D ideas and the exact consultation notes you should bring to the chair.
1. Perched Butterfly 3D Illusion on Inner Upper Arm
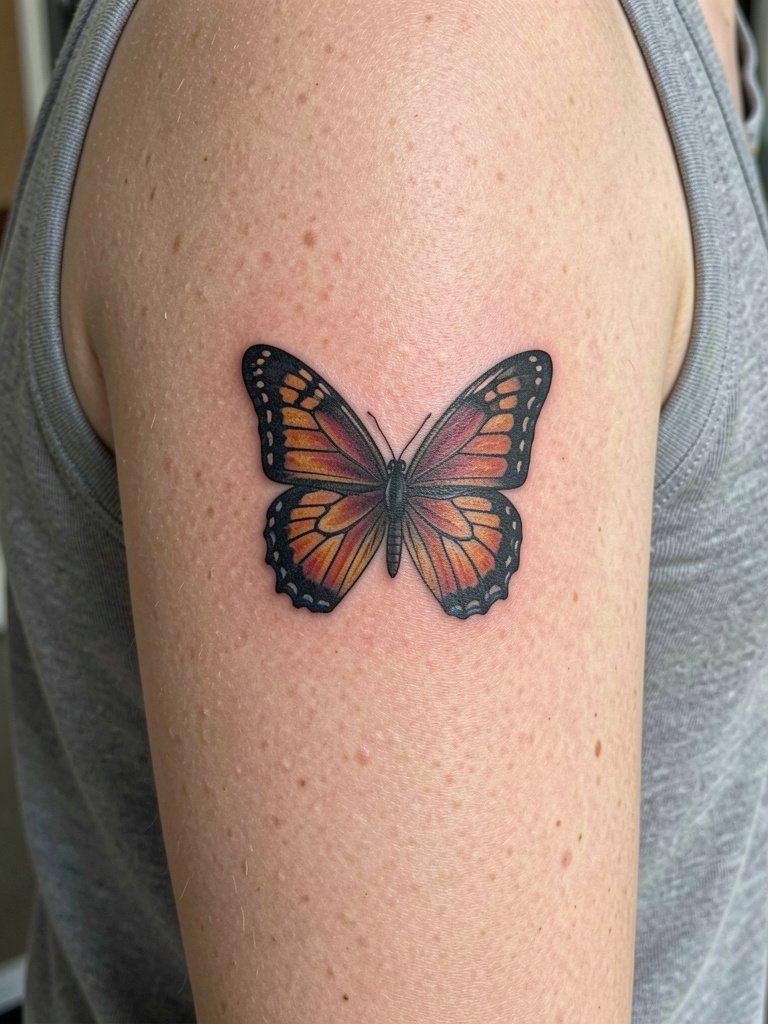
A perched butterfly reads best on the smooth inner upper arm because the surface stays relatively flat and the shadow under the wing can be tuned for photos. I recommend asking for slightly bolder shadow blocks with micro-detailed veins, not pure single-needle everything, so the contrast survives a year of sun and wear. Common mistake is requesting an ultra-tiny, single-needle butterfly that looks fragile in close-up and becomes a patchy blur after healing. Expect one session for a 2–3 inch version and plan a touch-up at 12–18 months if you want the wing highlights refreshed. For showing it off, pair with a sleeveless tank top in a neutral tone so the arm is the focal point during photos.
2. Floating Geometric Prisms on Inner Forearm
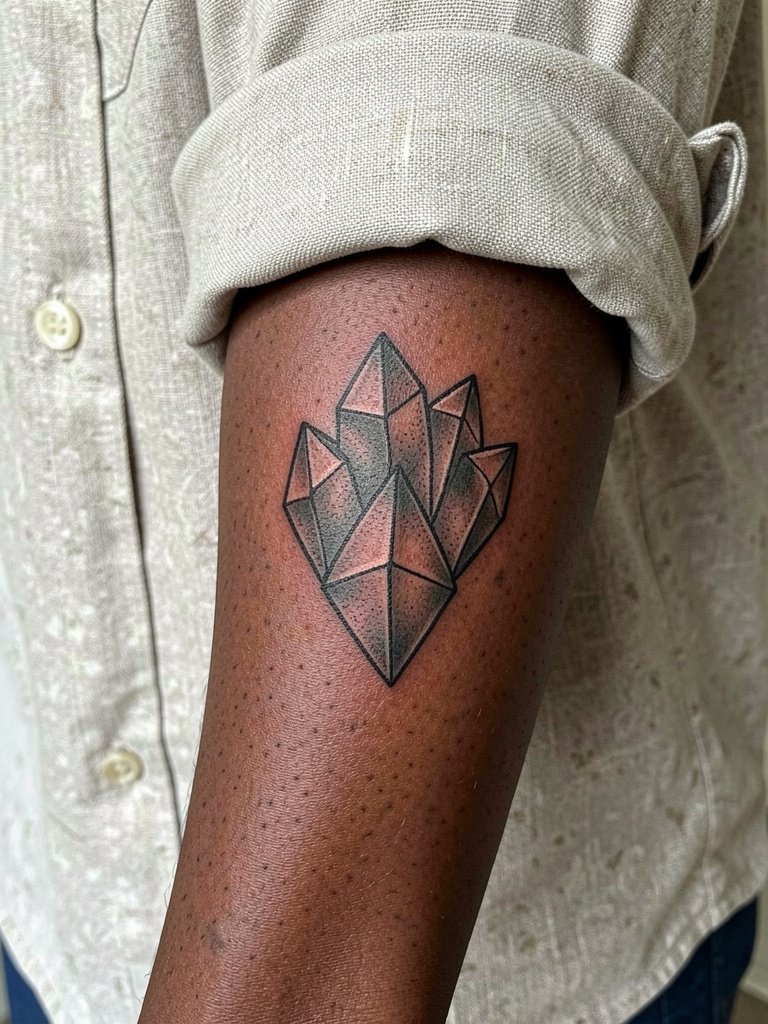
Geometric prisms rely on crisp edges and deliberate negative space to sell the hovering effect. The inner forearm is ideal because it is a low-movement canvas that holds perspective in photos. Tell the artist you want the shadowing to be layered in three visible tonal steps rather than feathered single-needle shading. The mistake I see most is making the shapes too small and too close together, which later reads as one gray mass. This design is low on pain and often finished in one long session. For a clean outfit that frames the geometry, try a rolled-up linen shirt in cream or olive.
3. Mechanical Opening, Tear in Skin on Lateral Hip Bone
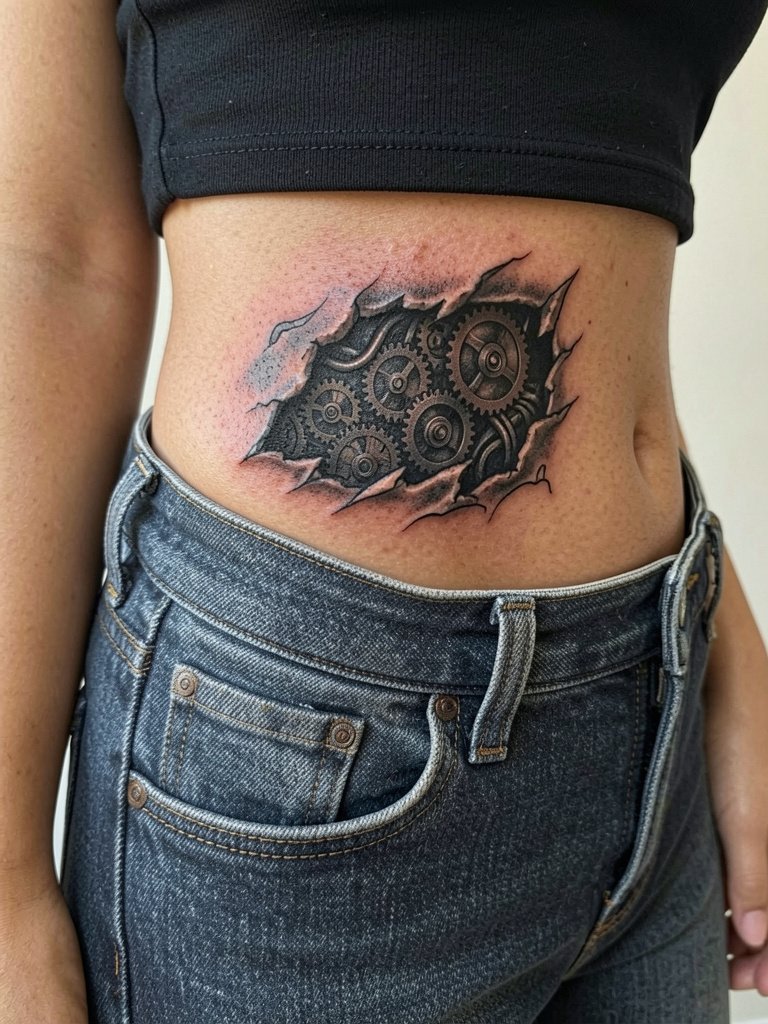
This design reads best when the "tear" follows a natural curve of the hip and the shading suggests depth rather than flat patterning. For longevity, ask for strong contrast in the void area and sparing use of ultra-thin strokes near the tear edge so the crisp rim stays distinct. A common error is over-detailing tiny gear teeth right at the tear. Those vanish in 12–24 months. Session feel is moderate because the hip is a bony, sometimes sensitive zone when leaning against the table. Expect two shorter sessions for a medium-sized version. For showing it off, low-rise pants or cropped shorts let the lateral hip remain visible without fabric covering the edge.
4. Sinking Depth Illusion on the Sternum
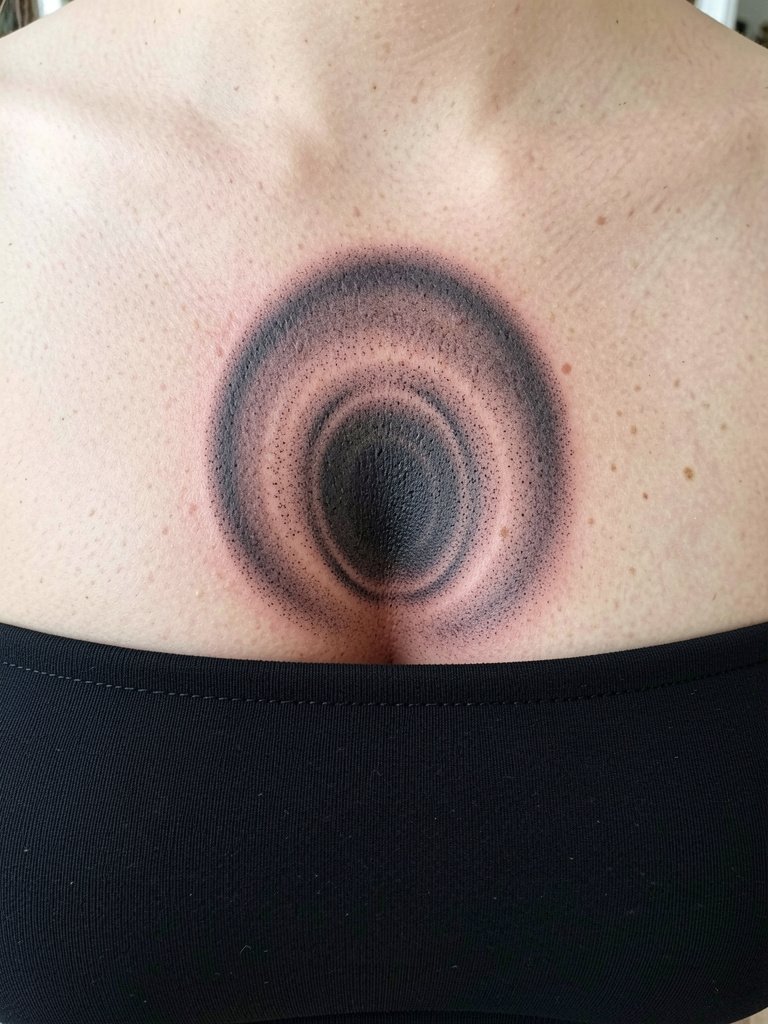
Sternum pieces that suggest infinite depth need solid black anchor zones and careful midtone transitions to avoid the "flat hole" look. When you consult, show photos illustrating how the tunnel should read at armrest angle and ask for layered shading rather than hairline stipple alone. One failure mode is overreliance on tiny stipple that fades into a gray blur on the moving chest. Expect two sessions for a full sinking illusion and plan for a touch-up at 12–24 months if you wear low-cut tops or get heavy sun exposure. For sessions, a strapless top makes access easy and prevents fabric pressure on the area.
5. Emerging Object Illusion on Outer Shoulder
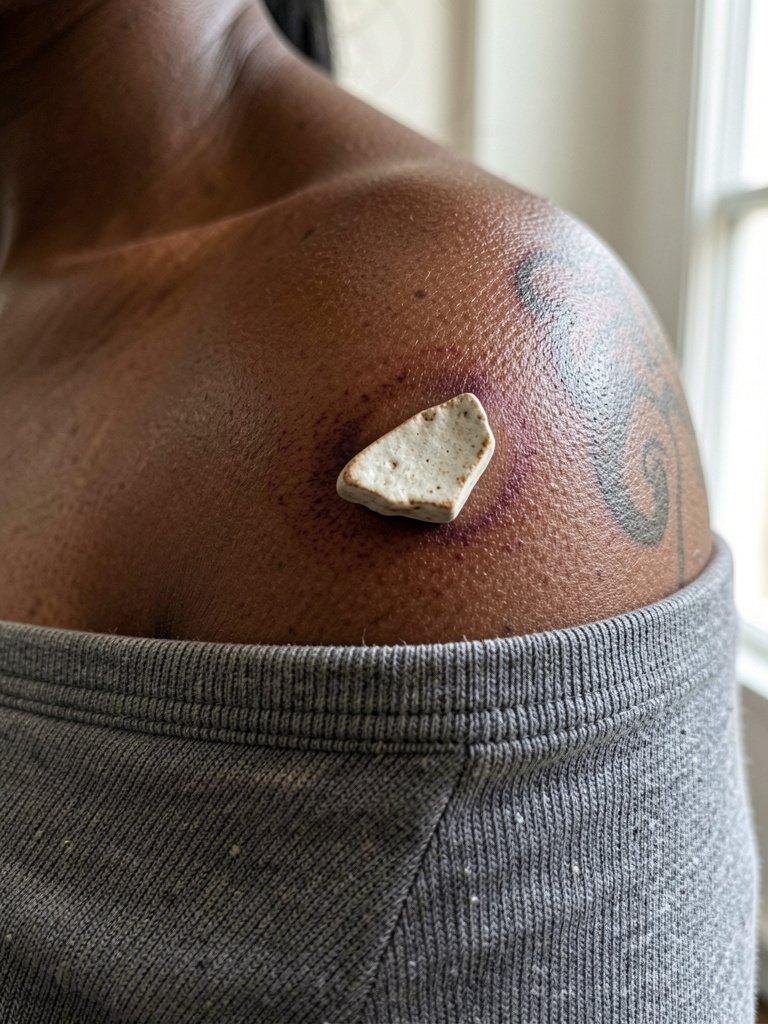
An emerging object works because the shoulder lets you play with curved perspective while preserving the cast shadow that makes the object pop. Be specific about light direction. Ask for a highlight and a single consistent shadow cast across the shoulder so the piece photographs reliably. A typical error is inconsistent lighting within the design that makes the object look pasted on in photos. The shoulder is medium pain and often done in one session for small to medium sizes. For outfits that show this off, try an off-the-shoulder top to keep the shoulder line visible and frame the piece.
6. 3D Water Droplet on Inner Forearm
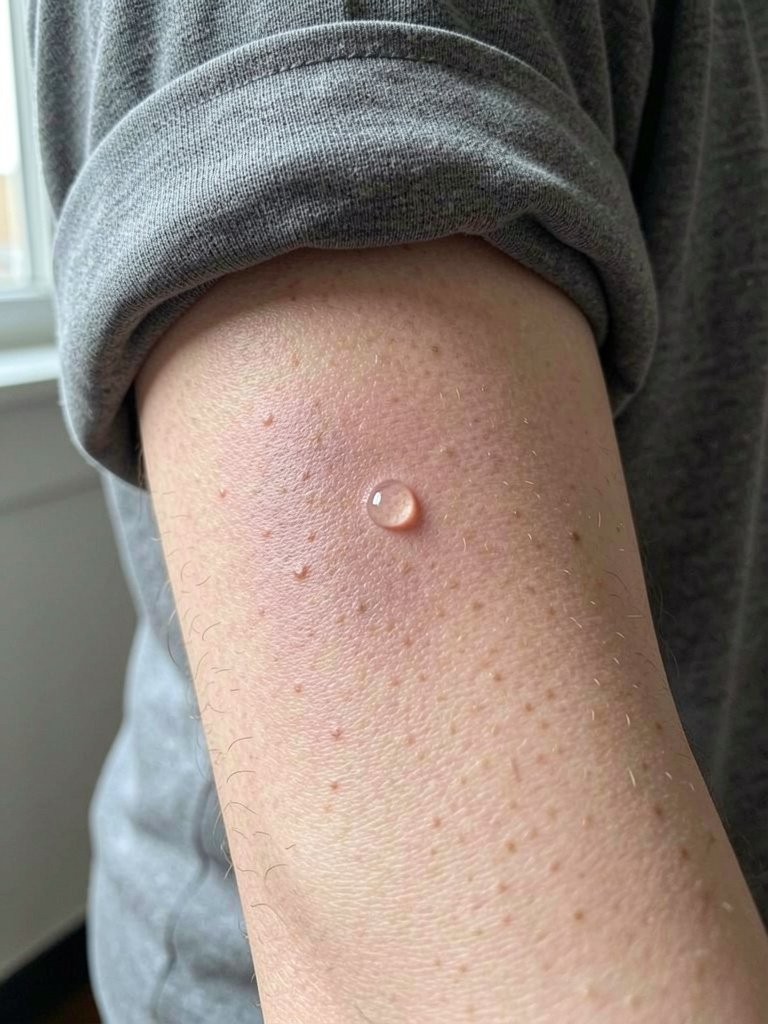
The water droplet is deceptively technical. Micro-realism detail needs a base of crisp contrast so the highlight looks like a raised bead. I advise requesting a slightly larger scale than you think; under one inch many droplet details disappear in normal lighting. Longevity depends on contrast and occasional touch-ups for the tiny highlights. If you want it to read in photos, have the stencil previewed in side-light so the artist can test the highlight placement. This is low to moderate pain and a short single-session tattoo. For styling, pair it with a dainty bracelet stack on the opposite wrist so the forearm reads editorial in close-up images.
Pack Smart
These first six ideas include delicate edges and small highlight work, so a few targeted items smooth out healing and first-week care.
- Hustle Butter Deluxe. A non-greasy balm that many artists recommend for detailed shading since it moisturizes without clogging tight needle channels during early healing.
- After Inked Tattoo Moisturizer. Lightweight lotion for the week after the initial ointment stage; it helps avoid the heavy residue that can obscure micro-realism highlights.
- Badger SPF mineral sunscreen. High SPF, low-grease sunscreens protect fine gradient contrast when the piece later sees sun exposure.
- Lubriderm fragrance-free lotion. Good long-term daily moisturizer to keep large gradient zones from drying and flaking during the first months.
- Aquaphor healing ointment. Thin layers right after the session lock in moisture for fresh lines without adding heavy film that can trap bacteria.
7. Floating Chain Link on the Collarbone
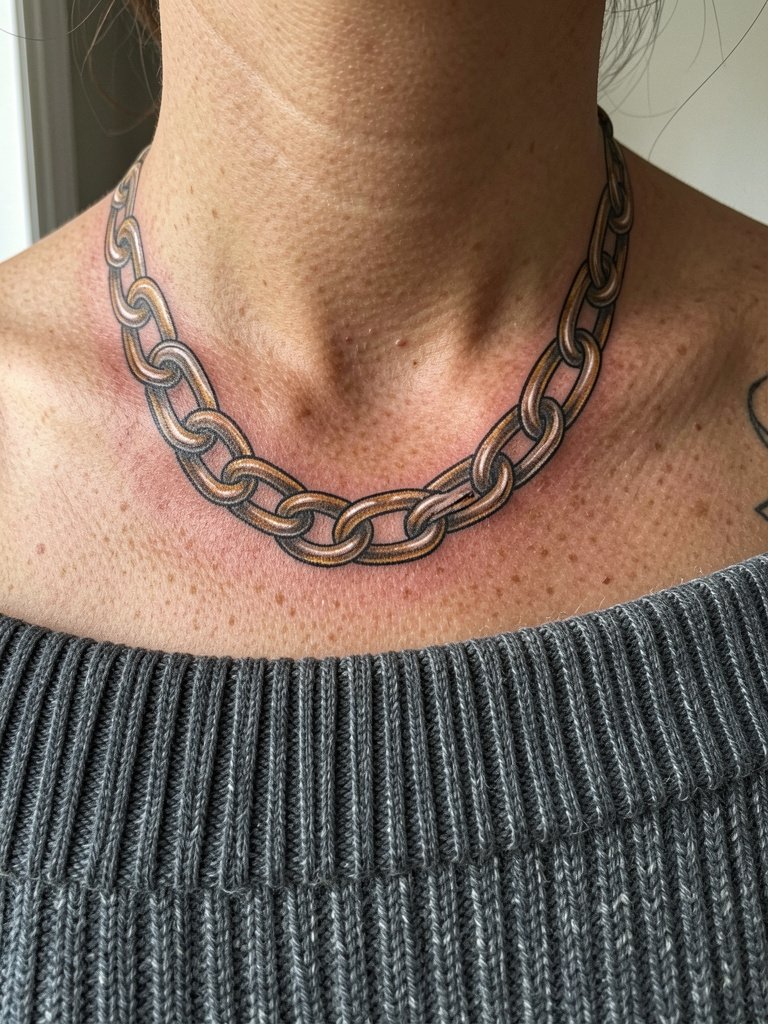
Collarbone tattoos read like jewelry when the metallic shading is dialed up and the shadow is placed consistently under the link. Specify that you want the highlight to mimic reflected light from the top side of the chain so photographs keep the floating illusion. A frequent mistake is trying to do too many links tight to the bone, which flattens the 3D effect once the area settles. Expect low to moderate pain and a single session for a simple link. For outfits, a wide-neck or off-the-shoulder top and a layered chain on the opposite side balance the visual weight and keep attention on the collarbone. Try a wide-neck sweater for fall photos.
8. Cracked Marble Surface on Side Torso Ribcage
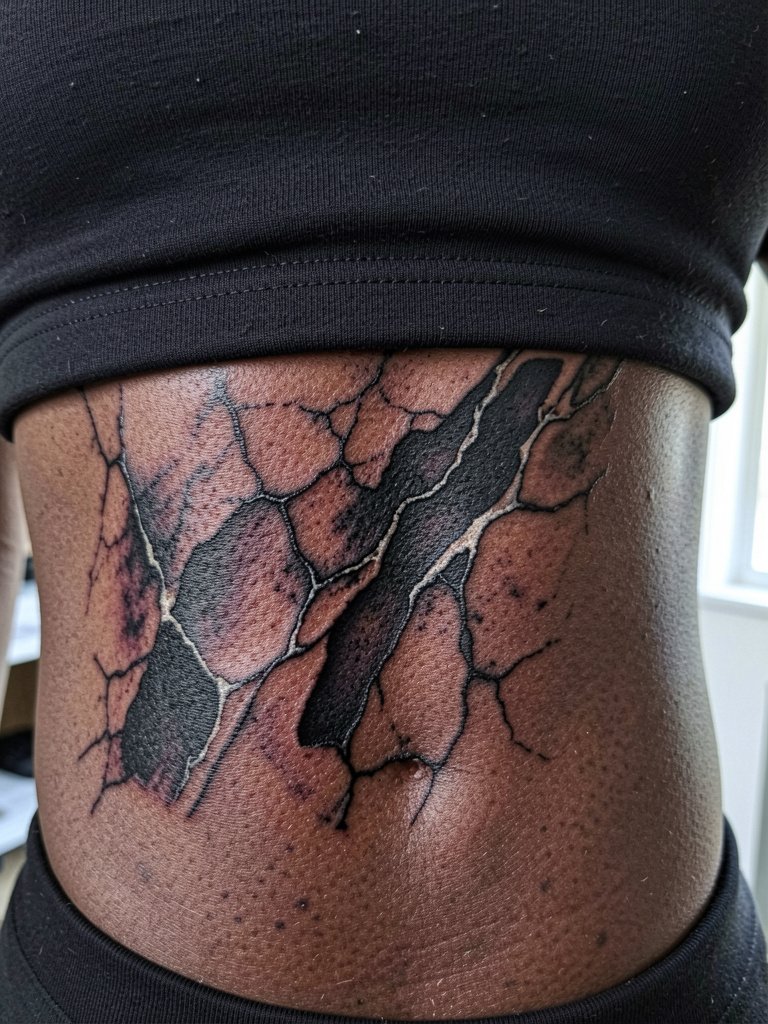
Ribcage is a polarizing spot for ultra-fine detail. One camp argues that fine-line 3D details on ribs or biceps blur within two years because the skin stretches and shifts constantly, destroying delicate gradients. The other camp says that with correct needle depth and slightly wider spacing for the primary shading blocks, the illusion holds up and healed photos can prove that. Be explicit about which side you are on before the stencil goes down. Expect higher pain on the ribs and plan for one to two sessions depending on size. Avoid asking for the tightest micro-veins right at the edge of the crack, those are the first to lose separation.
9. 3D Ribbon Wrap on Inner Forearm
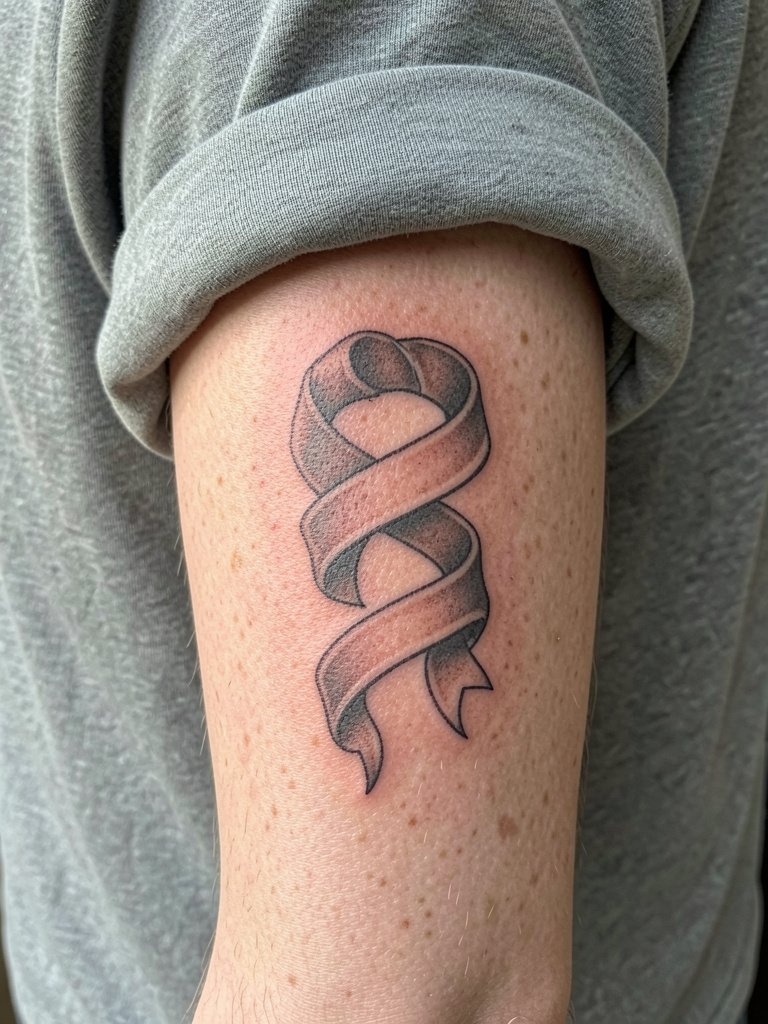
A ribbon wrap is playful but depends on trustworthy casting and negative space. Tell the artist you want the underside shadow to be a solid block rather than stipple so the ribbon reads as separated from skin even when photographed straight-on. Size matters here; when the ribbon is too narrow the twist details merge after healing. This is low pain and usually a single session. For session comfort, wear a loose button-down shirt so sleeves roll easily and do not press on the forearm while the piece is worked.
10. Floating Eye on Outer Upper Arm
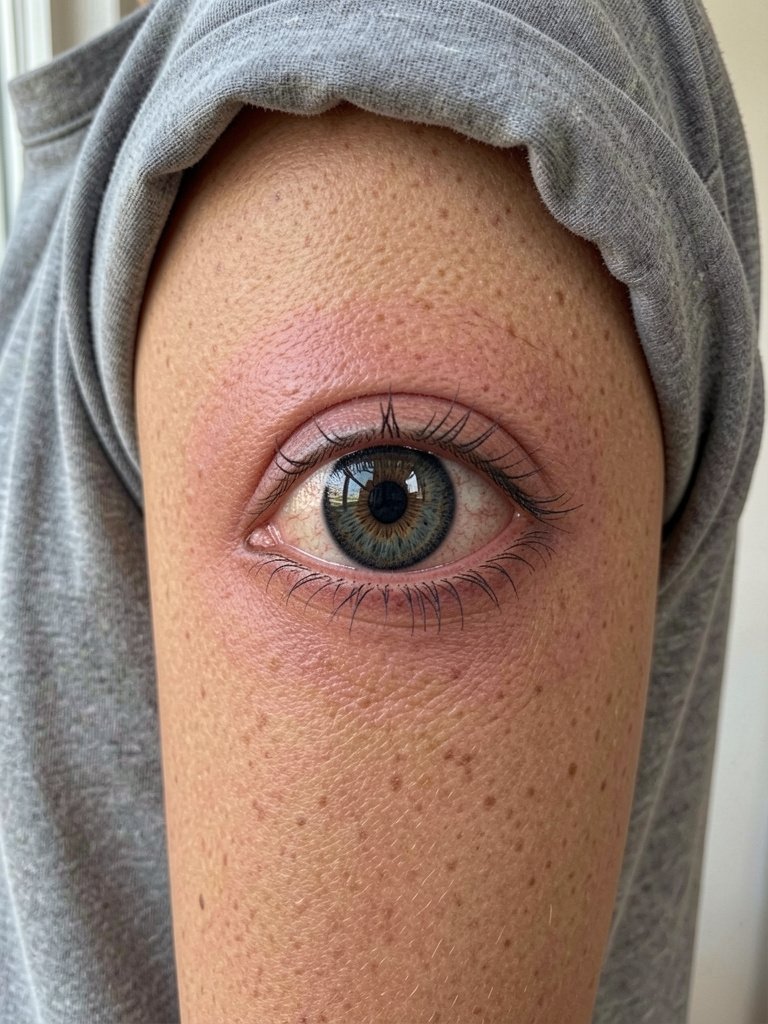
Color versus black-and-gray for 3D depth is an active split. One side argues that black-and-gray shading creates the most convincing depth because it mimics real light and shadow without color distraction. The other side contends that full color, especially with accent hues, creates a lively pop that photographs better and attracts more attention on social media. For a floating eye, both approaches work if the value structure is priorities; choose strong pupil contrast first, color second. The outer arm gives you room to make the iris large enough to keep detail after two years. Sessions are moderate and may require a second pass to deepen the pupil and refine highlights. For outfits, sleeveless or off-shoulder tops frame the arm and keep the eye visible.
11. Medallion Fragment on Lateral Hip Bone
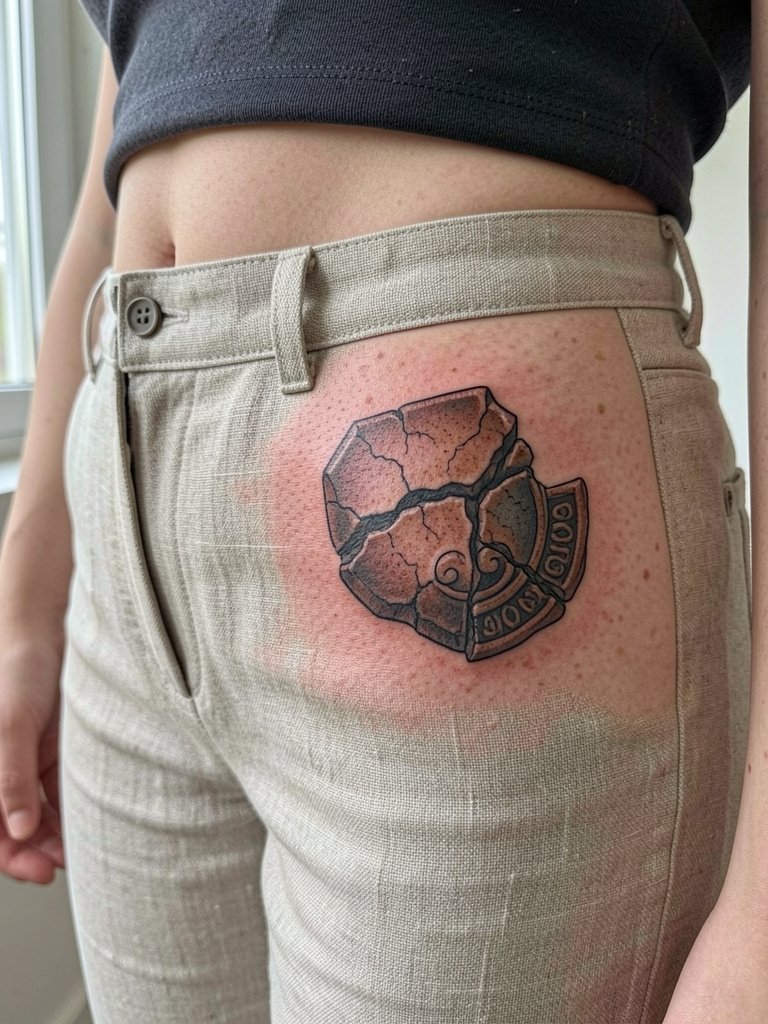
A medallion fragment plays into classic surface texture, so ask for weathered edges and one strong cast shadow to sell the resting effect. The hip tolerates bold blackwork but will show distortion if the design squeezes into the waistband zone. A frequent mistake is placing too much tiny crack detail right at the waistband where fabric rub erases crispness. Expect one to two sessions and pick low-rise session clothing so the artist can access the lateral hip without tight waistbands. For outings, low-rise shorts or linen pants keep the hip visible and photograph the fragment cleanly.
12. 3D Shadow of a Non-Existent Object on Inner Forearm
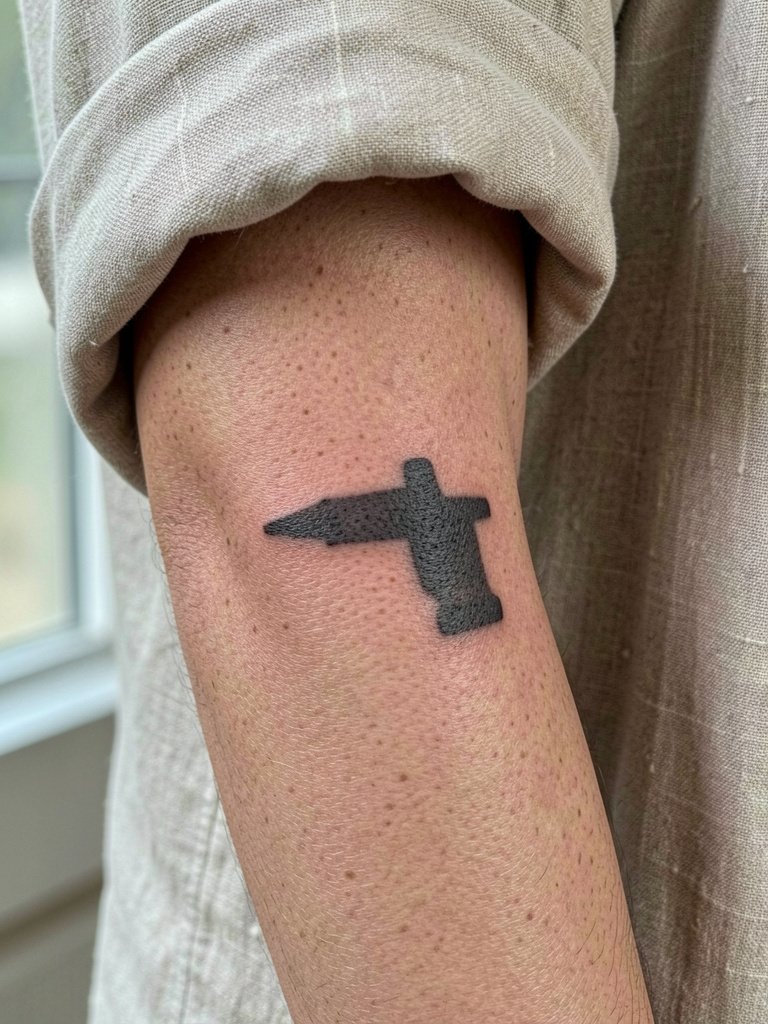
A shadow-only illusion is a subtle psychological trick that depends on perfect placement of soft gradients and negative space. Tell the artist your preferred light direction and have them stencil the shadow at the angle you most often photograph in. Common error is trying to pair the shadow with an outline that ends up reading like a silhouette instead of a shadow. This is one of the least painful 3D illusions and usually finishes in one session. To complement the minimalist look, a rolled-cuff linen shirt keeps the forearm the visual center in candid shots.
13. Floating Butterfly Wing (Split) on Upper Thigh
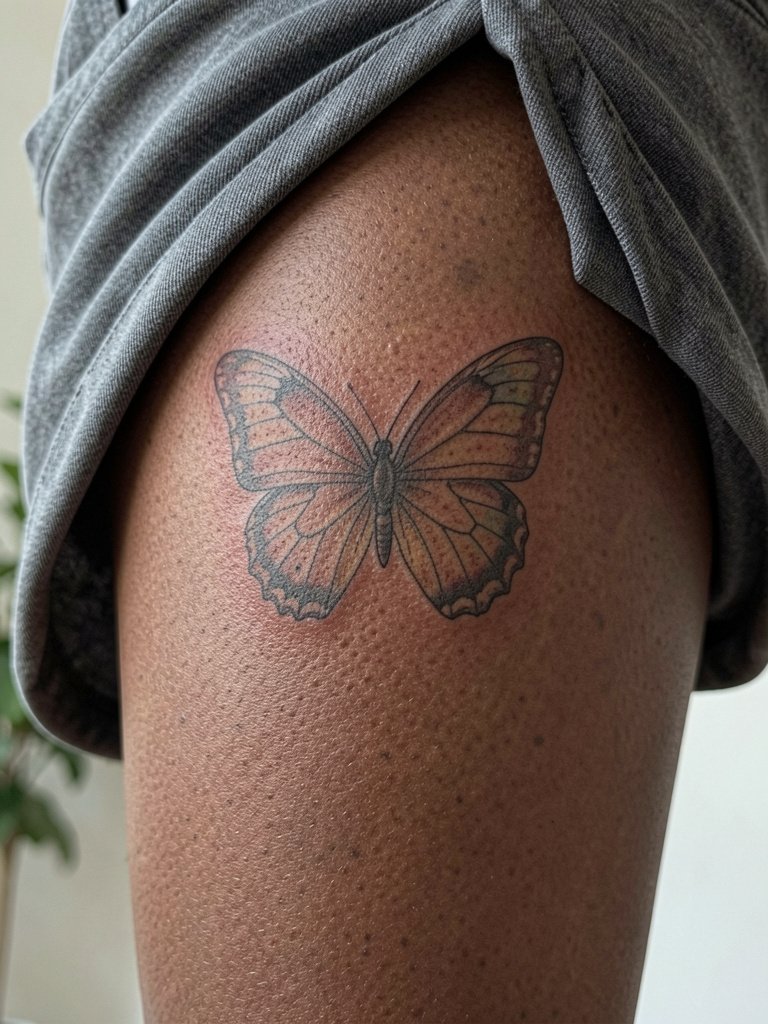
The split wing is made to pair with another person or a matching spot on your other leg, so symmetry and scale are the keys. Request a vein map that retains breathing room so the thin filaments do not collapse into a blurred patch after healing. A frequent mistake is going too small for thigh placement where the texture of the skin eats minute veins. The thigh is forgiving for fine detail but still benefits from slightly bolder main veins than a wrist piece. For selfies or summer wear, high-waisted shorts and skirts frame the upper thigh and show off the floating edge; consider a high-waisted shorts option for warm-weather shoots.
Frequently Asked Questions
Q: How should I photograph a 3D optical illusion tattoo so it reads three-dimensional?
A: Side-lighting is the simplest trick, because a one-sided light source recreates the artist's intended shadow and highlight. Try a small lamp or window light at a shallow angle and shoot from slightly above the piece. For small highlights, macros or close-up phones at natural side-lighting will keep the illusion visible.
Q: Do 3D tattoos last as long as regular realism pieces, or do they fade faster?
A: Longevity depends on contrast and placement more than on the 3D label. Low-movement, flat areas with strong black anchor zones hold contrast longest. Fine single-needle detail fades fastest on high-stretch skin, so expect tiny highlights to need touch-ups at the 12–36 month mark depending on care.
Q: Where can I find artists who actually do optical illusion tattoos without named recommendations?
A: Search hashtags like #3Dtattoo, #opticalillusiontattoo, and #microrealism on Instagram and TikTok and filter by location to see local portfolios. Use Tattoodo or Booksy to search keyword combinations like "3D floating butterfly" and look for healed photos rather than just concept renders. Reddit threads on r/tattoos and r/tattooadvice are good for peer recommendations and healed examples across skin tones.
Q: How much should I budget for a small to medium 3D illusion tattoo?
A: Expect small 3D pieces to fall roughly in the 400 to 900 range, and medium multi-session pieces commonly starting around 900 to 1,500 depending on complexity. Budgeting for touch-ups and sunscreen to protect gradients is part of the real cost.
Q: Are there placements I should avoid for 3D effects because they distort with movement?
A: High-stretch and highly curved zones like the inner bicep and the ribcage can change perspective as the body moves, which ruins some illusions. That is why many artists recommend flat, low-motion surfaces like the forearm and lateral hip for the most reliable 3D read. If you really want ribs or a bicep, plan for adjusted perspective in the design and accept possible earlier touch-ups.
Q: What should I wear to the session for different placements if I want easy access and comfort?
A: Dress so the area is exposed without fabric pressure. For a hip or lower-back session wear low-rise pants that can be lowered slightly without unbuttoning, for the shoulder wear an off-the-shoulder or sleeveless top, and for forearm or wrist pieces wear a short-sleeve or rolled sleeve shirt. A loose tank top is a versatile option for many upper-arm and shoulder appointments.
