
Fine-line wolf forearms look gorgeous on saved boards, but the reality in the chair is different. Trend feeds single-needle stencils that read delicate at first and ghost later on high-motion skin. Pick your placement, line weight, and scale with aging in mind, and bring two scale photos to the consult so you and the artist choose spacing that lasts.
1. Fine Line Wolf on Inner Forearm (palm-up surface, wrist to elbow)
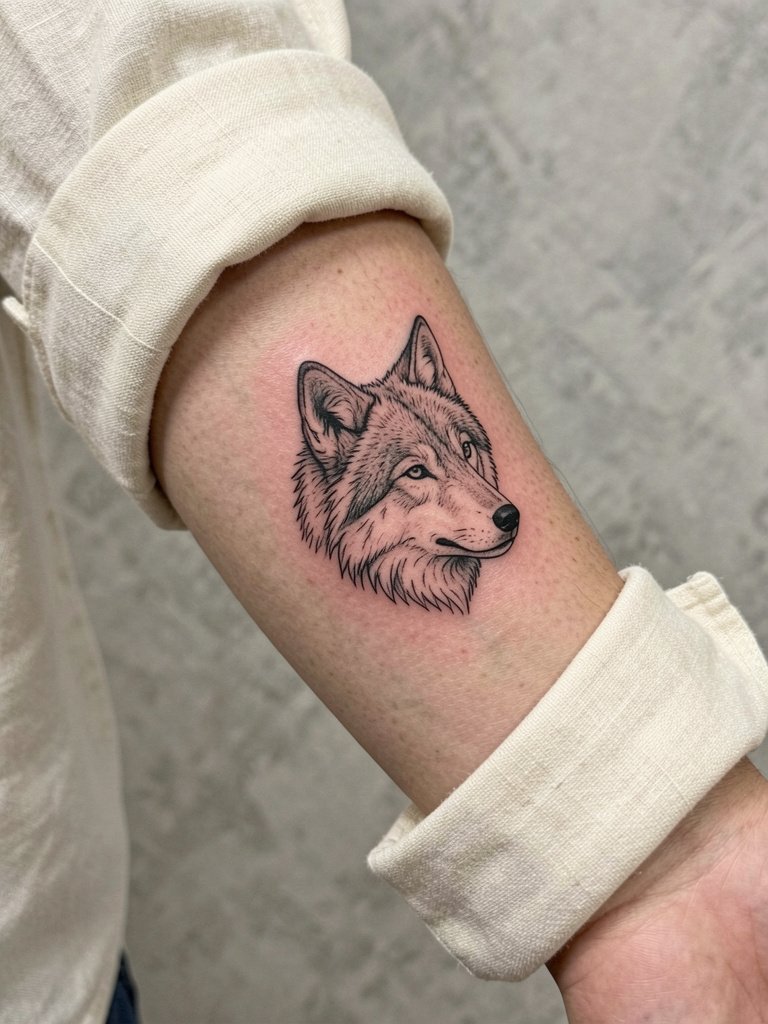
A single-needle wolf on the palm-up forearm reads intimate and moves with the arm. Recommend a hair heavier single-needle than your saved photo for any piece under two inches so the linework survives daily rubbing and hand motions. Bring two reference scales so the artist can show how the design looks at three inches versus five. Common mistake is asking for ultra-thin whiskers and then wondering why the texture softens by year two. For showing it off, roll a linen sleeve and pair with a dainty gold stacked bracelet set so the forearm stays the focal point. Expect about a one-hour session and a possible six- to twelve-month touch-up.
2. Micro-Realism Cat Whiskers on Collarbone (upper chest skin just below the clavicle)
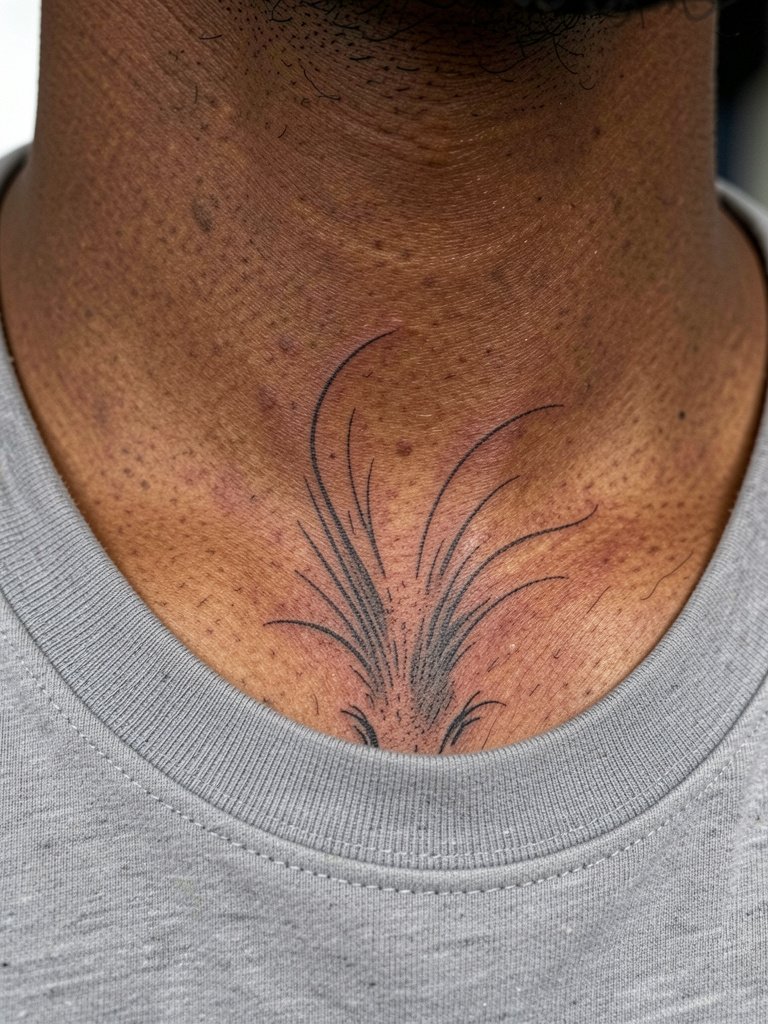
Micro-realism on the collarbone gives that discreet, layered detail without relying on wispy single-needle only. For darker skin tones, ask for slightly denser saturation and matte photo lighting advice so the blacks read true instead of gray in pictures. A frequent error is too-small whisker groups. Instead, place a thin stipple halo and slightly longer whiskers so the texture keeps reading at six months and two years. Wear a crew-neck cotton top to let the piece breathe during early healing. Session time is usually one to two hours and plan for a potential touch-up at the one-year mark.
3. Geometric Lion on Lateral Hip Bone (side of hip just below waistline, above upper thigh)
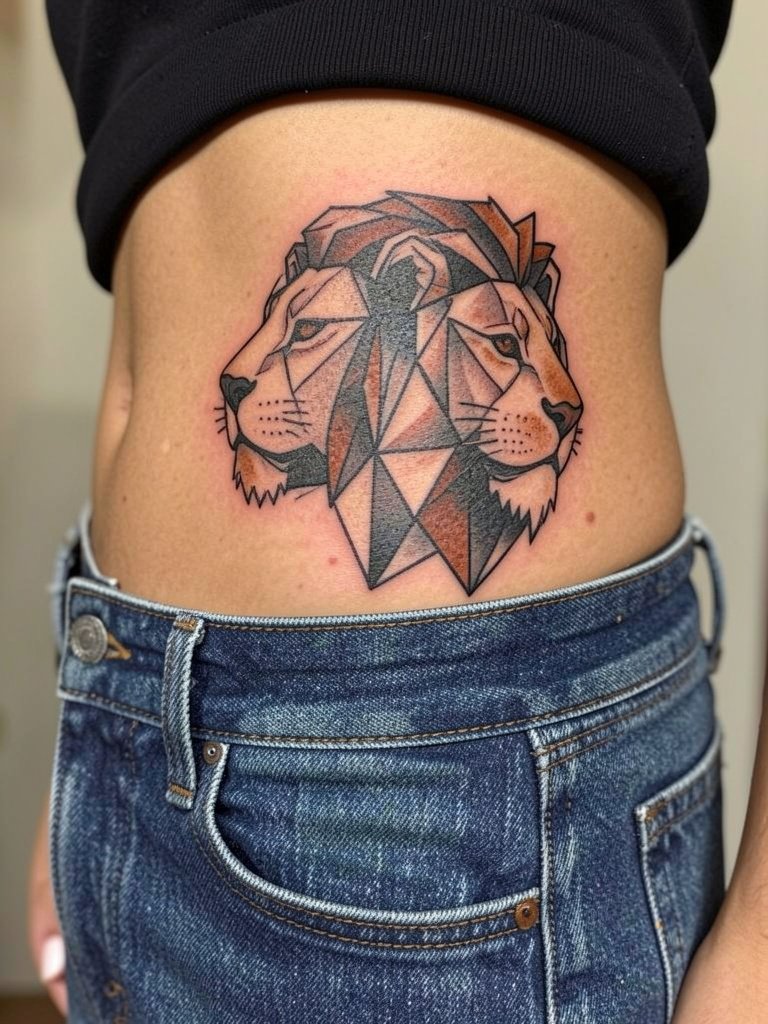
A geometric lion on the hip relies on clean angles and room to breathe. The main mistake is making the facets too small for the curving hip surface, which causes lines to thicken as the skin ages. During consultation, request a mockup on the hip at full scale so you can see how each negative-space triangle sits with the waist curve. For outfit pairings, high-waisted shorts in rust or olive echo the palette and keep the hip visible with a high waisted shorts women. Expect one session and plan for a touch-up if you lose sharpness after weight shifts.
4. Watercolor Hummingbird on Inner Thigh (medial inner thigh, mid-thigh on inside surface)
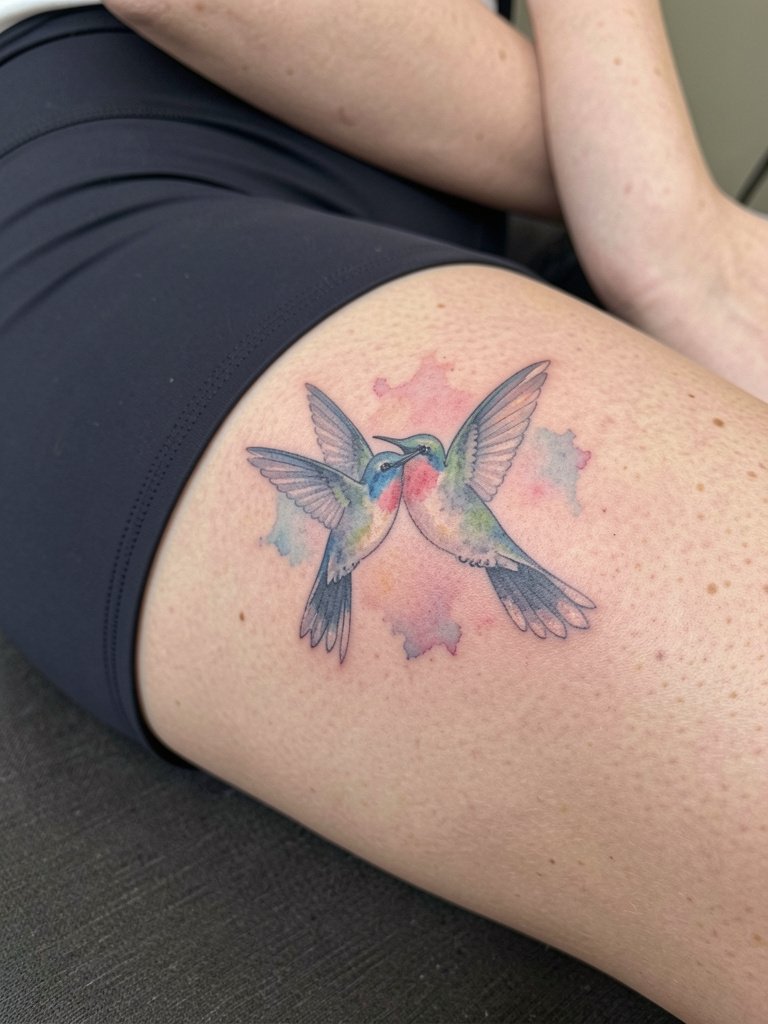
Watercolor on the inner thigh gives a soft, painterly feel but the color-versus-black debate matters here. One camp favors full color for vibrancy and habitat cues, noting touch-ups every two to three years keep saturation alive. The opposing camp prefers black-and-grey for more even aging and better contrast on deeper tones. If you want the watercolor look but longer life, ask for a micro-realism underlayer or an outline that supports the wash so the shape stays readable when hues soften. For showing it off, float a flowy maxi skirt in pastels and choose a fitting session outfit like shorts so the artist has clear thigh access. Expect one session and budget for a color refresh at two years.
5. Minimalist Panther Paw on Wrist
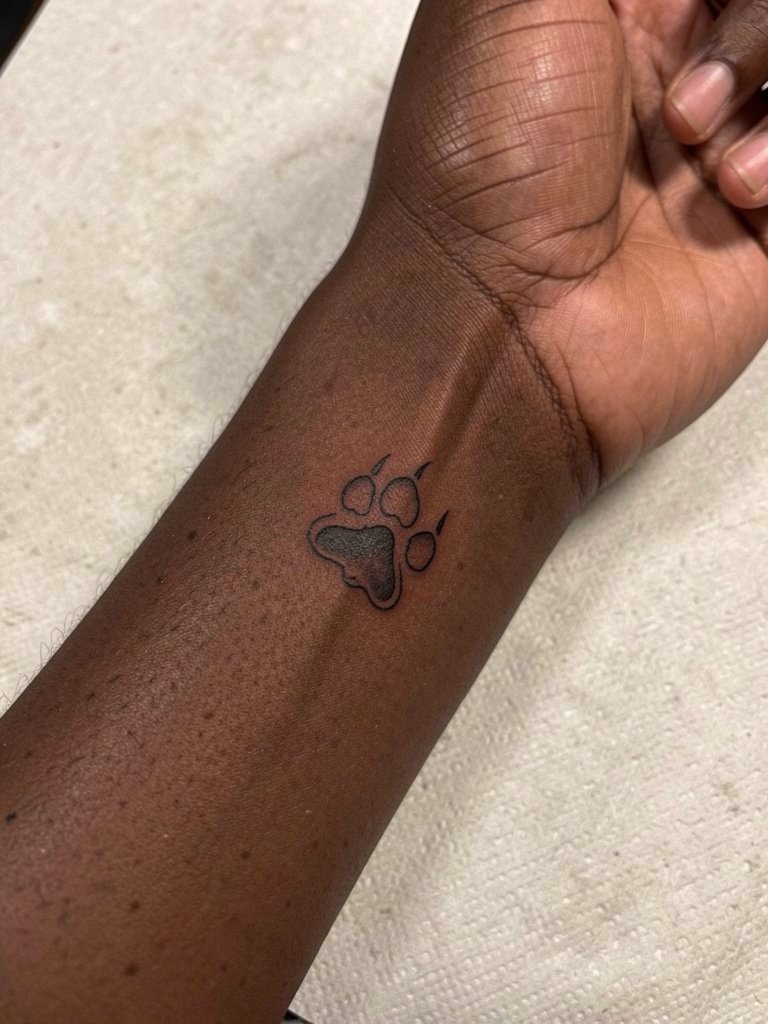
A tiny panther paw on the wrist reads clean when the single-needle weight is scaled to avoid blowout from constant washing and bracelets. The common error is making the paw under one inch with ultra-thin strokes. Instead, choose a compact silhouette with a hair heavier line so the pads keep contrast at six months. For everyday styling, a thin chain bracelet set on the opposite wrist balances the look. Session time is short, but expect sensitivity near the wrist bones and plan a touch-up within one to two years for maximum clarity.
6. Photorealistic Wolf Head with Colored Eyes on Outer Upper Arm (lateral side of bicep)
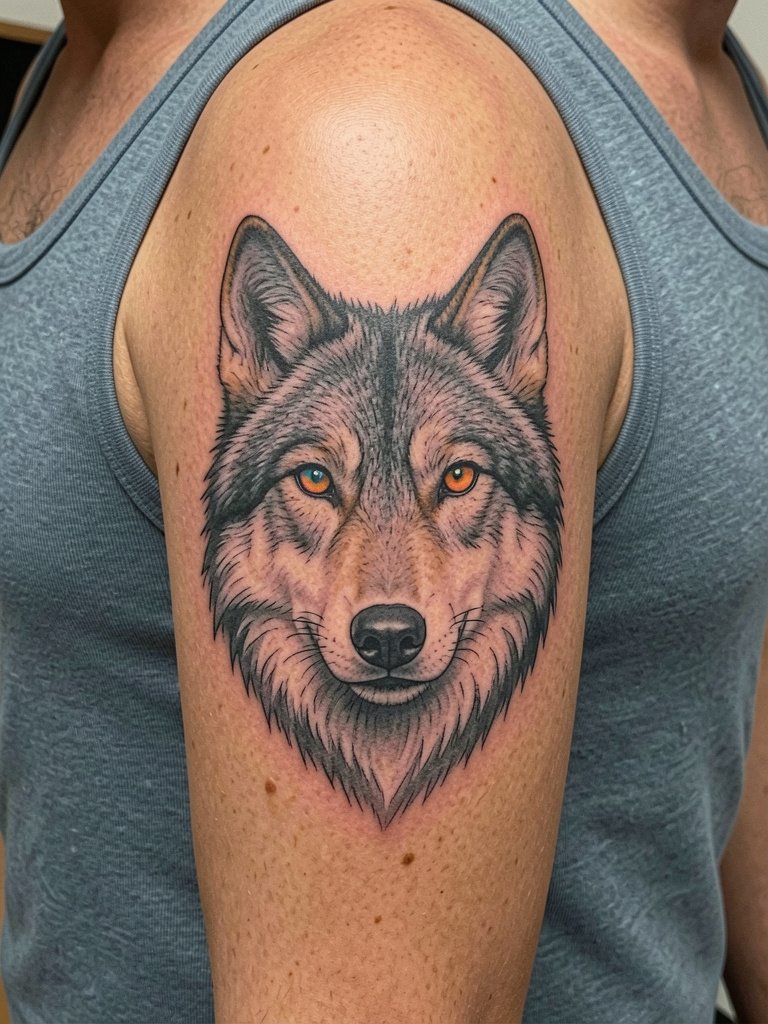
Photorealism demands trade-offs: larger scale, longer sessions, and careful placement on the outer arm so the portrait reads from across a room. Tell the artist you want multi-session shading with reference photos that show muzzle lighting at the scale you plan. A common mistake is shrinking a portrait too small, which loses eye detail and forces early touch-ups. Pair the piece with a solid color tank top to frame the bicep during warm months. Expect two to three sessions and budget accordingly for saturation and a possible touch-up after the first year.
Pre-Session Picks
Those first six pieces include everything from tiny wrist marks to multi-session photorealism, so a few small items smooth the chair day and the first week.
-
Mad Rabbit Tattoo Balm. A thinner balm fans out well on fine-line areas, which helps wrist and forearm pieces avoid greasy residue during summer healing.
-
Dr. Bronner's Hempzit Unscented. Gentle, fragrance-free wash that cleans without lifting pigment, useful for collarbone and chest work where sensitivity is higher.
-
Tattoo Goo Aftercare Japanese Brand Search. Fast-absorbing balm recommended by micro-realism fans for minimal shine and no lingering film on delicate whisker detail.
-
Biodermine Tattoo Balm Europe. Suited to watercolor healing windows where color bleed is a concern, used by some artists for short-term protection.
-
Hustle Butter Deluxe. A mainstream option many clients prefer instead of petroleum-based ointments during the initial healing days, especially for larger outer arm and thigh work.
7. Abstract Stylized Cat on Nape (back of neck below hairline)
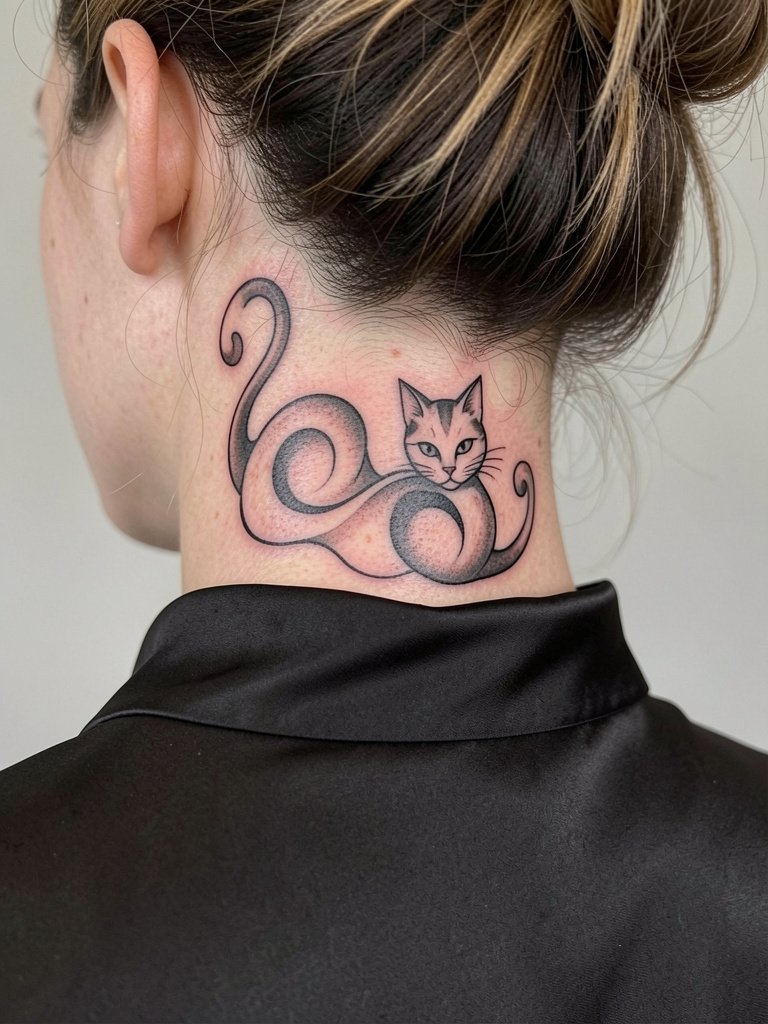
Nape pieces peek out when hair is up and read best with flowing shapes instead of tiny filigree that can blur in that motion-prone zone. A common mistake is asking for narrow swirls that the nape skin smudges as hair oils and friction act on the area. For session comfort, wear a backless or open-collar top so the artist has clean nape access. The small scale keeps session time around an hour and touch-ups are usually only needed if hair products irritate the area during healing.
8. Geometric Serpent on Inner Forearm (palm-up surface, wrist to elbow)
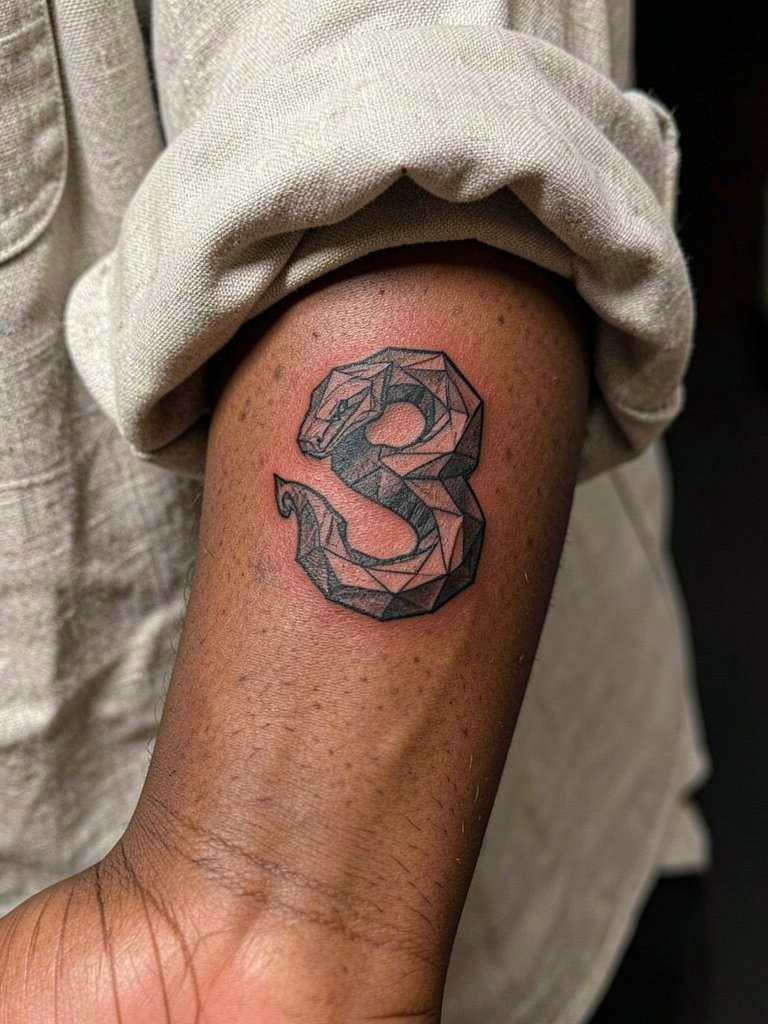
Geometric serpents need breathing room. The biggest error is compressing complex angles into a narrow band along the forearm. Have the artist show you negative-space tests at full scale and discuss how much white skin you want preserved between facets. On the style side, this placement pairs well with rolled cuffs and layered bracelets if you want to feature the forearm. The session is usually one sitting for a two-inch design and touch-ups happen sooner if lines are too tight at the start.
9. Earthy Deer on Medial Inner Thigh (mid-thigh on inside surface)
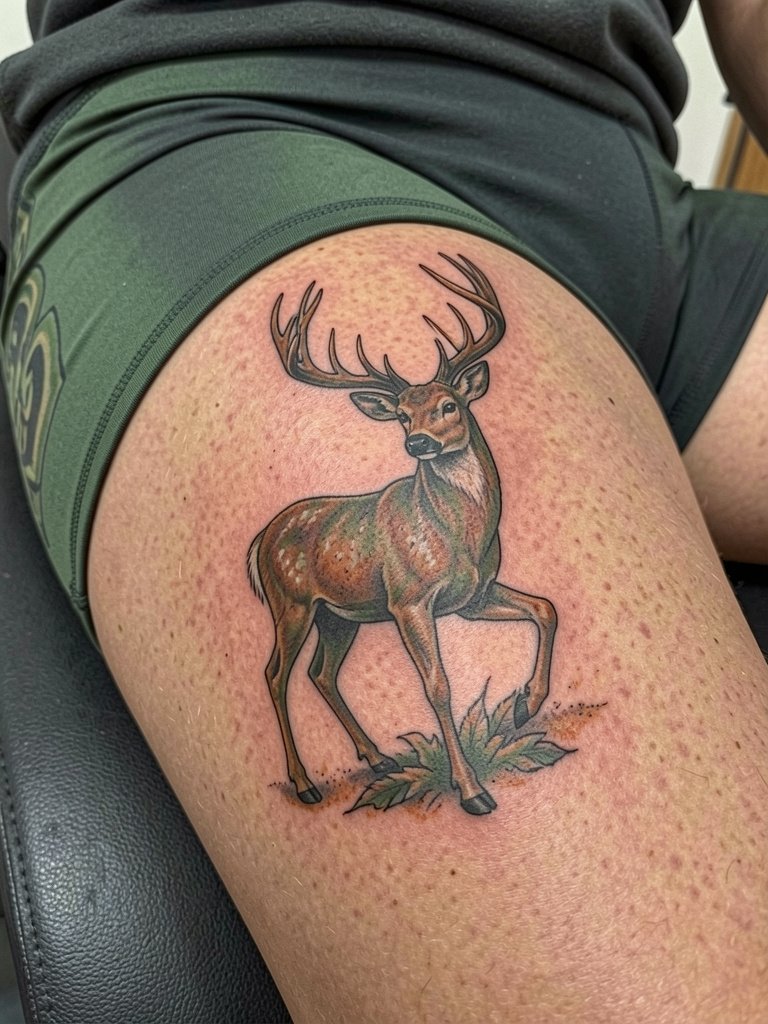
Inner-thigh pieces are private by default and respond well to softer shading and earth tones that mirror habitat. A typical mistake is expecting bold, tiny detail in a location that flexes and rubs. Instead choose moderate contrast and plan for a lighter touch-up schedule. For show-off outfits after healing, a flowy maxi skirt in pastels for watercolor pieces or earth-toned cargo pants for neo-traditional sets the tone. The session can be tender depending on proximity to the thigh crease, and a follow-up at one year is common.
10. Tropical Jungle Bird on Sternum (skin between or below breastline)
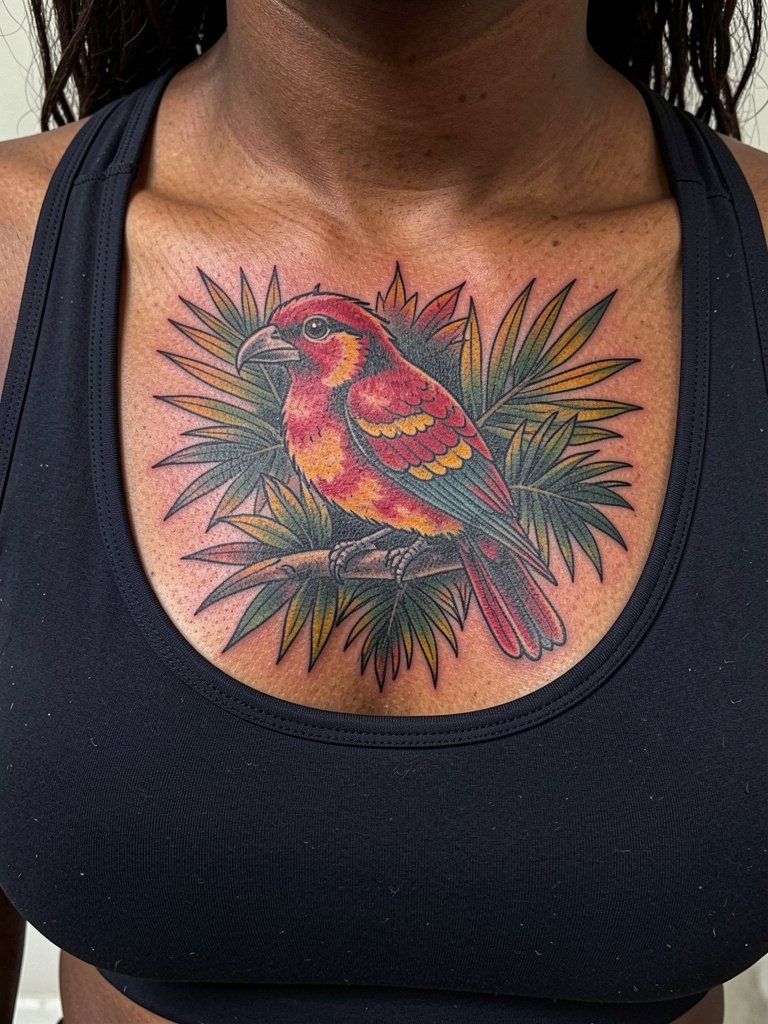
Sternum work can be intense and the numbing-cream debate matters here. One camp says numbing cream is a legitimate aid for ribs and sternum, helping clients stay still during long sittings and reducing motion that harms linework. The other camp warns that numbing can change skin texture, making single-needle or micro-realism shading unpredictable and risking pigment spread. If you consider topical anesthesia, specify timing and brand so the artist can adapt depth and pass counts. For showing the sternum, a strapless sundress highlights the center chest once healed. Expect sensitivity and plan a realistic session length with breaks.
11. Ocean Dolphin on Ankle
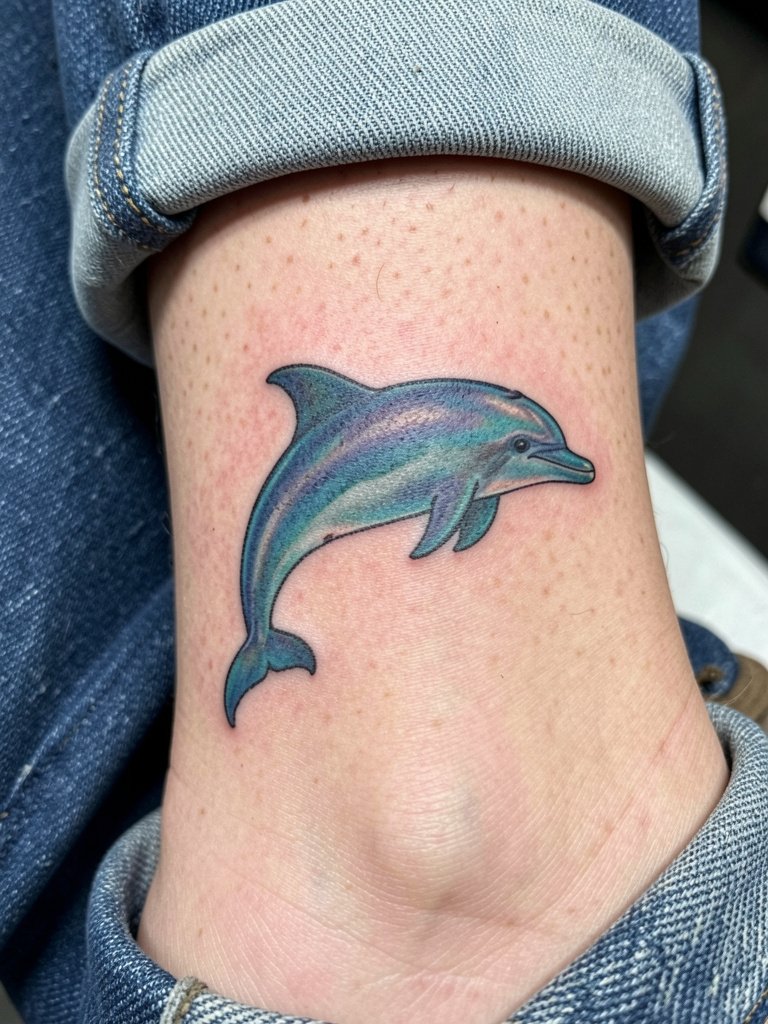
Ankle tattoos face daily friction from shoes and socks, so color saturation and placement matter. The common mistake is choosing a detailed scene that the ankle cannot hold. Instead pick a clean silhouette with soft shading that withstands light rubbing. For summer show-off looks, bare sandals or thin anklets keep attention on the piece; avoid heavy footwear during the first healing week. Sessions are short and touch-ups are common after six to twelve months if you wear a lot of friction-based footwear.
12. Black-and-Grey Raven on Lower Back (lumbar lower back, small of back just above waistband)
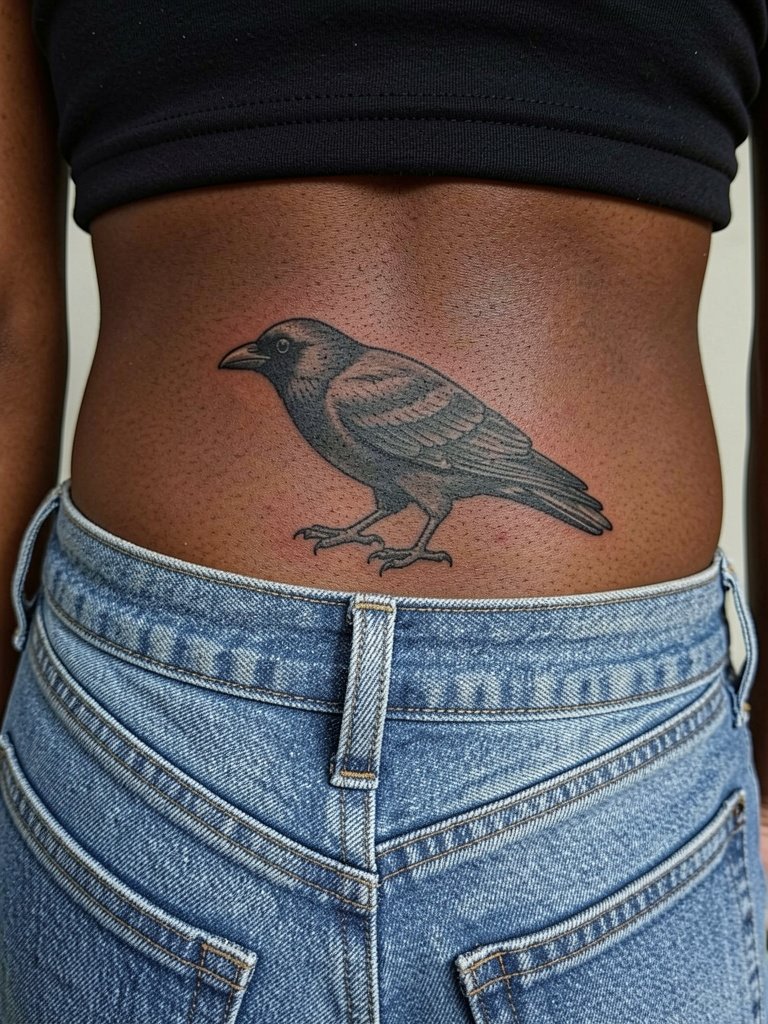
Lower-back placements benefit from broad black-and-grey shading because the skin there keeps contrast well when covered by clothing. A mistake is crowding too much fine detail into a three-inch piece, which can soften under waistband movement. For a polished look, choose a slightly larger scale and ask for gradient ramps that read at six months. Low-rise jeans and a belt with small pendant details complement the raven motif. Expect a one- to two-hour session and plan for a follow-up if the shading settles lighter than expected.
13. Stylized Owl-and-Lily on Side Neck (skin between ear and shoulder)
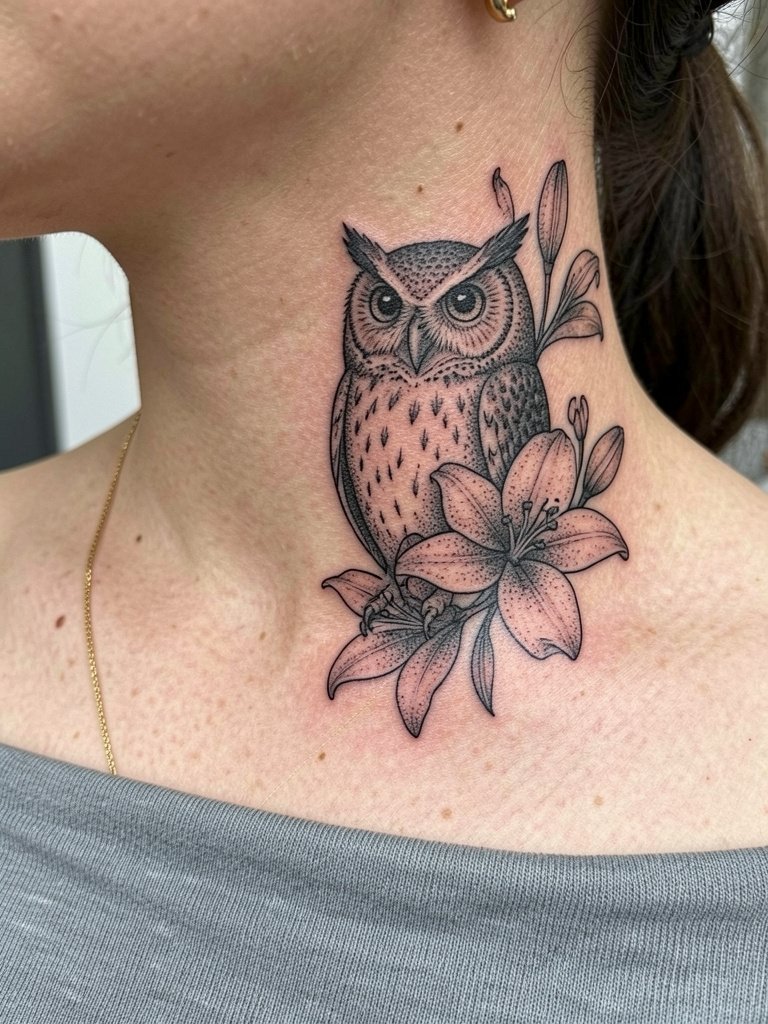
The side neck reads best when the composition follows the jawline and the lily acts as a soft counterbalance to the owl eyes. Artists split on how much fine detail to use in this placement because of movement and hair contact. Bring references that show line weight, and ask for a stipple approach where small dots create texture without relying on one continuous hairline. For styling after healing, off-the-shoulder tops let the piece peek without competition. Sessions are usually under two hours and touch-ups depend on how often you wear scarves or high collars.
14. Koi Carp Scale Texture on Inner Forearm (palm-up surface, wrist to elbow)
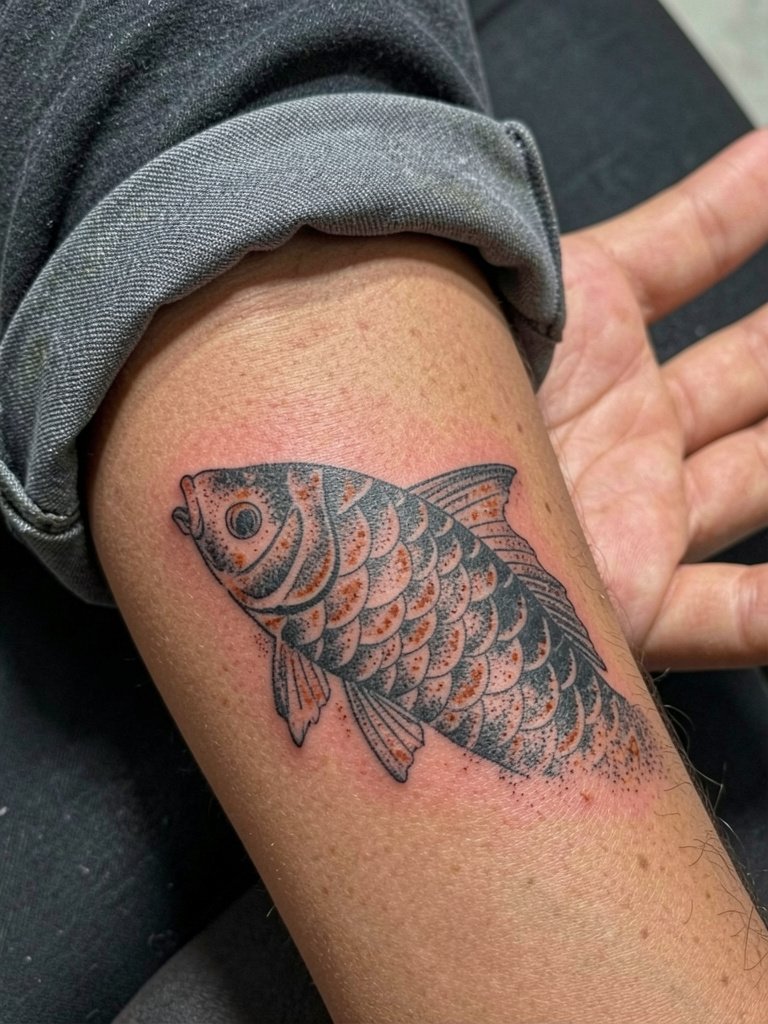
Micro-detail like koi scales requires tiny needles and steady skin. The mistake is using single-needle stippling at too small a scale on textured forearm skin. Ask the artist to show scale clusters at your intended size so you can see how stippling reads at six months. For showing it off, the same linen shirt roll technique as other forearm pieces works well and keeps the scale visible. This design typically needs two sessions for depth and a possible one-year refresh if some mottling appears.
15. Grizzly Bear on Front Upper Thigh (above mid-thigh, below hip bone)
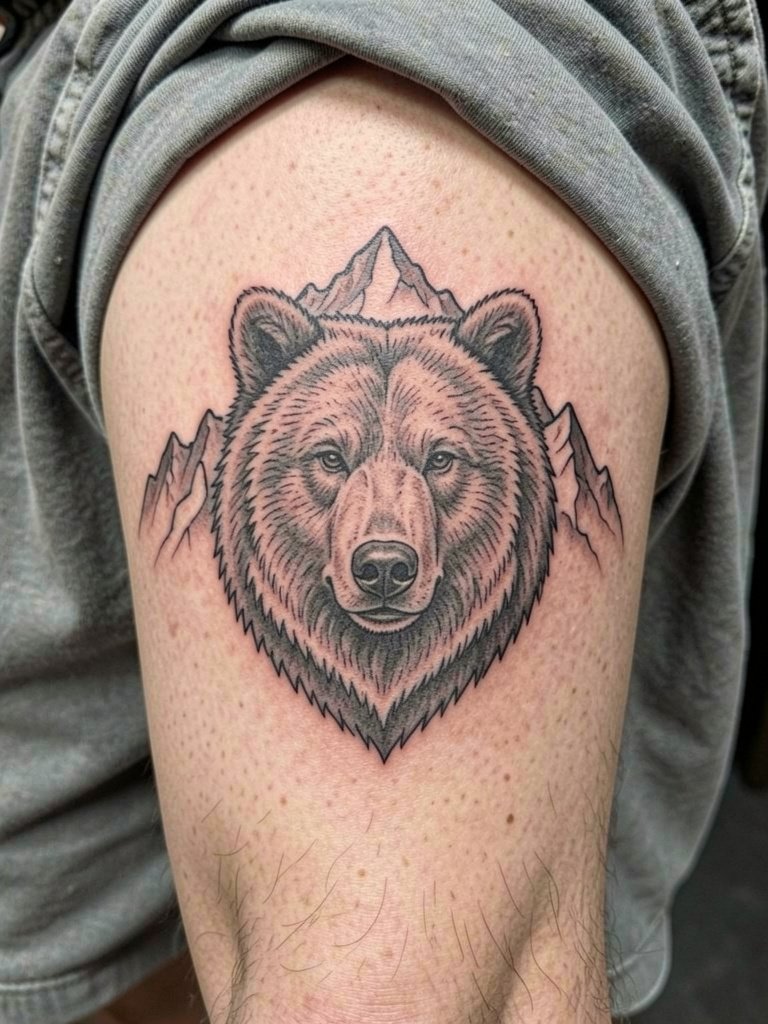
A large thigh piece allows detail and environmental elements like a mountain range to ground the image in place. The common error is trying to cram a full scene into a too-small footprint, which blurs after weight change. Discuss adding local landmarks for personal grounding and ask to see mockups at the exact thigh width you want. For post-healing outfits, high-waisted shorts in earth tones highlight the piece while keeping it private until you want to show it. Session time runs two to three hours and larger compositions often require multiple sittings.
16. Fine Line Owl on Ribcage (side torso, below breast crease)
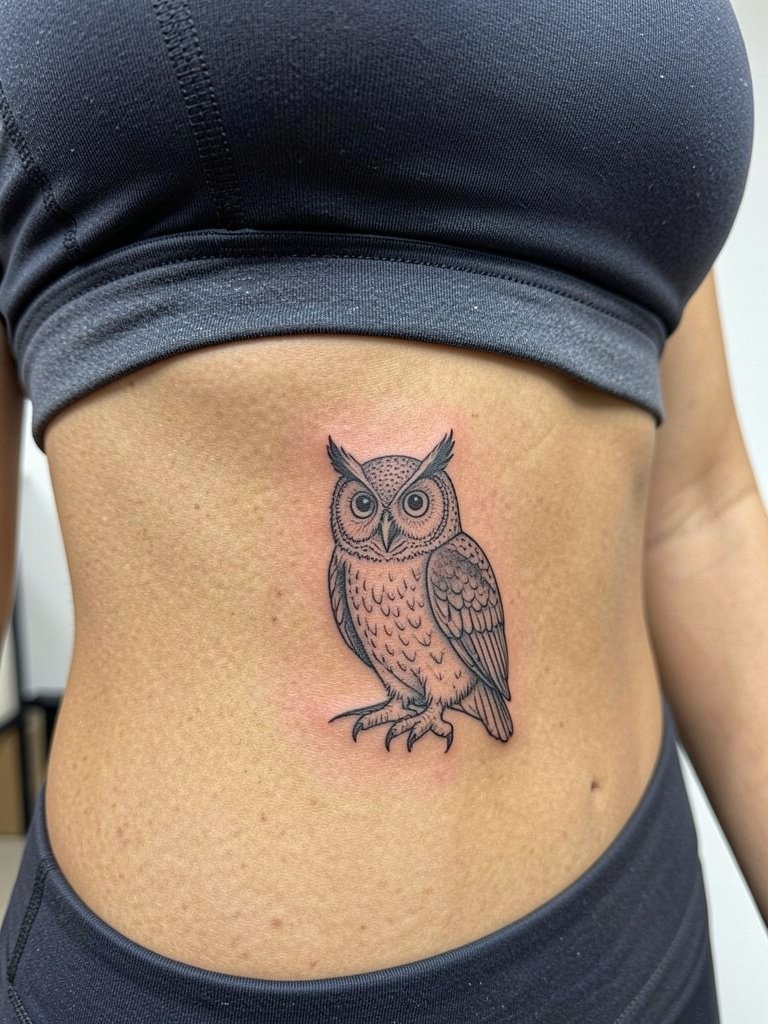
Fine-line on ribs triggers a clear debate. One group of artists and clients says ribs blur within two years because the skin stretches and the chest area shifts with breathing and clothing. The other group argues that with slightly heavier line weight and correct needle depth, fine line can settle well and they point to three-year healed examples as proof. If you still want ribs, ask the artist to demo spacing and show healed photos from similar placements so you understand long-term expectations. Sessions are often uncomfortable and a heavier initial line weight can reduce early loss of definition.
17. Minimalist Fox Behind the Ear
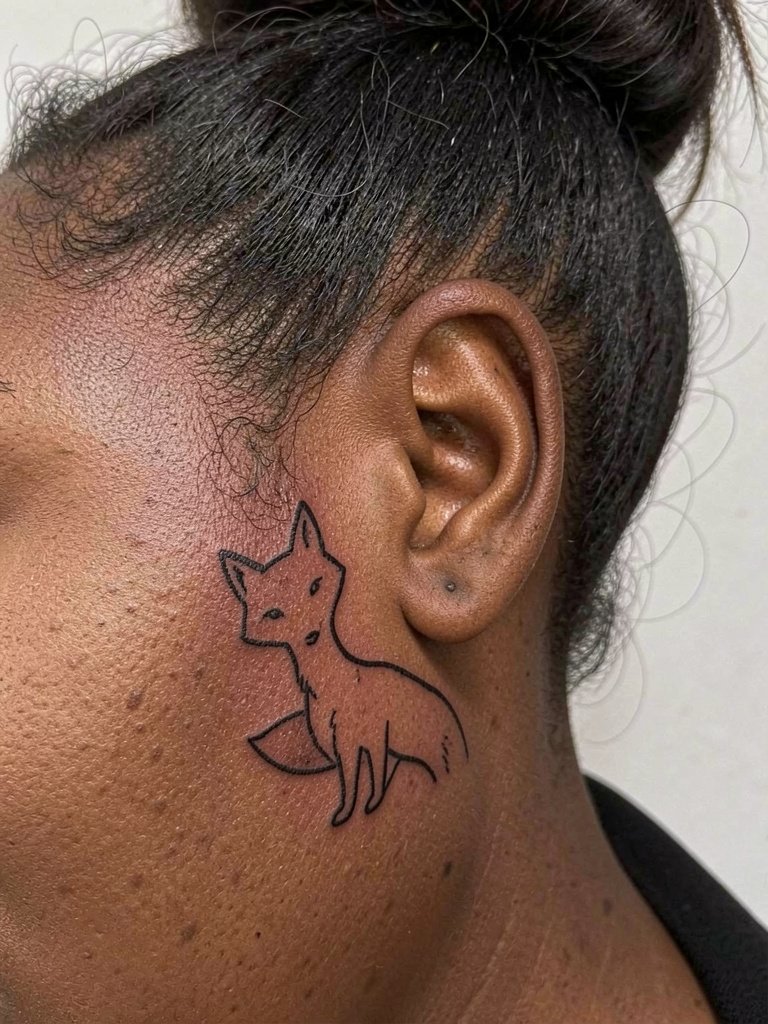
Behind-the-ear pieces are perfect for tiny, graphic motifs that surface only when your hair is up. The typical mistake is expecting a lot of internal shading in a very small area. Keep the fox simple and high-contrast so silhouettes survive hair oils and frequent touch. For the session, have hair secured away from the spot and wear a high-neck top to avoid moving fabric. Expect a quick 30- to 45-minute session and rare touch-ups unless you use heavy hair products on the area.
18. Mountain Hare on Outer Shoulder Blade
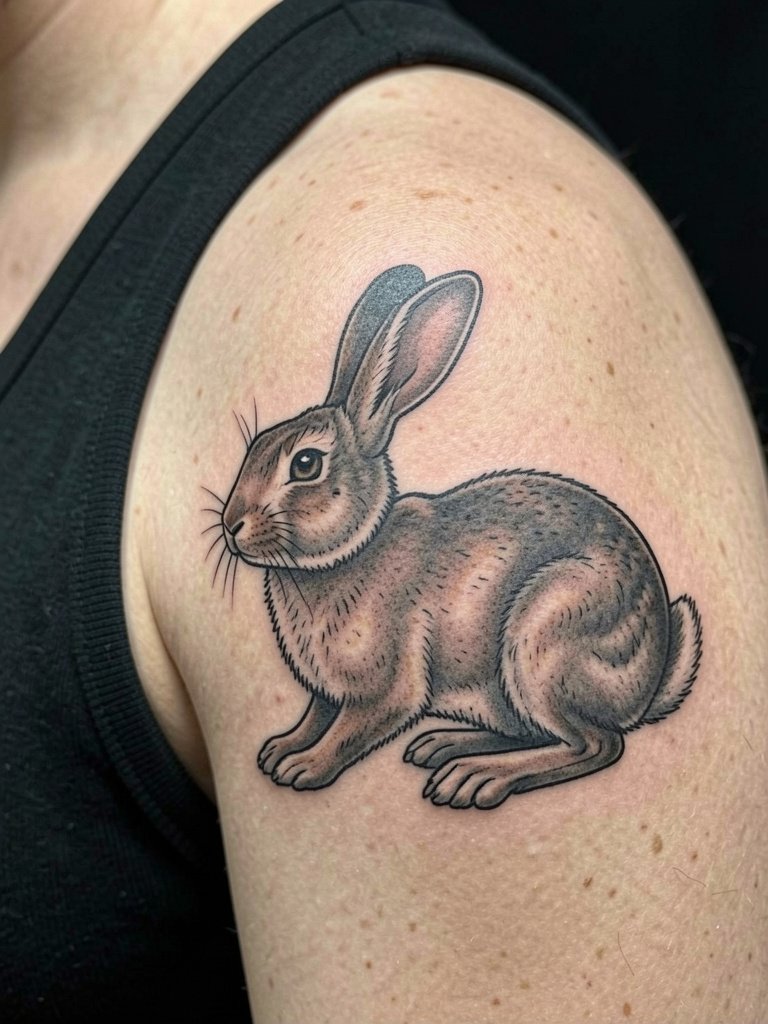
The shoulder blade accepts larger, decorative placements that travel with the arm without too much distortion. Common mistakes include placing too much micro-detail near the scapula crease where movement distorts fine work. Instead pick a bold silhouette with texture that reads from the side and back. A solid tank top makes the area easy to show and keeps the artist happy during the session. Sessions can be between one and two hours and touch-ups are usually minimal.
19. Geometric Fox on Inner Wrist
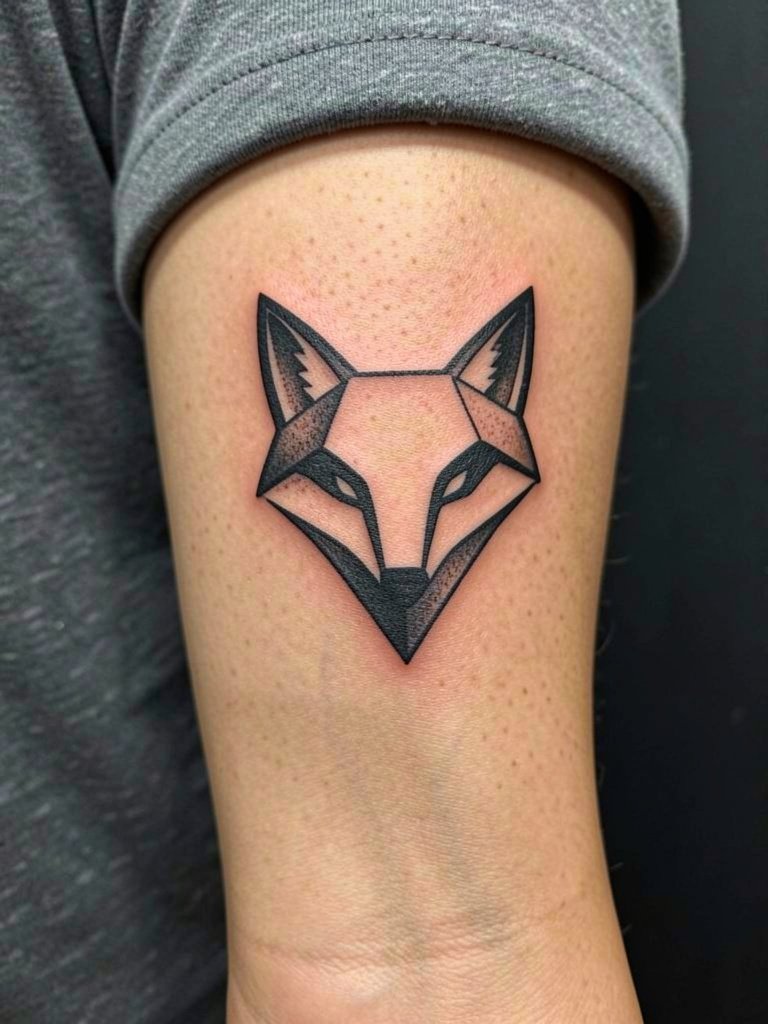
Wrist geometry reads well when the artist scales negative space to the wrist curvature. The mistake is forcing a wide pattern into a narrow wrist band. Ask for a wrap mockup so you can see how the shapes align with hand motion. Keep expectations realistic about wash and bracelet friction during healing. The inner wrist is sensitive and sessions are short. Plan a touch-up after several months if edges soften.
20. Stipple-Style Sea Turtle on Calf
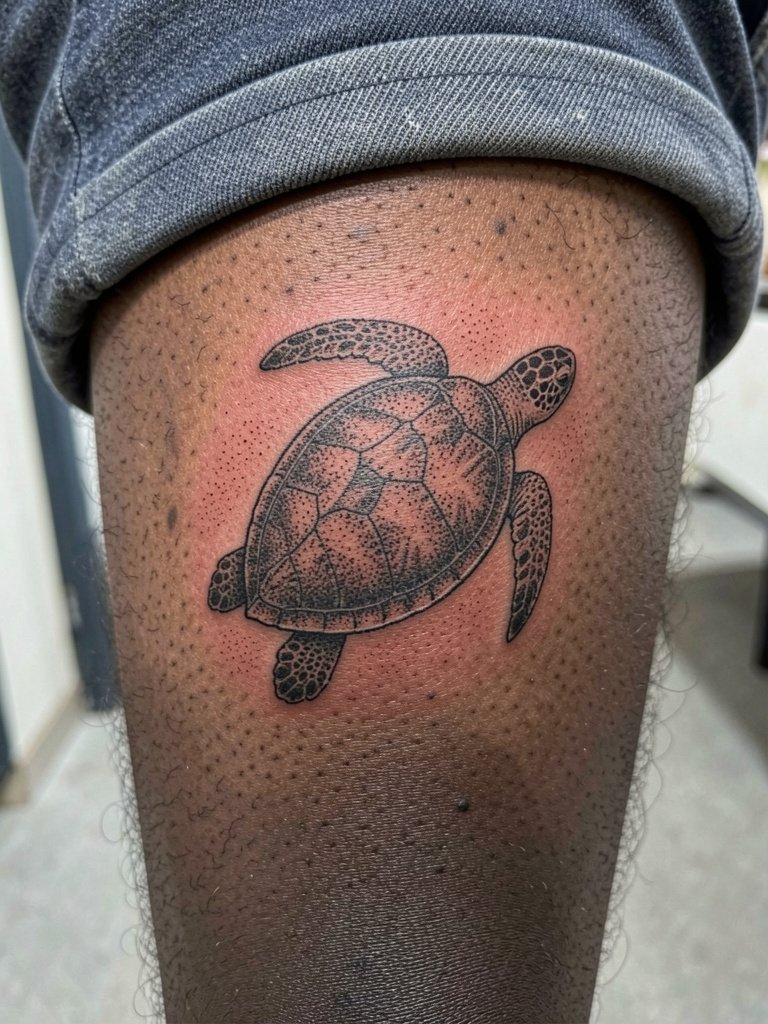
Calf tattoos allow for stipple work that reads as texture and depth. A real mistake is shrinking stipple textures down too small, which turns into muddied gray over time. Instead map the dot density at the size you want and ask the artist to show a healed example with similar skin tone. Calf sessions are often comfortable and let you stand or recline. Expect a one- to two-hour session and predictable touch-up timelines.
21. Waterfowl Silhouette on Chest Clavicle Edge
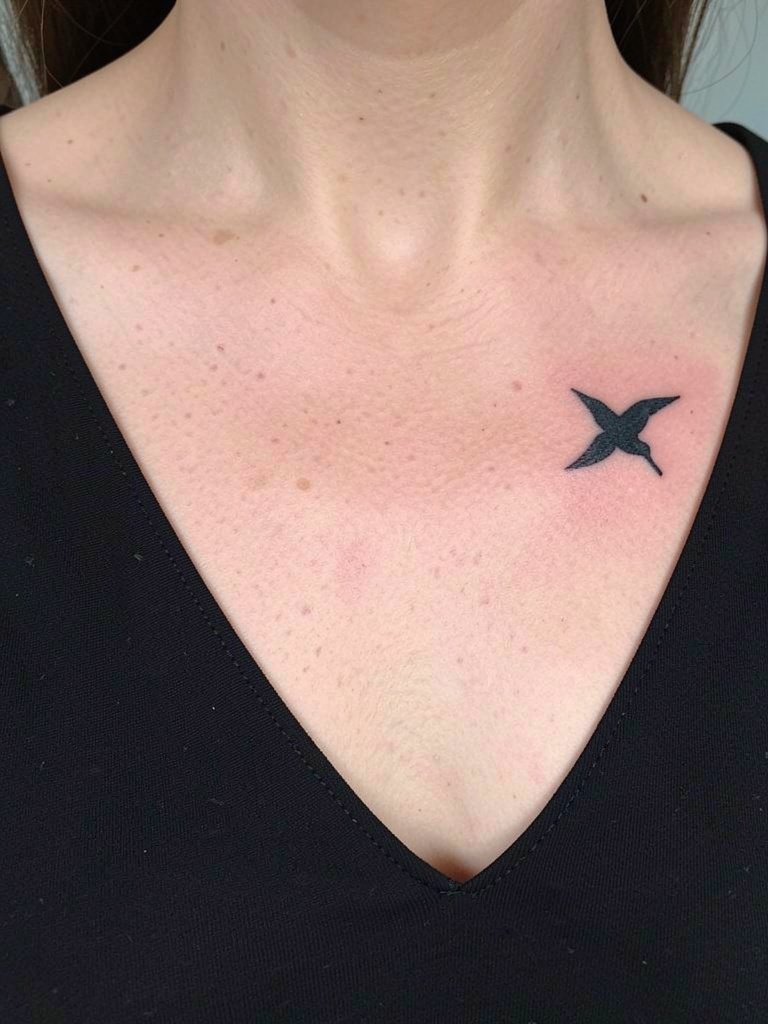
A small bird at the clavicle edge works as an elegant peek of ink. Avoid cramming too many tiny feathers into a one-inch motif. Instead select a clean silhouette and ask the artist to show how it reads against necklace placement if you plan to layer jewelry. For the session, wear a strapless or scoop-neck top so the artist gets unimpeded access. The small scale keeps session time brief and the touch-up window is usually one year.
22. Needlepoint-Style Moth on Upper Back
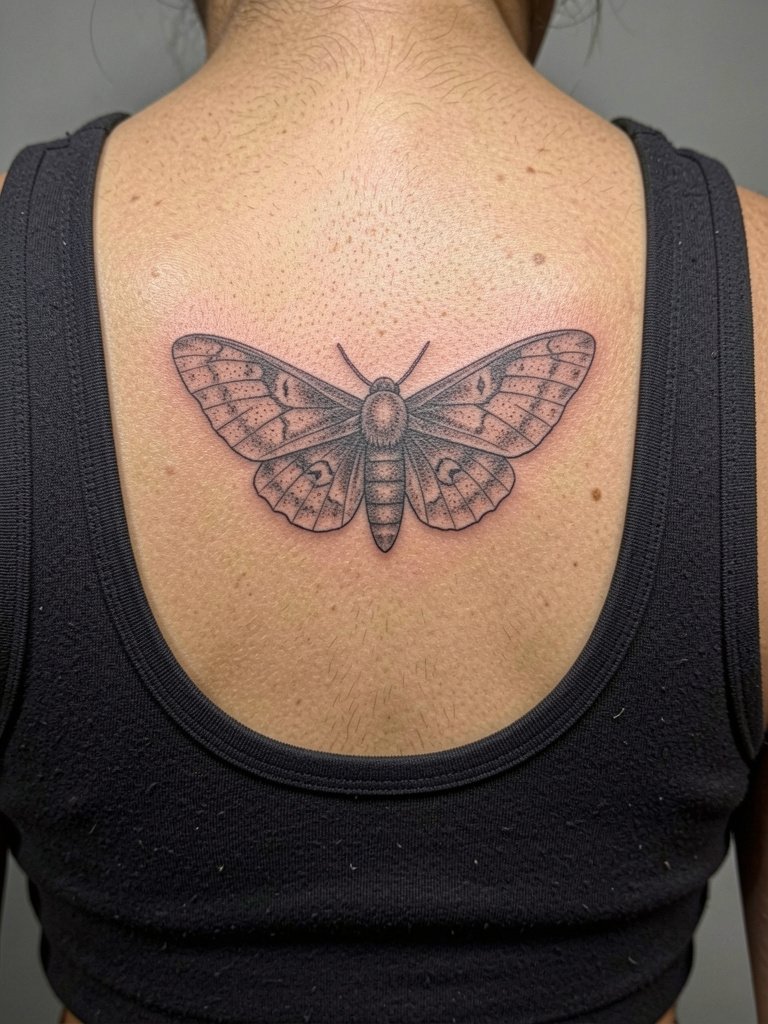
Upper-back moth work gives a chance to use symmetrical layouts without interference from waistbands. The main error is centering a tiny moth where normal posture blurs the body lines. Opt for a slightly larger layout and ask the artist for a symmetry check in standing and seated reference photos. Sessions are moderate in length and touch-ups are uncommon unless bedding friction occurs during healing.
23. Tiny Seahorse at Ankle
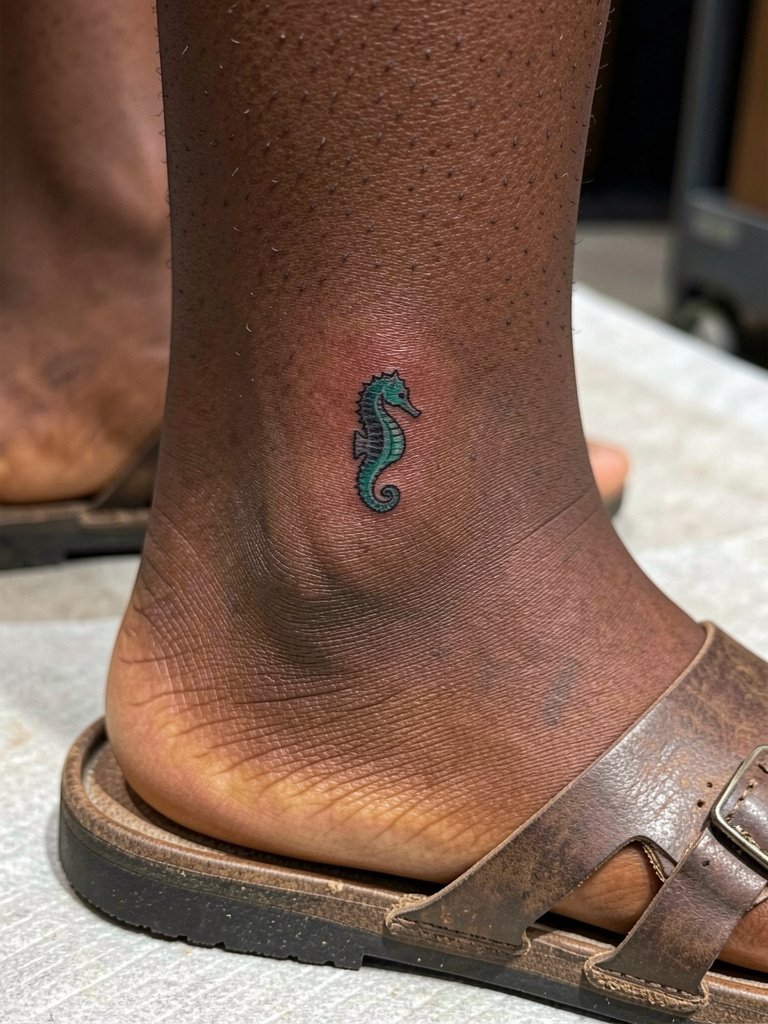
Ankle seahorses need to respect friction and footwear. A common mistake is tight internal detailing that the top of a shoe rubs at when walking. Choose clear silhouette lines and plan footwear changes for the first week. Sandals or ankle boots in warm months show the piece; avoid winter boots during initial healing. Sessions are quick and touch-ups are expected if repeated rubbing happens.
24. Kestrel Portrait on Side Neck (repeat placement with different motif)
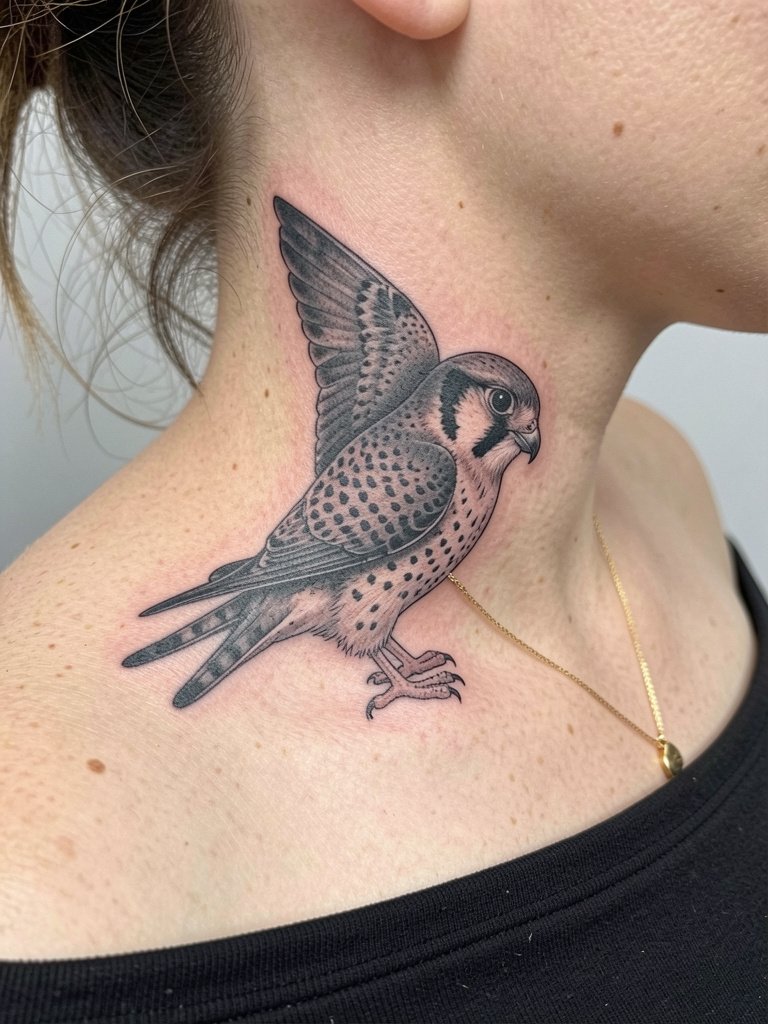
A neck kestrel reads sharply when the artist balances fine eye detail and solid beak lines. Avoid over-fiddling with tiny feather strokes that blur with collars and scarves. Bring reference shots for the exact neck curve you have so the kestrel's gaze aligns with your jawline. Off-the-shoulder tops let the piece show without crowding. Sessions are under two hours and you may need a touch-up if you wear heavy necklaces that rub the area.
25. Grackle Cluster Across Collarbone
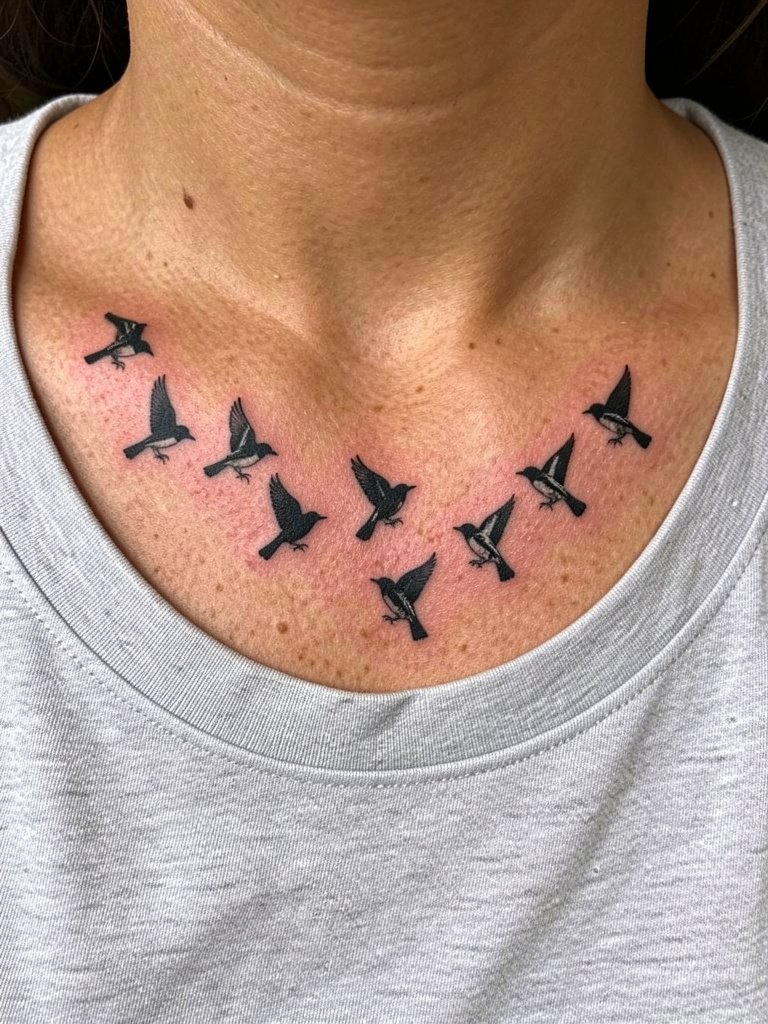
A collarbone cluster benefits from staggered spacing so each bird holds its silhouette as the skin moves. The mistake is placing birds too close together so they bleed into an indistinct mass over time. Have the artist mock up spacing based on your collarbone length and discuss whether a slightly bolder outline helps preserve readability. For styling, crew-neck tops let the cluster peek without necklace competition. Sessions are brief and touch-ups depend on how often the area meets straps or bags.
Frequently Asked Questions
Q: How do I find artists who post healed animal tattoos and portfolios near me?
A: Search hashtags like #finelinetattoo and #microrealismtattoo on Instagram and TikTok and use the location filter. Tattoodo and the Inked App let you search by keyword combinations such as "fine line wolf forearm" and often surface healed portfolios. Reddit threads on r/tattoos and r/tattooadvice surface peer recommendations and healed examples across skin tones.
Q: Will a fine-line ribcage tattoo blur faster than one on the forearm?
A: Ribs move and stretch with breathing and can cause hair-fine lines to soften quicker than forearm work. Some artists recommend slightly thicker line weight on the ribs to preserve contour. Expect a higher chance of touch-up within two years and plan scale and spacing accordingly.
Q: I have darker skin. Which animal styles hold contrast best in photos?
A: Black-and-grey realism and solid silhouettes tend to photograph more consistently on deeper tones, while watercolor can read differently depending on lighting. For portraits or micro-realism, ask your artist about saturation and matte photo finishes so blacks read true instead of gray.
Q: What should I wear to a sternum or inner-thigh appointment?
A: For sternum work wear a strapless or fitted sports bra so the artist has clear central chest access. For inner-thigh pieces choose loose shorts or a skirt that can be moved without pressure; a flowy maxi skirt is handy for the ride home and helps keep the area uncovered during immediate aftercare.
Q: How long before a watercolor hummingbird needs a color touch-up?
A: Watercolor pieces often need a color refresh sooner than black-and-grey work. A realistic window is two to three years depending on sun exposure and skin type. Plan for at least one touch-up in that timeframe if you want sustained vibrancy.
Q: What are red flags when booking an artist for animal work?
A: Avoid bookings where the artist has no healed photos, cancels without a clear rescheduling policy, or refuses to show scale mockups. Look for portfolios that include healed shots at one year or later and ask for a clear deposit and cancellation policy before you lock dates.
