
Most people assume the tiniest single-needle star will look best over time. In practice I have seen the opposite. Stars below an inch often blur into blobs on high-movement spots, while slightly larger single-line pieces or modestly bolder outlines read cleaner after five years. Read on for practical star designs sized and placed to hold up, plus what to bring to the chair.
1. Single Outlined Minimalist Star
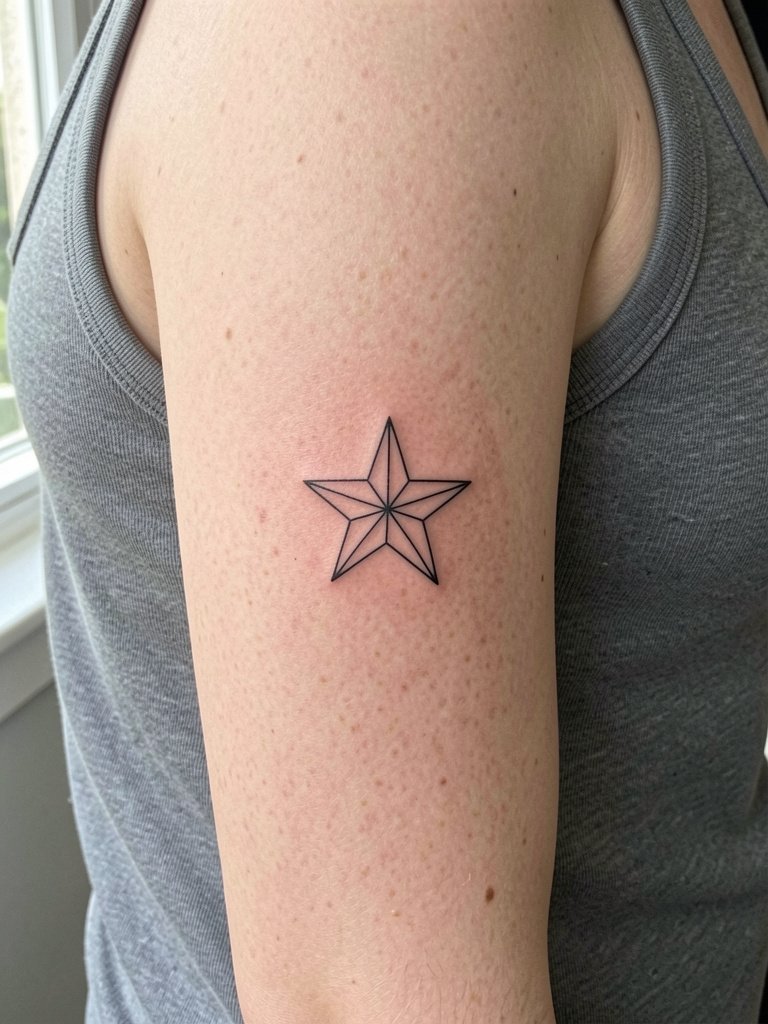
A single outlined star is the go-to if you want something that ages predictably on smooth inner upper arm skin. I recommend 0.75 to 1.25 inches here so the points remain crisp as elasticity changes. The biggest mistake is asking for ultra-thin single-needle lines under one inch. Those can heal sharp but look fuzzy by year three on textured skin. For this placement bring reference photos that show exact line weight and ask for slightly deeper needle depth so the ink settles cleanly. At six months the linework looks like a fresh hairline. At two years the same line reads soft but legible. Expect low pain and a single short session. If you plan outfits that show the inner arm, wear a sleeveless tank to the appointment. sleeveless tank top women
2. Five-Pointed Simple Outline
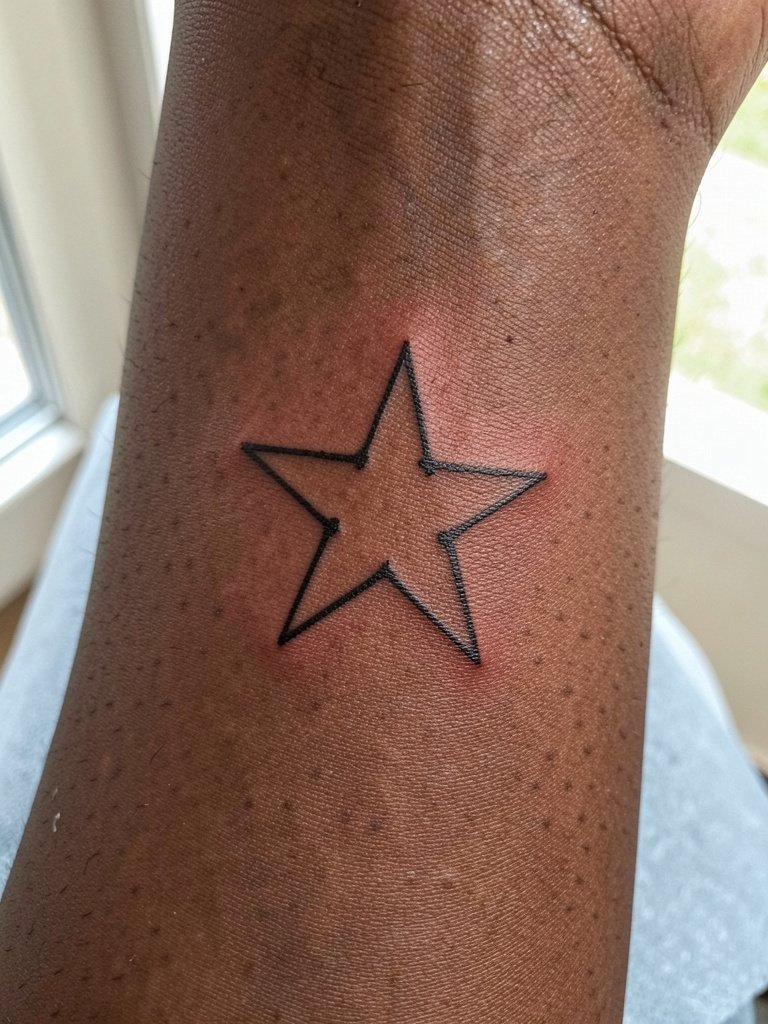
The inner forearm is forgiving for a classic five-point outline. I suggest straight black lines that do not intersect so the geometry reads even as skin moves. Common mistakes are asking for too small a scale or for intersecting decorative points that clog as the skin ages. Tell the artist you want slightly reinforced nodes at the star tips so the points do not melt inward after a few years. Expect a low-pain single session and fast healing with regular showers. This placement pairs nicely with rolled-up linen shirts in sand or sage to show the piece. linen button down shirt women
3. North Star (Beacon) Tattoo
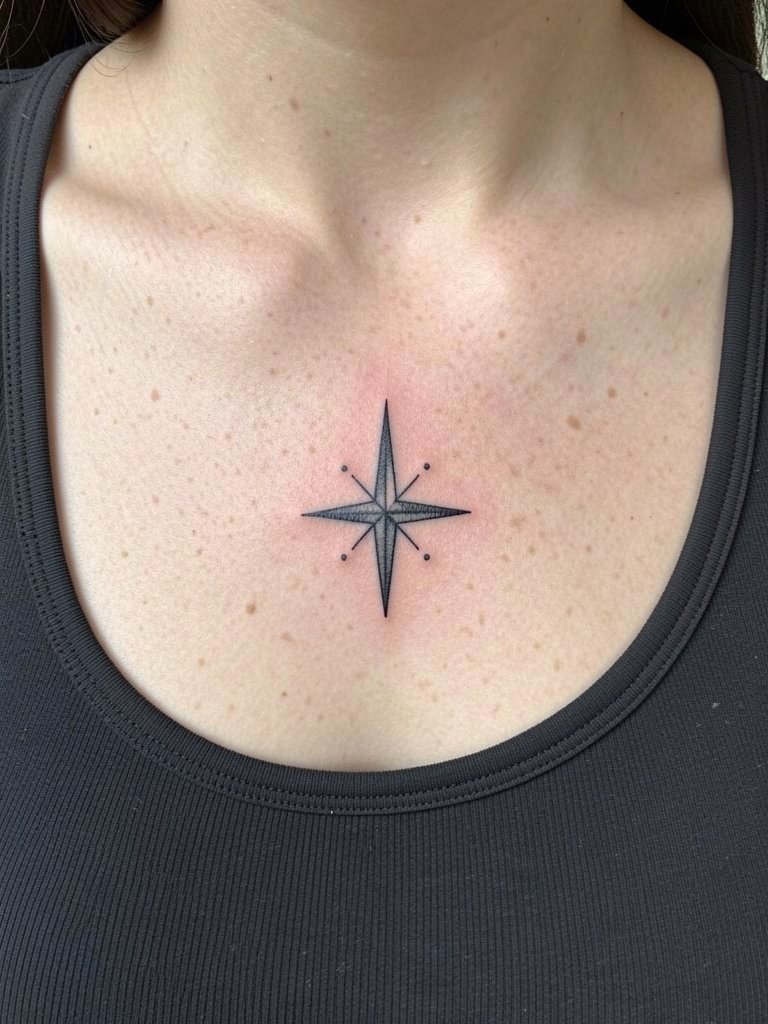
The North Star works well along the collarbone as a small beacon. Its two elongated points read like guidance rather than decoration. The wrong approach is to cram tiny script beneath a micro-star; the script competes and becomes illegible. For a collarbone North Star request slightly longer vertical points and ask for the star to sit where the skin is flat under a slip dress or wide V-neck. At six months the contrast is strong, at two years the silhouette is the thing that remains. Session wear: strapless or low-cut top so the artist has clean access. If you want to frame it for evenings, pair with a slip dress in cream and a short pendant that sits above the tattoo. slip dress women cream
4. Shooting Star with Spark
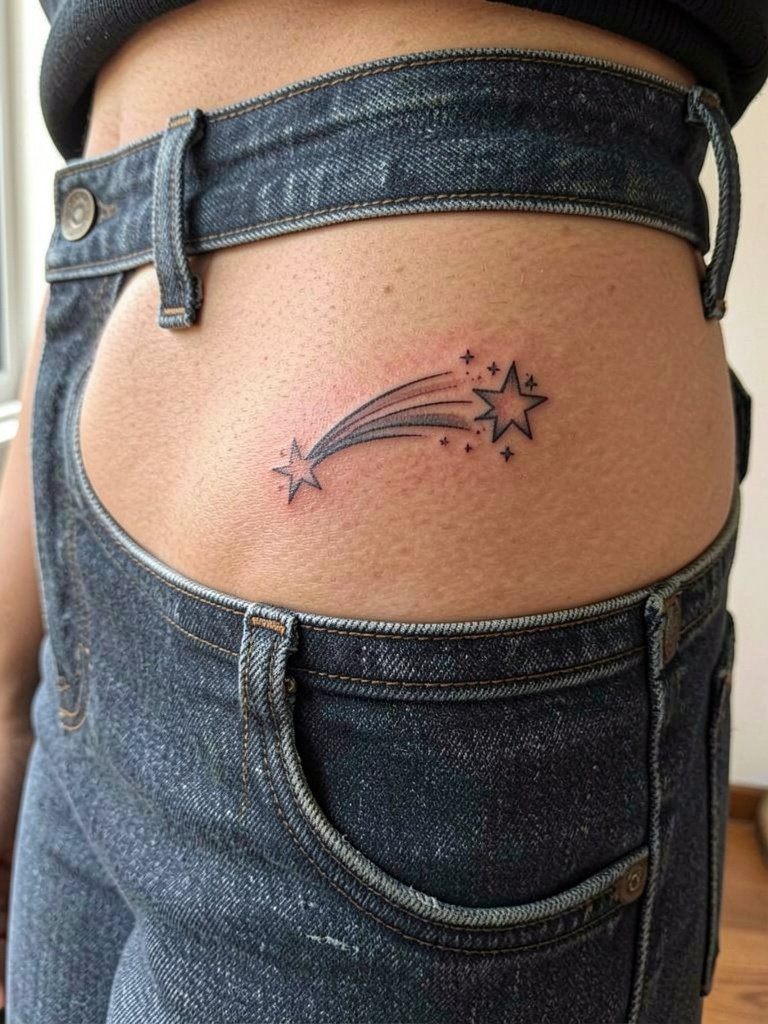
A shooting star carries motion. On the lateral hip it reads like movement across the curve. The key choice is tail density. Too many tiny tail dots make the design muddy after healing. Ask for a tapered tail with a few staggered spark dots and request a single-session shading pass so the tail heals cohesive. Expect moderate pain because of the hip’s thin subcutaneous layer. Heals faster under low-friction clothing but avoid tight waistbands for two weeks. Dress advice: high-waisted shorts in sand or olive highlight the curve and the tail. high waisted shorts women
5. Trailing Star Cluster
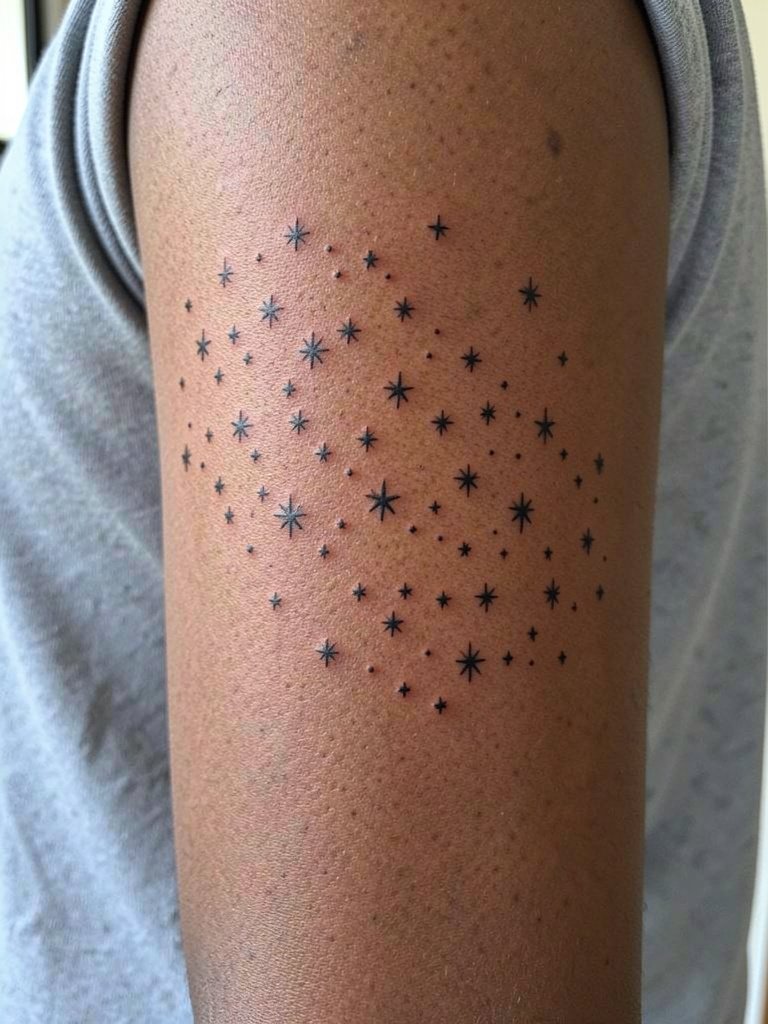
Clusters look best when sizes vary. The unique rule I recommend is a 30 to 40 percent variation between large and small stars so the field reads three-dimensional instead of uniform sprinkles. Common error is uniform tiny dots with no breathing room; that ages into a grainy patch. Ask for at least two inches of spacing planned for future filler moons or planets. On the inner upper arm this design benefits from sleeveless tops in neutral tones and bracelets on the opposite arm for balance. Session is moderate and may run longer if you plan a four to six inch span.
6. Geometric/Mathematical Star
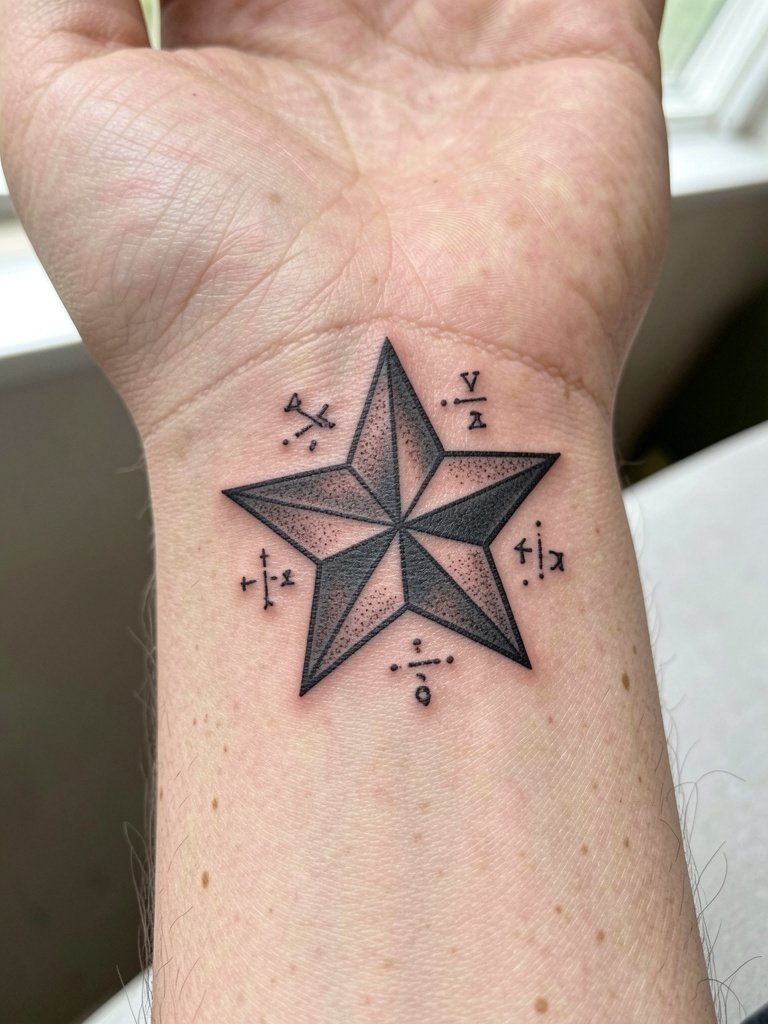
A geometric star leans into science vibes. For the inner forearm choose slightly bolder lineweight than a micro-fine piece so the angles remain crisp as skin moves. The common mistake is shrinking intricate geometry to wrist scale. If you want internal math glyphs, size up to two inches. Bring math or diagram references and ask the artist to show how the pattern reads at different scales. This style takes one session and feels low to moderate in pain. Pair it with rolled cuffs or thin stacked bracelets when showing it off. thin stacked bracelet set
Session Day Picks
The inner forearm, collarbone, and hip pieces above need different session wear and small tools on hand for comfort.
- Indie Black Ink Balm. Lightweight balm favored for fine-line healing. It soaks in without clogging needle channels and is good for single-needle stars.
- Xero aftercare kit. A drier Australian-style balm option that users report works well on high-movement spots like hips and thighs.
- Tattoo Guard thin healing tape. A thinner alternative to second-skin tapes that is handy behind the ear or on the wrist where bulk is a problem.
- Specialty tattoo balm thin formula. A thinner ointment made for fine-line work, helps reduce oversaturation on micro designs.
- Saniderm protective film. Useful if your appointment plan includes a hand or finger piece and you want a barrier during the busiest first 24 hours.
7. Constellation-Inspired Patchwork
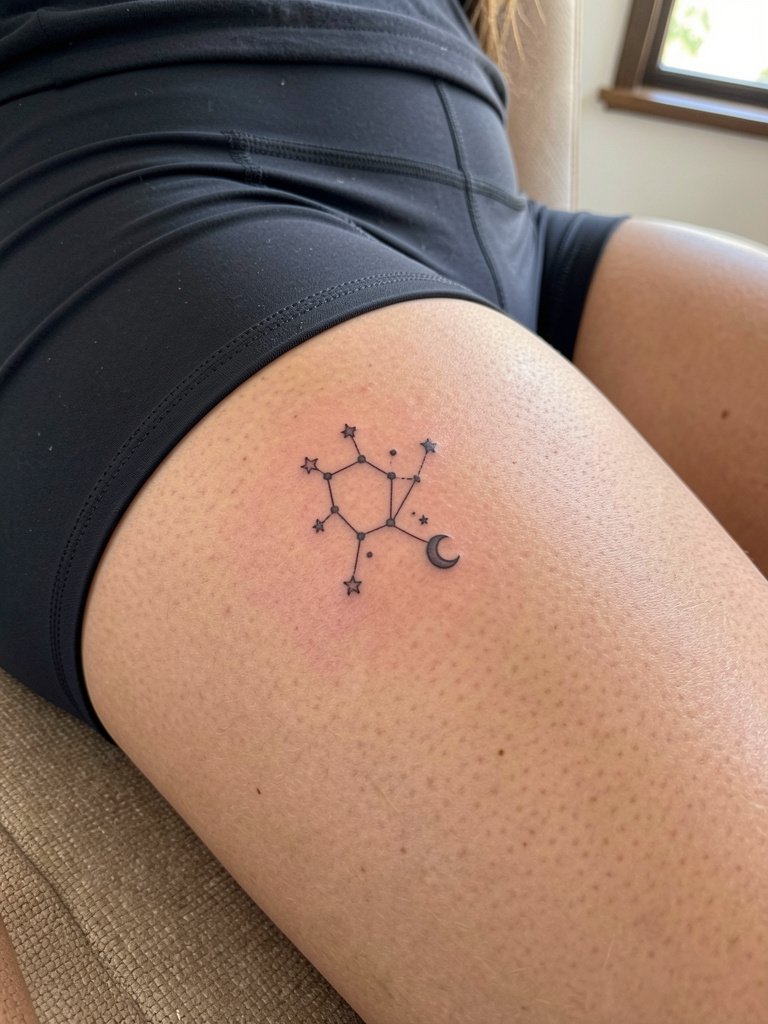
Patchwork is a slow-build strategy. I recommend spacing elements with at least 2 inches between pieces so future moons or planets slot in without crowding. A typical mistake is starting too close and then running out of canvas. Plan a few anchor stars first and map possible filler spots with your artist using reference photos. Inner thigh sessions require care for comfort and modesty. The design expands gracefully over multiple sessions and looks best beneath flowy skirts or shorts when you want to show it.
8. Behind-the-Ear Single Star
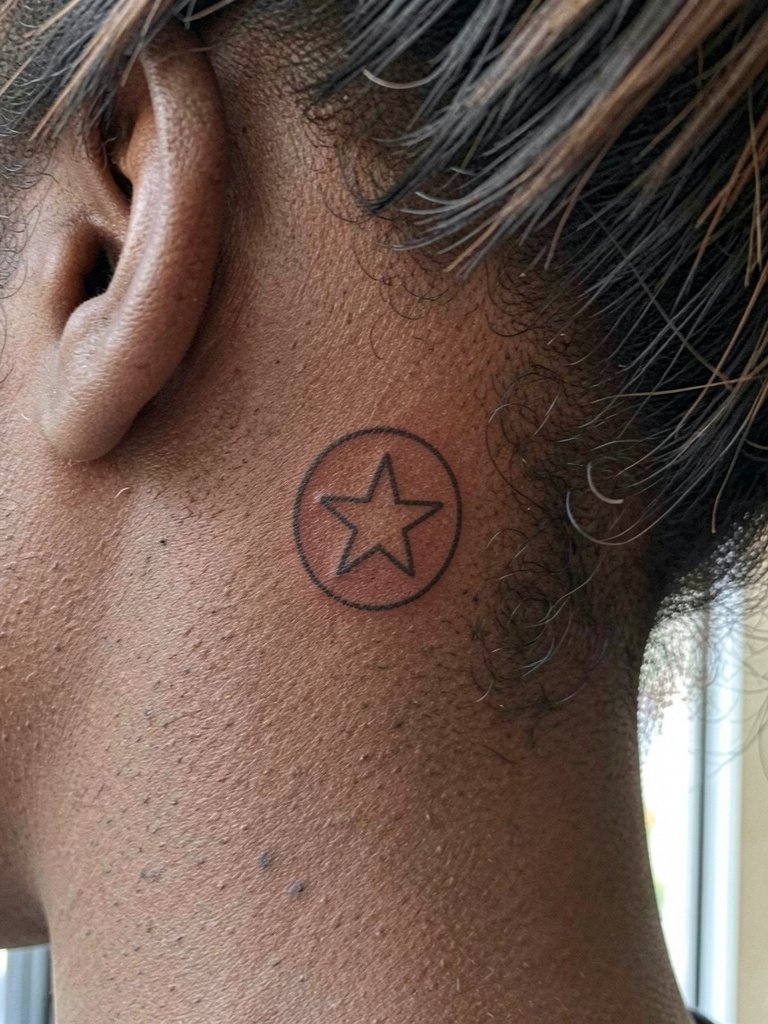
Behind-the-ear stars read best as single outlines because the mastoid surface curves and filled detail gets distorted. The common error is filling in a micro-star which blurs on that small curved plane. Ask for a single-needle outline with slightly reinforced outer points. Expect low pain but bring noise-cancelling headphones because equipment sounds are close. Style-wise wear high-neck blouses that reveal the area when hair is up, or tiny ear cuffs on the opposite ear for balance. high neck blouse women
9. Diamond-Shape Bold Star
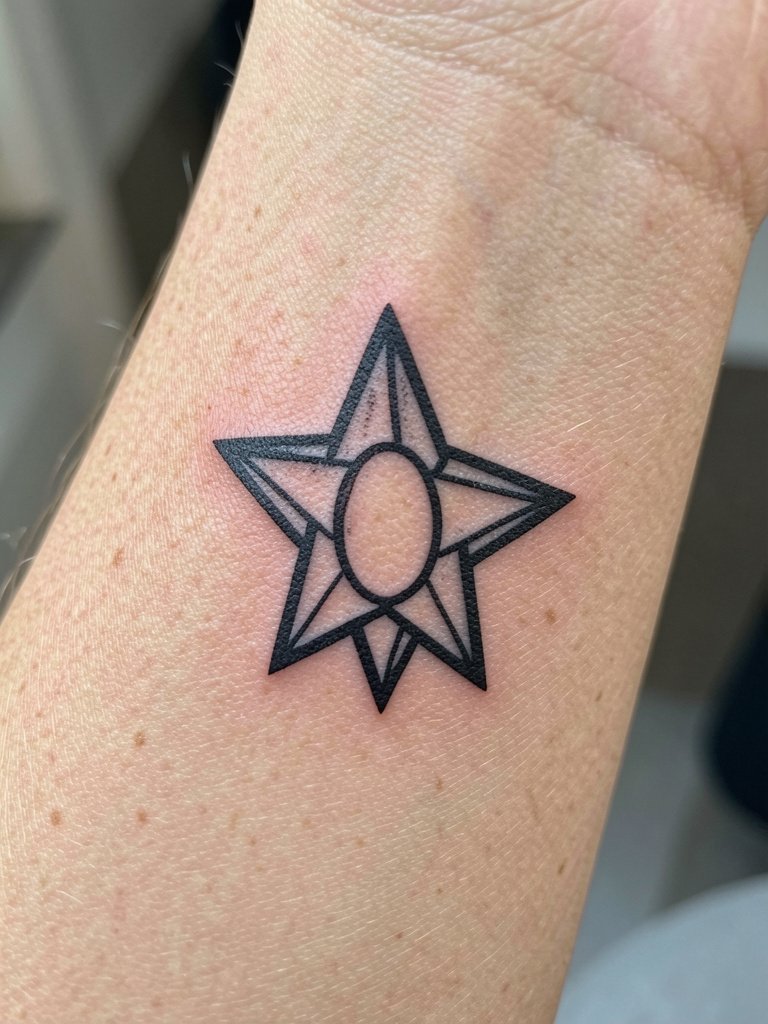
A diamond-shape bold star is the answer when you want presence on a small visible area. Bold contouring holds up better than micro-fine lines in zones that see friction. One debate here reflects two camps. One camp says thin single-needle outlines age gracefully if placed properly and sized at or above an inch. The other camp favors bold outlines because they resist movement and abrasion. Name both approaches with your artist and show examples sized on a wrist so you both agree on line weight. This wrist piece pairs with thin rings or a single bracelet. Session is short and healing is straightforward.
10. Variable-Size Depth Cluster
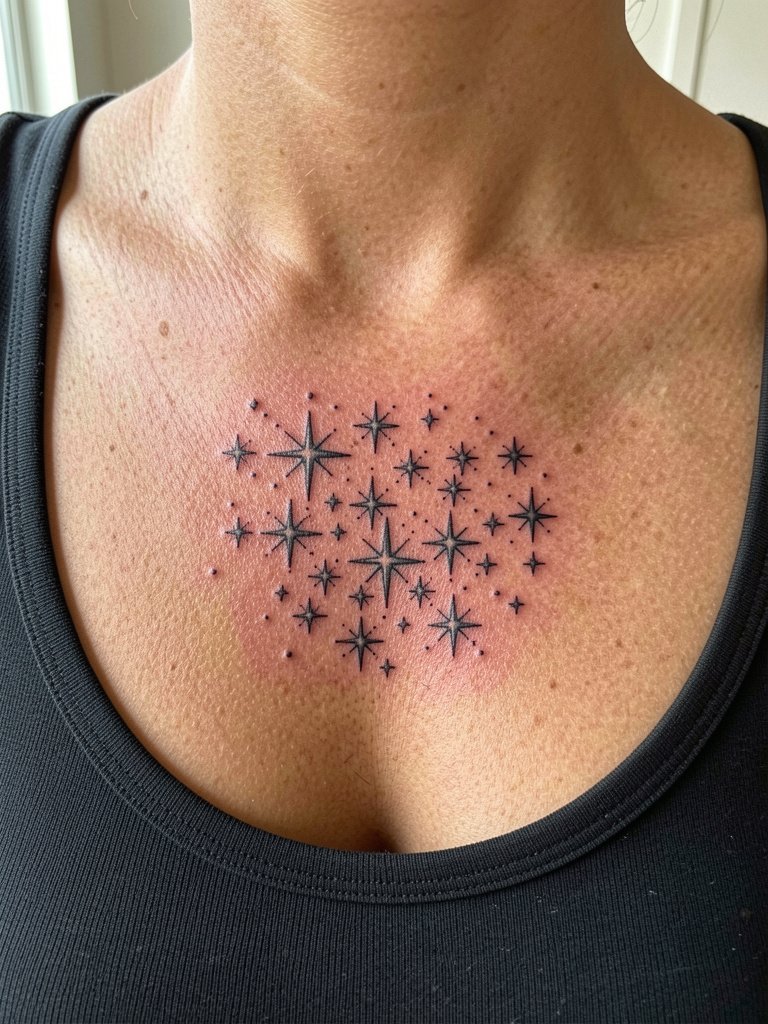
Varying star sizes by 30 to 40 percent creates an optical depth that feels like a real night sky. Place these on the upper chest so the largest star anchors the cluster and smaller ones recede. A typical mistake is uniform sizing that flattens the design. Discuss proportion maps with the artist and show how three sizes read together at life scale. This placement looks great with open-neck tops and works well with pendant necklaces that sit just above the cluster. pendant necklace short
11. Tiny Moon and Planet Filler
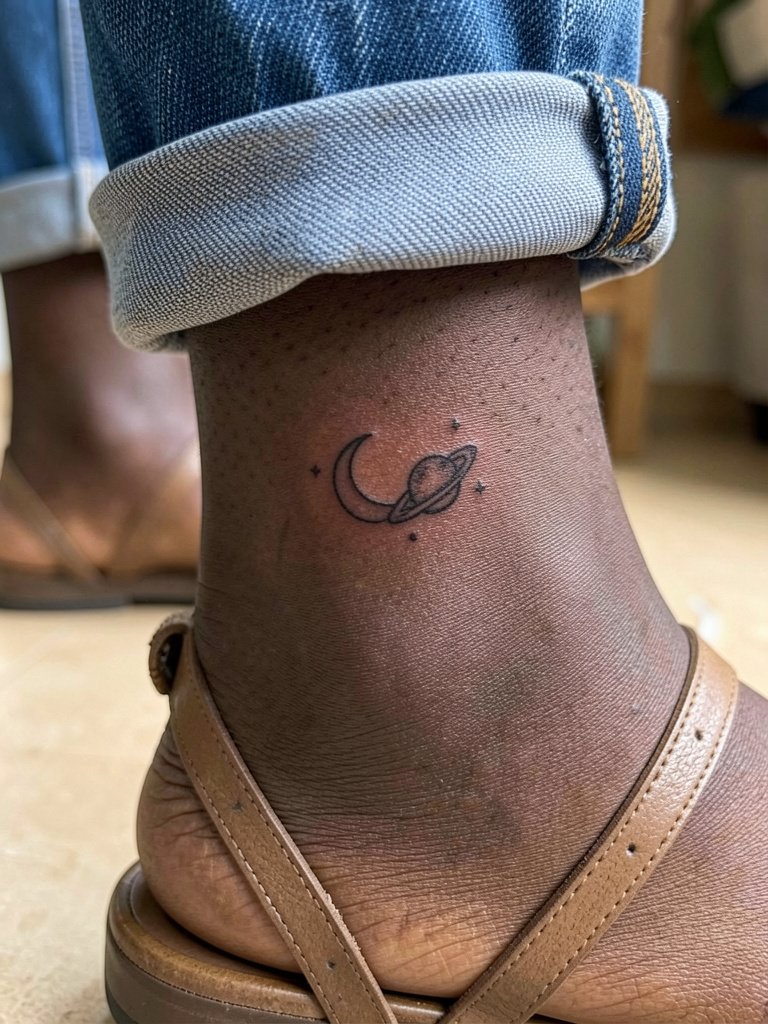
Ankle fillers are the perfect next-step after a cluster. Keep each accent under an inch so it complements, not competes. The main risk here is friction from socks and shoes. Many people add a tiny moon or planet as later-fillers, so leave ~2 inches of breathing room around the main star. For show-off styling, choose strappy sandals or ankle bracelets that do not cover the design. Session is short and healing benefits from brief shoe-free periods at home. strappy sandals women
12. Five-Point Minimalist with Phrases
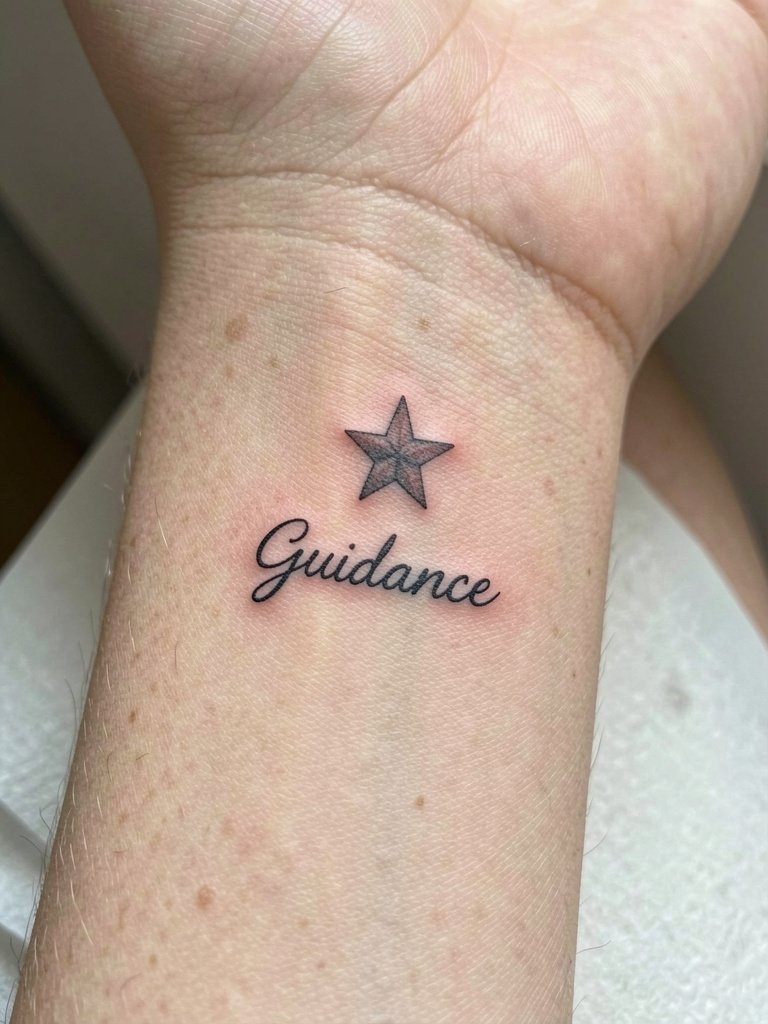
Combining a star with a single short word gives layered meaning without crowding. Keep the word small and in a readable script. The frequent mistake is picking a long phrase that scales down and becomes unreadable. Specify exact lettering, size, and baseline spacing during the consult and bring a sample of the font at the final size. Inner forearm placement shows the piece well with rolled-up sleeves. Expect a single session and uncomplicated healing.
13. Hand Placement Star (with Touch-Up Plan)
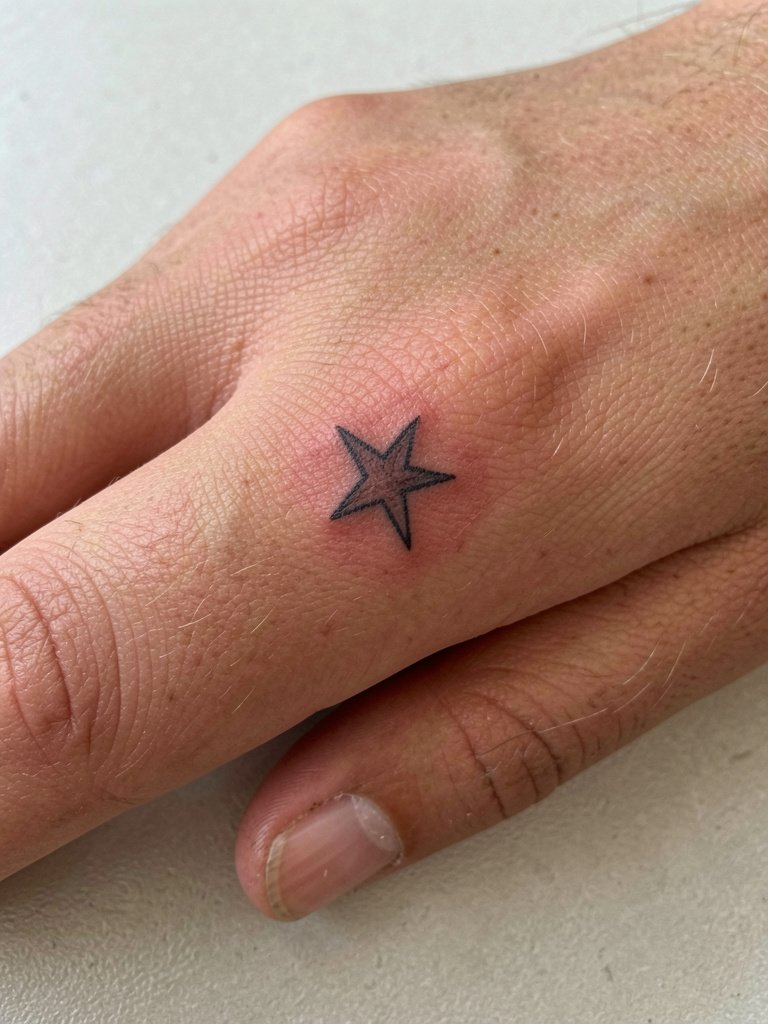
Hands and fingers are appealing but demand planning. Expect 30 to 40 percent faster fading on hands compared with protected areas and a realistic touch-up cycle every two to three years. One camp argues for charm and visibility and budgets for touch-ups. The opposing camp advises avoiding hands for first tattoos and choosing protected zones like inner arm or thigh. Name both camps when you plan so you accept the maintenance trade-off. Make the star at least an inch and ask for a bolder lineweight than you would on the forearm. For showing off, thin stack rings on adjacent fingers pair well. Session discomfort is higher because the area is bony and frequently used.
14. Large Scale Geometric Star
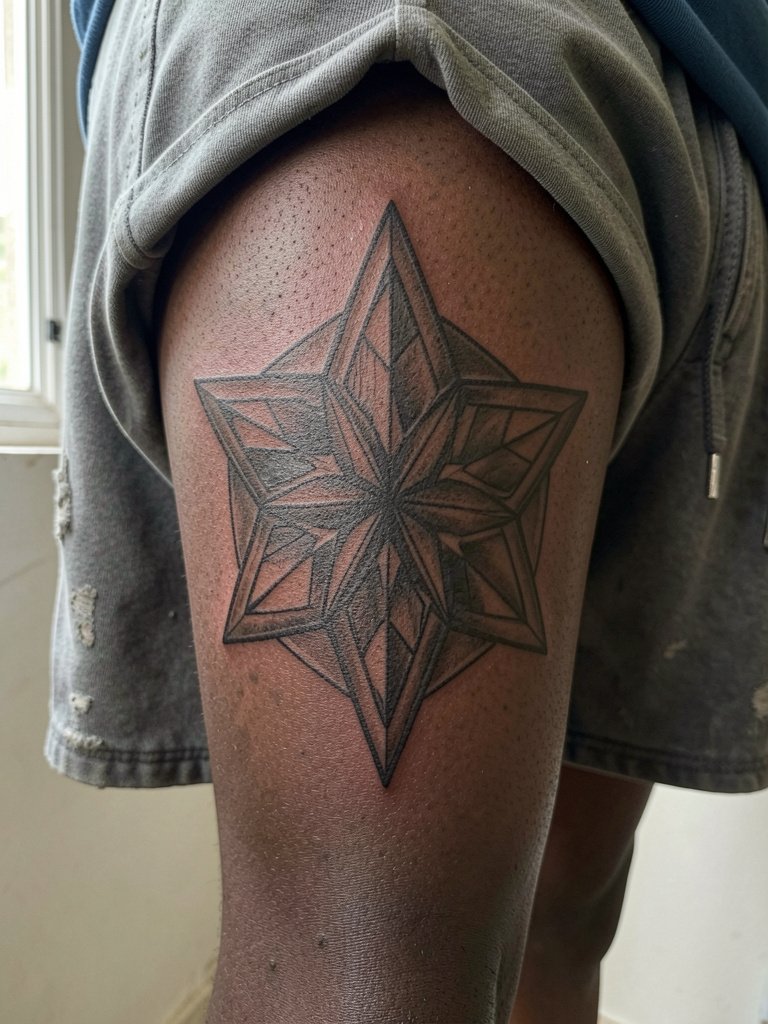
Complex geometry needs scale. If you want internal mandala-style detail, plan a minimum of two inches so the pattern reads after healing. The frequent mistake is compressing intricate fills into a tiny star. On the upper thigh you get enough canvas to render internal geometry and preserve negative space. Expect a longer single session or two short sessions. Pair the result with high-cut shorts or skirts to show it off. Wear loose shorts to the appointment so the artist can roll the leg without discomfort. high cut shorts women
15. Foot/Toe Micro Star
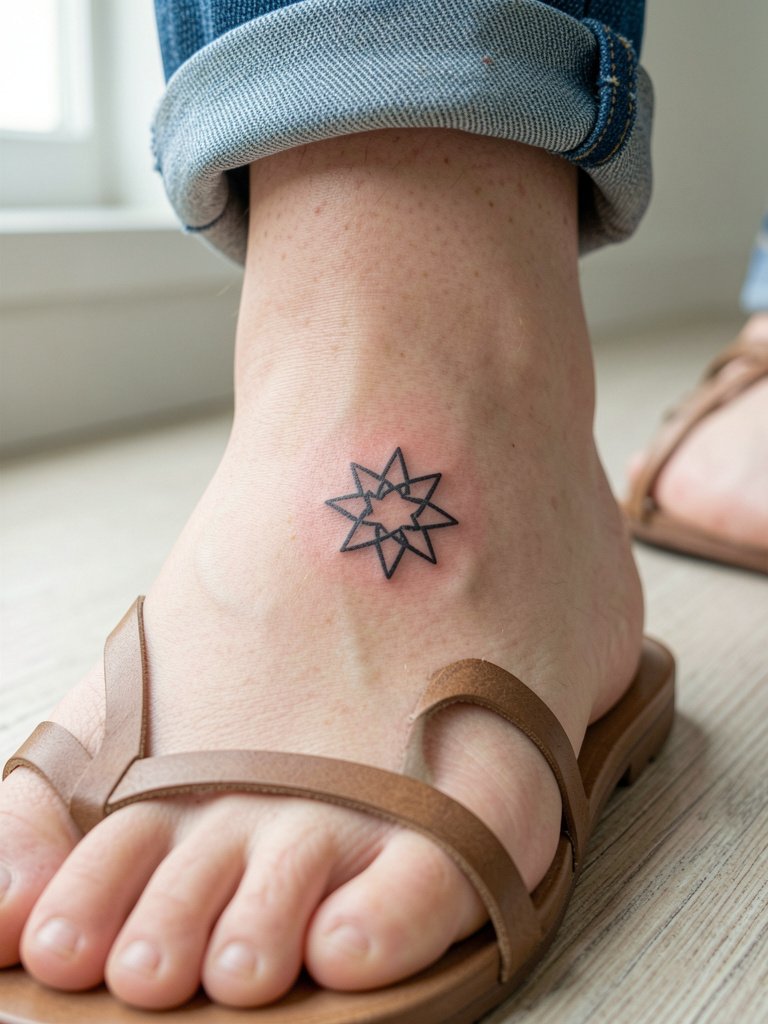
The top-of-foot and toe areas are high-friction and heal differently than flat skin. Keep the design simple and favor bolder outlines so the small size survives shoe wear. Expect more fading and possibly a quicker touch-up timeline. Session pain is moderate because of thin tissue and bone proximity. For footwear pairing, open-toe sandals and simple toe rings complement the piece and avoid direct rubbing over the area during healing. open toe sandals
16. Variable-Size Cluster for Patchwork Growth
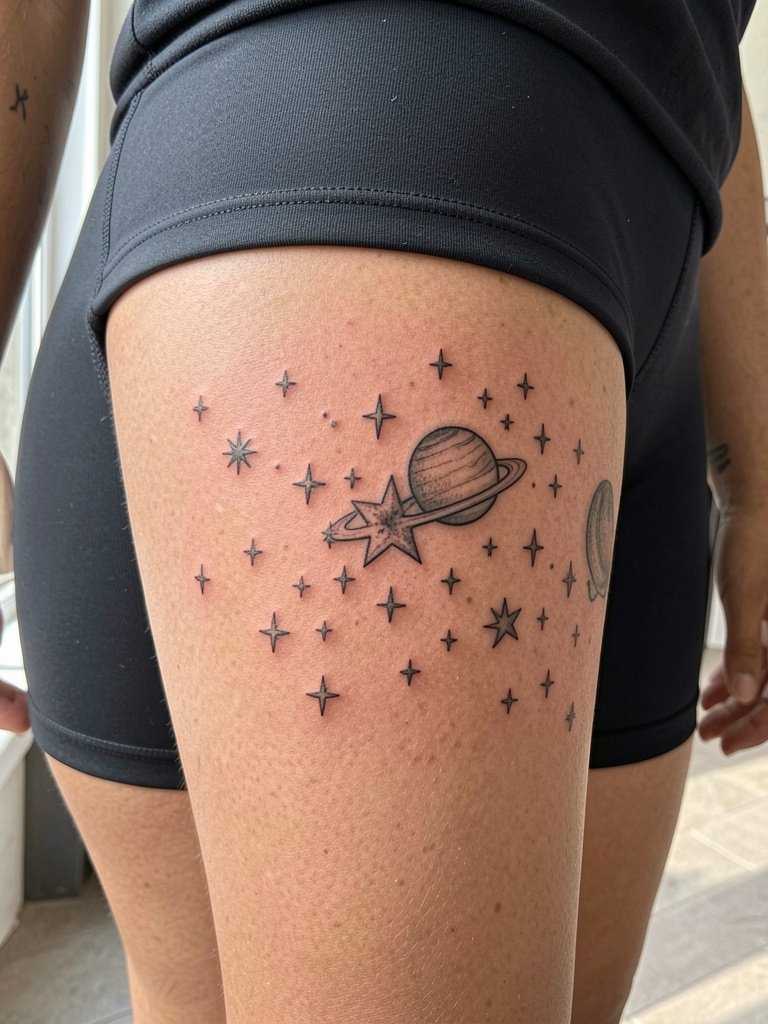
If you plan a constellation over multiple visits, map spacing now. I suggest at least two inches between primary elements so moons and planets slot in later. A common mistake is tight packing in the first pass. On the inner thigh the skin texture softens detail, so choose slightly larger stars or thicker lineweight for consistent longevity. This approach rewards long-term planning and pairs well with flowy skirts that show the area in motion. Session comfort improves if you wear loose shorts or a skirt to the booking.
17. Five-Point Bold Star for Knuckles
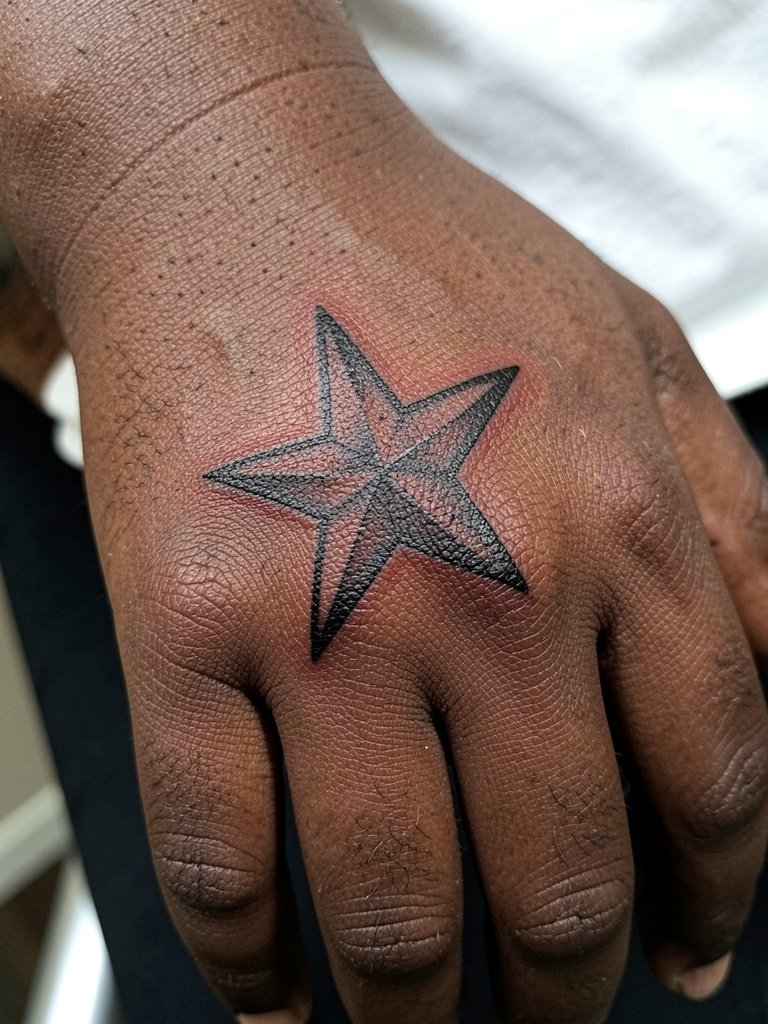
Knuckle stars need rules. Bold lines outlive thin ones here. The wrong call is fine-line knuckle work which fades rapidly from washing and motion. Plan for more frequent touch-ups and accept some softness over time. If visibility is the goal, thicker outlines and uncomplicated shapes are the durable choice. Wear short sleeves and remove rings during the session so the artist has full access. For showing off, neutral nail polish and thin rings on adjacent fingers keep attention on the star.
Frequently Asked Questions
Q: How big should a star be to avoid blur over time on a wrist or hand?
A: Aim for at least one inch for small star points to remain readable on wrists. For hands and fingers choose bold lineweight and budget for touch-ups every two to three years because those areas fade approximately 30 to 40 percent faster than protected skin.
Q: Which star style is best for building a constellation over years?
A: Start with anchors spaced two inches apart and use variable sizes for depth. Plan future filler moons and planets by leaving clear breathing room now so additional elements slot in without crowding the composition.
Q: Where can I find healed examples and local artists without naming people directly?
A: Search hashtags like #star tattoo, #finelinetattoo, and #minimalist tattoo on Instagram and TikTok and filter results by location. Tattoodo and Booksy let you search by keywords such as "single line star" or "constellation tattoo." Reddit communities like r/tattoos and r/tattooadvice are also useful for peer-shared healed shots across skin tones.
Q: Do darker skin tones need different linework for star tattoos?
A: On darker skin slightly thicker lineweight helps contrast so stars remain visible over time. Black ink is the most reliable across tones. Ask for a slightly bolder outline if your reference photo is on lighter skin so the artist can adapt scale and saturation.
Q: What should I wear to my appointment for a collarbone or hip star?
A: For collarbone pieces wear a strapless or wide V-neck top so the artist can access the area. For hip or thigh appointments pick low-rise pants or loose shorts that the artist can roll or move without tugging. Packing a comfortable robe or loose shorts for the ride home helps avoid rubbing during the first 48 hours.
