
Small matching tattoos that actually look crisp after a few years are usually the opposite of what gets the most saves online. Ultra-thin scripts and tiny filigree can soften fast on wrists, ribs, and fingers. Pick designs with clear negative space, slightly stronger lineweight, or a motif that reads well alone as well as paired. The first idea dives into a simple fine-line heart that proves the point and shows how to make it last.
1. Fine Line Interlocking Hearts on Inner Wrist
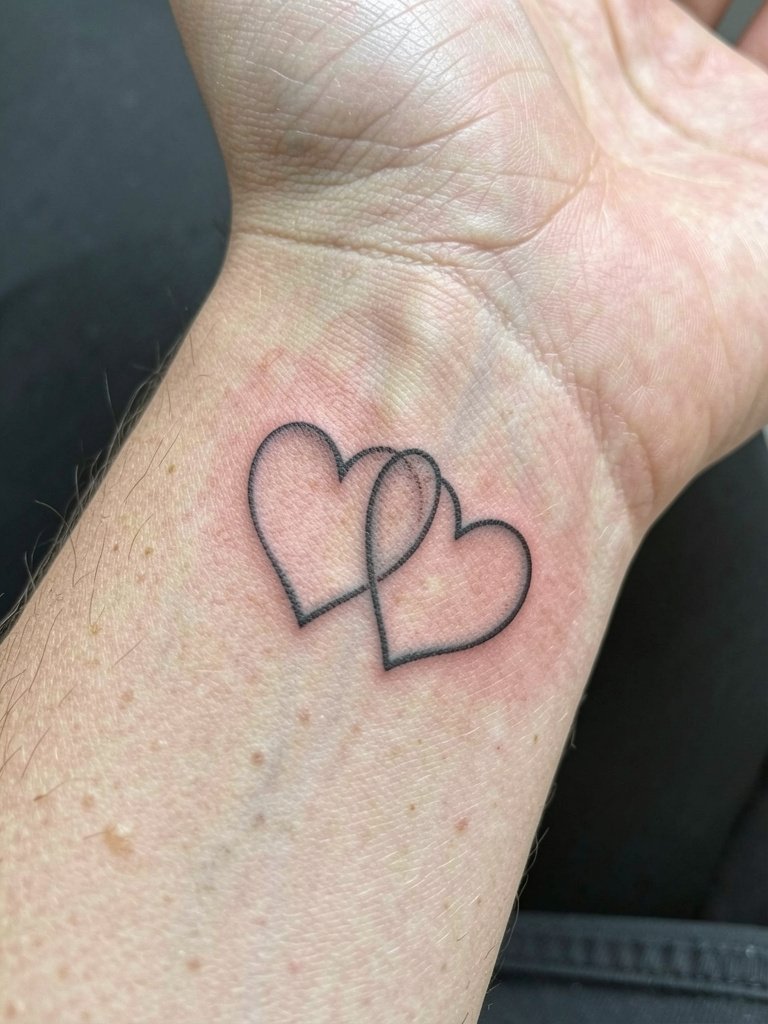
Tiny interlocking hearts read well because the shapes rely on negative space more than tiny detail. I recommend a single-needle outline that is a hair thicker than the Pinterest micro-heart. On the inner wrist the pain is a sharp pinch but short, and sessions usually run under 30 minutes. A common mistake is compressing too many tiny curls into each heart, which merges by year two. For longevity ask for clean continuous linework and slightly more spacing between the hearts so the gap stays visible at 6 months, 2 years, and beyond. This placement pairs nicely with rolled-up linen shirts and a dainty gold stacked bracelet set that keeps the look jewelry-like.
2. Matching Geographic Coordinates on Inner Forearm
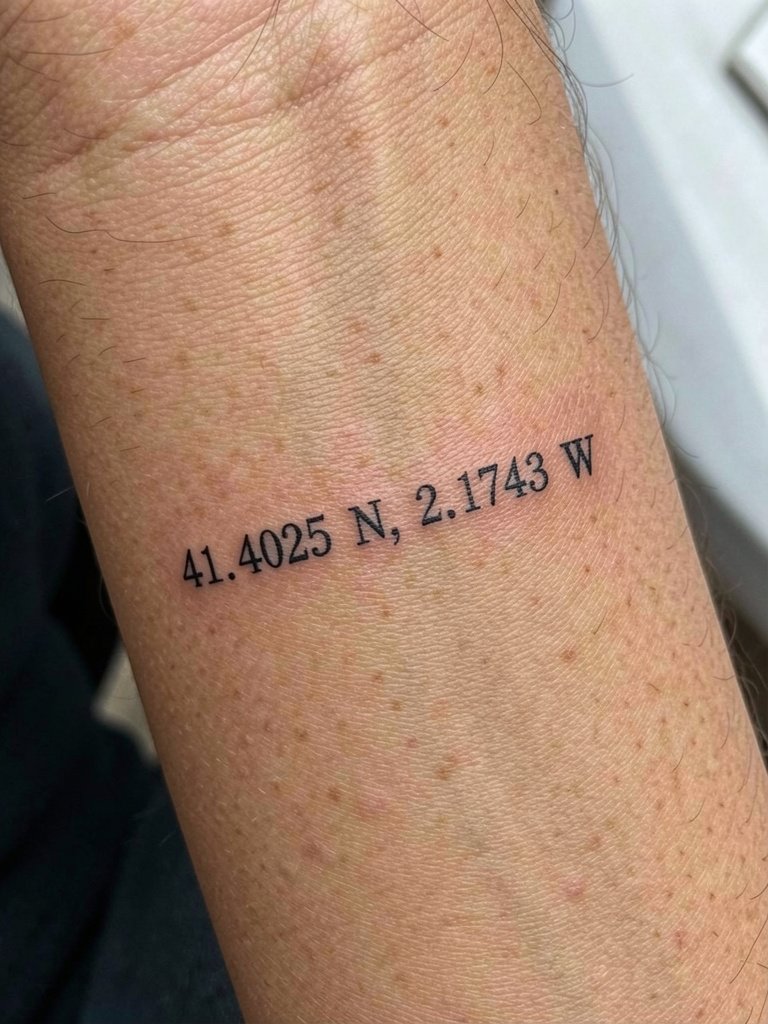
Coordinates are almost foolproof because they look complete on one person and even more meaningful when matched. For inner forearm placement the pain is moderate and sessions run about 45 minutes for two lines. The common error is using a decorative font that becomes illegible at small size. During consultation bring the exact numeric string and ask for a fine serif or monospace font optimized for readability at one inch. Over time the numbers may soften slightly but stay readable if linework is spaced. Show-off pairing: rolled-up button-down shirts and a thin chain bracelet on the opposite wrist. Grab a linen button down shirt for easy reveals in selfies.
3. Micro-Font Split Quote on Inner Forearm
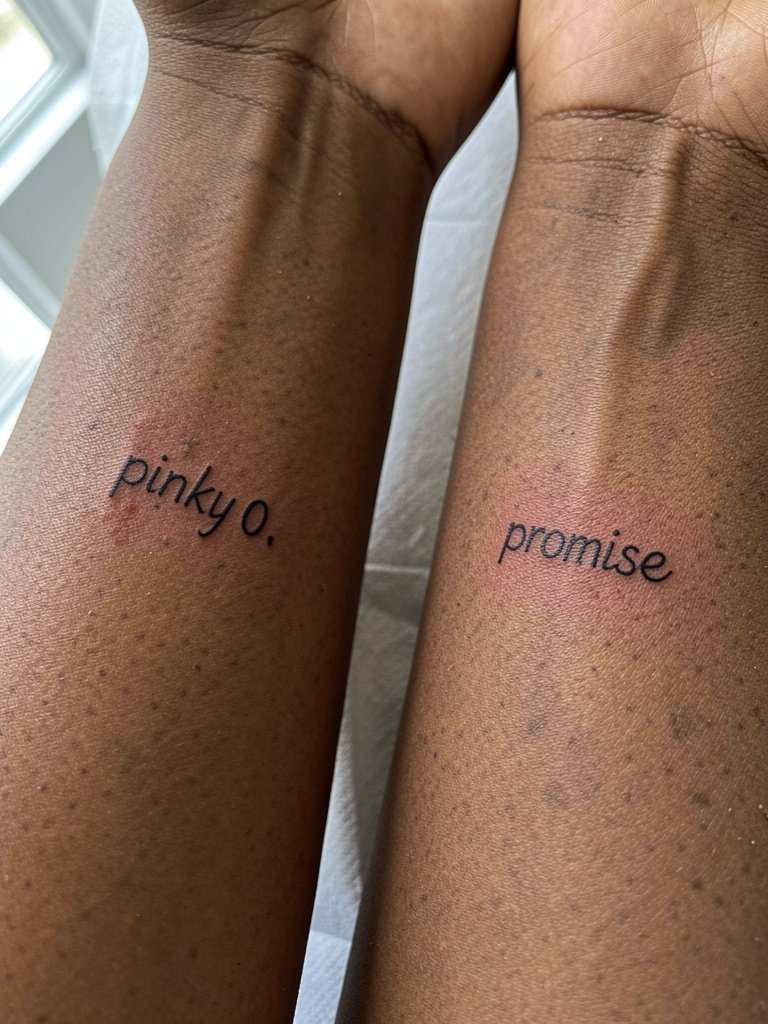
Split quotes work when each half reads as a small, attractive word on its own. Pain and session time mirror the coordinates placement. The biggest mistake is choosing a long sentence that needs many characters, which gets cramped and blurs. Instead limit each side to one to three short words, and have the artist map how the two halves line up when arms are side-by-side. If you plan to photograph the pair from a distance, ask for slightly bolder type so it still reads in phone photos. For showing the design, wear a rolled cuff shirt that frames the forearm without covering the ink.
4. Infinity Loop with Initials on Lateral Hip Bone
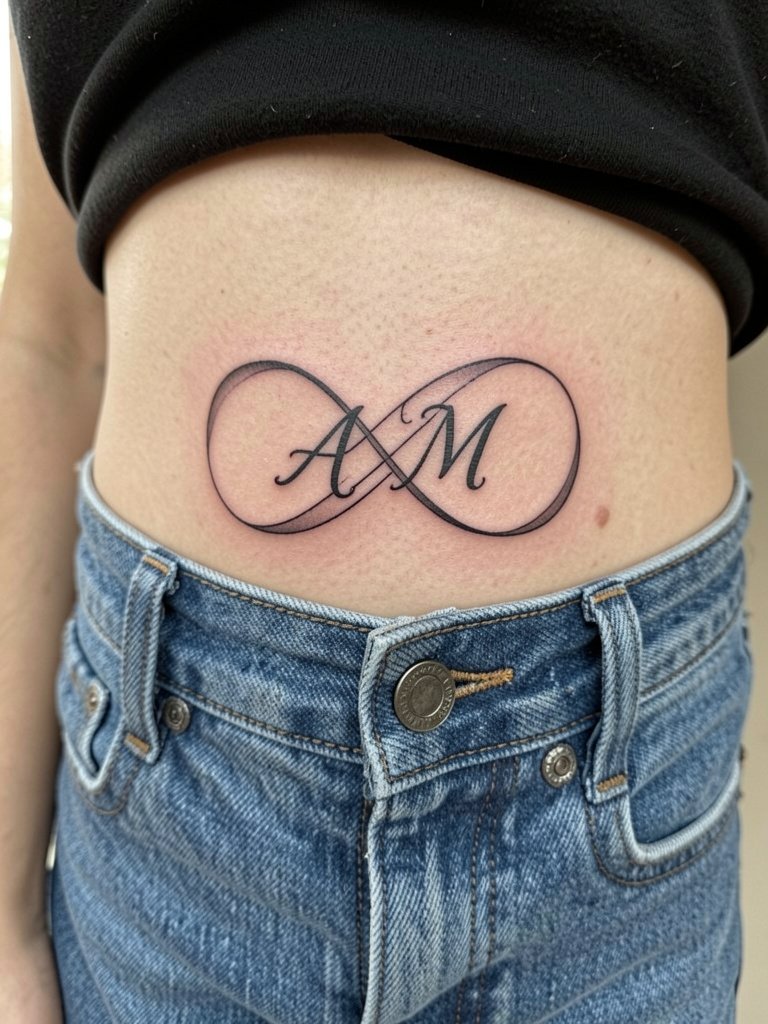
An infinity loop with initials reads as jewelry and works well on the lateral hip where the design can be tucked or shown. The area is moderate pain and sessions are brief. A common aging error is making the initials too ornate inside the loop, which fills in. Tell your artist to keep initials simplified and to leave negative space around them. This placement benefits from low-rise jeans or crop tops for showing off. For the appointment wear loose pants that can be lowered safely, like low rise jeans.
5. Tiny Paper Plane on Shoulder Blade
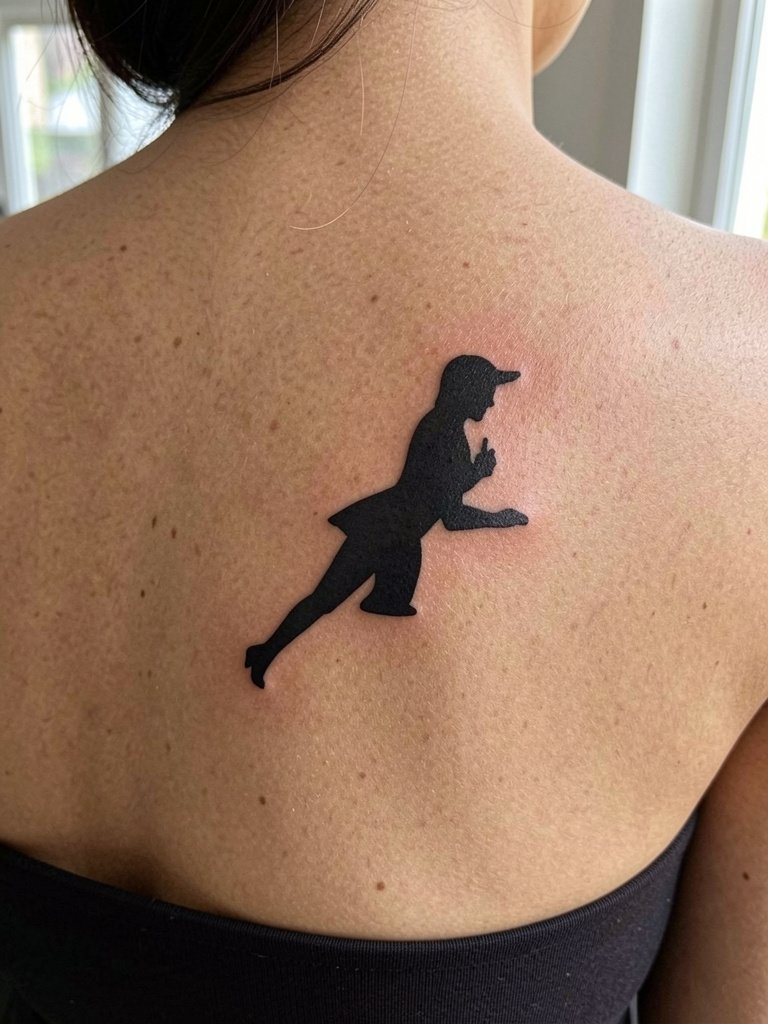
A small paper plane is travel shorthand and ages well because it is a silhouette, not tiny detail. Shoulder blade sessions are low-pain and quick. The mistake is trying to add tiny hatch lines or texture that vanish as the ink spreads. Keep the plane a clean solid shape and expect a touch-up in a year if you want the edges razor sharp. Show-off advice: wear backless tops or strapless dresses in solid colors. A good evening pick is an open-back midi dress that frames the plane.
6. Complementary Sun and Moon on Collarbone
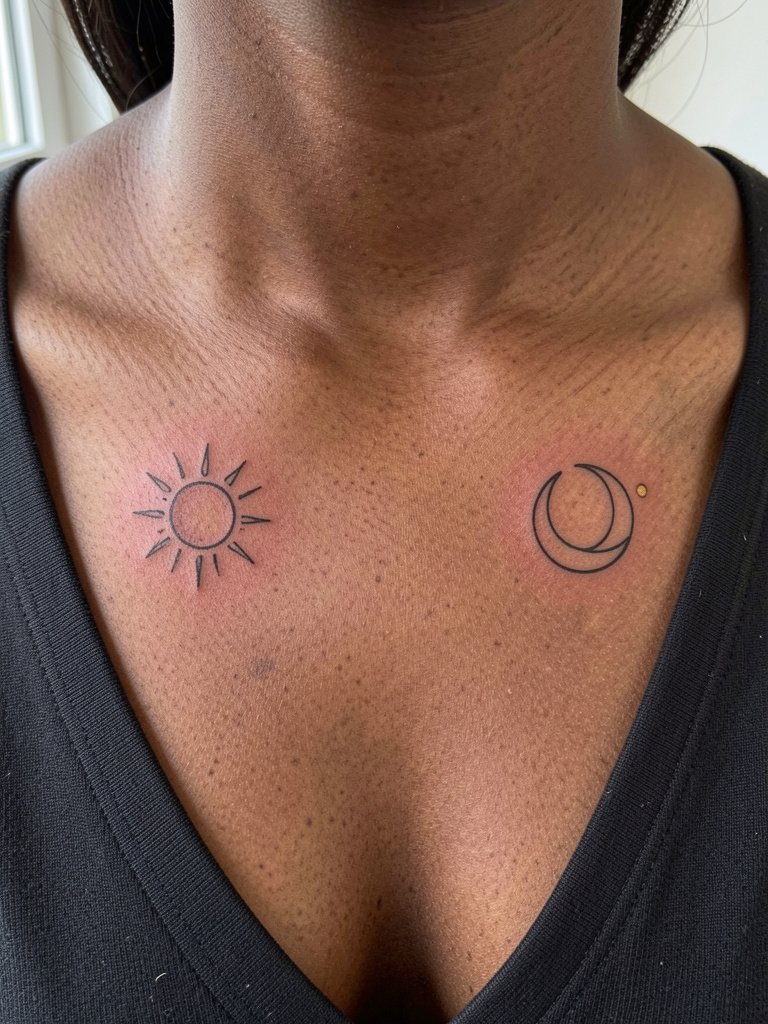
Sun and moon pairs perform well because each design stands alone. Collarbone work hurts more than a forearm but less than ribs, and sessions are usually under an hour. Artists often debate fine-line use here. One camp says the collarbone area moves and fades fast, so slightly bolder contour lines hold up better. The other camp argues that a careful single-needle approach with good spacing can settle beautifully. A mistake is overlapping necklace chains directly over the tattoo during the session. For showing off, pair with V-neck tops and delicate layered necklaces that sit above the ink. Try a layered delicate necklace set.
Pre-Session Essentials
The wrist and collarbone pieces above heal very differently from ankle or hip work, so a few items smooth the session and the first week.
- Tattoo Grove Healing Oil. Lightweight oil for day 7 plus that keeps fine-line work pliable and avoids heavy greasiness that can clog small needle channels.
- After Inked Lotion. A gentle, low-irritant lotion that helps black ink maintain contrast without adding pigment-shifting ingredients.
- CeraVe Tattoo Cream. Dermatologist-tested moisturizer for sensitive skin types during the later healing phase.
- Mad Rabbit Tattoo Balm. Thinner than petroleum-based ointments for day 4 plus and helpful when you need a non-greasy layer over delicate linework.
- Saniderm Second Skin (sheet). Breathable protective film for the first 48 to 72 hours after a session, useful on hands and wrists where friction is constant.
7. Puzzle Piece Duo on Inner Forearm
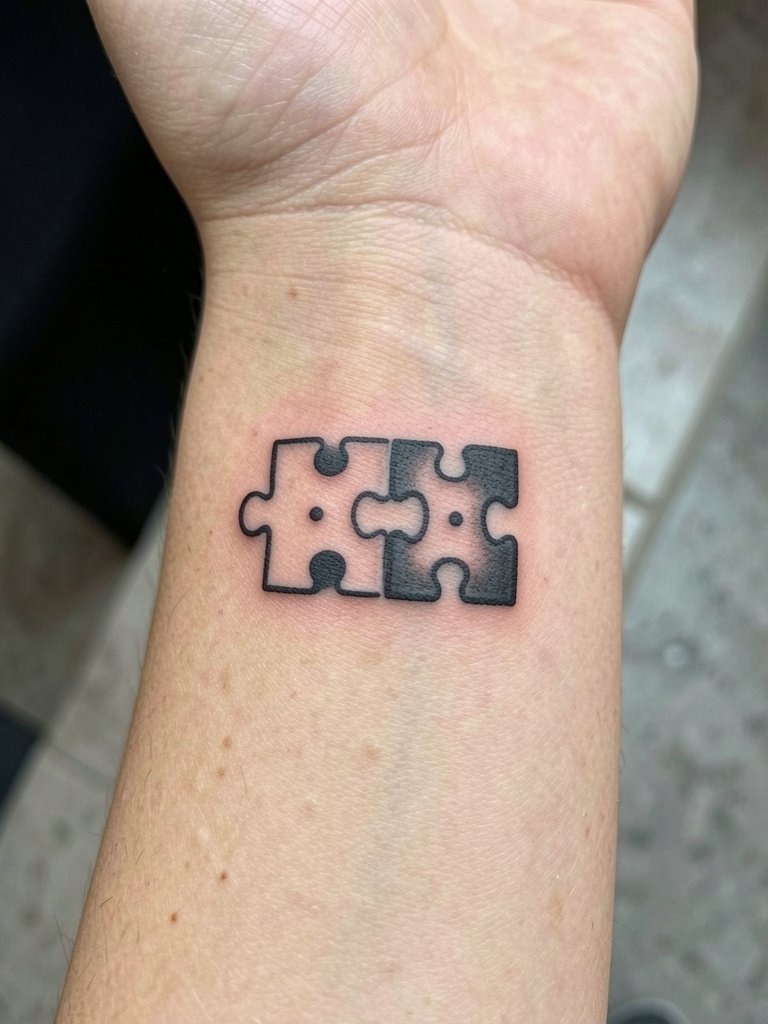
Puzzle-piece tattoos are graphic and forgiving because the visual read relies on silhouette. For inner forearm placement the pain is manageable and session time is short. A frequent mistake is adding tiny interior linework that fills in; keep the notch clean. Ask for bolder outlines if you both tend to skip touch-ups. This motif photographs well with rolled-up sleeves and a thin chain bracelet. Consider a thin chain bracelet set as an outfit accent.
8. Initials Script on Side of Finger
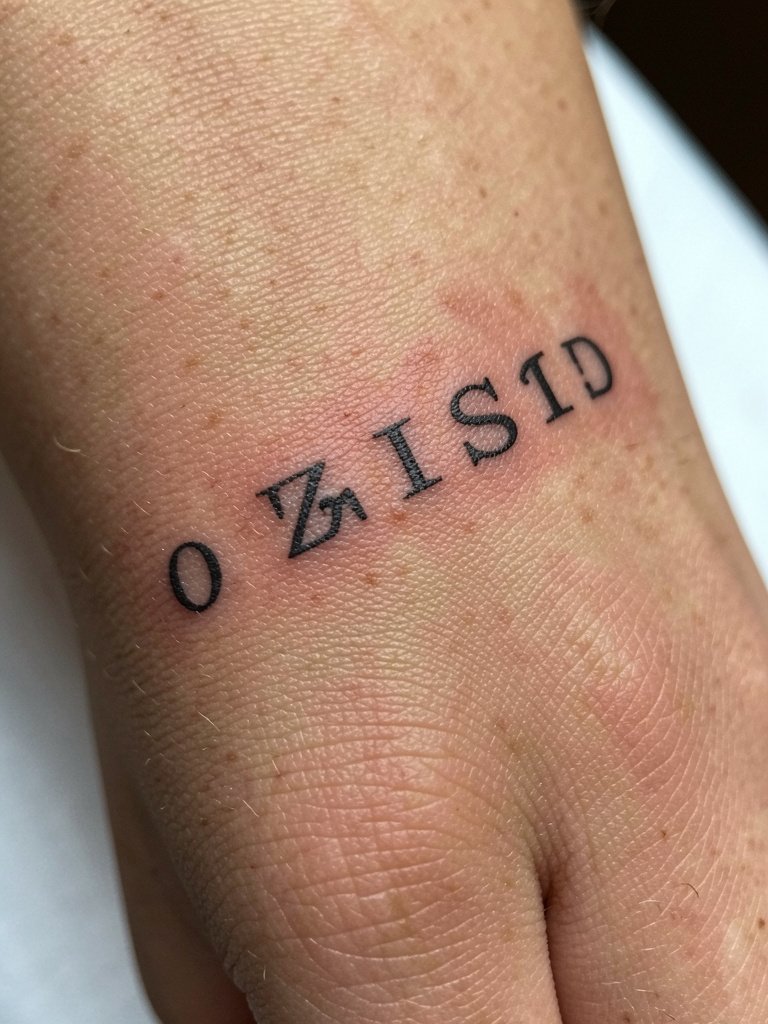
Finger side initials are ultra subtle but high-maintenance since the skin there regenerates quickly. Pain is sharp and healing needs extra care. The common error is choosing an ornate serif that flakes in the first few months. Ask for a compact, sturdy glyph and expect touch-ups within 12 to 18 months. Styling tip: keep rings minimal or wear a thin gold ring on the opposite hand. A good minimalist ring set is searchable as thin gold ring set.
9. Intertwined Hands (Pinky Promise) on Inner Wrist
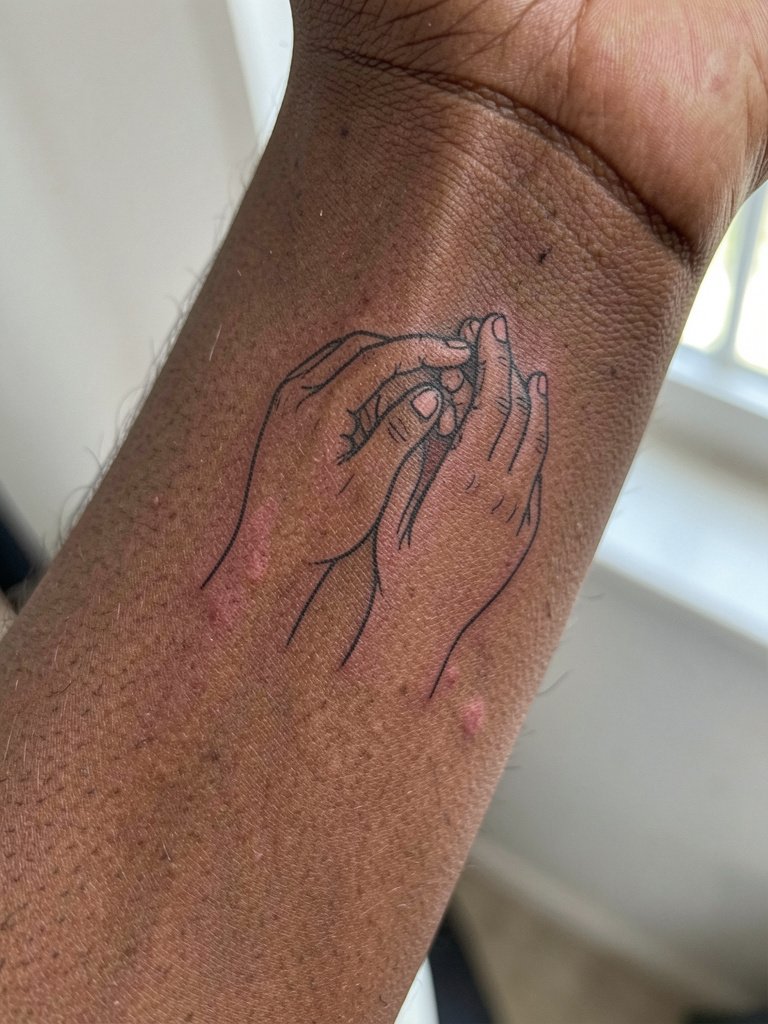
A single continuous line for hands makes the image look intentional rather than cramped. The wrist is sensitive and that pinch is short for a small outline. Mistakes happen when artists try to cram finger detail into a tiny space. Tell the artist to emphasize the handshake silhouette and leave out knuckle creases. For session wear choose a loose short-sleeve top for full wrist access and consider a linen short sleeve shirt for the reveal.
10. Lotus Flower Pair on Ankle
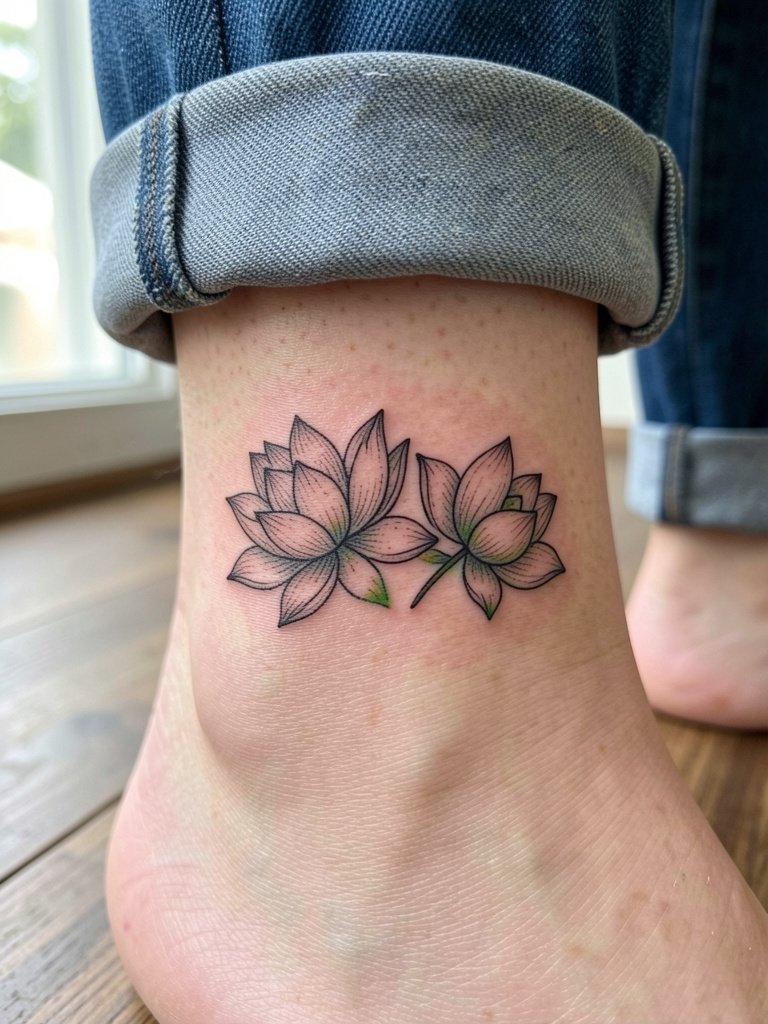
Lotuses read clearly because petals create distinct shapes. The ankle suffers from friction, so the mistake is placing too much tiny stipple shading that turns patchy. Choose slightly bolder petal outlines for better longevity. Sessions are quick and pain is moderate. Show-off pairing includes strappy sandals and cropped linen pants. Try strappy sandals in summer.
11. Heartbeat Line (ECG) on Sternum
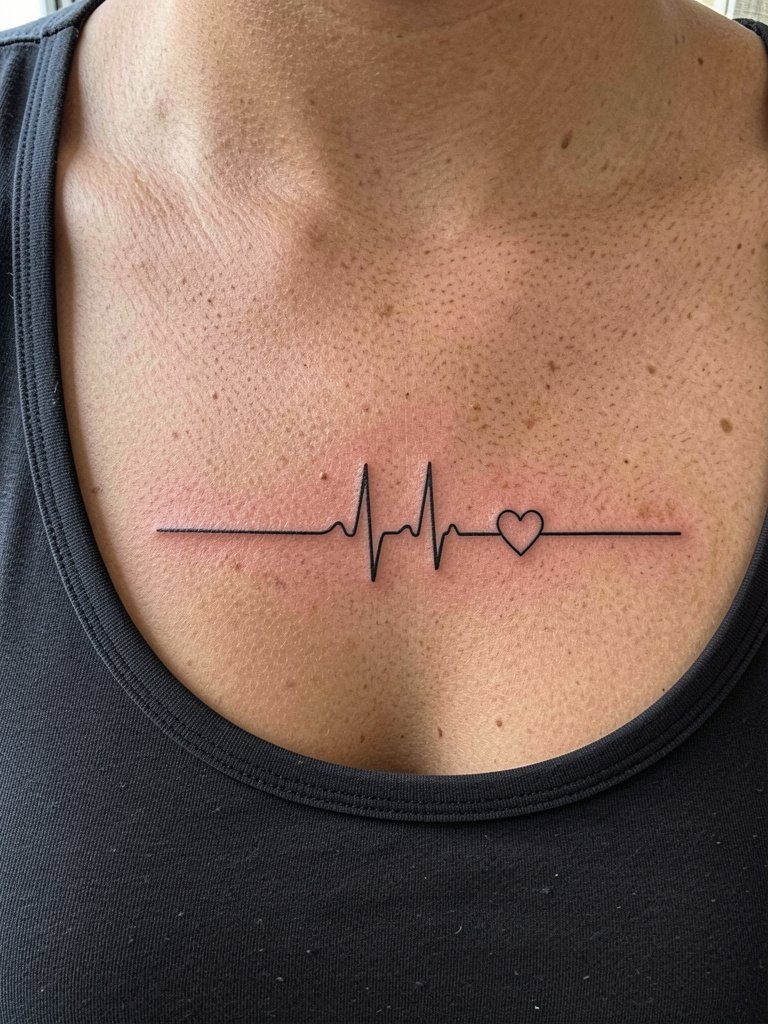
Sternum work is intimate and has a different healing profile. Pain tends to be higher and sessions can take longer if the line needs to cross a curving surface. The common blunder is making the peaks too fine. On the sternum, a slightly stronger line holds better over time. For session comfort wear a scoop-neck or V-neck top that can be lowered safely and avoid bras with underwire during the appointment. A good session top is a scoop neck tank.
12. Minimalist Twin Towers on Outer Upper Arm
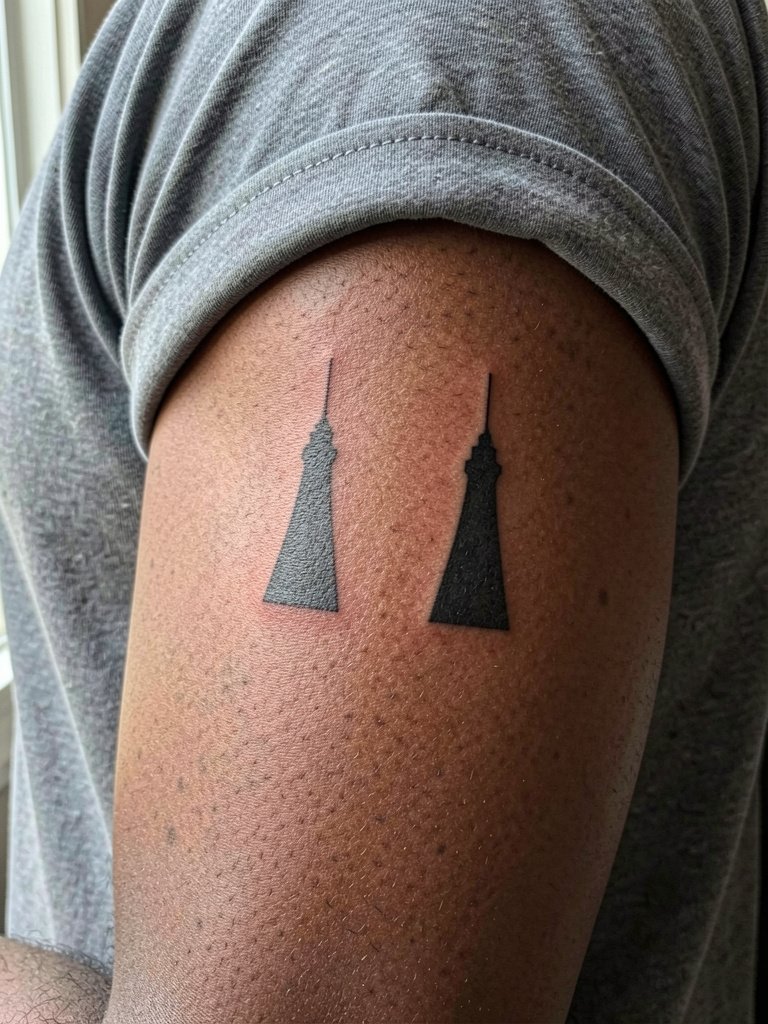
Bold silhouettes like simple towers resist blowout because they rely on form, not fine detail. Outer upper arm is a low-pain, low-motion zone that ages well. A mistake is over-stylizing the towers with tiny bricks. Keep the shapes pure and expect minimal touch-up. This spot is ideal for short-sleeve shirts and tank tops. Pick a tank top for easy reveals.
13. Opposite Direction Arrows on Inner Forearm
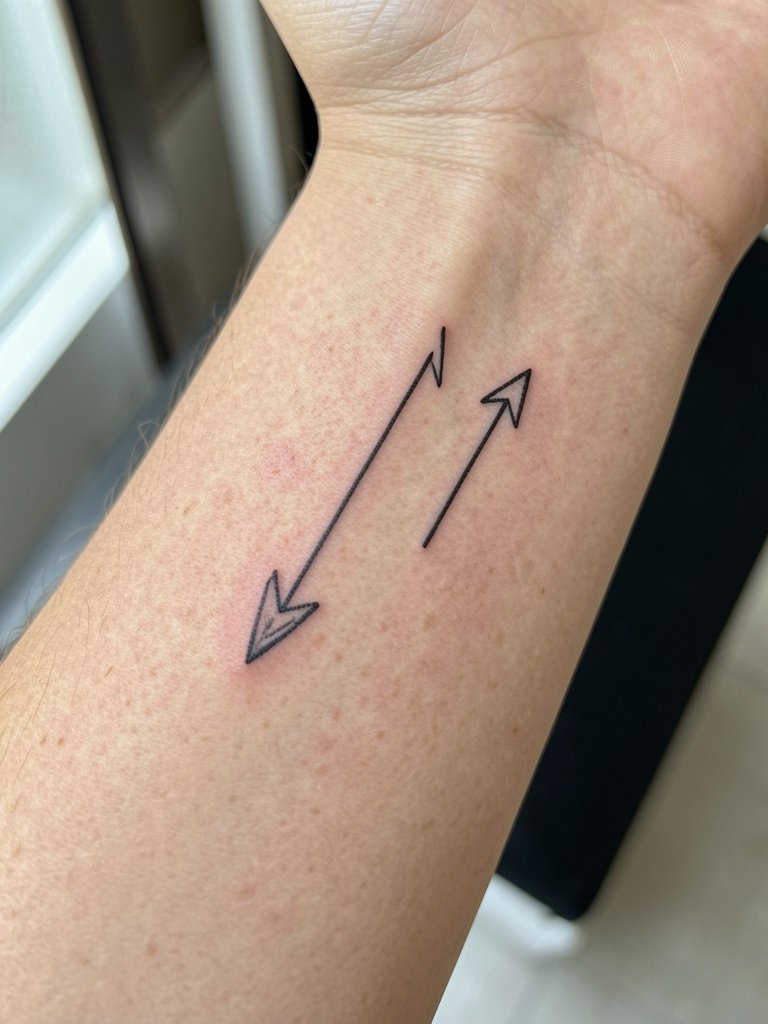
Opposite arrows are a concise symbol for diverging paths that stay connected. Thin linework works here but avoid making the shafts microscopic. A common misstep is adding feathered fletching that blurs into a smudge. For long-distance friendships this reads well in selfies. Pair with rolled-up button-downs and avoid watches on the tattooed wrist. Search for a rolled cuff shirt for styling.
14. Micro-Heart on Finger
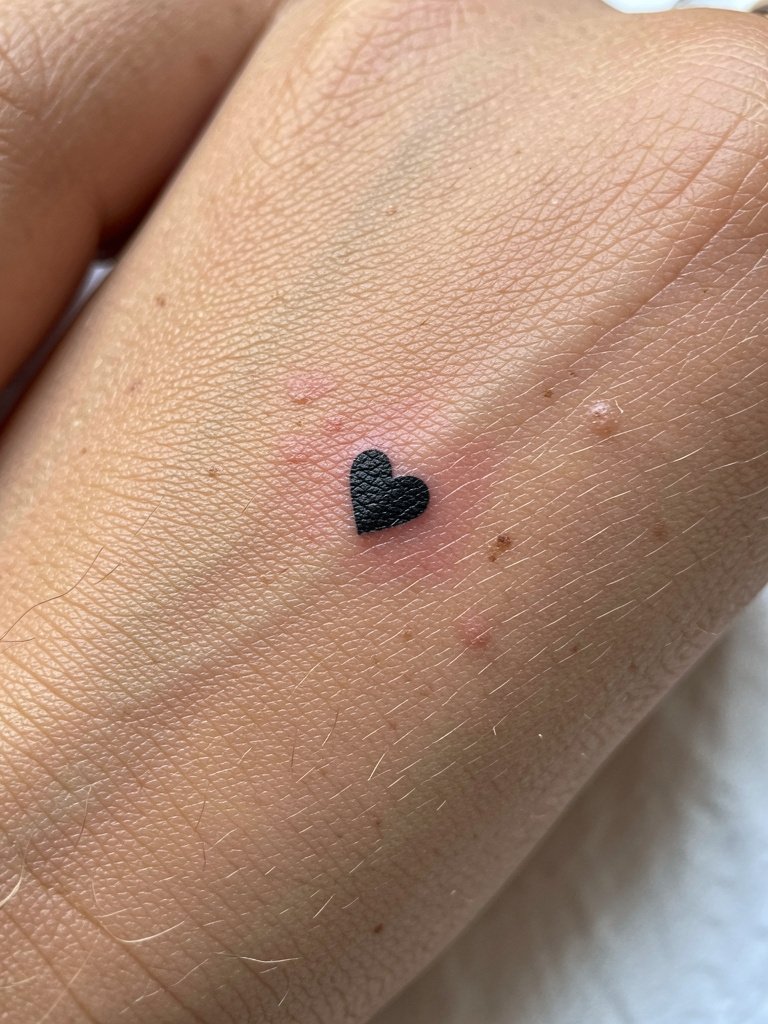
Finger hearts are minimal and carry the risk of fast fading. Expect a sharp sting and quick session. The biggest mistake is making the heart any smaller than 0.5 centimeters. Also plan for a touch-up within 12 months. For styling, keep rings thin or wear none on the tattooed finger. A simple dainty ring stack complements the look.
15. Star and Crescent Moon on Nape
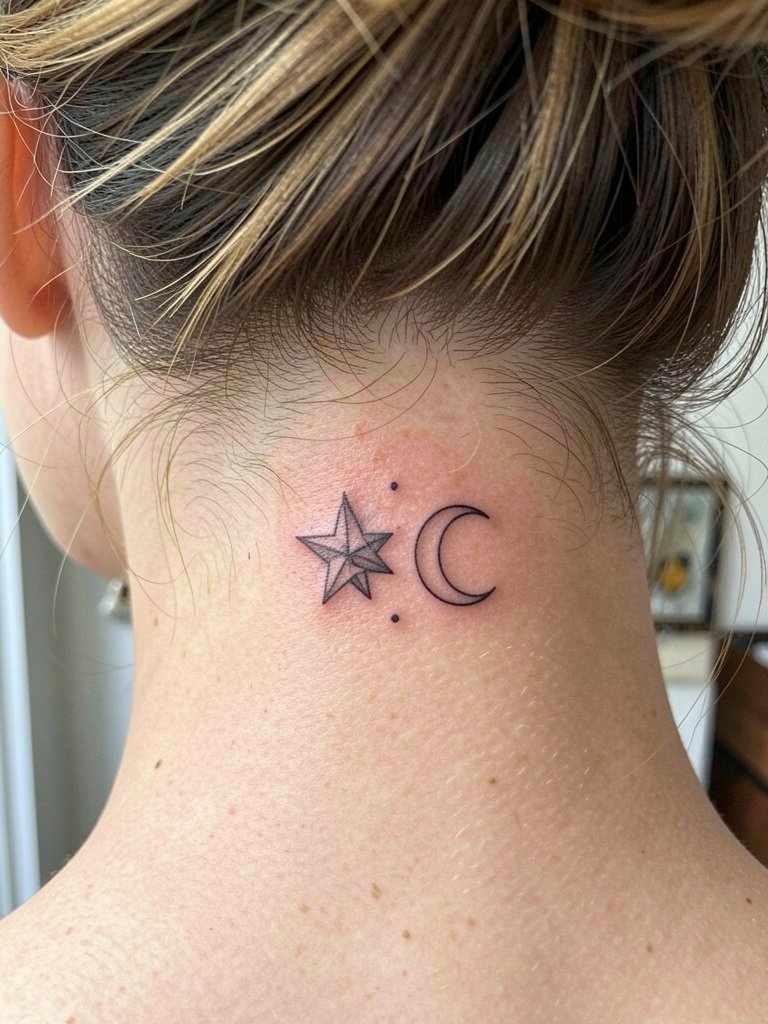
Nape tattoos are great small reveals when you wear hair up. The spot is low to moderate pain and sessions are quick. A common error is over-ornamenting the moon with minute shading that fills in. Keep the moon and star crisp and expect color to stay truest with black ink only. Style with hair accessories that do not cover the area. Try a thin headband gold for subtle framing.
16. Minimalist Anchor on Side of Ankle
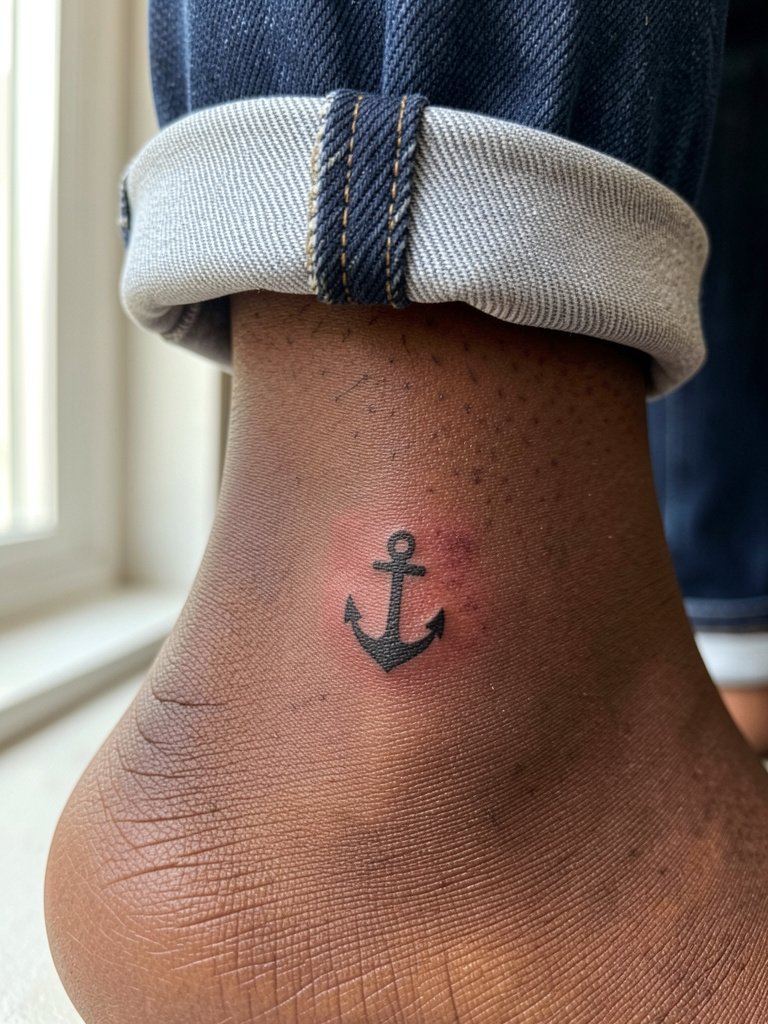
Anchor motifs are iconic and rely on a clear silhouette, which helps them last on ankles where friction is common. Sessions are fast and pain is moderate. The typical error is adding micro rope detail that softens. Choose bold, simple lines and plan footwear that shows the ankle, such as strappy sandals. A strappy sandal works well for summer looks.
17. Tiny Matching Constellation on Outer Forearm
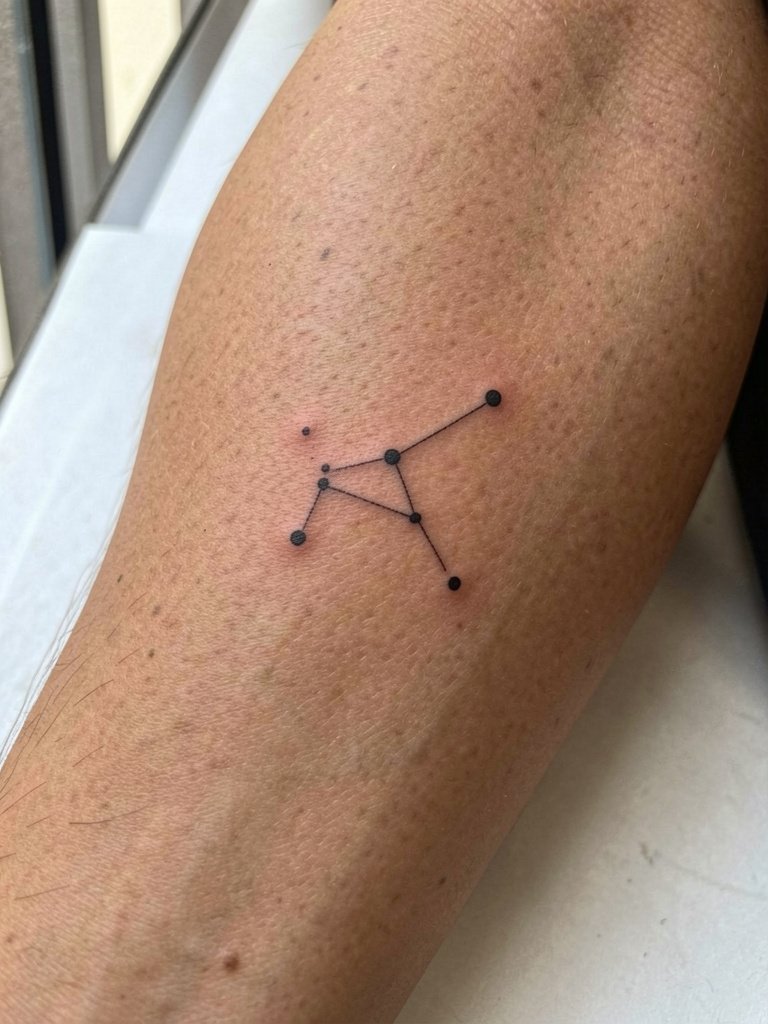
Constellation dots and connecting lines are low-risk designs that still feel personal. The outer forearm is low pain and ages well. A mistake is clustering too many tiny dots that blur together. Keep spacing deliberate and expect a lightening at two years that a small touch-up can correct. For showing off try short-sleeve tops and a thin chain bracelet set.
18. Small Anchor Chain Link on Inner Wrist
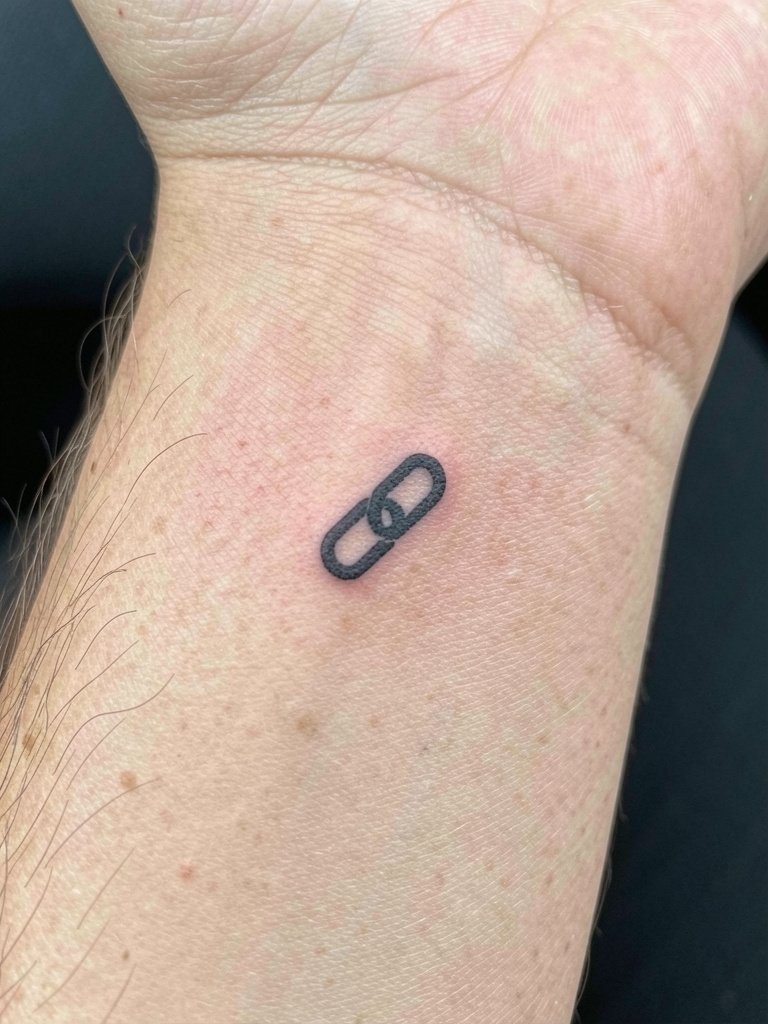
One-link chain tattoos read like jewelry and are simple to maintain. The inner wrist is sensitive but sessions are short. People sometimes choose a too-thin chain that vanishes; request a lineweight that stays visible in photos. For appointments wear a loose short sleeve top and consider dainty bracelets on the opposite wrist.
19. Minimal Compass Point on Ribcage
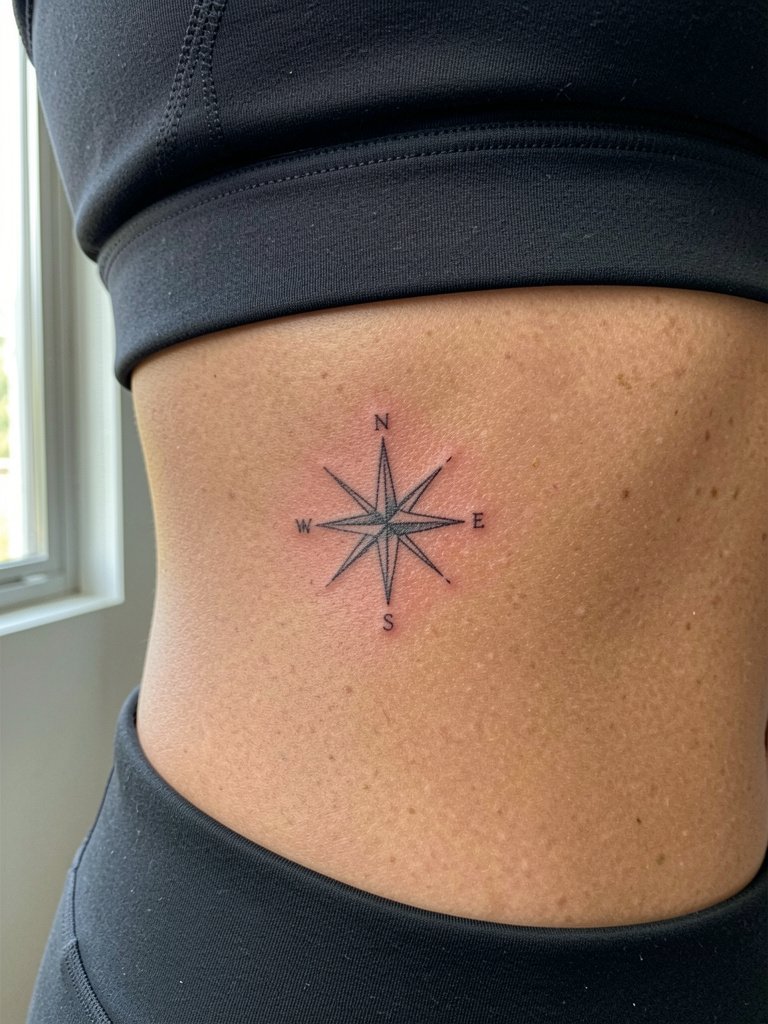
Ribcage placements split artists into two camps. One group says fine line on ribs blurs within two years because that skin stretches and compresses frequently. The other group argues that with correct needle depth and slightly wider spacing, fine lines settle fine and can look great at three years. If you want ribs, plan for slightly bolder linework and accept a higher chance of touch-up than on forearms. Numbing cream discussions matter here, so be specific about timing and effects.
20. Tiny Wave Motif on Lateral Hip
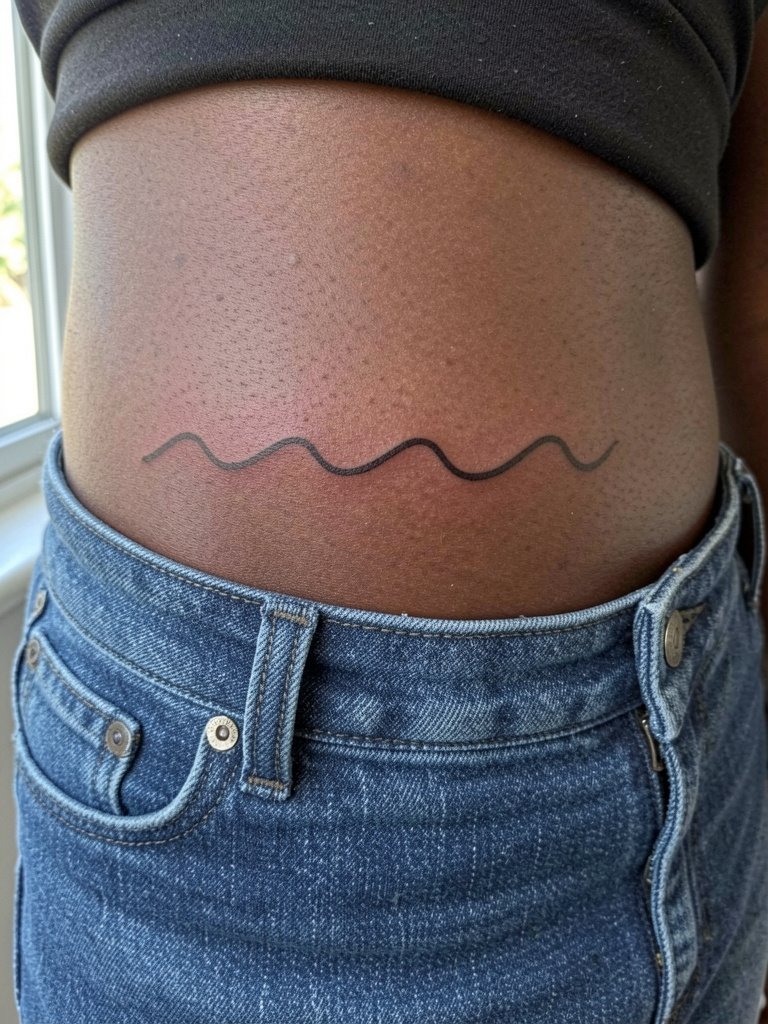
Wave motifs are clean and photograph well on hips. Pain is moderate and sessions are brief. The frequent misstep is doing tiny stipple shading that the area cannot hold. Keep the wave a continuous, slightly thicker line. Low-rise jeans and crop tops show this placement best. For the appointment wear loose pants that can be lowered safely.
21. Small Lock and Key Duo on Inner Bicep
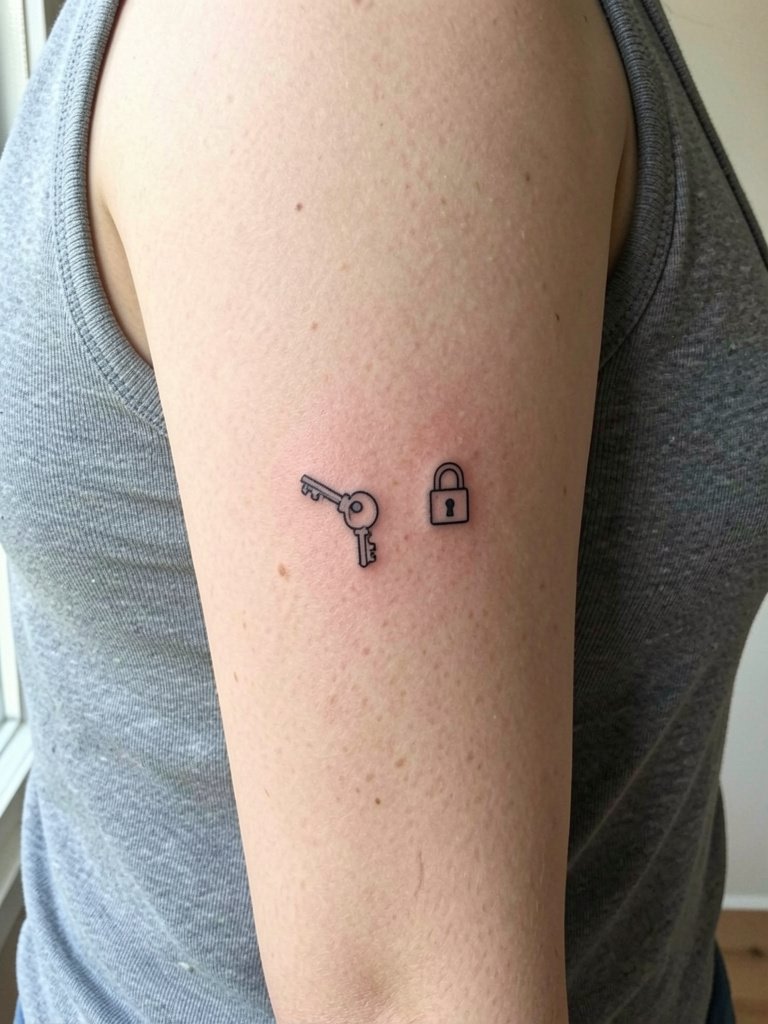
Inner bicep work reads as private and looks great when revealed. Pain is moderate and the area is smooth so fine detail can hold if not too minute. The mistake is cramming ornate teeth into the key. Simplify shapes, keep silhouettes clear, and expect touch-ups in two years if you want sharp teeth detail. For the session wear a sleeveless tee so the artist can access the inner arm easily. A tank top is ideal.
22. Minimal Wave Band Behind the Ear
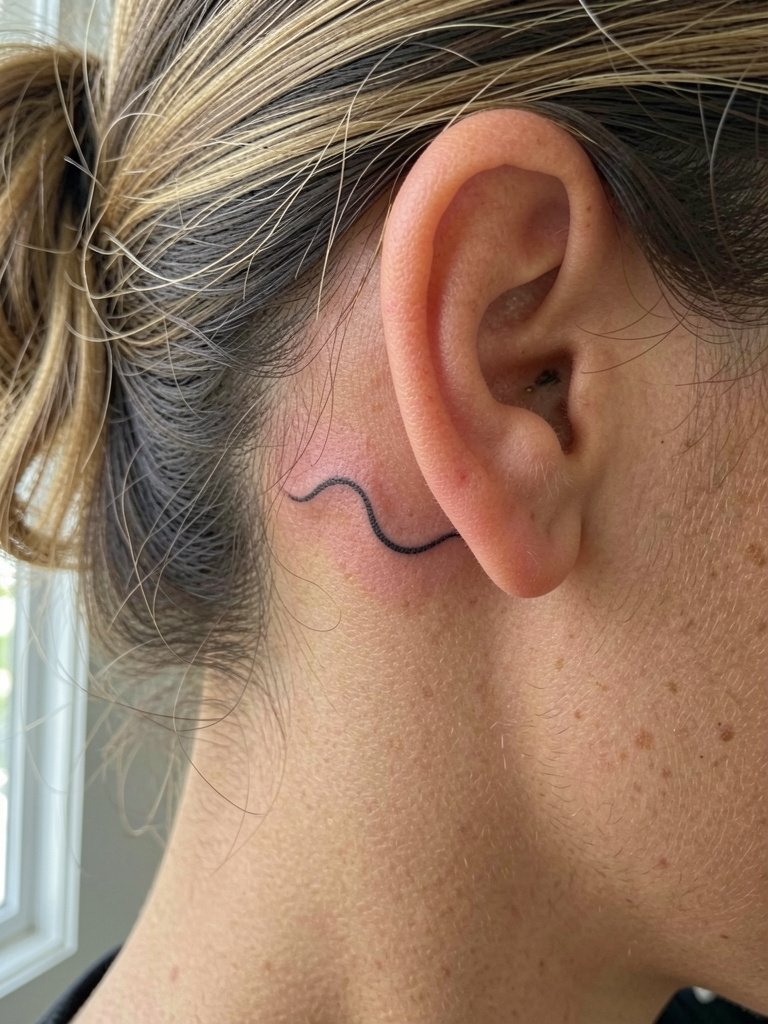
Behind-the-ear placements are tiny reveals and low pain. Because the skin is thin, avoid ultra-fine curls that can disappear. Keep the line continuous and slightly stronger than the thinnest single-needle. Style-wise, push hair back or use a natural updo to show the mark without changing daily grooming too much.
23. Small Roman Numeral Pair on Collarbone
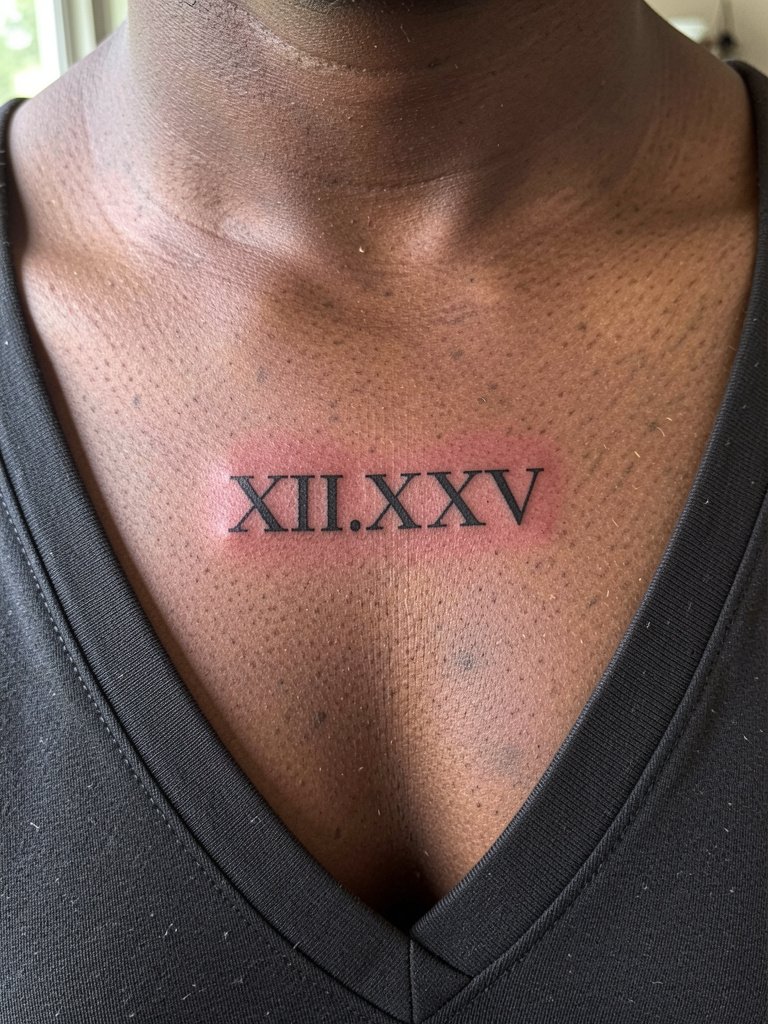
Roman numerals read like jewelry and are very legible when kept short. Collarbone skin moves but numerals held with slightly thicker strokes maintain clarity. Avoid choosing too many digits. For showing off layer delicate necklaces above the numerals and wear a v neck top to frame the area.
24. Tiny Origami Crane on Upper Thigh
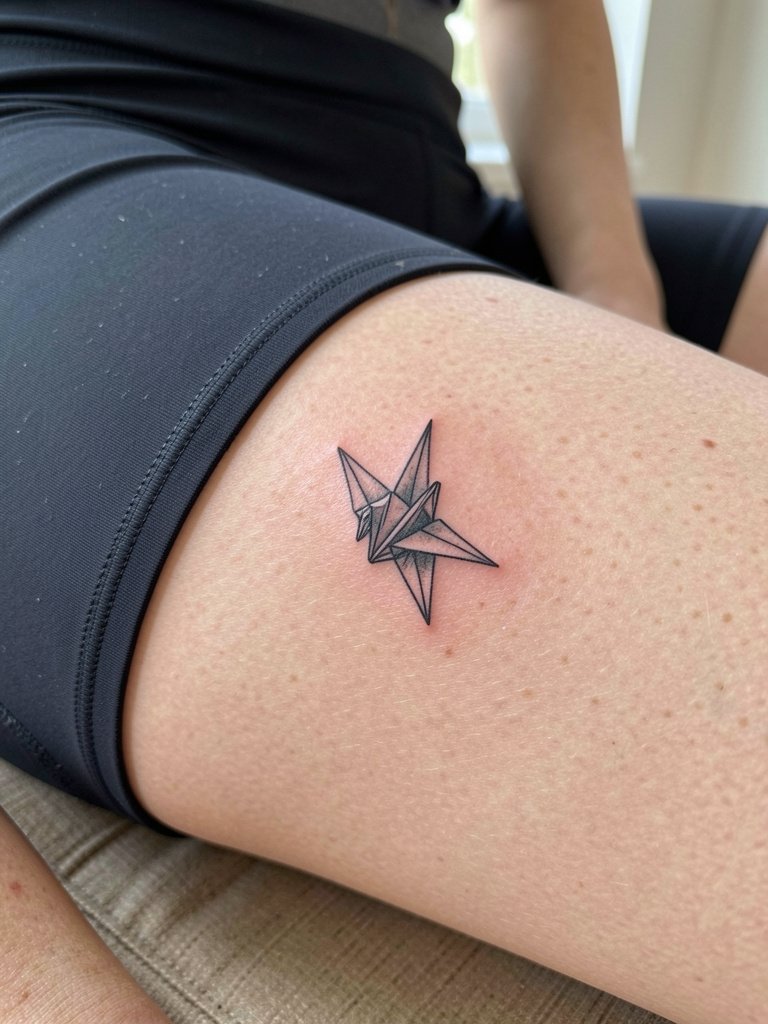
Inner thigh designs can be intimate and hold detail if you keep the size sufficient. Pain is moderate and sessions can be a touch awkward because of positioning. A common error is placing the crane too near the groin; put it mid-thigh instead. For the session wear modest athletic shorts that stay in place so the artist can work without fabric shifting.
25. Tiny Anchor Dot on Top of Foot
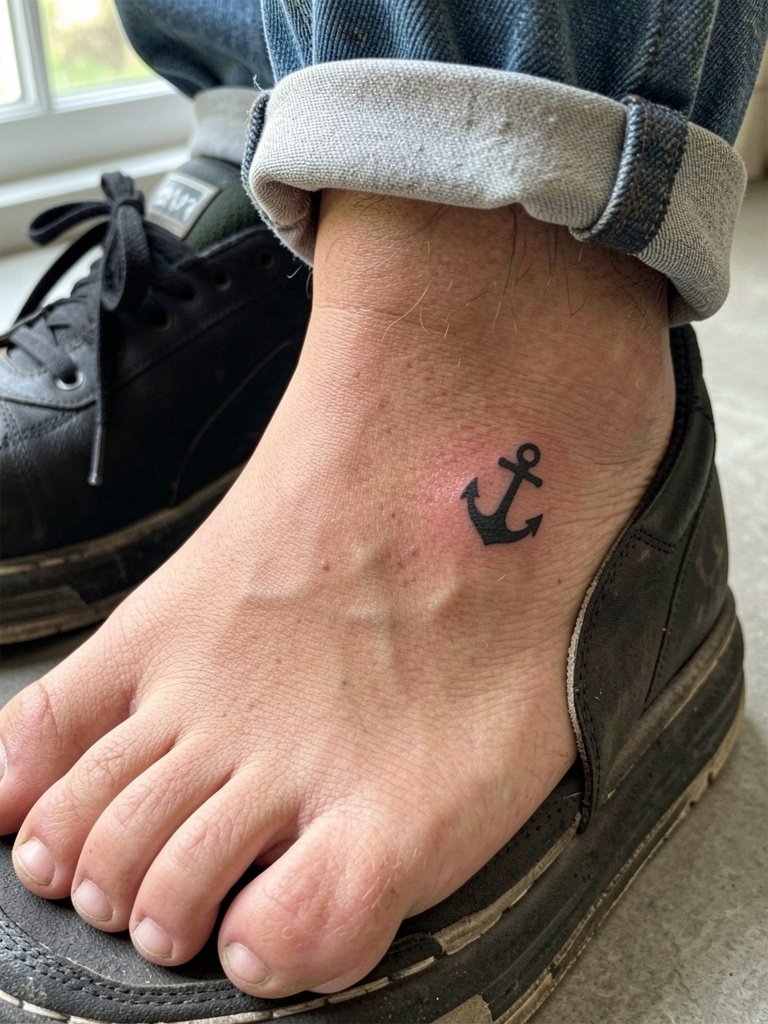
Top-of-foot tattoos face abrasion from shoes so solid silhouettes survive better than fine detail. The area is sensitive and sessions may sting more. Avoid tiny stipple work and expect some fading from friction. Sandals and cropped pants show this placement best. Search for ankle strap sandals that keep the top of the foot visible.
26. Morse Code Dots and Dashes on Inner Wrist
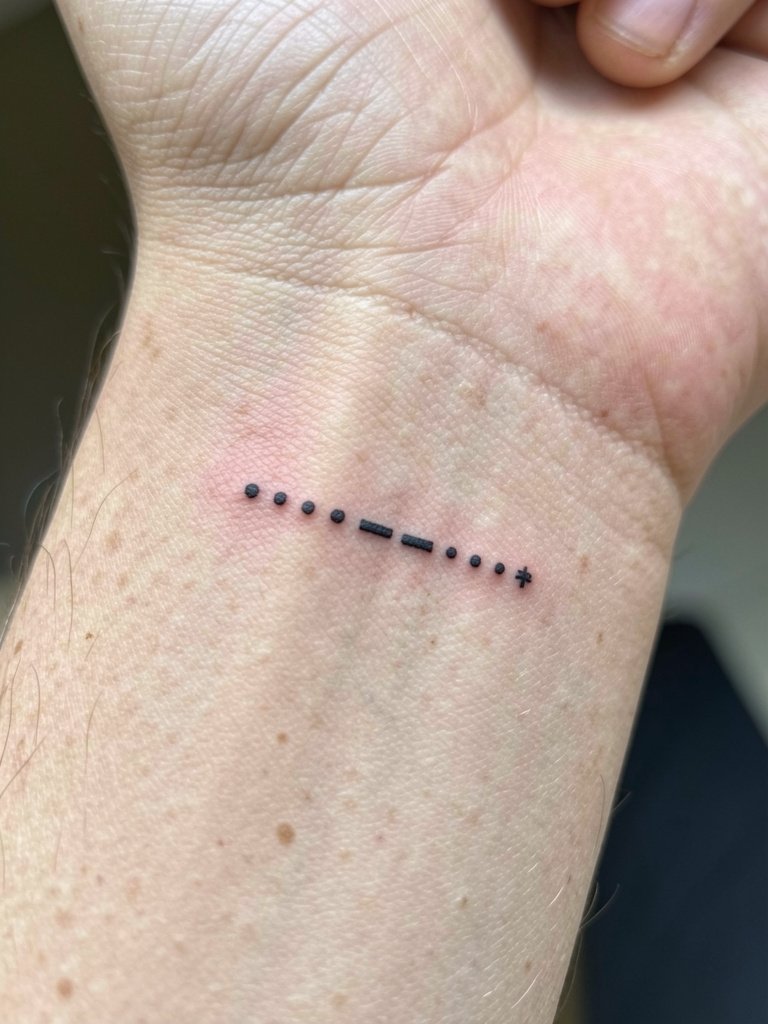
Morse code is a discreet way to carry a short message that reads only if decoded. The wrist is sensitive but this motif uses simple marks so sessions are fast. The error is spacing marks too close. Ask for deliberate spacing so the pattern stays legible as the skin shifts. Wear a linen short sleeve shirt for photography-friendly reveals.
27. Tiny Matching Seedling on Behind the Ear
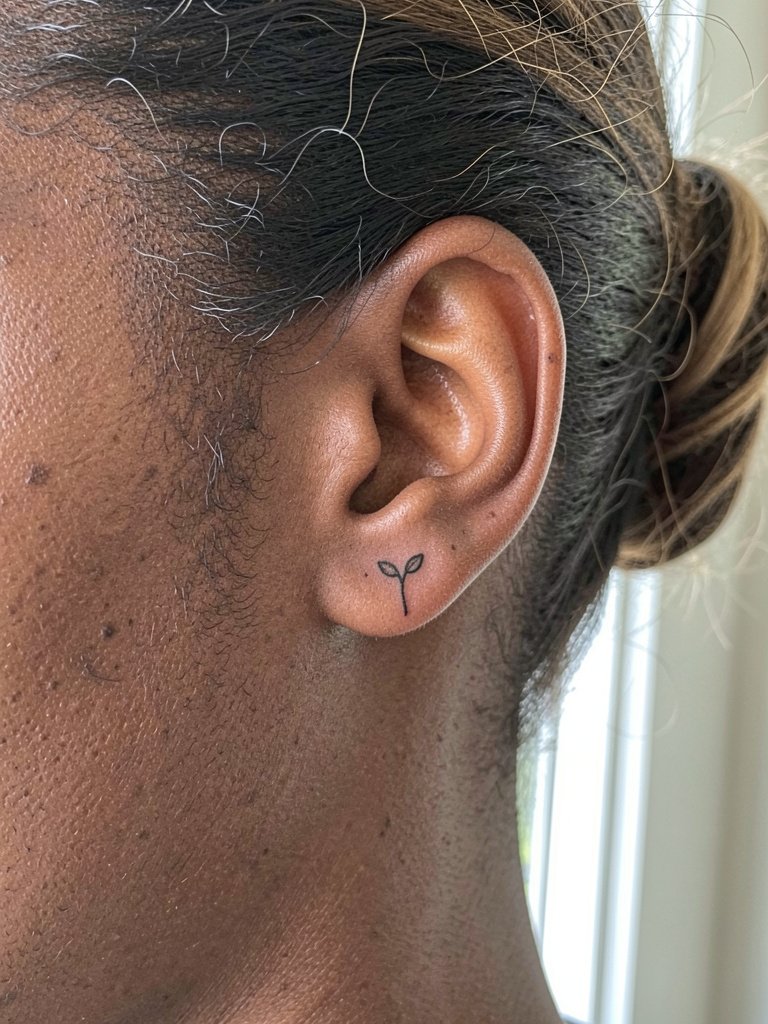
Behind-the-ear seedlings are private and sweet. The area is low pain but tiny marks can fade. Keep the sprout single-stem and avoid tiny leaf venation. For styling, pull hair up when you want the mark to show and use simple hair accessories that do not cover it.
28. Small Matching Crescent Row on Outer Wrist
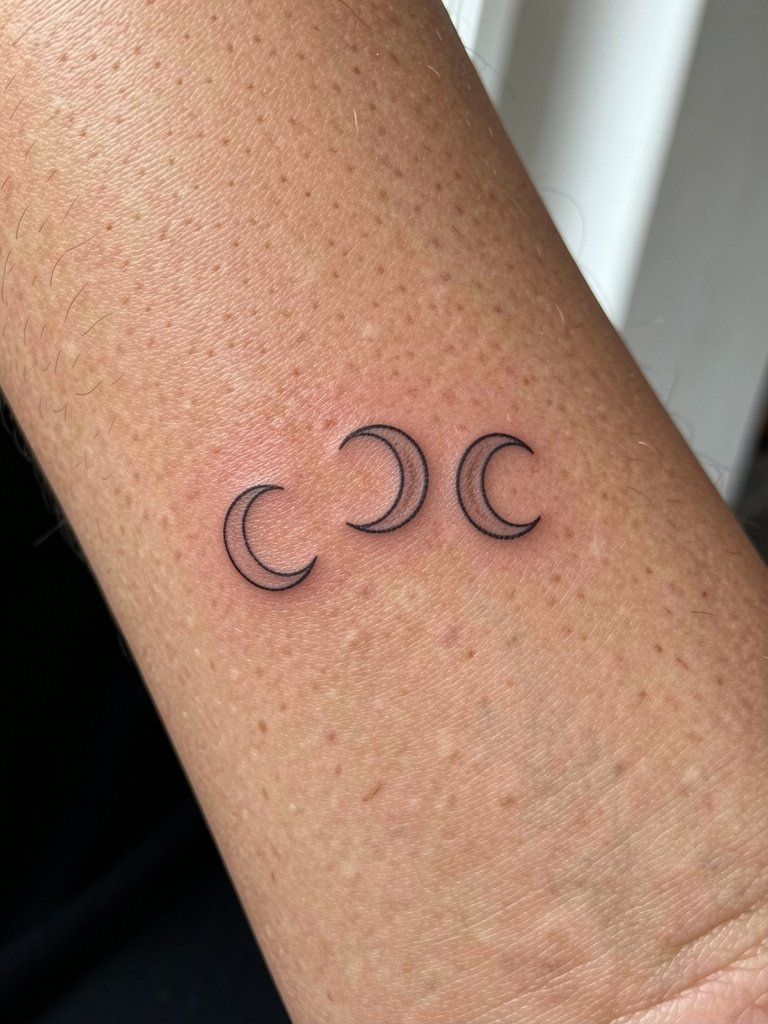
A row of crescents is decorative and holds well if each crescent has enough space. Outer wrist placement is slightly less sensitive than the inner wrist and photographs nicely. The common mistake is scaling each crescent too small. For showing off try short-sleeve tops and avoid bracelets on the tattooed wrist. A thin chain bracelet set on the opposite wrist keeps the focus balanced.
29. Tiny Matching Seed Coordinates on Collarbone
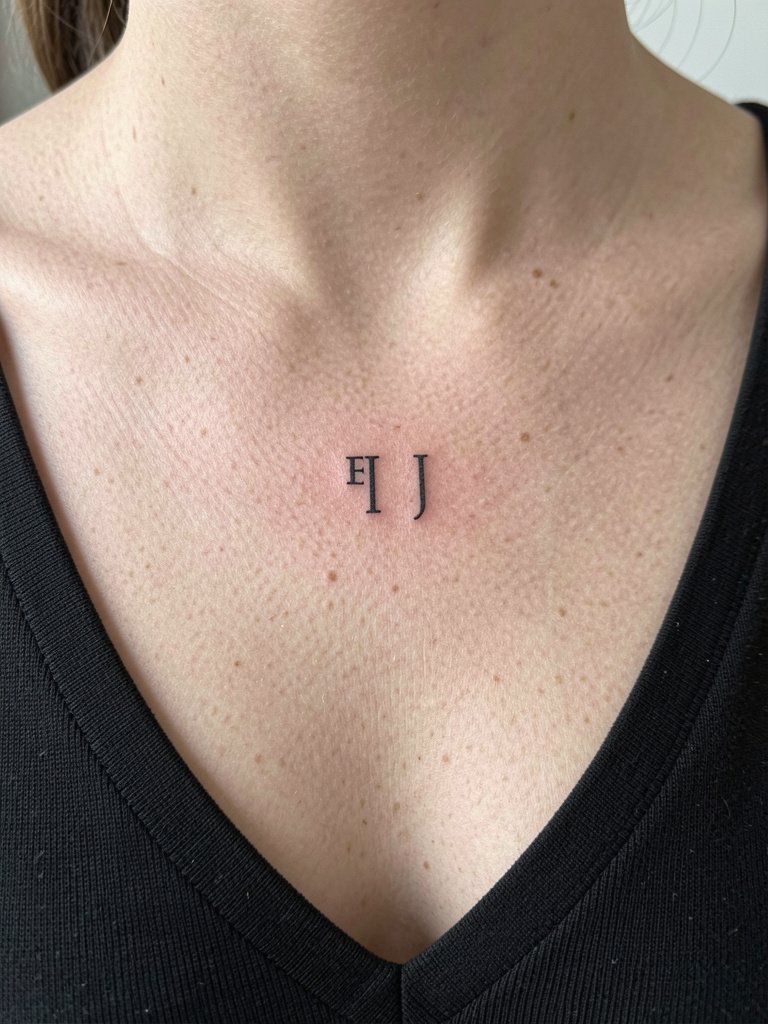
Placing coordinates on the collarbone gives a discreet, jewelry-like read. The area is moderately sensitive and sessions are under an hour. A design that is too typewriter-fine can blur, so ask for a slightly heavier serif weight. For showing this placement wear V-necks and layer delicate necklaces above the ink. A layered delicate necklace set sits nicely above coordinate lines.
Frequently Asked Questions
Q: What small friendship tattoos age best on wrists and fingers?
A: Graphic silhouettes and slightly bolder lineweights hold up better than the thinnest single-needle scripts on wrists and fingers. Inner forearm, shoulder blade, and outer upper arm are safer zones if you want the original crispness to last longer. Expect touch-ups in one to three years for high-movement spots.
Q: Are fine-line rib tattoos a bad idea?
A: Artists are split. One camp argues that ribs stretch and compress so fine-line work blurs within two years. The other camp says proper needle depth and slightly wider spacing let fine lines settle and still look clean after several years. If you choose ribs, opt for slightly bolder lines than a Pinterest sample and budget for a potential touch-up.
Q: Which aftercare products are worth using for small black ink pieces?
A: People debate this a lot. One group prefers thicker ointments as a short-term moisture barrier for the first three days. The other group switches to thinner balms early to avoid pore clogging. My experience is to follow the artist's specific timeline, and consider switching to a dermatologist-tested lotion like CeraVe after the initial sealed period.
Q: How do I find artists who do tiny, clean friendship tattoos near me?
A: Search hashtags like #friendshiptattoo and #finelinetattoo on Instagram and TikTok, then filter by location. Tattoodo and Booksy let you search by keywords such as "matching hearts fine line" or "coordinate tattoo small" and display portfolios. Reddit threads on r/tattoos and r/TattooDesigns also surface healed examples across skin tones.
Q: What should I wear to the appointment for a collarbone or sternum tattoo?
A: For collarbone and sternum work choose a V-neck or scoop-neck top that you can lower safely without slipping off. Avoid underwire bras during the session and pick loose, comfy bottoms. A fitted v neck top and loose pants make the appointment smoother.
