
Bold shoulder pieces with thick linework tend to outlive the delicate trends that flood feeds. On the deltoid the skin stretches and rubs in ways most people do not expect, and bold geometry or blackwork will keep its edge where whisper-thin scripts fade. Read the first idea to see how a mandala centered on the shoulder peak behaves when you lift your arm and how to size it so it still looks intentional in five years.
1. Deltoid Cap Mandala, Bold Geometric
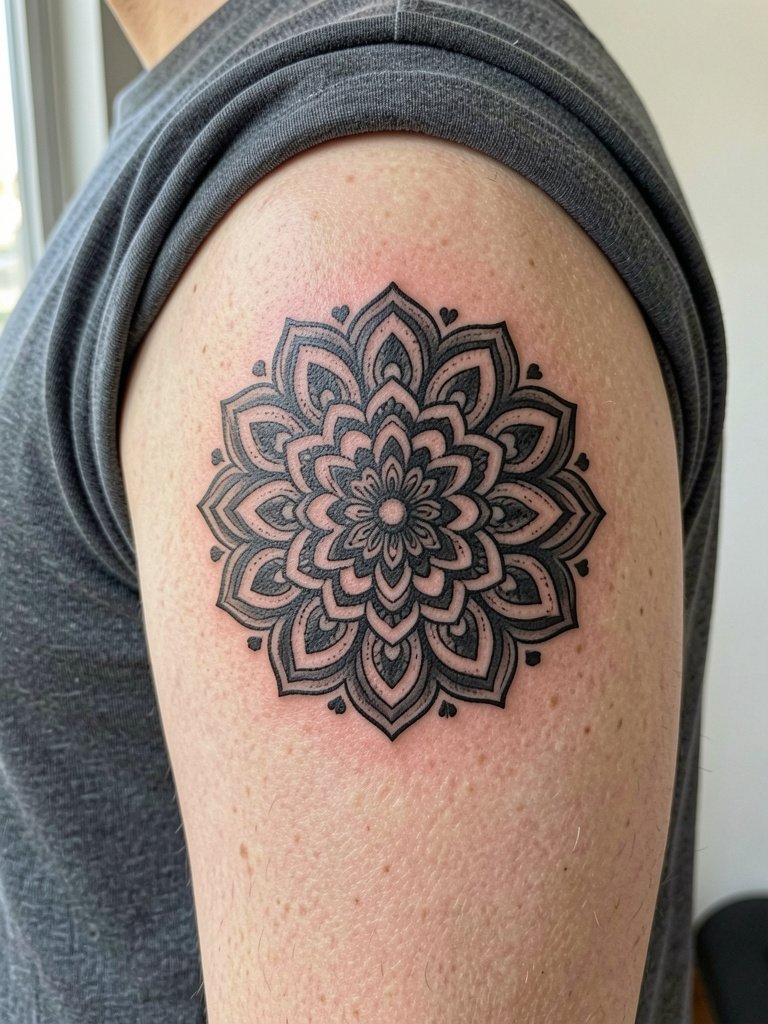
A mandala centered on the deltoid peak reads like armor when done with bold linework. Size it large enough that the radial elements have breathing room, because tiny geometry on this curved canvas tends to merge within a couple of years. For the consultation bring a scaled reference and ask for linework that is one step thicker than the image, so the pattern survives stretching and touch-ups look natural. Pain is moderate on the fleshy peak and most single-session caps finish inside two to three hours. Styling tip for showing it off: pair with a vintage short sleeve graphic tee that exposes the peak but keeps the rest of the arm covered.
2. Kinetic Tribal Band Wrap
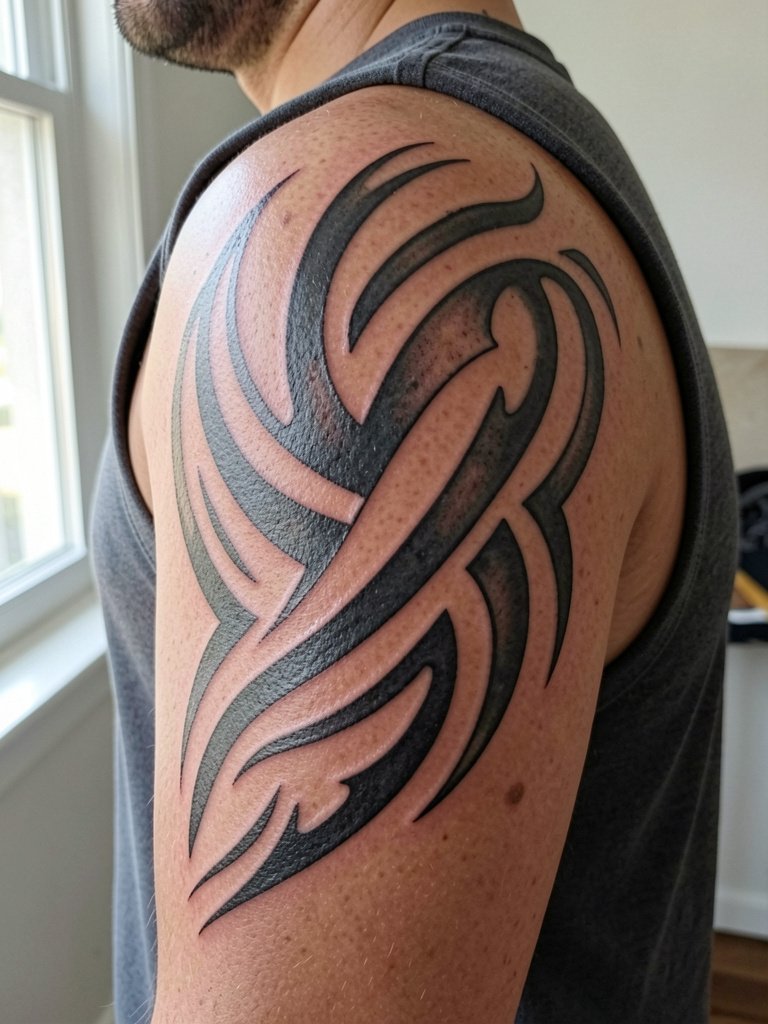
Tribal bands that use negative space to read differently when you lift the arm are engineered rather than decorative. The visual trick is in the breaks and the rhythm of the thick strokes, so the stencil must be tested on the exact curve of your shoulder before inking. Sessions are usually one to two hours depending on circumference. Common mistake is asking for uniform repeats around the arm, which flattens the kinetic effect. For the appointment wear a loose tank top so the artist can rotate the arm without fabric pressure. Expect touch-up at year one if you want the blacks saturated long term.
3. Neo-Traditional Lion with Bold Outlines
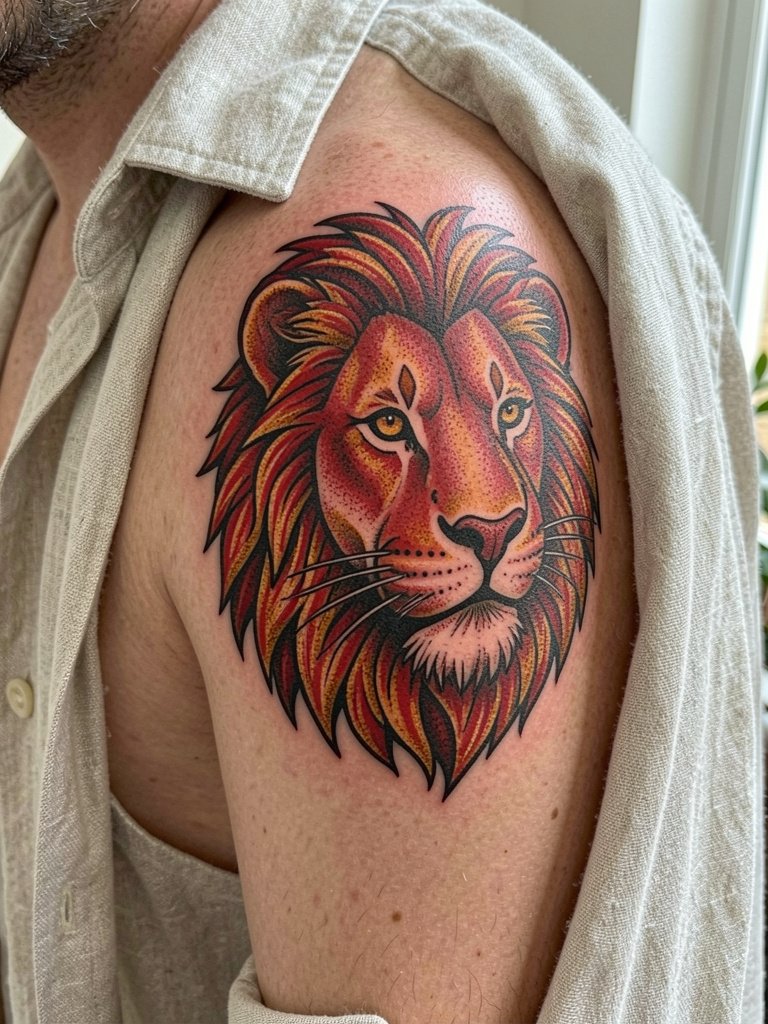
A lion on the front shoulder reads like a crest when outlined boldly. This placement shows off saturation and texture because the chest curve gives the face depth. Ask for reference photos that show fur detailing at both close and medium scale so the artist can plan stipple shading and color breaks for longevity. Expect two sessions if you want deep saturation and layered highlights. A common aging mistake is over-detailing the muzzle with tiny lines, which blur into a muddy area by year three. To frame the lion wear an open collar linen shirt that exposes the anterior shoulder and keeps the neckline simple.
4. Muscle Flexion Dragon
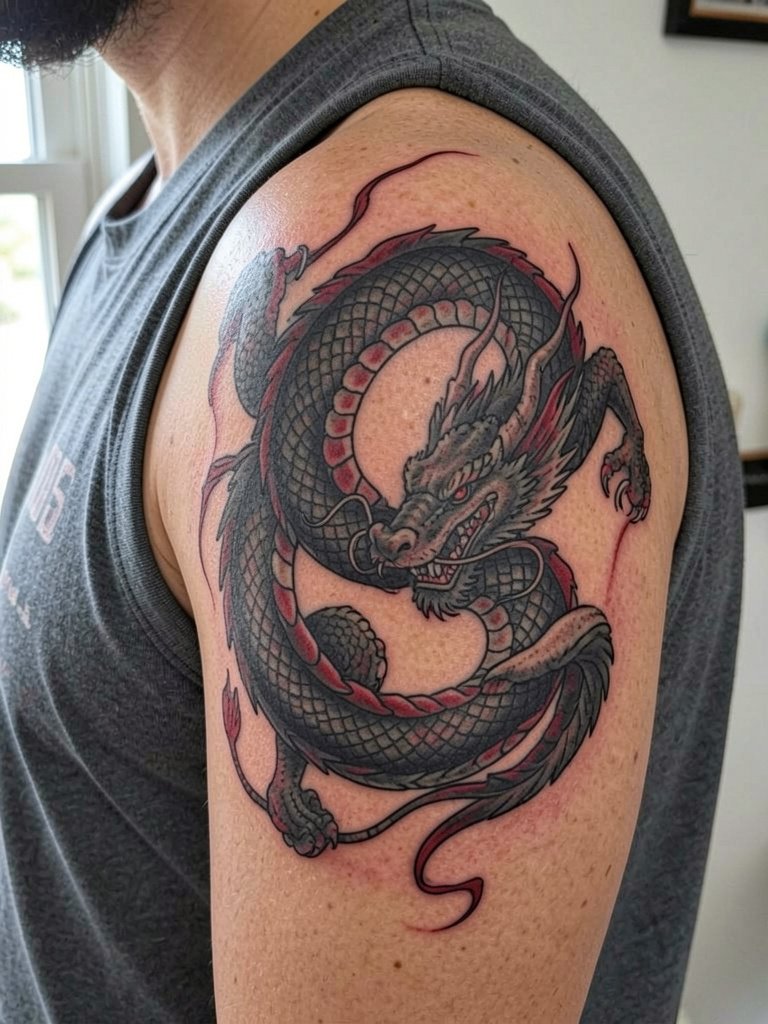
Dragons that flex with the muscle are a conditional win. The trick is drawing the coil so the head and key details fall on stable surfaces while the tail rides the moving skin. Bring motion references to your consultation and have the artist mark the head placement with you standing and flexing, so the focal point always reads correctly. Sessions for a dynamic shoulder-to-bicep piece usually take multiple sittings. Pain follows the anterior shoulder curve and can spike near the collarbone if the design creeps forward. For show-offs, V-neck tees and rolled sleeves let the dragon arch noticeably when you move.
5. Single-Side Phoenix Rise
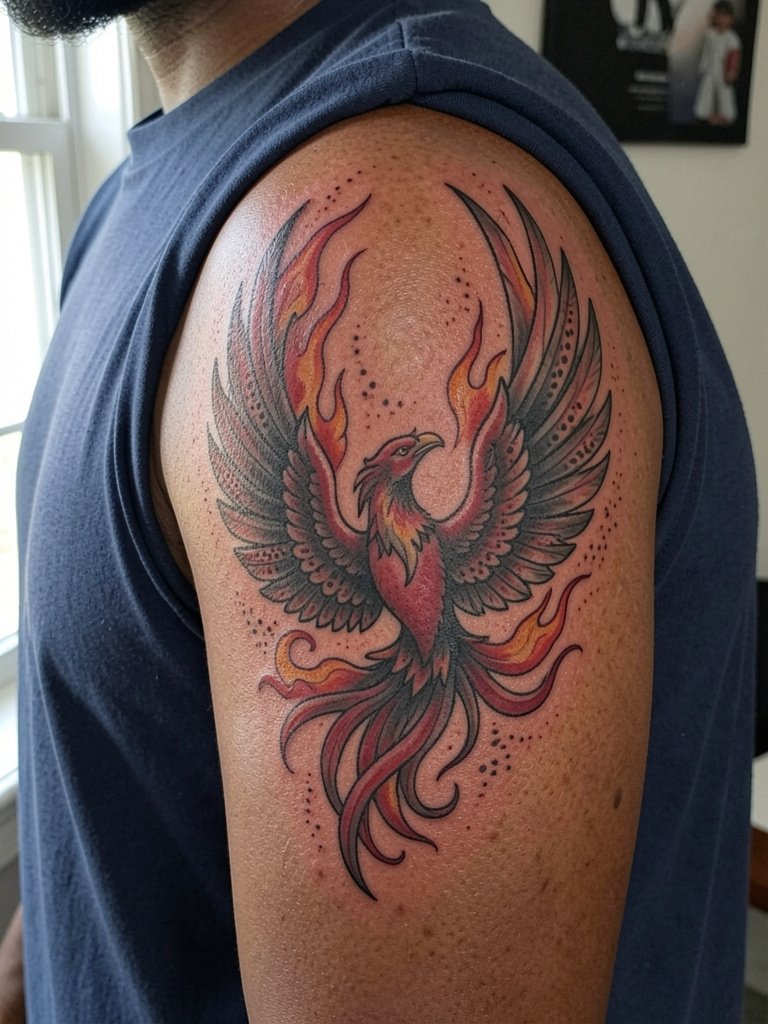
An asymmetric phoenix that favors the arm creates a lone, energetic silhouette instead of a mirrored look. For a clean rise effect, request feather transitions that scale outward rather than tiny filigree that will blur. Most cap-sized phoenixes finish in two sessions with emphasis on contrast in the flame areas. A real mistake is centering the face too close to the peak where flexion will compress the detail. When you want to reveal it, short-sleeve graphic tees or open-collar shirts work best. Try a v-neck t-shirt to show the front curve and avoid tight collars during the session.
6. Sacred Geometry Expansion
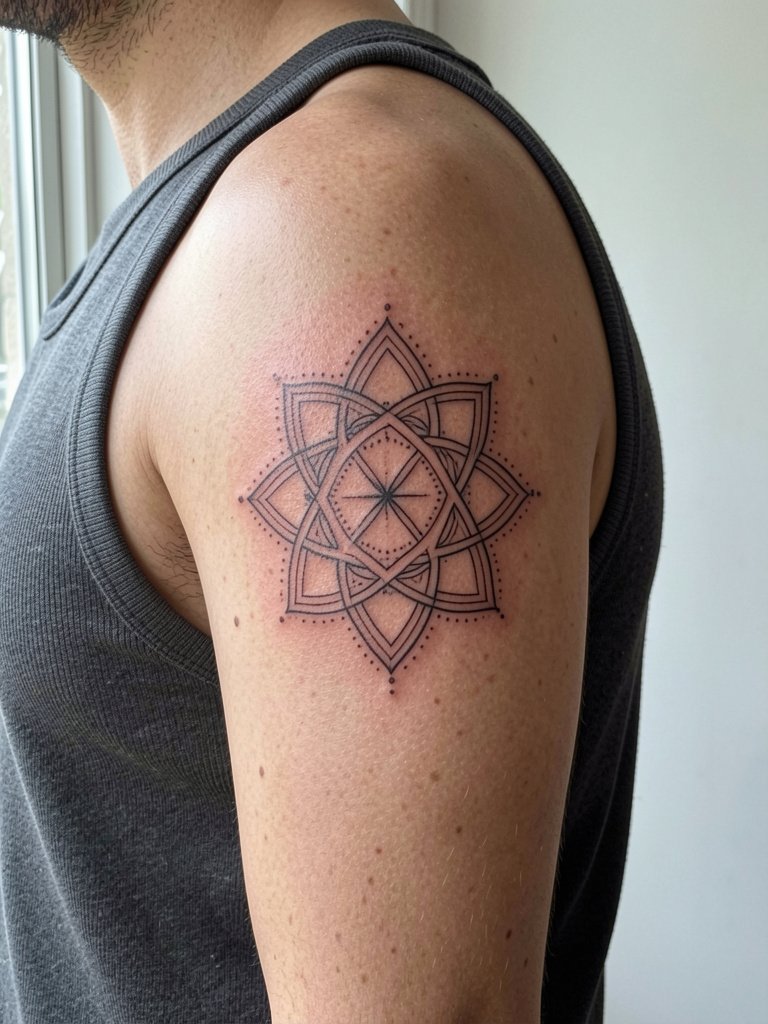
Fine-line geometry on the shoulder is elegant when sized correctly, but artists split on whether it holds up here. One camp warns fine single-needle work blurs within two years on the deltoid because the skin stretches and rubs. The other camp says with correct needle depth and slightly wider spacing the pattern can settle fine, and they point to healed examples at three years to prove it. If you want this look, ask for double-line spacing and dot work that gives each element room to age, and plan a one-year touch-up to restore crispness. For session wear bring a loose tank top so the artist has full access to the peak.
Pre-Session Essentials
These first six designs share needs around saturation, motion, and access, so a few items speed the session and make the first week easier.
- Hustle Butter Deluxe. A widely used moisturizer that keeps the skin supple during the initial healing phase without heavy residues that trap ink.
- Mad Rabbit Tattoo Balm. Lightweight balm good for daily moisturizing after the first couple of days, which helps fine-line work hold shape.
- Dr. Bronner's Unscented Castile Soap. Gentle, fragrance-free wash for the area during surface healing to avoid irritation to fresh linework.
- Saniderm Second Skin Cover. Useful for large cap pieces when you want protection through the first 24 to 72 hours and reduced scabbing.
- Aquaphor Healing Ointment. Thin application for the first two days helps lock in moisture before switching to a balm.
7. Aztec/Egyptian Heritage Shield
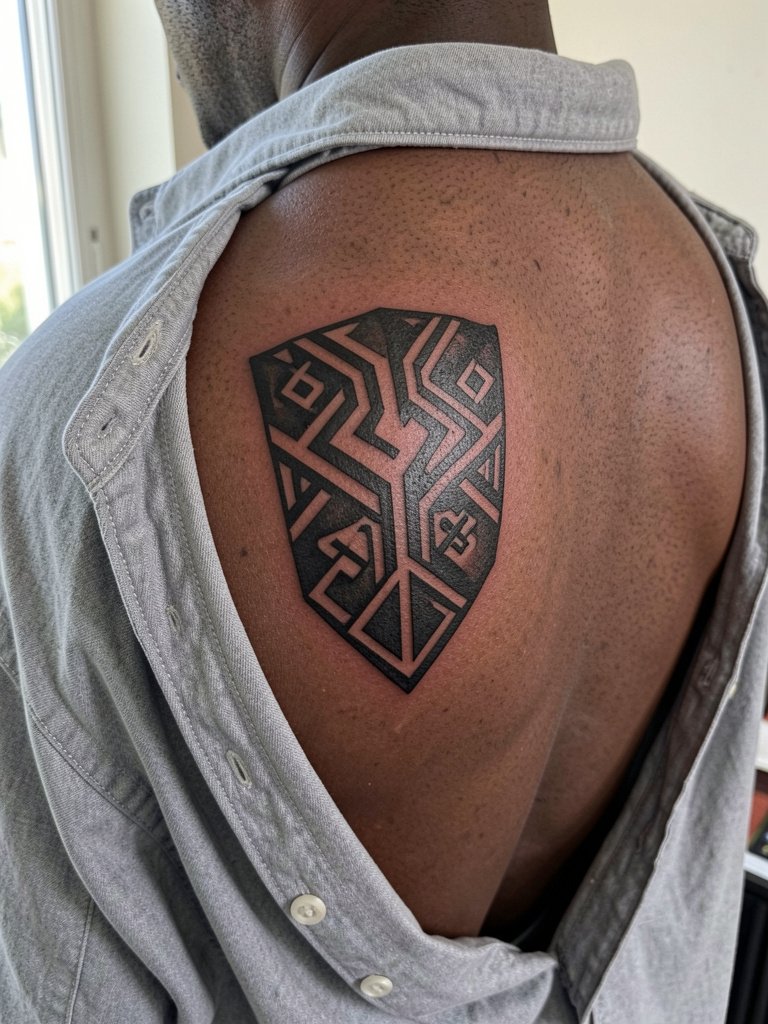
A heritage shield on the scapular blade uses the back as a stable canvas, so sharp blackwork lasts well. Respect cultural origins by specifying motifs that honor the source rather than copying sacred symbols without context. This placement is lower on the pain scale because the skin is thicker, and it is easy to hide for work. A common misstep is cramming too many literal glyphs into a small shield, which reads cluttered. Ask for a layout that leaves negative space to keep triangles and steps distinct. For the session wear a loose button-down shirt that the artist can slide down without tugging.
8. Wings and Armor Cap
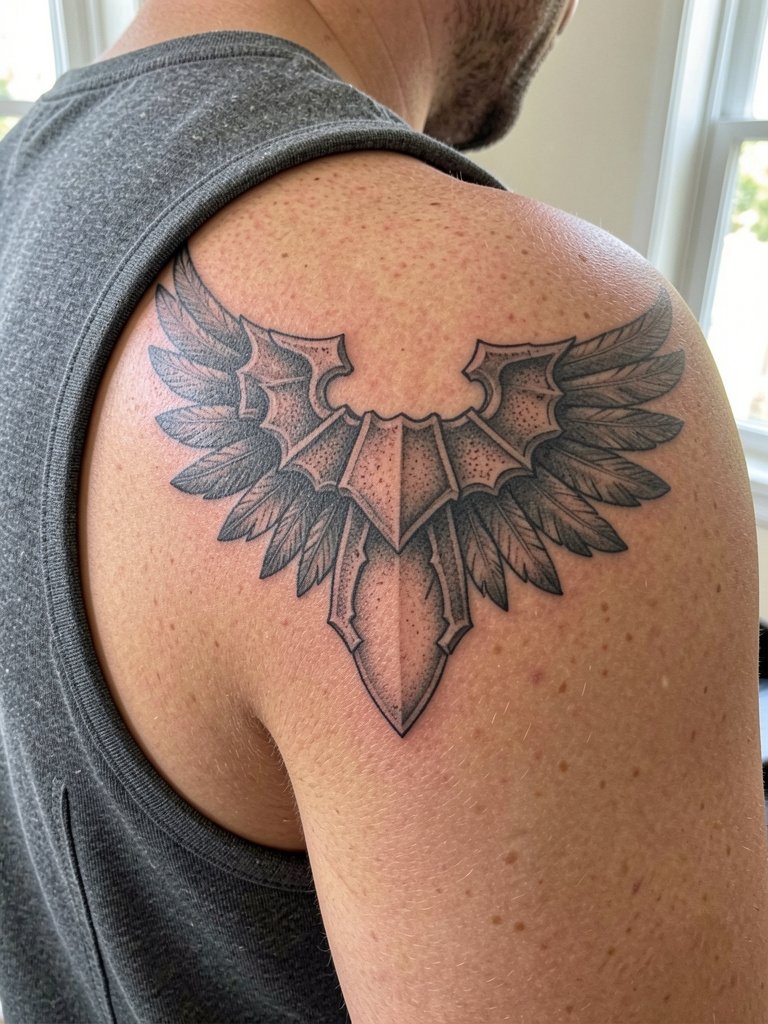
Wings flowing over the shoulder into an armor border balance privacy and show-off moments. The back gives room for feather detail, but if you want it to peek over the cap ask the artist to plan feather tips that sit on the deltoid peak without getting lost in sleeves. Sessions are multiple for half-sleeve integration because feather texture and grey washes need settling time. Mistakes often come from trying to force mirror symmetry across the spine, which can look stiff. To showcase the armor effect try a vest top or rolled-sleeve shirts so the wing tips appear when you move.
9. Minimalist Skeleton Skull
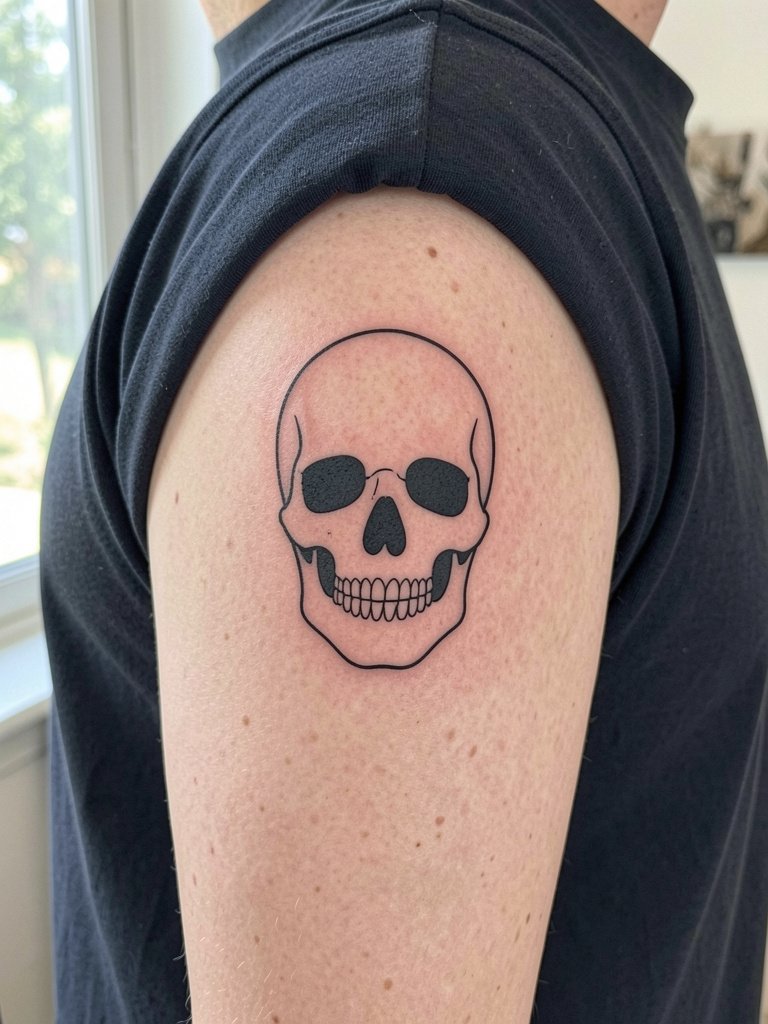
Small skulls on the shoulder cap read modern when kept simple. Single-needle work will look crisp early, but the deltoid's movement makes tiny features the first to soften. If you want a minimalist feel with longevity, request slightly bolder key contours around eyes and jaw so the silhouette remains legible at year two. Session time is short, typically under an hour. A frequent mistake is requesting extreme micro-detail inside the skull that turns into a smudge line. For the session wear a loose short-sleeve graphic tee so the artist can access the cap without tight fabric.
10. Celestial Map Offset
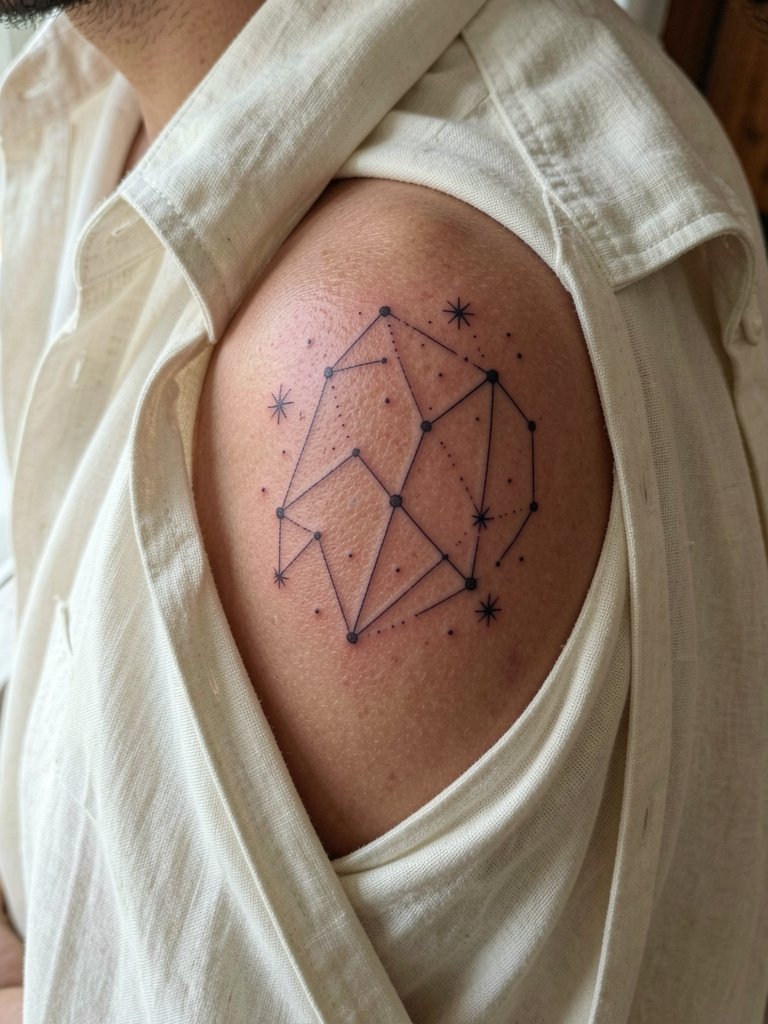
A star chart offset toward the chest creates a navigational feel without symmetry. Thin connector lines and tiny dots can look delicate at first but risk softening on moving skin, so ask for slightly heavier dots and spaced lines when you bring reference photos. This placement is visible in V-necks and is a good candidate for single-session work. People often over-cluster constellations and lose the negative space that gives the map readability. To frame the piece for evenings try an open collar linen shirt which exposes the offset and keeps the chest area neutral.
11. Dynamic Predator Silhouette
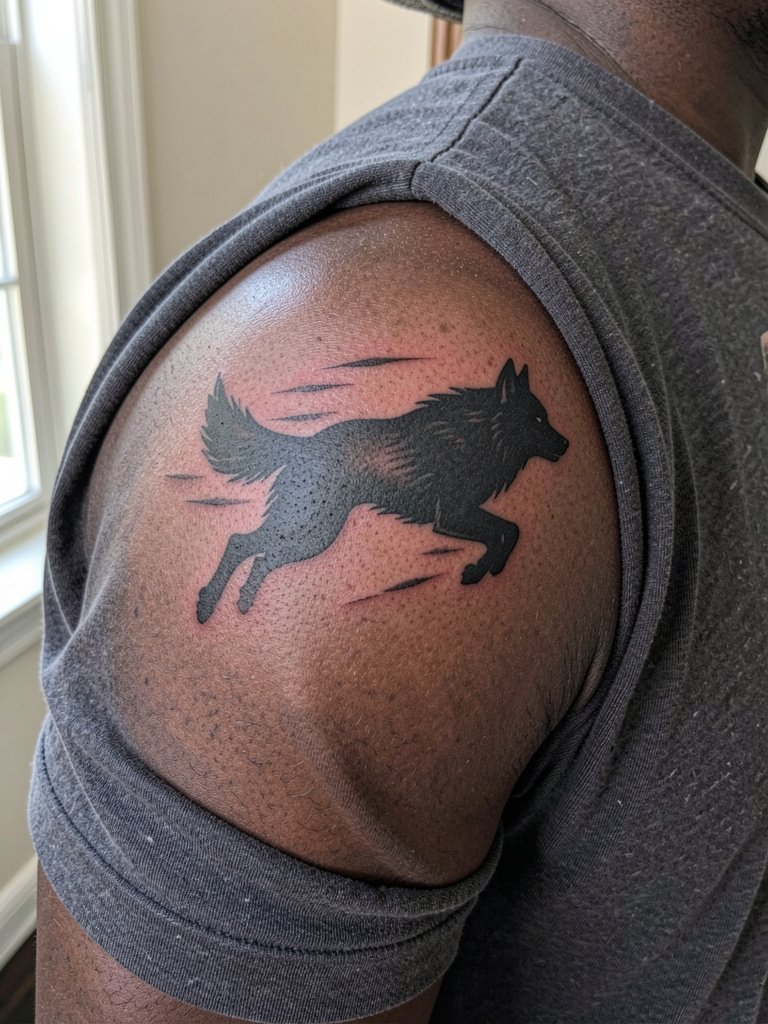
Solid silhouettes read strongly across the shoulder curve and sell motion without tiny details. The deltoid-to-back flow gives the illusion of momentum, and solid black fills age predictably. A session for a silhouette is usually one to two hours depending on size. Avoid adding intricate inner detail inside the silhouette if you want a clean look long term. Blowout risk is low when the fill is dense, but edge crispness benefits from conservative sizing and a one-year touch-up. For casual reveals a short-sleeve solid tee keeps attention on the silhouette without busy patterns.
12. Floral Cascade (Single-Side)
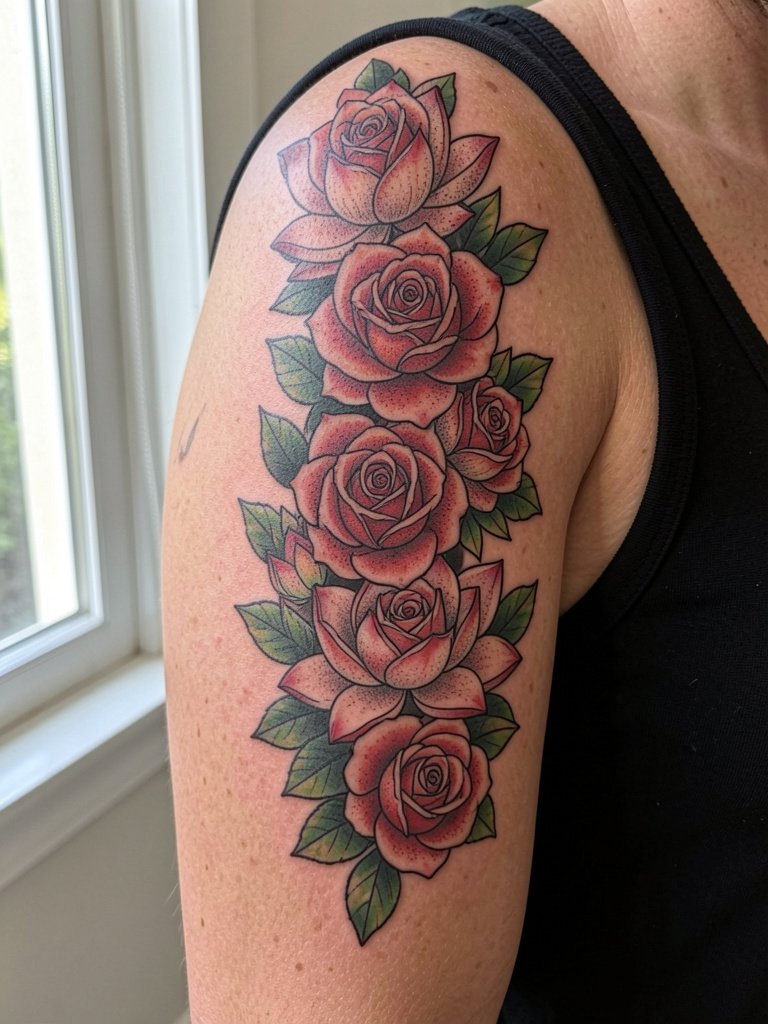
A cascading floral line that runs down the arm plays to asymmetry and movement. Color saturation in petals helps preserve definition against the skin's texture, and leaving small pockets of negative space between blooms prevents a flat block of ink. Plan for two sessions if you want deep color and layered shading. Common mistakes include packing too many tiny leaves into a narrow vertical band, which becomes a muddled stripe. For outfits that highlight the cascade use a sleeveless tank that keeps the arm free during the session and frames the flow afterward.
13. Clock Tower Unilateral
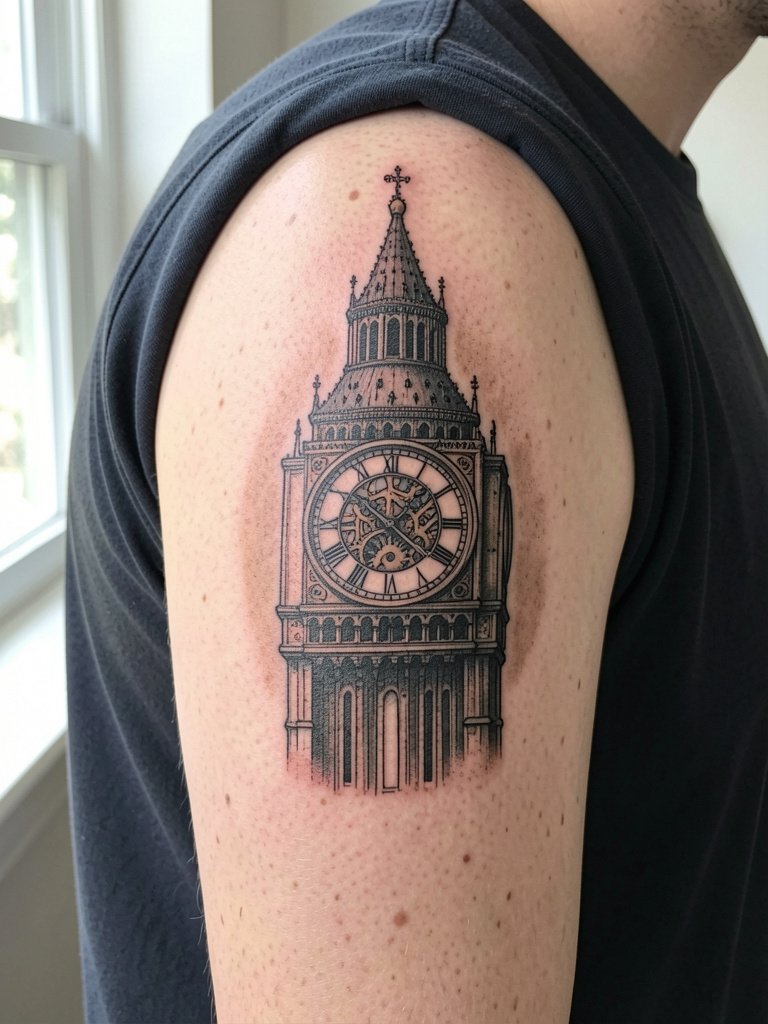
A unilateral clock tower gives you symbolism without symmetry. Place the heavier architectural elements away from the joint to reduce compression in the arches and gears. Ask for a mocked-up scale at the exact deltoid curve so the numerals do not wrap into awkward foreshortening. One common error is requesting tiny Roman numerals that later blur; make the numerals legible at a three-inch reference scale. Sessions for realistic shading will need a mid-session break to assess contrast. For casual wear, pair with a v-neck t-shirt that reveals the front shoulder curve.
14. Earth-Themed Globe, Mini
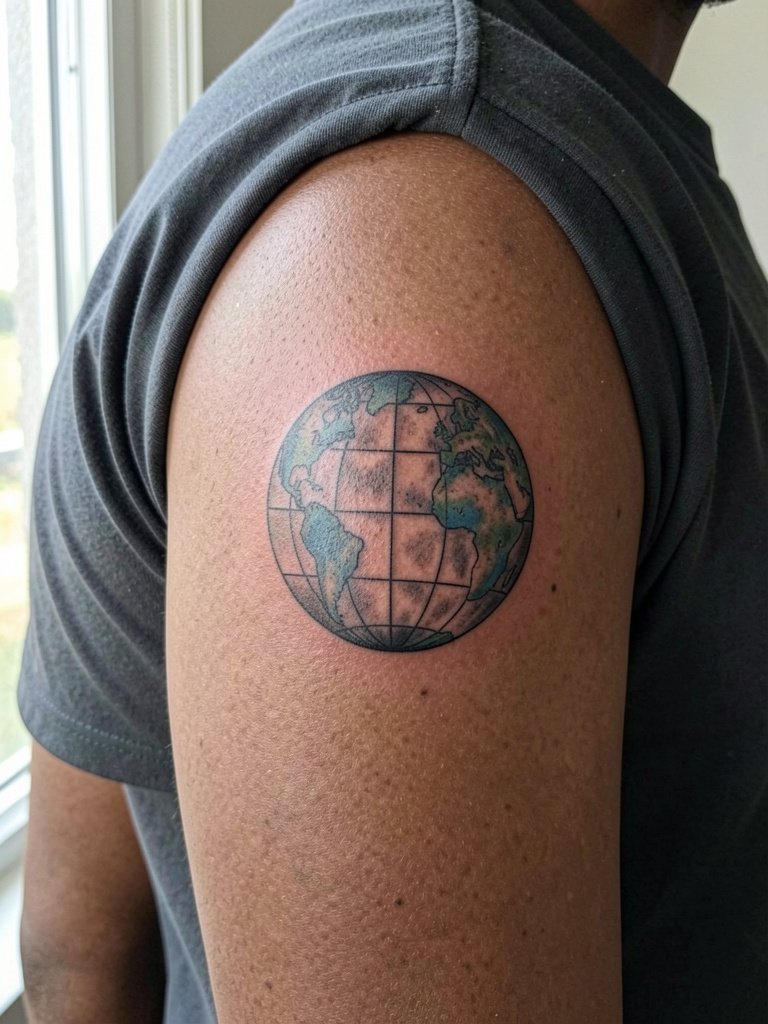
A small globe sits naturally at the peak when scaled to two or three inches in diameter. Realism here relies on clean negative space between continents and oceans, so ask for simple continent shapes rather than micro-coastline detail. Session time is usually under an hour for a mini globe, but color layering adds short touch-ups. People often overcomplicate the map with tiny type or coordinates that do not survive healing. To display it casually choose a short-sleeve solid tee in a neutral color so the globe reads clearly against skin.
15. Religious Icon, Antique Treatment
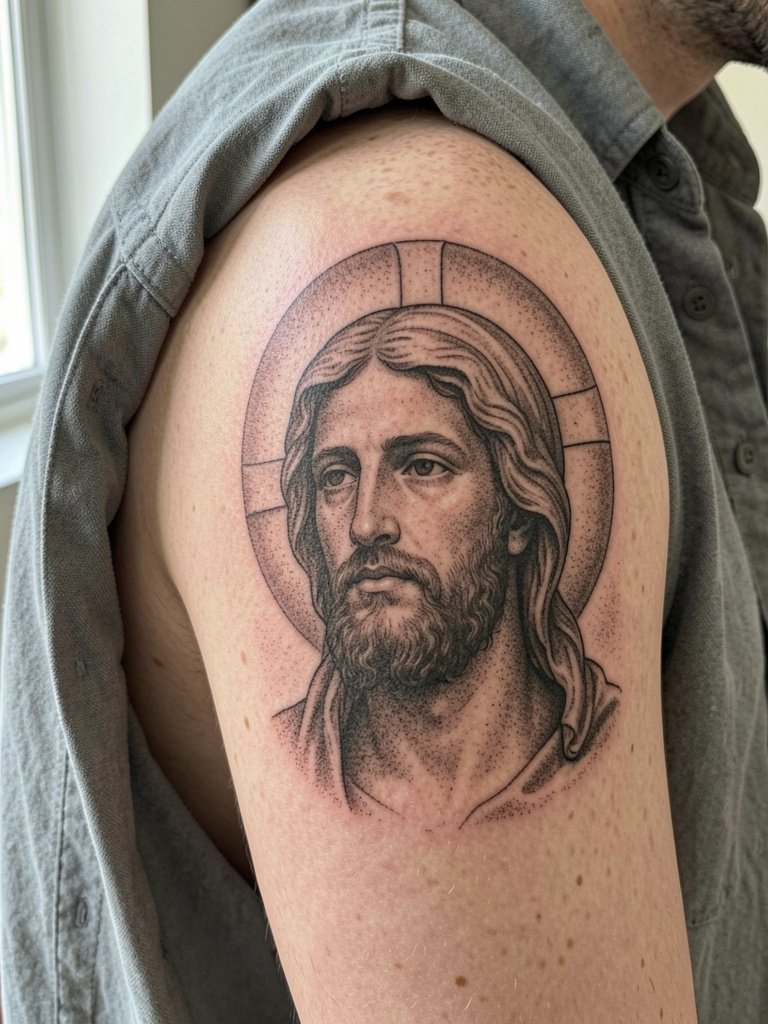
Antique religious figures on the shoulder need careful cultural sensitivity and placement to avoid awkward distortion. The anterior shoulder gives a friendly viewing angle, but faces require spacing so eyes and noses do not lose shape as the skin settles. Discuss iconography respectfully and be explicit about source motifs you want included or left out. A common mistake is choosing too-small facial detail, which ages into blotchy shading. Sessions run across two sittings for detailed faces and sepia layering. For a tasteful reveal try an open collar shirt that exposes the front shoulder without tight collars.
Frequently Asked Questions
Q: How painful are shoulder tattoos compared with other spots on the body?
A: The fleshy deltoid peak is generally a moderate pain zone, usually around a four out of ten for most people. Pain increases toward the collarbone and armpit, which can feel sharper, so plan placement with that in mind and expect brief spikes during shading near bony ridges.
Q: Will fine-line sacred geometry on the deltoid blur faster than bold mandalas?
A: Many artists say fine single-needle work has a higher chance of softening on movable skin like the shoulder, while others argue that correct depth and slightly wider spacing prevents early blur. If you want fine-line, ask for double-line spacing and schedule a touch-up at about one year to keep the geometry crisp.
Q: How do I find local artists who post healed shoulder portfolios without naming specific people?
A: Search hashtags like #shouldertattoo, #shouldertattooformen, and #deltoidgetattoo on Instagram and TikTok and filter by location. Use directories that let you search keywords such as "neo-traditional lion shoulder" and look for healed photos rather than fresh ink. Reddit communities and booking apps also surface peer recommendations and healed examples across skin tones.
Q: When should I plan a touch-up for shoulder work?
A: A realistic window is to check healed color and linework at six months, then schedule a touch-up around the one-year mark if areas show softening. For large saturated pieces touch-ups may be recommended annually for the first two years to keep saturation even.
Q: What should I wear to my shoulder tattoo session so the artist has proper access?
A: Choose loose, easy-to-remove layers that expose only the area you need inked. For deltoid caps a loose tank top or short-sleeve tee works well so the artist can roll or slide fabric without tension. Avoid tight straps and collars that pinch the fresh skin.
Q: How do I avoid a design that distorts badly when I flex?
A: Plan with movement in mind by testing stencils while flexing and standing. Prefer designs that either sit on stable planes or that are intentionally kinetic, and bring scaled references that show how the work reads at both three and six inches.
