
The minimalist mountain tattoos that hold up are rarely the whisper-thin single-needle stencils going viral. Designs with a little breathing room, intentional lineweight, and placement on stable skin read cleaner as they age. Below are small mountain concepts that favor readable linework, realistic healing timelines, and practical styling notes so you can pick a look that still reads well after touch-ups.
1. Single-Line Continuous Peak
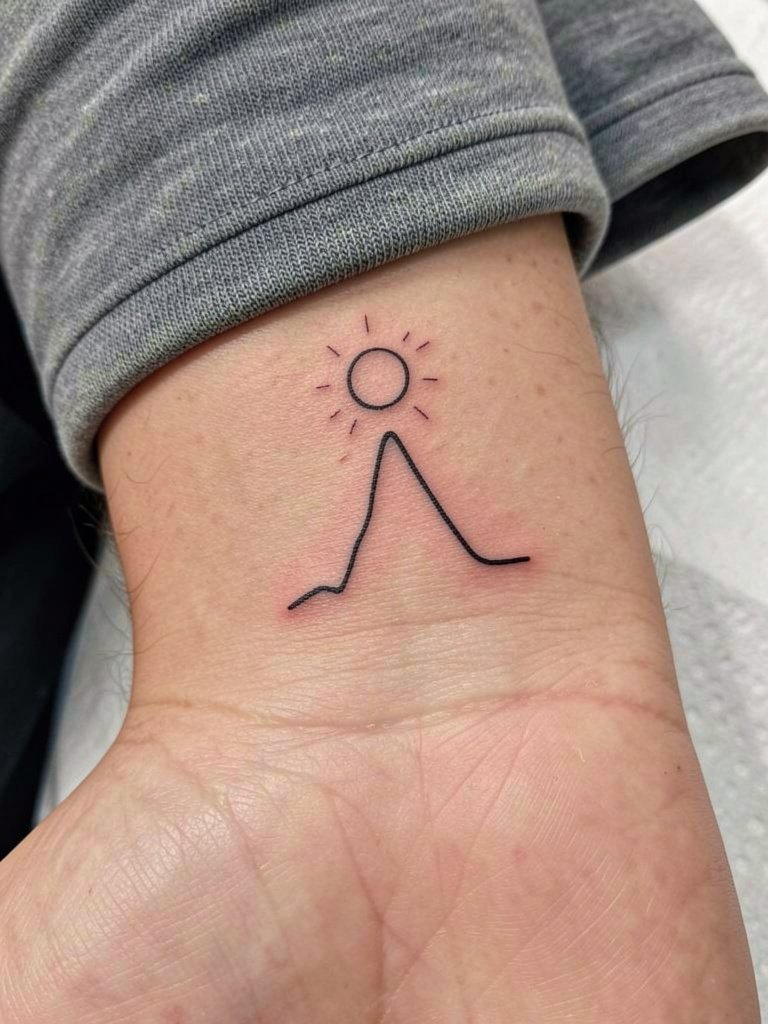
This classic single-line peak is ideal if you want a tiny motif that reads like an icon. I usually recommend it when you want a quick 10 to 20 minute session and a design that layers well with future patches. A common mistake is requesting the absolute thinnest single-needle line and placing it on the inner wrist where the skin moves and blurs. For better longevity choose a slightly heavier single-needle line or a 0.8mm hybrid approach so the ridgeline keeps crisp. During the consult bring a photo at wrist scale so the artist can show how the circle sun reads at one inch. For showing it off, swap a bulky bracelet for a thin chain bracelet set on the opposite wrist. Expect light session pain at the wrist and a touch-up possibility at 12–18 months.
2. Geometric Triangle Encasement
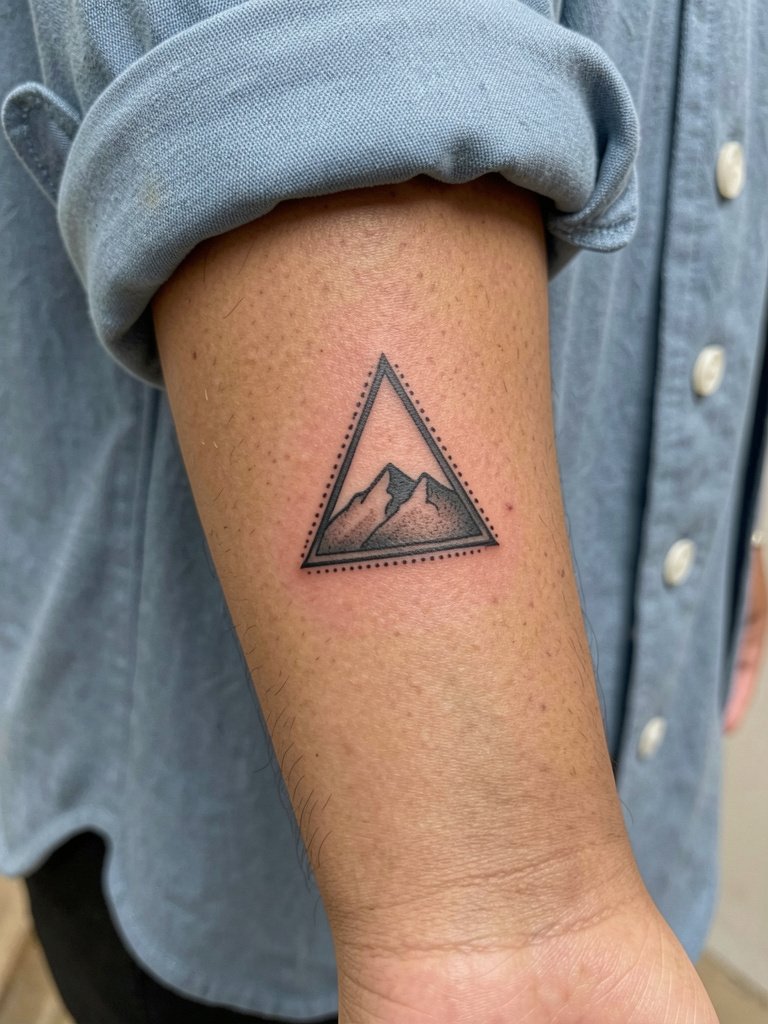
A triangle badge gives the mountain a deliberate, emblematic feel and works well when you want a compact design that could expand into larger work later. Ask for exact corner radii and dot spacing so the triangle does not read cramped at smaller sizes. The mistake I see most often is shrinking the triangle too much so that the dotted border looks like a fuzz of ink after a year. On the inner forearm the skin is stable enough that crisp angles will hold, but insist on clean stencil placement so the apex sits where you want it relative to bone contours. For session wear, a loose button-down you can roll up makes the area easy to reach without fabric pressure. If you plan to highlight the badge, pair it with a v neck neutral top that frames the forearm when sleeves are pushed up.
3. Negative Space Silhouette
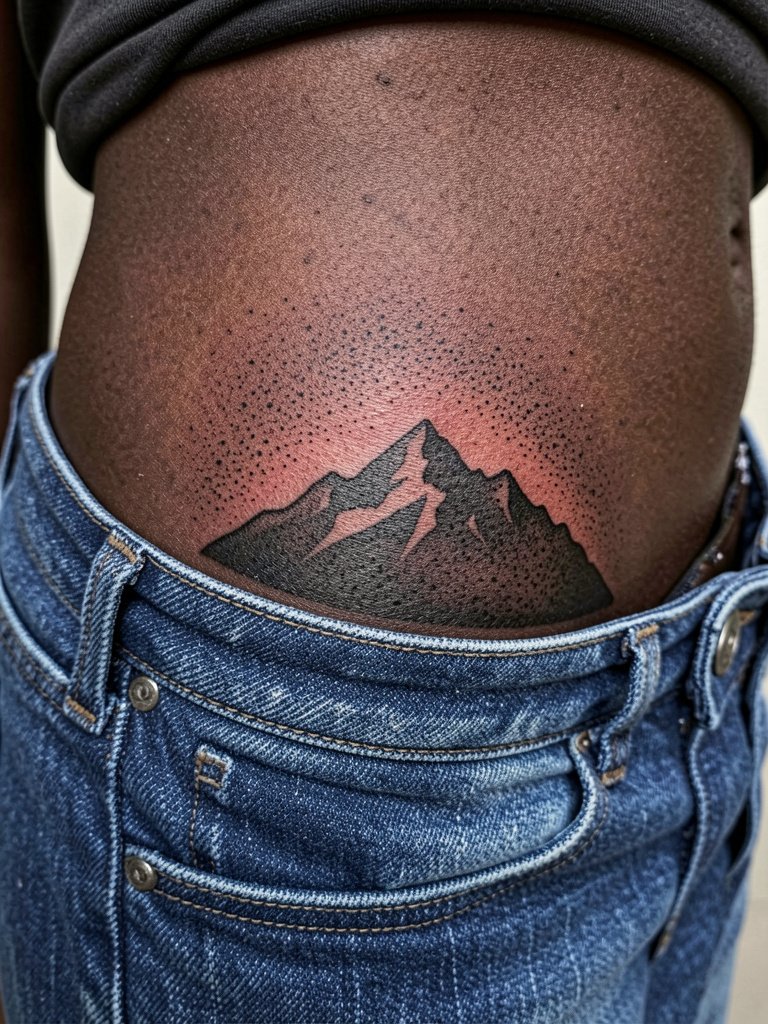
Negative space peaks rely on the skin to read the shape instead of inking the peak itself. This creates subtle contrast that reads best at a slightly larger micro size. A common error is packing too many stipple dots too close to the edge, which makes the negative space shrink into a smudge when healed. Tell the artist to mark the negative silhouette clearly on the stencil and to keep dot spacing airy around the edges. On the hip you will want loose drawstring pants for your session so the waistband does not press on fresh ink. To show the piece later, low-rise jeans that sit below the hip let the bare skin speak without competing fabric. The lateral hip heals with moderate friction risk from waistbands, so avoid tight belts for the first two weeks.
4. Mountain with Rising Sun or Moon
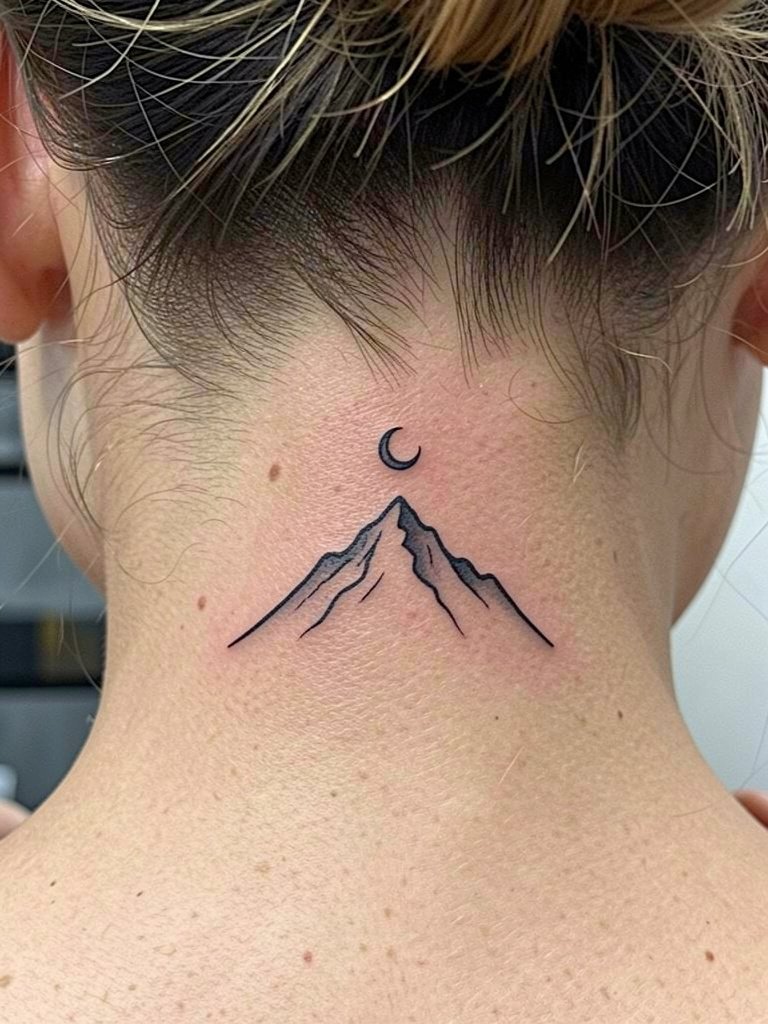
A tiny sun or moon lifts a single peak into a clear symbol and keeps the composition compact. The session is short and the nape is easy to hide or reveal. People often pick a crescent that touches the peak and then regret how the overlap blurs at six months. I suggest a small floating offset so the moon or sun sits clearly apart from the linework. Ask the artist to show the spacing on a printed stencil at the exact scale you want so you can approve before ink. For a discreet reveal, wear hair in a low bun or pin it back, and consider a low bun hair clip to keep the area visible on show days. Expect mild soreness under the hairline and plan on gentle shampooing rules for the first week.
5. Minimalist Pine Tree Base
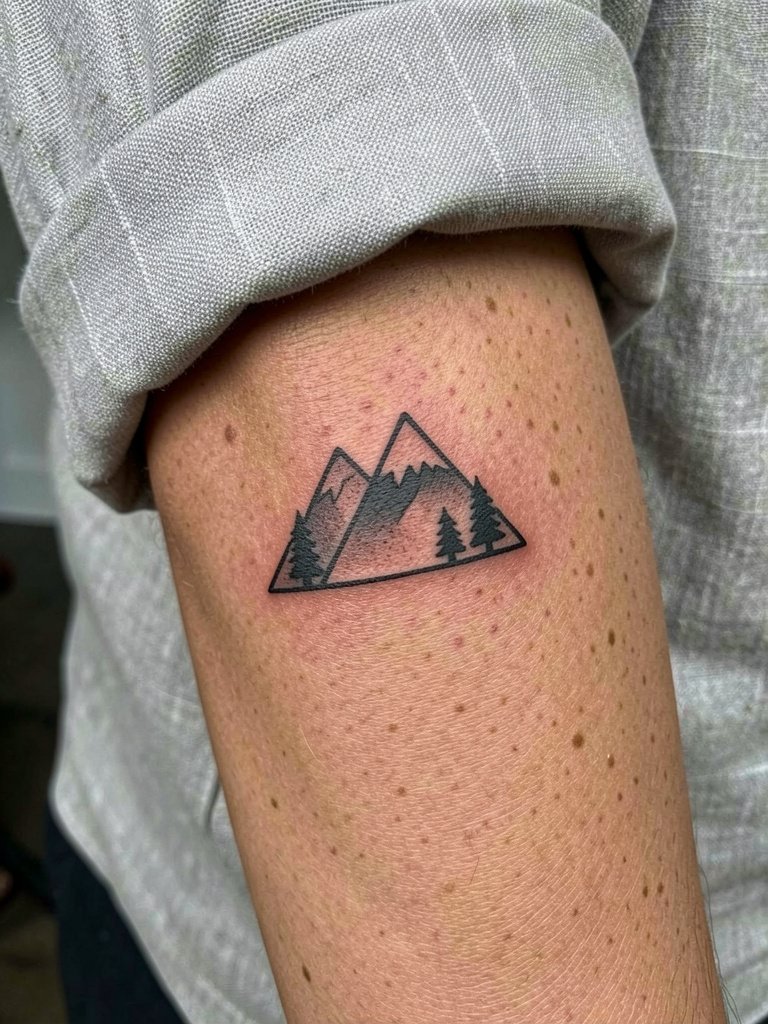
Tiny trees at the base give a small peak more scene-setting without creating clutter. This style reads well for people building a patchwork nature collection since the triangles for trees scale well with other icons. The mistake to avoid is over-detailing the trees into micro branches that disappear. Request simplified tree silhouettes and check healed examples at a similar scale. For session wear, a rolled-up linen shirt provides easy access and keeps fabric off the area. If you want to show it off, pair the piece with rolled cuff linen shirts in cream or olive so the neutral palette keeps attention on the linework. Expect low pain on the forearm and schedule a touch-up at about a year if the tree tips soften.
6. Geometric Reflection Lake
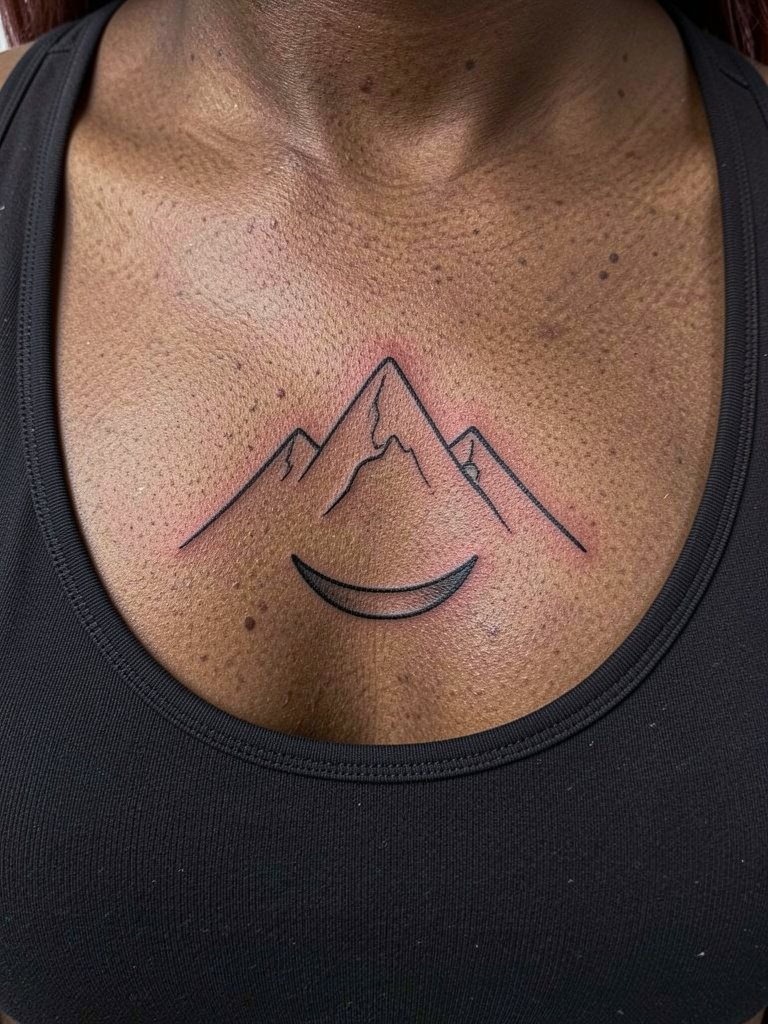
Symmetry sells for sternum work because the centerline helps the design sit balanced on the torso. This placement can be uncomfortable for some, so numbing cream becomes part of the decision. One camp argues numbing cream is a legit tool for getting through sensitive sessions without the client bailing. The other camp warns that numbing can change skin texture and make it harder for the artist to control needle depth. Both positions appear regularly in studio discussions. If you consider numbing, ask how long the artist waits after application and whether they prefer a topical that evaporates versus one that stays slick. Wear a strapless top or bandeau for the session so the artist has clear access and nothing presses on fresh ink. Plan for a careful two-week dry period around the sternum and a touch-up if the centerline softens.
Pre-Session Essentials
The wrist, forearm, and sternum pieces above benefit from simple supplies that ease the session and the early healing days.
-
Japanese tattoo soap Biologique Recherche. A gentle, non-foaming soap helps cleanse fine line work without stripping oils during the first three days.
-
Hustle Butter Vegan. A thinner, non-greasy balm reported by some to avoid clogging tiny needle channels while keeping lines hydrated later in healing.
-
Tattoo Balm by The Tattoo Club. A slightly thicker late-healing balm that helps with dry skin on minimalist tattoos during days seven to fourteen.
-
Mad Rabbit Tattoo Balm. A gentle balm for the later healing window that supports skin elasticity around fine lines.
-
Saniderm second skin. A clear protective film option that some people prefer for fine line work because it reduces scabbing and keeps lines smooth while the tattoo settles.
7. Circle Badge Mountain
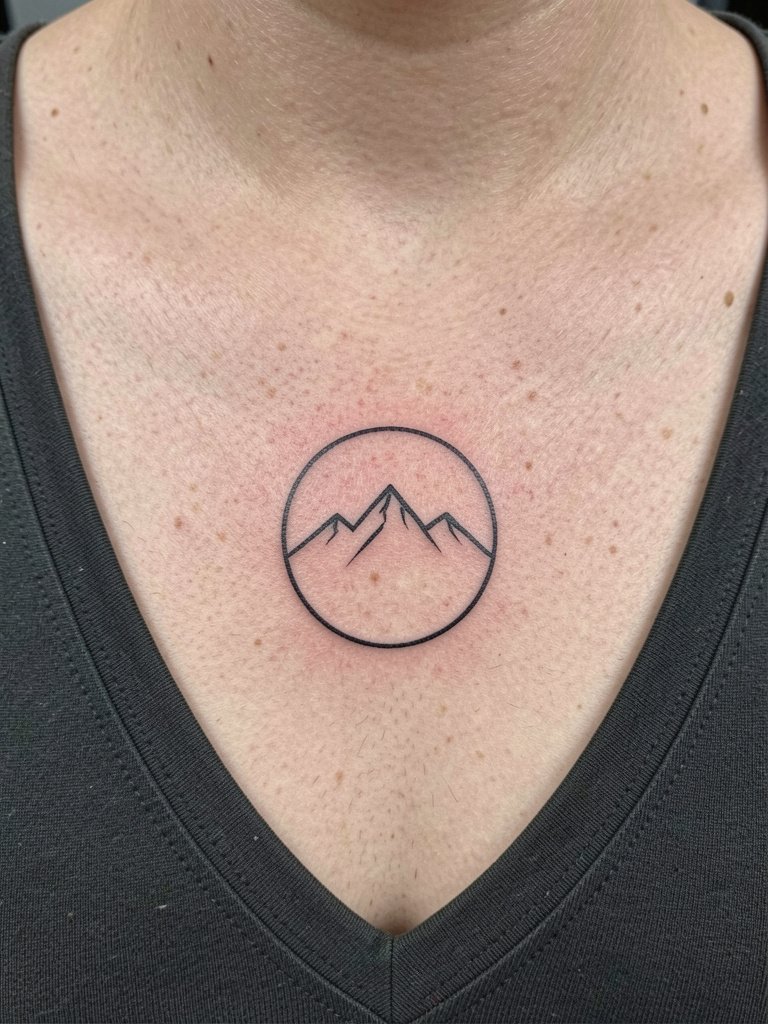
The circle badge reads like a compact logo and is smart if you might expand around it later. The common misstep is packing interior detail into the circle at too-small a scale. Ask for a mock stencil printed at the final size to confirm the internal elements still read. Badge pieces age nicely on the upper chest because the skin there is relatively stable, but necklaces or pendants can sit over the area and irritate during healing. For a night out the badge pairs neatly with a thin layered chain necklace that sits above the emblem so the pendant does not press on fresh ink. Expect a short session and a likely touch-up at the one-year mark if the interior dots soften.
8. Whimsical Floating Balloon
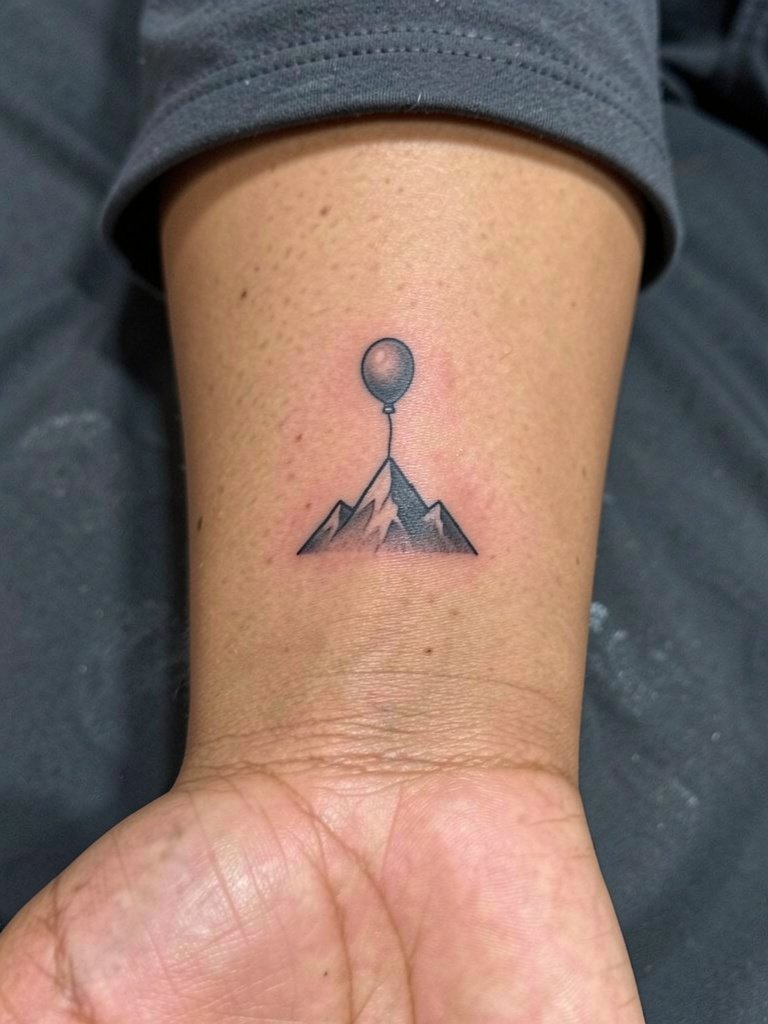
A mountain with a balloon adds a playful narrative without heaviness. That tether line is where people go wrong by making it too thin for wrist wear. Ask for the tether to be slightly bolder than the reference so it keeps visible movement after a year. For appointment day keep the wrist bare and wear a sleeveless or short-sleeve top so the artist can work without obstructions. If you want the balloon to show in photos, pair the tattoo with a minimalist watch on the opposite wrist rather than stacking jewelry on the tattoo side. The inner wrist eats micro detail faster than the forearm, so expect to consider a 12-month touch-up depending on daily wear and sun exposure.
9. Birds Over Peaks
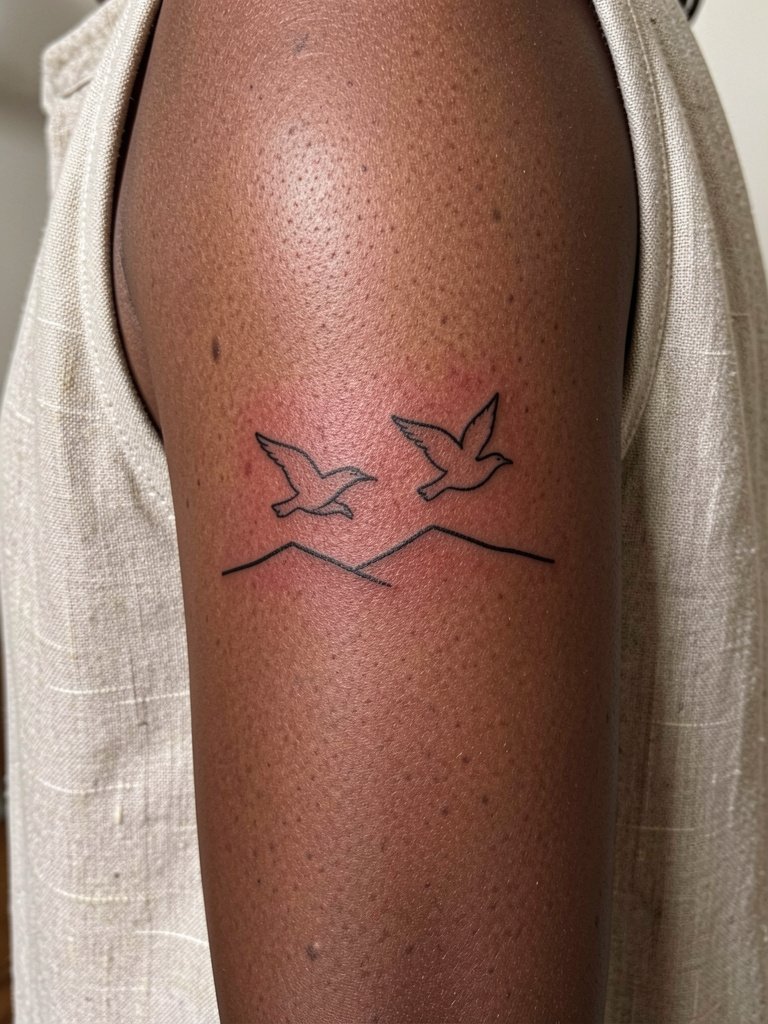
Small birds add dynamic motion and scale the mountain into a scene with minimal ink. Where this style goes wrong is when the birds are too detailed for their size, turning into blobs as they heal. Request simplified silhouettes with the wing tips spaced apart so the movement survives a few years. The inner upper arm is a stable location that keeps dot work and fine line readable longer than the wrist. For showing the design, a sleeveless linen top keeps the piece visible without fabric interference. If you like the idea of a patchwork sleeve later, plan placement so the birds can connect visually to future tree or moon motifs.
10. Bold Continuous Ridge
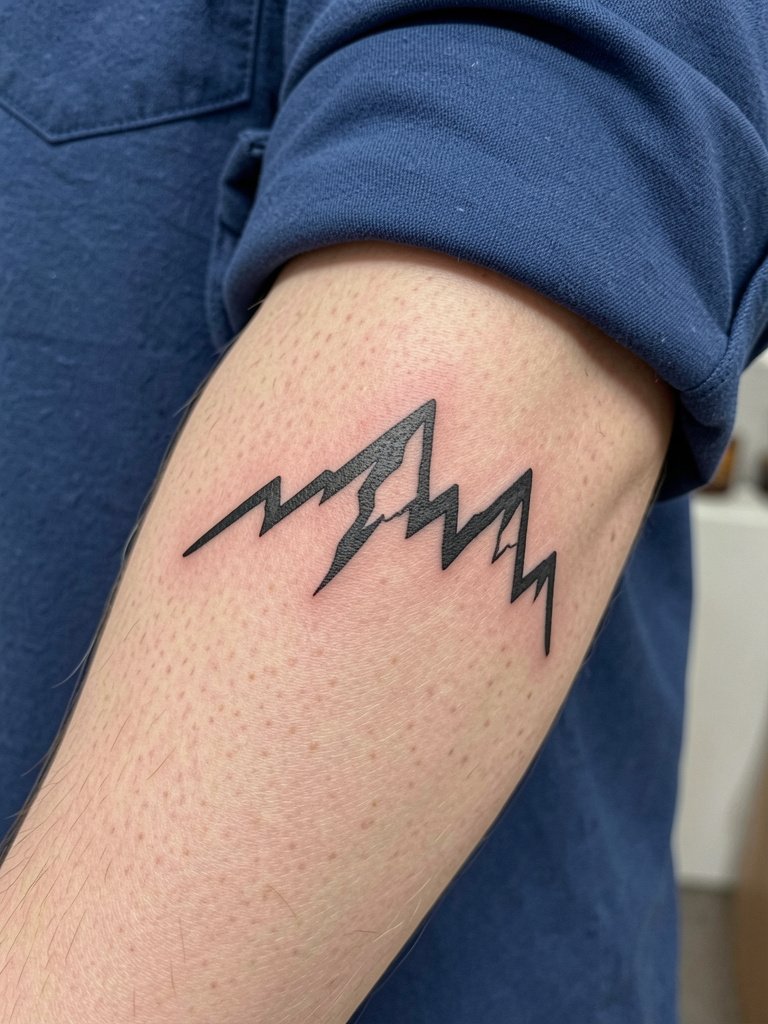
If you want durability at micro scale, bold minimal is the move. Thicker single-line ridges keep their silhouette as skin shifts. The trade-off is a stronger visual presence. A frequent mistake is asking for bold without considering how it will sit next to fine-line patchwork. During the consult show the artist other pieces you plan to add so they can match scale. On the outer forearm plan for a quick session with low pain and bring a open cuff shirt to roll up without pressure on fresh ink. Expect the bold ridge to require fewer touch-ups than single-needle options and to remain legible for many years.
11. Watercolor Wash Peak
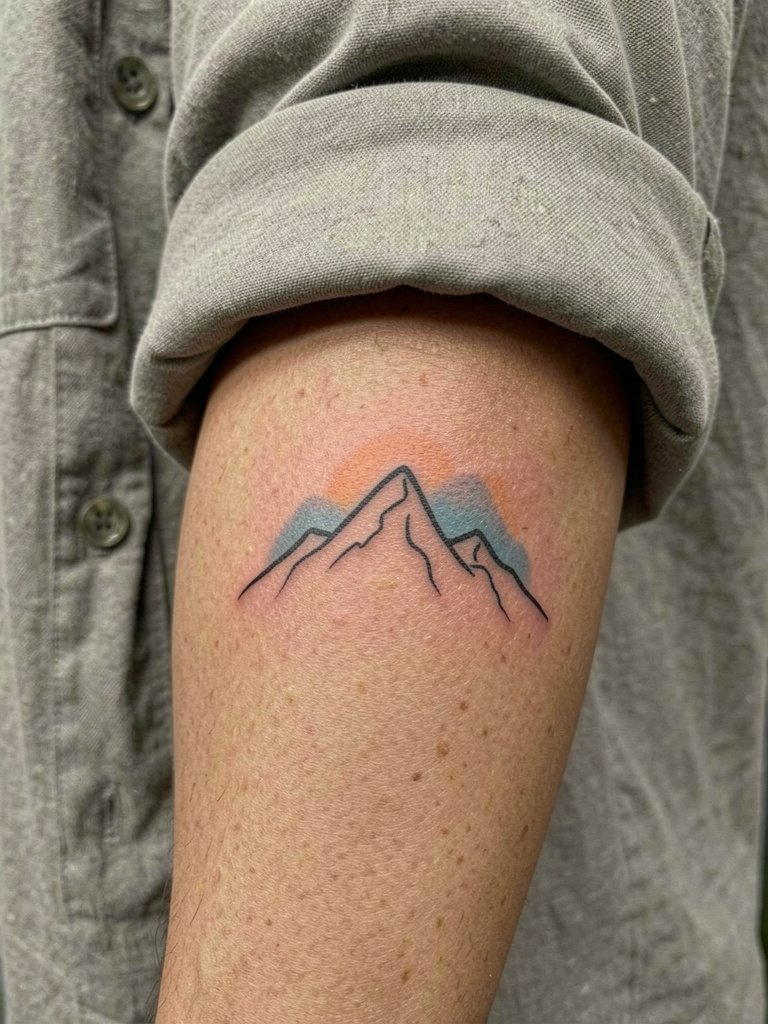
A soft watercolor wash adds atmosphere while keeping the mountain minimal. There is an ongoing debate on color longevity. One group argues watercolor washes fade faster and can bleed into black lines, so pure black is the safest option for long-term crispness. The other group contends modern pigments and dry application techniques let faint washes hold up without compromising the outline. Both views are common in studio conversations. If you want color, request a dry, layered wash and a slightly bolder black outline to protect edge definition. On the inner forearm the color will be more visible but also more exposed to sun, so plan strict sunscreen once healed and consider a 12-month check for touch-ups.
12. Heart-Encased Mountain
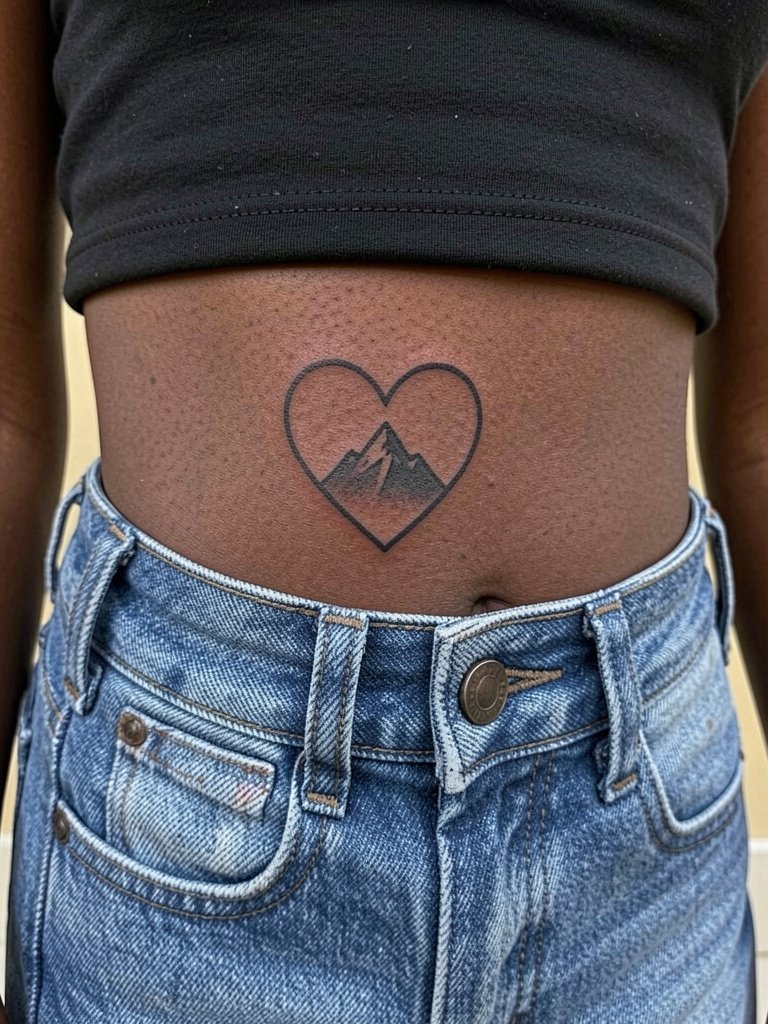
Framing a peak inside a heart condenses two symbols into one compact sign. This is great when you want a personal emblem not tied to any cliché phrase. A typical mistake is asking for a tiny heart with a detailed peak that will blur into a dark spot. Ask for clean negative space inside the heart and keep the mountain silhouette simple. For session day wear loose drawstring pants that pull down easily so the waistband does not press on the fresh ink. If you plan to show the piece occasionally, low-rise jeans that sit naturally below the tattoo keep it visible without forcing exposure. The lateral hip tolerates small touch-ups well if the edges soften after healing.
13. Dotted Sky Shading
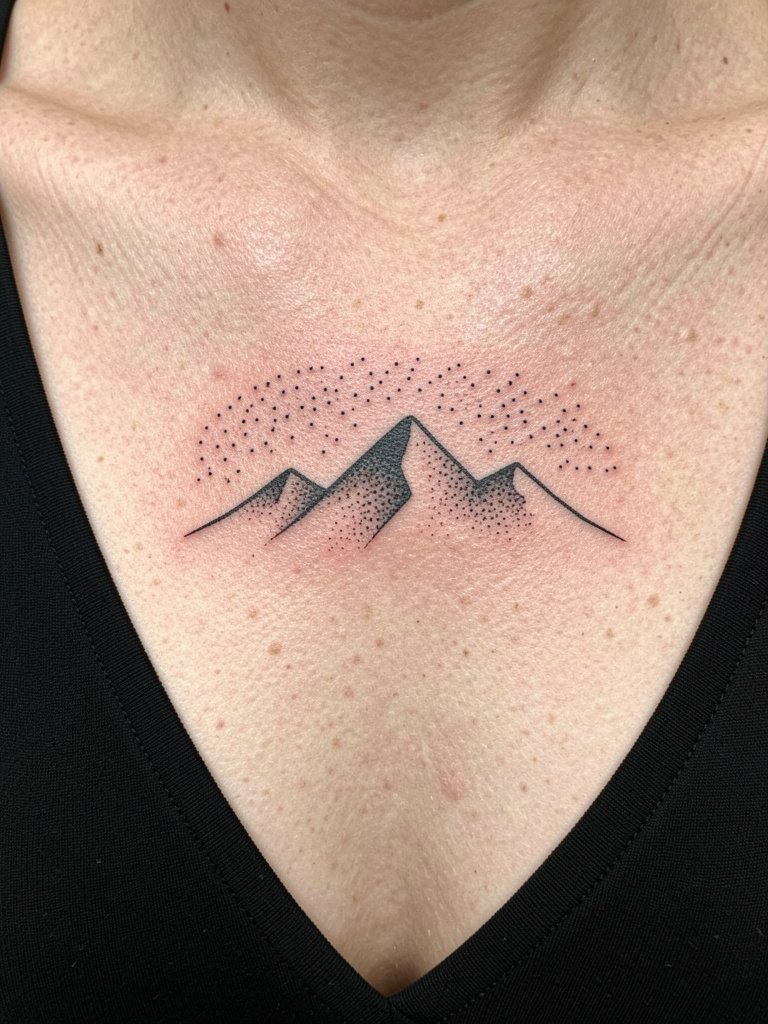
Stippled skies add texture and depth to a small mountain without heavy fill. The stipple approach ages differently than solid fills because dots can spread together over time if placed too closely. Ask for demonstrated healed stipple examples at this scale so you can judge dot spacing. On the upper chest the skin is fairly stable but watch necklaces and pendants during healing. For the session choose a strapless or wide V-neck top and consider a simple pendant necklace that sits above the piece when you wear jewelry later. Expect the stipple to soften gradually and budget a touch-up if you want the dot field to maintain strong contrast after several years.
Frequently Asked Questions
Q: How much should I budget for a small minimalist mountain tattoo?
A: Expect a small minimalist piece to fall into the common small tattoo range of about 100 to 250 for most reputable shops. Remember many studios have a minimum fee that covers setup and sterilization, so budget with that minimum in mind. Tipping around 15 to 25 percent is the usual US practice.
Q: Will a fine line mountain blur into a blob after a few years?
A: Fine line pieces on high-movement zones like the inner wrist and fingers are at higher risk of softening. Choosing slightly heavier lineweight or placing the same design on the forearm or thigh improves longevity. Schedule a touch-up at around 12 months if you want to refresh edge crispness.
Q: Where can I find healed portfolio examples and local artists without naming anyone?
A: Search hashtags like #minimalistmountain, #finelinemountain, and #smallmountaintattoo on Instagram and TikTok and filter results by your city. Browse Tattoodo or Booksy using keywords such as "minimalist mountain blackwork" to see healed photos. Reddit communities like r/tattoos and r/finelinetattoos also surface peer recommendations and healed shots across skin tones.
Q: How soon should I plan a touch-up for these styles?
A: For tiny single-needle work plan on a possible touch-up at 12 to 18 months. Bold single-line ridges often need less frequent work. Stippled or watercolor elements may require a touch-up sooner if contrast drops and you want to maintain the original look.
Q: What should I wear to the appointment for a collarbone or sternum piece?
A: For upper chest or collarbone work wear a strapless or wide V-neck top so the artist has access without fabric pressure. If you want to show the healed tattoo later, layer with a thin layered chain necklace that sits above the design to frame it without rubbing.
Q: Will these designs look the same on darker skin tones?
A: Darker skin tones do great with black ink designs when lineweight and saturation are adjusted. Ask for a contrast test or a healed example on similar skin during consultation. Slightly heavier lineweight and stronger saturation often read better than ultra-micro single-needle work on deeper tones.
