
Solid blackwork holds detail the delicate pieces do not. Thin single-needle Old English scripts and tiny sigils can look amazing fresh and then blur into a grey smudge. If you want gothic imagery that reads at year five, plan for saturation, negative space, and letter spacing up front. These ideas focus on designs you can actually live with decade after decade.
1. Blackout Sleeve with Gothic Architecture
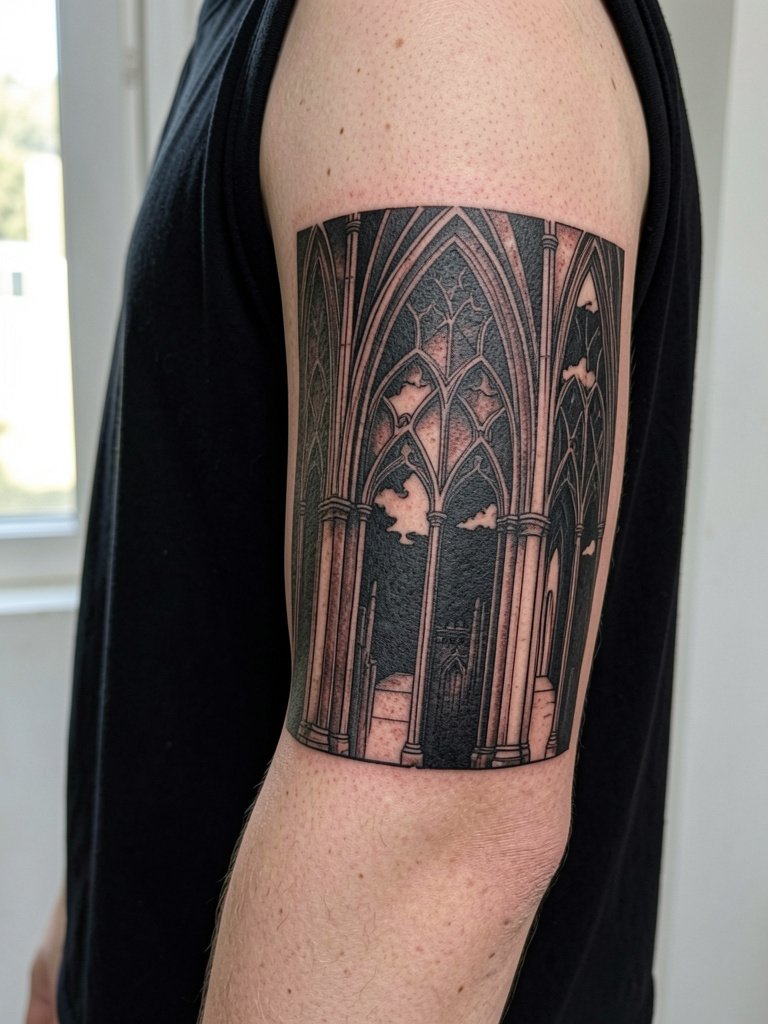
A blackout sleeve works when the architecture reads from a distance and still holds up close. Expect long sessions and heavy saturation, and plan three to five sittings for full saturation and clean transitions. For the appointment, wear a sleeveless black t-shirt so the artist can roll sleeves without pressure on the cuff. A common mistake is packing tiny architectural details into a blackout panel. The fix is to convert fine tracery into bold silhouette shapes with skin breaks for windows and sky. Healing for a saturated sleeve often runs longer than standard work, with scabbing and intense itching in week two.
2. Gothic Cathedral on the Sternum
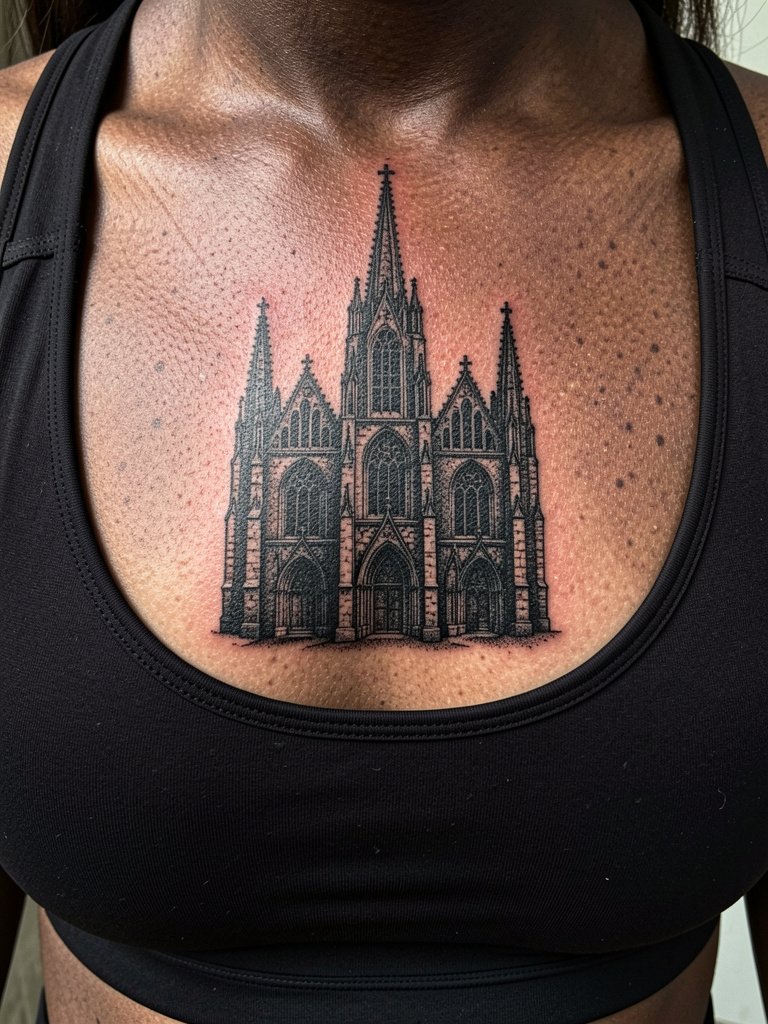
A sternum cathedral sings in the center of the chest because the architecture frames the body. For session comfort, bring a fitted bandeau or sports bra that gives the artist full access without tight straps. Wider kerning for any lettering in the piece keeps any text legible as the chest skin moves. Because the sternum sits under breast motion, expect tender sessions and consider splitting the work into shorter passes. One real mistake is shrinking the cathedral to fit a low neckline. Give the piece breathing room so arch details become negative-space highlights rather than thin linework that blurs.
3. Old English Script with Wide Kerning, Inner Forearm
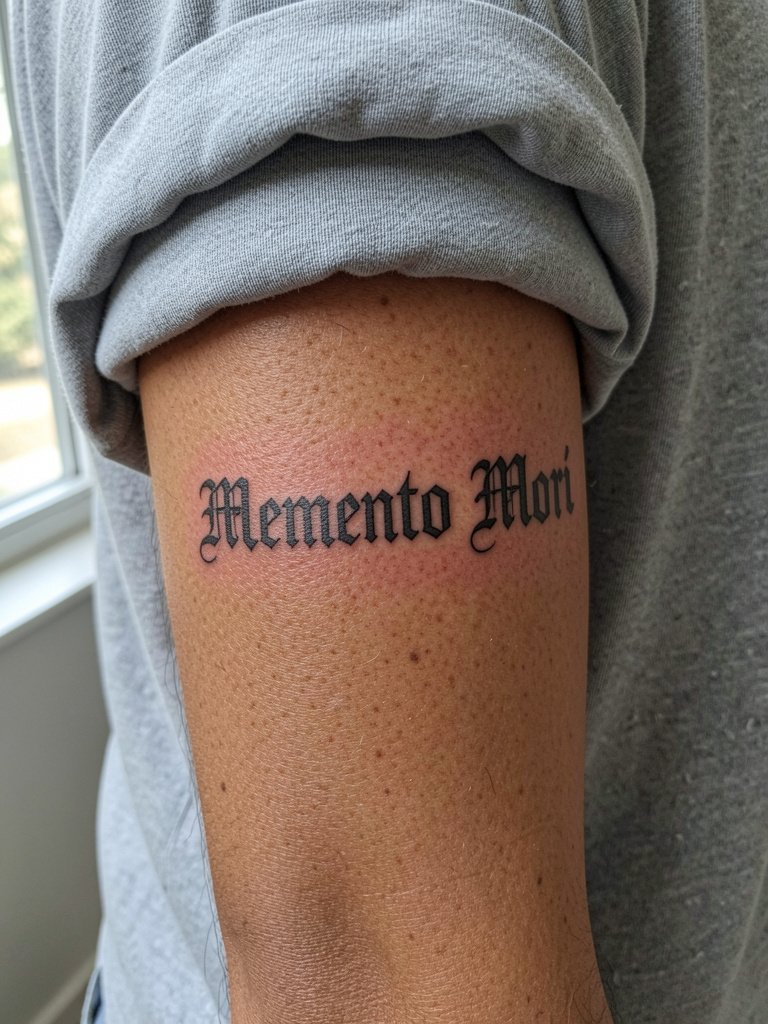
Text blurring is the complaint I hear most. Old English looks crisp fresh but the inner forearm eats thin strokes over time. The remedy is wider kerning and slightly heavier linework so letters stay separate as the ink settles. For the appointment, wear a loose short-sleeve shirt you can roll without tight cuffs. A common aging path: clean at six months, softening at two years, and a readable, darker script at five years when the spacing was planned correctly. Bring two reference sizes so the artist can show scale at three and five inches.
4. Gargoyle Silhouette with Negative Space, Lateral Shoulder
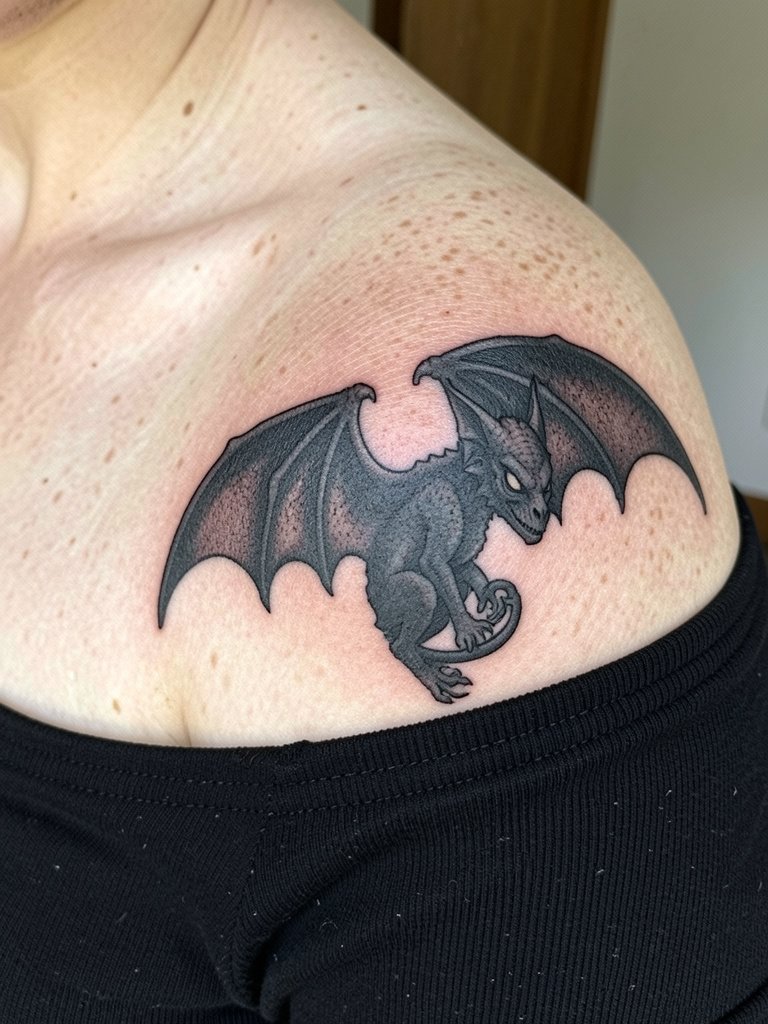
Silhouettes on the shoulder beat intricate filigree when friction and sun are factors. Shoulder skin tolerates bold blocks well and negative-space carving keeps the eyes and claws readable on darker tones. For the session wear a loose short-sleeve top or off-shoulder that the artist can work around. The usual mistake is asking for microscopic details in the wings. Scale up the shapes and let skin show the internal highlights. Touch-ups are common at year two if small dark fills were used without adequate negative space.
5. Occult Sigil in Geometric Blackwork, Inner Wrist
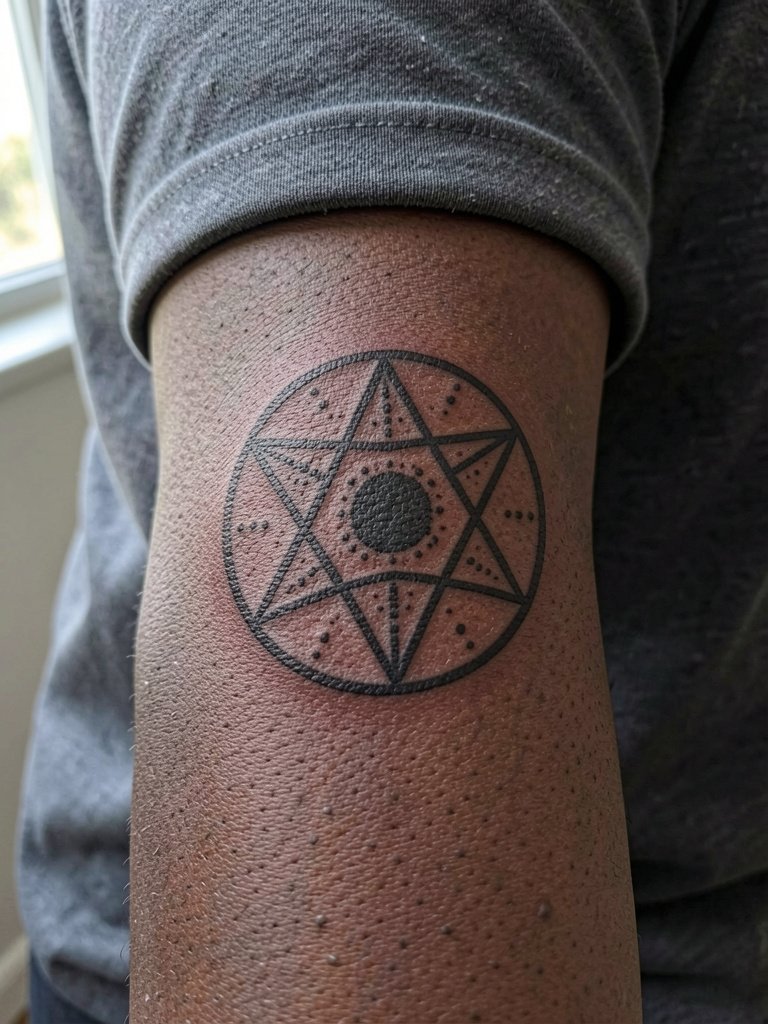
Tiny sigils can smudge if they are skinnier than two millimeters. For the wrist, prioritize crisp geometry and larger gaps between intersecting lines. Keep the session short and plan for a tighter placement test. Styling-wise, the design pairs with a thin chain bracelet set on the opposite wrist so the sigil remains the focal point. A frequent error is requesting microline detail that becomes grey within months. If you want small, accept a touch-up at year one as part of the plan.
6. Skull and Reaper, Ribcage
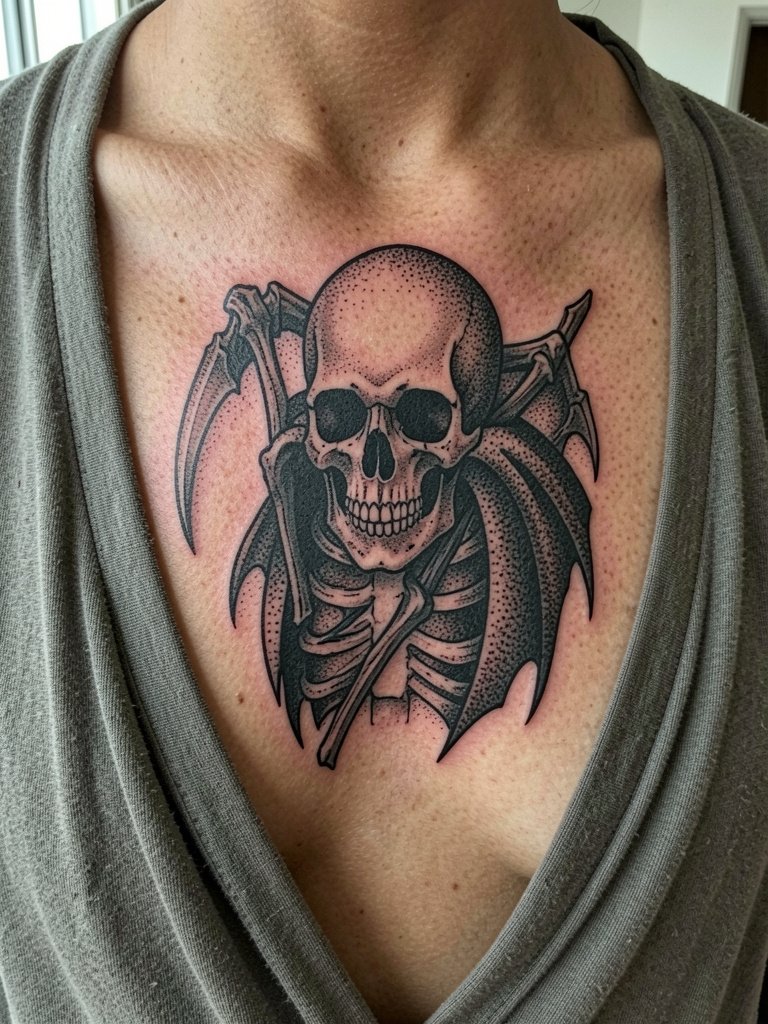
Fine-line fans debate ribs fiercely. One camp says fine line on ribs blurs within two years because the skin stretches and shifts under movement. The other camp insists that with correct needle depth and slightly wider spacing, fine-line can settle well and they point to healed examples for proof. Practically, a ribcage piece that leans blackwork and uses negative space for key details will age stronger than an ultra-fine-line realism pass. Expect high pain and consider shorter session windows. Numbing cream helps many clients get through long rib sessions, but confirm the artist's stance beforehand and follow their prep instructions precisely.
Session Day Essentials
These first six placements span wrists, forearms, shoulders, sternum, and ribs, so bring simple kit items that make the chair day cleaner and the first week smoother.
- Japanese aftercare balm. A thin, non-greasy balm that many people prefer for heavy blackwork because it does not trap heat under saturated areas.
- Australian Ink & Stone balm. Less sticky than many US balms, useful during the itchy second week of large black fills.
- UK Tattoo Butter. Higher beeswax content seals moisture without clogging pores for dry-healing blackwork panels.
- Solid aloe vera bar. Easy to apply on large sleeves without the mess of gels.
- Saniderm protective film. Use the film for the first three to five days on blackout areas to reduce friction and contamination.
7. Filigree Lace Band, Inner Thigh
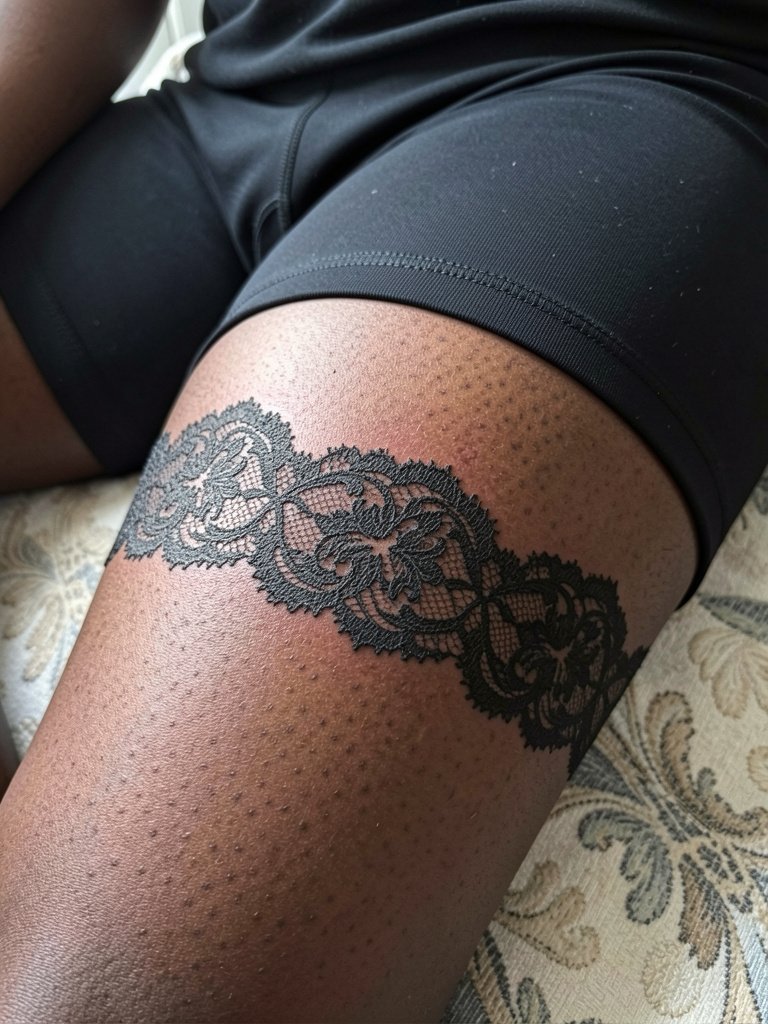
Inner-thigh filigree needs scale so the lace reads after movement and friction. Because the area is private, session wear should be loose shorts or a skirt that allows easy access without tugging at the waist. For showing off, a flowy maxi skirt with a slit lets the band peek when you move. Avoid microscopic lace lines; convert detail into negative-space loops and use stipple shading to suggest textile texture. The inner thigh can require touch-ups by year two if the original work used hairline filigree without room to breathe.
8. Abstract Blackout Panel with Gothic Text, Lateral Hip
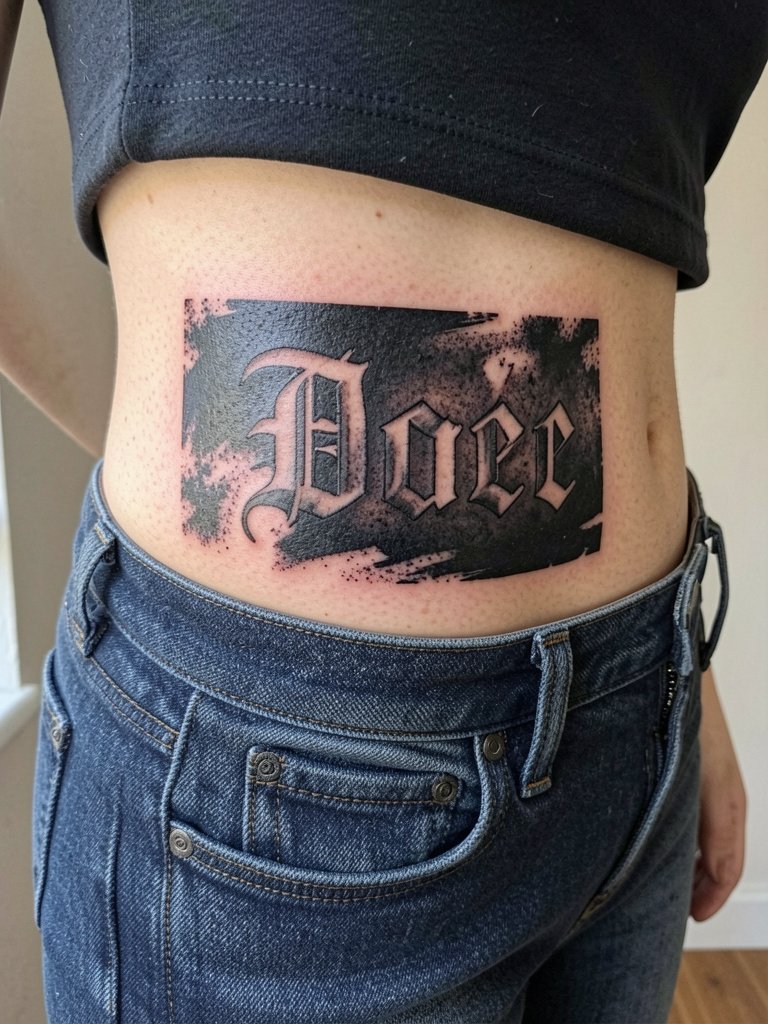
Blackout panels on the hip read like graphic patches when the negative-space word is bold and wide. Session-wise, wear low-rise bottoms so the artist can access the lateral hip without tugging at the waistband. For night looks, pair with low-rise black jeans to reveal the word at the waist. Avoid carving tiny script from within a blackout. Letters need breathing room or they will merge into the field at year two. Touch-ups are common as body movement and clothing friction can lighten edges.
9. Gothic Rose with Block Shading, Front Calf
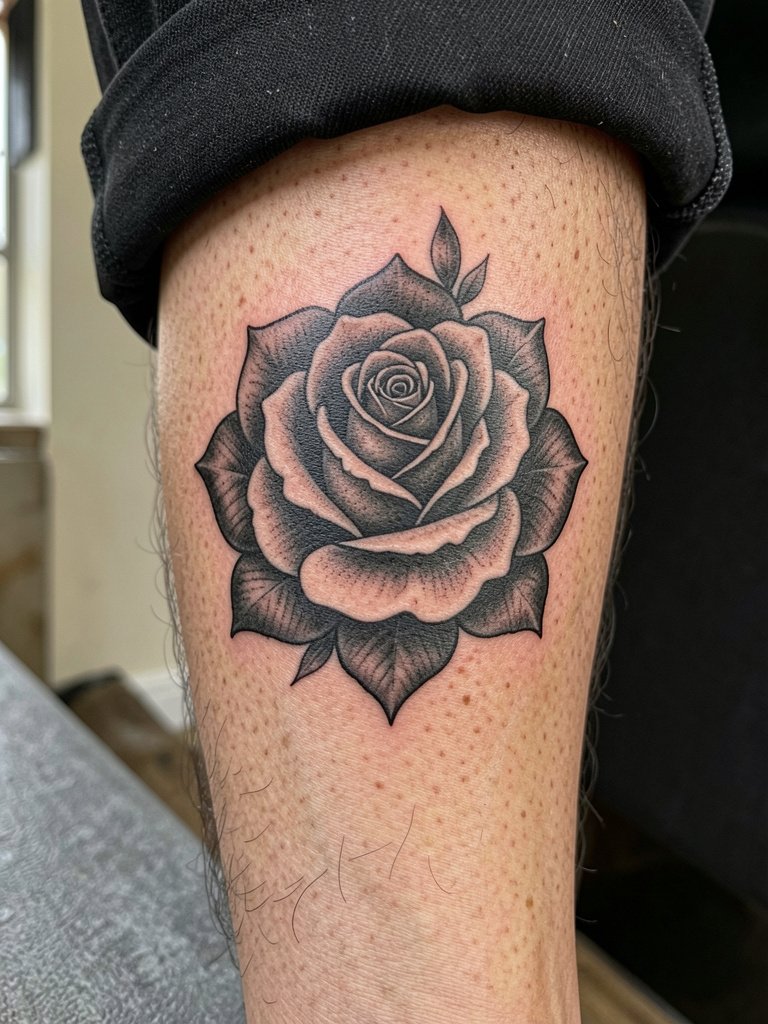
Block-shaded roses on the calf have great longevity because the skin is stable and the shapes are large. For a casual look, roll up your jeans and pair with ankle boots so the silhouette reads from a distance. People sometimes ask for tiny, soft-petaled realism there and then regret the lack of presence in photos. Larger black blocks and negative petal lines keep the rose legible as it ages. Healing on the calf is usually straightforward, but heavy fills can feel hotter during the first week.
10. Mandala with Gothic Motifs, Lower Back
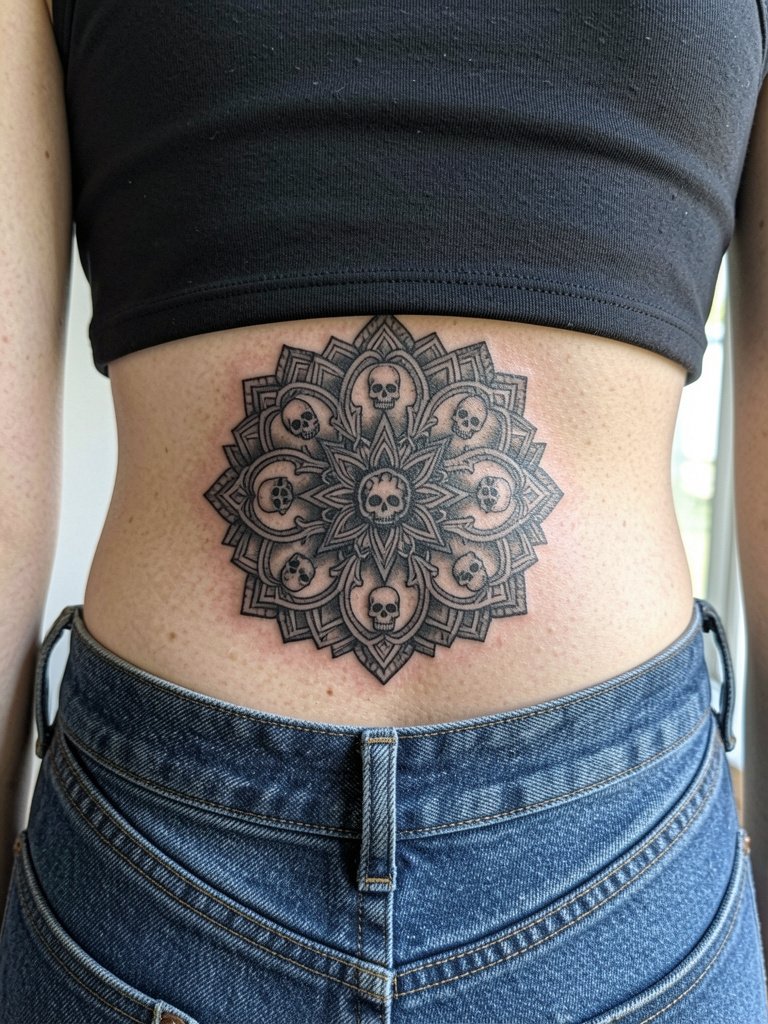
Mandalas with gothic motifs work best when the radial elements have room. The lower back offers a broad canvas but gets rubbed by waistbands, so siting the design slightly higher reduces abrasion. For show-off outfits, a low-rise top or crop pairs nicely with the placement. A common mistake is packing too many tiny arches into the center. Increase the central spacing and use dot work to suggest texture so detail does not vanish in three years.
11. Viking-Gothic Hybrid Shield, Upper Thigh
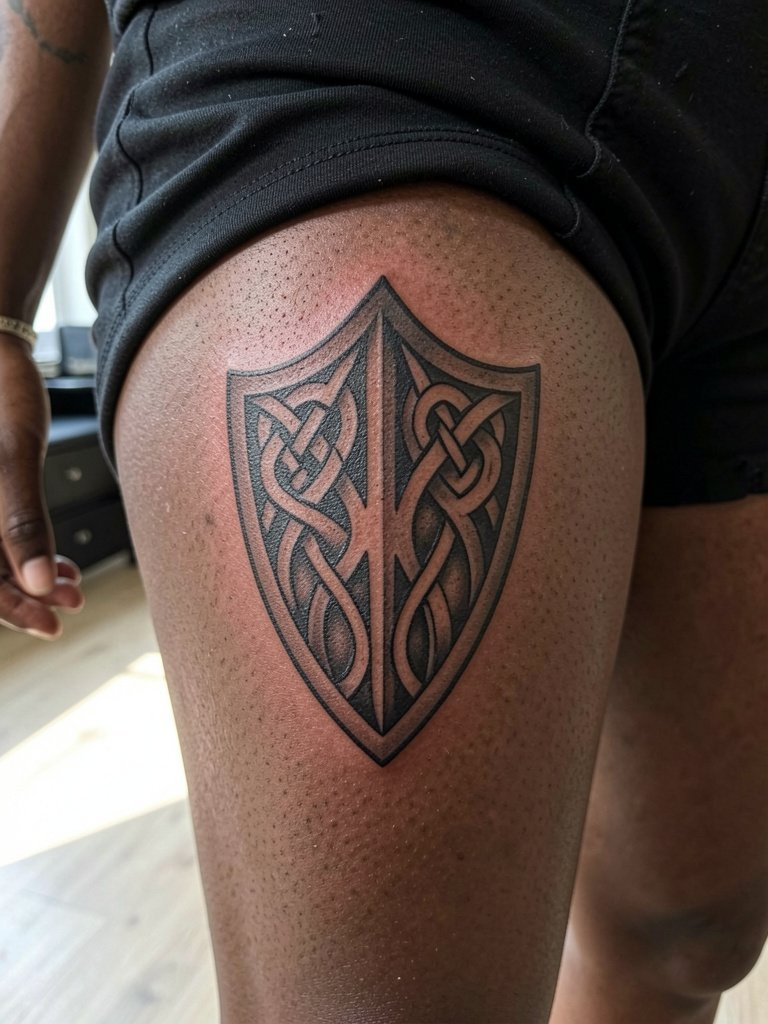
A thigh shield benefits from scale and strong black fields because the skin there can show crisp contrast in photos. For sessions, wear loose shorts the artist can move without tugging. To display the work, pair with high-waisted black shorts. The frequent mistake is shrinking knotwork too small. Larger knot intervals and arch silhouettes keep the shield readable at one and three years, and minimize the need for touch-ups.
12. Blackout Hand Panel with Gothic Finger Text
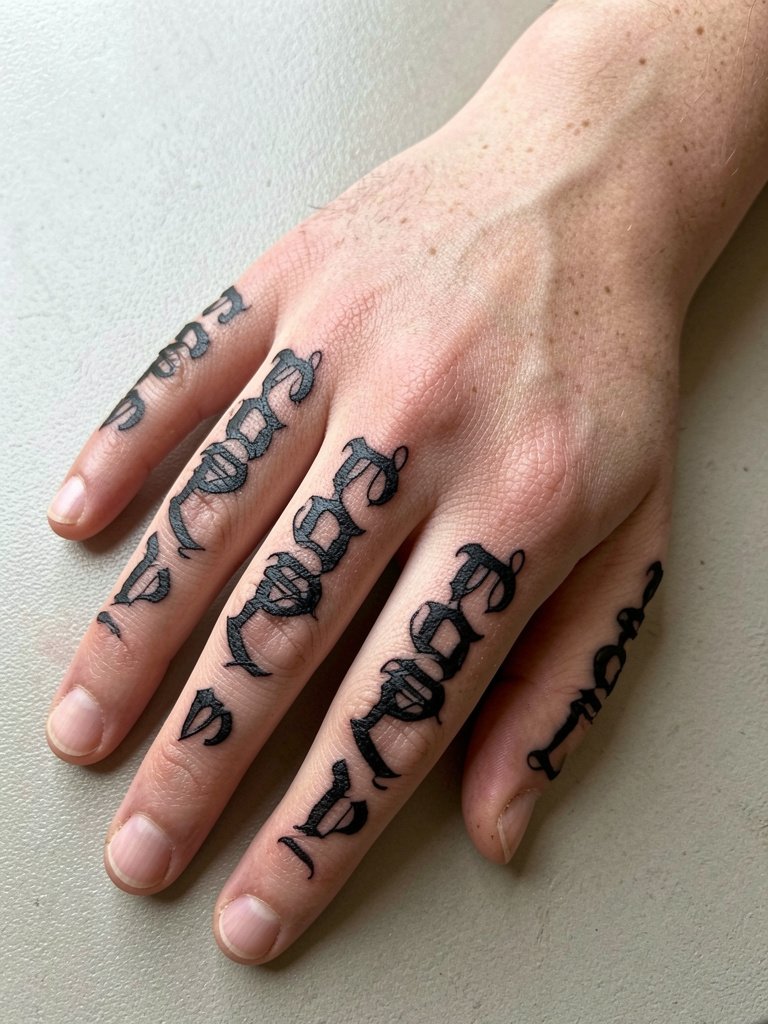
Hand blackouts are extreme and often need more touch-ups than other areas because hands face constant washing and friction. Small finger letters should be spaced generously, and expect maintenance sessions. A real mistake is assuming blackout fingers heal like forearms. They do not. Plan for multiple touch-ups within the first two years. For a wardrobe tie, thin rings on the opposite hand look intentional and let the blackout read as a single design rather than fragmented ink.
13. Crypt Door in Solid Black, Outer Forearm
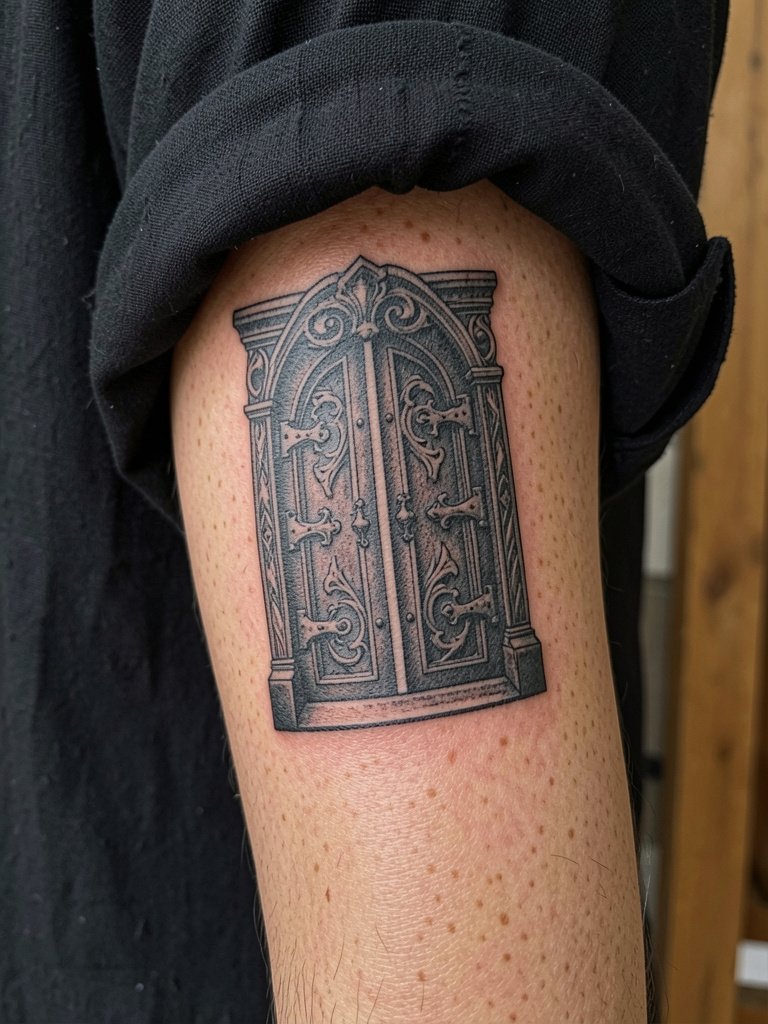
A forearm crypt door reads like a miniature narrative when the frame is bold and the interior relies on skin breaks. For a refined casual look, roll sleeves and pair with rolled-up black linen shirts. One common error is crowding too many tiny locks and hinges inside the door panel. Carve the silhouette cleanly and suggest interior detail with stipple rather than microline. Forearm skin tolerates solid black well but remember to plan for a touch-up in the first year if lines feather slightly.
14. Gothic Archway Framing a Scene, Collarbone
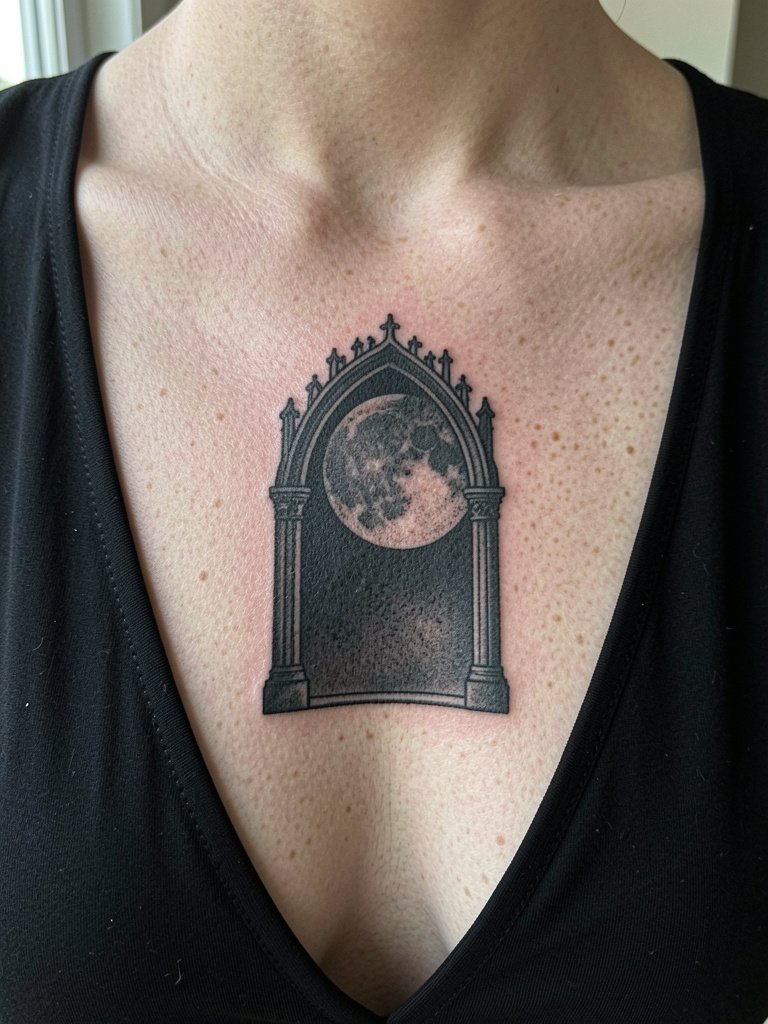
Archway frames on the collarbone focus the eye and let a small scene breathe. For the appointment, wear a deep-V or strapless top so the artist has clear access without tight straps. To style for evening wear, a deep V black top showcases the frame. A common aging issue is placing the frame too close to the clavicle bone, which can make linework sit unevenly. Sit slightly below the bony crest and keep the frame proportions balanced for longevity.
15. Blackwork Cross with Ornate Details, Nape
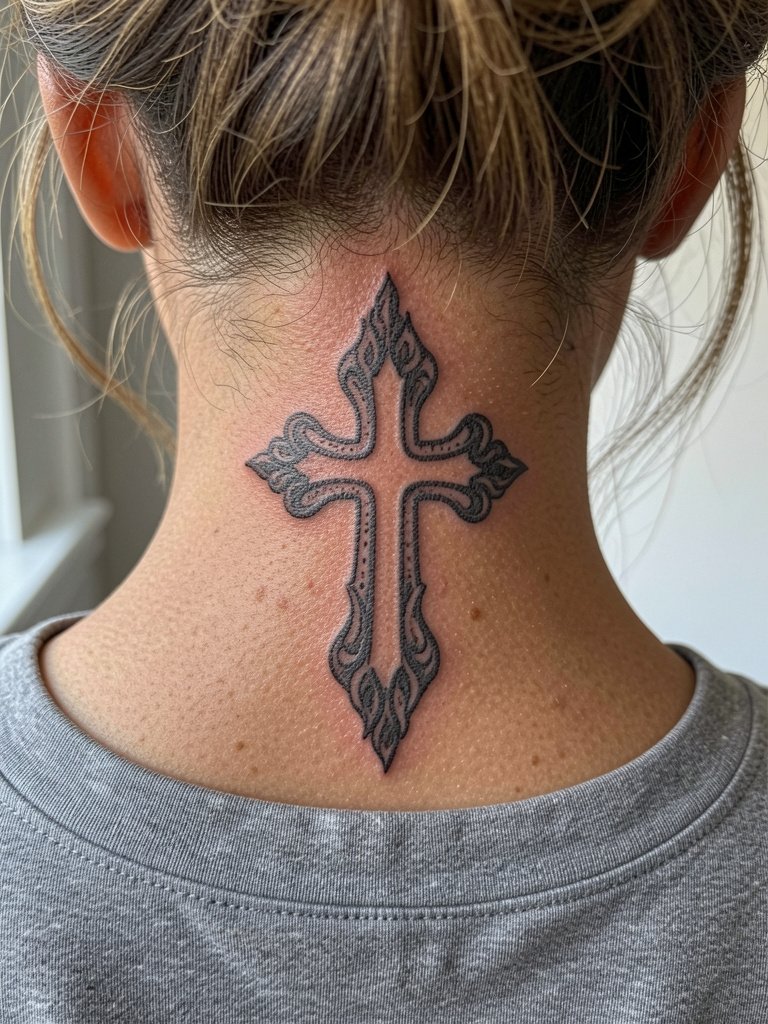
Nape pieces require an artist comfortable with the curvature and hairline. Keep the cross compact and let negative space form the filigree details for durability. For show-off outfits, a high-neck top or an updo will reveal the nape intentionally. A frequent mistake is loading the nape with tiny internal ornamentation that blurs after hair grows back. Use broader elements and plan a short touch-up window if you sit in a humid climate.
16. Stained-Glass Window Motif, Upper Arm
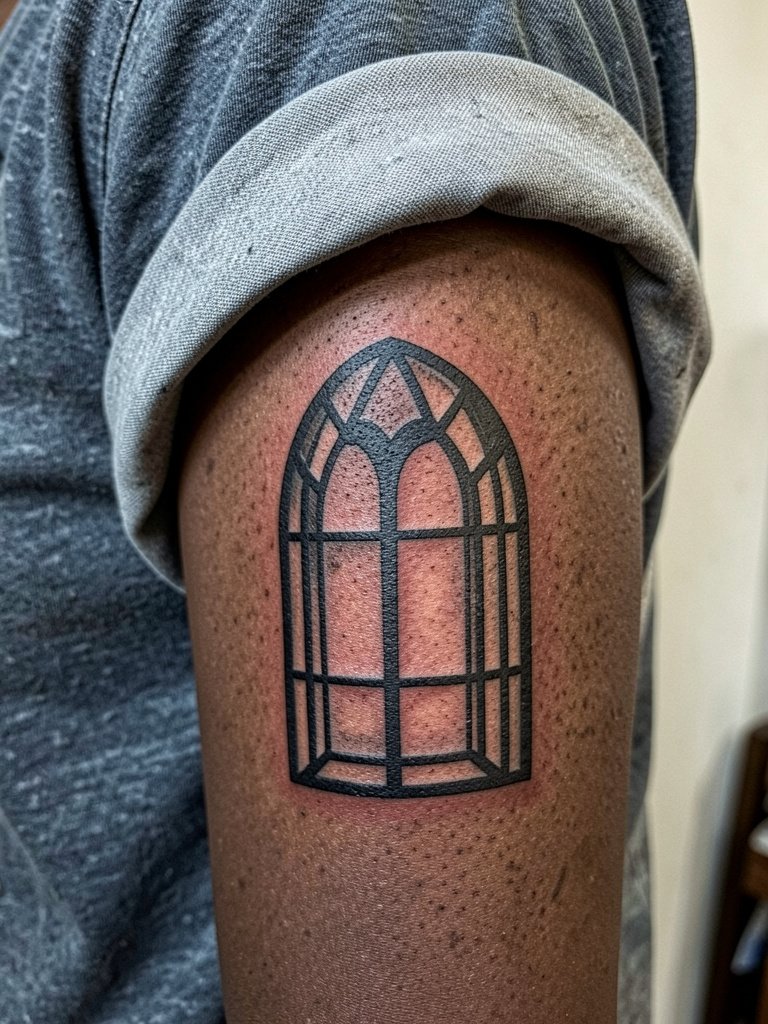
Stained-glass effects translate to blackwork when the "lead" lines are thick and panes are left as skin or tight stipple. For a session, wear a sleeve you can roll without tugging. The mistake is trying to replicate colored glass with tiny hatch shading; instead suggest panes using negative space and dot work to imply texture. Upper-arm skin holds bold lead lines well, and healed photos at one year often show excellent contrast if the original saturation was deep.
17. Pocket Watch Memento Mori, Sternum Patch
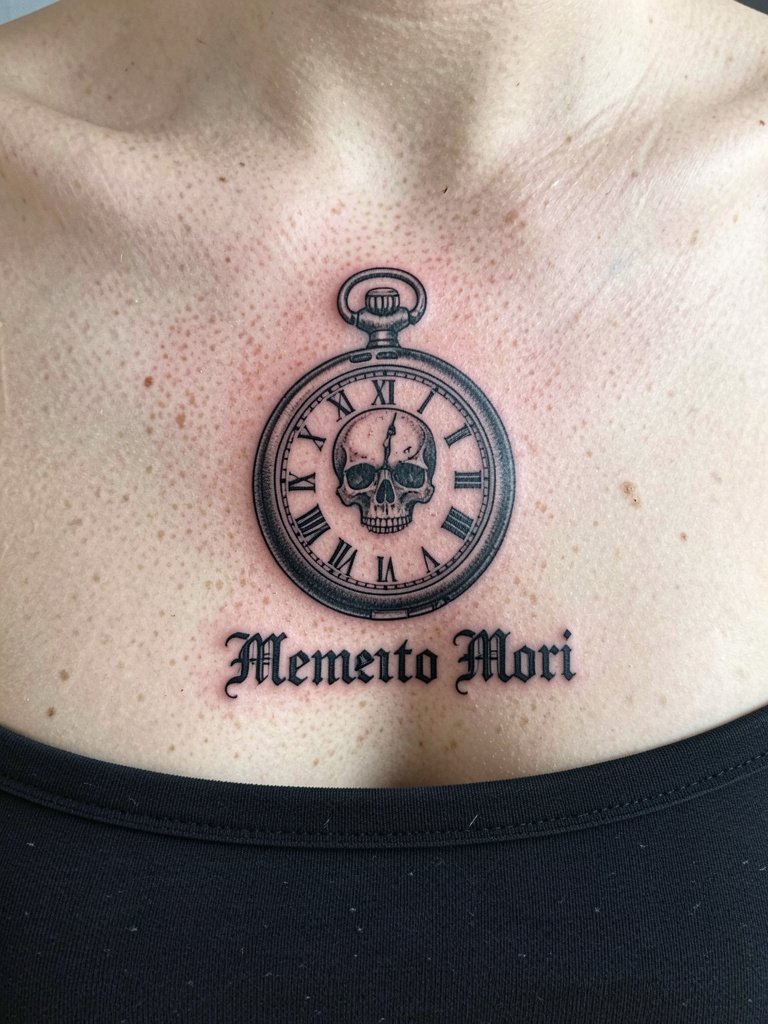
Symbolic timepieces work on the sternum if the numbers and hands are bold rather than microline. For the session, a strapless or front-opening blouse keeps access easy. To pair with outfits, a flowy black camisole frames the piece without covering it. A common error is tiny Roman numerals around a small dial. Increase dial size and use negative-space numerals for legibility at year two and beyond. Expect tender healing and plan a brief touch-up if internal numerals soften.
18. Bat Swarm and Spire Silhouette, Upper Back
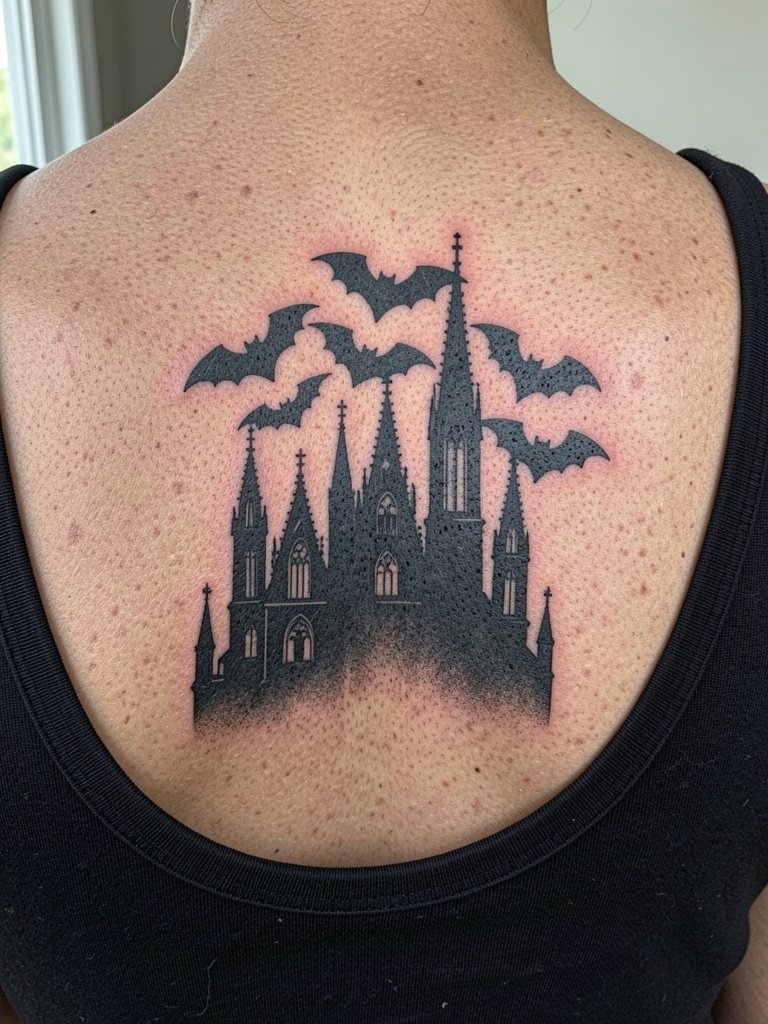
Grouped silhouettes like bats scale well across the upper back because movement and posture create natural animation. For the session, wear a top that allows the artist full access with minimal fidgeting. A casual show-off option is a scoop-neck tank. Avoid tiny wing veins and instead make the bats bold silhouettes with occasional skin-break highlights. Healing is usually straightforward, but large spreads may require a short touch-up session where edges soften.
19. Moonlit Abbey, Upper Chest
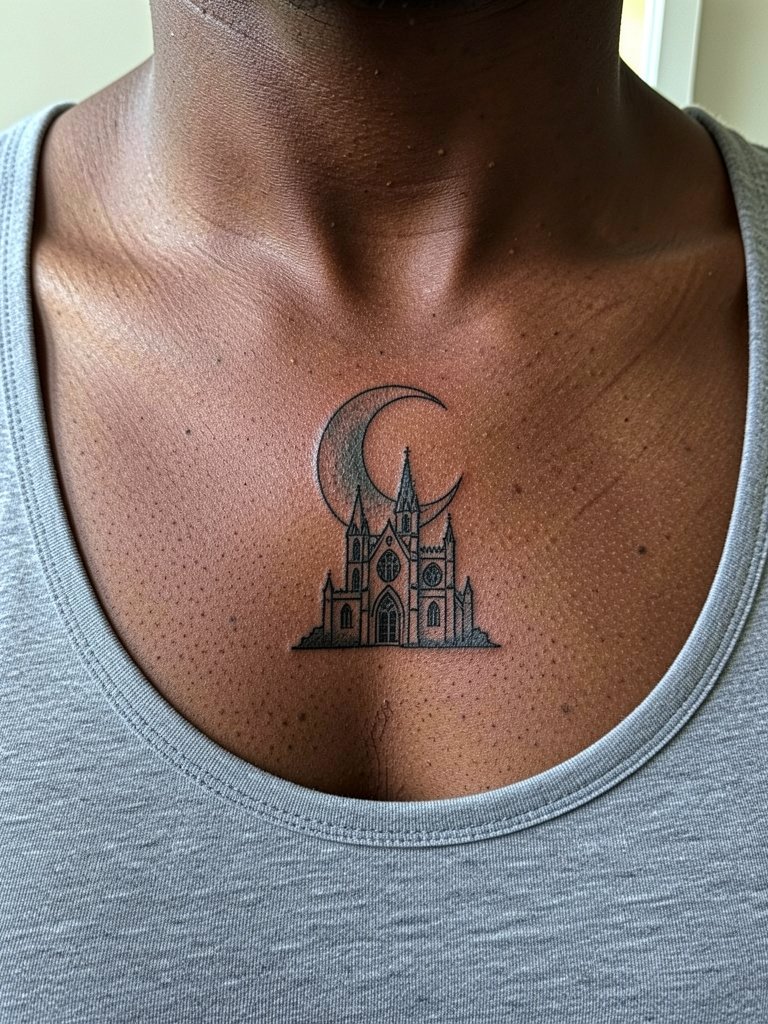
Compact upper-chest scenes work when the arch and moon are bold and the interior detail is suggested, not carved. For the session, a wide-neck shirt makes access easier and avoids straps digging the fresh work. Pair with a flowy camisole for an evening look. A typical mistake is shrinking the abbey too small. Give the spire room so negative-space highlights remain readable at year three.
20. Minimalist Arc and Bird, Inner Bicep
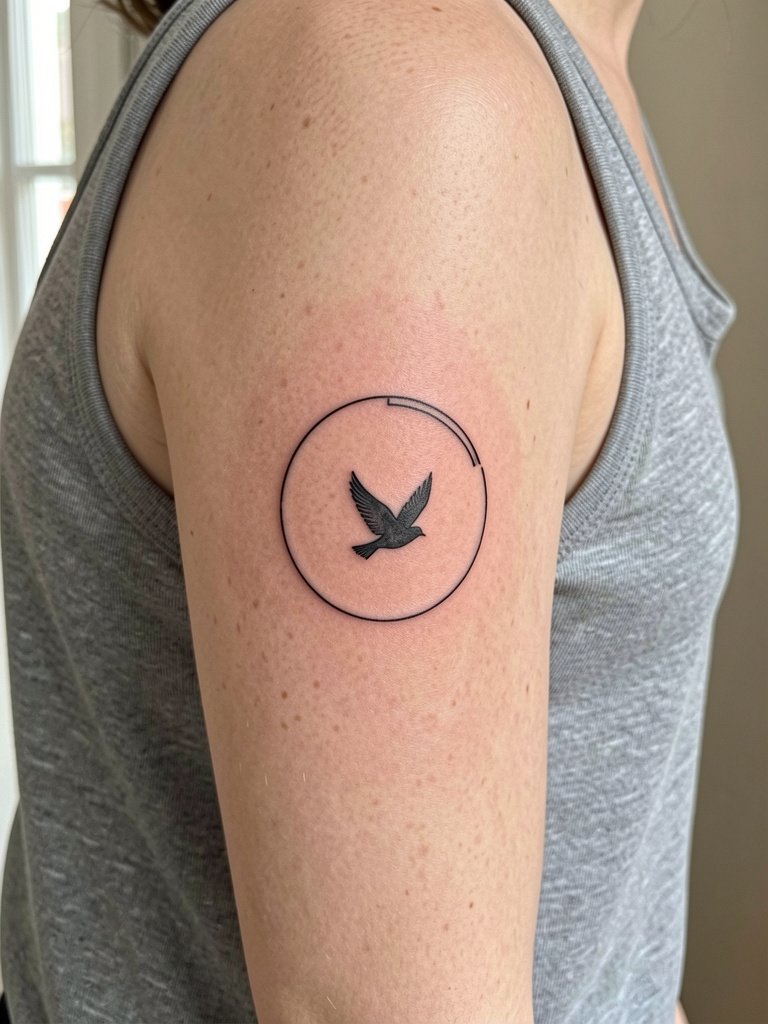
Inner-bicep pieces look delicate but that area moves and stretches. Keep the bird silhouette simple and the arc bold so the motif survives skin shifts. Wear a tank top to the session so the artist can work without fabric tugging. A frequent mistake is squeezing ultra-fine detail into the inner bicep. Slightly heavier line weight and open negative space help the piece last and photograph well at two years.
21. Hooded Figure in Stipple, Forearm Panel
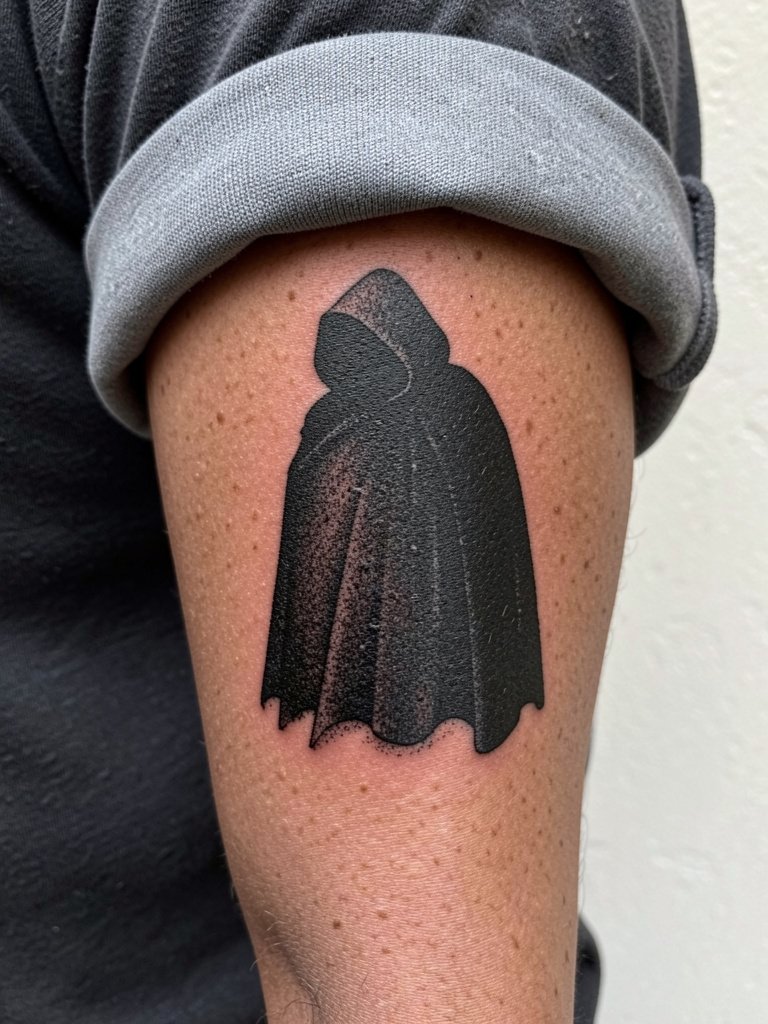
Stipple shading gives a soft texture without relying on greyscale washes. On the forearm, stippling and heavy silhouette balance well, and the piece photographs cleanly. For session wear, a rolled-up short sleeve keeps the area exposed. The mistake is requesting diluted wash effects that fade into dull greys. Instead, ask for concentrated stipple and clear skin breaks to maintain depth over time.
22. Candle and Dripped Wax, Hand Side
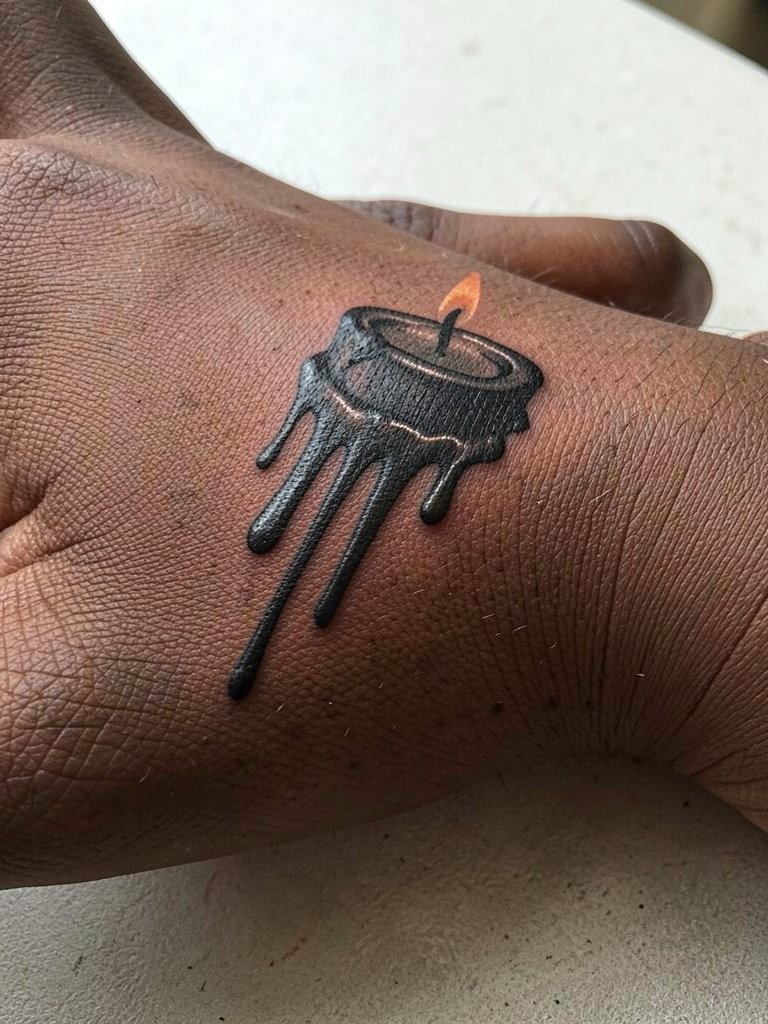
Hand-side motifs need bold strokes and acceptance of maintenance. Thin wax lines look great fresh and can soften with frequent washing. Avoid micro-carving and prefer thicker drips with clean negative-space edges. The practical mistake is expecting hand pieces to stay perfect without touch-ups. Plan a maintenance appointment within the first 12 to 18 months for hands.
23. Ornate Keyhole with Hidden Scene, Inner Wrist
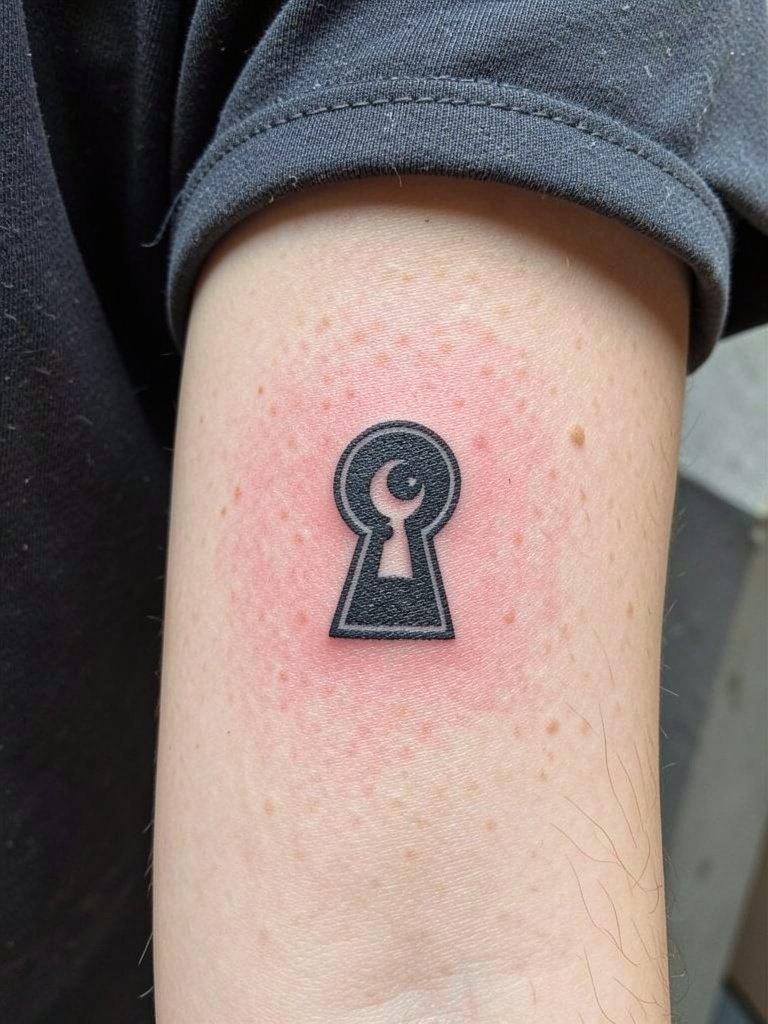
A wrist keyhole is a small detail that benefits from scale testing. Keep the internal scene minimalist so it reads after healing. For display, pair with a minimalist watch on the opposite wrist. Tiny details that crowd the keyhole will blur over time. Make the keyhole shape decisive and let the inner scene be a single silhouette for durability.
24. Archival Script Ribbon Around Arm, Upper Arm Band
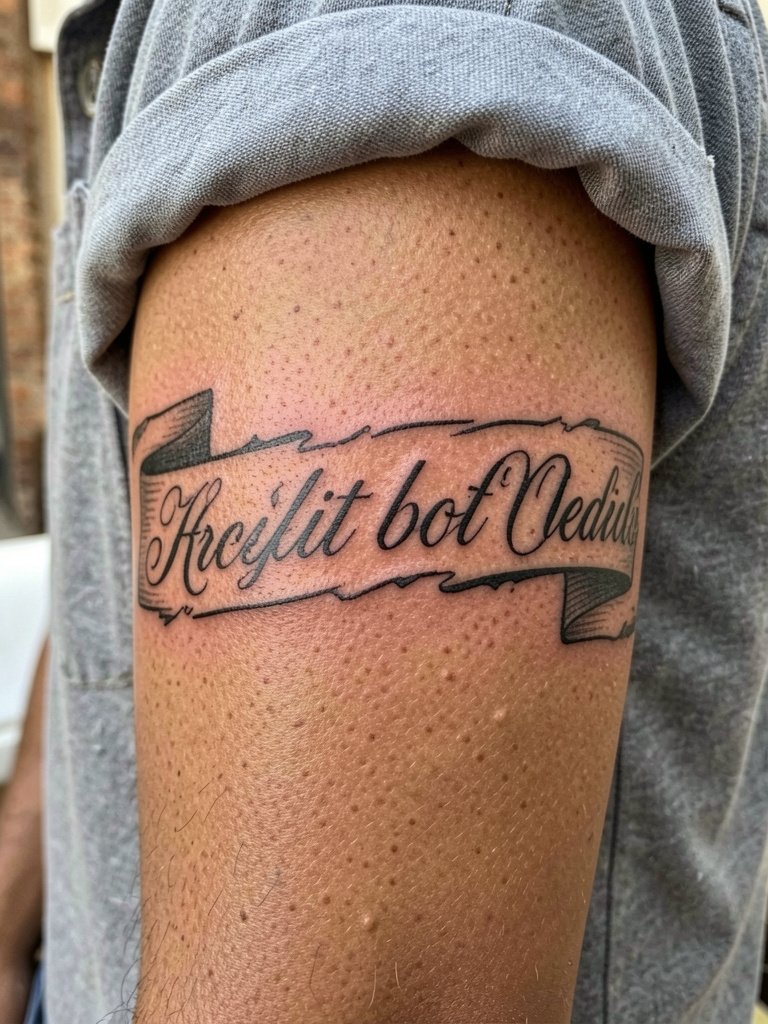
Arm bands with script age better when the ribbon is thick and letters have space. Narrow ribbons with dense lettering blur quickly. For the appointment, wear a shirt you can roll and still leave the band area relaxed. A styling tip is a rolled-up short-sleeve linen shirt to show the band casually. Expect that tight bands may need a touch-up where the ink meets hair follicles.
25. Framed Gargoyle Eye, Collarbone Nook
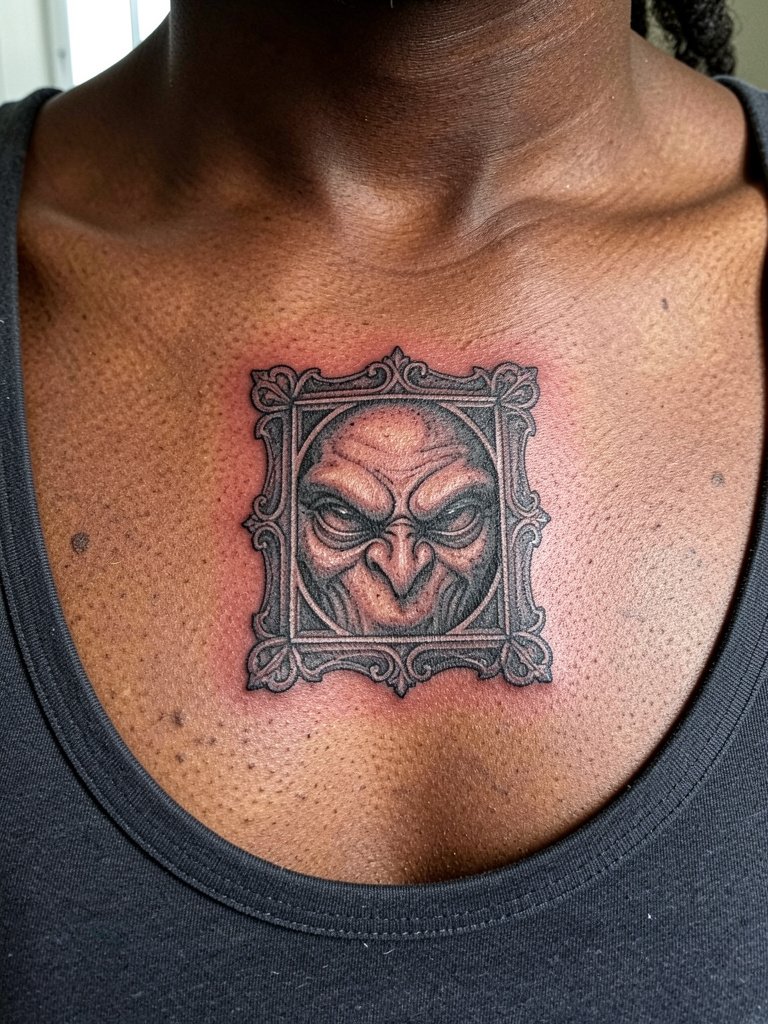
A single framed eye reads as a focal accent when proportioned to the collarbone. Keep the frame solid and let the eye be negative space with small stipple highlights. For the session, a wide-neck top gives clear access. To present the piece, a scoop-neck top keeps the collarbone visible. Packing too many internal highlights into a small eye leads to early loss of clarity. Aim slightly larger than you think and plan a minor touch-up window if the skin favors feathering.
Frequently Asked Questions
Q: How do I find artists who do gothic blackwork without scrolling endless generic blackout portfolios?
A: Search hashtags like #gothicblackwork, #blackworktattoo, and #darkarttattoo on Instagram and TikTok and filter by location. Use Tattoodo or Inked App keyword searches for phrases like "Gothic cathedral blackwork" and check Reddit threads on r/tattoos for healed examples across skin tones. Those pathways surface portfolios focused on architectural detail and negative-space technique rather than generic blackout panels.
Q: Will solid blackwork really last longer than black-and-grey washes?
A: Artists split into two camps. One camp says saturated blackwork retains contrast longer because solid fills do not soften into muddy greys as quickly. The other camp argues that careful black-and-grey techniques using high-quality ink and precise depth can age well and give dimensionality blackwork lacks. Practically, solid blackwork and strategic negative space are safer bets for high-contrast gothic motifs, and you can discuss touch-up plans with your artist if you prefer softer washes.
Q: I have dark skin. Which blackwork details keep contrast from looking like one blob?
A: Prioritize negative space and skin breaks rather than relying on white ink. Larger shapes, clear separation between elements, and open kerning for text help the black read against darker tones. I have seen dark-skin healed photos where carved-out highlights preserved detail, while microline fills did not survive. Mention the desired contrast level and show healed examples at your consultation so the artist can scale shapes appropriately.
Q: How long does heavy blackwork take to heal and when should I expect touch-ups?
A: Heavy blackwork commonly heals longer than lighter pieces, often three weeks before it calms down and a few months before it fully settles. Expect itchiness in week two and resist picking. Touch-ups vary by placement. Hands and ribs often need early touch-ups. Plan a touch-up discussion at the booking so the artist can flag high-friction spots and set a realistic recheck at three to twelve months.
Q: Is numbing cream acceptable for long blackwork sessions on painful zones like the ribs?
A: Artists and clients divide on numbing cream. One group uses it to manage long sessions and keep the client comfortable. The other group warns that numbing can alter skin texture and mask important feedback during the tattoo. If you plan to use topical anesthetic, ask the studio ahead of booking about their policy and follow their timing guidance to balance comfort and technique.
Q: What should I wear to appointments for different placements so the artist has access without discomfort?
A: For sleeves and forearms, wear a loose short-sleeve shirt you can roll. For sternum and chest work, bring a strapless or front-opening top. For ribs and hips, low-rise pants and a loose front-opening top reduce tugging. For inner thigh, choose loose shorts or a skirt, and for nape pieces pin your hair up. Clothes that give access without pressure on fresh skin make the session smoother and reduce post-session irritation.
