
Black, high-contrast optical tricks on the forearm can still surprise people on the street, but the versions that last are rarely the daintiest ones on Pinterest. Thicker linework and deliberate shadow placement make a geometric levitation read in sunlight, not just studio setups. Read these forearm-specific concepts, how they heal over time, and which outfit pieces actually make the depth pop in real life.
1. 3D Geometric Floating Stones, Inner Forearm
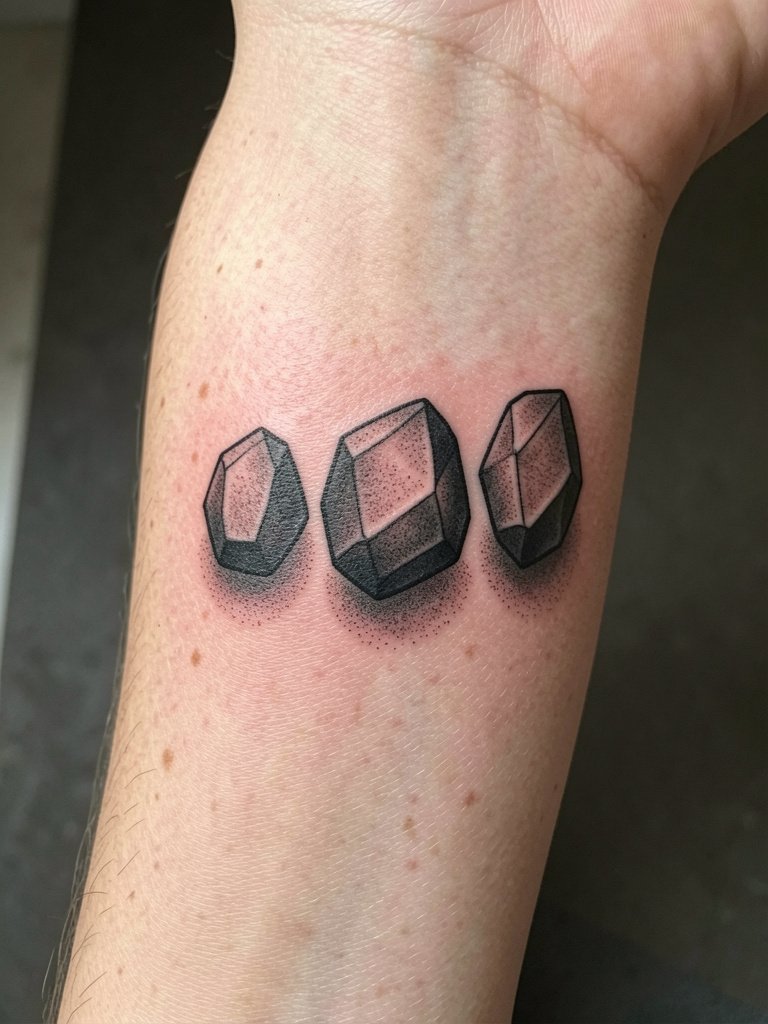
Pick this when you want a small, show-off piece that reads as a prop on your arm. The inner forearm lets the shadows fall naturally when your palm faces up. Expect a single session around one to two hours and a moderate pain level. The common mistake is using ultra-thin single-needle shadows that blend into gray at six months. For longevity, ask for bold shadow anchors and a touch of stipple contrast near edges. Healed at six months the stones keep their pop. By year two heavier black centers may soften but stay readable with a touch-up every 2–3 years. For outfits, rolled-up linen shirts in cream or olive frame the inner forearm nicely and show the levitation. Buy a linen button down shirt to try the look on warm days.
2. M.C. Escher-Inspired Infinite Staircase, Outer Forearm
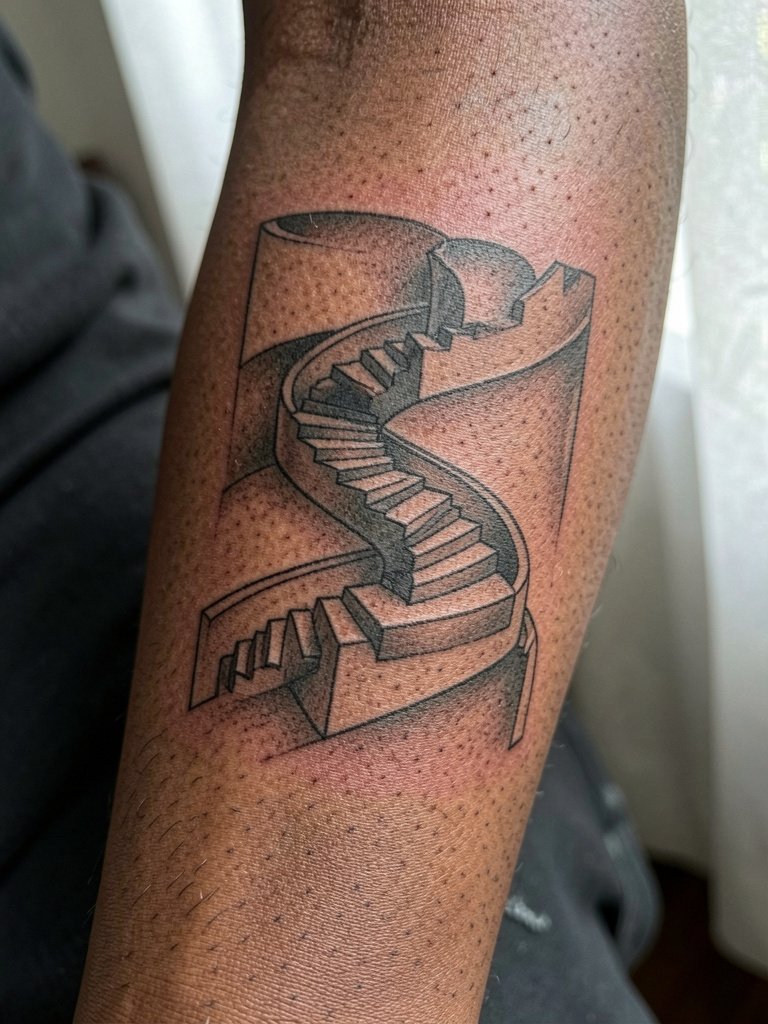
This vertical design benefits from the outer forearm's long canvas and structured clothing. The session typically takes two shorter passes and reads best with sharp linework and careful value breaks. A frequent error is packing too many tiny details into a small vertical band. If you want the staircase to hold at three years, scale up panel spacing slightly and add thin negative-space borders. Pain is moderate and touch-ups are common for crisp edges. Pair the finished piece with a fitted charcoal blazer or a black turtleneck to echo the architectural feel. Try a structured black blazer for show-off photos.
3. Rippling Wave Geometry, Inner Forearm
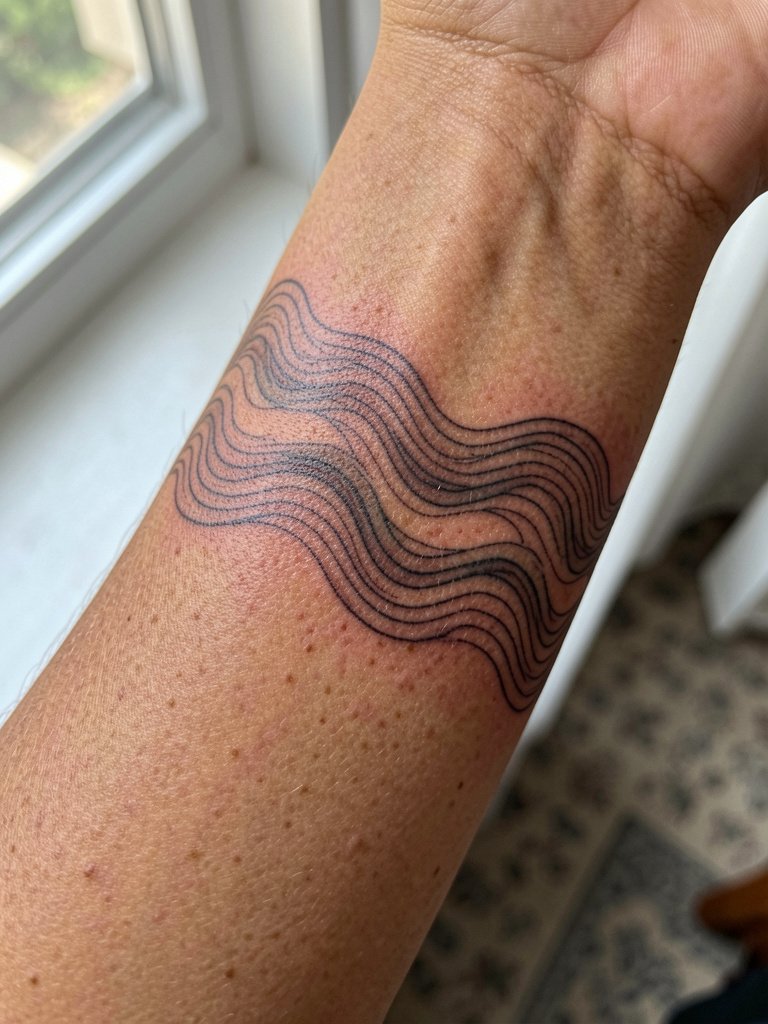
Choose rippling geometry if you like kinetic illusions that react when you flex. The inner forearm amplifies the wave as muscles move. Expect a single-needle session with high line density and a moderate tenderness during the last half hour. The top mistake is going too tiny. Ultra-fine spacing blurs into a gray mass on textured forearm skin by year one. To avoid that, increase baseline line weight to 0.5–0.8 mm and keep larger negative space islands. At six months the pattern should still show distinct ridges. For session comfort, wear a loose button-down the artist can roll up. Use a rolled cuff linen shirt to stage photos.
4. Anatomical "Opening Skin" Zipper, Inner Forearm
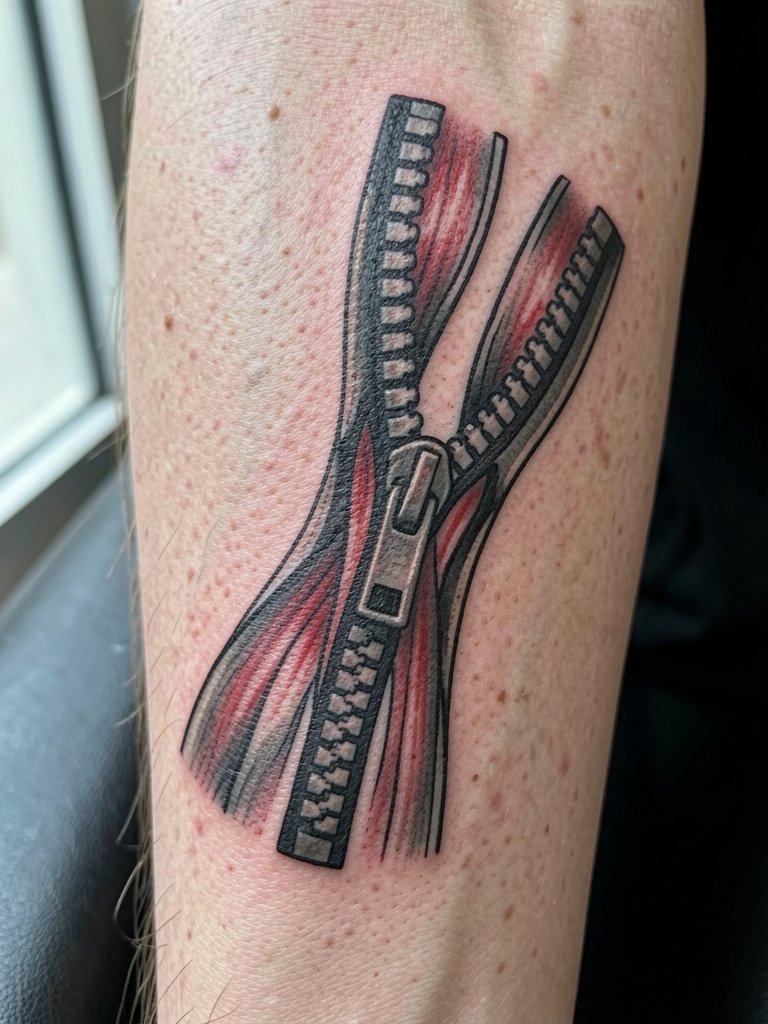
This playful yet visceral idea needs careful placement. The inner forearm's curve can sell the unzip effect if the artist aligns the "pull" with natural skin folds. Pain is low to moderate and the piece usually takes two sessions for color accents. Many people regret placing zippers right over flex zones because when the arm stretches the open-skin read can look like a raised scar. One camp says avoid high-movement areas entirely, while the other camp adapts the design to the flex and still gets reliable results. If you like wearing rolled sleeves, show it off with a dainty gold stacked bracelet set on the opposite wrist. During the consultation bring photos of the arm in multiple positions so the artist can map the zipper to the muscle.
5. Stereo-Depth Floating Birds, Outer Forearm
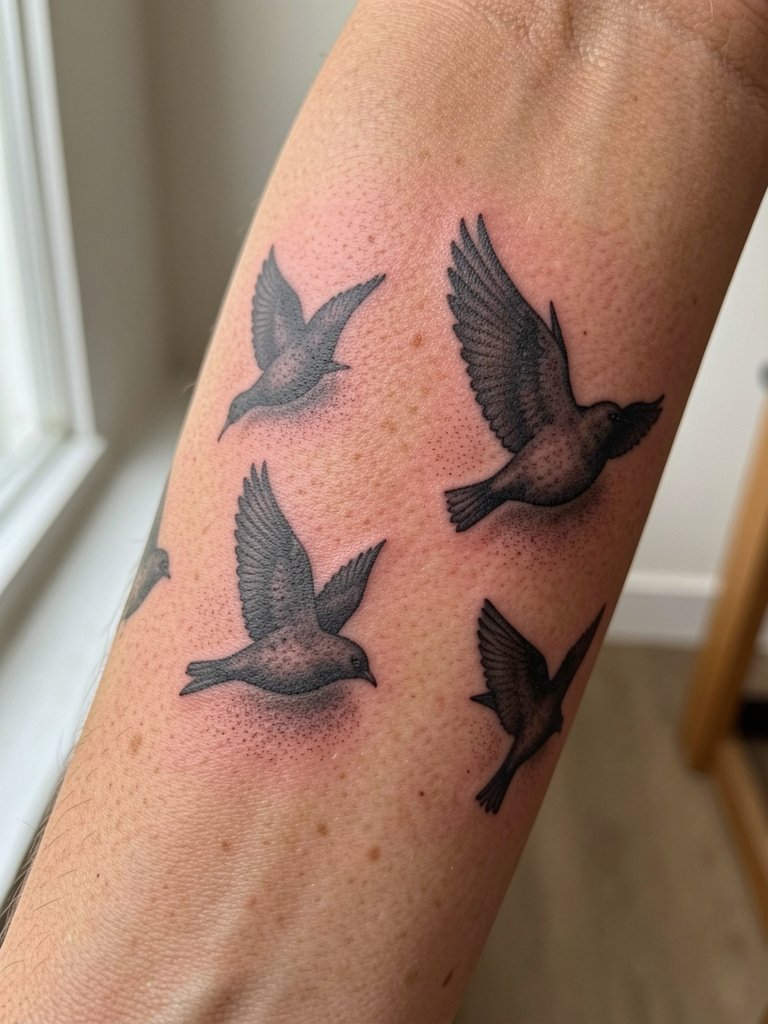
Floating birds work best when the shadow is intentionally detached from the silhouette. The outer forearm catches natural light, and soft stipple shading creates convincing lift. Sessions are compact and healing is usually straightforward. The most common error is placing the shadow directly under the wing outline; that flattens the effect once the arm moves. Instead offset shadows slightly and test with a temporary marker before inking. On darker skin tones consider small white-ink accents to keep the shape crisp. For outfit pairing, structured blazers or fitted turtlenecks in dark charcoal emphasize the vertical motion. Try a fitted turtleneck black for contrast shots.
6. Spiral Tunnel Sleeve, Full Forearm
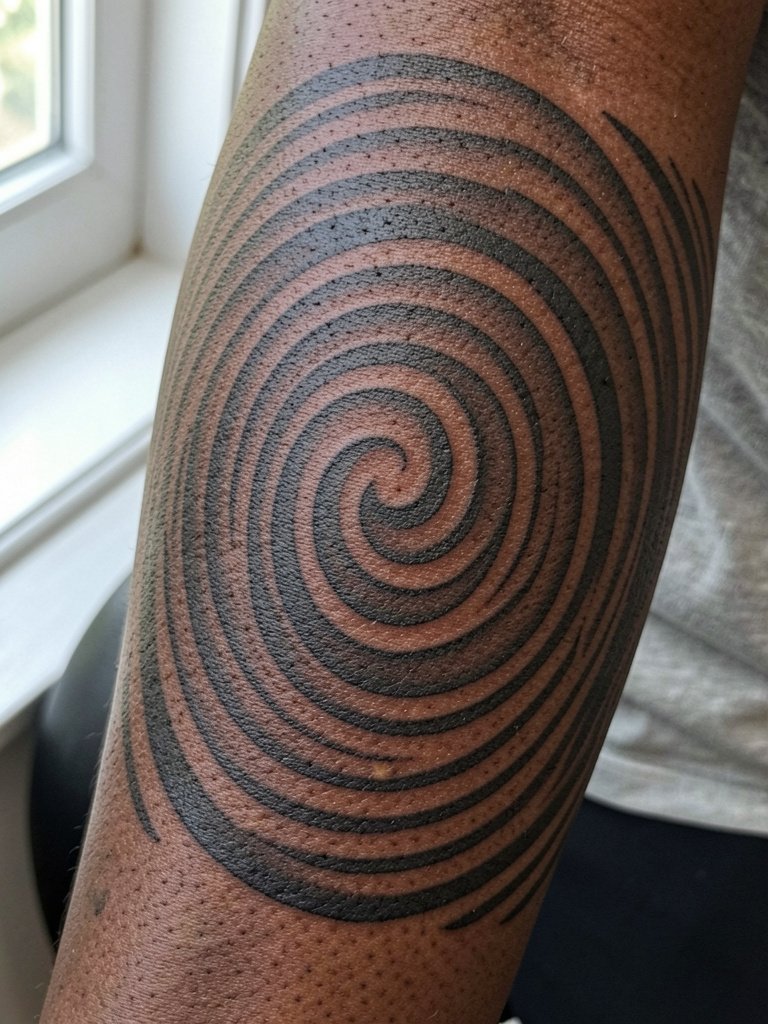
A full forearm sleeve of spirals is a commitment. Expect multiple sessions totaling several hours and noticeable soreness across the forearm. The design's success depends on consistent saturation and value transitions across both faces of the arm. One frequent mistake is uneven density where the artist works on different days. Healed at two years an evenly executed sleeve still creates a kinetic illusion when you twist your wrist. Because this wraps the whole limb, show-off outfits like sleeveless crop tops or wide-strapped tanks are ideal. For session comfort, bring a loose button-down that can be removed easily. Try a wide strap tank top for reveal shots.
Session Day Picks
These five products smooth the first week for high-contrast forearm work and protect delicate shadow gradients after the chair.
-
H2Ocean Ocean Spray saline wound wash. Gentle saline helps rinse ink and crust without stripping the subtle stipple that makes floating and shadow work read on darker skin.
-
Mad Rabbit Tattoo Balm (Black). A black-tinted balm used by blackwork clients to prevent early contrast loss while the tattoo skins over.
-
Eternal Ink Black Mat bottle. High-opacity ink helps technicians hold sharp shadow edges in dense 3D pieces, reducing the need for heavy touch-ups.
-
Hustle Butter Deluxe. A thinner balm option for the first week that keeps shading breathable while soothing the skin.
-
Tattoo Goo Ointment. Long-term maintenance balm for keeping blackwork from graying over years when used sparingly after healing.
7. Musical Note Motion Illusion, Near Wrist
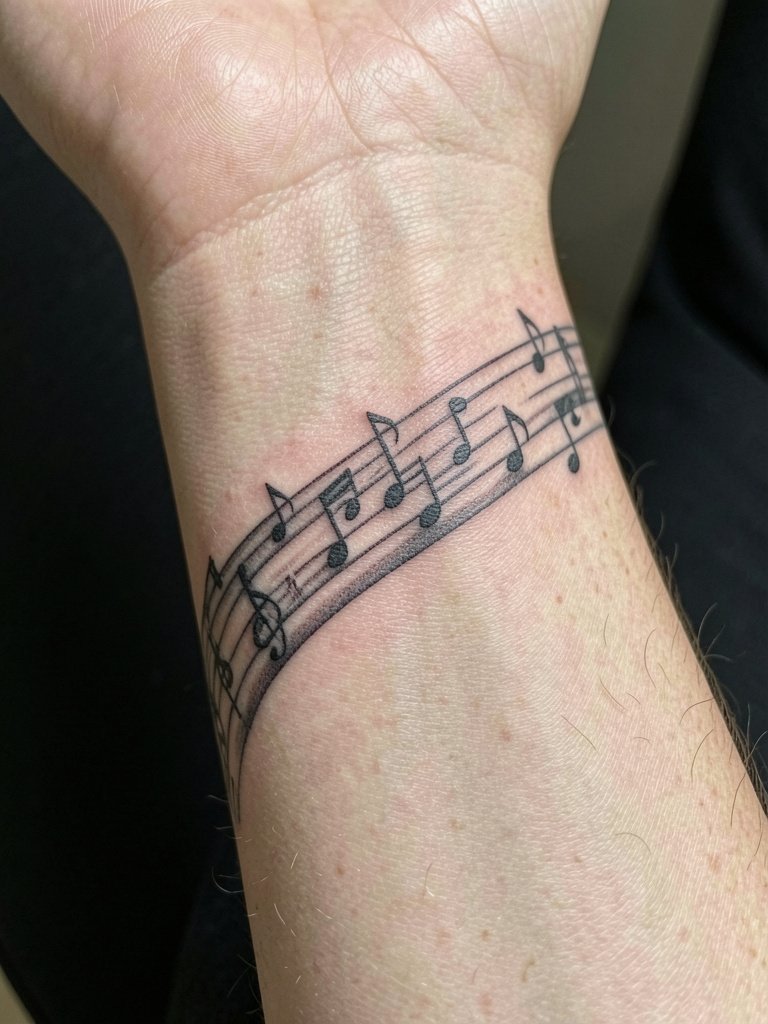
This placement uses finger movement and wrist rotation to animate the notes. Keep the design narrow and avoid packing too many tiny symbols into the wrist crease. The session is short but the area is sensitive so expect sharper stings near the bone. A frequent misstep is ignoring perspective skew; ask for a mock stencil while your arm is in motion so shadows line up when you move. Healed at six months the rhythm should still read; at two years maintain edge contrast with a light touch-up. For live shows, a dainty bracelet helps frame the notes. Pair with a dainty gold stacked bracelet set.
8. 3D Hollow Tunnel, Center Inner Forearm
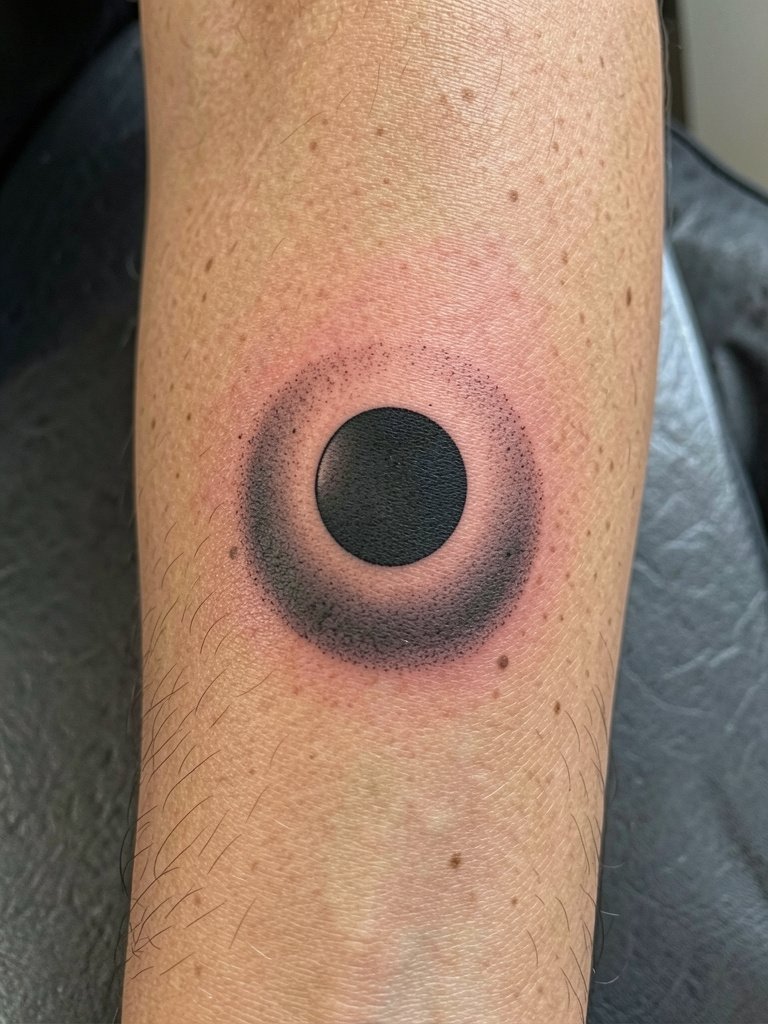
The central tunnel is a compact statement that reads from a short distance. Its success depends on crisp gradients and a strong dark center. The main failure mode is over-blending the edge gradient so it becomes a flat gray in daylight. Some people say 3D depth is mostly studio lighting and will look flat outdoors. Others insist a properly executed gradient keeps depth in sunlight. Those are the two camps. To make it hold, insist on high-contrast steps in the shading rather than one blended pass. Pain is moderate and touch-ups every few years keep the center dark.
9. Swirling Line Depth Pattern, Outer Forearm
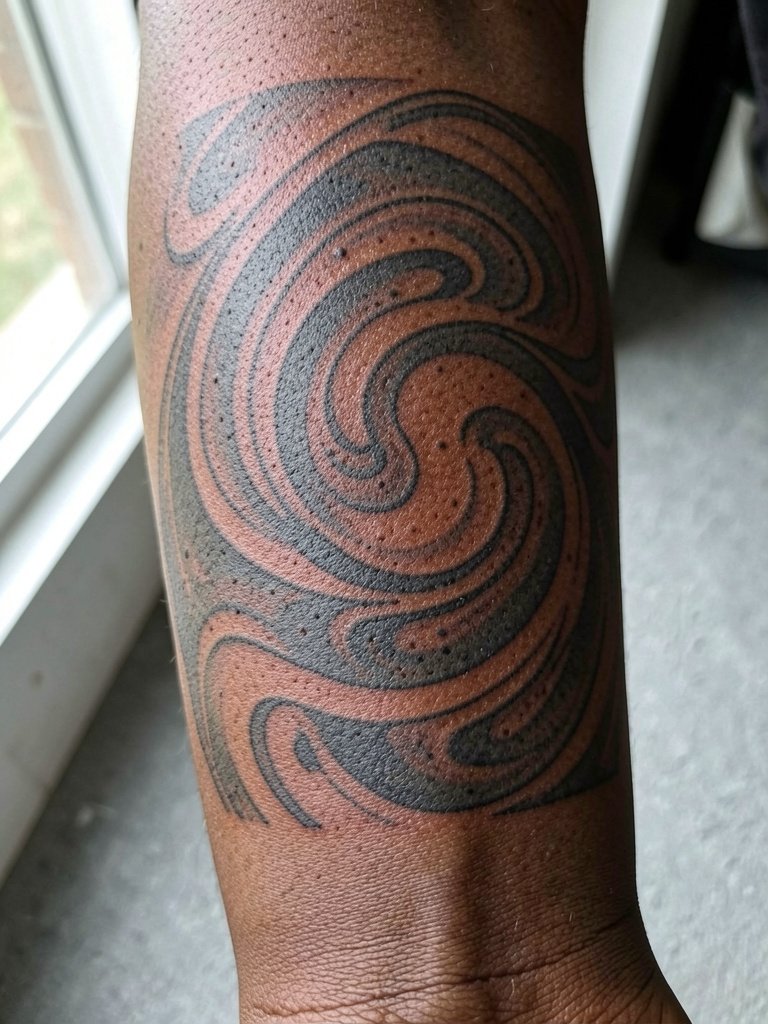
Swirling lines are ideal when you want an organic abstraction with depth. The outer forearm gives a broad viewing plane for larger, looping lines. Expect one to two sessions and mild soreness near the elbow crease. A common mistake is mirroring a circular pattern across a tapered forearm, which compresses the design toward the wrist. Ground the composition with intentional spacing so it breathes at all widths. For showing this off, a fitted short-sleeve top or blazer helps the vertical flow. Try a short sleeve sleeveless top for photos.
10. Floating Object Shadow Traps, Inner Forearm
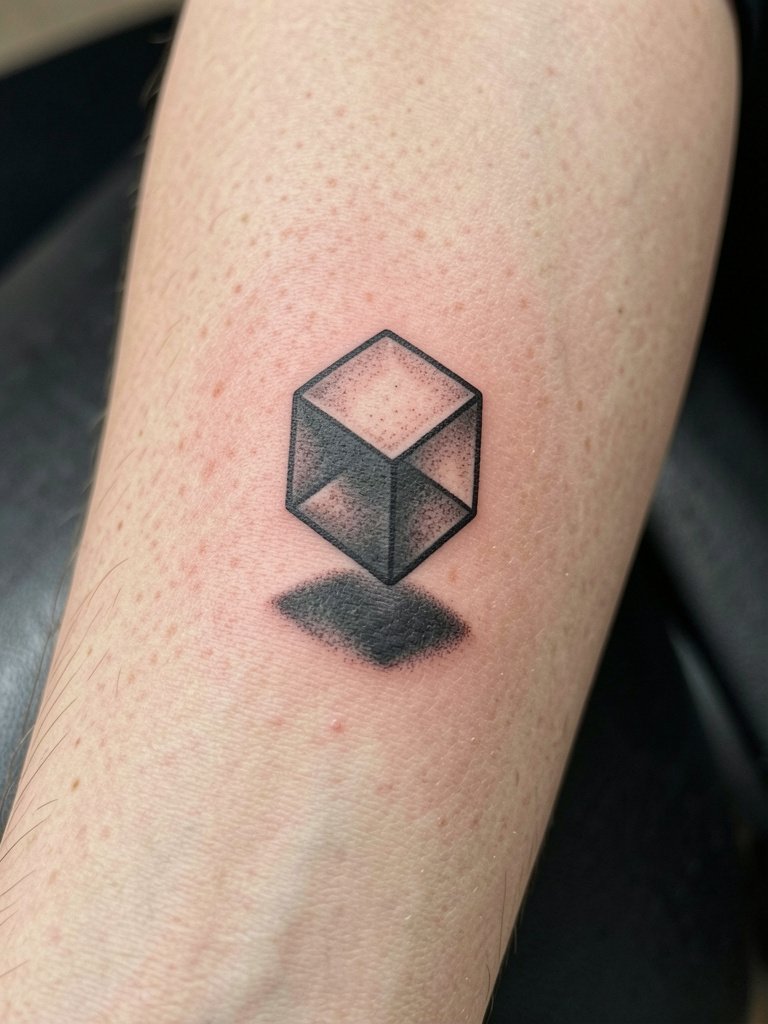
This technique uses shadow placement to make shapes float. The inner forearm is great because natural light falls across the shadow and enhances depth. The common misstep is a shadow that is too soft and sits flush under the object; that flattens the read. Ask the artist to mark the shadow on skin with marker and test in daylight before committing. Healed, the shape holds for years if the black saturation is solid. For casual days, rolled cuffs in neutral tones put the floating objects center stage. Use a rolled cuff linen shirt when you want to show this off.
11. Interlocking Logic-Defying Structures, Outer Forearm
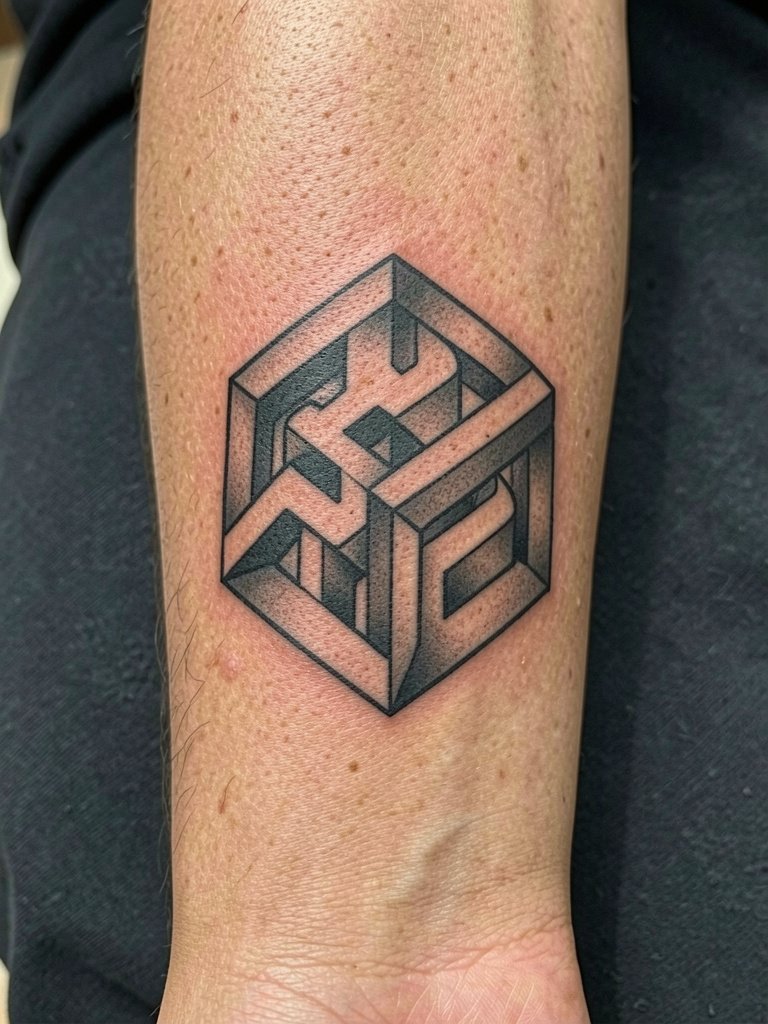
If you want a philosophical piece, impossible structures deliver depth and concept. The outer forearm supports vertical continuity for tall modules. The session is detail-heavy and often split across two sittings to maintain consistent line quality. The top error is trusting fresh photos only; healed examples are the reliable indicator of an artist's ability. At three years, sharp angles tend to soften, so plan slightly bolder anchors up front. For wardrobe, structured cuts like a tailored blazer suit the architectural vibe. Try a structured black blazer for gallery days.
12. Dynamic Morphing Geometric Pattern, Inner Forearm
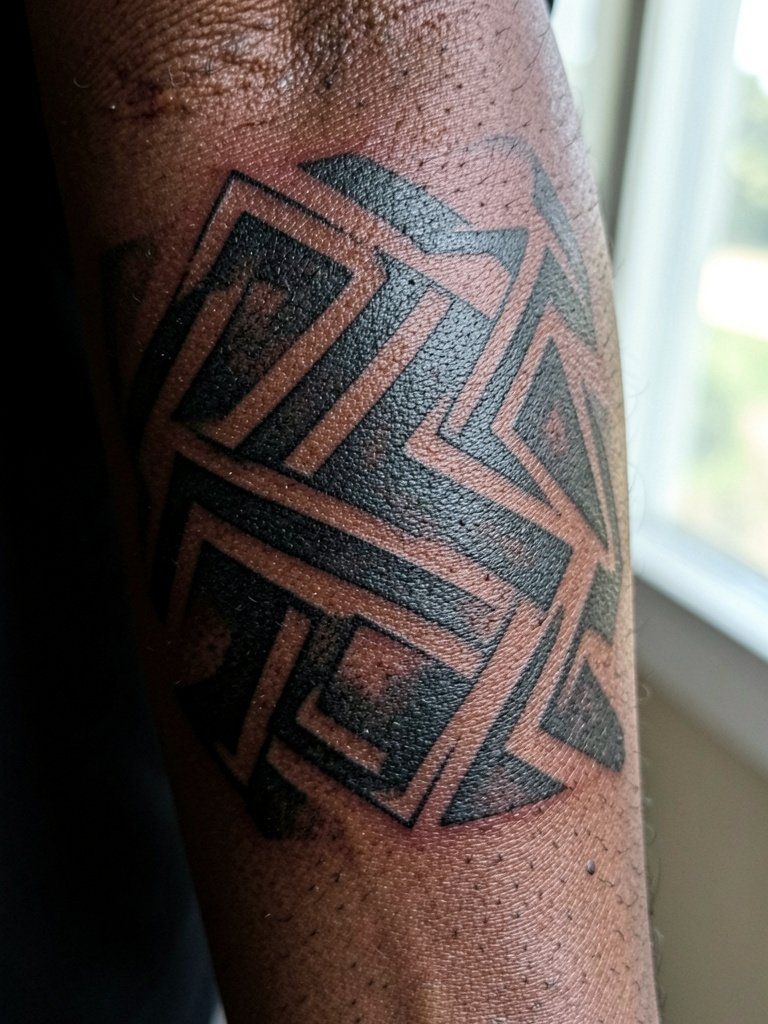
These designs are built to change as the viewer moves. Inner forearm placement leverages muscle flex for morphing. Plan for 1–2 sessions and expect a moderate ache when shading across the undersurface. Common mistakes include ignoring arm rotation when sketching. Ask to see the stencil while you rotate your wrist so the morph reads from several positions. Over time the shapes may blur slightly but a well-placed contrast ladder keeps the effect legible. For casual wear, a loose button-down makes the morph the focal point. Consider a loose button down shirt for session day.
13. Micro-Gradation Dot Tunnel, Center Forearm
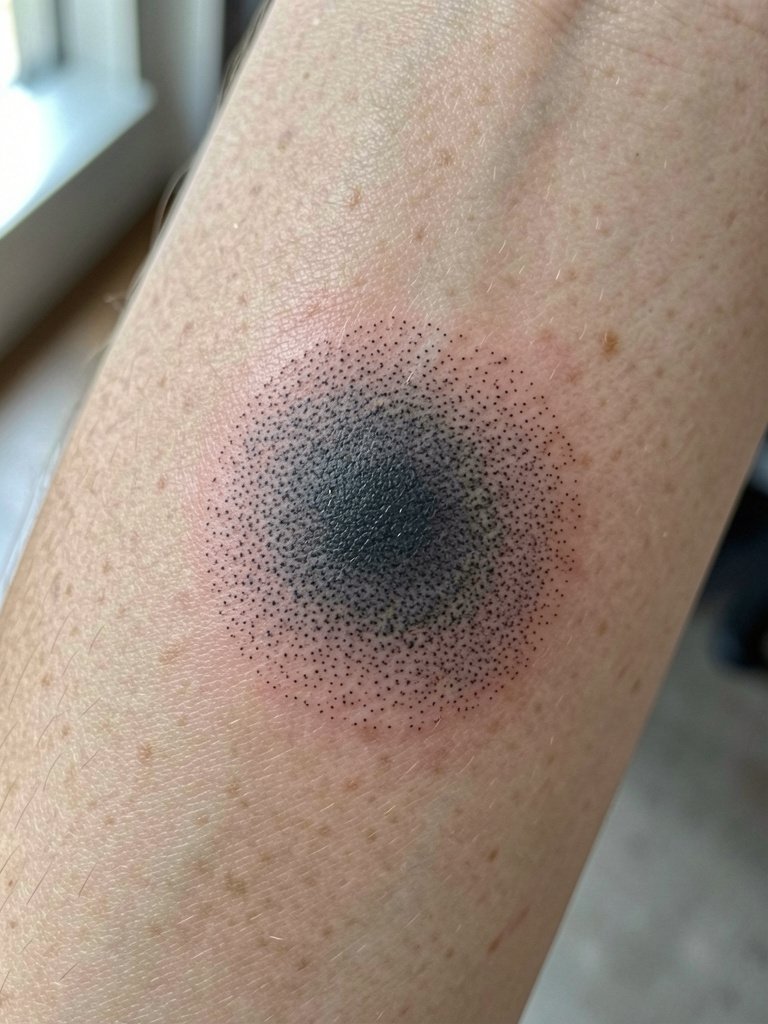
Dot work tunnels give a soft, tactile depth. They require patient sessions and steady hand speeds for even stippling. The danger is overworking skin in one visit which can cause excess scabbing and inconsistent heal. A staggered approach with clear session breaks reduces blowout risk. Fine dots can look delicate at six months and maintain structure at two years if spacing is generous. For an elevated casual look, pair the piece with dainty rings and short sleeves. Try a dainty ring set to complement the micro detail.
14. Layered Ribbon Perspective, Outer Forearm
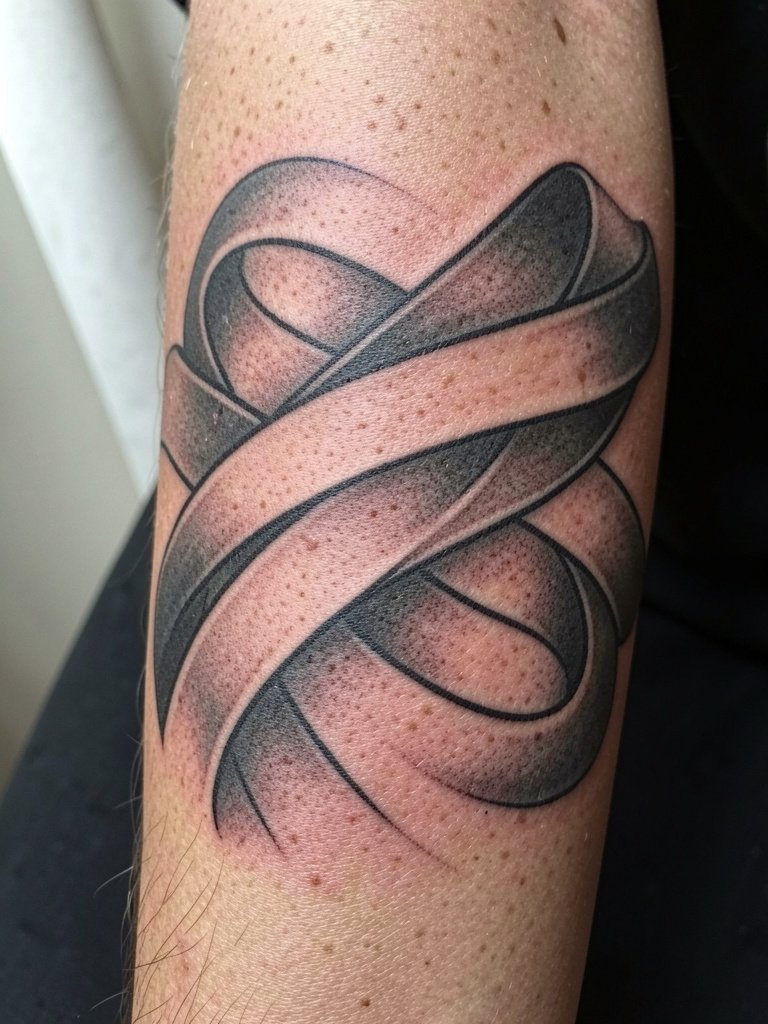
Ribbons with consistent perspective create the illusion of woven depth. The outer forearm's broad surface suits longer runs and repeating bands. Session time varies depending on how many layers you want. A common client mistake is asking for too many overlaps in a tight space which ages poorly as lines settle. Opt for slightly thicker band edges to avoid merging over time. Healed at two years the ribbon look stays graphic when anchor lines are bold. For wardrobe, a fitted turtleneck in charcoal or black supports the architectural rhythm. A fitted turtleneck black makes the geometry read cleaner in photos.
15. Negative Space Mandala Slice, Inner Forearm
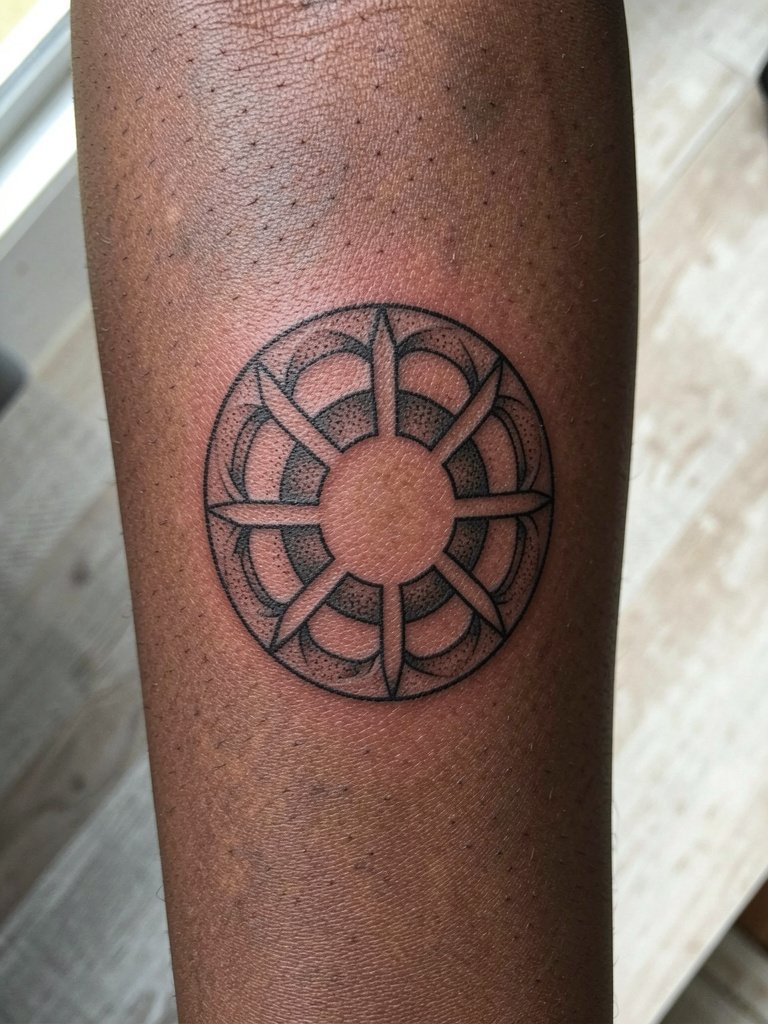
A mandala slice uses negative space to simulate raised rings. It suits clients who want detailed geometry without full coverage. The typical pitfall is over-detailing in a very small radius which causes blurring on textured forearm skin. Make the interior rays slightly bolder than you think to ensure legibility at year two. Pain is mild and the session is usually under two hours. This design pairs with dainty stacked bracelets and neutral rolled sleeves for an editorial vibe. Try a dainty gold stacked bracelet set to frame the negative space.
16. Optical Grid Warp, Outer Forearm
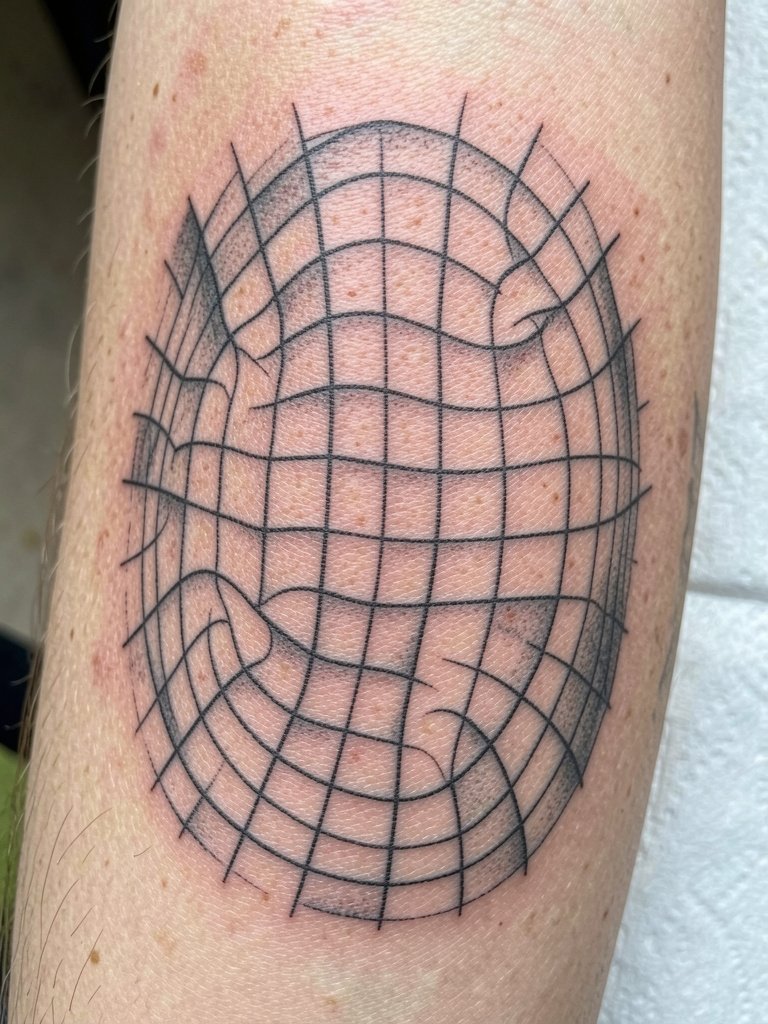
Warped grids are graphic and strong from a distance. The outer forearm's visibility helps the undulation read like a real bulge. Sessions are straightforward but require exact line spacing. Common errors include inconsistent spacing that betrays the illusion. For durability, use slightly heavier lines in primary anchor areas. At two to three years the warp still reads if negative spaces remain intact. Pair with structured blazers or fitted shirts to keep the architectural look coherent. Try a structured black blazer for a gallery-ready outfit.
17. Perspective Knife Edge, Near Wrist
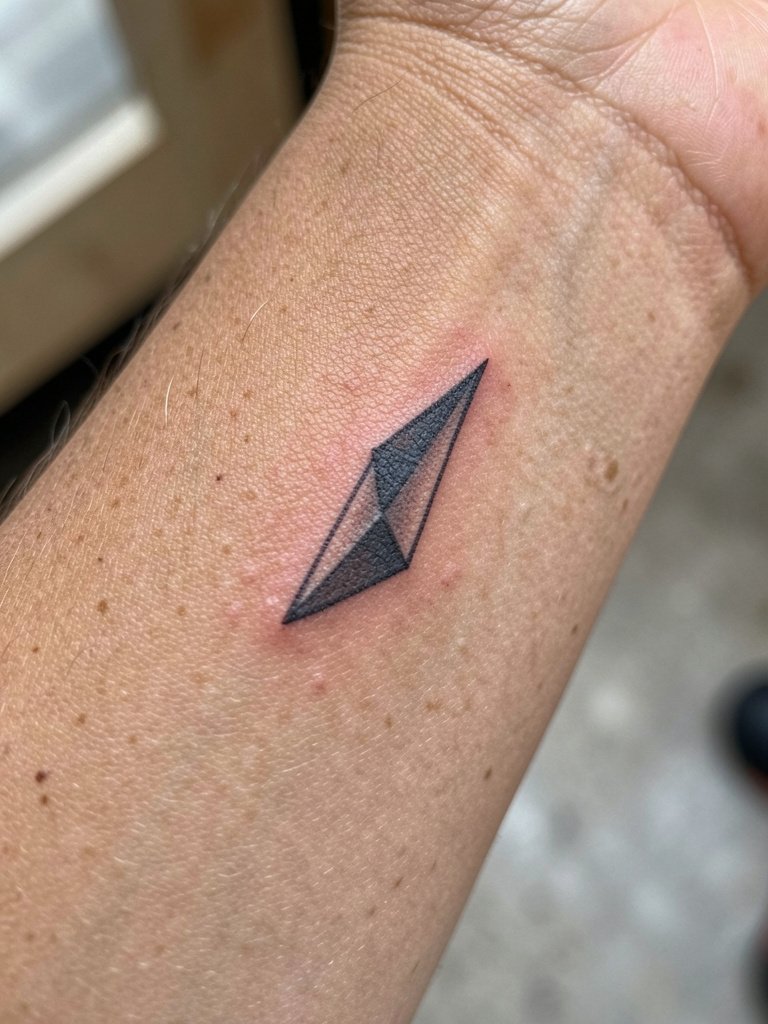
A knife-edge perspective is a compact 3D trick. The wrist area is sensitive so expect sharper sensations over bone. The key mistake is misplacing the shadow so the edge reads flat on the skin. Insist the artist test the shadow with a marker and view it in natural light. Healed after six months a well-executed edge still gives a micro 3D punch. For evening looks keep cuffs cropped to display the wrist area. A dainty bracelet set works well for refined reveals.
18. Optical Checker Relief, Full Forearm Strip
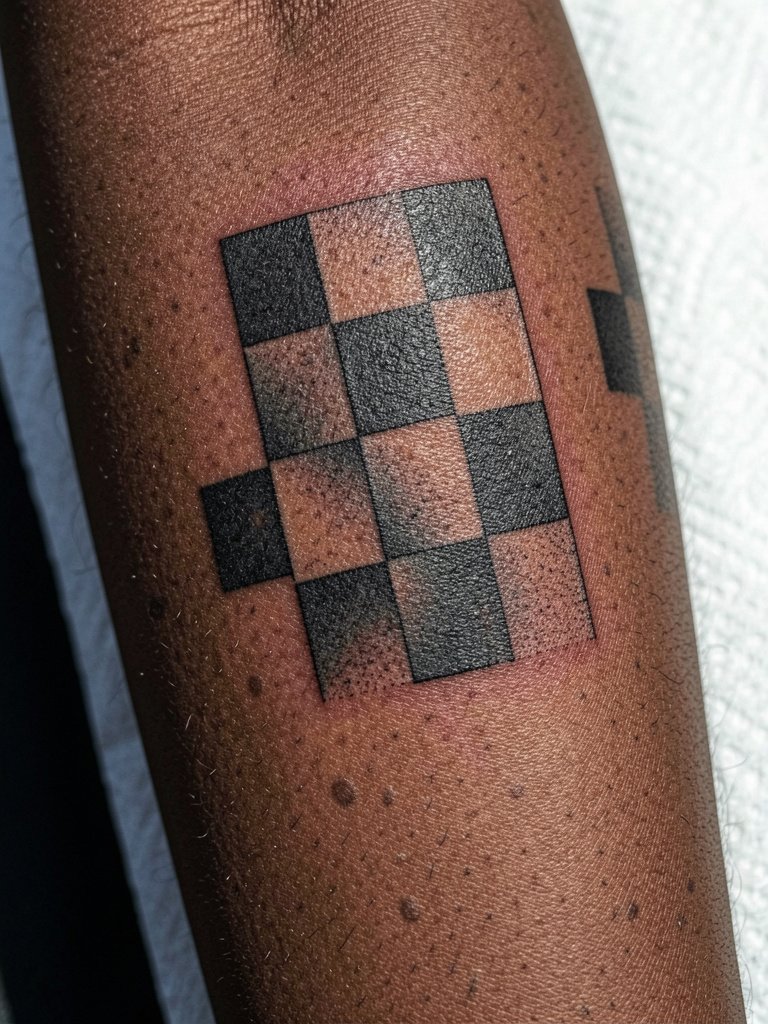
A checker relief uses strong value shifts to simulate depth. It demands consistent saturation to avoid patchy healing. The common oversight is patchy fills that break the pattern's continuity when healed. Plan for staged filling across sessions to maintain even saturation. Pain is diffuse across the forearm and manageable. For clothing, sleeveless crop tops or wide-strapped tanks let you show the full strip. Consider a sleeveless crop top neutral to reveal the whole piece.
19. Offset Shadow Script, Inner Forearm Near Elbow
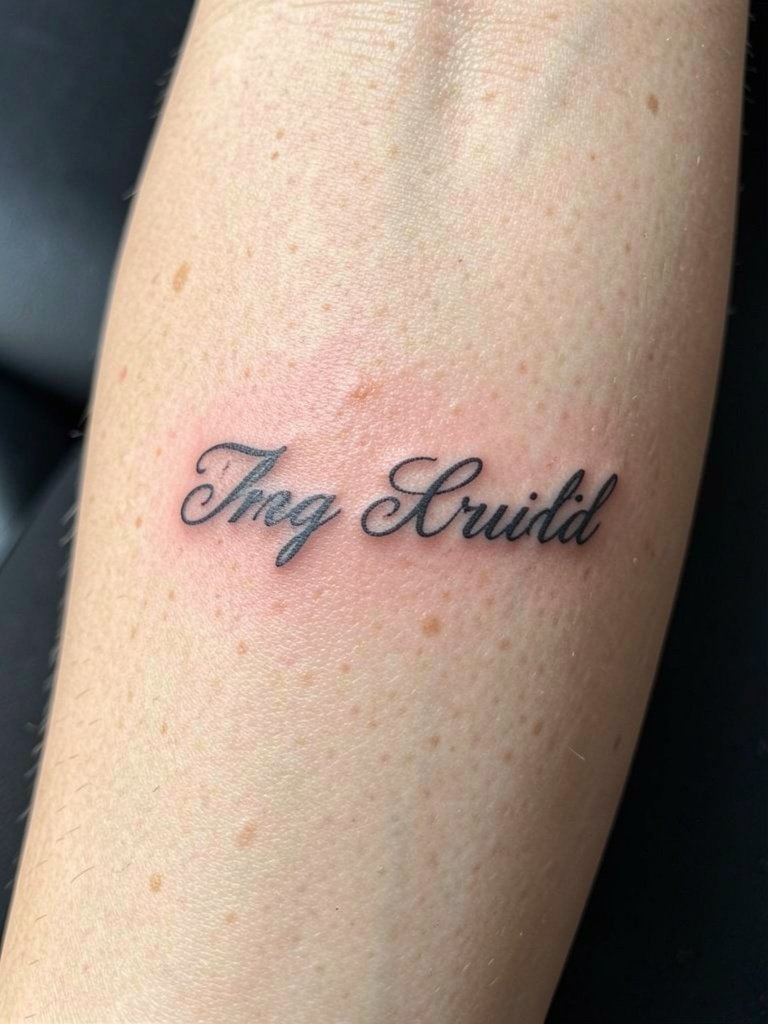
Offset shadow scripts are delicate but need spacing for longevity. The elbow-adjacent area moves a lot so place the word slightly away from the crease to avoid distortion. The frequent mistake is placing script directly in the fold which leads to warping. Require the artist to show how the letters look when you bend and straighten the arm. Healed at six months the shadow should remain distinct if spacing was planned. For session wear, choose a loose sleeve you can easily roll. A loose button down shirt will do.
20. Concentric Ring Vortex, Center Outer Forearm
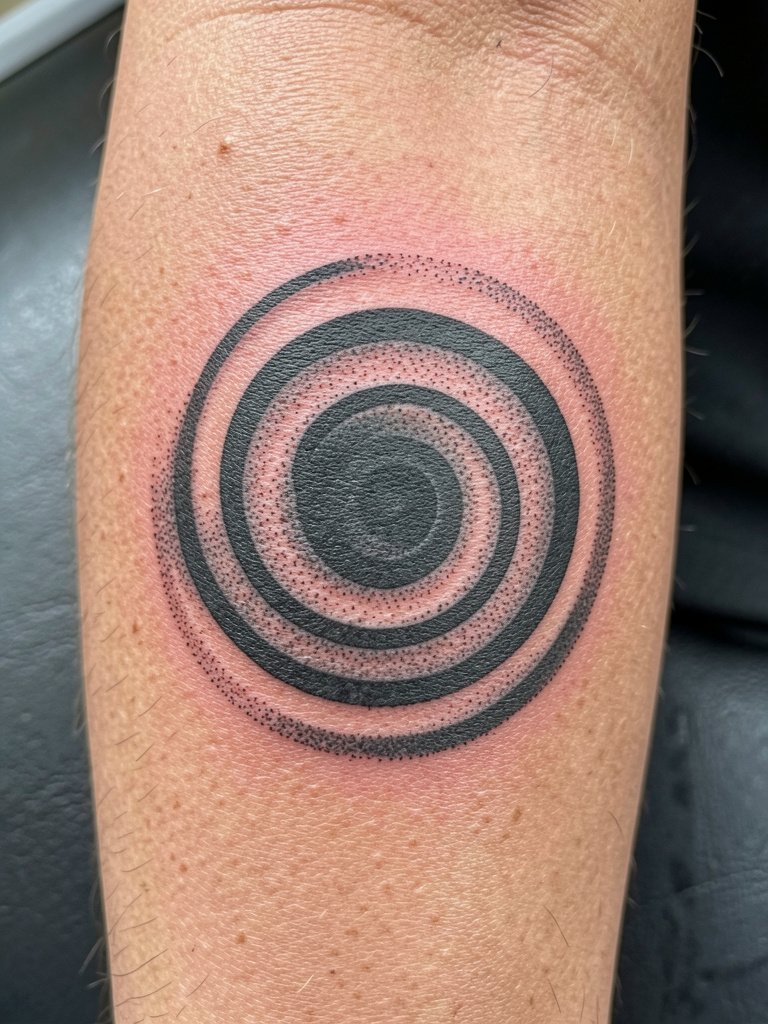
Concentric ring designs are still and hypnotic. They read well on the outer forearm where the eye can follow the rings. The top error is using too many thin rings which fuzz together over time. Keep primary rings bold and space the finer rings for breathing room. Sessions are moderate in length and pain varies by proximity to the bone. Healed at two years, a clean ring vortex still looks dramatic if saturation was consistent. For wardrobe, a fitted short-sleeve top keeps the rings unobstructed. Try a short sleeve sleeveless top.
21. Shadowed Geometric Cube, Inner Forearm
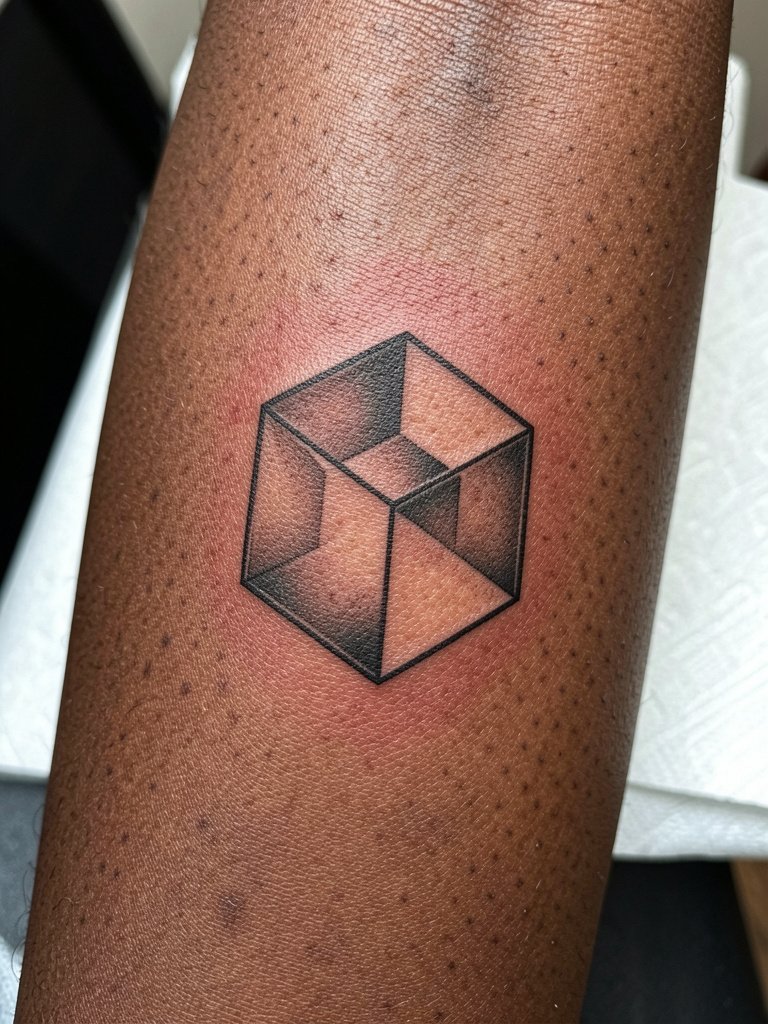
A solitary cube is a compact way to get 3D depth. Inner forearm placement makes the shadowed faces read cleanly. Common mistakes are uneven interior fill or too-thin outlines that blur after healing. Ask the artist to show a healed example of similar cubes on comparable skin tone. Healed at six months the cube should retain edges; touch-ups every few years maintain the crisp planes. For session comfort, wear a tank with roomy armholes. A wide strap tank top works well.
22. Tilted Checkerboard Collapse, Outer Forearm
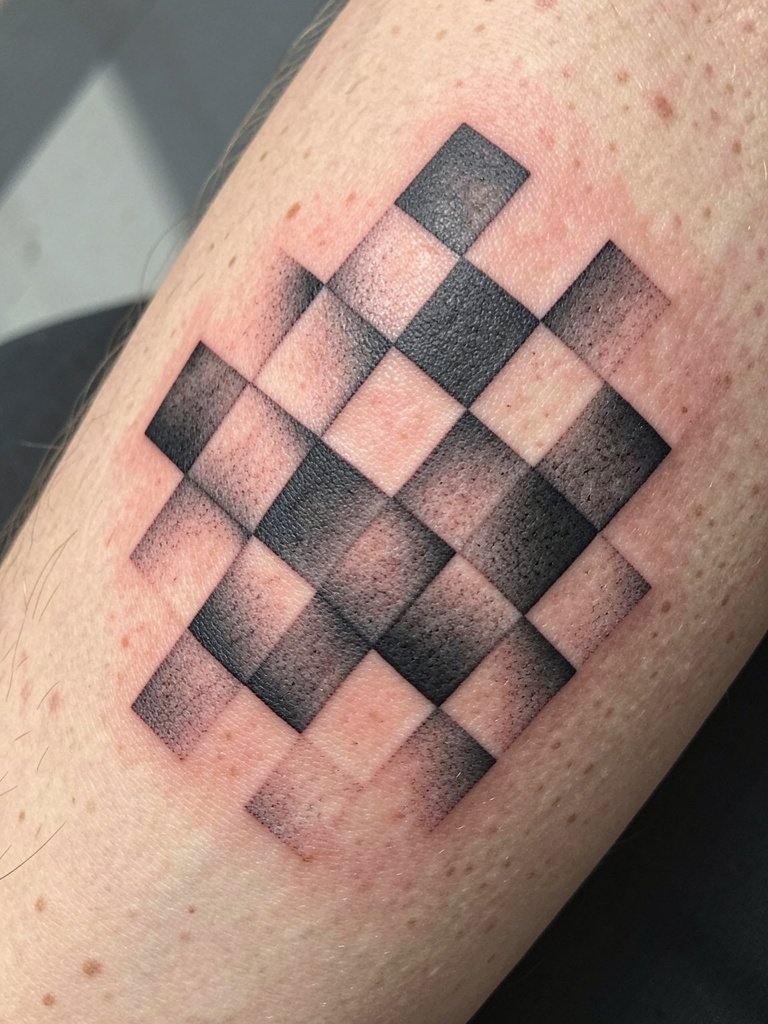
This pattern tricks the eye into a visual collapse toward a point. It needs consistent block sizes across the forearm to avoid unintended compression at the wrist. The session is methodical and requires steady machine tempo from the artist. A common misstep is mismatched square sizing across turns of the arm. To prevent that, request stenciling while you rotate the forearm. Healed, the collapse still reads strongly when the squares are sized conservatively. For photos, a cropped top highlights the pattern.
23. Floating Geometric Cubes Sleeve Cluster, Full Forearm
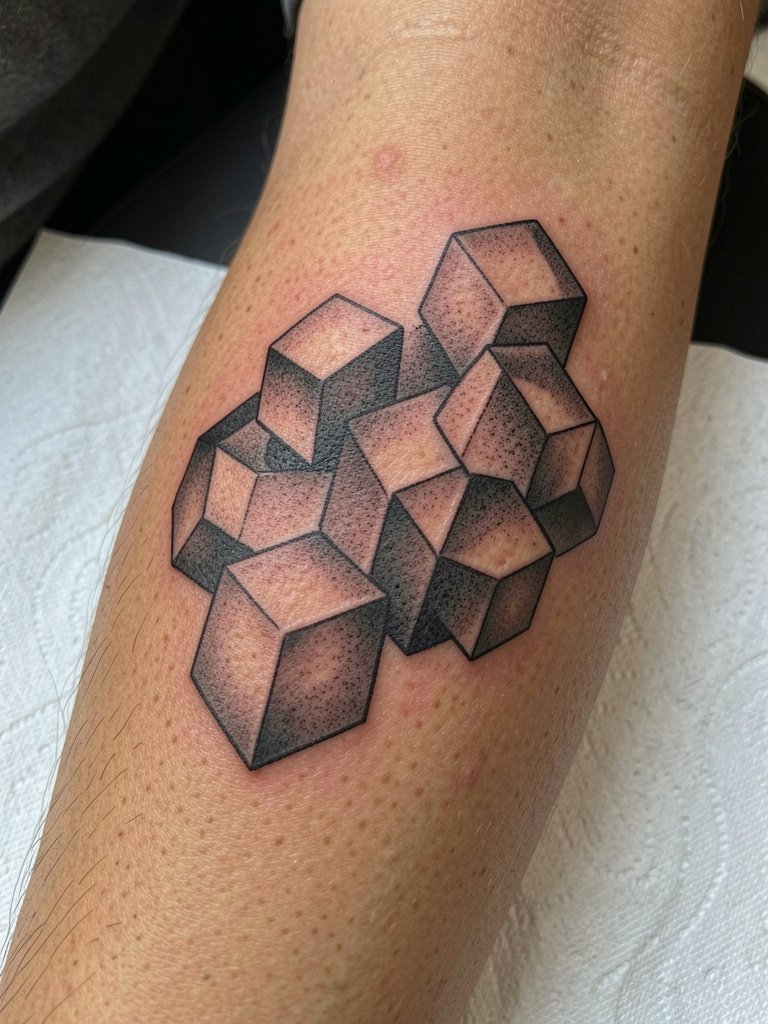
A cluster sleeve trades single-object detail for a continuous levitation motif. This is a longer build across several sessions and often favored by collectors. The challenge is keeping individual cube shadows consistent so the whole sleeve reads as a set. Expect soreness spread across two or more appointments. Healed at one year the sleeve still offers depth if contrast is preserved. For reveal days, sleeveless crop tops or tank tops maximize visibility. Try a sleeveless crop top neutral to show the collection.
24. Optical Ribbon Knot, Inner Forearm
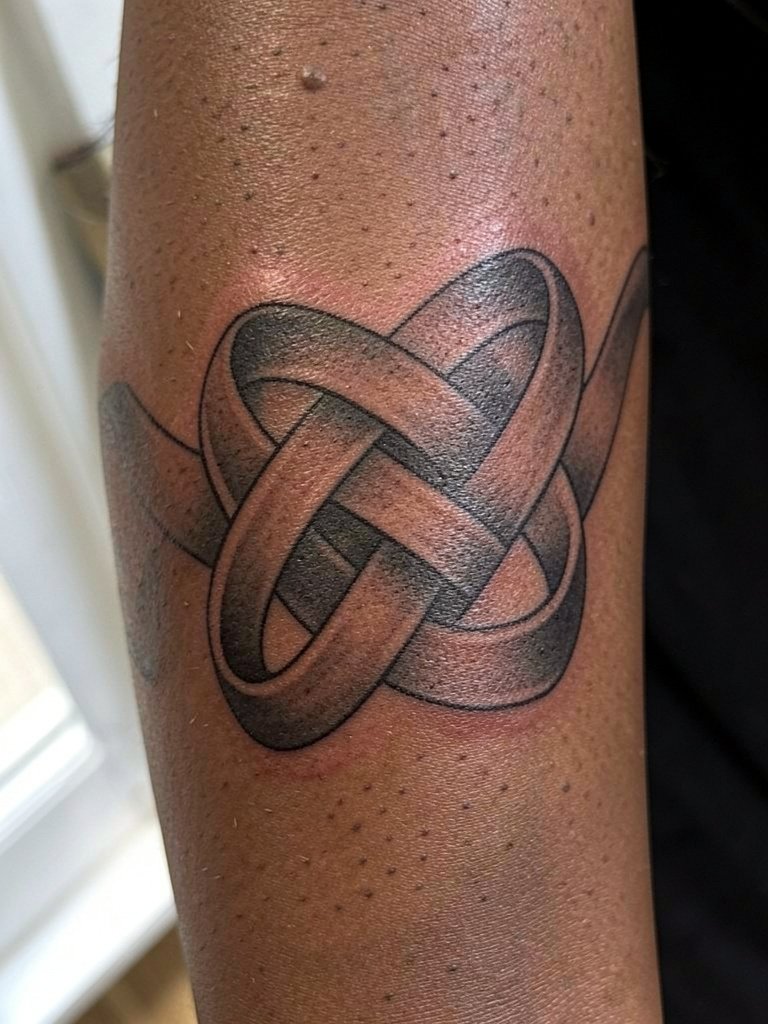
Knotted ribbons read like sculpture on the inner forearm. The main mistake is failing to commit to a single light source, which makes the knot look inconsistent after healing. At consultation bring examples that show the light source and shading you prefer. Staging the knot for your arm curvature reduces distortion when you flex. Healed, the knot remains legible with routine care. For session day, wear a loose sleeve you can pull up easily. A loose button down shirt makes access simple.
25. Micro-Realism Pocket Shadow, Near Wrist
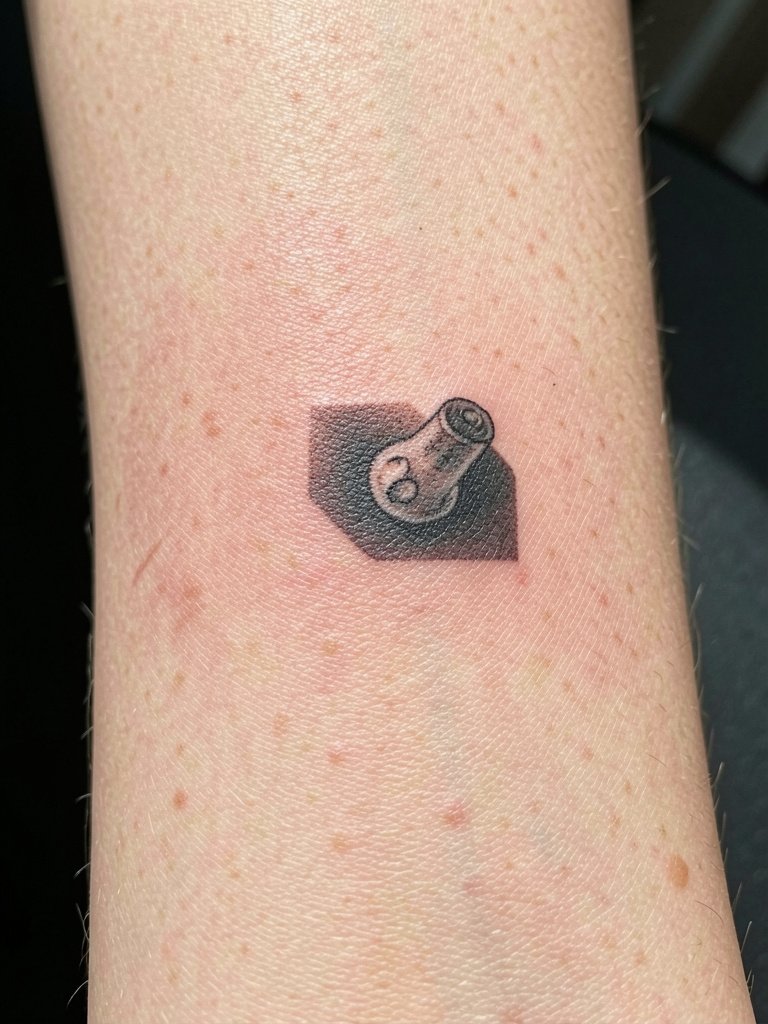
Tiny pocket illusions feel interactive. The wrist area is sensitive and careful placement avoids the bone. Mistakes include under-inking shadows so the pocket collapses in daylight. Insist on a strong shadow core and ask to view the stencil in motion. Healed at one year this style still surprises when the shadow reads deep. For show-off styling, simple bracelets keep the eye on the pocket detail. Try a dainty gold stacked bracelet set.
26. Wave Distortion Panel, Outer Forearm
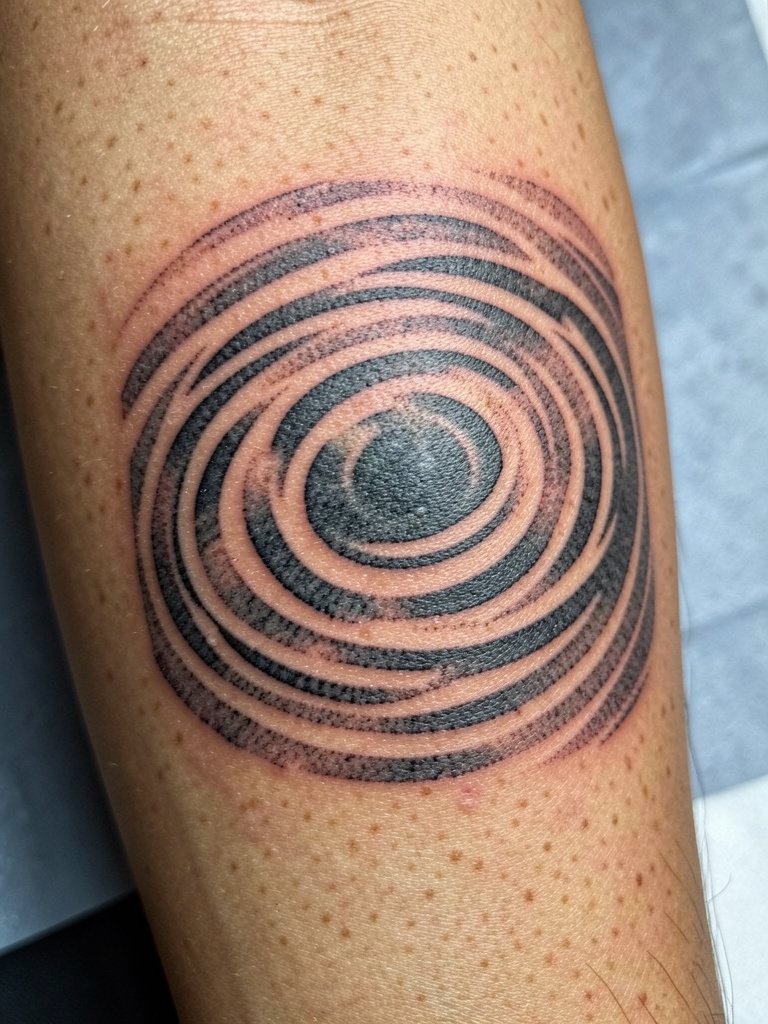
This panel creates a subtle kinetic illusion and reads excellently on the outer forearm. The most common error is inconsistent line thickness that interrupts the ripple. Sessions run reasonably quick but require focus on evenly spaced lines. Healed after several months the ripple keeps a vibrating effect when you move. For wardrobe, pair with fitted shirts or blazers that let the outer forearm be seen. A structured black blazer complements the geometric flow.
27. Negative Space Hole with White Accents, Inner Forearm
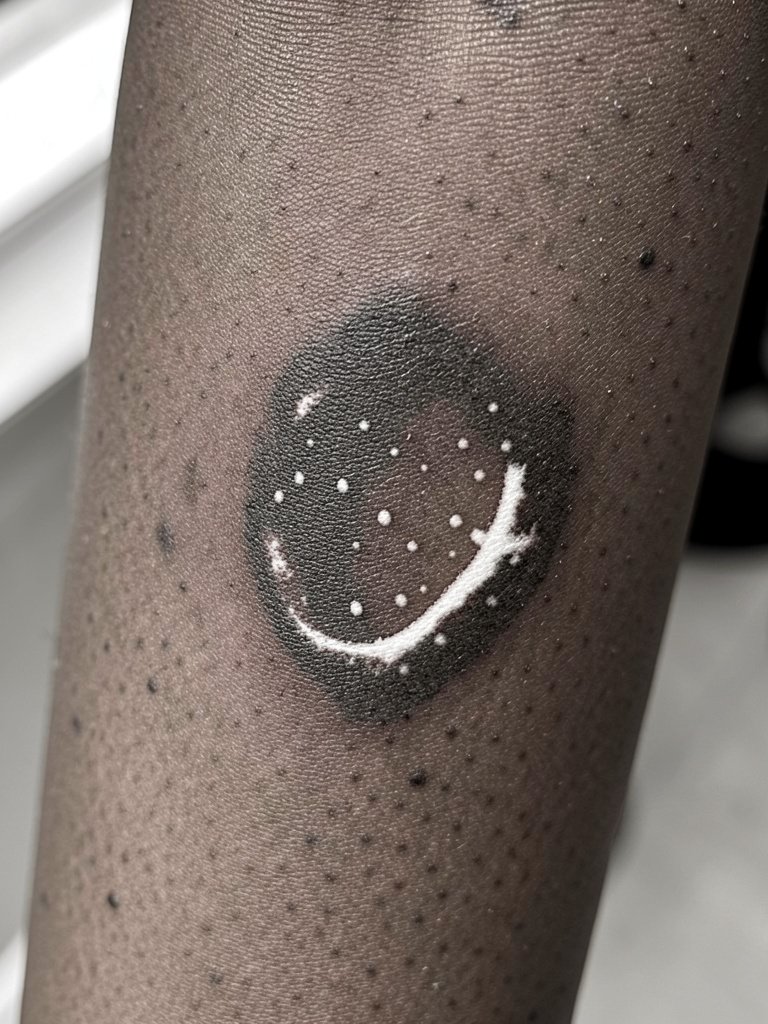
Using white ink sparingly can punch up depth on darker skin tones. White accents act as specular highlights that keep floating objects readable. The risk is overuse of white which can fade or yellow. Discuss the exact spots of white with the technician and ask to preview on a healed patch if possible. Healed, the white should remain discrete. For staged photos, neutral rolled sleeves highlight the contrast. Consider a linen button down shirt in cream for color balance.
28. Tessellated Depth Band, Outer Forearm
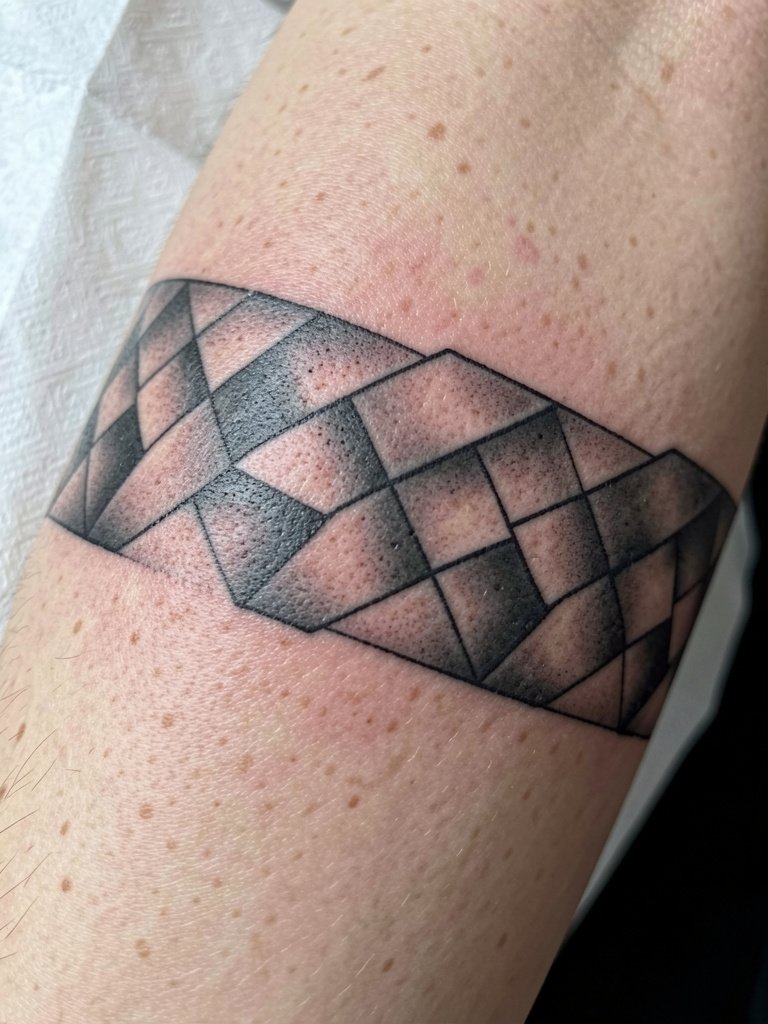
Tessellated bands are rhythmically satisfying and durable when scaled appropriately. The outer forearm provides the width for interlocks to breathe. Many people try to cram too many tiles into a narrow strip and lose definition. Opt for fewer, slightly larger tiles with clean edge anchors. Sessions are methodical and can be spaced to preserve skin condition. Healed at two years the band still reads if edges were bold. For photo sessions, short sleeves or blazers that expose the band work well.
29. Reflective Plane Illusion, Inner Forearm Near Wrist
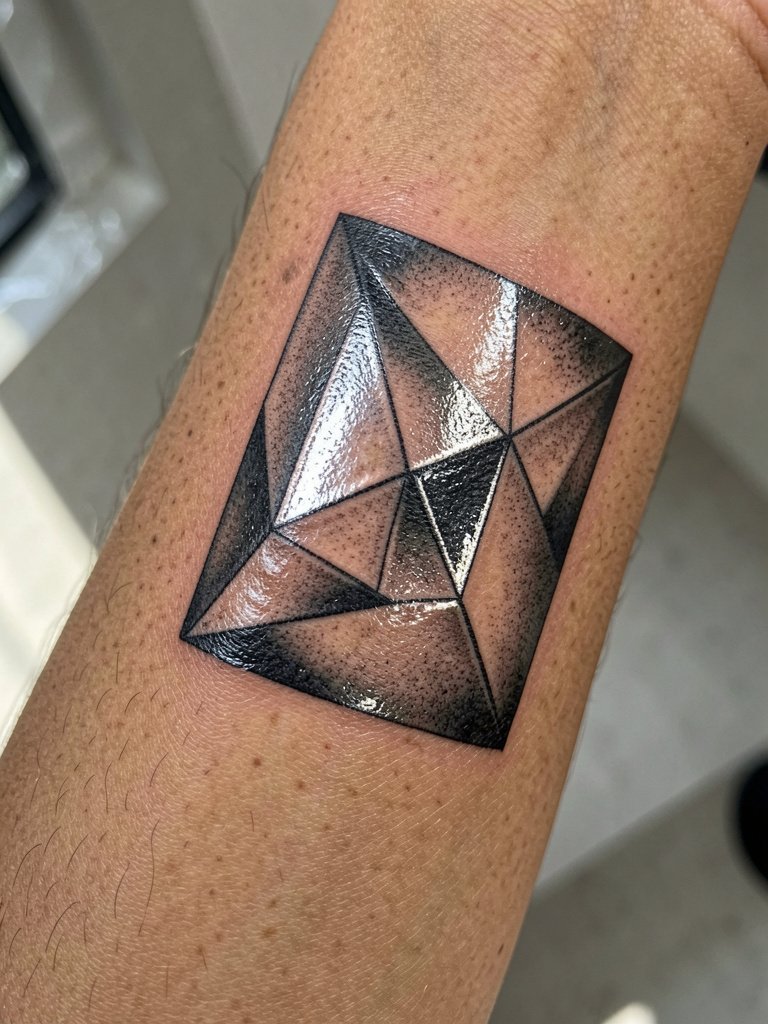
This small facet piece plays with simulated highlights to suggest reflection. The wrist proximity needs careful spacing to avoid bone irritation. The typical error is using too much white highlight which can fade rapidly. Request conservative white use and plan a touch-up timeline. Healed, reflective planes still read for people nearby when contrasts are well preserved. For gallery-ready looks keep sleeves cropped and minimal. A dainty bracelet set helps keep the wrist visually anchored.
Frequently Asked Questions
Q: How do fine-line geometric pieces hold up on the forearm?
A: Artists split into two camps on this. One camp says ultra-fine single-needle geometry blurs into gray blobs within two to three years because forearm skin stretches and has natural texture. The other camp argues that with correct needle depth, slightly wider spacing, and bold anchor lines, fine line holds up and points to healed photos at three years. Practical takeaway. If you prefer minimal detail, scale up the line weight to around 0.5–0.8 mm and ask for negative-space buffers so the geometry has room to age.
Q: Will a 3D shadow tattoo still read in natural daylight?
A: There are two strong views. Skeptics say many 3D pieces only look deep under studio lights or filtered photos and can appear flat in diffuse daylight. Advocates counter that properly executed high-contrast gradients and layered value steps maintain depth in varied lighting, especially if the artist tests the effect in sunlight. To reduce disappointment, preview the stencil and shaded mockup in natural light before the first pass.
Q: How often will I need touch-ups for optical illusion forearm work?
A: Expect touch-ups every two to four years for high-contrast blackwork that sees a lot of sun or friction. Dot-work and stipple shading may require more frequent light refreshes. Plan budgeting time into your schedule if you want the depth to keep reading sharp.
Q: Where can I find artists and healed portfolios for optical illusion tattoos?
A: Search hashtags like #3dtattoo, #opticalillusiontattoo, and #geometricblackwork on Instagram and TikTok, then filter by location to find nearby talent. Tattoodo and local tattoo directories let you search keywords such as "floating stone 3D" or "Escher staircase." Reddit communities like r/tattoos and r/GeometricTattoos surface peer recommendations and healed examples across skin tones.
Q: What should I wear to the appointment for a forearm piece?
A: For inner forearm work wear a loose button-down or tank so the artist has full access and no tight cuff presses on fresh skin. For full forearm or sleeve sessions a removable top like a button-down helps the artist move around the limb comfortably. If you plan reveal photos, lightweight rolled linen shirts in neutral tones photograph well.
Q: Do darker skin tones affect the visibility of black-and-white 3D effects?
A: Darker skin can reduce the perceived contrast of black-and-white tricks, so artists often add tiny white-ink accents or use bolder black anchors to preserve the depth. If you have darker skin, request healed examples on similar tones and discuss white-ink placement and expected fade characteristics so the design reads as intended after healing.
