
Tiny star tattoos read like jewelry when the linework and placement are chosen with aging in mind. Fine single stars, tiny clusters, and micro-constellations behave very differently over time depending on skin texture and daily friction. Read on for compact star ideas that prioritize spacing, readable line weight, and simple wardrobe pairings so the piece still looks sharp years from now.
1. Fine-Line Single Star on Inner Wrist
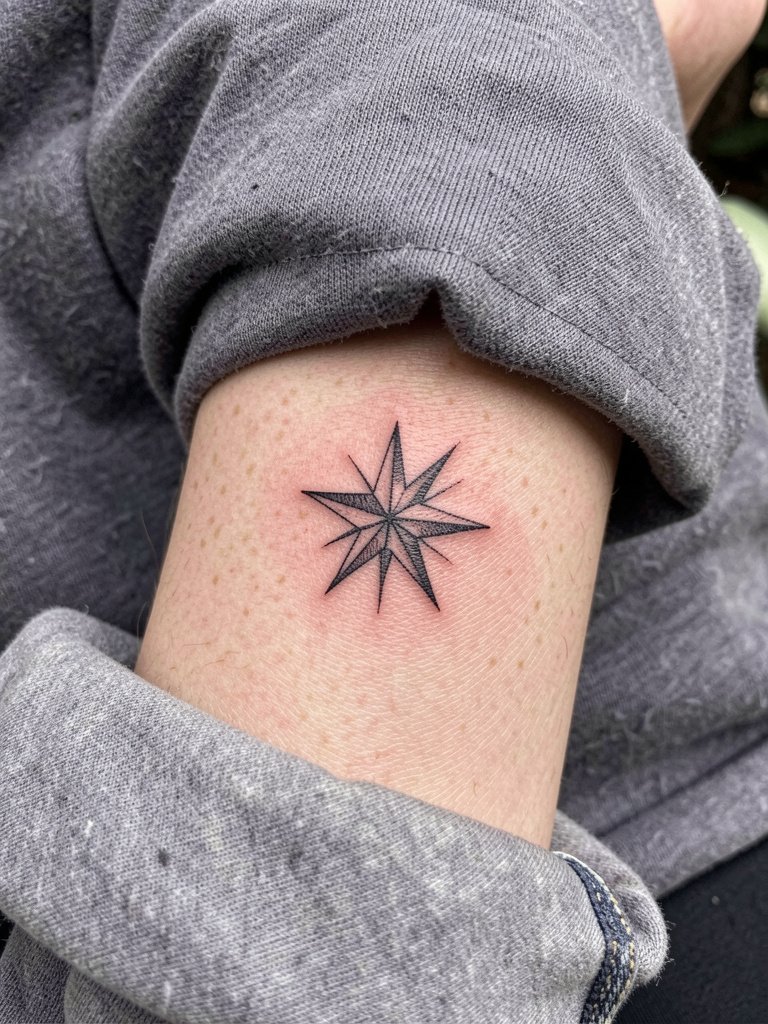
A single fine-line star on the inner wrist reads like a discreet accent and takes about 15 to 30 minutes. Recommend a hair-thicker line than the thinnest single-needle references because the inner wrist can blur from frequent washing and wrist flexing. Bring a photo that shows the desired scale next to a wrist for accurate sizing. The common mistake is going too small and expecting crisp detail after two years. Expect gentle softening at six months and slight feathering by year three, with a likely touch-up around year two. For the appointment wear a loose long-sleeve shirt so the artist can roll the cuff up without pressure.
2. Tiny Cluster Behind the Ear
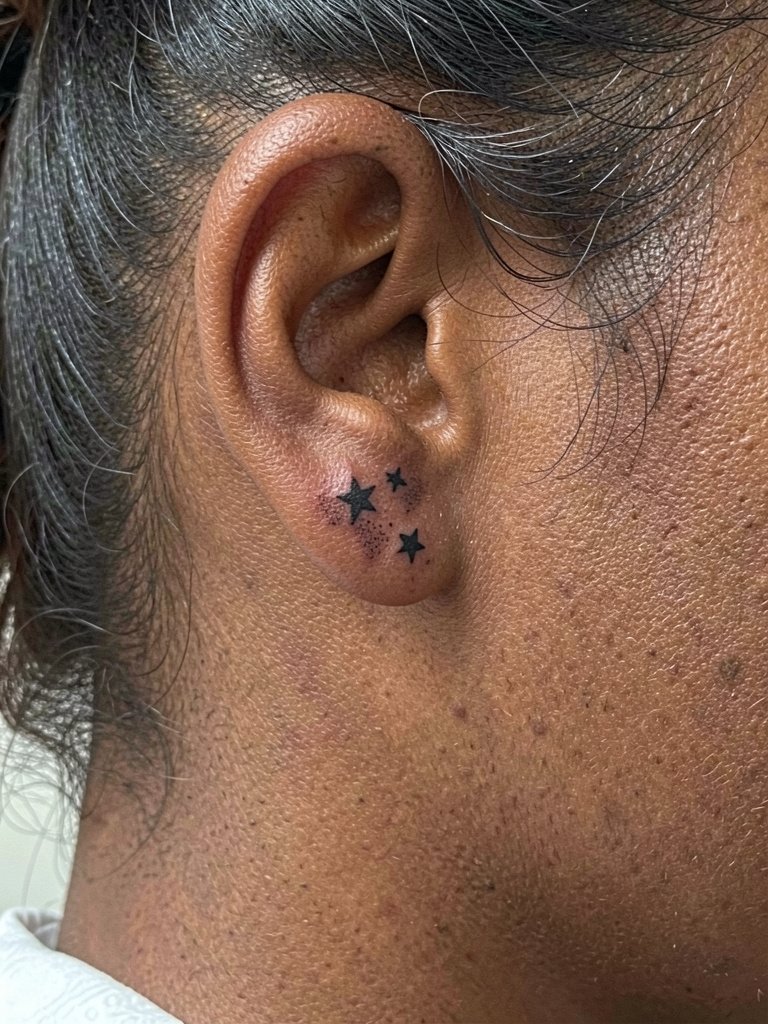
Behind-the-ear clusters are discreet and show off when hair is up. Sessions are short and low on pain, but the skin there is thin so needle depth matters for lasting crispness. Ask for slightly deeper, consistent needle depth to avoid patchy healing and to reduce the chance of slight scabbing that eats the tips of stars. A common mistake is requesting micro white highlights; they often disappear. This placement requires an artist comfortable with small-scale work on thin skin, so mention healed photos of similar spots during consultation. Professional consideration: specialized experience with small facial-adjacent placements is recommended.
3. Minimalist Constellation Along Collarbone
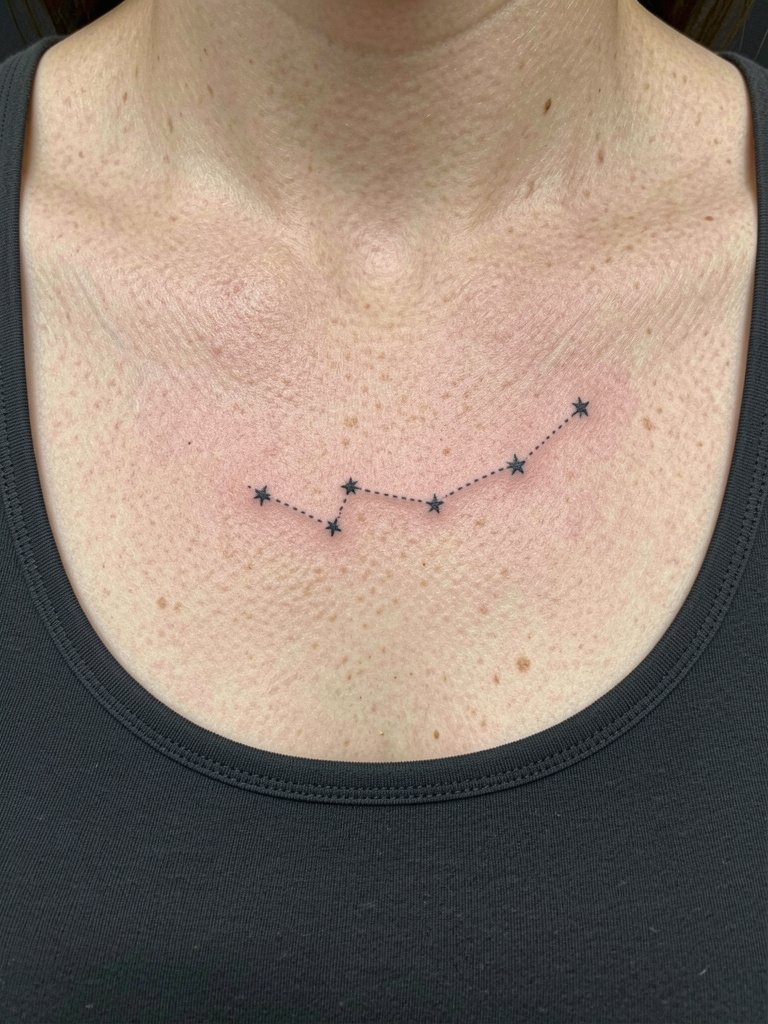
A collarbone constellation reads well as jewelry for open-neck tops and takes about 30 to 45 minutes. The dotted connector should be spaced so dots do not merge when the skin stretches. Discuss exact spacing and whether you want the dots deeper for longevity. Expect sharper edges at six months and gradual softening by year three, especially with sun exposure. Avoid overly fine spacing, that is the frequent error. Showing off this placement pairs nicely with scoop-neck tanks that frame the line.
4. Tiny Nautical Star on Outer Ankle
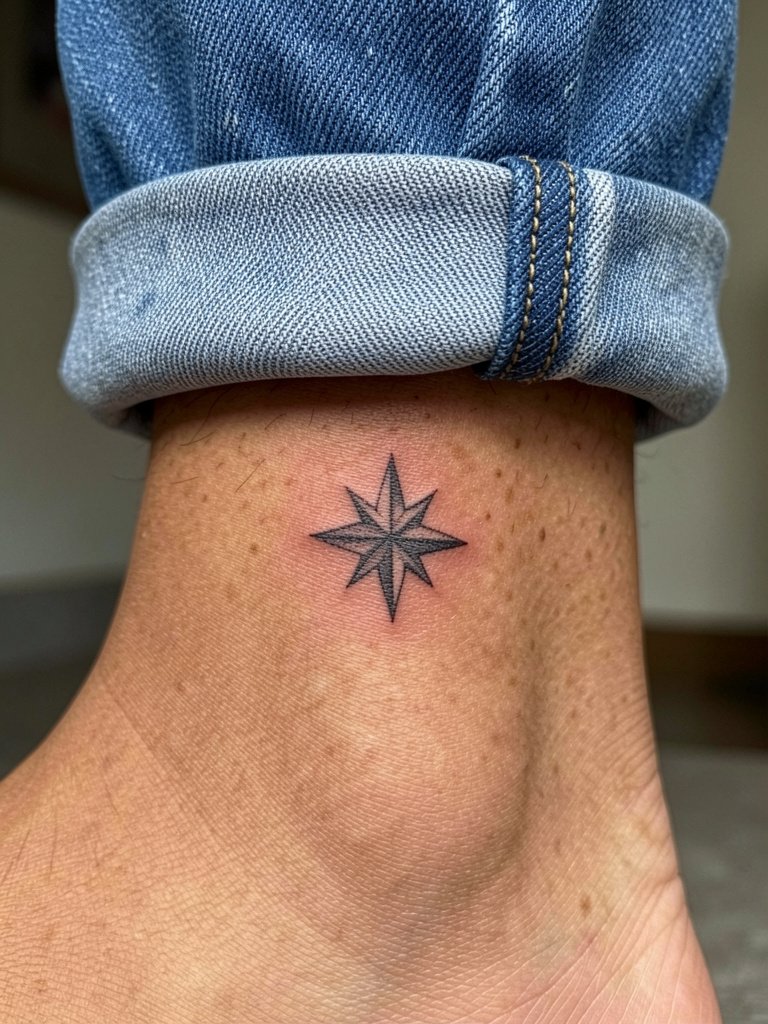
Outer ankle stars are classic and tolerate bolder line weight better than micro single-needle work. The skin over the ankle sees friction from socks and shoes so a slightly beefier outline preserves silhouette. A common mistake is using ultra-thin lines that scatter after daily wear. Plan for a 30-minute session, expect some tenderness while wearing shoes the first week, and anticipate a touch-up if the tips lighten. For show-off outfits try cropped jeans or ankle-skimming skirts paired with low-profile slip-on shoes.
5. Micro-Filled Star on Side Finger
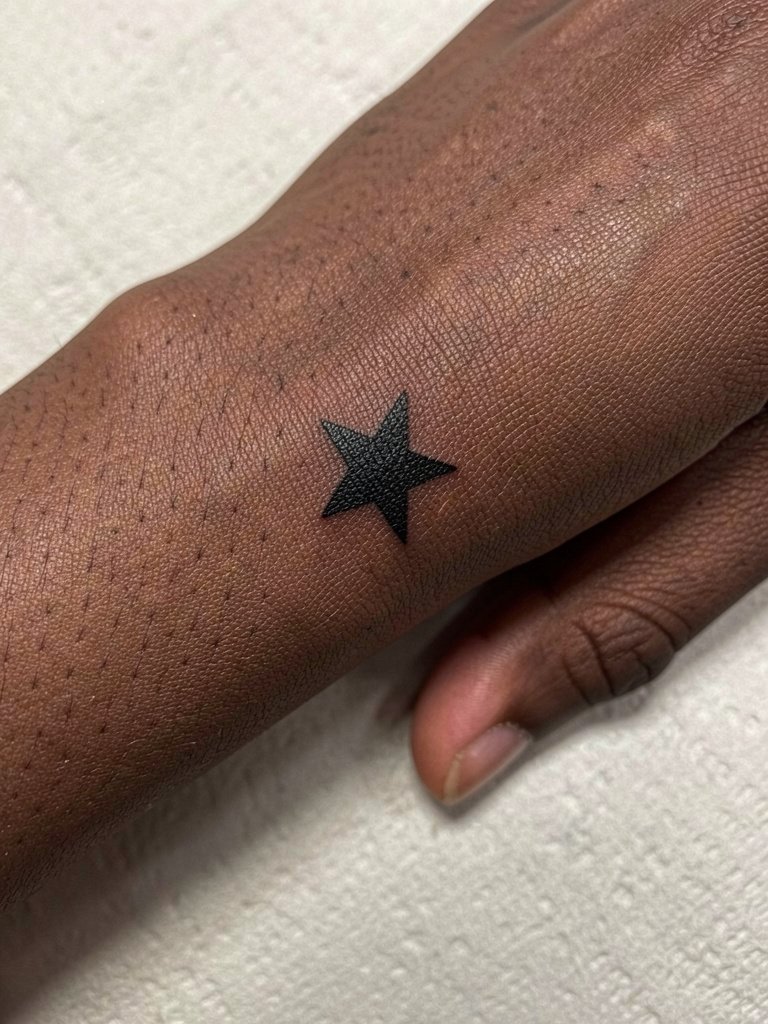
Side-finger stars look crisp initially but face high friction from handwashing and rings. Request slightly heavier saturation and expect a faster fade than wrist or ankle pieces. The common mistake is expecting ring-finger durability from finger-side pieces. Plan for a short session and an honest touch-up timeline of one to two years. For the appointment wear minimal rings so the artist can move your finger freely. Styling note: a thin open-band ring can frame this spot, and a slim sterling band complements the motif.
6. Micro Constellation on Inner Forearm
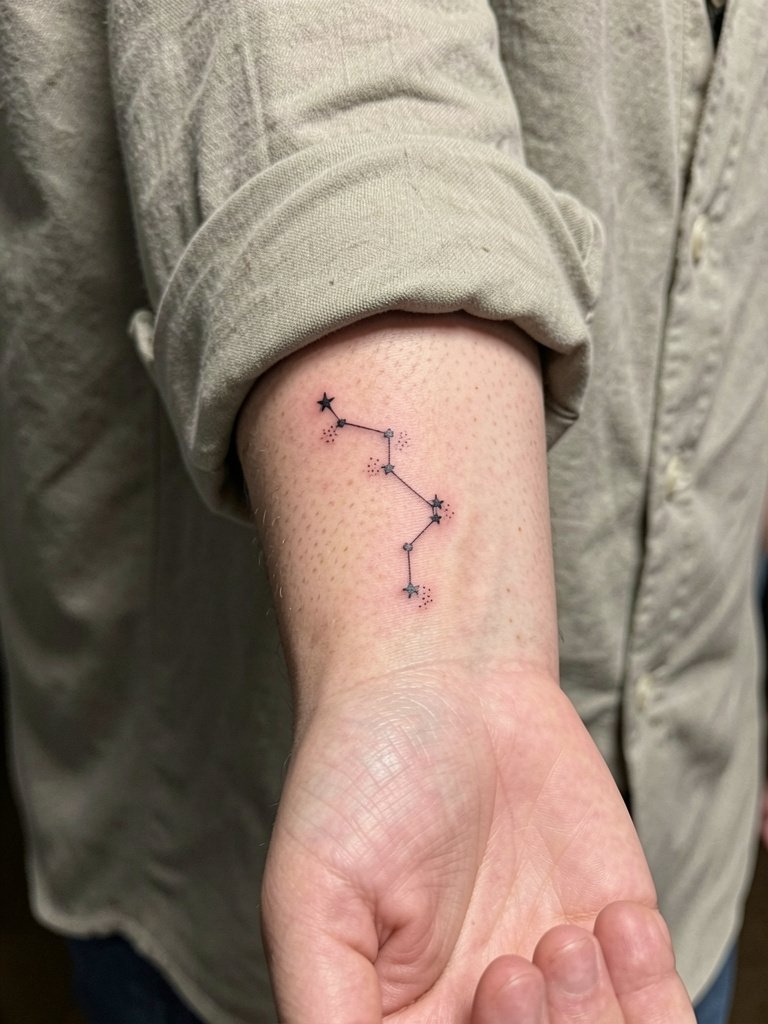
Inner forearm constellations are versatile and photograph well. I advise slightly wider spacing between stars than you might like if you want the pattern to read at arm's length after five years. Discuss spacing and dot size so artists can show scaling at 3 inches and 6 inches. The usual mistake is crowding tiny stars into a narrow band. Expect comfortable sessions and predictable healing, with a likely minor touch-up for the faintest dots after a year. For sessions wear a loose button-up shirt so the sleeve rolls easily.
Pre-Session Essentials
These tools smooth the short-session work above and help the smallest stars heal cleanly.
-
Transparent stencil transfer paper kit. Helps preview tiny star placement on the wrist and fingers before ink hits skin.
-
Topical numbing cream. Useful for sensitive ankle and finger placements when short sessions can still feel sharp.
-
Thin protective film roll. Shields small exposed pieces like side-finger and wrist designs during the first few days.
-
Fragrance-free gentle body wash. Cleans the area without irritating fine line ink.
-
Aquaphor healing ointment. Lightweight moisture barrier for the first 48 to 72 hours that works well on delicate star points.
7. Braille Dot Star Row on Ribcage
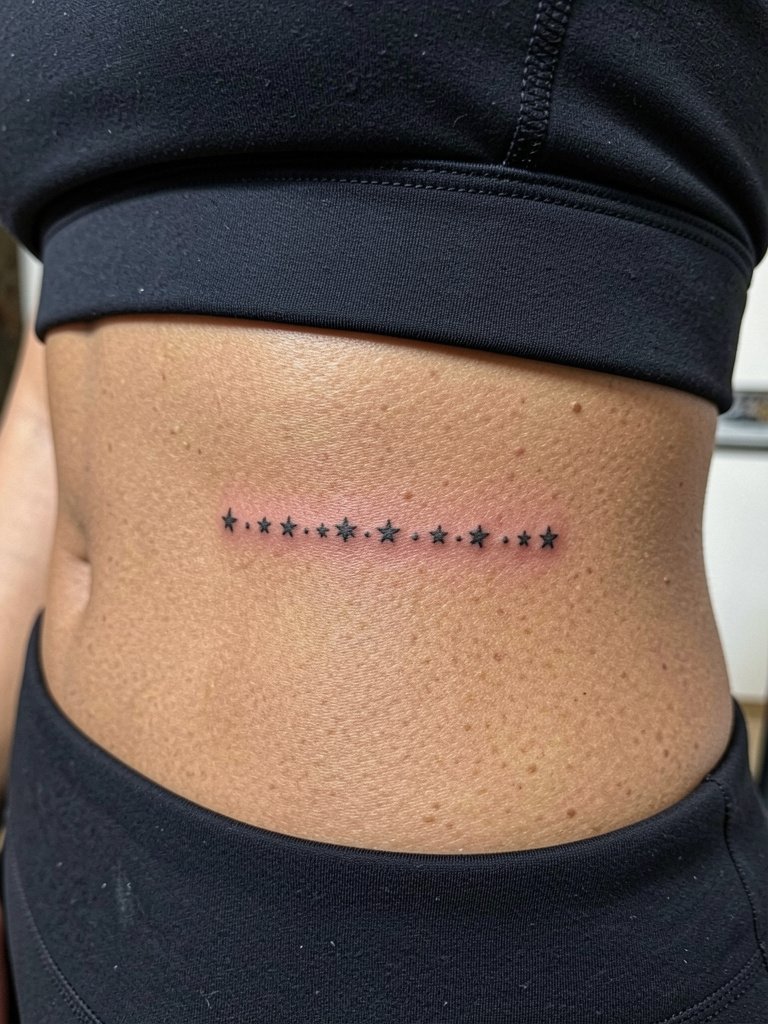
Ribcage rows look elegant but they are sensitive and prone to subtle migration if placed too close to the breast crease. Fine-line ribs are controversial among artists. One camp argues that the stretch and movement near the ribs cause fine lines to blur within two years. Another camp says that with careful needle depth and slightly wider spacing, fine lines settle and remain readable. If you choose this area, plan for a longer session window and discuss spacing that allows each dot to keep shape. For comfort wear a fitted sports bra that the artist can work around.
8. Tiny Shooting Star on Collarbone Edge
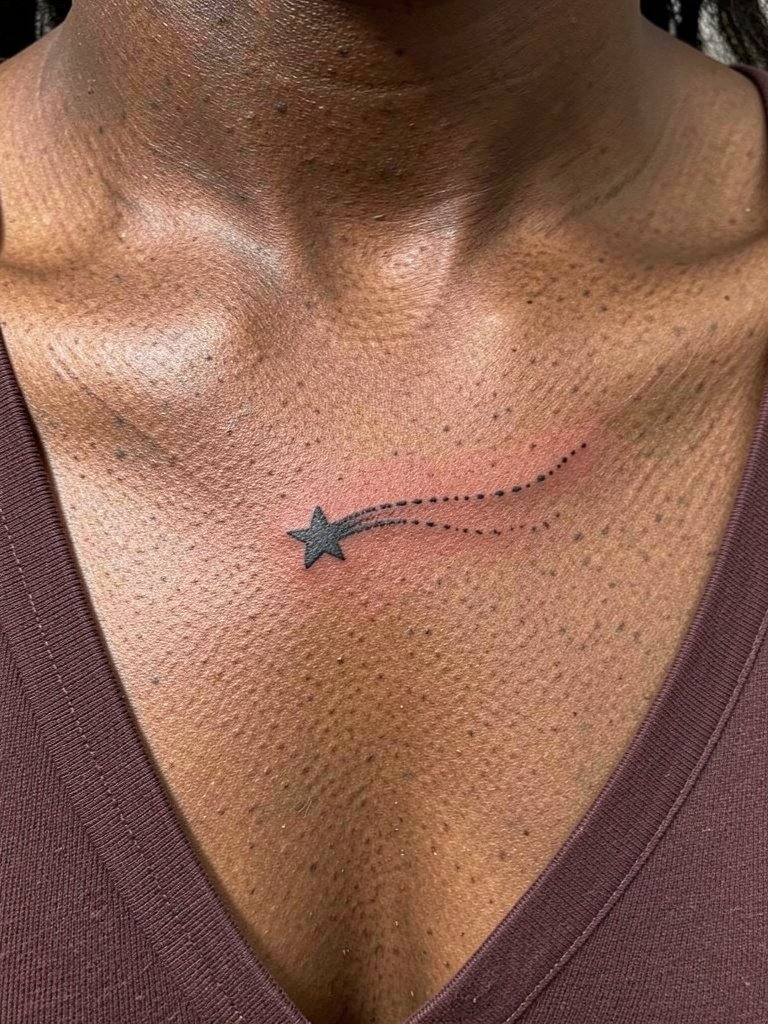
A shooting star along the collarbone makes a neat accent when paired with open-neck shirts. The trail should be spaced so dots do not merge when the skin moves or when the collarbone area sits in sunlight. Bring reference images that show how the trail reads at arm's length. A common error is asking for an overly long trailing line that looks busy in real life. Expect the session to be quick and to avoid heavy sun exposure while it heals. Pair with open-neck blouses for evening wear.
9. Tiny Geometric Star with Dot Work on Upper Arm
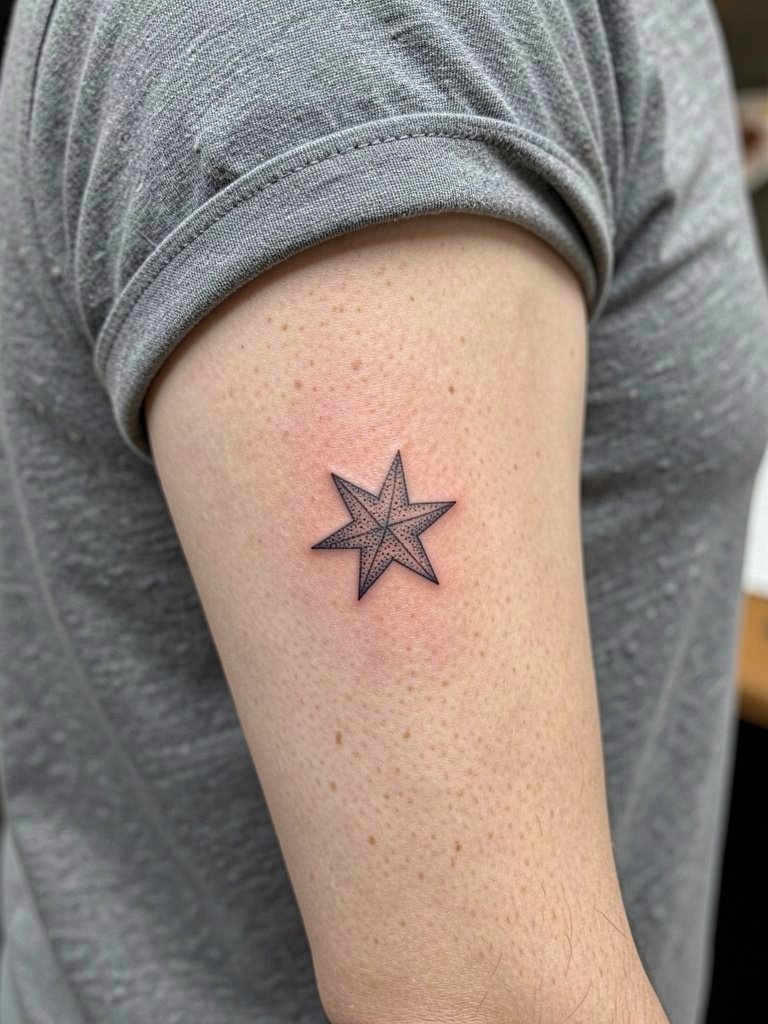
Outer upper arm pieces handle fine line and dot work well because the skin is thicker and the area sees moderate sun but little constant friction. Ask the artist to show healed dot-work examples at similar diameters so the density fits the placement. The mistake is over-packing dots too closely for a small scale. Expect a comfortable 30-45 minute sit and stable aging, with color and contrast maintained best when you use sunscreen. Session wear: a short-sleeve tee so the artist has clear access.
10. Micro Blackwork Star over the Shoulder Blade
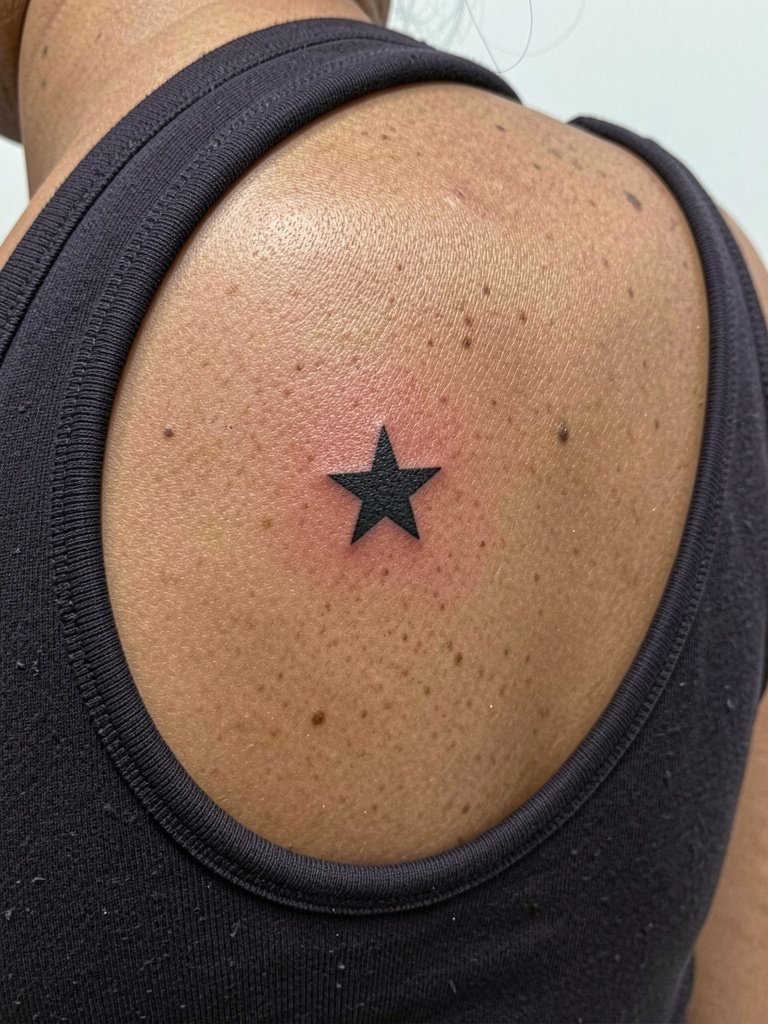
A shoulder-blade star can be slightly bolder than wrist or finger work. The thicker saturation helps the shape hold over time even with occasional sun exposure. Discuss the star's silhouette and outer edge crispness so the artist avoids over-softening during healing. One common error is making the star too tiny for the shoulder blade canvas. Sessions are low to moderate pain and quick, and showing it off works well with open-back tops and scoop-back dresses.
11. Crescent of Micro Stars on Upper Thigh
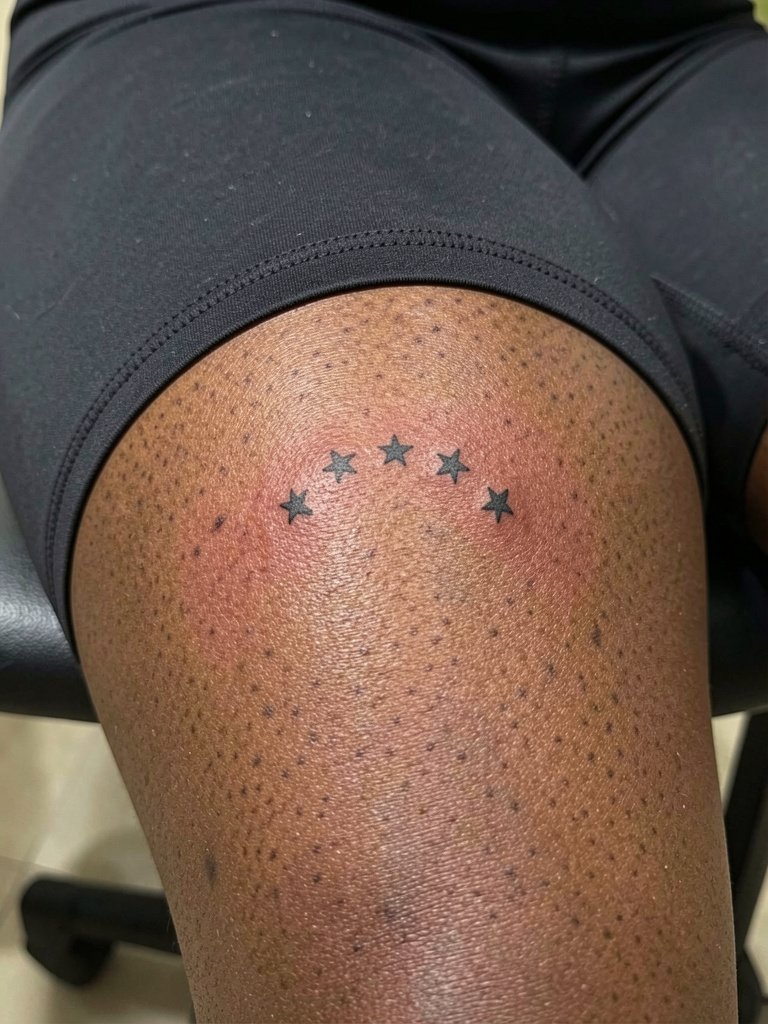
Upper-thigh clusters age well because the area has thicker skin and less daily abrasion. The main risk is placing stars too close to the groin line where chafing can occur. Ask the artist to map the exact arc while you sit so it follows the thigh curve. Expect a modest pain level and predictable healing, with touch-up possible after a year for the faintest dots. Session wear suggestion is fitted bike shorts so the artist can expose the area without you feeling exposed.
12. Tiny Star and Wave on Ankle Side
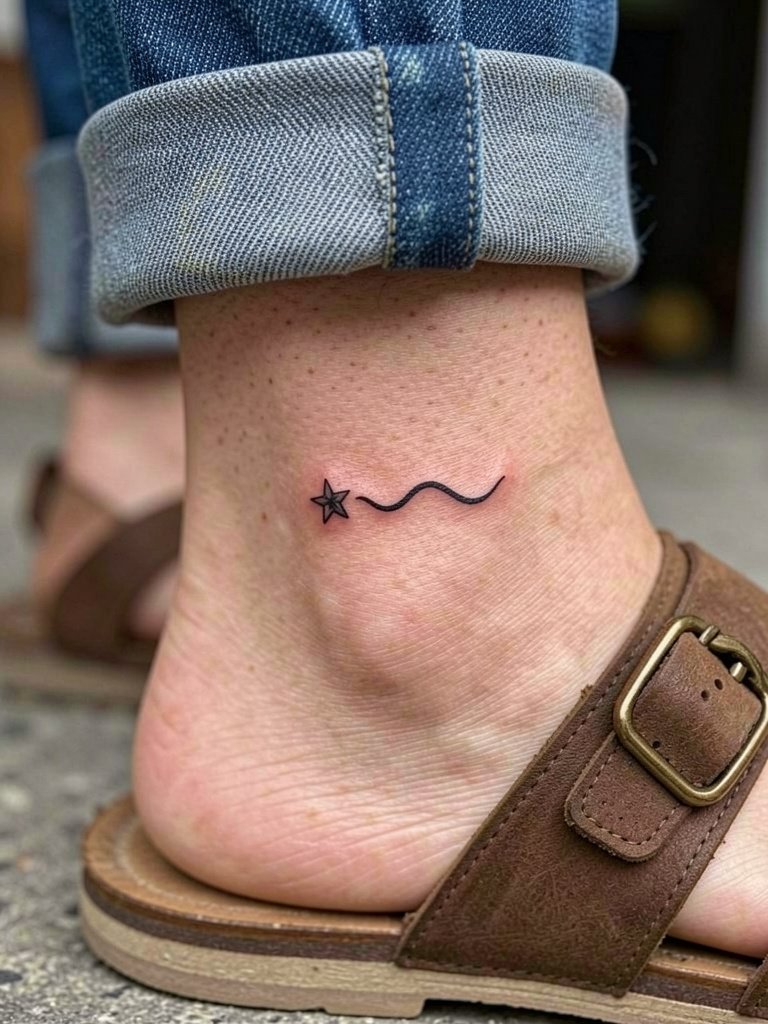
Pairing a star with a simple wave balances nautical aesthetics and keeps the ankle piece readable. The wave should be thin but not hairline to avoid blurring into the star point with shoe friction. Discuss the star-to-wave spacing during consultation so each element has breathing room. The usual mistake is crowding two elements into a tiny footprint. For showing off try summer sandals that make the ankle visible without rubbing the fresh ink.
13. Tiny Star in Minimal Script on Collarbone
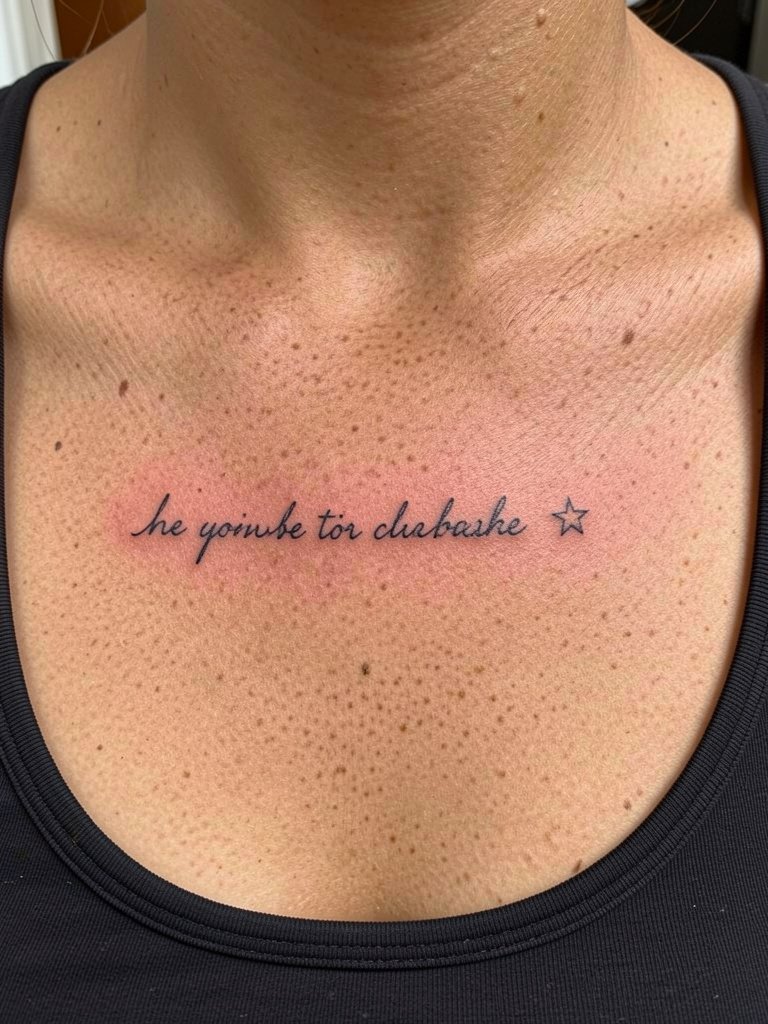
Combining a star with tiny script needs careful scale balancing so the lettering stays legible. Ask the artist to show the script at the same size in their healed portfolio or to stencil it on in place so you can check spacing. A common error is compressing letters too tightly next to a star. Expect straightforward healing and plan to use sun protection to keep the black ink from fading. For outfits pick tops with open necklines to show the pairing.
14. Single Geometric Star Near Clavicle
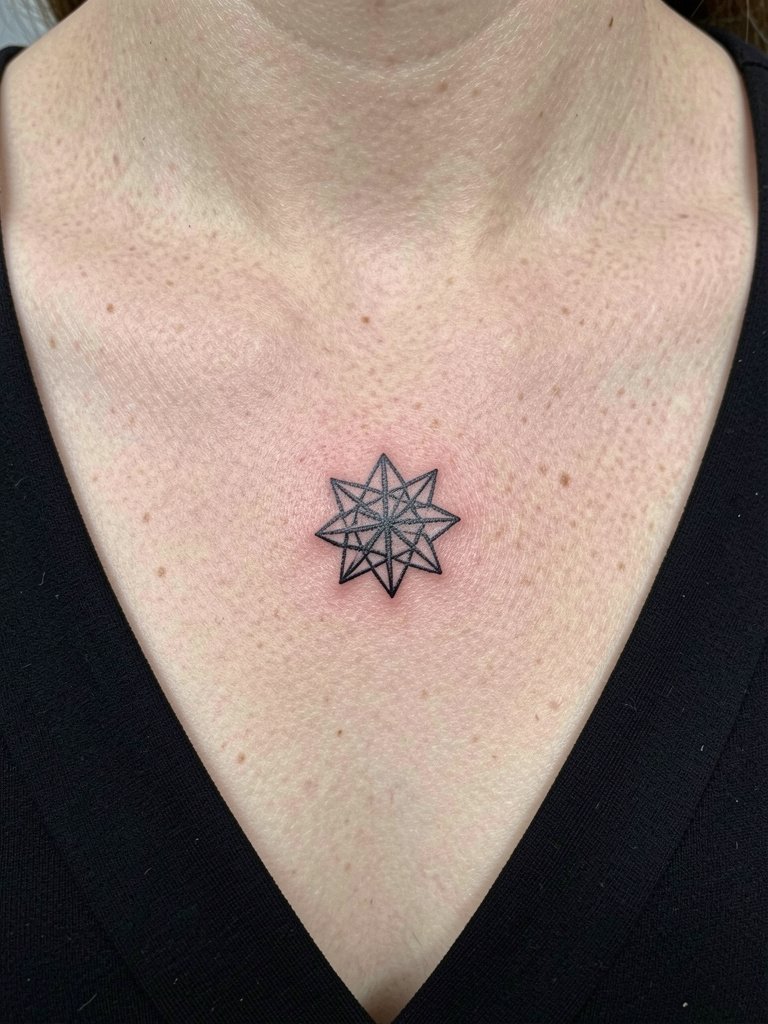
A geometric star with crisp angles works well on the clavicle where the skin is relatively flat and visible. Discuss line weight for the intersection points so the geometry stays readable in five years. The mistake is using ultra-thin linework without allowance for future softening. Sessions are quick and the placement pairs well with necklaces, but if you plan heavy sun exposure protect the area to keep saturation rich. For evening looks try pairing with a delicate chain necklace that frames the star.
15. Micro Star Halo on Nape
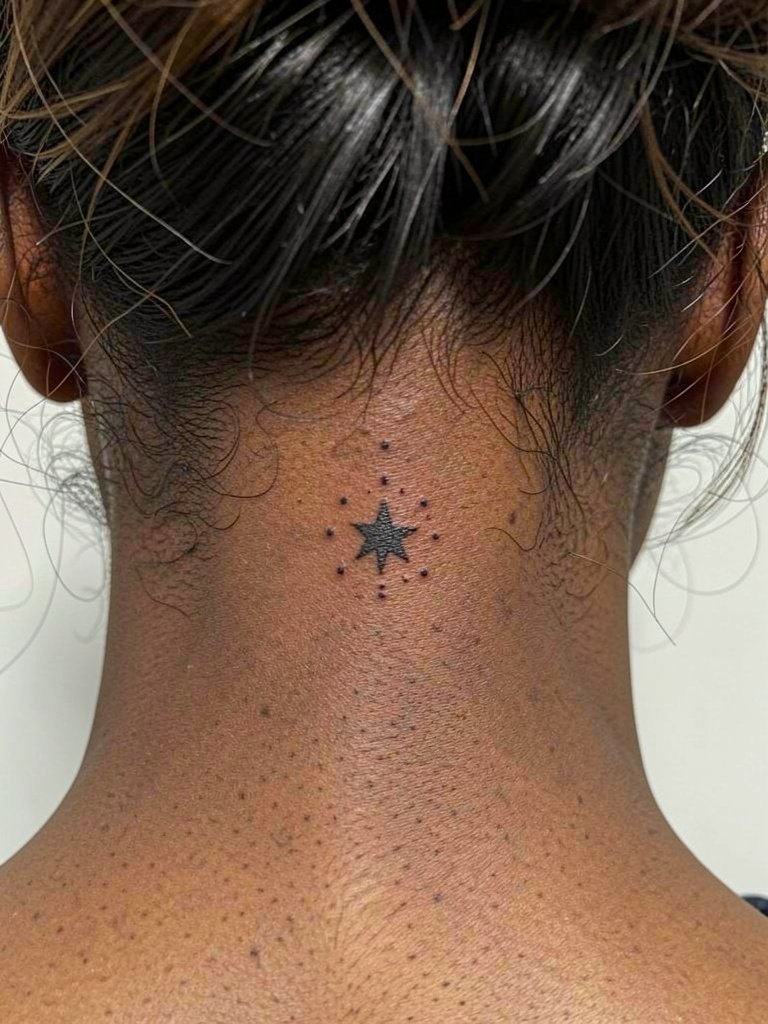
Nape placements are subtle and display well with hair up. Because the skin near the hairline can see friction from collars, ask your artist to position the piece slightly lower if you wear high collars frequently. The common mistake is placing it too high and then hiding it inadvertently with regular hairstyles. Expect a low to moderate pain level and predictable healing. For sessions plan a hairstyle that exposes the nape, and consider hair ties that hold a tidy bun for the appointment.
16. Micro Star on the Top of Foot
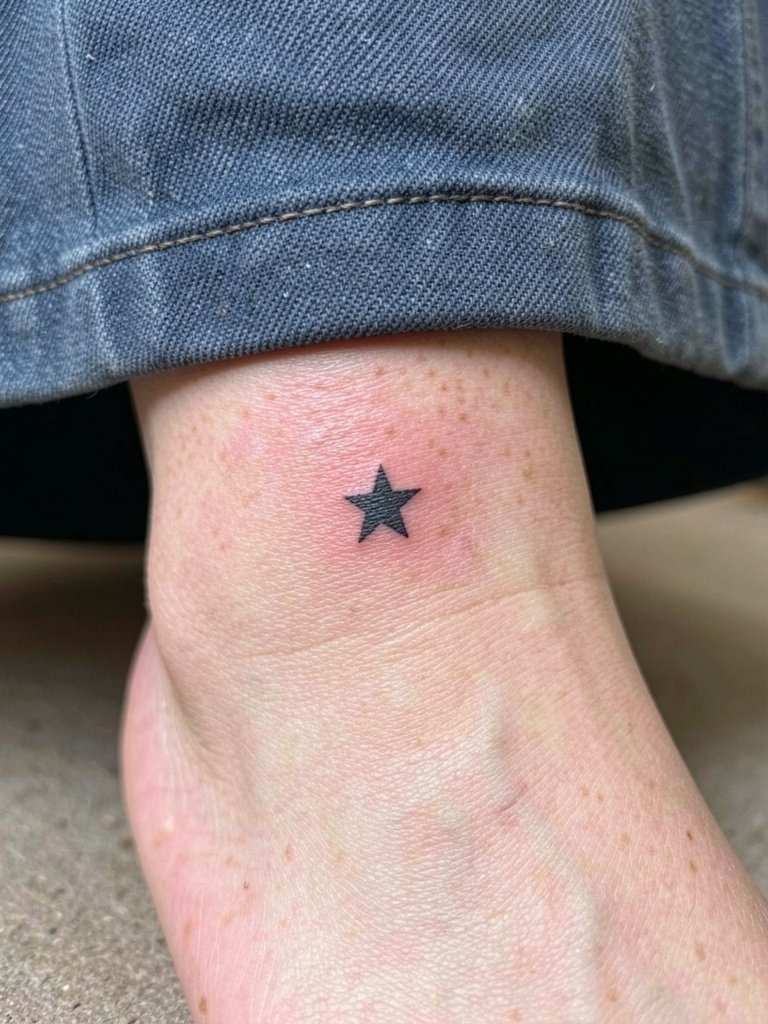
Top-of-foot stars look great with sandals but they endure constant friction from shoes and socks when worn. Ask the artist how they handle shallow stitches for this area and prepare for slower healing due to movement. A frequent mistake is expecting the same longevity as forearm pieces. Sessions are brief and you should avoid rubbing the area during the first two weeks. For showing off pick low-profile sandals or skirts that reveal the foot.
17. Tiny Star Cluster on Back of Shoulder
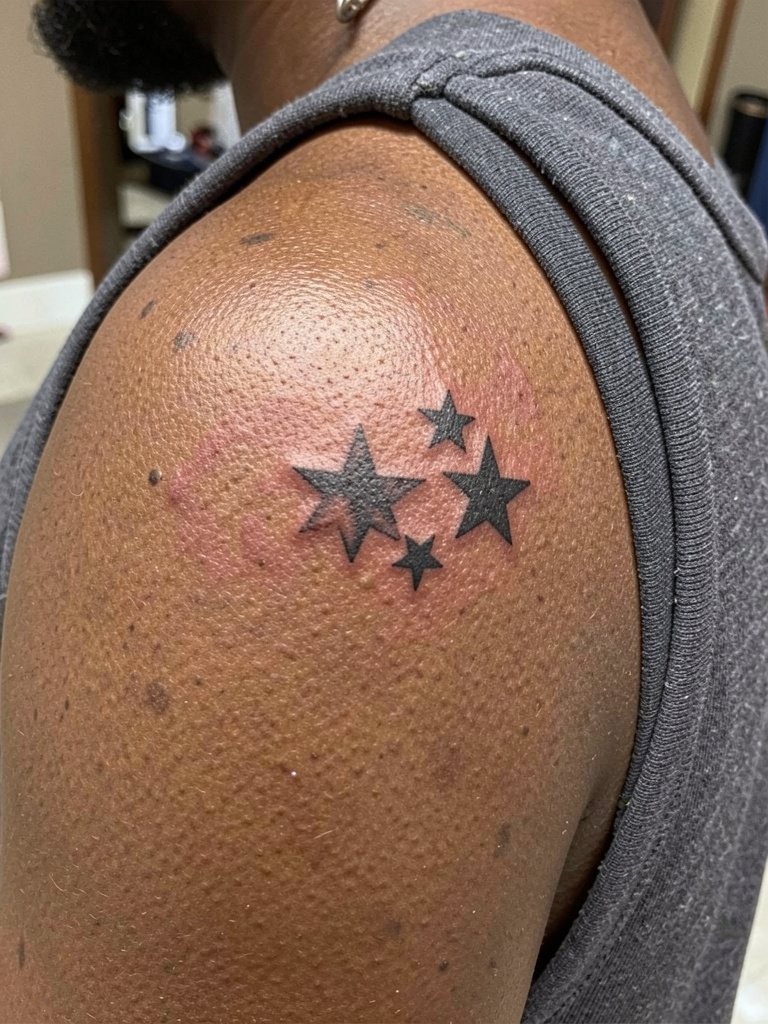
Back-of-shoulder clusters age well and are low-risk for blowout because of skin thickness. Discuss how the stars will read under different lighting so the artist spaces them for visible negative space. The usual mistake is cramming too many tiny stars into a small patch. Sessions are comfortable and the area is low-friction, so color stays truer. Pair this placement with sleeveless tops to reveal it.
18. Micro Star Above the Elbow Crease
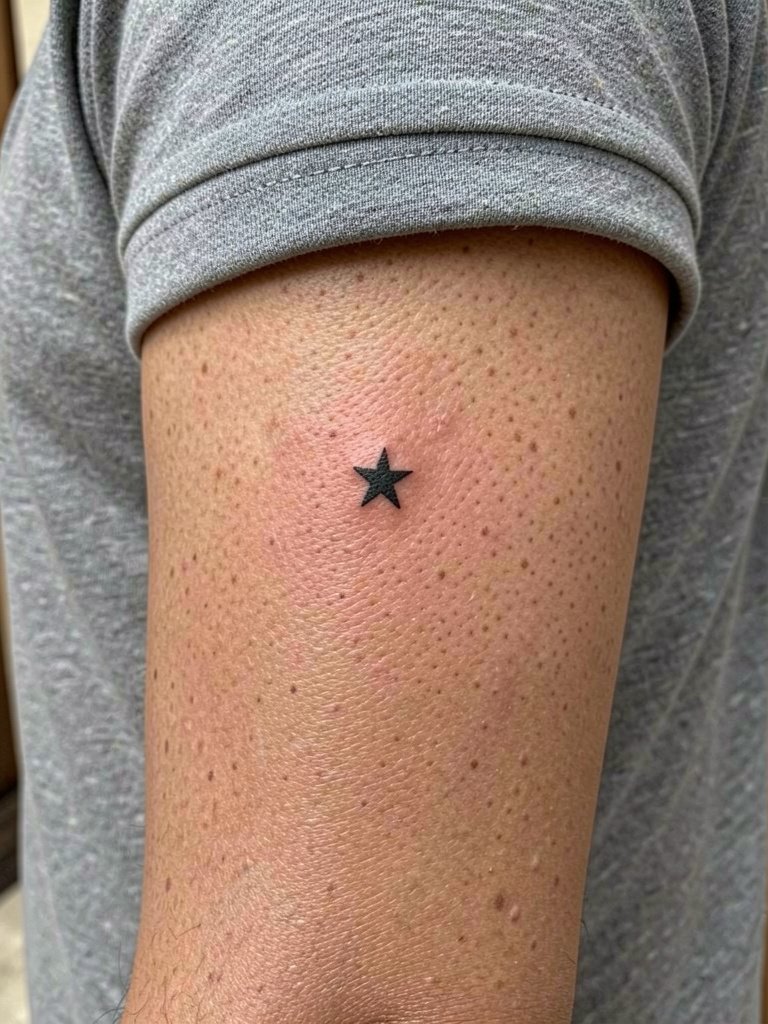
Placing a star near the elbow crease means planning for movement. Ask the artist to test the stencil with your arm bent and extended so the star keeps its shape in both positions. People often place designs across the crease which later distorts. Sessions are short and the area can scab more due to bending, so follow healing guidance carefully. For the appointment wear a short-sleeve tee that can slide on and off without rubbing the fresh ink.
19. Tiny Star on the Side of a Finger
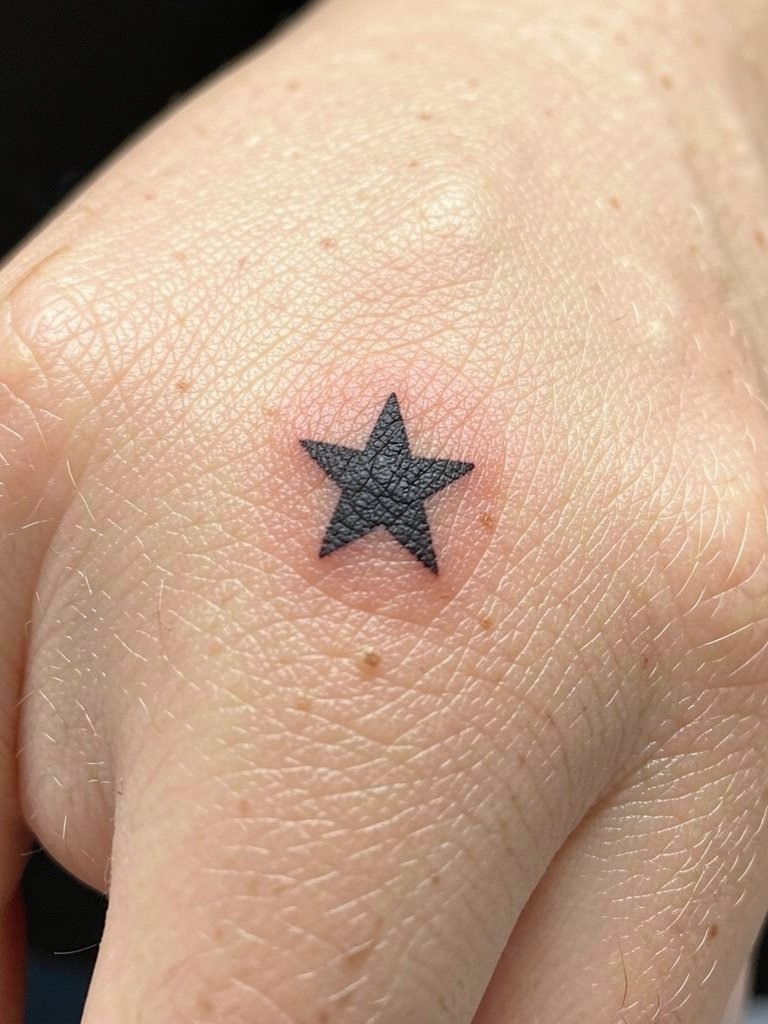
Finger-side tattoos spark debate in the community. One camp argues that fingers are high-friction, low-fat tissue, so even solid micro pieces will fade and blur within a year. Another camp maintains that heavier saturation and regular annual touch-ups keep small finger stars readable for years. If you prefer fewer touch-ups, consider a slightly larger scale or a finger-adjacent placement. Expect faster fading than forearm pieces and plan for periodic refreshes. Wearing minimal rings during the first month reduces rubbing.
20. Tiny Star Accent on the Upper Hip
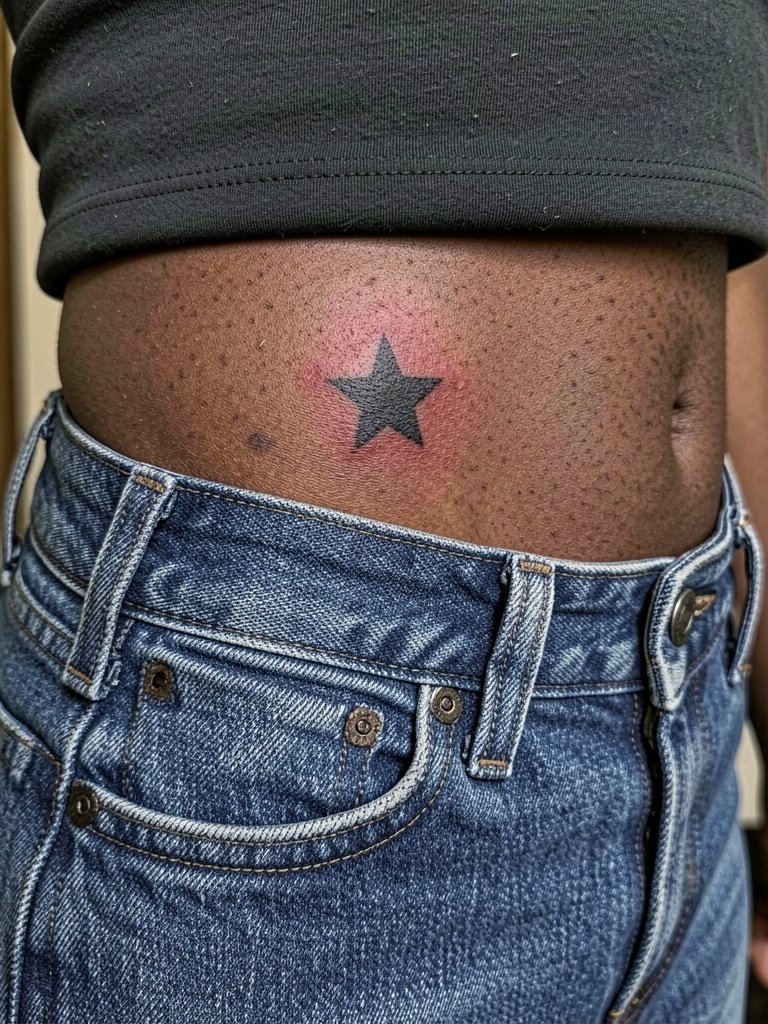
Hip stars hide well under clothing and show nicely with low-rise or cropped tops. Because the area can see friction from waistbands, request placement slightly above where your waistband sits to reduce rubbing. The common mistake is setting the design too low where jeans or underwear consistently rub. Sessions are low on pain and heal predictably, with minimal touch-up needs when protected from constant friction. For nights out choose outfits with low waistbands or cropped tops that reveal the area.
21. Tiny Negative-Space Star on Inner Bicep
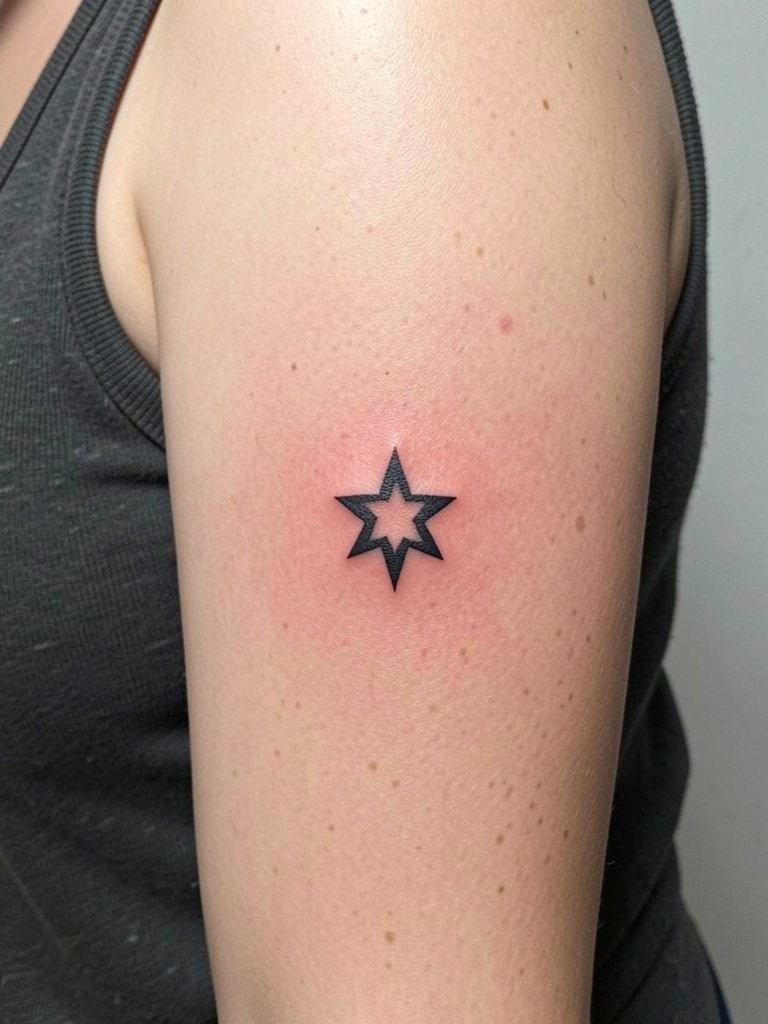
Negative-space stars read bold without fine-line work, which helps longevity on inner-arm skin that flexes. Discuss the required saturation and edge crispness since the technique depends on solid surrounding ink. A common error is under-saturating the surrounding fill, which then flakes unevenly. Sessions can take longer than a single-line piece. Wear a tank top so the artist can work with the arm relaxed and avoid armpit placement.
22. Micro Star with Metallic Ink Accent on Ankle
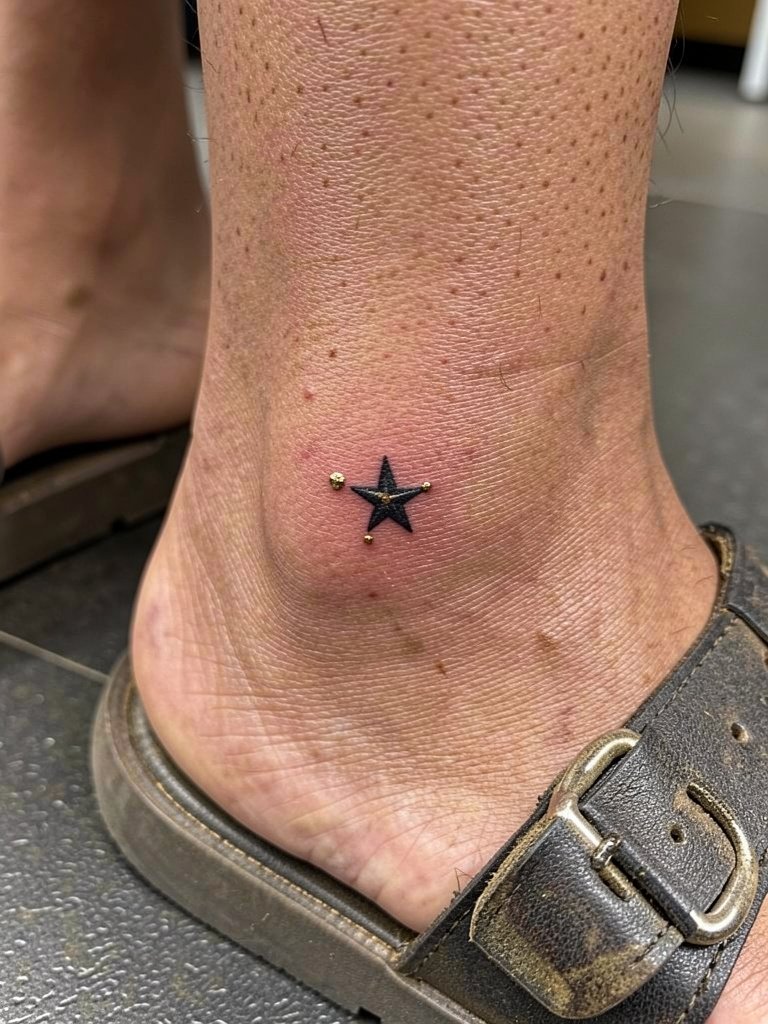
Metallic and novelty inks can add sparkle, but they behave differently than black. Ask for healed examples of metallic ink on similar skin tones and placements because reflection and fading vary. The common mistake is assuming metallic will remain as reflective as it looks fresh. Sessions are short and aftercare should avoid exfoliants in the first month to preserve the accent. For footwear pick sandals that do not rub the ankle while the piece settles.
23. Tiny Shooting Constellation on Forearm
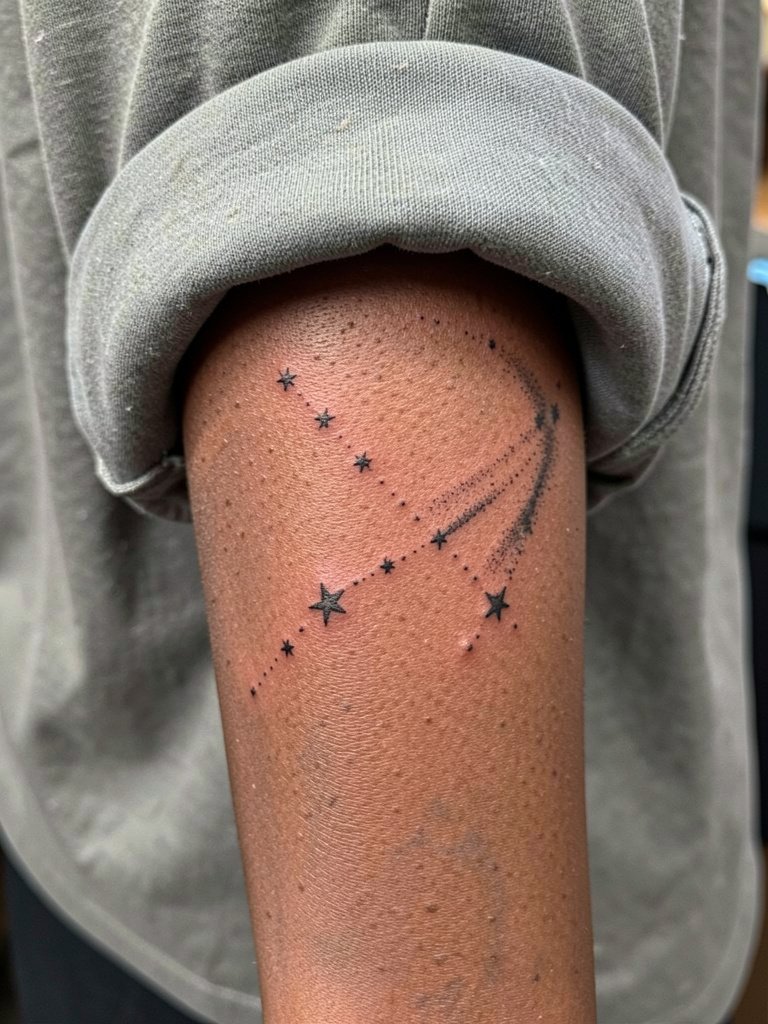
Outer forearm constellations photograph cleanly and handle detail if the dots are spaced intentionally. Ask to see stencils placed on the arm so you can judge how the trail reads at different distances. A frequent mistake is over-detailing a trail that looks busy in movement. Sessions are comfortable and the area is low-friction, so dot work holds well. For daily looks, cuffed sleeves and watches frame this area nicely; try a lightweight watch strap that does not press on fresh ink.
24. Small Star Accent on Sternum
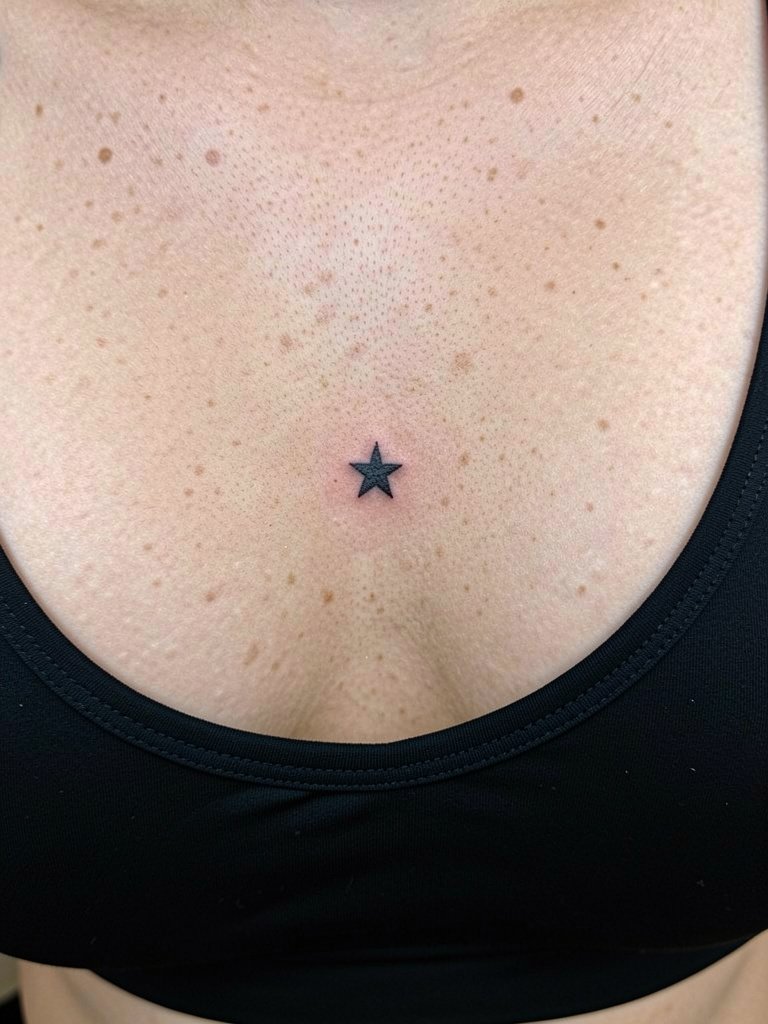
Sternum stars look striking but are a sensitive spot and require an artist who works on chest placements often. Discuss needle depth and pain management clearly, and plan sessions with short breaks. One camp of artists cautions that fine line on the sternum can blur because of skin movement under the breasts. Another camp says that with controlled depth and spacing, the central sternum holds fine and looks crisp. If you choose this area, schedule a longer appointment window and wear a fitted, supportive top for the session.
25. Micro Star Cluster Near Collarbone with Layered Lines
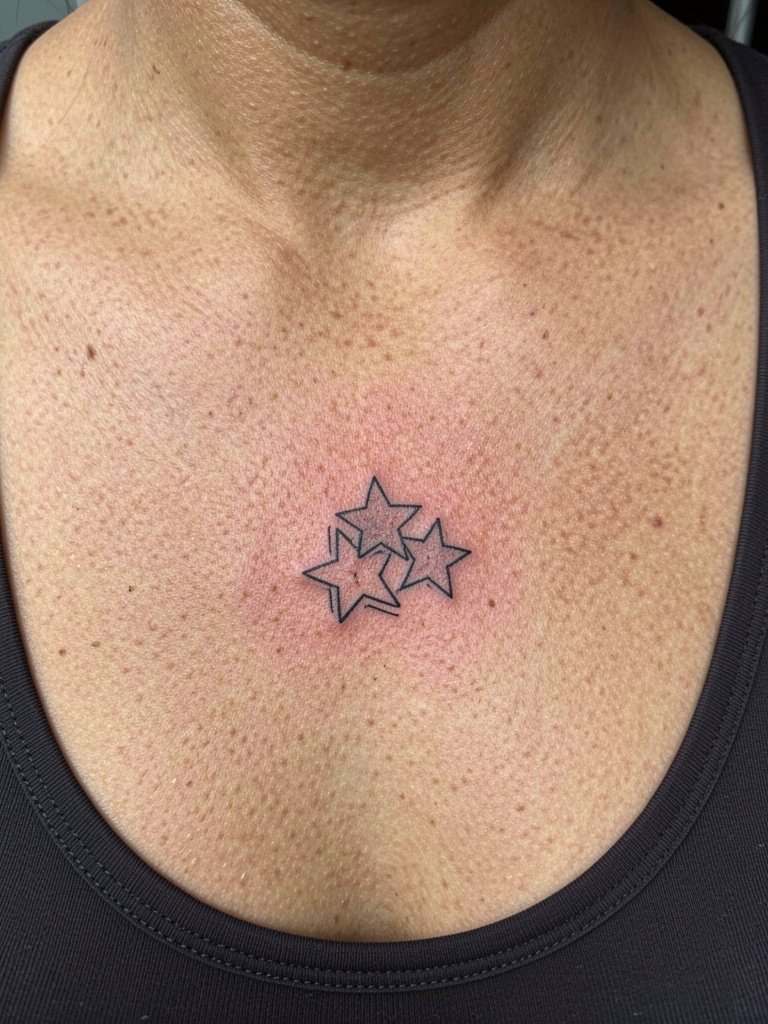
Layered-line clusters add subtle depth and show in necklaces or open collars. Ask for a slightly heavier contour on the outer lines to preserve separation as the piece softens. Mistakes include making the offsets too tight, which removes the layered effect when healed. Sessions are quick and the area is easy to protect from sun. For styling, choose open-neck garments and a delicate choker to balance the look without covering the tattoo.
26. Tiny Star on Mid-Back Spine Line
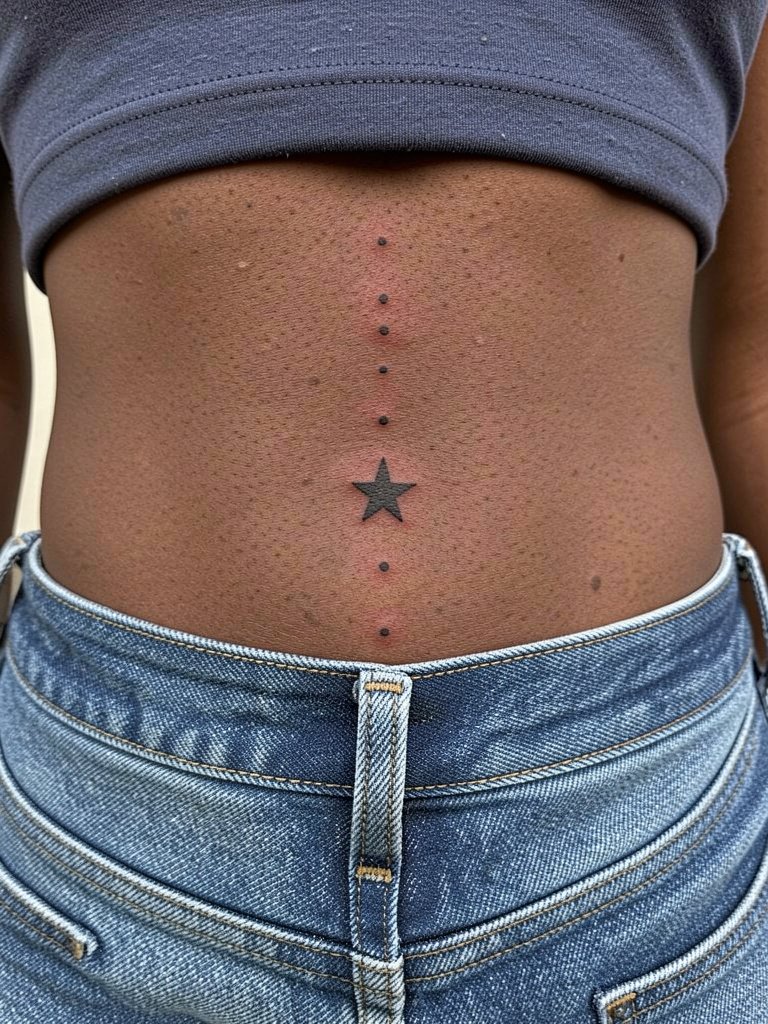
Mid-back stars sit in an area with thicker skin and low friction, so they tend to hold crisp edges. Discuss whether you want small accent dots for visual alignment along the spine. The common mistake is centering the piece too low where waistband friction becomes an issue. Session pain is mild and healing straightforward. Show-off pairings include low-back dresses and high-waist styles; a cropped tank works well for appointments and photos.
27. Micro Star Near the Ear Lobe
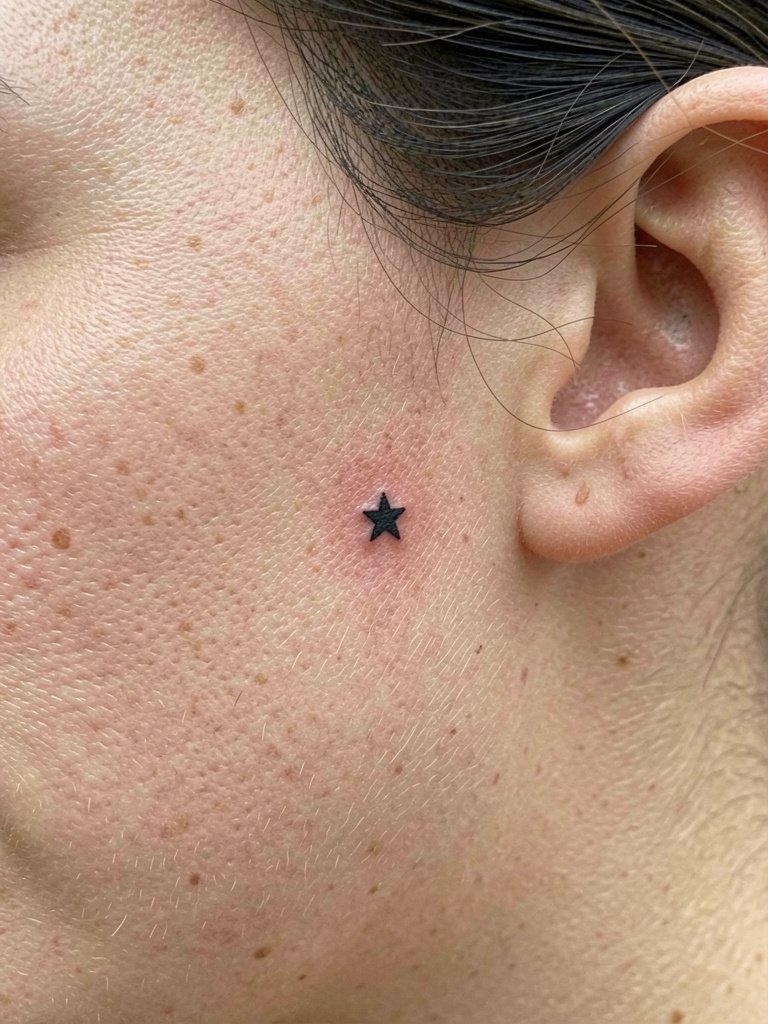
A tiny star near the earlobe is fun for people who like micro facial accents. The skin there is thin so needle depth and precise stencil placement are critical to keep the piece crisp. A frequent mistake is asking for overly intricate detailing in too small a space. Sessions are brief and require an artist experienced in facial-adjacent placements. Professional consideration: choose someone who routinely tattoos small areas near the face.
Frequently Asked Questions
Q: How small is too small for a star tattoo if I want it to last?
A: For most body areas, a star smaller than about four to five millimeters will likely lose detail faster. Choose a slightly heavier line weight or a small filled star rather than hairline points if you want longevity. I suggest asking the artist to show how the stencil looks scaled on your body before inking.
Q: Do fingers and hands really need more touch-ups than forearms?
A: Yes, fingers and hands face constant washing and friction which makes tiny stars fade faster. Expect a potential refresh within a year for many hand placements. If you want lower maintenance, choose nearby placements like the side of the hand or a small wrist piece instead.
Q: Where can I find healed examples and portfolios without naming artists directly?
A: Search visual platforms using targeted hashtags and location filters to find healed shots. Try Instagram and TikTok hashtags like #smallstartattoo, #microtattoos, and #healedtattoos, and filter by location if you want local portfolios. Reddit tattoo threads and Pinterest boards are also good places to see healed images across different skin tones.
Q: What should I wear to my appointment for a collarbone or chest star?
A: Wear a top that exposes the area in its normal worn position without being pulled. A fitted scoop-neck or wide V-neck top that you can remove or roll slightly without tugging is ideal. A scoop-neck tank usually works well for chest or collarbone sessions.
Q: How do I reduce blowout risk for tiny stars on softer skin areas?
A: Ask the artist to use slightly wider spacing and modest line weight for soft skin zones so the ink has room to settle. Also avoid overly shallow strokes which sit too close to the surface. Discuss how the design will scale and where natural creases sit during the consultation.
