
A small, well‑placed trick can read like a stunt in person and like nothing in a photo. For men chasing levitation, pop-out geometry, or a hidden reveal, the real win is a design that holds through sweat, sleeves, and phone flashes. Below I start with a reliable spot for sharp geometry and then move through wearable levitation pieces, wrap patterns, and stealth reveals you can actually live with.
1. Popping Geometric Cube on Inner Upper Arm
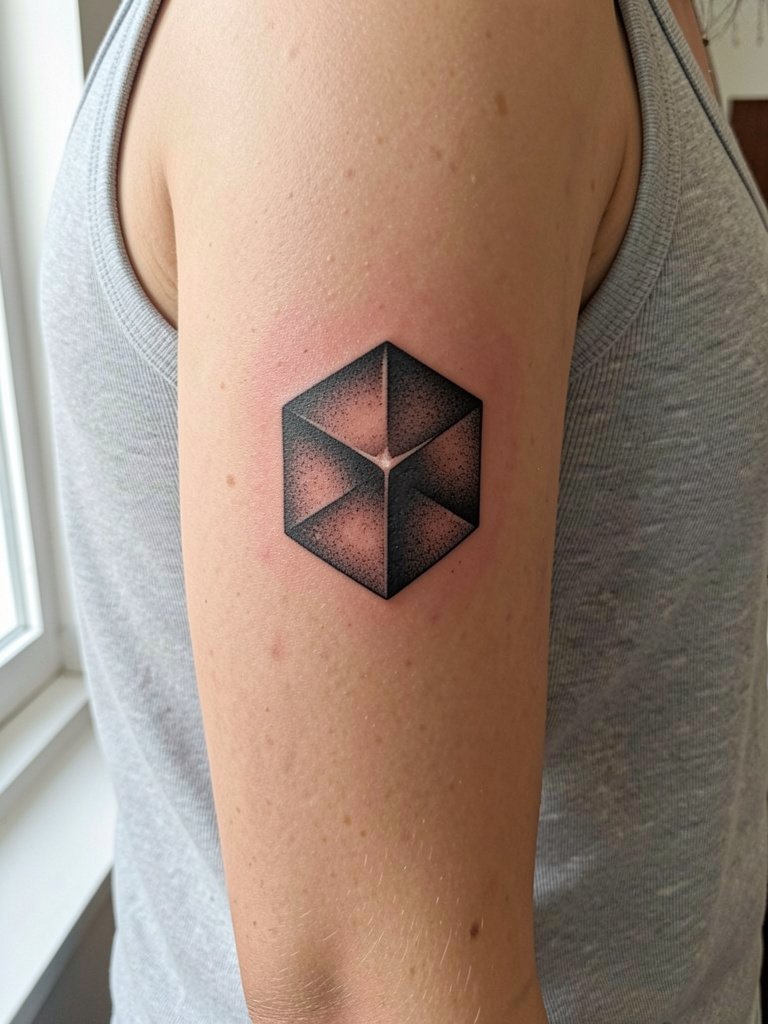
This is the poster child for a popping geometric that actually reads in real life. I suggest this over a flat outline cube when you want motion from a small area. Ask for heavier linework on the outer edges and stipple shading under one face so the cube seems to sit above the skin. One camp says heavy black and white highlights blur faster because saturation migrates. The other camp argues that slightly wider line spacing and controlled saturation prevent blowout and keep the pop for years. Expect moderate pain for the inner upper arm and a single session under two hours. Common mistake is doing this too small. Give lines room to breathe so touch-up looks minimal later.
2. Floating Stone on Inner Forearm
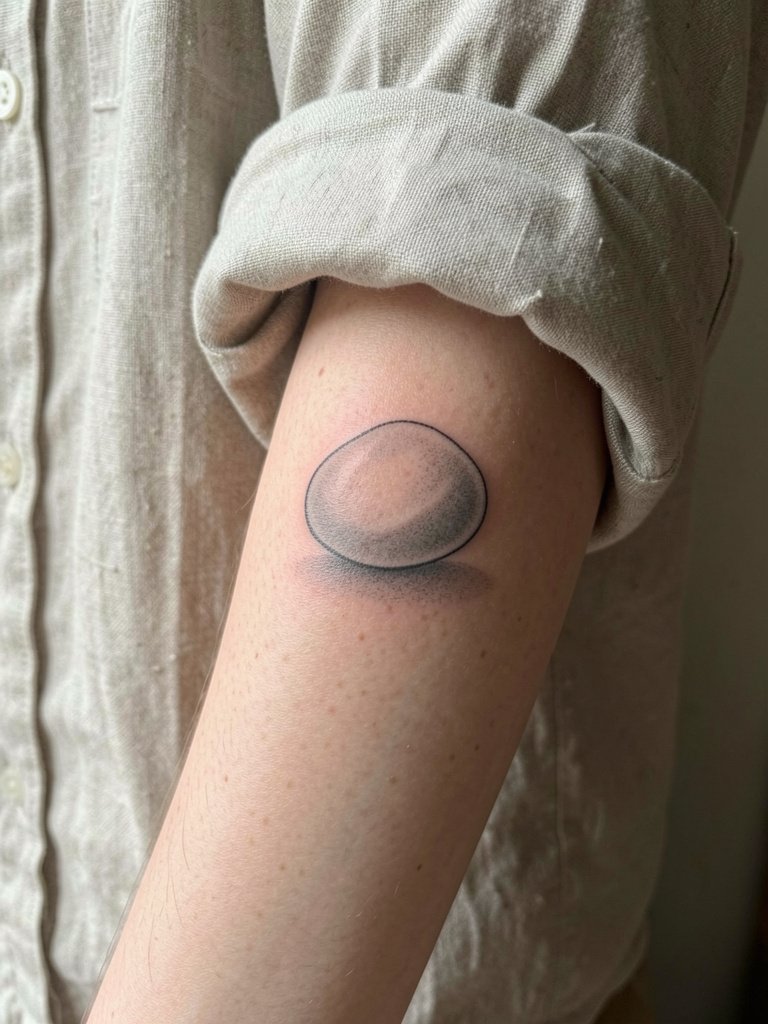
This tiny levitating rock is a low-commitment way to get a levitation effect that photographs better than most 3D miniatures. It works best on the palm-up forearm where the cast shadow reads consistently. During consult bring close-up photos showing the exact shadow shape and ask for slightly wider stipple in the shadow so the healed contrast survives. Healed at six months the shadow looks soft. At two years the edges thin unless the artist uses a slightly denser dot technique. Session time is short. Wear a loose button-down so the sleeve can roll without rubbing the fresh ink. For showing off, try a rolled-up linen shirt in cream or olive, linked here: linen button down shirt men.
3. Spiral Wrap on Outer Upper Arm
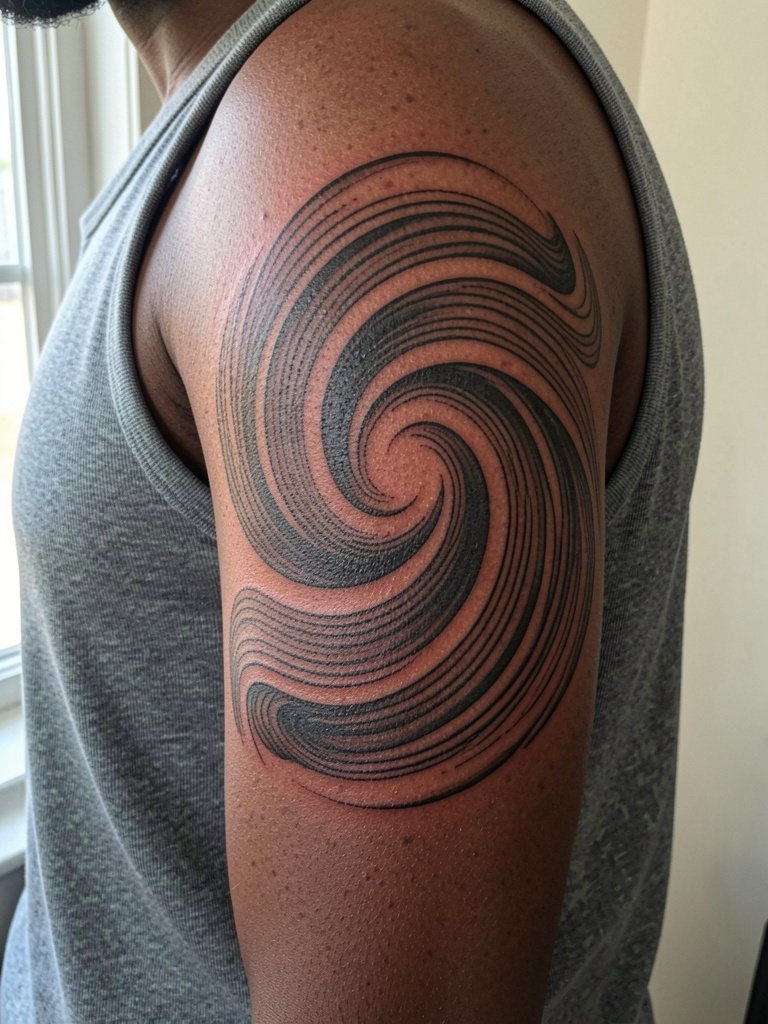
A spiral wrap turns the arm into a moving canvas when you rotate it. Pick this over a single panel if you like the piece to interact with movement. The trick is consistent line spacing and deliberate breaks where the spiral crosses natural muscle bulges so the effect does not warp when you flex. Common mistake is too-tight geometry. That causes lines to merge by year two. Plan for two to four shorter sessions so the artist can keep linework crisp. For show-off looks, a solid-color tank in navy or black frames this wrap well. Grab a solid color tank top men to match the vibe.
4. Hidden Reveal on Lateral Hip Bone
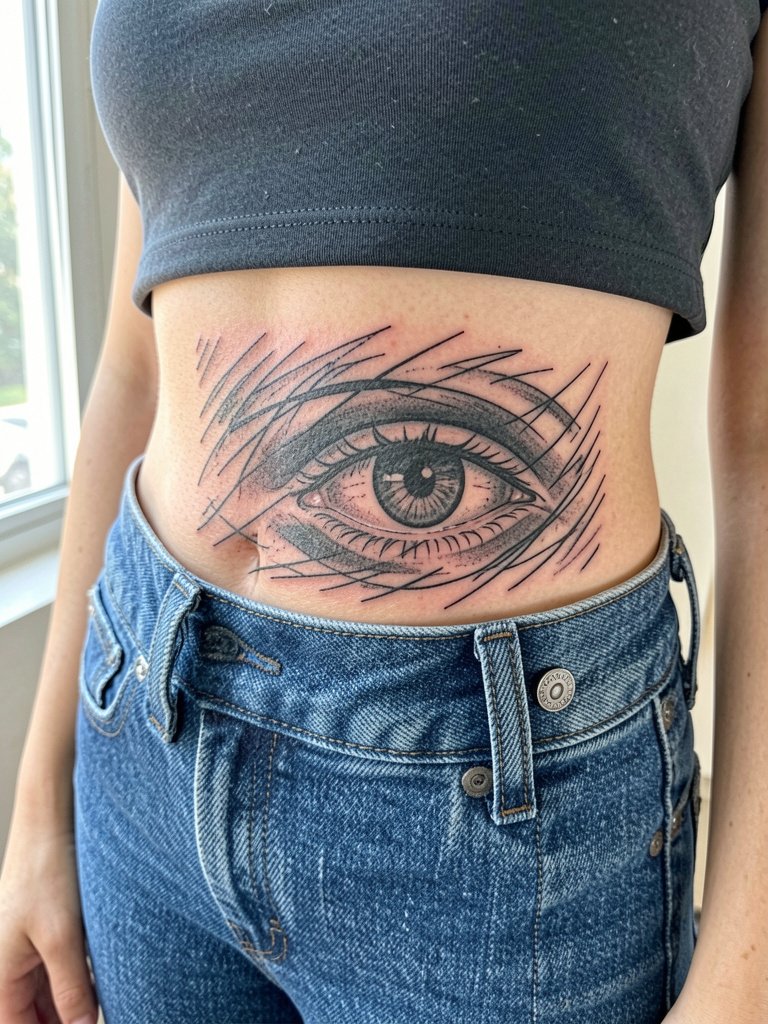
Hidden reveals are a physical puzzle for viewers. I prefer this method when you want the design to change with motion. Ask for mixed line weights and a few reference photos at different viewing distances so the artist can map the angles. The common failure is compressing detail into a tiny area. That makes the reveal unreadable after healing. On the hip the session is low to moderate pain and you can wear drawstring shorts to the appointment for comfort. Show-off pairing is low-rise pants in neutral tones like khaki or black. Try low rise pants men if you want a similar reveal-ready look.
5. Torn Skin Rip on Side Torso Ribcage
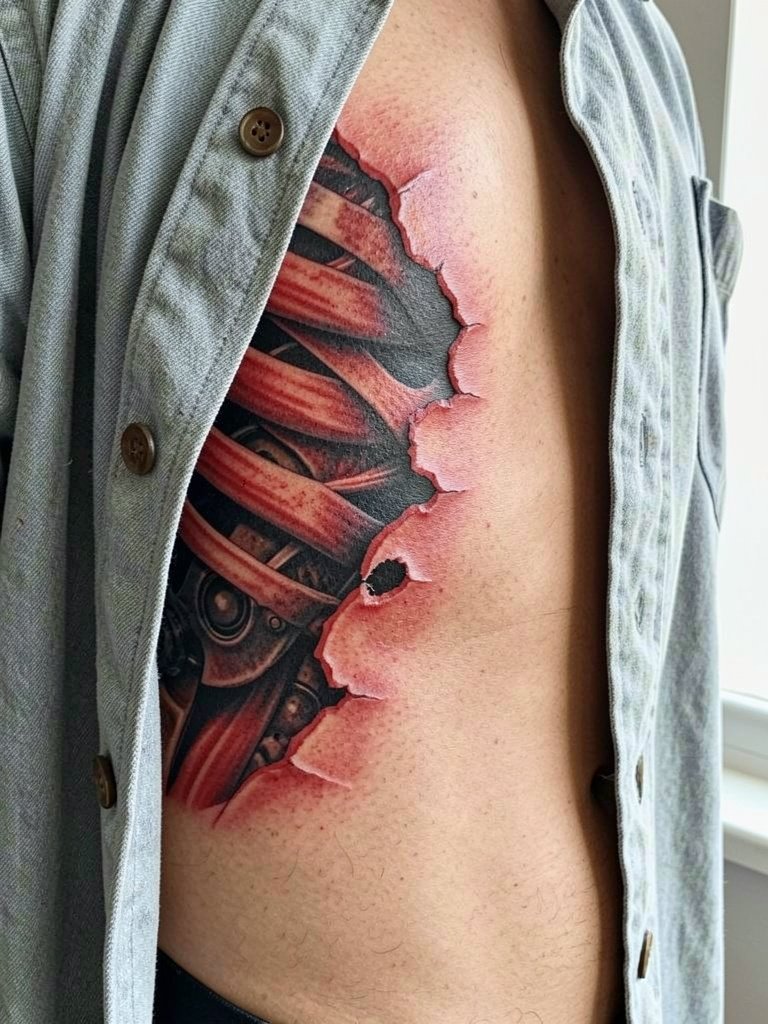
This is the high-impact option for collectors who want visceral contrast. The ribcage is one of the highest pain zones, and sessions often break into two to limit fatigue. One camp warns that heavy red and white highlights in rips can yellow or blur with time, softening the shock. The other camp insists that strategic saturation and texture work keep the illusion crisp for years if the artist stages touch-ups in year one. If you need discretion, place it under clothing or pick a subtler cracked geometry instead. For the session wear a loose button-down so the artist can access the ribs without tight fabric pressing on fresh ink.
6. Floating Wing or Bird on Inner Forearm
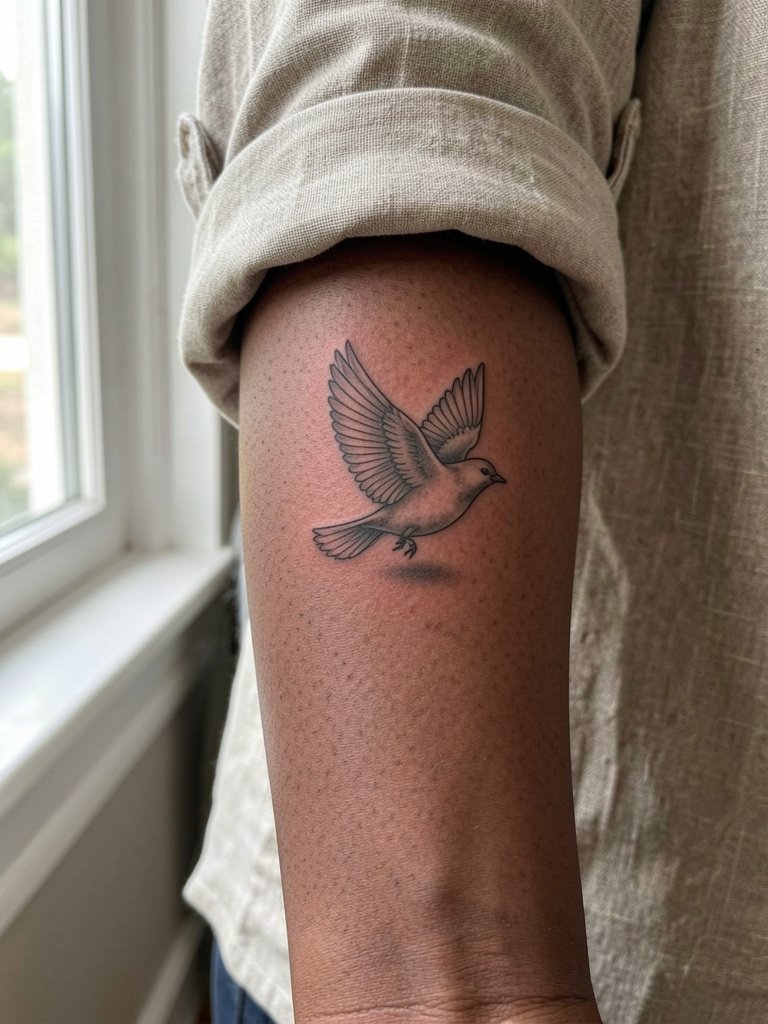
A wing with a painted shadow reads as light and portable. It pairs well with thin linework and soft grey shading. On darker skin tones, ask for cool-grey shadow mixes rather than pure black so the cast looks believable. A common mistake is relying on ultra-thin single-needle shading for the shadow. That can disappear as the skin heals. Session time is short and pain low. For showing off, roll up a linen shirt in cream or sand. Here is a wearable match: rolled cuff linen shirt.
Session Day Picks
The first six pieces show a mix of tiny levitation tricks and larger ribcage statements, so a few shop staples make the appointment smoother.
-
Eternal Inks cool grey shadow mix. Artists mix this for subtle shadows on medium and dark skin so the levitation looks natural instead of muddy.
-
TatFocus 0.3mm liner. A finer liner helps preview the thin contours on the forearm styles without collapsing the linework that ages poorly.
-
Hustle Butter UV aftercare balm. UV-blocking properties help preserve light highlights and reduce early yellowing on white or near-white touches.
-
Shadow-only stencil kit. Useful for artists who want to preview a cast shadow independently from the object. Great for floating stone and bird ideas.
-
Ring light kit. A simple ring light helps you photograph the 3D shading the right way so the levitation reads in pictures as well as in person.
7. Geometric Cracked Wrist
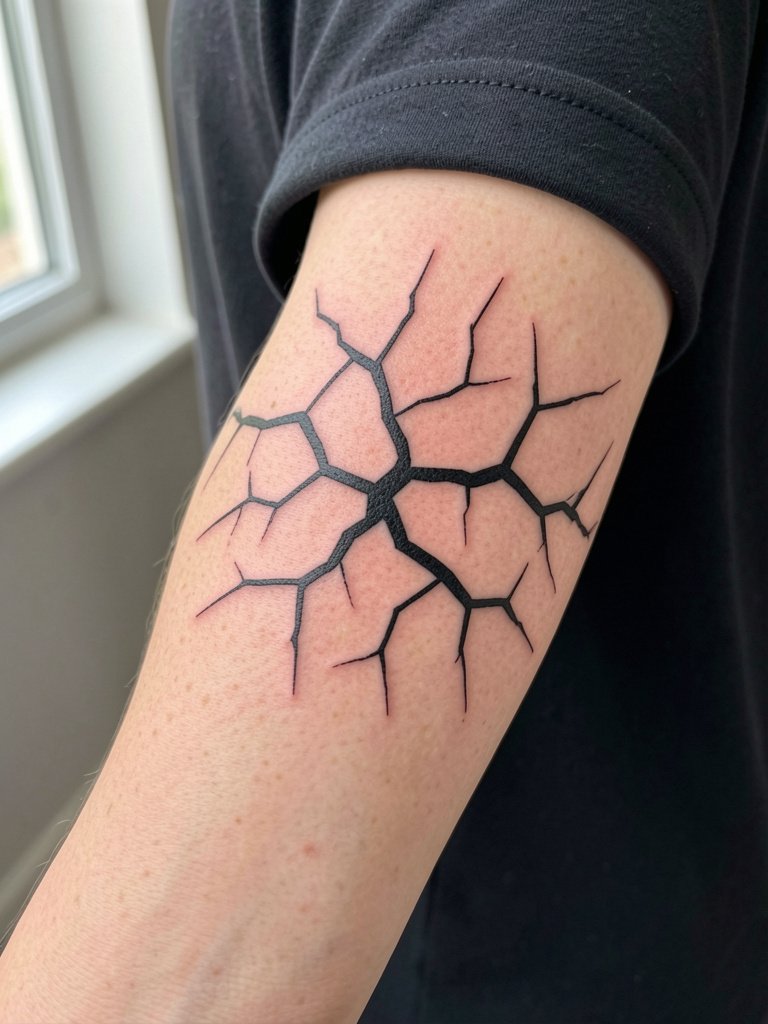
A cracked geometry on the wrist is a lean way to get a punchy three-dimensional read without heavy realism. It works best as a small piece because the wrist is flat and visible. The common error is overcomplicating the cracks. Keep clean angles and a bold outline for longevity. The wrist handles medium pain. Avoid watches or tight bracelets on the tattoo wrist on session day. For aesthetics, pair with a minimalist watch on the opposite wrist. Try minimalist watch men to complete the look.
8. Inset Sunken Motif on Inner Upper Arm
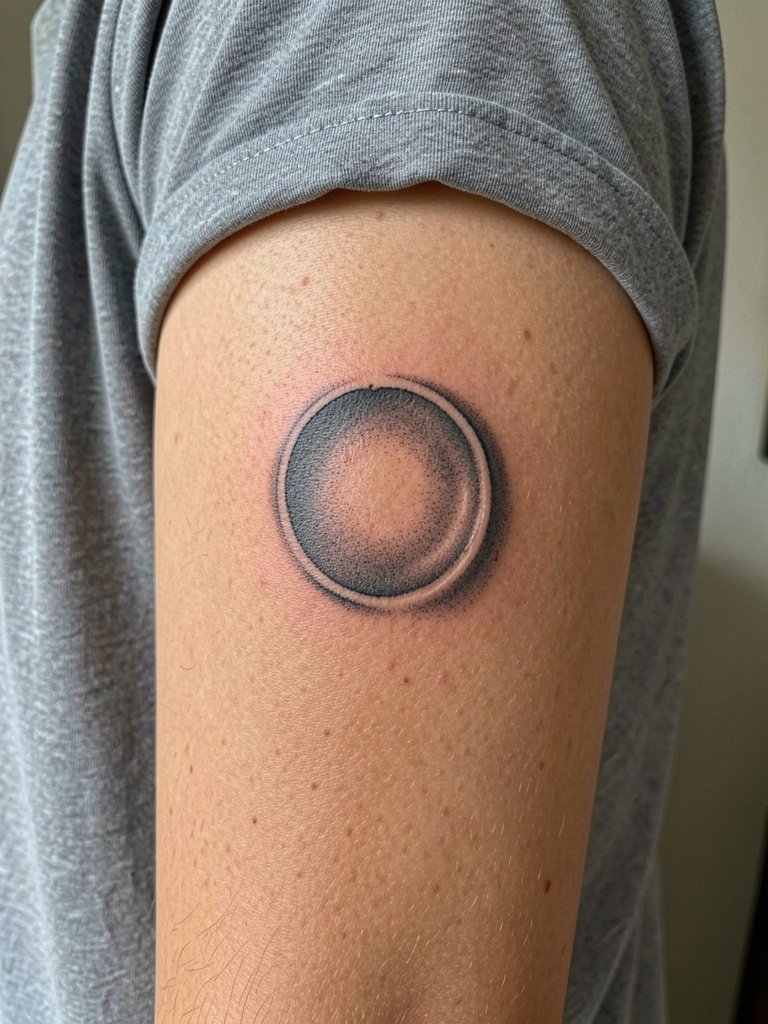
If you like a sculptural, low-gloss look, the sunken inset reads mature and ages well. Discuss edge softness and inner rim highlight with the artist so it looks carved and not stamped. The common aging issue is overusing white ink on the rim. Consider light grey instead for longer life. Pain is low on the inner upper arm. Session time is typically under two hours. For the appointment wear a loose short sleeve so the artist can access the area without rubbing.
9. Endless Corridor Forearm Wrap
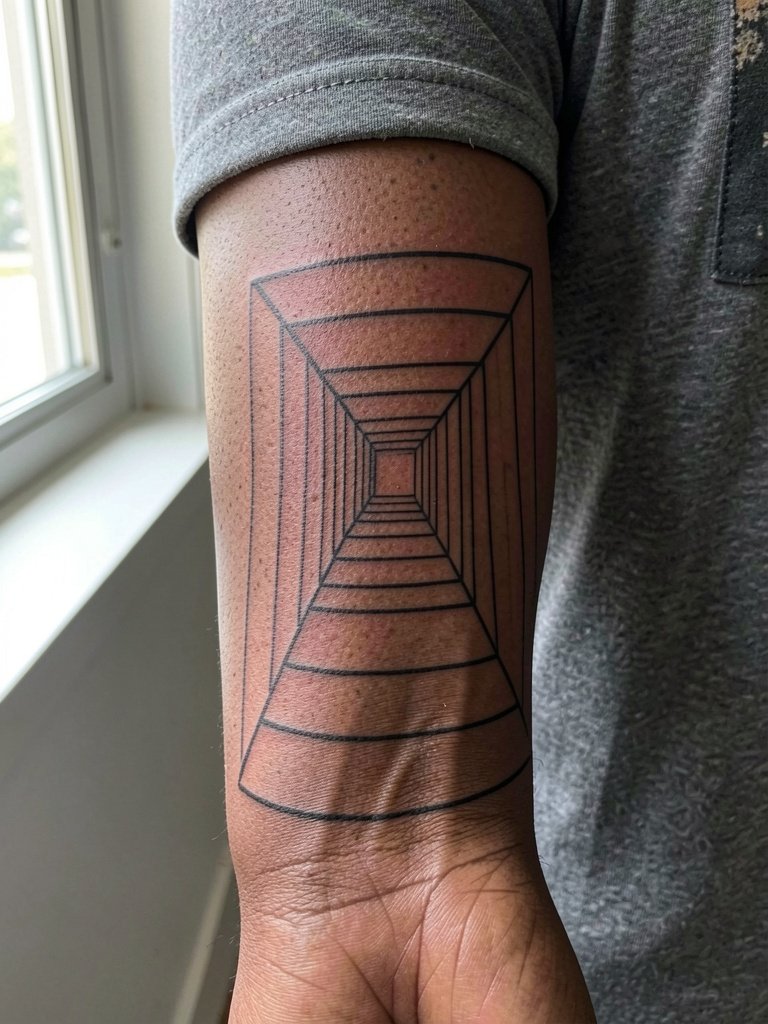
A corridor design gives a hypnotic visual when you rotate your arm. It needs exact line perspective and careful whipe shading for the tapered look. Mistakes happen when the vanishing point is off the curve of the arm. That makes the corridor collapse when you flex. Plan this over two sessions and ask the artist to mark the vanishing axis on the arm so the geometry reads from all angles. For photos, a ring light helps maintain contrast. Comfortable session wear is a short sleeve tee you can roll up.
10. Floating Eye on Lateral Hip
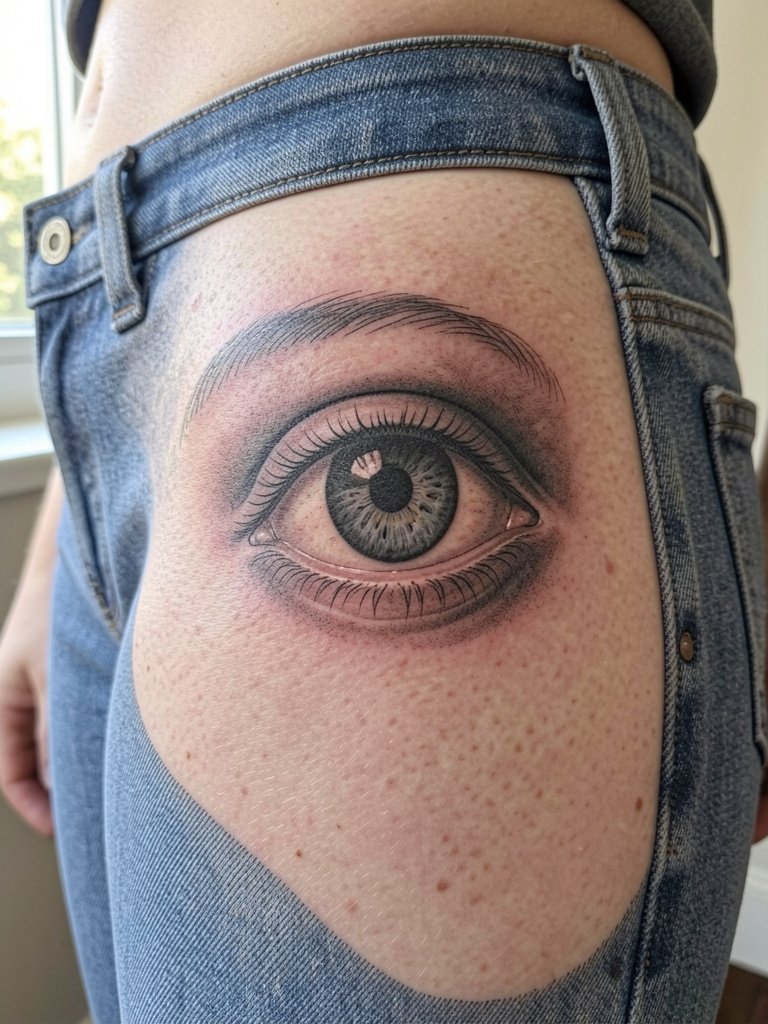
The floating eye is a symbolic piece that benefits from tight contrast in the iris and a believable cast shadow. On the hip the illusion plays with walking and posture changes. The usual mistake is oversaturating the pupil with white highlights that yellow. Consider a dark grey highlight instead for longevity. The session is low to moderate pain. Wear drawstring pants so the waistband does not press on fresh ink during travel. For a casual reveal try low-rise shorts paired with a simple chain necklace on the opposite side. See chain necklace men.
11. Wavy Grid Distortion on Inner Forearm
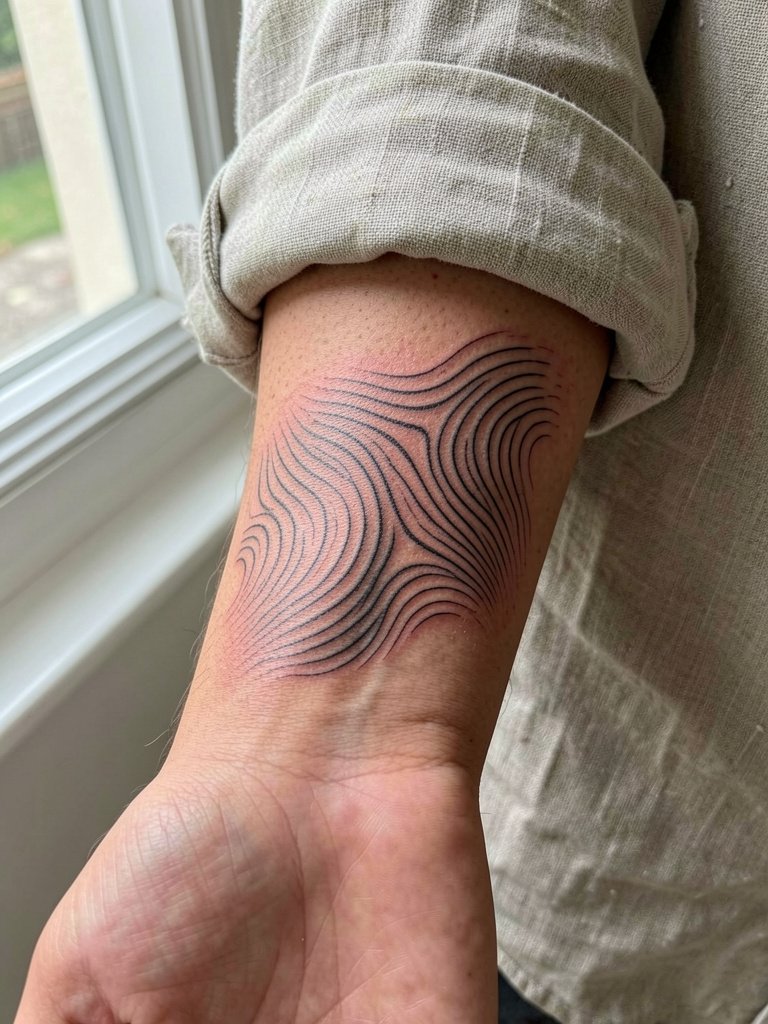
This subtle distortion reads modern and is less aggressive than heavy pop-out work. The key is variable spacing so the grid looks like a liquid surface. The common error is making lines too close, which causes blur after healing. Ask for slightly heavier linework in the most condensed areas. The forearm is a low-pain placement and this is a quick one-session piece. For showing off, rolled-up sleeves in neutral tones draw attention to the ripples. Try rolled cuff linen shirt for a clean frame.
12. Button, Buckle, or Zipper Impression on Inner Upper Arm
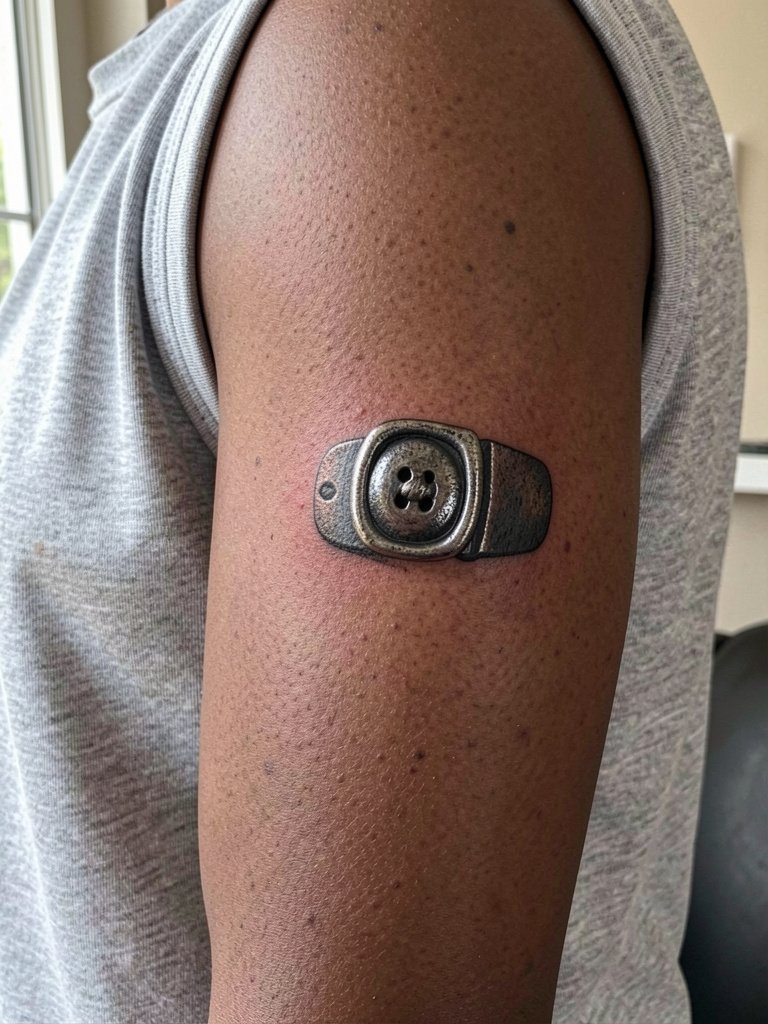
Tactile object illusions like a button or buckle are playful and low-profile. The session is short. The common mistake is using pure white highlights that fade and read wrong on darker skin tones. Instead, ask for cool grey or strategic negative space to simulate metal. If you want a tactile feel, stipple texture around the metal so it reads as attached rather than printed. For the session wear a loose tank top so the artist can work without rubbing.
13. Silhouette Cutout on Outer Upper Arm
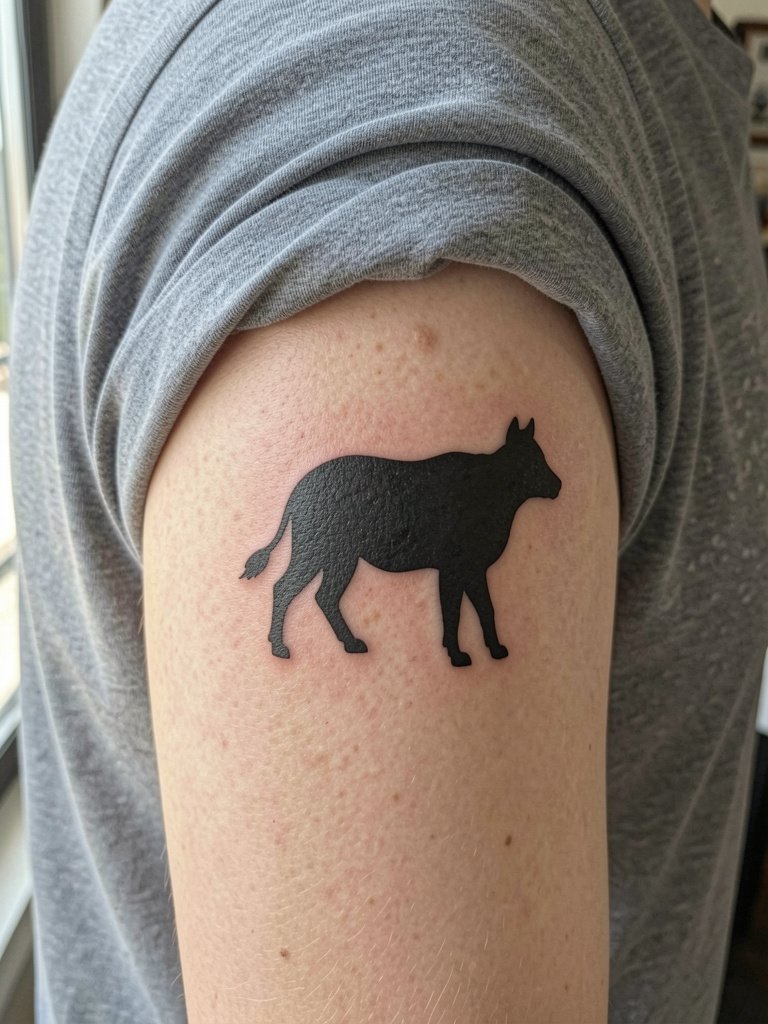
Silhouette cutouts are graphic and age relatively well if executed at the right scale. The outer arm tolerates saturation and contrast, which helps the silhouette stay readable. Avoid tiny silhouettes with thin fills. The session is low pain and often finishes in one pass. For a casual reveal wear short-sleeve tees in solid colors to contrast the silhouette. A leather strap watch on the opposite wrist gives a balanced silhouette for photos. Try leather strap watch men.
14. Levitating Crown at the Collarbone
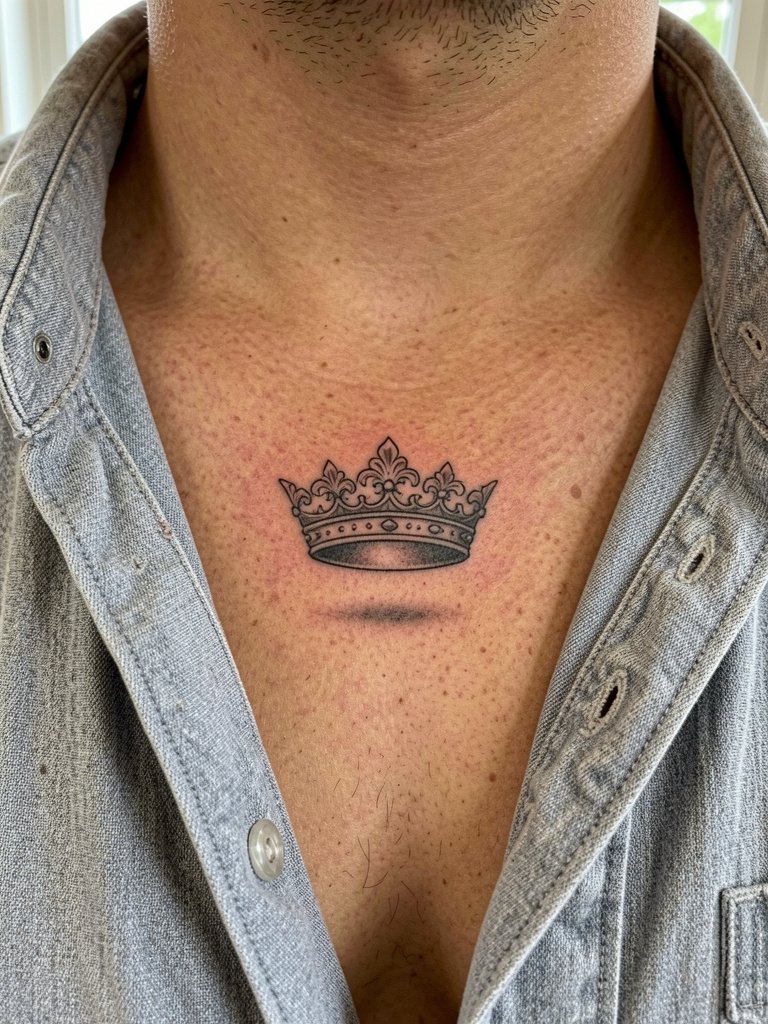
A collarbone levitating crown is decorative and visible with open collars. The sternoclavicular area is sensitive to motion but sits well visually. Common mistakes include placing it too close to the clavicle so the detail blurs. Plan for wider spacing in the filigree. Session time is under two hours depending on ornamentation. For showing off, open-collar shirts or tank tops in neutral tones frame the collarbone cleanly. Try open collar shirt men.
15. Geometric Portal on Wrist
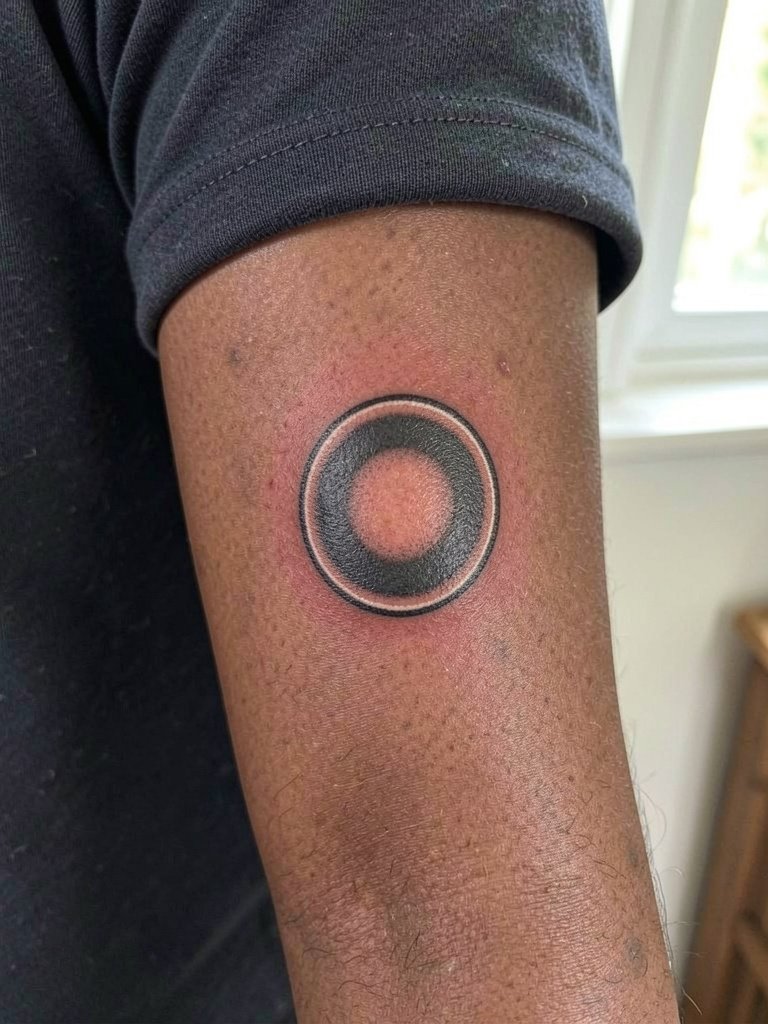
A portal on the wrist is the simplest portable illusion. The wrist accepts high-contrast circles well but is prone to friction from watches and daily washing. Avoid tiny rims for long-term legibility. The normal healing timeline shows the rim soften by six months unless the artist plans a touch-up at year one. For session comfort wear short sleeves and remove watches or bracelets from the tattoo wrist. A thin chain bracelet on the opposite wrist keeps the look balanced. Try dainty wrist bracelet stack.
16. Shadow-Only "Ghost" Impression
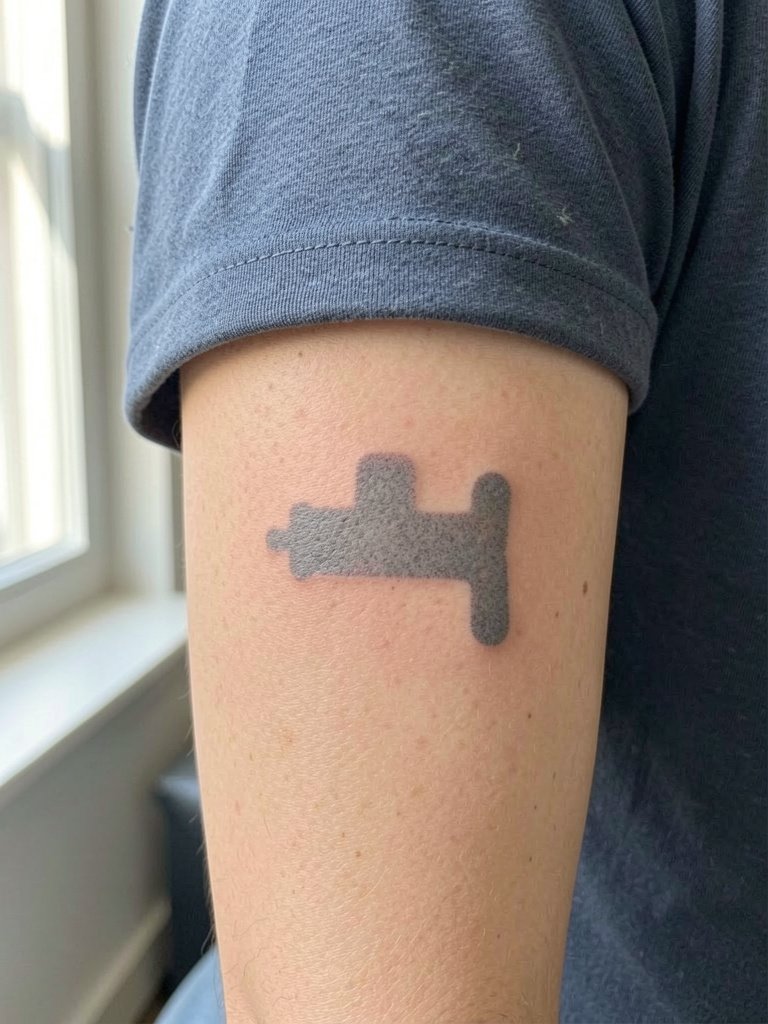
This under-covered idea leaves out the object and tattoos only the shadow, which creates a ghostly effect. It is subtle and ages like typical soft shading. The main consultation point is deciding the shadow shape and its angle relative to your body. Avoid ultra-thin stippling for the shadow on areas with movement because it can vanish. A cool grey mix works especially well on darker tones to avoid muddy saturation. Session time is brief and pain low on the forearm. Wear a short sleeve and a simple chain for photos if you like.
17. Framed Levitating Object on Outer Arm
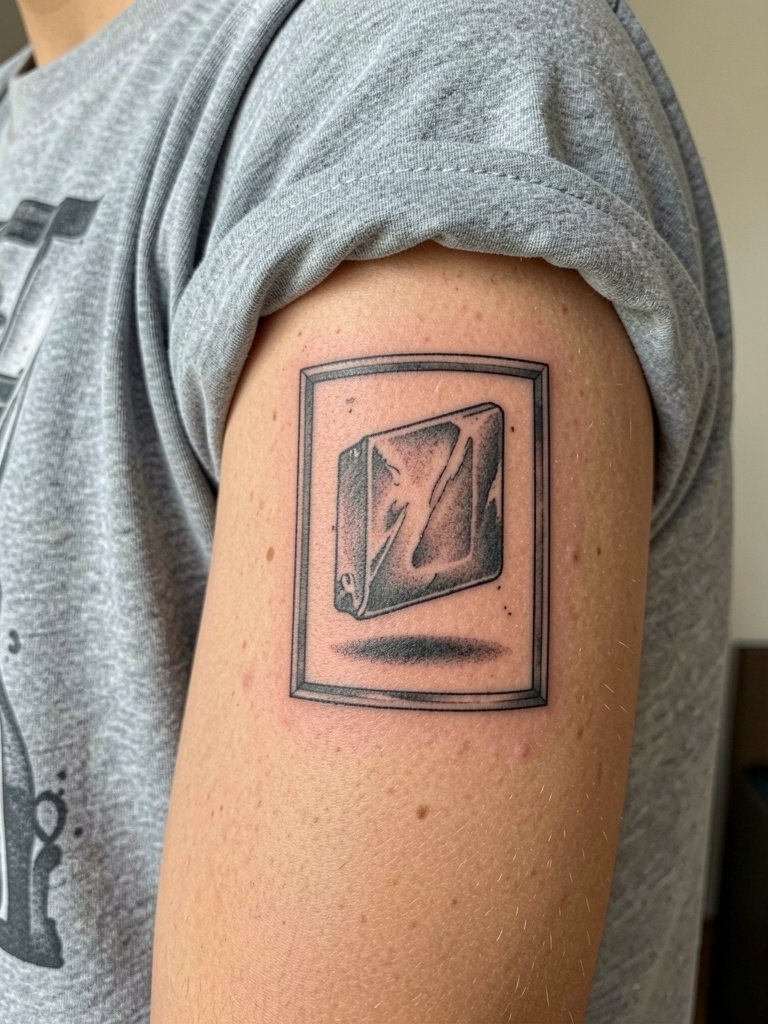
A framed levitating object gives a second layer of perception because the frame suggests a contained world. This is a fine option for someone who wants a structured composition that still plays with levitation. Discuss frame thickness and shadow angle with the artist so the object reads as hanging inside rather than stamped on the skin. A common mistake is making the frame too thin. That invites blowout along the borders. Outer arm placement is forgiving and handles saturation well. For the session wear a short sleeve or tank so the artist can work without obstruction.
Frequently Asked Questions
Q: How do these levitation and pop-out effects age compared with regular blackwork?
A: In my experience, heavy contrast pieces that use pure white highlights can show changes sooner than clean black and grey fills. One group of artists says white highlights are essential for maximum pop but accept touch-ups in year one. The other group prefers light grey or negative space for highlights to avoid that first-year fade. Expect touch-up conversations around year one to two for high-contrast levitation work.
Q: Where can I find artists who post healed examples and 3D-focused portfolios?
A: Search platform hashtags like #3dpopping and #floatingtattoo on Instagram and TikTok and filter by location to find local portfolios. Tattoodo and booking apps let you search keywords such as "floating stone black and grey" and usually display healed shots. Reddit communities often link to healed examples across skin tones. Use these pathways to confirm healed work rather than fresh photos.
Q: Will a floating shadow read on dark skin and what should I ask about during the consult?
A: On darker skin, pure black shadows can look flat. Ask the artist for a cool-grey mix and request a small healed patch or a detailed healed portfolio shot showing similar skin tone. Specifically ask for cooler undertones in the shadow rather than dense black so the cast keeps its subtle contrast.
Q: How should I dress for a session on the ribcage or hip?
A: For ribcage work wear a loose button-down so the artist can easily expose the side torso without the fabric pressing on the fresh work. For hip pieces choose drawstring or low-rise pants that can be comfortably lowered and fastened again. If you want a similar wardrobe to what is pictured above try drawstring shorts men.
Q: Do small levitation pieces photograph as well as they look in person?
A: Photography can flatten subtle shadows unless you use directional lighting. A ring light helps, but natural window light angled to pick up the cast shadow makes the difference. Plan for a quick photo session with a simple light source after healing to preserve the effect in pictures.
Q: How often do these pieces need touch-ups?
A: Expect most high-contrast popping or levitation pieces to benefit from at least one touch-up in the first one to two years. Subtler grey-only shadows tend to need less frequent work. Your artist can sketch a realistic touch-up timeline based on healed references they have for the same placement.
Q: Are there design red flags that suggest the artist does not understand perspective-based work?
A: Yes. Red flags include portfolios with only fresh photos, inconsistent vanishing points in wrap geometry, and heavy white highlights without healed examples on similar skin tones. Look for healed shots and ask to see reference pieces that match your placement and tone.
