
Bold black or classic serif scripture often holds up better than the wispy single-needle pieces everyone pins. Fine single-needle crosses and flowing cursive look great the day they land, yet the forearm and wrist can eat thin strokes fast. Below you will get practical picks that read well now and still read clean after a few years, starting with a forearm staple.
1. Fine Line Minimalist Cross (Inner Forearm)
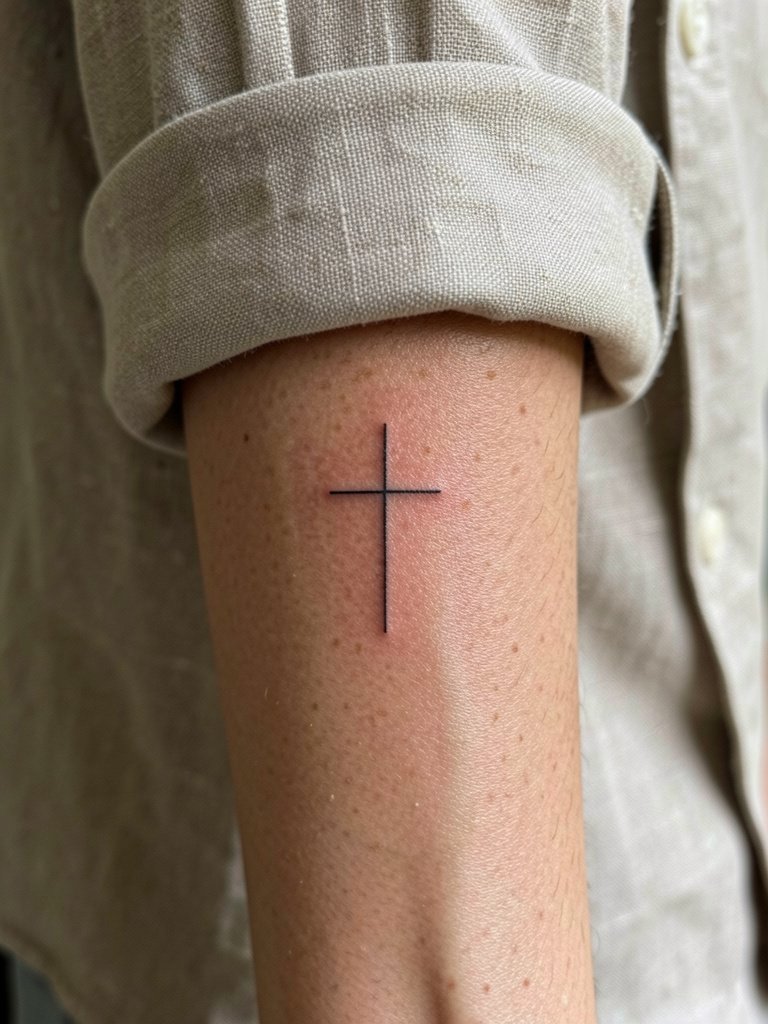
A tiny vertical single-stroke cross reads like quiet devotion on the inner forearm. Choose a slightly heavier line than the thinnest single-needle references and expect a touch-up window around six to twelve months for crisp edges. I recommend bringing a photo that shows the exact stroke thickness you want so the artist can scale the needle choice and spacing. Common mistake: copying a social-media single-needle shot without adjusting for forearm friction, which often leaves the cross looking soft at year one. Session feels short and steady, about 30 to 45 minutes, but plan gentle aftercare and avoid tight cuffs while it heals. For showing this piece, pair it with a rolled cuff linen shirt so the forearm sits visible without competing prints.
2. Bold Blackwork Chi Rho (Upper Chest)
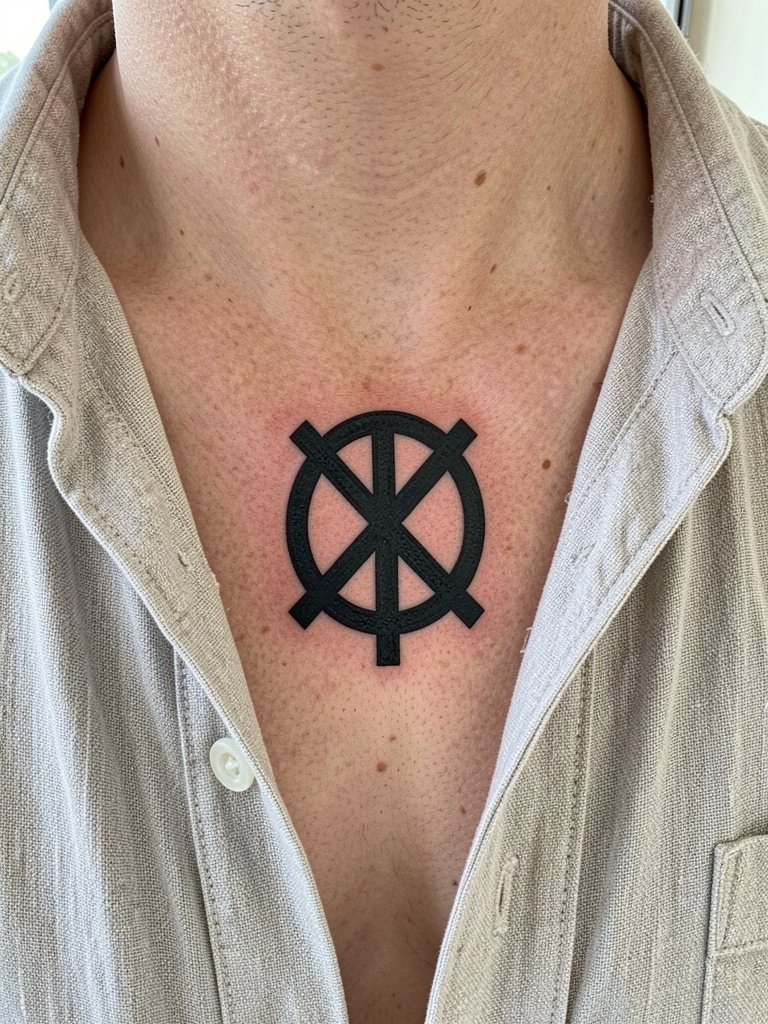
Chi Rho is compact and reads strongly when rendered in blackwork, which helps the symbol stay legible on chest skin over time. For a clean result, ask your artist for bold outlines with interior negative space instead of soft grey shading that can lose contrast. Healed look at two years stays graphic, but a common error is shrinking the symbol to fit a collarbone gap and losing visual weight. Expect a one- to two-hour session with minimal discomfort on the upper chest. When you want to show it off, an open-collared linen shirt keeps the chest area visible while keeping the portrait area tasteful.
3. Neo-Traditional Lion of Judah (Shoulder / Upper Arm)
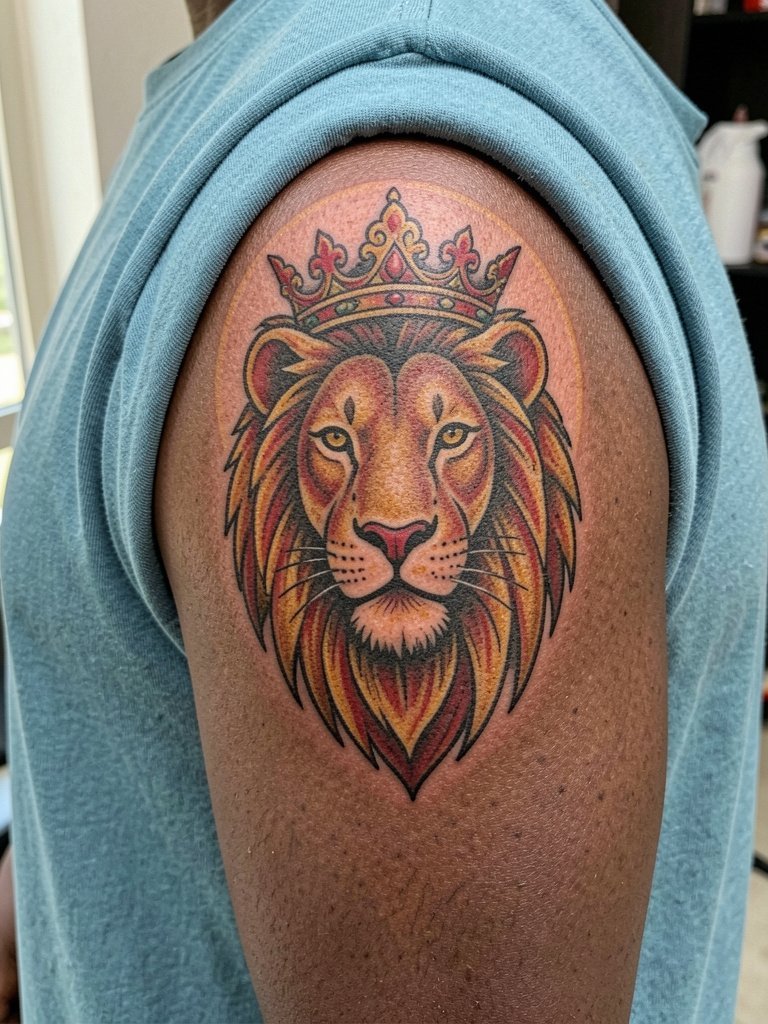
The Lion of Judah suits the shoulder because the curved surface lets thick linework and color saturation breathe. Ask for strong contrast and solid saturation to keep facial details readable on darker skin tones. A typical mistake is overfilling tiny facial details that end up looking muddy after healing. This piece usually takes 1 to 2 sessions, and the shoulder tolerates long work better than the ribs. For an easy showing, a solid-color short sleeve tee in navy or burgundy frames the lion without competing with the color blocks.
4. Micro-Realism Jesus Portrait (Chest or Inner Upper Arm)
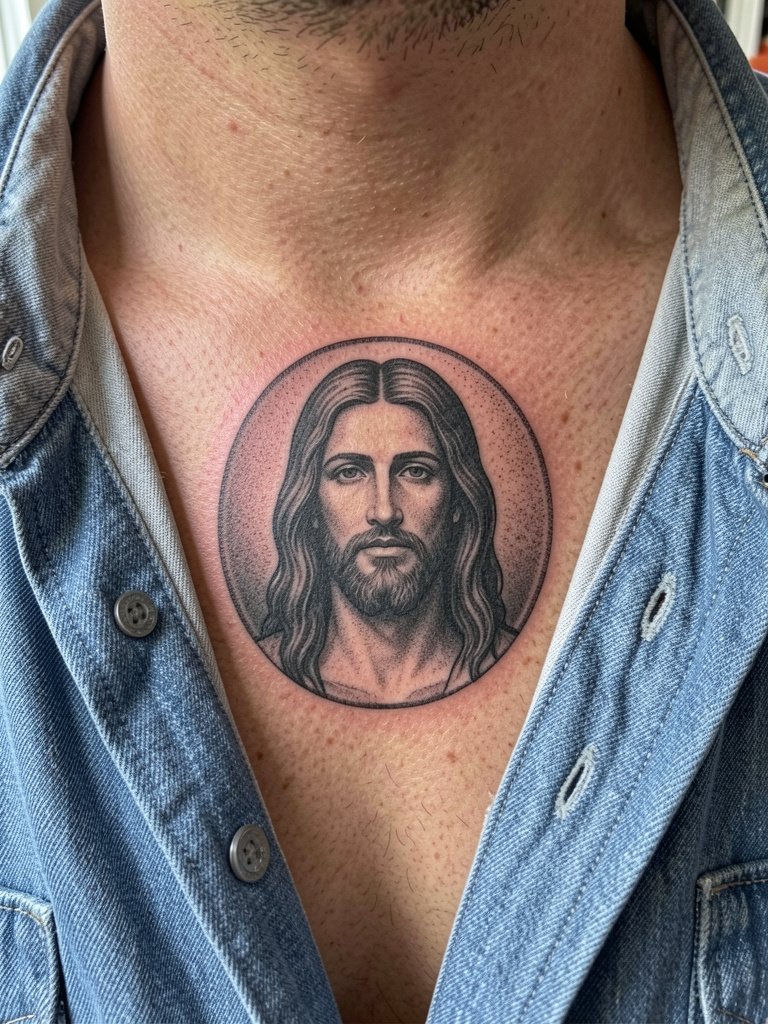
Micro-realism portraits demand a steady hand and realistic reference, and they age differently on various skin tones. One camp argues that black-and-grey portraits lose contrast on melanin-rich skin and look muddy in photos. Another camp says high-contrast black-and-grey with bold outlines and white highlights can hold well, pointing to healed two- to three-year examples. Plan for multiple sittings and expect the session to be detail-heavy and patient work. Bring a clear portrait reference and ask for a touch-up window at nine to twelve months for tonal refresh. For showing this piece, layer a thin silver chain so the necklace frames but does not compete with the portrait, and wear an open-collared linen shirt to keep the chest visible.
5. Fine Line Scripture Band (Inner Forearm or Wrist)
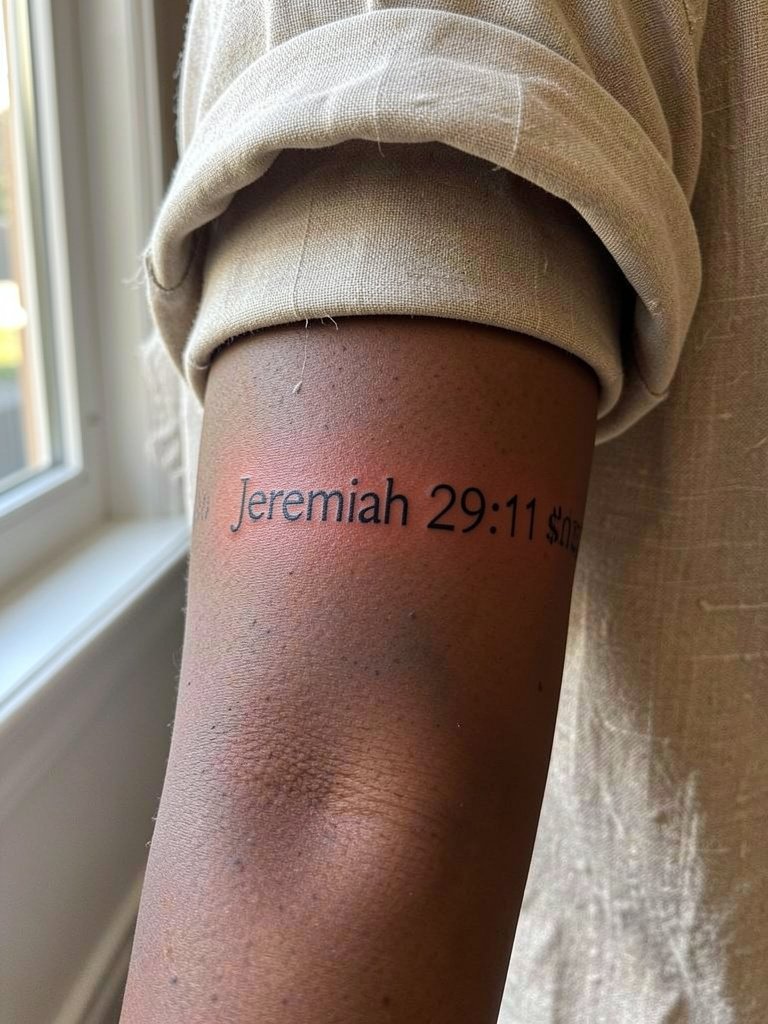
Script bands look neat when spacing and line weight are planned for longevity. One camp warns that fine single-needle script on the forearm blurs inside a year because of movement and friction. Another camp holds that slightly heavier line weight and wider letter spacing will keep text legible for years, with healed examples to show. The common mistake is copying ultra-thin social-media scripts without adjusting depth. For longer life, choose a clean sans-serif and ask for a 0.8mm equivalent line weight so letters keep shape. Session time runs around 45 to 60 minutes. Show this wrap with a rolled cuff linen shirt and a set of dainty gold stacked bracelets on the opposite wrist to balance the visual field.
6. Ornamental Anchor with Cross Nail (Outer Forearm or Calf)
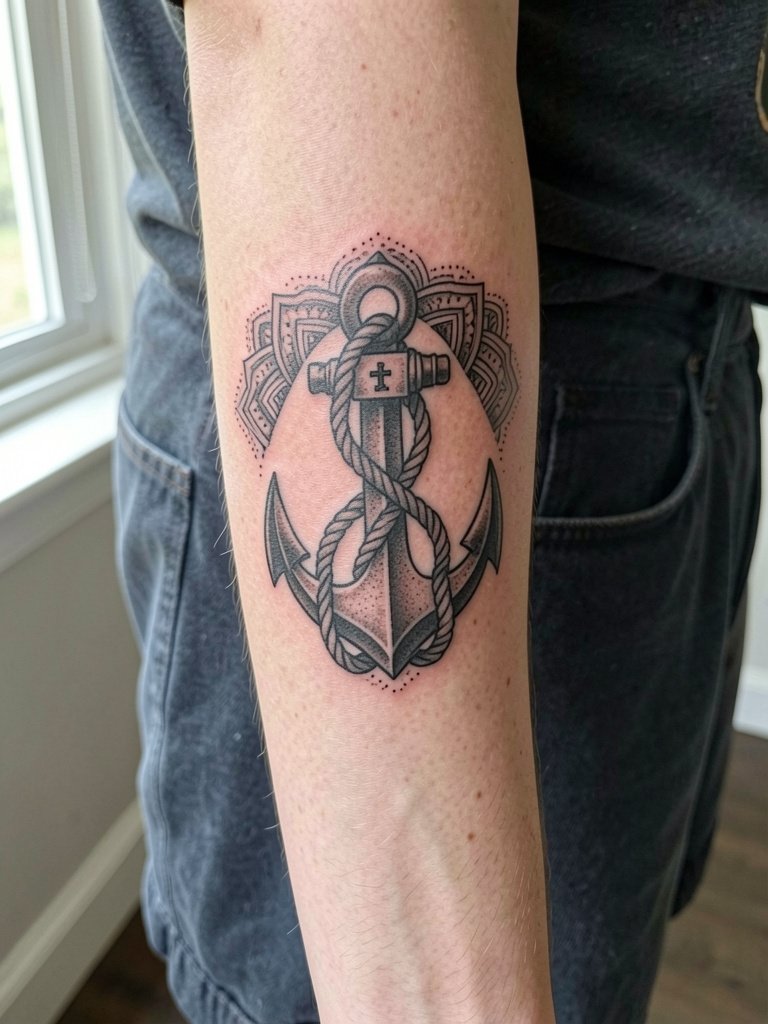
The anchor with a cross nail pairs visual history with geometric details that read well on the outer forearm or calf. For the forearm, expect moderate friction so line thickness should be deliberate. The calf gives more canvas for mandala detailing and ages reliably. A common mistake is packing tiny mandala detail into a small anchor, which clogs after healing. Session time for a mid-size version is one to two hours. For the appointment, wear loose shorts or a short-sleeve shirt so the artist can access the area without tight fabric pressure. For showing off the calf option, summer shorts or rolled pants work well.
Pre-Session Essentials
The inner forearm wraps and chest portraits above behave differently in the chair, so a few products smooth the first week and protect fine line work.
- H2Ocean Blue Ocean Spray. A spray-style aftercare that breathes well over delicate text and fine line pieces, reducing heavy ointment build-up that can soften lines in week one.
- Mad Rabbit Tattoo Balm. A lighter balm option that helps saturated black-and-grey pieces stay crisp while the surface epidermis heals.
- Vivid Ink Aftercare. An alternative for darker skin tones where some people find thicker balms interfere with early contrast.
- Tattoo Goo Healing Ointment. Reliable for traditional blackwork and saturated fills during the first few days of healing.
- Hustle Butter Deluxe. A mainstream balm many collectors use after the first 48 hours to keep color saturation and skin elasticity for larger colored pieces.
7. Traditional American Sacred Heart (Shoulder or Back of Shoulder)
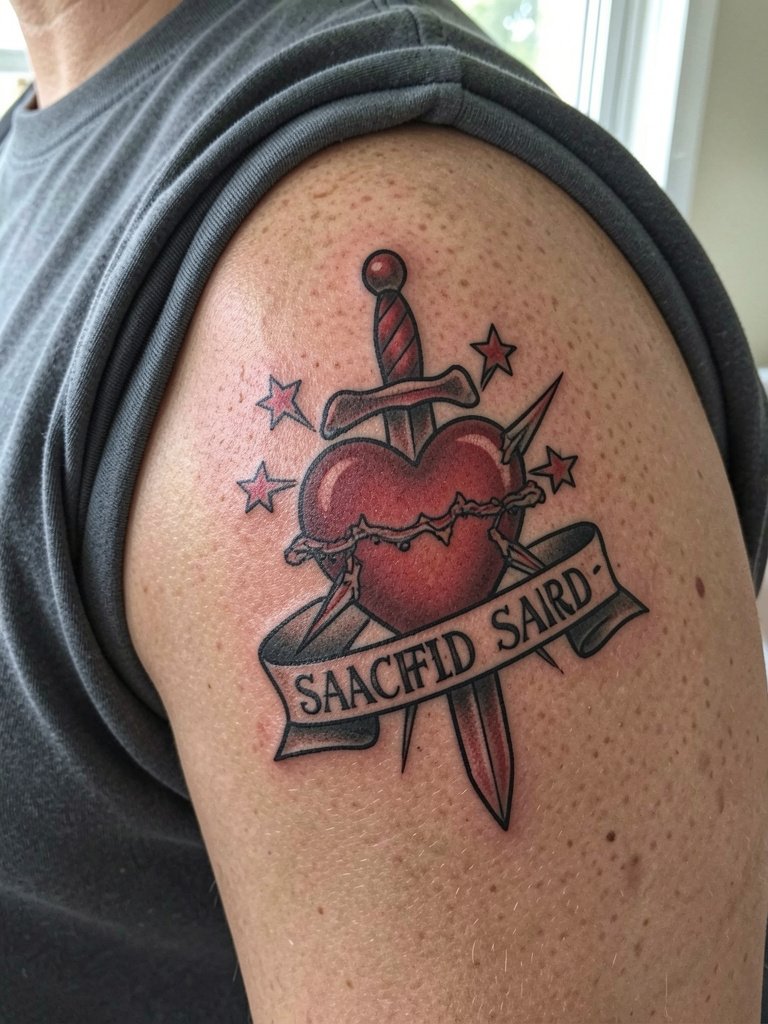
The Sacred Heart is a vintage nod that reads clearly when executed with traditional flat color fills and thick outlines. On the shoulder it will show well in short sleeves and age by holding its shape within the color blocks. Avoid overly detailed filigree that belongs to neo-traditional pieces, because simplistic bold fields survive touch and abrasion better. Session time is usually one to two hours. A common user error is adding tiny script above the heart that becomes illegible; keep lettering bold and spaced. Wear a vintage-cut crew neck or solid short sleeve tee to frame the work.
8. Minimalist Lamb of God (Behind the Ear or Inner Wrist)
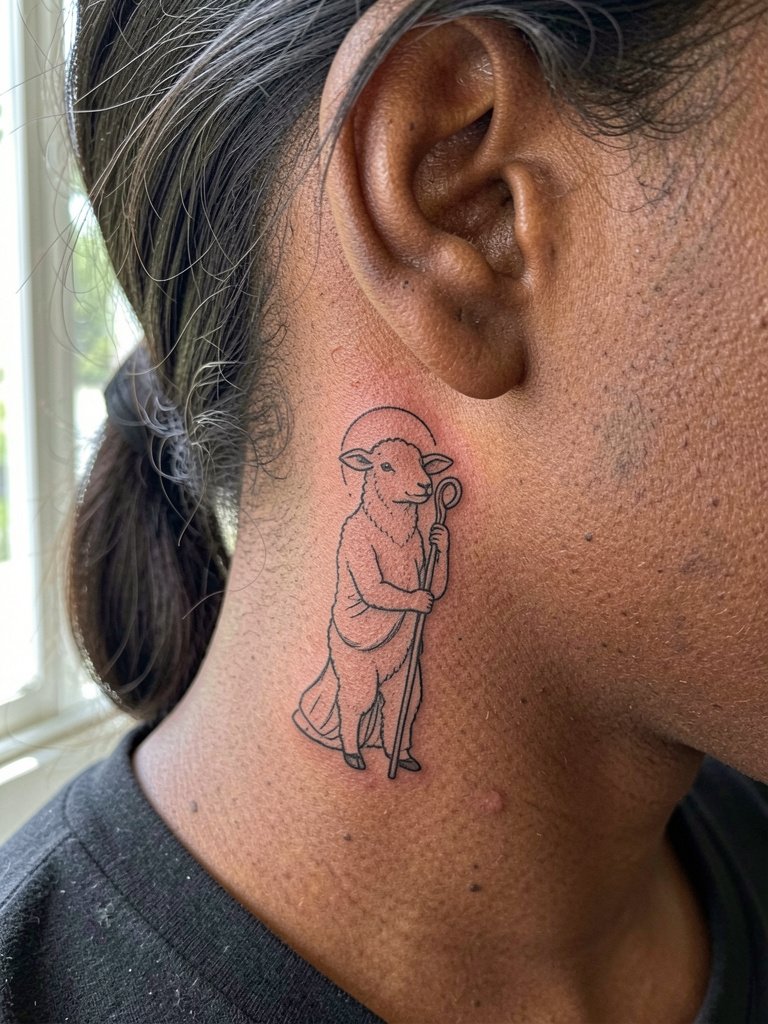
A tiny Lamb of God is a discreet choice that reads as a simple mark of devotion. Behind the ear the pain is low and the piece is very private, while the inner wrist increases visibility but also friction. The biggest mistake is asking for ultra-thin lines without accounting for the mastoid or wrist surface; add a hair of weight to preserve definition. Session time is short, around 15 to 30 minutes. If behind the ear, keep hair short or wear it up during the first few weeks so the area breathes.
9. Blackwork Saint Michael the Archangel (Back or Upper Arm)
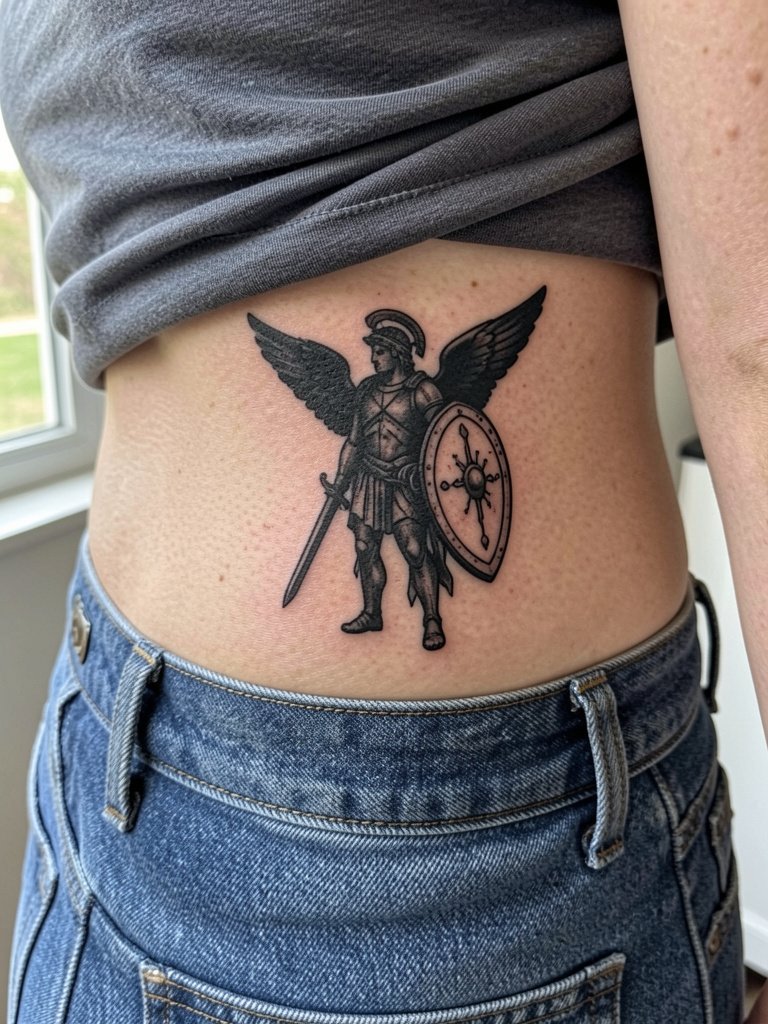
Saint Michael in blackwork gives a protective silhouette that reads from distance and holds definition over time. Heavy fills reduce the risk of softening compared with delicate portraits. Expect one to two sessions for a mid-size silhouette. A common mistake is overcomplicating the silhouette with tiny internal shading that disappears when healed. For the lumbar option, wear low-rise jeans in your appointment so the artist can access the area comfortably. The blackwork style also pairs well with open-back or low-back tees for seasonal visibility.
10. Fine Line Dove with Olive Branch (Collarbone or Inner Forearm)
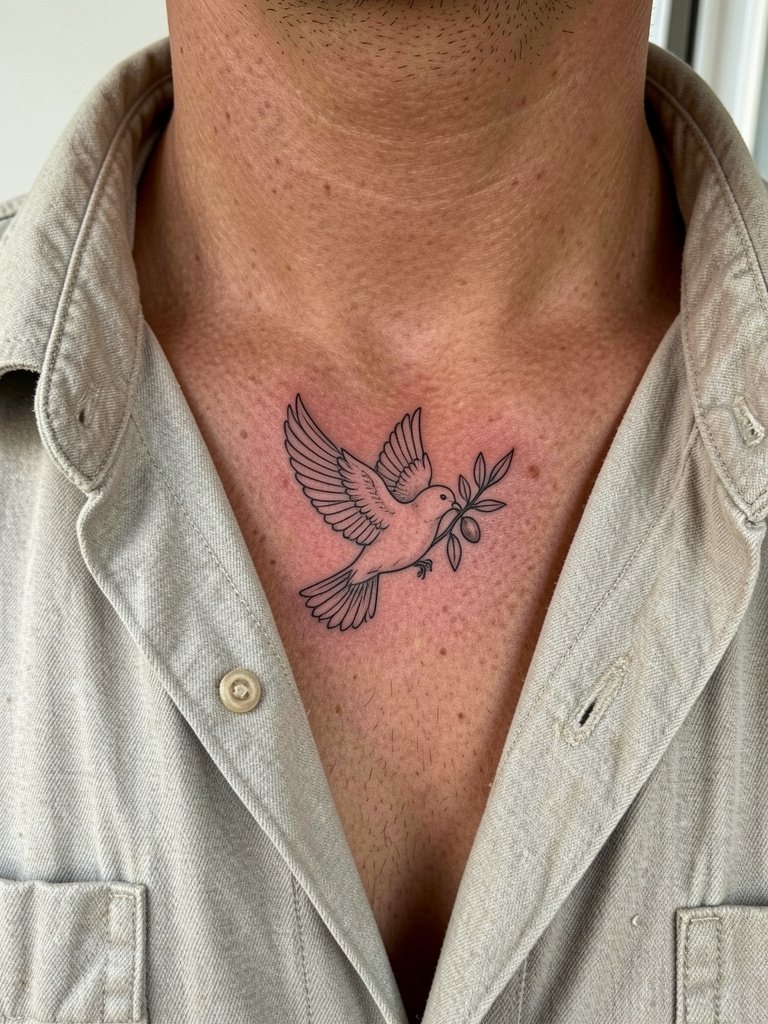
The dove with branch is delicate and peaceful, and it benefits from placement where rubbing is minimal, like the collarbone. If you choose the inner forearm, increase line weight slightly or plan for an earlier touch-up. The typical mistake is trusting a social post single-needle thickness for a collarbone placement that moves against shirt fabrics. Session time is short, and the collarbone location is low on the pain scale for most men. For styling, an open-collared shirt in neutral tones highlights the collarbone work and thin silver jewelry on the opposite side balances the frame.
11. Minimalist Cross with Verse or Ichthys (Collarbone, Wrist, Ankle)
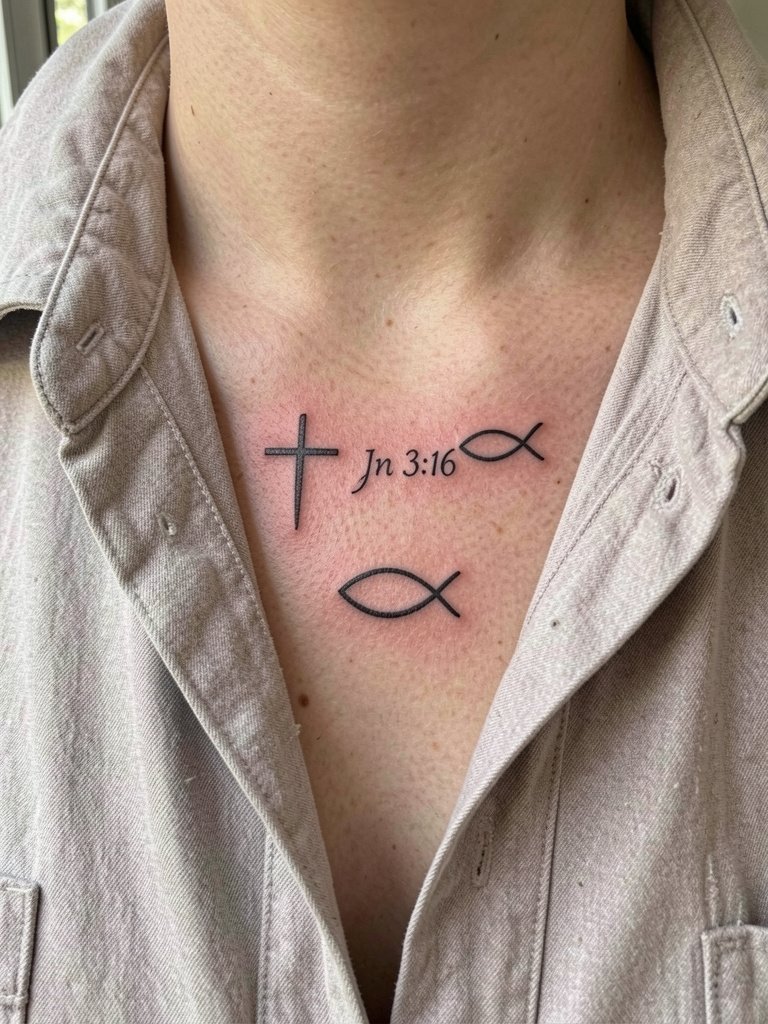
Small crosses with verse or the Ichthys symbol are great first-tattoo options because they are compact and inexpensive to book. The key is choosing a line weight that preserves letters and form at the intended scale. Expect 15 to 45 minutes depending on placement. A frequent client error is taking a reference that looks great blown up on a screen then shrinking it without adjusting stroke width, which leads to quick fading. For the ankle or wrist, show it off in low-cut sandals or rolled cuffs so the ink appears intentionally placed.
Frequently Asked Questions
Q: How do I choose between a fine line scripture and a bold line scripture for my forearm?
A: Think about how often your forearm rubs against clothing and gear. If your daily life includes brief friction from sleeves or a watch, a slightly heavier line weight and wider letter spacing preserve clarity longer. If you prefer a delicate look and accept a touch-up at six to twelve months, fine line still works.
Q: Will a Jesus portrait look different on darker skin, and what should I request in the consultation?
A: Portraits can read differently depending on skin tone. One approach uses high-contrast black-and-grey with strategic white highlights and bold outlines to keep facial features visible. Another approach leans on saturated color accents and deeper blacks for contrast. Ask for healed examples on a range of skin tones and request a planned touch-up window so the artist can account for contrast from the start.
Q: Are numbing creams safe for chest or rib work and how do artists feel about them?
A: Artists and collectors split on this. Some professionals use numbing cream to help clients get through high-pain areas without flinching and to keep the tattoo line steady. Other veterans say numbing can mask feedback that prevents skin damage and may affect early healing, so if you plan to use one, agree on timing, brand, and how the artist will monitor skin response during the session.
Q: Where can I find healed portfolios and local artists without naming people directly?
A: Search hashtags like #christiantattoo, #faithink, and #crossesformen on Instagram and TikTok and apply location filters to find nearby studios. Tattoodo and Booksy let you search by keywords such as "micro realism Jesus portrait" or "bold line scripture" and show portfolios. Reddit communities like r/tattoos and r/tattooadvice surface peer recommendations and healed photos across skin tones.
Q: What should I wear to a chest or collarbone session to make the appointment easier?
A: Pick clothing that gives the artist unobstructed access. For collarbone or chest pieces wear an open-collared linen shirt or a fitted scoop-neck tank so the artist can work without shifting fabric. Keep layers simple and avoid tight waistbands that press on fresh ink.
