
Small tattoos behind the ear tend to outperform expectations when they are designed to match the skin and curve of the mastoid, not to follow a trending Pinterest look. Fine line pieces that respect spacing and lineweight read cleaner over time than ultra-tiny, overworked realism. Read these idea-ready options with practical tweaks so your next behind-the-ear piece stays legible and easy to hide when you need it.
1. Tiny Floral Sprig
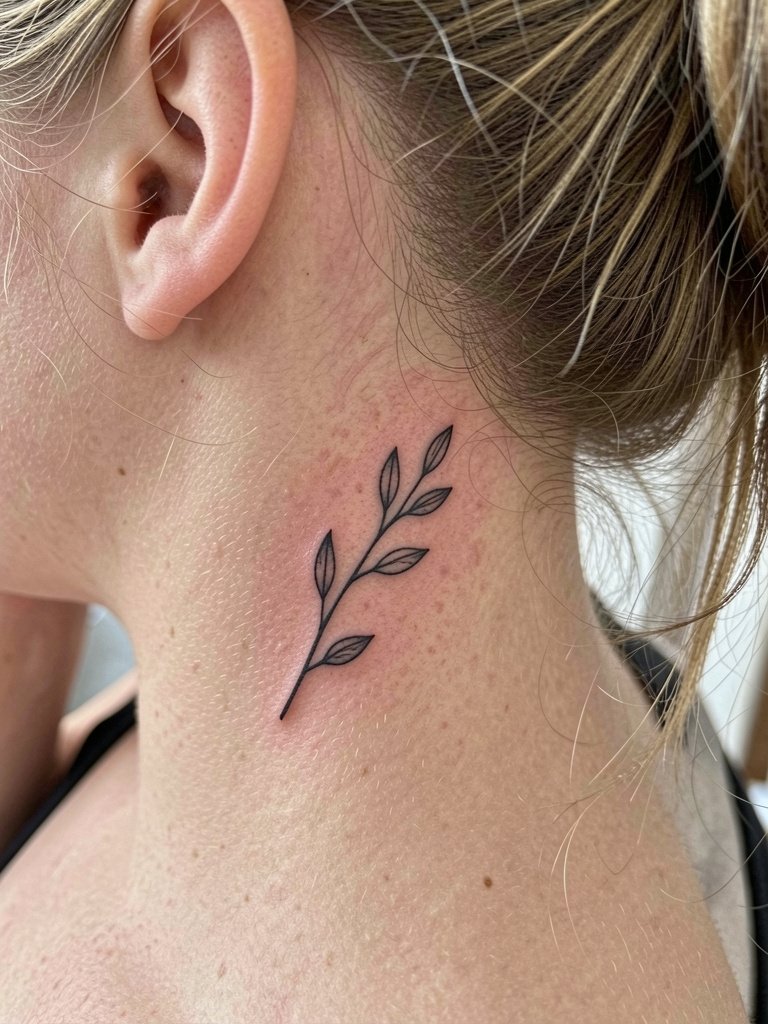
A tiny sprig is a textbook choice when you want a piece that follows the ear curve and reads intentional. Recommend a single-needle fine line with slightly heavier lineweight than your photo so stems keep contrast as the tattoo settles. A common mistake is asking for micro petals packed too tightly. Those petals blur within a couple of years. Talk specifics about spacing and lineweight during the consult. For the session wear a crew neck loose shirt so the artist can access the nape without tugging. Expect low pain and a short session under 30 minutes. Touch-up is typical at the one-year mark for tiny botanicals.
2. Crescent Moon Curve
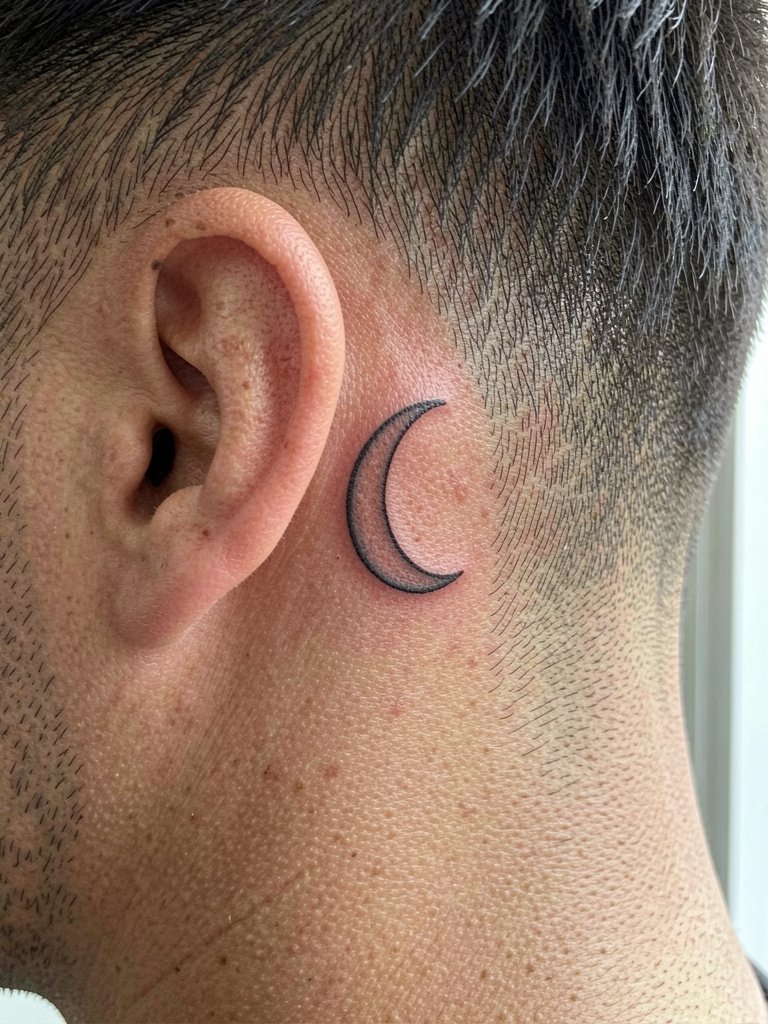
The crescent moon matches the concave space behind the ear and is forgiving for scale. Ask for a clean, continuous curve with a little negative space inside to help the crescent hold up. A too-thin crescent can suffer from blowout on softer skin, so discuss a modest increase in lineweight to ensure longevity. Session time is about 20 to 35 minutes and the pain level is low. For showing or hiding, this piece tucks behind hair when down and peeks out with a messy bun. Pair it with a delicate delicate gold chain necklace that sits above the hairline to frame the area.
3. Tiny Heart Outline
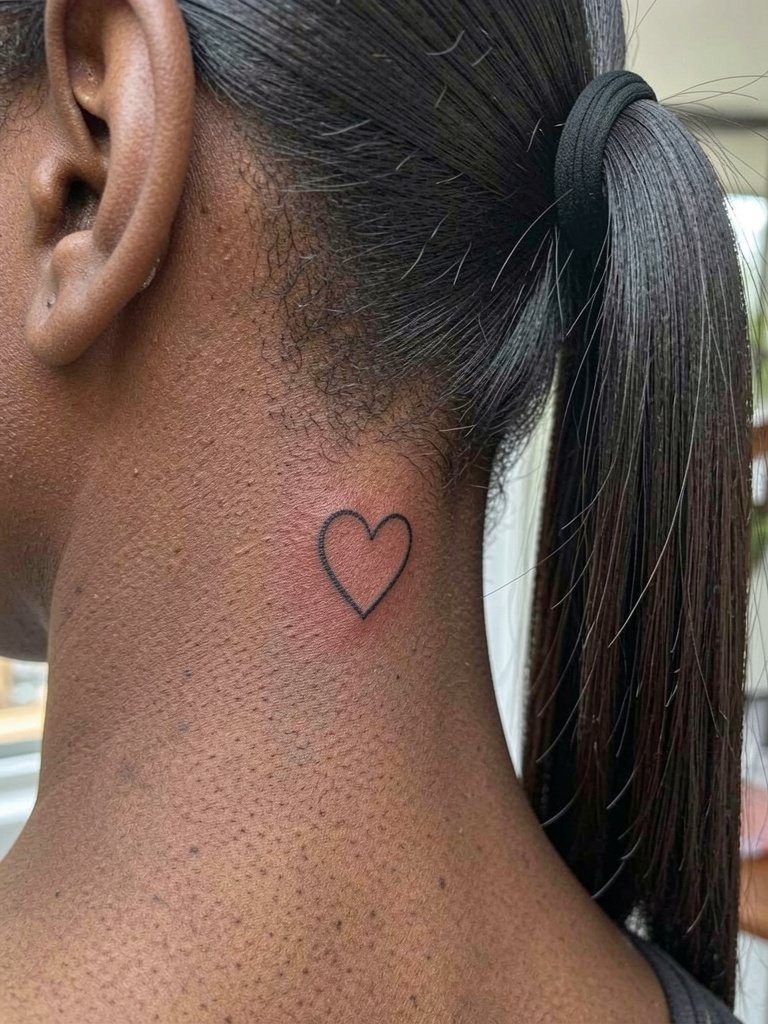
A micro heart is a classic starter for first-timers who want tiny, discreet ink. To keep the outline readable over time, request slightly rounded corners and an even lineweight rather than a hairline stroke. People often regret a heart that is too small and too thin because it softens into a smudge by year two. The session is short and the pain is low, which makes it ideal if anxiety is a concern. For showing it off, a sleek ponytail works best and you can add a simple front stud earrings set that sits on the front lobe so nothing contacts the healing area. Plan a touch-up at six to twelve months if the point softens.
4. Single Star Dot Work
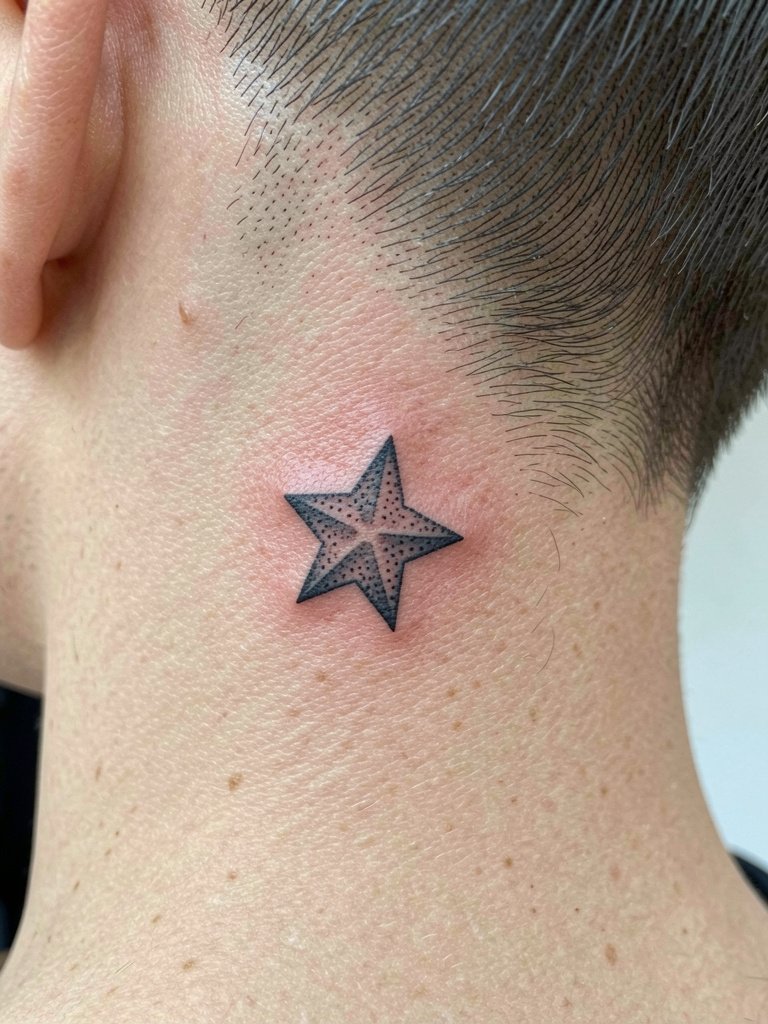
A single star reads airy and subtle when it uses dot work for dimension. Ask for a compact dot shading pattern with a small margin of clear skin between dots so stipple holds up. The mistake I see is overfilling the center with dense shading; that converts micro detail into a blotch as it ages. Expect a 20 to 40 minute session and low pain. If you want the star to peek when your hair is up, place it a touch lower along the mastoid. For evenings out, a simple pendant necklace that sits below the tattoo creates vertical balance without touching the fresh ink.
5. One-Word Reminder Script
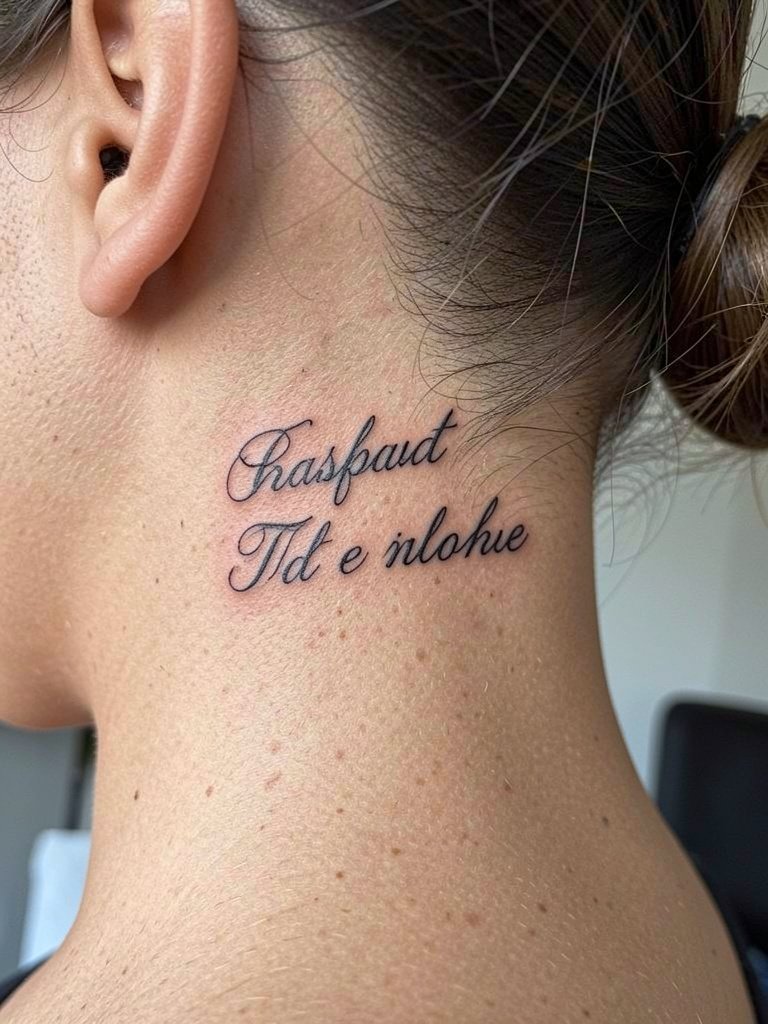
One-word reminders read best when letters are spaced deliberately. Specify the exact word and the font size you expect. Avoid ultra-tiny lettering with tight kerning because characters merge in two to three years. Numbing cream is a divided topic here. One camp supports topical numbing for nervous first-timers, noting it shortens chair time and eases the experience. The other camp warns that numbing can change skin texture and complicate ink flow, and some pros decline it for that reason. If you plan to use numbing, tell the studio when you book so they can confirm their protocol. For session comfort wear an open back top women so the artist can access the area without shifting your clothes.
6. Tiny Butterfly Micro-Realism
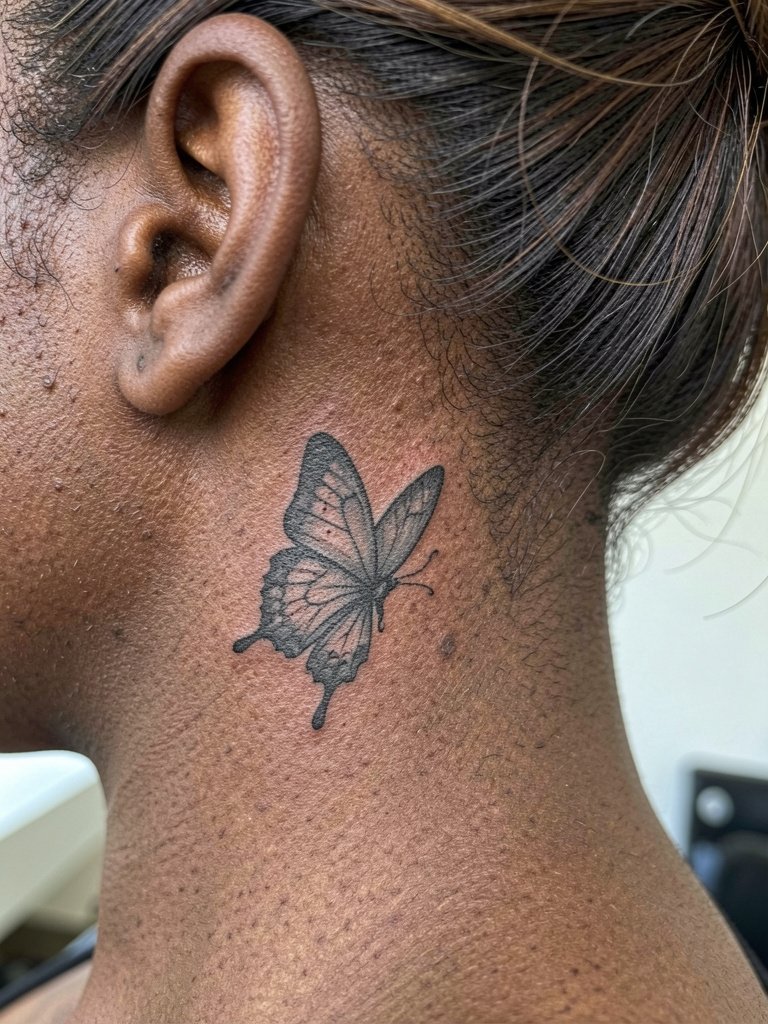
Micro-realism butterflies can look beautiful if executed by someone used to tiny scale shading. The controversy here is upfront. One camp says micro-realism is stunning but risky behind the ear because tight shading can blur into a dark patch within a few years. The other camp counters that with the right artist and slightly simplified shading it can age well, and they point to three- and five-year healed photos as proof. If you like this look, bring a healed reference at the same size you want so the artist can adapt shading. Expect a longer session, about 30 to 45 minutes, and plan for a touch-up at the one-year mark to restore delicate grey wash.
Pre-Session Essentials
These picks match the behind-the-ear designs above and help the area stay clean and easy to manage during the first week.
-
Mild antibacterial soap. Gentle cleansing removes shampoo residue and reduces infection risk for ink near the hairline.
-
Fragrance free body wash. A soap without perfumes keeps irritation down while you rinse shampoo and conditioner from the area.
-
Tattoo protective film roll. Short strips of protective film are handy to keep hair from sticking to the fresh tattoo during the busiest first day.
-
Scalp clarifying shampoo. Use in the first week only as recommended by your artist to remove product buildup without scrubbing the area.
-
Aquaphor healing ointment. A thin layer for day one can lock in moisture and protect fine line work while the crusting phase passes.
7. Mini Bird in Flight
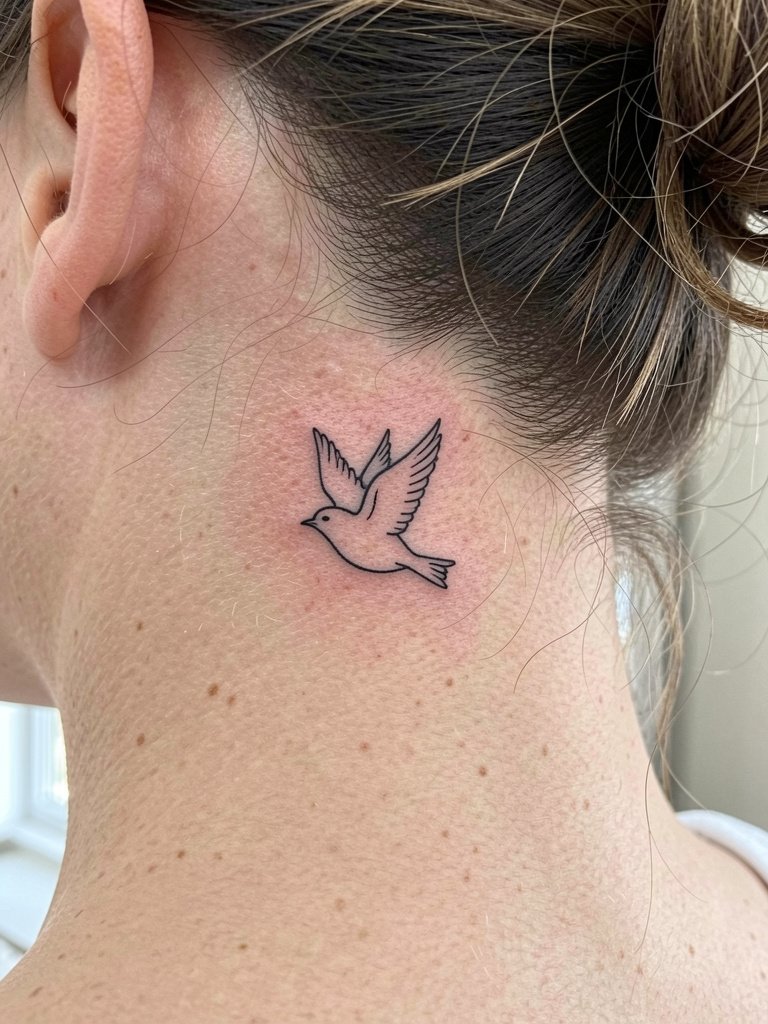
A flying bird reads elegant when kept as a clean silhouette. Ask for a silhouette with a defined negative space wing to avoid tiny interior lines that age badly. The typical error is over-detailing feathers at micro scale. That detail tends to blur and lose separation. Sessions run 20 to 30 minutes and feel similar to other mastoid placements. For showing it off, slick hair into a braid or use an updo hair clips to keep hair away without touching the healing skin. Plan a touch-up if the tail feathers soften after a year.
8. Tiny Bee Linework
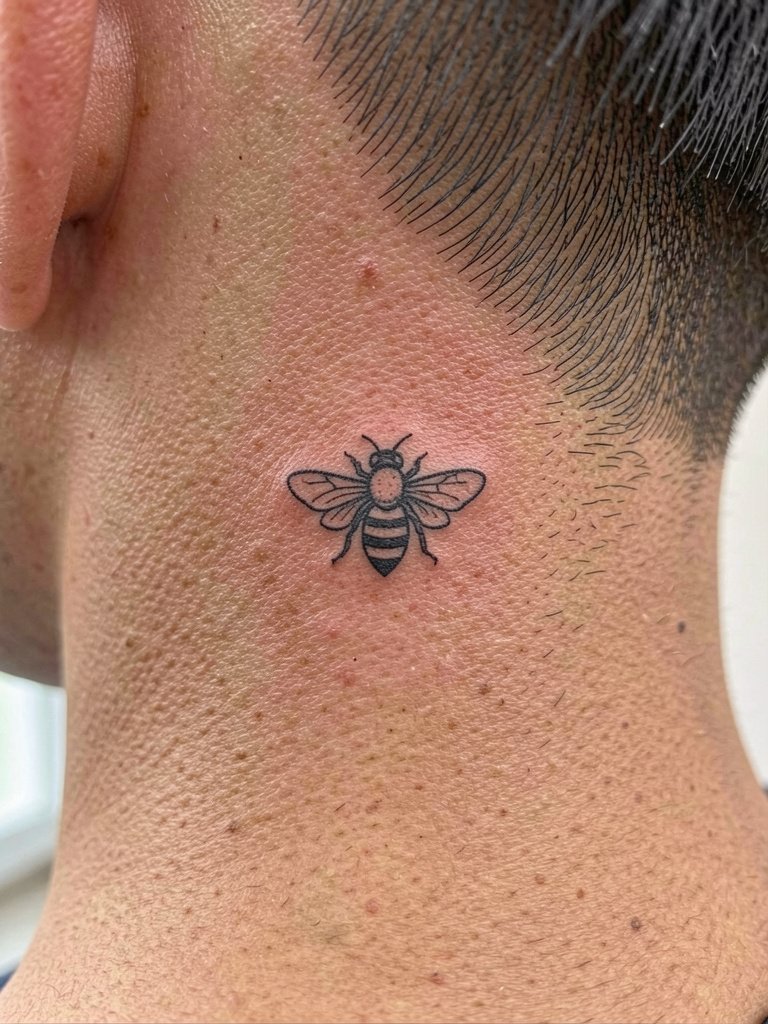
Bees work well in minimal line because their silhouette carries the symbol without micro shading. Specify a slightly bolder single-needle outline for body segments so the stripes do not merge. People often ask for tiny filled stripes and then find the bands blur within a couple of years. The session is brief and relatively painless. If you wear earrings, avoid studs that rest on the back of the ear while the area heals. For a subtle styling lift try a half up hair clip so the bee can peek out without full exposure.
9. Raindrop or Water Drop
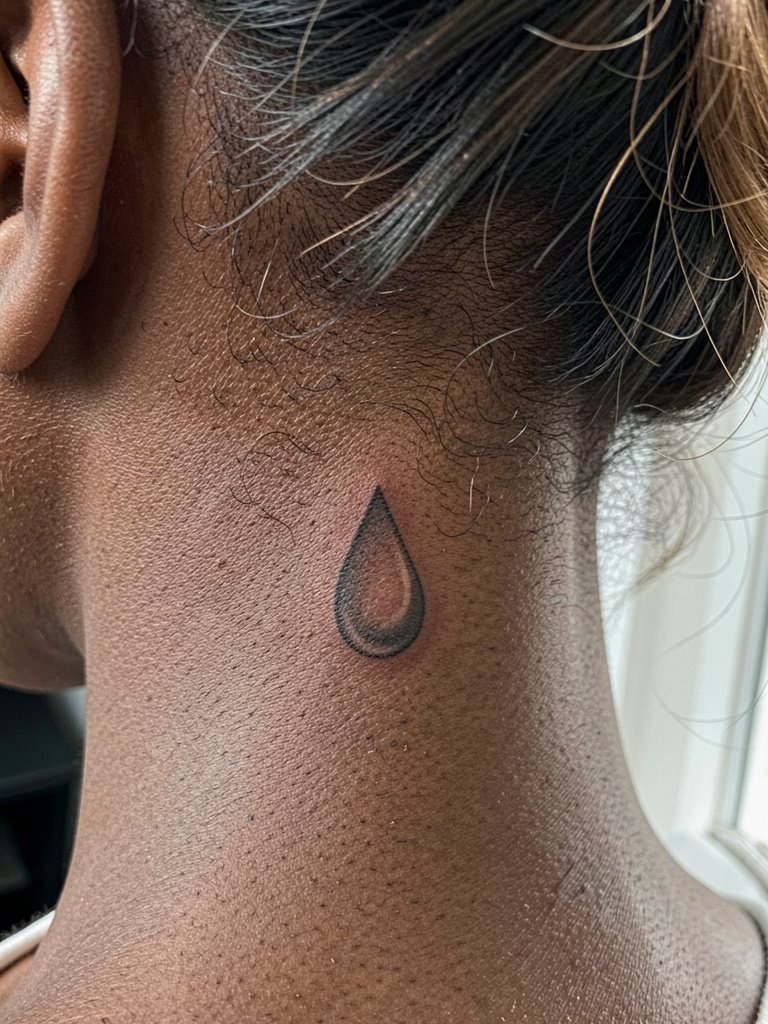
A single raindrop reads as a quiet symbol when shading is restrained. Ask for a light grey wash inside the outline with a small patch of negative space to preserve contrast. The aging mistake is a full interior grey fill in a very small area. That fill loses texture and becomes a flat spot. Session is very short and pain is low. If you like to alternate show and hide, this design tucks neatly with hair down. Pair it with a soft linen drawstring shirt when you want casual coverage and a clean neckline during healing.
10. Musical Note Accent
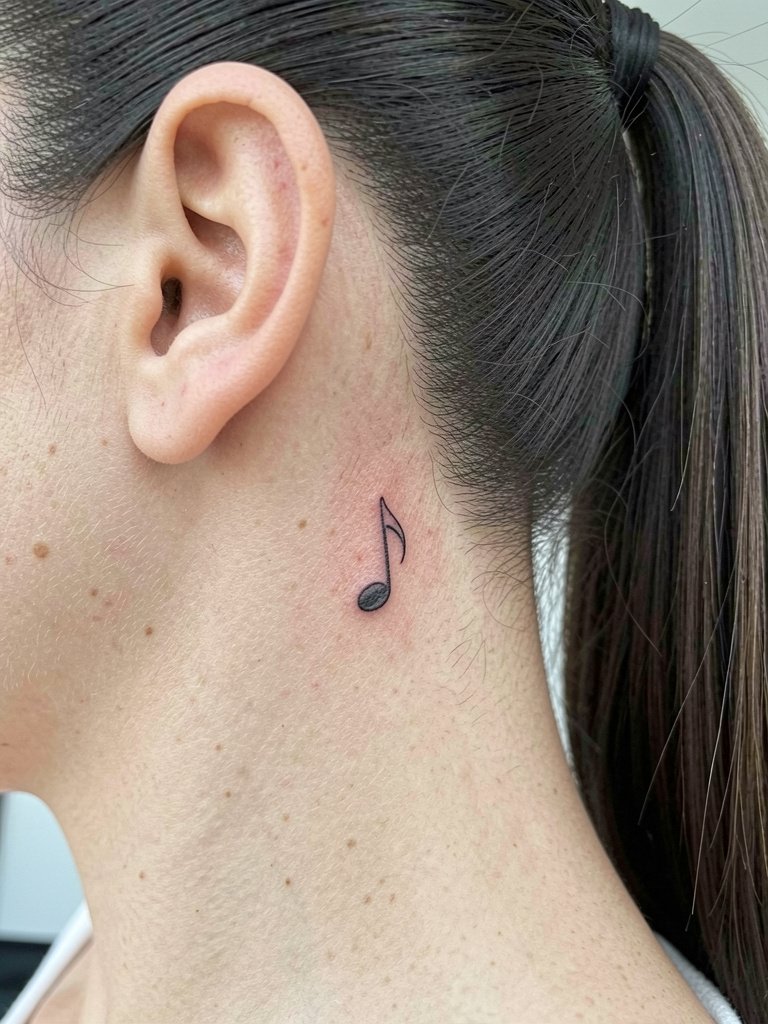
A single musical note works for musicians or music lovers who want a tiny emblem. Keep the note silhouette simple and avoid extra flags or curls at tiny scales. The common error is adding filigree around the note that looks crisp for months and blurred after a year. The session is short and the spot is low on the pain scale. To make it an understated piece for nights out, style your hair into a sleek ponytail holder and wear small front-facing studs that do not touch the back of the ear during healing.
11. Tiny Feather Curve
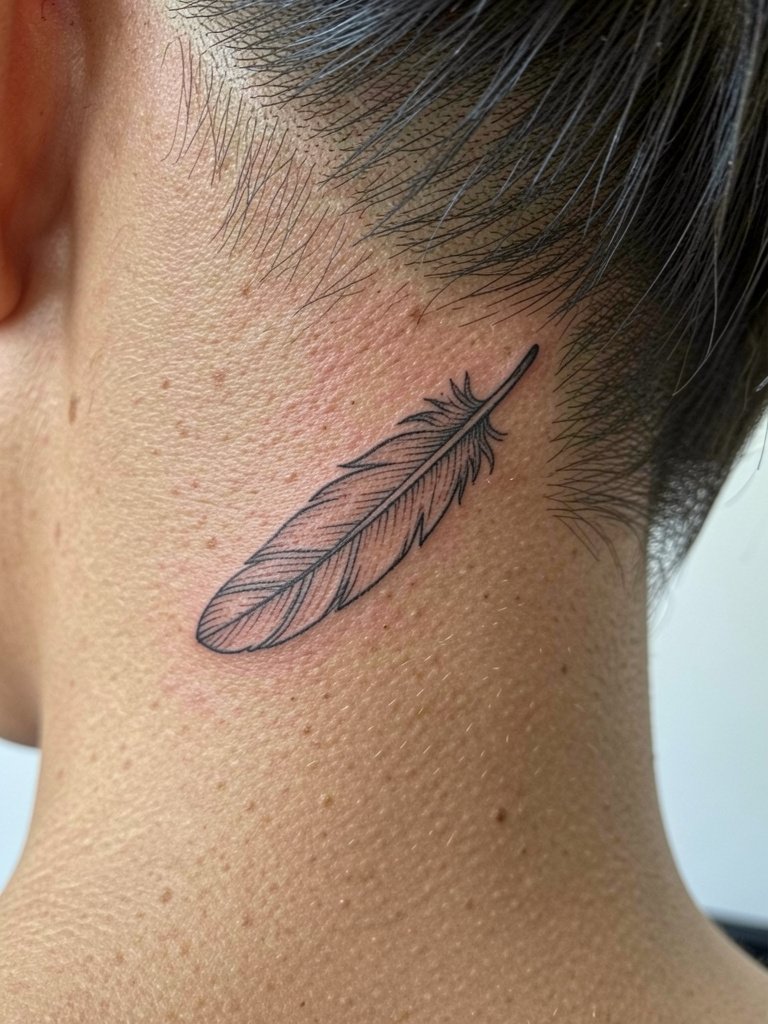
Feathers translate well to this space when you use a flowing curve that follows the ear. Ask for widely spaced barbs rather than ultra-fine individual strokes so the texture keeps reading after a few years. A mistake is insisting on hair-fine barbs that the skin cannot hold. The session is quick and the pain is low. For showing off, a half-up or tuck-behind-ear style works, and a simple pendant necklace worn below the neck area complements the vertical line of the feather. Touch-up timelines vary, but expect possible refinement at twelve months.
12. Micro-Realism Flower
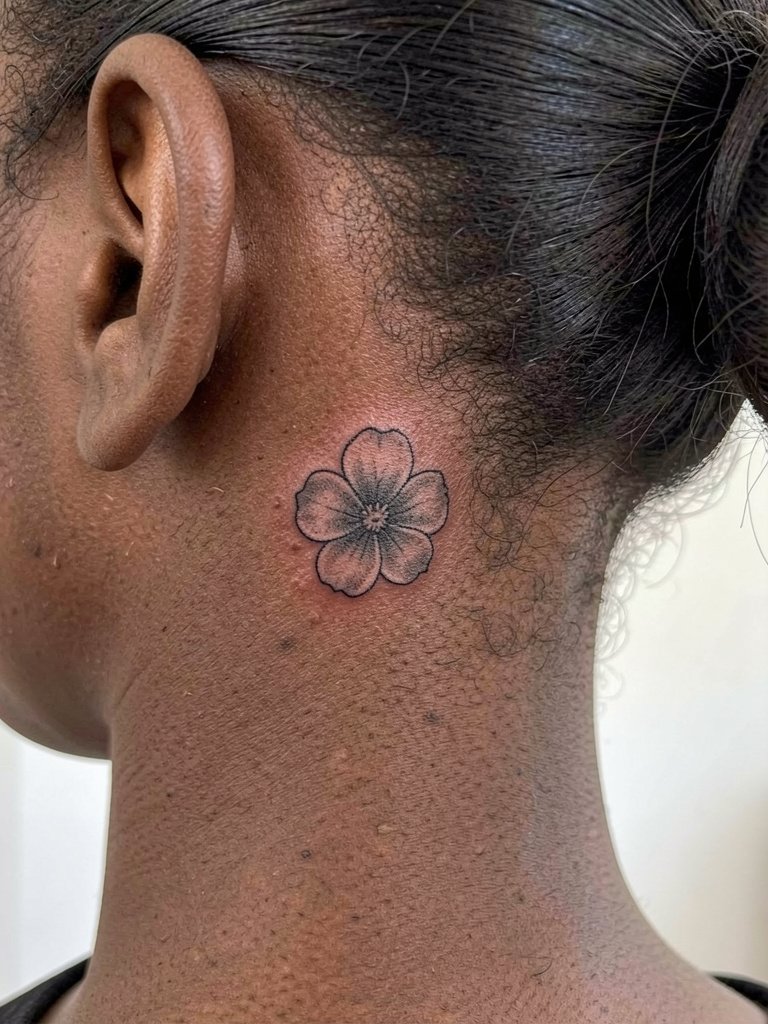
Micro-realism on a flower can be arresting if the artist specializes in tiny tonal work. The longevity debate is clear. One camp says micro-realism is risky in this spot because the detail can compress and merge, losing definition. The other camp argues that with slightly simplified shading and careful spacing it can still photograph well three years later. If you want micro-realism bring healed, same-size references and ask the artist how they plan to simplify shading. The session runs longer than a straight fine line piece and a touch-up is common at the one-year mark.
13. Tiny Shield or Badge Motif
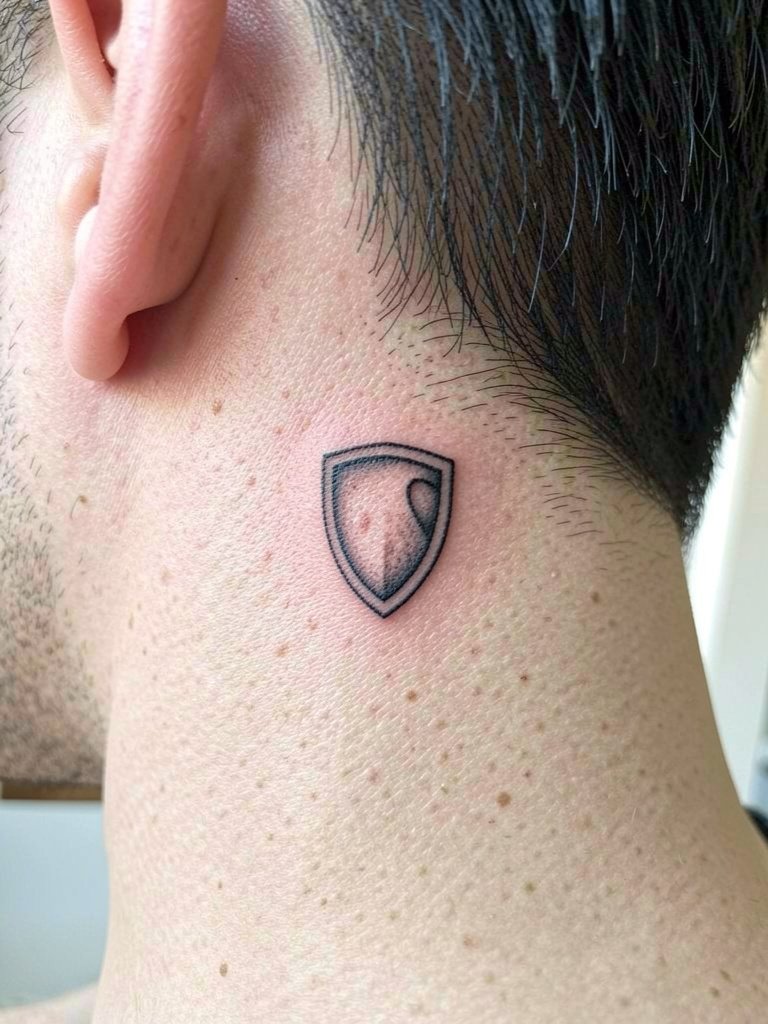
A tiny shield reads strong when its internal detail is minimal. Ask for a simplified interior or open negative space so the silhouette remains clear even if fine interior lines fade. Poor versions cram heraldry into a micro area and the result turns muddy. Session length is 20 to 35 minutes and pain is mild. Styling-wise, a delicate delicate gold chain necklace that sits above the tattoo can frame the area. Book a touch-up if interior strokes close up after healing.
14. Minimalist Arrow
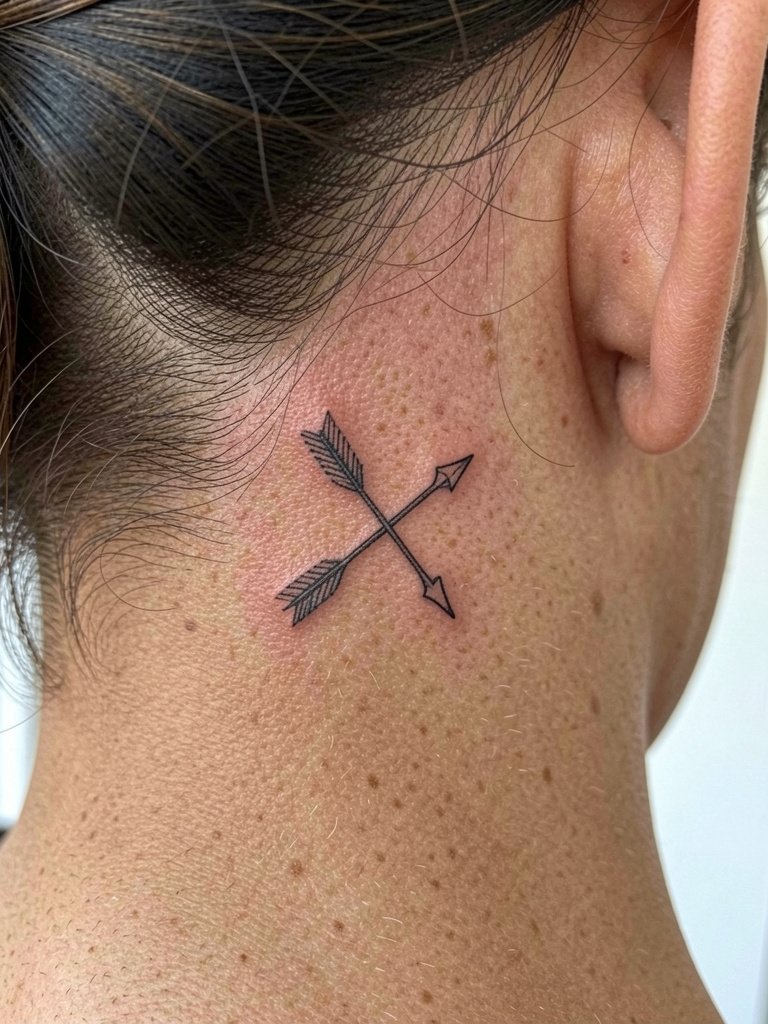
Arrows make excellent micro symbols if the shaft has breathing room. Ask the artist to avoid ultra-thin shafts and to give the fletching clear separation from the shaft. Tiny, shallow lines often fade or blur with motion in this part of the neck. A short session and mild discomfort are typical. This placement is easy to disguise with hair and pairs casually with a crew neck loose shirt on appointment day so nothing snags the fresh ink. Expect to revisit the piece for a small touch-up if the tip loses crispness.
15. Tiny Constellation Cluster
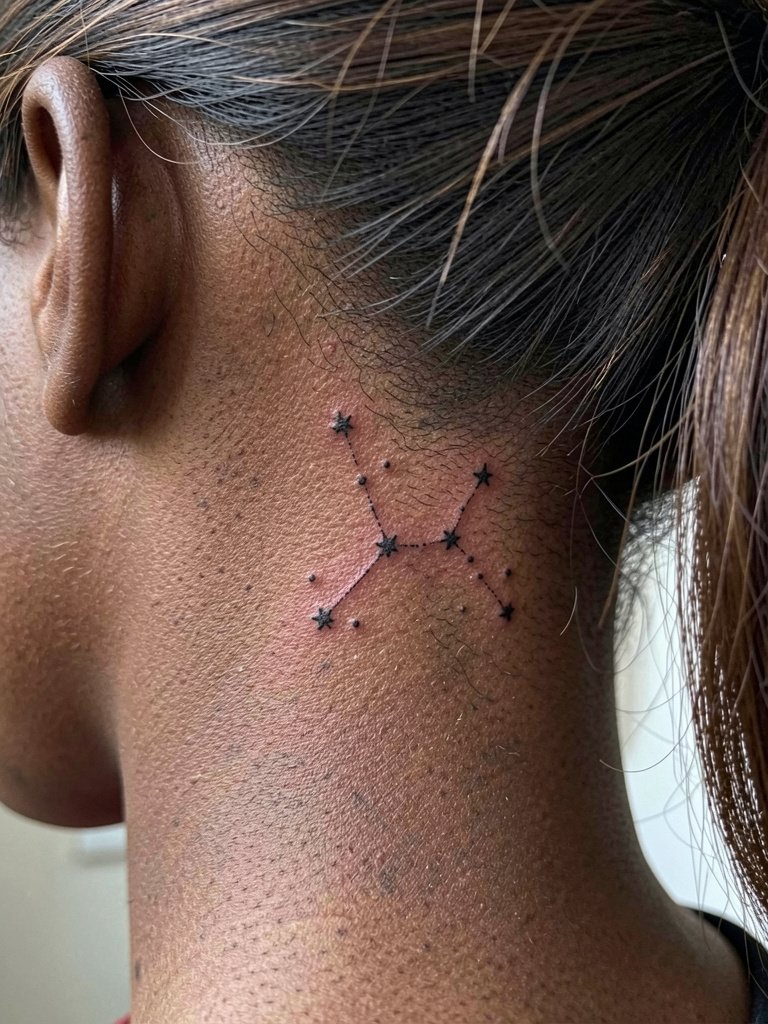
A mini constellation benefits from negative space between points. Tell your artist the exact spacing you want so dots do not close up into a line. The common mistake is connecting stars with too-heavy dots that become a thin bar over time. Sessions are short and the pain is low. For styling, a low bun or half-up style shows off the cluster around the ear, and you can add a simple pendant necklace if you want vertical balance. Touch-ups are common for dot work after six to twelve months.
16. Tiny Geometric Circle
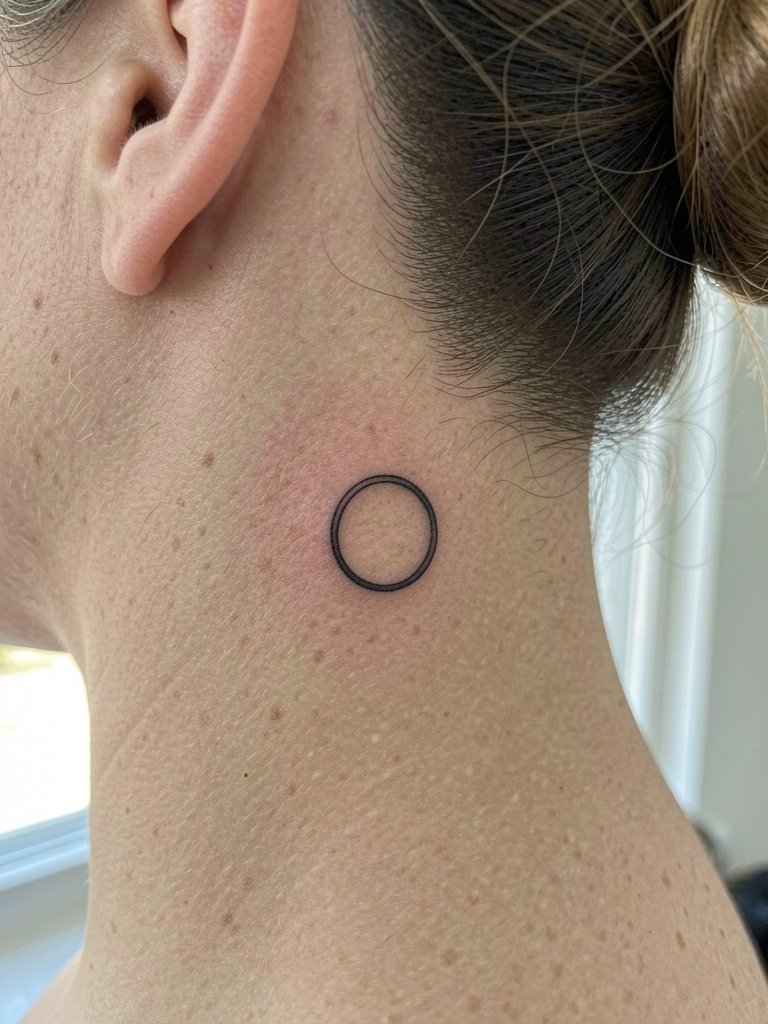
A plain circle is deceptively tricky because an uneven line will reveal itself over time. Ask the artist to show you the stencil scaled exactly to the size you want and confirm lineweight. People sometimes pick too small a diameter and later find the circle looks closed in. The session is under 30 minutes and discomfort is low. This piece hides easily and looks crisp with hair down. If you favor symmetry, request a quick stencil placement check from different angles so the ring sits flush with the ear curve.
17. Tiny Musical Staff Accent
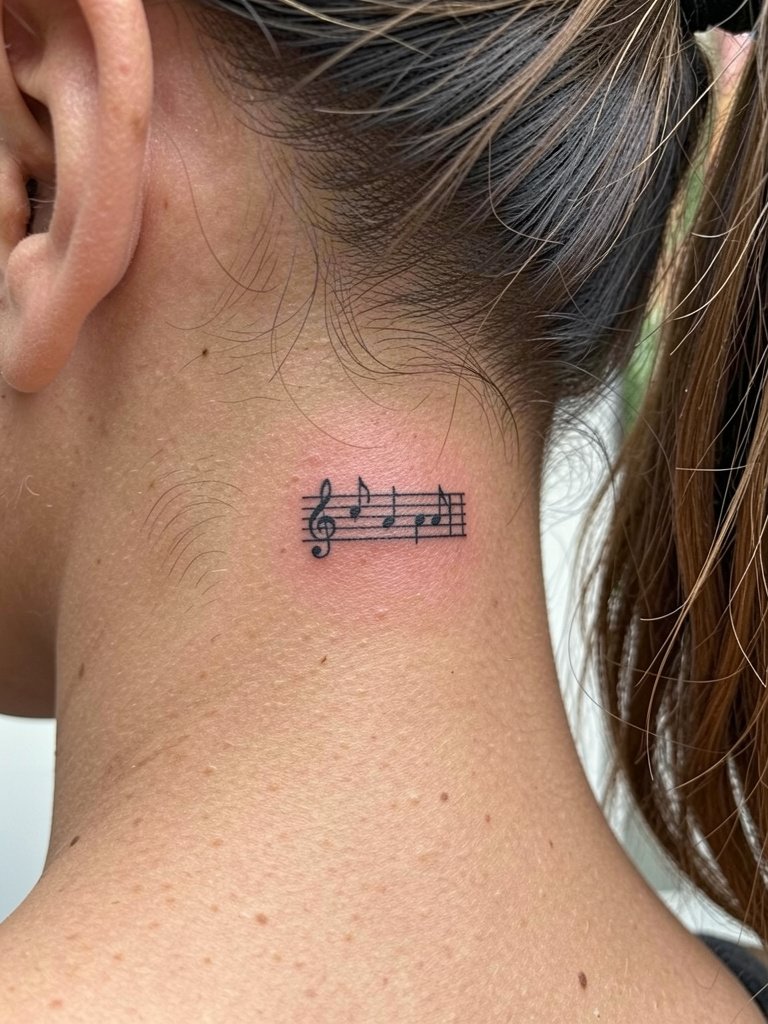
A tiny staff needs room between bars to avoid merging. Ask your artist to space the staff lines wider than a music sheet would be at full scale. The frequent error is compressing multiple bars into a micro area which then softens into a grey smudge. Sessions are short but expect careful stencil placement. For nights out, wear a low bun or a delicate gold chain necklace that sits above the tattoo to frame the placement. Touch-ups for staff lines are common.
18. Tiny Compass Point
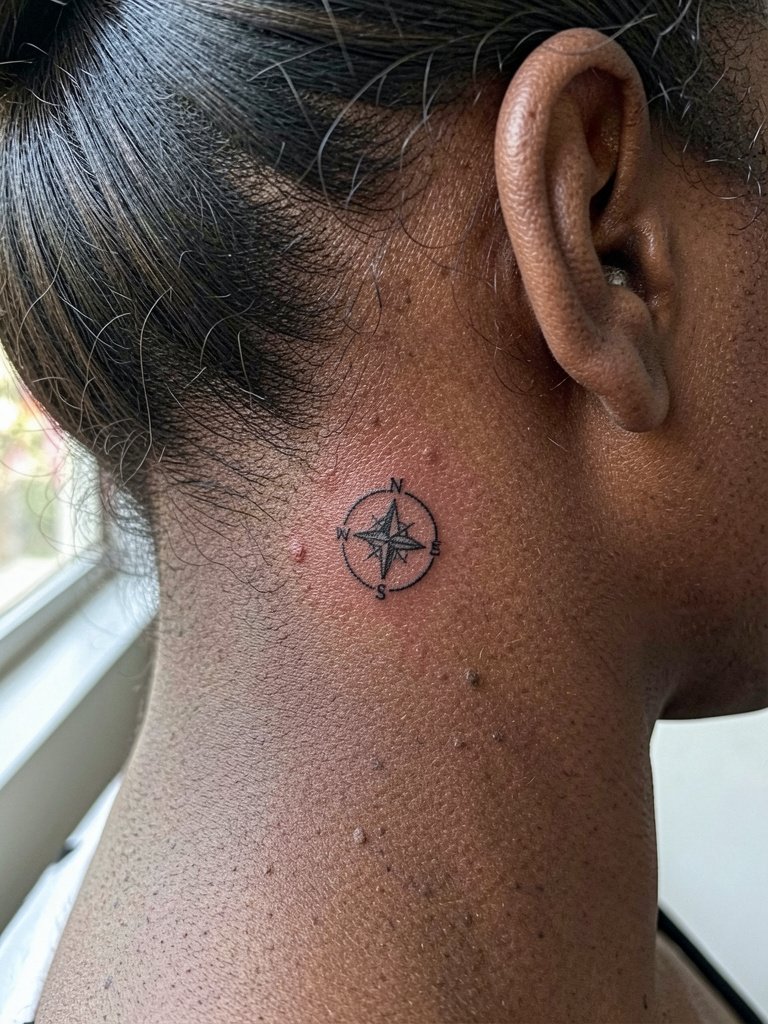
A compass point is a strong micro symbol when its border is not overloaded with detail. Request a bold outer ring and a simplified internal arrow so the motif reads from afar and up close. People sometimes request ornate compass roses at micro size and then see that petals merge. The session takes about 20 to 30 minutes and pain is low. The design peeks nicely with short hair. For session comfort wear a crew neck loose shirt so the artist can work without fabric interference.
19. Tiny Barbed Line Accent
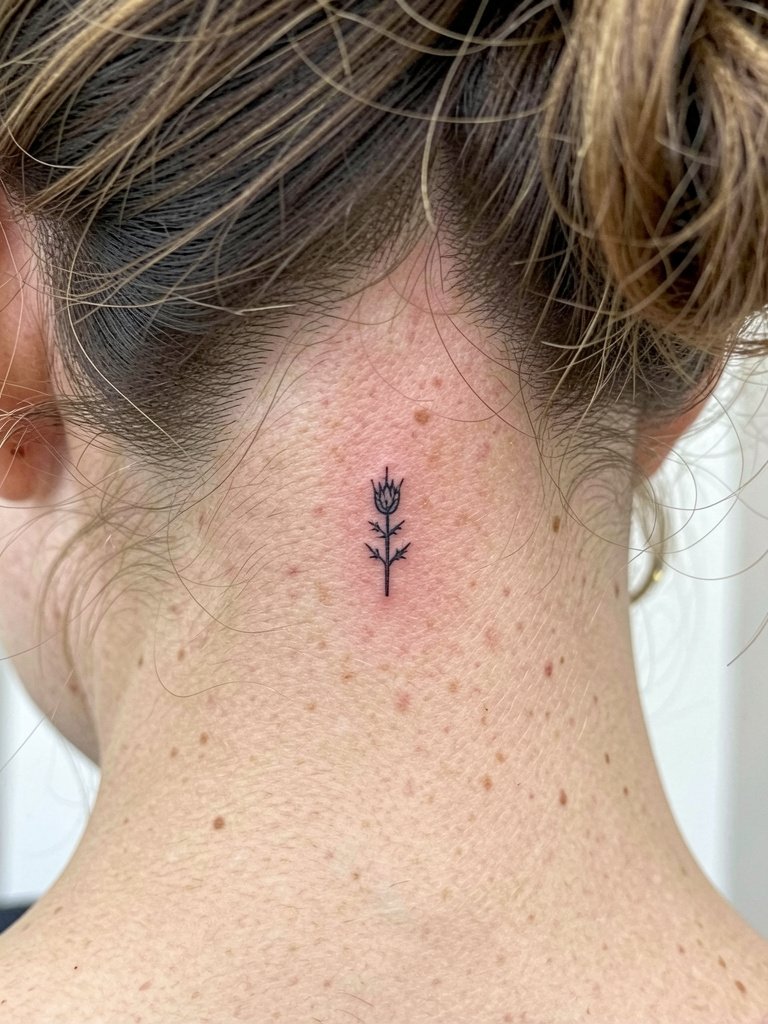
Simplified barbed lines or thorn silhouettes read edgy without overcomplication. Your artist should avoid adding fine inward barbs in a tiny space. Those bite into the skin and the negative spaces disappear. Expect a short session and a mild sting. For a pulled-together look after it heals try pairing with an updo hair clips to show the motif when you want it visible. A small touch-up at six to twelve months may be necessary if points soften.
20. Tiny Wave Line
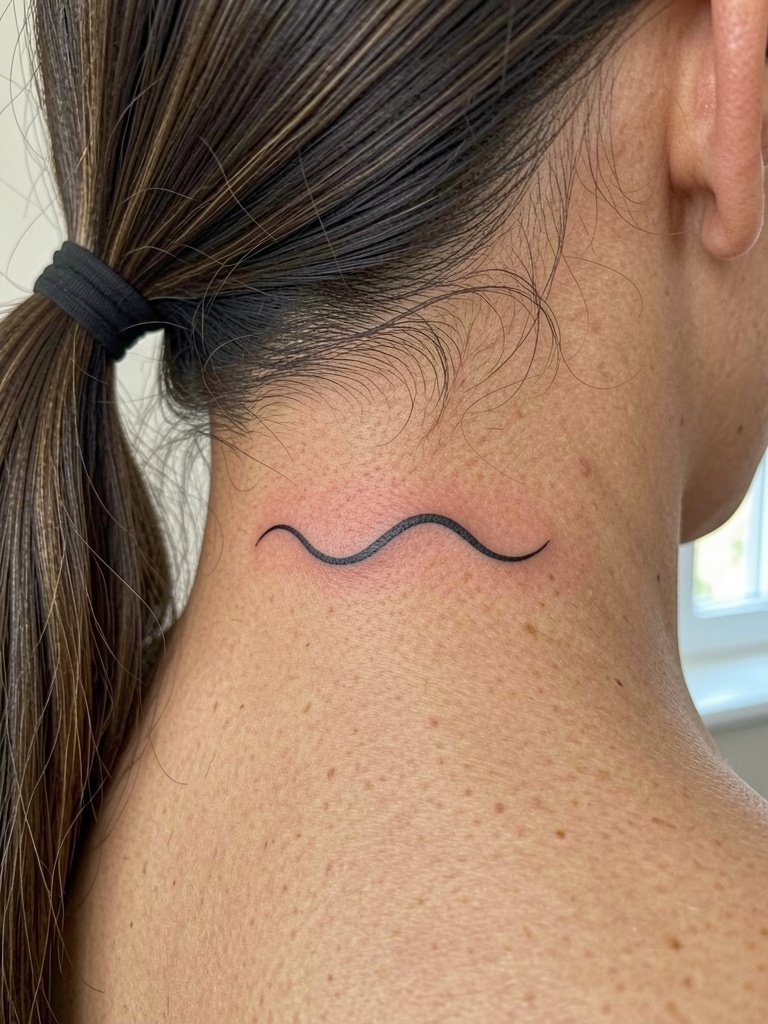
A tiny wave reads serene when it is a single confident stroke. Ask the artist to avoid multiple overlapping waves that crowd the small canvas. The common error is packing too much motion into a tiny space which blurs after a year. The session is quick and pain is low. This piece is easy to hide with hair down and pairs casually with a simple pendant necklace if you want an accessory that does not touch the healing area. Touch-up can sharpen the crest if it softens.
21. Tiny Leaf Outline
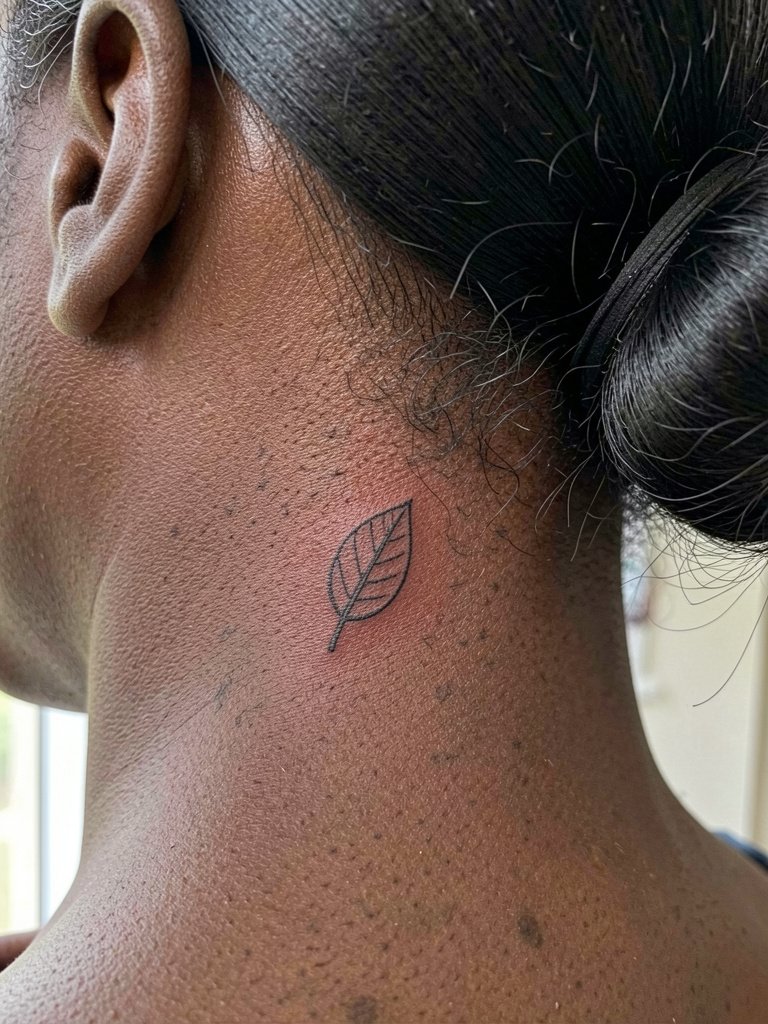
A single leaf works as a quiet, low-maintenance option that follows the ear curve. Ask for a slightly heavier midrib and a defined rim so the silhouette separates from skin tone over time. The usual mistake is requesting an ultra-thin rim that disappears. Session time is brief and the area is tolerant. For show-and-hide dressing, a half-up hair clip does the job and a neutral pendant keeps the eye moving down the neckline. Expect a small touch-up if the midrib loses contrast.
Frequently Asked Questions
Q: How painful is a small tattoo behind the ear compared with other spots?
A: Most people describe the mastoid area as low to moderate on the pain scale for tiny pieces. The skin is thin but the session times are short, and that short duration helps a lot. If you have low tolerance request short breaks and plan a numbing option only after confirming studio protocol.
Q: How long until I should consider a touch-up for fine line behind-the-ear work?
A: For single-needle fine line pieces expect to check in around six to twelve months for a touch-up if any lines soften. Heavier outlines tend to hold longer and often only need a touch-up after a year or two. Bring a photo of your healed reference at booking so the artist can advise a personalized timeline.
Q: Where can I find local artists who show healed behind-the-ear photos without naming specific people?
A: Search hashtags like #behindtheear and #finelinetattoo on Instagram and TikTok while applying the location filter. Tattoodo and the Inked App let you search portfolios by keyword such as "small moon tattoo" to see healed work. Reddit threads in r/tattoos and r/finelinetattoos often surface peer recommendations and healed shots across skin tones.
Q: Will hair products like dry shampoo affect healing for a mastoid tattoo?
A: Product buildup can trap bacteria and irritate the fresh ink, so avoid dry shampoo and strong perfumes near the area while healing. Use a mild fragrance-free body wash and, if needed, a clarifying shampoo to remove residue before the appointment. Rinse the area well after shampooing so no residue sits on the skin.
Q: Should I ask for heavier lineweight to prevent blowout on darker or softer skin?
A: Yes. On softer or higher-mobility skin a slightly heavier lineweight preserves the design long term. Ask for specific adjustments such as wider spacing or bolder stems rather than leaving it vague. Showing how wide you want the lines on a comparable healed photo helps the artist calibrate.
Q: What should I wear to the session to make access easier and avoid irritating the fresh tattoo?
A: Pick a loose crew neck or an open-back top that you can put on without tugging over the neck area. Avoid high collars and scarves for the first week. For jewelry, remove anything that might touch the back of the ear until the piece fully heals.
