
Minimalist arrows feel private and deliberate, a simple mark that can read like intention or memory. The trick most people miss is that tiny choices in line weight, negative space, and placement decide whether an arrow still looks crisp after a few years. These ideas favor clarity over fussy detail, with notes on aging, session feel, and how to style or wear each piece so it stays readable and intentional.
1. Fine Line Arrow on Inner Forearm
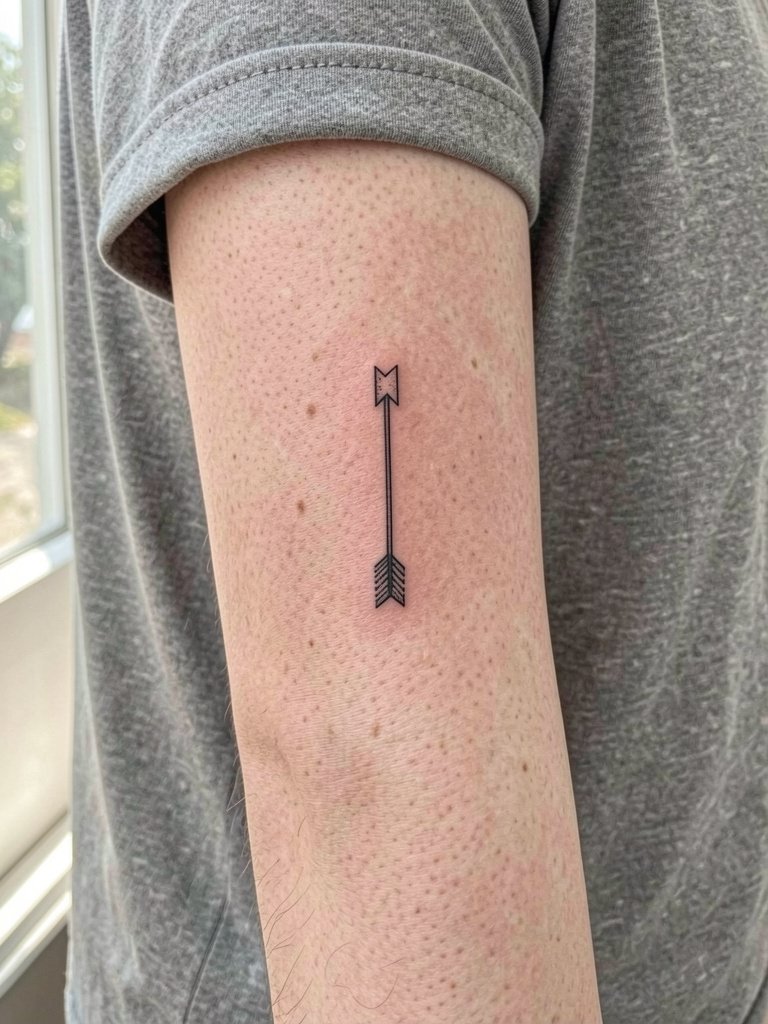
A narrow inner-forearm arrow reads clean because the surface stays flat and the skin is low-friction. Recommend the shaft be drawn a hair thicker than a Pinterest single-needle reference so the line survives two years of wear. During consultation bring a three-inch and a five-inch mockup so the artist can show how the design loses or gains presence at different scales. Expect a 30 to 60 minute session with low to moderate discomfort. Common mistake is asking for ultra-tiny heads that blur into the shaft. For evenings out, roll a linen sleeve up and pair with a loose cuffed shirt to let the linework show.
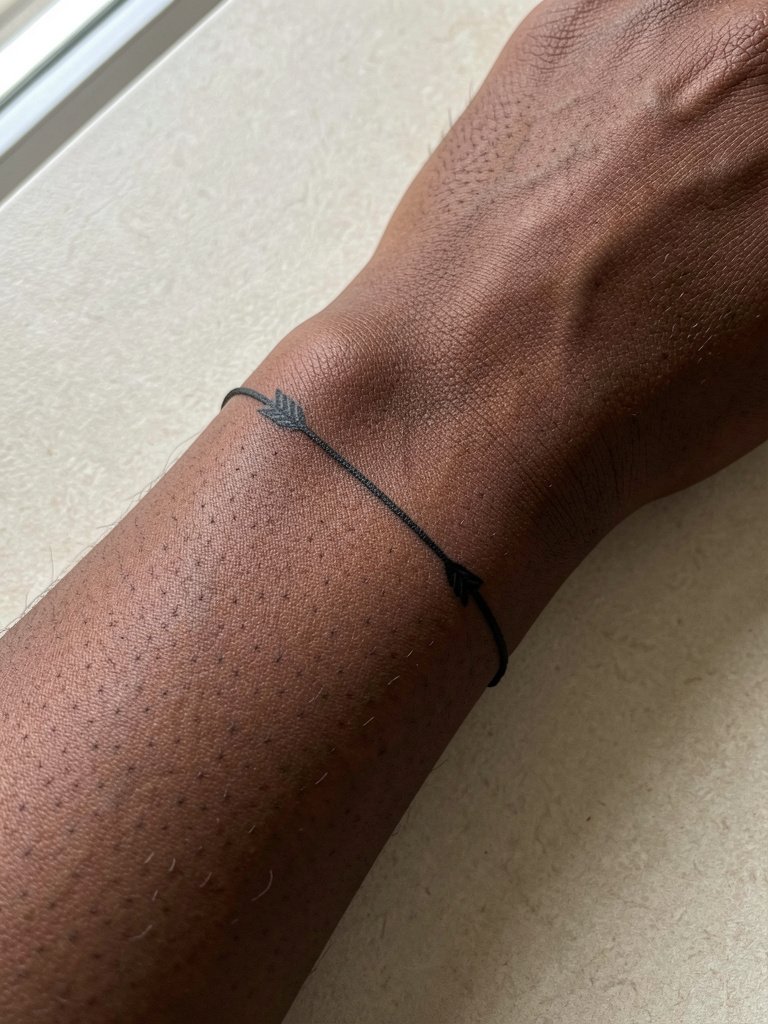
2. Bracelet Arrow Ring on the Wrist
Wrist arrows behave like jewelry, but the skin there sees constant washing and movement. I suggest slightly increased line thickness where the band crosses the wrist crease so the shape does not wash out at year two. For the session wear a loose long-sleeve button shirt you can roll up easily, and bring a soft cotton cuff bracelet to mirror the tattoo once healed. The pain sits around three out of ten for most people and a small wrist piece usually takes 20 to 40 minutes. A frequent error is placing the arrow too close to the bone where the line can spread into the tendon area, and that eats fine detail faster.
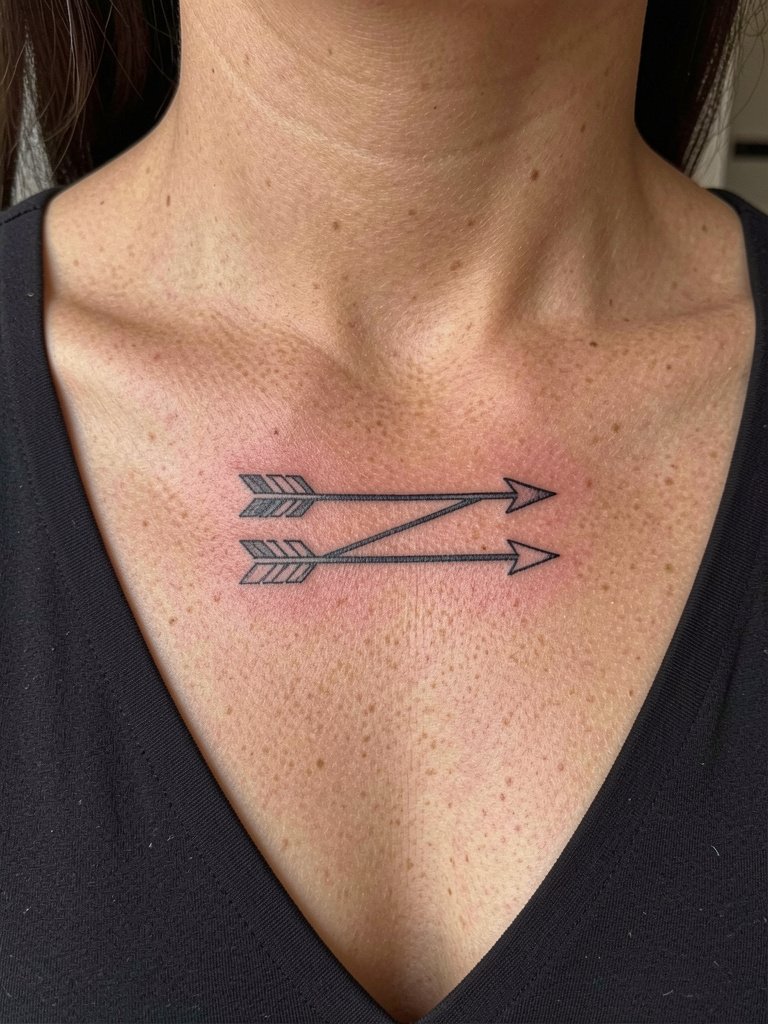
3. Parallel Arrows Across the Collarbone
A collarbone composition reads architectural because the bone creates a clean linear frame. I advise leaving several millimeters of negative space between the two shafts so the pair keeps separation as the skin moves. During the consult show the artist where the clavicle protrudes on your body and have them stencil it in the same sitting position you plan to wear for photos. Expect mild discomfort near the bone and a 30 to 50 minute session. Overly fine tails are a classic mistake here because the collarbone skin compresses differently and thin tails can morph into a single blurred mark after a few years.
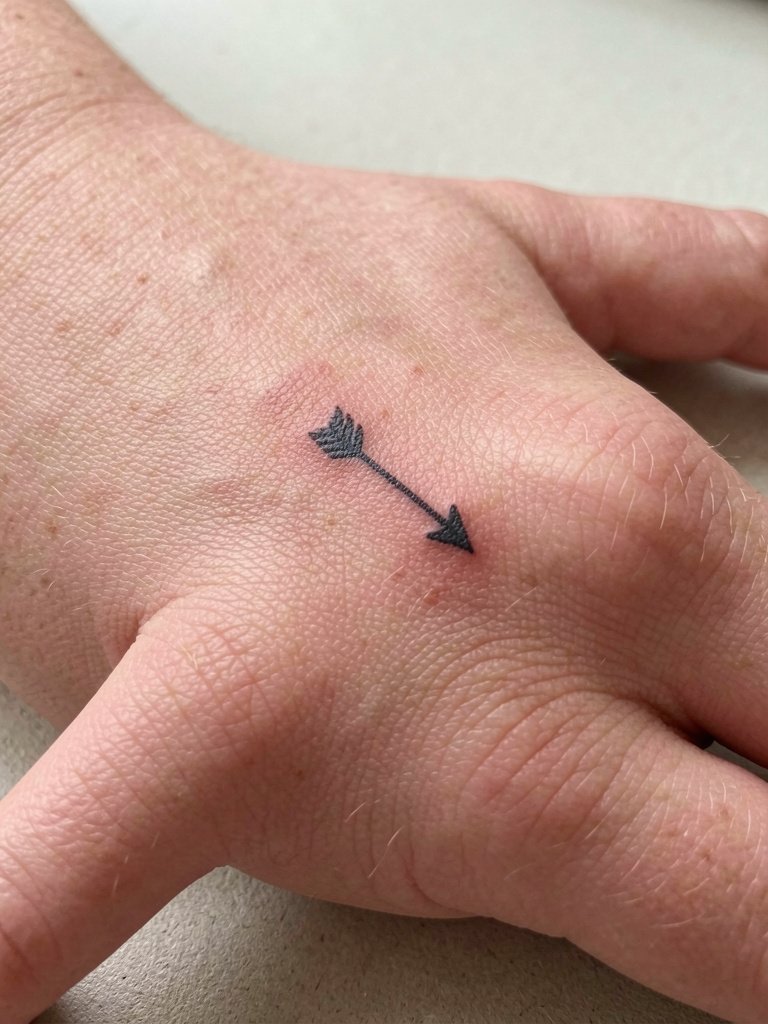
4. Micro Arrow on the Finger
Finger placement is intimate and high risk for blowout and fading because the skin there regenerates differently. One camp of artists says single-needle micro work on fingers blurs by year two due to constant washing and abrasion. The other camp argues that slightly bolder linework and planned spacing can keep detail visible for many years. Expect higher touch-up rates, often a touch-up at 6 to 12 months, then again as needed. Session time is short but the pain is sharp. For the appointment wear a shirt with a loose cuff and bring a thin protective finger sleeve to keep the area clean during travel after the session.
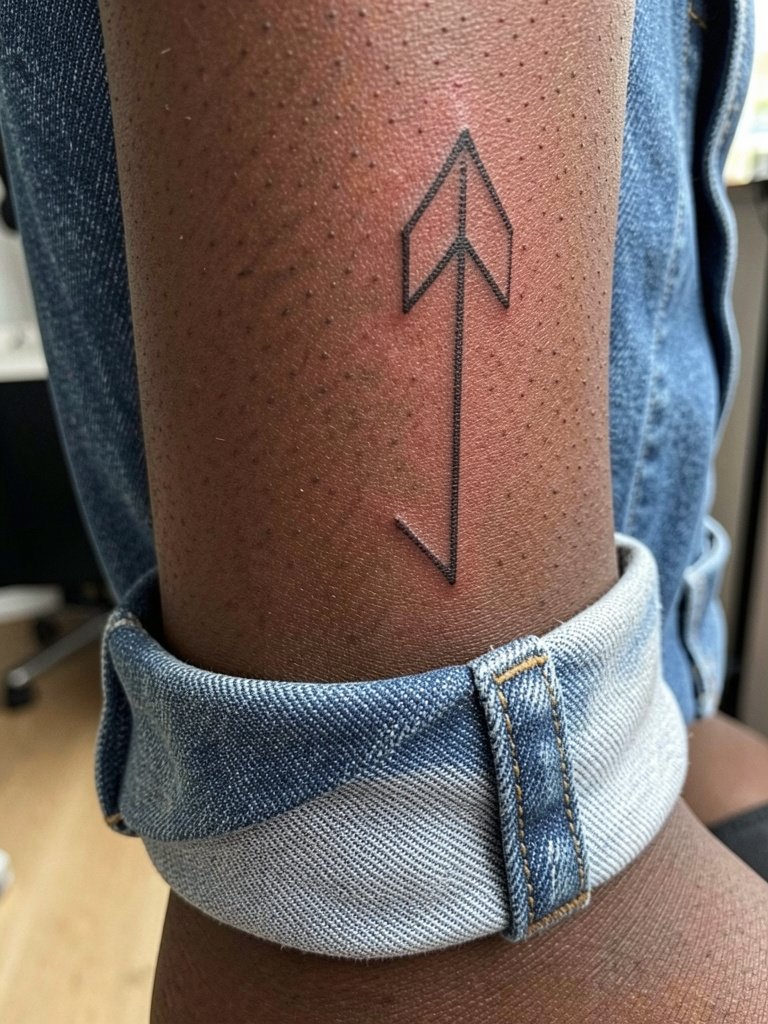
5. Geometric Ankle Arrow
Ankle arrows are low-profile and photograph well with cropped pants. The outer ankle is forgiving but takes friction from socks if placed too low. Recommend placement just above the ankle bone and a slightly bolder head to hold definition. Session time is 20 to 45 minutes and discomfort ranges from four to six out of ten when close to bone. Avoid ultra-fine tails that become faint when the skin thickens. For evenings out pair the ankle arrow with cuffed cropped jeans to show the design without rubbing it under socks.
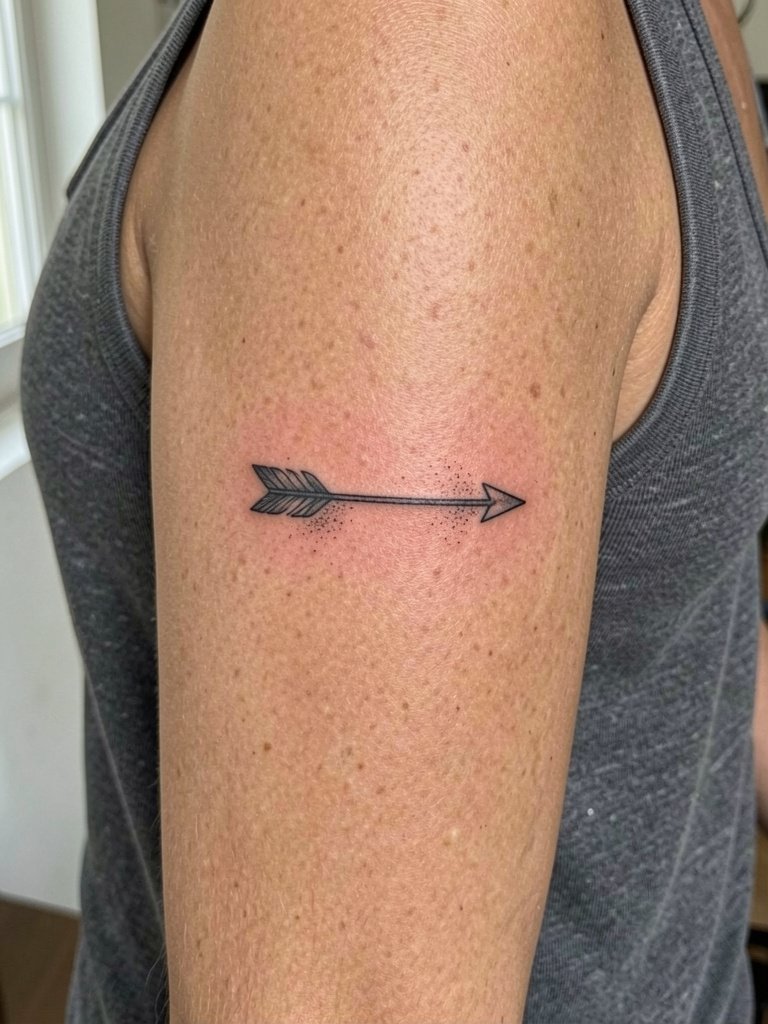
6. Feathered Tail Arrow on Inner Bicep
The inner bicep gives a relaxed canvas for a slightly longer shaft and decorative tail. Placement midway between elbow and armpit keeps the tattoo out of the axilla crease and reduces rubbing, which helps fine tails hold. For the consult specify that the feathered tail use stipple shading rather than thin hatch lines so the texture ages into readable grain. Expect a moderate pain level and a session around 45 to 75 minutes depending on length. Wear a sleeveless top for access and bring a loose drawstring linen pant to be comfortable post-session.
Session Day Picks
The first six placements include high-movement zones and sensitive spots, so a few reliable items make the chair day smoother.
- Stencil transfer paper kit. Lets you preview exact scale and rotation on the inner forearm and collarbone pieces before the artist inks, which helps avoid tiny heads that blur later.
- Topical numbing cream. Applied about 45 minutes before eases wrist and inner bicep sessions without interfering with linework.
- Thin protective film roll. Useful for ankle and wrist placements to shield the first 24 hours from friction.
- Fragrance-free body wash. Gentle cleansing for the first showers keeps fine line pieces from irritation.
- Aquaphor healing ointment. Thin application during the initial healing window helps retain moisture without suffocating single-needle channels.
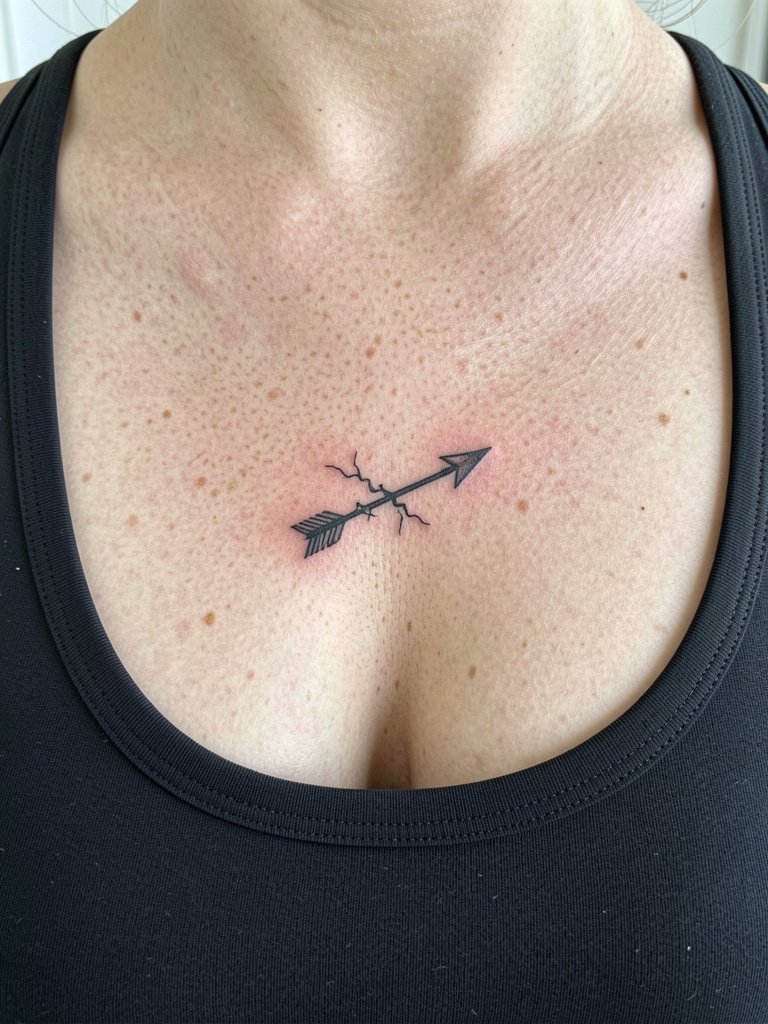
7. Broken Arrow at the Sternum
Sternum arrows sit near delicate movement and can be high on the pain scale. Because the area moves with breathing, avoid ultra-fine uninterrupted shafts. Instead ask for slight negative-space breaks in the line to reduce long continuous ink channels that can spread. Session length is often 45 to 90 minutes depending on width. A professional note: sternum work benefits from an artist experienced with chest contours and comfortable with working near the breastbone. The common mistake is underestimating how much breathing affects stencil placement during the session.
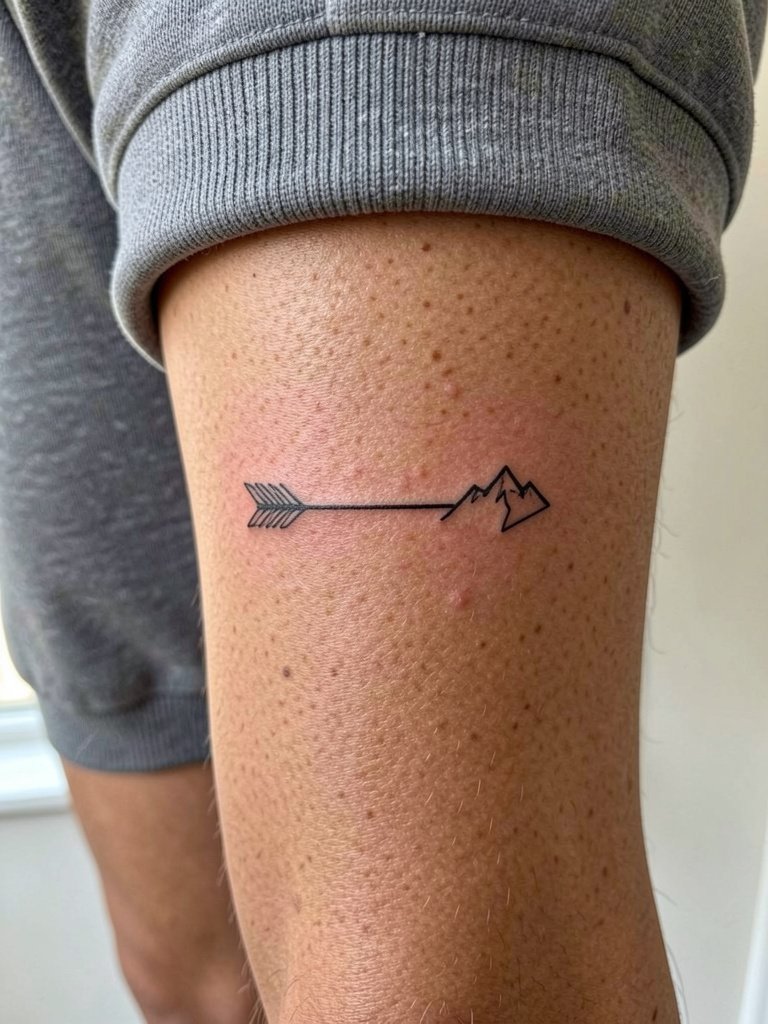
8. Mountain-Tipped Arrow on the Calf
Calf skin is forgiving and tolerates slightly longer designs without distortion. For a mountain-tipped arrow use clean negative space between peaks and a bolder tip line so the silhouette reads at a distance. The session is comfortable for most and usually 40 to 70 minutes. Artists disagree on how thin the mountain detail should be. One camp says tiny peaks and micro stipple age into a blur in three years. The other camp believes deliberate spacing and slightly heavier contour lines preserve the peaks for the long term. A practical fix is to start slightly larger and schedule a touch-up at one year.
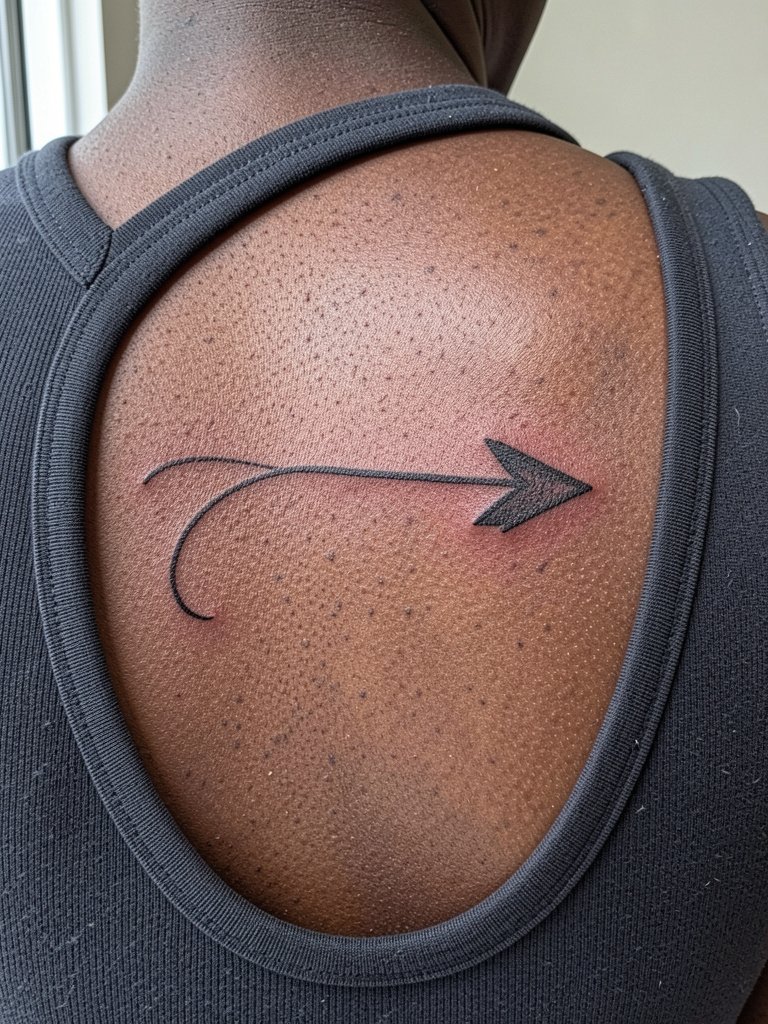
9. Single-Stroke Arrow on the Shoulder Blade
A single-stroke arrow across the shoulder blade reads like a signature because the skin there is broad and flat. Ask for a one-pass mockup so the artist can confirm how a continuous stroke sits with shoulder movement. Expect a session of 30 to 60 minutes with low to moderate pain. The common mistake is overly intricate tail detail that disappears when the scapula moves. For show-off outfits choose a wide-back tank top that frames the piece cleanly without masking the edges.
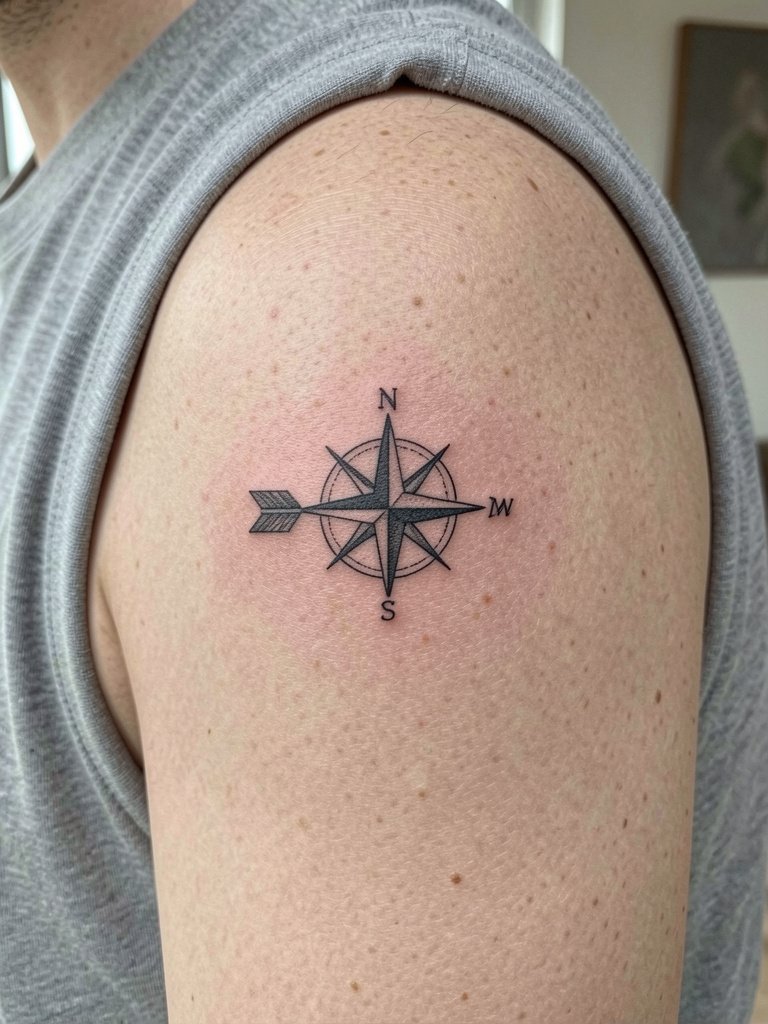
10. Compass Arrow on the Outer Shoulder
Outer shoulder arrows pair well with round shapes like tiny compasses because the area has natural curvature that frames circular elements. Request the compass lines use stipple rather than filled black so the center does not go patchy over time. This placement is low to moderate pain and usually done in a single short session. A session tip is to wear a tank or sleeveless shirt for quick access. To show the design off try a cutaway sleeve tee that leaves the shoulder clean in photos.
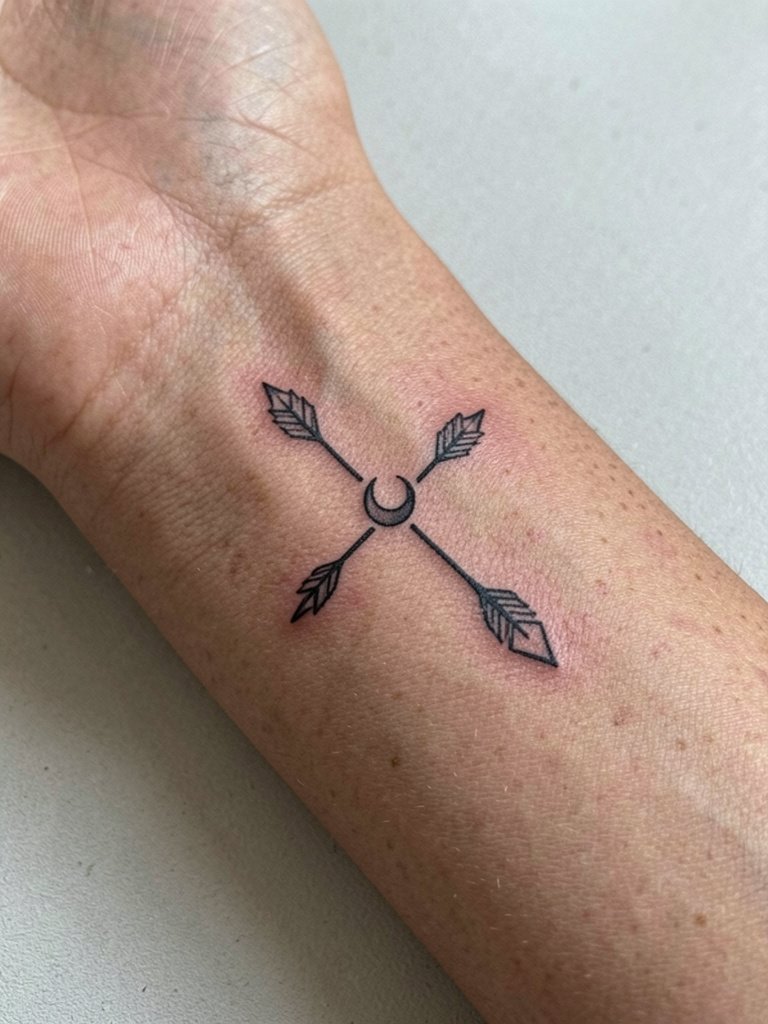
11. Moon-Accented Arrow on the Inner Wrist
Inner wrist arrows look intimate but suffer from constant movement and washing. I recommend a slightly heavier moon accent and a clean head so the negative space reads beyond six months. The session is generally 20 to 40 minutes and the pain is around three to four out of ten. Common mistakes include placing the design too close to the wrist crease or asking for a script-level tail that the wrist will wear away. For appointments wear a short-sleeve tee and bring a soft wrist wrap for post-session comfort.
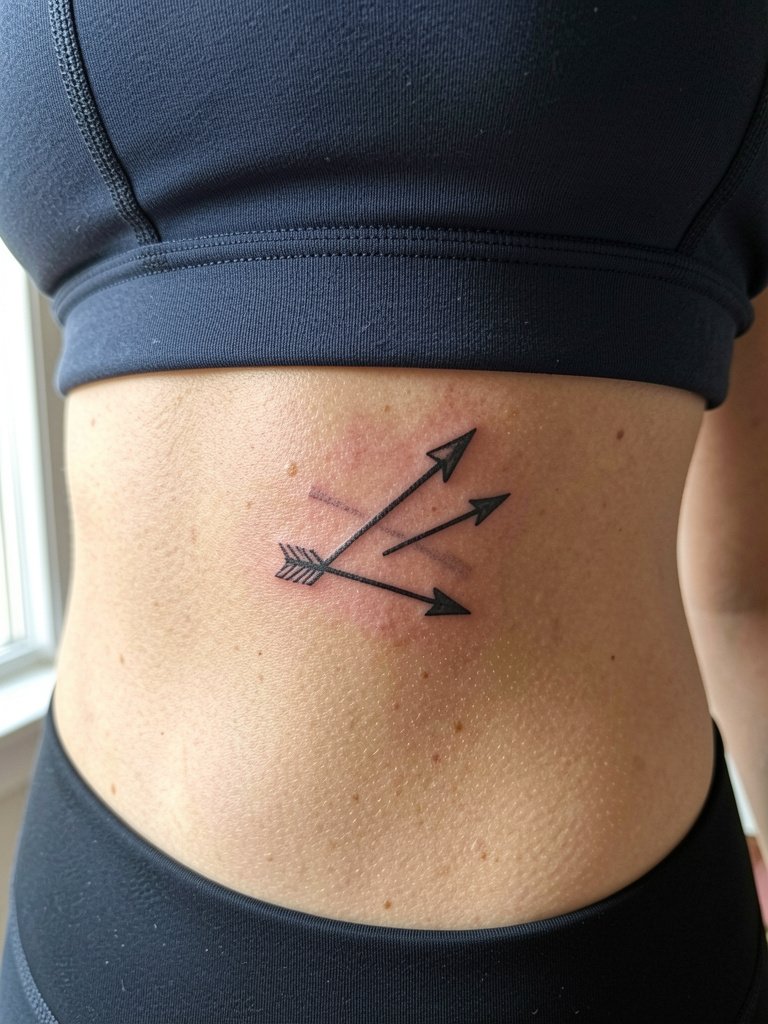
12. Clustered Arrows Along the Ribcage
Rib tattoos require planning because the skin stretches with breathing and undergarment friction. If you want multiple small arrows keep each at least half an inch apart so the shafts do not merge with time. Pain is higher and most sessions on the ribs need breaks, so expect 60 to 120 minutes total. Two camps debate fine-line ribs. One group says the skin motion and thin dermis blur fine lines fast. The other group maintains that slightly heavier spacing and careful depth keep lines crisp for years. For the session wear a fitted crop top and bring a lightweight robe to stay warm during breaks.
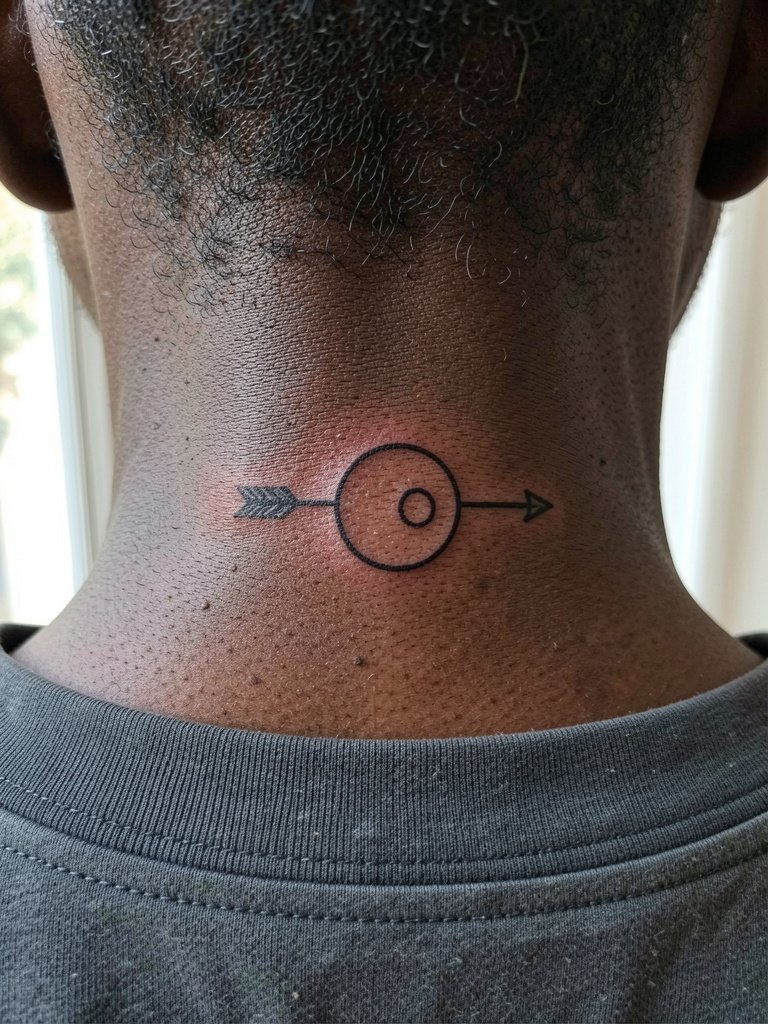
13. Circular Nape Arrow
Nape placements are discreet and photograph well with updos. Because the skin there moves with neck turns, avoid dense interior detail. A small circle pierced by an arrow gives strong negative space while keeping session time short at 20 to 40 minutes. Note for professionalism: neck and nape work benefit from an artist comfortable with collar interaction and hairline stencils. For showing the piece try a soft scrunchie or low bun style that keeps hair off the area without rubbing the tattoo.
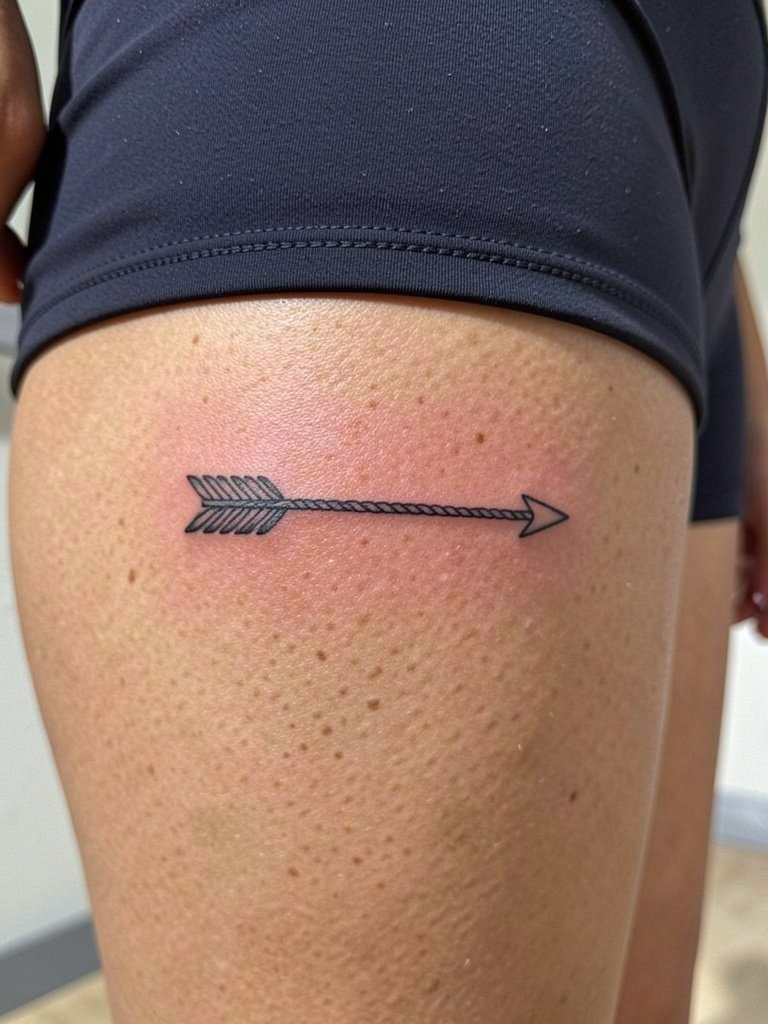
14. Braided Arrow on the Upper Thigh
Inner and upper-thigh arrows give privacy and scale options that hold fine detail well. I recommend a subtle braided texture created with short parallel strokes rather than continuous tiny lines, because the thicker micro-strokes keep contrast longer. Sessions range 45 to 90 minutes depending on size and soreness is moderate. For the consult bring photos of your preferred pant and short hemlines so the artist can place the tattoo where it will be visible when you want it shown. After the session a pair of mid-thigh bike shorts is comfortable and prevents rubbing during the first week.
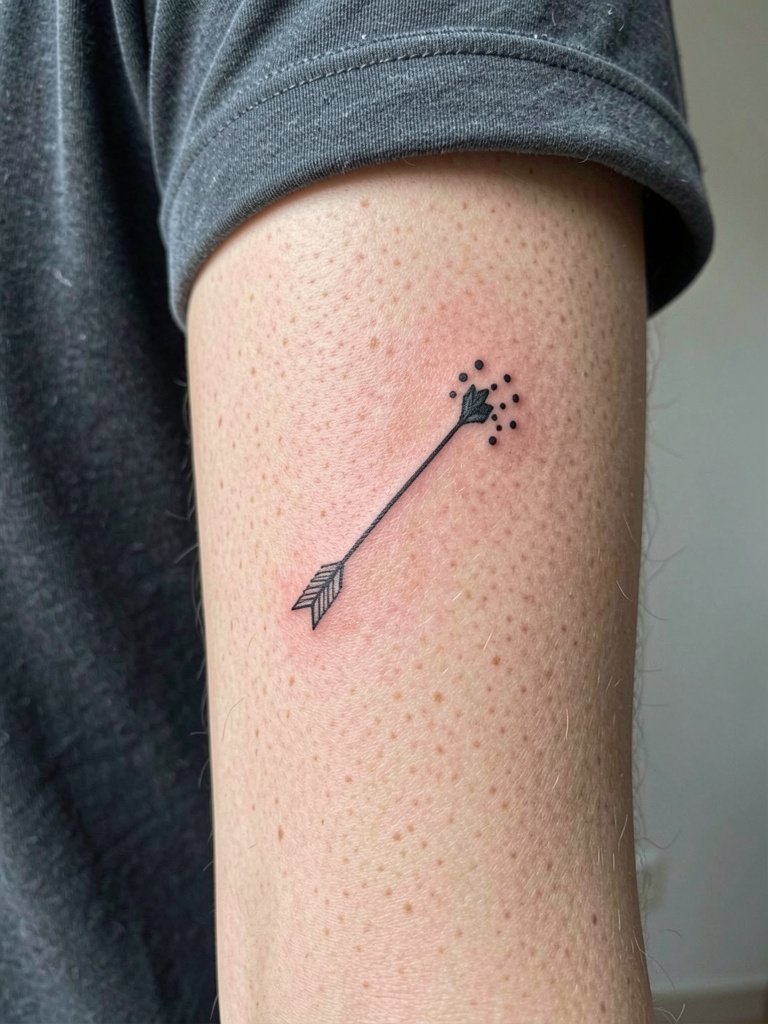
15. Constellation Arrow on the Forearm
Adding a dot constellation to an arrow gives personality without crowding the shaft. Request that dots be spaced so that they do not sit on the same axis as the arrow shaft, which reduces the optical merging that happens after a few years. Expect a 30 to 50 minute session and light to moderate pain. A common mistake is asking for dots smaller than the needle channel can hold long term. For casual display try rolling sleeves to just below the elbow and pair with a linen short-sleeve shirt that complements the fine work.
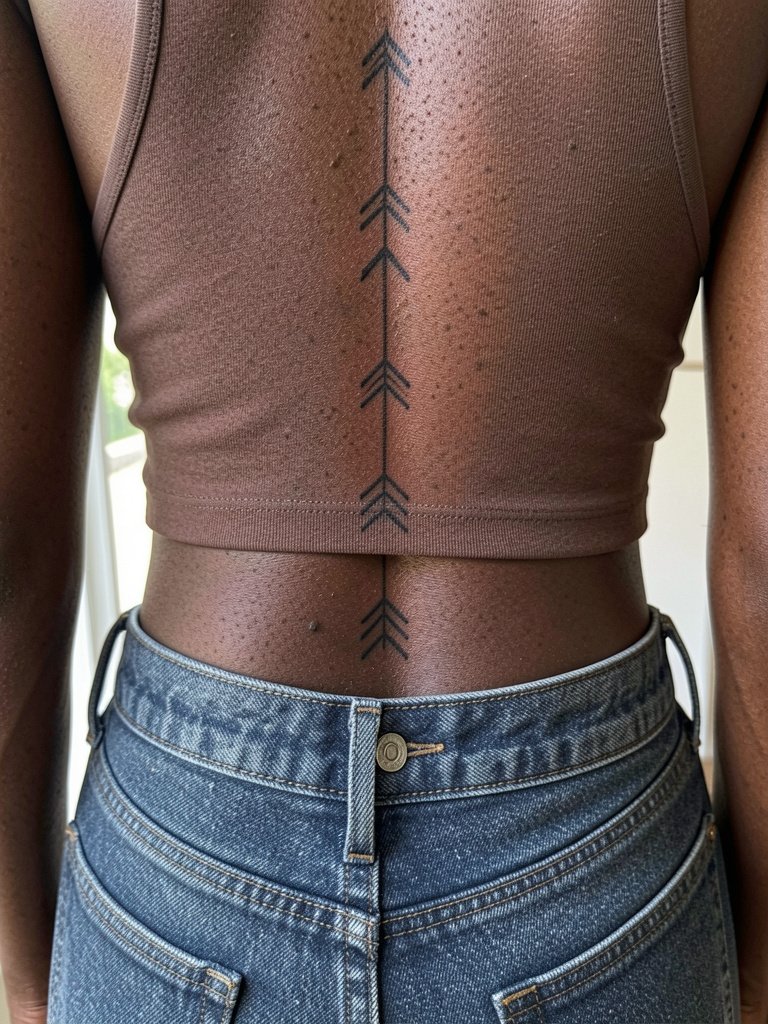
16. Vertical Spine Arrows
Vertical arrays of arrows on the spine read graphic and linear because the spine provides a natural guide. For a long stacked design maintain at least a quarter-inch spacing between shafts to prevent vertical merging. Spine work is sensitive and sessions often break into shorter passes. Touch-ups at one year are common for thin arrays. For the session wear low-rise jeans and a cropped top so the artist can access the lumbar and upper-spine areas easily, and consider bringing a soft travel pillow for comfort during longer sessions.
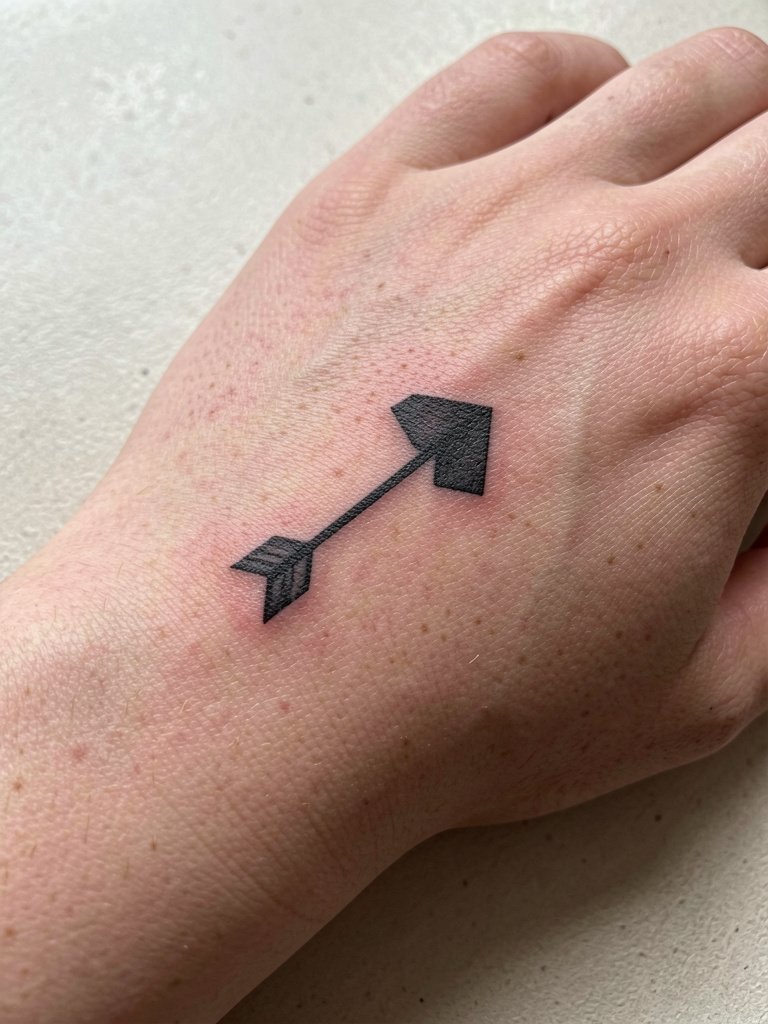
17. Dorsal Hand Arrow
Hand and dorsal web tattoos are visible and age differently. One group of artists will not do intricate hand arrow work because the skin and movement cause rapid fading. Another group accepts the higher touch-up profile and plans bolder contours from the start. If you choose a hand placement expect a higher rate of touch-ups, sometimes every 6 to 18 months. Keep the arrowhead simple and avoid micro-shading. For the appointment wear a top with sleeves that pull back easily and bring a hand wrap bandage to protect the area on the way home.
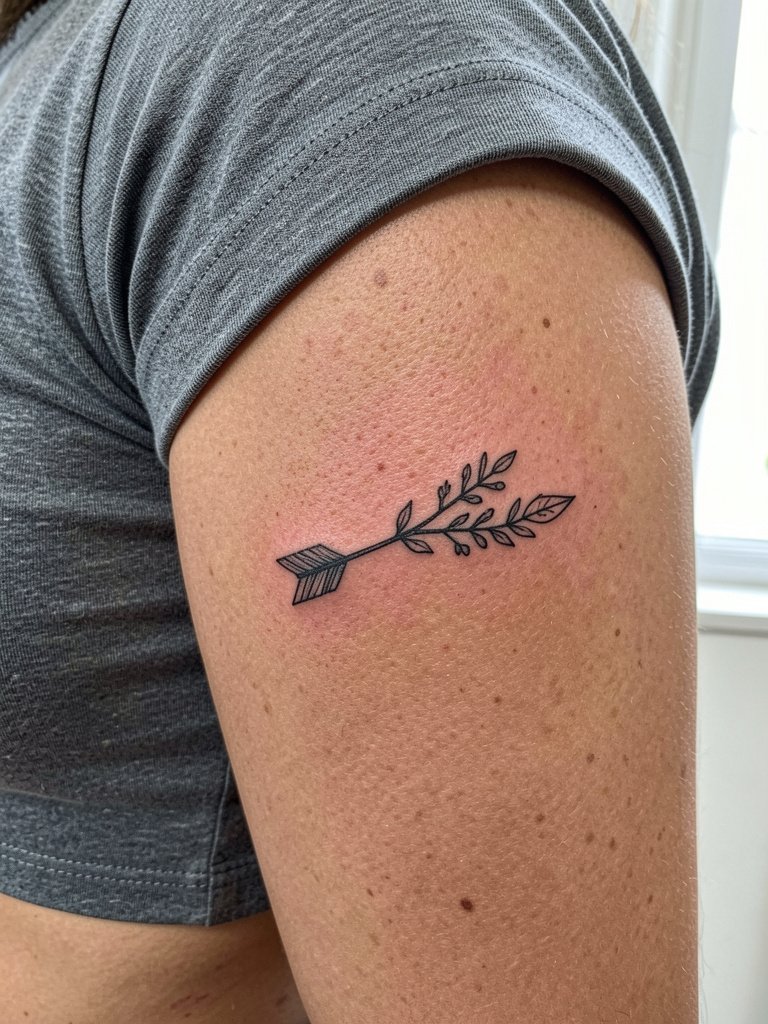
18. Botanical Arrow for the Rib Side
Combining a sprig or small leaf with an arrow softens the silhouette without adding heavy fill that ages poorly. For this area ask the artist to map the leaf spacing so the negative space between veins remains clear as the skin shifts. Expect a higher pain level because of rib sensitivity and plan on shorter breaks. A common mistake is packing too many tiny leaves into what should be a simple accent. For post-session comfort wear a fitted sports bra and a lightweight robe to avoid fabric rub during the first week.
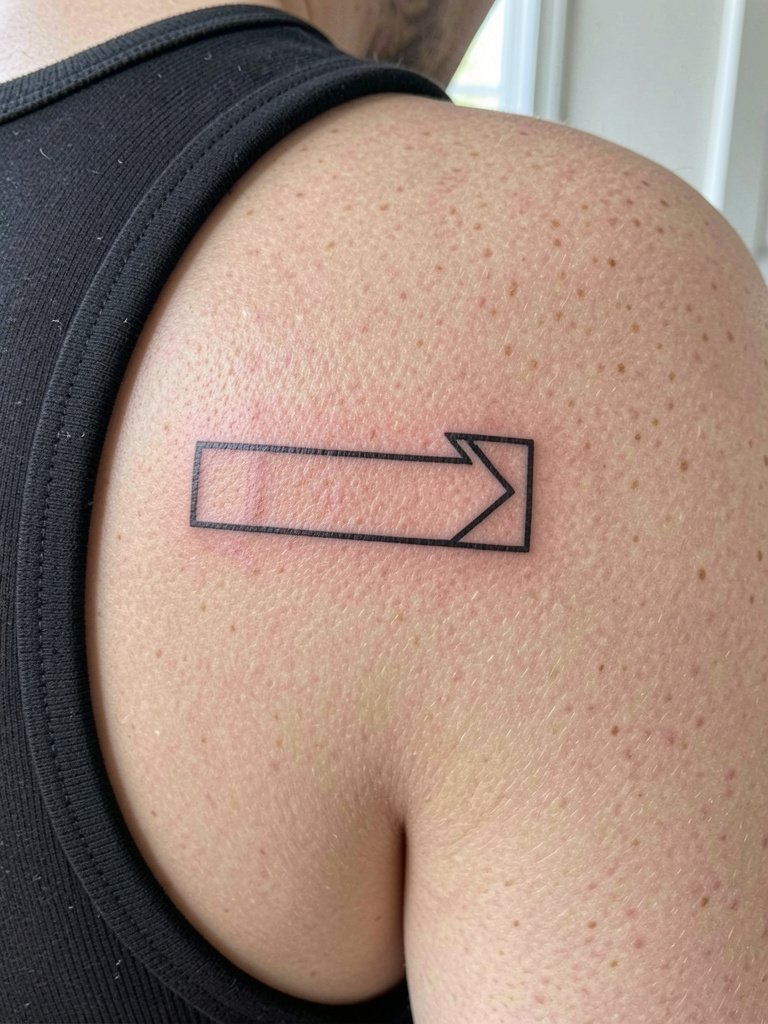
19. Negative-Space Arrow on the Shoulder
Negative-space arrows use surrounding ink to shape the arrow and work well on broader areas such as the shoulder. Ask the artist to stencil the rectangle and step back to check readability from arm-at-rest angles. Session time varies with size, typically 30 to 60 minutes. Mistakes happen when the surrounding fill is too light or mottled, which removes the crisp cutout. For showing this design, try a wide-back tank dress that frames the negative space cleanly.
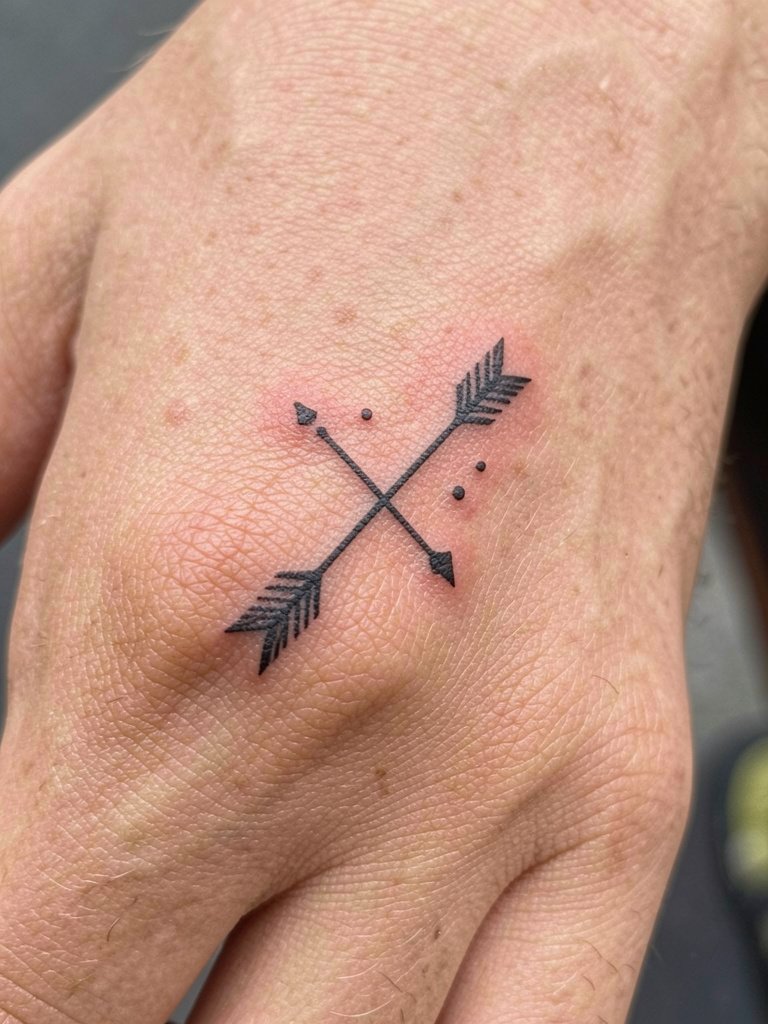
20. Morse Arrow Finger Accent
Small coded motifs paired with an arrow give meaning while keeping the silhouette minimal. Because finger skin is active, place dots and dashes with intentional spacing so they do not converge into a single smudge over time. Sessions are quick but the need for touch-ups is higher than on flat areas. A session tip is to bring reference for exact spacing so the artist can show how the code reads at the size you want. For daily comfort pick a pair of cotton gloves to wear for short periods if swelling occurs.
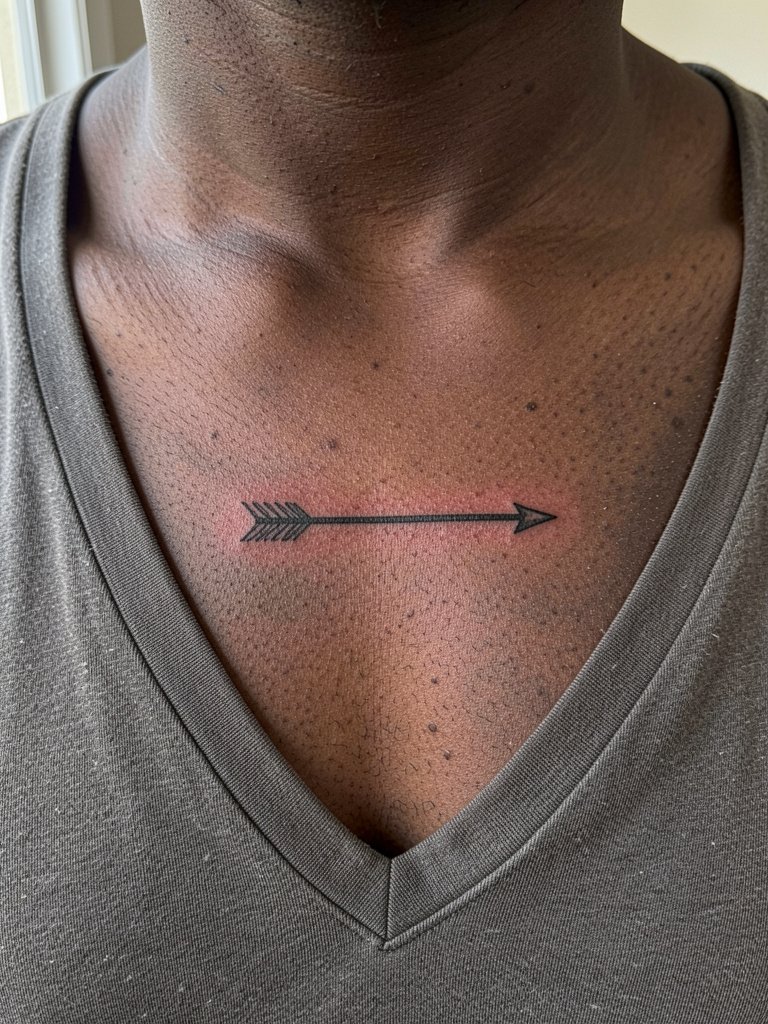
21. Subtle Barbed Arrow on the Chest
A narrow barbed detail gives an arrow edge without full heavy blackwork. For chest placement keep barbs minimal and avoid cross-hatching that can turn patchy. Sessions vary from 30 to 60 minutes and discomfort is moderate. A frequent error is asking for multiple barbs in tiny clusters which ages into a blot. For photos the V-neck top showcases the shaft line while keeping the piece tasteful.
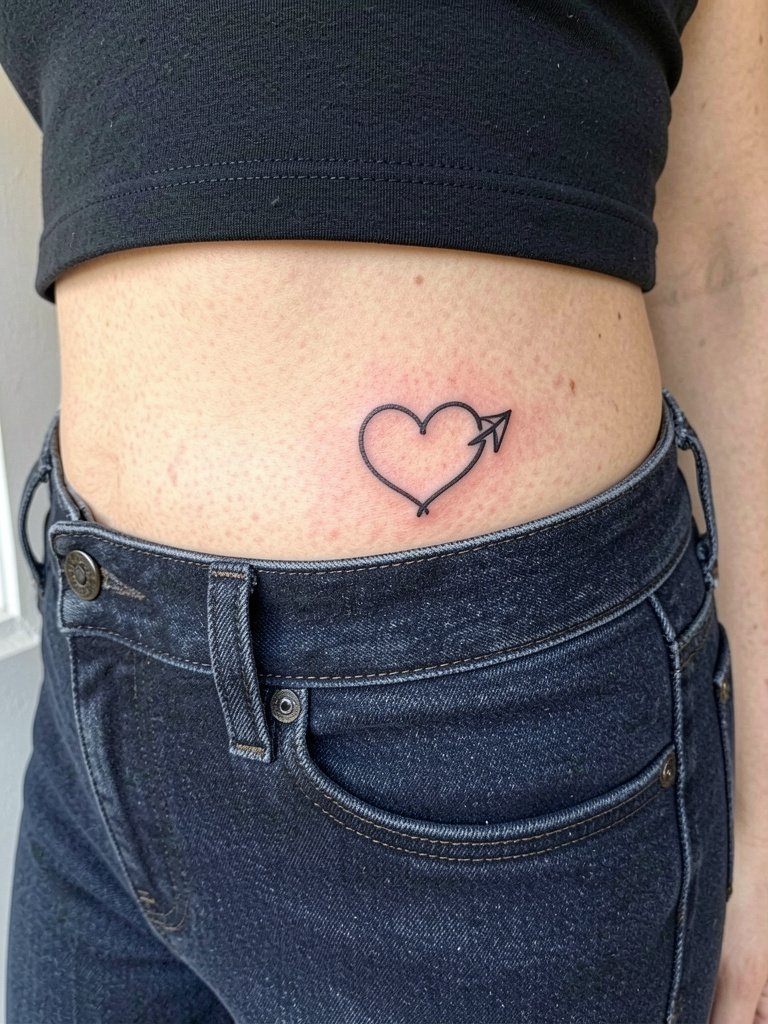
22. Hip Heart Arrow
Hip arrows live near clothing edges so choose placement above the waistband where fabric will not rub daily. A small heart cutout at the head adds a personal touch while keeping the rest minimal. Session time is often 30 to 60 minutes and discomfort is manageable for most. The typical mistake is placing the design too low so jeans rub the fresh work. For comfort and showing the piece try low-rise jeans and a cropped tee.
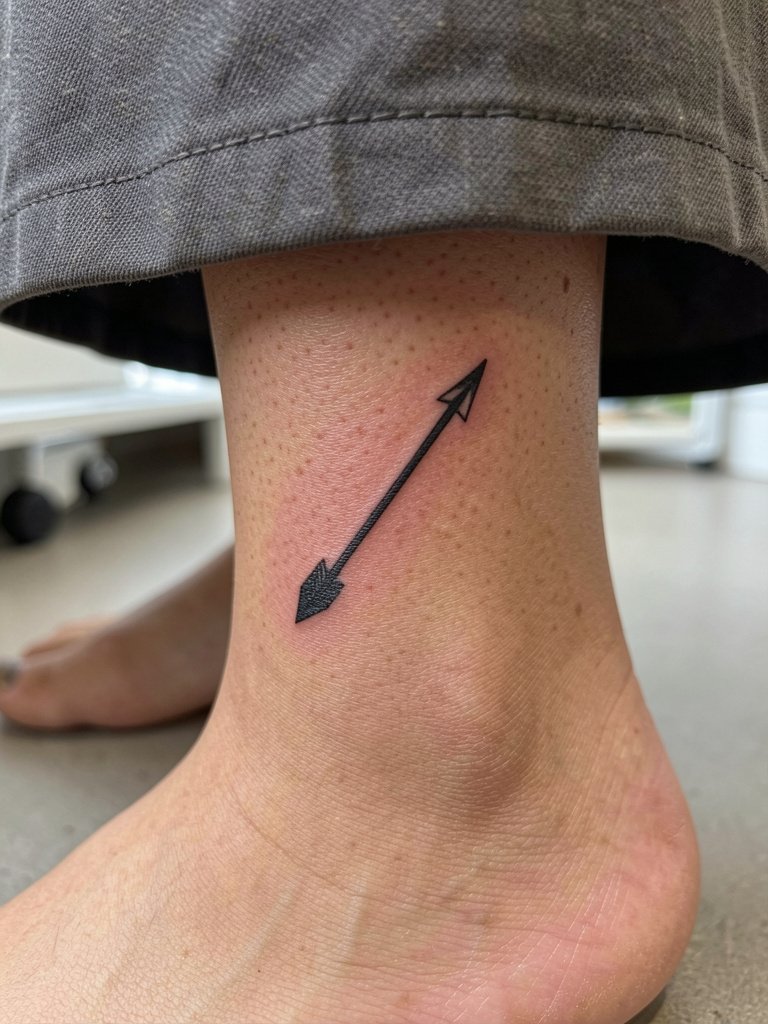
23. Instep Arrow
Foot and instep arrows are discreet but face friction from shoes and socks. Place the shaft where shoe rubbing is minimal and expect touch-ups if you walk a lot. Sessions are quick and discomfort is moderate to high near bony areas. The common mistake is not planning for footwear, which can scuff the fresh ink. For healing wear sandals when possible and keep the foot elevated in the first 48 hours.
Frequently Asked Questions
Q: How small can a minimalist arrow be and still age well?
A: In my experience a three-quarter inch arrow is about the smallest that maintains a clear head and shaft without frequent touch-ups, especially on high-motion spots. If you want something tinier, plan for a heavier line weight and a touch-up at six to twelve months so the shape stays defined.
Q: Where can I find healed examples and discovery pathways without naming individual artists?
A: Search platform tags like #MinimalistArrowTattoo, #FineLineArrows, and #TinyTattooHealed on Instagram and TikTok, use location filters to see nearby healed work, and browse community threads on Reddit for photos in different skin tones. Those pathways surface full portfolios and healed shots without directing you to single accounts.
Q: I'm worried about blowout on the inner forearm. What should I specify in the consultation?
A: Tell the artist you want slightly increased line weight for the shaft and insist on a stencil placed with your arm in the same relaxed position you will photograph in. Ask them to show healed photos of similar spacing on the inner forearm, and plan a one-year touch-up window as a precaution.
Q: Which garments are best to show off a collarbone or shoulder arrow?
A: Wide V-neck tops and wide-back tanks frame collarbone and shoulder pieces best because they expose the area without rubbing the edges. For shopping, try a wide V-neck top in a neutral color to let linework read clearly in photos.
Q: How often do minimalist arrows need touch-ups?
A: It depends on placement. Fingers and hands often need touch-ups every 6 to 18 months. Flat areas like the shoulder blade or calf usually hold for several years before a touch-up is required. Plan for a one-year check to assess any loss of contrast and schedule a touch-up if needed.
