
Fine geometric framing can make a wolf feel more modern than a portrait, and the pieces that age best are the ones that plan for skin movement up front. Thin single-needle ideas look fragile on textured skin. Bolder geometry that preserves negative space, smart spacing between facets, and a planned touch-up window keep the silhouette readable for years. The first idea below starts with a clean inner-forearm build that proves the point.
1. Minimal Geometric Wolf on Inner Forearm
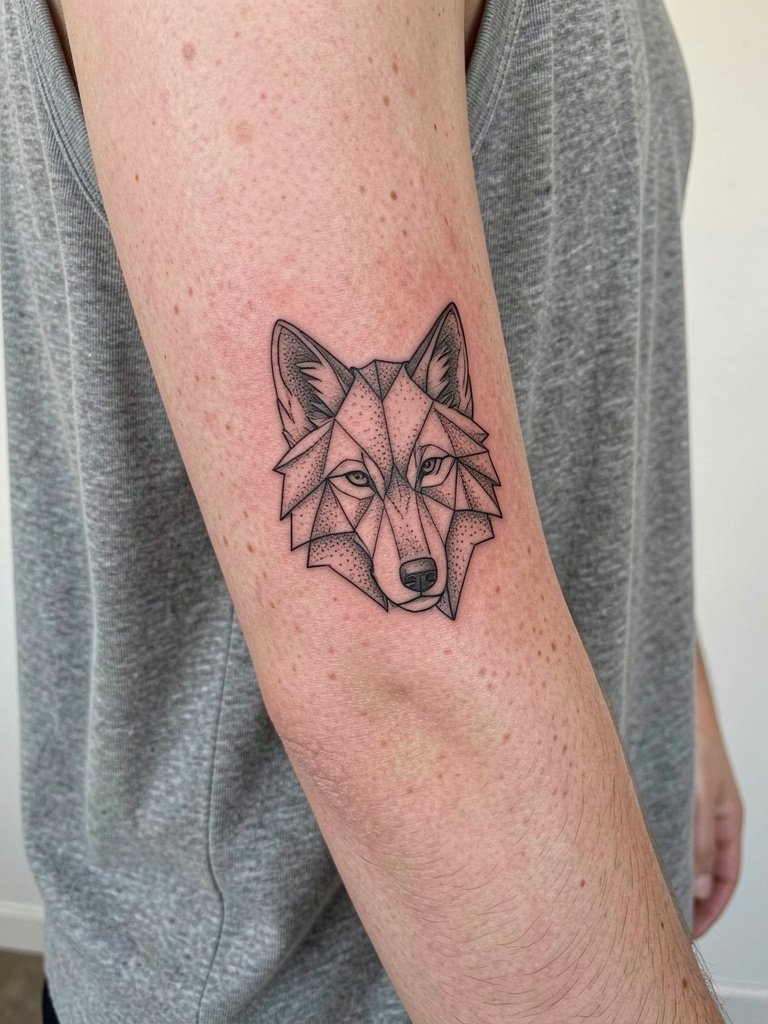
A slim inner-forearm geometric wolf reads like a bracelet from a distance and like a small crest up close. I recommend slightly heavier linework than the Pinterest single-needle references so the facets keep contrast as the skin stretches. Bring two scale references so the artist can show the design at three inches and five inches. The biggest mistake is going too small, which invites blowout along the fine joins. Expect a one-to-two hour session and a touch-up around year one for saturation loss. For the session wear a loose tank top so the artist has clear access to the palm-up surface.
2. Low-Poly Wolf on Collarbone
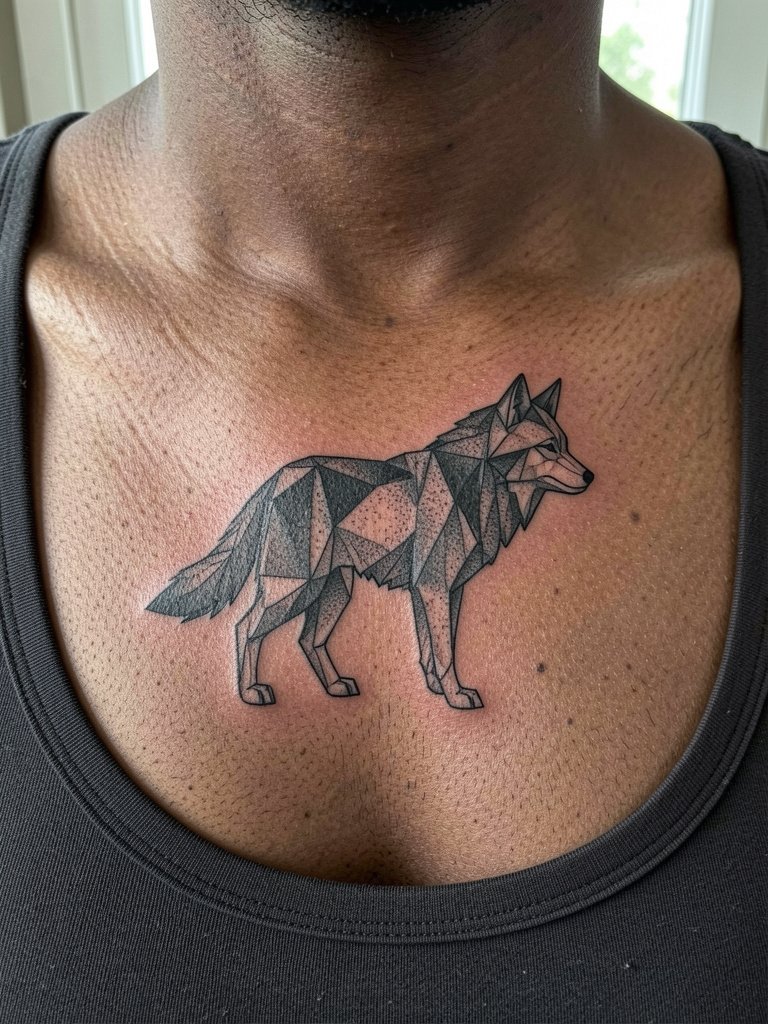
A collarbone wolf in low-poly geometry sits in a high-visibility spot that benefits from bold facets. I advise requesting a slightly wider negative space between facets so the crest does not merge at the edges as the collarbone skin moves. The session feels like a five out of ten for pain because the bone is nearby, but it's usually under two hours for a compact design. The common aging problem is over-detailed tiny facets that blur into one shape. Wear a wide-neck top to the appointment so the artist can access the area without fabric shifting.
3. Symmetrical Geometric Wolf Chest Panel
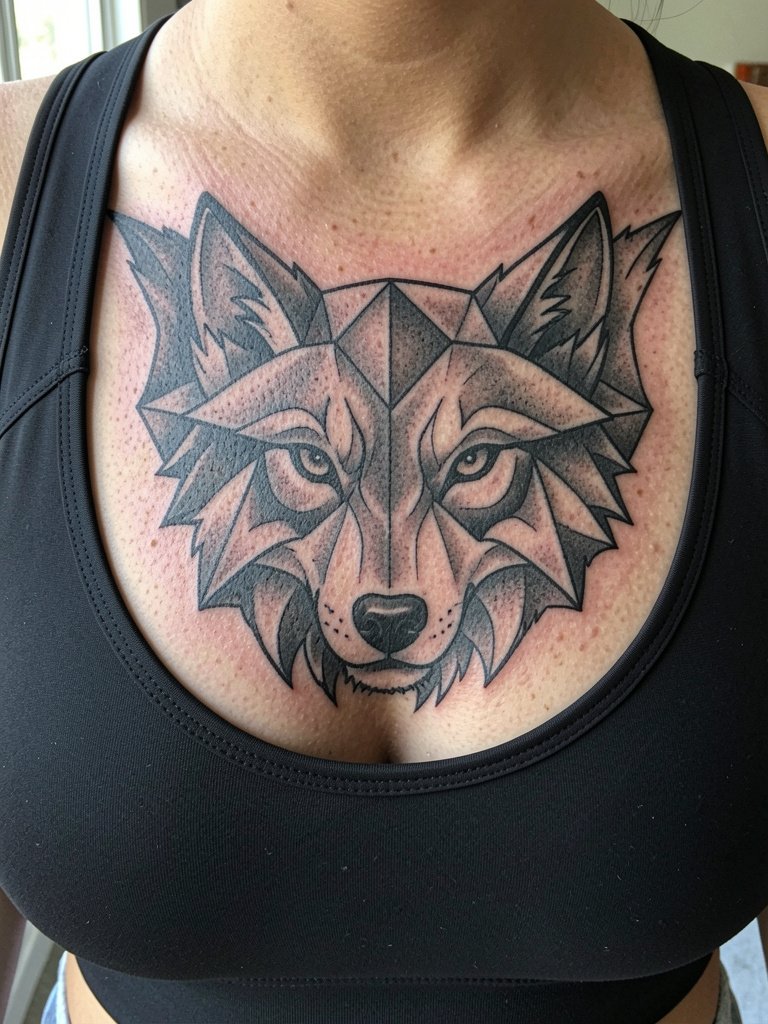
A chest panel gives room for symmetry and makes geometry feel architectural. Tell the artist to keep the central lines slightly heavier for structure and to balance the outer stipple shading so the piece reads at a distance. Fair warning, sternum sessions can climb higher on pain scales because of thin skin over bone. The typical mistake is compressing too many tiny facets near the center. Expect a two-to-three hour initial pass and a touch-up at twelve to eighteen months for saturation. For the appointment, a fitted sports bra in normal position provides access while keeping you comfortable.
4. Angular Wolf Sleeve Start on Outer Upper Arm
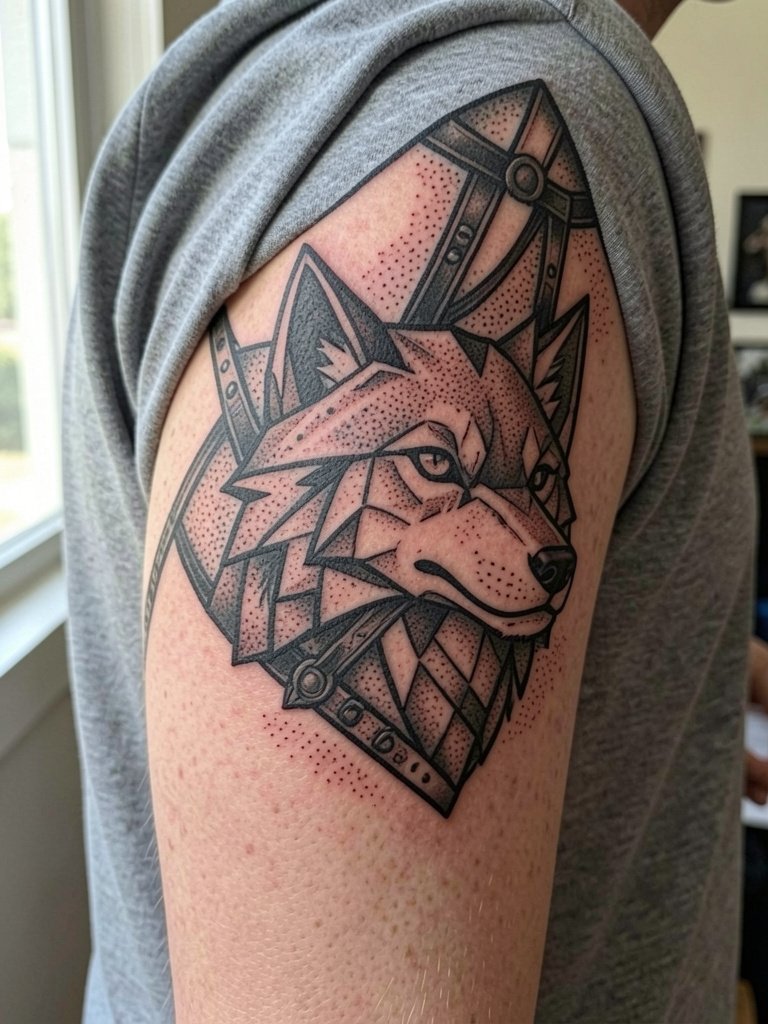
Start a sleeve with an angular geometric wolf as an anchor that links into other motifs. I suggest you ask for negative-space gutters between facets so later additions have breathing room. Session time for this area is usually two to four hours depending on how much stipple you want. A common error is matching the inner-forearm line weight to the outer arm, which reads inconsistent. If you want to show it off, pair the piece with rolled sleeve shirts like a casual chambray shirt that frames the shoulder without covering the design.
5. Ribs Geometric Wolf with Negative Space
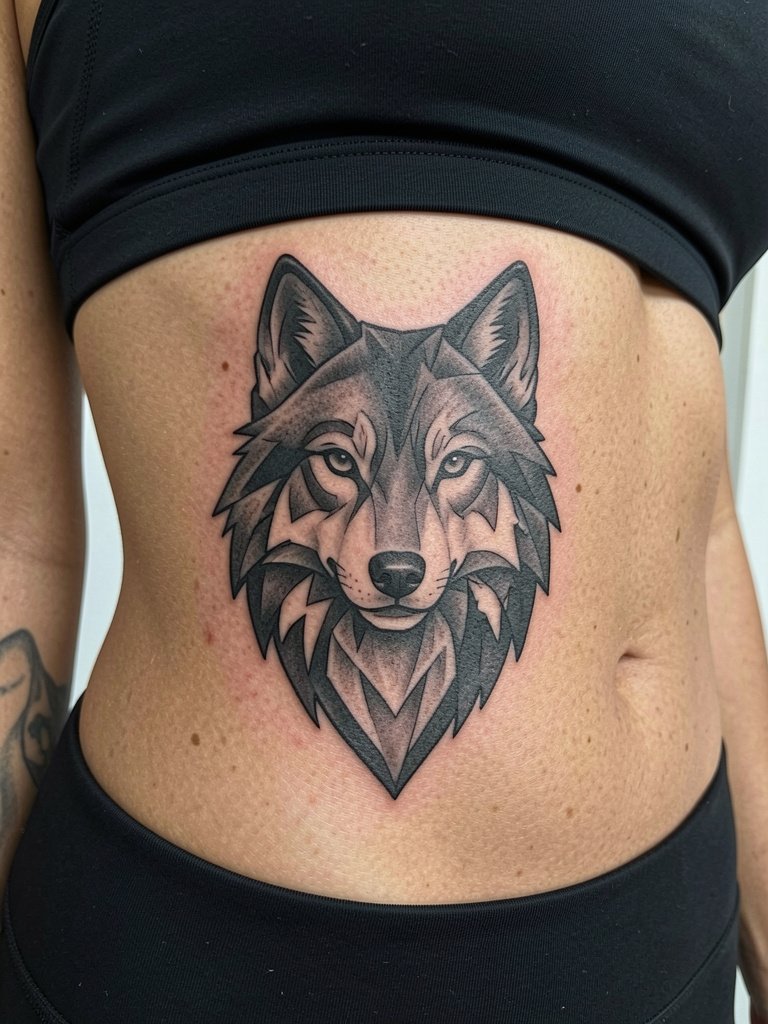
Rib geometry provokes a real split in opinion. One group of artists says fine-line geometry on ribs blurs and loses definition within two years because the skin stretches with breathing and weight changes. Another group argues that slightly bolder line weight plus generous spacing prevents early blurring, and they will show you three-year healed photos to support that. If you lean toward ribs, request spacing diagrams and plan a touch-up in the first eighteen months. Sessions are longer and more painful for most people. For the appointment, wear a fitted cropped top that stays in place and gives clear access.
6. Geometric Wolf Thigh Portrait
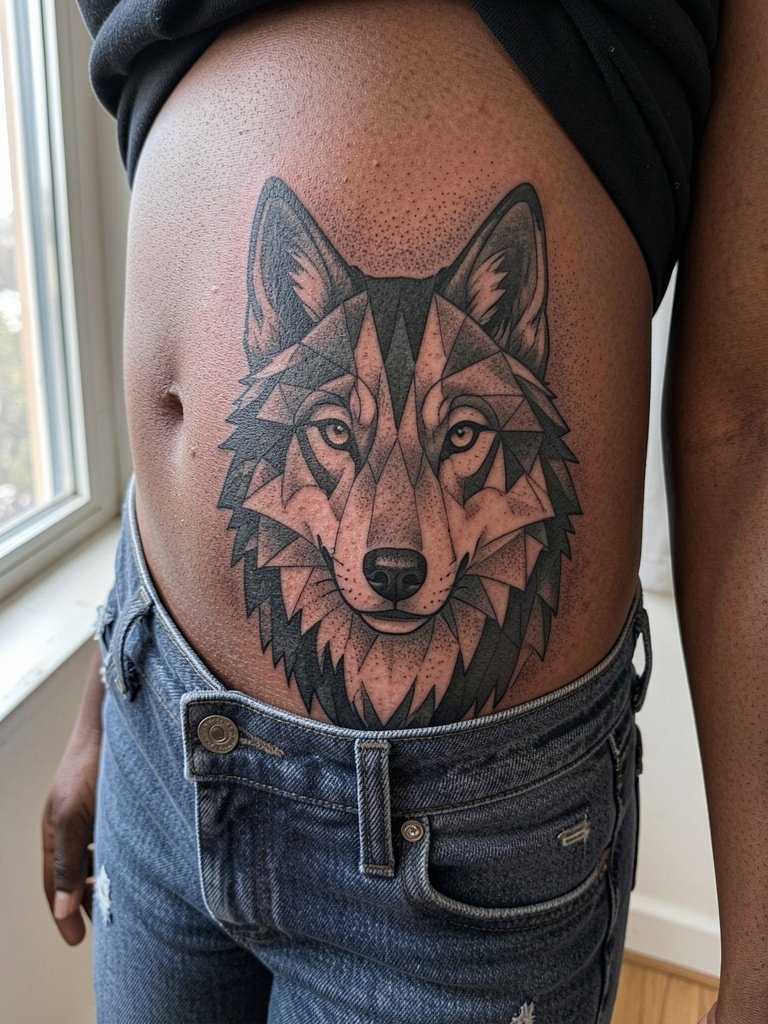
The outer thigh is forgiving for detailed geometry and makes a dramatic canvas for a larger wolf portrait. I recommend stipple backgrounds to soften the edges and preserve a strong silhouette against movement. Bring scale images and ask for a mockup placed on your thigh to check how facets align with muscle curves. Thigh work is lower on pain scales and often completed in two to four hour sessions. A common aging issue is overly tiny inner detail that disappears with time. Wear fitted shorts in normal position to the session so the artist can check placement without fabric shifting.
Session Day Picks
The inner forearm, ribs, and thigh pieces above have different access needs, so a compact kit makes the appointment smoother.
-
Stencil transfer paper kit. Lets you preview how the geometric grid aligns on skin, which matters for the collarbone and inner-forearm placements.
-
Fast-absorb numbing cream. A targeted topical applied about forty-five minutes before the session can reduce discomfort during sternum and rib passes.
-
Thin protective film roll. Useful for temporary protection on the thigh and collarbone during the first day of movement.
-
Silicone scar prevention sheets. Helps flatten raised healing areas on larger blackwork panels as they settle.
-
Aquaphor healing ointment. A reliable mainstream balm for the first few days after a bold blackwork session to lock in moisture without suffocating the tattoo.
7. Micro-Geom Wolf on Wrist Band
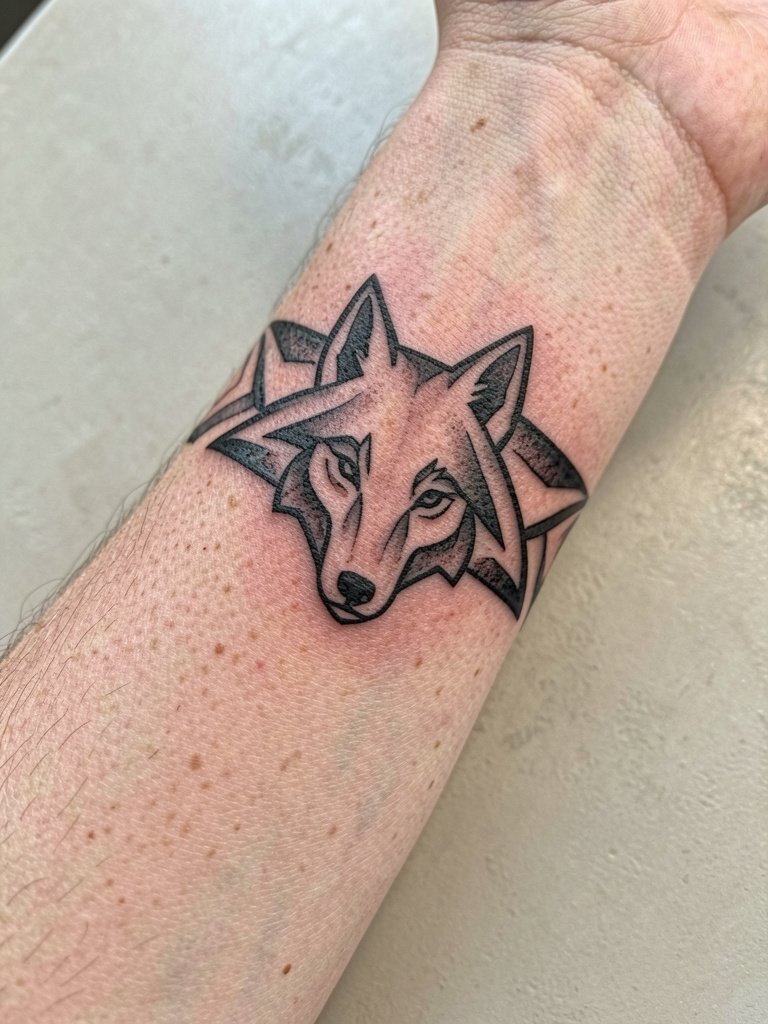
A wrist band wolf reads as jewelry and demands careful spacing so the facets do not bleed into one another with frequent hand movement. Specify a slightly heavier outer contour and ask for two mockups wrapped around the wrist to ensure the joins align. The wrist sees a lot of washing and friction so blowout risk is real for ultra-fine details. Sessions are short, often under an hour, with a likely touch-up in six to twelve months. Show-off pairing works well with cuff bracelets or a minimal leather cuff that frames the design.
8. Geometric Wolf Behind the Ear
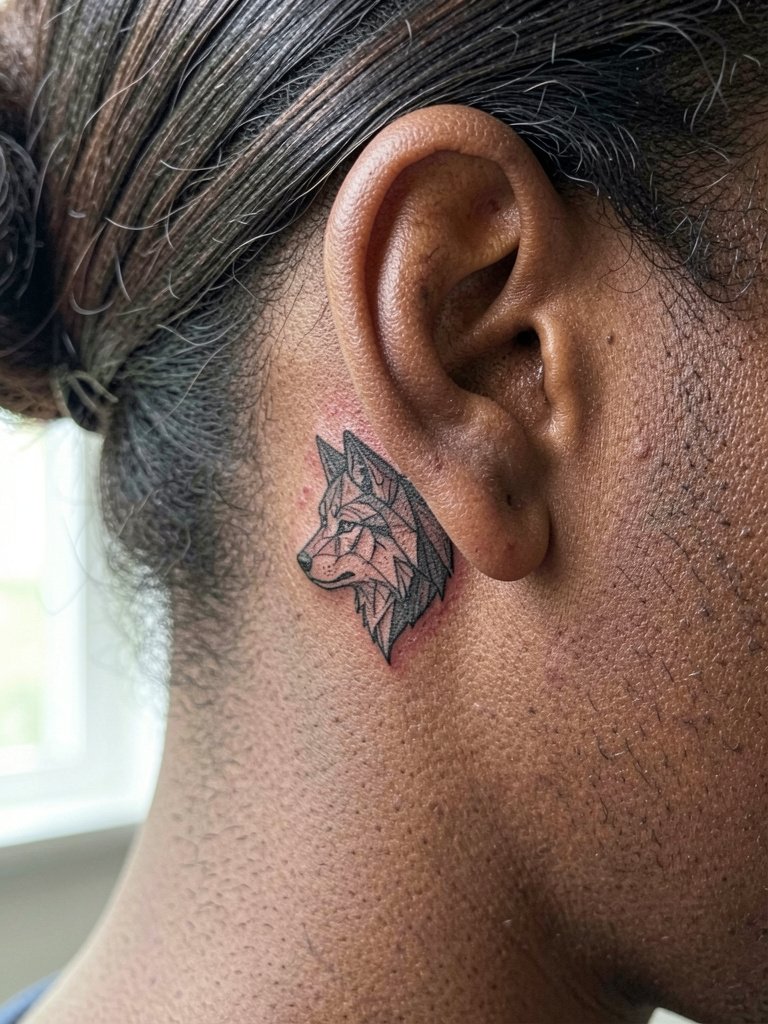
Behind-the-ear geometry is intimate and needs needle depth calibrated to the thin mastoid skin. Request that the artist preview line weight on the area because overly fine single-needle lines can vanish or create a soft blur. Sessions are quick but can sting because of the thin skin. For visibility, this placement pairs nicely with an updo or short haircut, and I like a simple gold stud earring for contrast when you want the tattoo visible. Note that this area may need a selective touch-up sooner than thicker-skin placements.
9. Geometric Wolf on Calf with Negative Space Bands
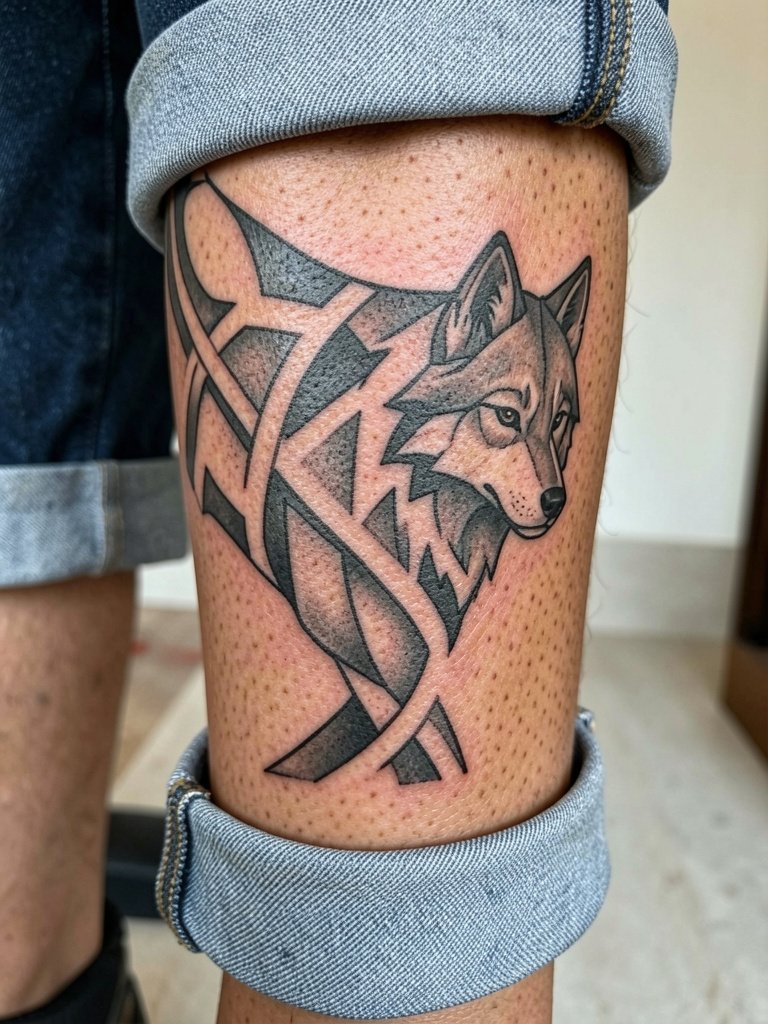
Calf geometry benefits from muscle curvature that gives the facets natural depth as you move. I recommend asking for wrap-around mockups so the negative-space bands do not distort when you flex. A common mistake is forcing perfectly straight bands across a rounded surface. Sessions are comfortable for most and usually fall in the one-to-two hour range. For showing off, pair with rolled jeans and a casual sneaker so the design has room to breathe visually.
10. Abstract Linework Wolf on Nape
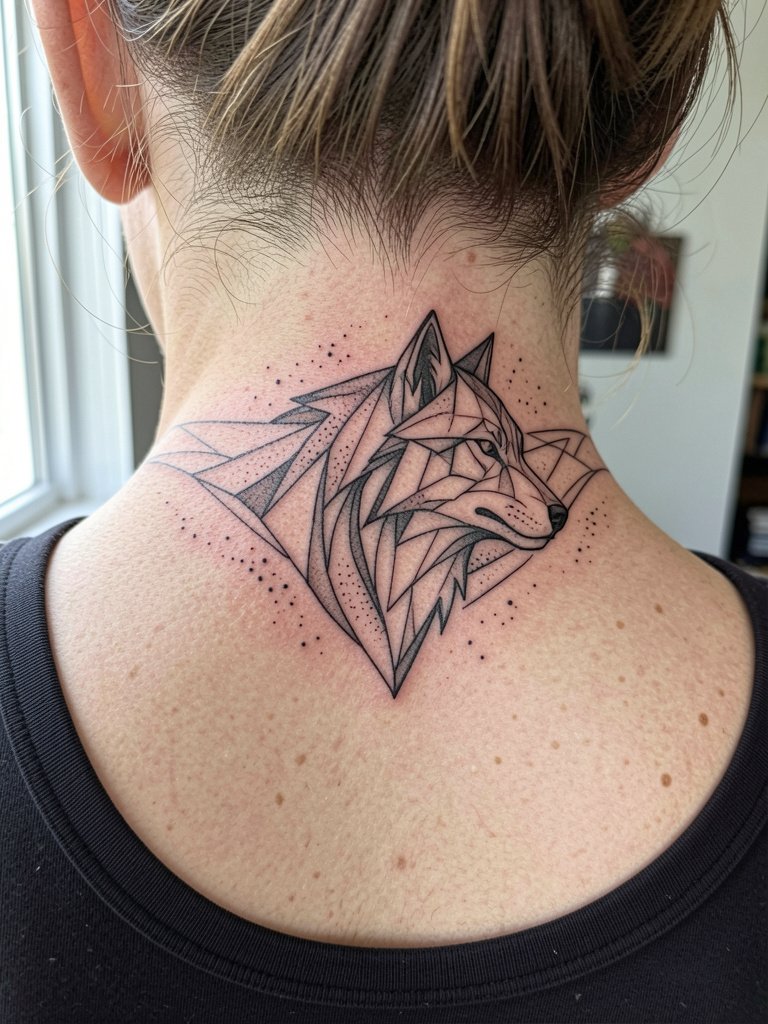
A nape piece reads as an accent and benefits from varied line weight to catch light. Specify that the artist keep inner lines slightly bolder than single-needle examples so the design retains structure as the hairline shifts. Healing here is straightforward but you should plan for a touch-up around year two if you wear scarves or collars often. If you want it visible, short hair or a half-up style works well. For session comfort, a wide-neck tee gives access without fuss.
11. Geometric Wolf Finger Accent
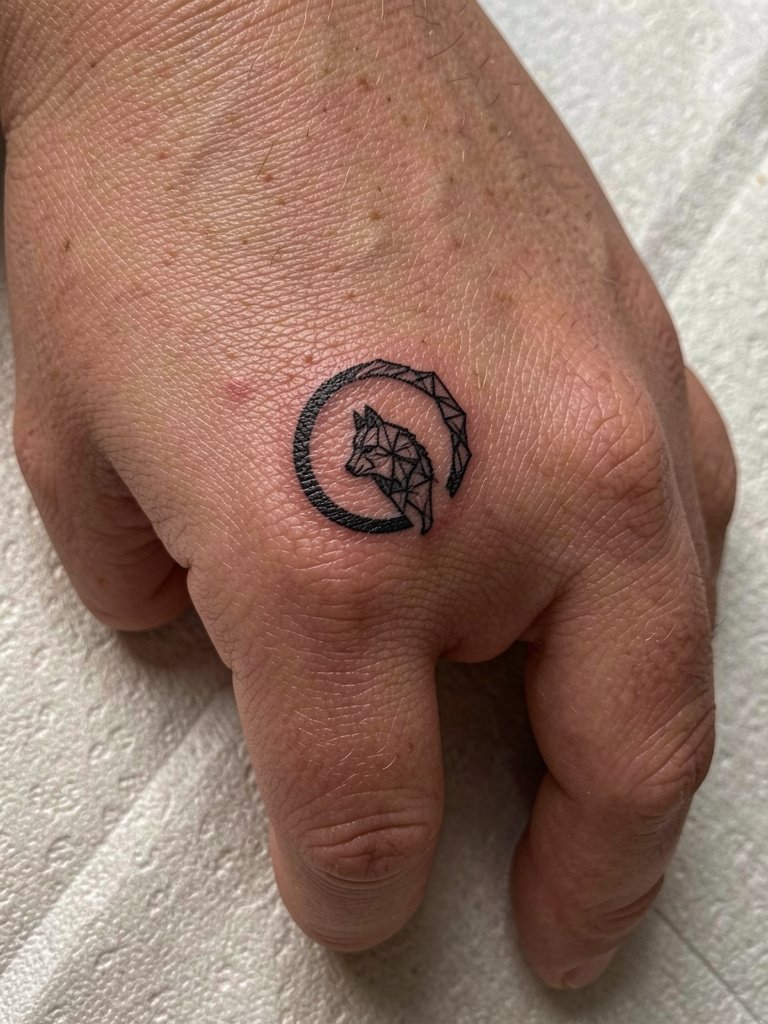
Finger geometry is striking but high maintenance. The skin on fingers regenerates quickly and ink can fade or migrate. Ask the artist for a micro-bolder outline and plan on touch-ups at the six to twelve month mark. A typical mistake is requesting complex inner facets on such small real estate. Sessions are short but recovery needs extra care because of frequent washing. Wear no rings during the healing window and consider pairing with a thin stacking ring set after the first month to frame the area.
12. Geometric Wolf Back Piece with Sacred Geometry
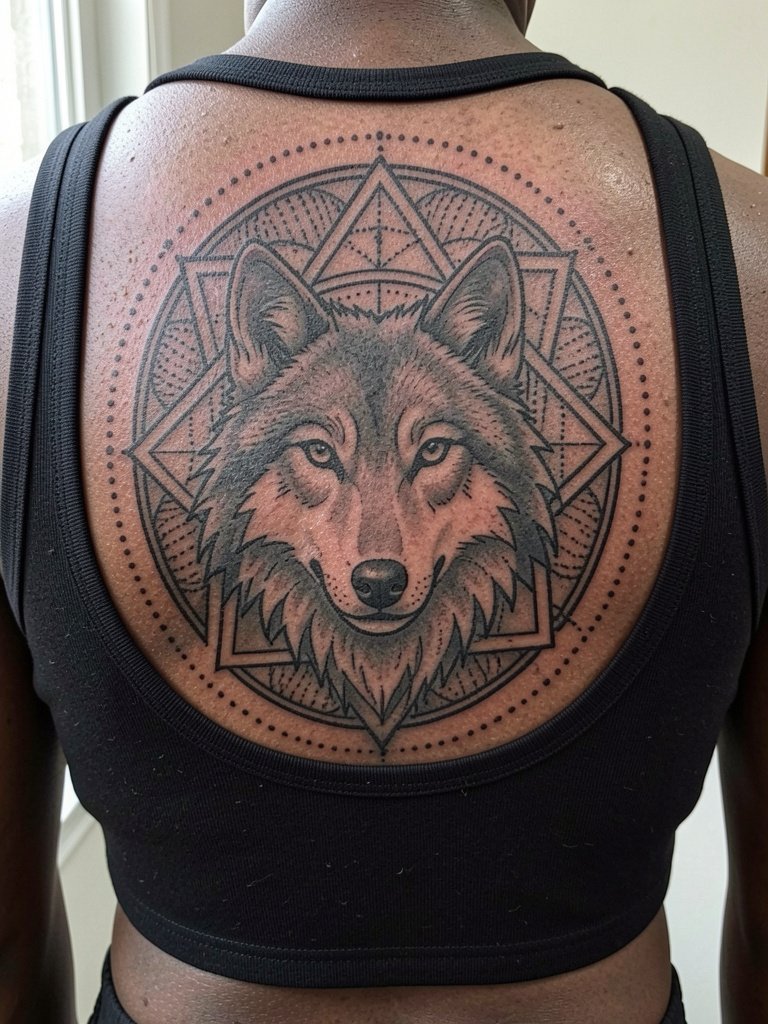
A full back panel gives the chance to combine geometric wolves with sacred geometry for a structured, symmetrical composition. Specify that the artist maintain clear gutters between concentric rings so the design keeps definition as it settles. A common error is overloading the center with tiny stipple that softens into an indistinct patch. Sessions for this scale are multiple appointments. If you want to reveal it, pair with open-back dresses or a strappy bralette that complements the symmetry.
13. Geometric Wolf Handpiece Across Knuckles
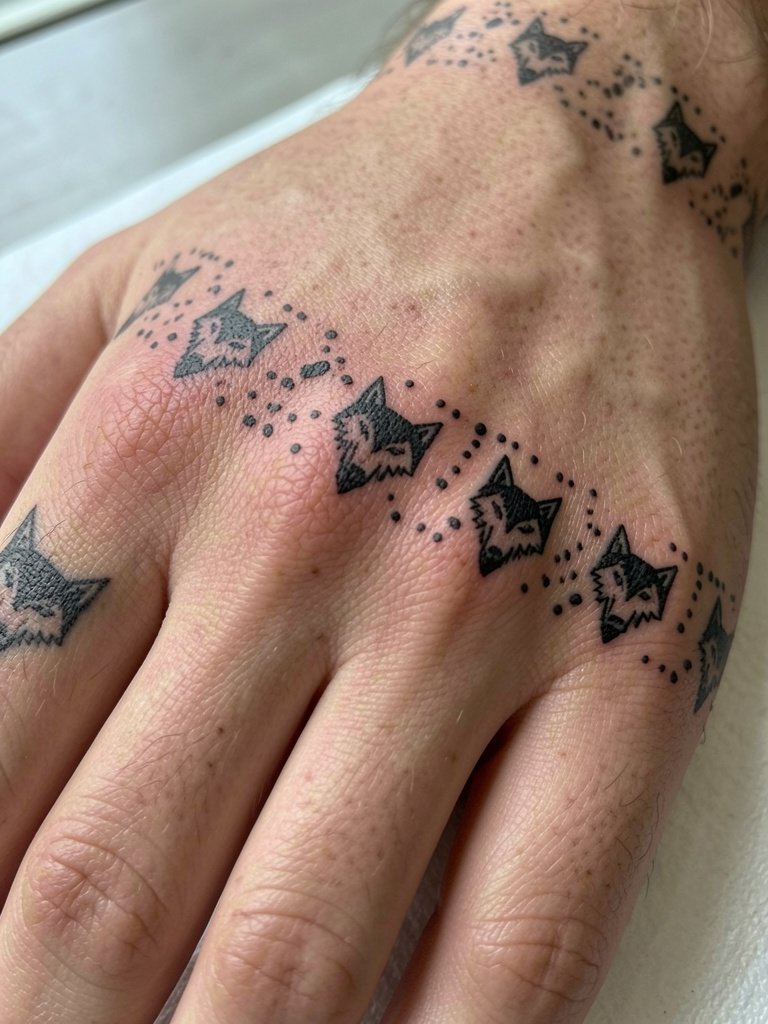
Knuckle geometry reads as punctuation and must account for frequent motion and skin flex. Request slightly thicker dots and avoid long thin facets that follow the knuckle creases. The mistake people make is treating knuckles like a flat canvas. Expect faster fading and plan touch-ups within the first year. Hand placements forgo a lot of black saturation to avoid raised scabbing. For style, pair with a minimal chain bracelet to balance the hand when you want to show the piece.
14. Single-Needle Geometric Wolf on Neck Side
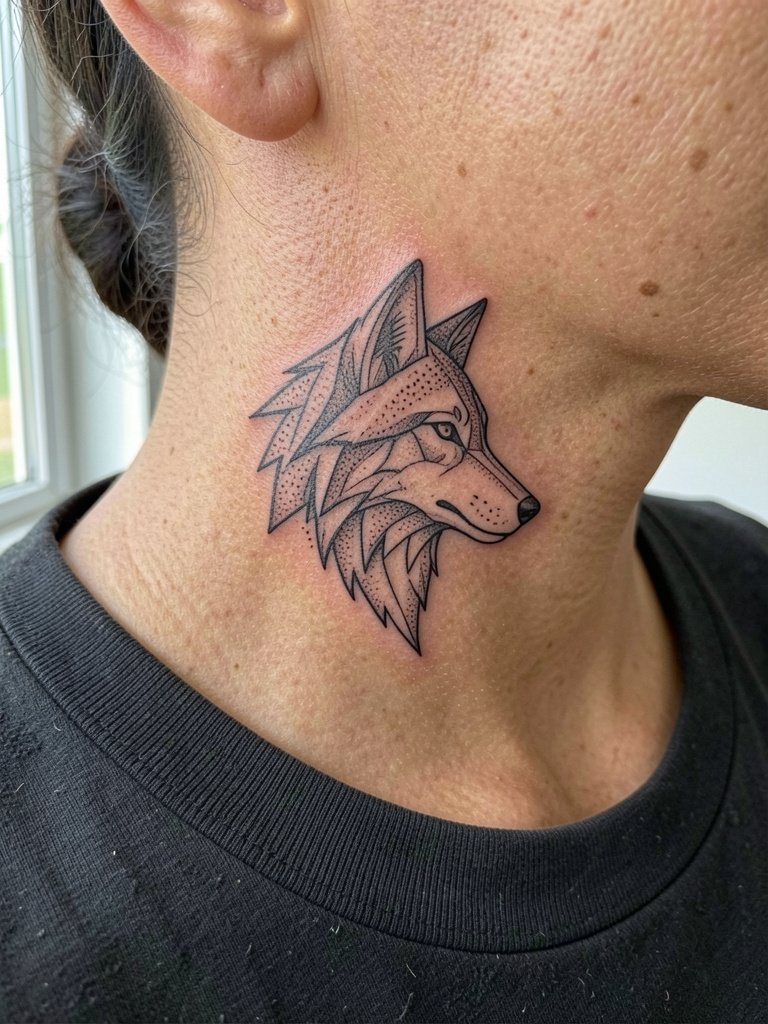
Fine-line geometry on the neck triggers a two-sided debate. One camp warns that single-needle work here can blur within a couple of years because the skin shifts and collars rub the area. The other camp maintains that with slightly heavier initial line weight and protective healing practices the piece can remain crisp. If you want a single-needle look, ask for a slightly bolder guideline and plan a touch-up at year one. Sessions sting more due to thin skin. For visibility, a wide-neck top shows the placement without tugging fabric.
15. Geometric Wolf Over Sternum with Dot Halo
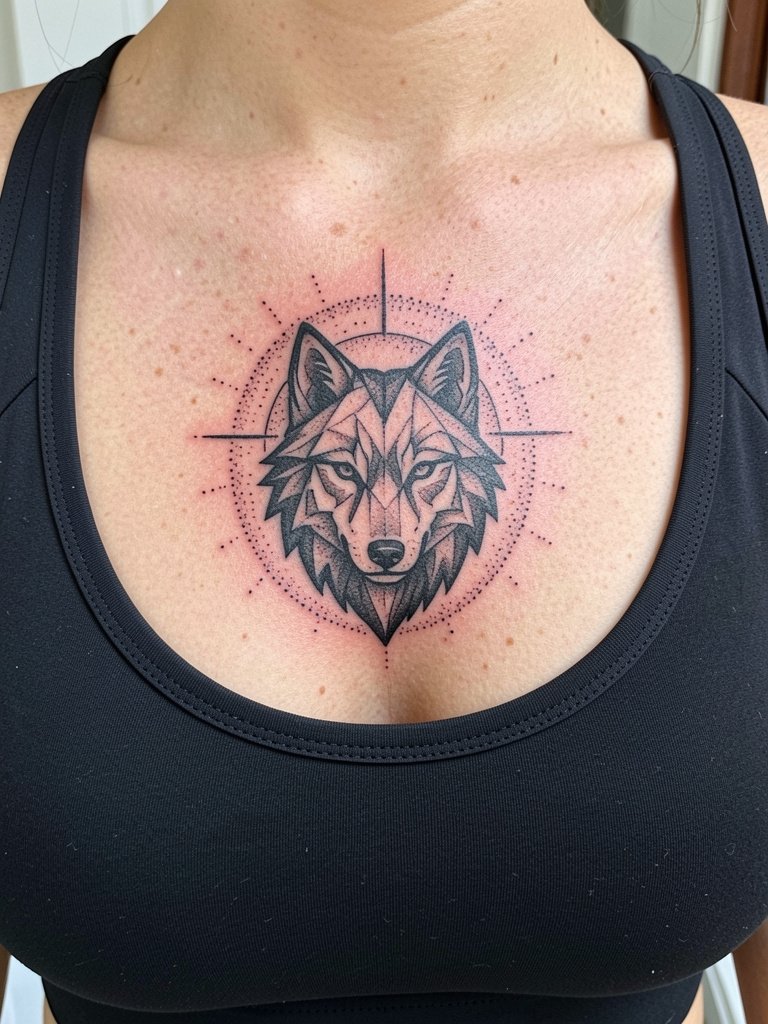
Sternum geometry benefits from a clear central axis and a dot halo that softens hard facets. Specify spacing in the halo so dots do not crowd the center and cause a muddy look over time. Sternum sessions are high on the pain scale for many due to thin skin between rib and breast tissue. The common mistake is packing too many micro dots into the halo. For the session wear a fitted sports bra that stays put while giving access, and plan for a touch-up in twelve to eighteen months if the dot work fades.
16. Low-Contrast Greywash Geometric Wolf on Side Rib
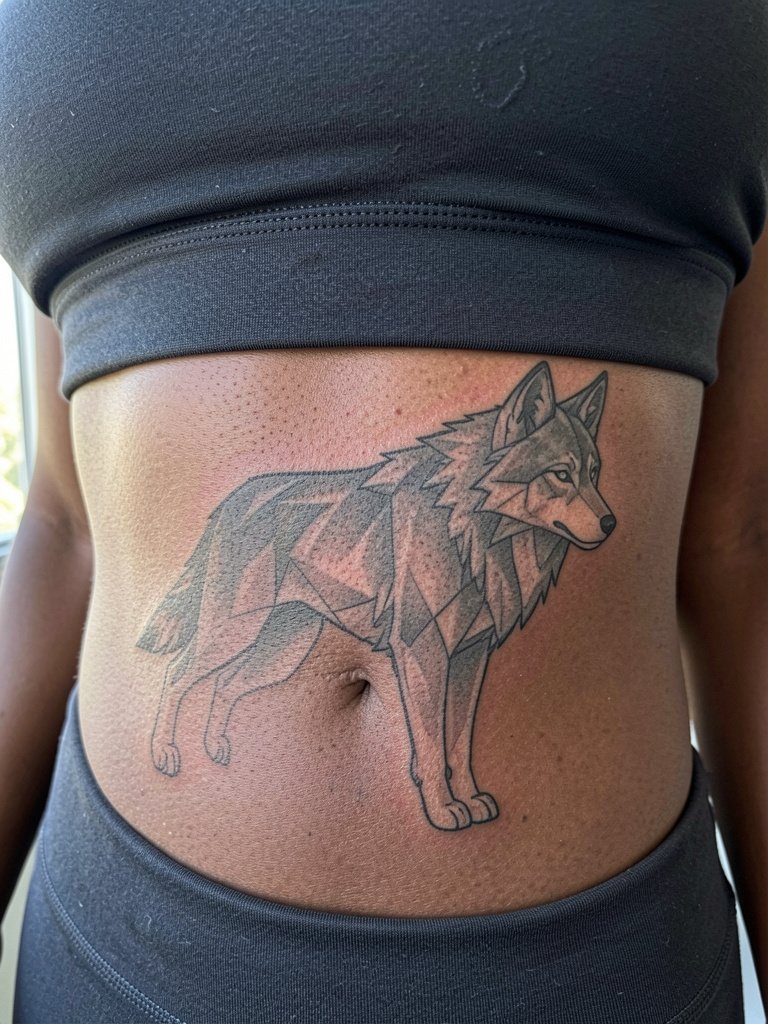
Greywash wings soften geometric wolves if you want less contrast. Ask the artist to map where grey fades into negative space so edges keep definition. The side rib alternates between tight and loose as you breathe, which affects how grey washes settle. A common oversight is using too many narrow grey gradients that flatten with time. Sessions here are longer and more uncomfortable. Bring comfortable breathing techniques and expect a touch-up in the first year for grey saturation.
17. Geometric Wolf Over Shoulder Blade
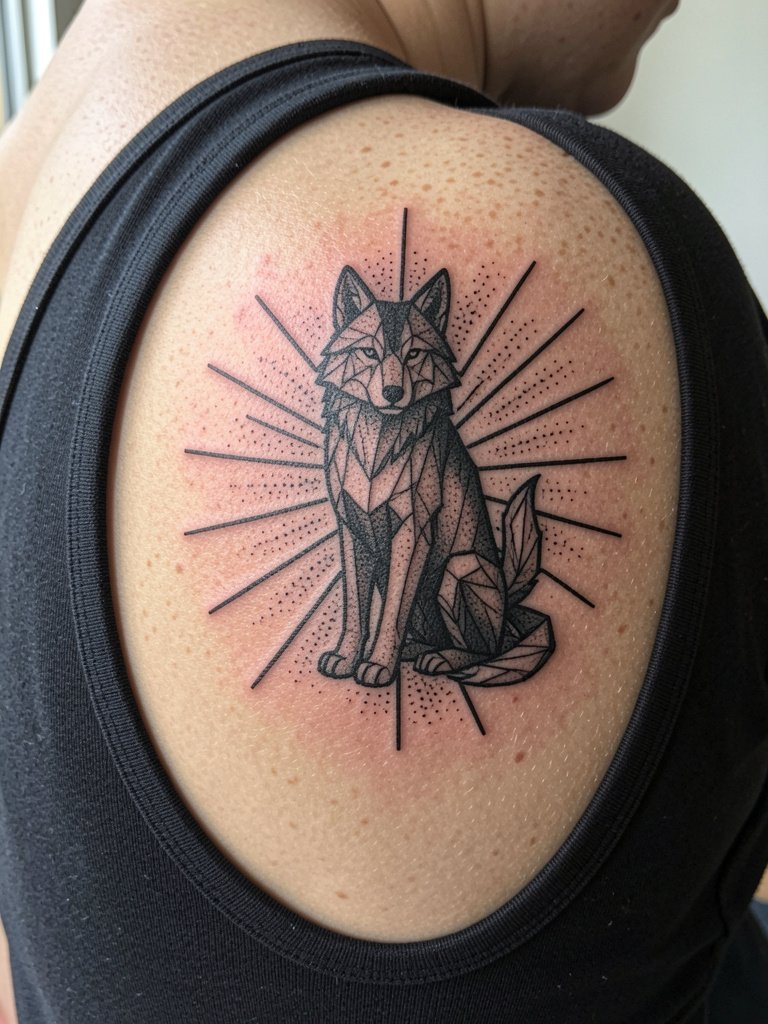
The shoulder blade is a forgiving spot where large geometry can spread without distortion. I recommend asking for a few degrees of asymmetry so the design reads as organic rather than overly mechanical. Sessions are comfortable and often split into two hours for detail and background. The mistake is crowding the blade with tiny filler that competes with the central wolf. To frame the piece, wear tank tops or off-shoulder styles like a cropped tank when you want to show it off.
18. Geometric Wolf Collarbone Slash
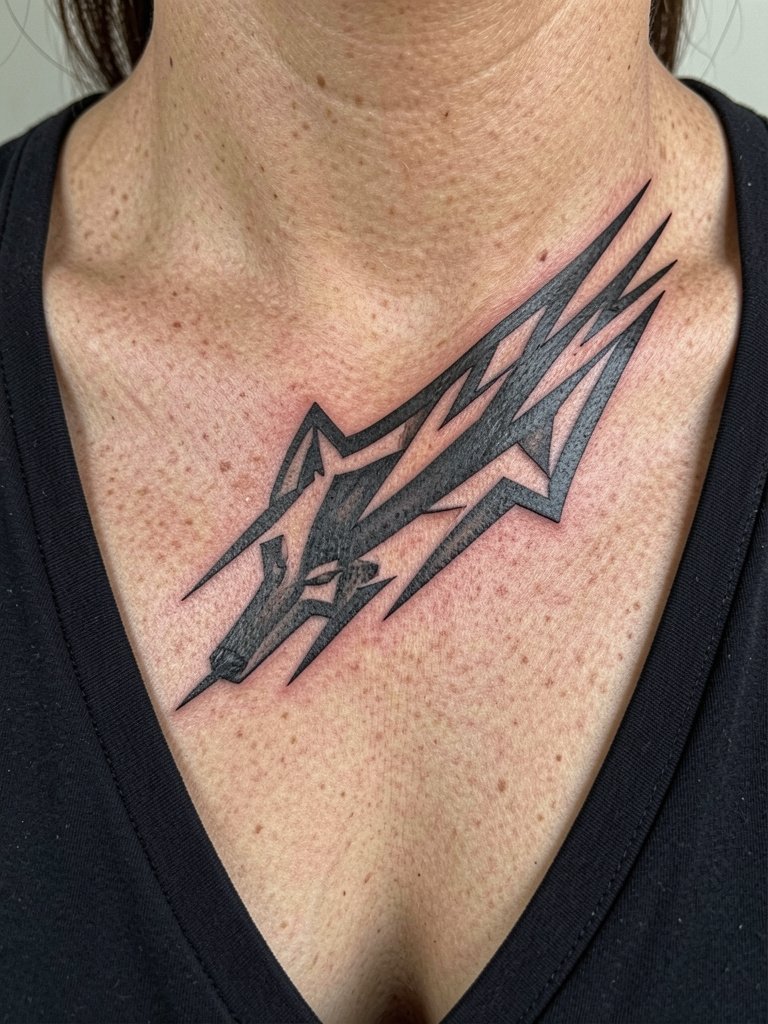
A diagonal collarbone slash reads dynamic and benefits from decisive outer contours that sit clear of the bone. Request the artist increase outer line weight slightly compared with interior facets to guard against early softening. Pain is moderate because the clavicle is near the surface. The common aging issue is letting tiny inner facets run too close to the bone where blowout risk is higher. For showing the design, pair with open-neck shirts or a wide V-neck blouse that frames the slash.
19. Geometric Wolf Mandala Fusion on Upper Arm
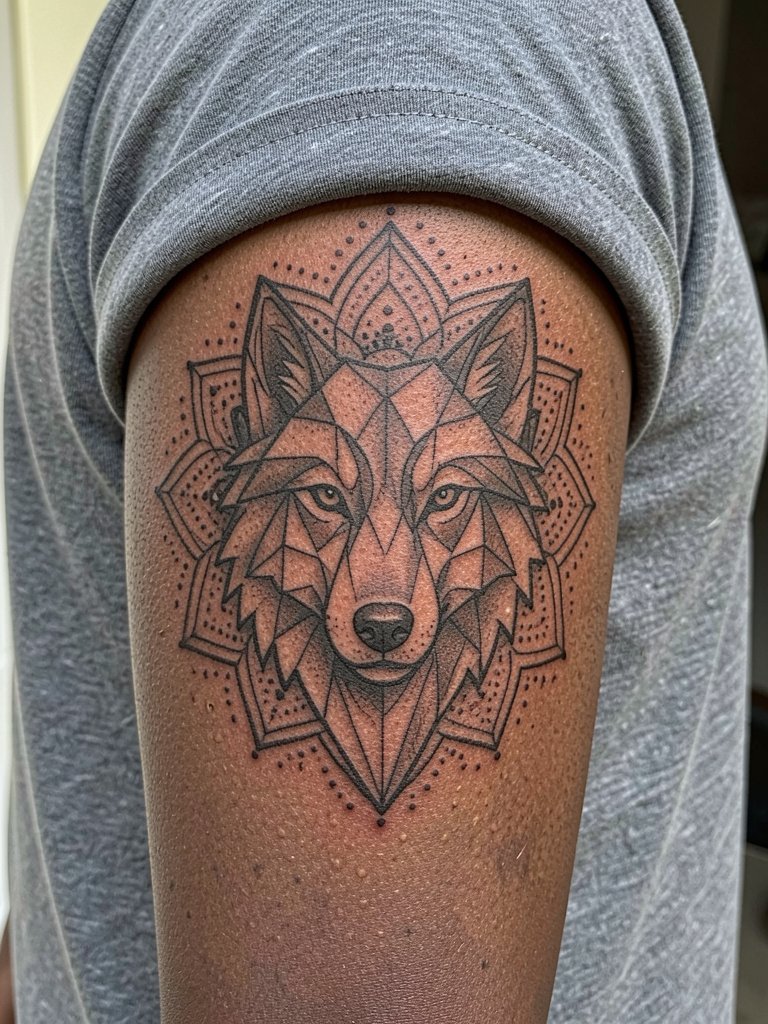
A mandala fusion provides structure around a geometric wolf and creates a focal point that ages gracefully because of its symmetry. Ask for balanced negative space between radial rings so the mandala does not merge into a dense spot after a few years. Sessions are typically medium length with mostly dot work that can feel time-consuming. Avoid asking for too many tiny radial lines near the center. For evening looks, a sleeveless dress that exposes the arm will showcase the mandala.
20. Low-Saturation Geometric Wolf on Inner Thigh
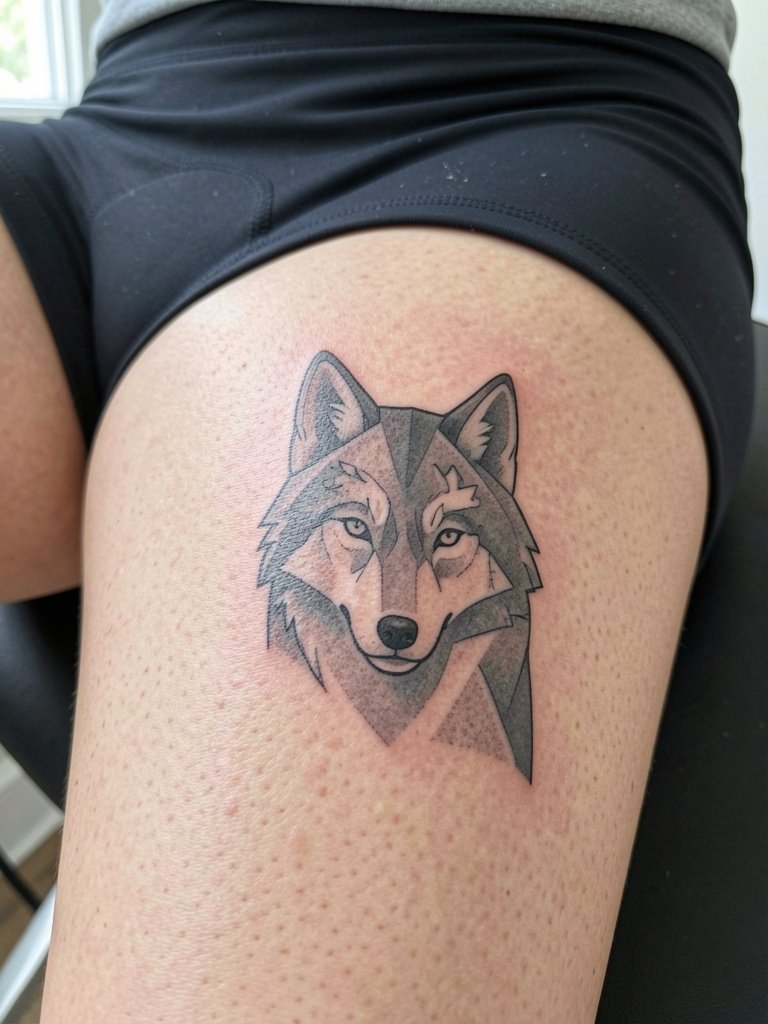
Inner-thigh geometry is intimate and forgiving, so you can keep subtler greywash without losing the image at distance. Discuss how the design behaves during sitting and standing positions and request a mockup in both poses. The area is lower on pain scales for many but sensitive for others. A common mistake is placing too many micro-lines close to the groin edge. For the session wear fitted bike shorts in normal position so the artist can expose the area without fabric moving.
21. Geometric Wolf Sleeve Connector at Elbow
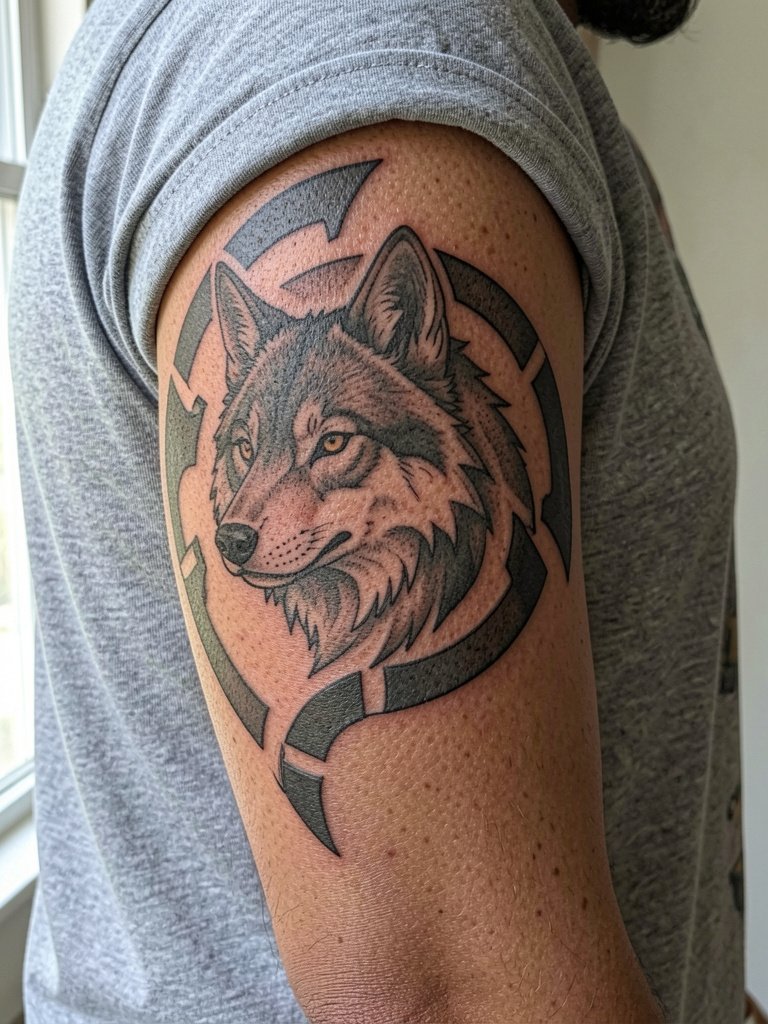
Elbow connectors need planning because the crease can distort straight edges. Ask the artist to test the design on a flexing mockup so lines hit correctly when the arm bends. The typical mistake is running long rigid bands across the crease. Sessions can be uncomfortable around the elbow bone. For showing the connector, rolled sleeves work, and a stretch cotton tee keeps the fabric off the area while you show the work.
22. Geometric Wolf with Mandible Line on Jawline
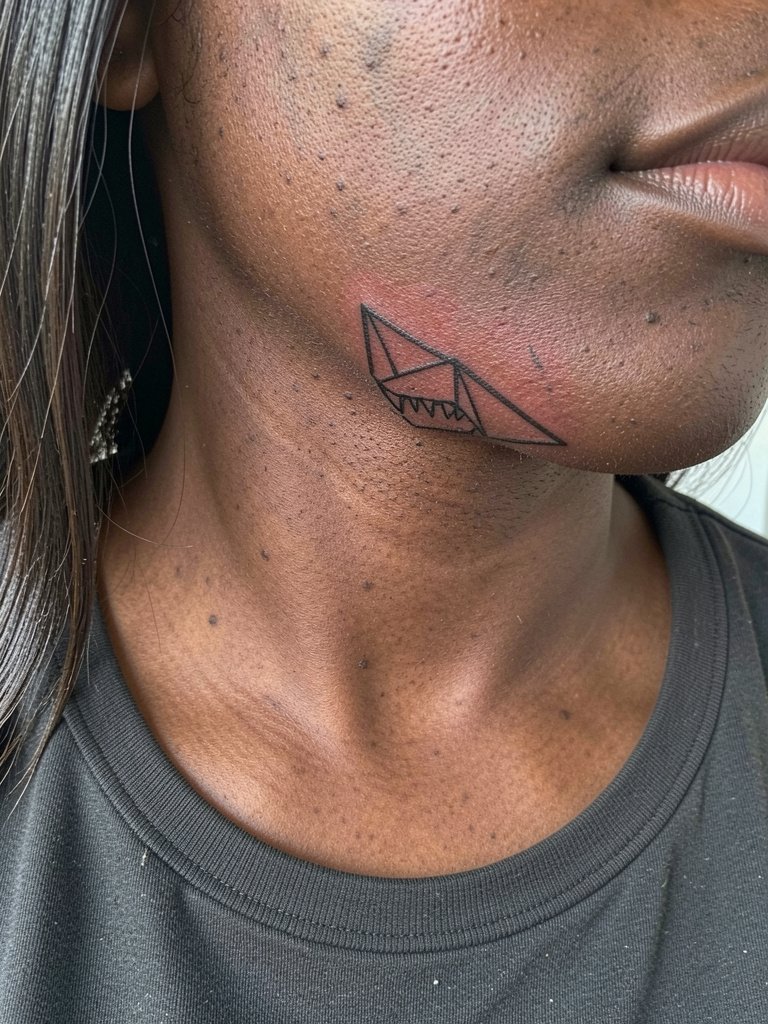
Jawline geometry is highly visible and requires precise placement to avoid asymmetry as facial tissue shifts. Request a symmetry check in neutral and smiling expressions so the lines fall where you want them at rest. This area can be sensitive and may need a conservative approach to line weight. A common error is overreaching with long lines that age unevenly. For appointments, wear hair off your face and a wide-neck top to give the artist clean access.
23. Geometric Wolf in Negative Space Chest Stripe
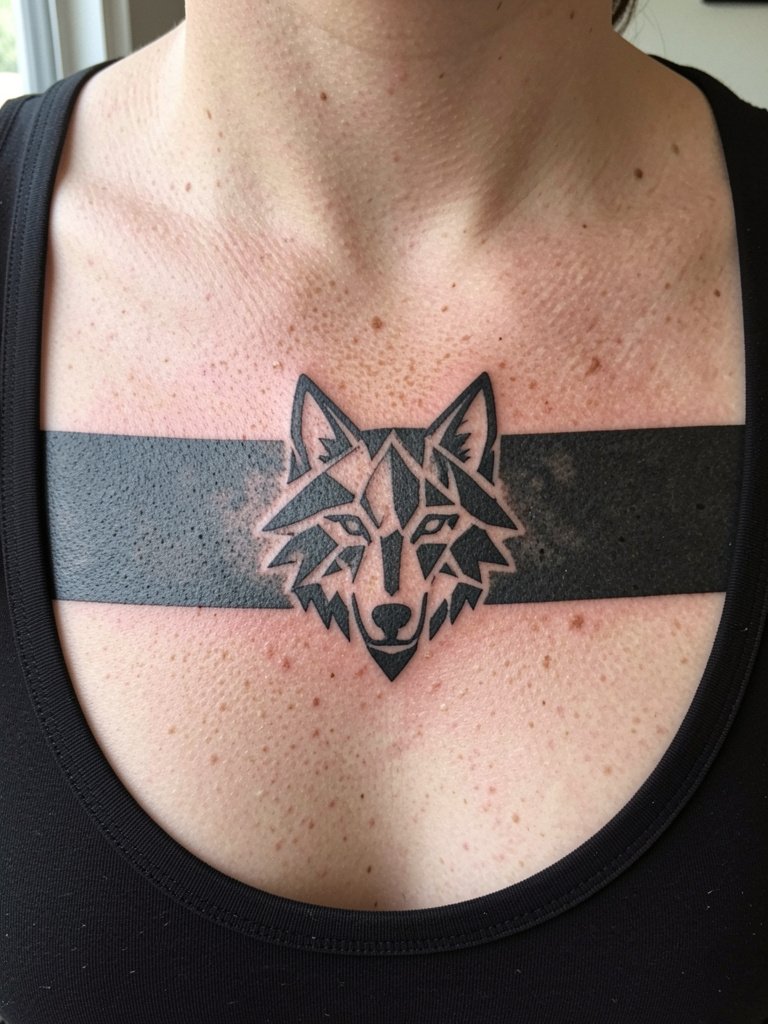
Negative-space wolves inside a chest stripe create dramatic contrast and age well because there is less tiny linework to blur. Ask the artist to preview how the negative shapes will look on your chest contours before inking. Common mistakes include lining the negative edges too close to bone, which reduces clarity. Sessions are generally medium in length. Pair with open-neck tops or a scoop-neck tank to reveal the stripe when you want.
24. Geometric Wolf Calf Half-Sleeve with Tribal Lines
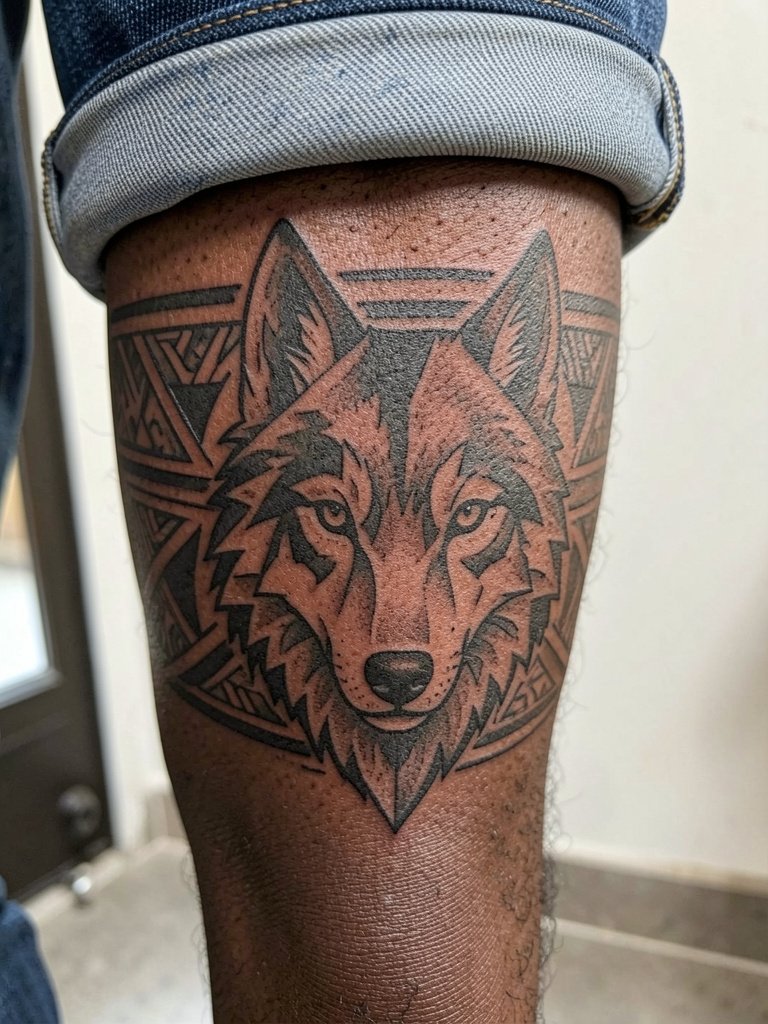
Calf half-sleeves let you mix geometric wolves with bold tribal lines for movement. Ask for a hierarchy plan so the wolf is the focal point and the bands support rather than compete. The common mistake is letting the bands overpower the central portrait. Sessions are comfortable and usually staged over a couple of appointments. For showing the work, rolled jeans and low socks pair well with a classic trainer to keep attention on the calf.
25. Small Geometric Wolf on Ankle
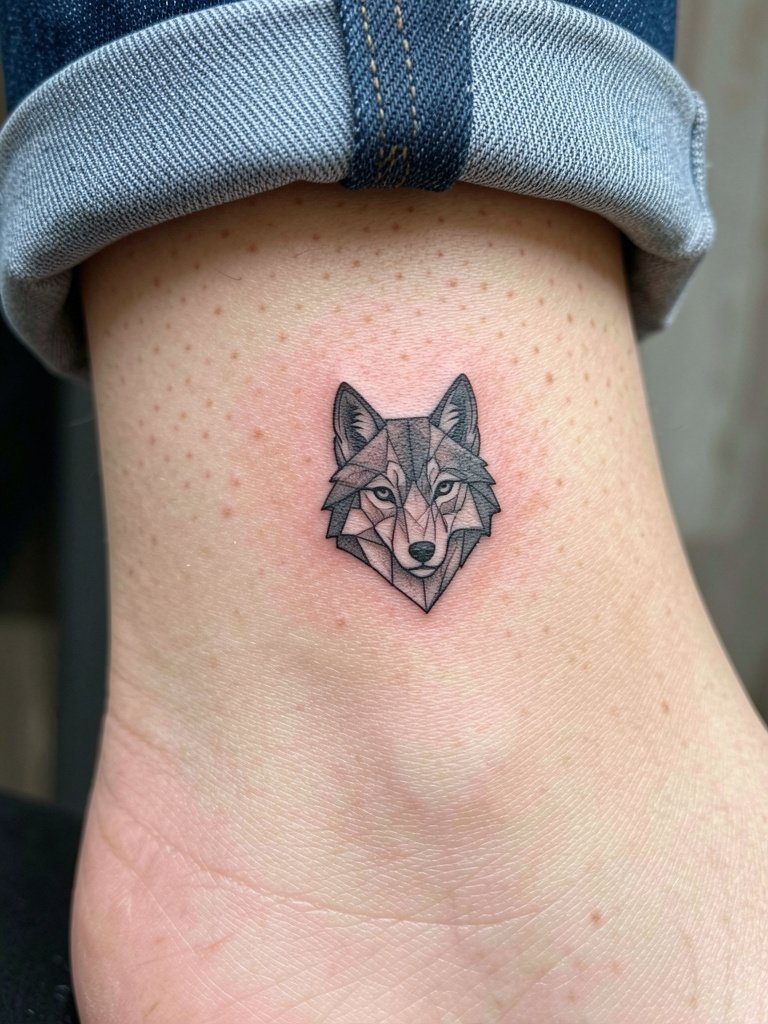
Ankle placements take friction from socks and shoes, so solid contour lines outperform fragile facets here. Specify a bolder outer contour and avoid asking for ultra-tiny inner detail that will degrade with rubbing. Sessions are short and healing is straightforward if you protect the area from tight footwear. Expect a touch-up within the first year for any loss of saturation. For showing the piece without stress, wear low-profile sneakers or sandals like a minimal slide sandal.
26. Geometric Wolf Over Heart Pocket
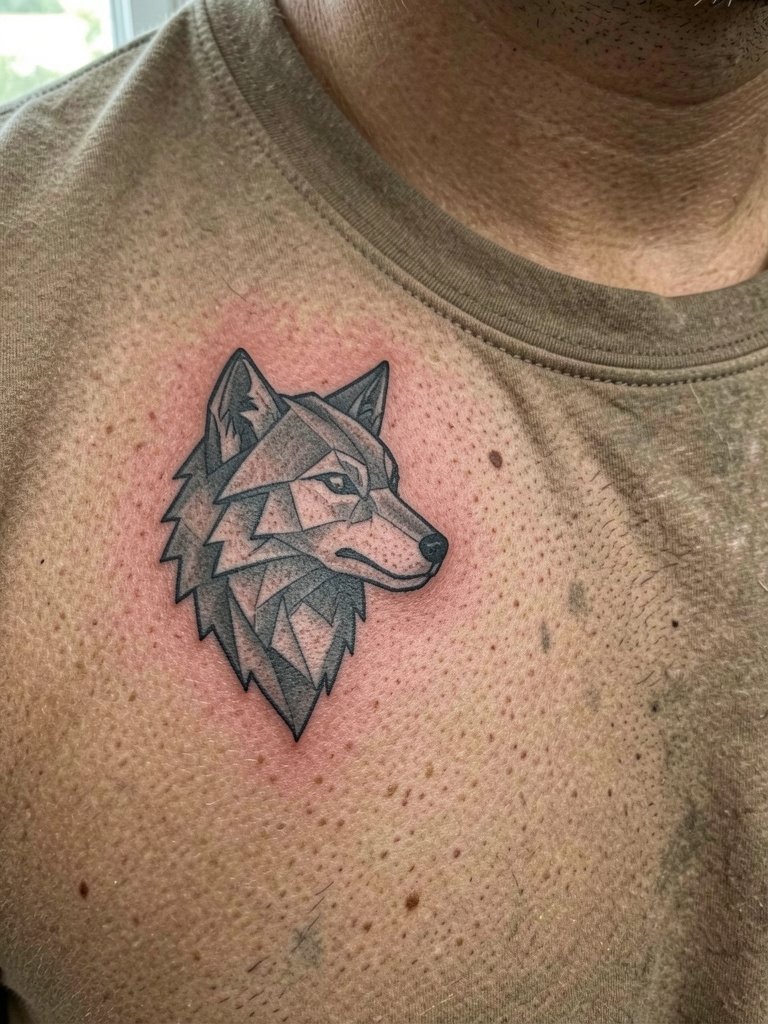
A heart-side wolf invites meaningful placement and needs balanced density so it does not look heavy on one side. Ask for a placement mockup over your chest to check how the facets align with the pectoral curve. Sessions are medium in time and sensitivity varies by person. A typical mistake is centering the wolf too close to the nipple or the bone. For wardrobe, crew-neck tees in normal fit keep the area visible on the left side without interfering with healing.
27. Full Geometric Wolf Back-Centerpiece
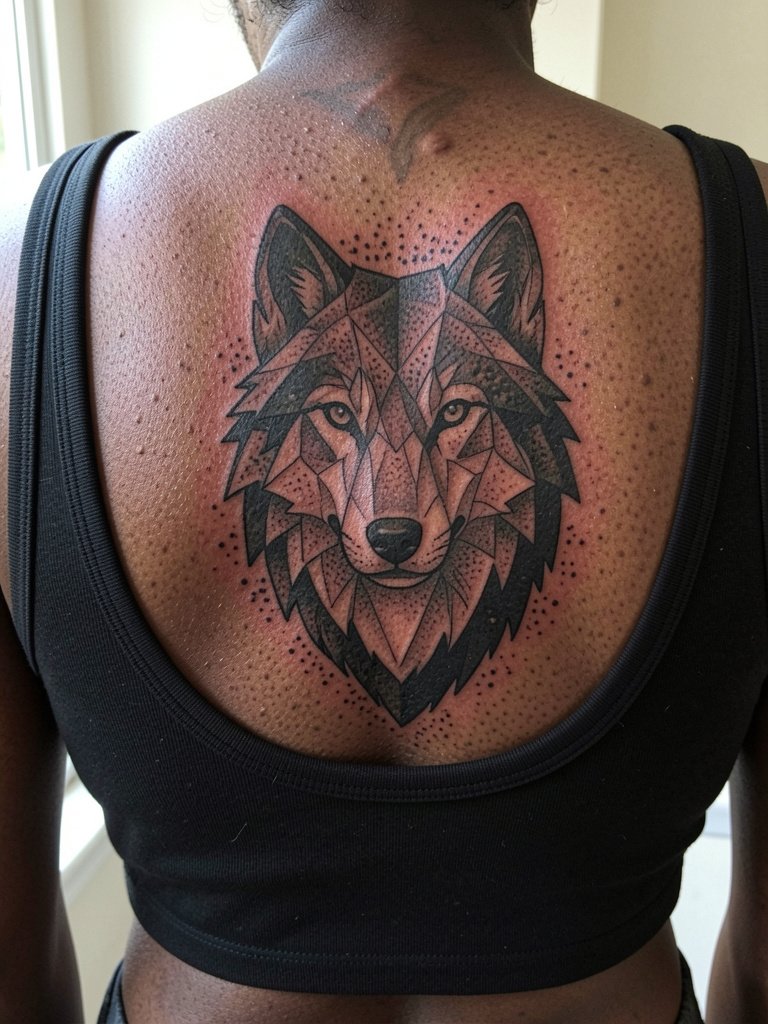
A back centerpiece allows the biggest geometric statement and is a great choice if you want longevity from the composition because large facets and negative space age predictably. I advise a staged plan of two sessions so the artist can lock in outer structure first then refine dot work. The common mistake is packing excessive micro detail into the central sections that later blend. Sessions will be multi-hour and you should expect a one-year touch-up for final saturation balance. For showing, open-back tops and strappy styles work well.
Frequently Asked Questions
Q: How do geometric wolves hold up on lighter versus darker skin tones?
A: In my experience, contrast matters more than skin tone. On darker skin, bold blackwork and clean negative space maintain the silhouette well. On lighter skin, fine-line facets can read clearly but require careful spacing. Plan small touch-ups and ask your artist to test stencil contrast on your actual skin before inking.
Q: What should I wear to a rib or sternum session for comfort and access?
A: Wear a fitted sports bra or a cropped top in normal position so the artist can work without you pulling fabric. For ribs expect longer sessions and bring layers that do not tug at the ink during breaks. A fitted sports bra gives access while keeping you comfortable.
Q: How often will a geometric wolf need touch-ups?
A: Plan for a touch-up in the first twelve to eighteen months, especially for finer work on wrists, fingers, neck, and ribs. Larger panels and pieces with bold negative space often only need a light adjustment at year one. Expect more frequent touch-ups on high-friction areas like hands and ankles.
Q: Artists disagree about fine-line geometry on ribs and neck. Where do I look for nuanced healed examples without naming artists?
A: Search social platforms for healed-tagged posts like #HealedGeometry and #GeometricWolfHealed and filter by location if you want nearby portfolios. Use Reddit tattoo threads and curated portfolio pages to find multi-year healed photos across skin tones. That lets you compare what each approach looks like at one and three years without contacting a specific artist.
Q: Are there any placements to avoid for intricate geometric detail?
A: Avoid ultra-intricate facets on high-motion, high-friction spots like fingers, inner wrist, and the lateral ankle if you want long-term crispness. If you still want detail in those areas, request slightly heavier line weight and accept a touch-up schedule.
