
Neon ink can read two ways in a few years. When saturation and spacing are handled like a color block, neon retains pop and contrast for longer than people expect. When neon is treated like delicate single-needle detail it often feathers into a smudge. These picks favor approaches that keep the glow obvious, the linework bold enough to resist blowout, and the wardrobe choices that let color do the talking.
1. Neon Script Along the Collarbone
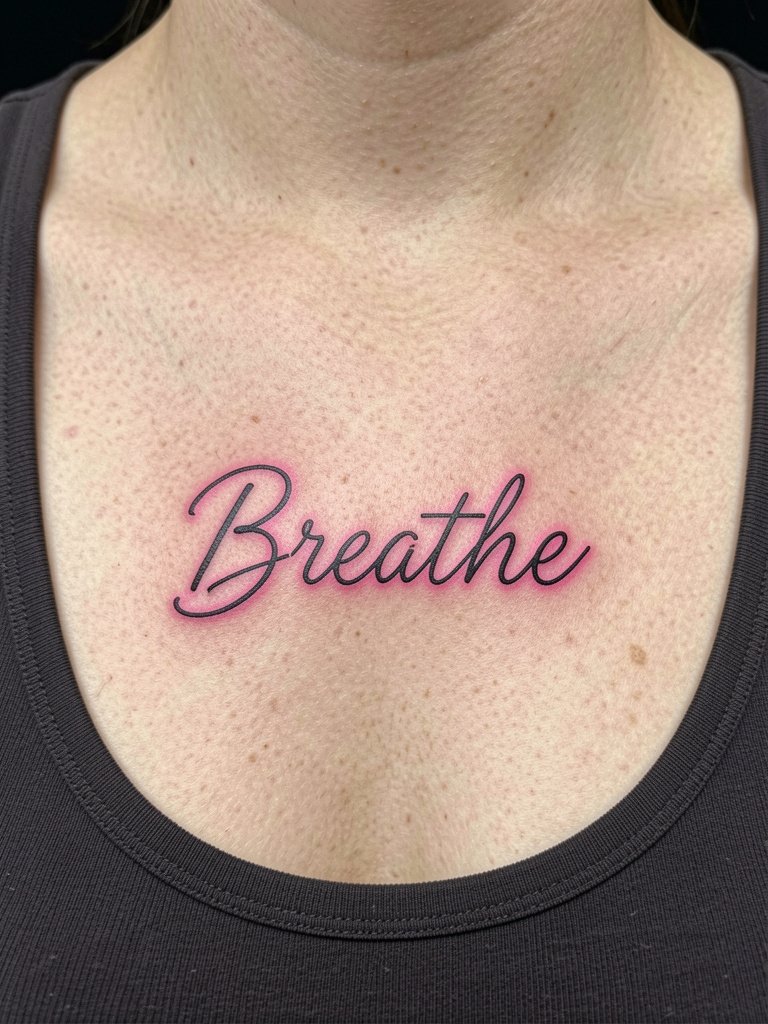
This collarbone script uses a dark core line with a neon wash outside the letterforms so the word keeps definition as it heals. Expect a low to moderate pain level and a session of 30 to 60 minutes depending on length. The common mistake is a pure single-needle neon outline with no darker anchor, which softens into a blur at year two. Bring two reference sizes so the artist can show how the halo reads at three versus five inches. For show-off outfits, pair with scoop-neck tanks that sit naturally on the collarbone and let the glow peek through.
2. Electric Floral Sleeve Accent
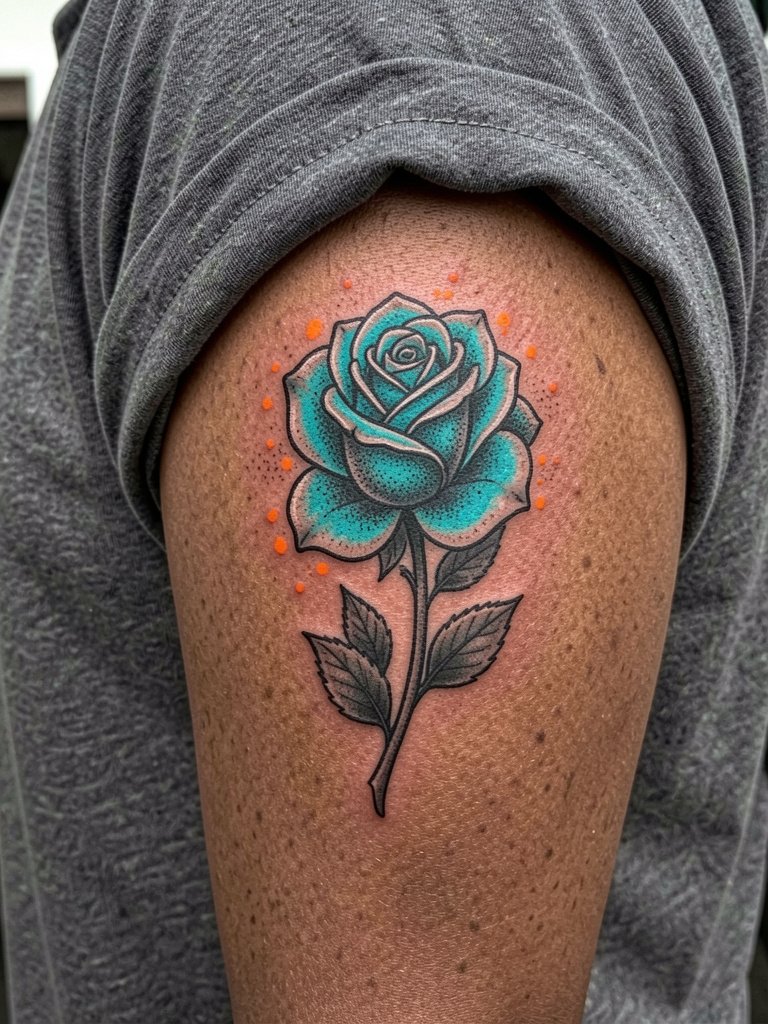
This accent works as a sleeve anchor or a standalone shoulder burst. The session runs one to two hours for a medium-sized piece. One mistake people make is packing neon across thin petals without a black outline, which causes loss of bloom when the glow fades. Ask for a bold outline and mid-tone greys for longevity so the neon reads against deeper values. When you want to show it off, a short-sleeve linen shirt rolled at the cuff frames the shoulder without covering the artwork.
3. Ultraviolet Micro-Constellation on Wrist
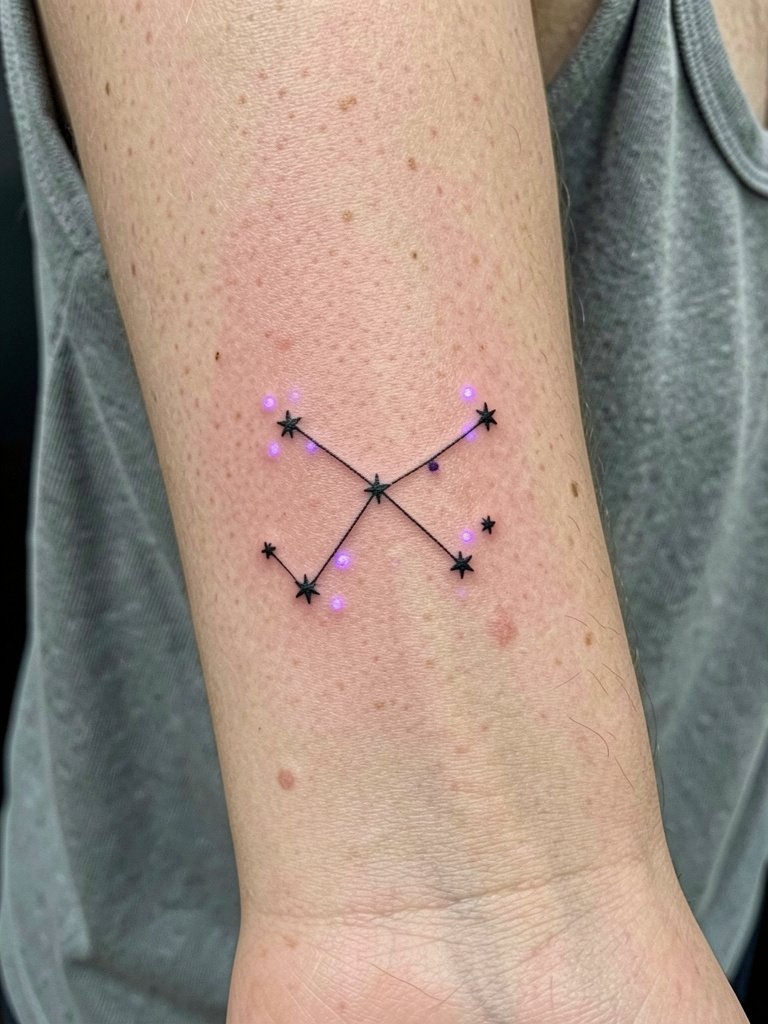
This tiny wrist piece mixes classic black linework with UV-reactive accents that glow under blacklight. The session is usually under an hour. One camp of artists warns that UV inks fade faster and can cause sensitivity in some clients. Another camp argues modern UV pigments, applied with the right saturation and sealed behind strong black anchors, remain reliable and safe for most people. To protect the delicate wrist detail, plan for a touch-up around year two and keep the neon spots as accents rather than the primary structure. Wear a thin bracelet cuff for evenings when you want the wrist to catch light without covering the ink.
4. Neon Mandala Centered on the Sternum
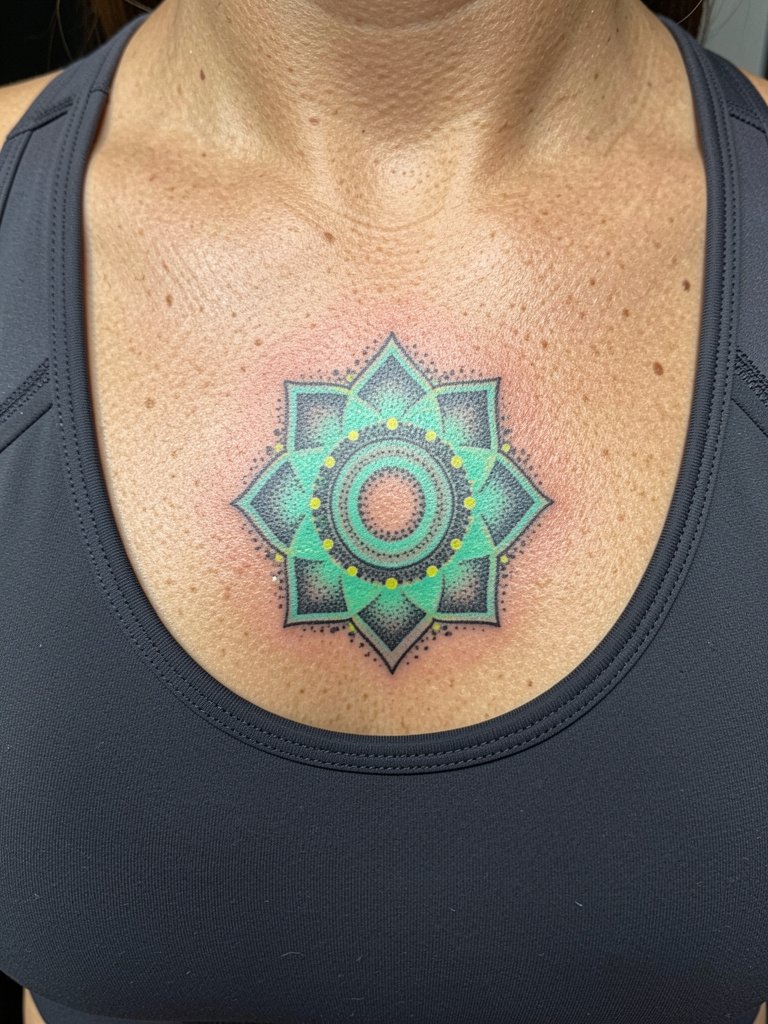
Sternum pieces demand careful spacing because the skin here moves and stretches. Expect a higher pain level and a longer session, often two to three hours or split visits. The common mistake is pushing ultra-fine spokes too close together, which leads to merging at year three. Tell the artist you want slightly wider radial spacing and stipple shading for texture so the neon ring holds against the natural skin movement. Session wear recommendation is a fitted sports bra so the artist can access the area without fabric tugging.
5. Neon Outline Geometric on Inner Forearm
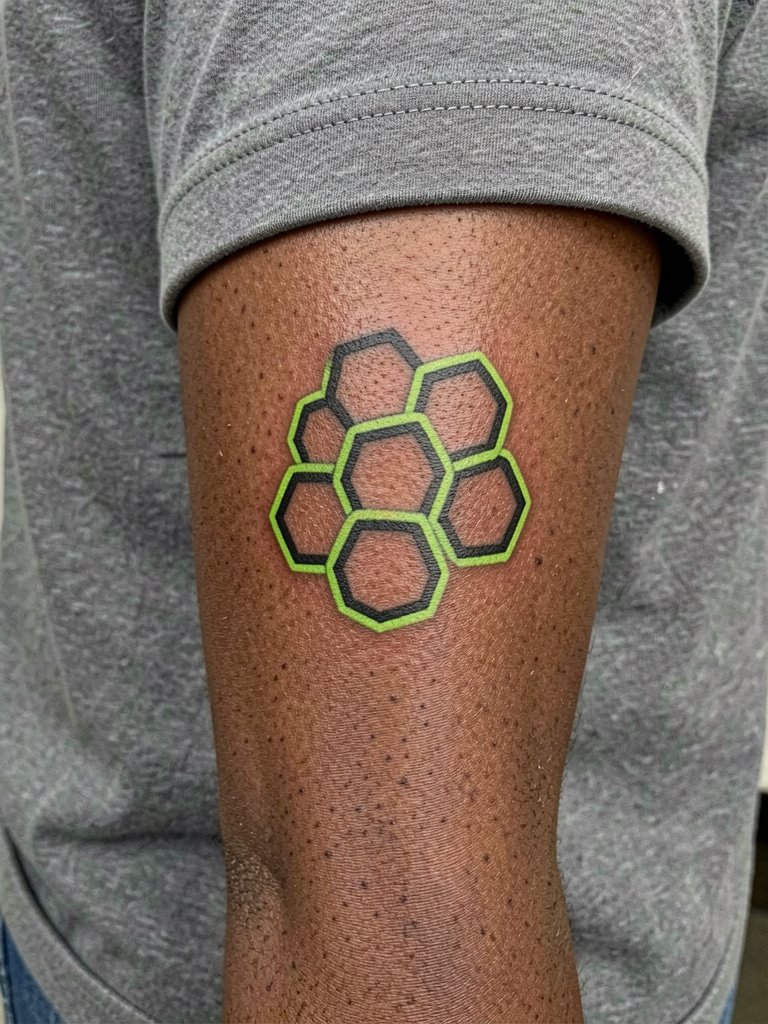
Inner forearm is forgiving for linear neon work and heals visibly. Sessions vary from 45 minutes to two hours based on scale. A mistake is using neon alone without a dark anchor line, which loses edge as saturation lightens. Discuss exact line weight so the neon halo sits around a defined black core and does not become a color wash. For outfit pairing, a rolled-sleeve button shirt shows the forearm and keeps the look deliberate without overexposure.
6. Neon Watercolor Splash on the Calf
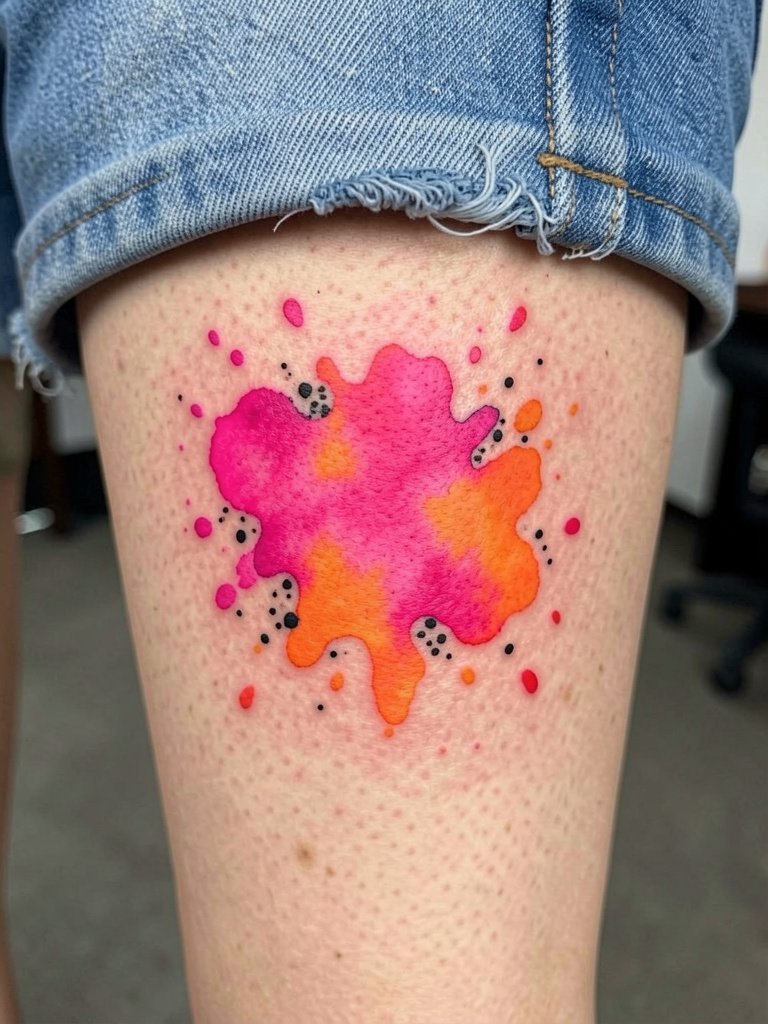
Calf pieces handle saturation well and show color from a distance. Expect a one to three hour session depending on coverage. The common aging issue is letting neon bleed into adjacent skin with no dark anchors, which blurs the watercolor edges. Ask for strategic black or charcoal accents to preserve composition as the neon softens over years. For evenings out, pair with mid-thigh denim shorts to let the splash read without heavy coverage.
Session Essentials
The first six picks include visible placements and delicate wrist or forearm work, so a few items smooth the appointment and the first week of healing.
-
Precision stencil transfer sheets. These help preview exactly where text and halos will sit on curved areas like the collarbone and inner forearm.
-
Topical benzocaine numbing cream. Applied according to label timing it can reduce jumpy reflexes during short wrist or sternum passes.
-
Medical-grade transparent protective film roll. Useful for first-day friction zones such as the wrist and ankle that see lots of rubbing.
-
Fragrance-free gentle body wash. Cleanses without stripping pigments around neon halos during the early healing days.
-
Aquaphor healing ointment. Thinly applied for the first 48 hours it locks in moisture for delicate single-needle and neon-tinted work.
7. Neon Outline Dagger on the Wrist
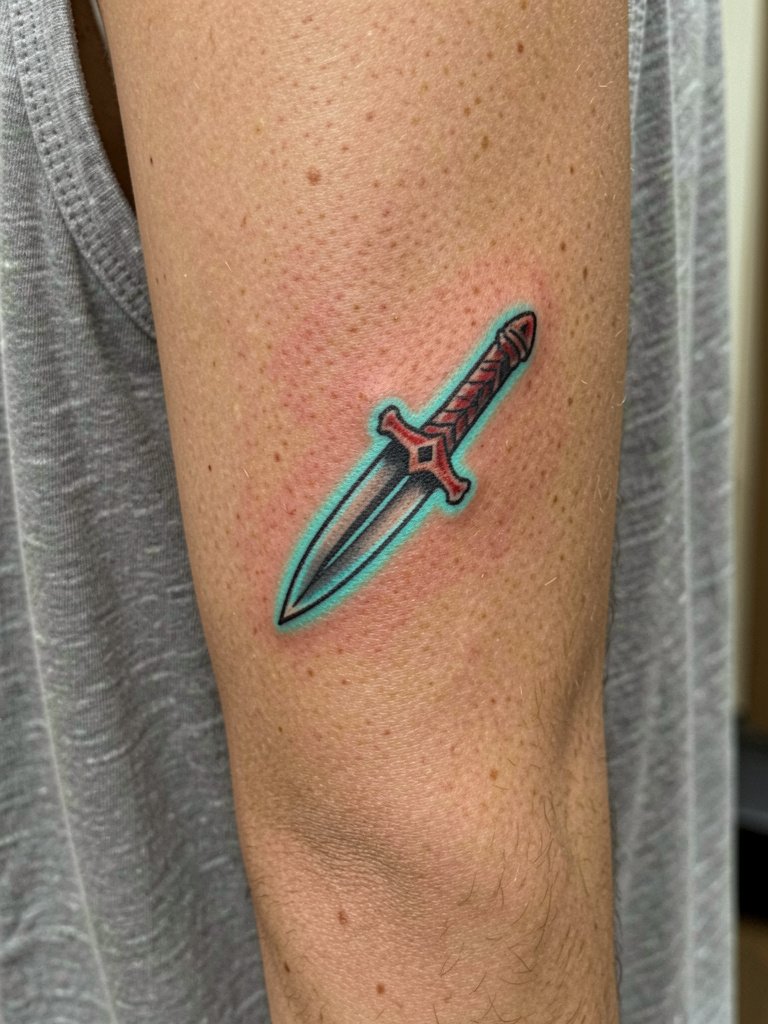
Wrist daggers are visible and take frequent hand washing, so expect touch-ups sooner than for thigh pieces. Sessions are compact, usually under an hour. The biggest mistake is running neon washes across the blade without a strong black outline, which yields a ghosted shape at year two. Ask for a slightly thicker outline than your reference so the silhouette stays crisp with repeated washing. To show it off, layer a minimal leather cuff that can be worn on the opposite wrist so the dagger remains visible.
8. Neon Geometric Mandala on the Upper Back
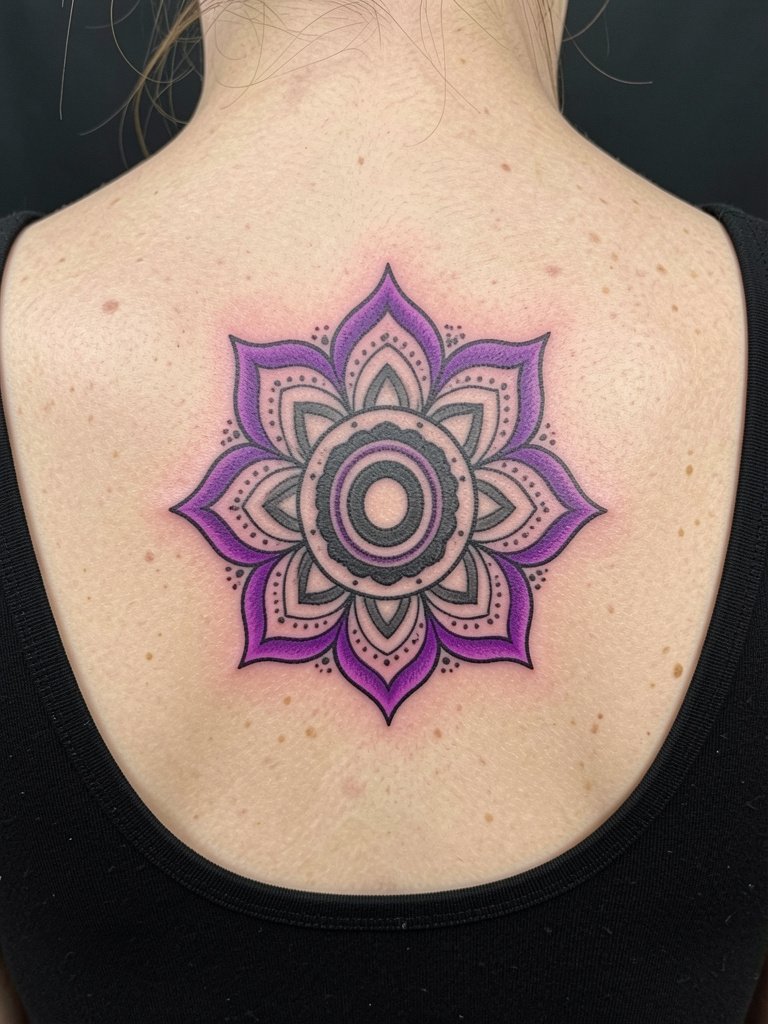
Upper back mandalas allow larger scale and more deliberate spacing, which helps neon hold. Sessions can be multiple hours and may require breaks. A common mistake is cramming too many fine spokes into tight rings, which causes merging across the pattern. Request wider negative space between rings and stipple shading to retain contrast as the neon softens. For wardrobe, back-exposing tops like scoop-back dresses make the mandala a focal point.
9. Neon Cat Eye Micro-Realism on the Ankle
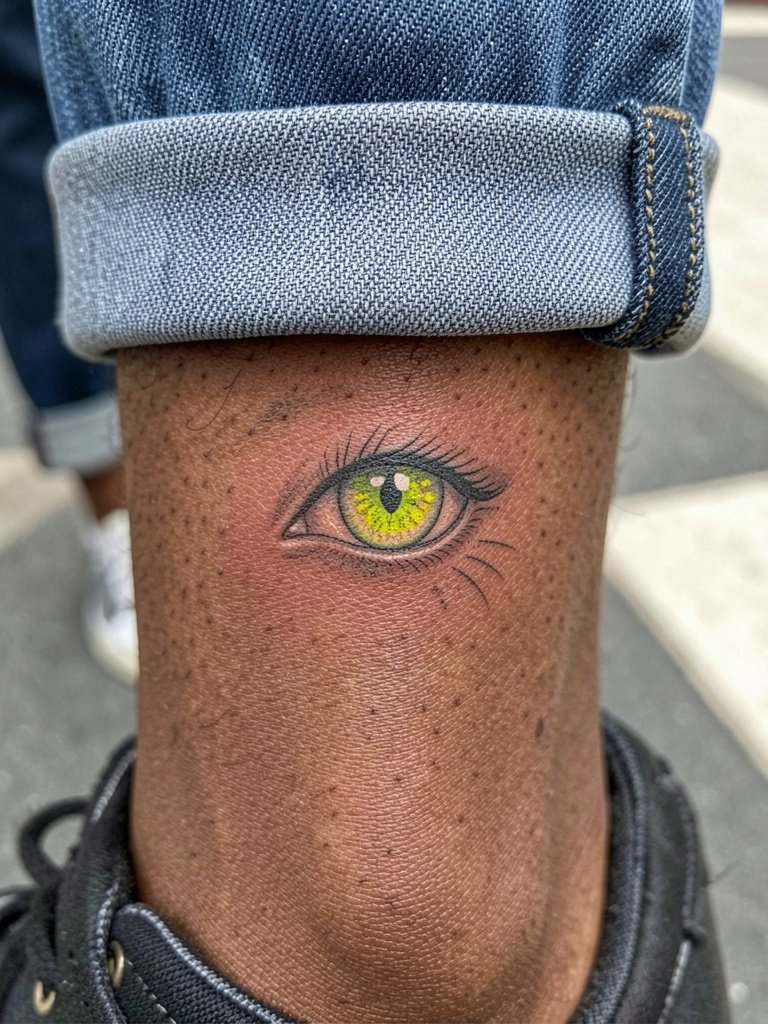
Micro-realism with neon accents looks striking on the ankle but the thin skin and frequent movement demand careful depth control. Sessions are short but precise. People often request tiny realistic detail without considering the need for a small dark anchor, which leads to a washed-out look. Ask the artist to balance grey shading with neon flecks so the eye maintains depth at six months and beyond. For show-off looks, pair with cuffed jeans that expose the ankle without rubbing the site.
10. Neon Botanical on the Thigh
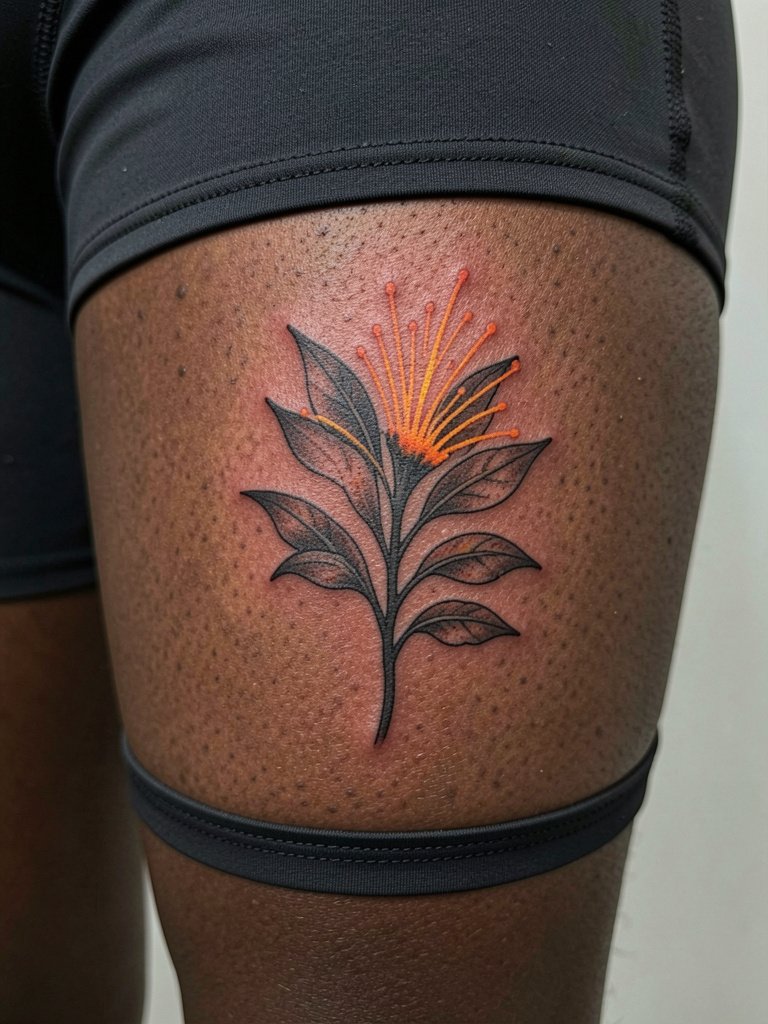
Thigh placements are forgiving and excellent for saturated neon washes. Sessions can be long, often one to three hours. A frequent error is choosing very fine detail that blurs under friction from clothing. Request simplified leaf shapes and a neon accent layer so the piece stays readable. For the session, wear athletic shorts that let the artist access the upper thigh without fabric tugging.
11. Neon Tiny Script Behind the Ear
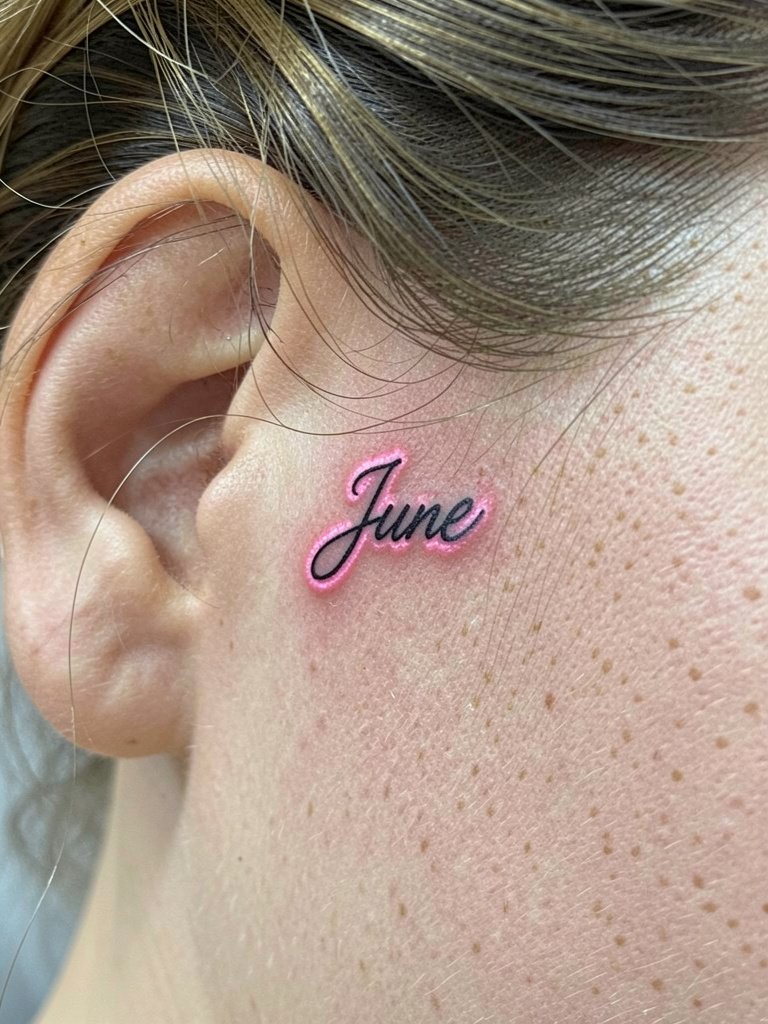
Behind-the-ear work is discrete and heals quickly, but the skin is thin and lines must be planned. Sessions are typically under 30 minutes. The mistake is using neon-only ink without a darker script baseline, which fades to an unreadable ghost. Specify a clear black core with neon wash for longevity. Note that this area may require specialized needle control because of proximity to thin tissue.
12. Neon Solar System Band on the Upper Arm
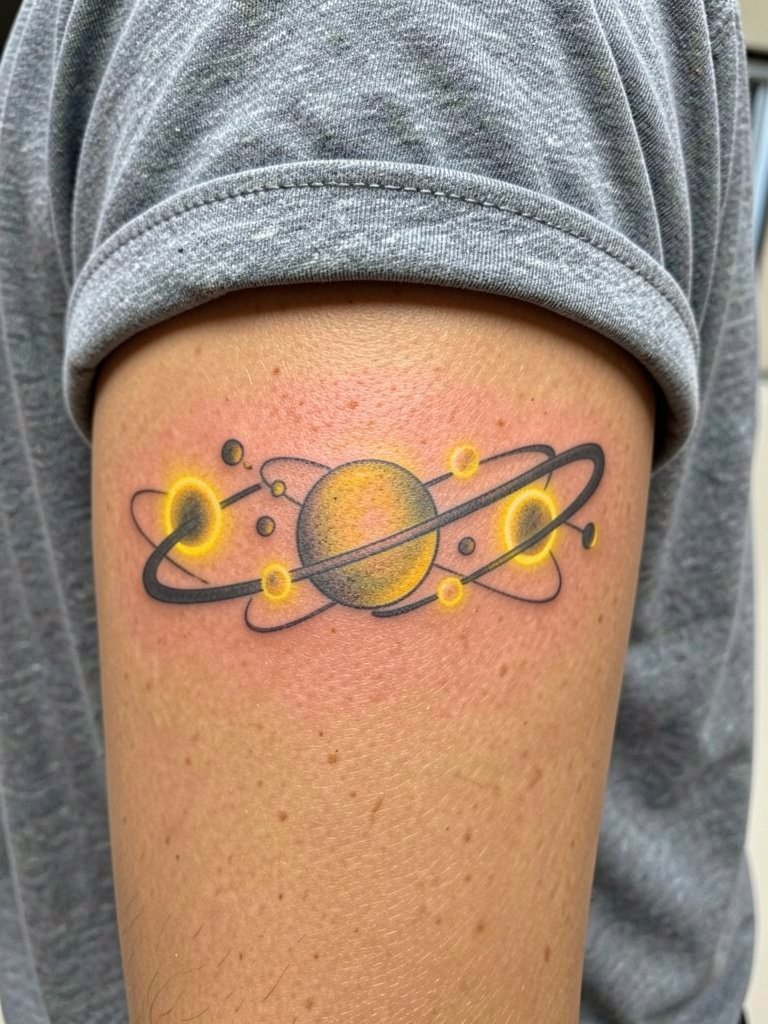
Band pieces wrap subtly and work well with bold neon pops. Expect a one to two hour session for a clean band. A common problem is placing tiny orbit lines too close together, which creates soft overlap as they age. Ask for slightly thicker orbit lines and spaced neon dots so each planet retains a halo over time. For summer months, a short-sleeve linen shirt keeps the upper arm visible without constant sun exposure.
13. Neon Skull Minimalism on the Ribcage
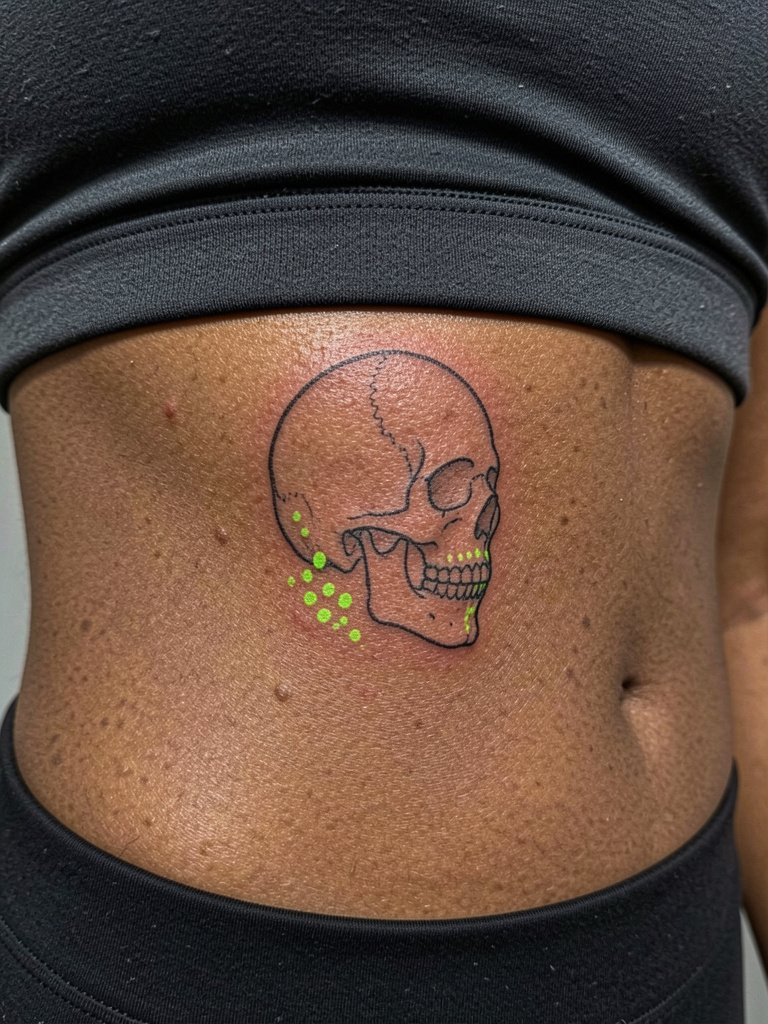
Ribcage work splits opinion in the tattoo community. One group insists fine-line ribs blur within two years because of constant expansion and compression under clothing. The other group argues that with slightly wider spacing and thoughtful needle depth, fine-line pieces can settle well and remain legible. Pain here is higher and sessions are often broken into passes. Ask for a mockup that shows spacing at three inches so you can judge how the neon accents will breathe on curved skin.
14. Neon Pixel Heart on the Finger
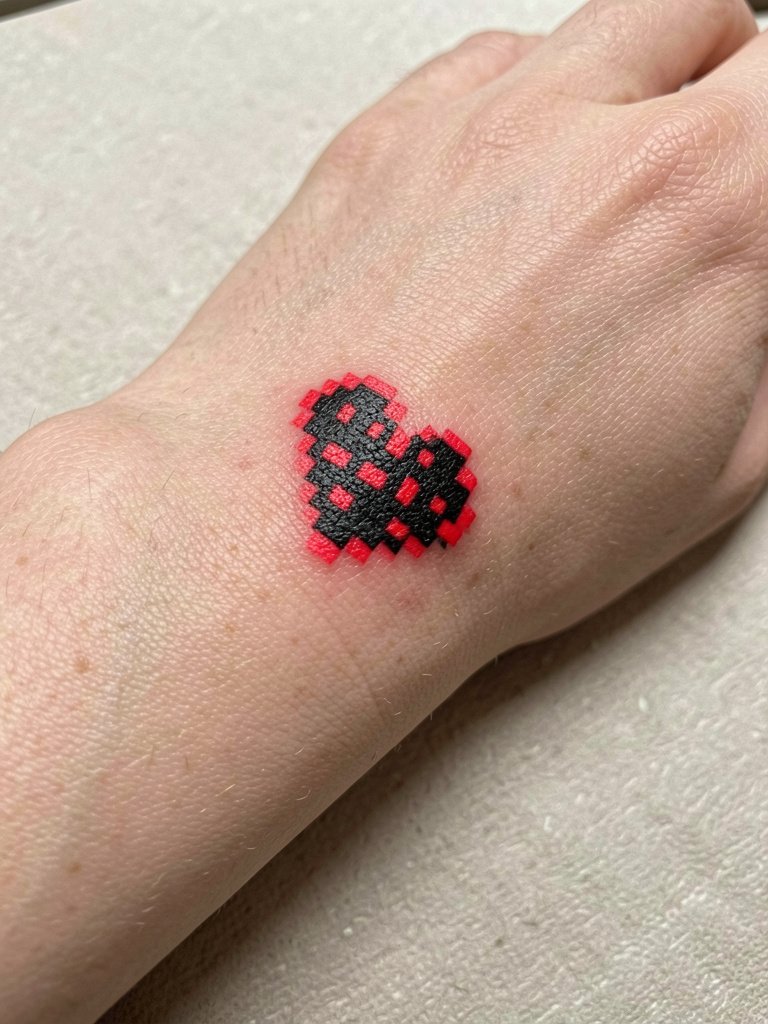
Finger tattoos face constant washing and friction, so expect faster fading and earlier touch-ups. Sessions are short but exacting. The main mistake is requesting full neon fill on a finger square without dark borders, which disappears quickly. Specify black pixel anchors and limit neon to the outermost squares so the form stays crisp. For minimal coverage when you want to hide it, a simple ring will conceal the area when needed.
15. Neon Comic-Style Speech Bubble on the Shoulder Blade
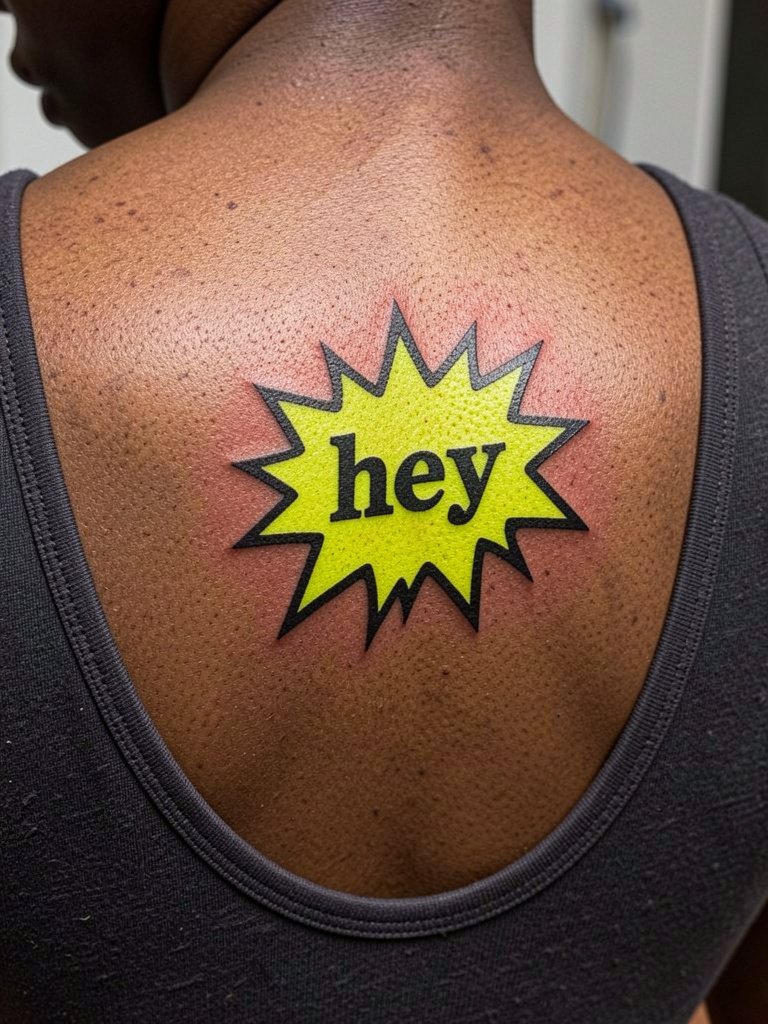
Shoulder blade placements let saturated color breathe and remain visible under typical clothing. Sessions can be moderate length. A design pitfall is small text inside a neon fill without a bold black letterform, which becomes unreadable. Ask for black letterline and neon background so the speech reads from a distance. For everyday wear, a scoop-back tee highlights the piece without rubbing against it.
16. Neon Wave Line on the Side Torso
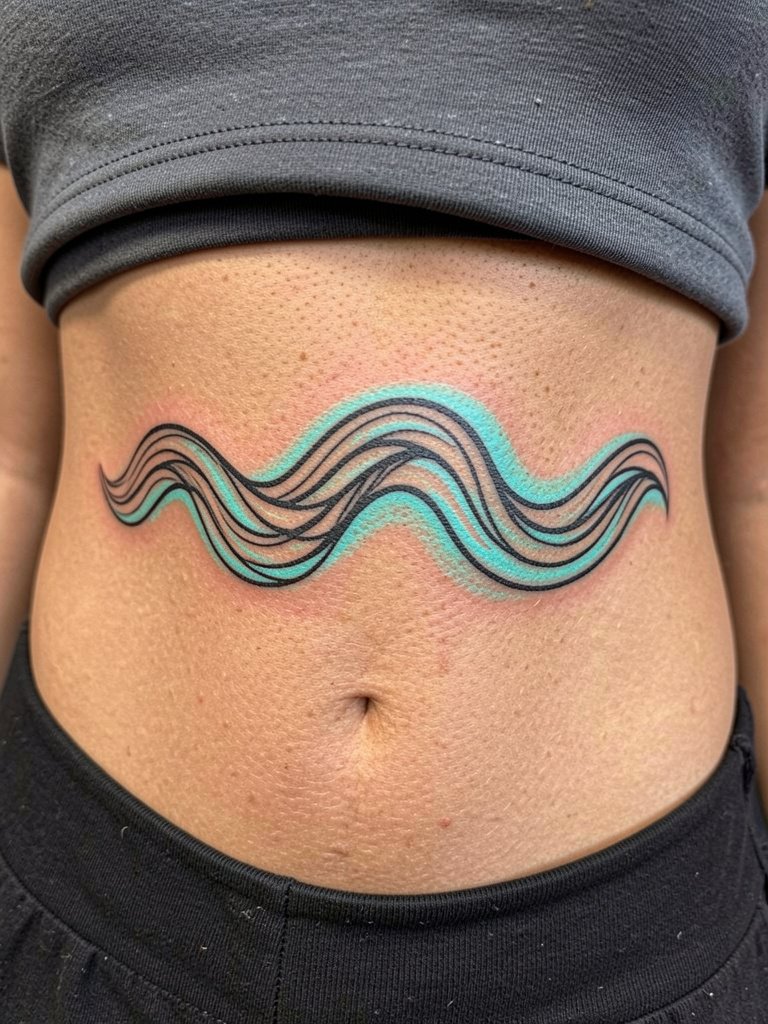
Side-torso lines are visually flattering but subject to more movement. Sessions may be split to manage discomfort. One camp believes fine-line waves blur on the ribs as the skin flexes, and another camp maintains that slightly heavier line weight and strategic negative space solve that. Choose a line weight that reads at two years and ask to see healed comparisons on similar placements. For the appointment, a cropped tee allows access while keeping you comfortable.
17. Neon Arrow Cluster on the Calf Outside
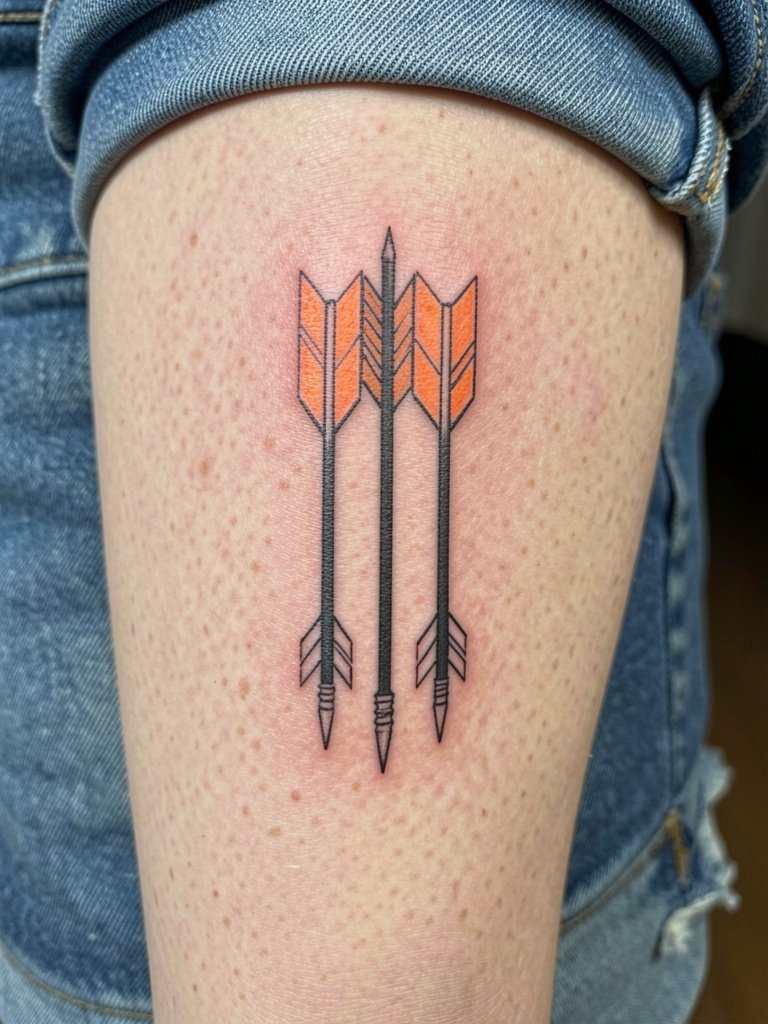
Calf is durable for directional motifs and tolerates saturated neon. Sessions are usually between one and two hours. The error is grouping arrows too close without negative breathing room, which causes the neon fletching to blur into a single bright band later. Ask the artist to space the arrows so each fletch keeps a separate halo. For casual looks, pair with denim shorts that let the arrangement be seen without friction.
18. Neon Floral Ring on the Thumb Web
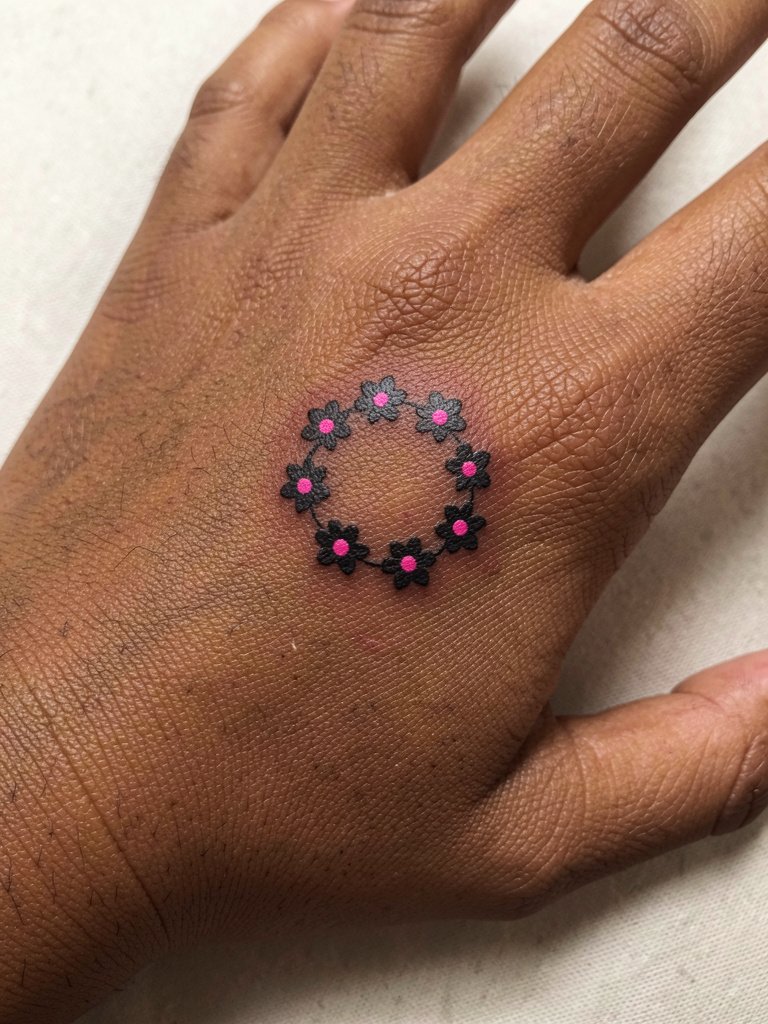
Thumb web tattoos age fast because of constant motion and washing. Sessions are short but can require multiple small passes. Many clients ask for neon fills here that simply do not last. Instead, request neon only as tiny center dots with a solid black ring so the motif reads even when the pink softens. For a subtle highlight, wear thin rings on the opposite hand to balance visual weight.
19. Neon Celtic Knot on the Hip
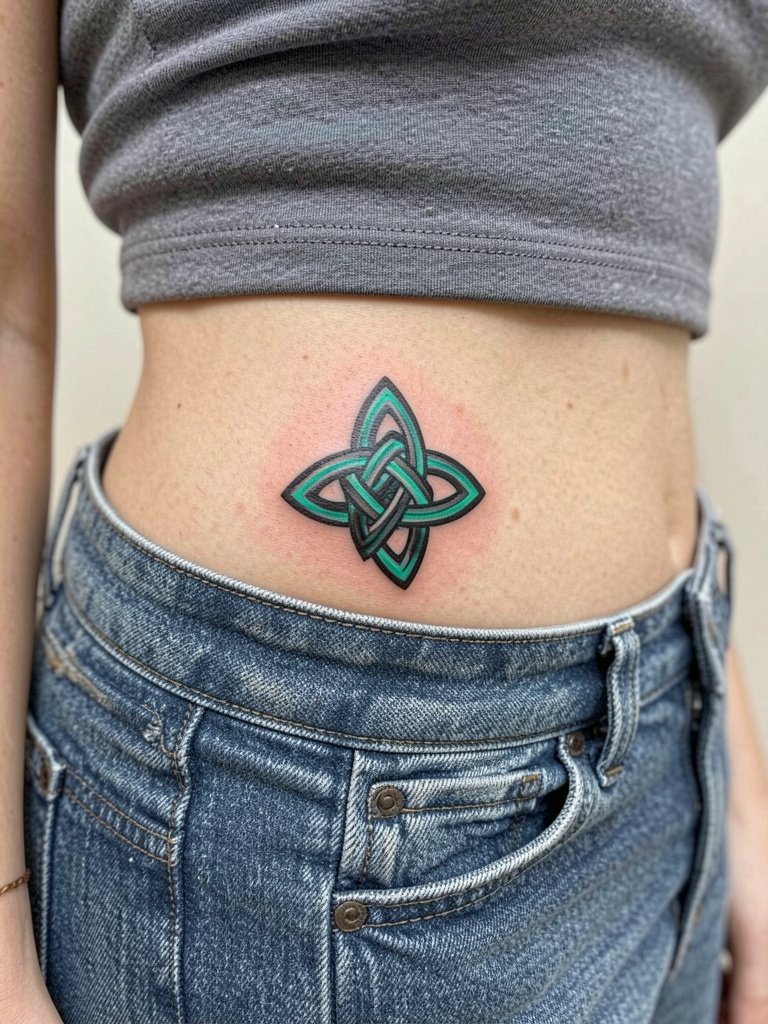
Hip pieces let you play with saturated paths and interlocking loops. Sessions vary by complexity, often one to three hours. A frequent mistake is adding neon lines into every weave without a dark backbone, causing reduced clarity when the neon fades. Ask for neon as highlight strokes rather than full fills so the knot still reads in low light. For evenings, low-rise jeans that sit naturally below the motif let the design be revealed when wanted.
20. Neon Portrait Accent on the Shoulder
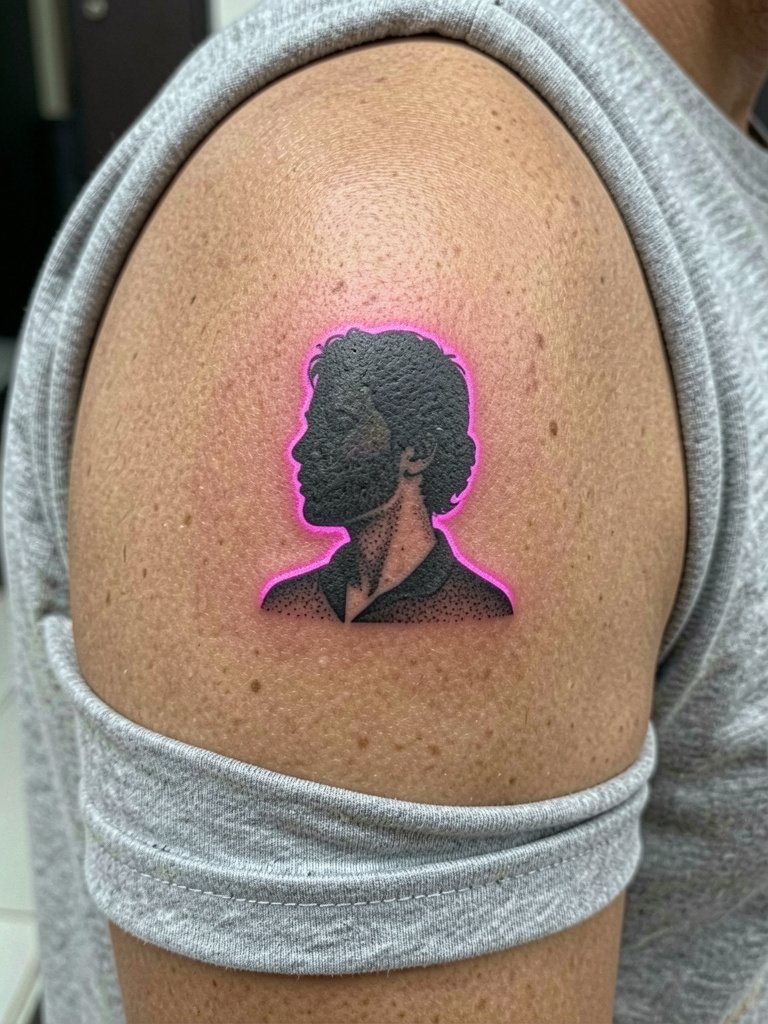
Portrait accents need a strong black silhouette to anchor neon rim lighting effectively. Sessions range from one to three hours. The error is making the neon the primary form instead of the accent, which results in a floating halo with no readable subject as the neon fades. Request a crisp silhouette and limited neon rim so the portrait retains shape. To show it without covering, choose short-sleeve tees with a relaxed shoulder seam.
21. Neon Script Band Around the Wrist
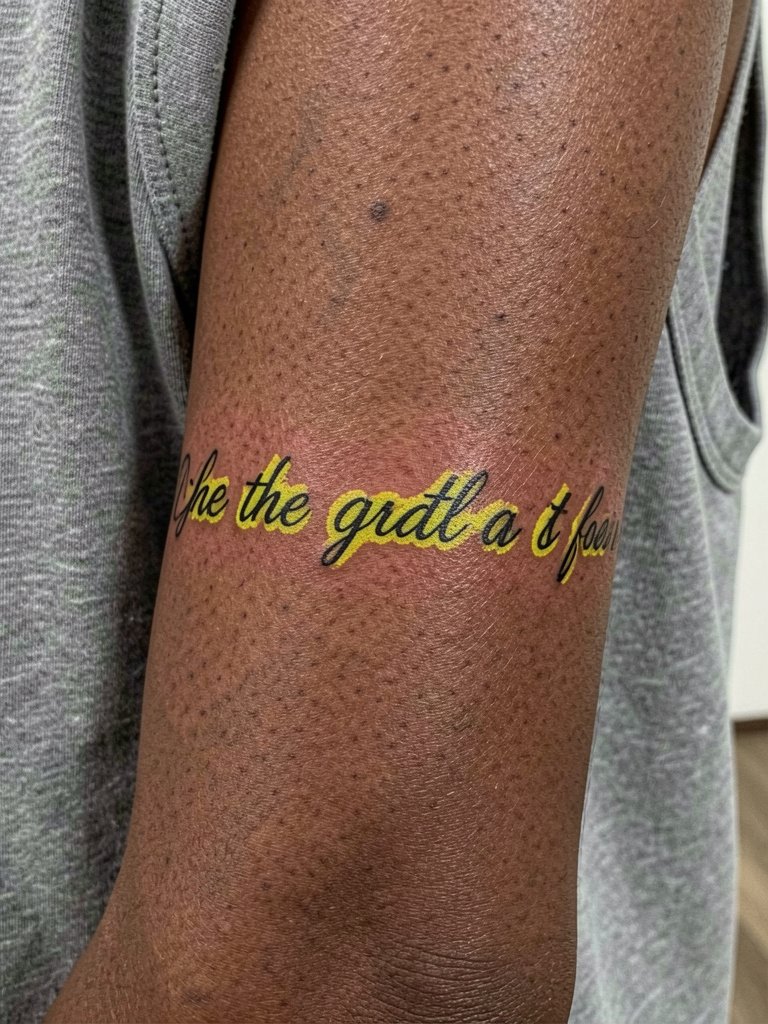
Wrist bands must consider constant movement and soap exposure. Sessions are short but may need touch-ups. The common mistake is tiny cursive without a dark letter base, which becomes faint after months. Ask for letters with a slightly thicker black core and neon halo for presence. When dressing to show it, a minimal bracelet worn on the opposite wrist draws the eye without disrupting the healed ink.
22. Neon Geometric Chest Piece Above the Heart
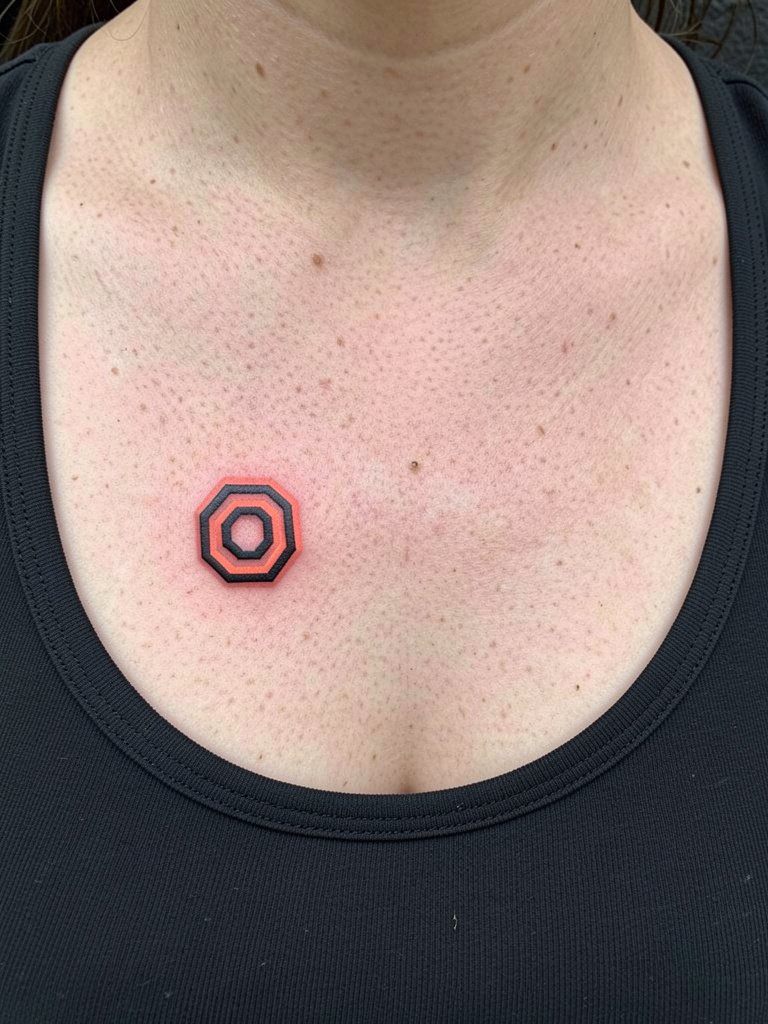
Chest pieces age differently with sun exposure and clothing friction. Sessions can be lengthy. A design error is over-detailing small hex cells without contrast, which leads to muddiness after a few years. Request bolder outlines on the larger cells and selective neon fills so pattern hierarchy remains clear. For show-off moments, a scoop-neck tank frames the upper chest while protecting the area from tight collars.
23. Neon Minimalist Crescent on the Nape
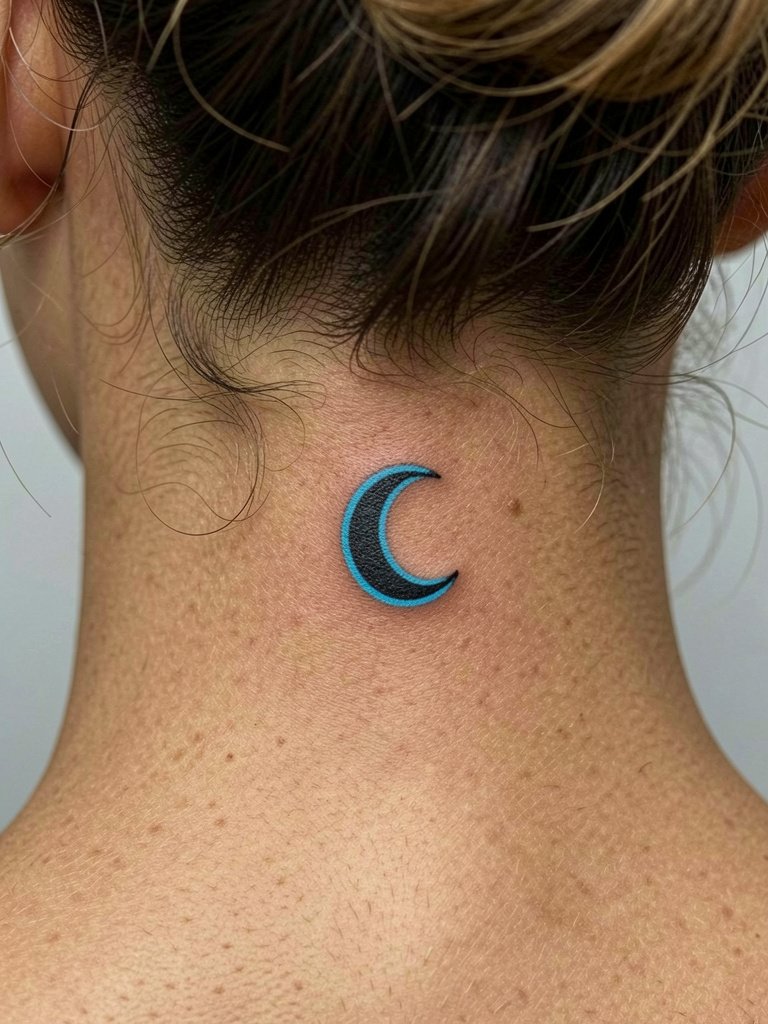
Nape tattoos are discreet and settle well when the design is compact. Sessions are quick. A common mistake is asking for the neon to be the only visible element without a black crescent for contrast, which disappears in ordinary light. Ask for a compact black crescent with neon rim so the shape is legible day and night. Tell your stylist you plan to wear your hair up often so the area will receive regular sun exposure and adjust the aftercare plan accordingly.
Frequently Asked Questions
Q: How long do neon tattoos generally last before needing a touch-up?
A: Neon tattoos can look bright for the first year and often need a touch-up around year two to three depending on placement and sun exposure. High-friction sites like fingers and wrists typically need touch-ups sooner, while thicker-skinned areas like the calf or thigh hold color longer. Expect touch-up timelines to vary and plan for at least one follow-up session if you want long-term vibrancy.
Q: Are UV-reactive neon inks safe and what are the trade-offs?
A: UV-reactive inks offer a striking effect under blacklight but some artists treat them cautiously because older pigments faded quickly and caused sensitivity in a minority of clients. Another group of artists uses modern UV formulas and reports consistent results when combined with solid black anchors. If you choose UV accents, request a spot test and plan on a lighter touch of UV as an accent rather than the main structure.
Q: How should I prepare clothing for session day for different placements?
A: Wear loose or fitted pieces based on the placement so the artist can access the area without fabric tugging. For collarbone and upper chest choose a fitted scoop-neck top, for ribs a cropped sports bra, for thigh and calf wear bike shorts or denim shorts, and for shoulder or upper back a scoop-back top. These clothing choices let the artist work comfortably and reduce movement-related drafting during long sessions.
Q: Where can I find healed neon tattoo examples and community portfolios?
A: Search platform filters and specific hashtags on social apps to find healed shots, for example look for tags that combine "neon" with the placement you want. Use location filters on social apps to find studios nearby and browse healed galleries in portfolio pages rather than single-day posts. Reddit tattoo threads and portfolio collections often include multi-year healed photos in different skin tones so you can evaluate longevity.
Q: Do neon inks cause allergic reactions more than standard pigments?
A: Some clients report sensitivity to certain bright pigments, so a patch test is a reasonable precaution if you have a history of skin reactions. Many artists now use tested neon pigments and monitor for reactions, but if you have reactive skin discuss patch testing and alternative color placements with the artist. This avoids surprises during the healing window.
Q: Which placements are most likely to lose neon saturation fastest?
A: Fingers, hands, wrists, and areas with daily friction or frequent washing typically lose neon saturation first. Areas exposed to sunlight without protection will also fade faster. For longevity pick larger placements with black anchors and plan for annual touch-ups if you want sustained brightness.
