
Shops I sit in on Saturdays get the same questions from first-timers. People worry about linework that will blur, placements that look great in a photo but hate movement, and whether a tiny script will read in five years. I tell newcomers what actually matters and where compromises save regret. Read these practical picks and consultation pointers so your first appointments feel like informed choices, not experiments.
1. Fine Line Arrow on Inner Forearm
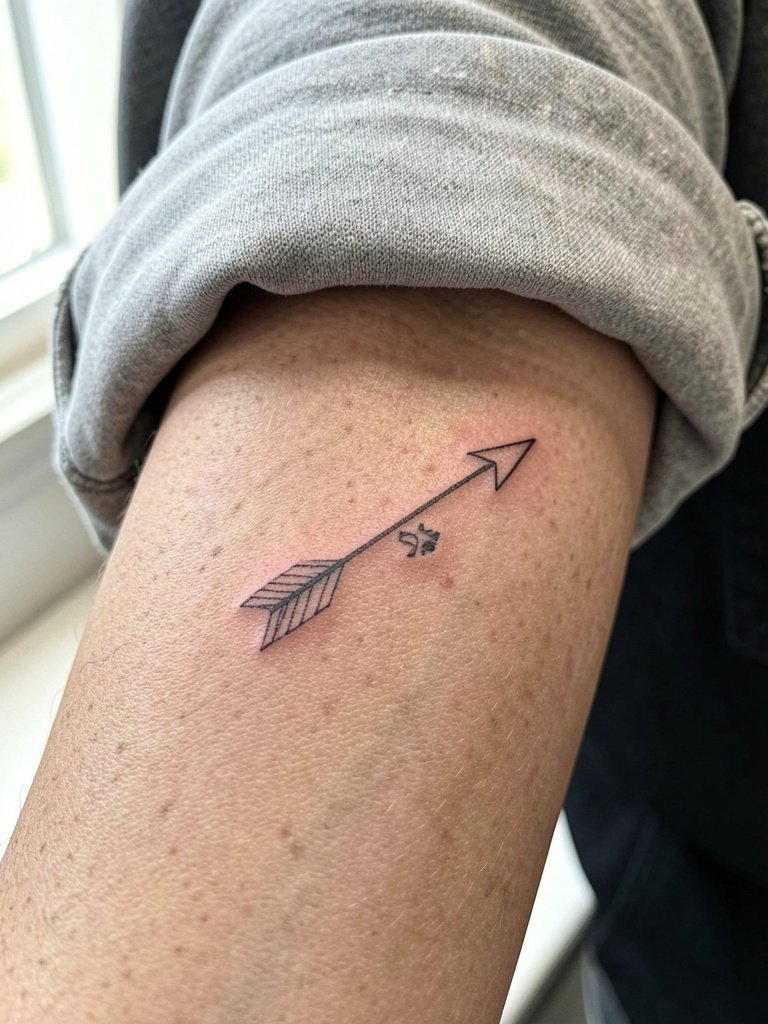
This thin arrow is a good first piece because it gives you a visible result without a long session. For placement pick the inner forearm if you want a low-pain, visible spot and ask for slightly heavier linework than online references so the shaft holds at year two. A common mistake is requesting single-needle lines at two inches with no spacing. That version often softens into a gray blur by year three. Expect a 30 to 60 minute session and a likely one-hour touch-up at six to twelve months. For showing it off, roll sleeves and wear a loose linen shirt to keep attention on the forearm line.
2. Micro-Realism Moon on Wrist
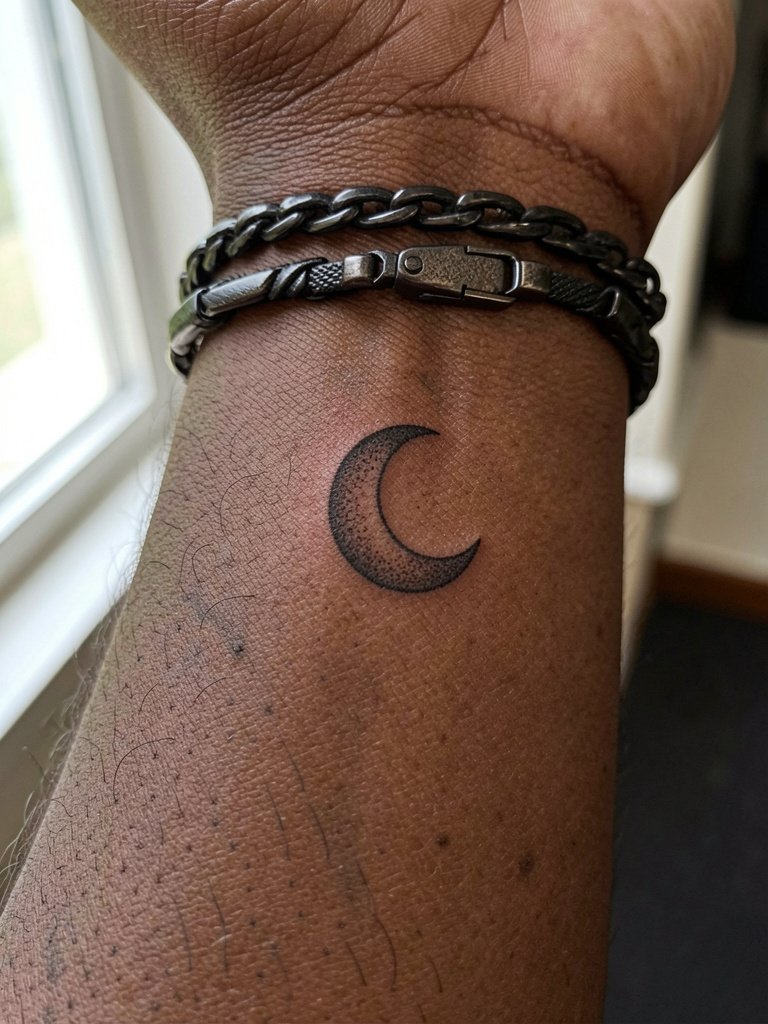
A tiny micro-realism moon gives a personal accent that settles into the wrist texture. I recommend a slightly bolder outline than pure single-needle so the crescent edge reads in a year. Wrist skin takes constant washing and bending, so expect some fading by year two and a likely touch-up at year three. Session time is usually under an hour. Avoid asking for complex interior shading at this scale because the fine stipple can clump. During the session wear a loose cuffed shirt you can roll without tugging the area.
3. Botanical Wrist Band
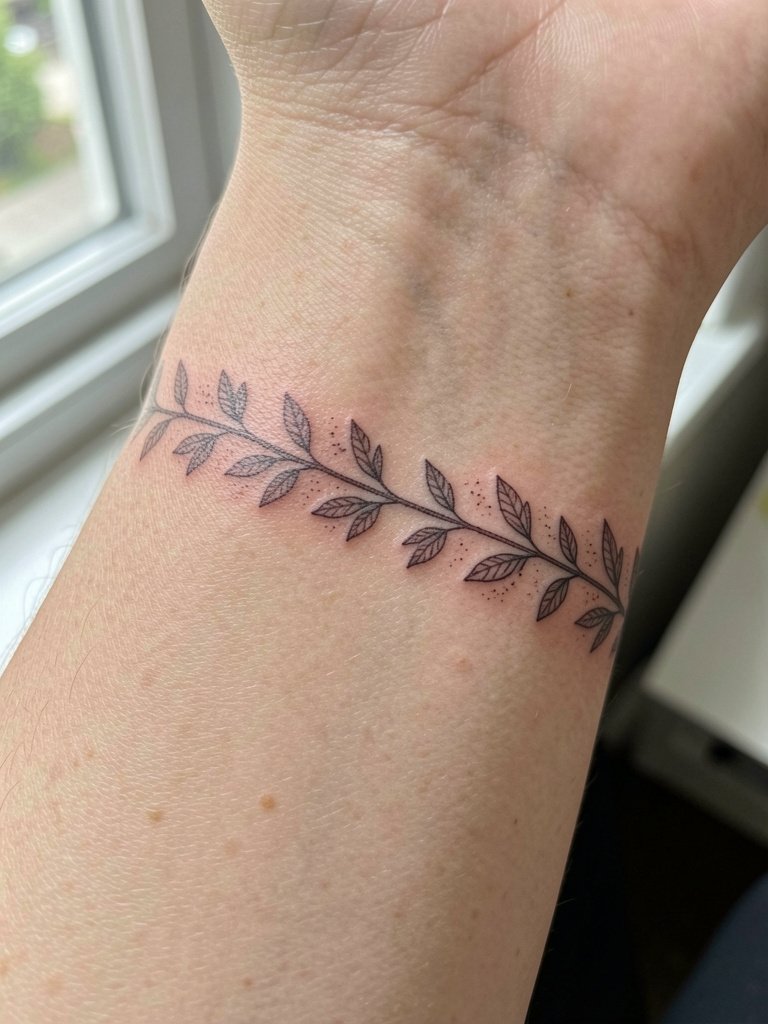
A wrist band with botanical motifs reads like jewelry without needing daily wear. For beginners pick slightly larger leaf shapes and a consistent rhythm so the negative space prevents merging. A common aging issue is crowding leaves so small the veins blur into a dark line. Talk to your artist about spacing and where to start and stop the band relative to the wrist crease. The session is short but expect the first week to be fussy since wrist skin flexes. Pair it with a delicate watch or dainty bracelet that complements but does not rub against the ink.
4. Tiny Geometric Mandala on Behind the Ear
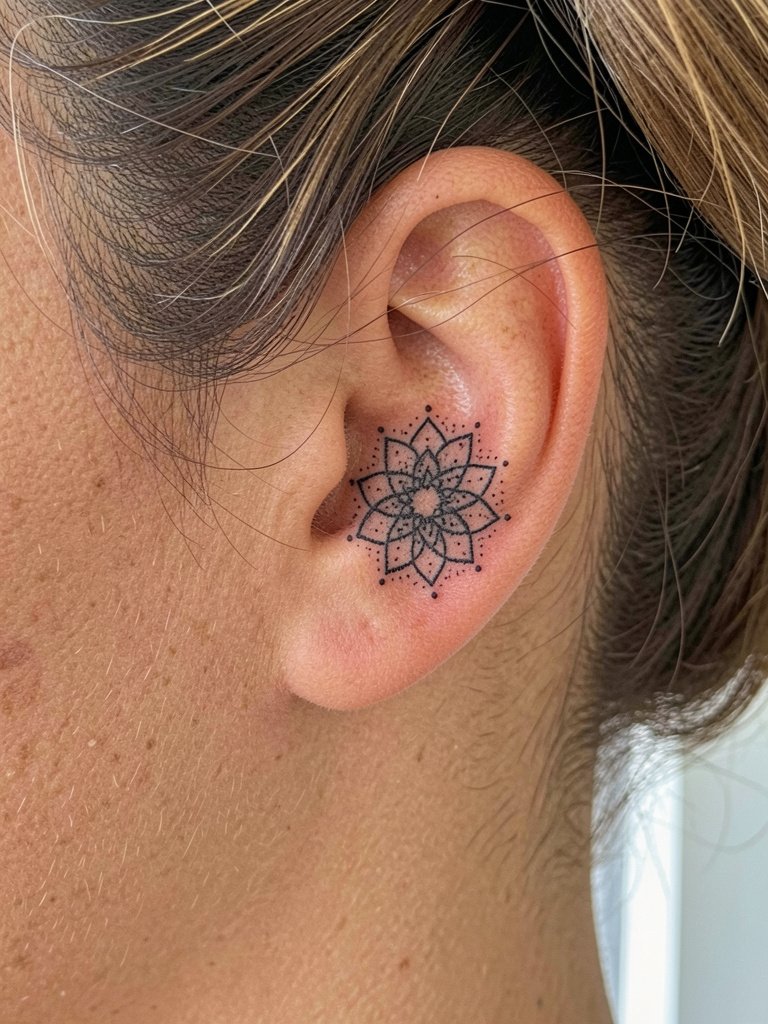
The behind-the-ear spot is discreet and reads best as a small, high-contrast graphic. Because the area is tight, choose a mandala with clear open shapes rather than dense filigree. One common mistake is over-detailing at a size the skin cannot hold. This placement is low on session time but high on precision, so expect a 20 to 40 minute appointment and a likely touch-up at six months. Sensitive placement note: artists who work here often specialize in small-area work, so pick a practitioner comfortable with micro dot work. For styling, short hair or a tidy updo lets the rosette peek through naturally.
5. Classic Rose on Shoulder
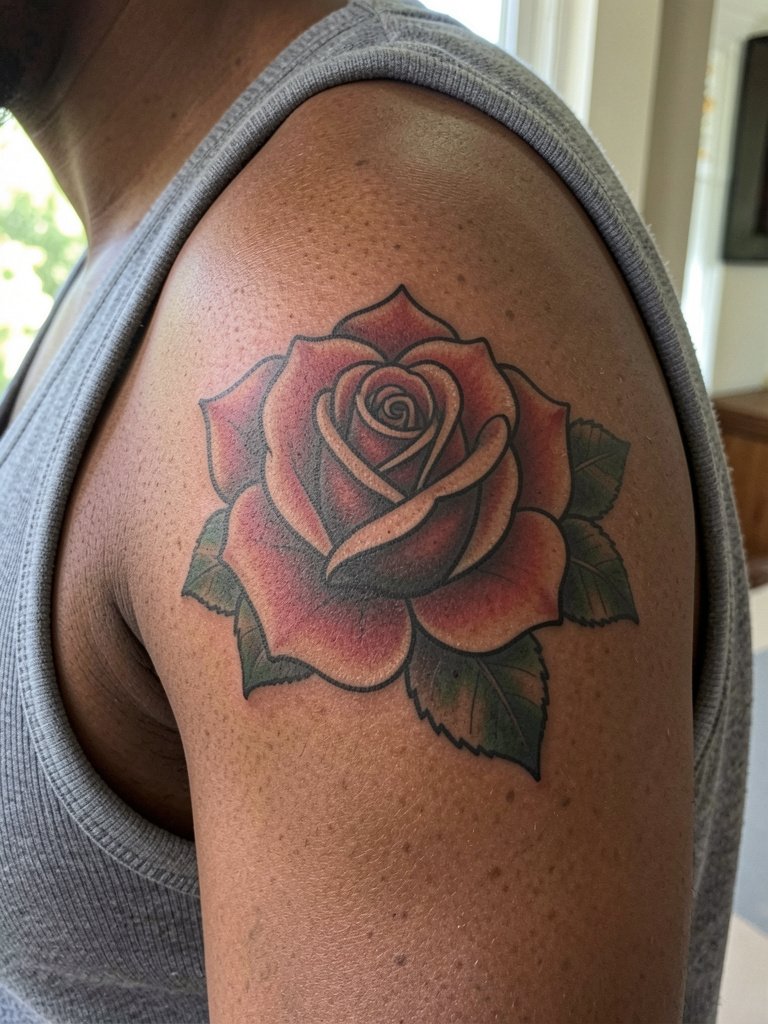
A bold rose on the shoulder ages predictably because saturated fills and thick outlines retain contrast. Choose classic black outlines with strong saturation rather than tiny shading that looks muddy later. For first-timers this placement is forgiving on pain and heals under normal clothing. I suggest asking your artist to map how the petals wrap with shoulder movement so the blossom does not distort when you raise your arm. Session time often ranges from one to two hours, depending on color. To show it off wear a tank top that keeps the shoulder visible.
6. Minimal Script on Collarbone
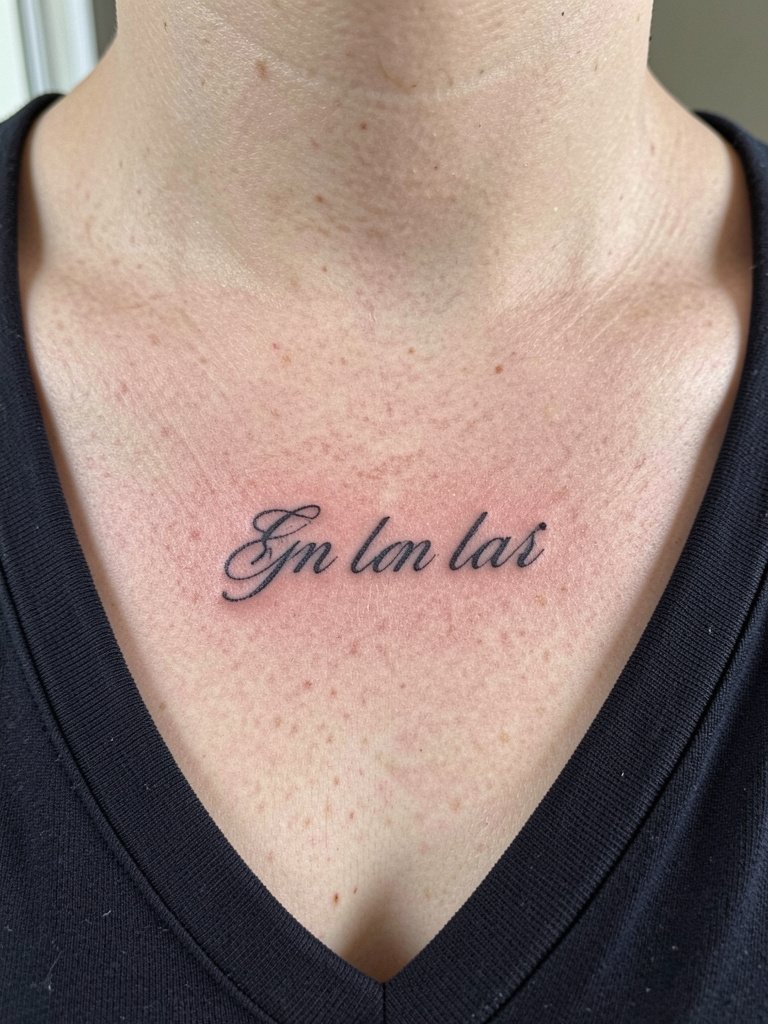
Collarbone scripts look elegant but they sit on skin that moves with breathing, so choose slightly wider letter spacing than a stationery mockup. Tiny script with tight joins is a frequent regret because the letters can merge over a few years. Tell your artist the scale you want measured in inches so they can show you a stencil at life size. Expect a 30 to 60 minute session and a likely touch-up at one year. For appointments wear a top with an open neckline like a wide V-neck shirt so the artist has clear access without fabric tugging.
Session Day Picks
The wrist, collarbone, and shoulder pieces above all benefit from small session and clothing adjustments that make the appointment smoother.
-
Stencil transfer paper kit. Lets you preview life-size placement on skin so you and the artist can decide on scale before needles start.
-
Topical numbing cream. Applied before shorter wrist or collarbone sessions it eases the first pass for nervous beginners.
-
Thin protective film roll. Useful for wrist and hand pieces where friction from daily life can irritate a fresh dressing.
-
Fragrance-free gentle body wash. Keeps healing areas clean without stripping delicate ink.
-
Aquaphor Healing Ointment. A mainstream, widely used option for the initial thin-layer moisturize stage.
7. Neo-Traditional Dagger on Outer Bicep
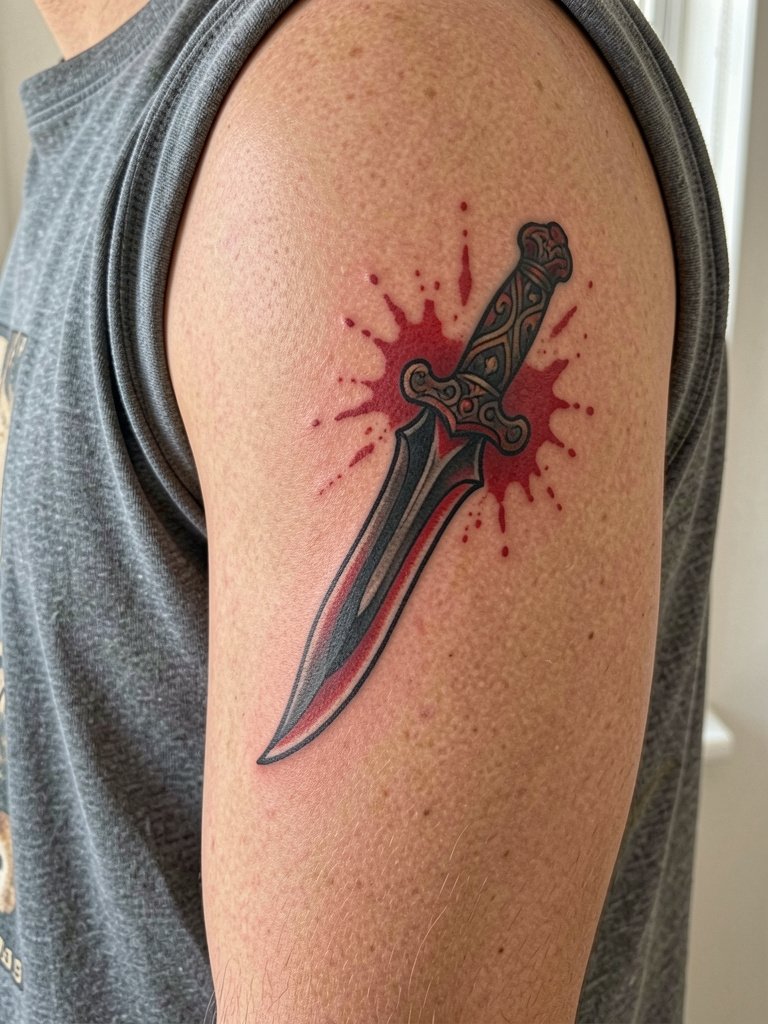
Outer bicep provides a forgiving canvas for neo-traditional work and is a low-pain area for most people. For this style emphasize saturated color and clean outlines so the dagger keeps contrast as color fades. A real mistake is asking for tiny ornate details without enough size. Ask the artist to show how the dagger reads from six feet away so the composition holds. Sessions can be one to three hours depending on color layers. Show-off tip: a sleeveless knit or a button-up shirt worn open frames the artwork without covering it.
8. Single-Line Continuous Wave on Ribcage
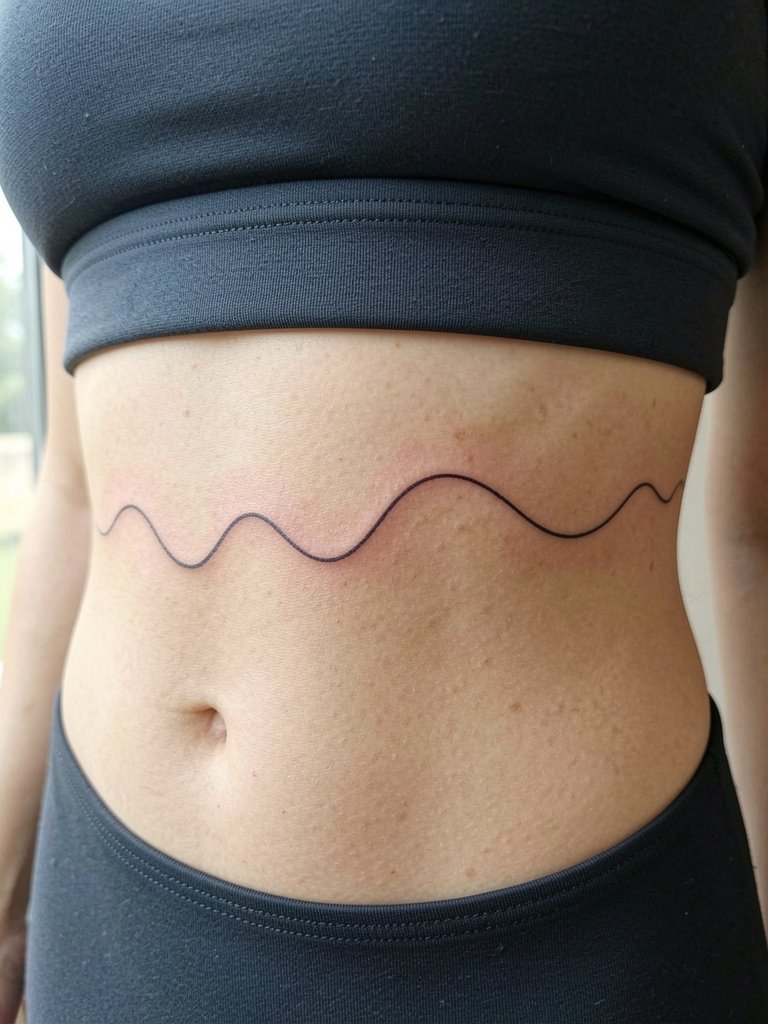
Rib tattoos are notorious for movement and sensitivity. One camp argues fine single-line on ribs blurs quickly because the skin stretches and rubs under clothing. The other camp insists that with slightly wider spacing and proper needle depth it can hold for years. Discuss exact line spacing and ask for a life-size stencil while breathing normally so the piece sits correctly when you inhale and exhale. Pain is higher here so plan breaks and a longer session. Wear a fitted sports bra or bandeau that gives access without fabric tugging.
9. Small Blackwork Sun on Sternum
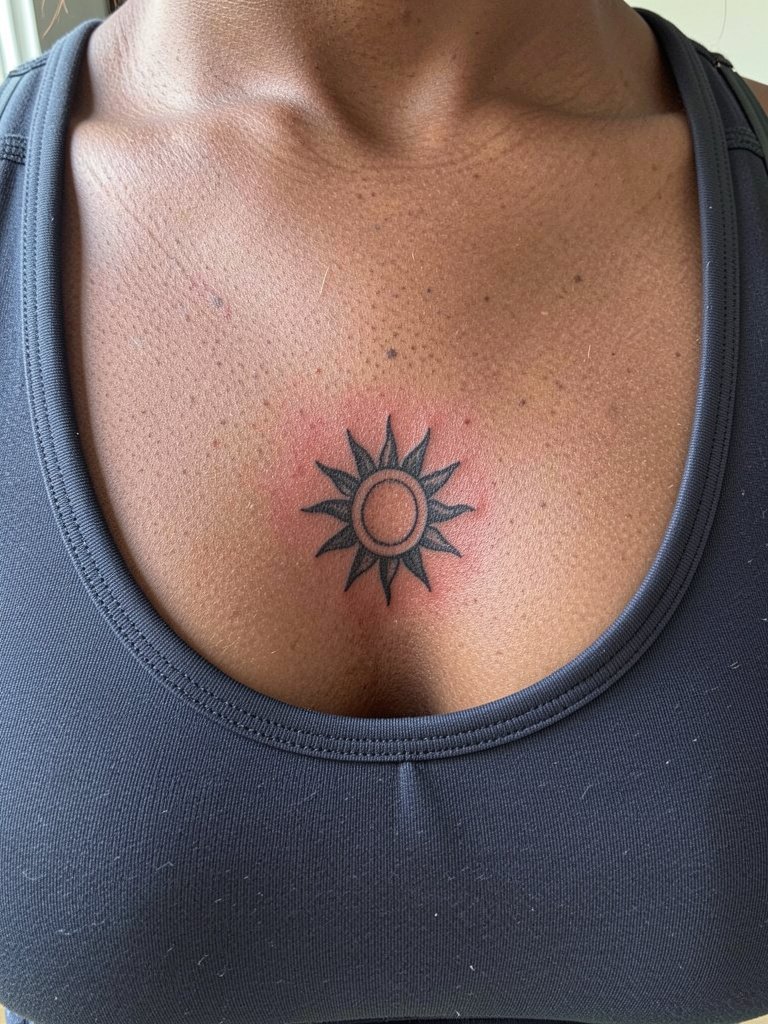
Sternum pieces sit on sensitive skin that moves with breathing. The practical choice for this area is bold blackwork rather than intricate micro-shading so the rays stay defined. A common error is requesting tiny filigree centered on the sternum, which tends to blur and require touch-ups. Session time can be uncomfortable for beginners, so plan numbing and breaks. Sensitive placement note: some artists specialize in chest work and can advise on spacing to avoid distortion under the breastline.
10. Linework Mountain Range on Calf
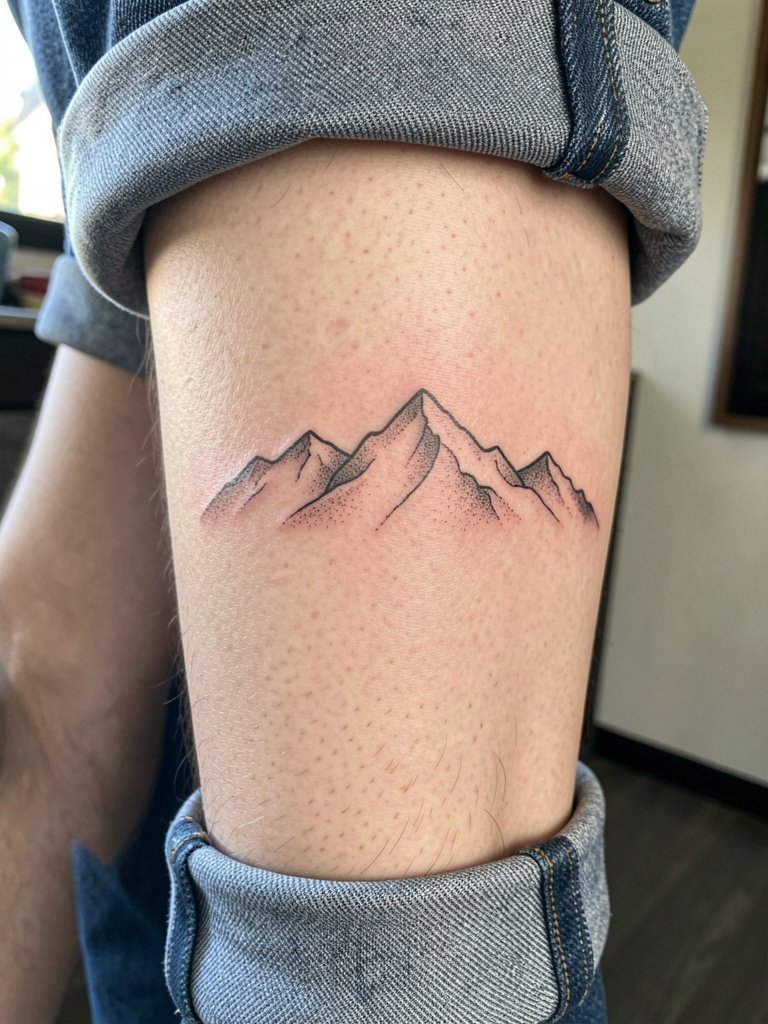
A calf tattoo is great for a first sleeve-adjacent piece because it gives a long vertical canvas with moderate pain. I recommend clear negative-space ridgelines so the mountain reads when you are standing at a distance. Mistakes include crowding tiny peaks without breathing room. Expect a session from one to three hours depending on length. For session wear low-rise or cuffed pants so the artist can roll the leg without pressure on the area. Pair with boots or sandals to style the exposed calf after healing.
11. Dot Work Crescent on Upper Thigh
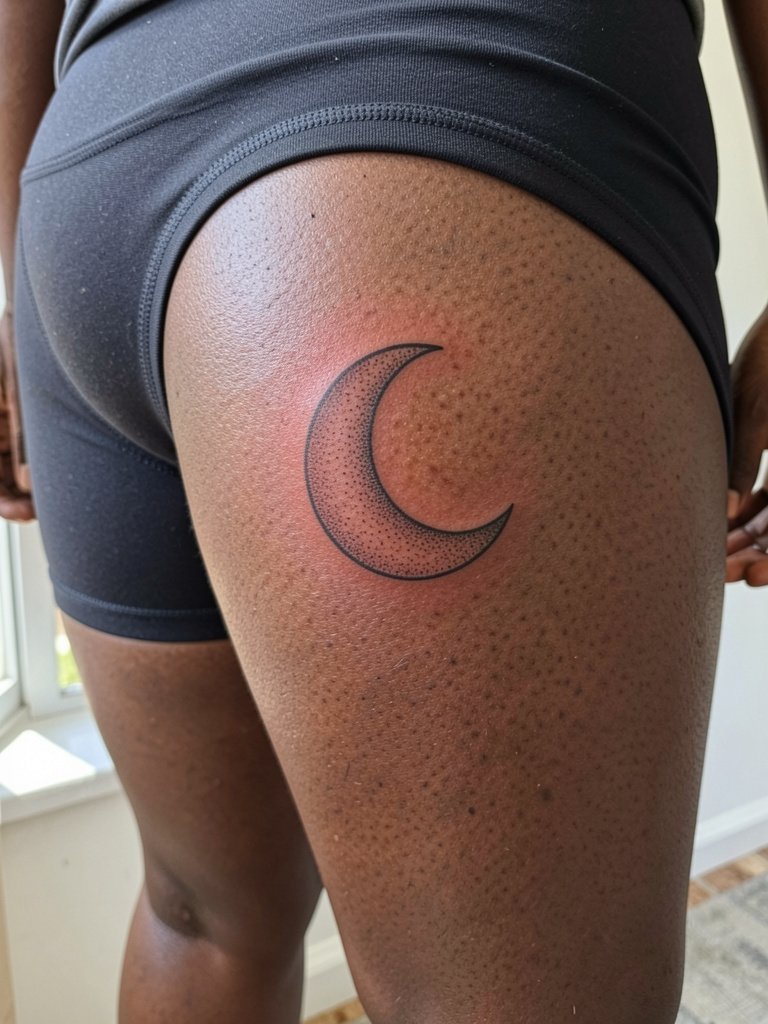
Upper-thigh dot work gives you a private canvas that shows when you want it to. The skin here holds stippling well if the artist spaces the dots for the intended distance. A misstep is asking for extremely dense dot gradations at a small scale which can read muddy later. Sessions are moderate in pain and often longer when shading is involved. Sensitive placement note: inner thigh work can be intimate so choose an artist comfortable with that area. For appointments pick shorts or a skirt that lets you sit comfortably while exposing the area.
12. Fine Line Constellation on Finger
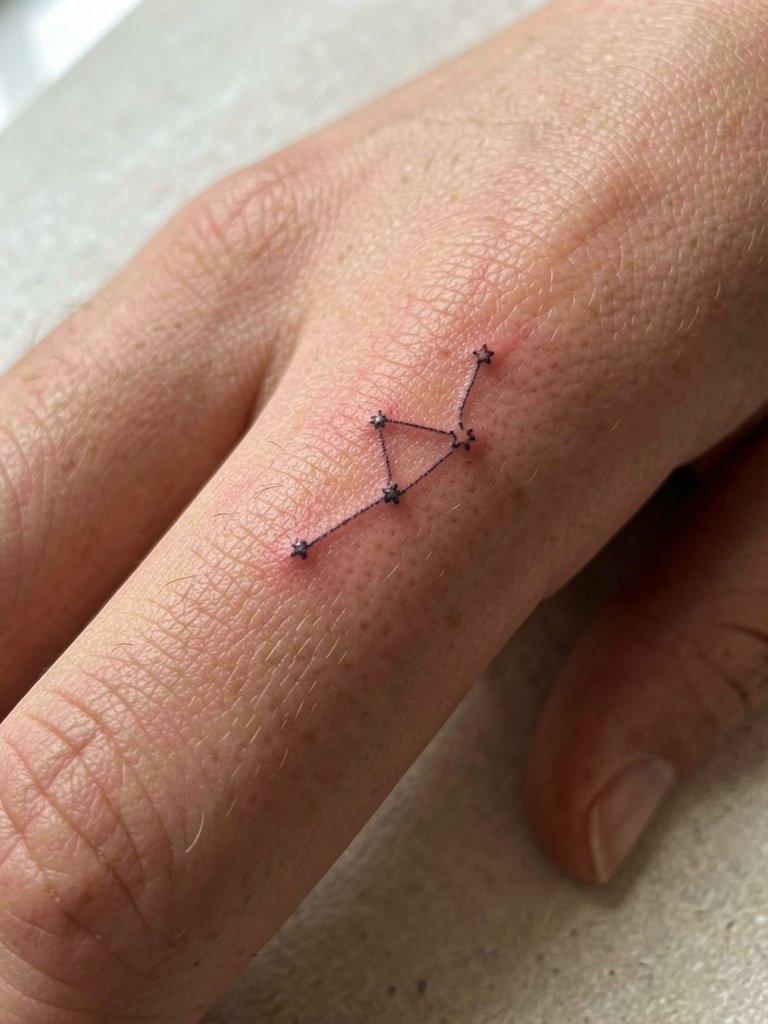
Finger tattoos are visible and fast to do but they fade and blur faster than most spots. Artists split into two camps about finger work. One group says fingers are a high-fade zone and avoid intricate linework because the skin is thin and oil exposure is high. The other group argues that with bolder single shapes and planned touch-ups you can keep fingers looking crisp. If you choose this spot, ask the artist how they handle ink depth and schedule a touch-up plan. For the appointment keep the hand clean and wear minimal rings so the area is unobstructed.
13. Watercolor Floral on Side Rib
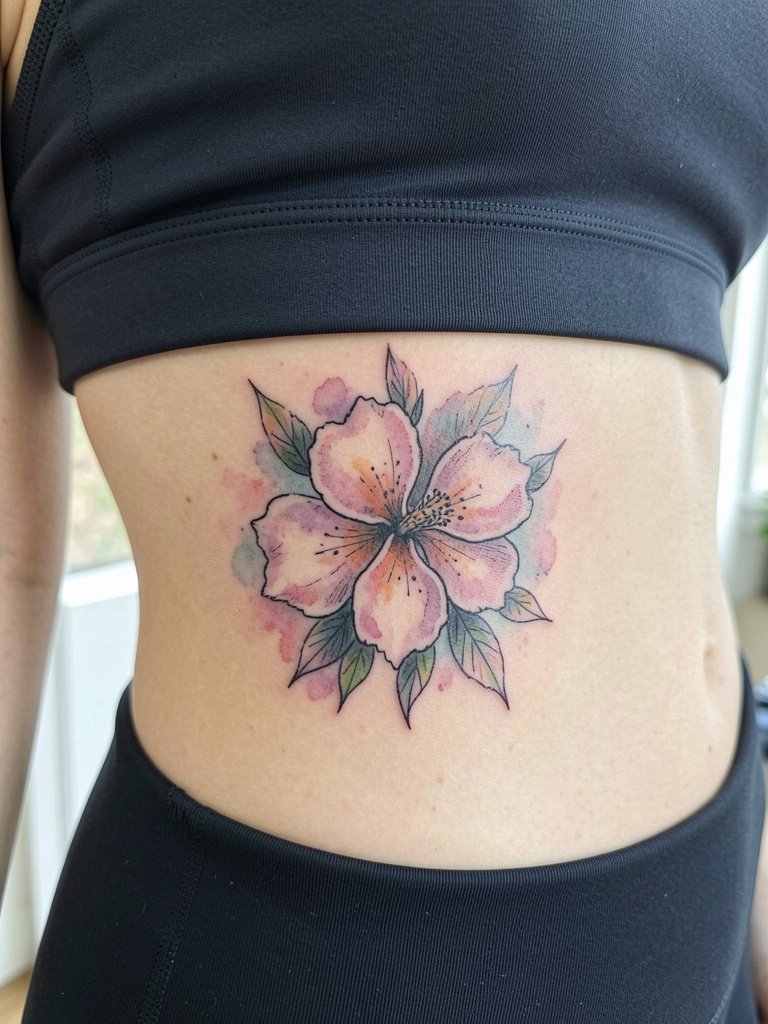
Watercolor effects look painterly in photos but tend to lose their edge over time. My recommendation for ribs is to anchor watercolor with subtle black linework so the composition keeps structure as the colors soften. A frequent regret is pure color washes with no outline at small scale because they can spread and look patchy. Sessions here take longer because of breathing and breaks. Wear a cropped top that stays put so the artist can reach the area without fabric movement. Consider a touch-up window planned at one to two years.
14. Tiny Portrait Locket on Sternum Edge
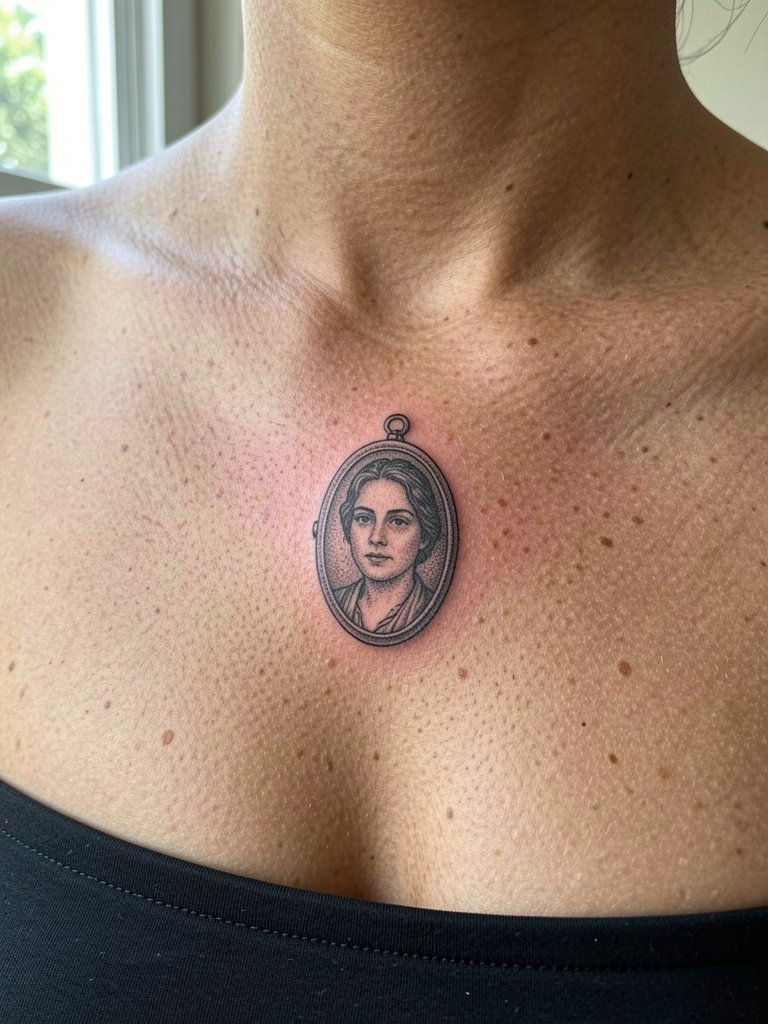
A portrait at this size needs referenced facial proportions and a slightly larger scale than most people ask for. Tiny faces lose identity quickly when the skin settles. Ask your artist to show a photo of a similar-sized healed portrait so you can see realistic expectations. Sessions are detailed and may require two visits. Sensitive placement note: sternum work benefits from an artist experienced in small facial features on chest skin. For appointments wear a top that gives clear access without shifting.
15. Tiny Script Behind Collarbone
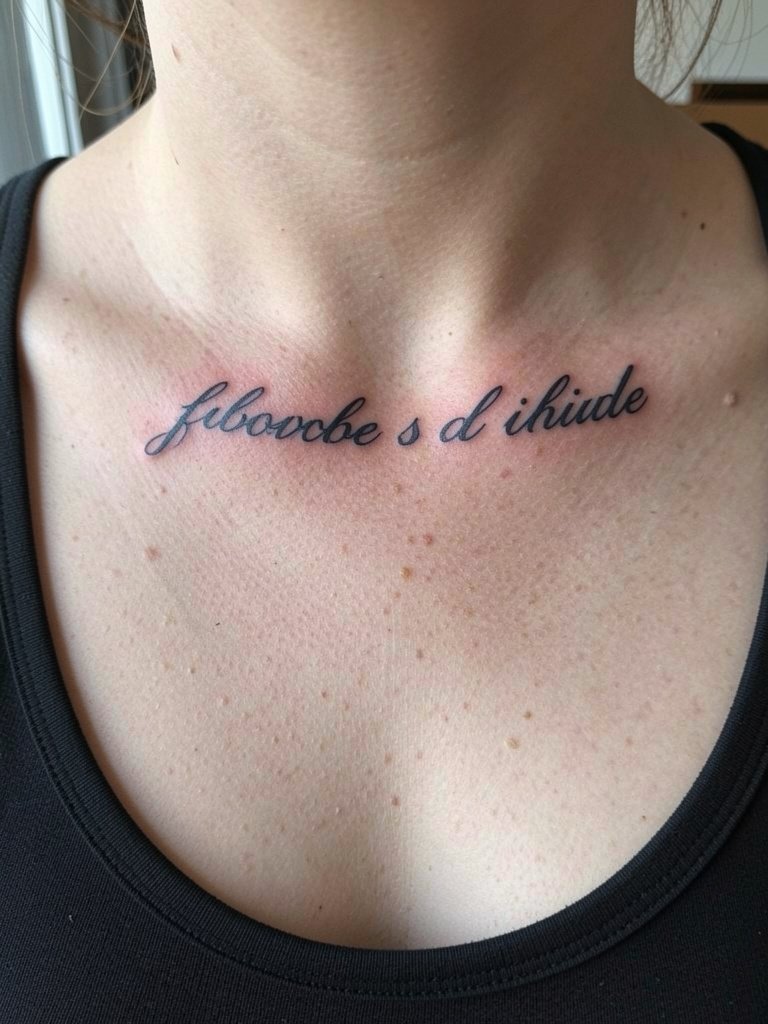
Small collarbone scripts work as subtle accents but sit on moving, thin skin. Pick slightly heavier strokes and ask the artist to preview the stencil with your normal posture so letters do not curve oddly when you move. A typical mistake is trusting a tiny font at life size without seeing how it sits on the collarbone contour. Sessions are usually under an hour but expect a touch-up. For showing the piece, scoop-neck dresses or a wide-neck knit let the script breathe visually.
16. Bold Blackwork Band on Forearm
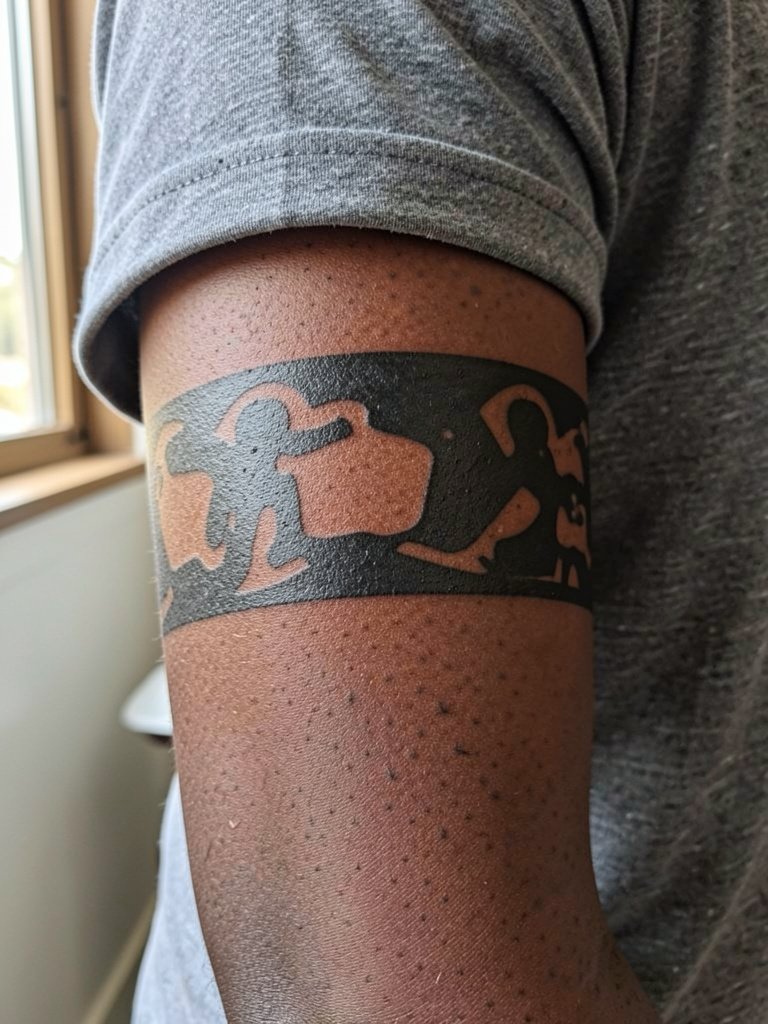
Blackwork bands read strong and last well when the saturation is consistent. The main trade-off is size and placement. Ask how the band will look when you bend your wrist since wrapping can distort thin negative elements. A common mistake is making negative-space filigree too thin against a saturated block. Session times vary with saturation area. For styling, short sleeve shirts or rolled cuffs keep the forearm visible and let the band act like a bold accessory.
17. Stippled Botanical Thigh Panel
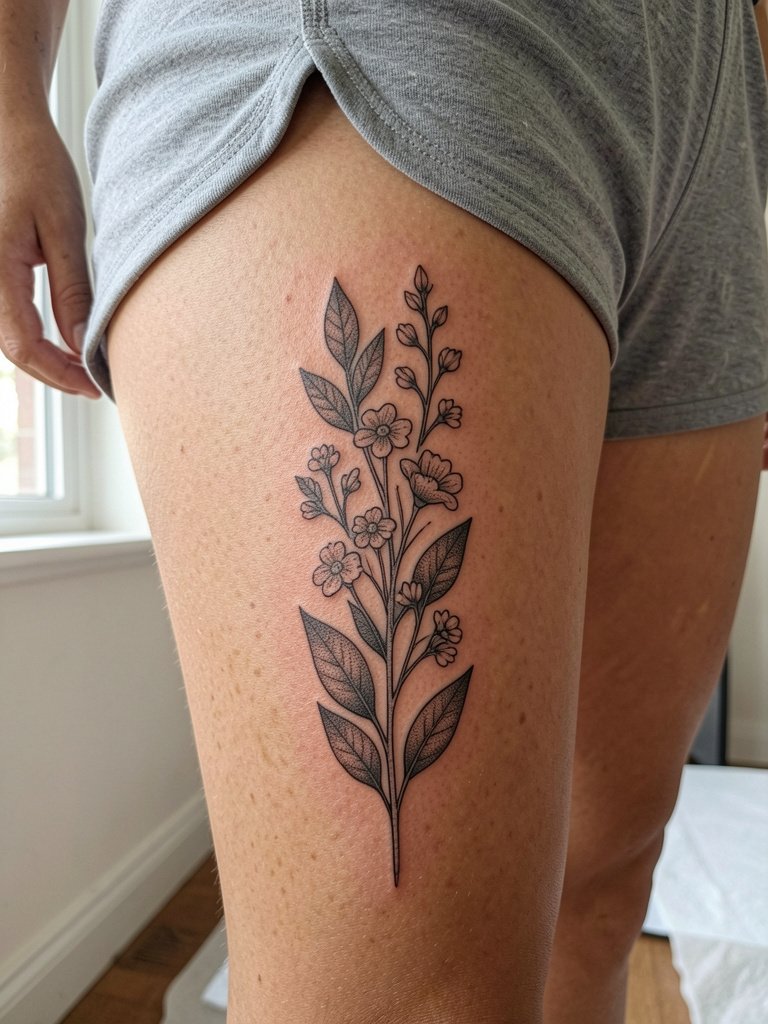
Thigh panels let you go larger with low visibility when you want privacy. Stipple shading shows beautifully here but needs space to avoid looking dense later. A real mistake is packing tiny stipple gradients into a small area. Sessions can be longer and may be split. Sensitive placement note: inner thigh pieces demand an artist comfortable with intimate locations. For the session wear shorts that let you sit without fabric bunching near the tattoo.
18. Geometric Mandala on Upper Back
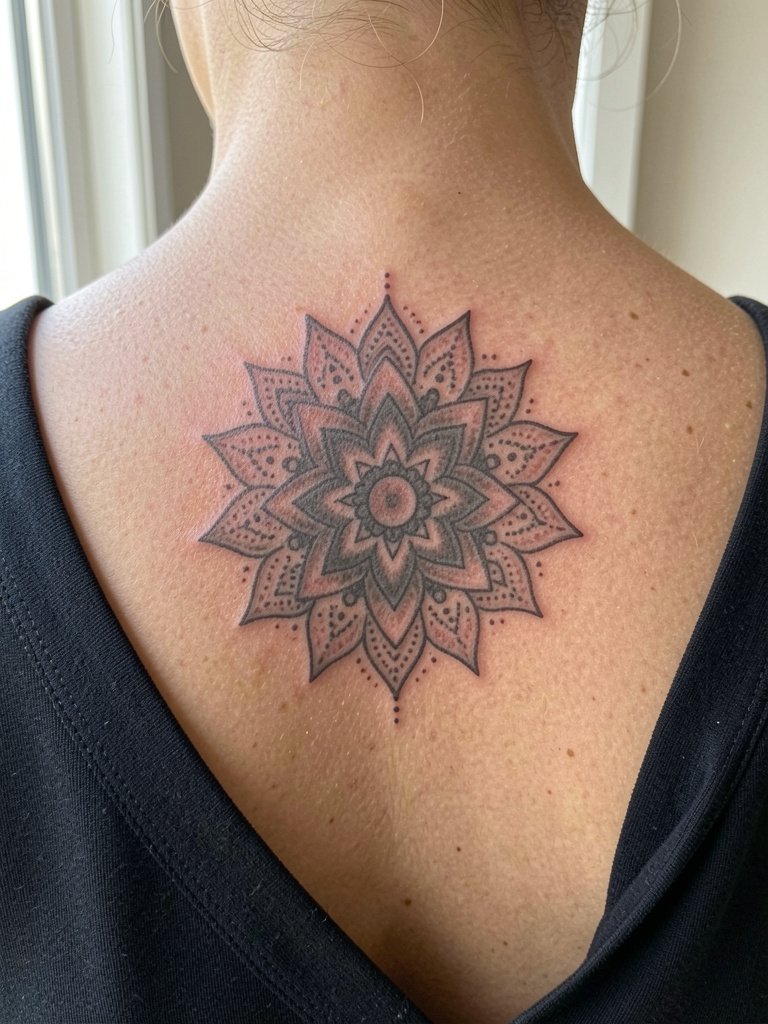
Mandala work requires precision and symmetry, and the upper back is forgiving for fine geometry. When discussing the piece specify how large you want the central negative space to be so the pattern does not look crowded as it ages. For cultural origins, be mindful of motifs rooted in particular traditions and ask about respectful adaptation. Sessions are moderate to long. To show off the piece wear open-back tops or dresses that reveal the central geometry.
19. Small Anchor on Ankle
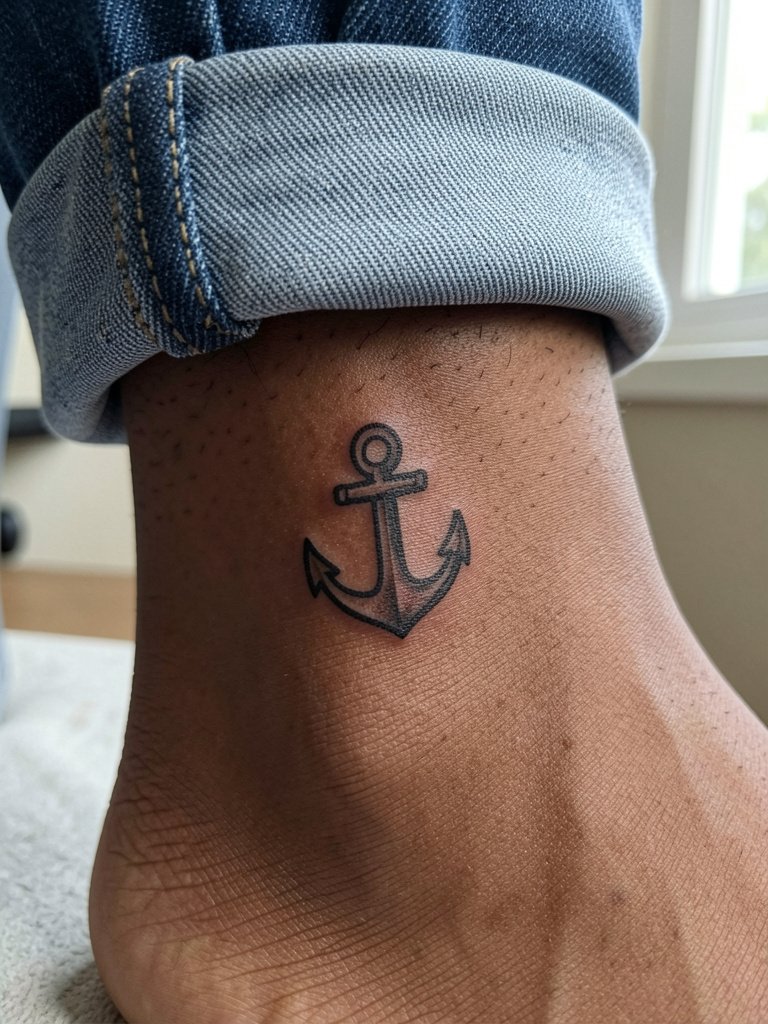
Ankle tattoos face friction from socks and shoes so solid outlines and clean silhouette outperform tiny filigree. A typical mistake is asking for thin ornamental lines that get lost when the area rubs. Expect the first week to require protective film and light care, and plan a touch-up if you wear closed shoes often. Session time is short. For showing the design wear cuffed jeans or sandals to keep the ankle visible and reduce rubbing while healed.
20. Thin Blackwork Arrow on Side Neck
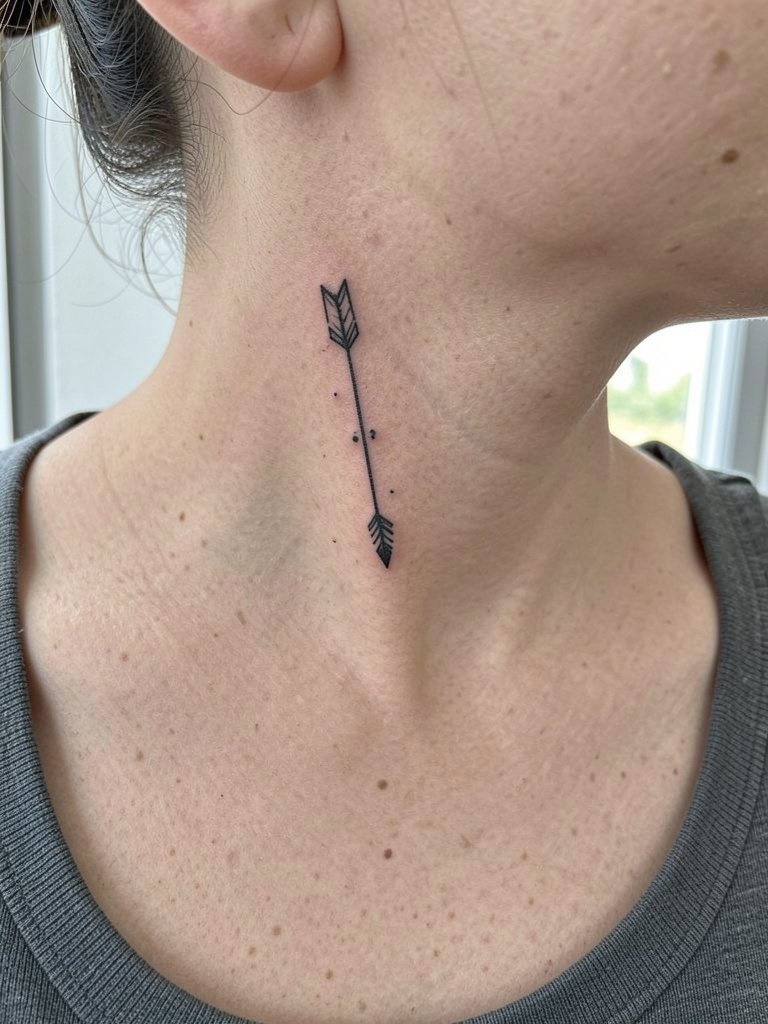
Neck tattoos are highly visible and require frank discussion about long-term visibility. Pain is moderate because the skin is thin and movement is constant. For this placement choose bold, simple motifs rather than tiny script. A mistake people make is asking for extremely fine detail at that scale. Sensitive placement note: side neck work often needs an artist with experience in high-visibility areas. For the appointment wear a wide-neck top so the artist can access the lateral neck without stretching fabric across the area.
21. Single Needle Script on Rib Lower Edge
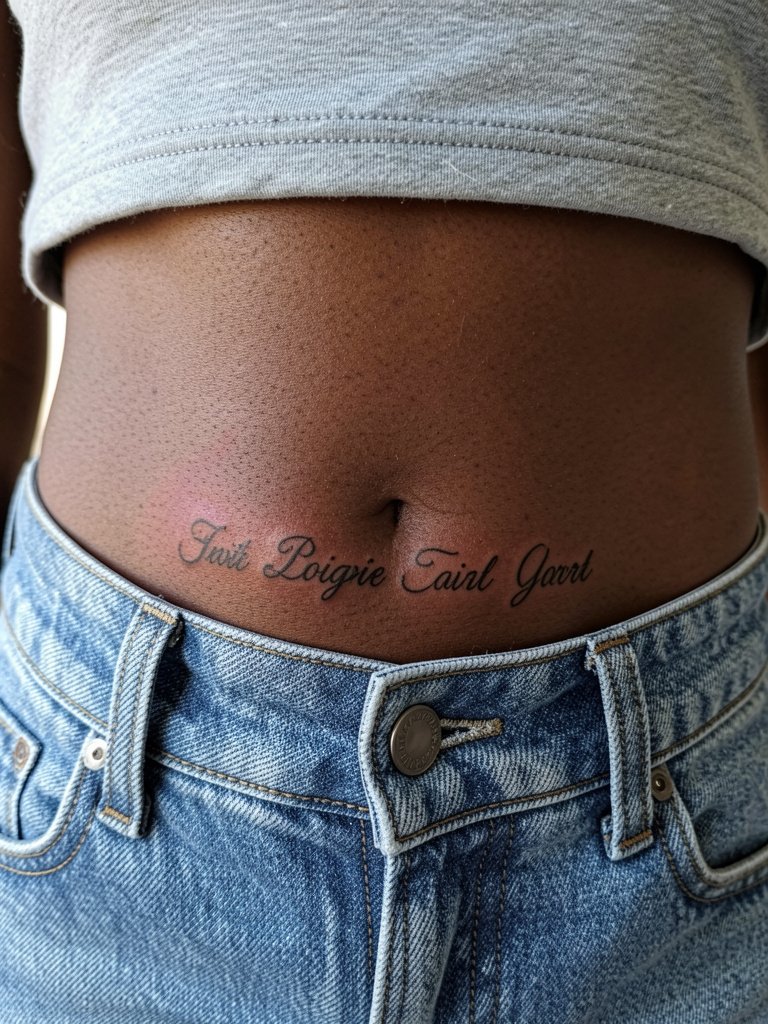
The lower rib edge sees movement from twisting and growth, so tiny single-needle script is a risky starting point. Pick slightly more open letterforms and request a breathing test with the stencil so you can see how phrases stretch when you move. A common regret is choosing an ultra-fine script that becomes illegible after a few years. Expect higher pain and possibly a two-part session. Wear high-waisted bottoms that remain buttoned so the artist can reach without clothing adjustments.
22. Tiny Floral Wrist Cluster
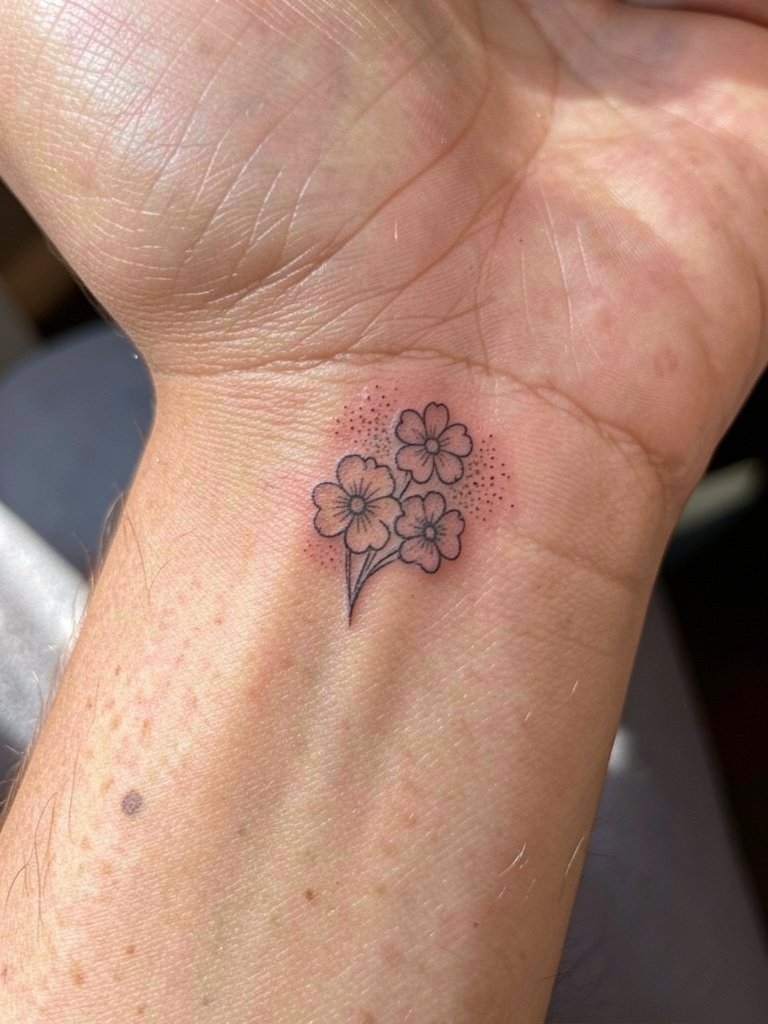
A small floral cluster works well for beginners because it reads as a compact unit and can be scaled without losing form. The wrist eats fine detail so choose clear petal shapes and ask for slightly heavier separation between elements. A frequent mistake is compressing multiple tiny elements into a fingertip-sized area. Sessions are brief. For showing the cluster off choose rolled sleeve looks or a slim watch that sits below the piece, and consider a slim leather strap watch that complements the wrist without rubbing the healing ink.
23. Tiny Crescent Behind Thumb
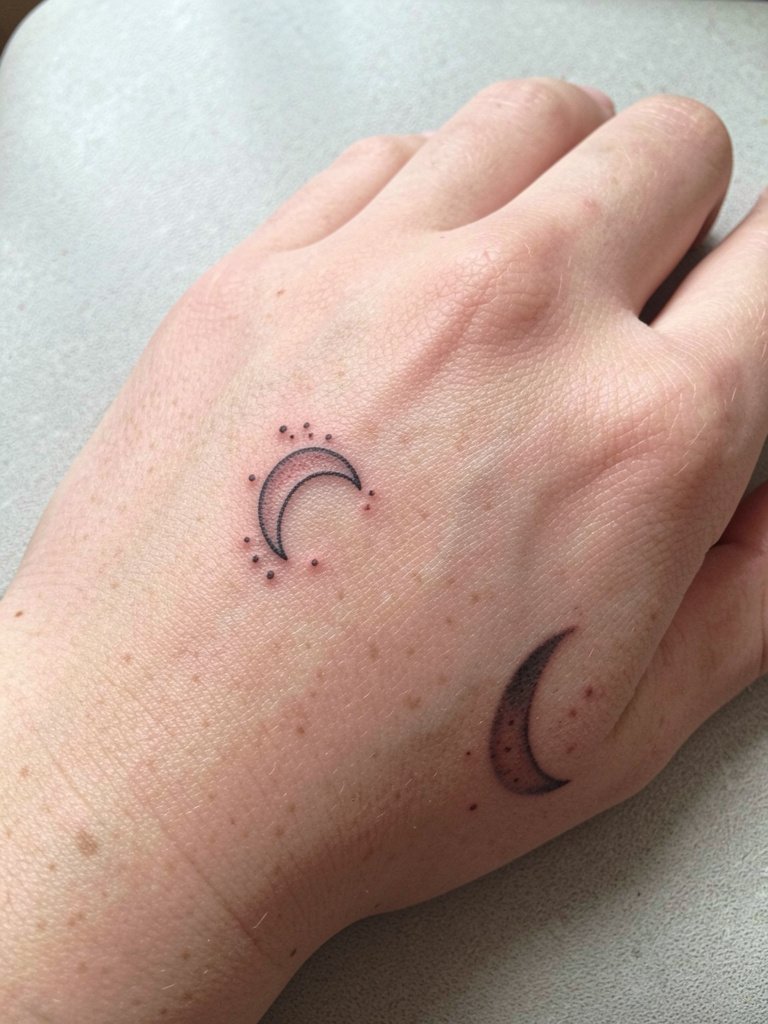
Hands and the lateral thumb area are high-wear zones that need realistic expectations. One camp supports hand tattoos as a form of personal expression and will do simple, bold pieces despite faster fading. The other camp advises against hands for first-timers because daily washing and abrasion cause earlier touch-ups and potential loss of fine detail. If you proceed, go for bold silhouette shapes and plan touch-ups. For the session keep rings off and hands clean so the artist has unobstructed access.
Frequently Asked Questions
Q: How should I pick size and spacing for fine-line pieces to avoid early blurring?
A: Ask for a life-size stencil and view it on your skin while standing and while moving the placement area. Line spacing needs a hair more room than paper mockups provide, and slightly heavier linework at small scales keeps contrast longer. I have seen stencils resized in the chair and those decisions save touch-ups later.
Q: Where can I find healed examples and portfolios without naming specific artists?
A: Search platform filters and hashtags on Instagram and TikTok, use keywords like "healed fine line wrist tattoo" or "healed blackwork shoulder," and browse community threads on Reddit for user-shared healed photos. Look for portfolios tagged with "healed shots" and use location filters if you want work near you. This one-place discovery approach helps you see real results across skin tones.
Q: What should I wear to a session depending on the placement?
A: Match your clothing to the placement so the artist can work without fabric tugging. For shoulder and upper-back pieces pick a tank top. For ribs and sternum wear a fitted sports bra or bandeau that stays put. For thigh and calf pieces bring shorts you can sit in comfortably. Comfort and access matter more than style during a session.
Q: How often do small tattoos need touch-ups in the first five years?
A: Small wrist, finger, and hand pieces often need a touch-up within one to three years, while bolder shoulder and blackwork pieces can go longer without refresh. It depends on sun exposure, friction, and your skin type. Plan for at least one touch-up window for most small designs.
Q: Are there cultural concerns I should be aware of when picking mandala or tribal motifs?
A: Yes. When a design has cultural origins, consider the meaning and source of specific symbols and ask how your artist plans to adapt them respectfully. Some motifs are sacred in certain contexts and deserve attribution or avoidance. Ask for alternatives that capture the aesthetic without appropriating specific cultural elements.
