
Glow-reactive ink solves a visibility problem and creates one at the same time. It can vanish in daylight, flare under club lights, or irritate sensitive skin during healing, so pick technique and placement with those trade-offs in mind. I focus on designs that read well in normal light, hold saturation over time, and still pop under UV so you get the glow without the common regrets.
1. Fluorescent Dotwork Constellation on Inner Forearm
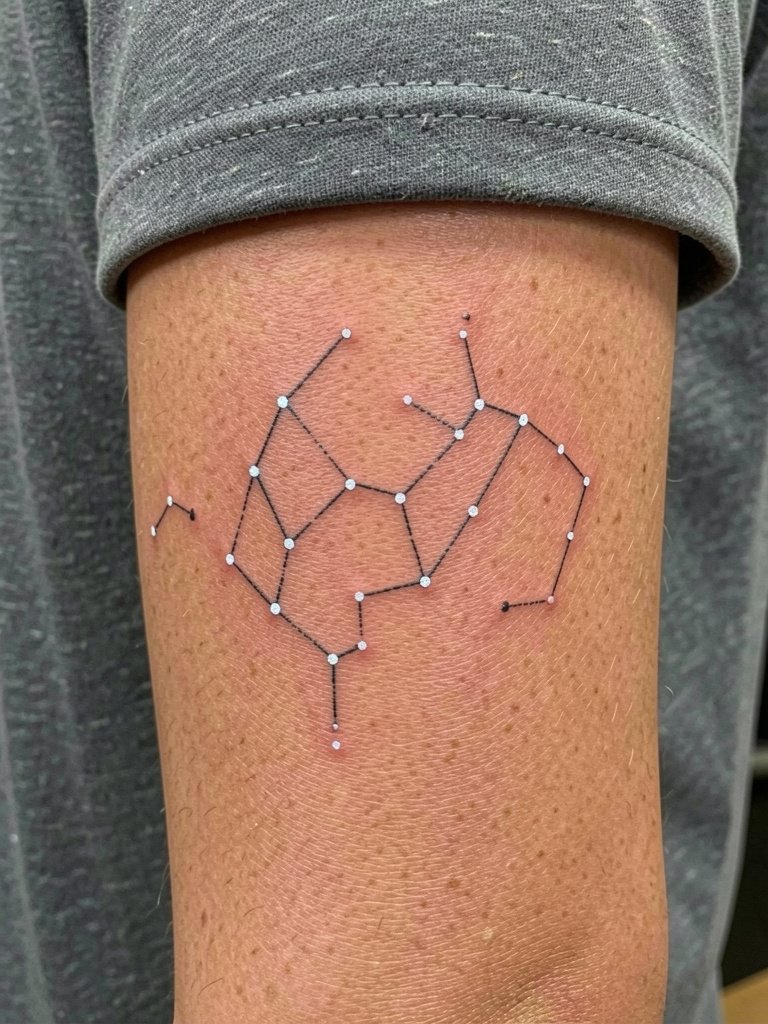
This constellation uses stipple shading and clustered dots so the design reads at arm's length in daylight and brightens under blacklight. I recommend slightly heavier point density than a pure single-needle piece because the inner forearm compresses detail over time. Common mistakes include requesting microscopic stars that blur into a gray patch by year two. For the session plan expect low pain and a one- to two-hour slot for a modest spread. For show-off styling pair with rolled sleeves and a linen short-sleeve shirt that keeps the forearm visible.
2. Neon Mandala Behind the Ear
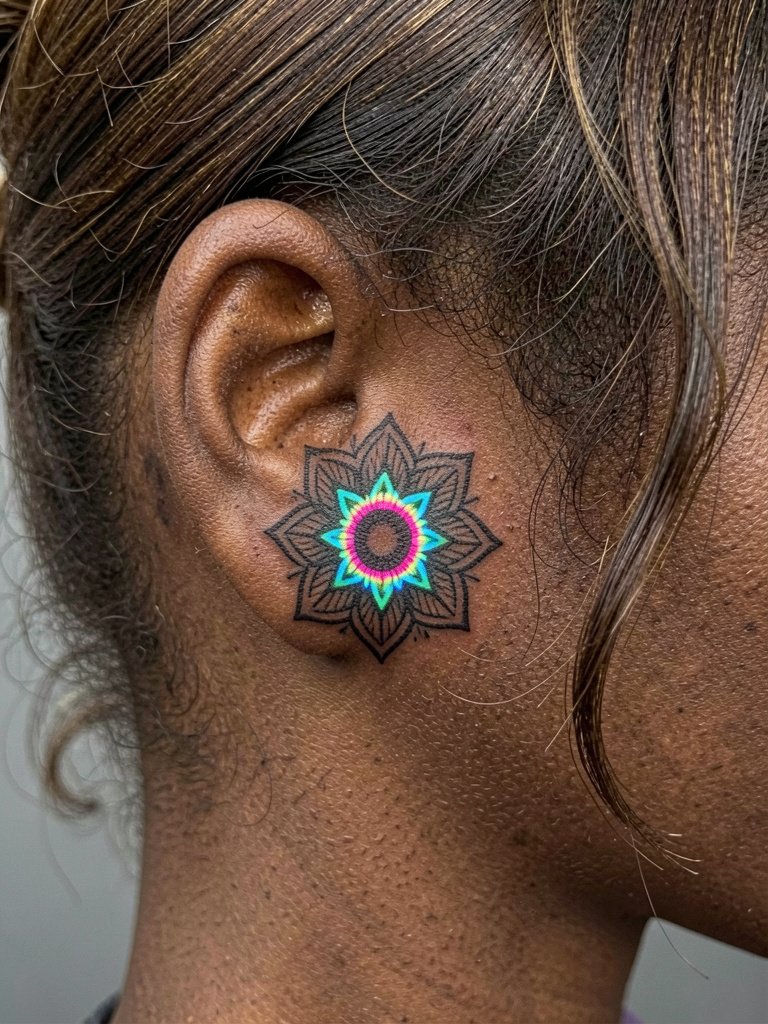
Behind-the-ear pieces need single-needle control for crisp radial lines and careful saturation for the neon accents to show under UV. Pain is low to medium depending on nerve sensitivity. A common error is over-detailing the center, which loses contrast as the skin settles. Plan for a short session under an hour but allow the artist to patch-test the UV pigment. This placement looks sharp with short hair or an updo, and it pairs with small silver hoop earrings that frame the area.
3. Glow Geometric Sternum Accent
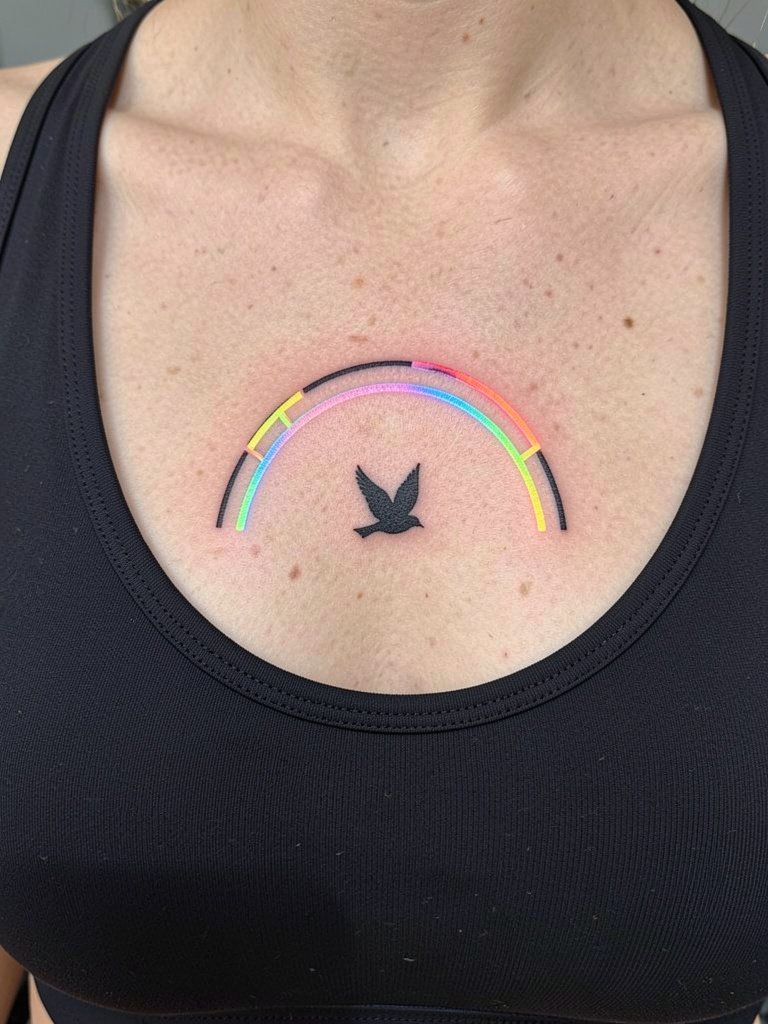
Sternum work ages differently because the skin moves with breathing and body changes. For UV accents keep lines simple and centered so the negative space reads cleanly after healing. Pain here is higher than forearm pieces and you should budget a longer session with breaks. A common mistake is ultra-fine script across the sternum, which blurs by year three. During the appointment wear a fitted sports bra so the artist has access without fabric being moved. For evenings out consider low-cut tops that let the geometric arc peek through.
4. Bold Blacklight Floral on Shoulder Blade, Controversy Noted
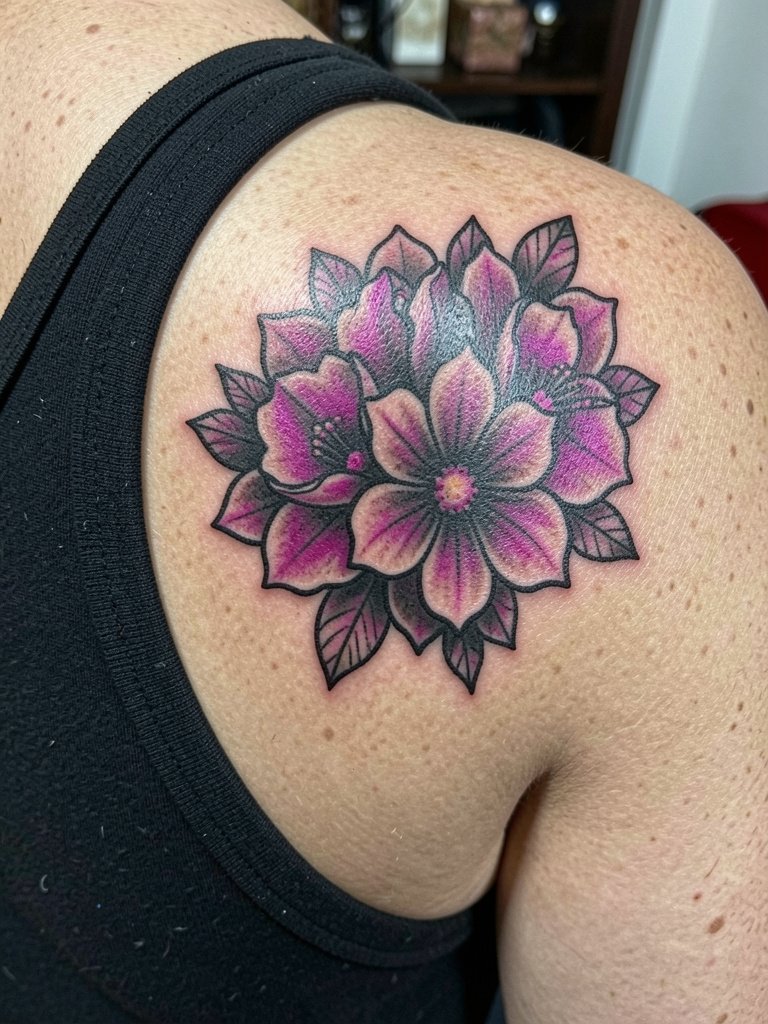
Artists split on UV inks for large color fields. One camp says UV pigments can be less stable and raise allergic reaction risk, especially in broad saturated fills. The other camp argues that modern UV formulas and careful layering keep saturation and reduce reaction, and they point to healed gallery shots to back that claim. If you lean toward larger petals, ask for a patch test and plan for a thicker black outline to protect the neon fills from early loss.
5. Micro-Realism Neon Eye on Inner Wrist
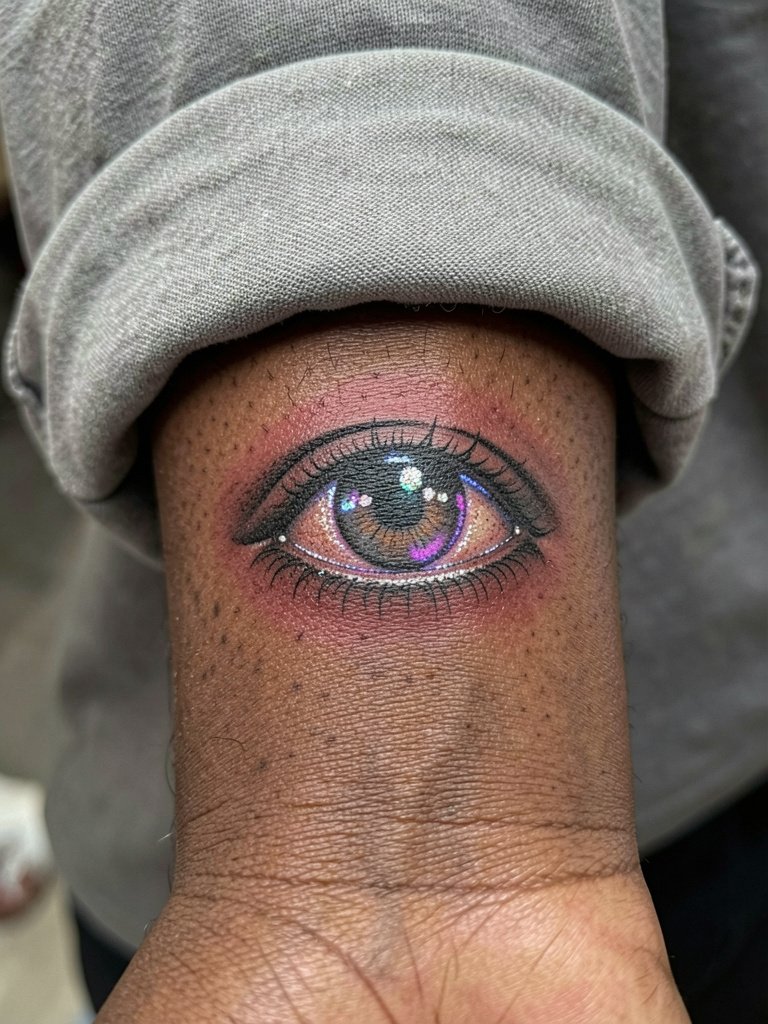
Inner-wrist micro-realism needs deliberate line weight to survive friction from watches and bracelets. The wrist eats single-needle detail, so request slightly bolder contour lines and denser saturation in the neon highlights. Session time is short but the healing window demands extra care and realistic touch-up expectations at year one. For styling, a slim minimalist bracelet keeps the wrist visible without rubbing the fresh ink.
6. UV Script Around Ankle
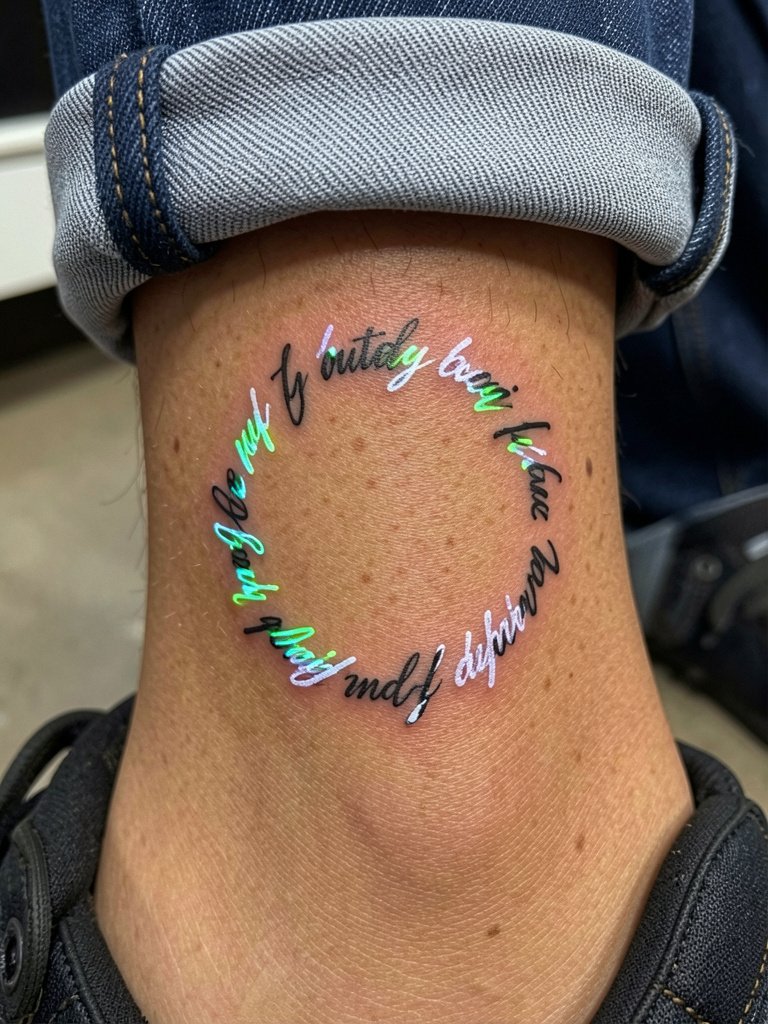
Ankle lettering can look crisp for the first year and then soften if the letters are too close. Use readable letter spacing and ask the artist to bold the baseline stroke slightly so the script stays legible. The area sees friction from socks and shoes, which increases touch-up needs. Expect low to medium pain and a single short session. Pair this with low-cut sneakers or rolled jeans to show the ring of script more often.
Session Day Picks
The forearm, wrist, and ankle pieces above all have different friction and access issues, so these items help with the day-of comfort and early healing trade-offs.
-
Silicone stencil transfer sheets. Lets you preview exact placement on skin for small script and dot work, especially useful for wrist and ankle pieces above.
-
Hypoallergenic topical numbing cream. Applied before longer shoulder blade or sternum sessions helps manage discomfort without affecting artist technique.
-
Thin protective film roll for first-week coverage. Keeps ankle and wrist tattoos clean during the first days of heavy movement.
-
Fragrance-free gentle body wash. Gentle cleansing supports healing for inner forearm and sternum pieces that may contact clothing.
-
Aquaphor healing ointment. Thin layers for the first few days lock in moisture and help fine line work settle without clogging.
7. Blackwork UV Spine Line
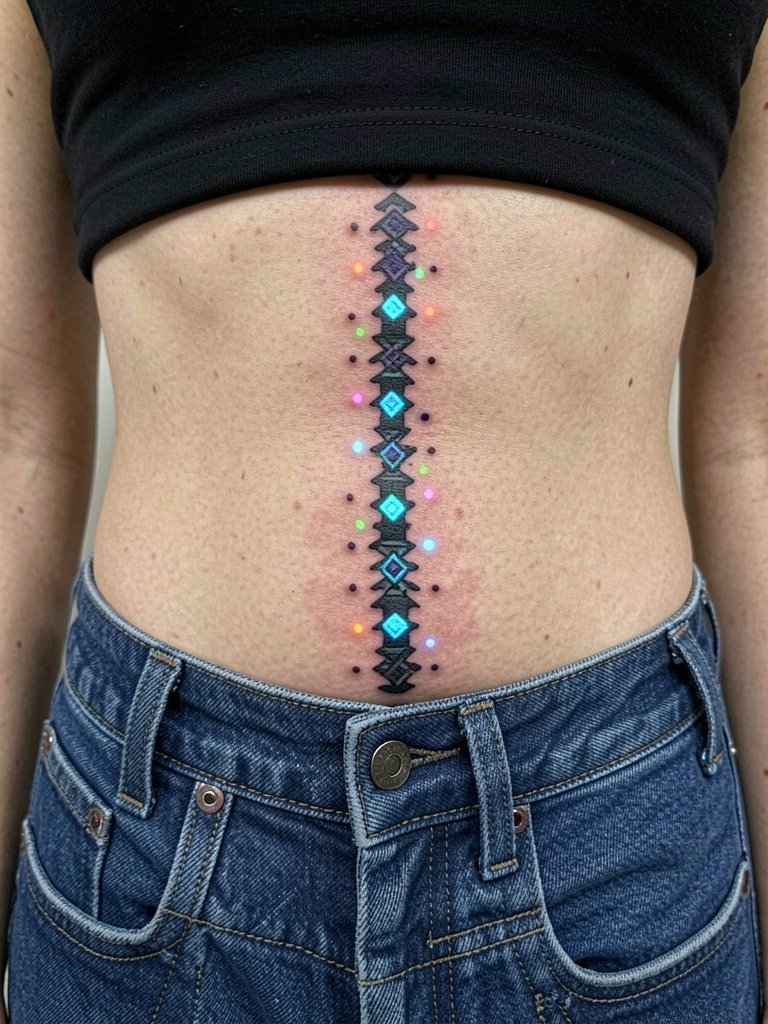
Lumbar pieces can handle bold blackwork with intermittent UV dots for impact under club lights. The skin there is relatively stable, so linework holds well over time if the artist spaces the geometry correctly. Sessions are medium in length and pain is variable depending on proximity to the spine. Wear a fitted cropped tank the day of to give clear access without fabric being adjusted. For nights out, low-back dresses reveal the vertical line elegantly.
8. Subtle UV Halo on Collarbone
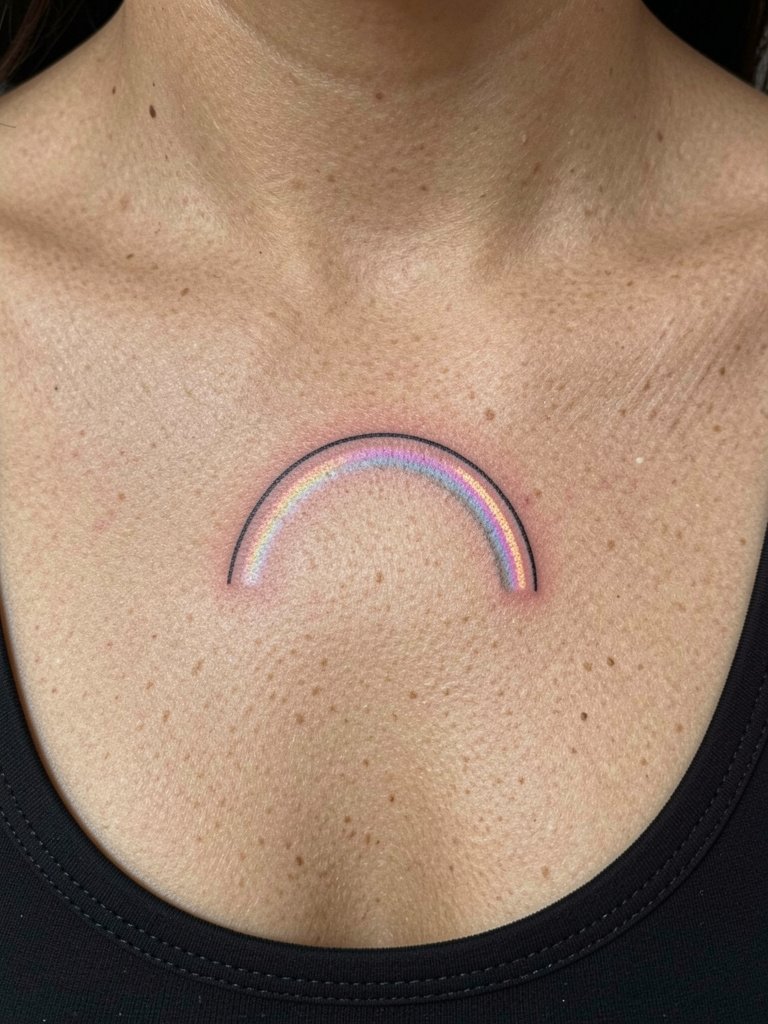
Collarbone arcs need enough negative space to avoid crowding as the skin moves. The visual impact is greatest when paired with low neckline clothing that does not press on the area. Pain is medium because the bone is shallow beneath the skin. Expect a short session and plan for a touch-up if the neon rim fades faster than the black. For styling consider wide-neck tops that let the halo breathe.
9. UV-Enhanced Traditional Rose on Upper Arm
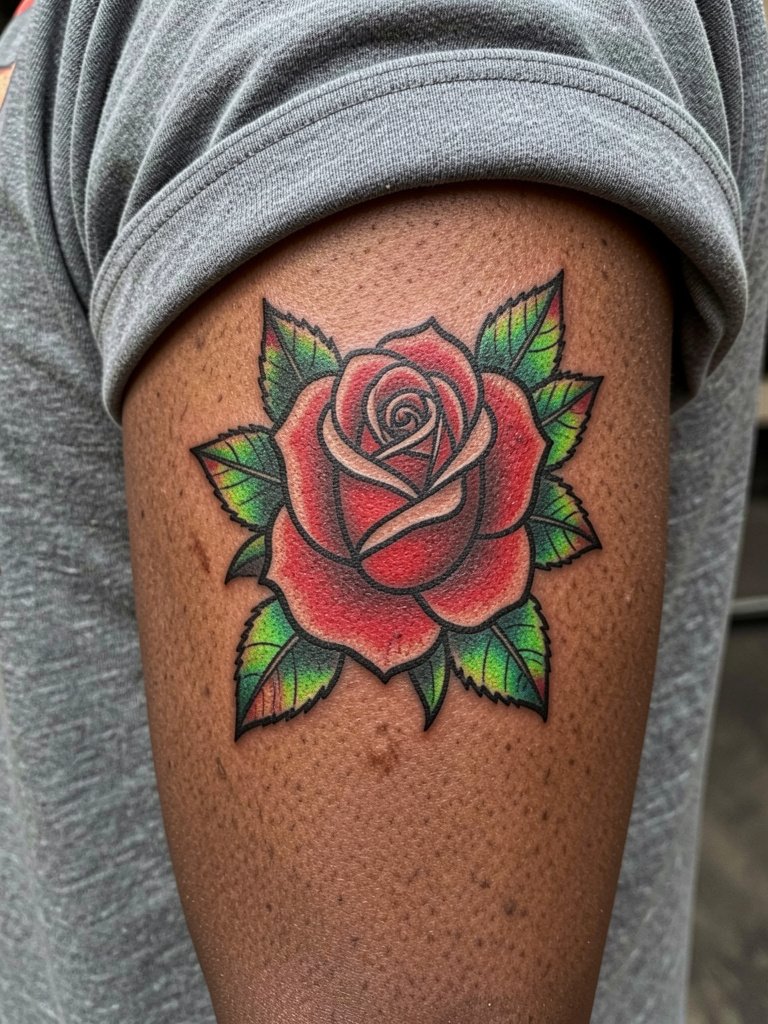
Traditional black outlines protect neon fills from blurring, which is why these roses hold up better than fully single-needle neon pieces. Expect medium pain and a one- to two-hour session for a classic upper-arm scale. A frequent error is tiny leaves with UV paint that fade into noise. This design pairs with rolled sleeves and a classic denim jacket so the rose can peek when you move.
10. Minimal UV Barcode on Ribcage
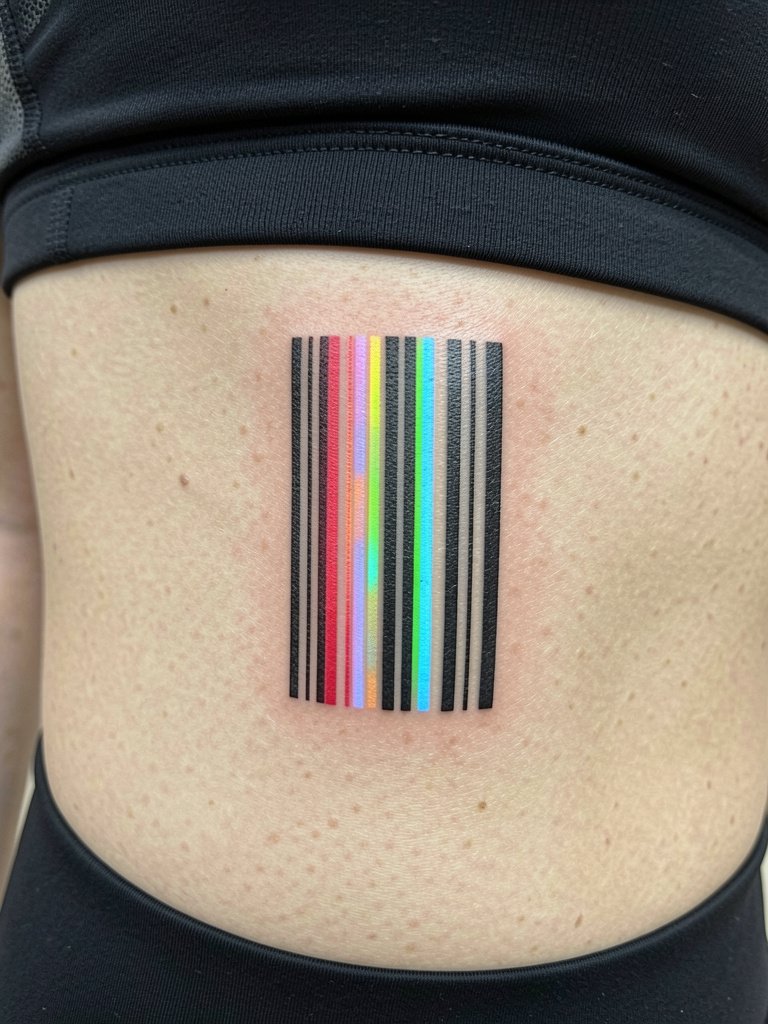
Ribcage tattoos have two recurring debates in the community. One side says fine line ribs blur because the skin there stretches and moves too much for delicate scripts. The opposing side contends that with slightly wider spacing and precise depth the work settles well and stays legible. For a barcode motif go with moderate bar thickness and expect a higher pain level. Wear loose clothing and allow time for a calm, steady session.
11. UV Dotwork Moon on Thigh
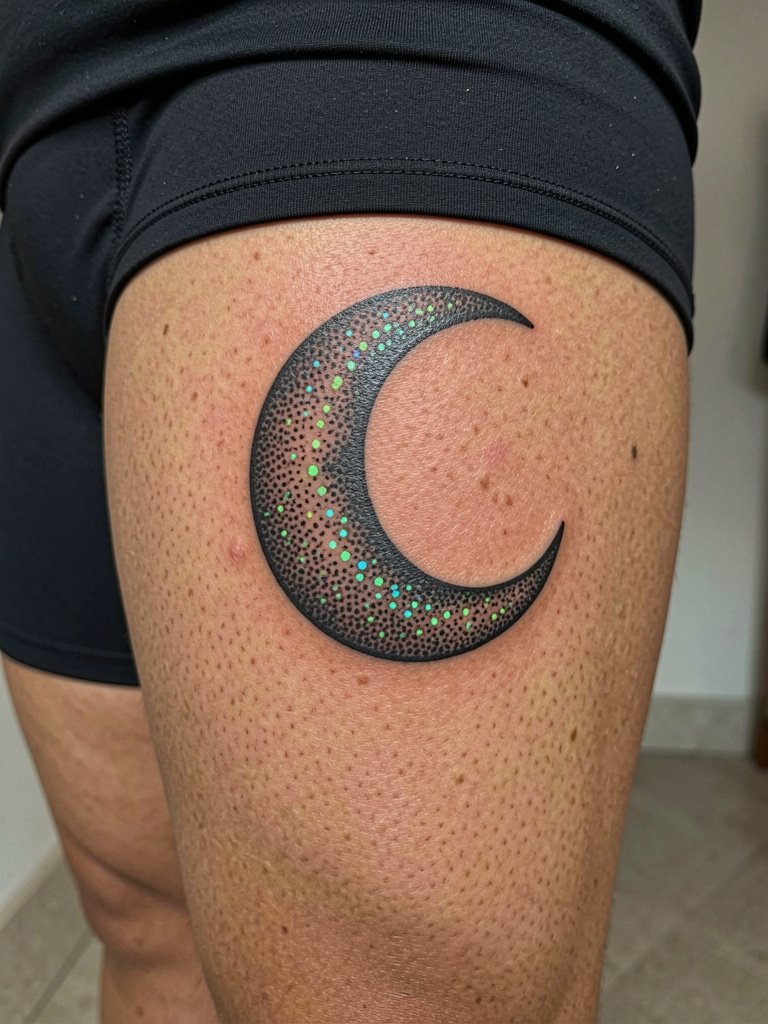
Inner-thigh dot work gives a soft glow under UV while remaining discreet in daylight. The medial thigh tolerates stippling well, but it is an intimate placement and needs an artist experienced with that area. Sessions can be longer and the skin is sensitive, so plan for numbing options if needed. For reveal styling, mid-thigh skirts or high slits frame the piece without forcing attention.
12. Neon Circuitry Calf Sleeve
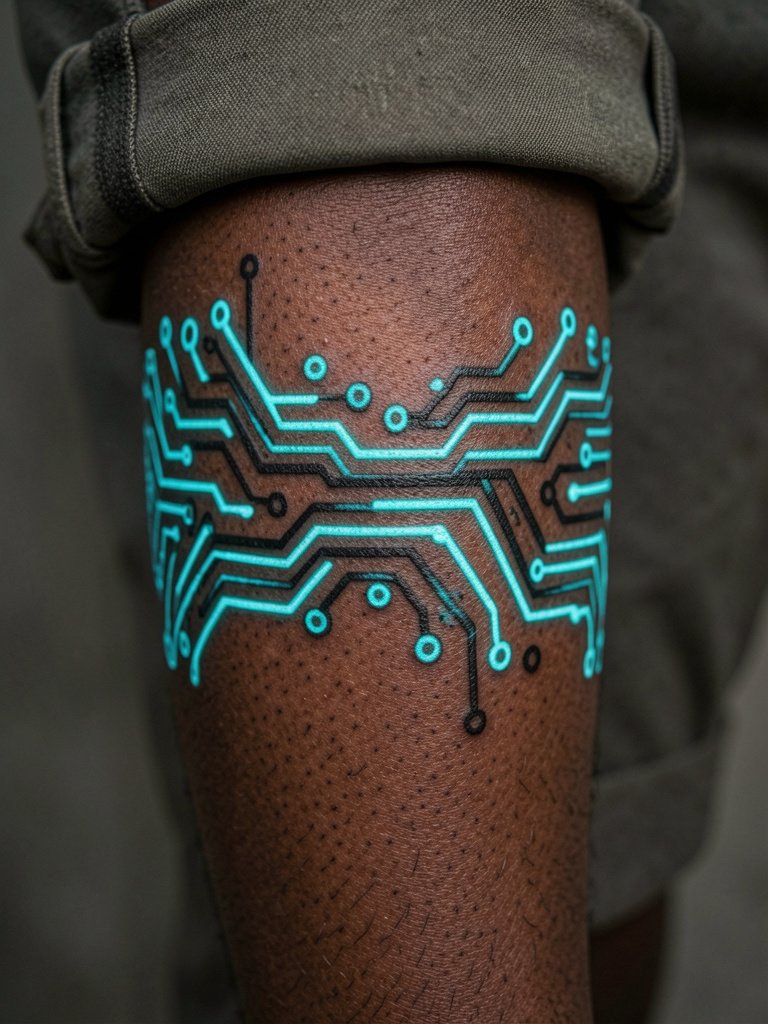
Calf sleeves let you play with long neon lines and blocky black anchors, so the glow reads in motion. The area is forgiving for saturation and handles larger color fields well. Sessions are medium to long depending on coverage. Avoid micro circuitry that compresses into mud over time. For day-to-day show-off wear cropped trousers or dresses that let the calf pattern be the focal point.
13. UV Geometric Ring Around Finger
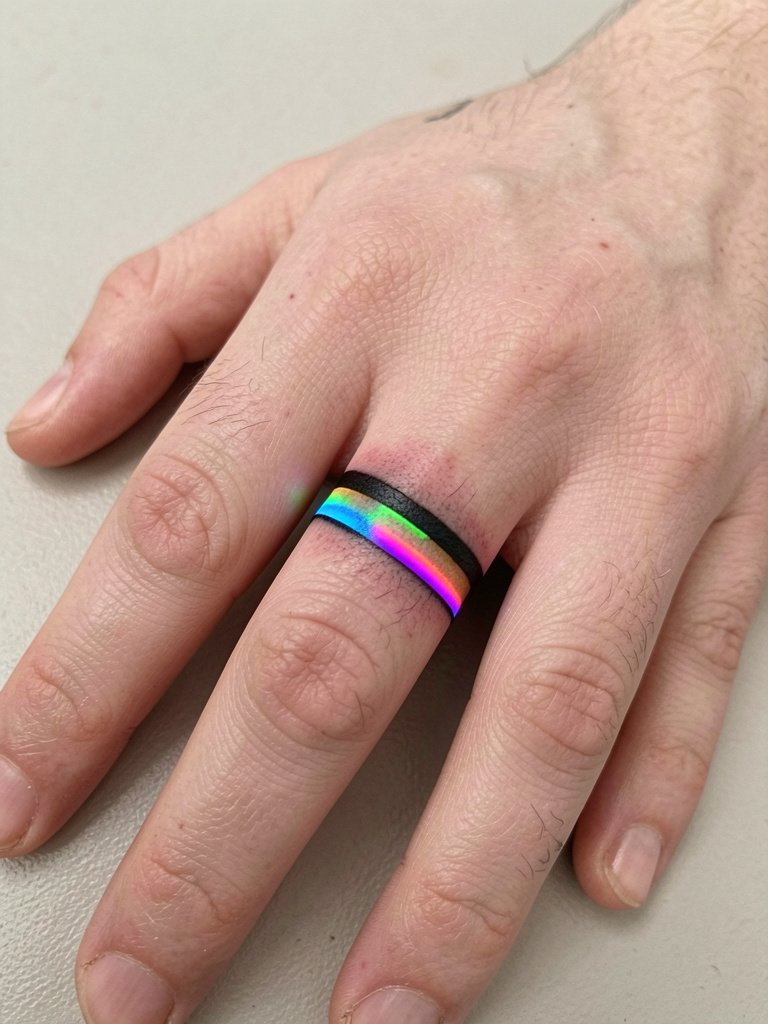
Finger rings face heavy friction and fading. For a UV ring combine neon inner bands with a stronger black band to keep the motif readable as the neon fades faster. Expect a high touch-up likelihood and the session is short but the healing is finicky. A common error is ultra-thin neon-only rings that disappear within months. For styling, wear thin open-finger gloves or layered rings when you want extra contrast.
14. Subdermal-Effect UV Chest Panel
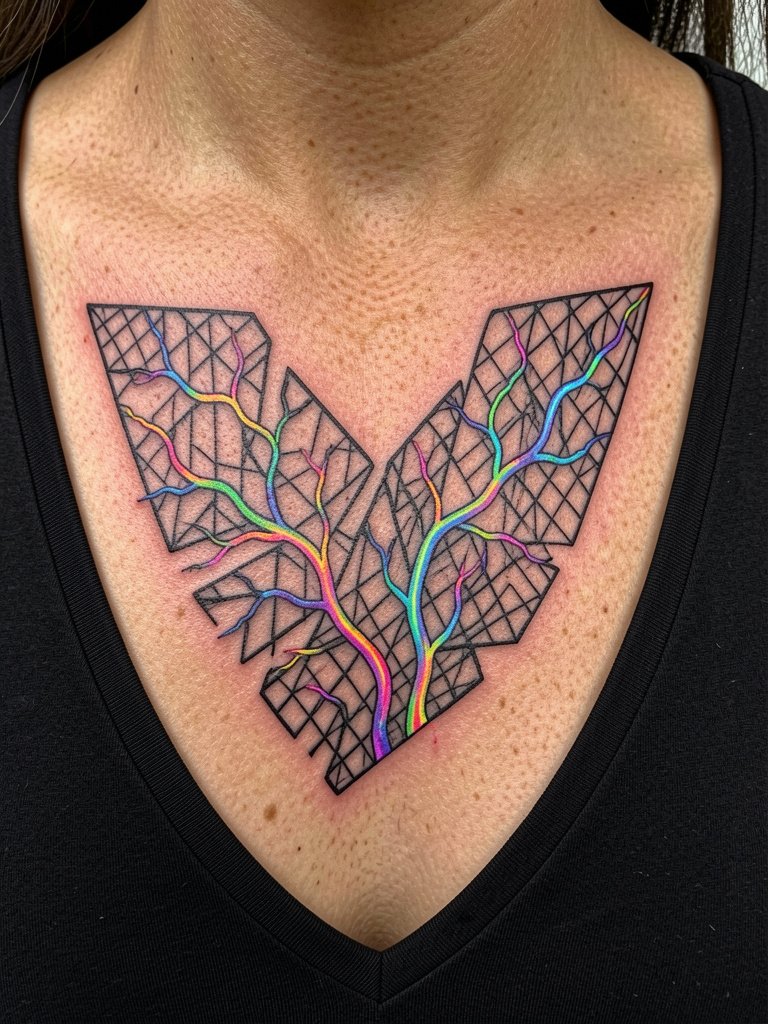
Chest panels let you mimic a subdermal glow without invasive techniques. Stippled micro-lines paired with neon veins create depth. The pain is medium and sessions can be split. One mistake is over-etching the micro-lines which then merge after healing. During the consultation bring scaled references so your artist can map negative space correctly. For outfits, scoop or V-neck tops in neutral tones let the panel breathe without competing with loud patterns.
15. UV-Outlined Scorpio on Inner Bicep
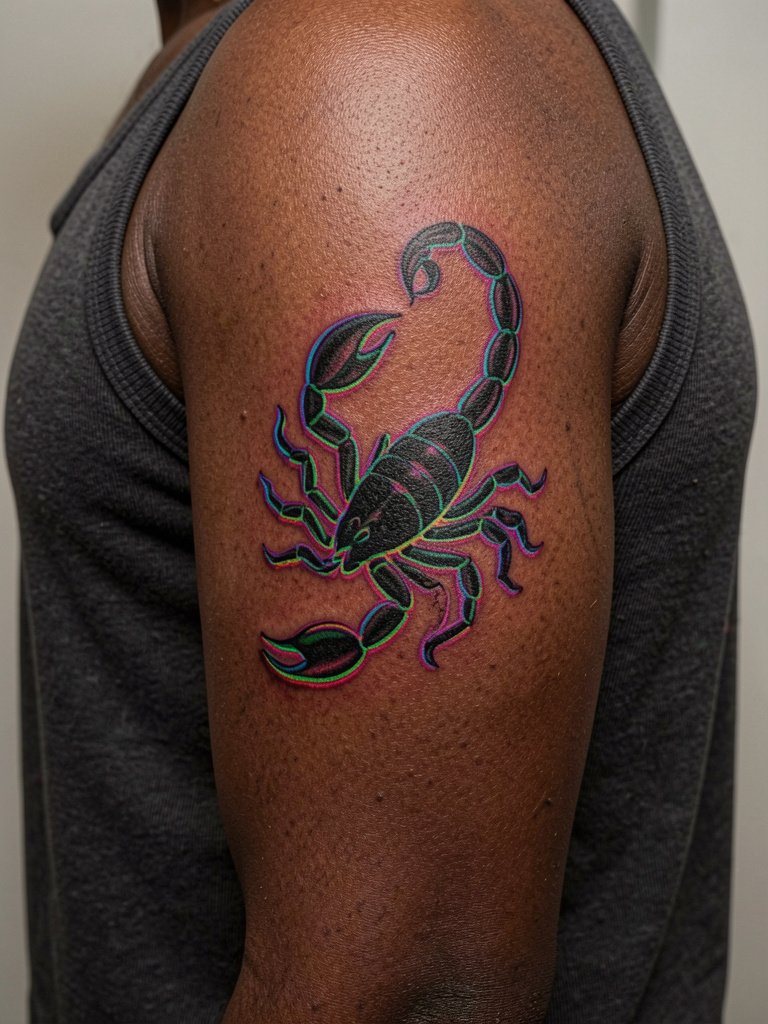
Inner-bicep silhouettes need strong contrast to stay legible as the skin compresses. The UV outline adds flash without risking internal detail loss. Pain can be medium to high on the inner bicep, so plan for breaks. A mistake is tiny internal markings that become indistinct over time. For the session wear a sleeveless top so the artist has access and bring a loose long-sleeve to wear after the appointment. To show it off, wear short sleeves or rolled cuffs.
16. Neon Wave Band on Lower Leg
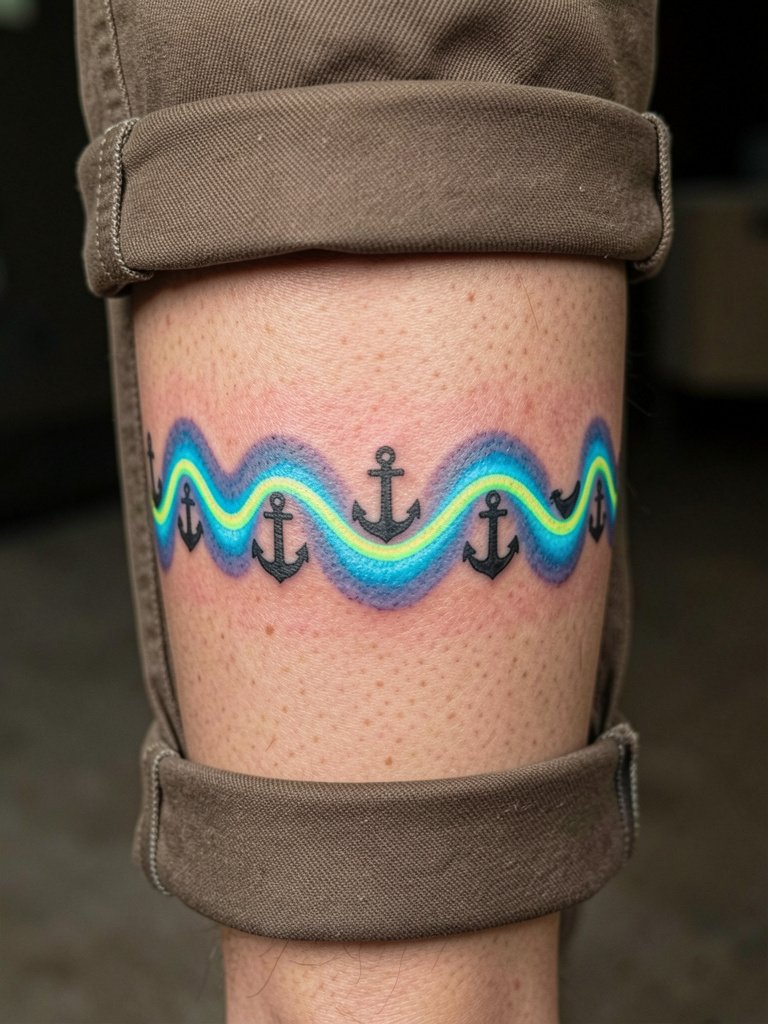
Lower-leg bands work well for rhythmic neon patterns because the calf muscles keep the design visible. The area tolerates saturation nicely so the wave will remain bold. Sessions are short to medium. Avoid too many narrow lines that run together after a year. For display, pair with cropped pants or sandals to let the neon band catch light.
17. Contour Glow Pet Portrait on Thigh, Controversy Here
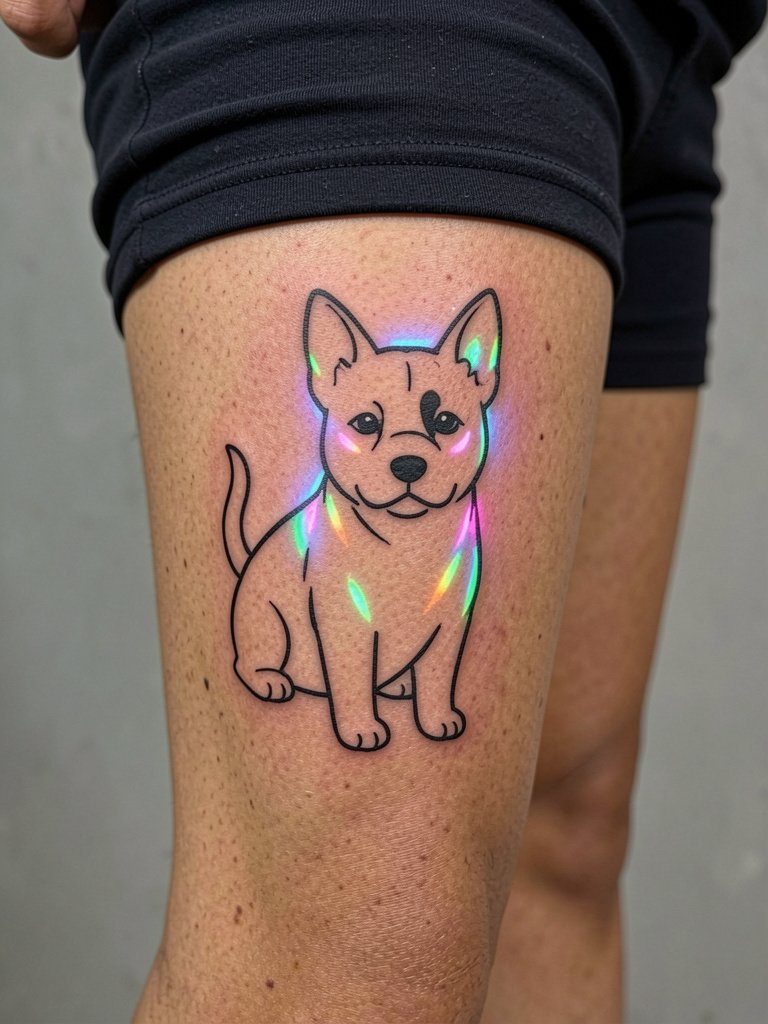
Portrait fans argue about UV in representational work. One camp warns that neon pigments change tonal relationships and can make realistic shades read wrong once healed. The other camp says careful placement of neon as accents preserves the portrait while adding a hidden pop under blacklight. If you want a pet portrait with glow, reserve neon for whisker highlights or collar accents and insist on healed photos from the artist for similar skin tones.
18. Glow Botanical Wrist Wrap
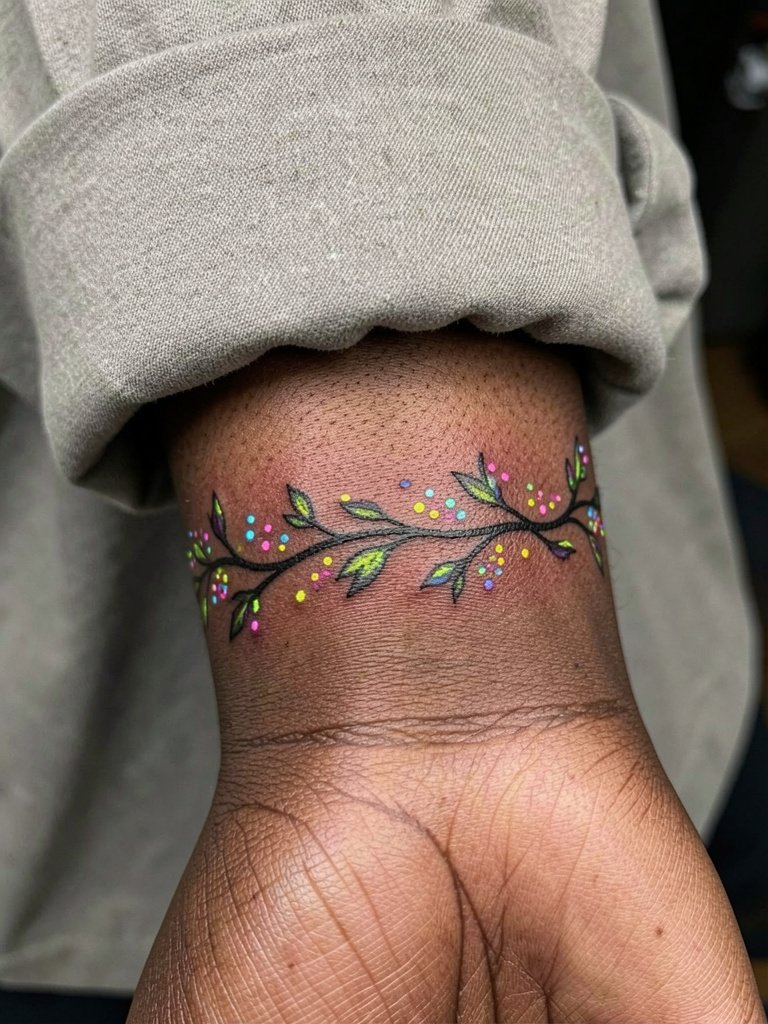
Wrist wraps should avoid tight spirals that the skin cannot support. Use slightly wider spacing between leaves and thicker vine strokes. The wrist gets constant washing and rubbing which accelerates neon fade. Expect a small session and realistic touch-up plans. For styling, stack with delicate thin leather bracelets to frame the wrap without rubbing the fresh ink.
19. UV Script Along Collarbone
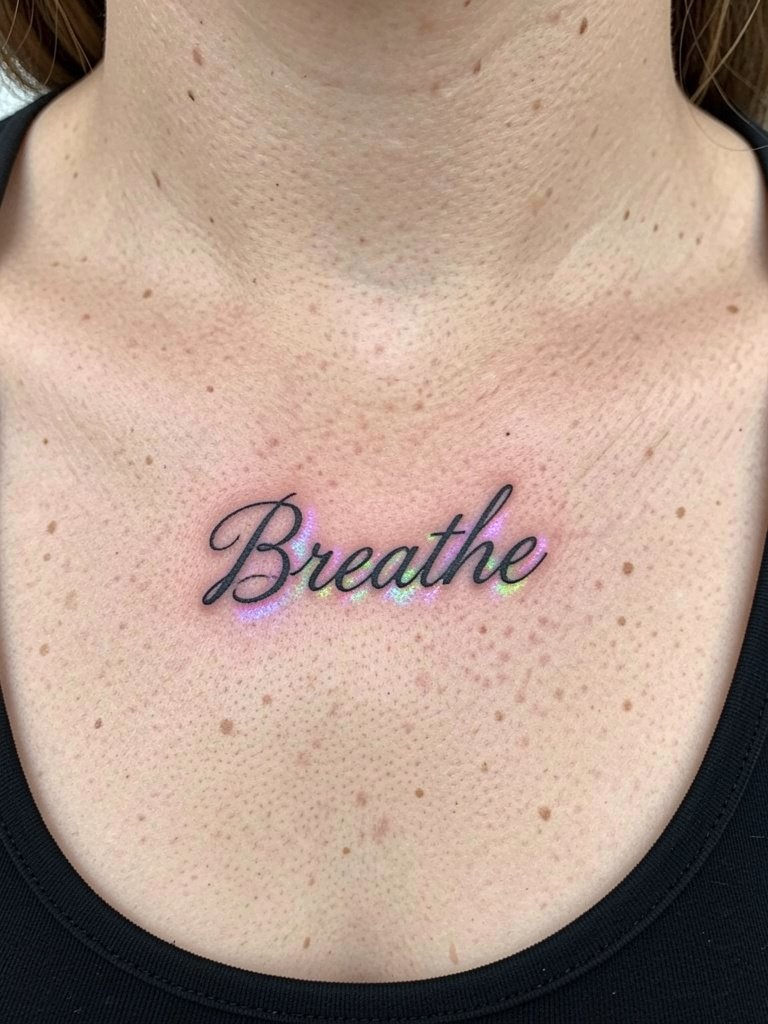
Script along the collarbone looks delicate but needs careful spacing to resist blurring. For longevity ask for slightly heavier main strokes with UV as a subtle underscore rather than the primary ink. Pain is medium and session time is short. A common mistake is asking for ultra-fine single-needle cursive that softens into a gray line. Pair with open-neck tops to show the line without pressing on it.
20. UV Starburst on Hand Back
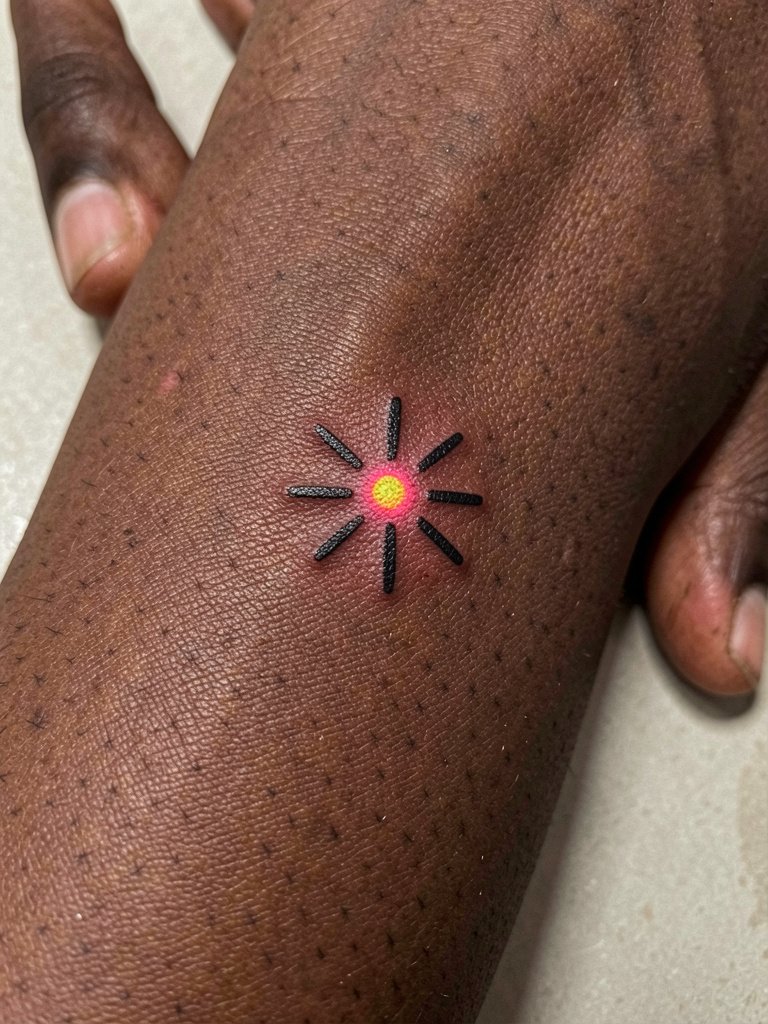
Hand pieces are notorious for early wear. For a starburst keep rays bold and short, and accept a higher touch-up likelihood. Pain is moderate. A session is quick but healing is affected by frequent hand washing. For styling, minimalist rings help the starburst read without rubbing the area. Consider a protective thin film for the first week.
21. UV-Trimmed Mandala on Upper Back
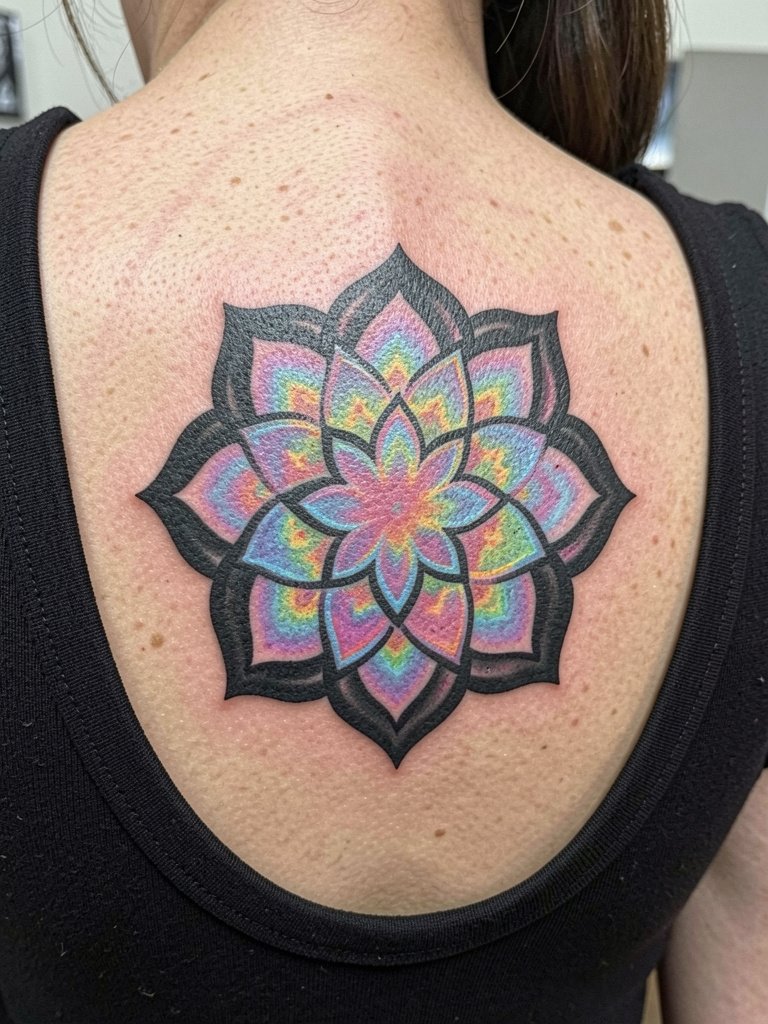
Upper-back mandalas read from a distance when outlines are confident and neon is limited to inner petals. The area has stable skin so the pattern holds well. Sessions can be medium length and pain is moderate. Avoid overly dense inner filigree that can fill in with time. For evenings, open-back dresses showcase the trimmed mandala beautifully.
22. UV-Accented Arrow on Calf
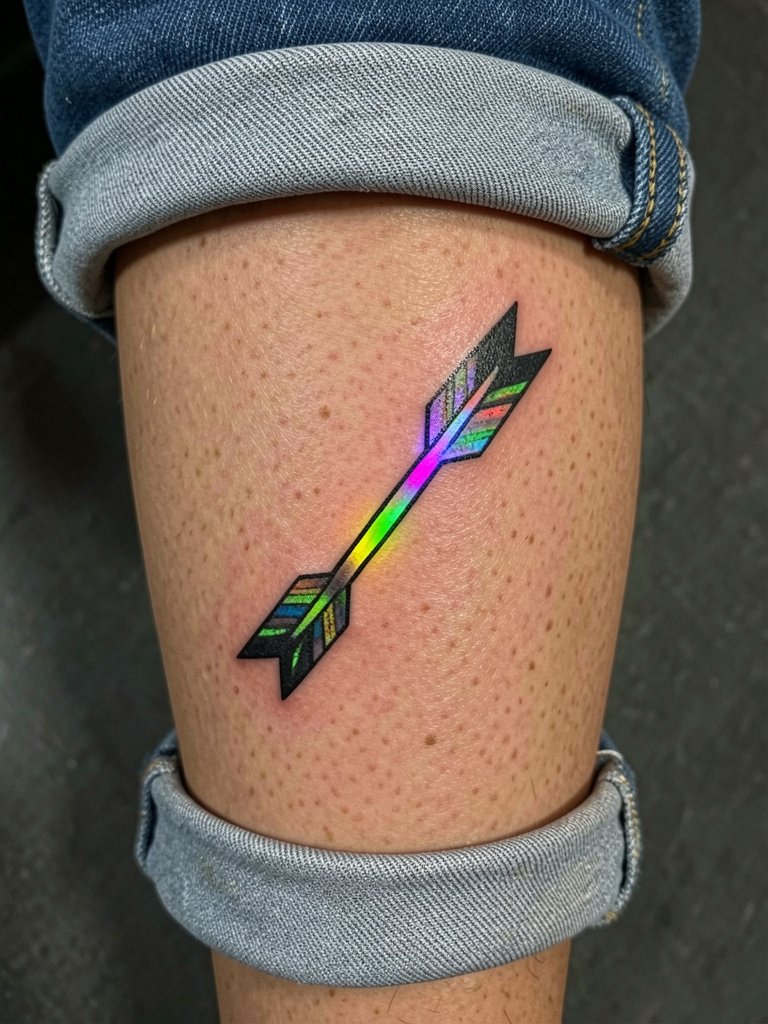
Calf arrows are low maintenance and show well in motion. The UV shaft adds a modern detail without compromising longevity. Session time is short and pain is low to medium. A common mistake is tiny feathering on the shaft that blurs in six months. Pair this with cropped athletic shorts or skirts to let the arrow be visible while walking. Consider a light protective film for the first 48 hours.
23. UV-Flecked Geometric Chest Stripe
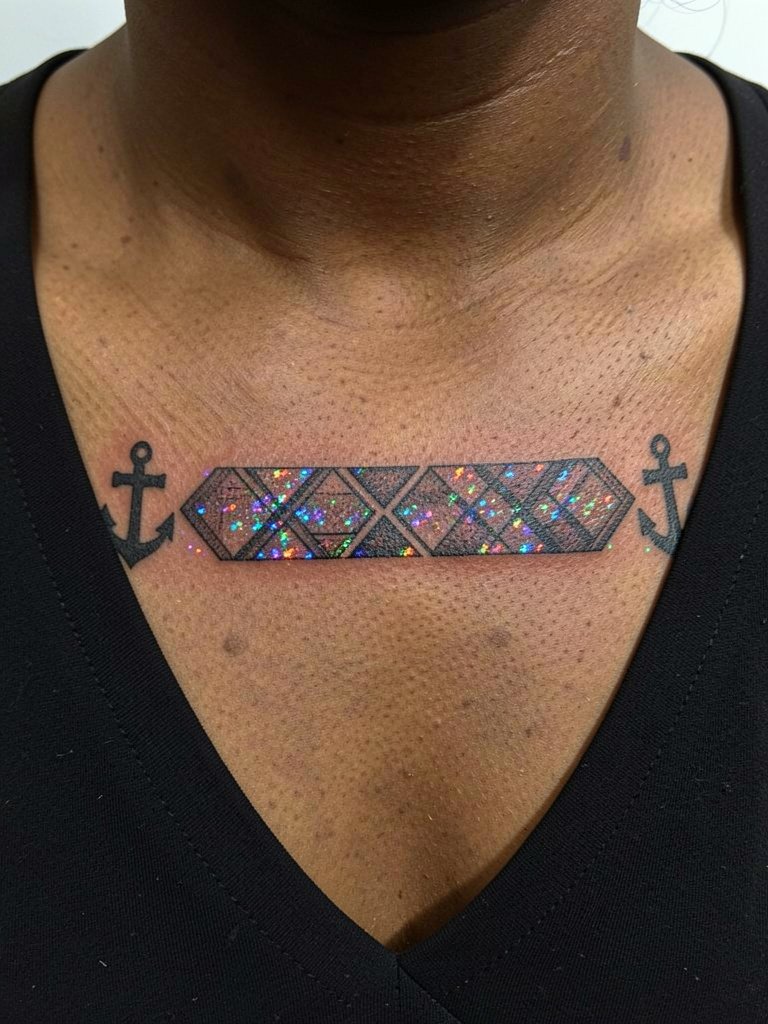
Chest stripes need consistent saturation so the neon flecks read across the band. The pain is medium and the session length is modest. Avoid tiny speckled fills that become uneven as the skin heals. For wardrobe pick wide necklines or button-front shirts worn open to reveal a sliver of the stripe.
24. UV-Outlined Diamond on Finger Side
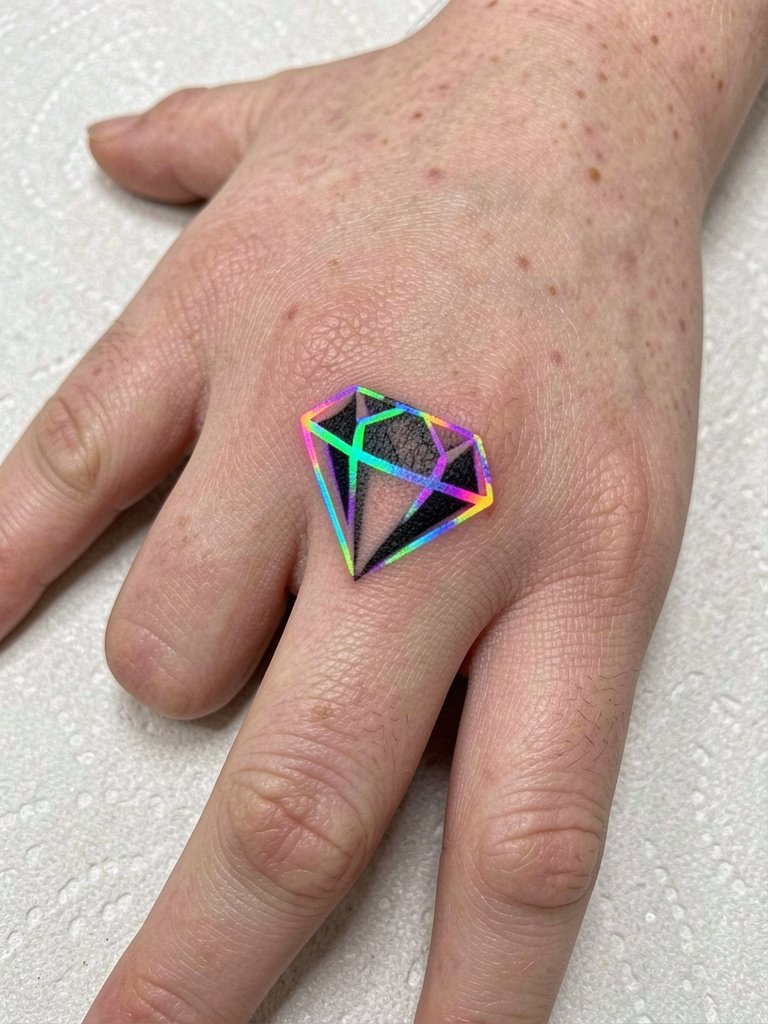
Side-of-finger diamonds will need thicker outlines to resist the constant motion and washing. Expect a higher touch-up frequency and a quick session. A common misstep is tiny inner detail rather than strong outer facets. For styling, stack with delicate midi rings that do not press into the tattoo.
25. UV-Lined Rib Panel
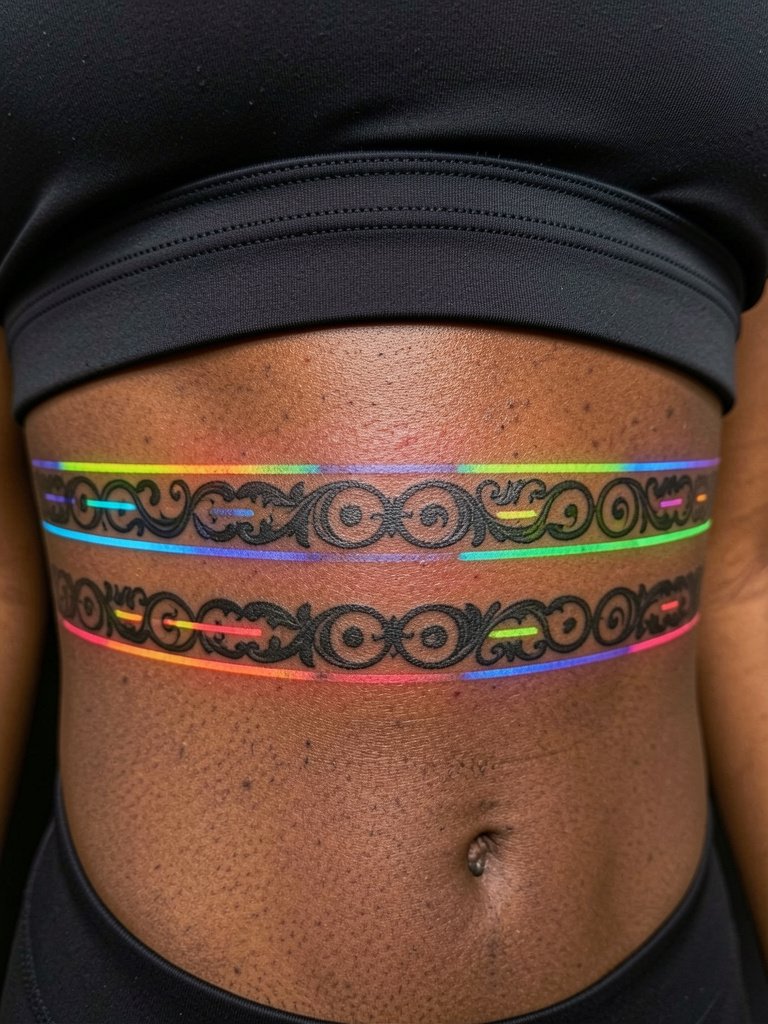
Rib panels are high on the pain scale and need design breathing room. Use neon as thin lines between larger black elements to avoid tonal imbalance. Sessions may need to be split and numbing strategies discussed in advance. For clothing, cropped tops or swimwear that sit above the rib line show the pattern without fabric rubbing the area during healing.
26. UV-Backlit Crescent on Nape
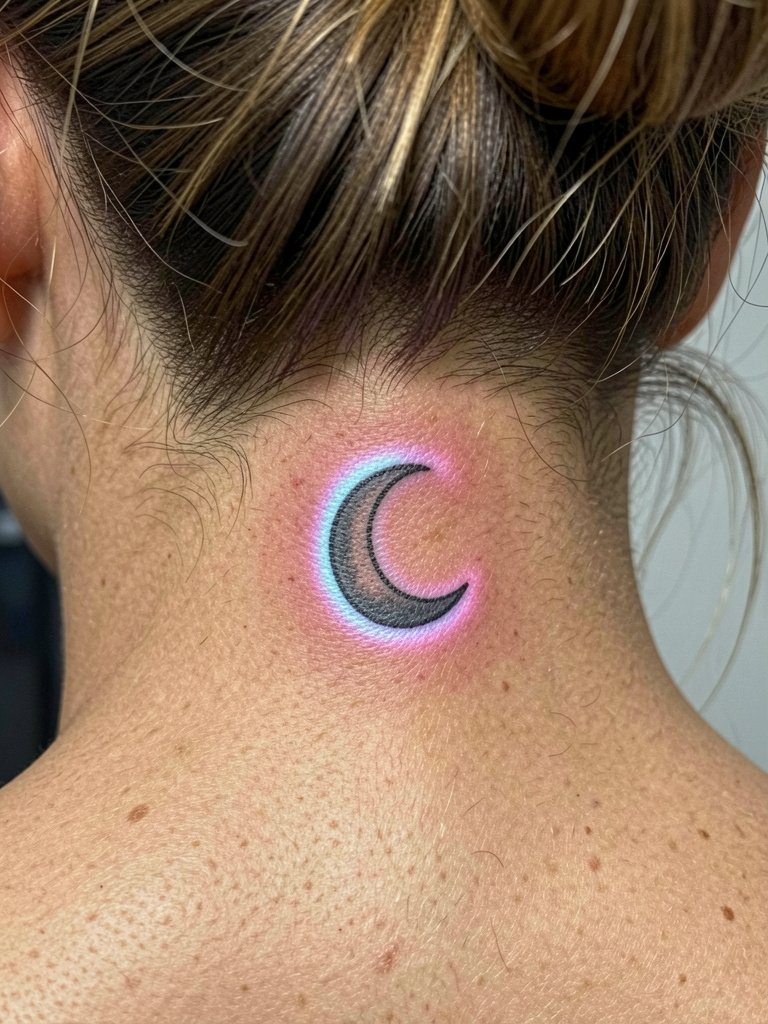
Nape pieces are subtle and work best with a bright halo rather than complex interior detail. Pain is medium. For showing off, wear the hair up or short styles that reveal the nape. Avoid asking for excessive fine detail since hair movement and clothing contact can speed blur.
27. UV-Infused Chevron on Hip
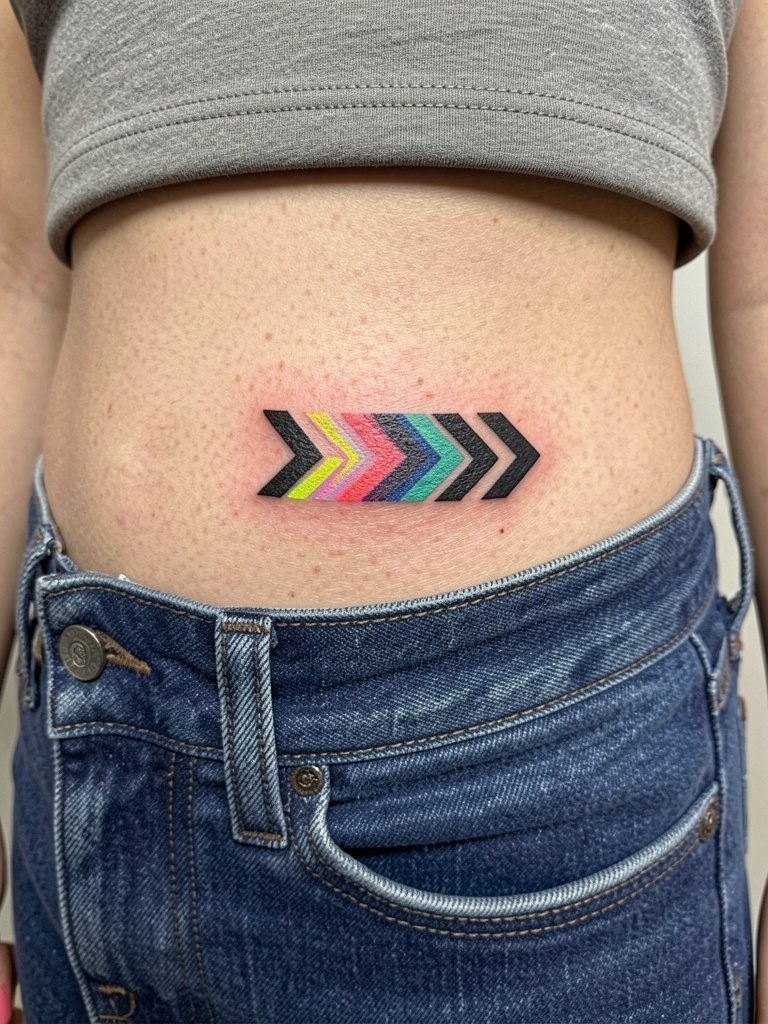
Hip chevrons are low-friction and hold crisp edges if the black bands are bold enough. Sessions are short and pain is variable. A mistake is placing tiny chevrons too close to the waistband where rubbing will fade the neon. Wear low-rise jeans on the appointment day so the artist can access the lateral hip without fabric being adjusted.
Frequently Asked Questions
Q: Will UV-reactive ink show in normal light or only under blacklight?
A: Most UV pigments are visible in daylight as a subtle tint or highlight, but they really pop under blacklight. If you want a design that reads well both ways, combine solid black linework with selective UV accents so the silhouette stays strong in regular light.
Q: Are UV inks more likely to cause allergic reactions?
A: There are two viewpoints. One argues that some UV pigments carry higher risk and that patch testing matters. The other claims modern UV formulas are milder when applied correctly and that careful layering minimizes issues. I recommend a small patch test for any new pigment and to monitor the area during the first week.
Q: How often will UV accents need touch-ups compared with normal color?
A: In my experience UV highlights can fade faster than saturated black or standard color fills. Expect touch-ups sooner for neon accents, especially on high-friction areas like hands, fingers, and ankles. Build a touch-up plan into the consultation so you know the realistic timeline.
Q: Where can I find healed examples and portfolios without naming artists directly?
A: Try searching platform hashtags and portfolio sites with targeted keywords, use location filters on social apps to narrow to your city, and browse dedicated tattoo galleries for healed shots in different skin tones. Reddit threads and community boards also surface first-hand healed photos. Those routes help you compare healed results across styles and placements.
Q: What should I wear to the appointment for a sternum or ribcage UV piece?
A: For rib and sternum work wear a fitted sports bra or bandeau that stays in place so the artist has clear access without fabric being moved. For sessions on the hip or thigh pick low-rise bottoms or bike shorts that naturally expose the area. Comfortable, intact clothing that does not require adjusting prevents unnecessary rubbing post-ink.
