
Small dots add up to big problems if the spacing and placement are wrong. I have seen tiny mandala centers on high-friction spots merge into a gray blur after a few years, and I have seen the same dotwork hold for a decade when the artist left breathing room between stipple clusters. Start with pieces sized and placed so the dots can settle without crowding, beginning with a forearm mandala that reads clean at three inches.
1. Compact Inner Forearm Mandala for Daily Visibility
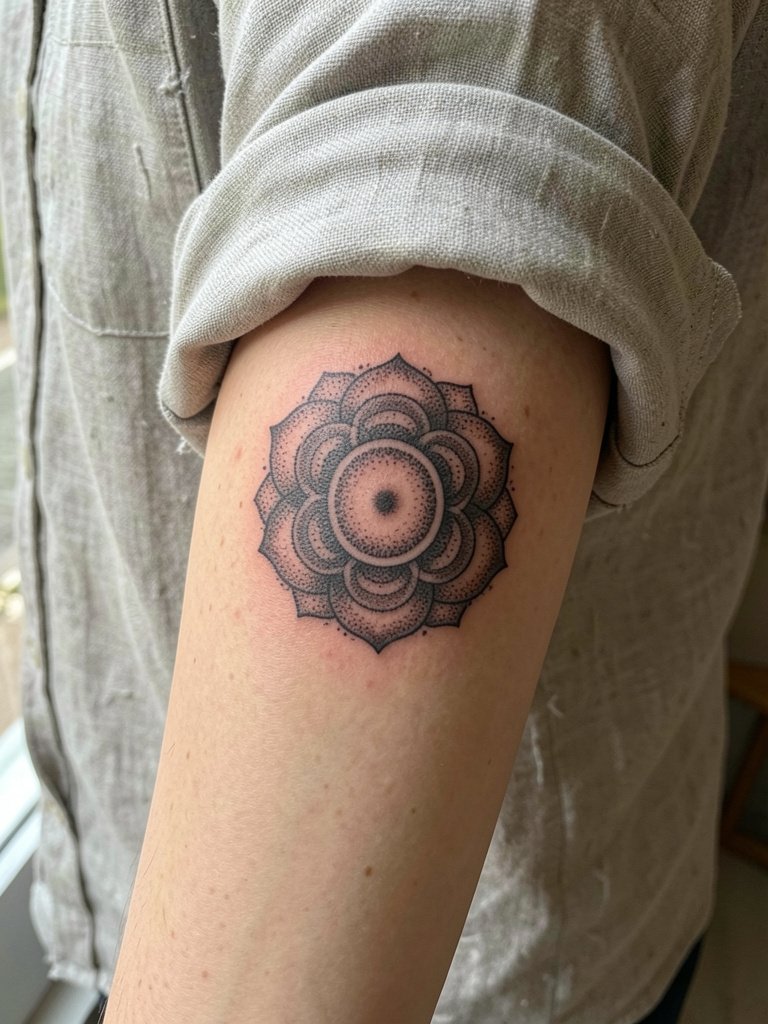
This size and placement read clearly for offices and casual settings because the inner forearm does not rub much against fabric. Expect a two-hour session for a three-inch mandala done in stipple shading, with low discomfort and a one-week surface scab phase. Common mistake is asking for single-needle dots at match-head spacing, which the skin will blur into five years out. Ask for incremental dot sizes from the outside in so the center keeps definition, and wear a rolled-up linen shirt the day of your appointment so the artist can access the area without tugging.
2. Tiny Behind-the-Ear Micro Mandala
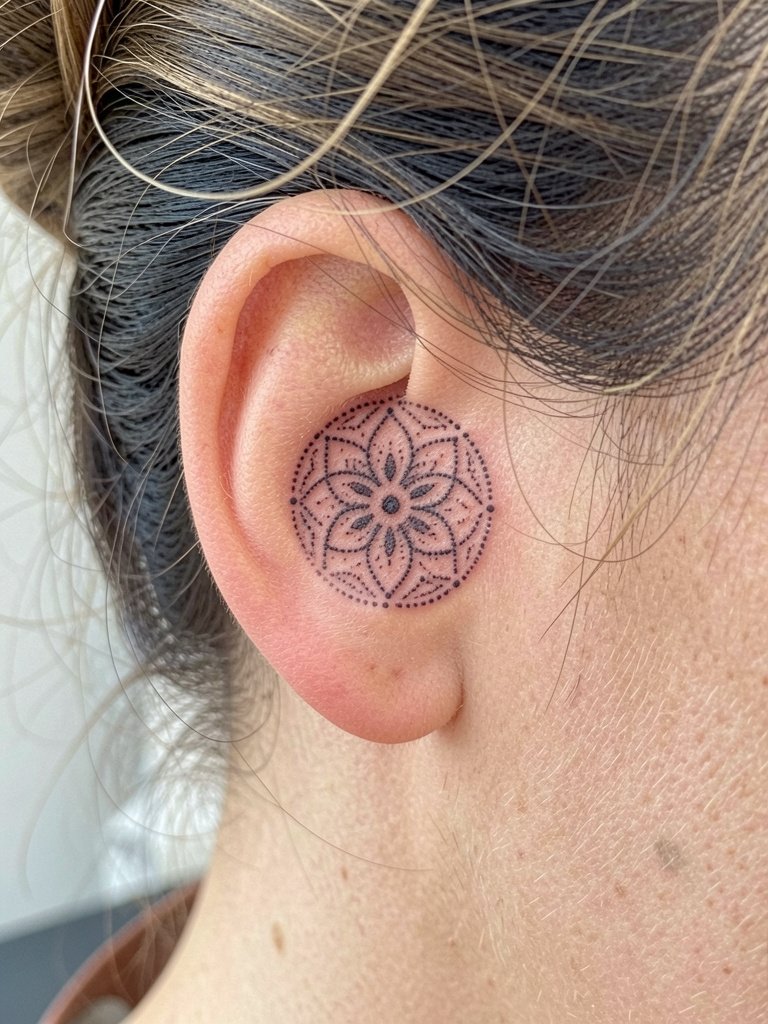
A healed micro mandala behind the ear is subtle and low-profile, but the area offers less room for dot spacing than the forearm. The session is short, often under an hour, and pain is mild to moderate because of thin skin. The main mistake is compressing the design too small. I recommend a slightly larger negative-space ring so the central dots stay crisp at one and three years. For post-session visibility at events, pair this with small hoop earrings or a delicate hair claw that tucks hair away without rubbing the area.
3. Ankle Halo Mandala That Avoids Friction
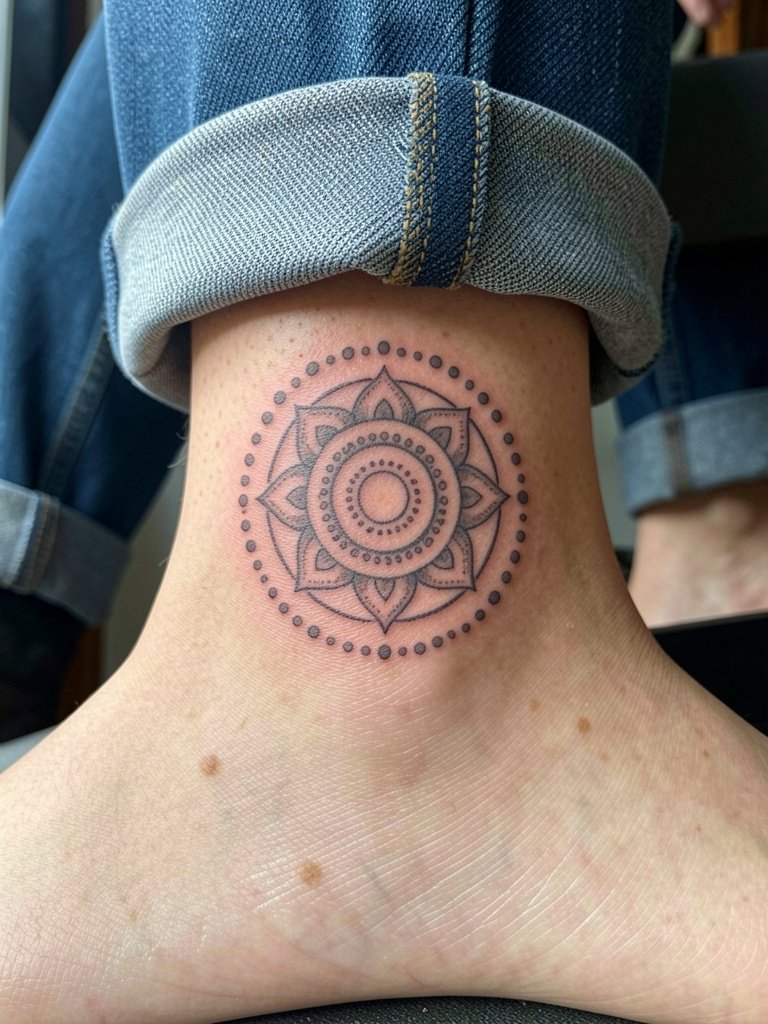
Ankle mandalas face constant friction from socks and shoes, so I push for slightly bolder outer dots to protect the silhouette. Sessions usually run 60 to 90 minutes for a three-inch piece and the first two months need careful protection. A common error is requesting filigree at the edge that later softens into fuzz. Ask for an outer ring of denser dots and avoid ultra-thin outer lines. When you want to show it off, cuff jeans and slip on woven ankle sandals for evenings out.
4. Sternum Lotus Mandala with Cultural Respect
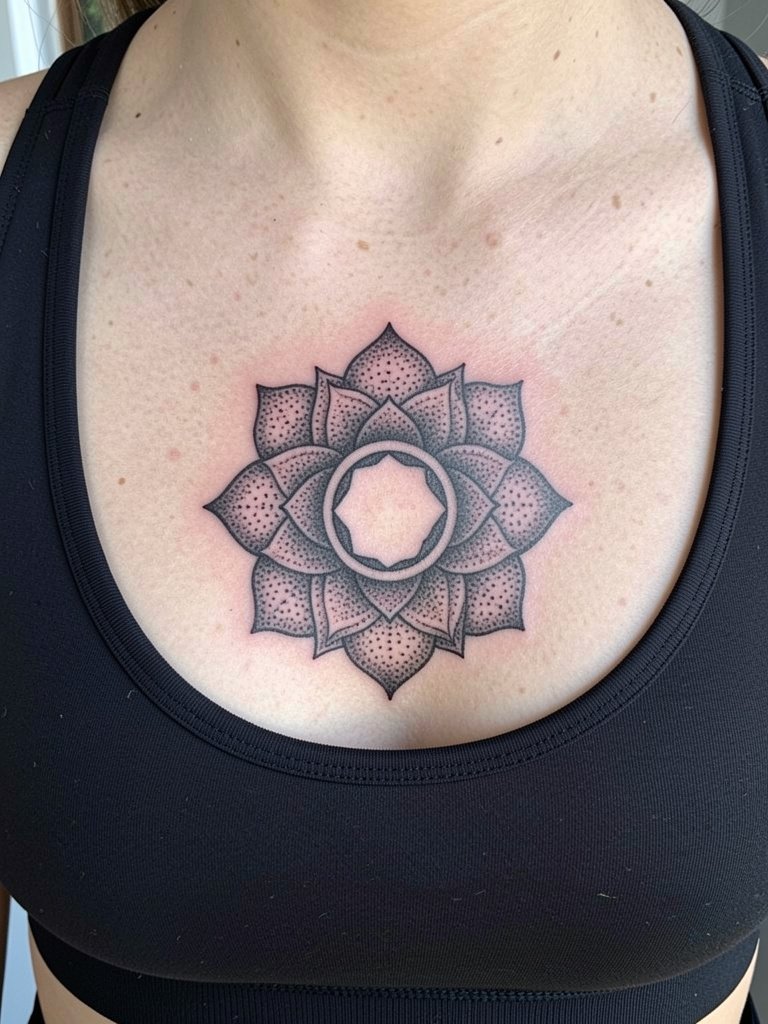
Mandala designs draw from sacred visual languages, and some people see the lotus motif as devotional. One camp argues these symbols should be reserved for practitioners who understand their spiritual context. The other camp points out that respectful, researched adaptation can honor the form and serve personal meaning. Pain on the sternum is higher than forearm, and sessions can run two to three hours with breaks. Request slightly wider dot spacing on the center axis so the skin at the chest crease does not fill in over time. For session comfort, wear a fitted sports bra you can remove and replace without tugging at the area.
5. Thumb Ring Mandala That Wraps Without Blurring
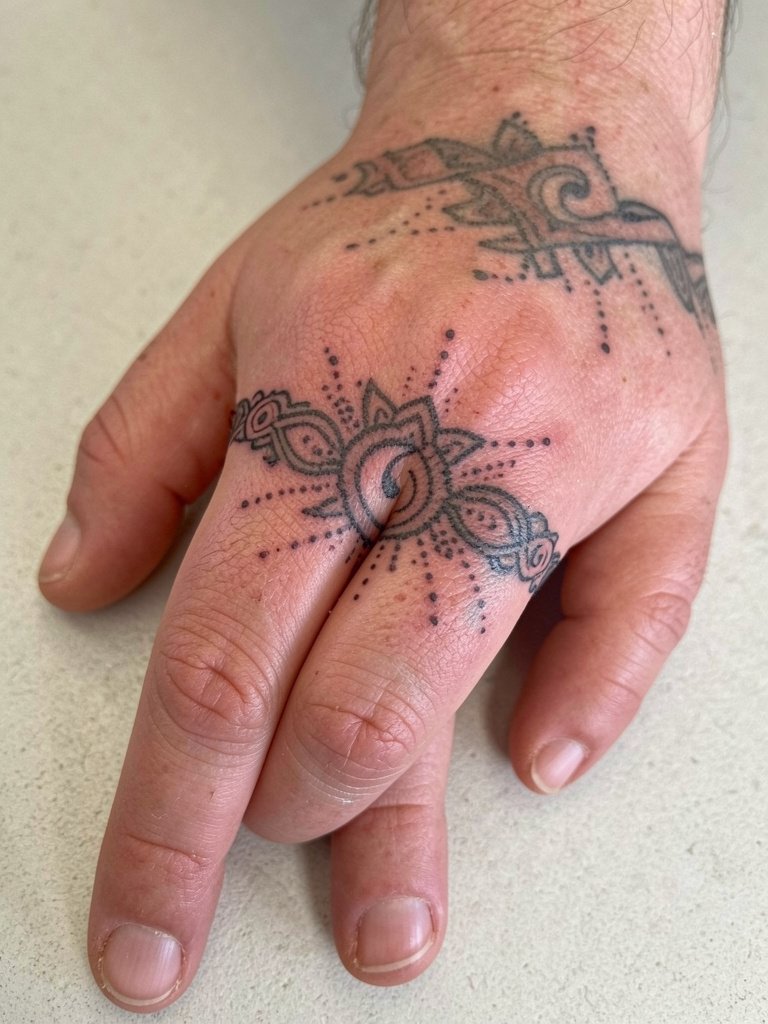
Hand and thumb skin rub constantly, so plan for touch-ups. One common mistake is treating these as permanent jewelry without accepting future refreshes. Expect a 30 to 45 minute session for a small band, moderate discomfort, and frequent fading in the first year. Space the dots a touch wider than you would for non-hands so the band keeps its negative-space separators. During healing avoid rings that slide across the site, and consider wearing a thin silicone ring after scabbing to reduce metal-on-skin abrasion.
6. Thigh Mandala with Bold Stipple Gradient
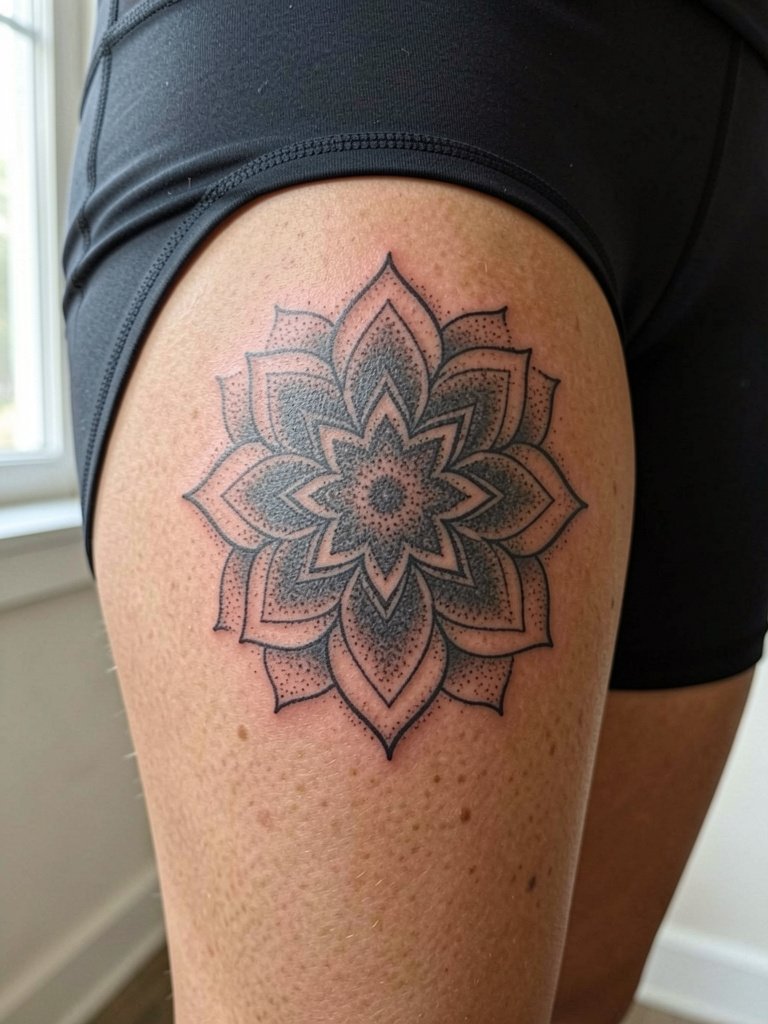
Upper thigh handles dense dotwork well because the skin texture maintains dot separation over time. Sessions for a larger mandala run two to four hours depending on detail. A mistake is overloading the edges with tiny dots that the thigh tissue compresses into a muddy rim. For longevity request a solid outer silhouette and a graduated stipple fade inward. For wardrobe that frames the piece, try a flowy midi skirt that sits above the tattoo so it shows when you cross your legs.
Session Day Picks
These products smooth the short-term experience of the wrist and chest pieces above while protecting fine dotwork in the first week.
-
Stencil transfer paper kit. Lets you preview how concentric elements will align on curved skin, which matters for wrist and sternum mandalas.
-
Professional topical numbing cream. Applied as directed reduces chair time for dense stipple sections without dulling the line visibility.
-
Thin protective film roll. Keeps ankle and thumb bands isolated from friction during the crucial first 48 hours.
-
Fragrance-free gentle body wash. Cleanses scented-product sensitive areas without disturbing delicate dotwork.
-
Aquaphor Healing Ointment. Thin layers during the initial healing window lock in moisture for stipple shading without clogging pores.
7. Collarbone Crescent Mandala for a Subtle Frame
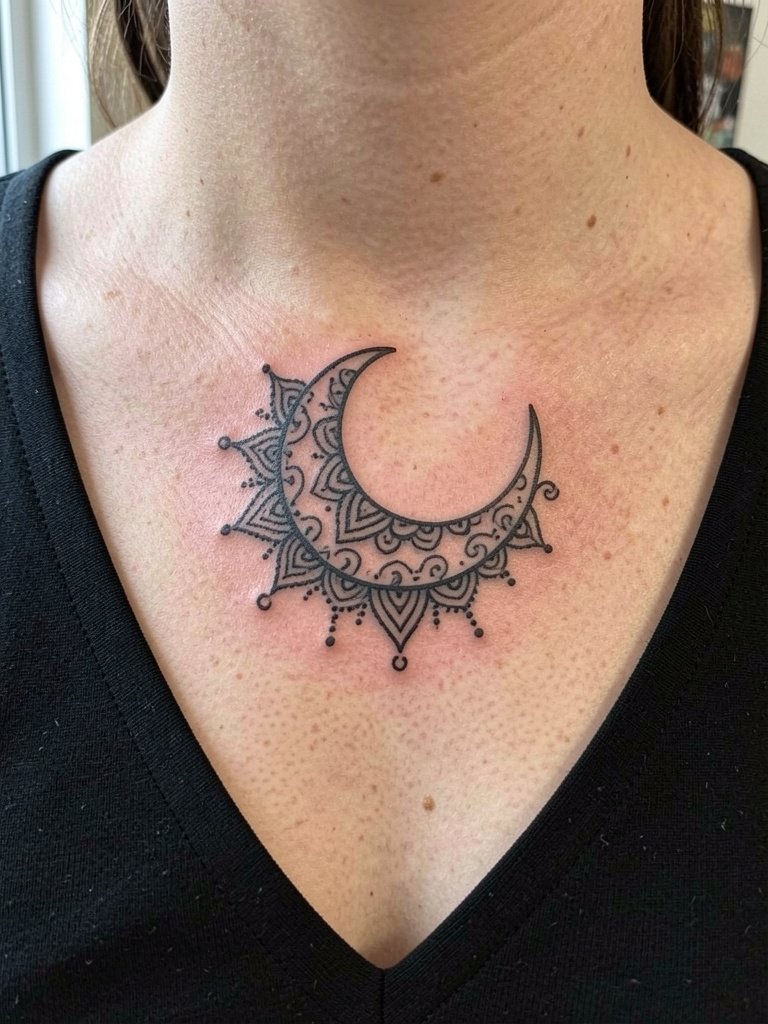
A collarbone crescent gives an elegant frame for shirts and jewelry, but the area moves quite a bit. Expect medium pain and a 90 to 150 minute session for a well-shaded half-mandala. The frequent error is asking for ultra-fine center dots that fade under skin tension. Request slightly widened central negative space and a stronger outer ring so the design remains legible at two and five years. Pair with open-neck tops at events and consider an open-back blouse that shows the curve without rubbing.
8. Calf Radial Mandala That Reads From Farther Away
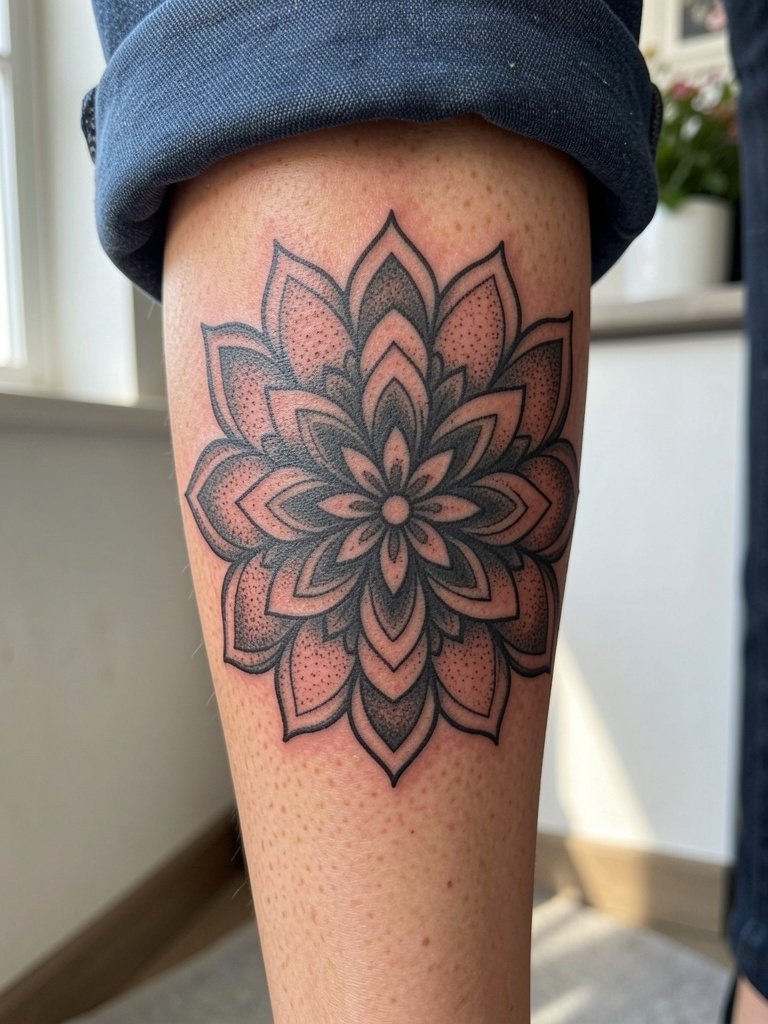
The calf is forgiving for dense stipple and maintains dot separation better than hands and ankles. Sessions for a four-inch radial piece are two to three hours and pain is moderate. A frequent mistake is pushing the center too dense without leaving negative space rings, which reduces readability as the dots settle. Ask for layered stipple bands that scale outward. To show it off with skirts, try cropped denim with suede ankle boots that keep the lower leg visible.
9. Shoulder Cap Mandala That Flows Into a Sleeve
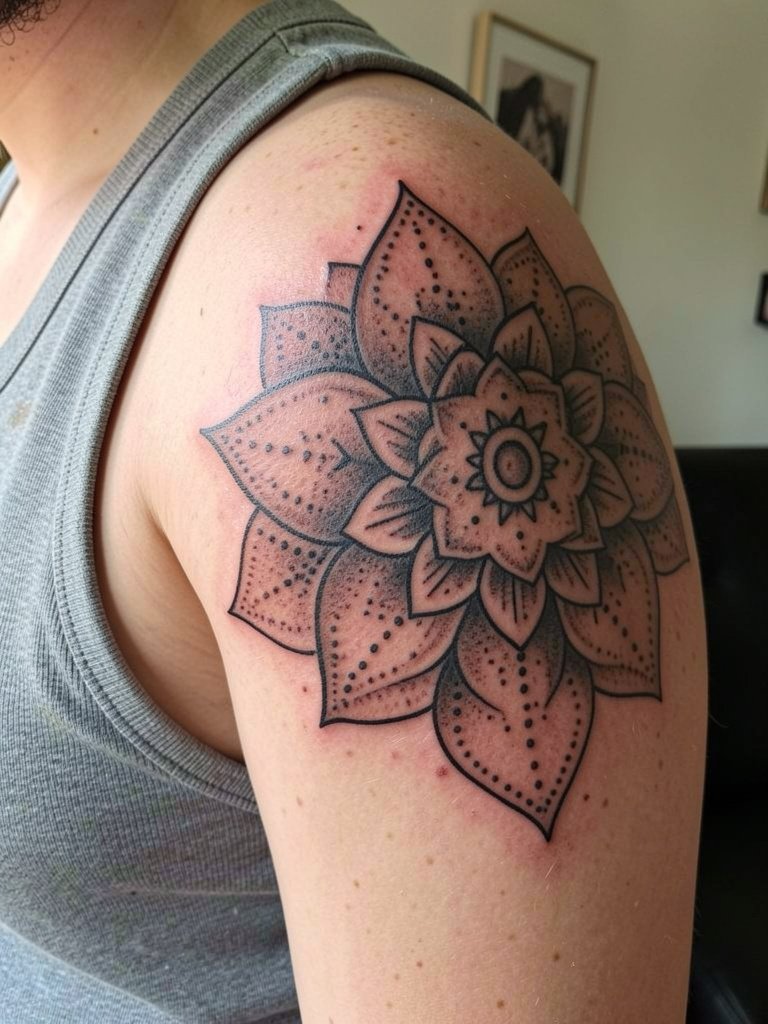
Shoulder cap pieces can expand into sleeve work without losing the mandala's geometry if you plan spacing from the start. The session is medium in length and mild in pain. Mistakes happen when people cram the mandala to touch the deltoid crease, which blurs as muscles move. Ask for a buffer zone and clear guide lines for future sleeve connections. For sessions wear a loose tank top so the artist can rotate the arm without tugging.
10. Ribcage Half Mandala With Spacing for Movement
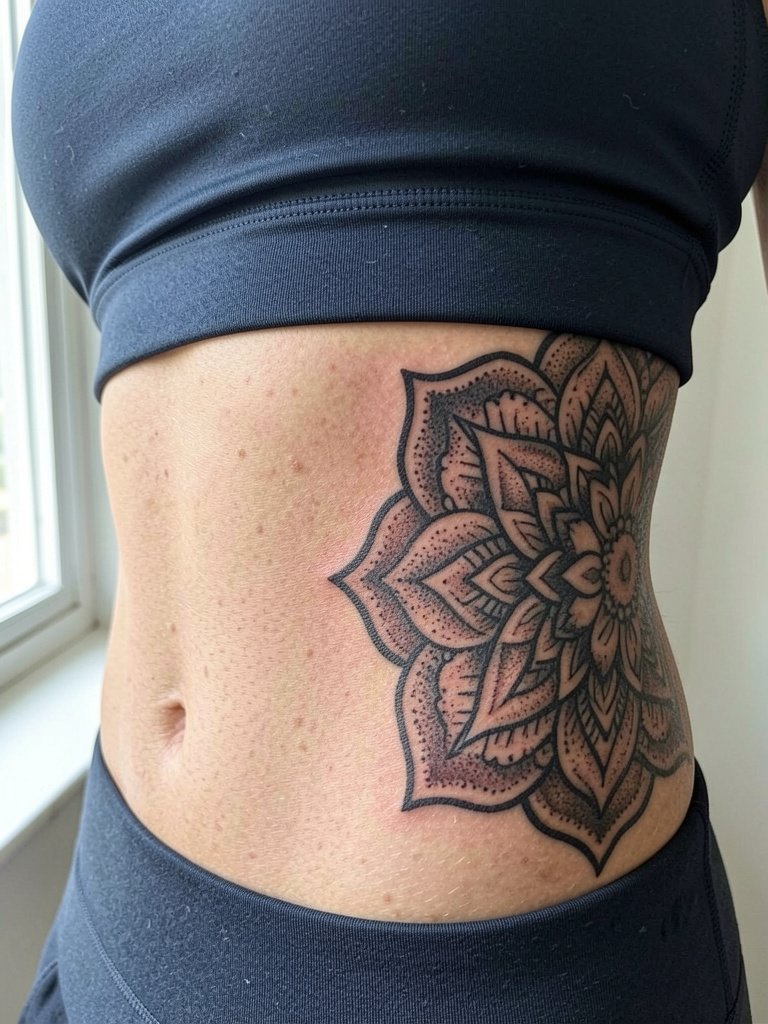
Ribcage placements stretch and compress with breathing, so spacing is crucial. One camp says extremely fine dotwork on ribs blurs quickly because the skin moves. The other camp says with slightly heavier dot spacing and precise depth it can remain crisp. Plan for breaks in a two to four hour session and request test dots to confirm the skin reacts well under the needle. Wear a fitted cropped top that you can put back on alone after the session and bring a loose hoodie for comfort during the drive home.
11. Spine Axis Mandala for Vertical Symmetry
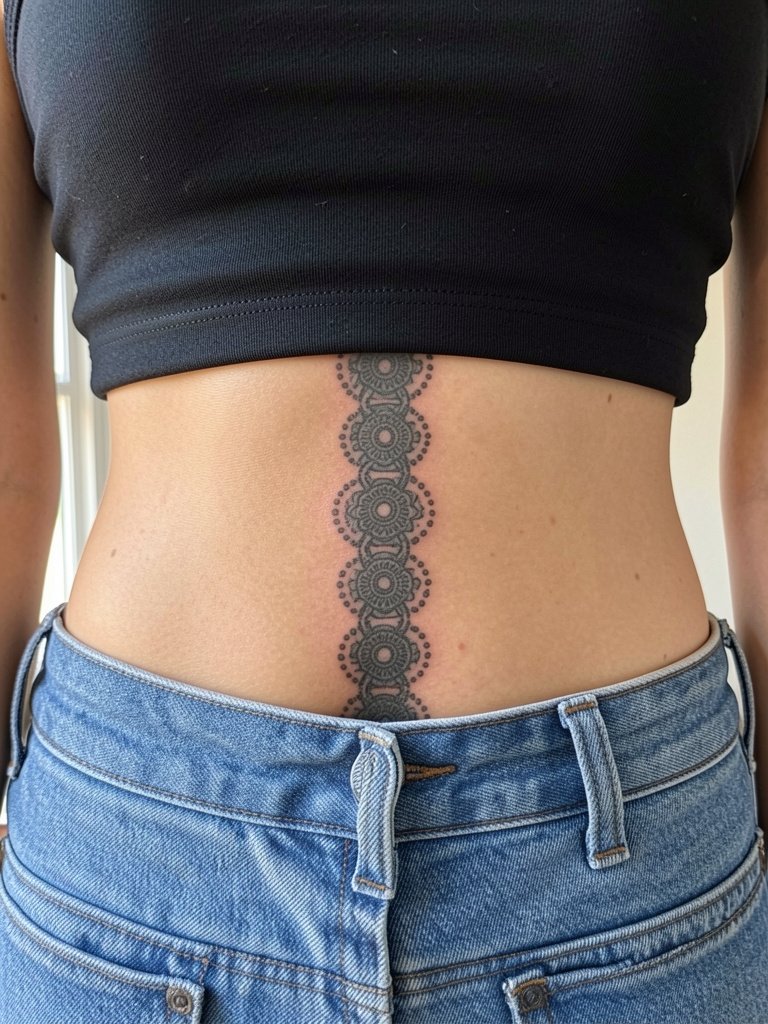
A spine-aligned mandala needs consistent dot rhythm so the vertical modules do not look uneven. Sessions can be split over two visits for comfort. A typical mistake is compressing modules too close so the axis loses definition after settling. Ask for one to two millimeters of negative space between stacked rings so the pattern breathes. For photos and nights out choose low-back dresses or tops that frame the spine without rubbing, and bring a bare-shoulder wrap to keep the area protected while traveling.
12. Finger Pad Micro Mandala and the Durability Debate
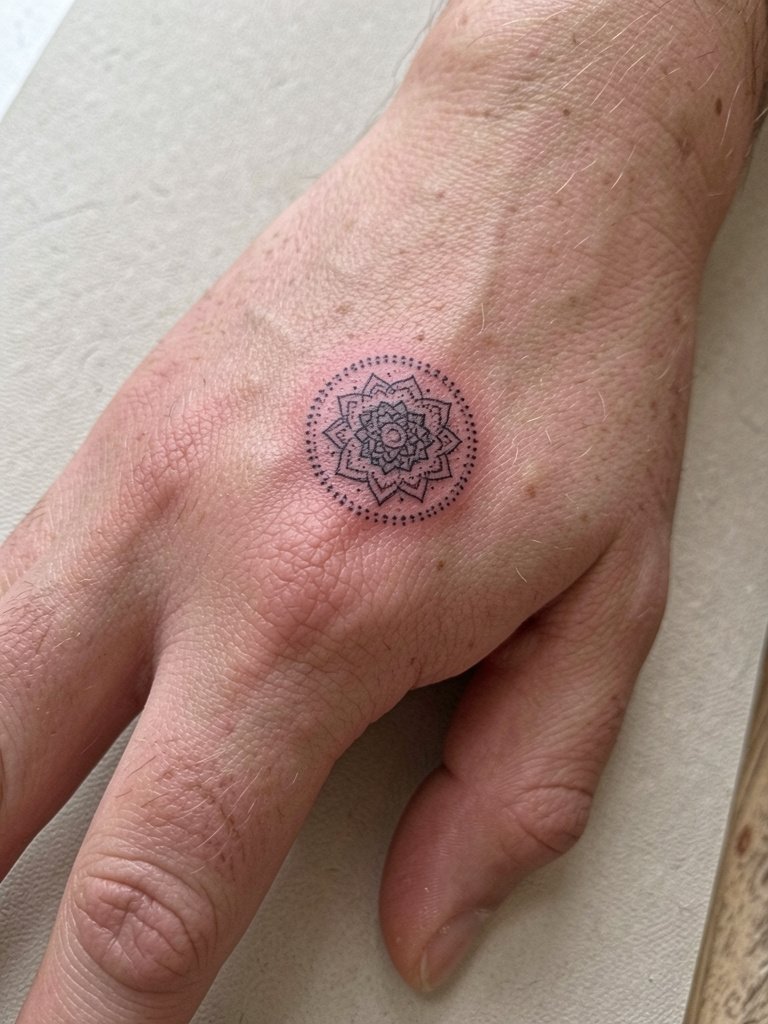
Finger pad tattoos face an active debate in tattoo communities. One camp warns finger pads and palms lose ink quickly and demand frequent touch-ups because of constant washing and skin turnover. The other camp argues that with conscious placement on non-joint pad zones and a plan for yearly refreshes the look can be maintained. Be realistic about touch-up commitment and ask for reduced dot density so the design keeps identifiable shapes rather than a solid smudge. During healing keep the area dry and avoid rings that press across the design.
13. Mini Mandala Wrist Cuff That Wraps Nicely
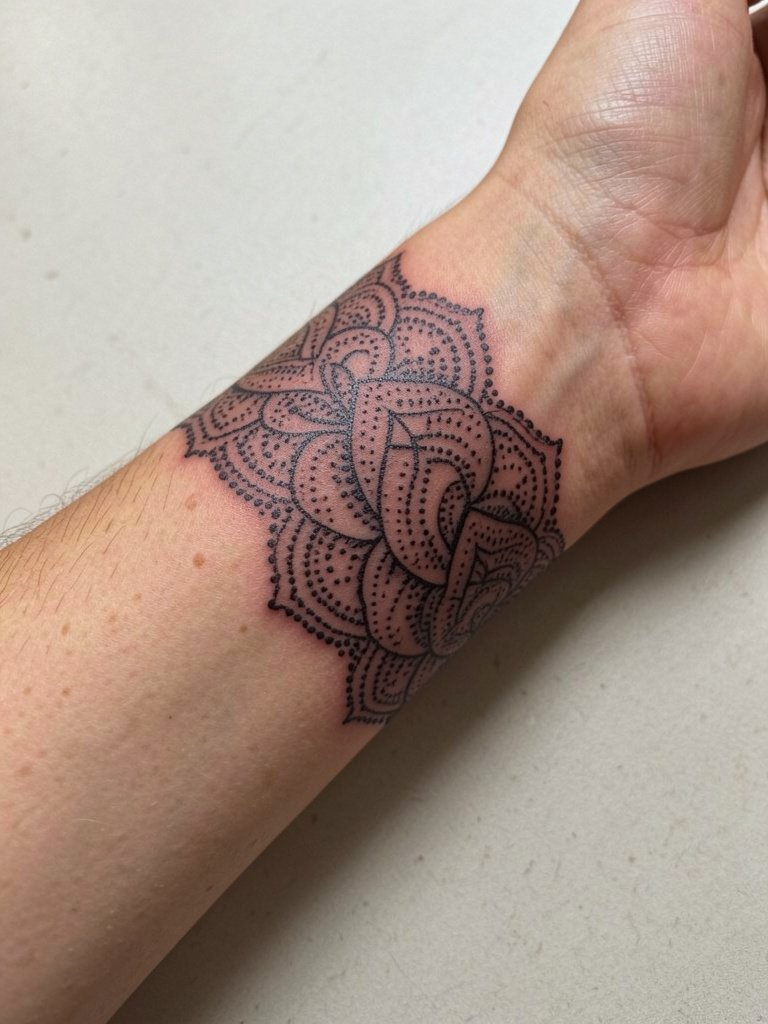
Wrist bands read well when the arcs have consistent negative-space breaks. A common error is making the band too tight or too thin, which blurs after repeated motion. Sessions are short and pain is mild to moderate. Request a mock-up wrapped around the wrist so you can see how the repeat aligns with your bone landmarks. For showing the cuff, pick rolled sleeves or stack with a thin leather bracelet that frames the design without rubbing directly on the ink.
14. Nape Compass Mandala That Plays With Hairlines
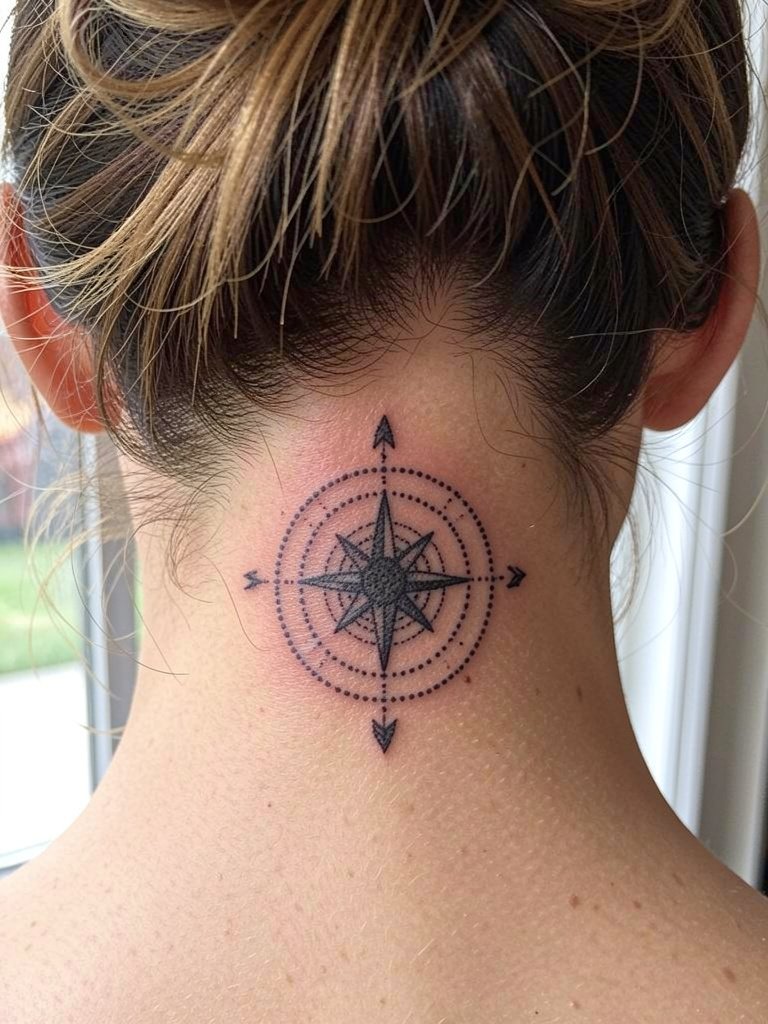
Nape pieces can peek out with updos and hide under loose hair, so plan for visibility you want. The skin there is thin which increases sensitivity, and a small piece can be done in under an hour with moderate pain. A typical mistake is choosing a design that requires dense interior dots too close to the hairline, causing touch-up headaches. Request slightly bolder outer dots and clear spacing from the hairline so your stylist can shave a small patch without sacrificing the composition. Accessorize with short hair clips or a minimal hair claw to reveal the area.
15. Negative-Space Mandala That Uses Skin as a Tone
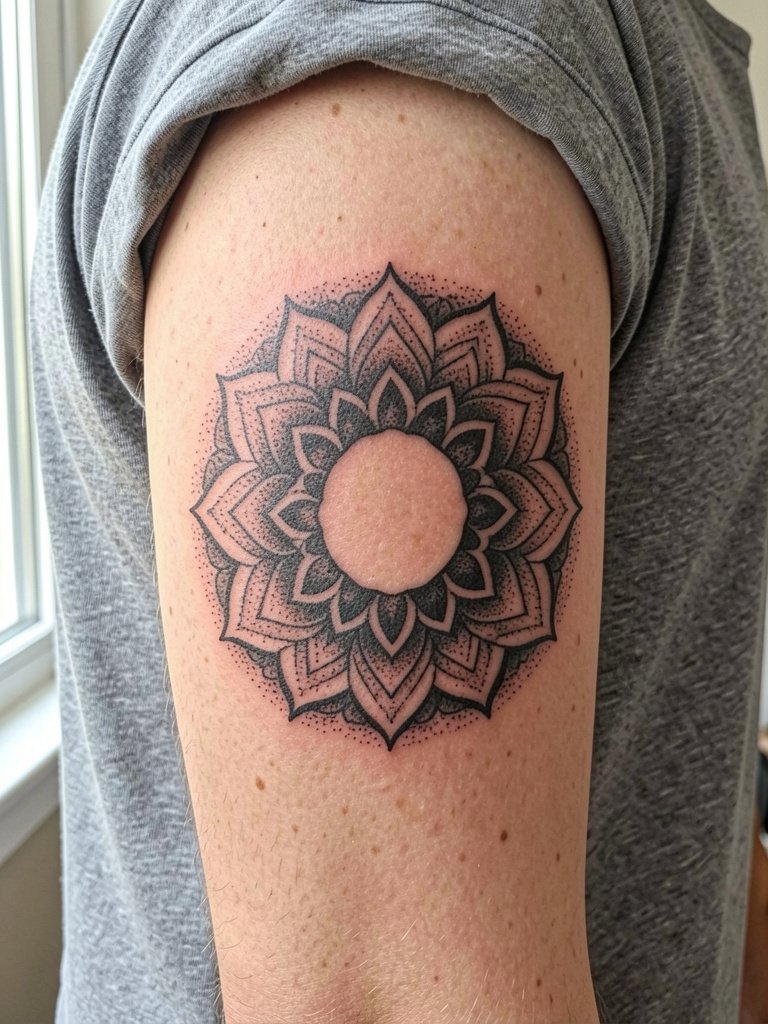
Using negative space as the central tone preserves crispness longer than ultra-dense black fills. This approach works well on medium-thickness skin zones like the outer arm where contrast holds. The session time is moderate and pain is low. Avoid filling the inner rings too close to the negative core because the skin may soften those edges with time. Ask for a mock-up photo of the negative zones on skin of your tone to ensure the contrast reads. For a display-ready outfit choose short sleeves or a rolled-sleeve chambray shirt so the negative shapes are visible.
16. Mandala with Fine Line Geometry for the Upper Thigh
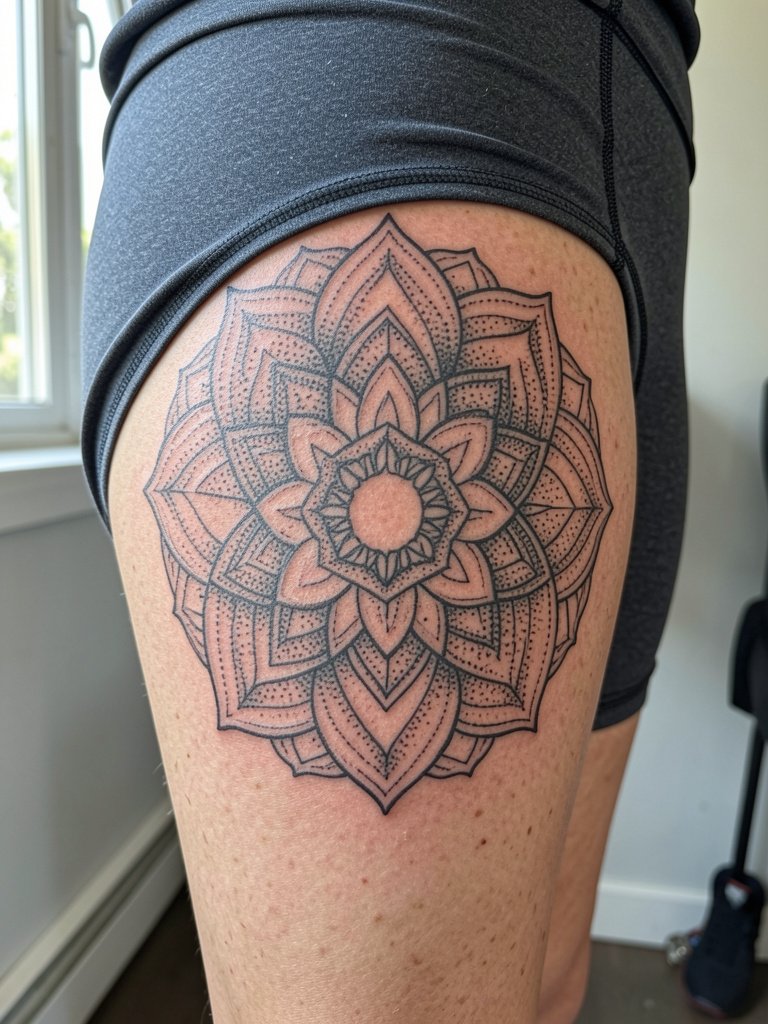
Combining fine geometry with stipple creates a crisp architectural feel, but the fine lines need slightly heavier weight than single-needle when placed on high-movement skin. Sessions for a large upper-thigh panel are multiple hours and do well when split. A frequent mistake is trusting ultra-thin geometry without planning for muscle flex. Ask for slightly reinforced linework on key anchors and request healed photos from the artist of similar placements. For evenings wear a mid-thigh slip dress that reveals the area elegantly.
17. Half-Sleeve Mandala Panel That Blends Patterns
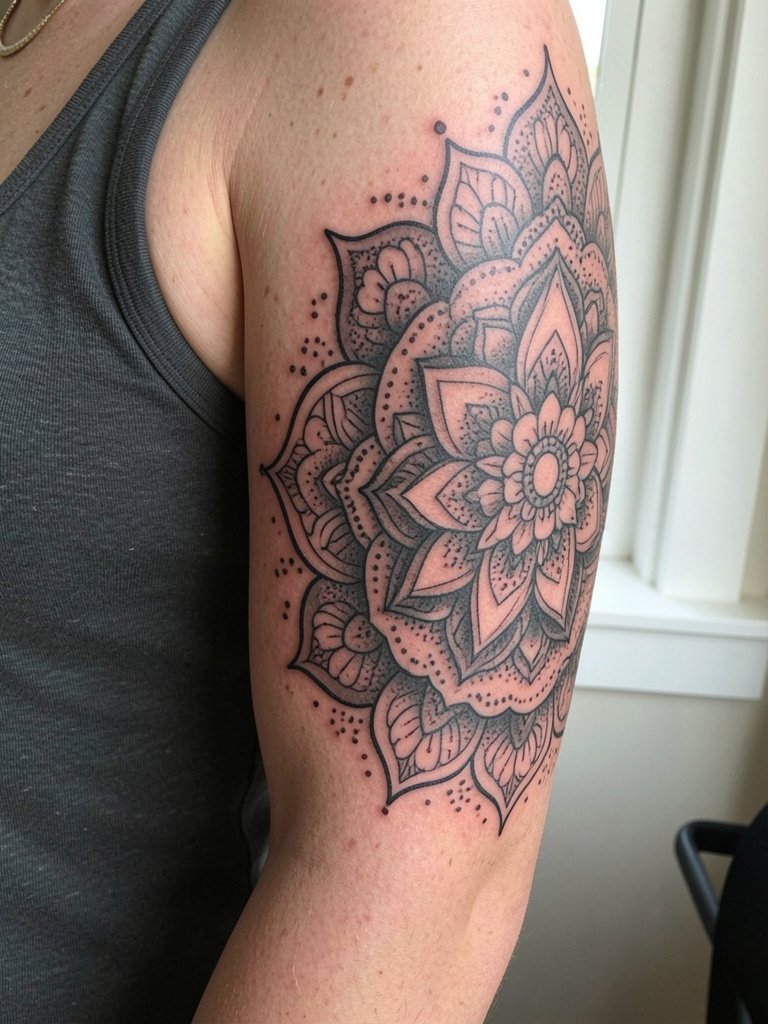
Half-sleeve mandalas need an initial hierarchy so future additions do not overwhelm the core motif. Sessions are multi-hour and you should plan for at least two visits. A common mistake is lacking a clear primary mandala scale, which leaves future pieces fighting for focus. Ask the artist to map out negative-space corridors for future elements. For styling, rolled sleeves and layered bangles work well, and a stackable bangle set complements the radial rhythm.
18. Mandala Collar Piece That Sits Above the Heart
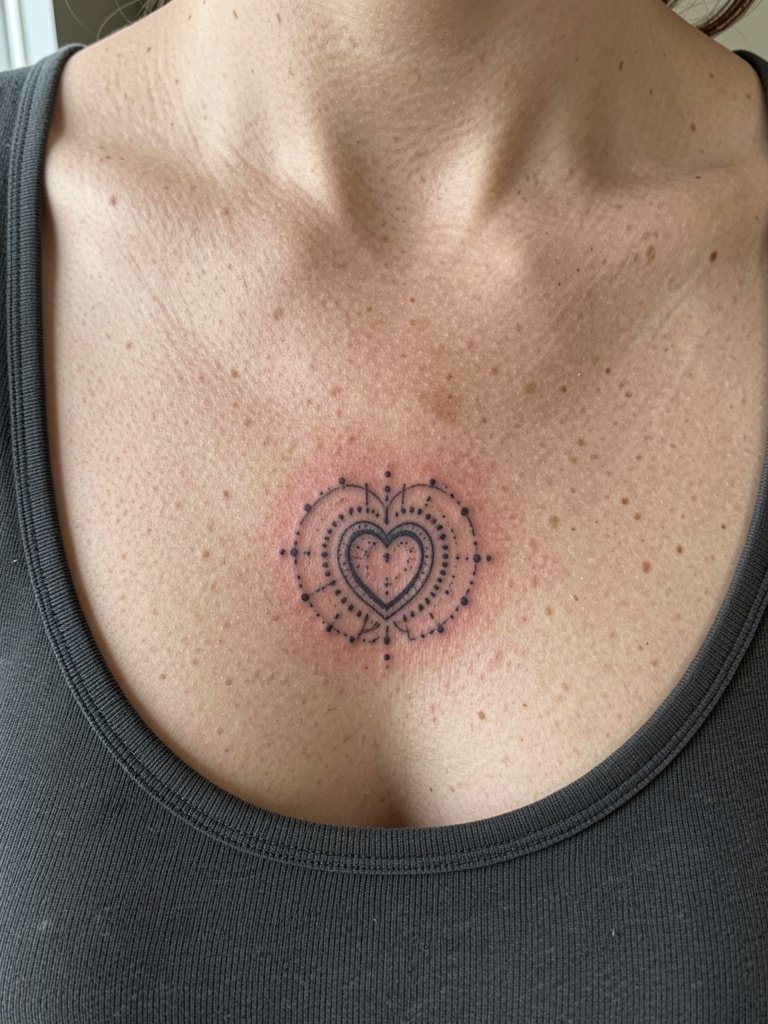
A chest-centered mandala reads intimately and can be a personal focal point. Expect higher sensitivity and sessions broken into shorter stints. People often pick tiny central motifs that the chest tissue softens; instead choose slightly larger inner rings. Ask for center spacing that tolerates expansion with normal movement. For nights out, scoop necks and layered pendant necklaces pair well, and a delicate pendant chain frames the area without rubbing.
19. Geometric-Mixed Mandala for the Outer Hip
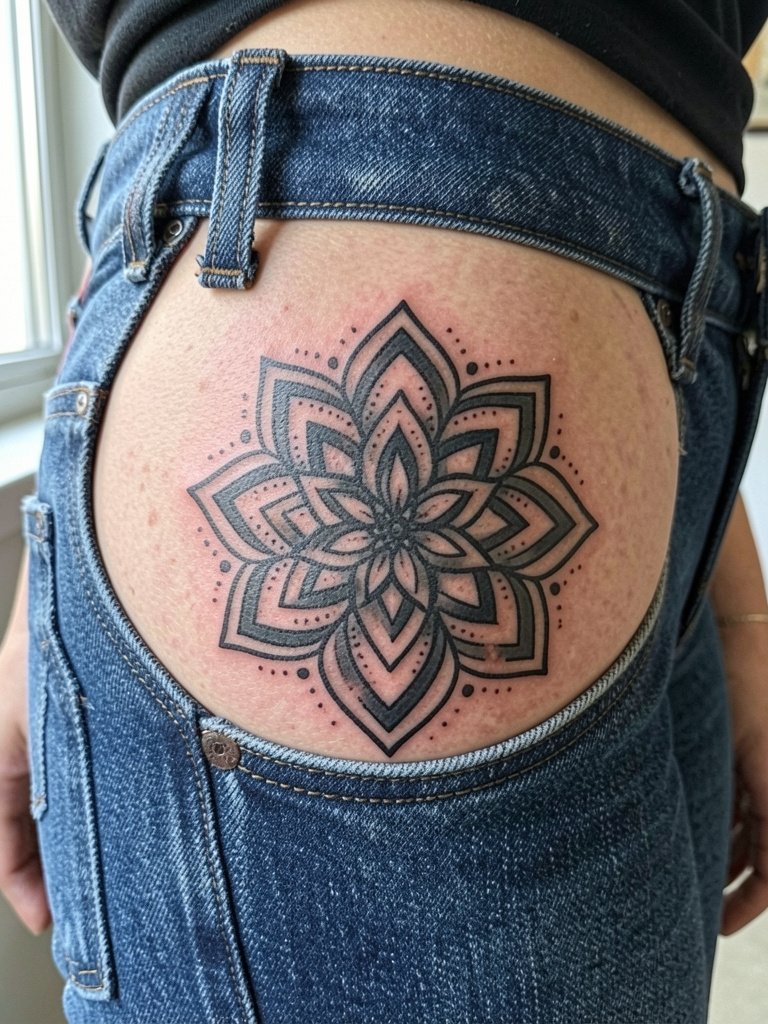
Hip placements look great because the skin there keeps dot separation and the area can be hidden when you want. Sessions tend to be moderate in length and pain depends on fat coverage. The mistake is placing too many fine interior dots that the skin compresses near the pelvic bone. Ask for a clear outer silhouette and a slightly bolder ring where the hip flexes. For showing it off wear low-rise jeans or a cropped tee with high-waist jeans so the mandala peeks above the waistband.
20. Sunburst Mandala Over the Scapula
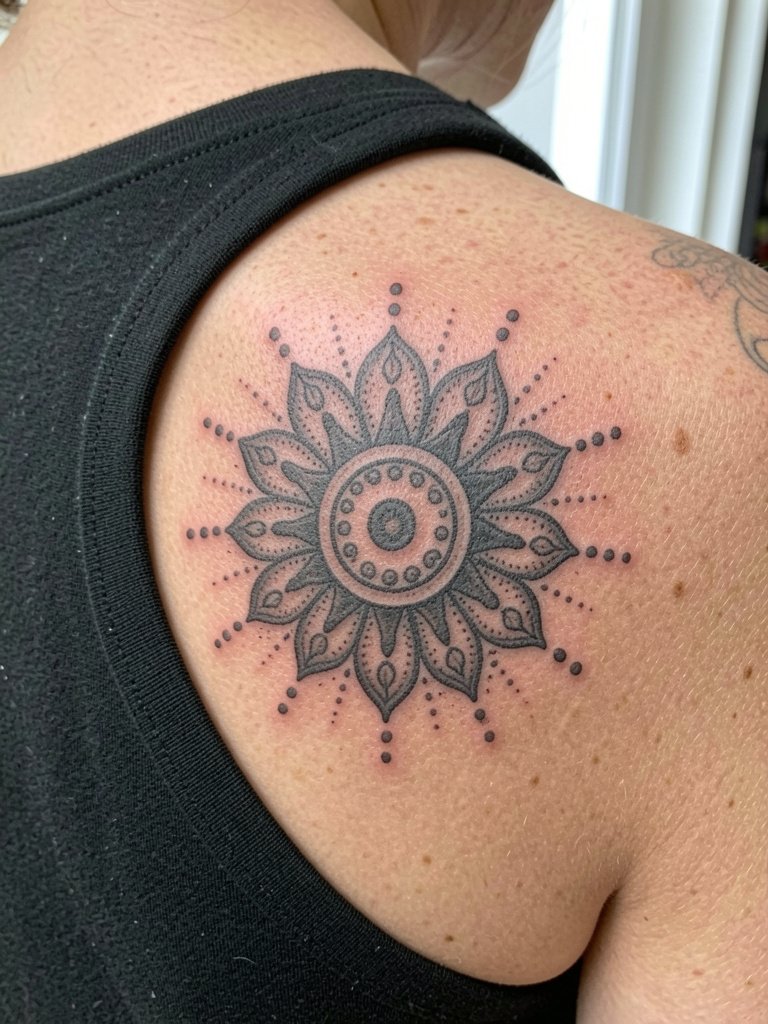
Scapula placements photograph beautifully and tolerate dense dotwork. Sessions vary by size and are usually two to three hours. A typical error is centering too close to the spine where movement blurs symmetry; center on the scapula to keep balance. Ask the artist to align the main axis with your shoulder blade tip. For showing off choose open-back tops or a strappy tank that frames the curve without rubbing.
21. Full Back Mandala for a Statement Piece
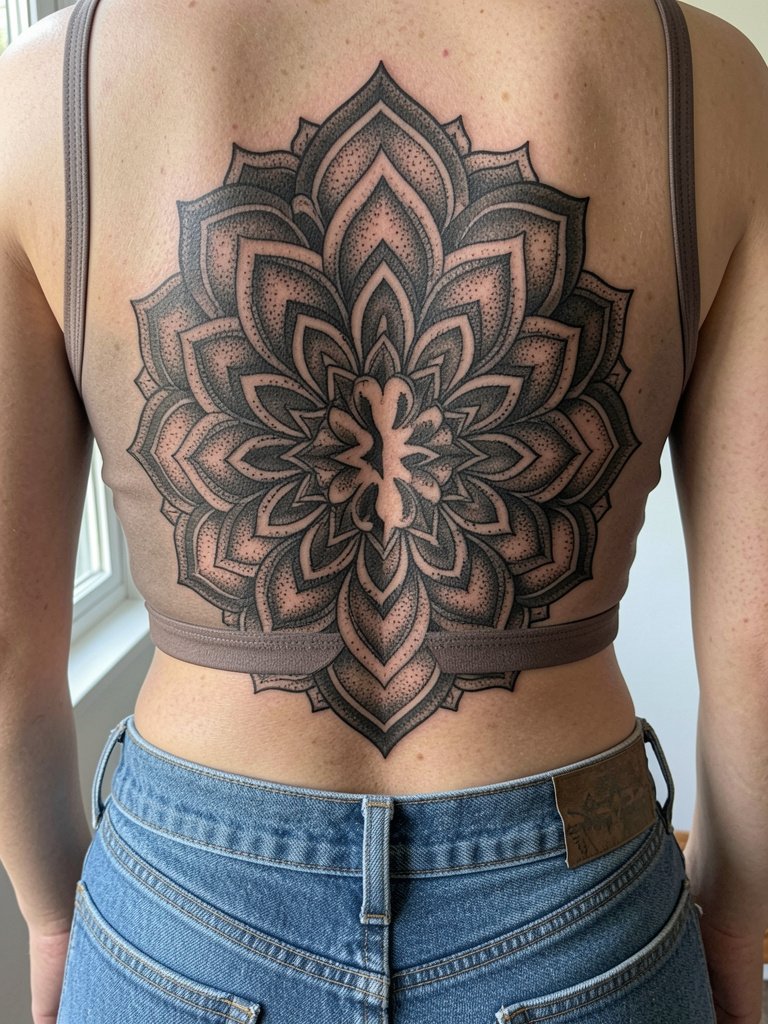
Full back mandalas are a major commitment and need a clear spacing plan so inner rings remain distinct at different healing stages. Sessions will be multi-day and you should budget for at least two long sittings. A common mistake is packing so much interior detail that the mid-back becomes visually noisy after settling. Insist on large-scale negative-space bands between major rings. For skimpy-back dresses consider a low-back dress that showcases the mandala without abrasion.
22. Mandala with Subtle Color Accents on the Shoulder
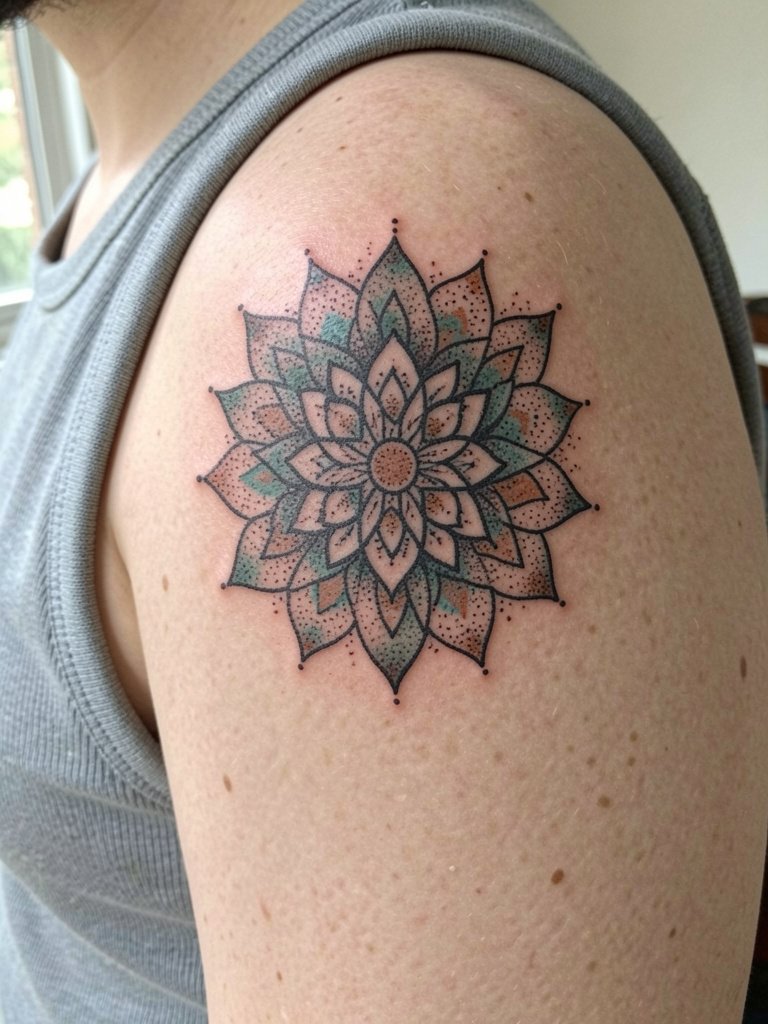
Adding subtle color to dotwork can enhance depth but demands careful saturation to avoid muddying the black stipple. The debate here is practical rather than ethical. One camp prefers pure blackwork for longevity because pigments fade at different rates. The other camp supports small, well-saturated color accents that add pop and can be refreshed separately. If you want color, request small swatches tested on adjacent skin to see how your skin tones the pigments. For outfits, linen tees or tanks in neutral hues let the color accents stand out, and a neutral linen tank keeps focus on the art.
23. Mandala Chest Band That Wraps Horizontally
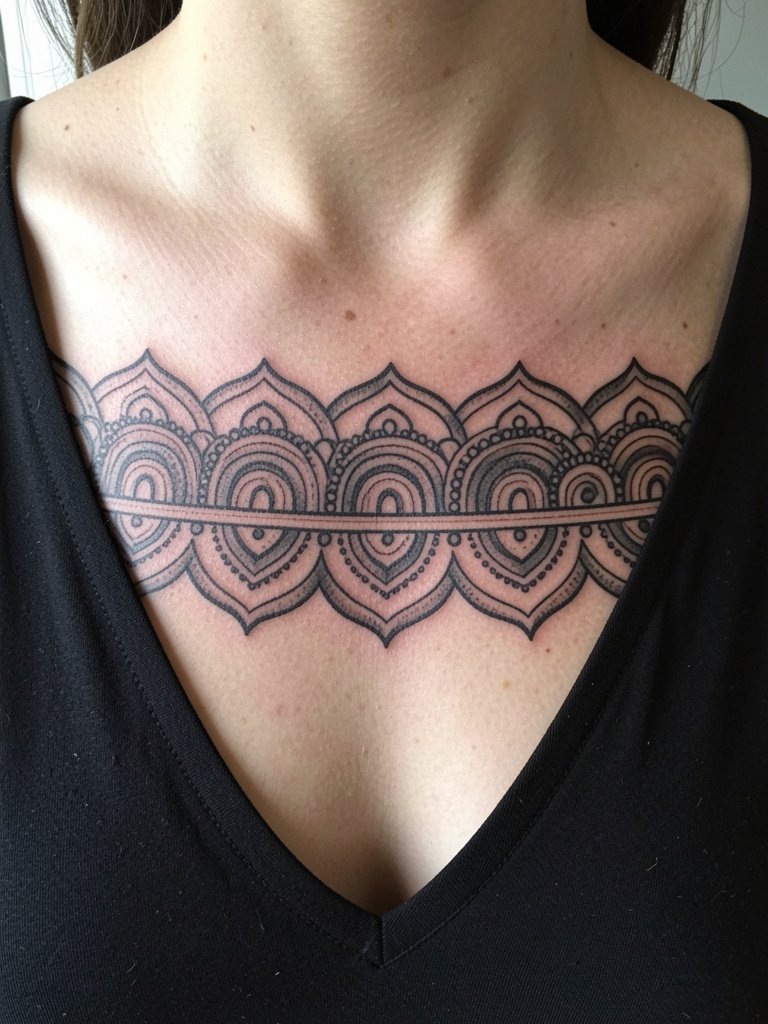
Chest bands need a strong silhouette so the repeat motif retains clarity across movement. Sessions are medium length and sensitivity varies. The mistake is choosing too many tiny interior dots that merge when the chest expands and contracts. Ask for firm outer arches and slightly expanded negative gaps. For showing and coverage, wide V-necks and crewneck sweaters layered over are both good, and a wide V-neck sweater can frame the band.
24. Mandala That Integrates Botanical Elements on the Thigh
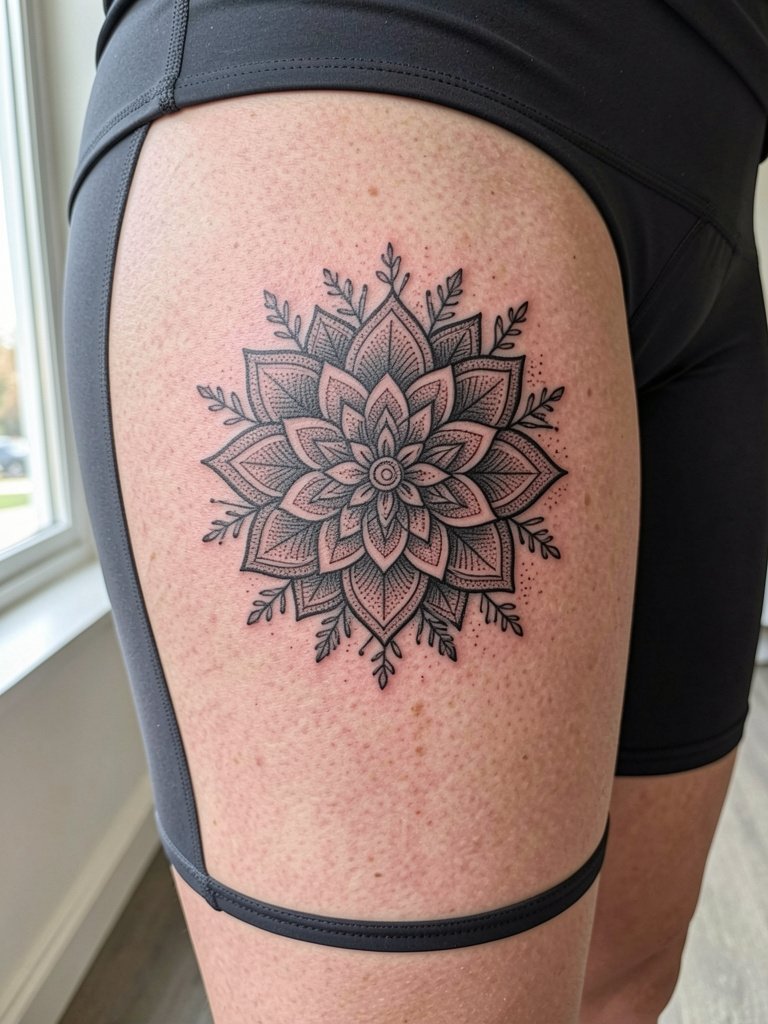
Blending botanical linework with stipple can warm a mandala into a more organic composition. Sessions are longer and you should plan for multiple passes to layer the leaves and dots. A common error is using thin botanical lines that disappear into the stipple mass. Specify that the flora outlines be slightly reinforced. For outfits that show the integration try a wrap skirt that drapes above the thigh without rubbing.
25. Micro Constellation Mandala for the Wrist Inner Edge
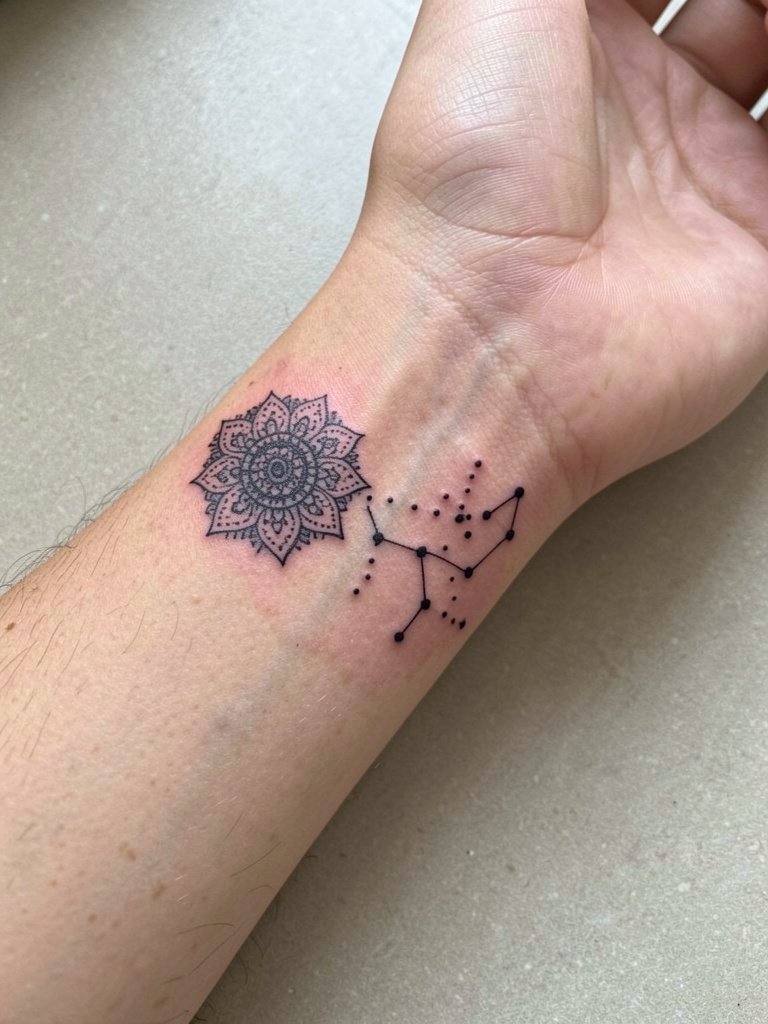
Inner wrist pieces are visible and delicate, which makes dot spacing crucial to avoid early feathering. Sessions are short and pain is mild. The mistake is clustering too many micro dots without stronger connectors, which can appear as a gray patch after sun exposure. Request defined connector dots and a light sun-protection plan post-healing. For showing the piece pair with watches or thin cuff bracelets and consider a minimalist wristwatch that complements but does not rub the tattoo.
26. Mandala with Whip Shading for a Soft Edge on the Hip
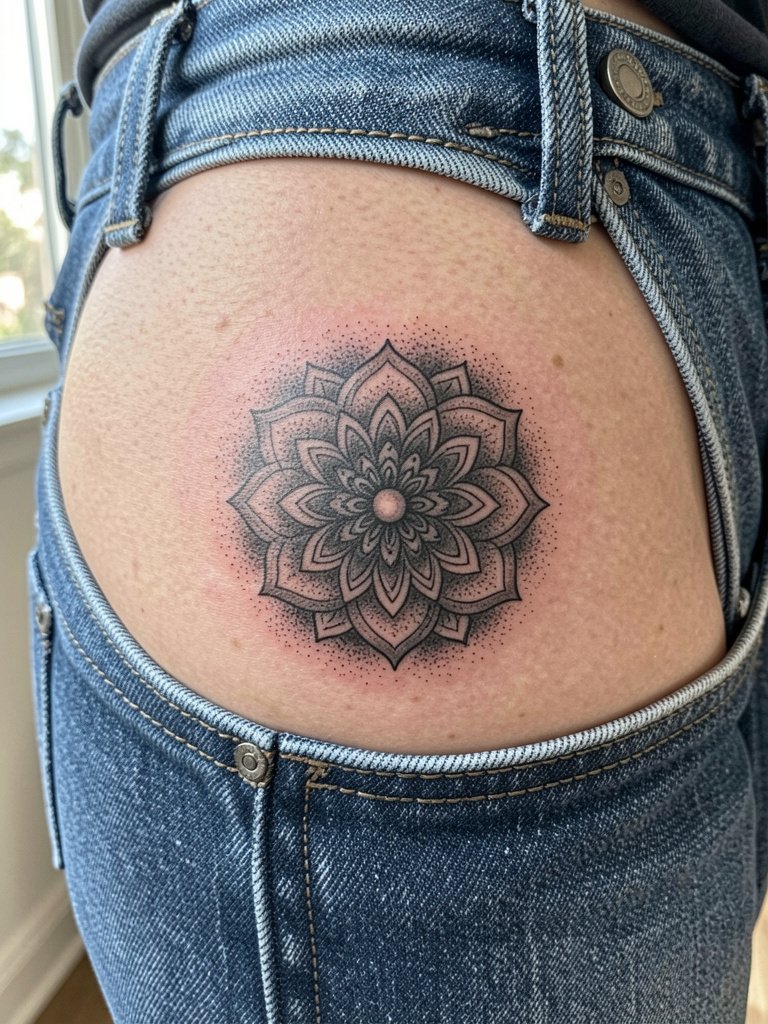
Whip shading blends lines into stipple and yields softer silhouettes that photograph well. The hip accepts this technique because it keeps the outer lobes soft without collapsing the central geometry. Sessions are moderate in time and pain is low to moderate. Avoid requesting feathered edges too close to clothing seams, which can cause premature fading. Ask the artist to keep the whip-shaded zone at least one finger-width from the waistband. For outfits try low-rise jeans with a cropped knit top that reveals the hip when desired.
27. Tiny Nipple-Area Medallion for Intimate Symbolism
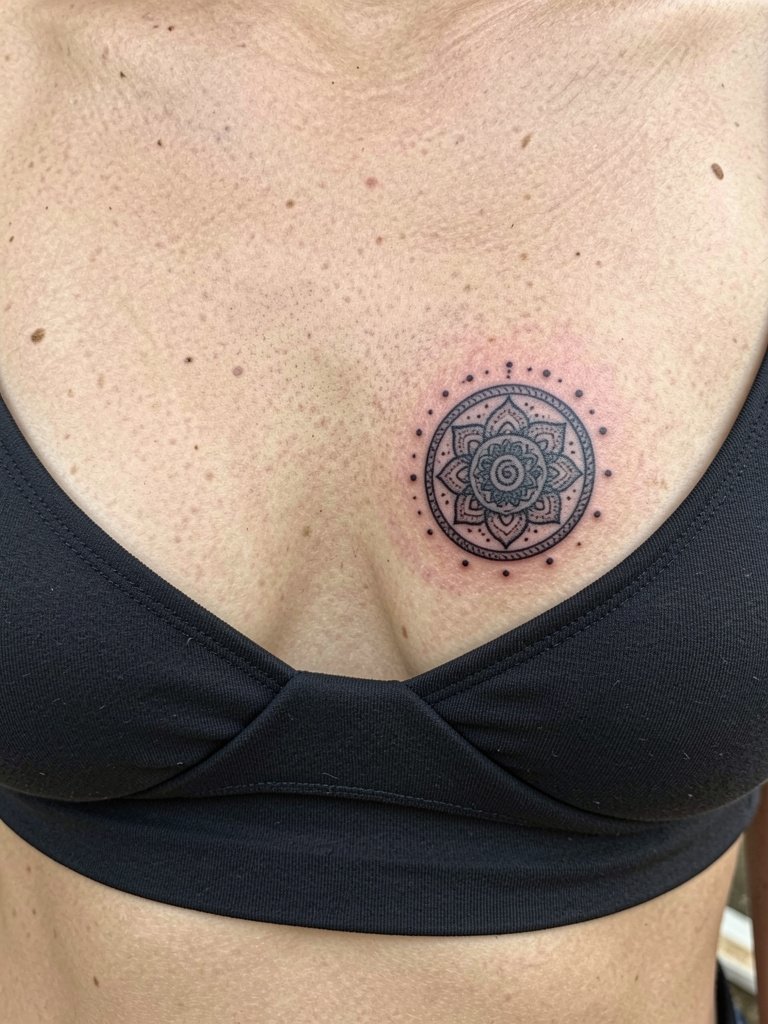
Intimate-area mandalas require experienced artists who work with sensitive skin. This placement is not for walk-ins because shading and dot depth need careful calibration. The mistake is using heavy center dots right next to areolar tissue which can distort as the skin changes. Ask for a softened outer ring and discuss scarring risk specifics with the artist before booking. Wear a fitted bandeau that you can remove without stretching the area for the appointment.
Frequently Asked Questions
Q: How long do mandala dotwork tattoos take to heal and when will the dots look like the healed photos in this guide?
A: Most dotwork pieces form surface scabs in the first week and look substantially healed by six to eight weeks. Final subtle settling of dots often continues up to six months, especially for dense stipple. I tell people to expect a visible change between the one-month and three-month photos and to plan touch-ups after six to twelve months if needed.
Q: Are mandala dotwork tattoos more painful than standard linework in certain placements?
A: Dotwork can feel like repeated, concentrated tapping, so on thin areas such as the sternum, ribs, and behind the ear it will seem more intense than a single outline in the same spot. On the thigh, calf, and outer arm dotwork is usually less uncomfortable. Break sessions into shorter passes for ribs or sternum to keep pain manageable.
Q: Where can I find healed mandala portfolios and discovery pathways without naming artists directly?
A: Search platform hashtags and keywords such as #MandalaDotwork, #DotworkHealed, and #MandalaHealed on Instagram and TikTok, and use location filters to find portfolios in your city. Look through tattoo community forums and tag-specific boards for user-posted healed timelines that show different skin tones.
Q: How do mandala dotwork tattoos age on different skin tones and should I change the spacing?
A: Darker skin tones can absorb contrast differently, so a little more negative space and slightly heavier outer dots often preserves the mandala silhouette longer. Lighter tones show crisp micro dots more readily but can also display sun-induced fading. Ask for a healed mock-up on skin tone samples when possible and plan touch-ups based on your daily sun exposure.
Q: Can I add color to a dotwork mandala later and how does that affect touch-ups?
A: Yes, small color accents can be added, but recognize color and black fade at different rates which can change the balance over time. If you plan color later, ask the artist to reserve small anchor areas where color will sit so future saturation does not crowd black stipple.
Q: What should I wear to appointments for different mandala placements and any clothing recommendations for aftercare photos?
A: Wear clothing that the artist can remove or shift without tugging the tattoo site, such as a loose tank for shoulder work or fitted low-rise jeans for hip pieces. For showing healed work in photos pick garments that frame the area, for example a scoop-neck top for collarbone pieces or a flowy midi skirt for thigh mandalas.
