
Bold, saturated Japanese work can age far better than tiny single-needle pieces that vanish into the skin. Traditional motifs designed with breathing room and heavy outlines keep their identity as skin changes. These ideas favor composition that reads at a distance and still feels refined up close, so think spacing, contrast, and placement before you pick color. The first entry starts with a classic that shows exactly how to plan for longevity.
1. Koi Swimming Upward on the Calf
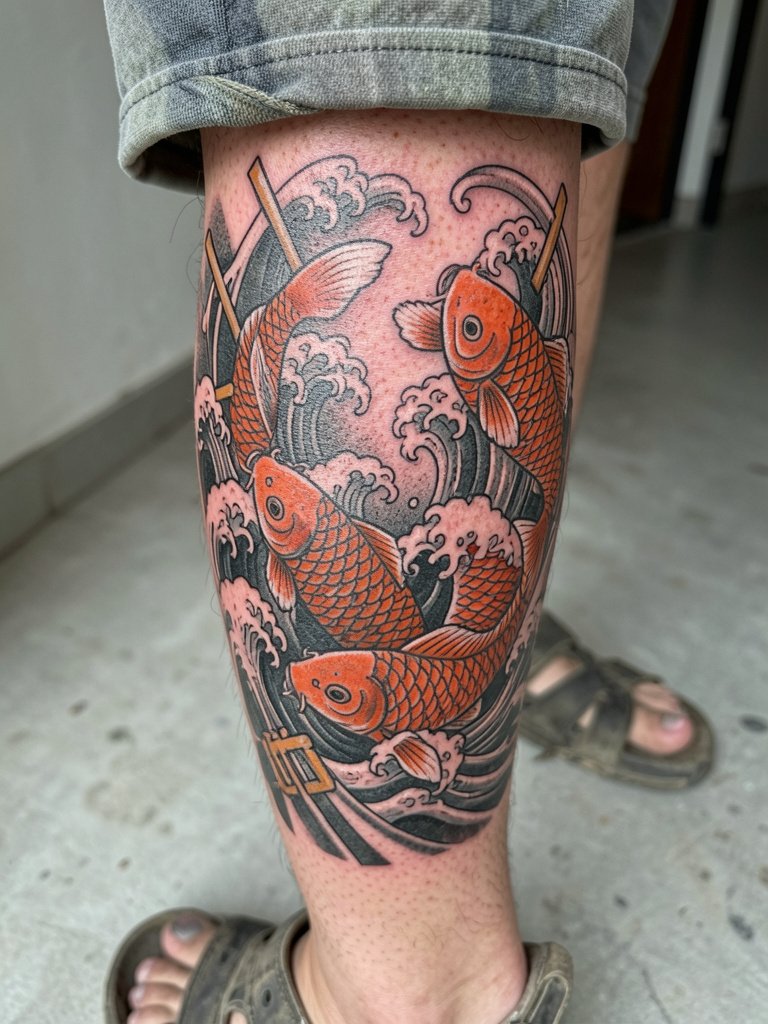
A calf koi reads well from across a room, which is why I recommend mid-size composition rather than tiny detail. Ask the stencil to be tested at the actual calf width so scales have room. Expect a two to three hour session for a single koi of this scale, with low to moderate pain that most people find manageable while seated. The calf has lower blowout risk than the inner arm because the skin is thicker, but shading packed too tight will soften over time. For showing it off wear rolled denim shorts and low sandals to keep the outline visible, and plan a touch-up in year two if you want the orange fully saturated again.
2. Coiling Dragon Along the Spine
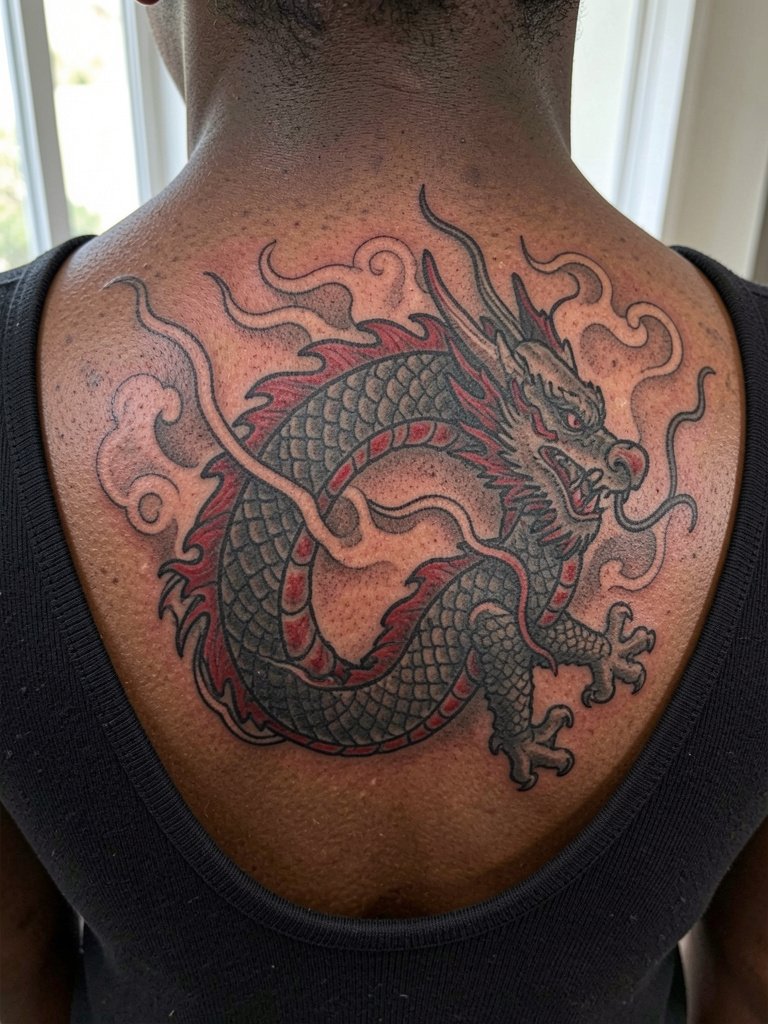
Spine runs show movement and demand careful tapering of line weight as the form crosses ribs and muscle. For this piece bring reference photos that show the exact curvature you want because lineflow on the spine is unforgiving. The session will be longer and may need multiple appointments, and the pain tends to spike near the spine and lower ribs. One common mistake is forcing too many tiny scales into a narrow band. Let the artist simplify scales into readable shapes. For nights out choose low-back dresses or tops that keep the spine visible, and try open-back midi dresses when you want the work to show.
3. Layered Peony Shoulder Cap
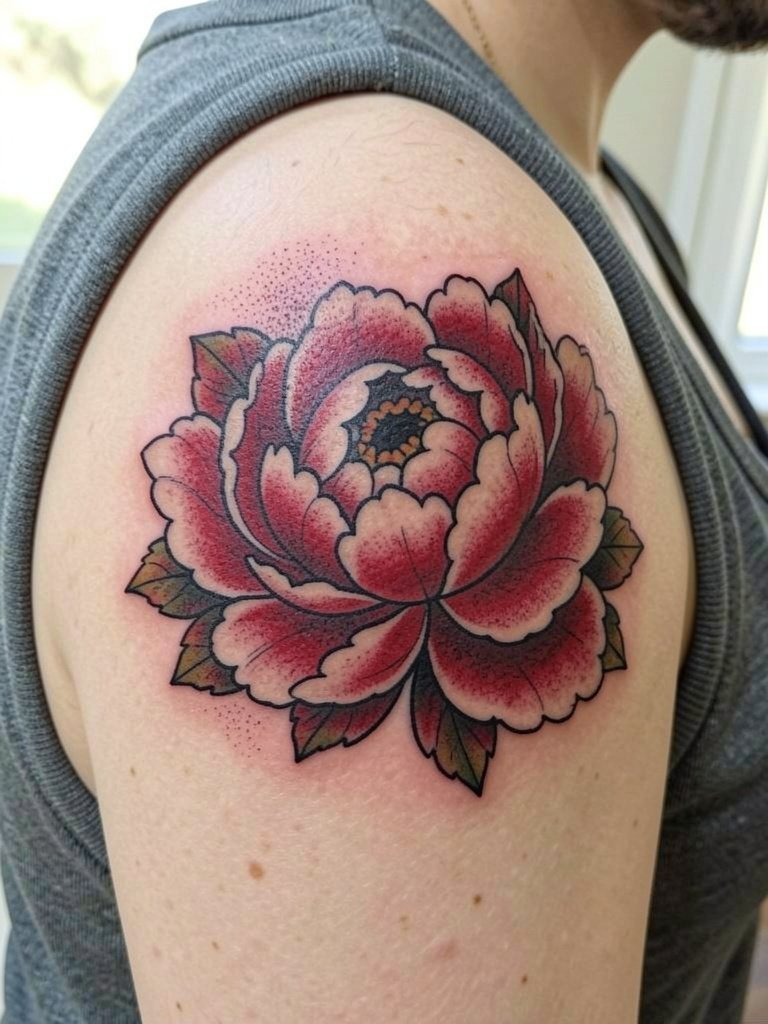
A shoulder peony is forgiving on scale and ages predictably when the outline is bold. I recommend asking for slightly heavier linework across petal edges so the flower keeps its silhouette at five years healed. Small, single-needle petal veins look delicate at first but often blur into a single tone. Session time is typically one to two hours with moderate pain. For styling pair this with sleeveless linen shirts that frame the shoulder. Note the peony is a Japanese motif with cultural history, so approach the design respectfully and avoid combining it with unrelated cultural symbols in a way that erases origin.
4. Full-Chest Hannya Mask Panel
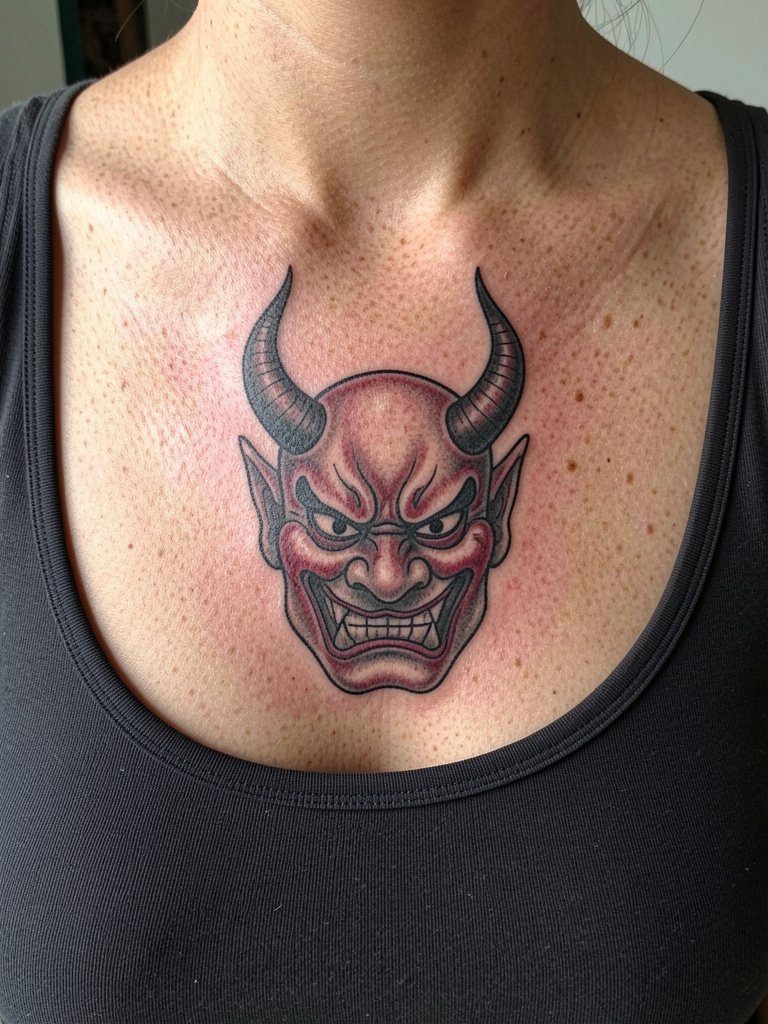
Hannya masks draw tight debate in the community. One camp argues these motifs require deep understanding of religious and theatrical meaning and that artists should present the cultural context when offering this design. The other camp says skilled artists can render Hannya respectfully for anyone who approaches the symbol with care and curiosity. For the chest placement expect higher sensitivity near the sternum and under the collarbones, and plan at least two sessions to let the artist space heavy outlines and build saturation. If you want this framed under low-neck shirts, try wide V-neck blouses that reveal the mask without crowding the neckline.
5. Samurai Kabuto Helmet on the Upper Arm
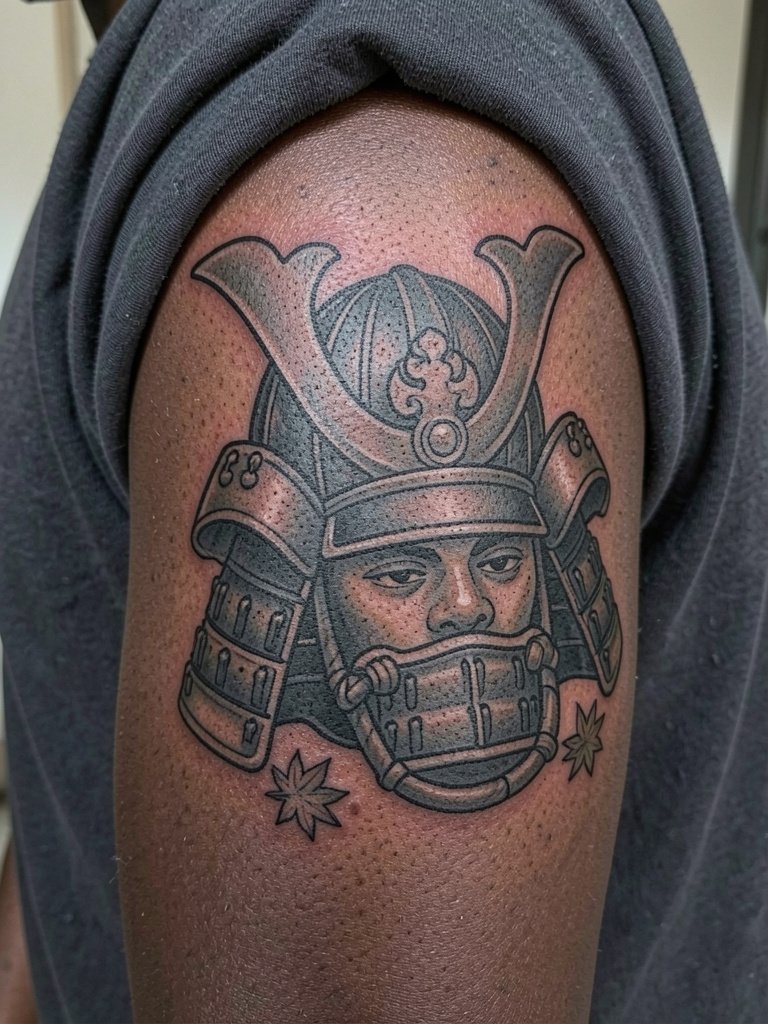
A samurai helmet reads well on the outer arm because the surface is flat and shows detail. Recommend a session plan that starts with the crest and works outward so you can adjust scale if the plates need space. Expect two to three hours of work with low to moderate pain. Common mistakes include packing too many tiny rivets that blur with movement. For an evening look pair the piece with short-sleeve button shirts that let the helmet peek under the cuff. The imagery carries historical weight, so keep composition authentic and avoid merging it with unrelated icons that dilute its cultural roots.
Session Essentials
These first six pieces hit a range of chest, arm, and calf placements, so a few studio items make the booking smoother.
-
Stencil transfer paper kit. Lets you preview the exact linework on skin before the needle touches, which is especially useful for the fine crest and helmet details above.
-
Topical numbing cream. Applied 30 to 45 minutes before the session reduces chest and spine sensitivity without altering linework when used as directed.
-
Thin protective film roll. Keeps the calf and upper arm pieces clean in the first week against friction from clothing and footwear.
-
Fragrance-free gentle body wash. Cleans the healing area without stripping pigment or irritating sensitive chest work.
-
Aquaphor healing ointment. Thin application for the initial days locks in moisture for bold blackwork and saturated color without clogging needle channels.
6. Wave and Wind Bars Sleeve Accent
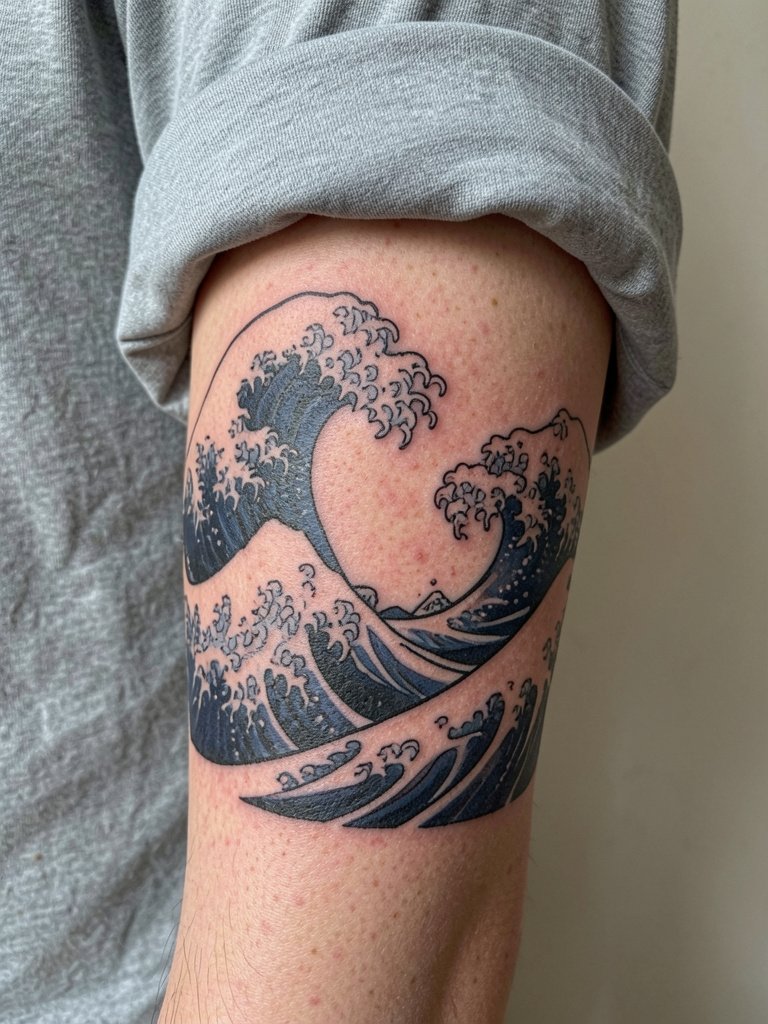
Waves and wind bars are the connective tissue for many Japanese compositions and they age well when given breathing room. The mistake is over-cramming foam detail into narrow bands. Tell the artist how wide you want the bars so they can translate that to the full sleeve flow. Sessions can be broken into two-hour blocks so you can assess how the flow reads when moving. The forearm tolerates shading nicely but the inner forearm will soften detail faster than the outer. For everyday wear choose rolled cuff shirts that show the wave edge without revealing the whole sleeve at once.
7. Rising Phoenix Backpiece
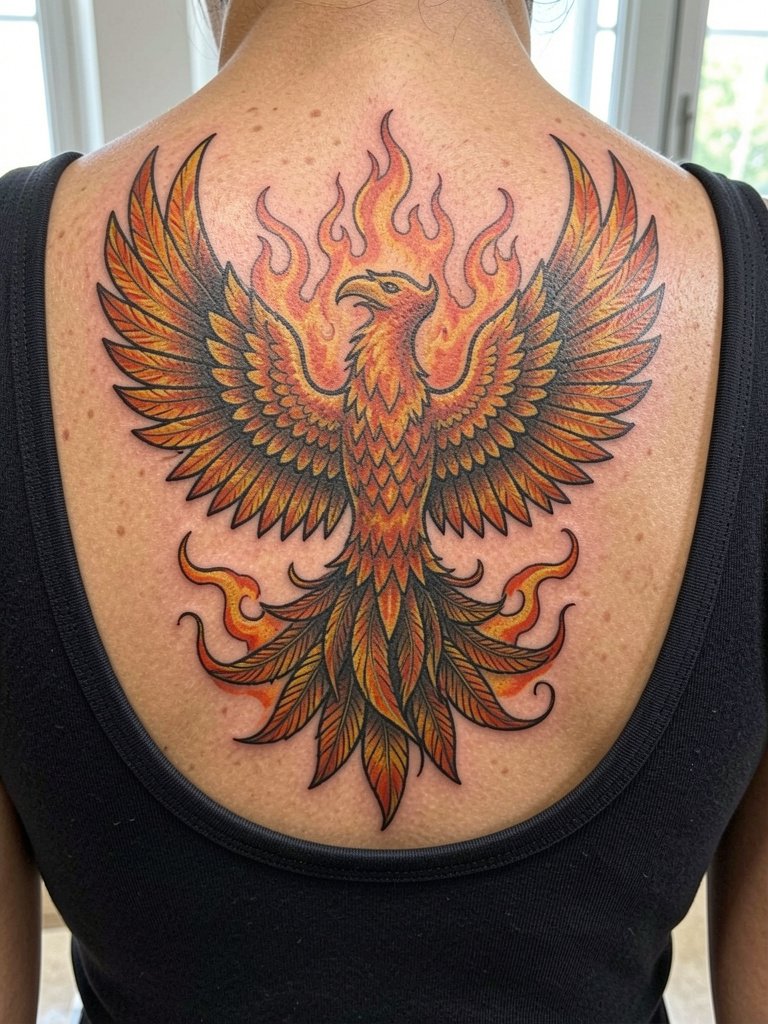
A phoenix backpiece requires a multi-session roadmap and clear hierarchy so the wings and tail do not fight for attention. I recommend starting with the major wing spans and adding feather detail later. Pain is moderate to high depending on proximity to the spine and scapula. A common error is trying to compress the tail into a narrow strip which then becomes a muddy gradient. For styling when healed wear open-back tops or halter dresses to highlight the silhouette. The phoenix is frequently integrated into larger Japanese panels so coordinate motifs with your artist early.
8. Tiger Charging Across the Thigh
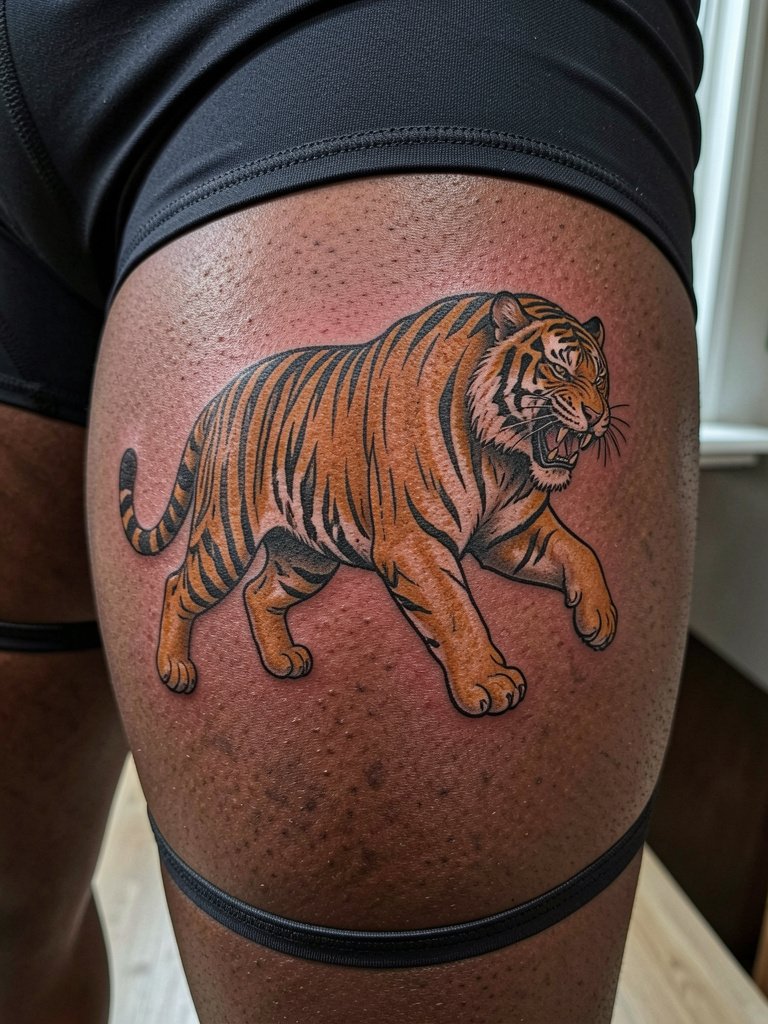
Thigh placements let you go large without the constant friction of calves or feet. A charging tiger benefits from open, bold stripes and less interior stippling so the face stays readable after movement and time. Expect a multi-hour session and moderate pain that most describe as tolerable. Watch for the common mistake of tiny teeth and whisker detail that fades into a blur. For showing the work pair it with high-waisted shorts or skirts, and consider modest athletic shorts for initial comfort during sessions.
9. Cherry Blossom Branch on the Wrist
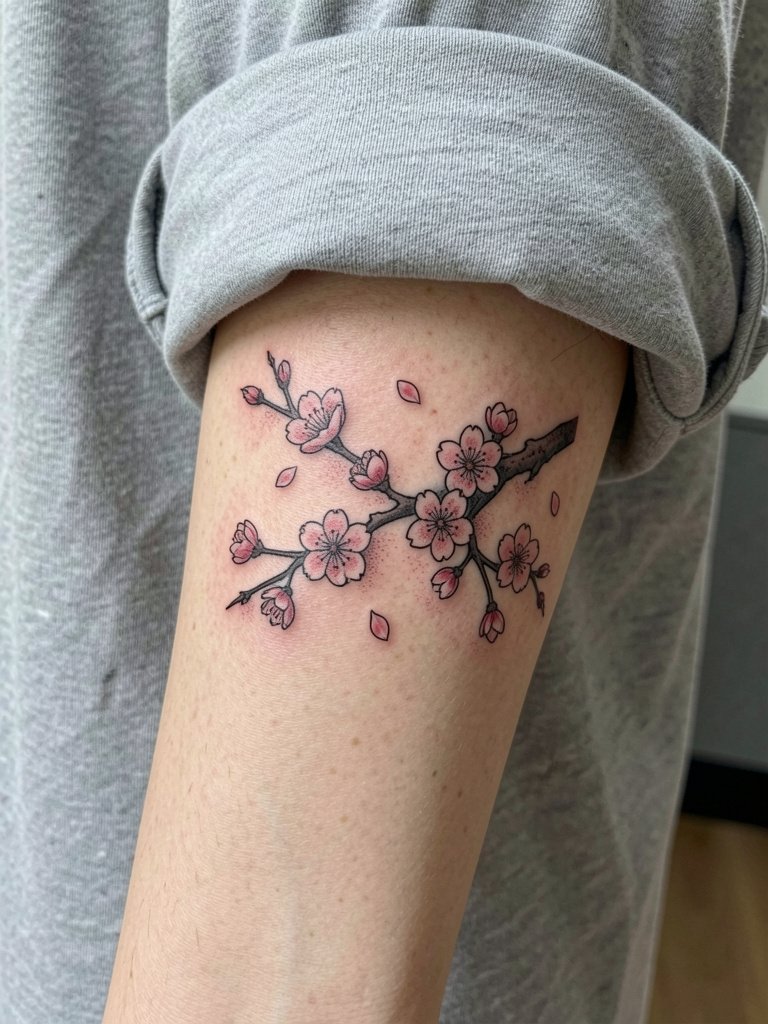
Small floral wrist pieces sit in a constant wash of soap and sun, which is why the community splits on scale and line weight for this placement. One camp argues thin single-needle blooms look elegant at first but blur within two years due to constant washing and friction. The other camp says small floral work can settle fine if the lines are slightly heavier and petals are given extra negative space. If you want longevity ask the artist for hairline stems but slightly bolder bloom outlines and plan a touch-up at year one. For sessions wear a loose sleeve you can roll up easily and consider delicate chain bracelets to frame the floral placement when showing it off.
10. Lotus Sternum Mandala
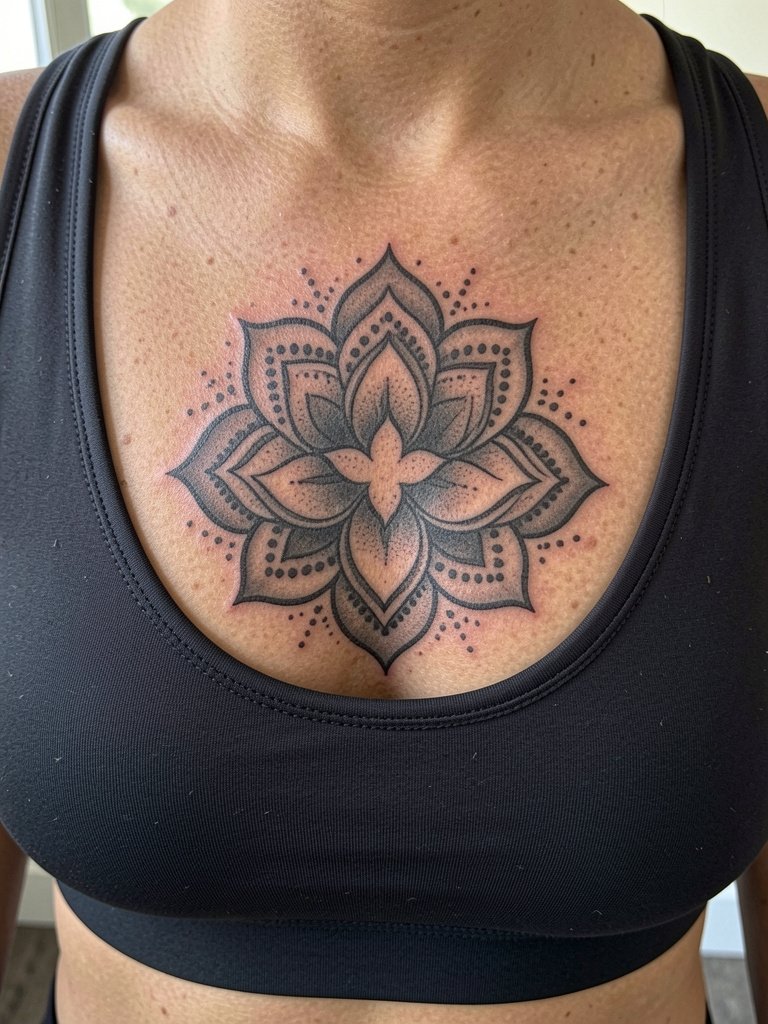
The sternum is a sensitive area and requires a patient artist who paces the session. Expect higher pain and plan for short breaks. A common mistake is trying to put too much micro-dot detail close to the center where the skin creases. The fix is slightly larger petal spacing and heavier anchor lines so the mandala reads at distance. For the session wear a sports bra that sits naturally so the artist can access the area without fabric shifting. This design has spiritual and cultural meanings in some traditions, so treat the iconography with attention and avoid combining unrelated sacred symbols.
11. Crane in Flight on the Shoulder Blade
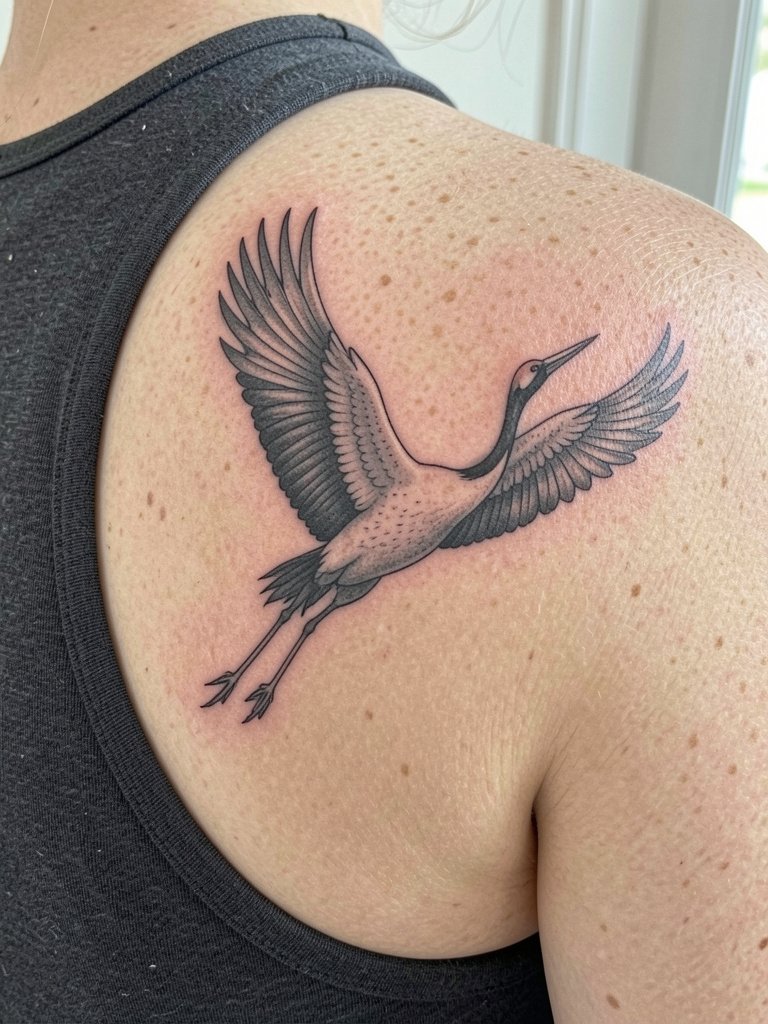
Shoulder blade cranes move with the scapula and show beautifully when the arm shifts. Ask the artist to sit you up and move your shoulder through a range so the composition lands in motion. Sessions are typically one to two hours with moderate pain mostly when the needle reaches the bone edge. Avoid over-detailing the wing tips or they will blur into streaks. For styling, open-back tops and halter straps show the crane's wing shape, and I like pairing it with a simple racerback dress when you want the silhouette revealed.
12. Maple Leaves and Peony Forearm Band
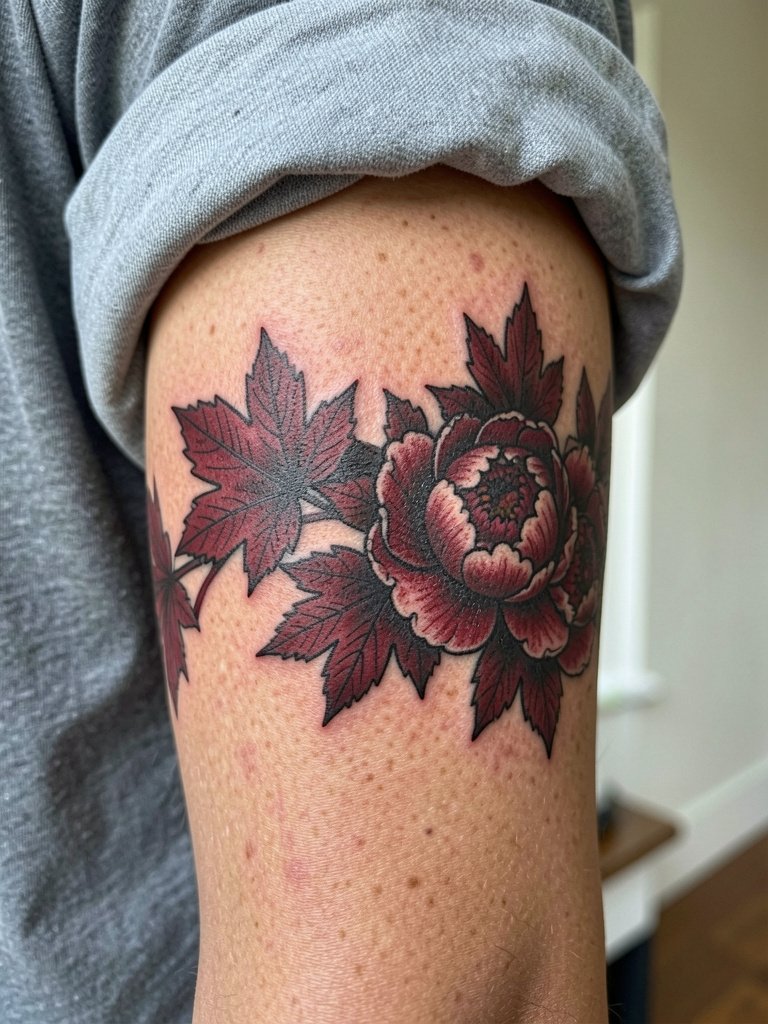
A forearm band balances motion and visibility, and maple leaves frame peonies well when spacing is considered. The forearm will experience sunlight and more friction than inner bicep areas, so recommend slightly stronger outlines and saturated color. One real mistake is crowding leaves so the band loses negative space. Sessions for a band are often two hours and mildly uncomfortable near the ulna. For daily wear try casual rolled sleeve shirts that keep the band visible and protected when needed.
13. Pine and Bamboo Collarbone Accent
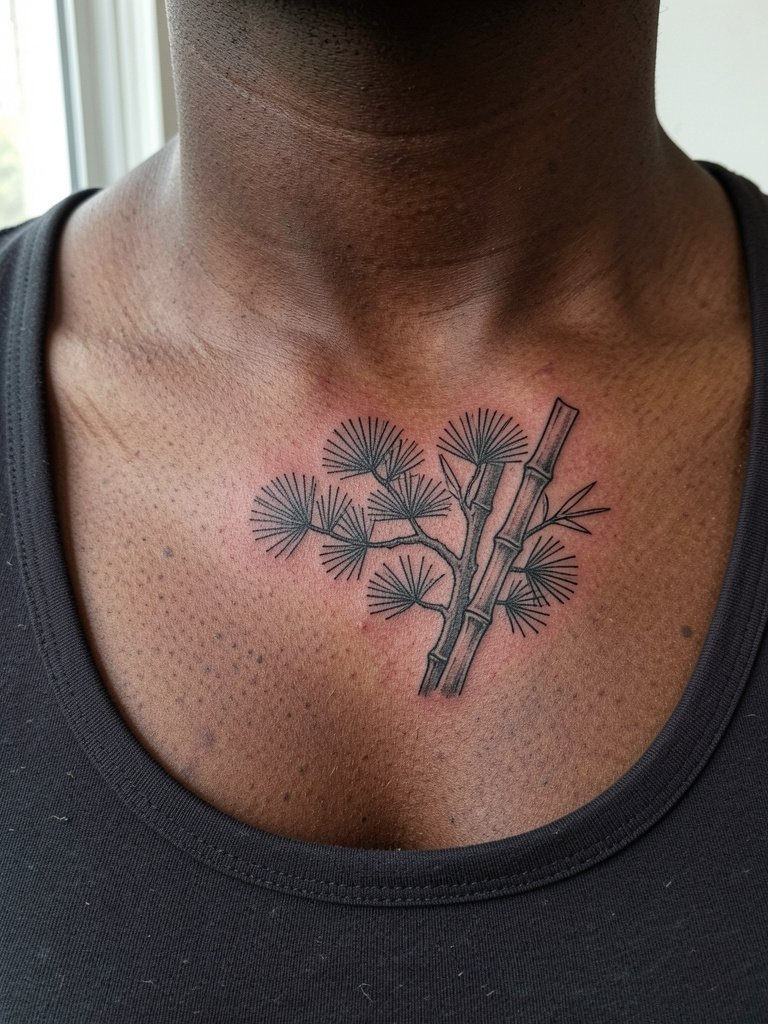
Collarbone pieces are subtle and visible with everyday tops, but the thin skin can make fine detail soften faster than on the shoulder. Ask for slightly firmer linework on the bamboo and wider spacing between pine needles so the silhouettes hold. Sessions are often one hour and the area is sensitive near the bone. For evening wear use scoop-neck tops that show the collarbone without forcing the design into a tight cleavage frame.
14. Oni Mask on the Calf Side Panel
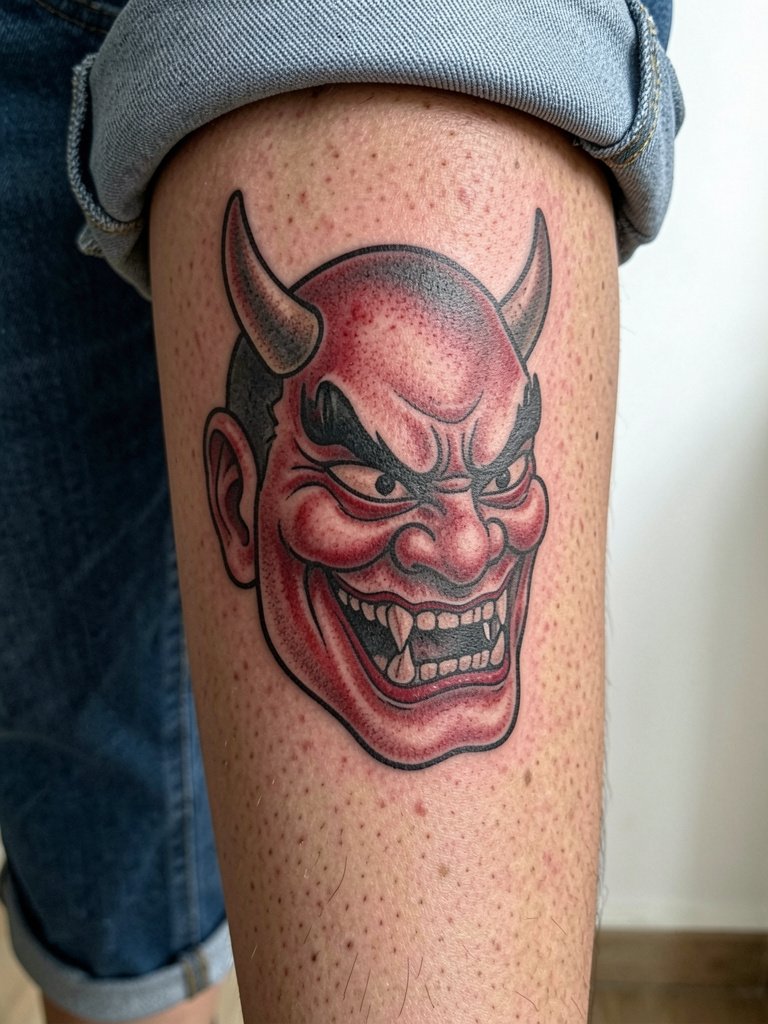
Oni masks are bold and perform well on limbs where the canvas allows expression. The calf panel takes heavier outlines and looks great with deep red saturation. Expect a one to two hour session with moderate pain. One mistake I see is shrinking facial features to fit a narrow strip which kills the impact. For show-off looks pair with cuffed jeans and boots. Remember this imagery has cultural context in Japanese theater and folklore, so approach the symbol with respect for its origin and avoid mixing motifs in ways that erase meaning.
15. Full-Back Traditional Panel
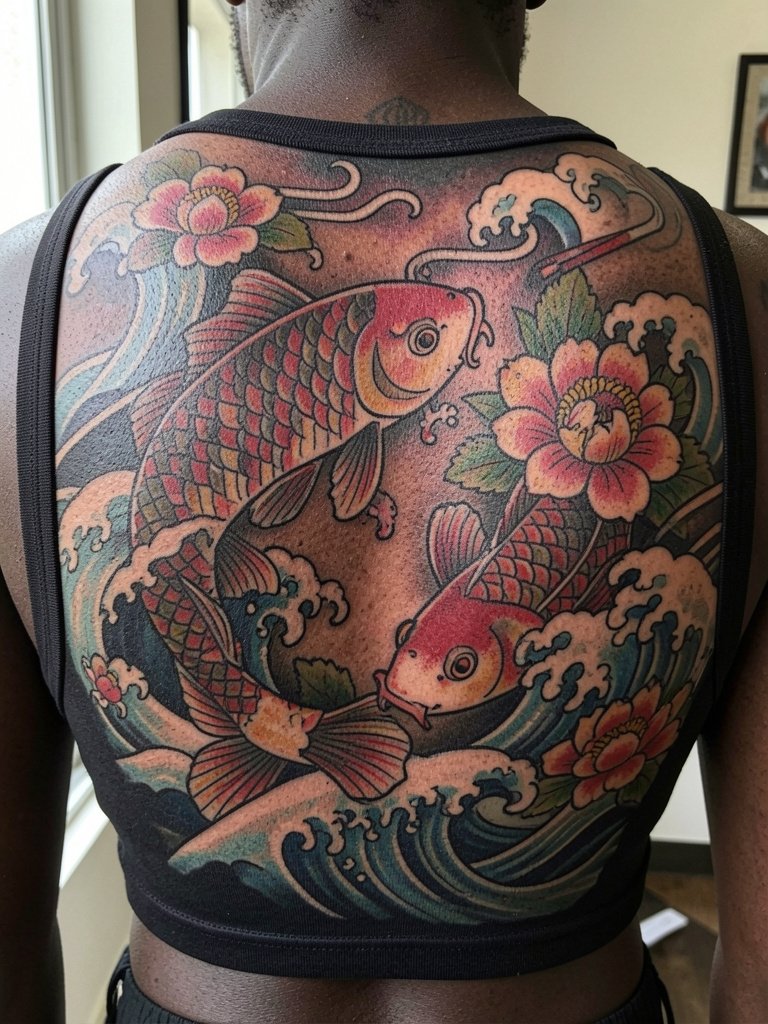
Large back pieces revive a classic debate about authenticity and ownership of style. One camp insists that full traditional panels should follow historical Irezumi conventions with heavy outlines and strong negative space so the work reads as a single unit. The other camp supports contemporary reinterpretation that mixes motifs and color palettes for personal storytelling. When planning a back panel, book the composition consultation first and ask the artist to map the major shapes across the entire back so each motif has room. Sessions will be multiple days and the pay-off is a cohesive piece that still breathes as the body moves.
Frequently Asked Questions
Q: How do I find healed Traditional Japanese portfolios without naming specific artists?
A: Search platform tags like #TraditionalJapaneseInk, #IrezumiPanel, and #KoiBackpiece and filter by "healed" or "healed tattoos" on Instagram and TikTok. Use Reddit threads that collect healed shots by keyword and check portfolio pages for before-and-after healed galleries. Local shop websites often label healed galleries with placement and skin tone.
Q: Will a small sakura wrist piece need touch-ups more often than a bold forearm peony?
A: Yes, small wrist work tends to need touch-ups earlier because the wrist is exposed to sun and washes. Plan for a light touch-up in year one or two for single-needle florals. For better longevity request slightly thicker bloom outlines and extra negative space so petals do not merge.
Q: Are Irezumi motifs culturally sensitive to wear if I am not Japanese?
A: This depends on intent and execution. Some people in the community say these motifs require knowledge of cultural context and prefer artists who explain symbolism. Others accept respectful, well-researched use when the design honors origin and avoids sacred or ritual imagery. A good path is to ask for an explanation of the symbols included and be transparent about your reasons.
Q: What should I wear to a session for a sternum or chest piece?
A: Wear a fitted sports bra or a wide scoop top that stays in place and gives the artist clear access without adjustment. If you want to reveal the area afterward, pack a wide V-neck blouse that shows the work without compressing the area during healing.
Q: How long does a traditional back panel usually take and how painful is it?
A: A full back panel is typically split across several sessions that can total 15 to 30 hours depending on detail and saturation. Pain varies by location, with the spine and ribs being higher on the scale and the fleshy upper back less so. Expect to book multiple studio days and allow recovery time between sessions.
