
Bold, saturated phoenix pieces tend to keep their silhouette far longer than the whisper-thin single-needle versions that flood social feeds. If you want a rising bird that still reads clearly after five years, the variables that matter are spacing, contrast, and where the ink sits on the body. Below the first idea, you will find designs that play with geometry, traditional flare, and modern minimalism so you can pick the version that fits your skin and wardrobe.
1. Geometric Rising Phoenix on Inner Forearm
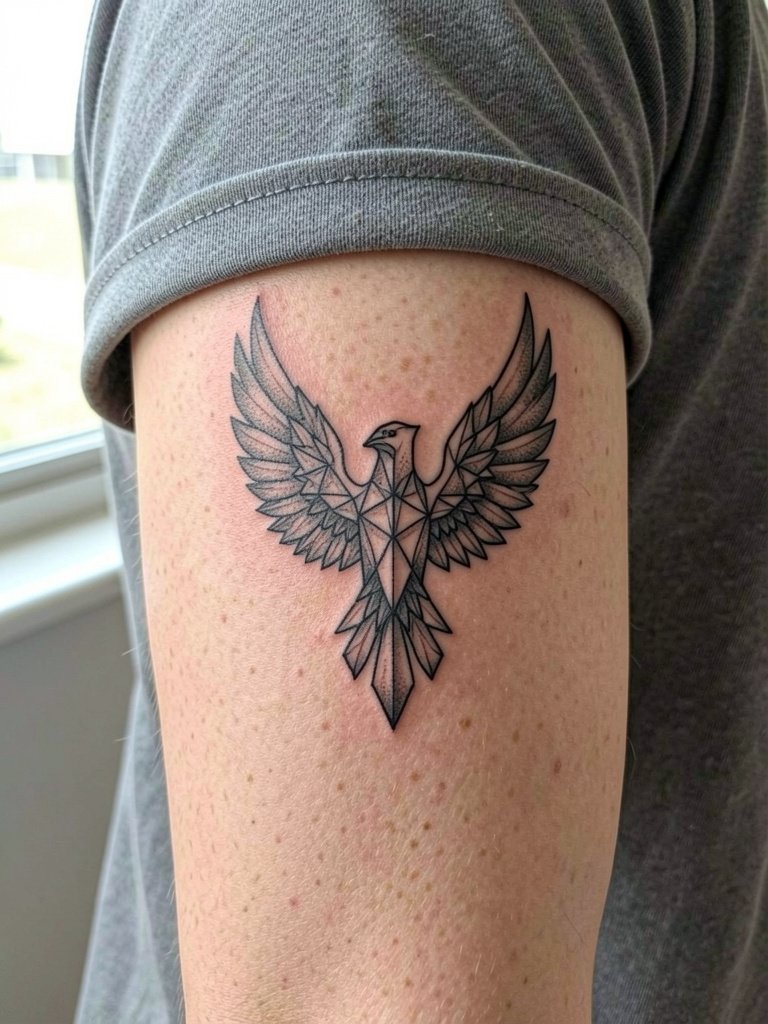
A geometric phoenix on the inner forearm reads like wearable architecture. Linework and negative space make the silhouette pop the first day and give contrast as the piece heals. Pain sits at a moderate level on the inner forearm and most sessions here run 1.5 to 3 hours depending on detail. Ask for slightly heavier linework than a single-needle reference so the triangles keep their shape at year two. A common mistake is shrinking the design to fit a slim wristband idea and losing the negative-space balance. For outfit pairings, show the piece in a rolled-sleeve linen shirt so the forearm becomes a visible statement.
2. Neo-Traditional Phoenix Wrap on Shoulder Blade
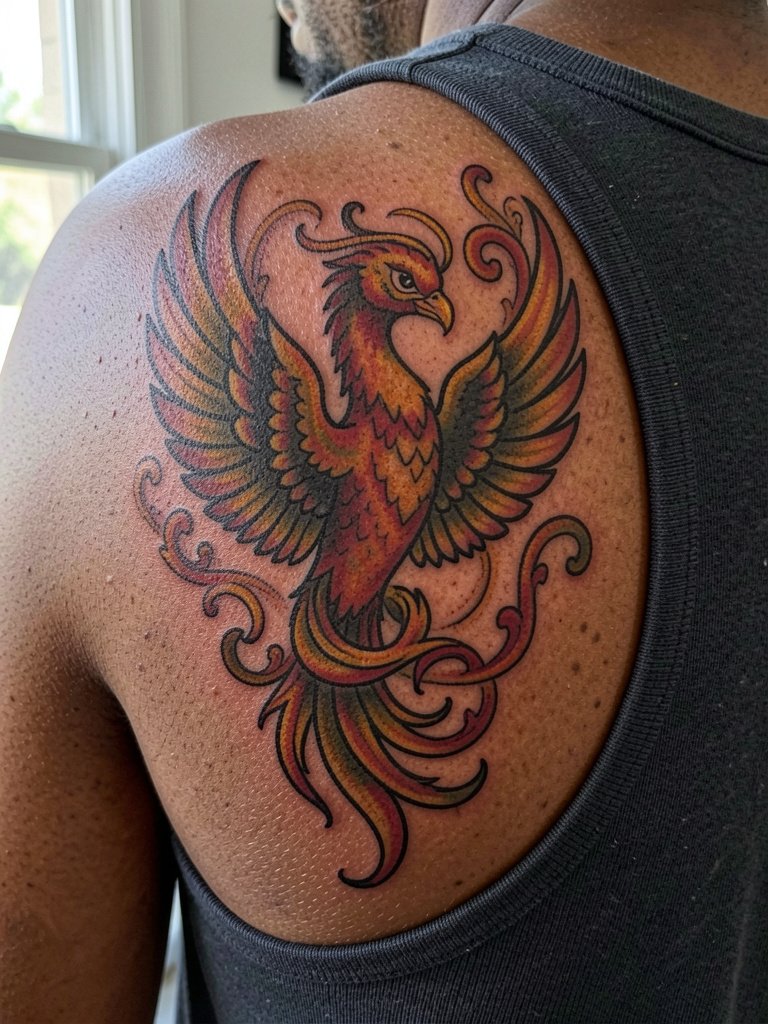
The shoulder blade gives a phoenix room to unfurl across muscle and skin grain. Sessions typically last two to four hours and feel moderate in discomfort because the bone edge is avoided. When you want longevity, prioritize saturated fills and bold outlines over ultra-fine detailing. A misstep is asking for tiny decorative filigree that will blur into the feathers after a few years. For styling, this placement pairs with wide-back tanks for evenings out and the visual balance works under layered jackets. Mention in consultation that you want overlapping feather planes to preserve the bird's silhouette as the piece ages.
3. Mini Rising Phoenix on the Inner Wrist
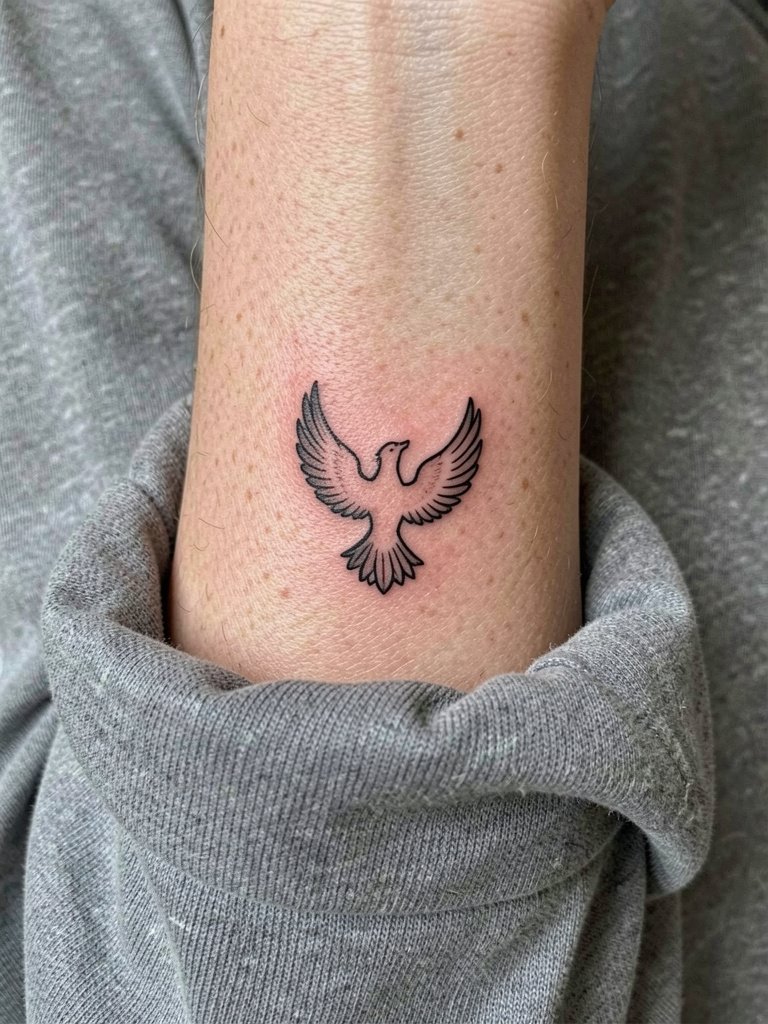
Tiny wrist phoenixes look crisp at first but they face high friction from watches and constant hand movement. Expect a short touch-up window around year one for single-needle work. One controversy here splits artists into two camps. One camp argues small, single-needle wrist pieces frequently blur and lose crispness within two to three years because the wrist skin is thin and mobile. The other camp says careful placement, slightly heavier linework, and leaving breathing room around the motif can keep a mini phoenix readable for much longer. If you favor show-off outfits, pair this with slim stackable bracelets to frame the wrist but avoid items that rub directly over the tattoo during healing.
4. Full Back Rising Phoenix Spread
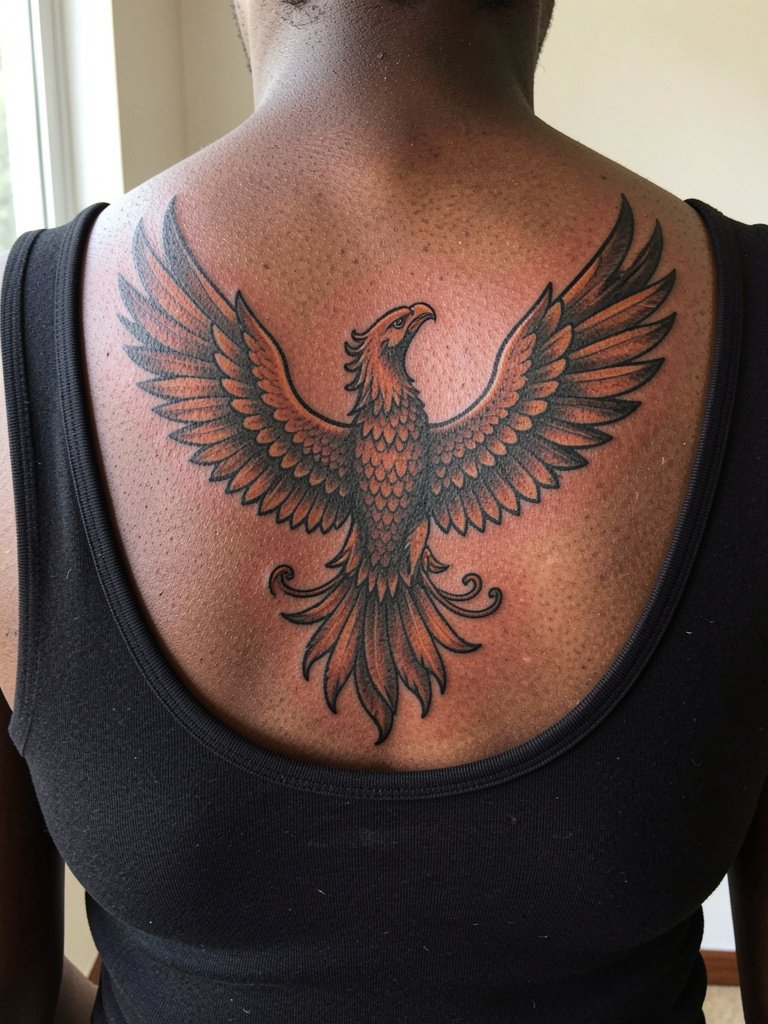
A full-back phoenix gives the artist scale to work with complex feather layers and motion. Sessions will be long, often split into multiple visits of three to six hours. Pain ranges from moderate to high depending on proximity to the spine and lower ribs. The right approach spaces out the densest detail to avoid saturation pooling and blowout across a broad area. For a wardrobe that complements the spread, choose eveningwear with a low or scooped back like a scoop-back dress so the tattoo reads at events. During consults, specify the wingspan dimensions in inches so the artist can map how the bird moves with your shoulder blades.
5. Stylized Linework Phoenix Along the Collarbone
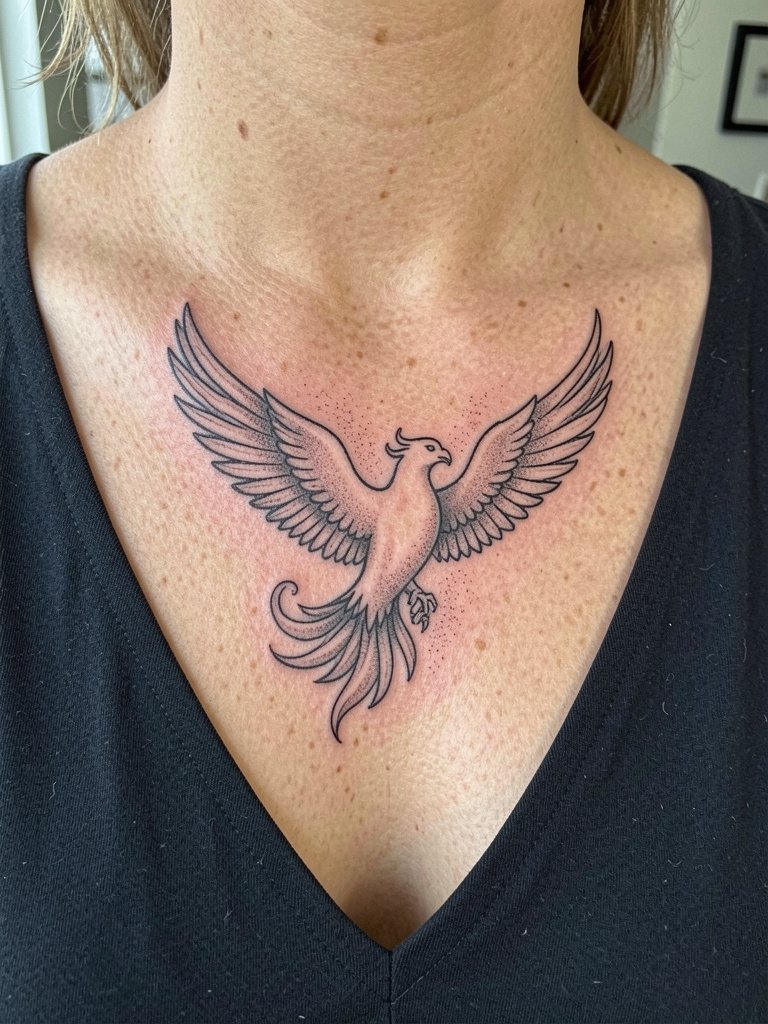
Collarbone phoenixes demand decisions about where lines sit relative to bone. Pain is higher over bone and sessions are typically one to two hours for compact linework. A common mistake is compressing too much script or ornamental detail into that narrow band. For longevity, request slightly increased line thickness and modest negative space to prevent the piece from smudging into the clavicle shadow. This placement pairs well with open-neck pieces like delicate layered necklaces that frame the collarbone without covering the ink. Mention in the consultation that you want the main feather axis aligned parallel to the clavicle so movement does not distort the silhouette.
Studio Day Picks
These first six phoenix concepts range from tiny wrist pieces to back spreads, and a few products make prep and the first week easier for those placements.
-
Stencil transfer paper kit. Helps preview the bird's linework on your skin before tattooing, which is useful for inner wrist and forearm placements where scale matters.
-
Botanical numbing cream. A gentler option some clients use for sensitive collarbone and rib sessions when they need extra comfort.
-
Thin protective film roll. Keeps shoulder blade and wrist tattoos clean in the first 24 to 48 hours during movement and clothing friction.
-
Silicone scar management sheets. Useful for smoothing areas that received heavy shading and for skin prone to raised texture during healing.
-
Aquaphor healing ointment. Thin layers in the first two to three days aid comfort and prevent the scabbed surface from drying into large flakes on broad phoenix fills.
6. Minimalist Phoenix Line Art Behind the Ear
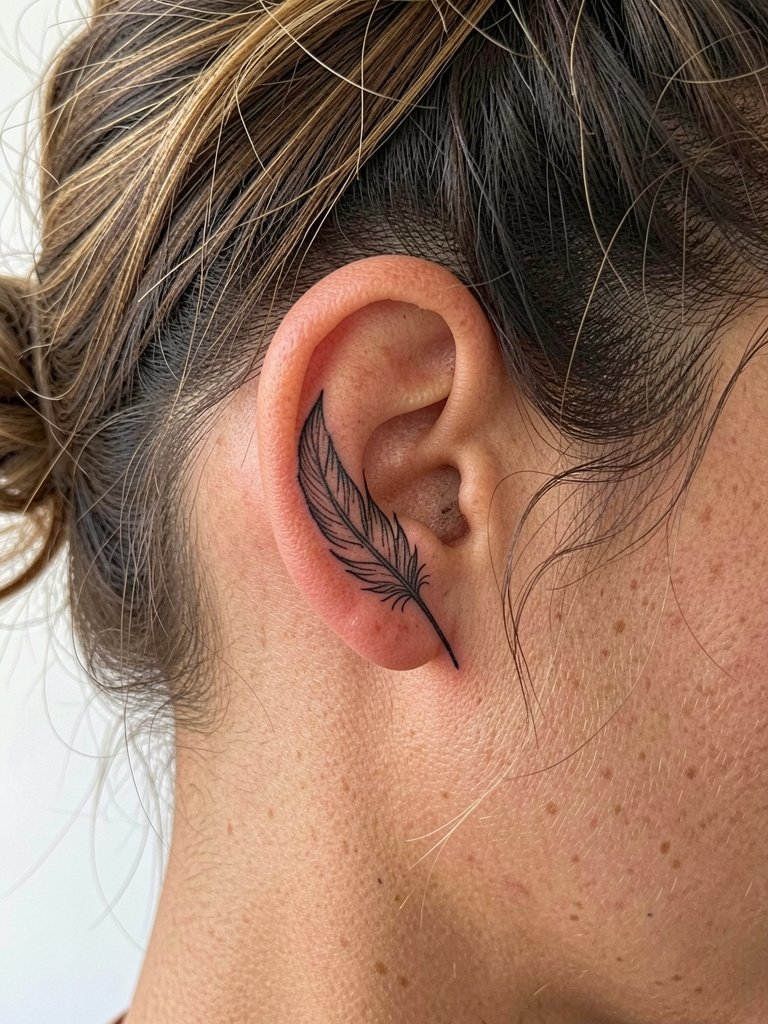
Behind-the-ear phoenix motifs are intimate and discrete. Sessions are short, often under an hour, and the pain is sharp but brief due to thin skin. A frequent mistake is expecting single-needle curls to stay crisp without slight reinforcement later. If you want this placed for subtle reveal, ask for a hairline of negative space to separate the feather tip from the hairline so the design stays readable. This location pairs with short hair or updos, so consider accessories like small textured hair clips that pull hair away naturally without rubbing the area. Note that some artists prefer experience with otoplasty-adjacent skin, so seek someone comfortable with mastoid placements.
7. Watercolor Rising Phoenix on the Calf
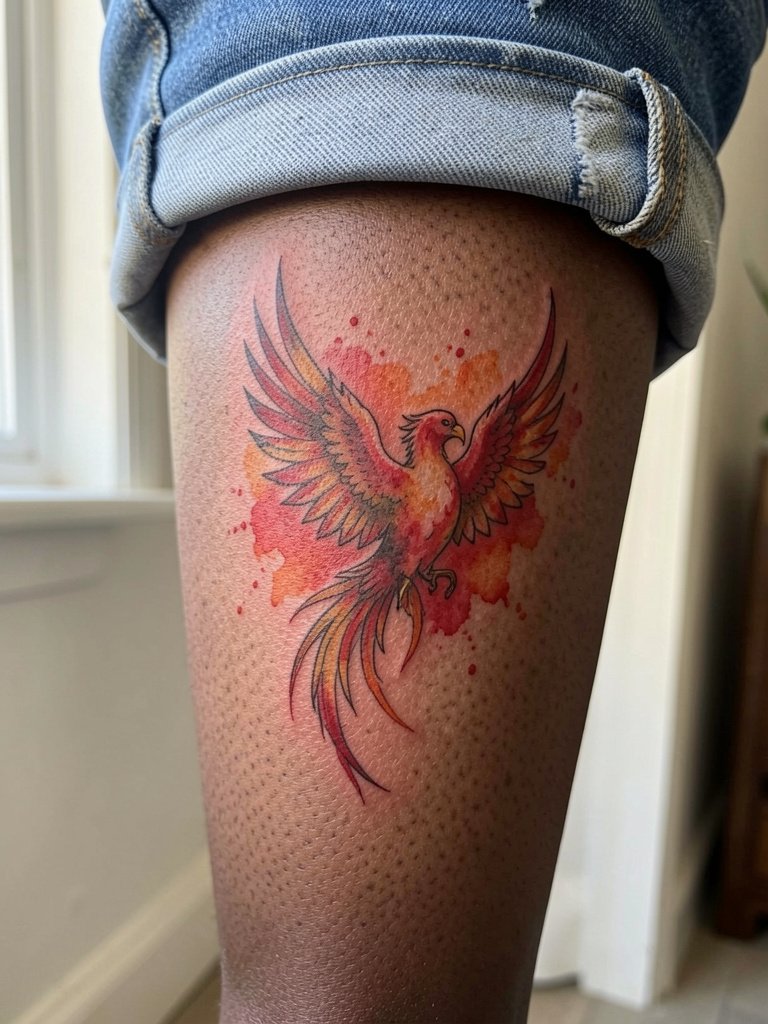
Watercolor phoenixes read as painterly and airy, but they can fade faster than saturated fills. On the calf, the session is moderate, usually two to three hours, and touch-ups at year one are common to refresh color intensity. Avoid asking for all-fade washes without clear black anchors because color bleed makes the shape ambiguous as it ages. For show-off outfits, choose cropped denim and midi skirts that reveal the calf, like denim midi skirts. During consults, point out which tone you want dominant so the artist knows whether to lock in deeper color or keep the watercolor feel.
8. Blackwork Rising Phoenix on the Thigh
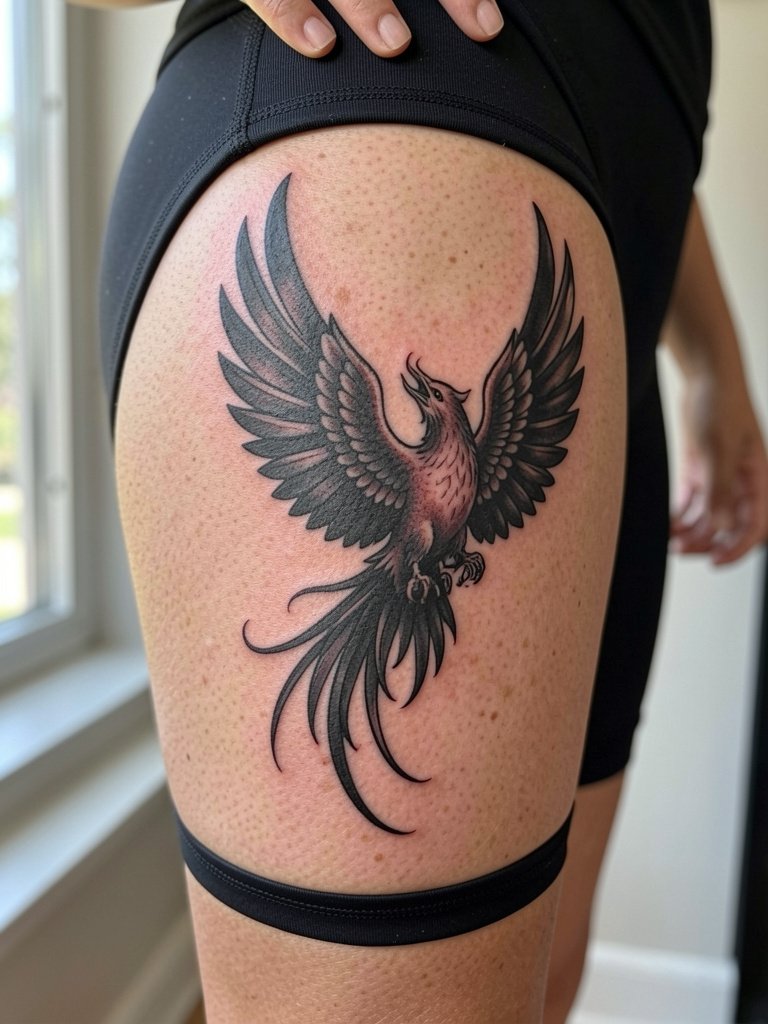
Blackwork phoenixes age robustly because saturation and strong contrast resist the softening that blurs fine lines. The outer thigh tolerates heavy fills well and sessions can be longer without excessive pain. One common mistake is trying to place dense blackwork too close to a seam or waistband where friction will dull edges. For session wear, pick loose bottoms or drawstring linen pants so the artist can access the outer thigh without pressure. Ask for feather edge spacing to avoid a heavy black block that can read flat over time.
9. Fine Line Phoenix on the Ribcage
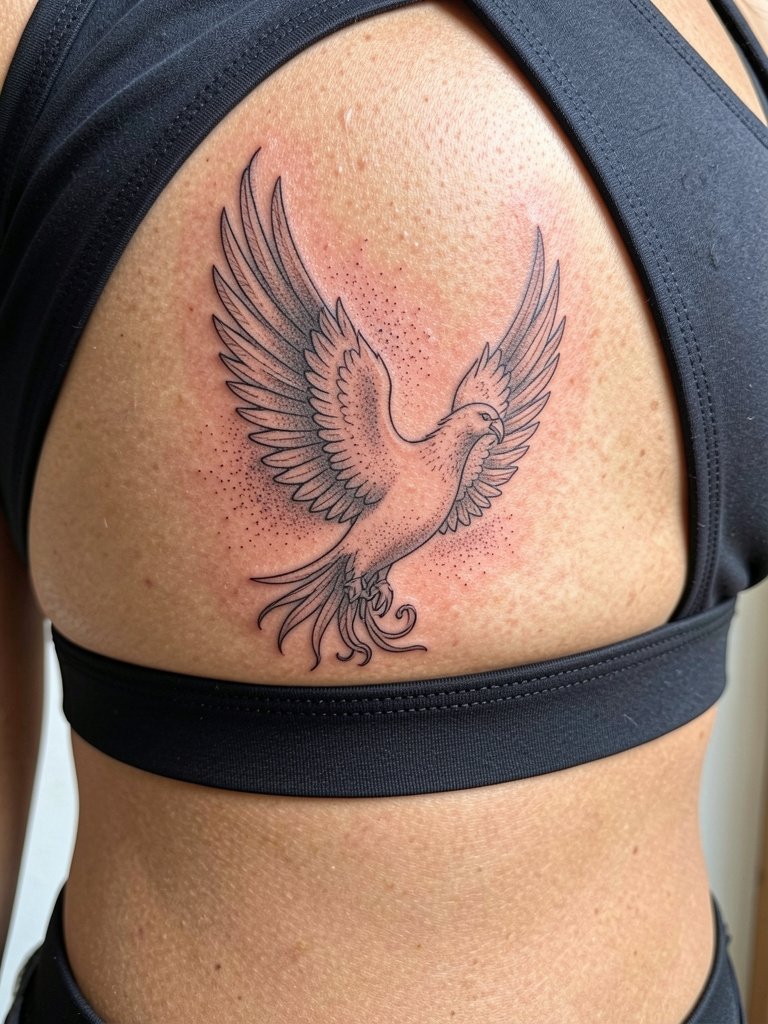
Ribcage phoenixes look delicate but testing shows the area moves and stretches a lot. Pain is intense and sessions are often split. There is an active debate among artists about fine line in this zone. One camp warns that the stretch and breathing motion cause ultra-fine lines to blur within a couple of years, especially where skin folds meet clothing. The other camp says experienced artists who use slightly heavier single-needle spacing and map the design along the chest curves can achieve long-term clarity. If you want ribs, plan for a two-step session and a likely touch-up window around year two. Wear a fitted sports bra to the appointment so the artist can map placement accurately.
10. Stipple-Shaded Phoenix on the Upper Arm
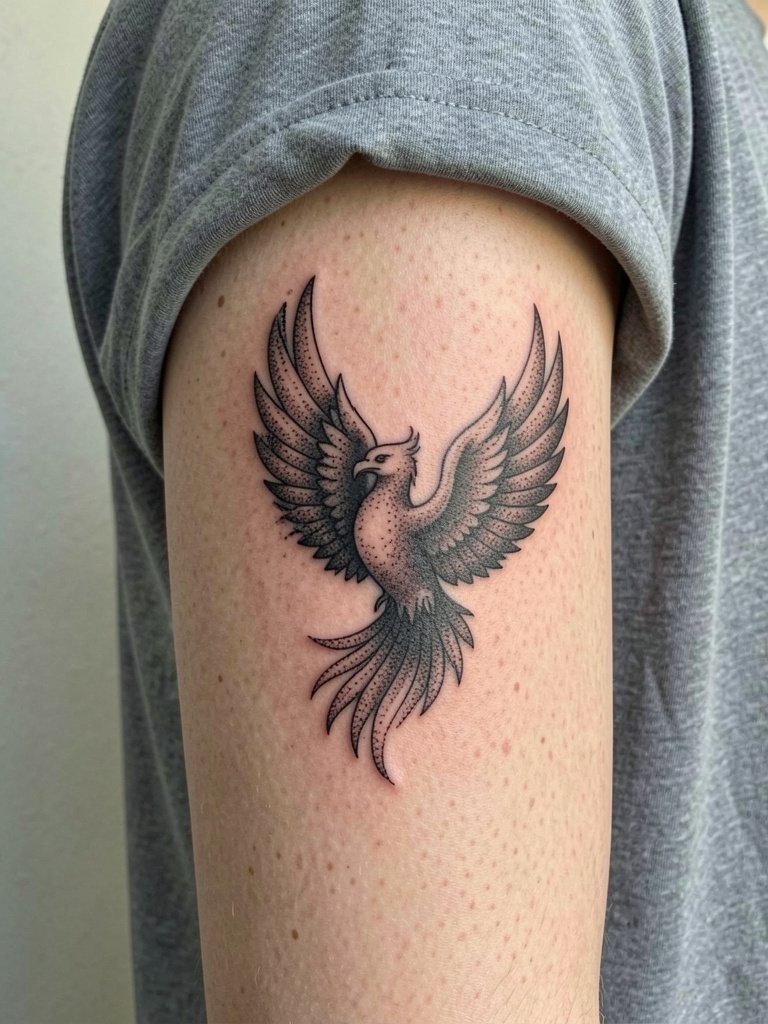
Stipple shading brings texture without heavy solid fills and works especially well on the upper arm. Sessions are comfortable and can be handled in focused two-hour blocks. A typical mistake is requesting overly dense stipple that clumps into a gray mass after healing. Ask the artist to spread dots progressively so the feather gradients hold over time. For show-off outfits, short-sleeve button-ups in neutral tones help the stipple read clearly, try pairing with a short-sleeve cotton shirt. Mention the desired tonal range in your consult so the artist can test dot density on a small area.
11. Single-Color Red Phoenix on the Sternum
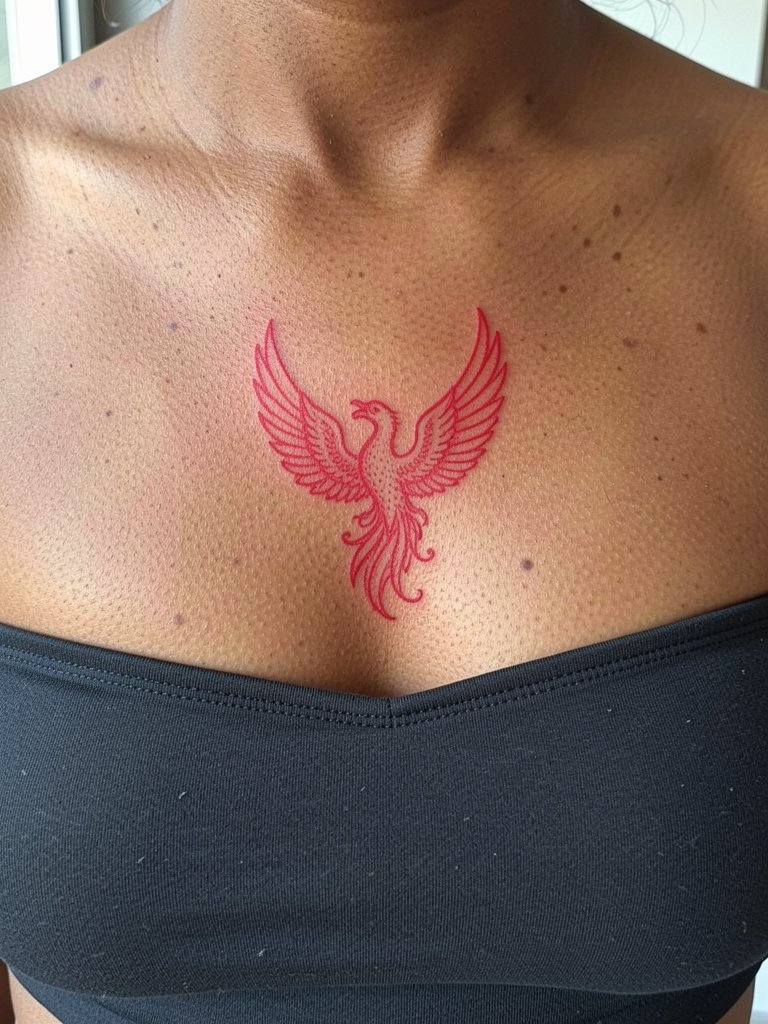
Sternum pieces sit in a sensitive zone and pain is high. Sessions are usually split, and healing requires careful movement management. A common error is asking for dense linework right under the breast crease, which experiences friction and increased moisture. If you like a single-color look, red can remain vibrant but plan a touch-up to boost saturation. For session wear, a fitted bandeau or sports bra in its normal position gives the artist access while preserving modesty. Clarify in the consult the vertical placement relative to the breast crease so you avoid distortion when standing versus reclining.
12. Neo-Geo Phoenix Sleeve Accent
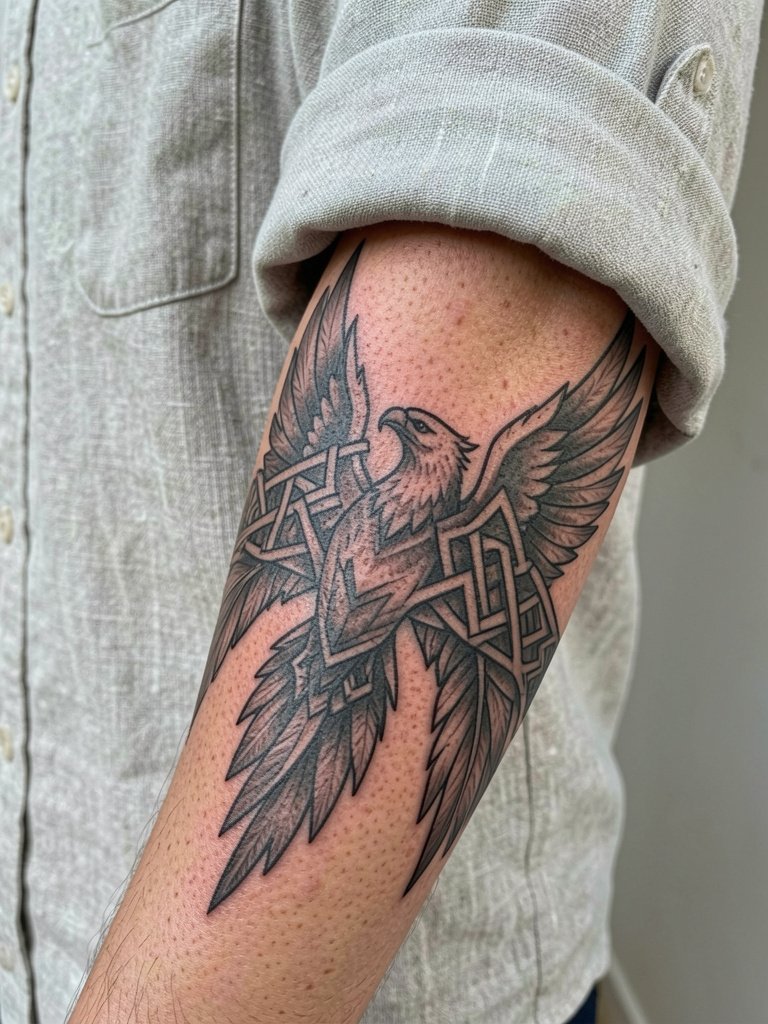
A sleeve accent blends phoenix imagery with geometric structure to guide the eye. Sessions vary by how much integration you want and often run in multiple three to five hour blocks. Mistakes include mismatched line weights across different artists when a sleeve is done over time. Request consistent linework samples and ask to see healed photos showing sleeve continuity. This placement looks great when the forearm is exposed, so consider shirts with sleeves that can be rolled like linen button-ups. During your consult, bring references for the overall sleeve rhythm so the phoenix reads as part of the composition, not an afterthought.
13. Black and Grey Photoreal Phoenix Portrait
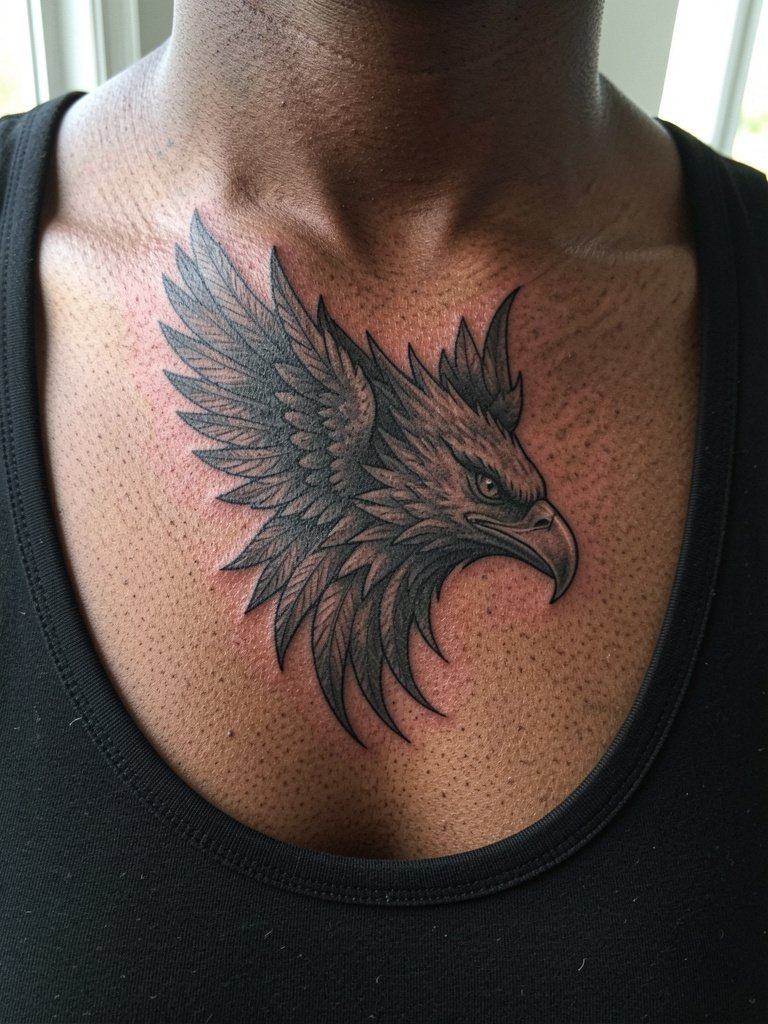
Photoreal phoenix heads require mastery of tone and saturation. Sessions can be long and the pain level varies by proximity to bone. If photorealism is your aim, specify which photographed reference you want reproduced and how large you need it to maintain detail at year five. A mistake is shrinking a portrait too small; details collapse. For neckline choices that show off the chest portrait, consider open-neck pieces like scoop-neck tees. Be explicit about the desired contrast range in your consult so shadow planes do not wash out on darker skin tones.
14. Linework Phoenix Across the Knuckles
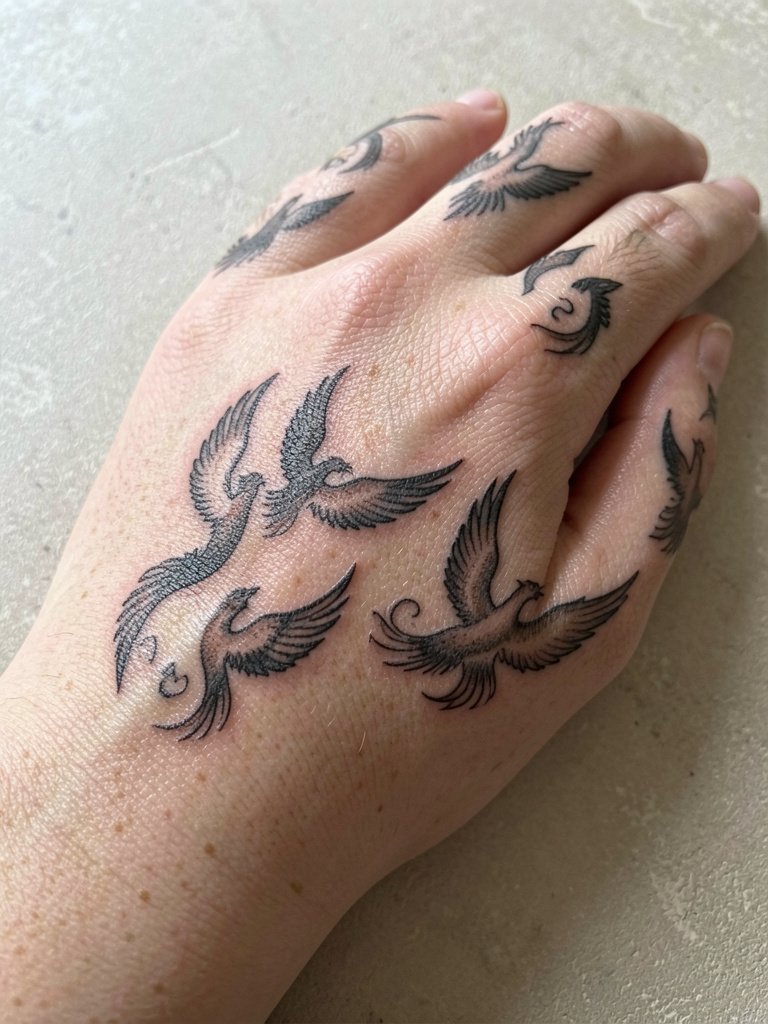
Knuckle work is highly exposed to handwashing and abrasion, so expect quicker fading. Sessions are short but touch-ups are often needed within the first year. One common mistake is packing too much detail into each knuckle panel. Instead, use bold, simple contours and allow negative space. For session comfort, avoid rings and wear short-sleeve or sleeve-pushed clothing like short-sleeve tees so the artist can access the hand freely. Note that hand tattoos require an experienced artist familiar with hand anatomy to minimize early migration.
15. Ornamental Phoenix with Mandala Backdrop on the Upper Back
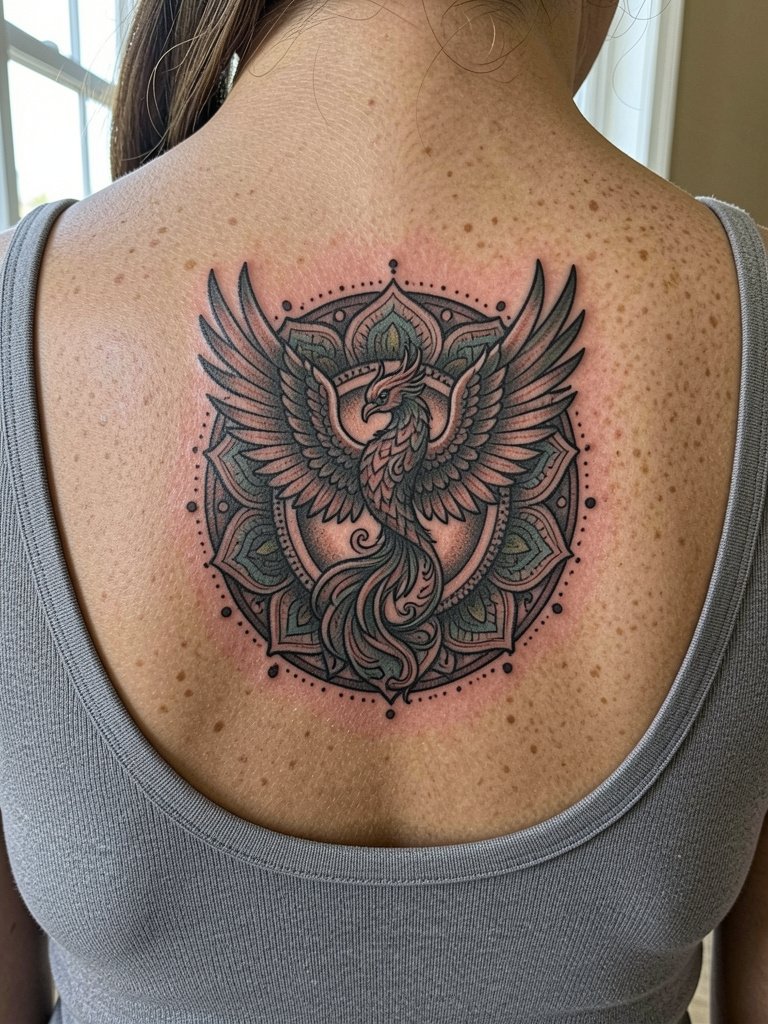
Combining ornamental motifs with a phoenix calls for cultural sensitivity if you borrow mandala or sacred geometry elements. Name both origins and intended meaning in the consult to avoid appropriation. Sessions are moderate to long and require mapping the circle to your spine and shoulder blades. Mistakes include repeating symbolic patterns without understanding placement significance. For showing the upper back art, low-back or scoop-back tops work best, try a scoop-back dress. During consults, explain which cultural elements are meaningful to you so the design respects its source.
16. Tiny Finger Phoenix Accent
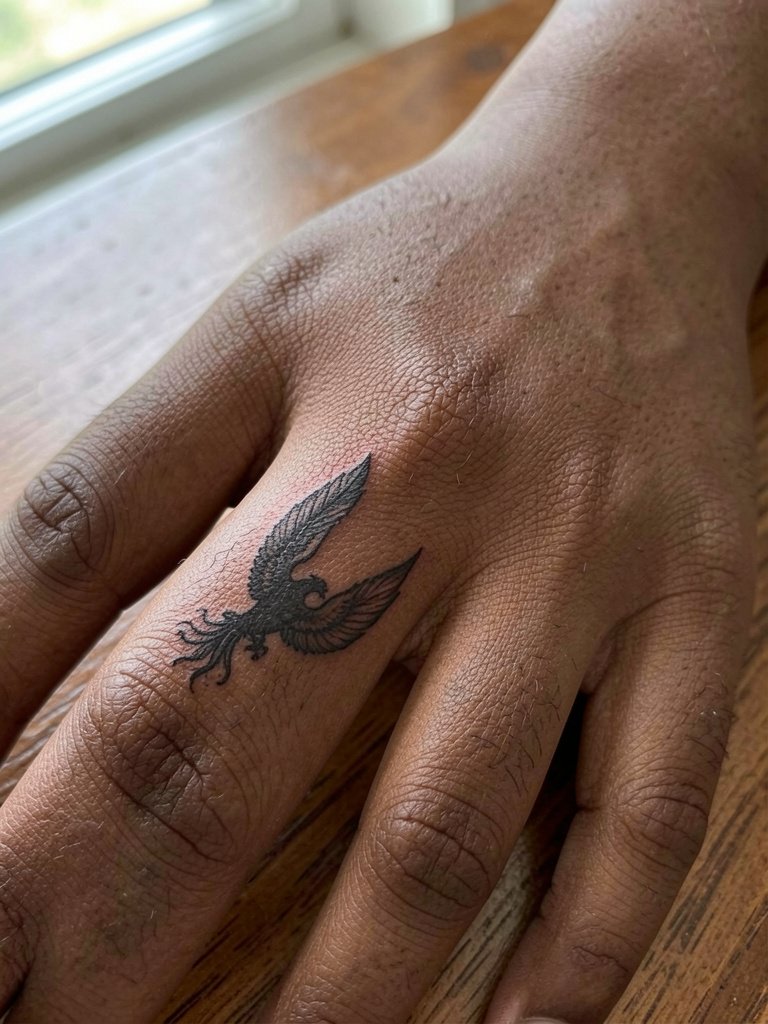
Finger accents are high-maintenance. Expect color and linework to soften faster because of constant use and washing. Sessions are short but you should budget for touch-ups within 6 to 12 months. Avoid tiny text or filigree that will fill in; instead, favor a strong silhouette or small negative-space cutouts. For styling, minimal rings that do not sit directly over the tattoo are best, consider thin minimalist rings. Specify in your consult that the artist should leave a millimeter of clear skin margin so the design maintains separation from joint creases.
17. Feathered Phoenix Crest on the Nape
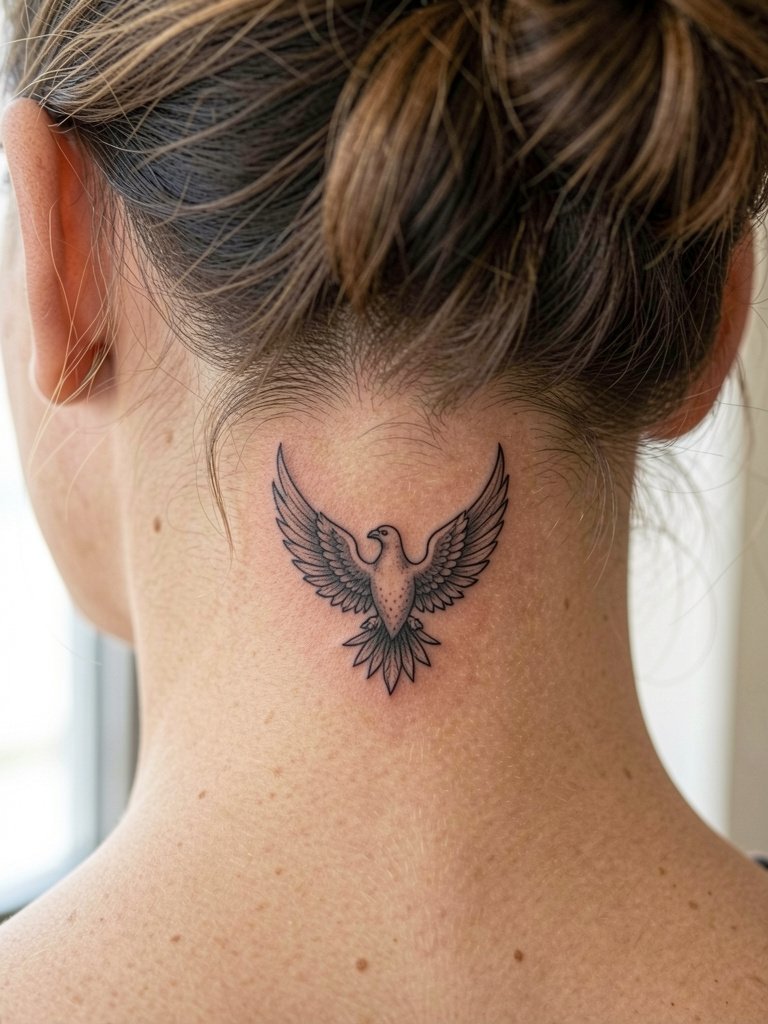
Nape phoenix crests are subtly revealable with updos. Pain is moderate and session time is typically under two hours. A common error is putting too much tapering detail that vanishes under hair growth or scales. Ask for modest negative space and a clear top edge so the crest reads when hair is windswept or pinned up. For styling, discreet hair accessories like small hair pins let you reveal the nape without stressing the area. Note that some tattooists will want to see healed photos of similar nape work before committing because of skin movement in that zone.
18. Folded-Feather Phoenix on the Hip
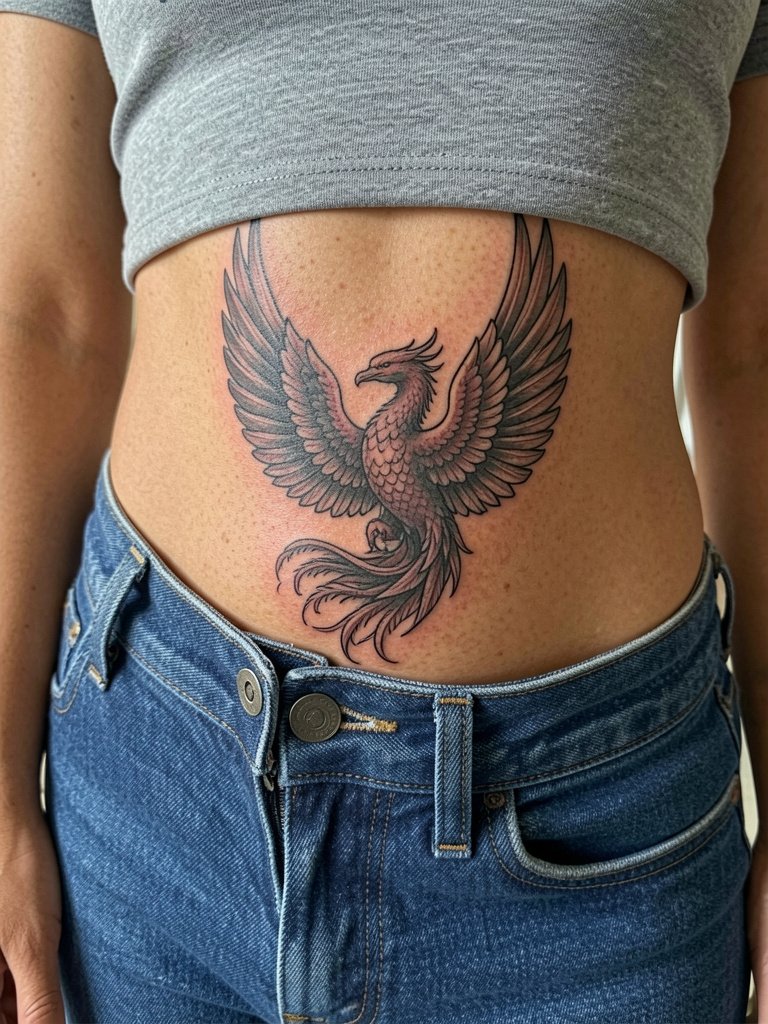
Hip phoenixes sit near friction zones from waistbands so placement is key. Sessions are moderate and healing can be affected by tight clothing. One typical mistake is planning a large detail flush with the waistband where rubbing will dull edges. For session wear, pick low-rise jeans or skirts so the artist can map the exact lateral placement without fabric pressure. For nights out, cropped tops that show the hip like cropped tees frame the design. In the consult, specify how low your typical waistband sits so the artist can design a safe clearance from clothing seams.
19. Abstract Line Phoenix Across the Sternum
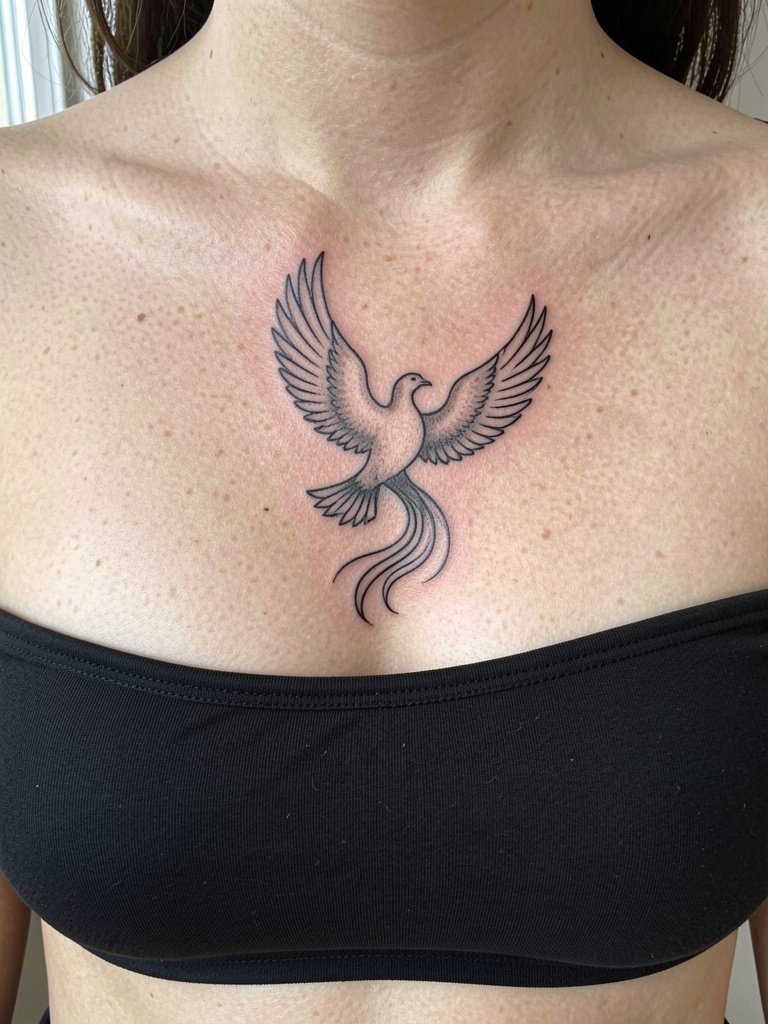
Abstract sternum lines can be visually clean but are vulnerable to motion and moisture. Pain is high and sessions often need breaks. A mistake is running a continuous line too thin across the sternum where the skin moves and the line can fragment. Ask for modest line thickness and spacing from the breast crease. For outfits that reveal this area safely, bandeaus or fitted cropped tops work well, try bandeau tops. State in the consult whether you intend the piece to sit above or below the brassiere line so the artist can measure accordingly.
20. Split-Color Phoenix Wing on the Calf
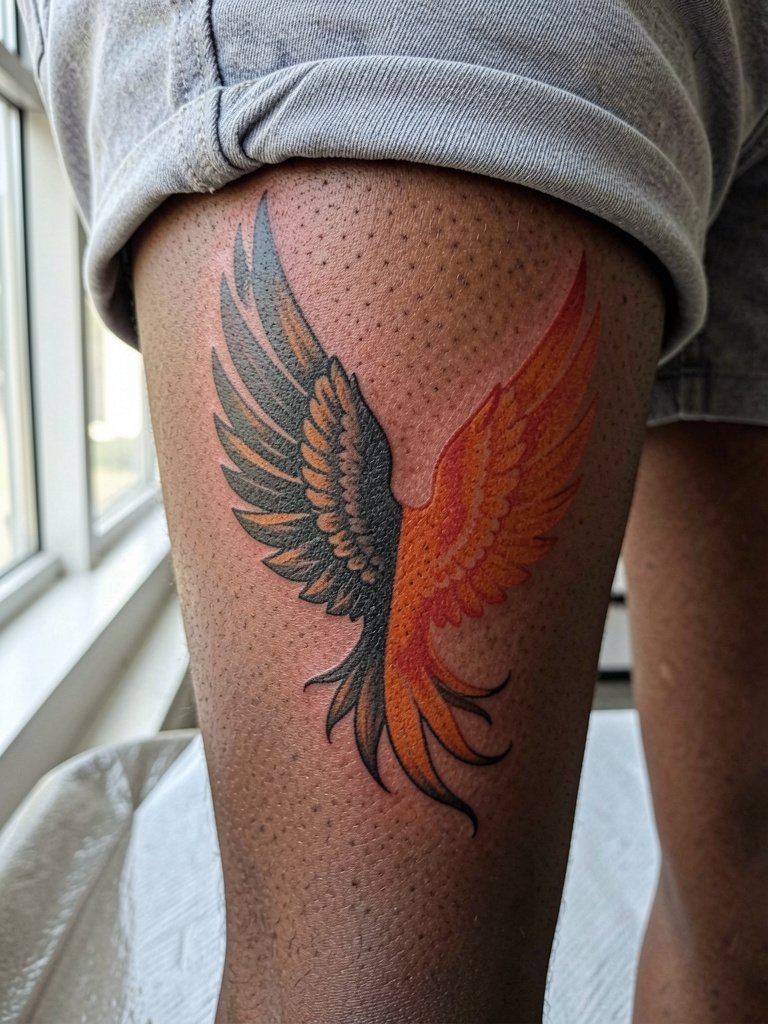
A split-color approach gives dramatic contrast but requires planning to avoid sudden fade differences. Sessions are moderate and may be split to ensure even saturation. One mistake is mismatching pigment depth so one side fades faster. Request color tests on adjacent skin to compare how pigments settle on your tone. For summer visibility, pair with casual shorts that keep the calf exposed. Be explicit in the consult about which side you want dominant so the artist balances saturation accordingly.
21. Crest-Style Phoenix on the Sternum and Upper Chest
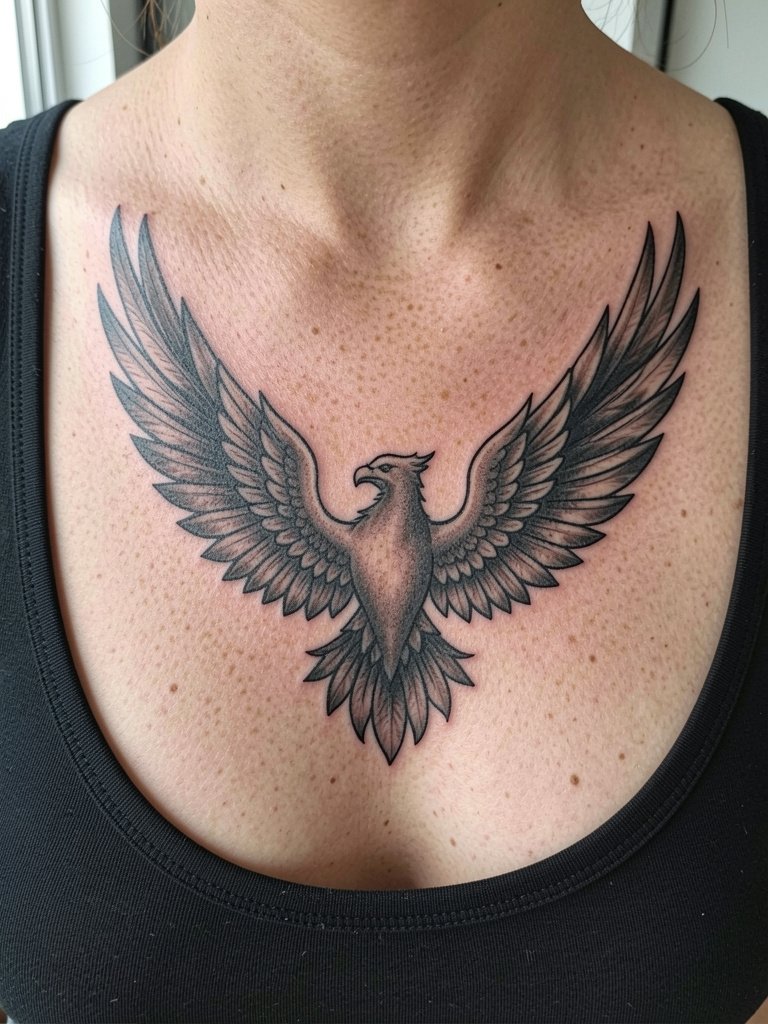
A crest that crosses sternum and upper chest needs symmetry and careful mapping. Pain is varied and sessions can be lengthy. A common misstep is assuming a mirrored design will sit the same when you tilt or smile. Ask for a symmetrical stencil check while sitting and reclining to verify alignment. For evening wear that shows the crest, deep V or scoop necklines like a scoop-neck dress frame the piece elegantly. Request the artist mark central spine and clavicle landmarks so the crest aligns with your anatomy.
22. Geometric Negative-Space Phoenix Wrist Cuff
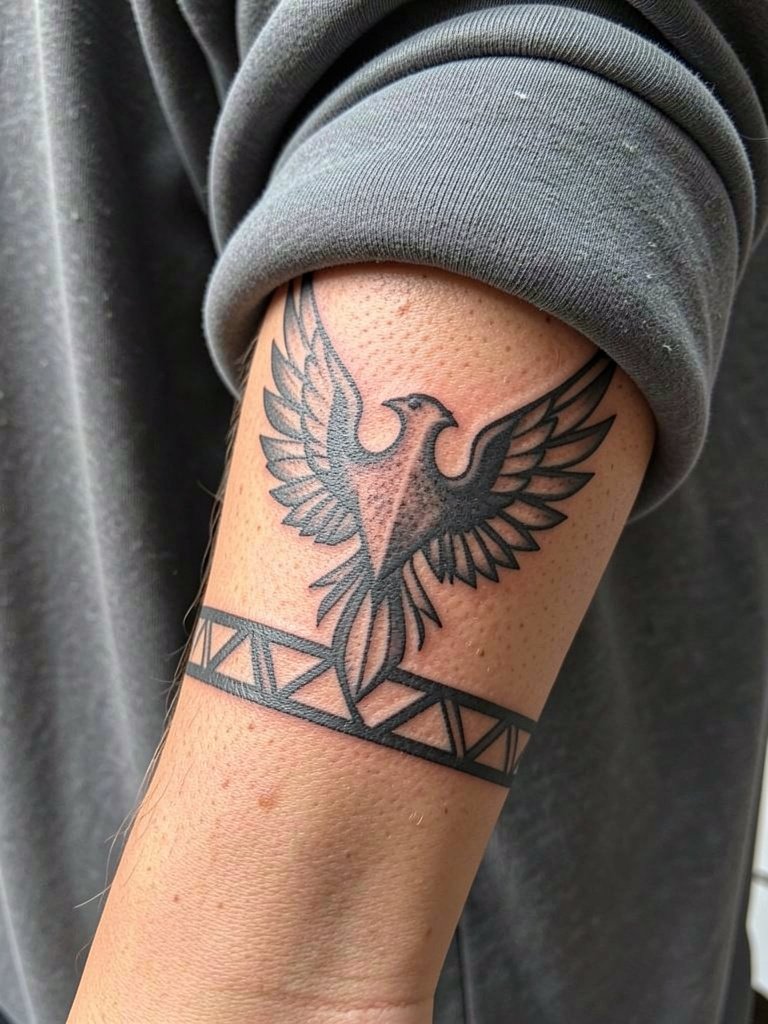
Wrist cuffs can be striking but they face movement and accessory friction. Sessions are short but early touch-ups are not uncommon. Avoid overly delicate internal detailing that will fill in at the skin crease. If you want the cuff to function like jewelry, opt for bold negative-space shapes and coordinate with slim bracelets that sit away from the design such as slim cuff bracelets. During consults, rehearse wrist rotation so the cuff reads when your hand is at rest.
23. Rising Phoenix in Traditional Americana Style on the Bicep
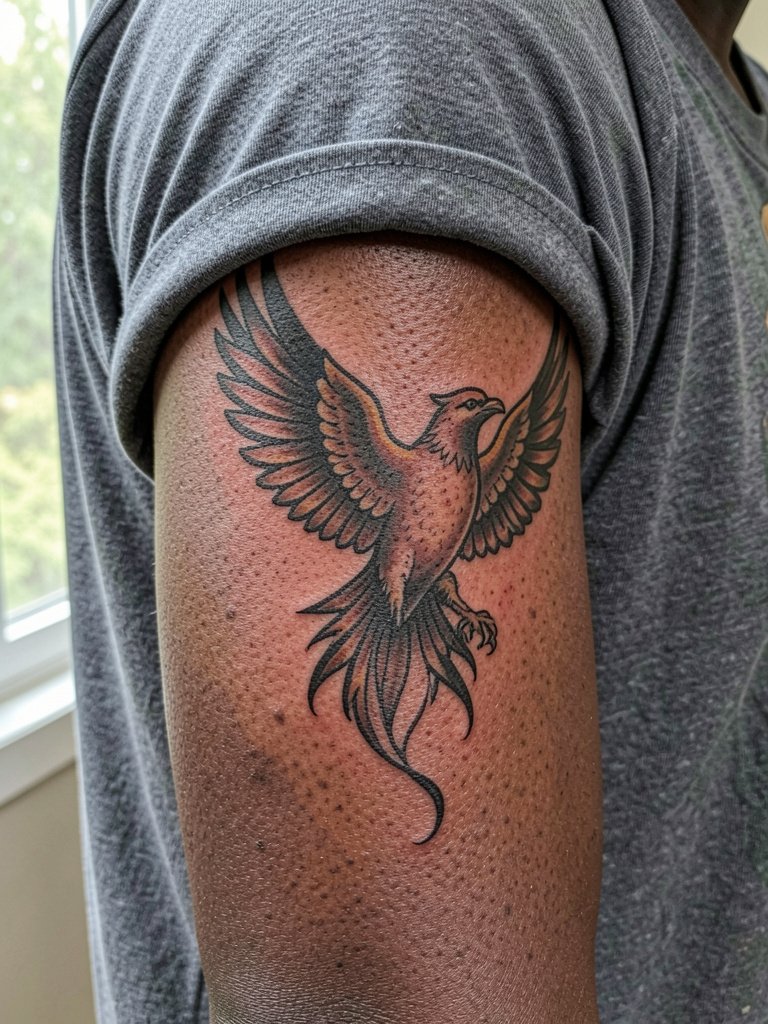
American traditional phoenixes age well due to strong outlines and saturated color blocks. Bicep placement is comfortable and sessions are usually under three hours for medium designs. The usual mistake is crowding the design with small ornamental details that contradict the bold style. For daytime looks, rolled sleeves or sleeveless tops showcase the bicep piece, try a tank top. If you plan a sleeve later, discuss how the traditional phoenix will connect to adjacent motifs to maintain stylistic consistency.
24. Minimal Script and Tiny Phoenix Accent on the Collarbone
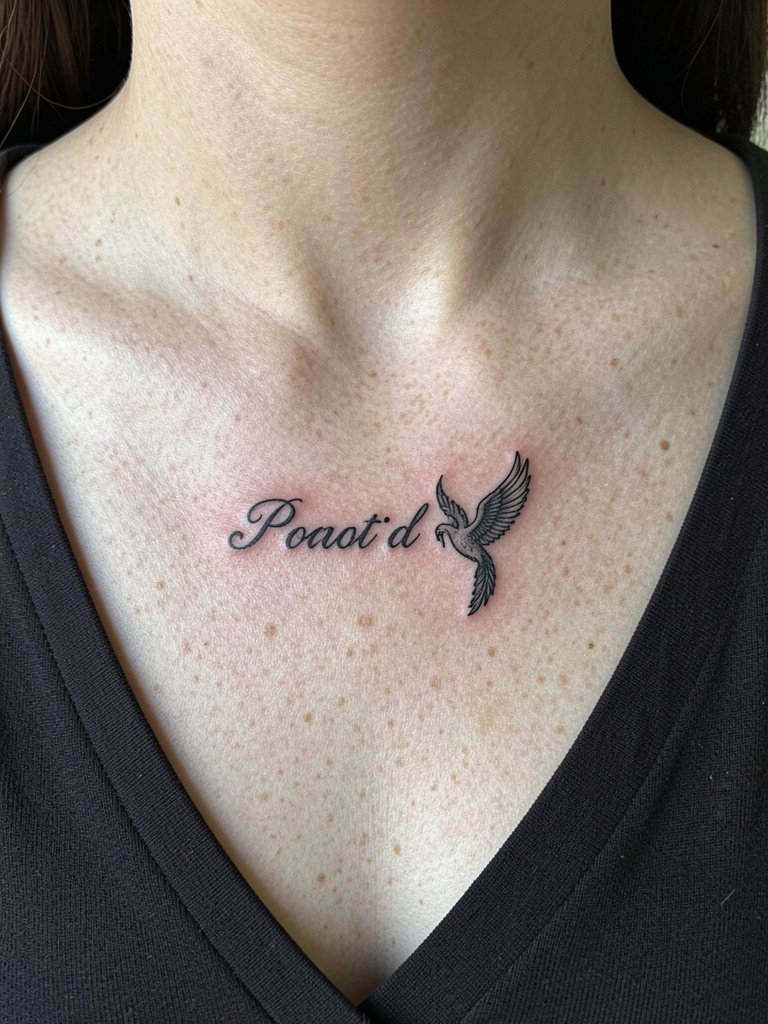
Small script with a phoenix accent offers a sentimental option with low visual weight. Collarbone skin over bone means pain is higher and lettering needs enough scale to remain legible. A common issue is choosing a font too skinny for the area. Pick a slightly thicker cursive and keep the accent feather clear from the lettering so both elements stand out. For jewelry pairing, delicate layered necklaces work well, such as layered chain necklaces. Share your exact word and preferred font size in the consult so the artist can stencil the scale accurately.
25. Negative-Space Phoenix Sleeve with Floral Elements
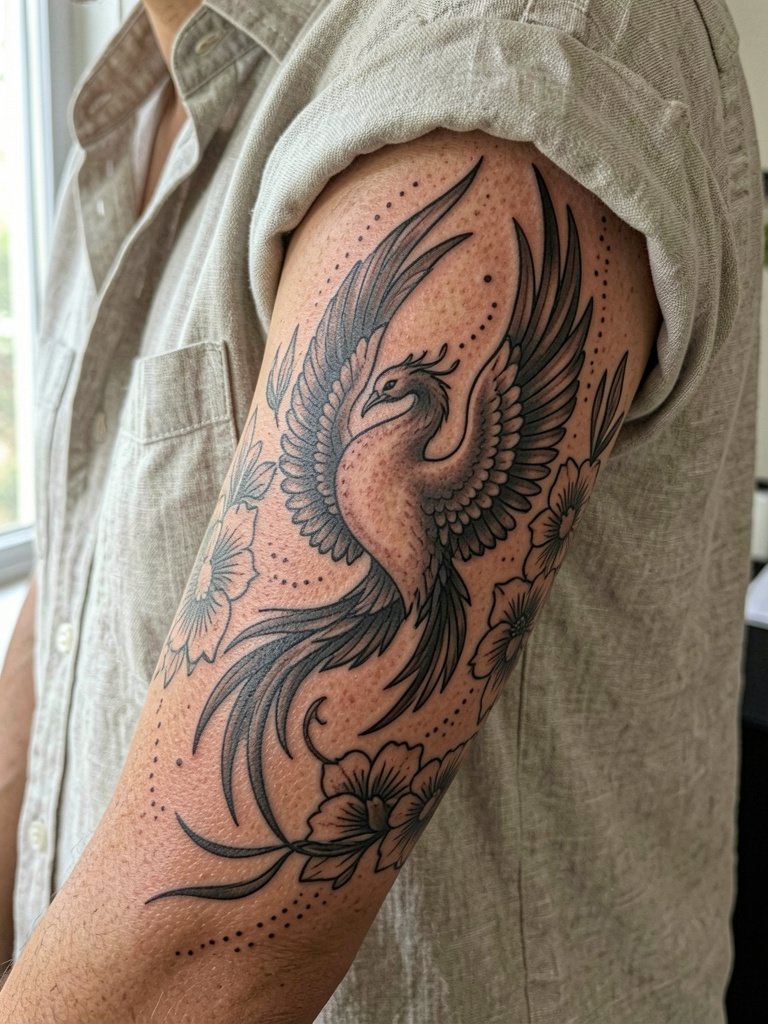
A negative-space phoenix sleeve balances skin and ink to create motion. These projects require multiple long sessions and a consistent shading plan to avoid patchy healing. A frequent mistake is mixing too many disparate styles; commit to either floral realism or ornamental dot work to maintain cohesion. For exposed looks, sleeveless or rolled sleeves showcase the sleeve rhythm nicely; consider a sleeveless linen top. During planning, ask the artist to map which areas will be left as skin so you can judge how the negative space shapes read at arm length.
26. Micro-Realism Phoenix on the Rib Edge
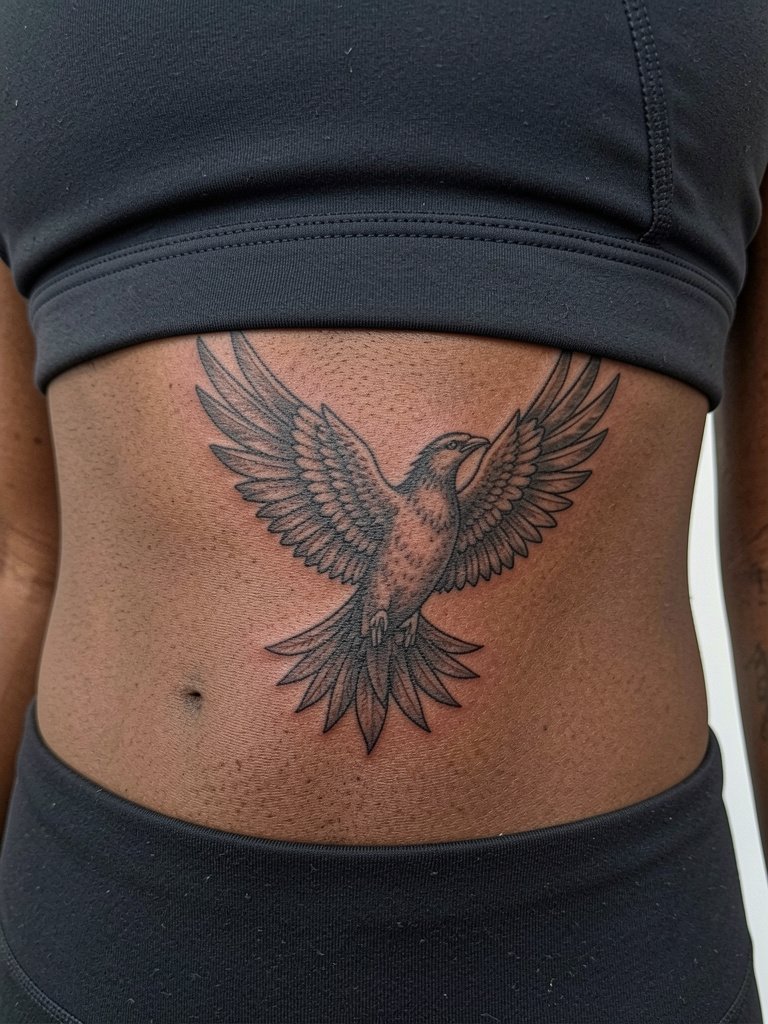
Micro-realism on the rib edge is high-risk and high-reward. Pain is significant and single-needle detail here can blur faster than on flatter surfaces. One camp of artists prefers avoiding micro realism here. Another camp accepts the challenge but will increase spacing and offer a firm touch-up plan. If you pursue this, plan for a follow-up touch-up at year one and ask the artist to map feather spacing wider than your reference photo. Session wear should be a fitted sports bra so the artist can access the area without fabric pressure. Be explicit about the expected touch-up timeline in the consult.
27. Rising Phoenix Anklet Band
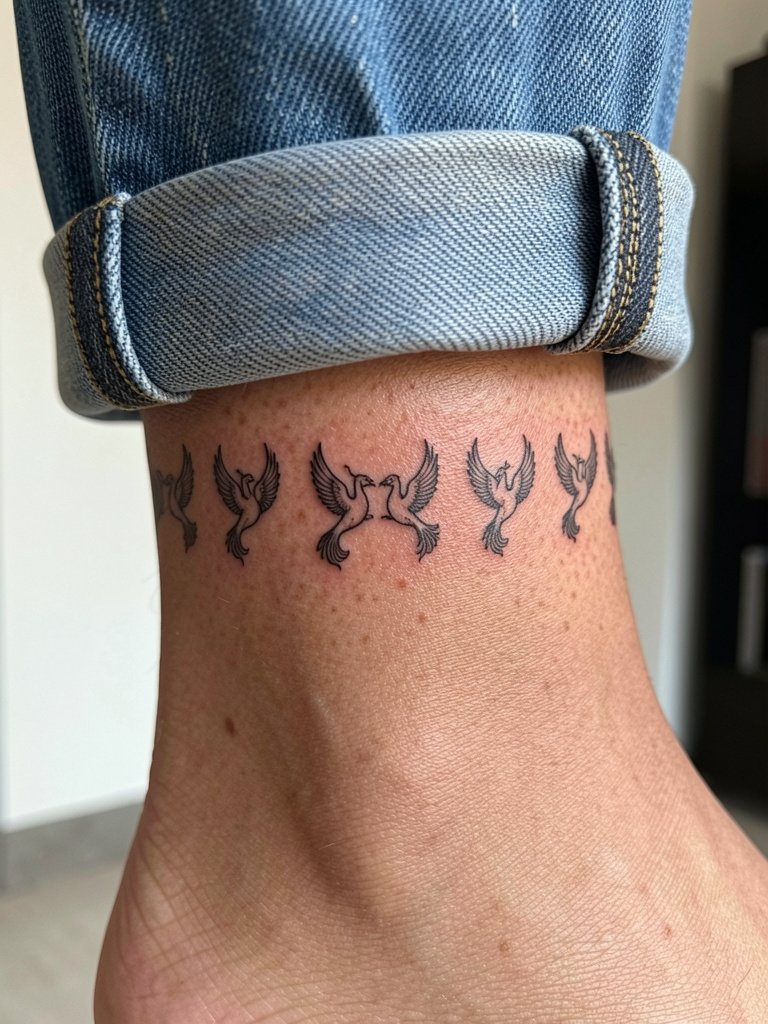
Anklet bands are cute and visible with summer footwear but face constant abrasion from socks and shoes. Expect touch-ups sooner than other placements and protect the area during the initial week. A mistake is placing motifs too low where shoe straps or sock cuffs rub directly on the ink. For display, cuffed jeans or sandals work well, try flat slide sandals. In the consult, specify how you habitually wear socks and shoes so the artist positions the band away from chronic friction points.
Frequently Asked Questions
Q: How do I choose between fine line and blackwork for a phoenix that will last?
A: Fine line offers delicacy but needs careful placement and slightly heavier spacing to avoid early blur, especially on high-motion areas like wrists or ribs. Blackwork sacrifices subtle detail for long-term silhouette clarity, so pick blackwork when you want low maintenance and visibility in high-friction zones.
Q: Where can I find healed examples and portfolios without naming specific artists?
A: Search location-filtered portfolio pages, browse platform tags that focus on healed shots, and check community threads where people post year-one and year-three photos in different skin tones. Use platform filters and keyword searches to compare healed work at scale.
Q: Will a phoenix on my ribs be more painful than on my shoulder blade, and how should I prepare?
A: Ribs are generally more painful than the shoulder blade because of thinner skin and proximity to bone, and sessions may require breaks. For ribs, arrive hydrated, avoid tight clothing, and use a fitted sports bra or bandeau to give the artist unobstructed access while keeping fabric stationary during the session.
Q: How soon will a wrist or knuckle phoenix need a touch-up?
A: Expect wrist and knuckle work to need a touch-up within 6 to 18 months depending on how often the area is washed and rubbed. These placements are high-movement zones so plan for maintenance and request slightly bolder linework to extend clarity.
Q: Are there cultural considerations when combining a phoenix with mandala or sacred geometry?
A: Yes. One should name the origin and purpose of any sacred elements and discuss respectful adaptation with the artist. If a symbol carries cultural or religious weight, consider simplifying or choosing motifs you can trace back to a source and credit in your own notes.
Q: What should I wear to my session for a thigh or hip phoenix so the artist has access and I stay comfortable?
A: Wear loose bottoms with easy access such as drawstring linen pants or bike shorts so the artist can roll or adjust fabric without pressure on the area. Comfortable clothing that stays fastened in normal worn position avoids fabric friction during healing.
