
A small, well-placed birth flower can read like private handwriting on skin, a marker of months and memories that does not shout. Pick a scale and style that match how you live, because tiny filigree that looks delicate on a saved photo often loses definition on high-friction spots. These 23 ideas pair each month’s floral symbol with placement, how it heals over time, what to specify in the consultation, and simple outfit tips that help the tattoo sing.
1. Tiny Carnation on the Inner Forearm
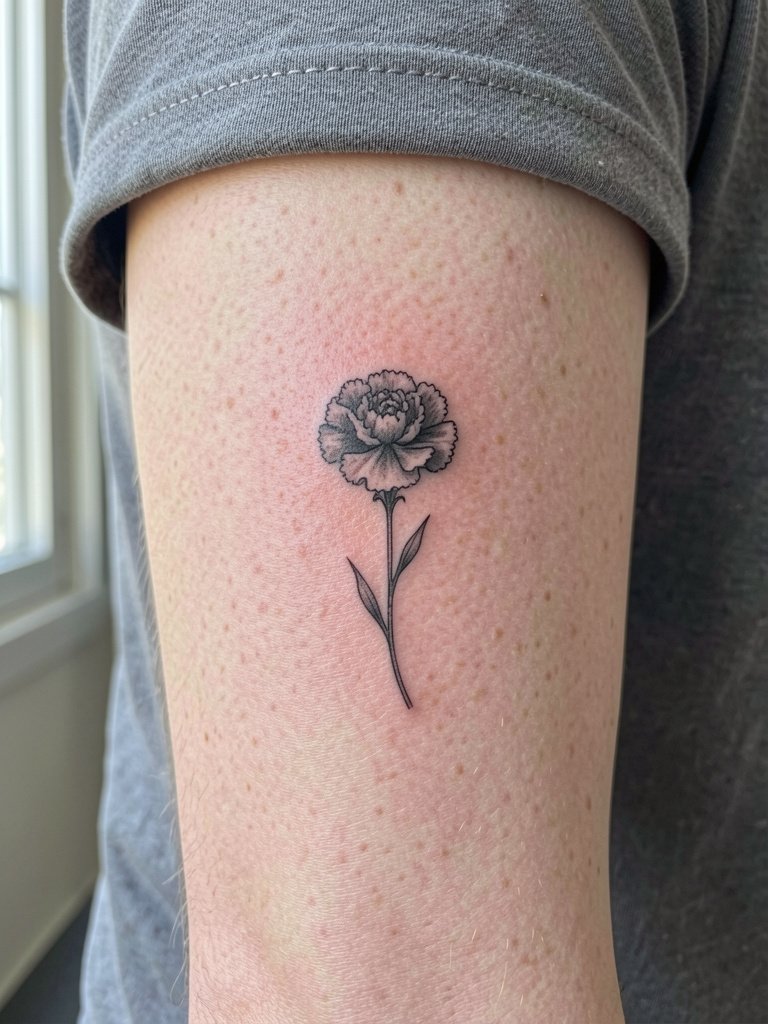
For a delicate Carnation here pick single-needle linework at three to four inches so the petals keep definition. I recommend you bring two reference photos at different scales so the artist can show how a two-inch bloom reads versus a four-inch one. The inner forearm is low friction and shows detail well at six months, but ultra-fine strokes often soften by year three. A common mistake is asking for the smallest possible size and expecting long-term clarity. Expect low to moderate pain and a single quick session under an hour. For outfits that highlight the piece, try rolled short sleeves or a lightweight linen shirt that frames the forearm without covering it.
2. Violet Wrist Bracelet, Micro Line
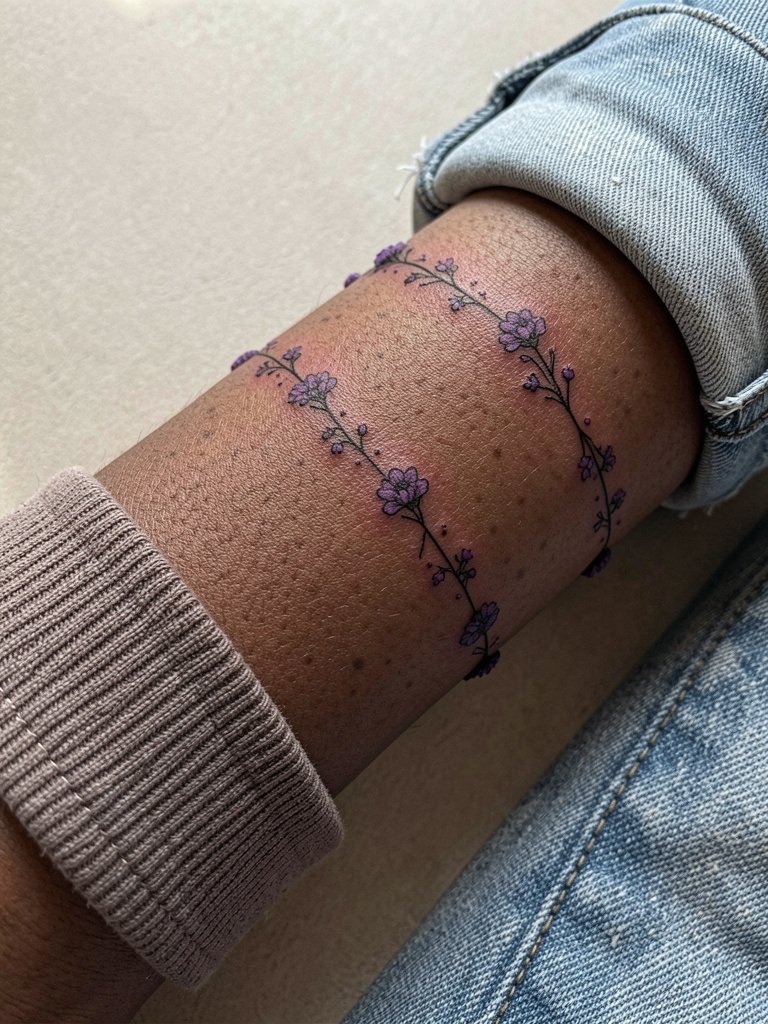
A wrist wrap of Violets reads like jewelry when the line spacing stays open. Ask for slightly heavier lineweight than on a reference photo so the petals do not merge with hand motion and frequent washing. Small wrist tattoos can lose crispness from friction and soap by year two if the lines are too thin. The session is fast but expect the first week to need patience during handwashing. Swap delicate bracelets for thin metal cuffs to complement the piece and avoid irritation during healing with a soft slip-on cuff. If you plan lots of typing, mention that to the artist so they adjust spacing for longevity.
3. Daffodil Single-Stem on the Ankle
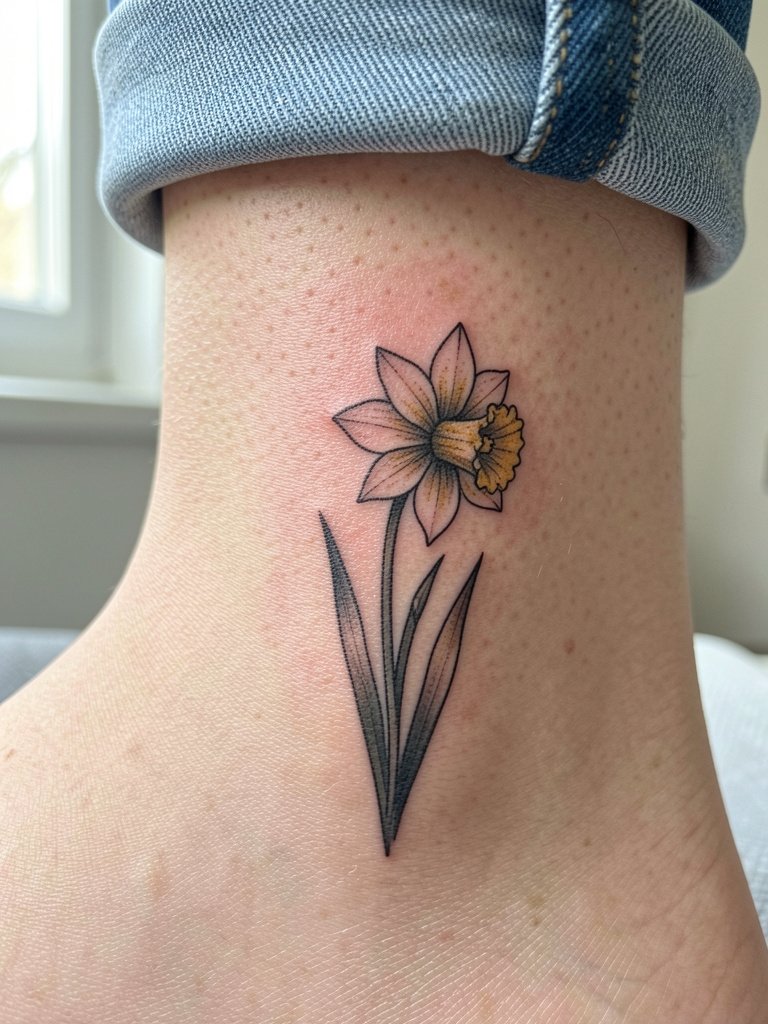
Ankle pieces face shoe friction and socks, so a clean silhouette beats filigree here. I advise a modest size so the trumpet shape reads when socks rub the area. Tell your artist you want bold outer contours and restrained interior detail so the shape lasts through seasonal wear. Most people see crisp lines at six months and gentle softening by year three on ankle placements. Pain is moderate and session time is short. For evenings when you want the tattoo visible, pair with rolled cuff jeans or low-cut sandals. If you wear ankle boots daily, plan touch-up sooner rather than later.
4. Daisy Cluster Behind the Ear
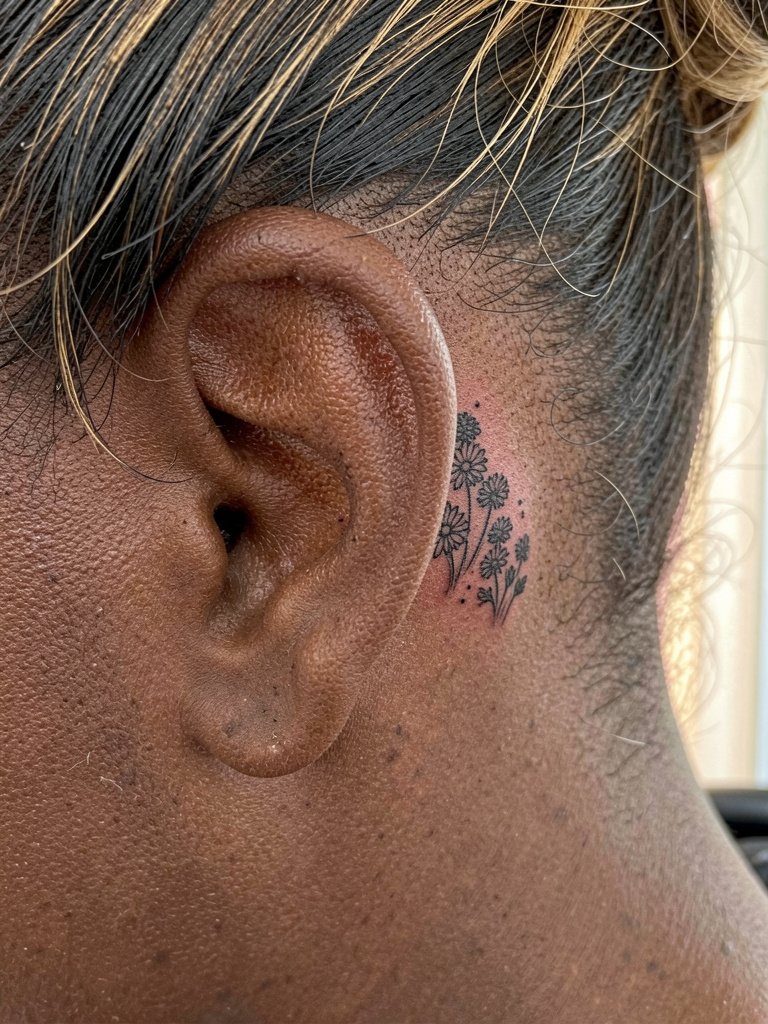
Behind-the-ear tattoos are intimate and highly visible when hair is up. Artists often advise slightly thicker stems here because the area moves and hair oils can soften single needles. Describe exact spacing so the daisies form a clear trio rather than a blur. A common mistake is requesting ultra-fine details that will not survive hair growth and laundering. Sessions are quick but expect tender skin; this is a sensitive area requiring experienced handling. For shows or nights out, pull hair into an updo to reveal the cluster and wear small stud earrings to balance the composition. If you want more than three blooms, consider the nape instead.
5. Lily of the Valley Sternum Accent
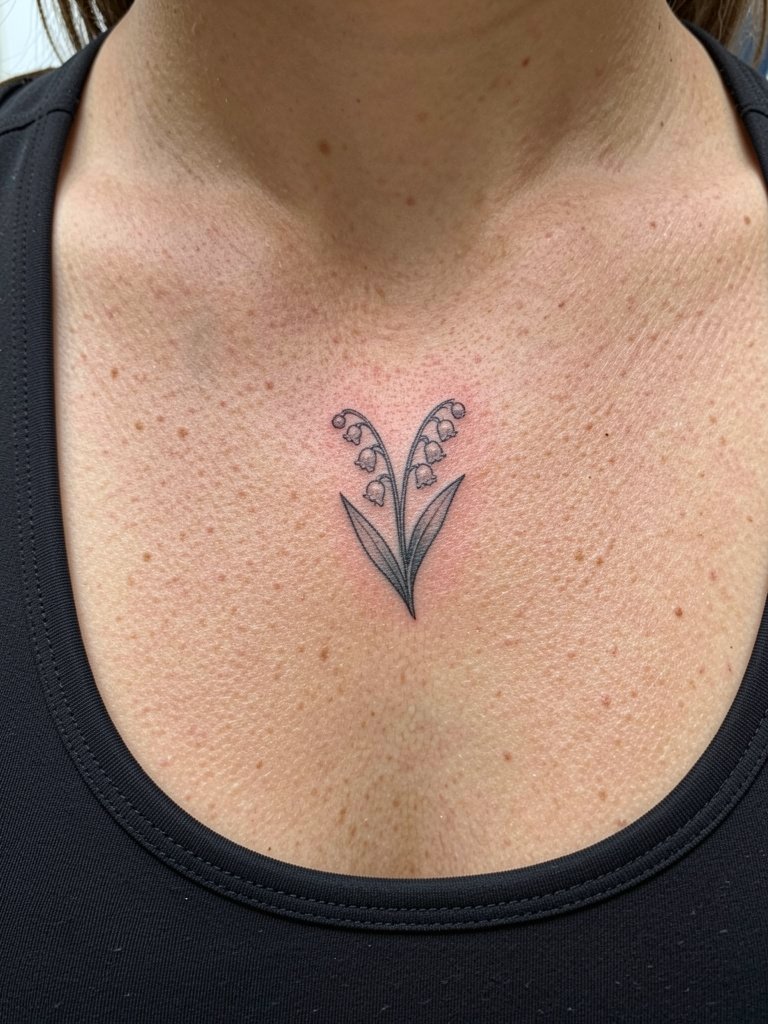
Sternum pieces are sensual and temperamental. For tiny Lily of the Valley sprays plan for slightly wider spacing between bells so the negative space ages gracefully. When you sit for the consultation, have the artist show stencil placement with clothing on so you can preview how bras or tops will frame the area. Pain ranges high on the sternum and sessions need breaks. The biggest mistake is packing too many small elements into the narrow sternum field. Wear a fitted sports bra to the appointment so the artist has access, and expect a touch-up within a year for delicate stems. Professional considerations apply here; seek someone with sternum experience.
6. Rose Bud on the Back of the Hand
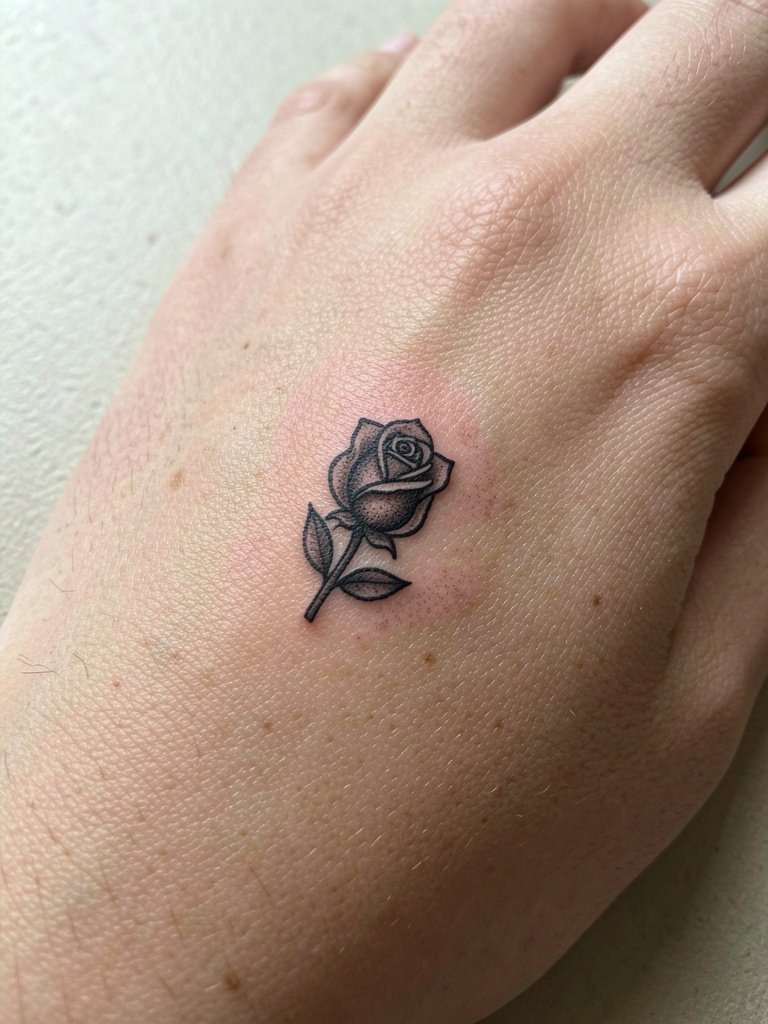
Hand tattoos age faster because skin there regenerates and sees constant washing. For a Rose bud on the hand, request bold contours and strong saturation to compensate for fading. Ask the artist to show how the petals read at three months versus two years so you understand longevity trade-offs. A common misstep is choosing ultra-fine shading that vanishes with daily use. Sessions can be slightly uncomfortable and may require multiple short passes. For showing it off, pair with rings and a minimalist bracelet, such as a thin ring set that complements the placement. Expect earlier touch-up timelines for hand pieces.
Studio Day Picks
These first six designs include a few high-friction spots and delicate single-needle work. A few practical items smooth the session and the first week of healing for wrist, hand, and sternum placements.
-
Single-use stencil transfer paper kit. Lets you preview exact line placement on skin before the needle work, especially helpful for the wrist bracelet and inner forearm ideas above.
-
Topical numbing cream. Applied per instructions about 30 to 45 minutes before can reduce sternum and hand sensitivity without interfering with linework.
-
Thin protective film roll. Useful for covering wrist and ankle pieces after the first dressing to reduce friction and keep water off during showers.
-
Fragrance-free gentle body wash. Cleans the area without irritating delicate single-needle work like the Violet bracelet.
-
Aquaphor healing ointment. Thin layers in the first few days lock in moisture for delicate linework without clogging the surface.
7. Marigold Calf Sprig, Stipple Shading
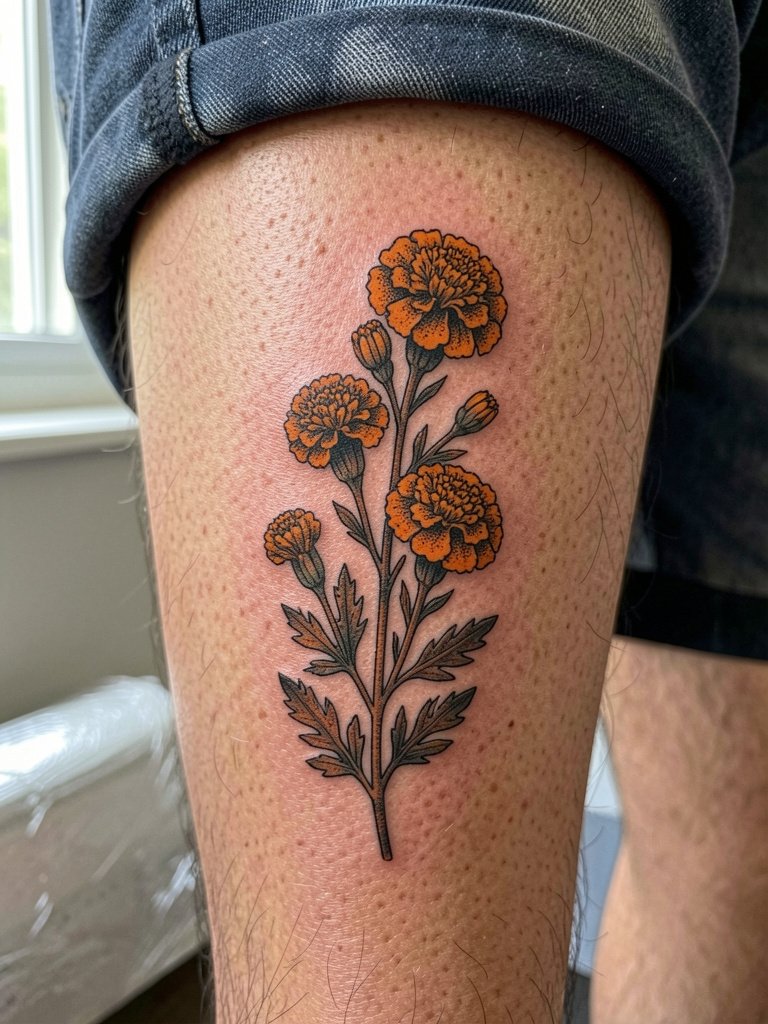
The calf is forgiving for medium-detail work and handles stipple shading nicely. Specify a slightly denser stipple for the Marigold petals so the texture holds after a year. I find that splashed color with defined edges keeps its character longer than washed-out watercolor fills. The session feels moderate; expect a single longer sitting if you add color. A mistake is compressing too many blooms into a narrow vertical space. For showing it off wear high-waist shorts or slip dresses with side slits, which reveal the calf without rubbing the area during healing. Touch-ups for color typically happen around year two.
8. Sunflower Mini on the Shoulder Cap
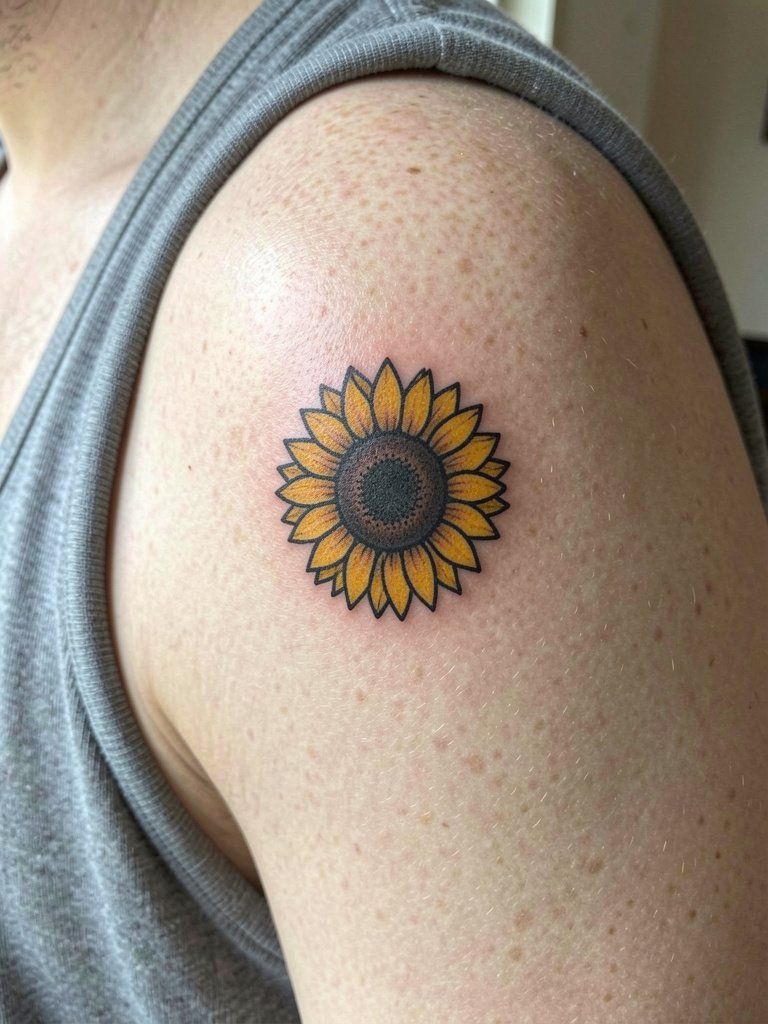
Shoulder caps are classic display spots and handle saturated color well. For a Sunflower choose solid petal saturation and a clear dark center so it reads at arm's length. Ask the artist to show a healed color example on similar skin tone to preview saturation and contrast. The shoulder will look stable at six months and age gracefully, though sun exposure can flatten color over years. Sessions are low to moderate pain and usually single-visit for small work. For summer wear, pair with tank tops that frame the shoulder and avoid persistent UV exposure while healing.
9. Iris Thigh Band, Geometric Frame
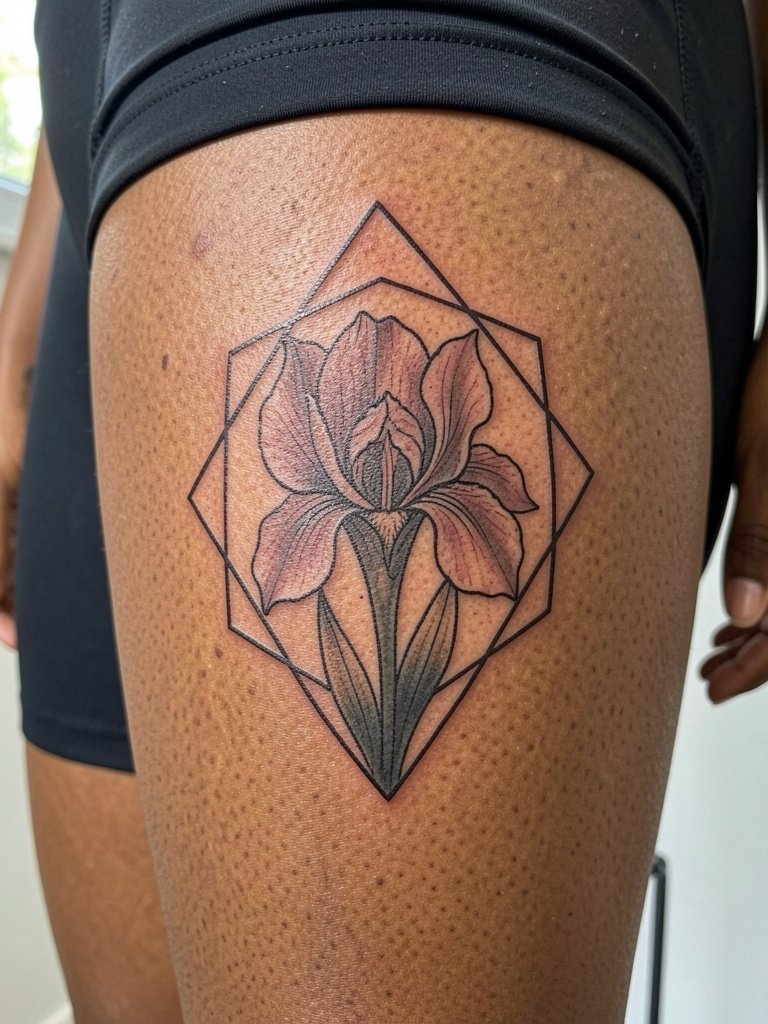
Thigh bands handle bold composition and let you combine linework with geometry. For an Iris band specify negative space inside the frame to keep the design readable after weight and skin shifts. Tell the artist if you plan to wear tight clothing often because compression affects how the ink settles. Inner thigh placements need different spacing than outer thighs for longevity. Sessions can be longer and moderately painful depending on sensitivity. For styling, a mid-thigh slip dress or high-cut swimsuit shows the band without rubbing during healing. If you plan workouts immediately after, schedule lighter exercise for the first two weeks.
10. Poppy Single Bloom, Watercolor Accent on the Ribcage
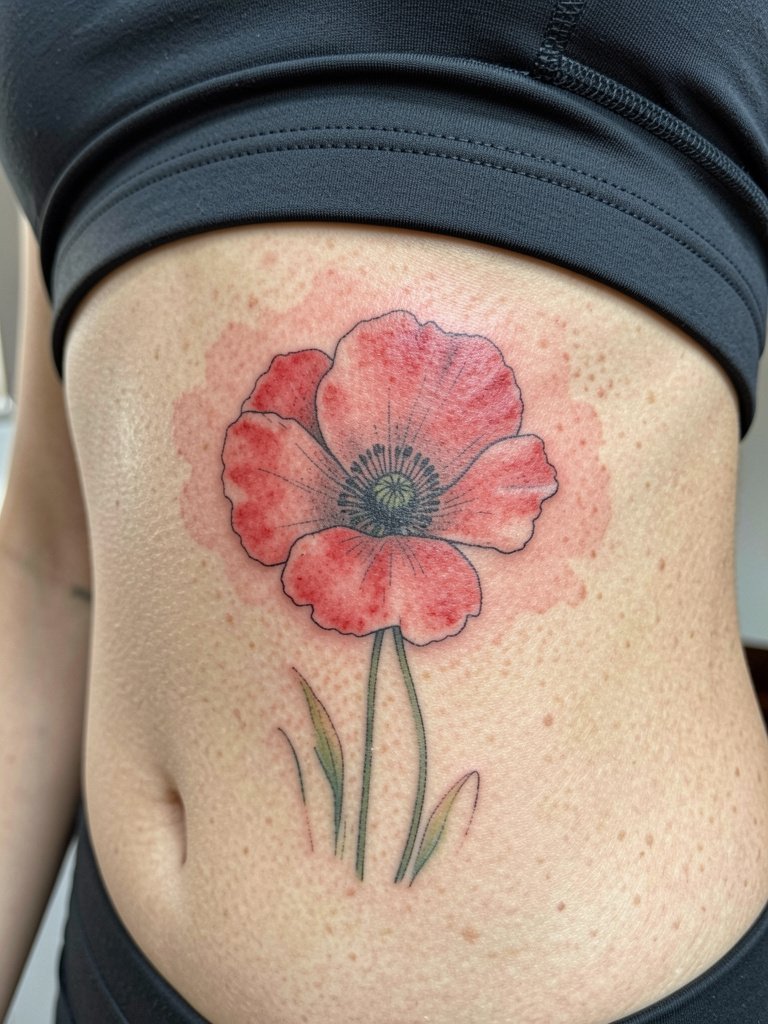
Watercolor accents on the ribs can be beautiful but controversial. One camp argues that rib skin stretches and washes out watercolor pigments within a few years, especially under clothing pressure. The other camp says careful pigment placement with stronger outlines and slight spacing preserves watercolor effects long term, and they point to healed portfolios that back that up. If you want the watercolor look there, ask for a stronger borderline and slightly more pigment saturation near edges so the piece keeps structure. Expect higher pain and a longer session. Wear a fitted sports bra to the appointment so the artist can see natural drape, and plan a touch-up at year two for color refresh.
11. Chrysanthemum Small Upper Back Motif
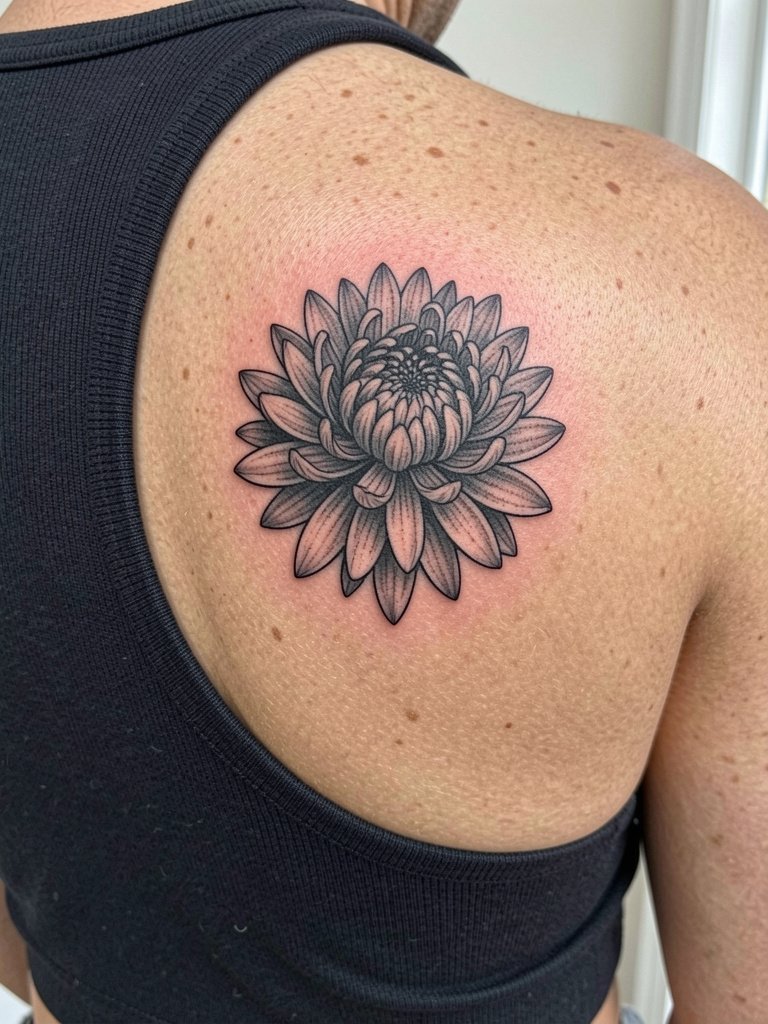
Upper back placements handle larger petal layering without losing clarity. For a Chrysanthemum request staged petal depth with contrast between foreground and background layers so the bloom keeps a three-dimensional feeling. Discuss how the design will sit against shoulder motion as you raise your arm because stretching can blur tight inner details. Sessions are moderate and comfortable for most people. Avoid packing tiny hairline veins of shading that will vanish. For apparel pair with open-back tops or a scoop-back dress that lets the flower sit as a focal point.
12. Snowdrop Inner Wrist Accent
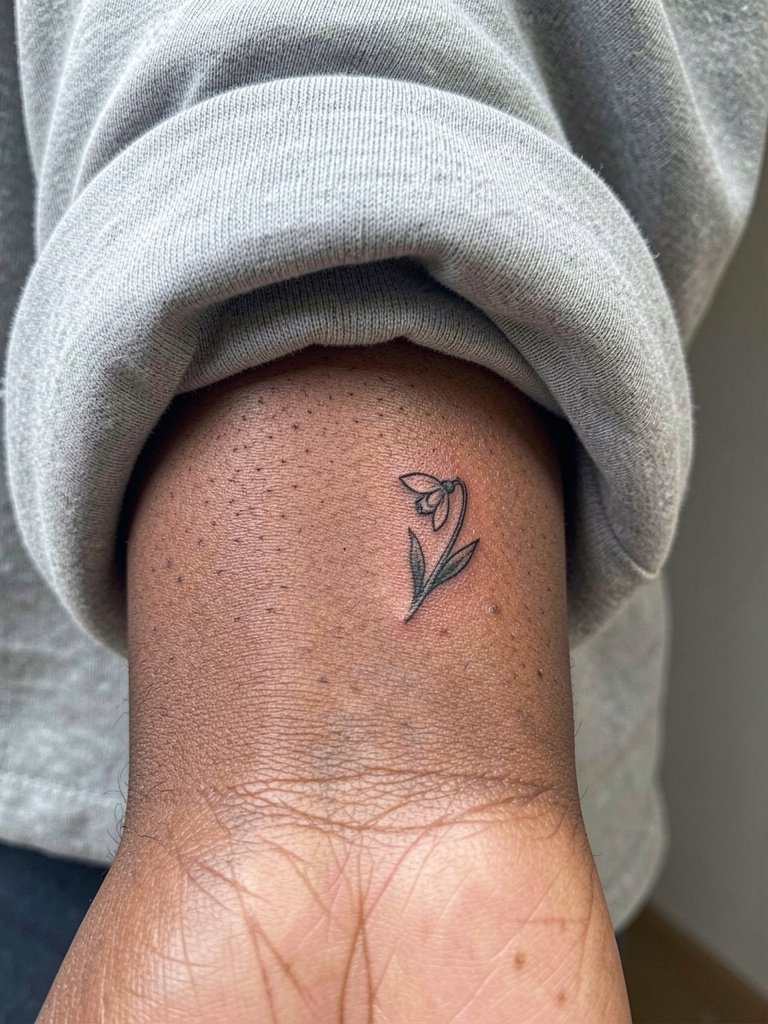
Inner wrist tattoos can be seen often and suffer from frequent washing. For a Snowdrop, suggest slightly heavier lineweight on stems and a small area of negative space inside the bloom so it keeps clarity. Show the artist exactly where on the wrist you want it relative to the crease because placement affects how the piece folds with motion. A common mistake is centering too close to the crease. Sessions are short but the area is sensitive. Wear a loose long-sleeve top you can roll up easily to the appointment. Consider a discreet bracelet like a thin leather wrap to complement the wrist without abrasive metal.
13. Narcissus Lower Rib Accent Strip
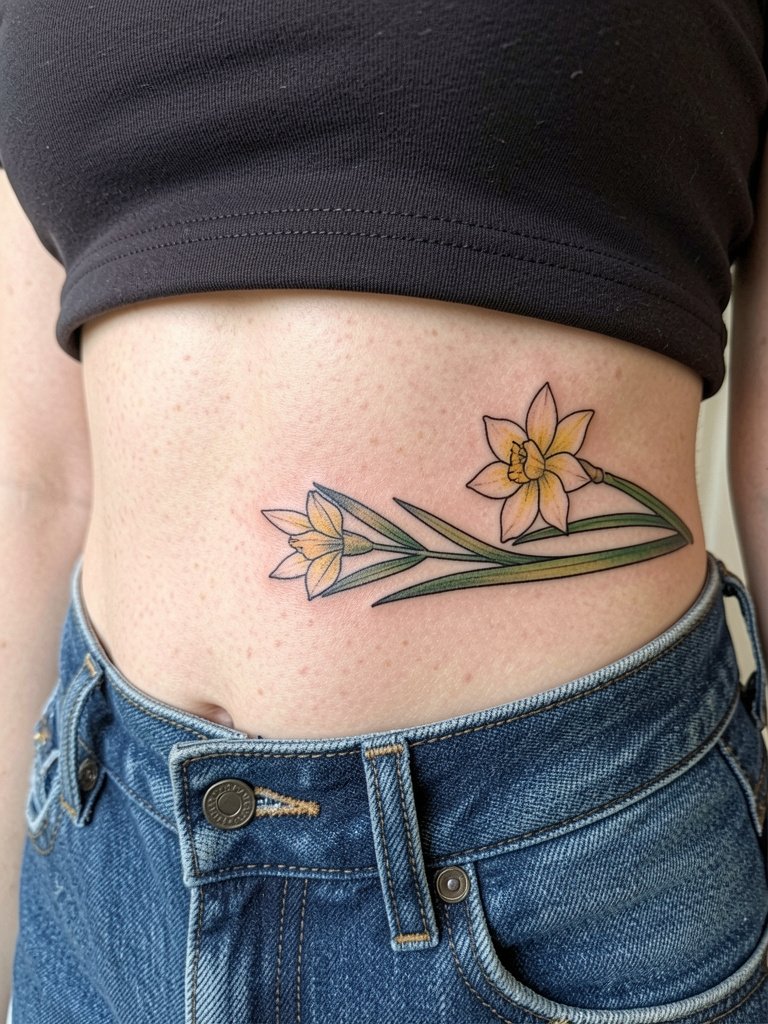
Lower rib tattoos can suffer from stretching and clothing pressure. When placing a Narcissus here ask the artist to keep the central trumpet slightly larger than in reference photos so the focal point remains distinct as the skin shifts. Pain is higher and sessions may need breaks. A frequent error is requesting lots of tiny filigree in a zone that moves with breaths and waist movement. For healing, avoid tight waistbands; choose high-waisted pants that do not press directly over the tattoo during the first two weeks.
14. Gladiolus Vertical Wrist-to-Forearm Line
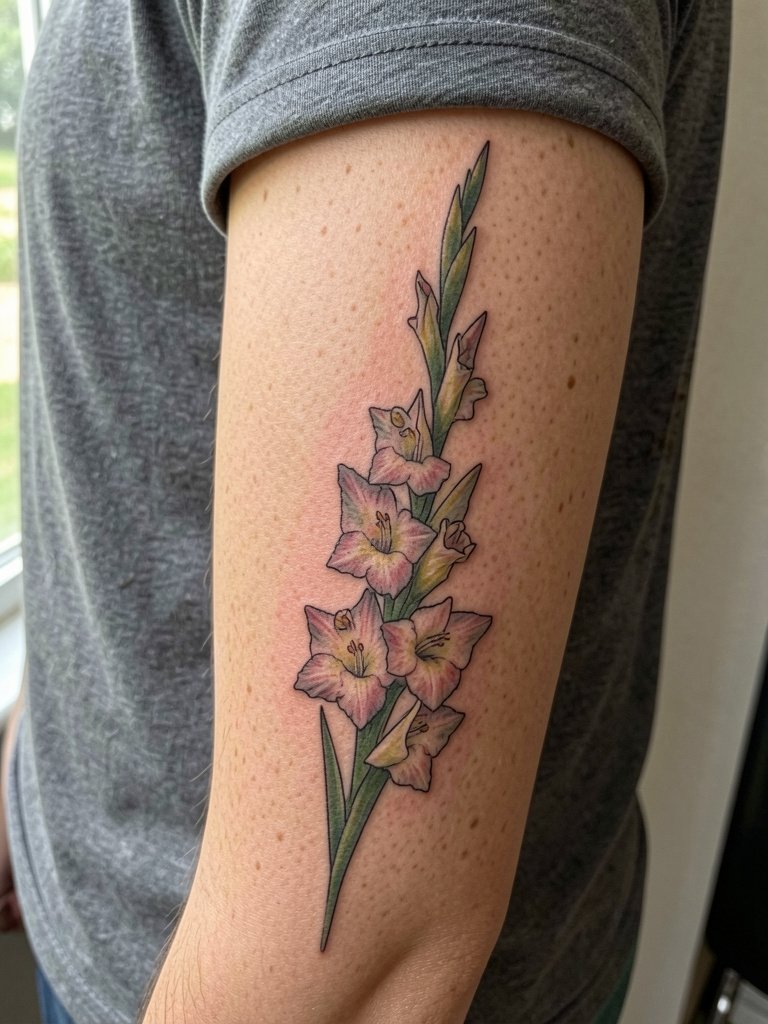
A vertical Gladiolus fits the natural flow of the forearm and can be scaled without losing detail. For longevity request slightly heavier outlines on the lowest and highest blooms because those areas see more abrasion. Discuss at the consultation how the piece reads at both two and five inches tall so the artist balances detail and durability. Forearm pain is low to moderate and sessions are straightforward. For daytime outfits pair with rolled sleeves and a lightweight bracelet to mirror the stem lines. Expect minimal touch-up if you prioritize outline clarity at the start.
15. Aster Collarbone Accent, Minimal Script
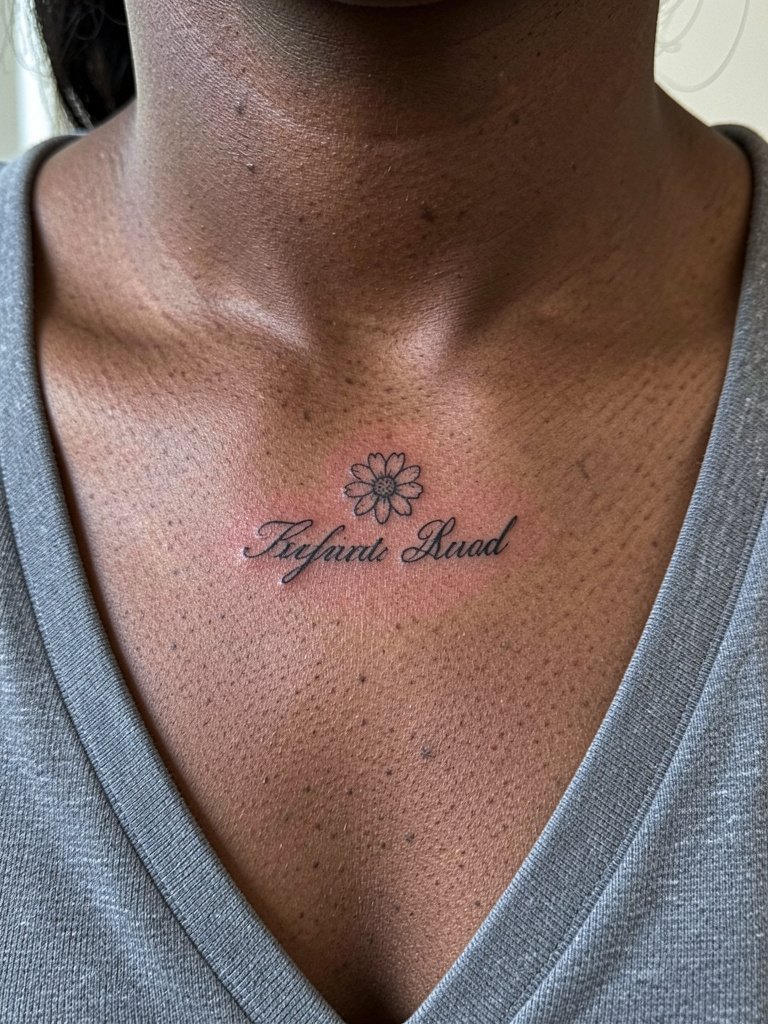
Collarbones show jewelry and tops naturally so tiny Aster placement benefits from clear spacing. When you choose script beneath the bloom, specify exact lettering size and font weight so the type remains legible in years. The collarbone can be bony and a bit more painful than nearby shoulder skin, so expect a short, slightly sharp session. A common error is requesting tiny script without giving the artist a sample of the exact font and spacing. For styling, open necklines like a wide V highlight the piece; consider a delicate chain necklace that sits above the bloom rather than across it.
16. Cosmos Small Upper Arm Portrait
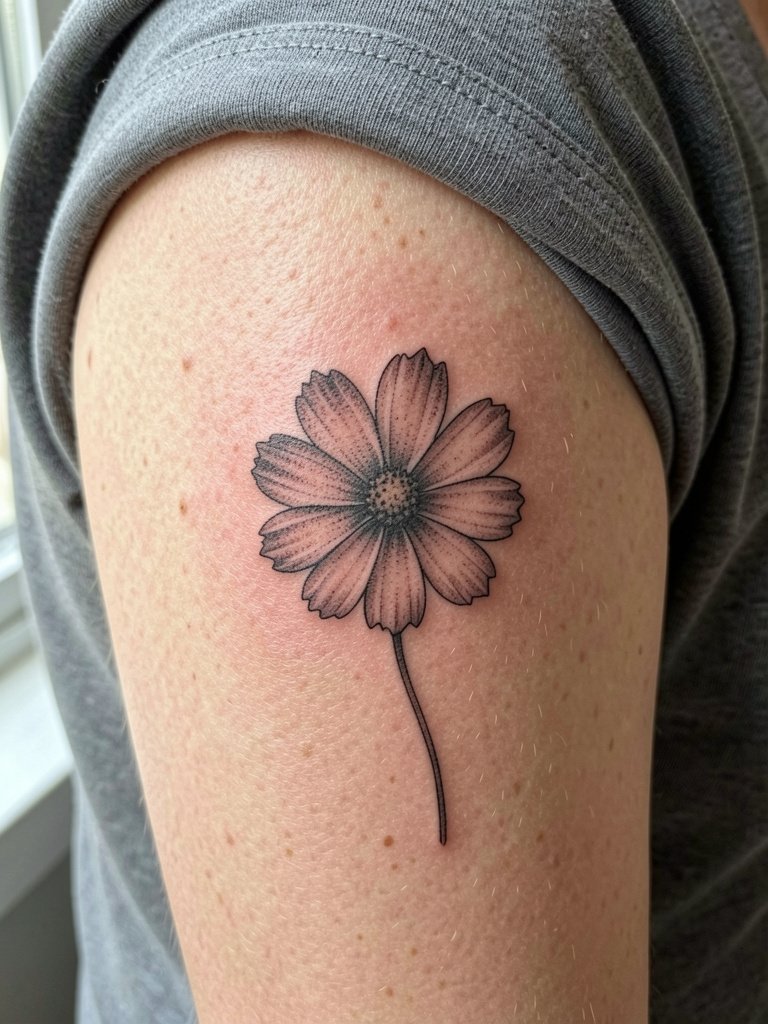
Outer upper arm placements are low-risk for blowout and preserve fine detail well. For Cosmos micro-realism communicate desired petal texture so the artist knows to use stippling rather than wash. This placement heals predictably and usually needs minimal touch-up. A mistake is pushing too many micro details into a very small diameter; allow two to three inches minimum for realism. Sessions are comfortable and often single-visit. Show it off with short sleeves or a structured blazer that leaves the upper arm visible for a polished look.
17. Morning Glory Clavicle Curve
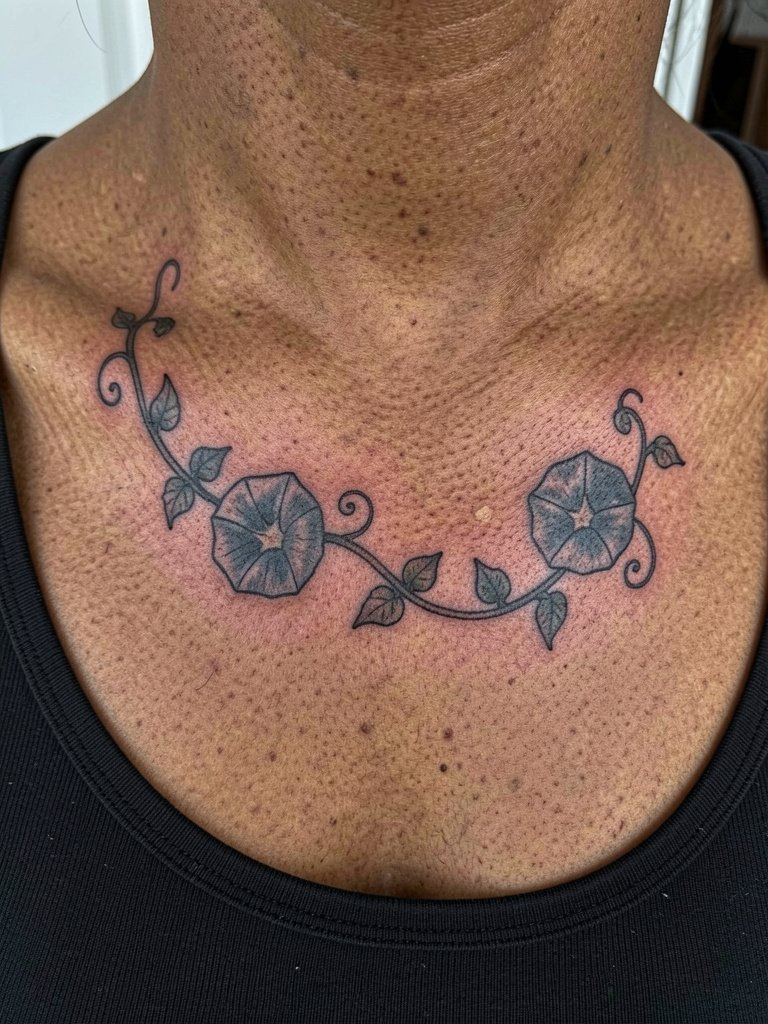
Clavicle curves let you play with flow and negative space. Describe whether you want the vine to follow the bone exactly or sit slightly below it because that changes how tops frame the work. Clavicle skin can be bony, so expect more sensation during inking. A typical mistake is asking for extremely thin tendrils that disappear after months. For daytime wear, scoop-neck tops and delicate chains expose the curve nicely. If you want higher contrast, request a slightly darker wash in the blossom centers so they pop against clothing and skin tone.
18. Honeysuckle Side Hip Spray
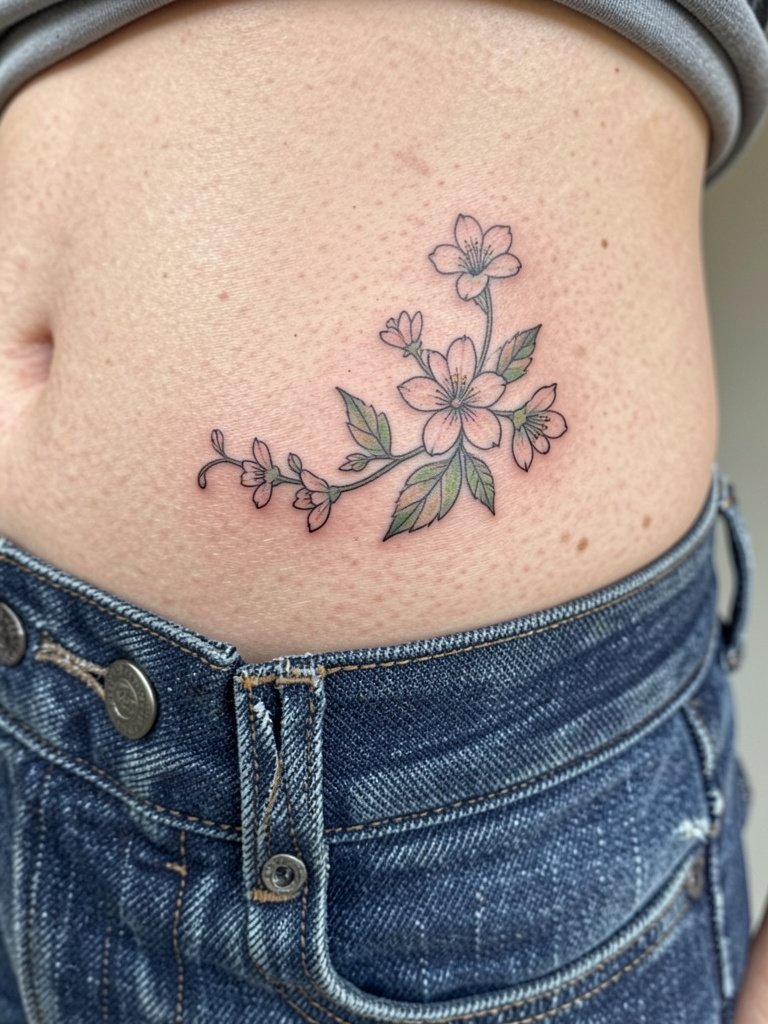
Hip tattoos sit near waistlines so discuss how your favorite jeans sit relative to the design. One camp prefers designs placed higher to avoid waistband friction; the other prefers just-below-waist placement to keep art hidden under clothing. Tell the artist your typical waistband height so they can place the spray accordingly. The hip has moderate pain and can take a little longer to heal if clothing rubs it. For styling, low-rise jeans with the waistband sitting naturally below the design show the spray well. Use breathable fabrics during the first two weeks to reduce irritation.
19. Larkspur Small Behind the Knee
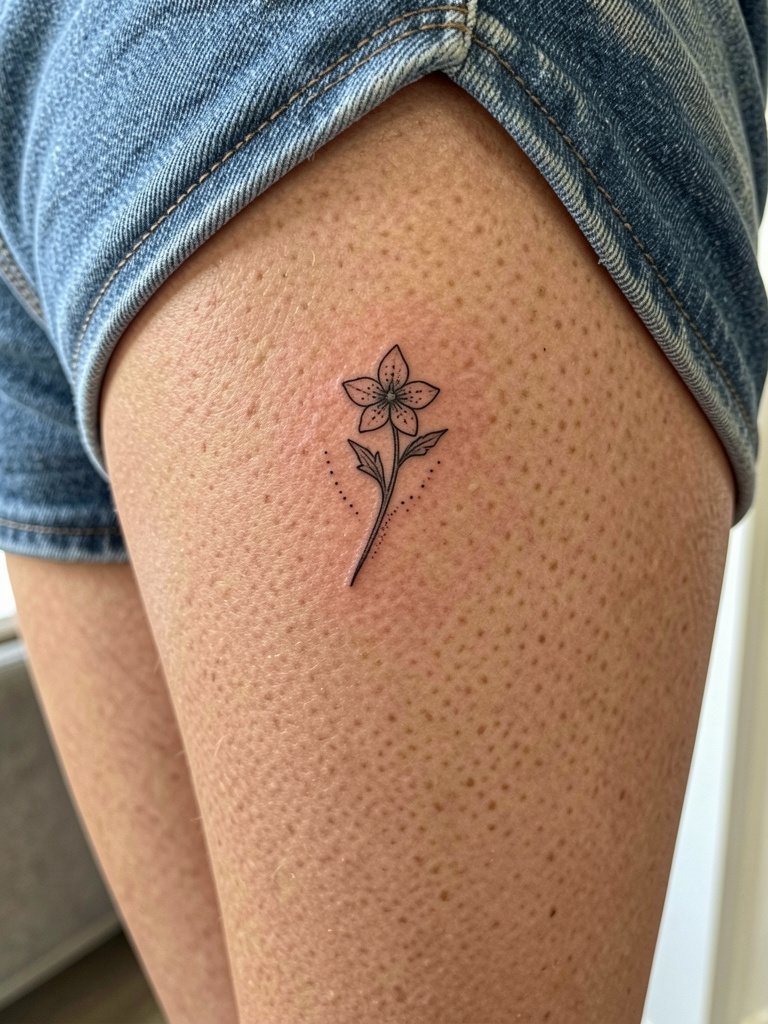
The area behind the knee creases a lot and can distort tiny detail. For a Larkspur here prefer a slightly simplified silhouette rather than intricate internal shading. Explain to the artist that you want the design to survive motion and kneeling. This is a higher-movement spot and sessions can feel peculiar because the skin flexes while sitting. A common mistake is packing high-detail shading that looks great fresh but blurs with movement. For outfits, opt for shorts or midi dresses that reveal the back knee without tight bands near the crease during healing.
20. Magnolia Side Thigh Panel
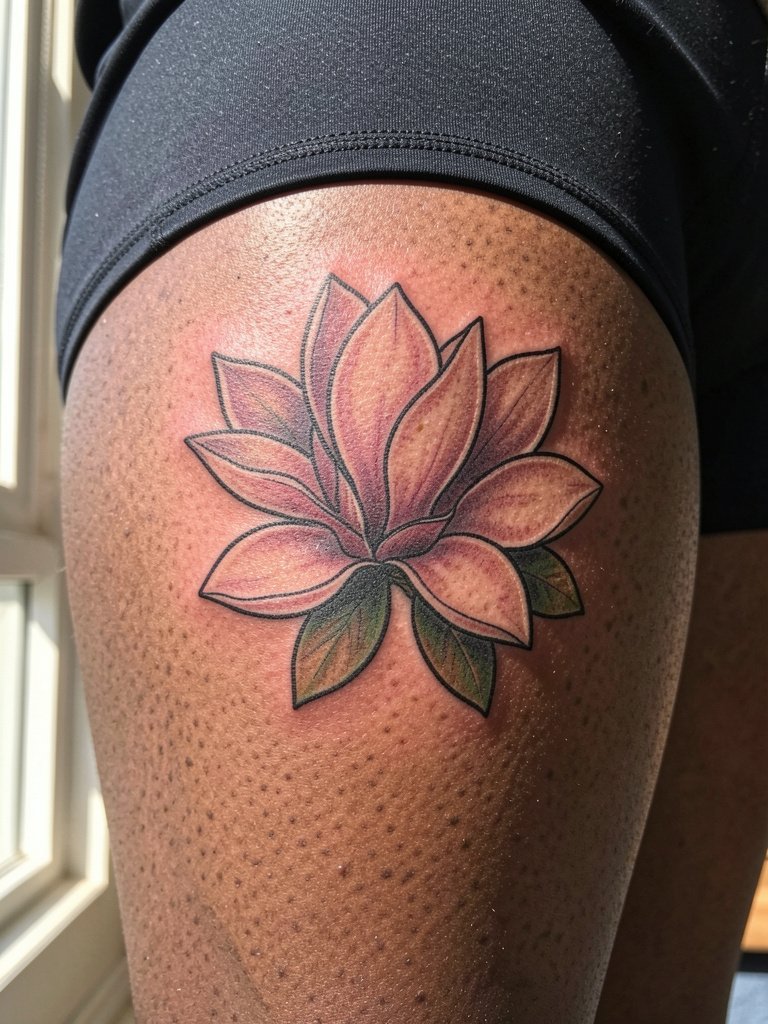
Magnolia panels on the thigh offer space for scale and layered shading. Tell the artist how often you wear tight shorts since compression can slightly distort petals. The outer thigh tolerates detail and color well, with low blowout risk compared to hands or wrists. A mistake is crowding the panel with extraneous elements that compete with the bloom. Sessions can be longer depending on size, often over an hour for shading and color. For summer reveal, pair with a floral midi skirt or high-cut swimwear that showcases the panel without pressure on healing skin.
21. Cornflower Mini on the Finger
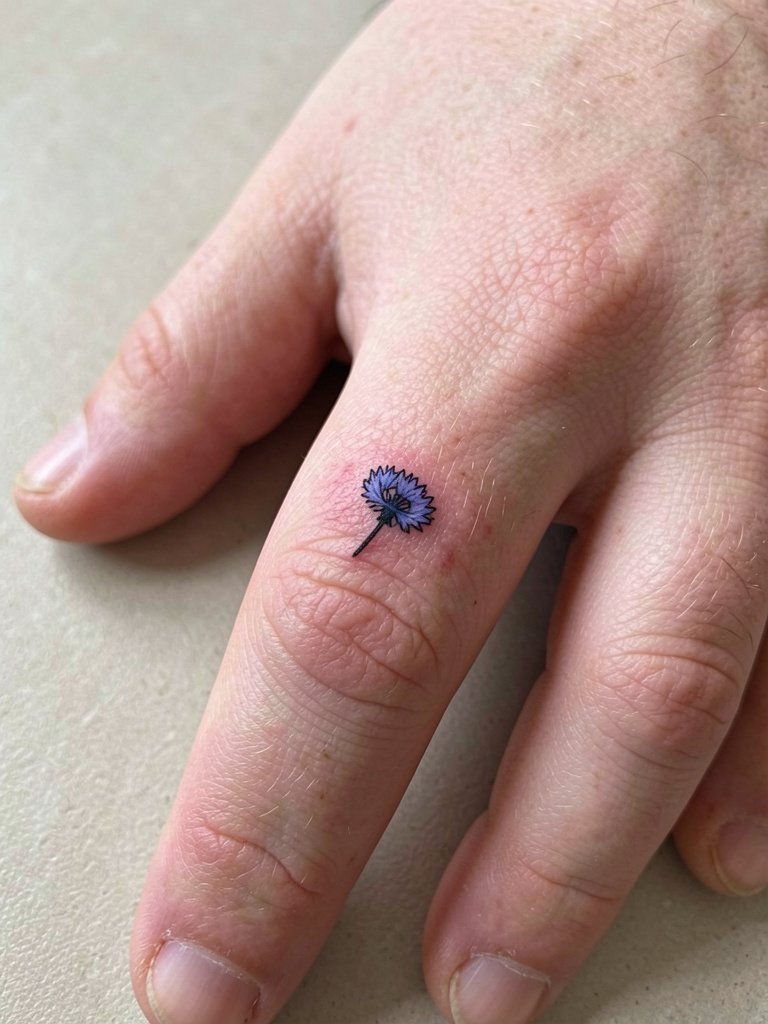
Finger tattoos are the most high-maintenance because skin there renews rapidly. For Cornflower on the finger insist on a compact, bold outline and expect earlier touch-ups. Specify exactly which finger face or side you want so the artist can place the bloom where movement will least blur it. People often pick the top of the finger and then wonder why the piece fades quickly. Sessions are short but painful due to bone proximity. For jewelry pairings choose thin stackable bands that do not press directly onto the ink during healing. Plan on an annual touch-up as a realistic timeline.
22. Marigold Behind the Ear Lobe Curve
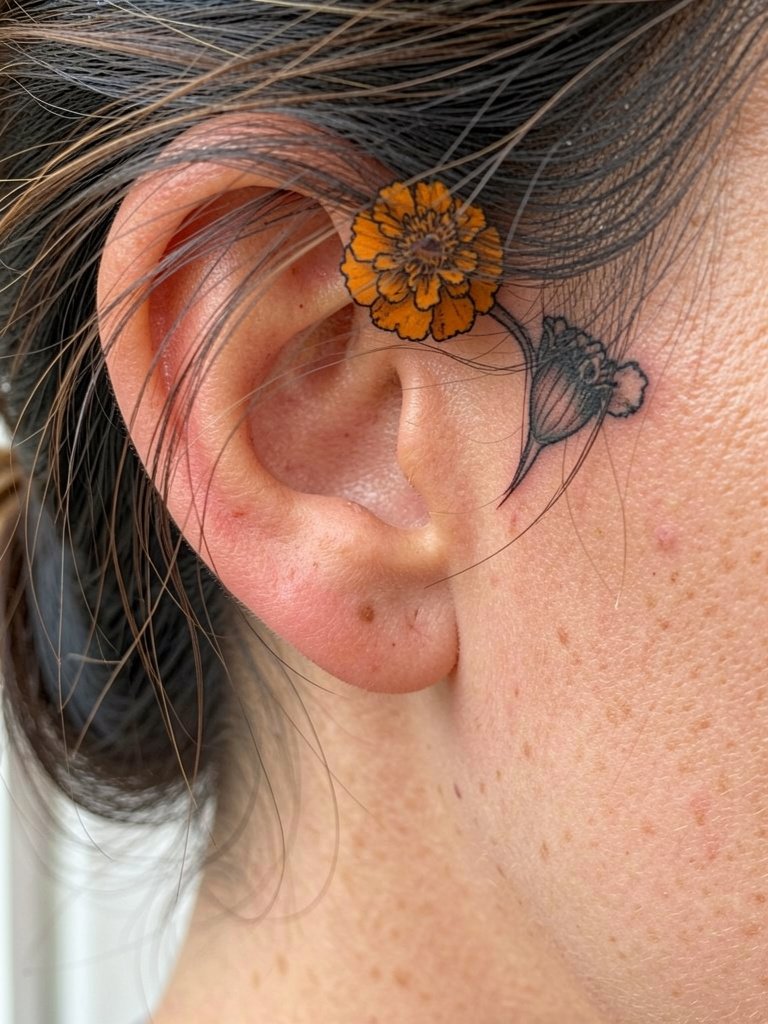
This tucked placement is subtle and low-friction when hair is down. Ask the artist to map the bloom so it will still peek out under short hair or with an updo. The area tolerates fine work but avoid ultra-fine internal detail that will blur from hair oil contact. Sessions are quick and usually low to moderate pain. For reveal moments pair with small hoops or studs rather than large dangling earrings that could rub the fresh ink. If you often wear heavy earrings, discuss placement slightly higher to avoid contact.
23. Rose of Sharon Nape Line
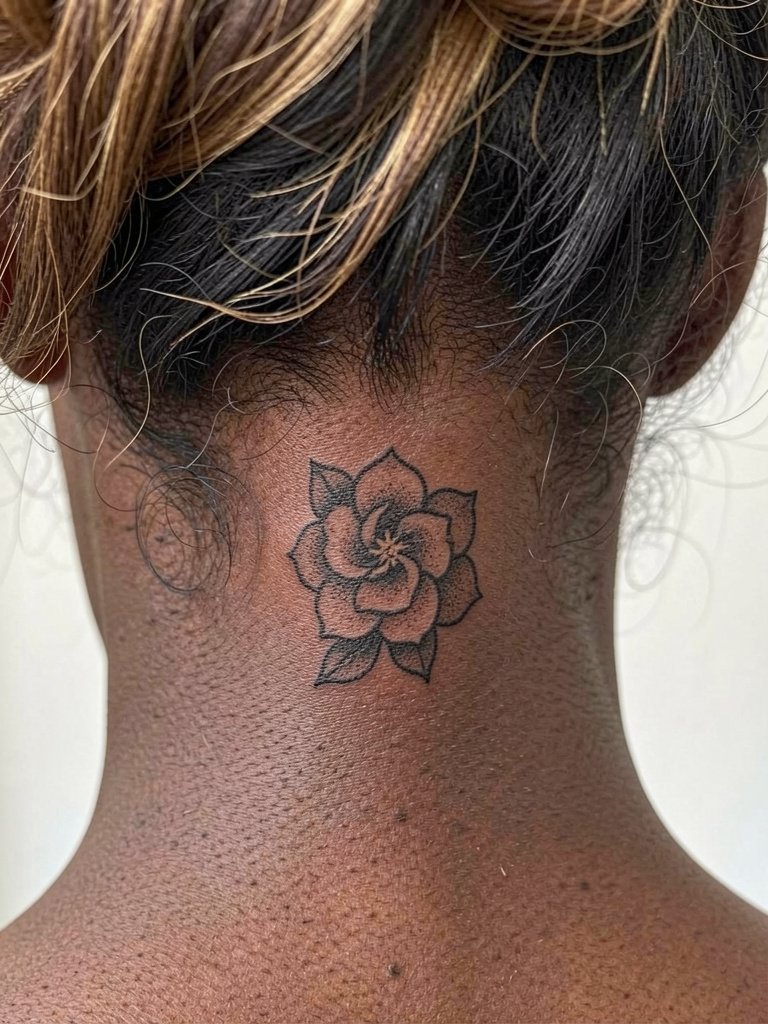
Nape placements are flattering and fairly protected from sun, but they need clear hairline planning. Ask the artist to preview how the piece looks with your usual hairstyle to avoid covering the design unintentionally. The skin at the nape handles linework well and ages predictably. A common mistake is choosing a size that disappears when hair is worn down. Sessions are moderate in pain and you may need to schedule around hair appointments to avoid shampooing for the first 48 hours. For styling, wear your hair up or in a chic low bun to expose the Rose of Sharon on evenings out.
Frequently Asked Questions
Q: How do I choose between single-needle fine line and slightly bolder outlines for my birth flower?
A: Think about placement and daily wear. If the design sits on hands, fingers, wrists, or the ankle, slightly bolder outlines preserve form longer. For low-friction spots like the upper arm or back, single-needle work can keep delicate detail. Bring photos at multiple scales so your artist can show how lineweight reads at each size.
Q: Will color make my birth flower fade faster than black ink?
A: Color can fade faster in areas exposed to sun and friction, but richer saturation and proper aftercare slow that process. Darker pigments in centers or outlines can anchor a colored bloom so it still reads as the color softens. Plan for a possible color refresh at the two- to three-year mark for visible spots like shoulders or calves.
Q: Where can I find healed examples and portfolios without naming specific artists?
A: Search platform tags and portfolio sites for healed work. Use hashtags like #HealedTattoo, #BirthFlowerTattoo, and placement tags such as #InnerForearmTattoo on Instagram and TikTok. Browse portfolio collections on tattoo directory sites and check subreddit galleries for healed shots on different skin tones. Filter by location if you want to see local studios.
Q: What should I wear to the appointment for a sternum or hip placement?
A: Wear clothing that gives the artist clear access while staying comfortable. For sternum choices, a fitted sports bra or bandeau in normal worn state works well. For hips, low-rise jeans that are fully zipped and buttoned let the artist place the stencil without fabric being moved. Bring easy layers so you can adapt during breaks.
Q: Are there placements to avoid if I want a long-lasting fine-line effect?
A: High-motion and high-friction areas such as fingers, palms, and the side of the ribcage are trickier for single-needle detail. If you want longevity in these spots, pick slightly larger scale and stronger outlines. For truly delicate single-needle detail choose the inner forearm, outer upper arm, or upper back where the skin is stable.
