
Fine line white ink can read like a whisper at first and either fade into nothing or develop a soft, wearable texture over time. Many people pin ultra-thin single-needle scripts expecting long-term clarity, but those often blur or vanish faster than slightly bolder, placement-aware pieces. One camp argues white ink is inherently temporary and fades into light dusting within a few years. The other camp says with the right spacing, modest saturation, and touch-up plan it holds as a delicate, low-contrast option readers still notice over time.
1. Fine-Line Crescent on Inner Wrist
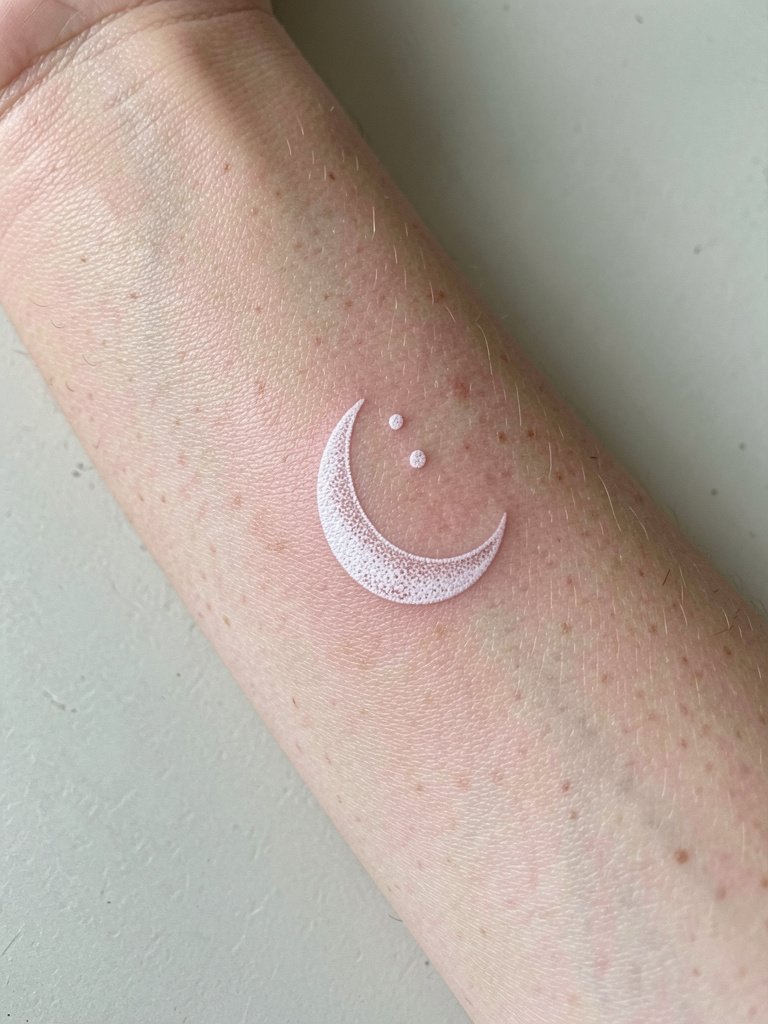
A fine-line crescent on the inner wrist is for someone who wants hint-like jewelry without heavy contrast. Expect a quick 30 to 45 minute session and a low-to-moderate pain level because the wrist has thinner skin. The common mistake is asking for it at single-needle thinness without spacing; lines too close will blur by year two. Ask for slightly increased line weight in the center arc and more negative space at the tips so the form stays readable over time. If you want to show it off, roll up sleeves and try a lightweight linen shirt that keeps the forearm visible without rubbing the area during the first week.
2. Micro-Leaf Cluster Behind the Ear
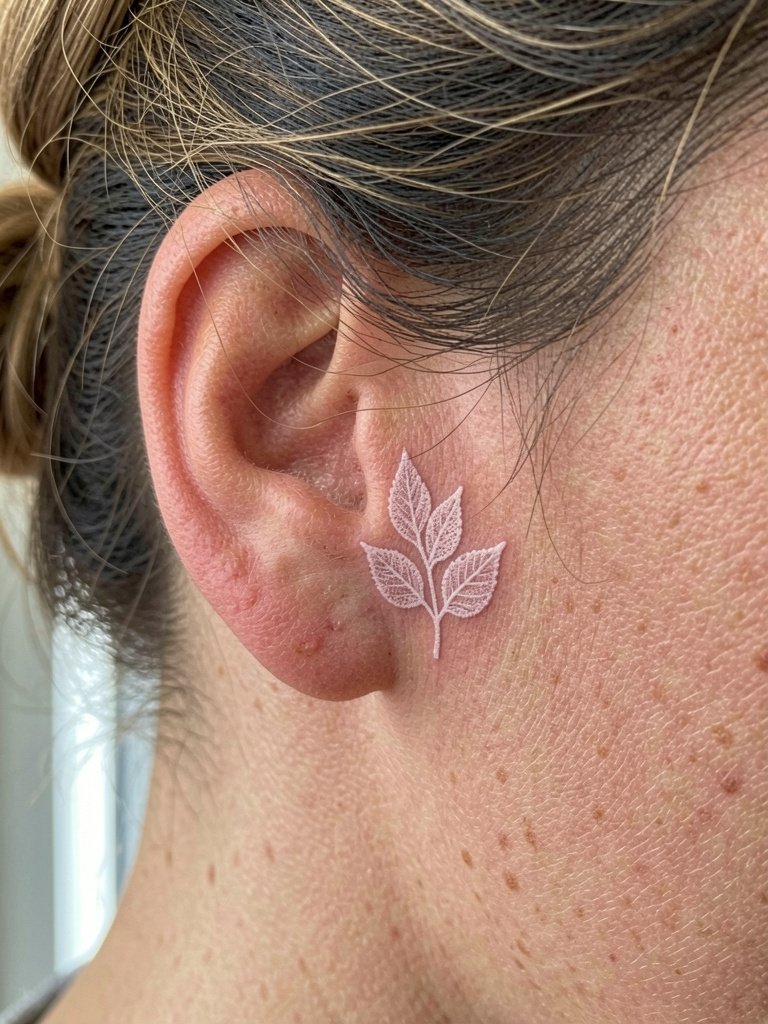
Behind-the-ear placements read like a private detail. Pain is low to moderate and the session often takes under an hour. The typical request that ages poorly is a dense cluster of stems and veins in white only. White ink benefits from simple silhouettes and sparse stipple. Bring a photo showing how the design looks scaled to a 1.5-inch area so your artist can map spacing. For everyday styling, small hoops or a minimalist stud pair well. If you plan to wear your hair up to show the piece, consider the comfort of lightweight hair claws so the area is not tugged during the first week.
3. Tone-on-Tone Script Along the Collarbone
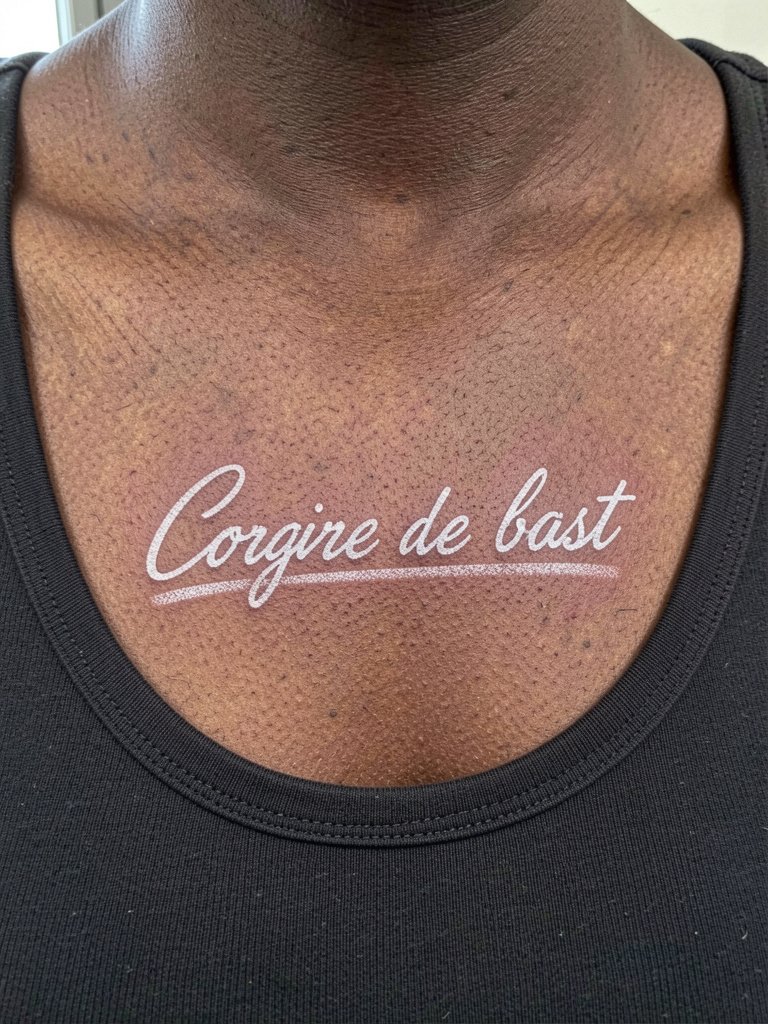
A collarbone script is visible and fragile. This placement has moderate pain and usually fits into a 45 to 75 minute session. The design that holds up best uses slightly heavier lettering and wider spacing than Instagram single-needle examples. A common mistake is requesting micro-kerning and then experiencing letter merge by year three. During consultation, show the exact word at the size you plan to wear it so the artist can demonstrate how the letters read at three and five inches. For nighttime looks, a wide V-neck top frames the area, and a satin cami works well without rubbing the healing skin.
4. Ghosted Botanical on Outer Forearm
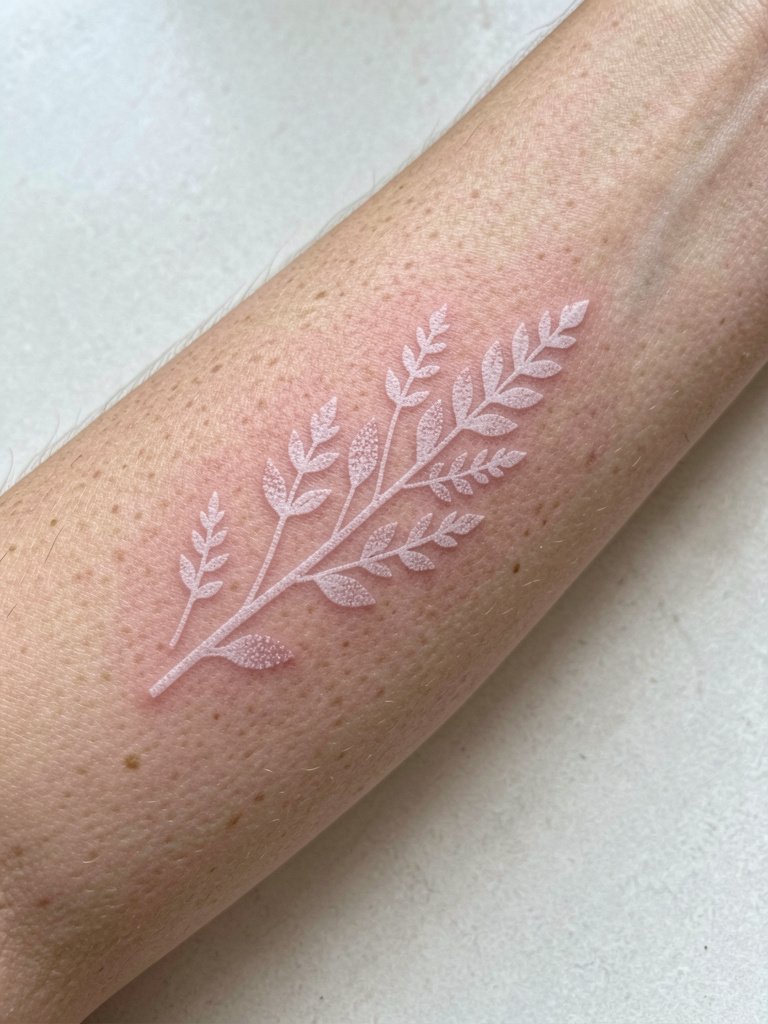
Outer forearm pieces tend to read better with mellow contrast because they get lots of sun exposure and friction from sleeves. Session time is about one to two hours depending on coverage. One mistake is over-detailing the leaf veins; these thin marks blur first. Ask during consultation for larger leaf shapes and stipple rather than micro-veins so the silhouette remains. In six months a ghosted botanical reads faintly; by two years it may require a touch-up to bring back highlights. To show it off without accelerating fade, pair with rolled sleeves and a lightweight cardigan that exposes the forearm while protecting the ink.
5. Minimalist Dotwork Ankle Chain
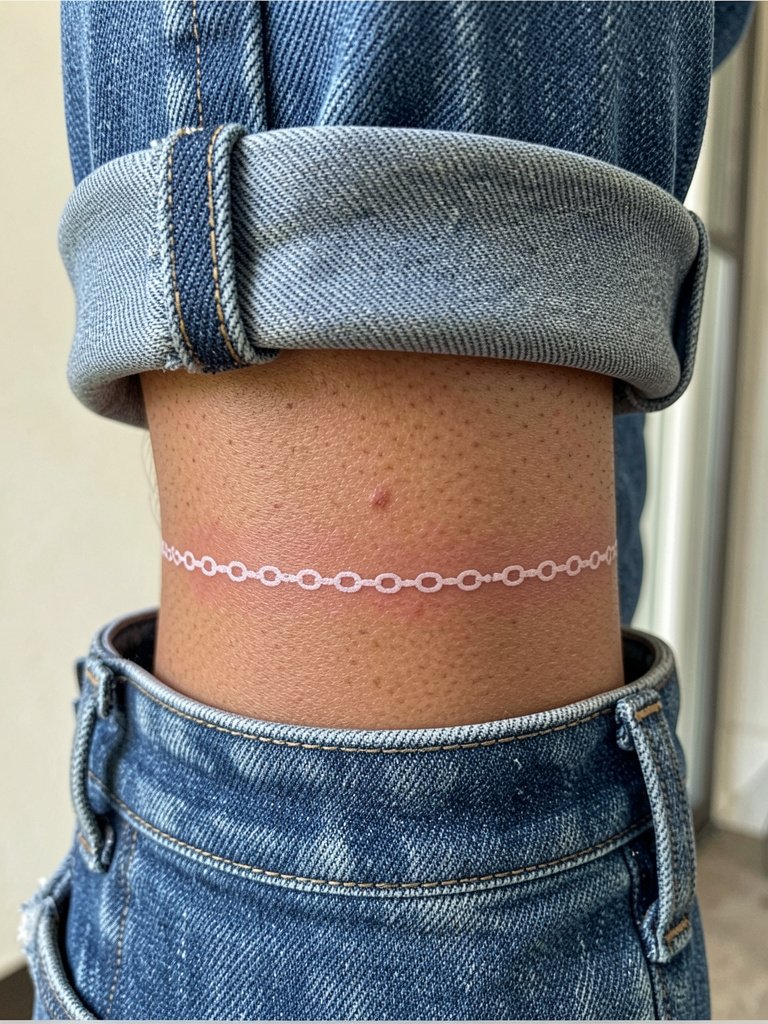
An ankle chain in white is discreet and playful. The placement has low-to-moderate pain and usually fits into a 30 to 60 minute session. The common error is crowding dots too closely; tight spacing produces early merging from socks and shoes. Specify the exact diameter you want so the artist spaces the dots with breathing room. Because the ankle faces friction, expect a touch-up around year one. Pair this design with cropped denim and ankle strap sandals when showing it off, and make sure socks are low-cut during the first two weeks to limit abrasion.
6. White Ink Florals on the Ribcage
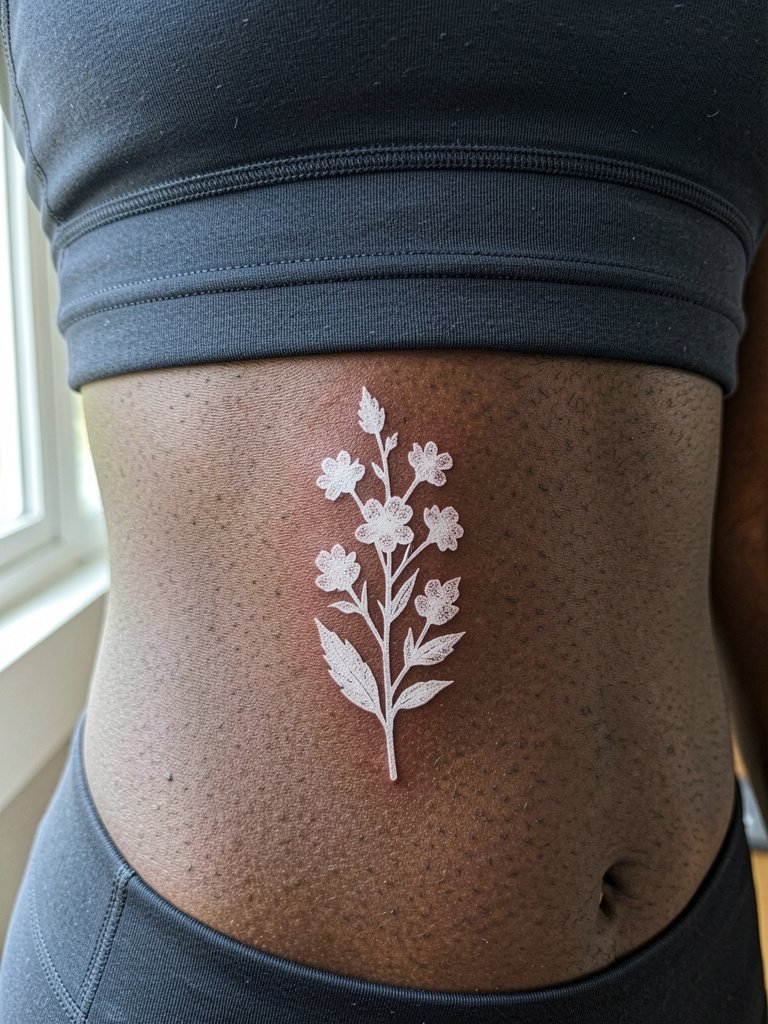
Ribcage white ink divides opinion. One camp says the skin there stretches and the lines blur within two years. The other camp argues that with slightly wider spacing, moderate saturation, and planned touch-ups it can keep a soft, readable shape for years. Be specific in the consultation about how far to space stems and where the highlights should sit. Expect a higher pain score and a session that can run from one and a half to three hours. Plan to avoid tight bras for the first week and consider showing it with crops and bralettes once healed.
Session Day Picks
The wrist, ribcage, and ankle pieces above all benefit from a few small items that keep the session smooth and the first week gentle.
-
Stencil transfer paper kit. Helps preview scale on the wrist and collarbone areas highlighted in ideas 1 and 3 so you can confirm spacing before any needles touch skin.
-
Topical numbing cream. Applied according to directions with a 30 to 45 minute soak time eases ribcage discomfort during longer floral sessions.
-
Thin protective film roll. Useful for ankle and wrist placements where friction from socks and cuffs is common during the first 48 hours.
-
Fragrance-free gentle body wash. Cleanses healing skin without scents that can irritate delicate white ink outlines.
-
Aquaphor healing ointment. A widely used option for the initial thin layer recommended by many artists to protect fine-line and white ink pieces.
7. Tonal Geometric Dot Mandala on Outer Thigh
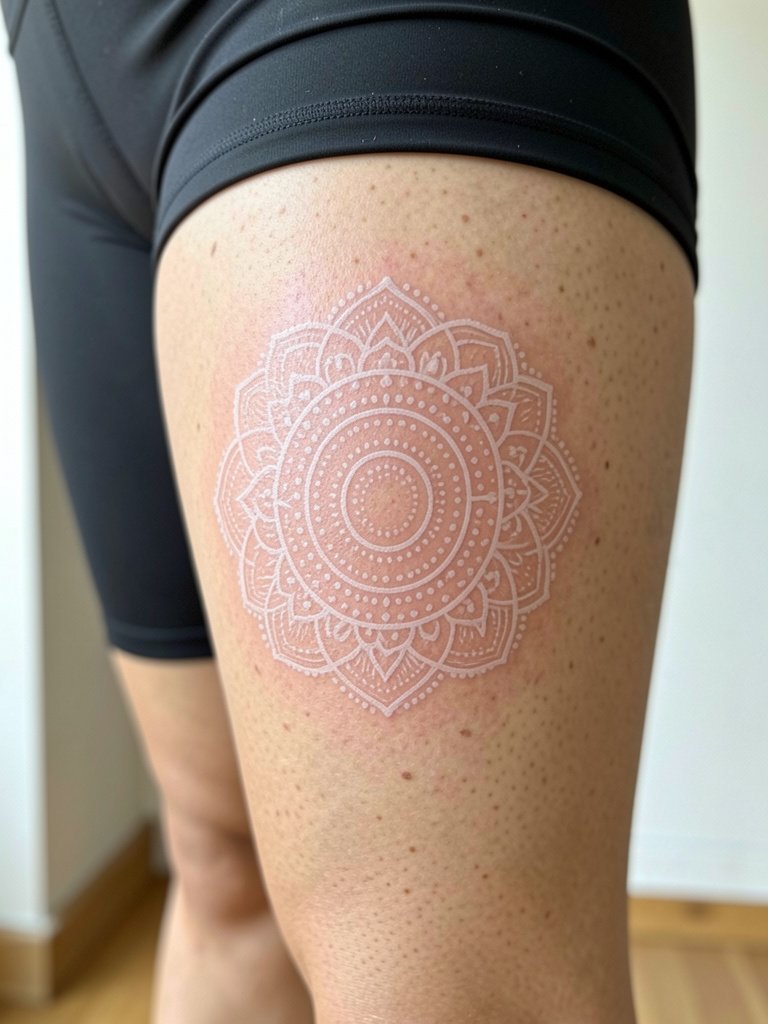
A geometric mandala on the thigh gives room for spacing and age-friendly composition. The session time depends on size, often one to three hours, with moderate pain. A common mistake is shrinking a mandala to four inches; the fine dotwork needs eight or more millimeters between key radiating lines to avoid early merging. During the appointment bring shorts you can sit comfortably in so the artist has access without fabric shifting. For evenings out try pairing the piece with mid-length slip dresses that allow the thigh to peek naturally without chafing the area.
8. Pale Compass on the Outer Shoulder
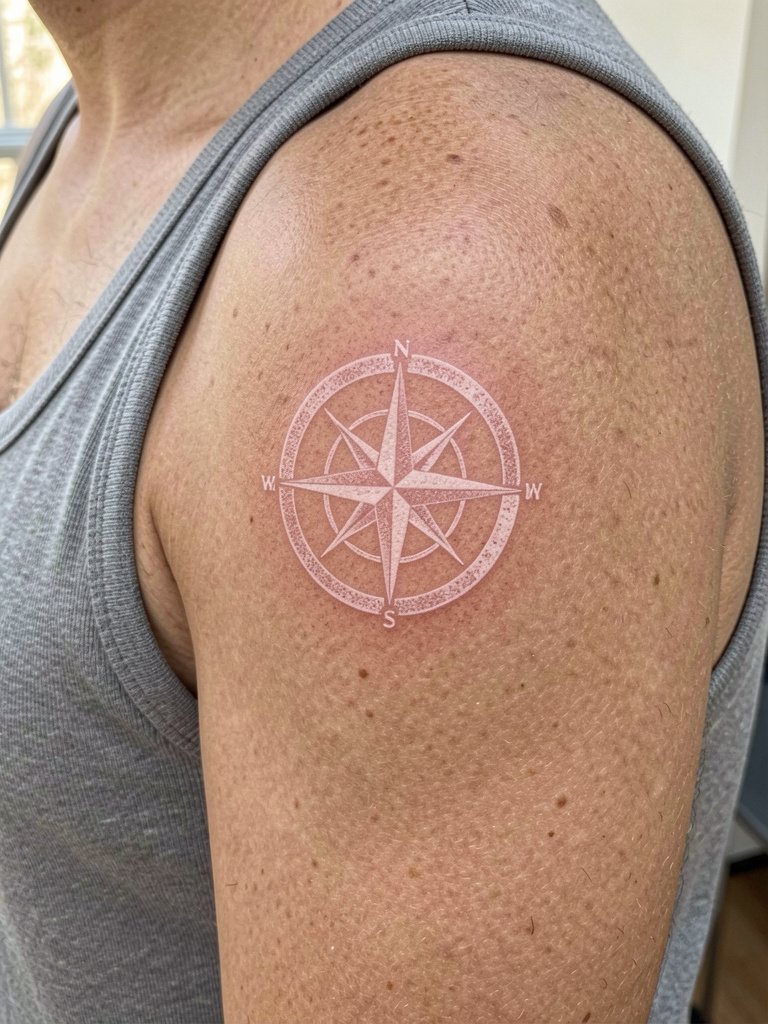
The shoulder is forgiving for white ink because it avoids constant friction. Expect a 45 to 90 minute session and moderate pain. Artists often recommend slightly thicker outer rings to keep the compass readable against melanin contrast. A mistake is requesting an ultra-thin outline that loses its compass shape after sun exposure. For shows and summer wear, a boat-neck tank top leaves the shoulder visible and protects the area from straps that might irritate healing skin.
9. Negative-Space Arrow on the Side of Finger
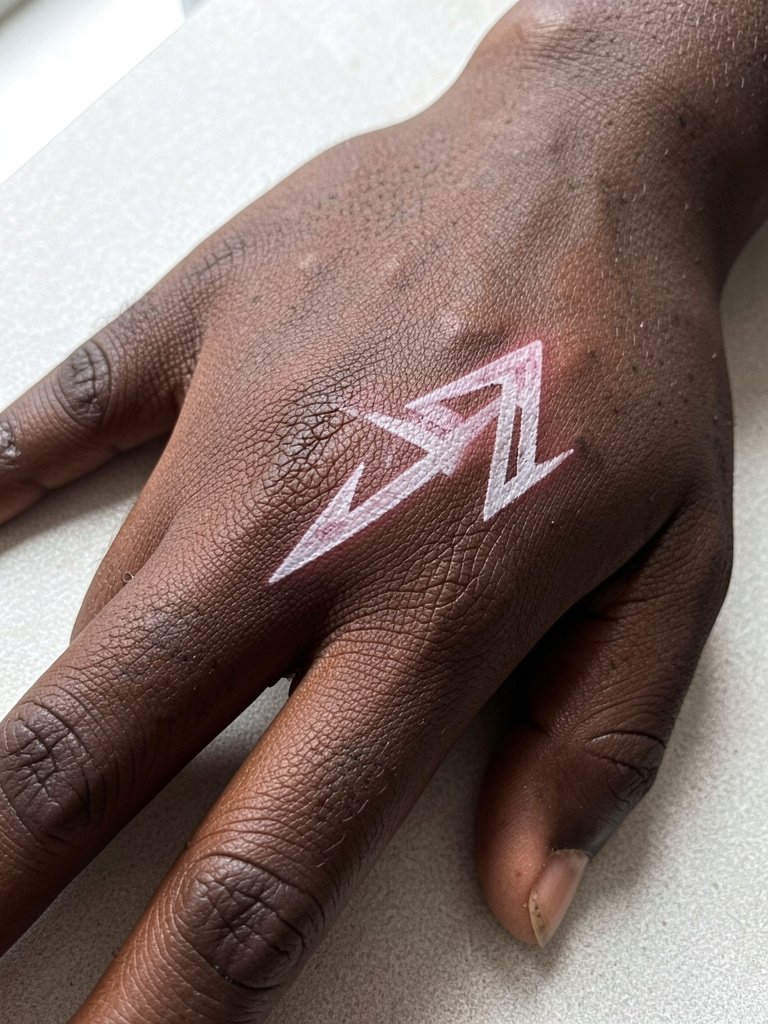
Finger work is high maintenance. Pain is moderate and sessions are short but often require touch-ups. The usual error is placing intricate detail on a tiny canvas; white ink needs clear negative space to avoid merging from daily hand use. Discuss exact scale so the artist can show how it will age at six months and two years. Because finger tattoos face constant washing and abrasion, anticipate a touch-up within the first year. For showing the arrow, slim rings and open-finger gloves are complementary, and a pair of minimalist stacking rings keeps attention on the small piece without overwhelming it.
10. Subtle Solar Symbol on the Nape
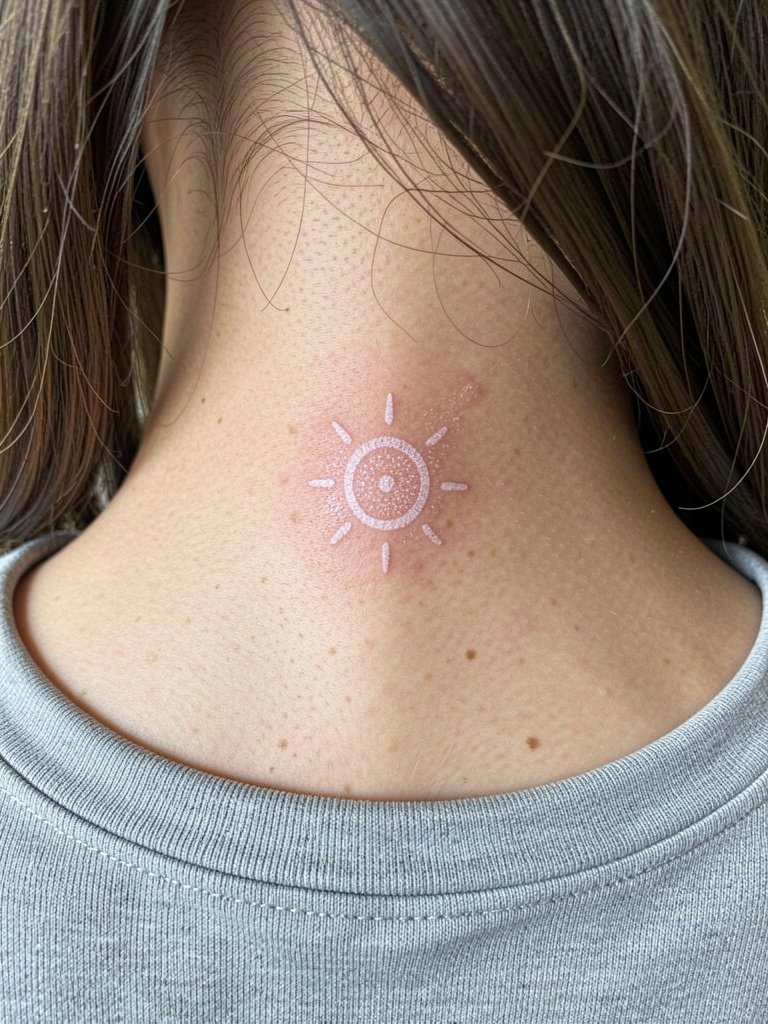
Nape placements sit at a moderate pain level and are discreet unless hair is up. The piece typically needs 30 to 60 minutes. A mistake is crowding rays too finely; wider rays and a small stipple core keep the sun readable as the skin moves. For the session, bring a hairstyle that the artist can easily pin up without tugging the area. In terms of showing it off, open-back tops or high buns work well without rubbing, and a lightweight silk scrunchie keeps hair up without roughing the skin.
11. Whispered Wave on the Side Rib
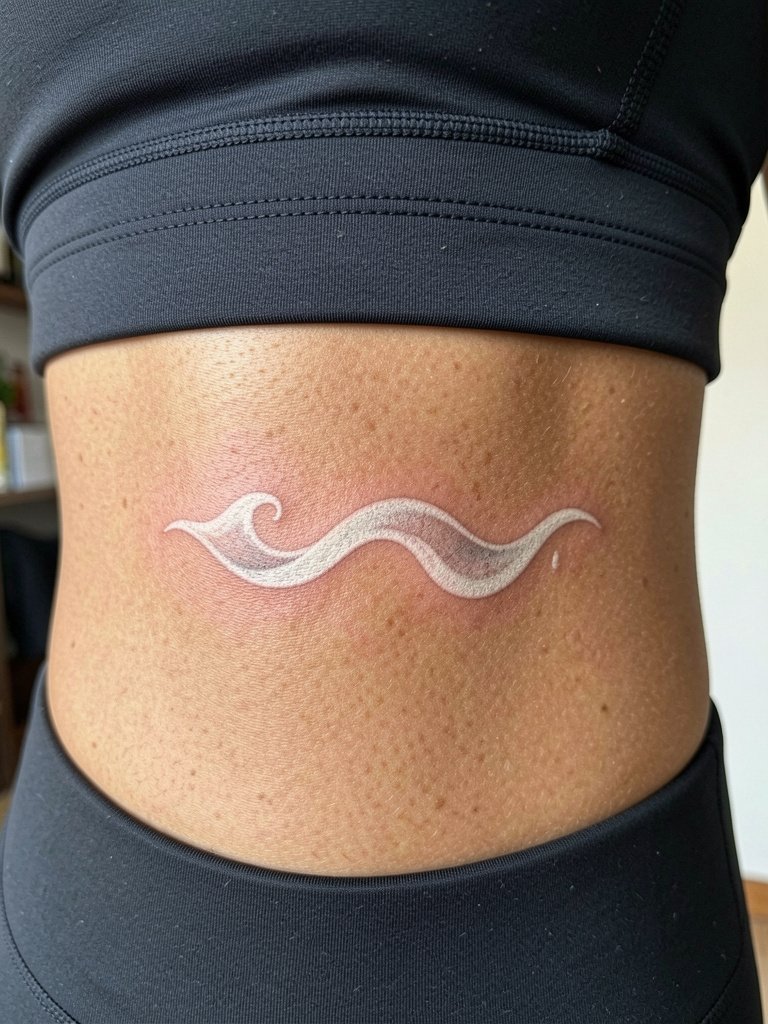
Side ribs create elegant, slightly private pieces but the skin moves. Expect a higher pain score and sessions that range from 90 minutes to three hours for larger layouts. One common error is requesting extremely fine tapering that disappears as the skin flexes and the lines relax. Ask for a demonstration of how the curve reads when you inhale and exhale so the artist can place the peak in a stable plane. For after healing, crop tops and low-rise bottoms frame the area; try a cropped knit top to reveal the wave without constant abrasion.
12. Whispered Constellation on the Inner Bicep
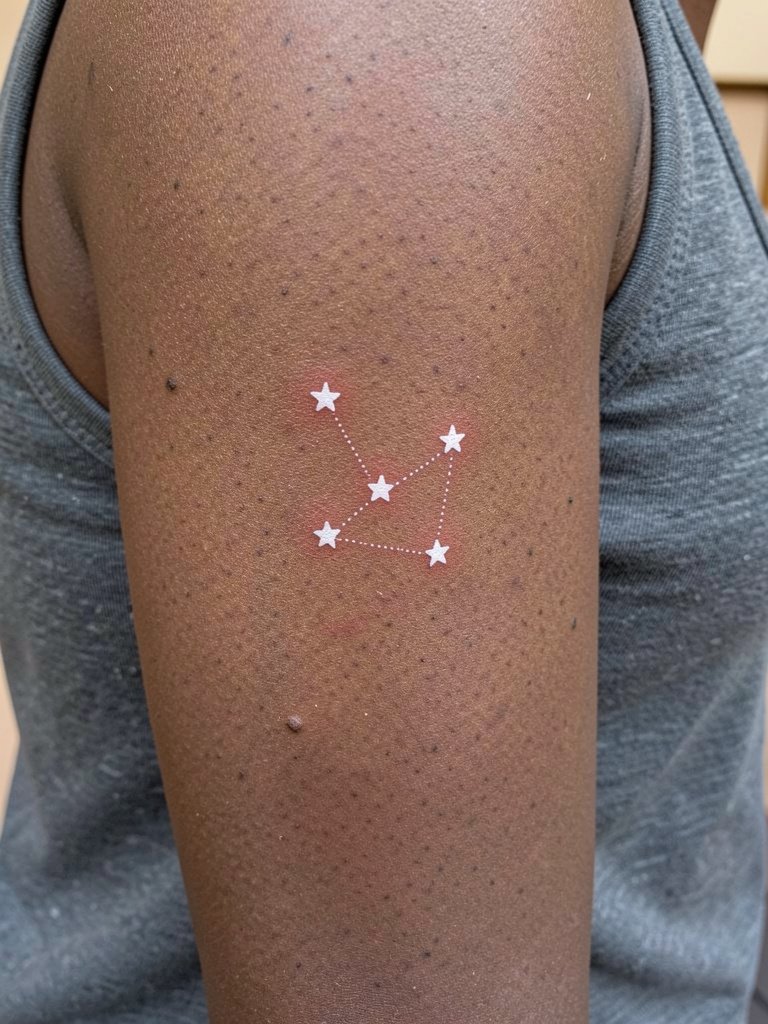
The inner bicep holds subtle white ink well if scaled correctly. Pain is moderate and sessions run 45 to 90 minutes. The frequent mistake is crowding dots and lines too tightly, which leads to blurring as the skin shifts. Ask the artist to space the connecting dots slightly wider than a normal line so the constellation still reads after movement. For comfort during the appointment wear a loose tank top that allows the arm to rest naturally. When healed, the area looks great with sleeveless shirts and a linen tank that keeps the piece visible without causing friction.
13. Pale Key on the Upper Thigh
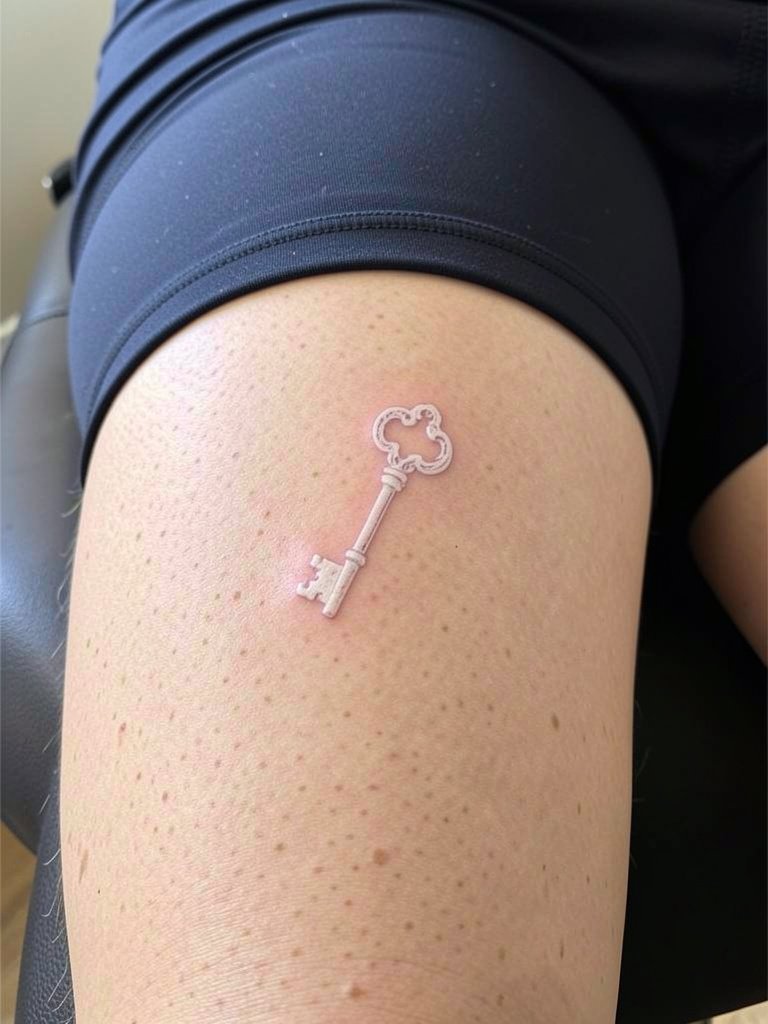
Upper-thigh pieces let you pick a size that ages well. The session is moderate in pain and may take 45 to 90 minutes. A common issue is placing too many filigree details that wash out; ask for simple key contours and reserved negative space. For the session wear shorts or pants that allow the artist to work without the fabric shifting. When you want to reveal the piece, slip dresses or skirts with a mid-thigh slit frame the key nicely, and a flowing midi skirt keeps it visible without constant rubbing.
14. Faint Mountain Silhouette on the Calf
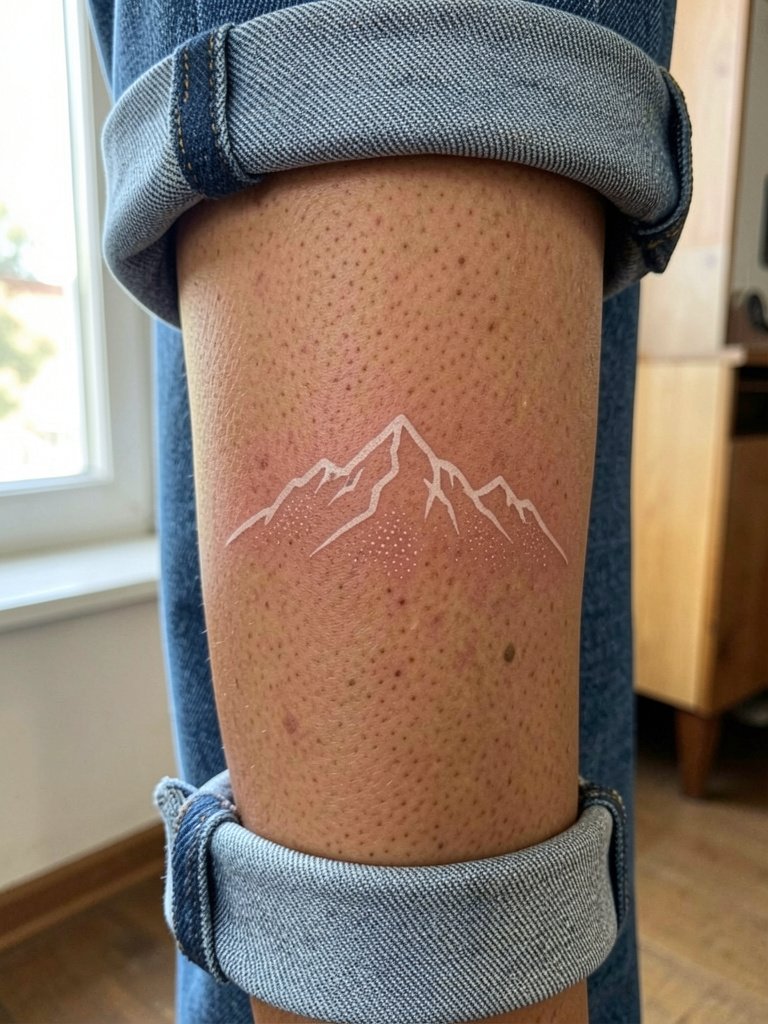
Calf placements are durable and read nicely with pale ink. Sessions are typically 45 to 90 minutes and pain is moderate. The mistake is drawing an overly detailed landscape that loses ground when scaled down. Instead choose a simplified silhouette with negative space peaks. Ask the artist to show how the ridge reads at both sitting and standing angles so it does not distort. For everyday looks, cropped trousers or summer dresses showcase the calf, and a pair of low-top canvas sneakers complements the outdoorsy feel.
15. White Ink Script on the Side of the Rib
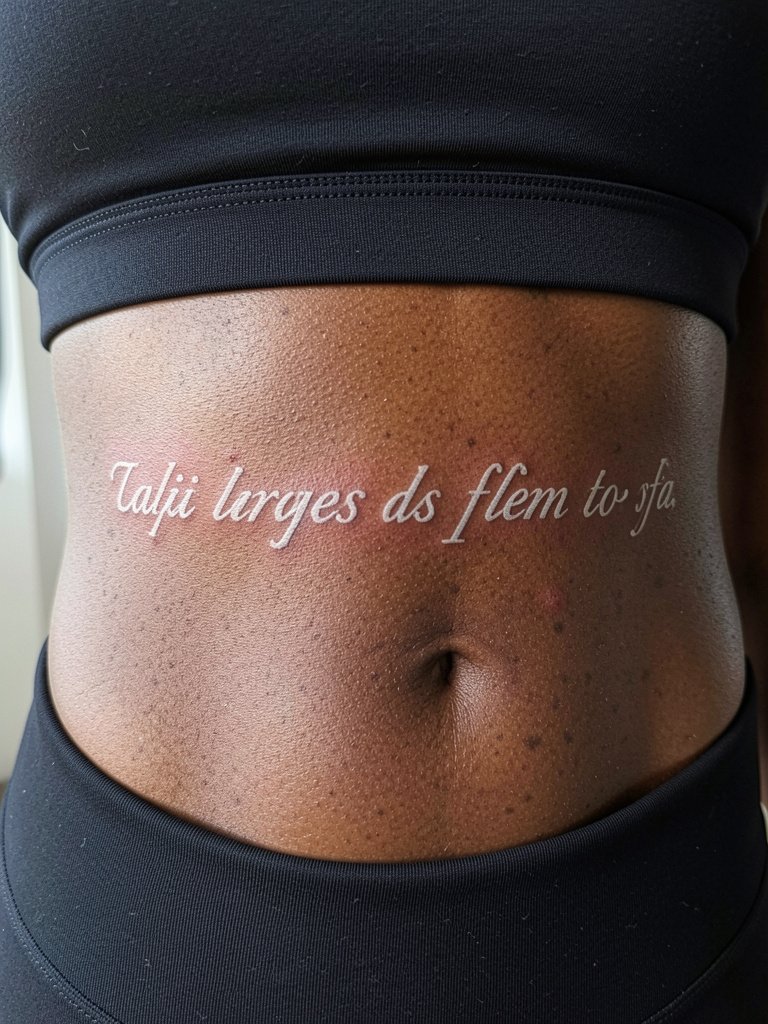
Side-of-rib scripts are intimate and demand placement strategy. Pain is higher and sessions may be one to two hours. The design that lasts uses slightly bolder downstrokes and planned spacing so letters do not migrate into shaded areas as the skin moves. A common misstep is insisting on ultra-thin italic without allowing the artist to thicken key strokes. For the appointment pick a supportive top that does not press on the area while you sit, and later consider pairing the healed script with off-shoulder tops or wrap blouses to let the piece show without daily abrasion.
Frequently Asked Questions
Q: Are white ink pieces permanent, or do they disappear after a few years?
A: It depends on technique, placement, and follow-up touch-ups. One group of artists treats white ink as inherently temporary and positions it as a seasonal accent that will soften fast. Another group plans for modest saturation and spacing and then offers a touch-up timeline to maintain the design. Expect some fading and plan a realistic touch-up within one to three years depending on placement.
Q: How does white ink behave on darker skin tones compared with lighter tones?
A: White ink reads differently across skin tones. On darker skin it often appears as a soft highlight or a pearly texture rather than stark white. That effect can be exactly what some people want and less visible for others. Ask for healed photos on similar skin tones and discuss slightly bolder outlines or stipple work if you need more definition.
Q: What should I wear to the studio for a rib or hip white ink session?
A: Wear clothing that gives the artist access without adjusting fabric during the session. For ribs and hips a fitted sports bra and low-rise jeans in their normal worn state work well. A lightweight zip-up hoodie is a practical top to throw on after the appointment without rubbing the new ink.
Q: Where can I find portfolios and healed examples for white ink without naming specific artists?
A: Search hashtags like #WhiteInkTattoo and #ToneOnToneInk on Instagram and TikTok, filter results by location to find shops near you, and read subreddit threads for long-term healed photos. Portfolio sites and community forums often let you view multiple healed shots and short clinic notes without needing to contact artists directly.
Q: How often do white ink pieces need touch-ups compared with black ink?
A: White ink usually requires touch-ups more often because contrast is lower to begin with. Small placements like fingers and wrists commonly need a touch-up in the first year. Larger, well-spaced pieces on the shoulder or calf might go two to three years before a touch-up. Expect the artist to recommend a realistic plan during consultation based on placement and your lifestyle.
