
Tiny, single-needle arrows look delicate on Instagram, but they often blur on high-movement skin unless planned with spacing and slightly heavier linework. Solid shafts and simple negative-space tips survive daily wear better than ultra-fine feather details. Read on for practical arrow placements, what to ask for in a consultation, and outfit pairings that actually show off the finished piece.
1. Fine Line Arrow on Inner Forearm
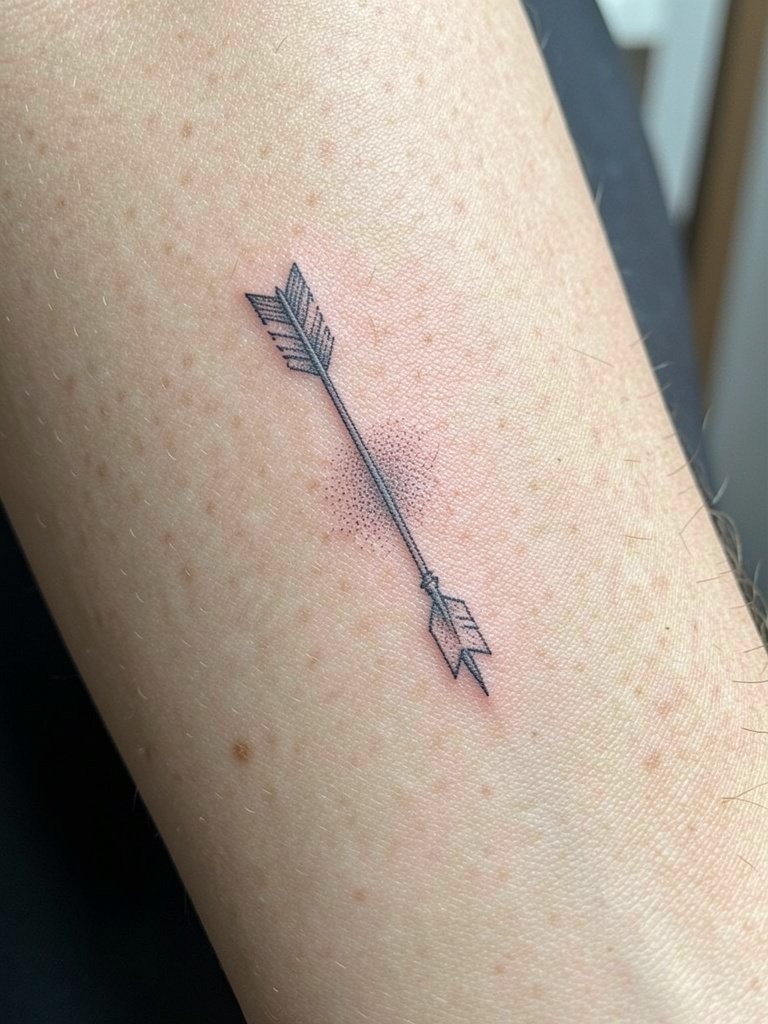
Start this one when you want a readable everyday piece that sits under bracelets and short sleeves. I recommend slightly heavier linework than the thinnest single-needle reference, because the inner forearm moves and rubs against surfaces. Bring two reference photos at different scales so the artist can show how the barbs read at three inches versus five. Expect light soreness for an hour and touch-up needs at year two for any faded micro details. For showing off, a rolled short-sleeve linen shirt keeps the arm visible without covering the design.
2. Arrow with Botanical Quiver on Outer Bicep
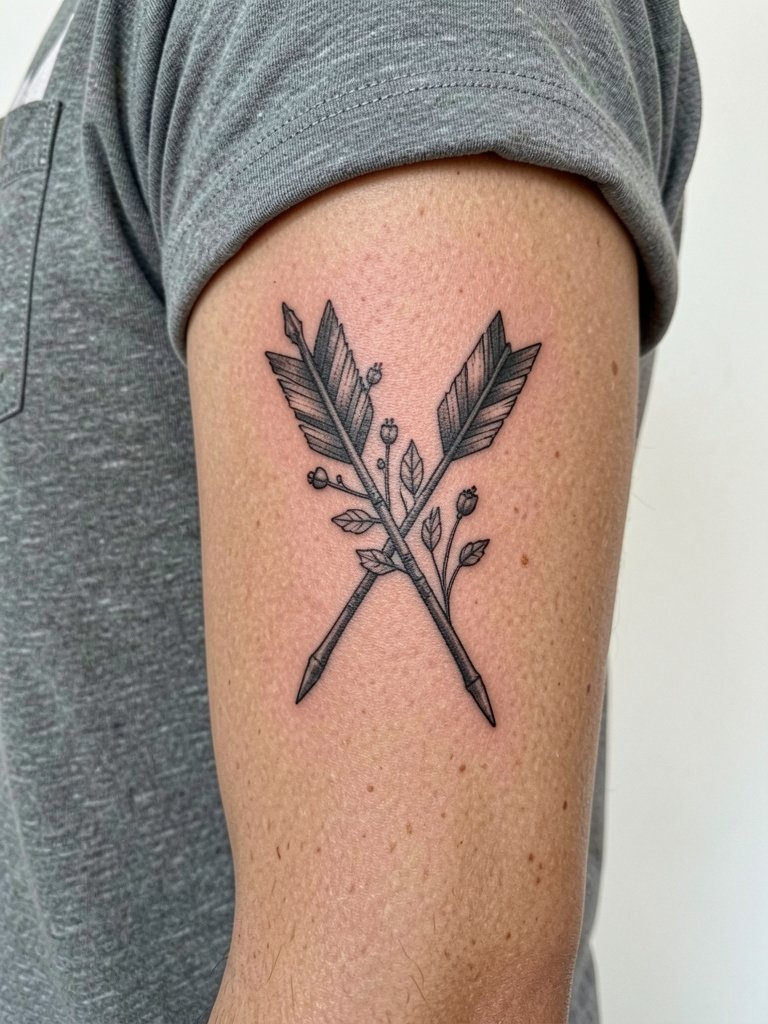
Choose this if you want a statement that still tucks under sleeves for formal settings. The outer bicep tolerates saturated shading, so ask for dense black in the shaft and stipple shading behind the leaves for long-term clarity. A common mistake is asking for ultra-fine leaf veins that merge after a year. Session time is often 60 to 90 minutes and pain rate is moderate because flesh there is forgiving. Pair the piece with sleeveless tank tops that let the quiver read cleanly at arm-rest angle.
3. Tiny Arrow Behind the Ear
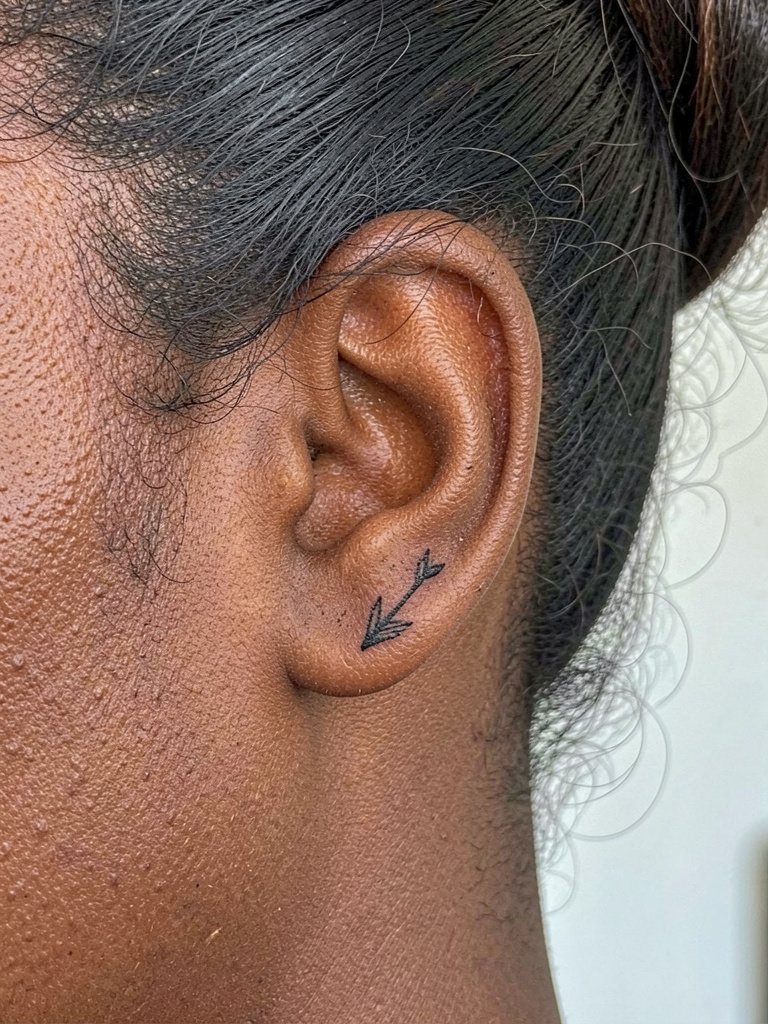
This discreet placement suits someone who wants an intimate accent visible only with pulled hair. The skin behind the ear is thin and requires a confident single-needle artist. Bring the exact font or arrow head reference because small shifts in angle show up quickly. Expect a short session under 30 minutes and a crisp touch-up after six to twelve months if any pinprick dots fade. For photos and nights out wear high ponytail elastics that keep hair off the nape.
4. Wrapped Arrow Around the Wrist
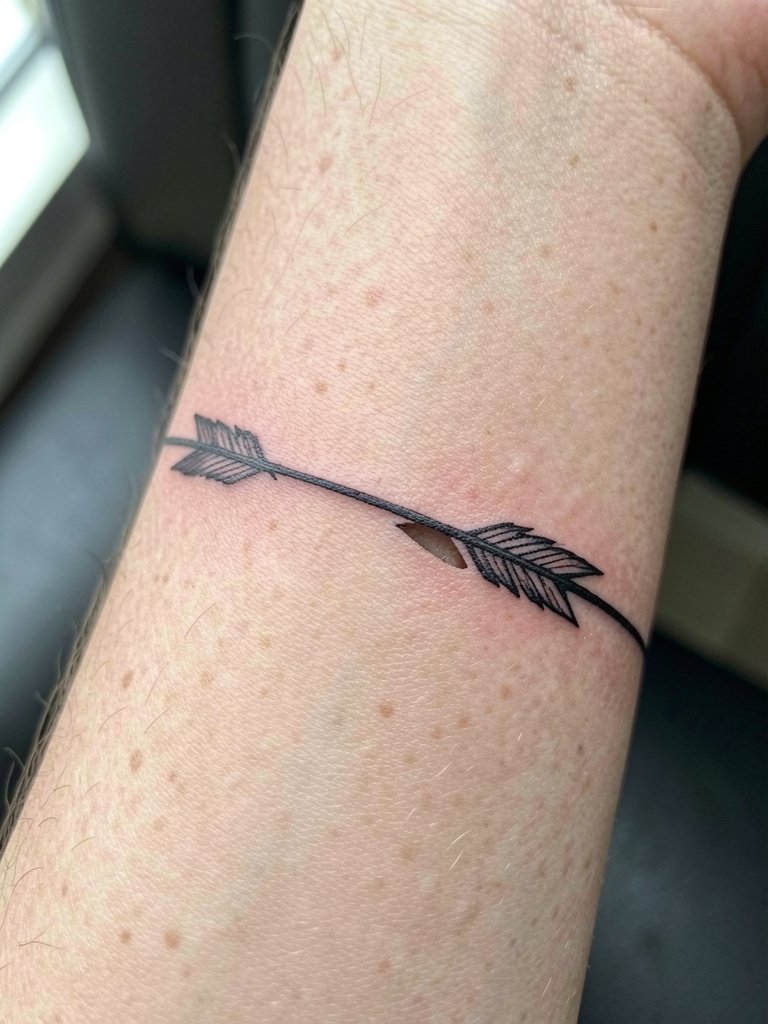
Wrist wraps read like jewelry but they face constant washing and friction. I recommend a modest gap under the wrist to prevent the cuff from becoming a solid blurred band in a few years. Ask for slightly bolder shaft work and avoid micro-stippling in the feather. Expect high visibility in day-to-day life and quick fading if you frequently wear bracelets that rub. Session time is 30 to 45 minutes and a touch-up within the first year is common. Pair with delicate chain bracelets so the tattoo and jewelry complement each other.
5. Compass Arrow at the Collarbone
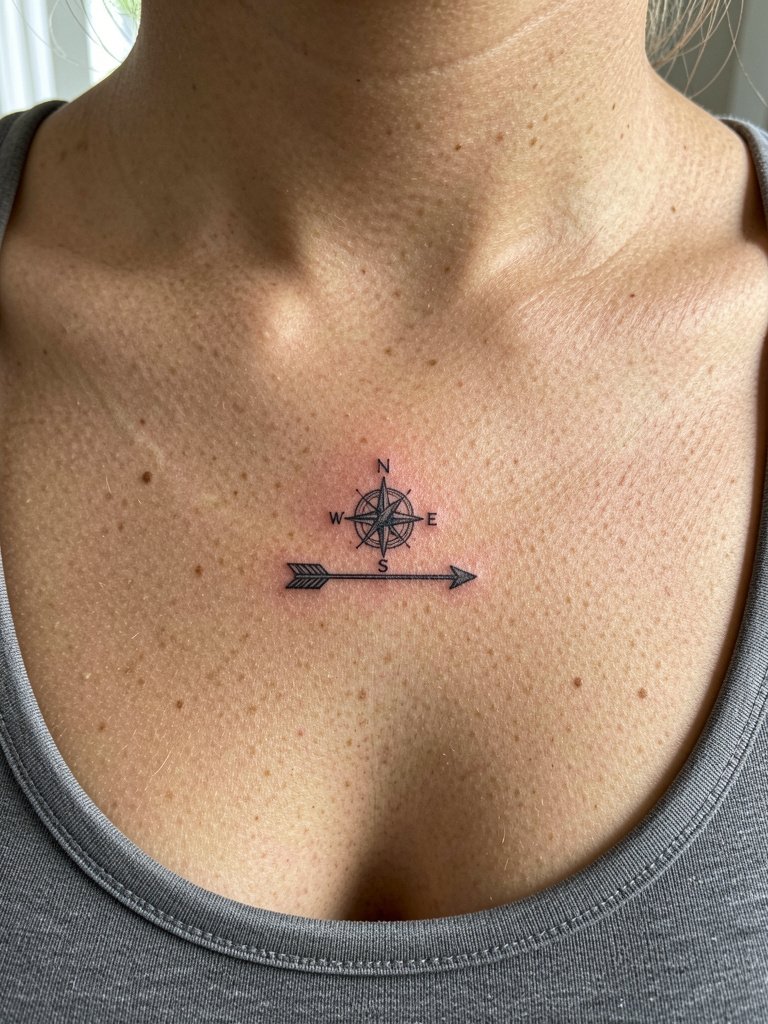
This spot reads as an intentional accent with open necklines. The collarbone moves with breathing so ask for a small but solid compass center rather than fragile filigree. A common mistake is requesting ultra-tiny compass points that blur when skin shifts. Expect moderate pain during a 45 to 75 minute session and plan a touch-up at two years if tiny points soften. For nights out, choose wide V-neck tops that frame the piece.
6. Geometric Arrow Sleeve Accent
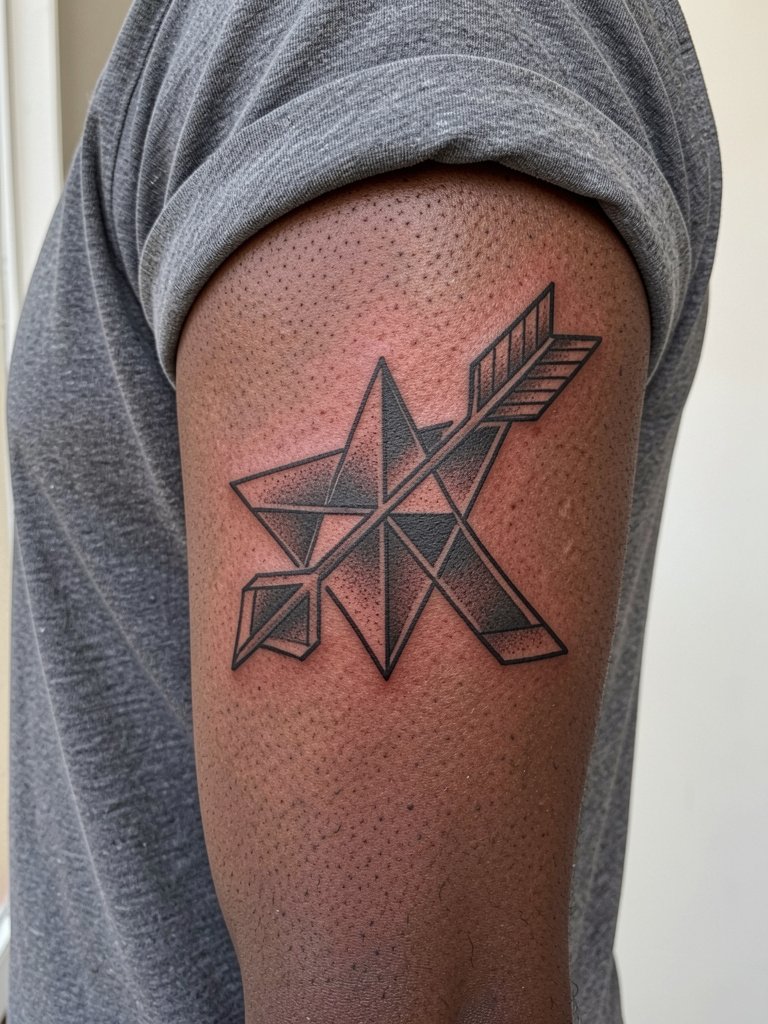
Geometric arrows integrate well into sleeves by anchoring with a heavy shaft that reads under color and shading. When you want a sleeve accent, bring a placement map so the artist can plan negative-space breathing room for future expansion. A mistake is squeezing too many tiny triangles into the shaft, which look muddy after a few years. Sessions run 60 to 120 minutes depending on surrounding fills. Show it off with rolled linen short sleeves that reveal the upper arm patch without hiding it.
Session Day Picks
The ankle, forearm, and collarbone pieces above have different care during the appointment. A few targeted items smooth the session and the first week.
-
Stencil transfer paper kit. Lets you preview the exact line placement on skin for inner forearm and collarbone pieces before any needle touches the area.
-
Topical numbing cream. Apply per label about 45 minutes before the session for sensitive wrist and rib placements to reduce the shock without altering linework.
-
Thin protective film roll. Keeps ankle and wrist tattoos clean during the first week of friction from socks and daily handwashing.
-
Fragrance-free gentle body wash. Cleanses healing areas without irritating the fresh linework on forearms and chest.
-
Aquaphor Healing Ointment. Thin application for the first few days helps lock in moisture for single-needle pieces without clogging needle channels.
7. Constellation Arrow on the Ribcage
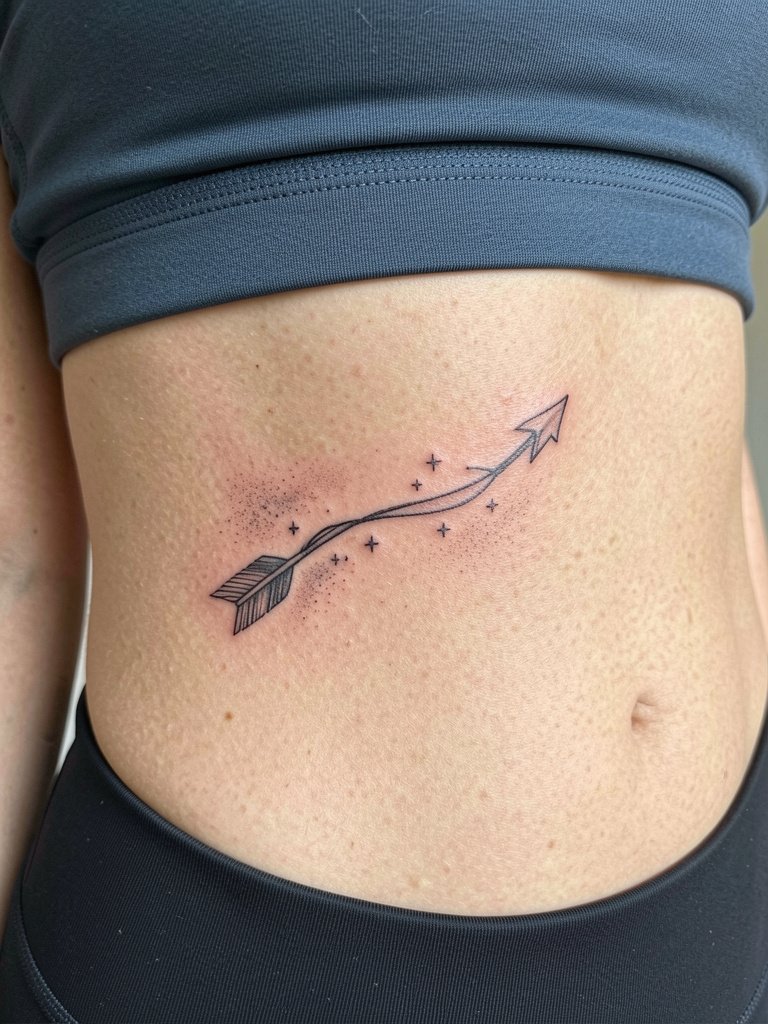
Ribcage arrows are dramatic but they come with a trade-off. Fine-line fans are split into two camps. One camp argues that the skin stretch and constant flexing blur fine lines within two years, especially near the breast crease. The other camp insists that slightly wider spacing and precise needle depth let fine-line rib pieces settle well, and they will show healed photos to prove it. Expect a higher pain rating and a longer session break plan, and plan a touch-up around year two if any of the tiny star dots spread.
8. Minimal Arrow Along the Side of the Finger
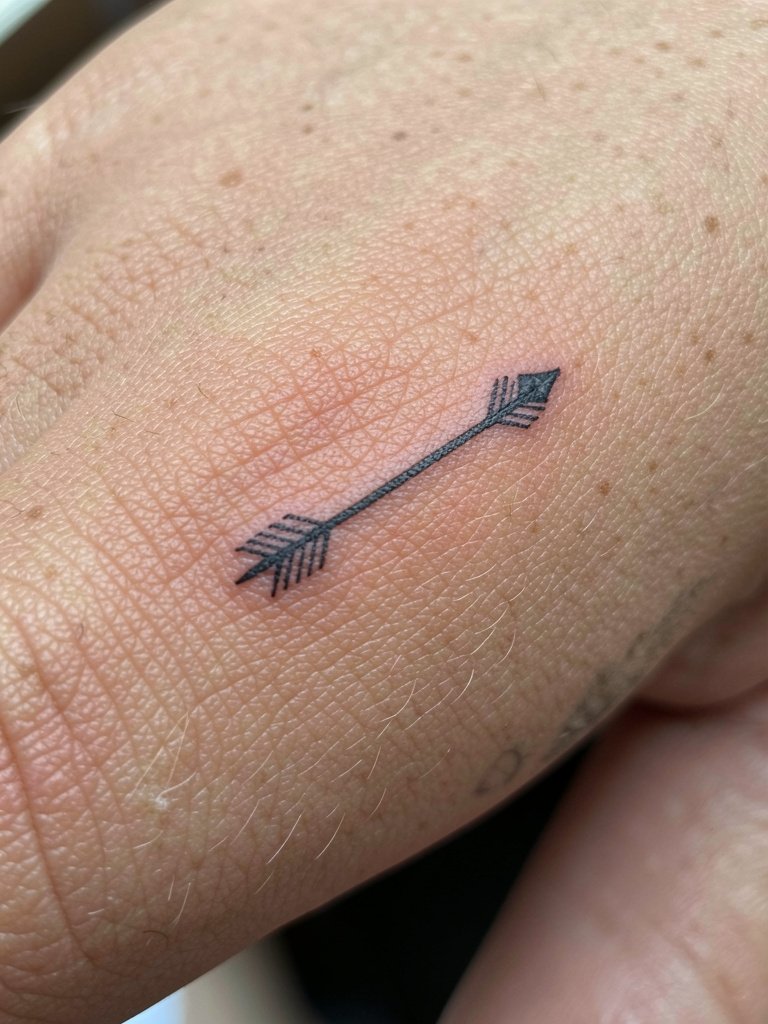
Finger arrows are fashion-forward but high maintenance. The skin on fingers sheds and moves so expect faster fading and more frequent touch-ups. A common mistake is asking for fully filled black on the side of a finger which often peels unevenly during healing. For this placement ask for a simple shaft with clean negative-space feather and plan for a touch-up within six to twelve months. Session time is short but the healing week requires gentle washing and minimal soaking. Pair with slim adjustable ring bands that do not press directly over the tattoo.
9. Arrow with Watercolor Wash Behind It
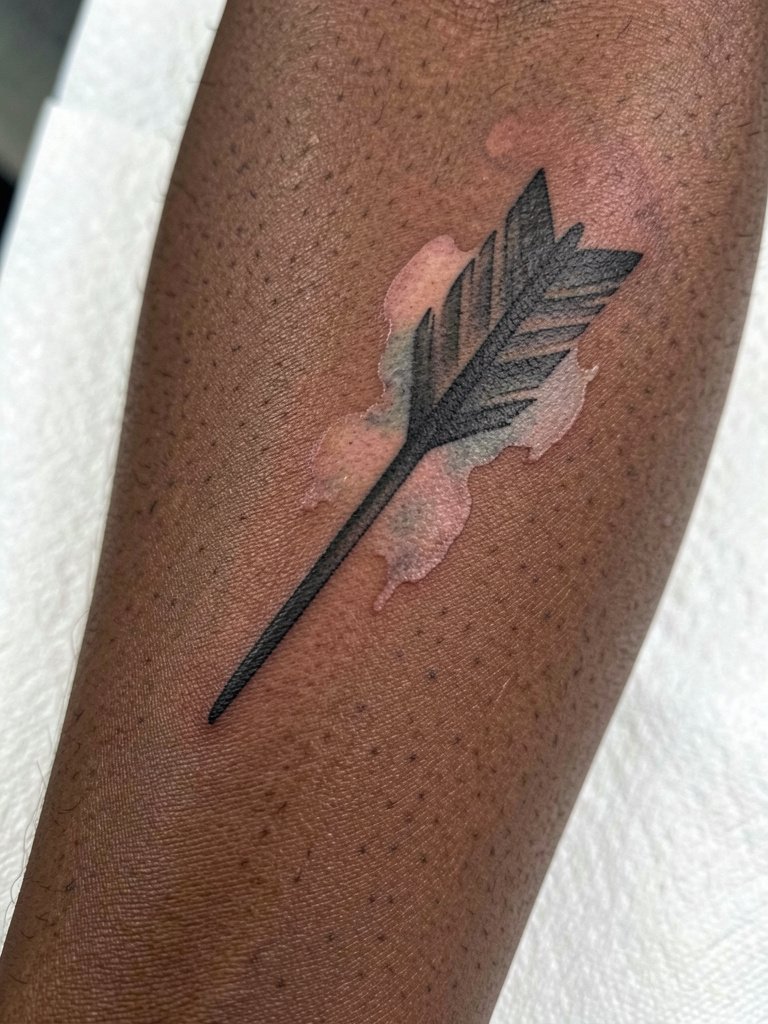
Watercolor behind a bold arrow gives the visual pop of color without relying on fragile line detail. The trick is keeping the shaft saturated and the wash soft. Ask the artist to outline the arrow shaft in a slightly denser black so the color can fade without the silhouette losing clarity. Watercolor fades faster on high-sun areas, so expect more frequent refreshes if you like saturated hues. Session time varies with color layering, often 90 minutes. Wear short-sleeve crop tops for easy showing and minimal rubbing during healing.
10. Traditional Black Arrow on the Calf
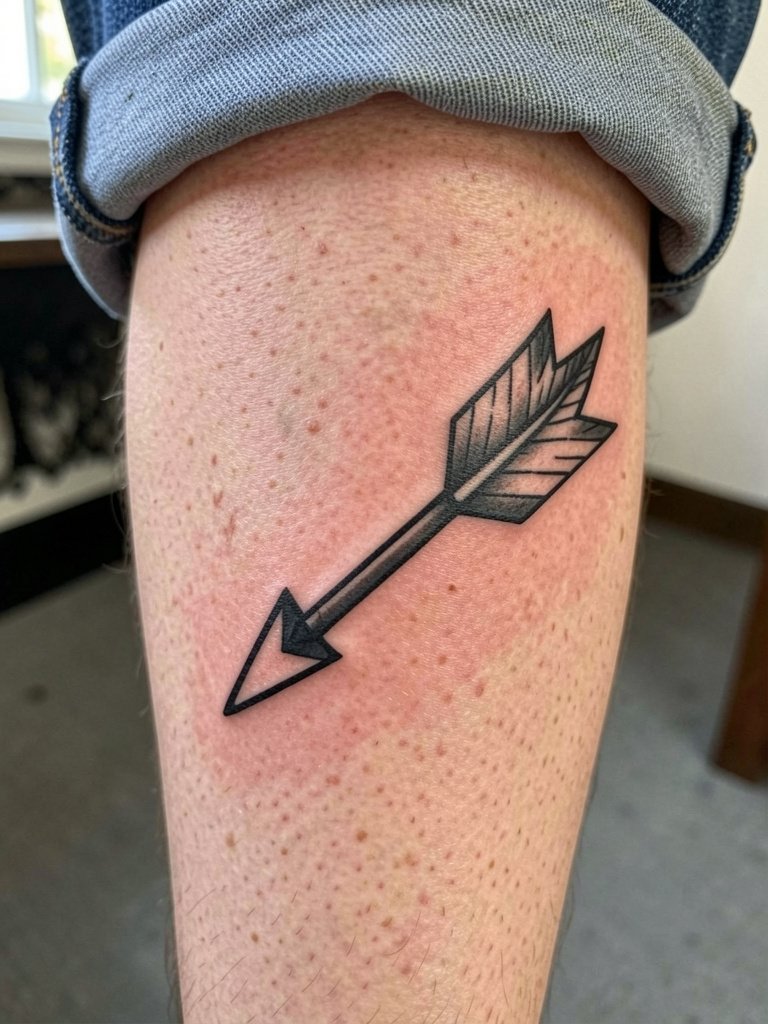
The calf takes heavy black work well and often ages better than thin-line placements due to thicker skin. If you want longevity, traditional black fills are a solid choice because saturation holds. A mistake is asking for tiny feather details that lose definition when the calf muscles change shape. Sessions are comfortable for most people and touch-ups may be years apart. For warm months, wear mid-calf boots or rolled jeans that keep the area visible without constant abrasion.
11. Arrow Through a Tiny Floral Mandala
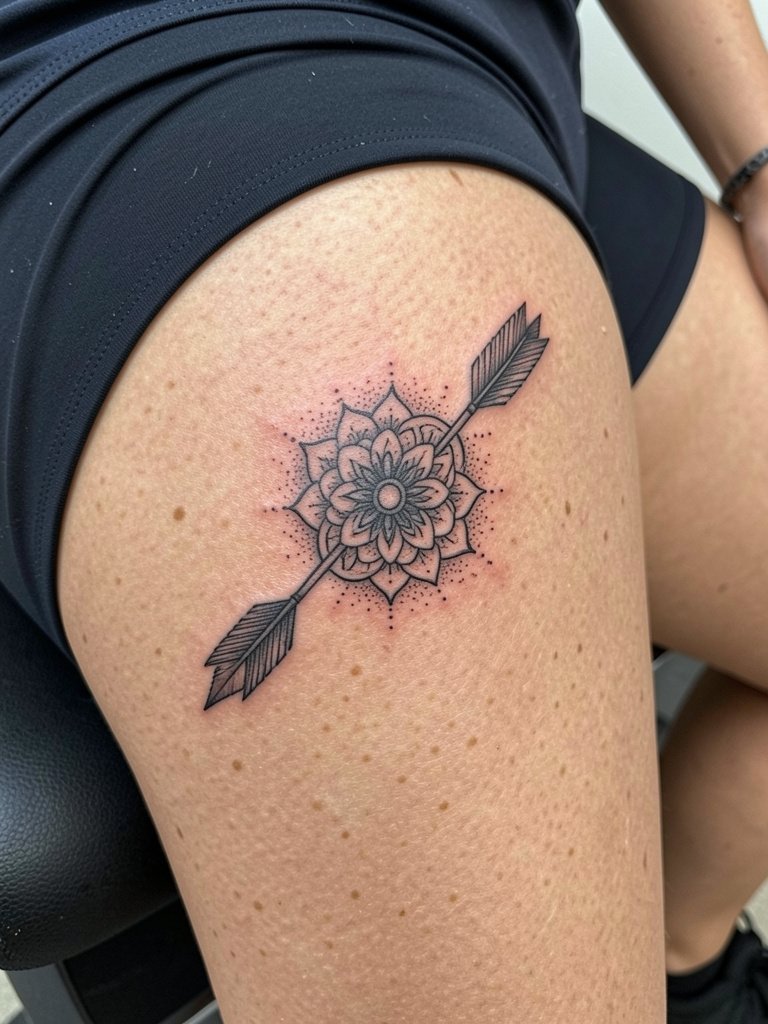
Pairing an arrow with a mandala gives a directional focus to a circular motif. Because mandalas have cultural origins, artists and clients often debate appropriate use. One group argues that mandala elements are universal and can be respectfully adapted with credit to traditional patterns. The other group says certain indigenous and sacred motifs should not be used without direct cultural permission or lineage. When choosing this, request clean spacing between the mandala petals and the arrow shaft so both read at six months and at three years. For sessions in the inner thigh wear modest athletic shorts so the artist has access without fabric shifting.
12. Arrow and Script Along the Ribcage
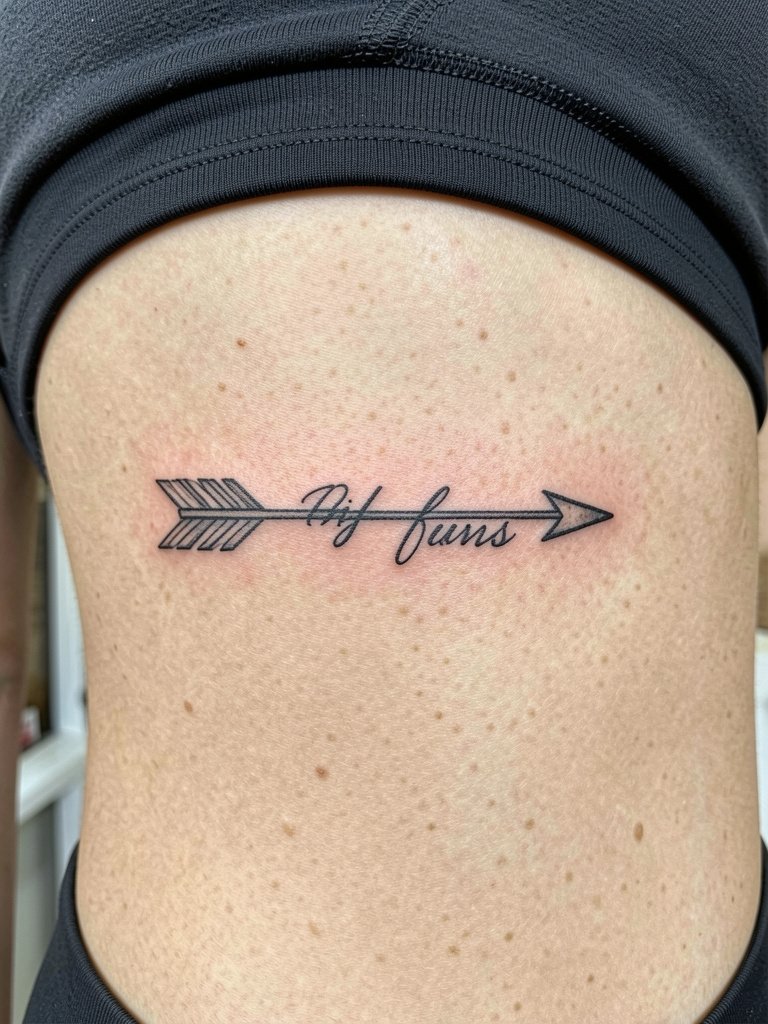
Combining script with an arrow on the ribs can look elegant if the lettering is sized correctly for skin movement. Avoid ultra-thin cursive that relies on hairline strokes. Instead ask for slightly thicker script strokes and consistent spacing from the arrow so the type does not merge into the shaft as the skin stretches. Plan for a longer appointment and consider numbing for comfort. Expect to consider a touch-up for letter clarity after the first year. Choose a cropped sports bra on session day so the artist can access the area without fabric getting in the way.
13. Arrow with Tiny Bead Accents on the Ankle
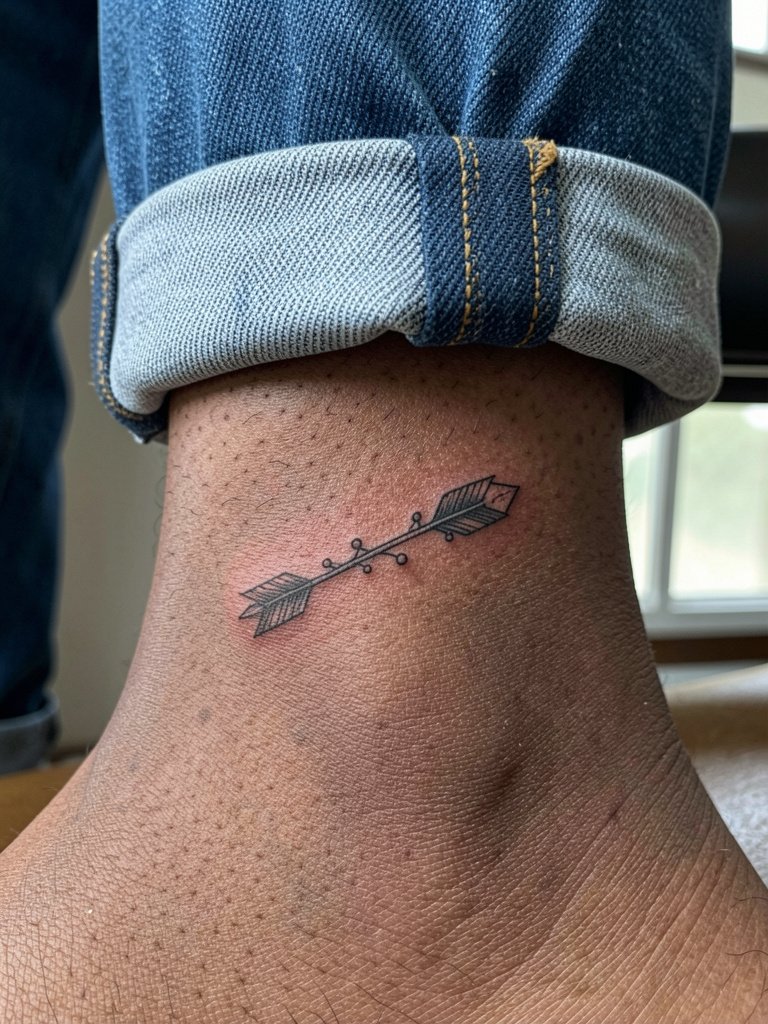
Beaded details add delicate ornamentation to an ankle arrow, but tiny dots fade fast with friction from socks and shoes. A smart approach is to use slightly larger bead spacing and denser ink in the shaft so the beads remain readable. Sessions are short and pain is variable depending on proximity to bone. Expect a first-year touch-up for dot clarity. For styling, ankle arrows pair well with delicate anklets that sit above the tattoo without rubbing.
14. Double-Ended Arrow Across the Sternum
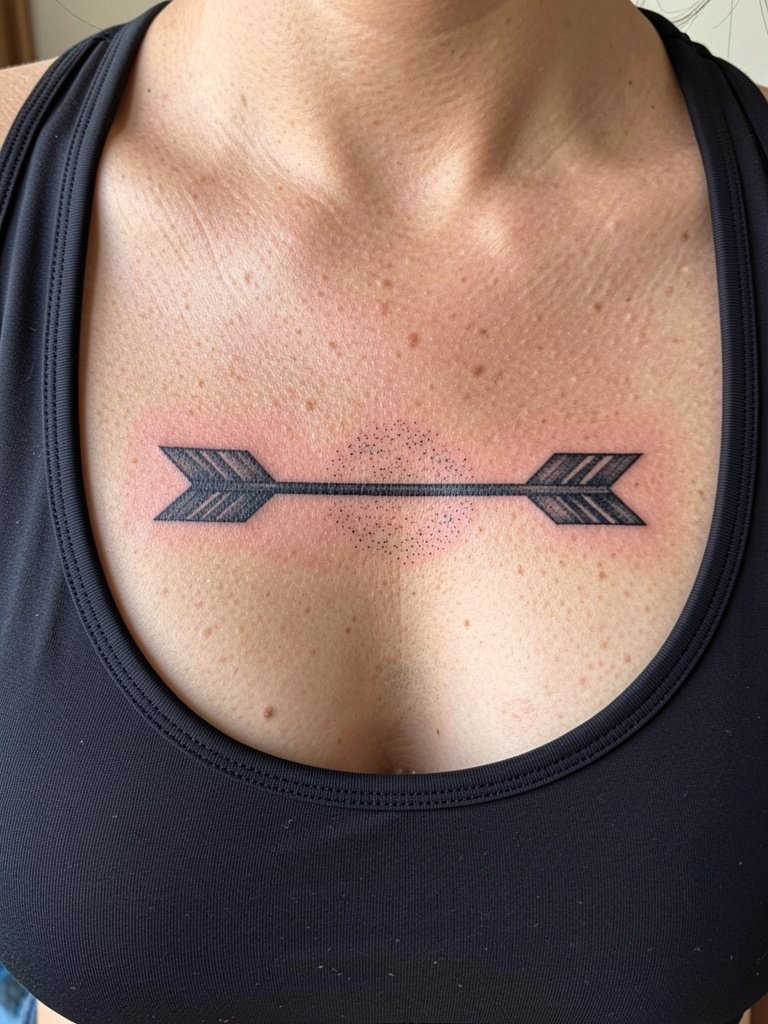
Sternum arrows make a bold centerline statement but expect a higher discomfort level. The area flexes with breathing and can make ultra-fine details bleed into shaded areas over time. Request a strong central shaft and limit tiny feather ornamentation to avoid early softening. Sessions often require breaks and a numbing timeline discussion such as 45 minutes pre-application. For showing the pearl-line placement try low-cut or wide-neck daywear like bandeau tops that reveal the piece without tugging fabric.
15. Tribal-Inspired Arrow with Respectful Attribution
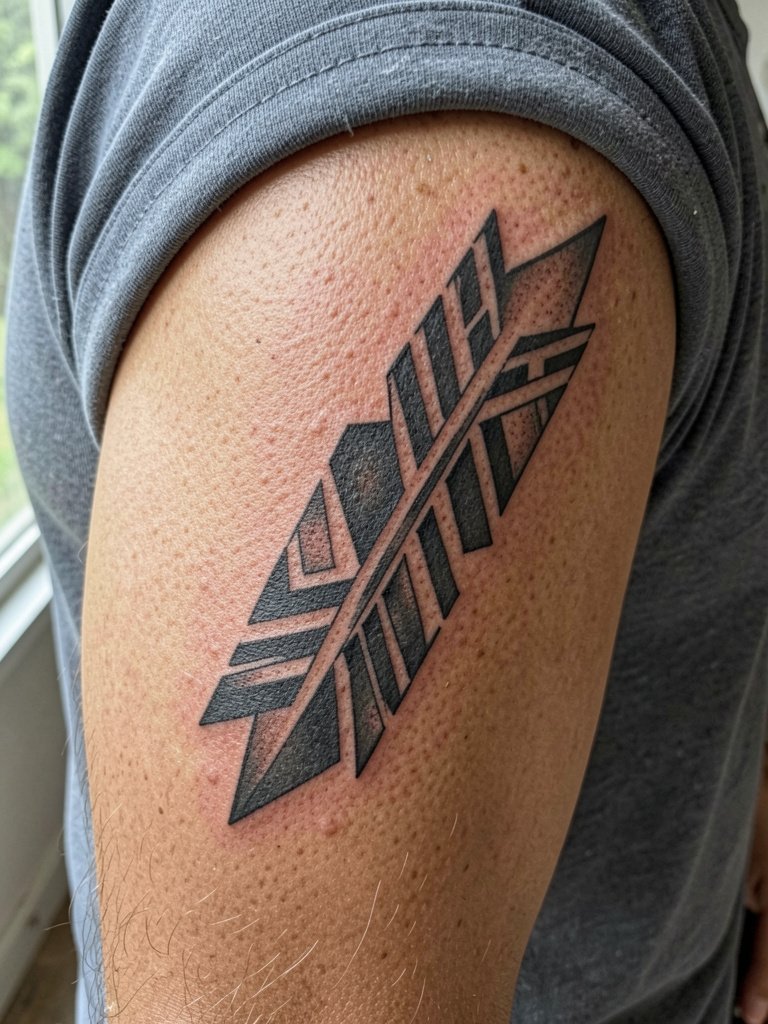
When a design draws from tribal visual language, some artists and clients advise proper cultural sourcing. One camp feels that geometric motifs are widely shared and can be adapted respectfully with clear credit and study of origins. The other camp argues that specific indigenous patterns hold sacred meaning and should not be used without community permission. If you want a tribal-inspired arrow, discuss origins and provide context on the reference motifs. Also ask for distinct spacing and heavier black blocks so the chevrons remain crisp over time. Wear boxy tees with rolled sleeves to make the bicep piece visible.
16. Micro-Realism Arrow with Tiny Landscape Inside
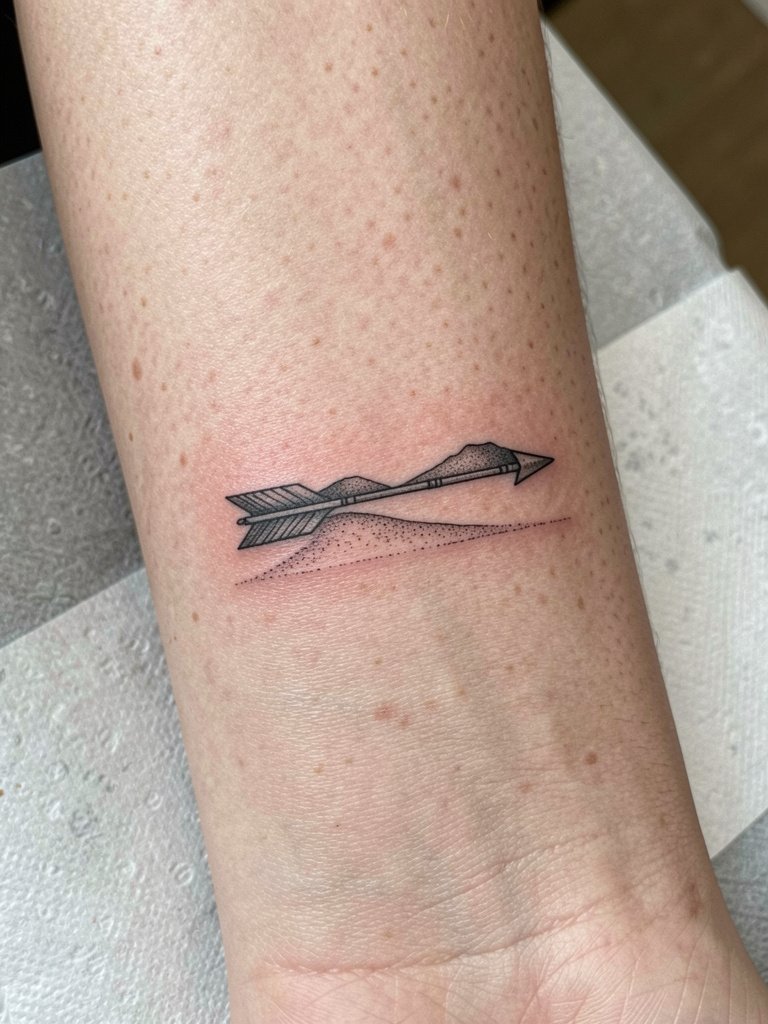
Fitting micro-realism scenes inside an arrow is a fresh angle that reads like a tiny window. The risk is over-detailing, which can turn into a blur when the negative space is reduced. Ask the artist to scale down complexity to high-contrast elements rather than tiny gradients. Sessions can take 60 to 120 minutes depending on complexity and precision. Expect a touch-up at year two to restore any lost micro lines. For display, short-sleeve linen shirts make the inner forearm visible while keeping the overall outfit soft.
17. Arrow as Part of a Stacked Wrist Set
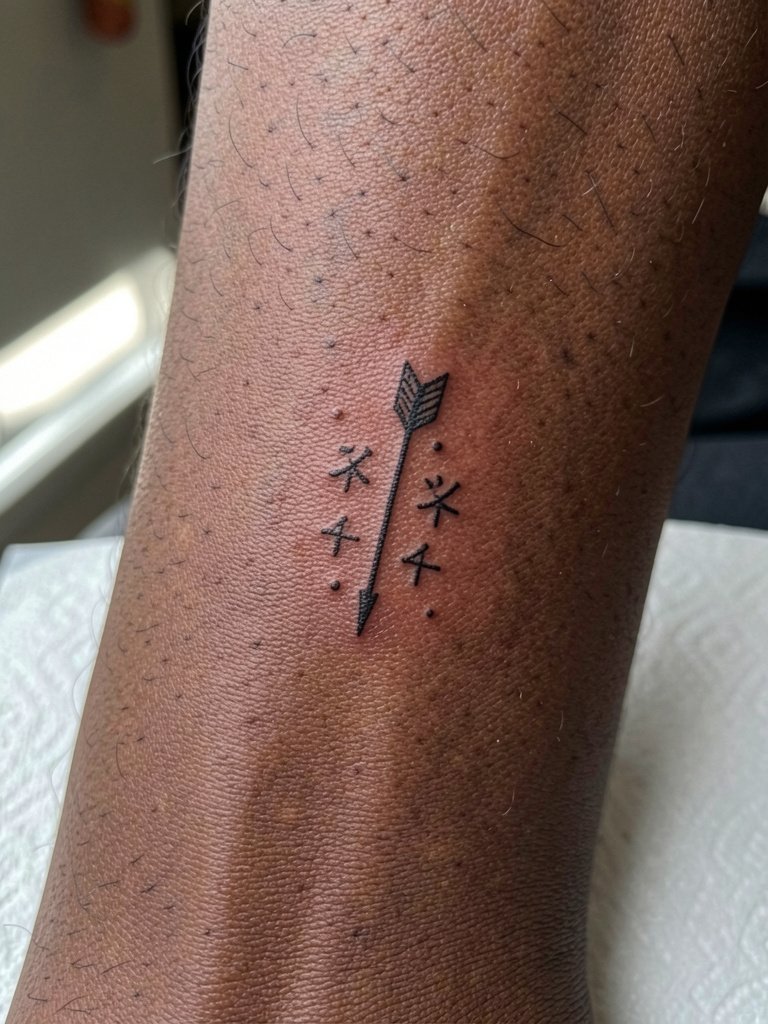
Stacked wrist sets let an arrow sit alongside other tiny symbols for a curated look. Keep spacing deliberate so the pieces do not merge into a single dark band. When planning, supply the artist with the exact list and order you want so negative-space margins are preserved. Expect multiple short sessions if you spread the work over time. For daily wear choose thin stackable bracelets that complement the row without rubbing the tattoo.
18. Arrow with Minimalist Feather on the Neck
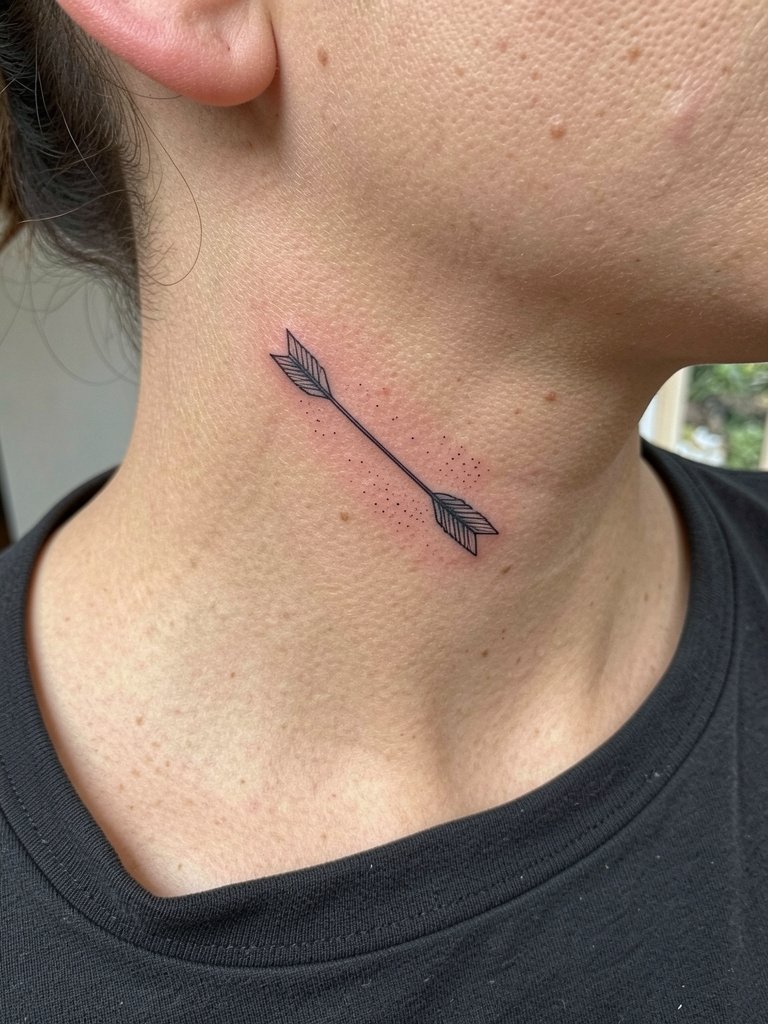
Neck arrows are visible and carry social implications in some fields, so consider placement carefully. The skin on the neck is thinner which can affect how fine lines settle. Ask for slightly wider feather lines and a confident outline so the silhouette reads at a distance. Sessions are brief but discomfort is higher than on the arm. For a wardrobe match choose wide-neck blouses that expose the side neck without fussing with collars.
19. Arrow Piercing a Tiny Crescent Moon
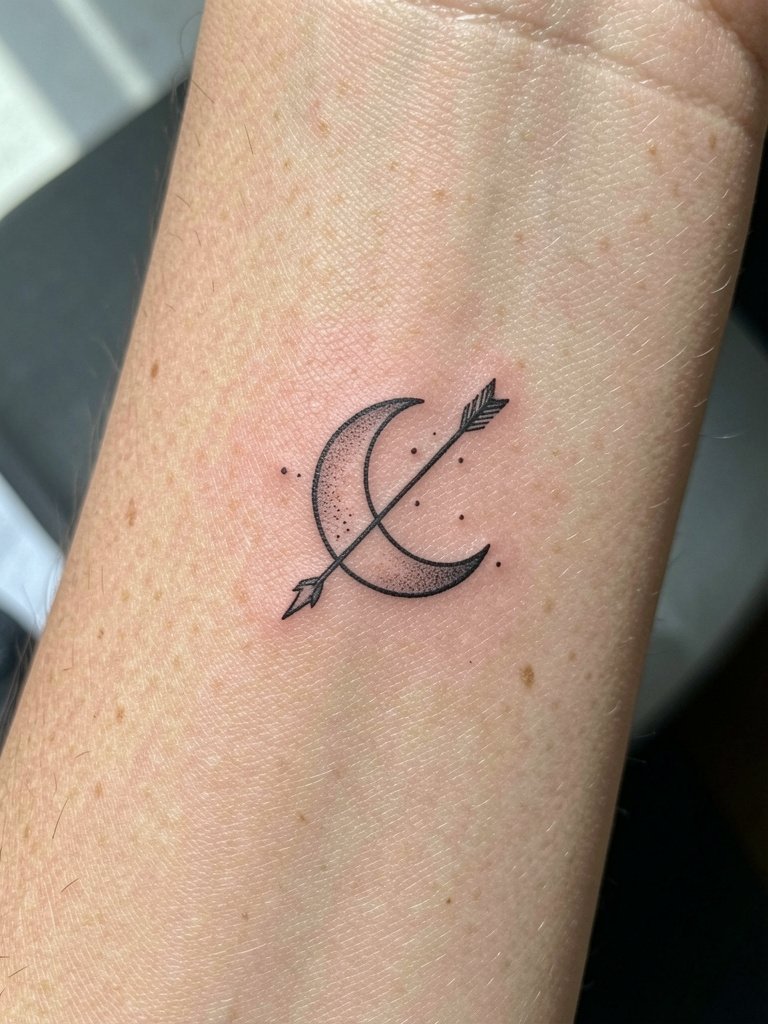
Combining celestial motifs with arrows gives a subtle narrative without adding bulk. The inner wrist's movement and frequent washing mean that small crescent edges can soften, so request a slightly thicker moon outline to preserve shape. A typical session lasts under an hour and you should expect a six- to twelve-month touch-up for crispness. For showing the tiny moon wear rolled long-sleeve tees or bracelets that draw the eye inward.
20. Barbed Arrow on the Shoulder Blade
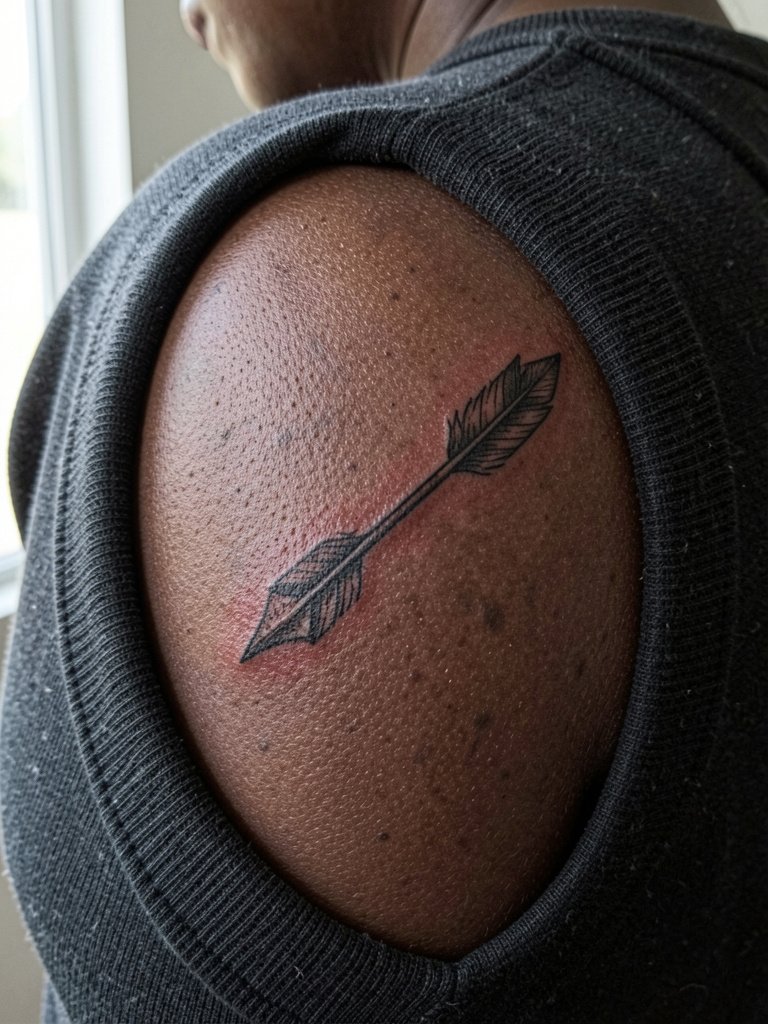
The shoulder blade is a forgiving canvas for mid-sized arrow designs and holds bold black quite well. If you want the barbed details to stay clean, leave breathing room between barbs and avoid tight micro-shading in the barbs themselves. Sessions are comfortable for most and touch-ups are infrequent. For photos pair with off-shoulder tops that reveal the upper back without tugging at the skin.
21. Arrow with Coordinates at the Ankle
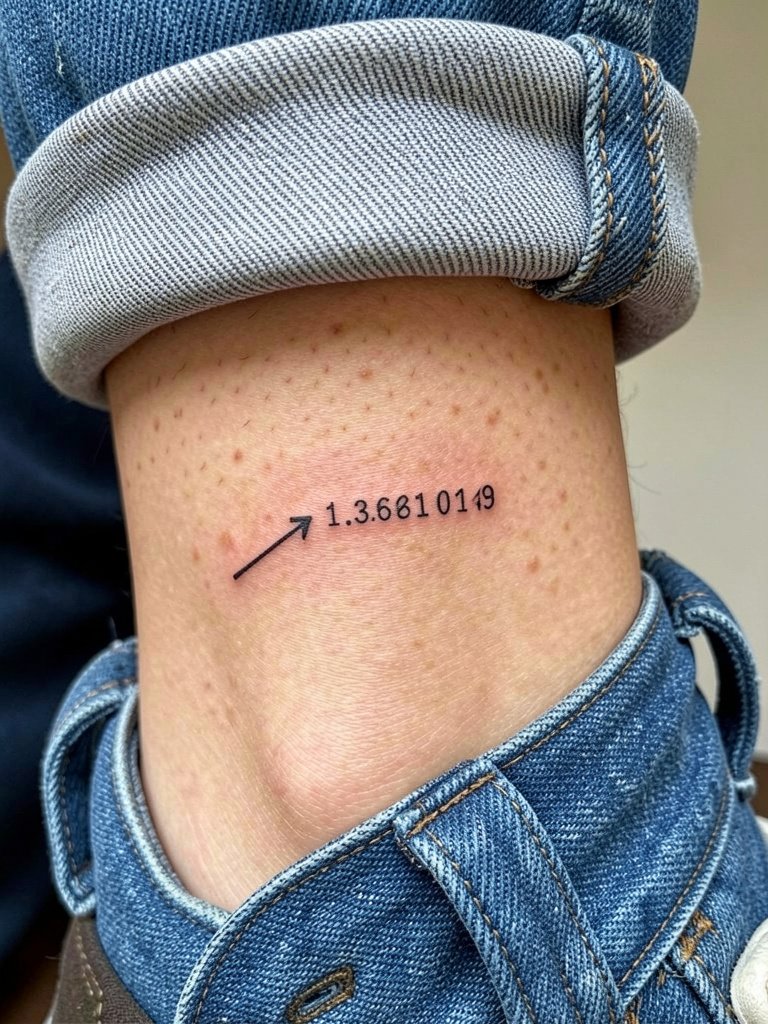
Coordinates add personal specificity to an arrow piece. If you include numbers, ask the artist to use a readable monospace size that will remain legible as the skin ages. Tiny numerals that are too close together often blur. Sessions are quick and usually under 45 minutes. For everyday wear, pair with thin ankle socks and low-cut sneakers that do not rub the exact location.
22. Arrow with Invisible Ink Accents
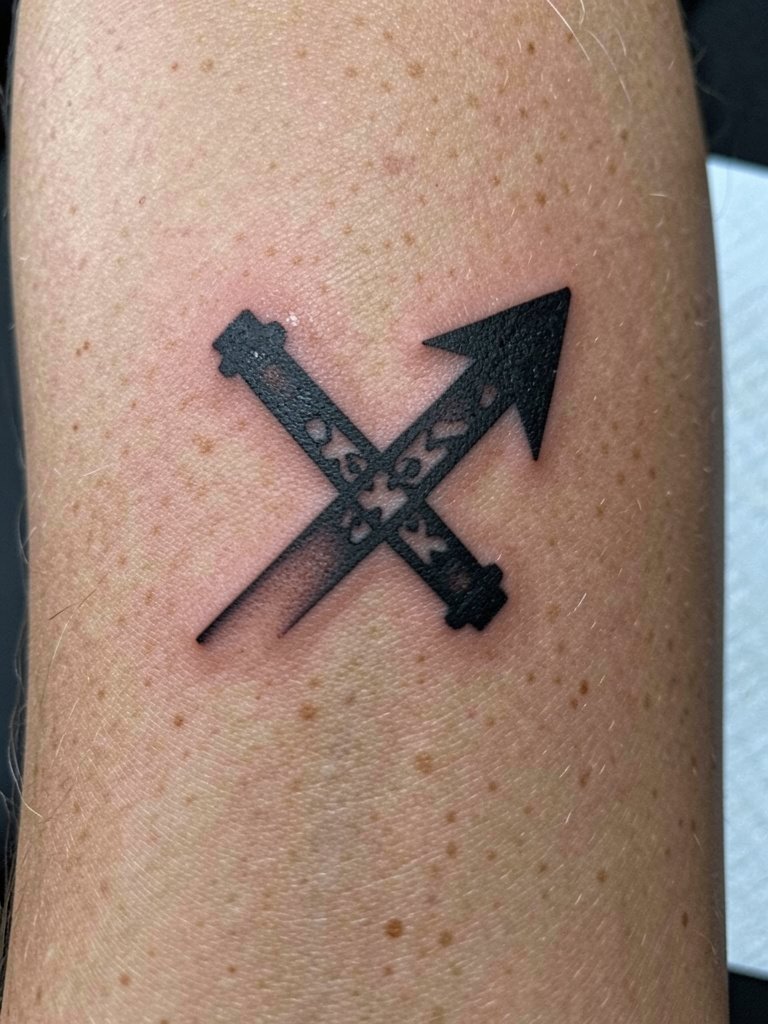
Invisible ink adds a hidden layer to a straightforward arrow, but it requires a specific ink type and aftercare awareness. Before committing, confirm the ink's longevity and that the artist has healed photos of similar work. A real mistake is assuming invisible accents require no extra touch-up; they can fade faster under sun exposure. Session times lengthen slightly due to careful layering. For nights out, wear rolled short-sleeve shirts that show the visible arrow while the hidden accents remain a private detail.
23. Arrow with Negative Space Mountains
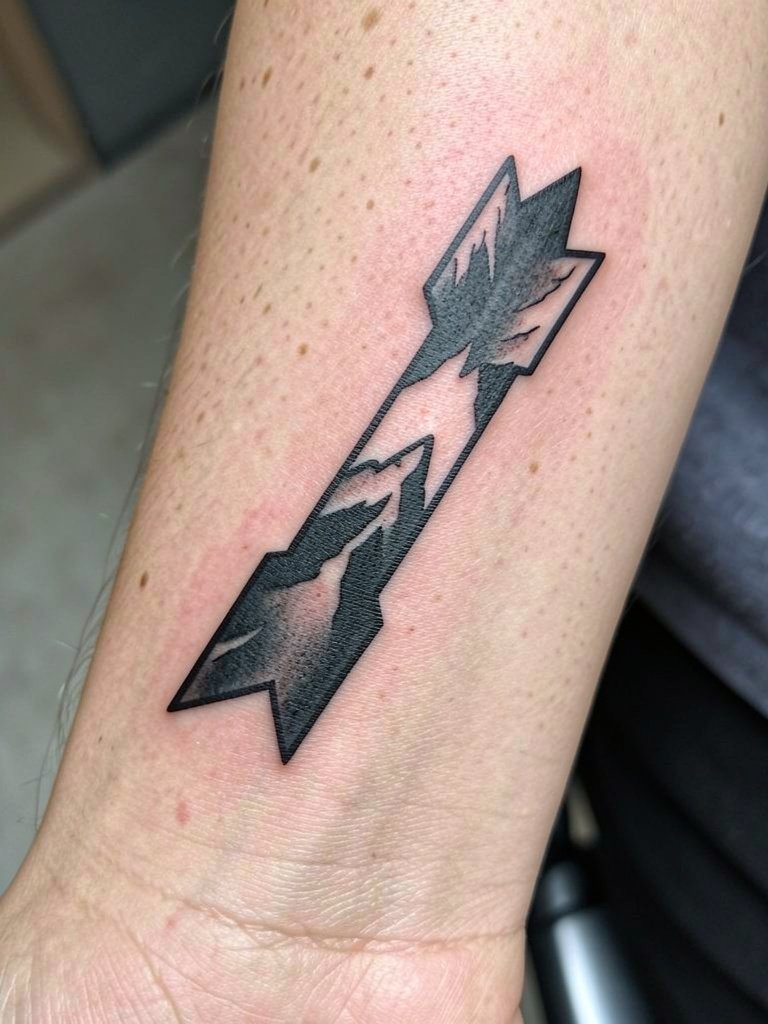
Negative-space landscapes inside an arrow read clearly if the surrounding black is dense and the separations are generous. A typical mistake is packing too many ridgelines into a narrow shaft. Ask for simplified mountain silhouettes and strong outer edges to preserve contrast over time. Sessions vary by complexity but often fall in the 60- to 90-minute range. Style with cuffed sleeves or a simple denim jacket so the inner forearm view is front and center.
24. Split Arrow on the Back of the Neck
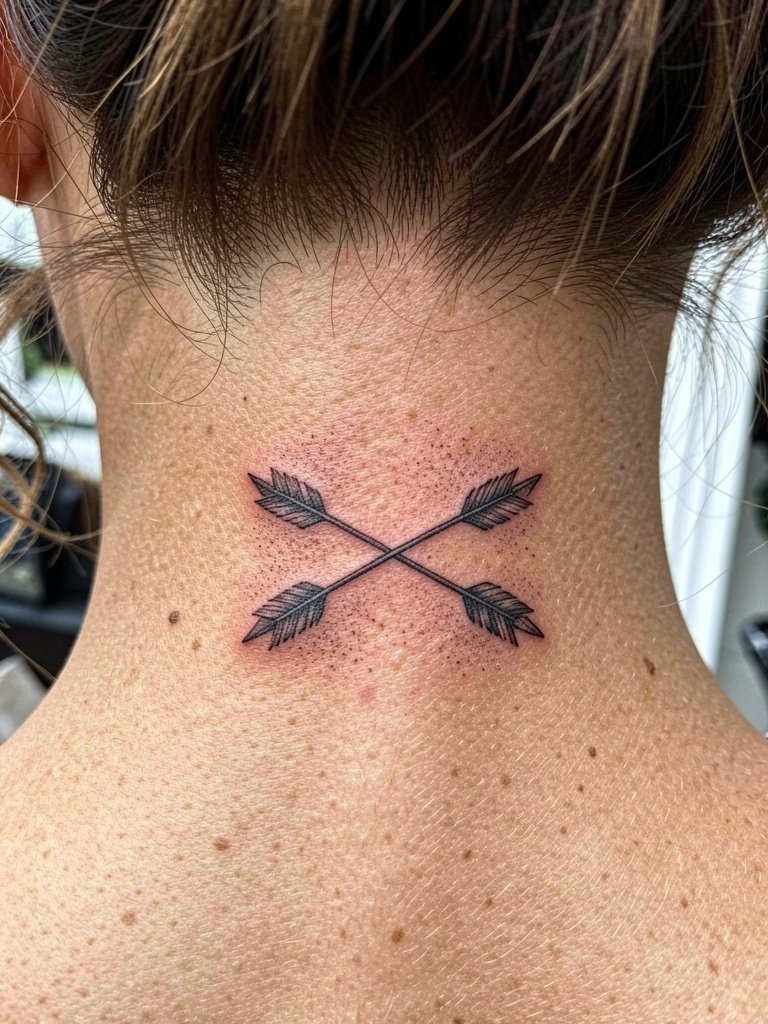
Nape arrows are subtle and peek out with certain hairstyles. The skin there is thin and lines can spread if too fine. I recommend slightly stronger lineweight for both shafts and a clear negative-space gap between them. Sessions are quick but expect tenderness and haircare adjustments during healing. Pair the look with simple hair clips or low buns that let the tattoo show.
25. Arrow with Seedling Tip on the Thigh
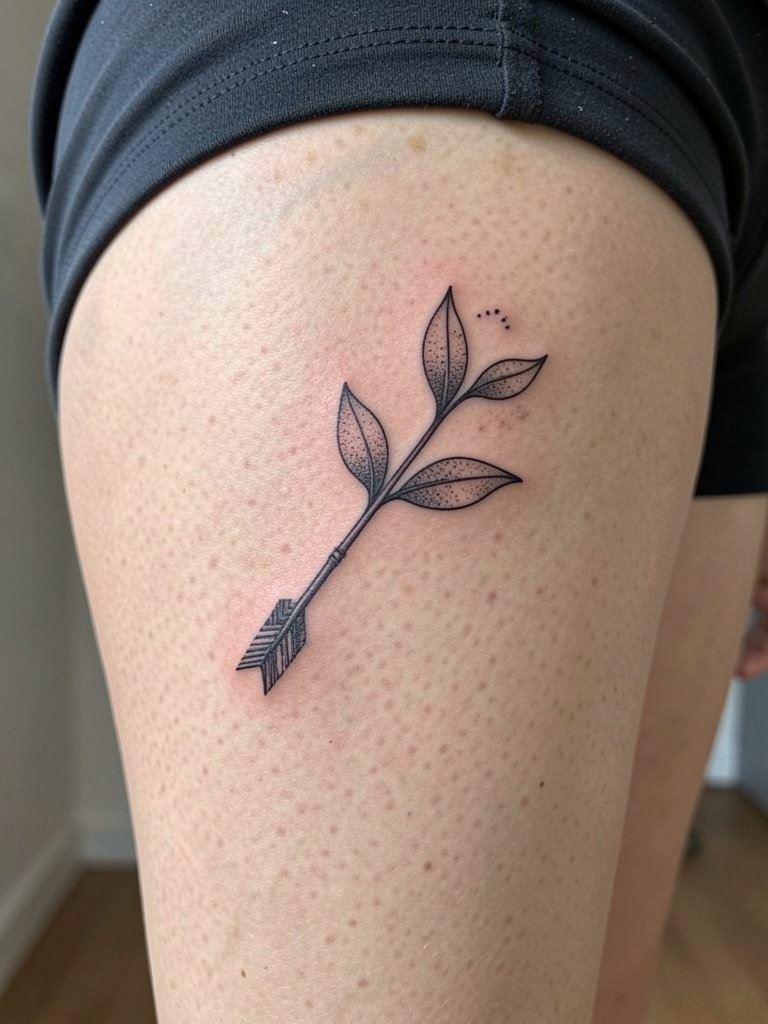
Thigh arrows let you expand motifs without competing with clothing. Seedling tips are feminine but tiny leaves often lose detail if too fine. Ask for modest leaf size and subtle stipple to keep form. Sessions are relaxed and pain is lower than near ribs. Touch-ups are occasional and usually cosmetic. For revealing moments choose high-cut shorts that show the piece without fabric digging into healing skin.
26. Arrow Tattoo as Ear Cuff Accent
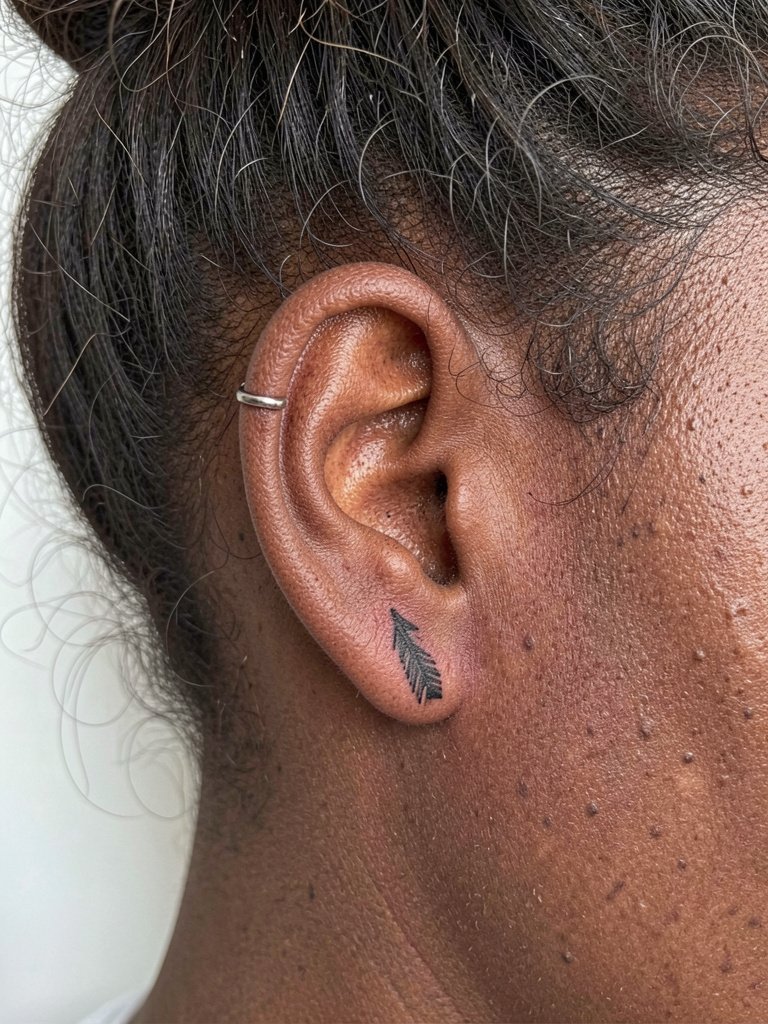
An ear cuff arrow mirrors jewelry placement and creates layered styling opportunities. The area is small so request a clear, simple silhouette rather than decorative feathers. Sessions are extremely short and healing is fast. Expect to avoid heavy hair products near the site while it heals. Pair with minimal ear cuffs that echo the tattoo's direction.
27. Long Arrow Along the Spine
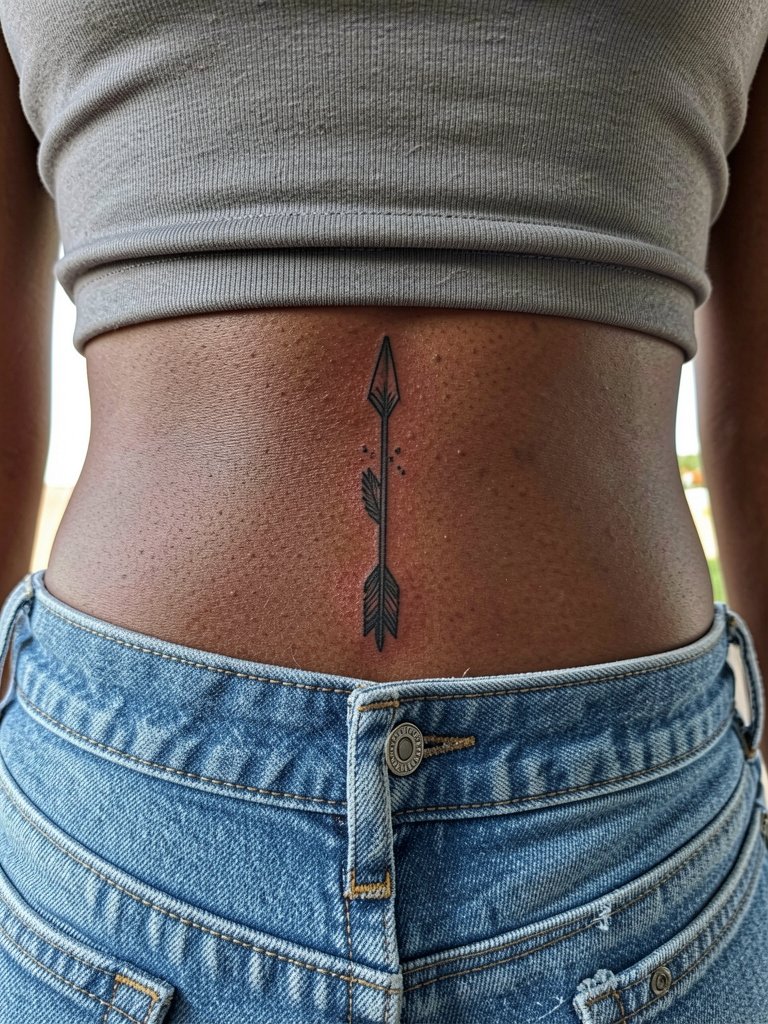
A spine arrow is impactful and helps elongate the back visually. Keep negative-space segments consistent and request a strong central shaft so the design reads from a distance. A common mistake is making the shaft too thin near the lower back where skin folds with sitting. Plan for a longer session and discuss breaks for comfort. For looks choose low-rise jeans and cropped tops that reveal the upper portion without constant rubbing.
Frequently Asked Questions
Q: How long will a fine-line arrow on the wrist or forearm stay crisp?
A: From my observation, a well-executed fine-line arrow on the forearm can look very good at two to three years if the shaft is slightly bolder than the thinnest references. Wrists face more friction and washing so expect touch-ups within the first year for ultra-fine detail. Wear protective clothing or light bracelets that do not rub directly on the line during the first month.
Q: Where can I find healed arrow portfolios and stylistic variations without naming specific artists?
A: Search social platforms with targeted hashtags and location filters to find healed examples, such as tag searches for healed single-needle arrow, healed geometric arrow, and micro-realism arrow. Use Instagram and TikTok location filters to see city portfolios, and browse forums for healed photo threads that show multiple skin tones and aging. Reddit tattoo communities often keep compilation threads that include healed shots in different lighting.
Q: Are hand and finger arrows worth it if I want low upkeep?
A: Hands and fingers require more upkeep because the skin renews and the area sees constant use. If low maintenance is a priority pick a bolder shaft and limit tiny dots or script on the side of fingers. Plan on touch-ups every six to twelve months and avoid heavy rings or gloves that will rub the site during healing.
Q: How do I balance cultural motifs with an arrow design respectfully?
A: If your arrow incorporates motifs with clear cultural origins, bring references and ask the artist about provenance and respectful adaptation. Request that the design be framed as an interpretation rather than a direct copy of sacred patterns, and be open to guidance on which elements to avoid. That approach keeps the work visually strong and culturally considerate.
Q: What should I wear to my session for a sternum, rib, or inner thigh arrow?
A: For sternum and rib work wear a fitted sports bra or crop top that stays in normal position and does not need adjusting during the session. For inner thigh pieces wear modest athletic shorts with the hem ending mid-thigh so the artist can access the area without fabric shifting. Choose clothing you can remove or adjust with one hand for comfort and minimal movement.
