
Polynesian and neo-tribal motifs keep circulating on social feeds, but what looks sharp in a filtered photo does not always hold up on real skin. Small, fiddly flash often blurs; bold body-flow pieces last. Expect small bands and wrist wraps to run in the low hundreds, while chest, back, and full-wrap projects can push into the thousands depending on size. Start with compositions that follow muscle lines, and begin the list with the shoulder cap, where scale and flow matter most.
1. Polynesian Shoulder Cap With Upper-Arm Banding
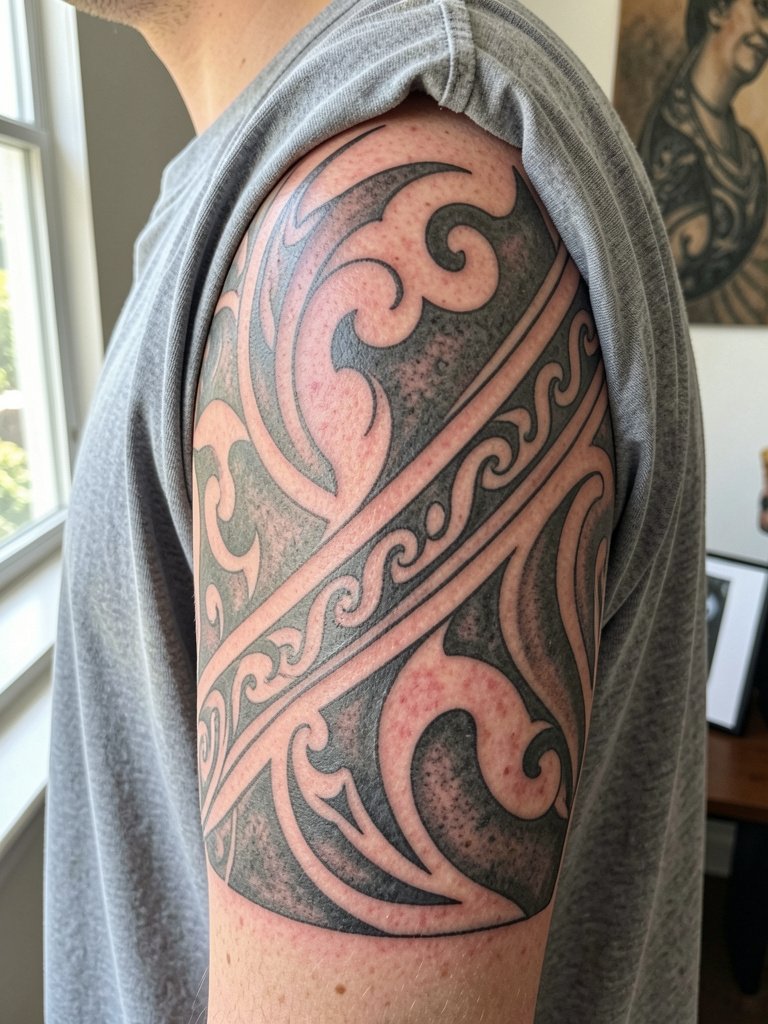
A shoulder cap anchors tribe-style patterns so the design reads from many angles. This placement favors bold blackwork with sweeping flow that follows the deltoid, and the session typically runs one long sitting or two shorter ones depending on coverage. One camp argues you should avoid borrowing sacred motifs unless there is a direct cultural link, because heritage patterns carry meaning. Another camp treats Polynesian-inspired geometry as a broader blackwork language that can be adapted into original body-flow pieces without copying protected symbols. For the appointment, wear a loose short-sleeve tee that rolls above the deltoid so the artist has clear access, and bring photos showing how you want the band to wrap around the arm.
2. Maori-Inspired Koru Spiral on Outer Forearm
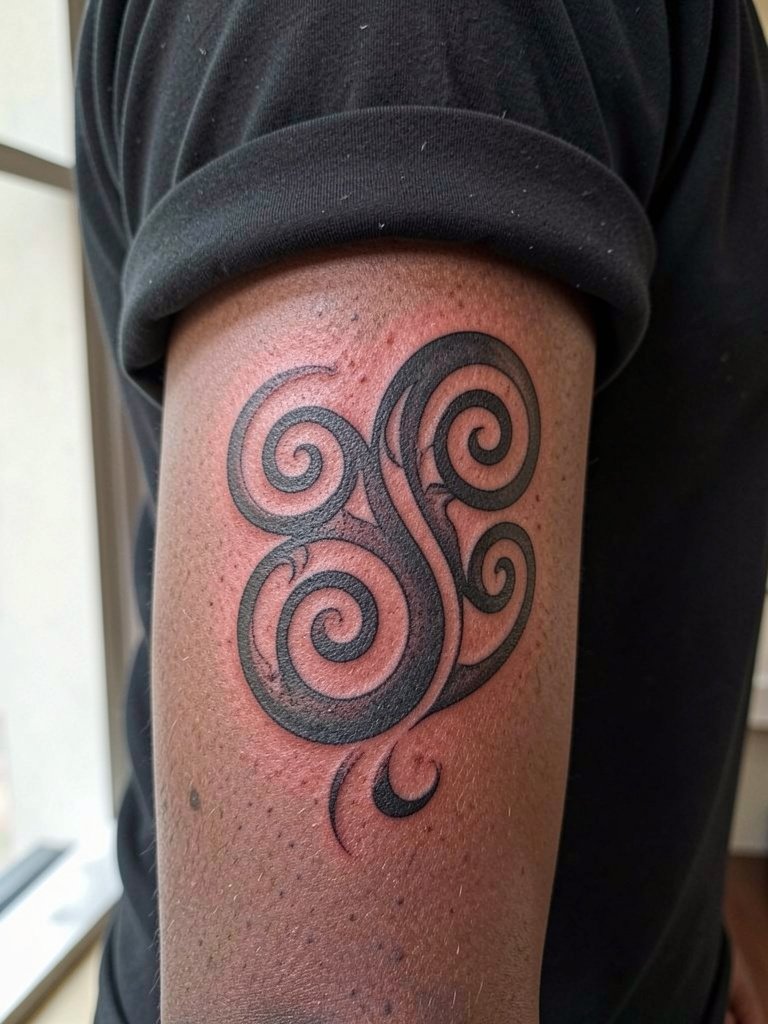
A koru-style forearm suits someone who wants rhythm in a visible place. It reads well in photos and wraps the arm naturally, but fine detail needs breathing room so the swirl does not smudge over time. Specify slightly wider spacing between coils and ask the artist to show a mockup scaled to your forearm length so you can judge the negative space. Expect one long sitting for a medium piece and plan for a touch-up if the smallest interior details are tight. For showing it off, a rolled-cuff Oxford or a fitted black tee frames the flow nicely, link to fitted black t shirt.
3. Full Black Armband With Negative-Space Breaks
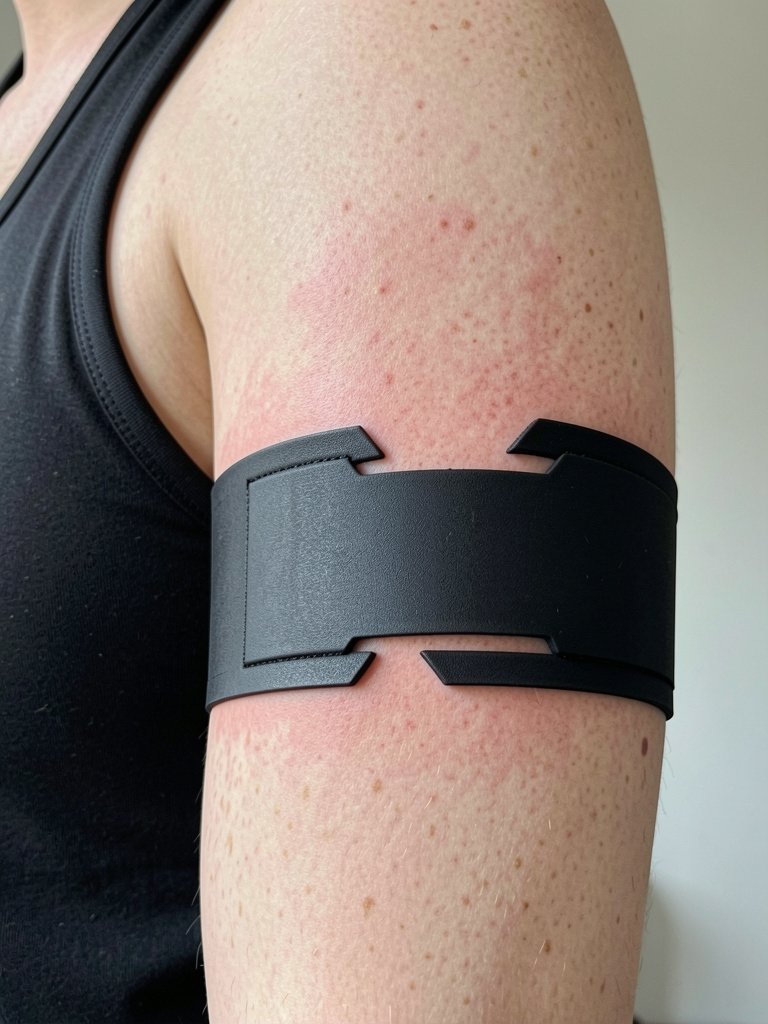
An armband is a straightforward tribal nod that scales easily into stacked bands later. One camp favors dense black fills for longevity and silhouette retention, because solid saturation reads clean longer on varied skin tones. Another camp favors open negative space so the band breathes and avoids becoming a solid block across the arm. For appointments wear a loose tank so the artist can reach the whole circumference without friction. The session for a single solid band usually fits into one appointment, and ask for crisp edge photos of healed examples on similar skin tones so you know how the block will age.
4. Tribal Chest Panel Sweeping Into the Pectorals
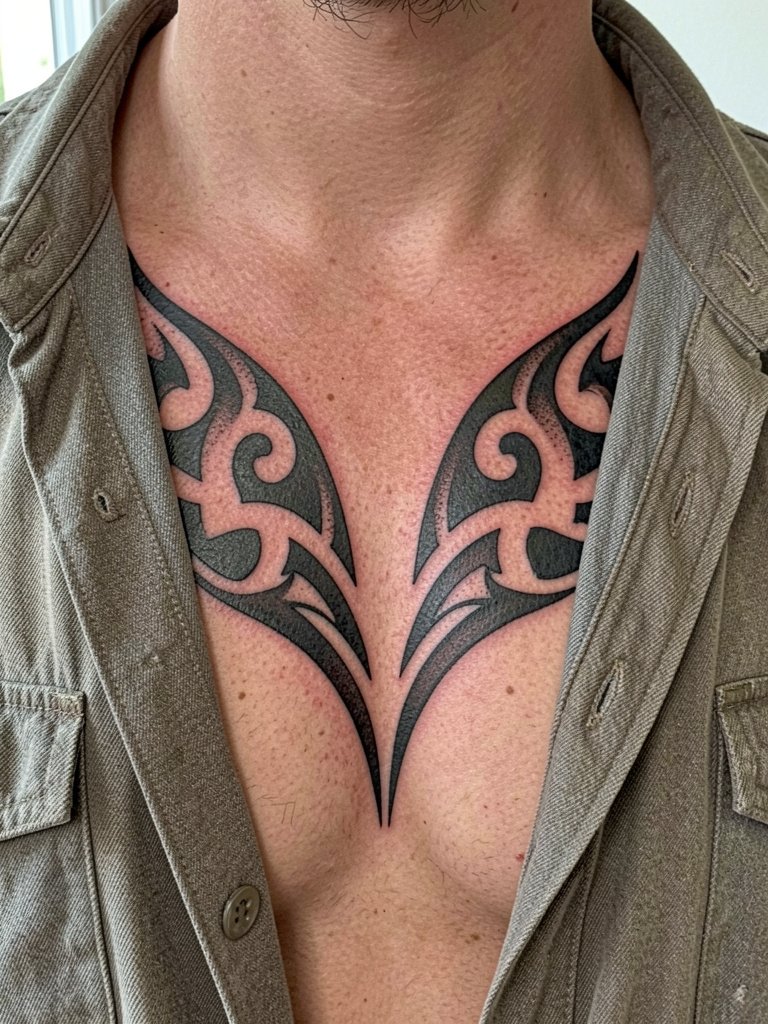
Chest panels broaden the torso visually when placed below the collarbone. These are custom pieces that need clear symmetry and flow across the sternum and pectoral curve. Bring reference photos that show the exact width and how the pattern sits against a bare chest, and request a mockup that the artist scales to your frame. Pain sits moderate to high on the sternum edge but lower on the pectoral flesh. For showing off pair the piece with an open camp-collar shirt and an unbuttoned overshirt while healed.
5. Half Sleeve Tribal Wrap With Blade-Like Extensions
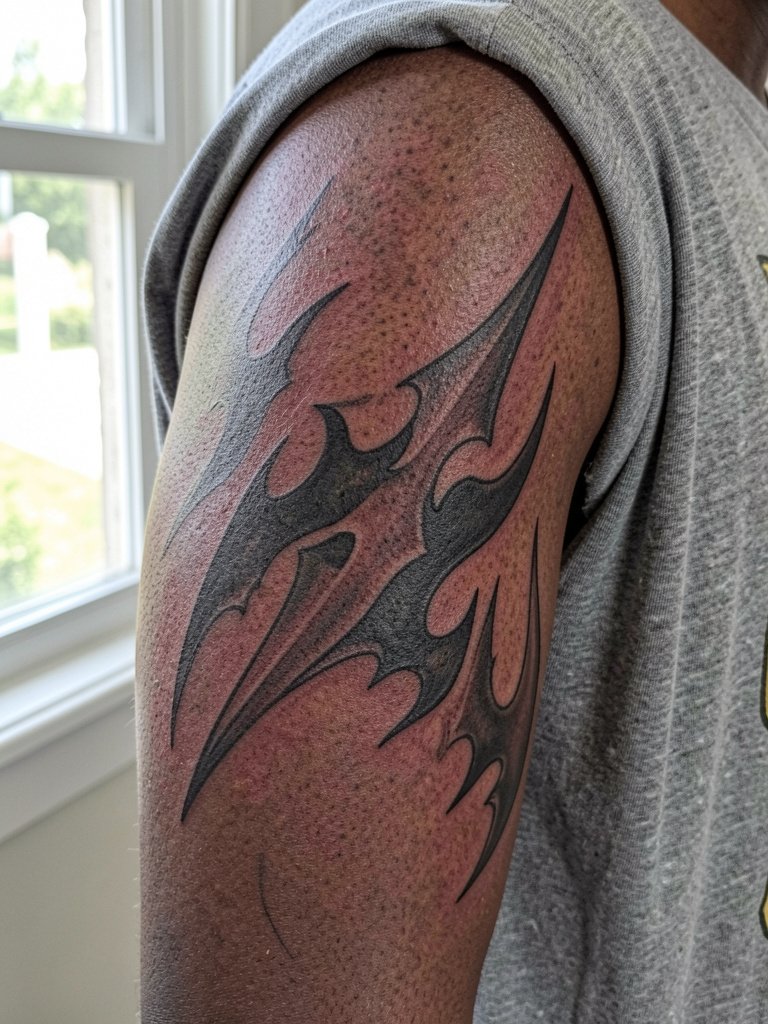
A half sleeve that reads like armor uses pointed extensions to create motion and an athletic silhouette. The common mistake is making those spikes too thin at the tip, which eats up over two years. Ask the artist to thicken the terminal points slightly and show the wrap from three viewing angles so you see how the flow works in motion. Sessions typically split into two to four blocks. Session wear should be a button-front shirt that opens flat so the artist can roll sleeves without rubbing the fresh ink.
6. Sweeping Back Piece Across the Scapulae
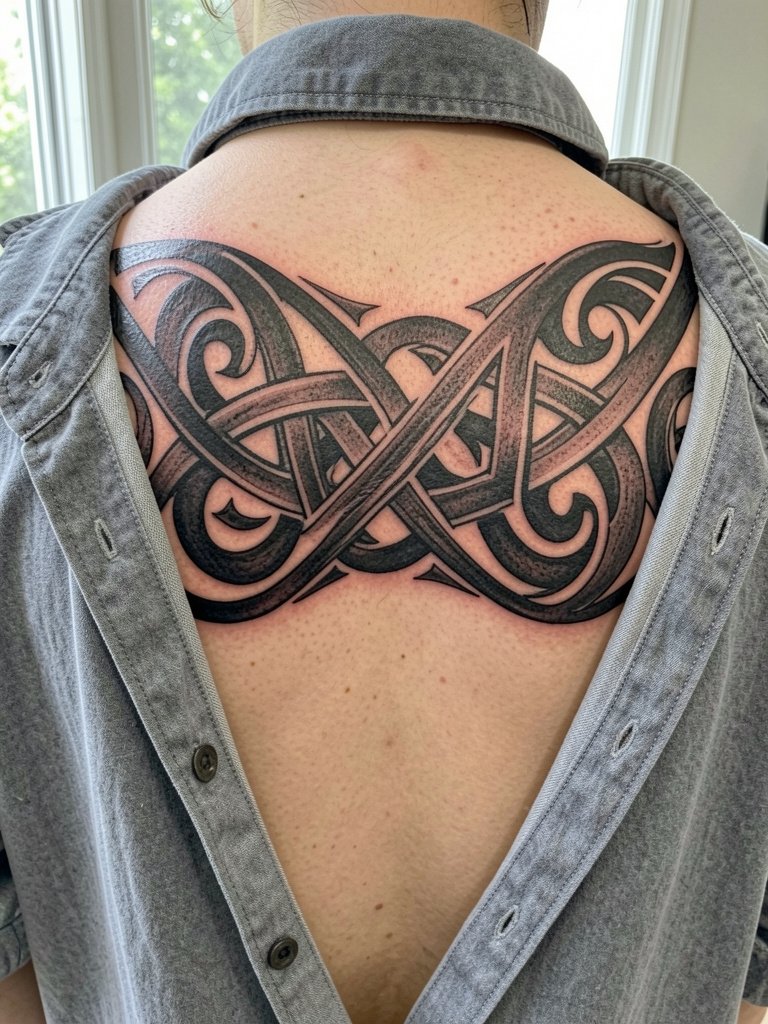
A back panel gives maximum canvas for custom tribal composition that follows muscle lines. Realistic expectations matter because full-back pieces need multiple sessions and patience. The most common error is trying to cram a sleeve-style pattern into a scapula panel without adjusting scale, which makes the back look busy. During the consultation, have the artist map the flows to your shoulder blades and spine so negative spaces land over muscle valleys. Wear a loose button-front shirt on the day so it can be removed or rolled away without creasing the new ink.
Pre-Session Essentials
The shoulder, forearm, and back pieces above all benefit from a few session-day items that reduce friction and speed recovery.
-
Second-skin style protective bandages. A breathable film keeps larger back and chest panels protected during the first 24 to 48 hours when friction from clothing is most likely.
-
Topical numbing cream. Useful for longer chest or rib sessions when you want a calmer first pass without affecting ink saturation.
-
Thin protective film roll. Cut-to-size strips help protect wrist and hand wraps from accidental knocks while you move around the first day.
-
Fragrance-free gentle body wash. Cleans the area without irritation during the initial healing phase, which matters for dense blackwork.
-
Aquaphor healing ointment. A familiar mainstream balm many artists recommend sparingly in the first days to lock in moisture on solid black fills.
7. Celtic Knotwork Hybrid for Forearm or Calf
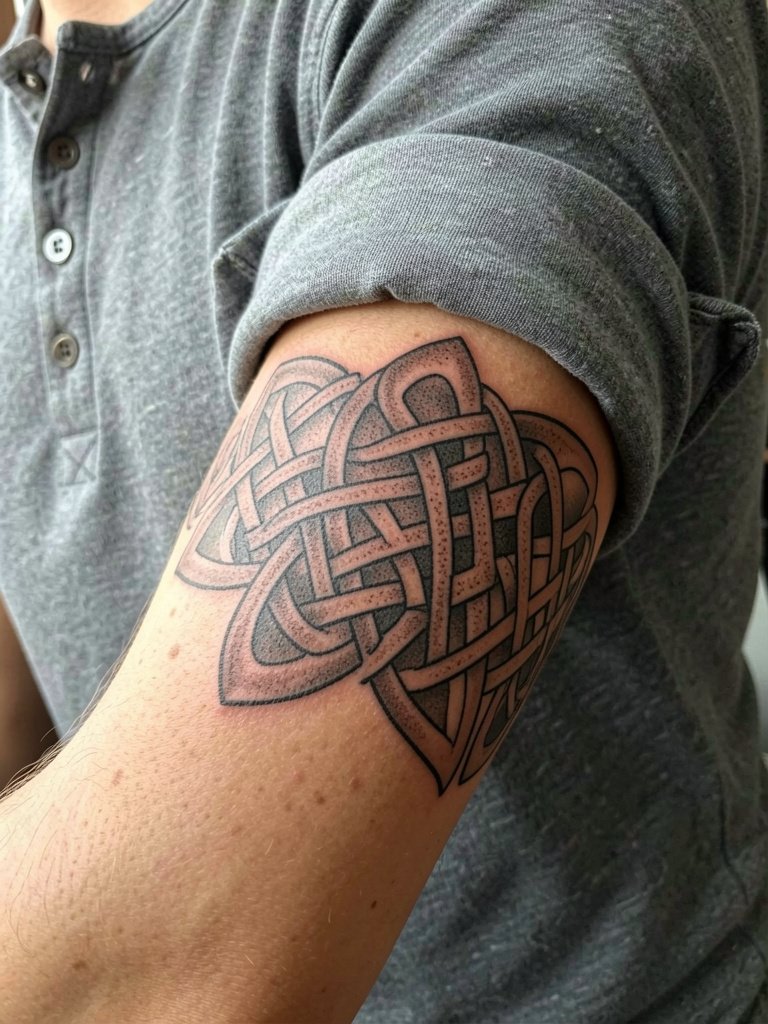
Celtic knotwork translates well into a tribal-adjacent look when the interlace is bold and the negative spaces are deliberate. The pitfall is over-detailing within tight widths, which blurs after a couple of years. Have the artist redraw any tiny crossover loops at a slightly larger scale so the pattern reads clean when healed. This design works equally on the calf if you prefer covered visibility. For outfits, a lightweight henley with sleeves rolled shows the forearm pattern off, link to lightweight henley.
8. Abstract Shoulder-to-Bicep Sweep With Sharp Spikes
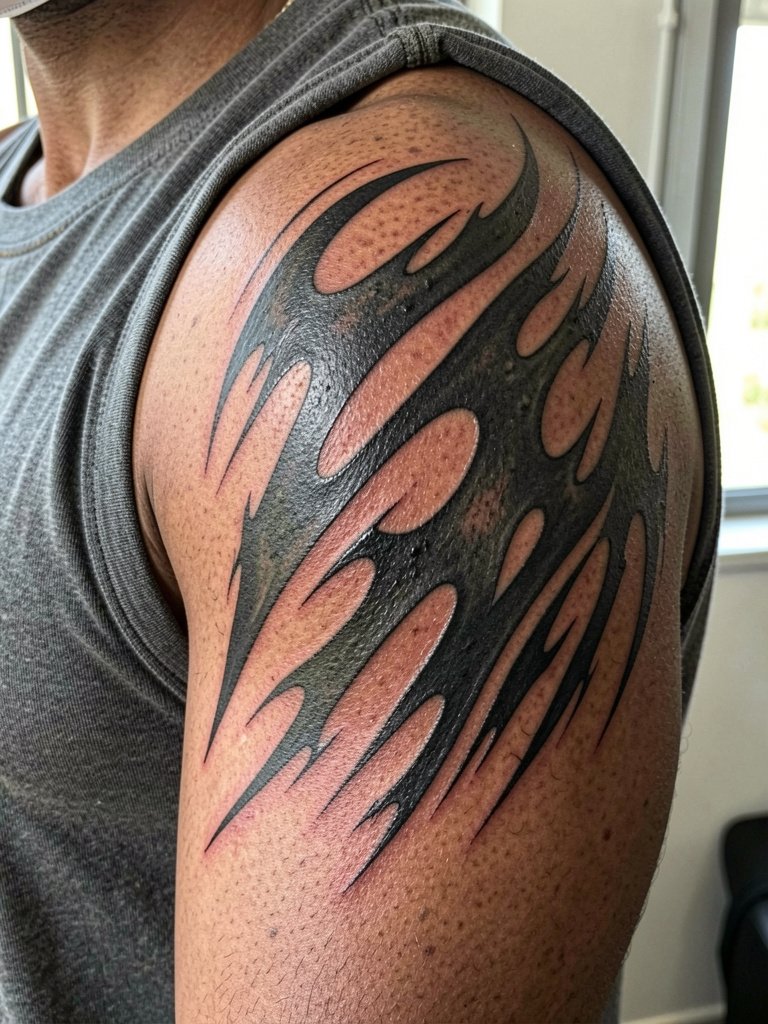
This aggressive look reads modern and masculine when the spikes are scaled to the deltoid. The session pain is moderate because muscle flesh takes needle work well, but the larger black fills can leave the skin raw for a few days. A common mistake is making spikes too narrow at the tips, which softens with healing. During the consult bring silhouette photos so the artist can match the curve to your deltoid. For showing the arm, a sleeveless muscle tee keeps the shoulder contour visible, link to black sleeveless tank.
9. Makonde-Inspired Linear Body Pattern
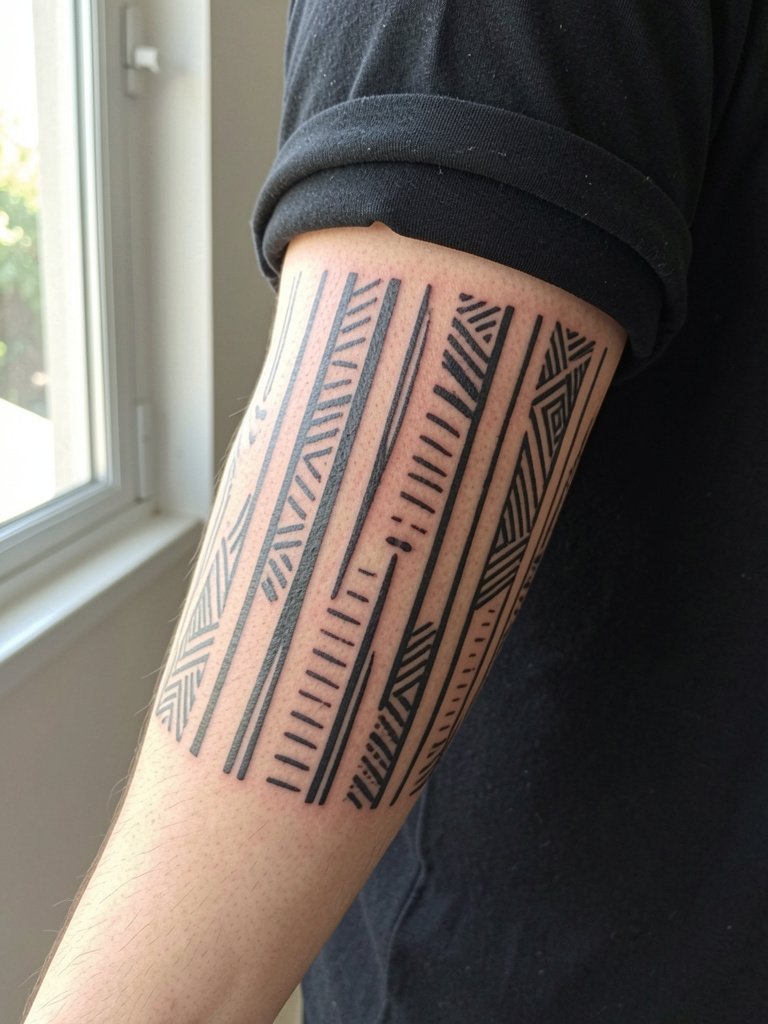
Makonde framing brings a protective, identity-linked feel when it is commissioned thoughtfully. If you are drawn to heritage motifs, state your inspiration and ask for a custom composition that honors the visual language without copying specific ceremonial patterns. The piece often reads best medium to large so the vertical linearity breathes. Expect a custom quote because these are usually bespoke. For session comfort wear short sleeves that roll easily and avoid tight cuffs that press against fresh ink.
10. Ribcage Panel That Follows Side-Torso Curve
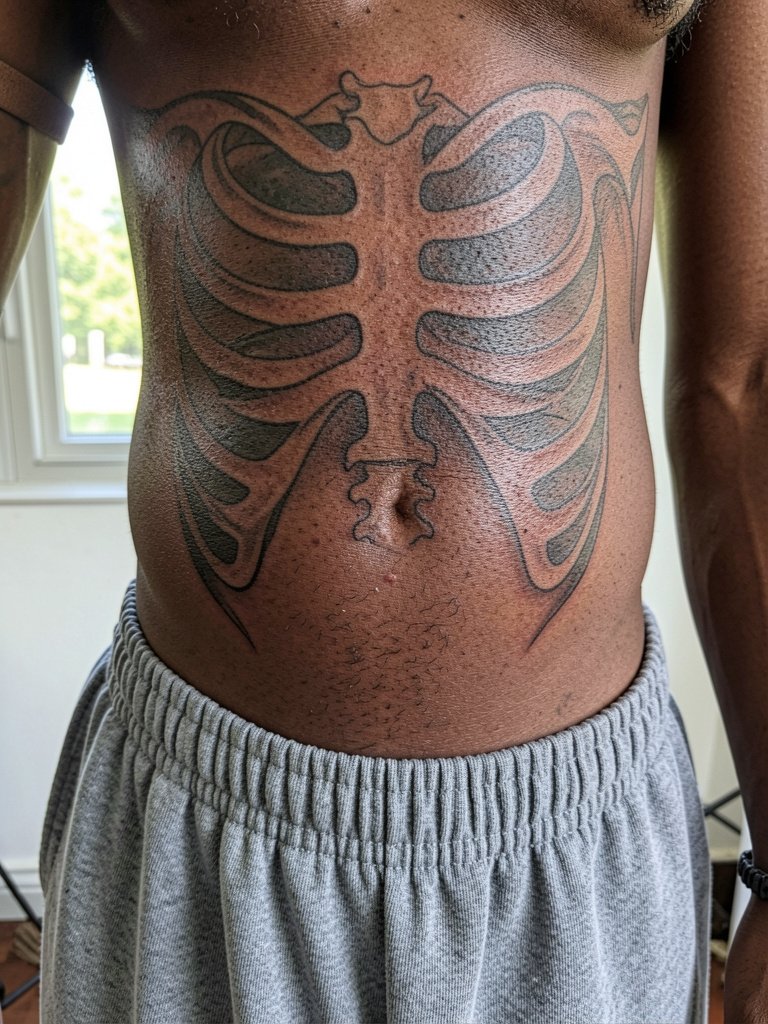
Ribwork looks dramatic in profile but heals slower and with more discomfort. Pain is higher here, and friction from waistbands can irritate fresh ink. The common mistake is assuming small, intricate detail will hold on the ribs. Instead, ask the artist to increase line weight slightly and keep spacing generous so the design ages more predictably. For the session pick soft, loose waistband shorts so belts and waistbands do not rub the area during the first week.
11. Nape Extension Into Upper Back
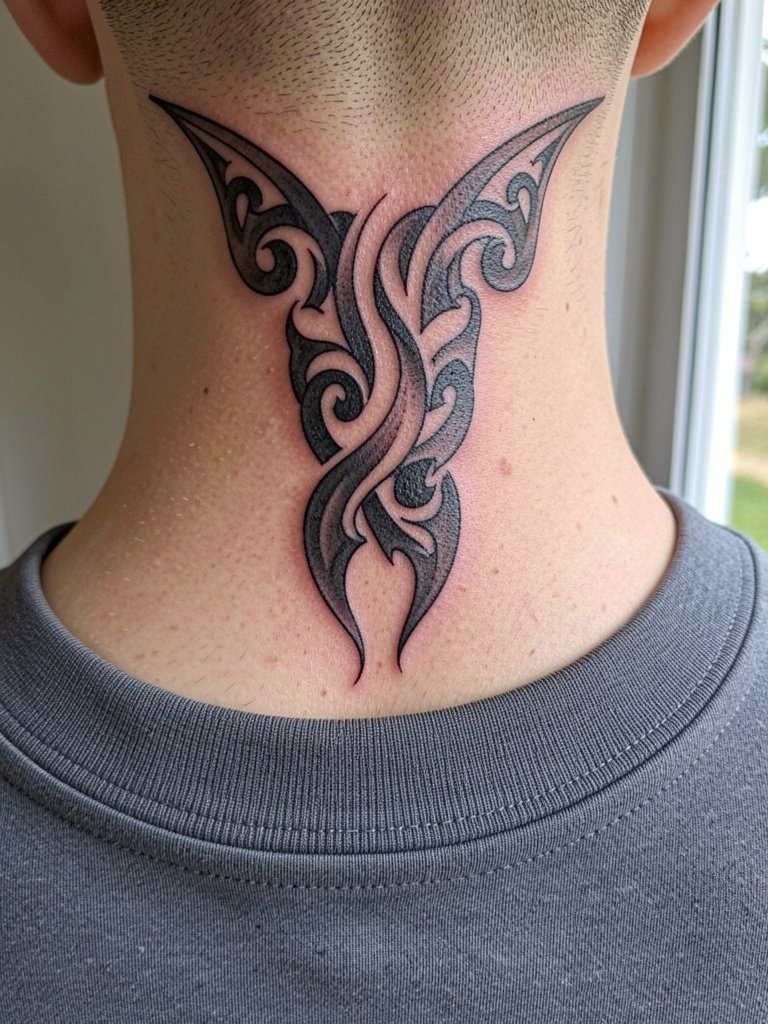
Nape pieces frame the head and add a bold neckline finish. These are more visible when hair is short or tied back. Ask the artist for a mockup that shows how the design moves into the upper back so it does not look like an afterthought. Nape skin can take ink well but is sensitive when leaning against headrests, so plan short recovery days and sleep with a clean pillowcase. Styling tip for healed work includes a low-collar crewneck that lets the nape peek through, link to crewneck t shirt.
12. Calf Band With Vertical Tapering Motifs
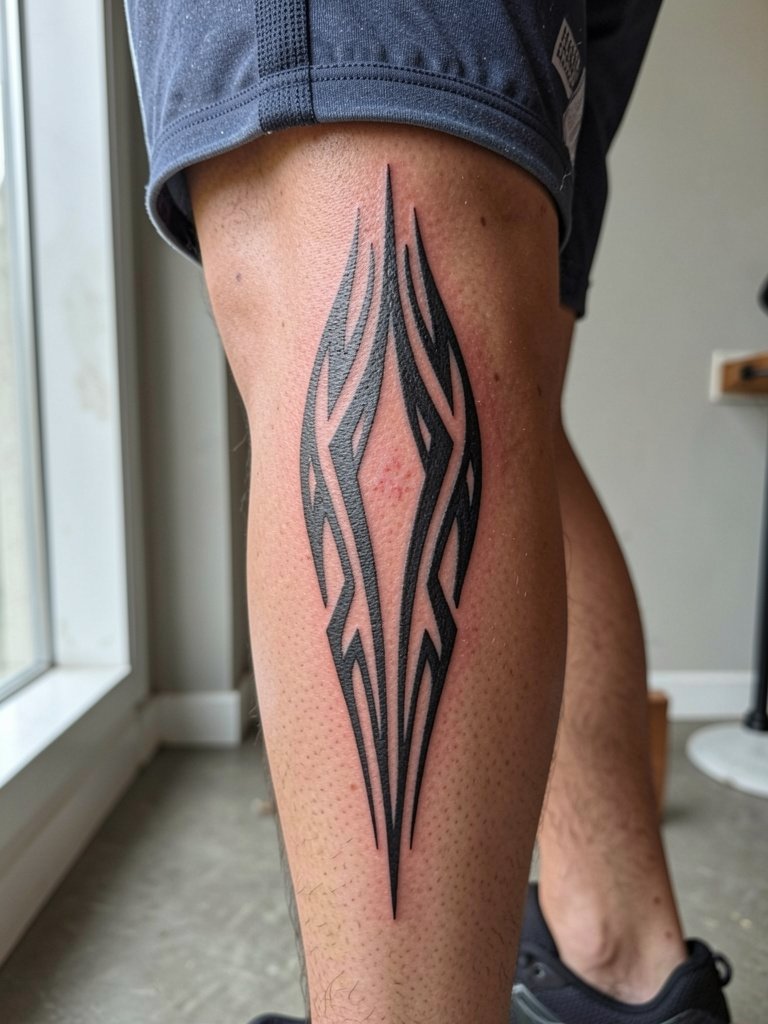
The calf is a forgiving spot for medium-scale tribal bands because it hides easily and shows when you want it to. A common mistake is placing the band too high or too low relative to the widest calf point, which can make the pattern look awkward while walking. Ask for the stencil with the leg relaxed and standing so you can inspect where the tapering lands. For summer show-off pair the healed band with cropped athletic shorts, link to athletic shorts.
13. High-Visibility Hand and Wrist Wrap
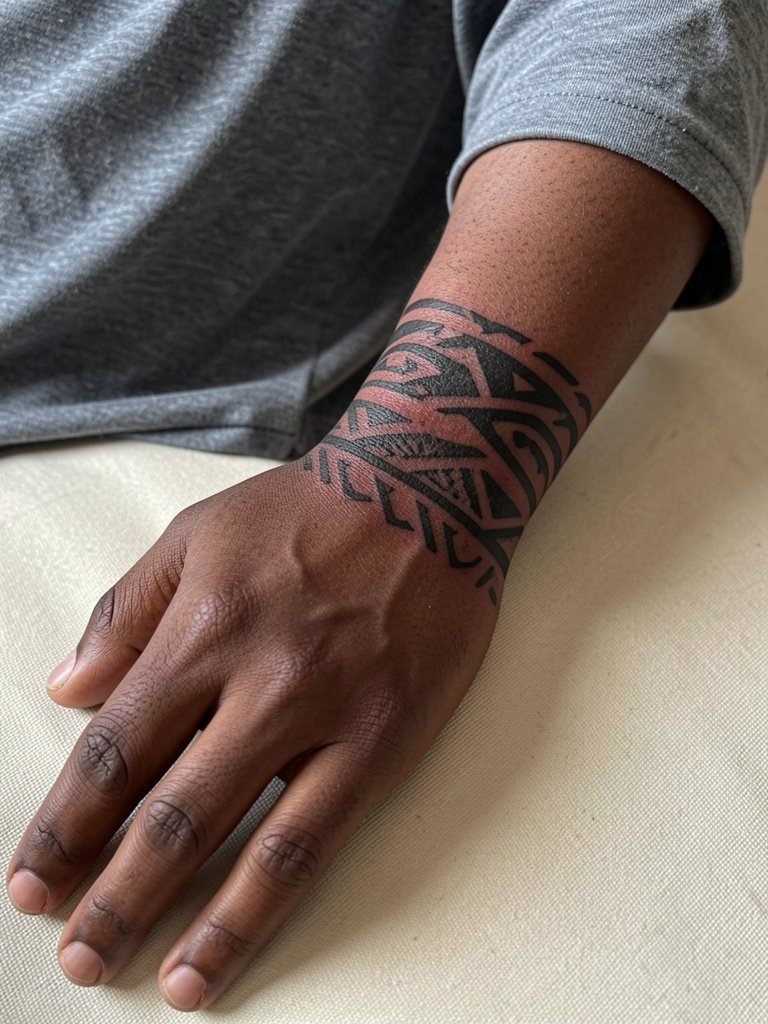
Hand and wrist tattoos read immediately and can connect to sleeve work later. The wrist eats fine detail faster than the forearm, so thicker linework and careful edge spacing prevent early softening. Healing demands attention because the hands wash often and see friction. Avoid bracelets or watches on the tattooed wrist during healing. If you want a minimal visual accessory, go with a thin watch on the opposite arm, link to minimal watch.
14. Geometric Hybrid With Dotwork Fill
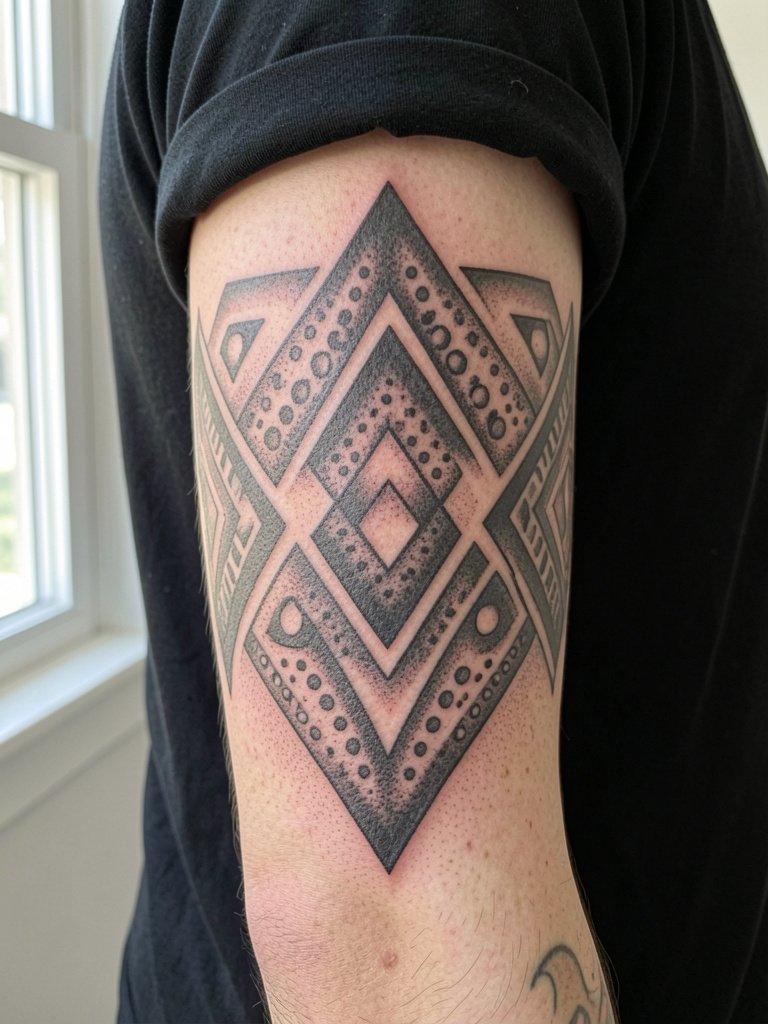
A geometric hybrid gives tribal motifs a cleaner contemporary finish by adding symmetry and dotwork fills. Small dotwork requires spacing so stippling does not merge into solid gray over time. Tell the artist you want dot density shown at three sizes so you pick one that reads on your skin tone. This style pairs well with a fitted black tee to showcase the contrast, link to fitted black t shirt.
15. Wraparound Shoulder-to-Chest Panel
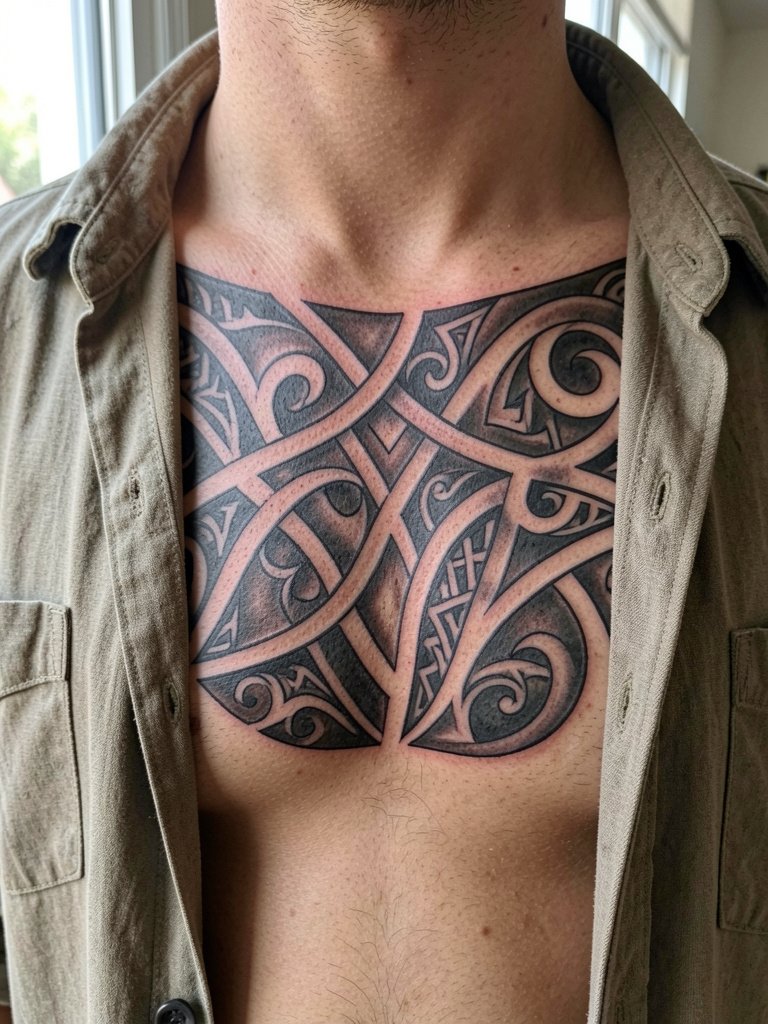
This panel makes the design feel built into the body rather than pasted on. The mistake is copying shoulder art without resizing for chest curvature, which flattens the effect. During the consult bring shirtless photos of your torso and request the artist show the piece in a chest-spread view. For show-off wear an open camp-collar top that echoes the tattoo's neckline, link to camp collar shirt.
16. Minimalist Vertical Spine Motif
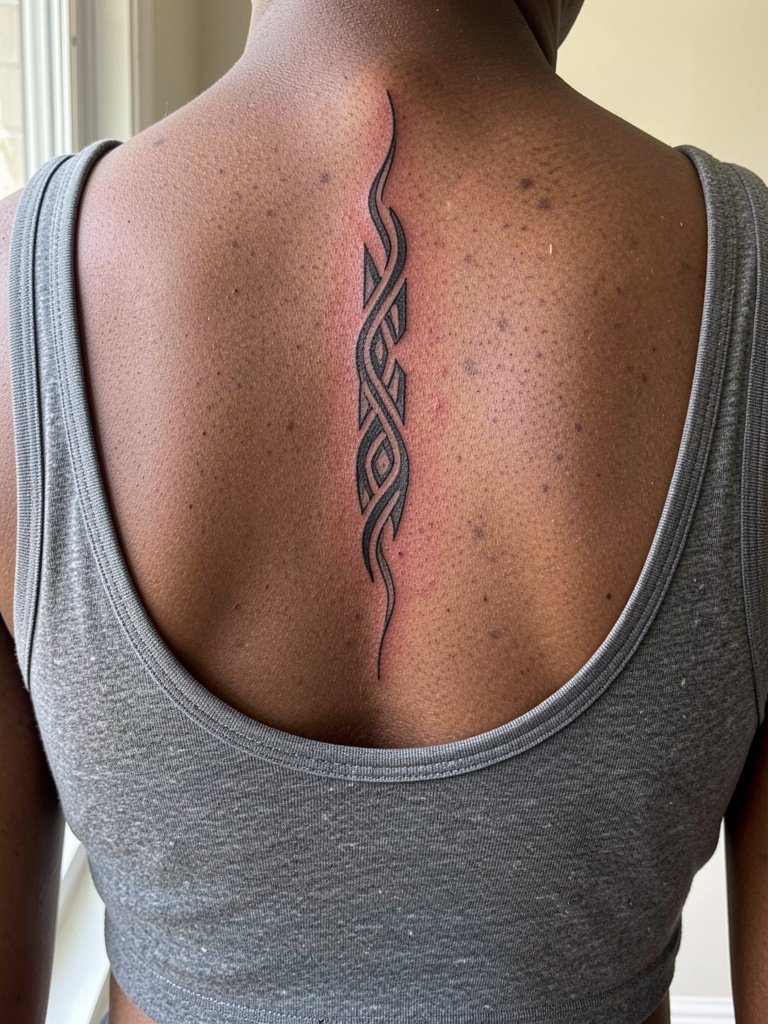
A narrow spine motif is subtle when viewed head-on and striking from behind. Keep the line weight consistent but slightly heavier than the thinnest needle size so the spine does not blur with movement. Spine work can be sensitive in spots, so plan breaks and hydrate well. For apparel pair with a cropped tank that lets the vertical element peek through, link to fitted tank top.
17. Geometric Arc With Bird Silhouette (Minimal Mock Motif)
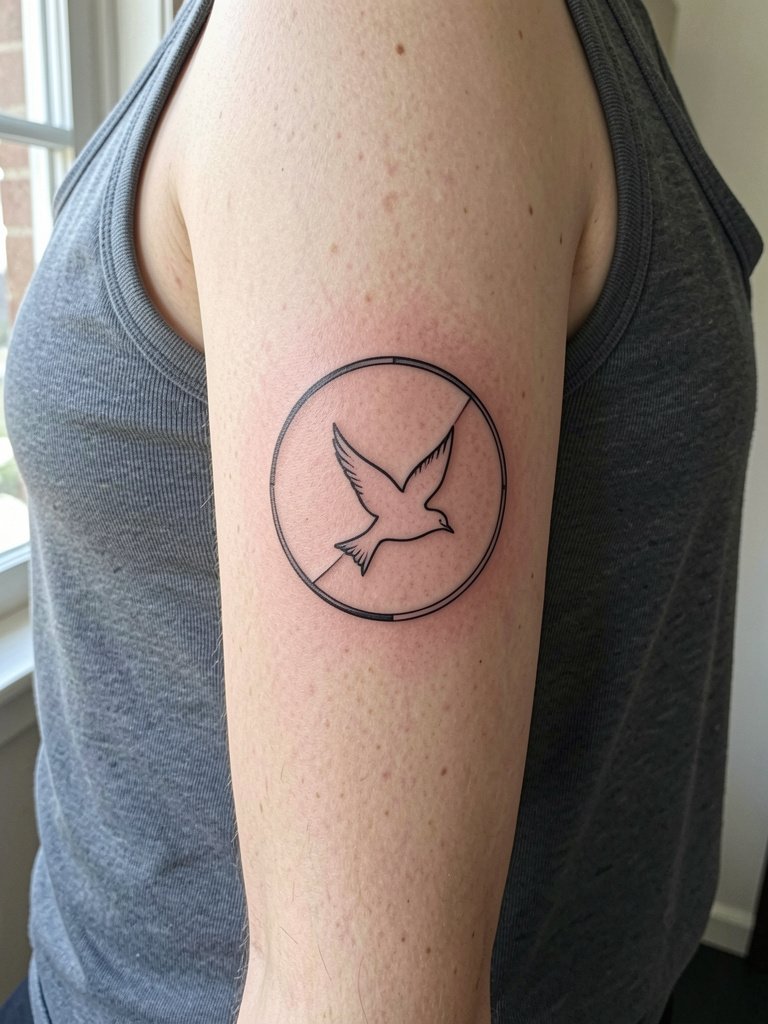
This clean arc plus silhouette translates well into a tribal-adjacent motif when simplified into blackwork. Inner bicep placement demands slightly bolder lines than you might choose for an outer-arm design because the inner skin texture may soften fine detail over time. The picture of healed ink matters here, so ask to see healed shots on similar placement and skin tones. For session wear pick a tank top with the arm relaxed at the side so the artist can reach the inner bicep without the armpit coming into the frame.
18. Vertical Tapering Shin Panel
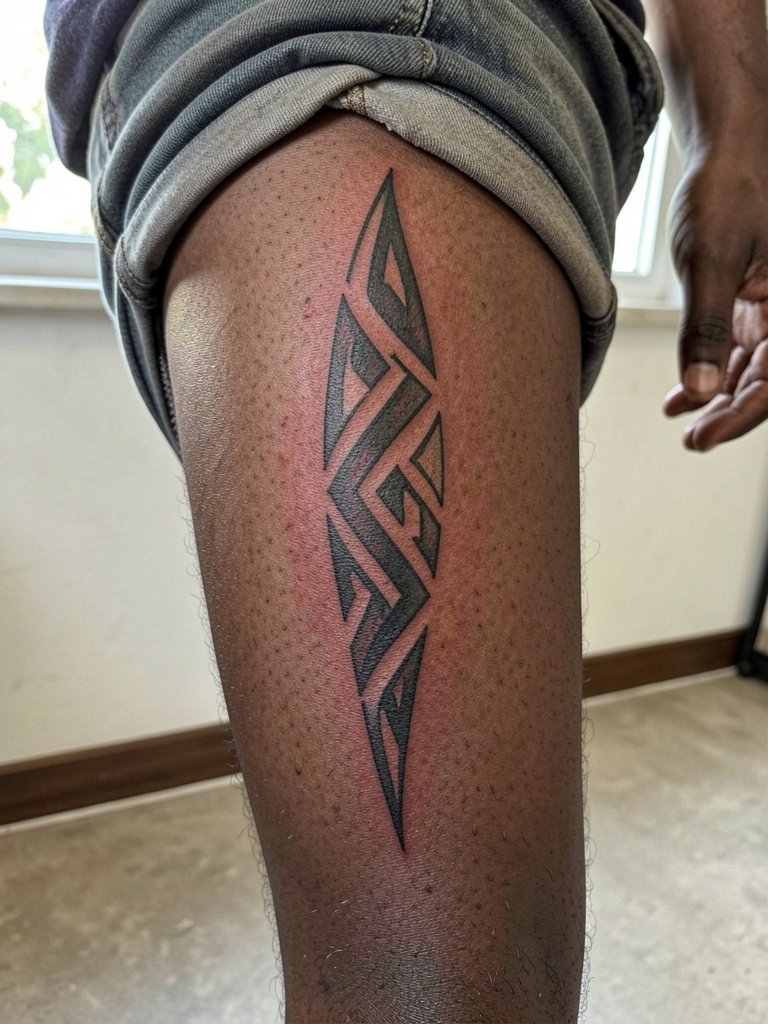
Shin placements let vertical patterns elongate the leg, but they are subject to knocks and scuffing during the first week. Avoid extreme fine detail there and pick a scale that resists abrasion. Ask the artist for placement photos while standing so the taper visually aligns with your natural stance. For the session wear shorts with wide leg openings that allow easy access and reduce rubbing, link to loose waistband shorts.
19. Small Wrist Chevron Cluster
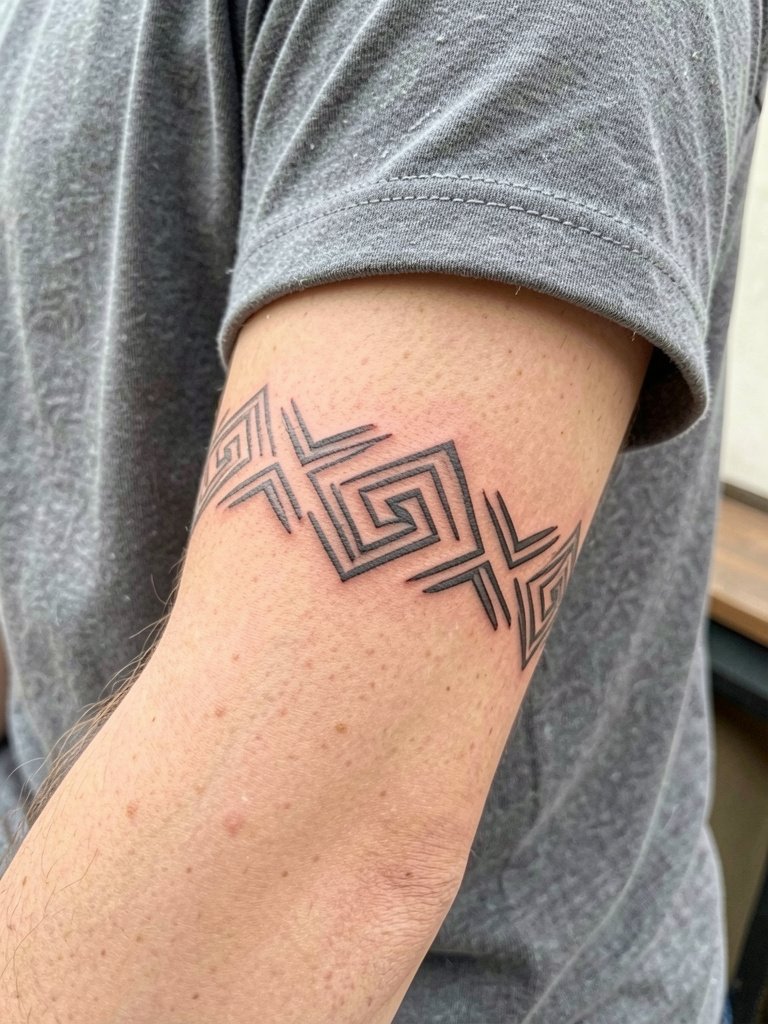
Tiny wrist motifs are visible and discreet. The wrist eats detail quickly, so thicker linework and slightly increased spacing make the chevrons read longer. The most frequent error is copying tiny flash from a photo without asking to scale it for wrist circumference. Bring the reference and request a scaled mockup at your actual wrist circumference. During healing keep the area free of bracelets and watches to avoid friction related scabs.
20. Stipple-Filled Geometric Upper Arm Patch
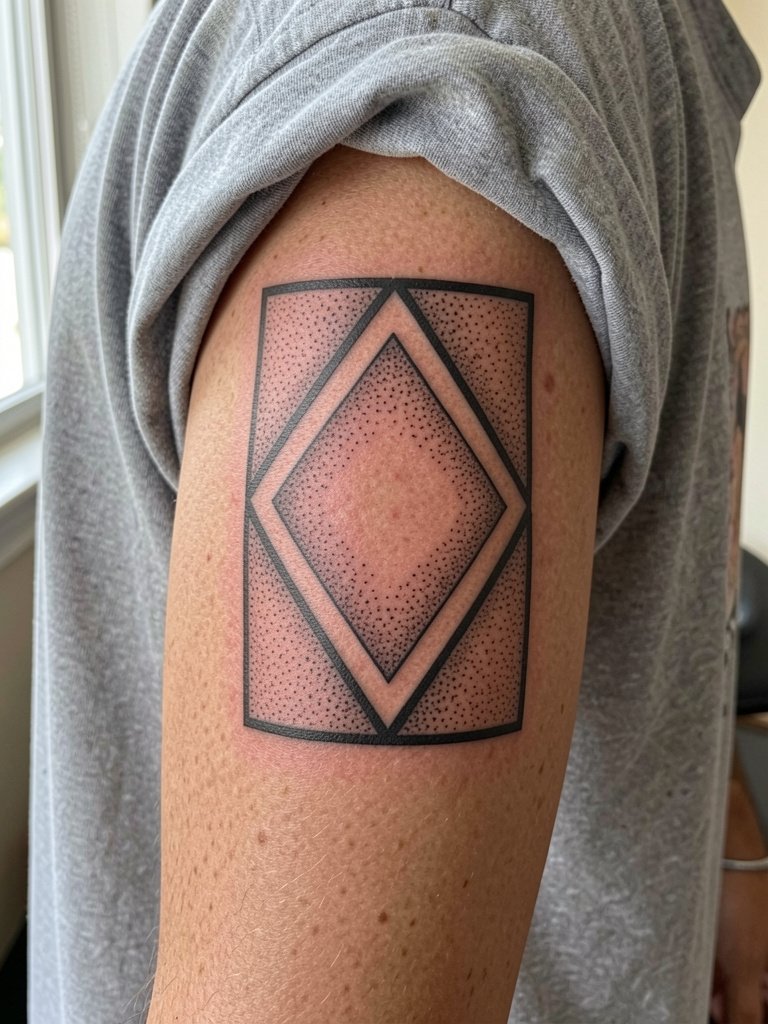
A patch-style upper-arm piece with stipple fills keeps the look contemporary while maintaining readable negative space. Dotwork needs open areas so the stippling does not fuse into flat gray. Ask the artist to show how dot density looks at a one-year healed stage to pick the best balance. Sessions for dense stipple can run longer than expected, so confirm breaks and post-session care. For show-off wear a loose short-sleeve tee that can be rolled above the patch, link to loose short sleeve tee.
21. Side-Torso Armor Panel
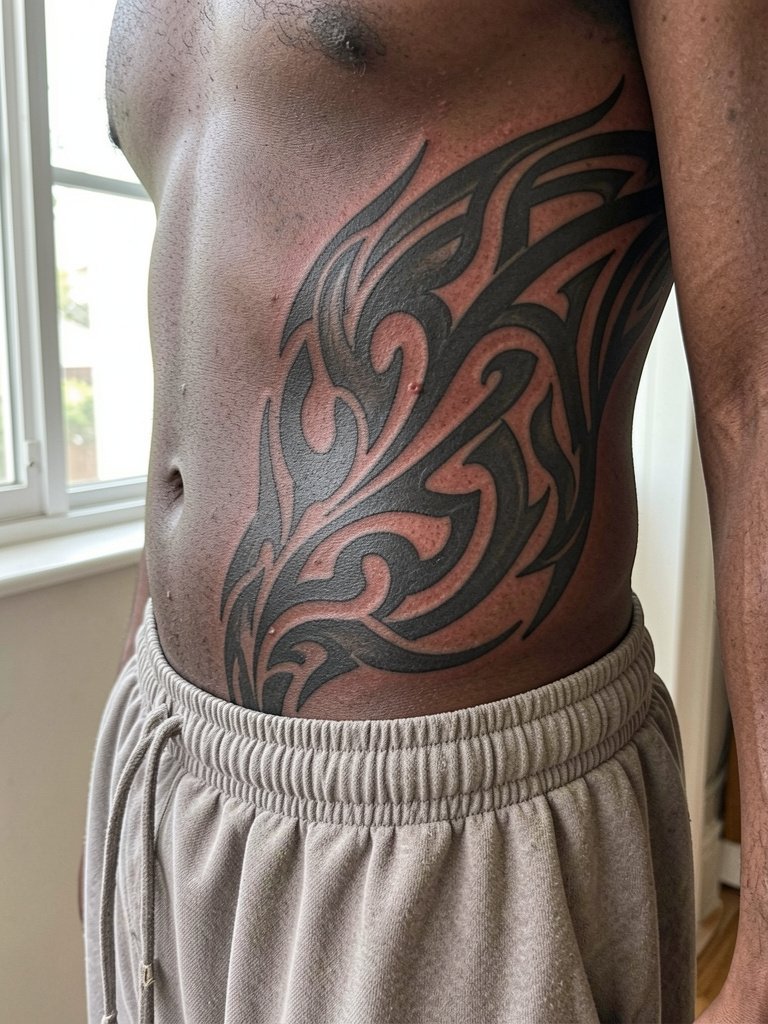
Armor-like panels along the side torso emphasize curves and can integrate with chest or back work later. The rib area is more painful and sensitive to movement, so plan longer recovery. The usual mistake is underestimating how belts and waistbands will irritate the area during healing. For the session wear soft, loose waistband shorts that avoid pressure on the fresh ink, and sleep with a clean pillowcase to minimize bacteria exposure.
22. Small Ankle Sigil or Band
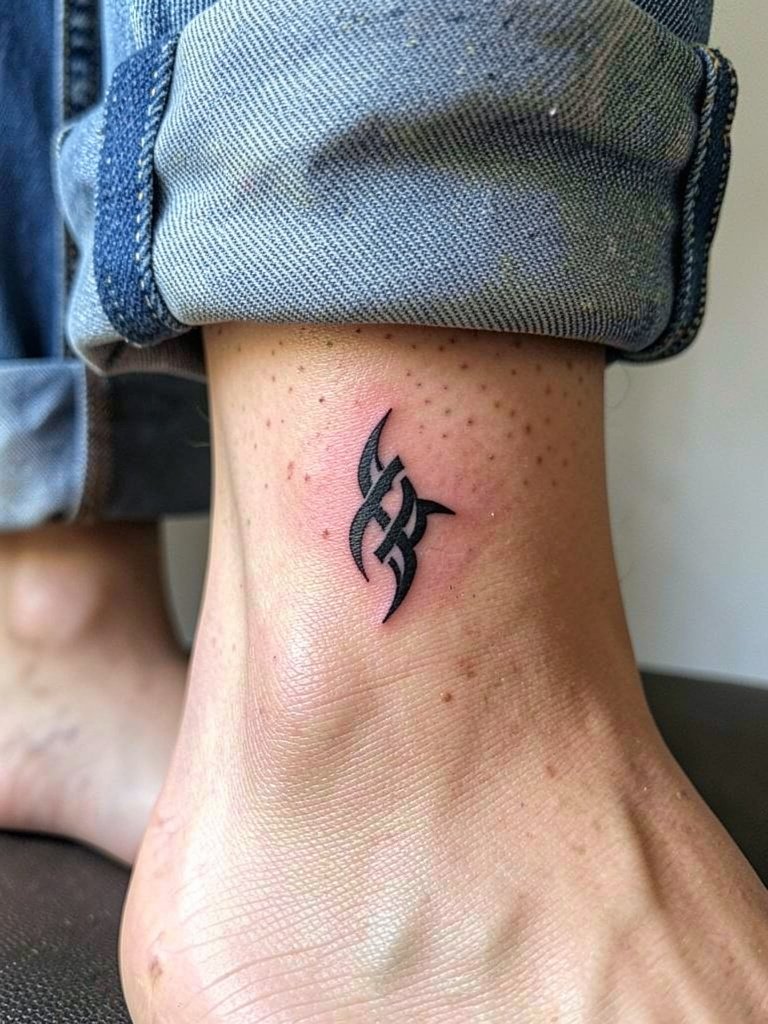
Ankle sigils are low-commitment and readable in summer. The area faces pressure from shoes and socks, so allow extra healing time before regular footwear. Avoid extremely fine filigree because the ankle's thin skin and movement soften tiny lines. For session wear shoes with easy closure and bring socks you can avoid for the first two days. For summer style show the ankle with cuffed jeans, link to cuffed straight leg jeans.
23. Tribal-Inspired Hammerhead or Blade Motif on Bicep
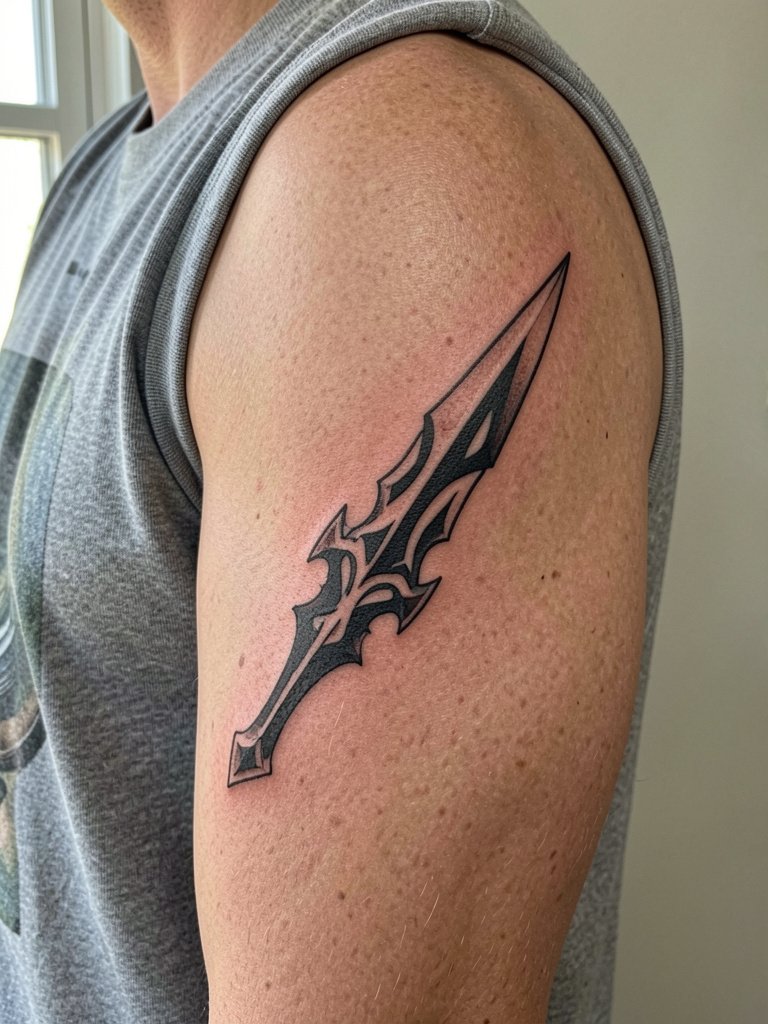
A bicep blade motif gives a built look without a full sleeve commitment. Line weight should be balanced so the taper reads when the arm flexes and when it is relaxed. A common misstep is making the central negative space too narrow, which fills in over time. For the session wear a sleeveless top so the artist has easy access, and consider a second brief touch-up session if the tips need crisping after healing.
24. Ornamental Collarbone Fringe
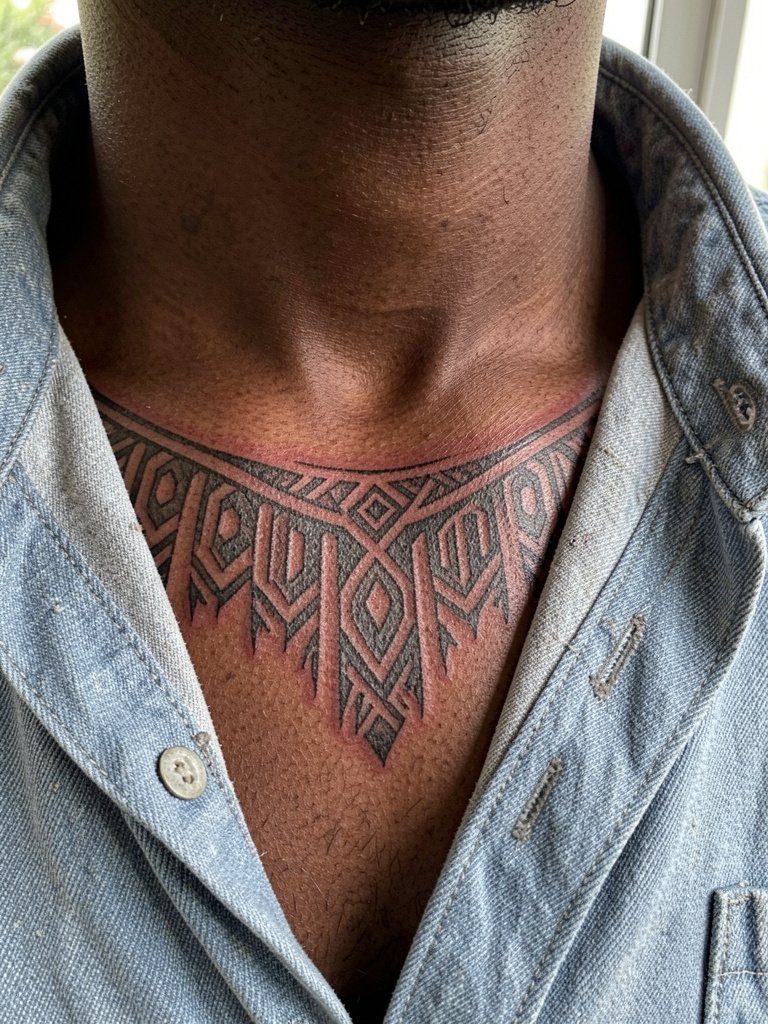
Collarbone fringes work well for someone who wants a bold neckline accent that can be shown with shirts. The risk is placing the fringe across the clavicle so lines cross the bone and blur. Ask the artist to place primary motifs on the softer skin just below the collarbone. For healed styling pair with an open-collar shirt to reveal the line, link to open button down shirt.
25. Neo-Tribal Flame Wrap for Outer Forearm
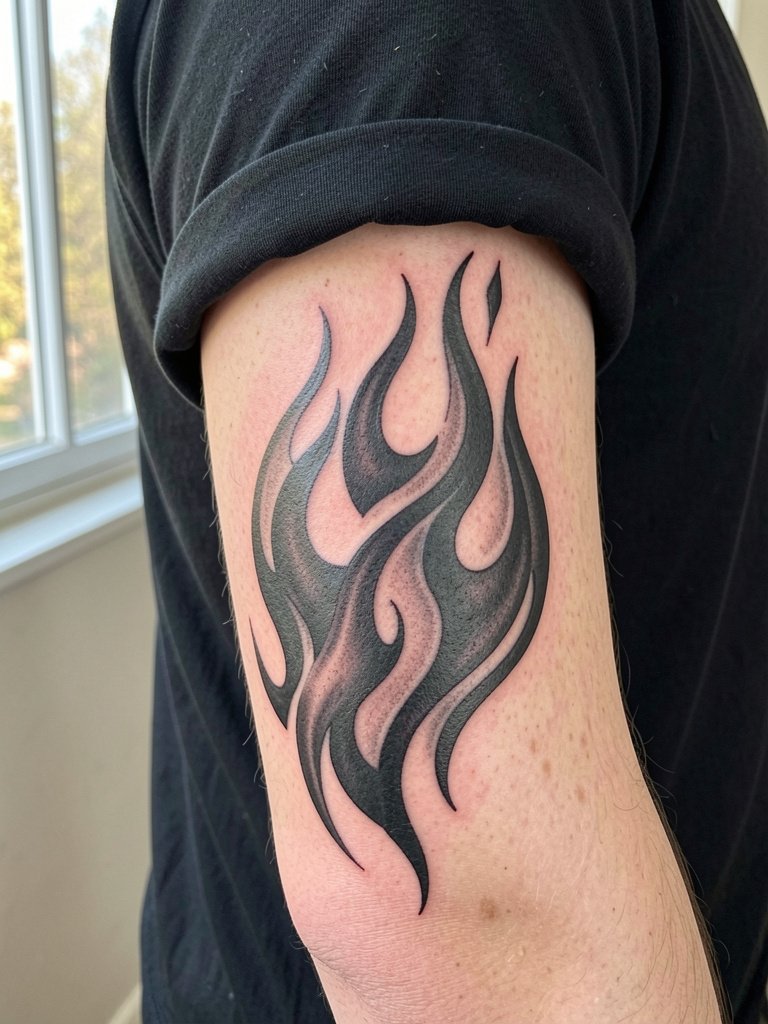
Flame-inspired wraps give movement and read athletic on the outer forearm. Make sure the flame tongues are thick enough at their tips so they hold after two to three years. Bring both a close-up and a full-arm shot so the artist can match scale to the buccal curve of your forearm. This piece pairs with rolled sleeves or a fitted tee to keep the focus on the flow, link to rolled cuff oxford shirt.
26. Small Geometric Chest Accent Near Sternum
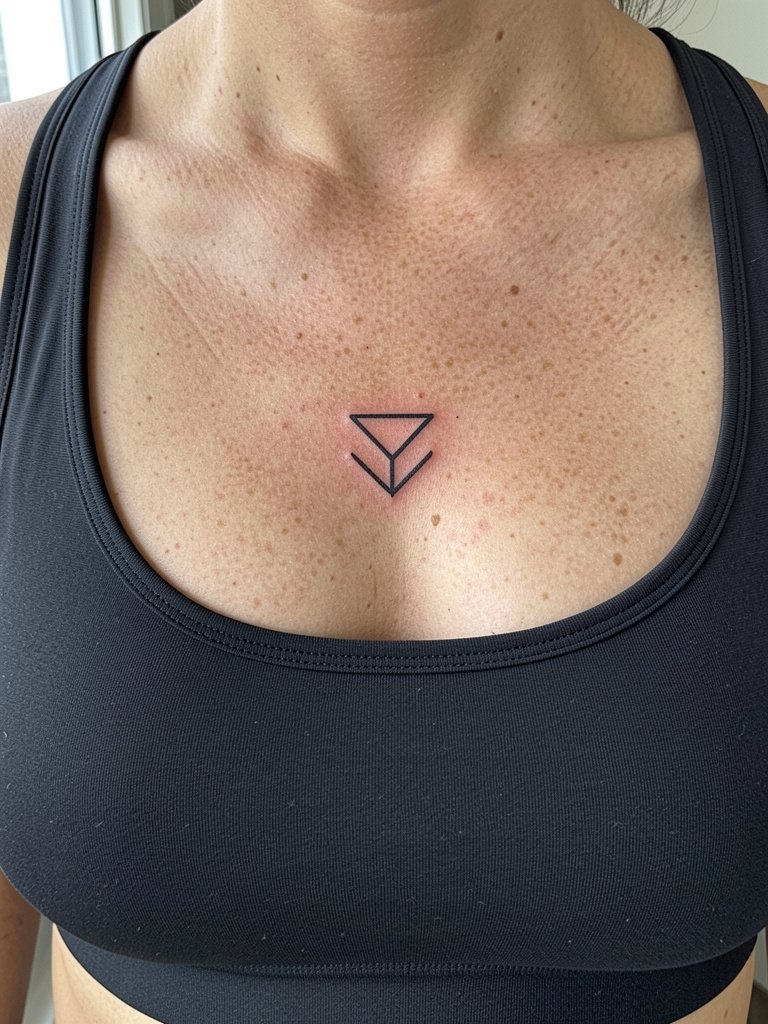
A compact chest accent gives the torso a focal point without a full panel commitment. The sternum area is less forgiving for tiny script or filigree, so opt for simple geometry with slightly heavier linework. Plan the session so the design is centered when you stand naturally, not when you hold your breath. For session wear a button-front shirt so you can open it flat and avoid friction as the piece heals.
27. Calf-To-Achilles Vertical Flow
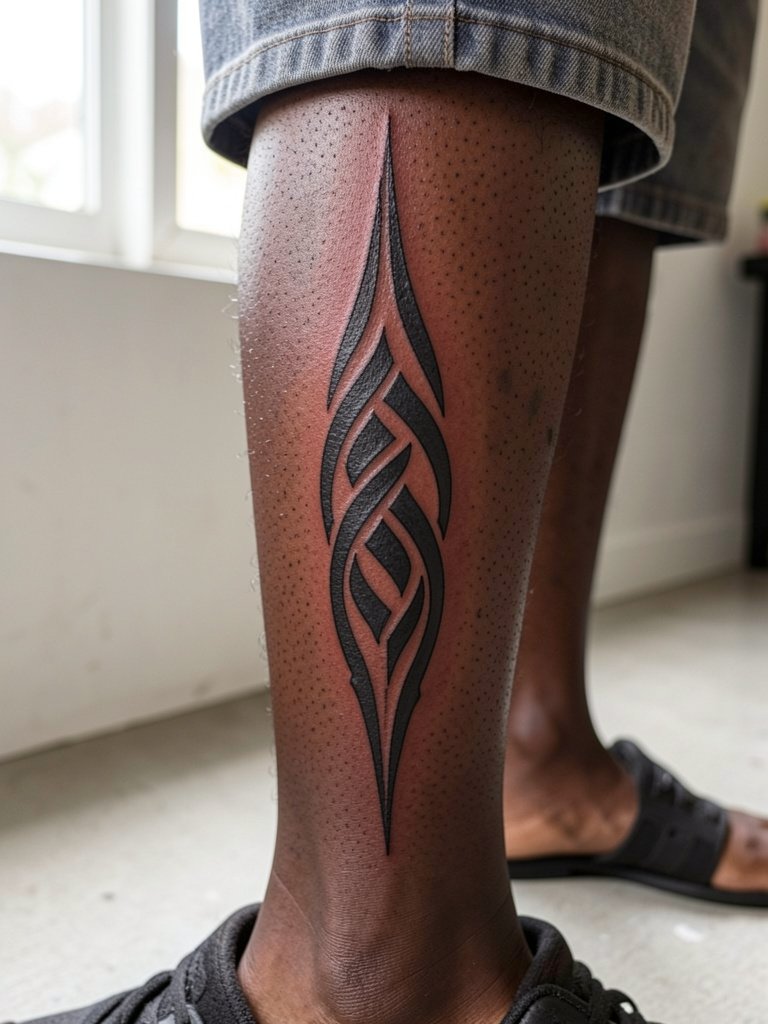
A calf-to-Achilles flow reads dramatic when shot from the side and in motion. The Achilles and lower calf can be subject to shoe friction and scuffs, so plan recovery with open footwear and avoid long runs for a few weeks. The typical mistake is compressing too many motifs into a narrow vertical column. Ask the artist to space elements for walking posture so the rhythm remains clear when you are standing or moving. For summer styling show the lower leg with tailored shorts, link to tailored shorts men.
Frequently Asked Questions
Q: How much should I expect to pay for a tribal piece?
A: Costs vary by size and custom work. Small bands and wrist wraps often start in the low hundreds, while custom chest, back, and wraparound projects can move into the thousands depending on hour totals and complexity. Expect custom blackwork to have a higher hourly cost than simple flash because of drawing time and saturation work.
Q: How do I avoid cultural appropriation when I want Polynesian or Maori elements?
A: Two perspectives shape this debate. One viewpoint says avoid using sacred or lineage-specific patterns unless you have a direct cultural connection because those designs carry identity and ritual meaning. Another viewpoint holds that tribal-inspired blackwork is a wider stylistic language that can be adapted respectfully if you work with an artist who understands origin, plates, and intent. If you care about respect, ask for an original composition that honors visual cues without copying ceremonial motifs.
Q: Where can I find portfolios or healed examples for tribal work without naming specific artists?
A: Search style hashtags and placement phrases on social platforms. Try tags like #tribaltattoo, #polynesiantattoo, and #blackworktattoo, then narrow by placement words such as shoulder cap, forearm, chest panel, or ribcage. Reddit communities focused on tattoo advice are also helpful for healed-photo feedback. For local searches add your city name and check studio websites to see healed galleries rather than just fresh-ink photos.
Q: How do tribal tattoos age on darker skin tones, and what should I ask for?
A: Healed contrast relies on strong saturation and slightly heavier linework on darker skin tones so the pattern remains legible. Ask the artist to show healed examples on skin tones similar to yours, and request slightly bolder strokes on fine details. Dotwork and very tight line grids can appear denser on darker skin, so discuss dot density and spacing during the consult.
Q: What should I wear to the session for shoulder, chest, and rib placements?
A: For shoulder cap and upper-arm work wear a loose short-sleeve tee or sleeveless tank so the deltoid is accessible. For chest panels an open button-down or camp-collar shirt that lays flat avoids rubbing. For rib and side-torso sessions choose soft, loose waistband shorts so belts and tight waists do not hit the fresh ink. For a quick option see loose waistband shorts for session comfort.
