
Someone I know spent months narrowing tattoo ideas down to one problem. It was not the design. It was knowing which star style would still read clearly after two years on real skin. I have spent time at five shops across Brooklyn and seen the same handful of star choices come up in conversations and portfolios. Below are 25 bold star tattoo ideas for men that consider placement, aging, consultation notes, and common mistakes to avoid.
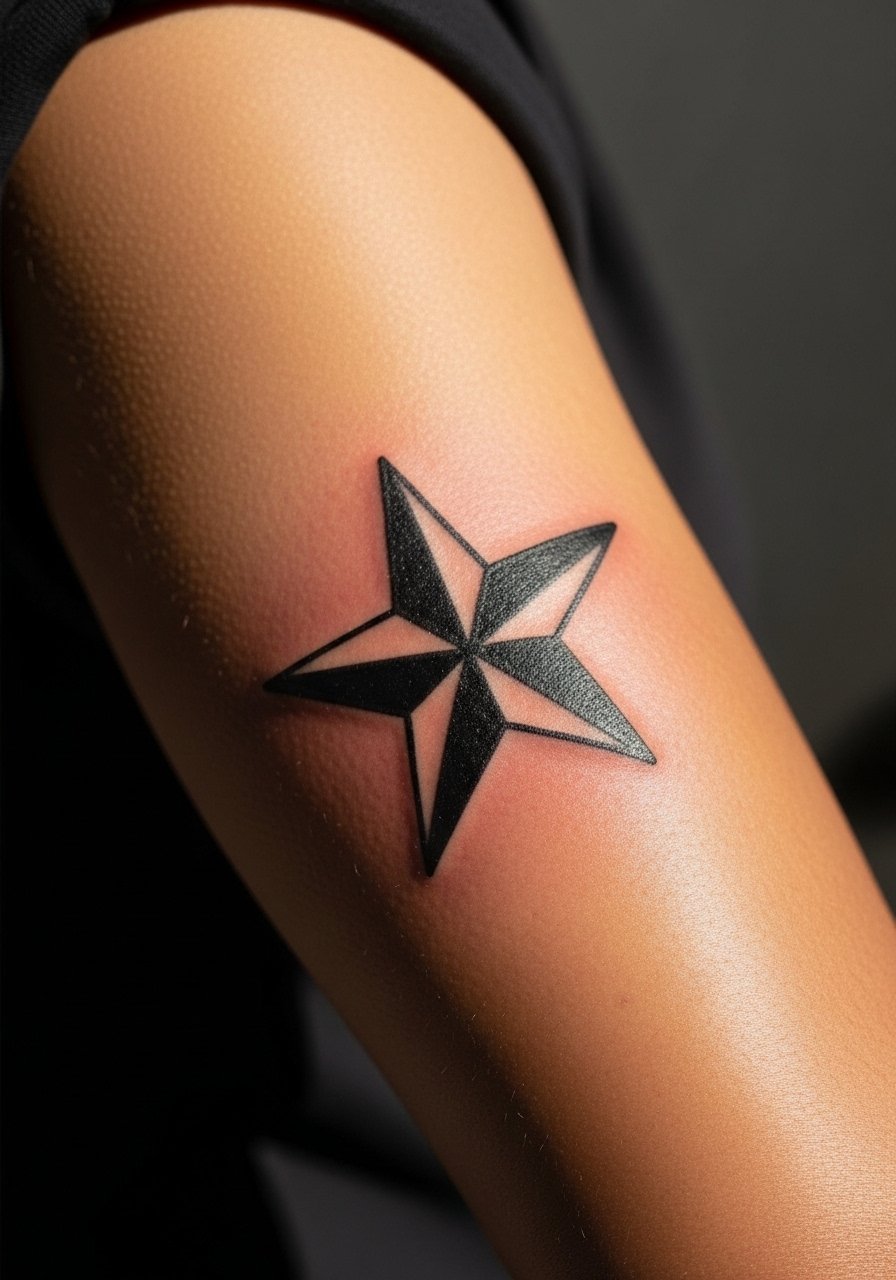
1. Traditional Nautical Star on Upper Arm
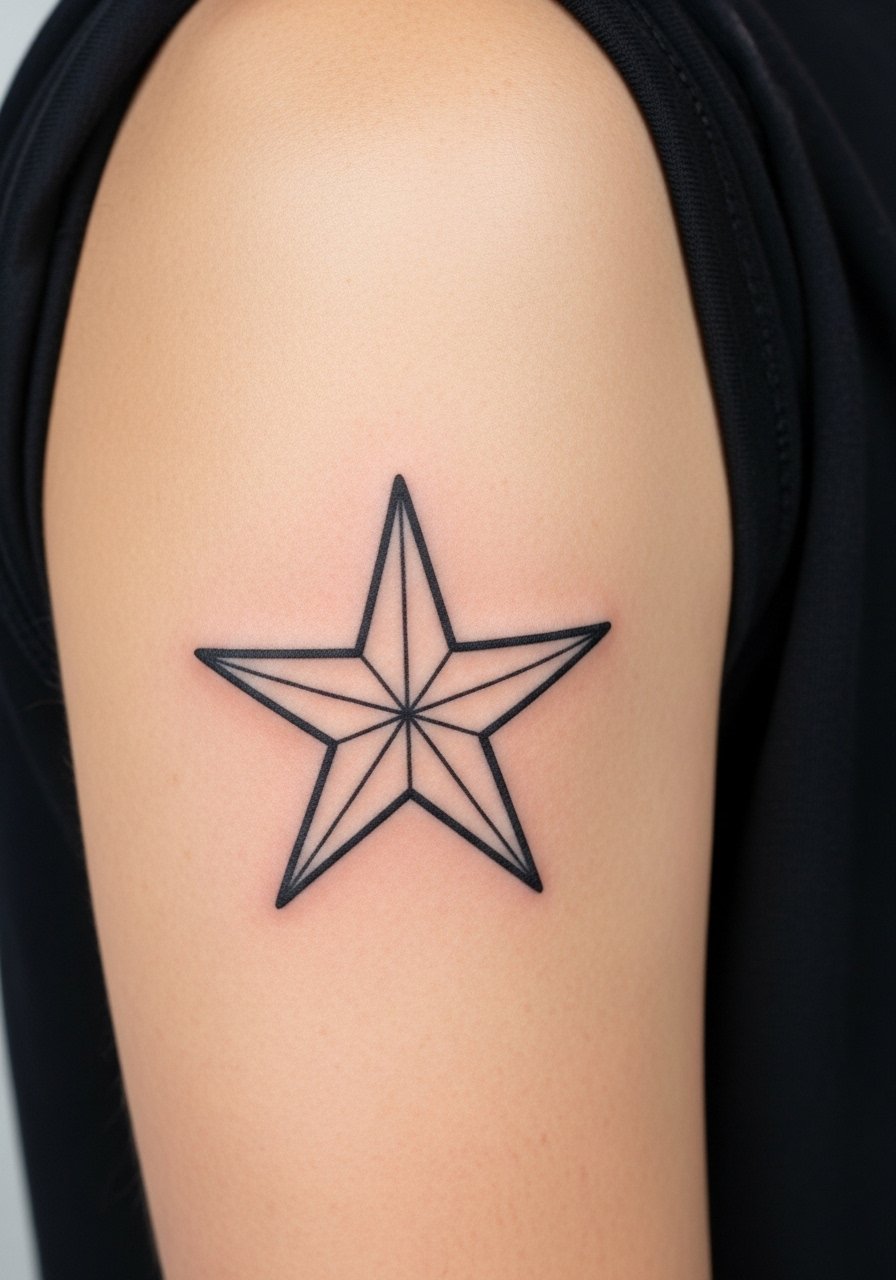
Someone I know first noticed this on a veteran's sleeve and liked how the bold outline reads from a distance. It is a low to medium pain placement and usually fits in a single session under two hours. Tell your artist you want solid linework and a slight offset for saturation so it does not look flat after healing. A common mistake is making the star too small for the thickness of the ink, which increases blowout risk. On the upper arm it holds saturation well, and touch-ups are rarely needed before year three if UV protection is consistent.
2. North Star with Coordinates on Inner Wrist
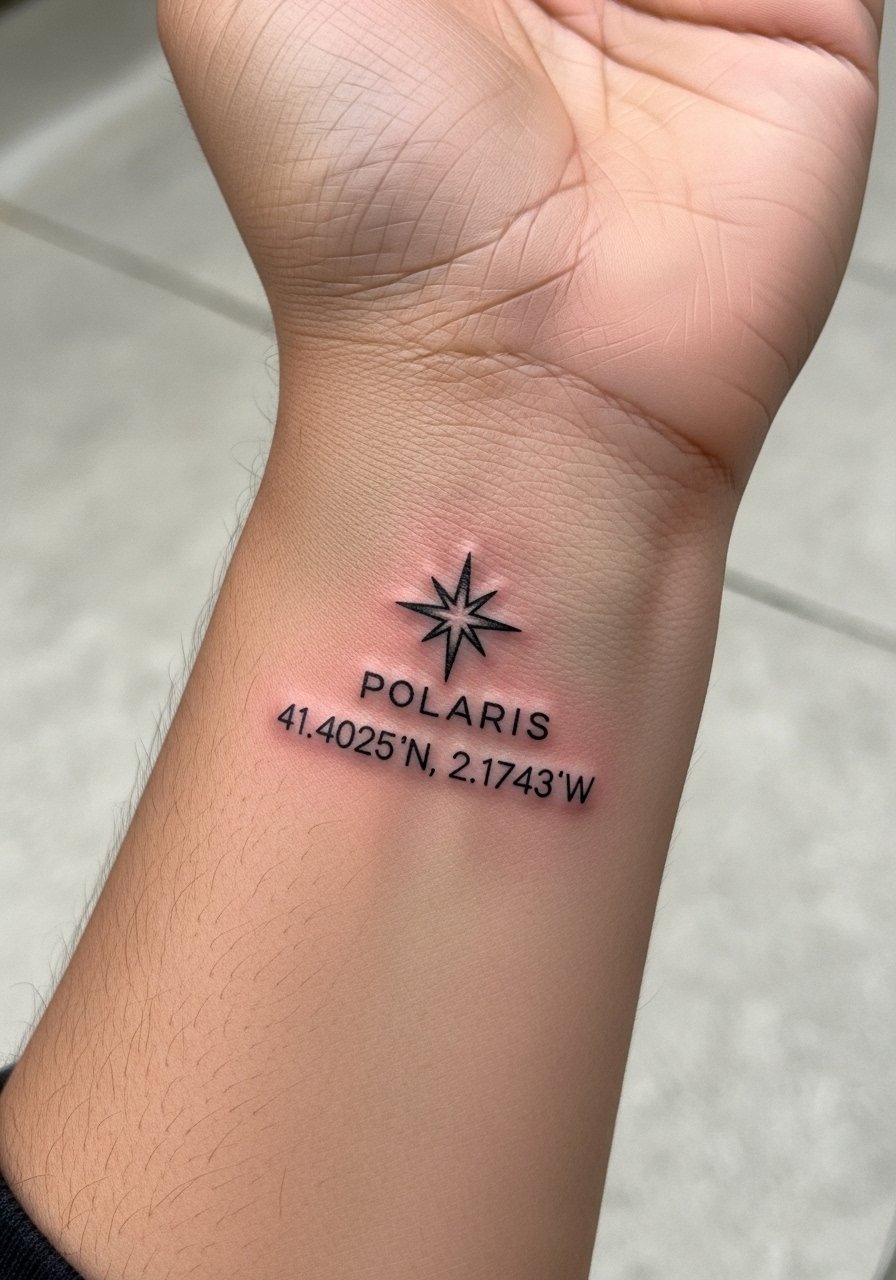
When you want meaning in a compact piece, pair the North Star with coordinates of a hometown or meaningful place. Plan for a 30 to 60 minute session and expect the wrist to be more sensitive than the forearm. Tell your artist you want crisp points and tighter spacing between the star and numbers so the coordinates remain legible after a year. Fine line on the wrist can blur if scaled too small. If you want longevity, ask for slightly bolder numerals and allow the artist to space the text a hair wider.
3. Shooting Star Trail on the Calf
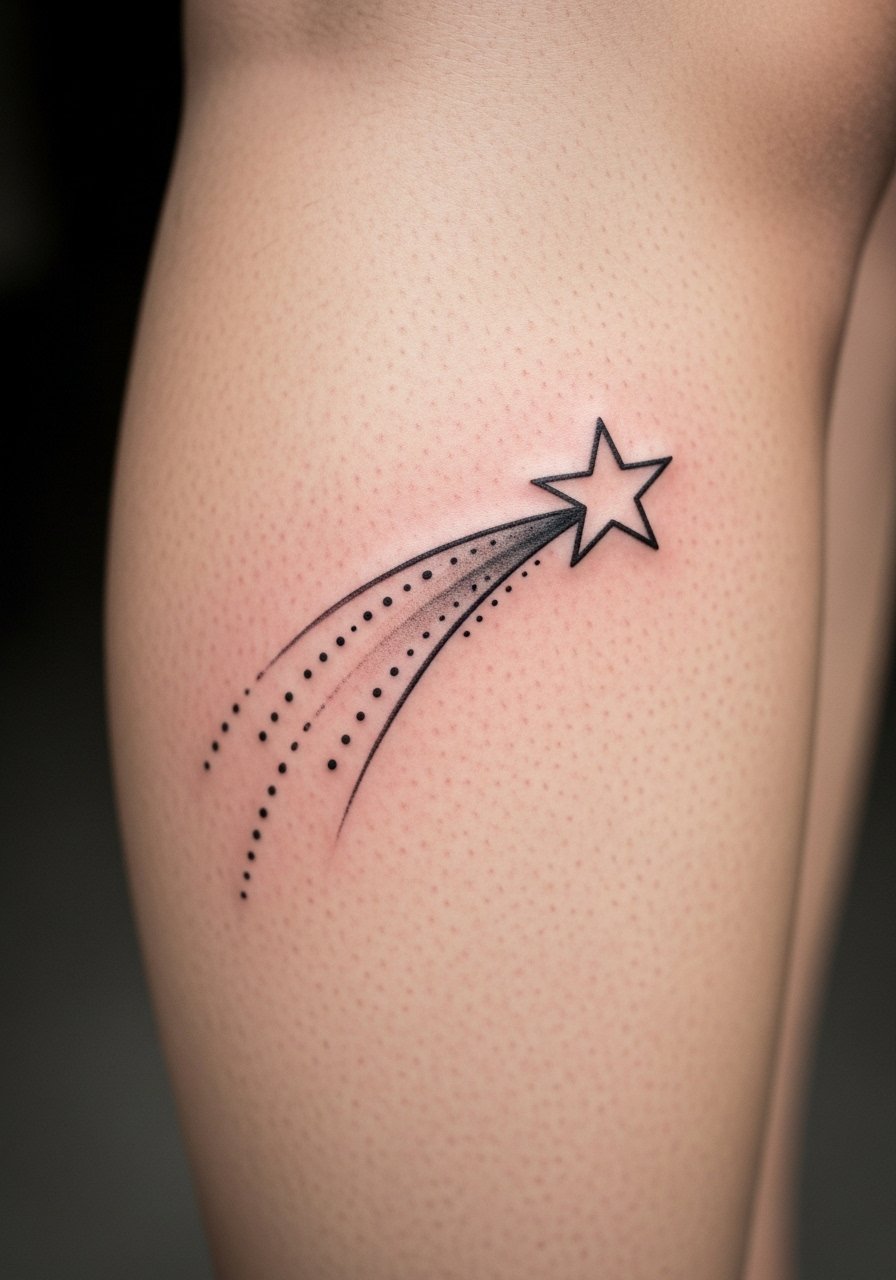
Visual impact lead. The calf gives room for a dynamic shooting star trail that curves with the muscle, which makes the motion feel alive when you walk. Sessions run around one hour for a medium-size piece. Tell your artist to follow natural muscle flow so the tail does not look rigid once you move. A frequent mistake is putting too many tiny stars into the tail, which ages like a smudge. Calf pieces sit well for years when saturation and spacing are respected, and touch-ups are an aesthetic choice rather than a necessity for most people.
4. Micro-Constellation Cluster on the Forearm
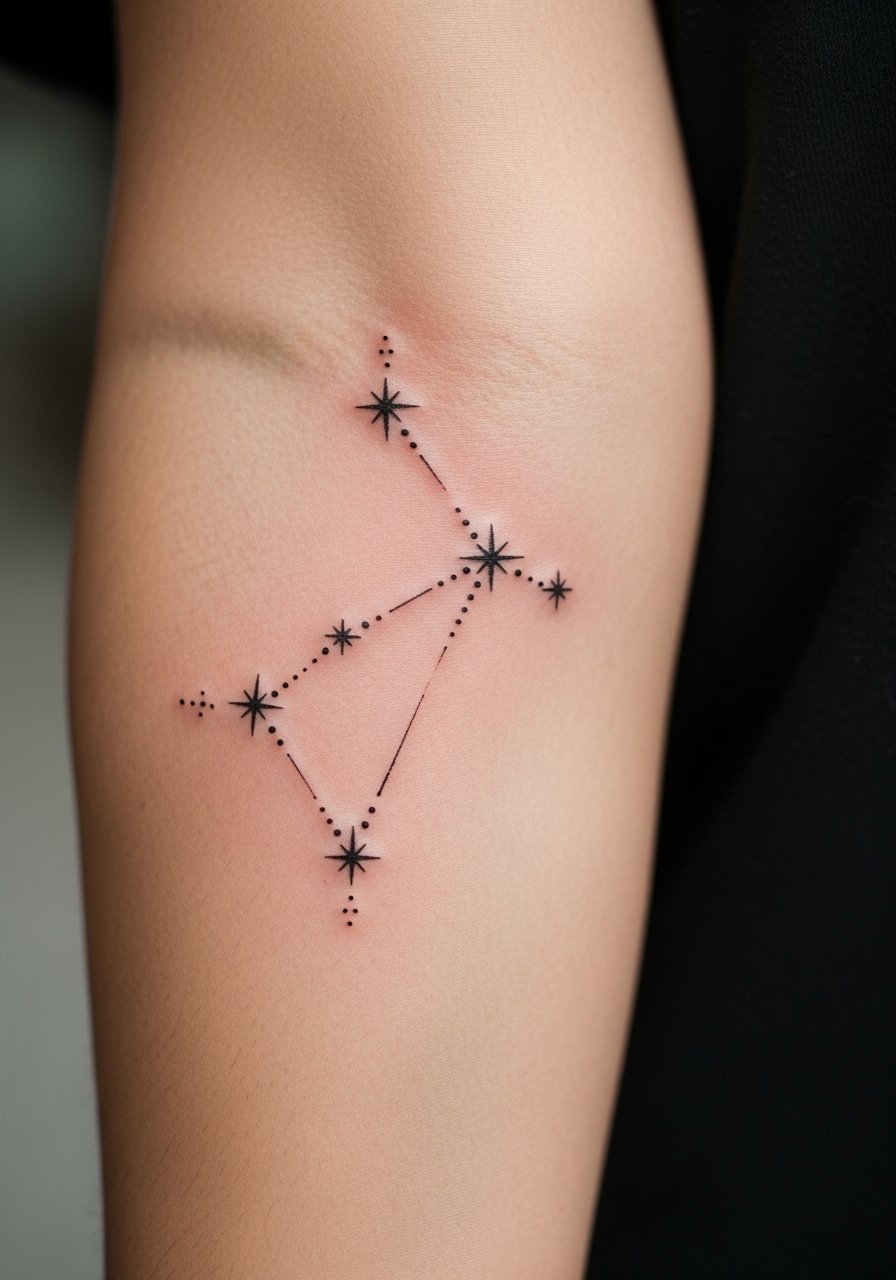
Personal observation lead. I have seen this style used to map a personal date or family members, and it reads as subtle from a distance. The forearm tolerates fine work well, but blowout risk rises if dots are crowded. Ask your artist for a balance of dot work and micro line spacing so each star has breathing room. If you plan a sleeve later, design the cluster to integrate with larger elements. Tiny dots may require touch-ups around year two to keep separation crisp.
5. Bold Blackwork Star on Chest
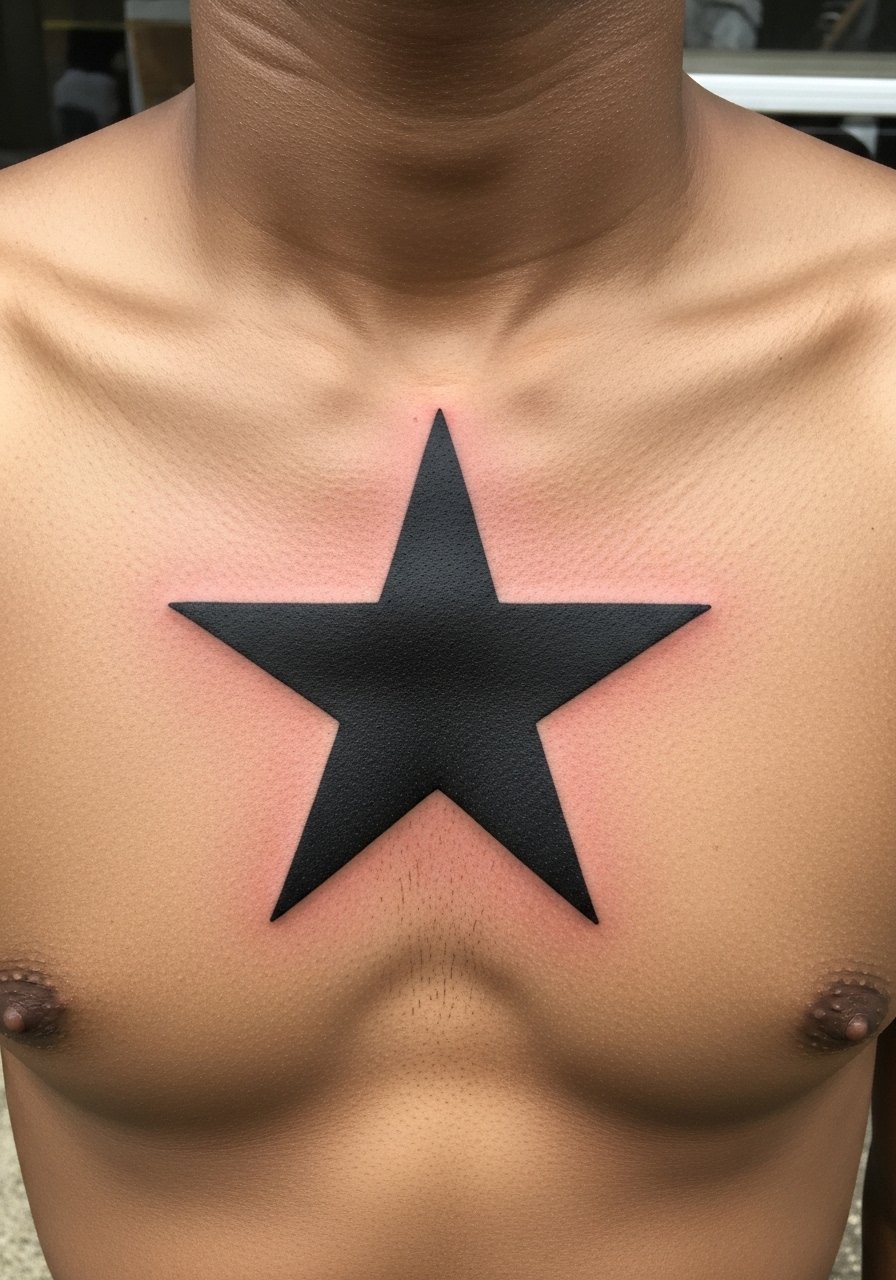
Visual impact lead. A bold, saturated black star on the chest reads strongly across skin tones and ages predictably because saturation wins longevity. Expect a one to two hour session depending on size and pain that ranges higher near the sternum. Tell your artist you want even saturation and crisp borders rather than feathered shading. One common mistake is over-complicating the fill with gradients that leave patchy healed spots. For chest pieces plan for a touch-up in year two to reinforce even saturation if you train frequently and sweat a lot.
6. Minimalist Single Star Behind the Ear
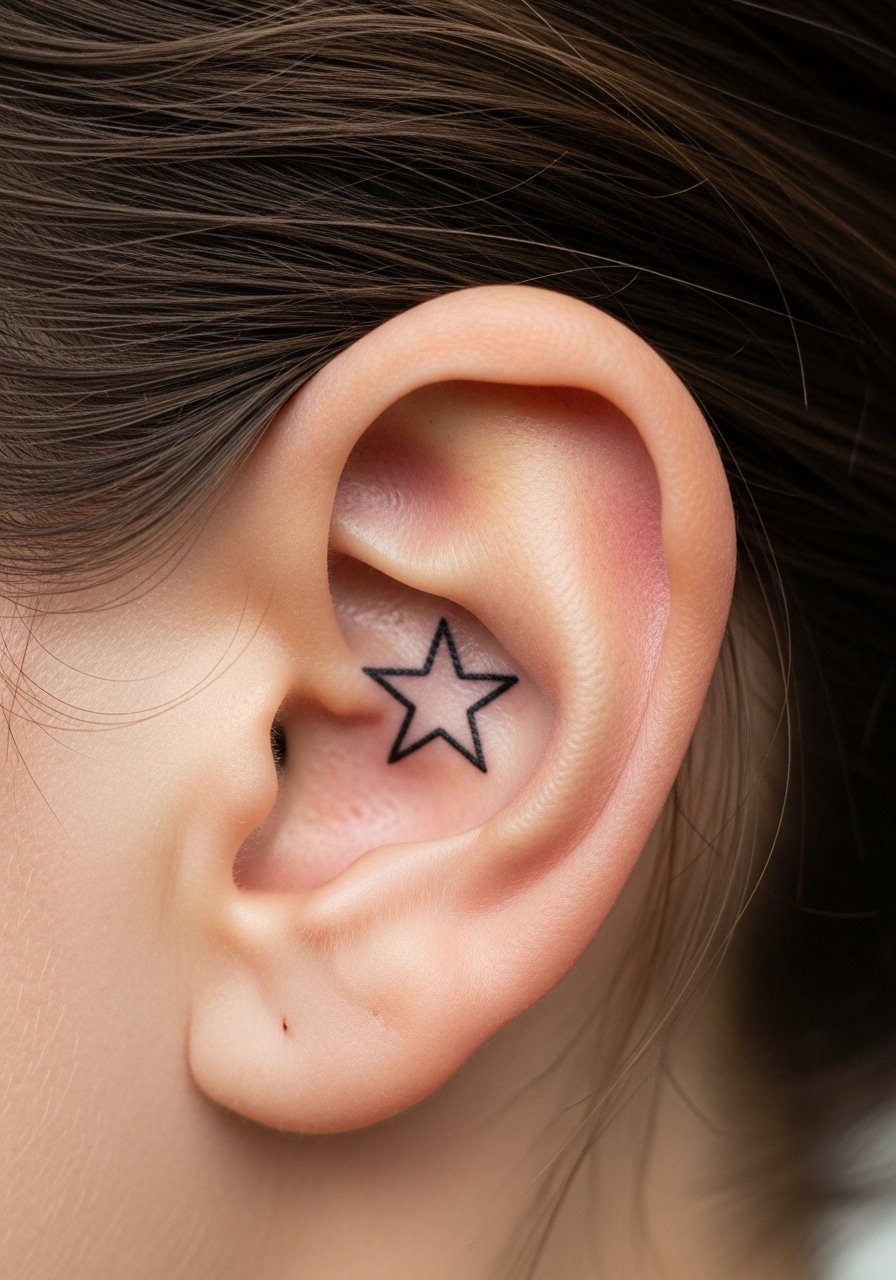
Mistake lead. Behind the ear is a discreet spot that looks intentional when kept very simple. The session is quick, under 30 minutes, and pain is low to medium. Tell your artist to avoid tiny, overly delicate points because the thin skin there can blur over time. A common error is asking for ultra-fine points that vanish within a year. If you might need a visible workplace profile, remember behind-the-ear pieces still peek out with short hair styles.
7. Star Compass on Shoulder Blade
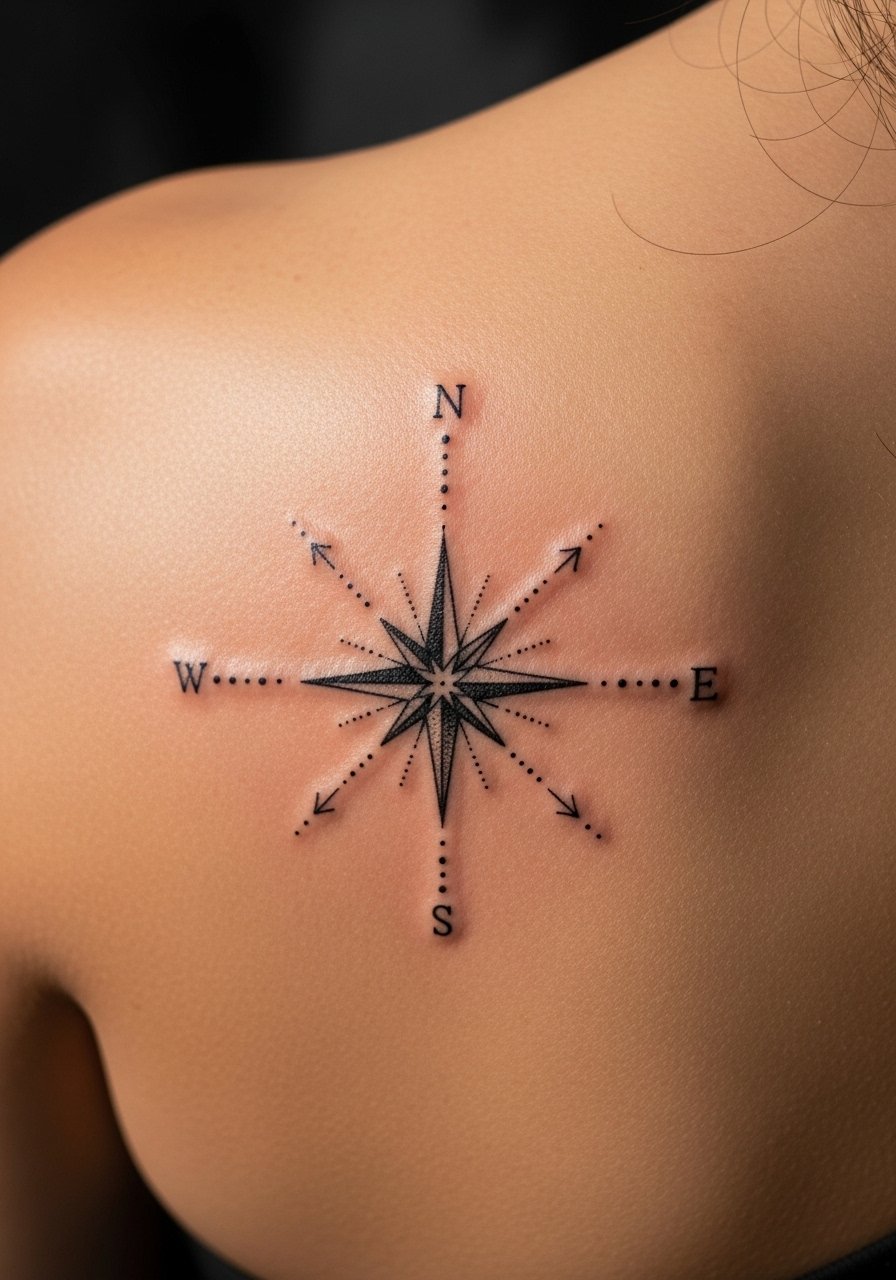
Consultation lead. The shoulder blade offers a broad surface for a compass-style star that can anchor larger back pieces later. A session may run one to two hours. When you meet your artist, bring compass examples that show the exact arm length and dot density you want. The biggest mistake is asking for needle-fine directional arms without giving them room, which invites early blurring. When placed properly on the shoulder blade it ages steadily and is forgiving with movement.
8. Five-Point Traditional Star on the Bicep
Pain warning lead. The inner bicep can be more sensitive, but the muscle shape makes a traditional star sit flush and readable. Sessions vary from 30 minutes to an hour. Ask the artist to scale the star to the bicep width so it does not look squashed when your arm relaxes. A common mistake is using thin outlines that age into soft edges. Traditional bold outlines with solid fill tend to maintain contrast and need fewer touch-ups than micro styles.
9. Star with Roman Numerals on the Ribcage
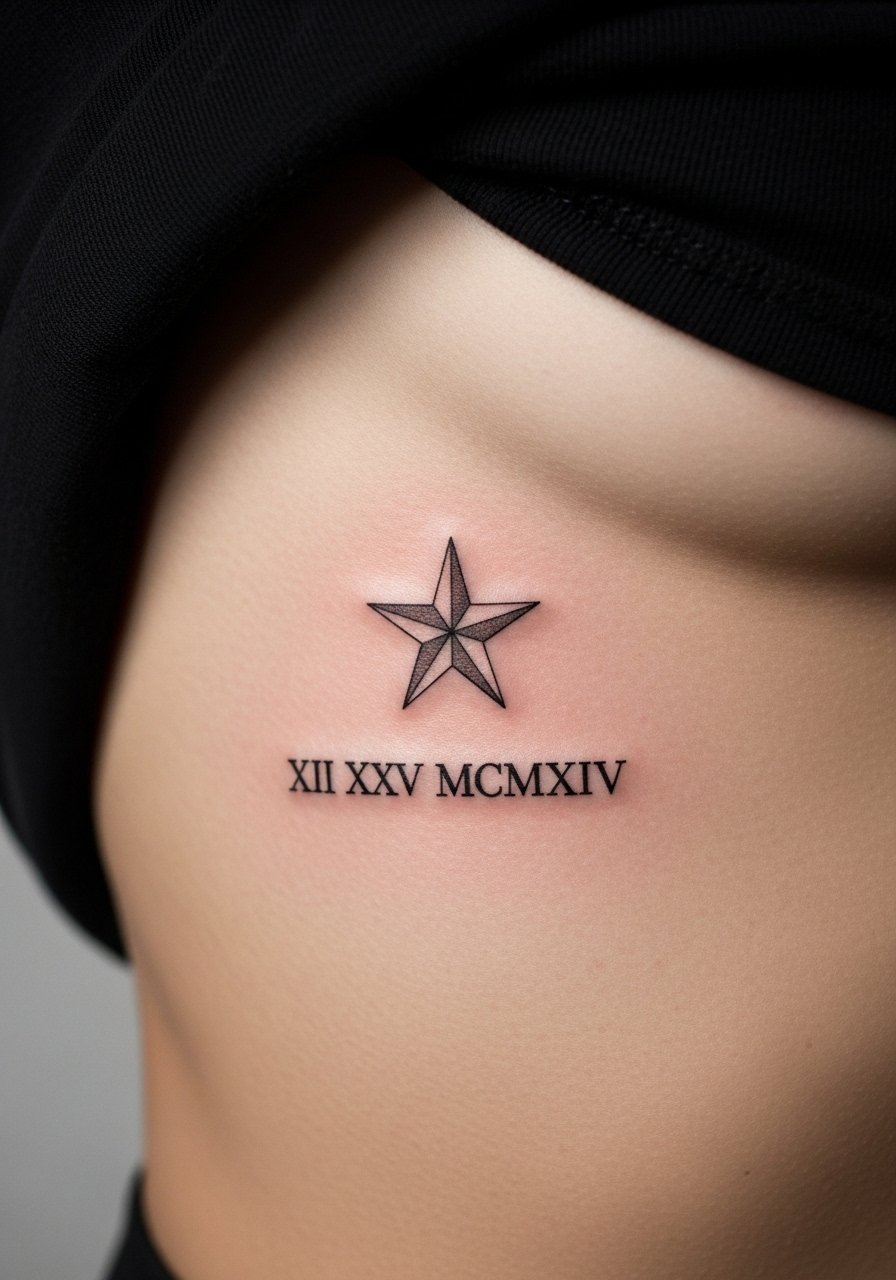
Controversy lead. Fine line on the ribs splits artists into two camps. One camp says the skin stretch and movement blur fine lines within two years. The other camp argues that with precise needle depth and spacing fine line holds up. The truth depends on the artist's technique and your body's healing. Rib pieces are high on the pain scale and often need longer sessions or multiple sittings. Ask whether your artist prefers slightly bolder numerals to improve longevity and plan a touch-up window around year two.
10. Matching Sibling Constellation on the Collarbone
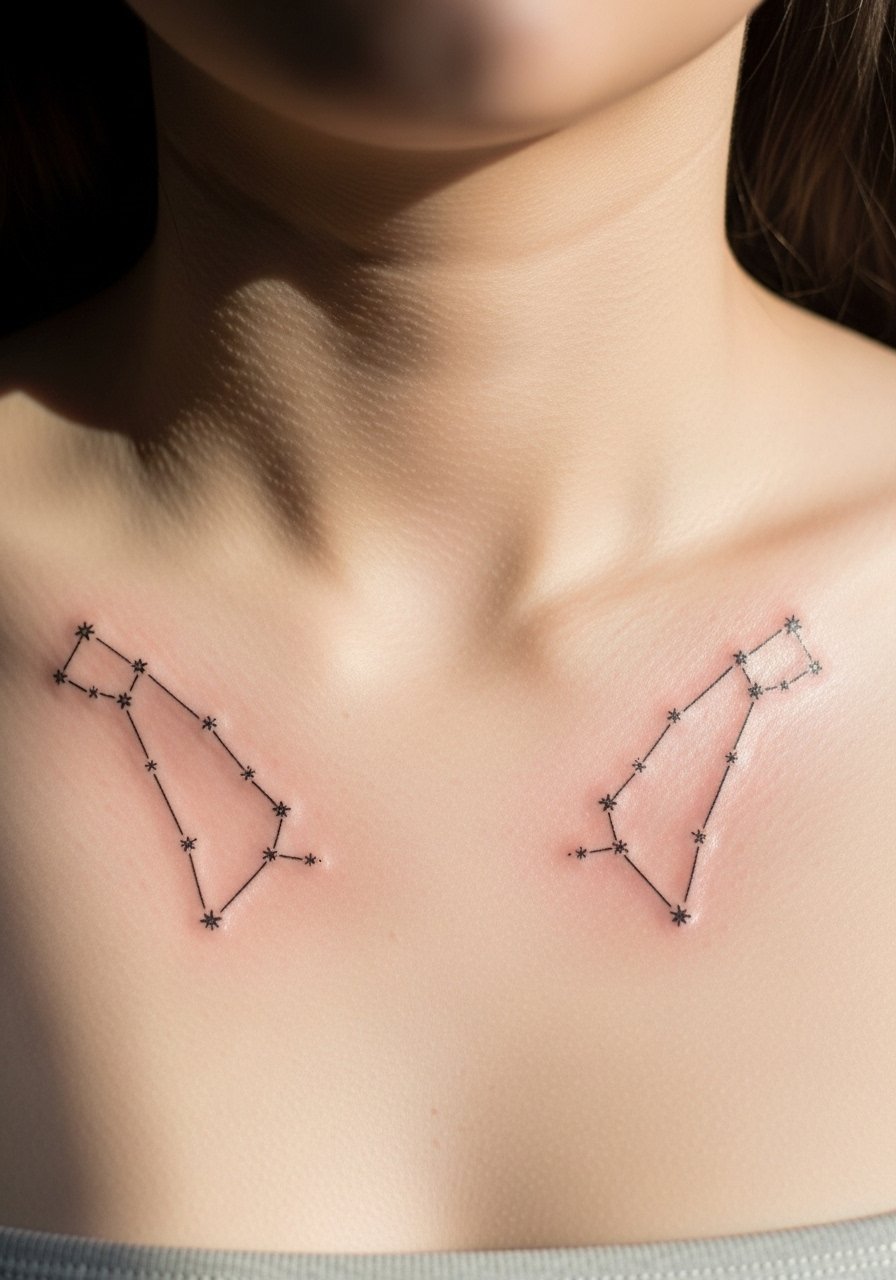
Consultation lead. For shared ink with a sibling, use mirrored collarbone placements that align when you stand together. Sessions are short, about 45 minutes total. Tell the artist you want consistent spacing so both constellations read as a set. A common mistake is letting each person pick different dot sizes. If you expect frequent sun exposure, ask about slightly denser dots to preserve contrast. Collarbone skin can be thin so minor touch-ups around year two are common.
11. Galaxy Cluster Sleeve Accent on Outer Forearm
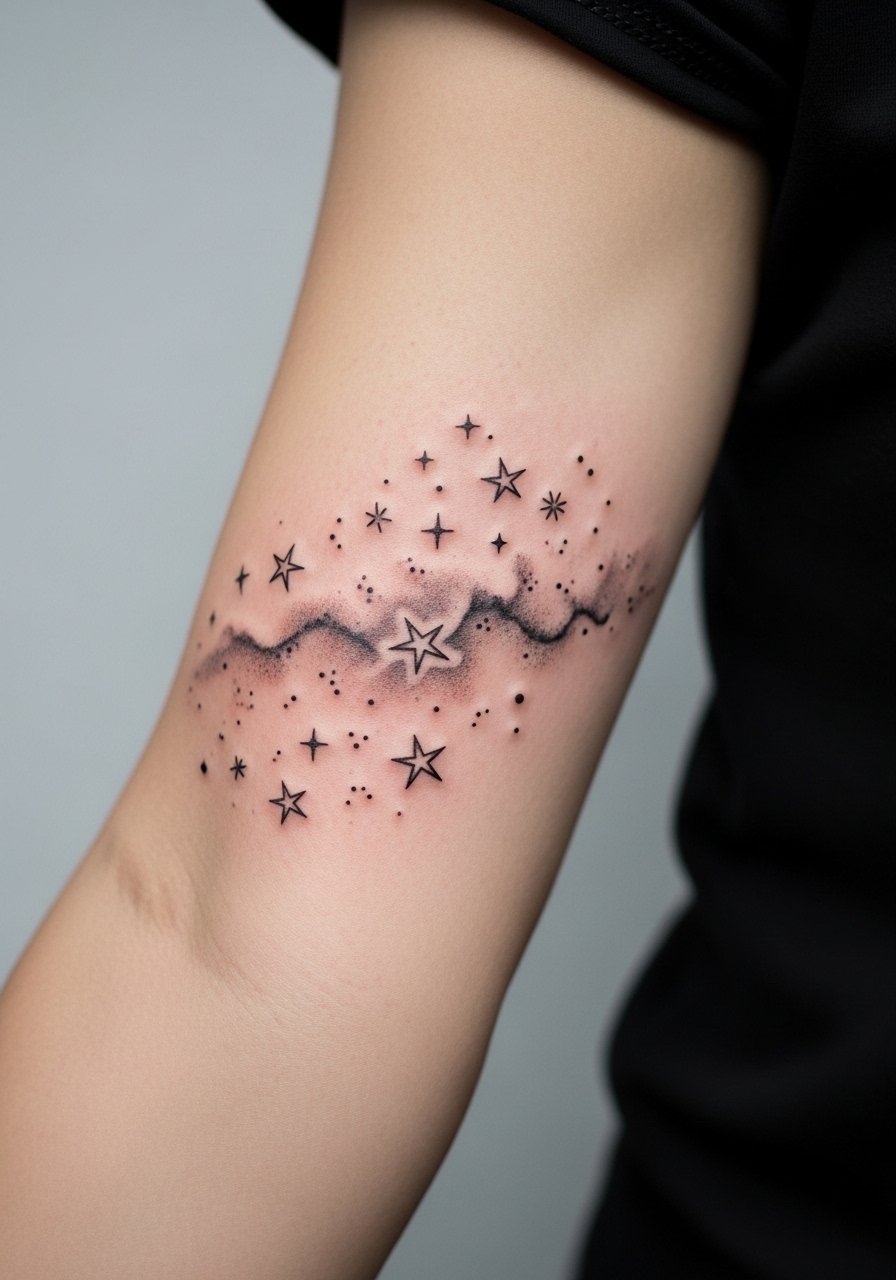
Visual impact lead. Add a cluster of stars as the connecting detail in a sleeve layout to tie motifs together. Sessions vary by complexity and can be broken into two sittings. Tell your artist where you want negative space to allow stars to breathe. The mistake I see is overpacking the forearm with tiny dots and gray wash, which becomes muddy after healing. For sleeves plan touch-ups at year three to maintain edges and saturation along the forearm curve.
12. Stipple-Shaded Star on the Thigh
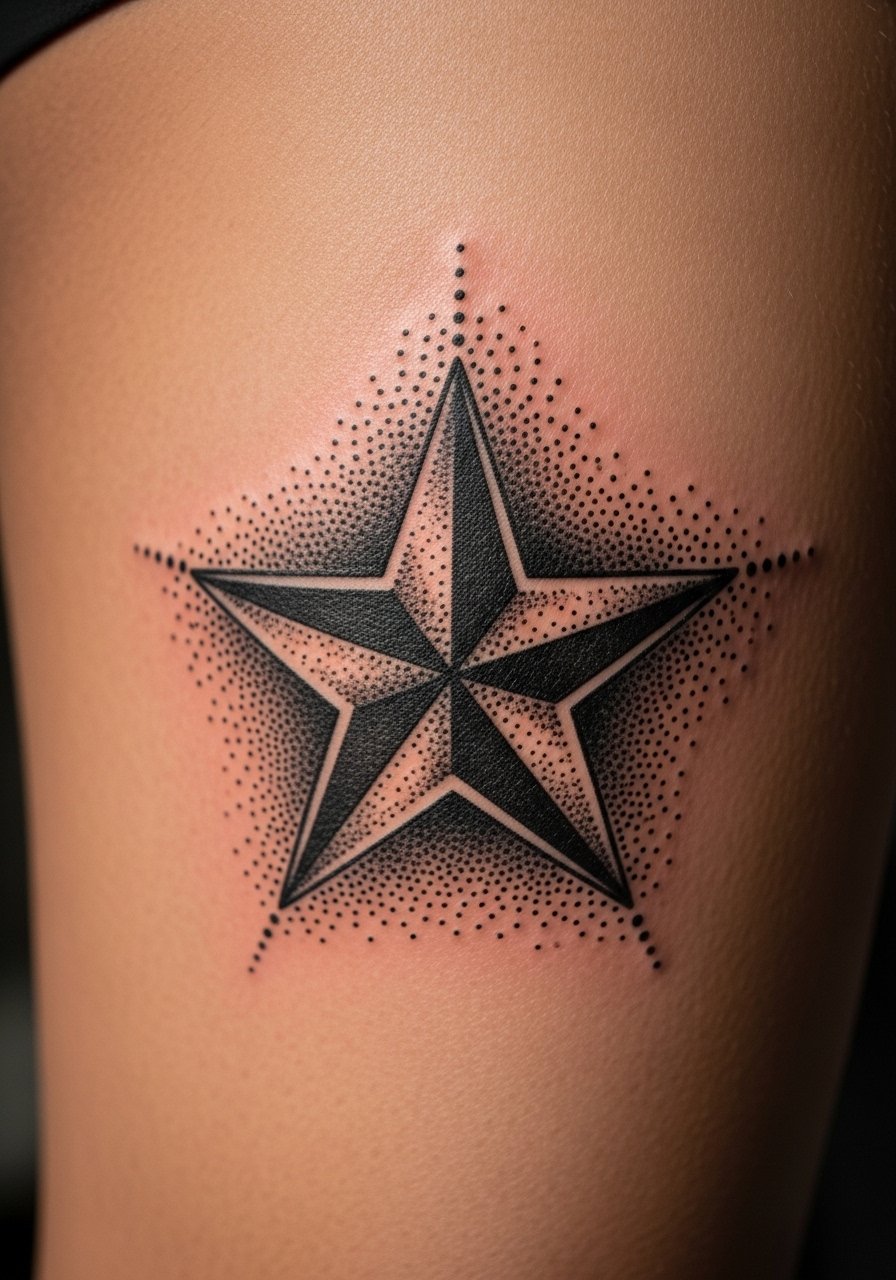
Aging/healing lead. Stipple shading can look crisp for years if the dots are spaced deliberately. Expect moderate pain and a session up to two hours depending on size. Ask for a test patch of dot density if possible in the consultation so you can see how the stipple reads on your skin tone. Artists split over how dense is too dense for stippling. One group favors tighter dots for definition, and the other prefers looser dots to avoid patchy heals. On the thigh you have forgiveness for density adjustments and touch-ups are straightforward.
13. Tiny Micro Star on the Finger
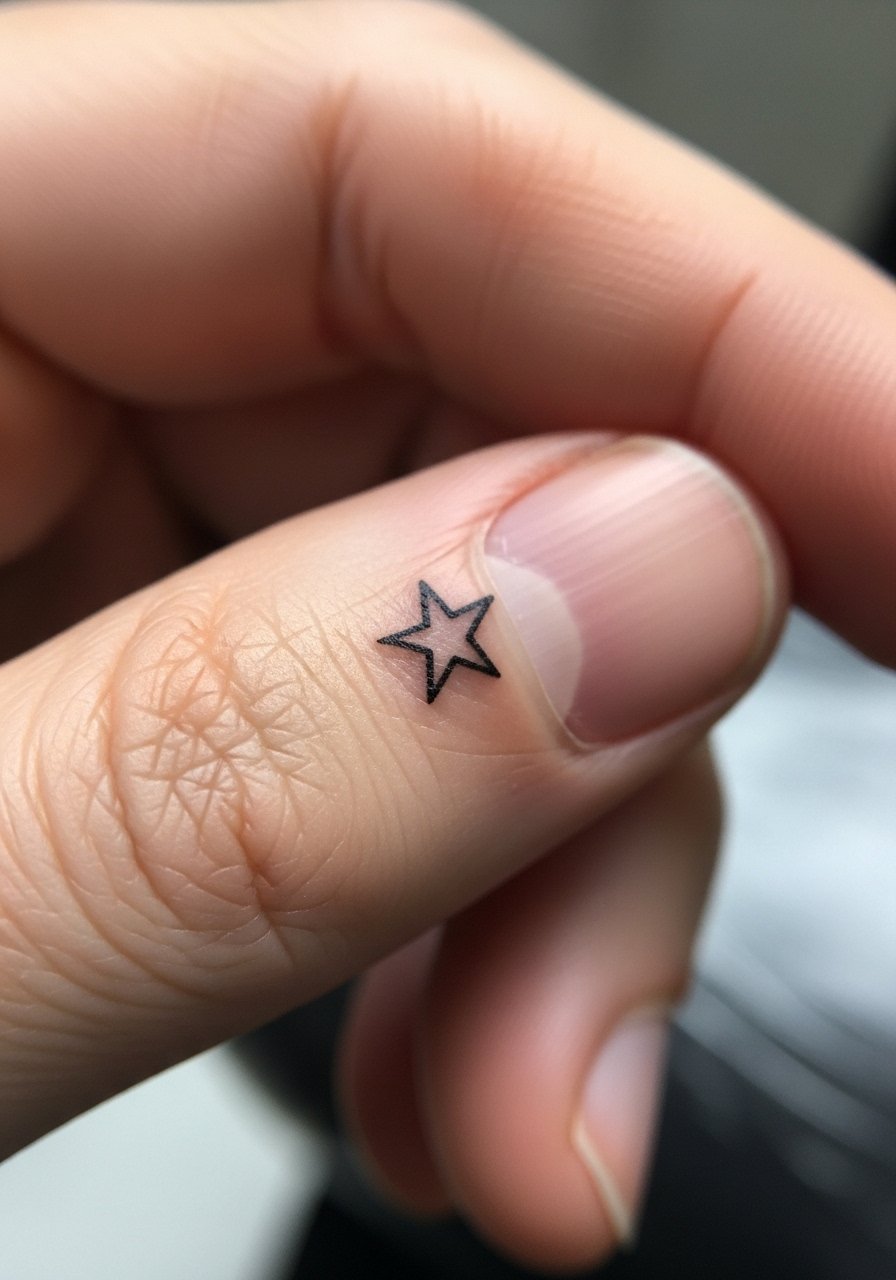
Mistake lead. Finger tattoos are notoriously prone to early fading and edge softening because of constant use. Sessions are quick. Ask your artist about micro placement on the finger edge versus flat surface since the edge heals worse. A common error is putting a detailed piece where skin sheds frequently. Expect touch-ups as early as six to twelve months. If you need it to last longer, plan for a slightly bolder line weight and accept the maintenance trade-off.
14. Sternum Star with Dot Work
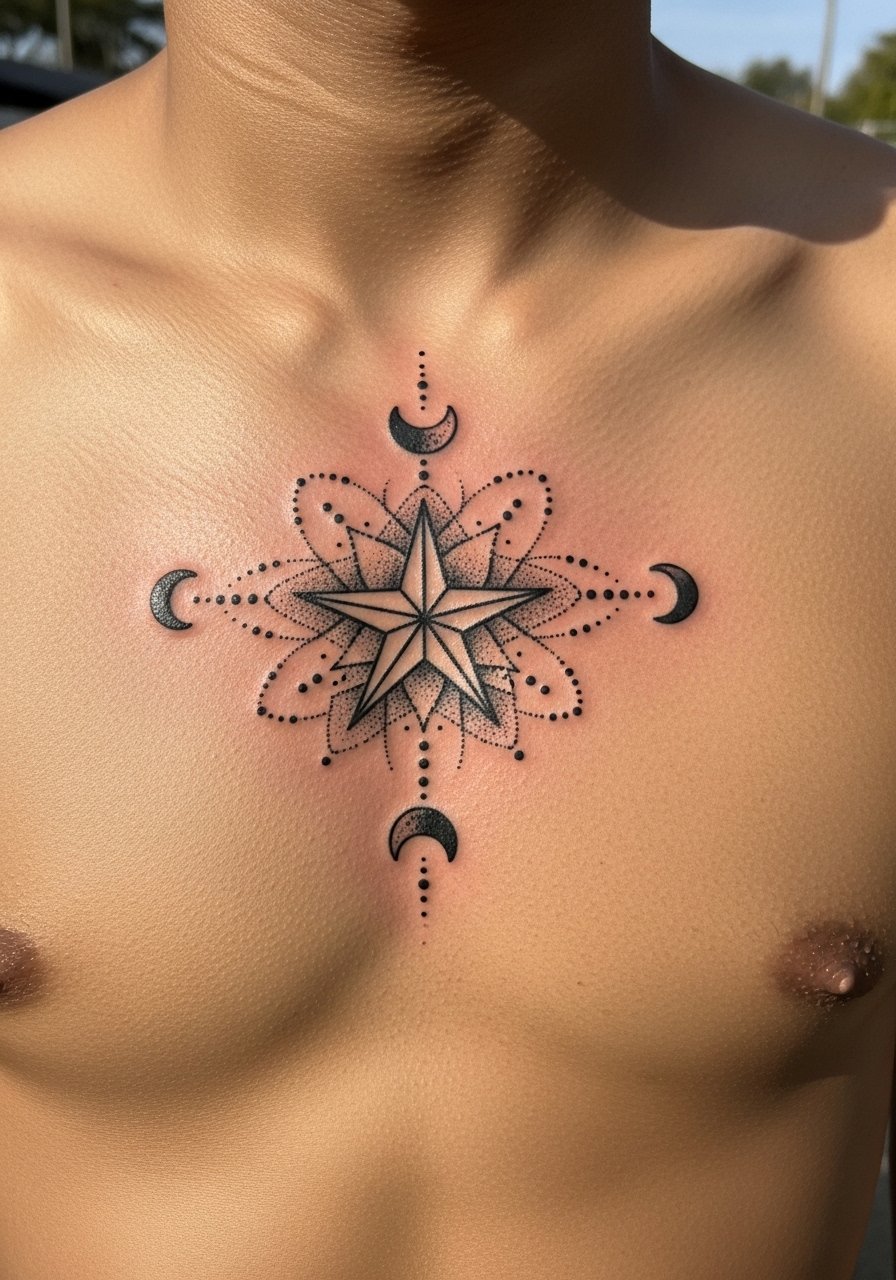
Sensitive placement note. Sternum tattoos are intimate and require an artist experienced with chest anatomy. Pain is higher and sessions can be split. During consultation mention how much negative space you want because crowded dot work can look muddy. A common mistake is asking for ultra-fine detail on the sternum center when movement and breathing can soften dots. Expect a touch-up in year two for dot clarity if you sleep on your stomach frequently during healing.
15. Star and Anchor on the Ankle
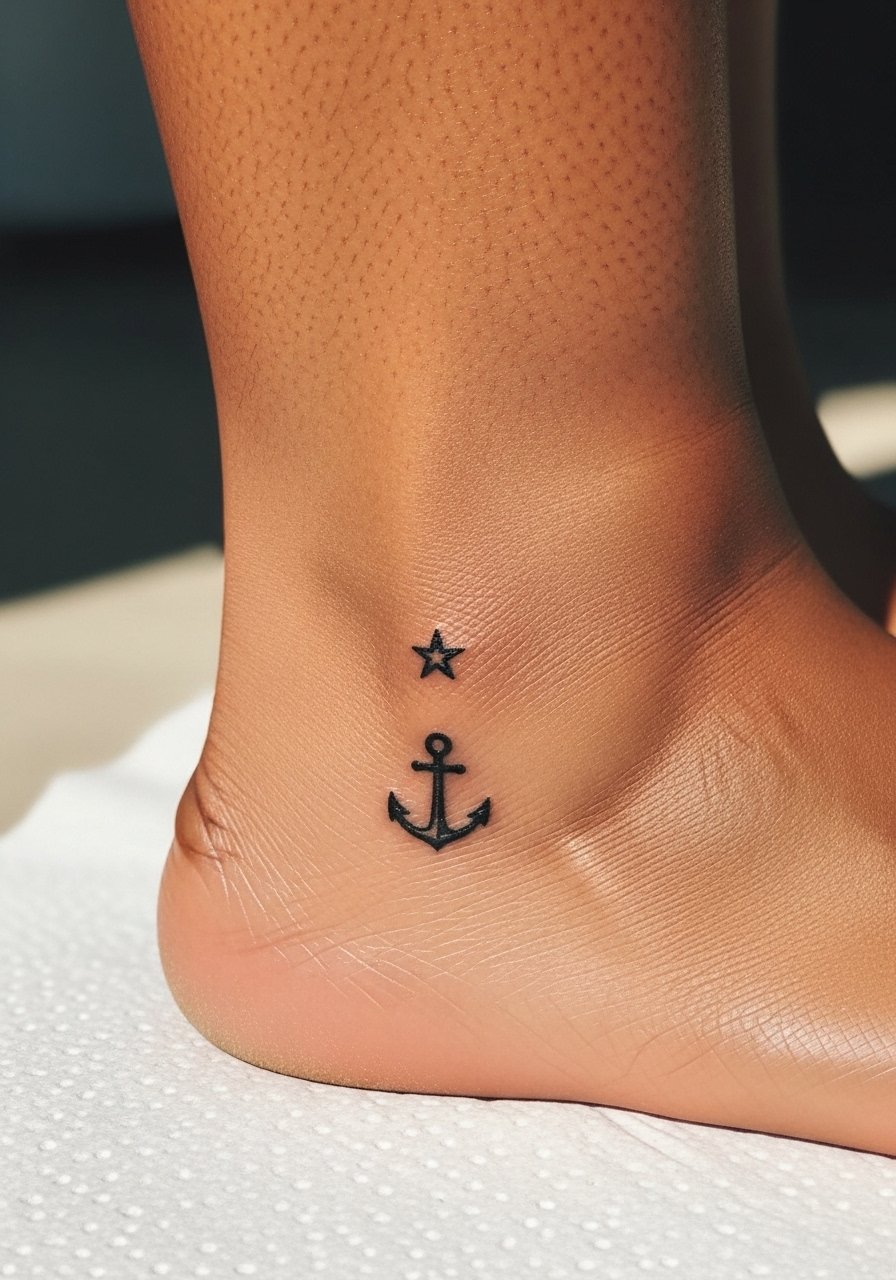
Personal observation lead. The ankle reads well for nautical motifs and the skin there tolerates small bold shapes if sized correctly. Sessions are short but the area is bony and sharp pain is common. Tell your artist you want the star perched above the anchor rather than overlapping, so each element keeps its clarity. A mistake is blending the two with tiny fills that become one smudge after healing. Ankle tattoos often need touch-ups around year two due to friction from socks and shoes.
16. Geometric Star Mandala on Upper Back
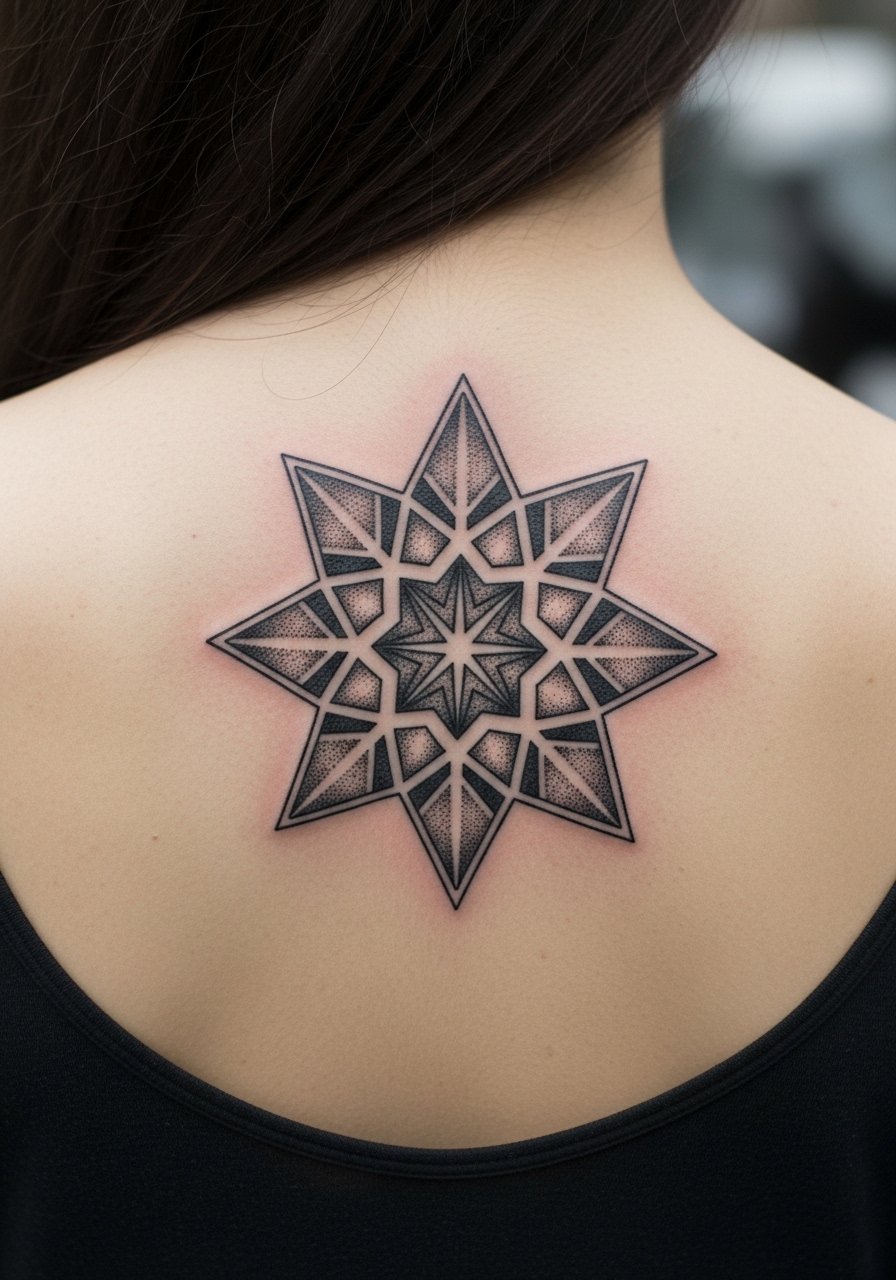
Consultation lead. A star mandala on the upper back can serve as a centerpiece for larger back work. Sessions take longer and may be split. Bring reference mandalas that show exact symmetry and line weight. The most common mistake is not allowing enough spacing between concentric lines, which causes the pattern to blur. On the back the piece ages well, but plan for a symmetry check at the touch-up since posture and muscle changes can alter how it sits.
17. Single Bold Star on Knuckle
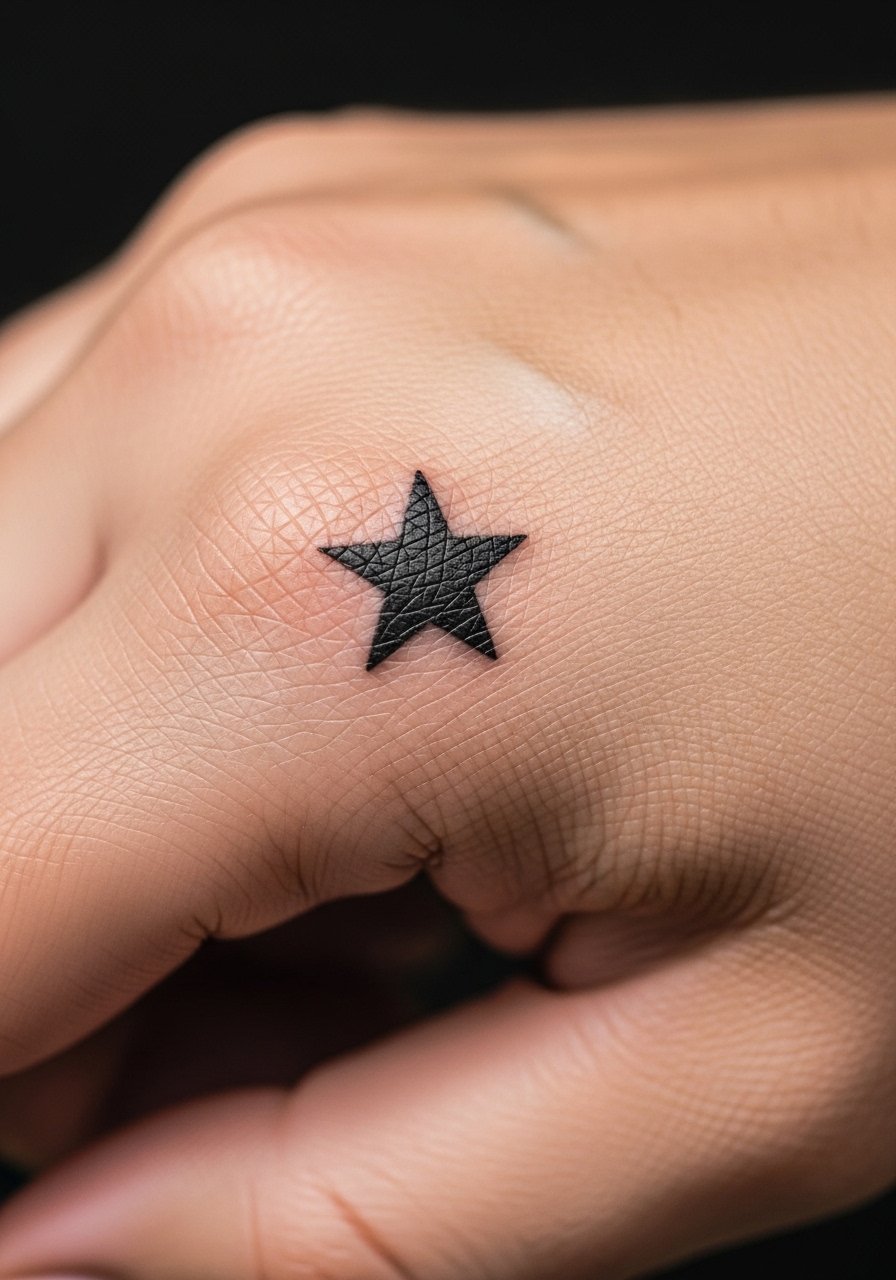
Sensitive placement note. Knuckle tattoos take heavy wear from washing and activity, so expect frequent early fading. Sessions are quick but may sting. Ask for slightly heavier outlines to increase longevity, and know touch-ups could be needed every year or two. A common mistake is using soft shading on knuckles that vanishes. If your work requires a conservative hand, remember knuckle visibility can influence hiring conversations.
18. Shooting Star through Script "Breathe" on Inner Forearm
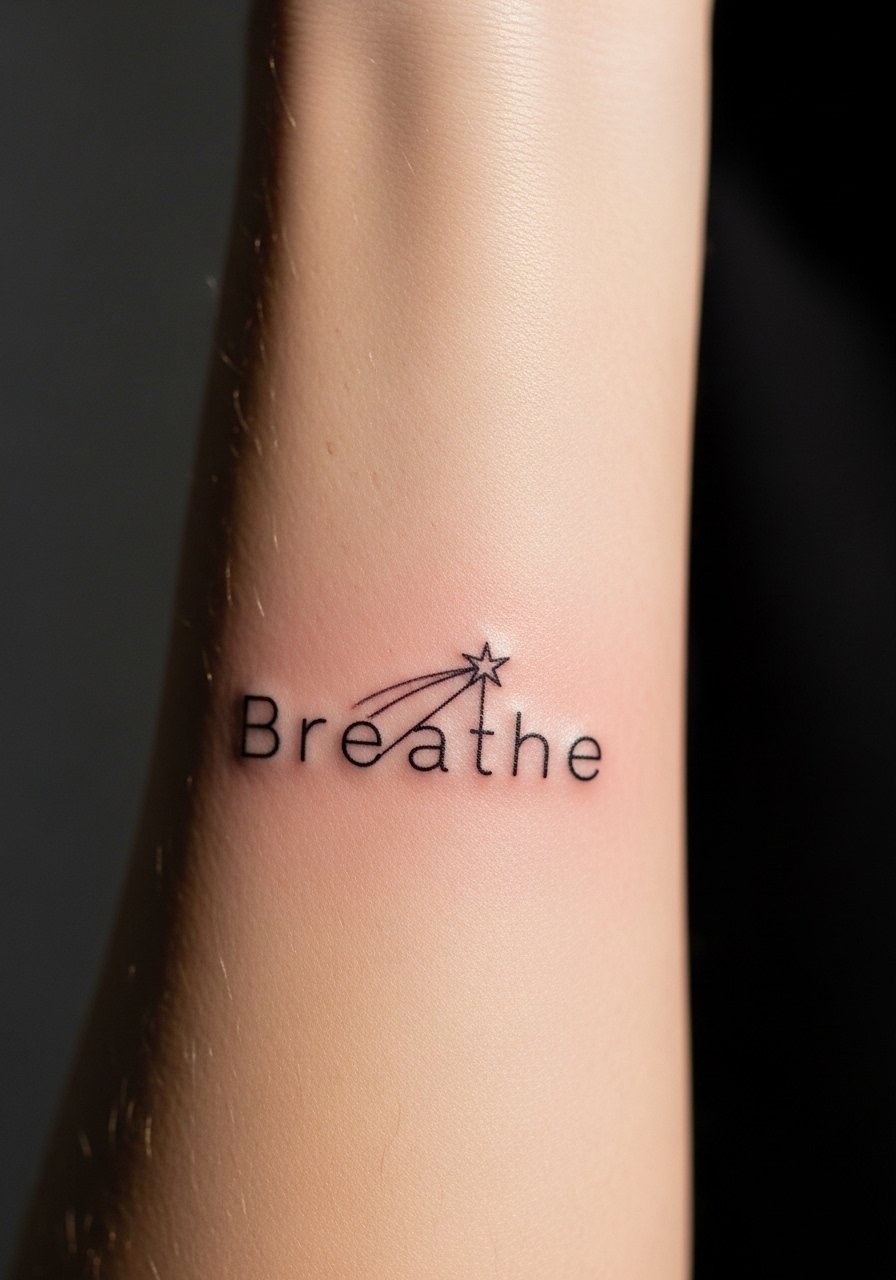
Consultation lead. When text is part of the design, exact wording matters. Request the artist set the script size so the letters keep legibility after healing. Inner forearm sessions are moderate in pain and usually one sitting. The common mistake is picking a script that is too ornate for small scale. Tell your artist the exact word "Breathe" and show the preferred font weight. With proper spacing, both the word and the star will age cleanly for years.
19. Star and Wave on the Calf
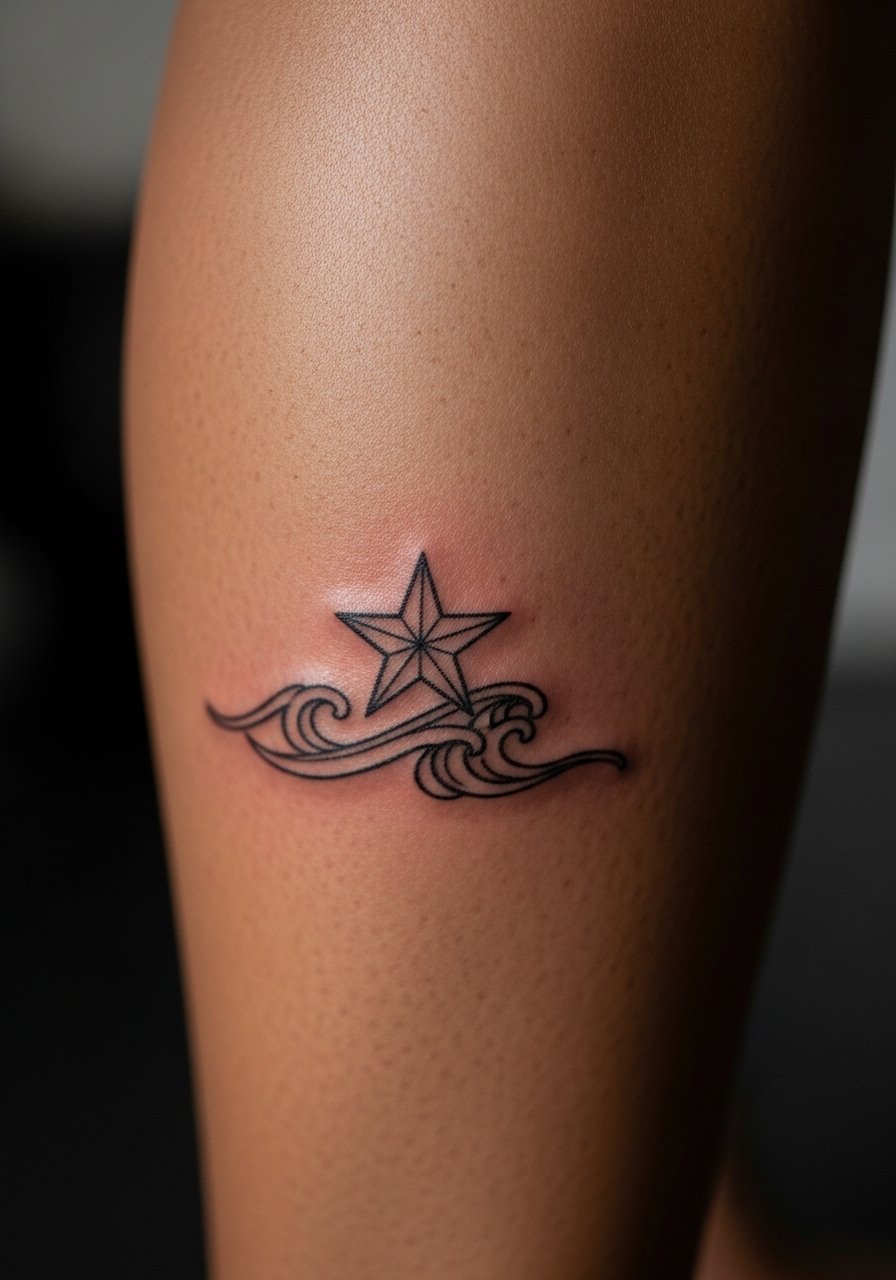
Visual impact lead. Pairing a star with organic wave lines makes a compact narrative piece that follows calf curves. Sessions are about an hour depending on shading. Tell your artist which curve of the calf you want the wave to emphasize. A common error is aligning the wave across the muscle seam which can distort the composition when you flex. Calf placements are forgiving for saturation and the piece usually needs touch-up only for cosmetic refresh.
20. Retro Neon Star with Color Pop on Forearm
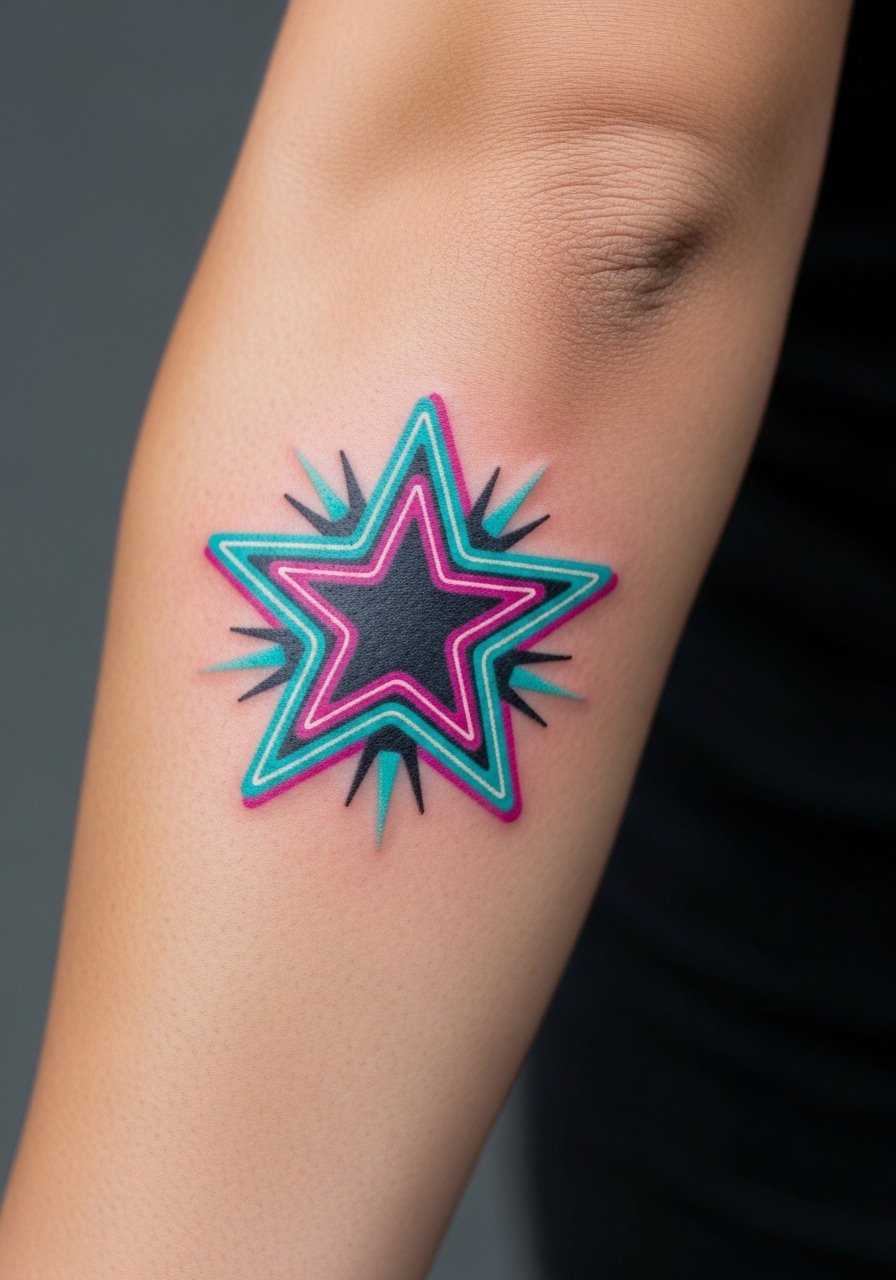
Visual impact lead. Neon-style color reads great on lighter and medium tones when saturated well. Expect color work to take longer and possibly require multiple sessions for even saturation. Tell your artist you want strong color contrast and mention any past color fades you want avoided. A frequent mistake is under-saturating the neon tones initially to avoid swelling. Plan for a color boost in year two because bright pigments can fade faster than black.
21. Blackwork Star Mandala on Center Chest
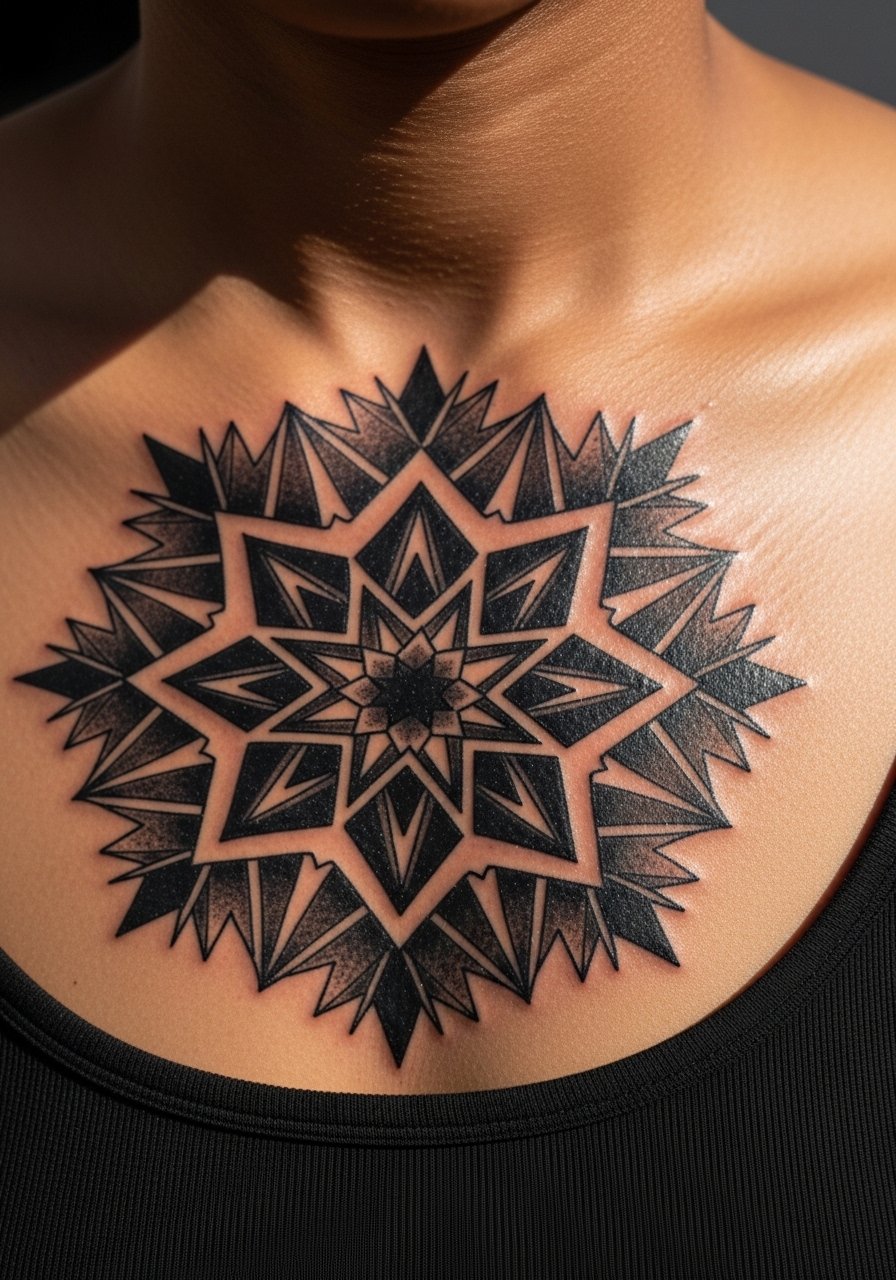
Aging/healing lead. Dense blackwork often wins on longevity because pigment holds in place. Sessions can be long and may be split into two sittings. Tell your artist you want crisp negative space to prevent the mandala from looking like a blob once healed. One mistake is packing too much black without defined edges. When executed cleanly the piece maintains presence and usually requires fewer touch-ups than color-heavy designs.
22. Small Star Cluster Behind the Knee
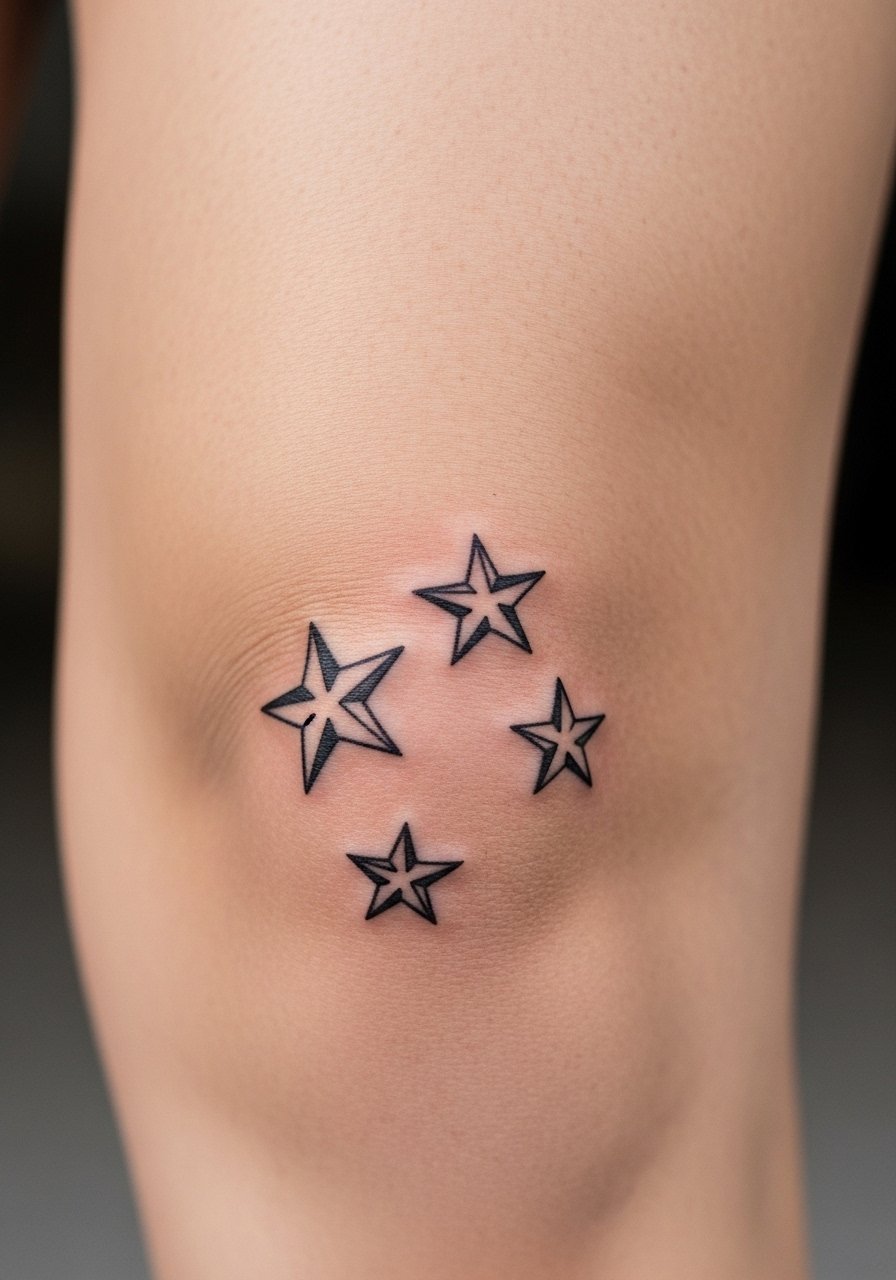
Pain warning lead. Behind the knee is a sensitive and mobile area, so siting a small cluster there requires an artist familiar with joint placement. Sessions are short but position can be awkward. Tell your artist you expect movement to affect dot spacing and ask for slightly more space between stars. A common mistake is squeezing intricate detail into a fold area. Behind-the-knee pieces often soften faster than thigh placements and may need touch-ups within two years.
23. Star with Compass Rose on Outer Bicep

Personal observation lead. Combining a star with a compass rose gives clear directional symbolism and reads well on the outer bicep where muscle growth is visible. Sessions typically take an hour. During consultation explain how bold you want the cardinal points. The mistake I see is making the compass points too thin for the bicep's movement. Proper scaling keeps the design readable for years with infrequent touch-ups.
24. Three Tiny Stars Down the Spine
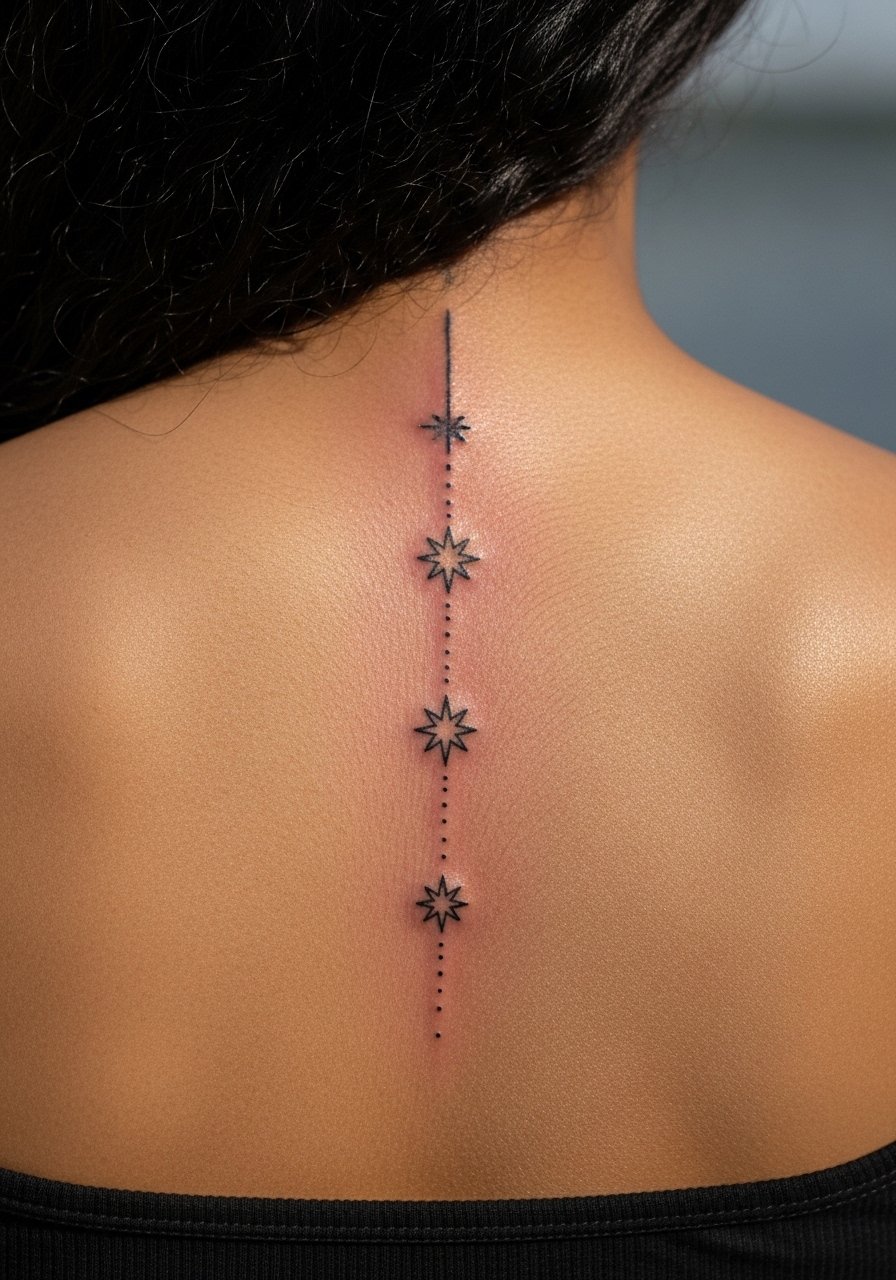
Consultation lead. A vertical trio down the spine is a subtle, centered choice that suits minimalist aesthetics. Expect moderate pain and a session under an hour for small stars. Ask your artist to space the stars to align with your spine's natural curvature to avoid looking off-center when you move. A frequent mistake is uneven spacing which becomes obvious as the skin settles. Spine pieces are private and heal predictably if you avoid heavy back pressure during recovery.
25. Celestial Sleeve with Stars and Planets
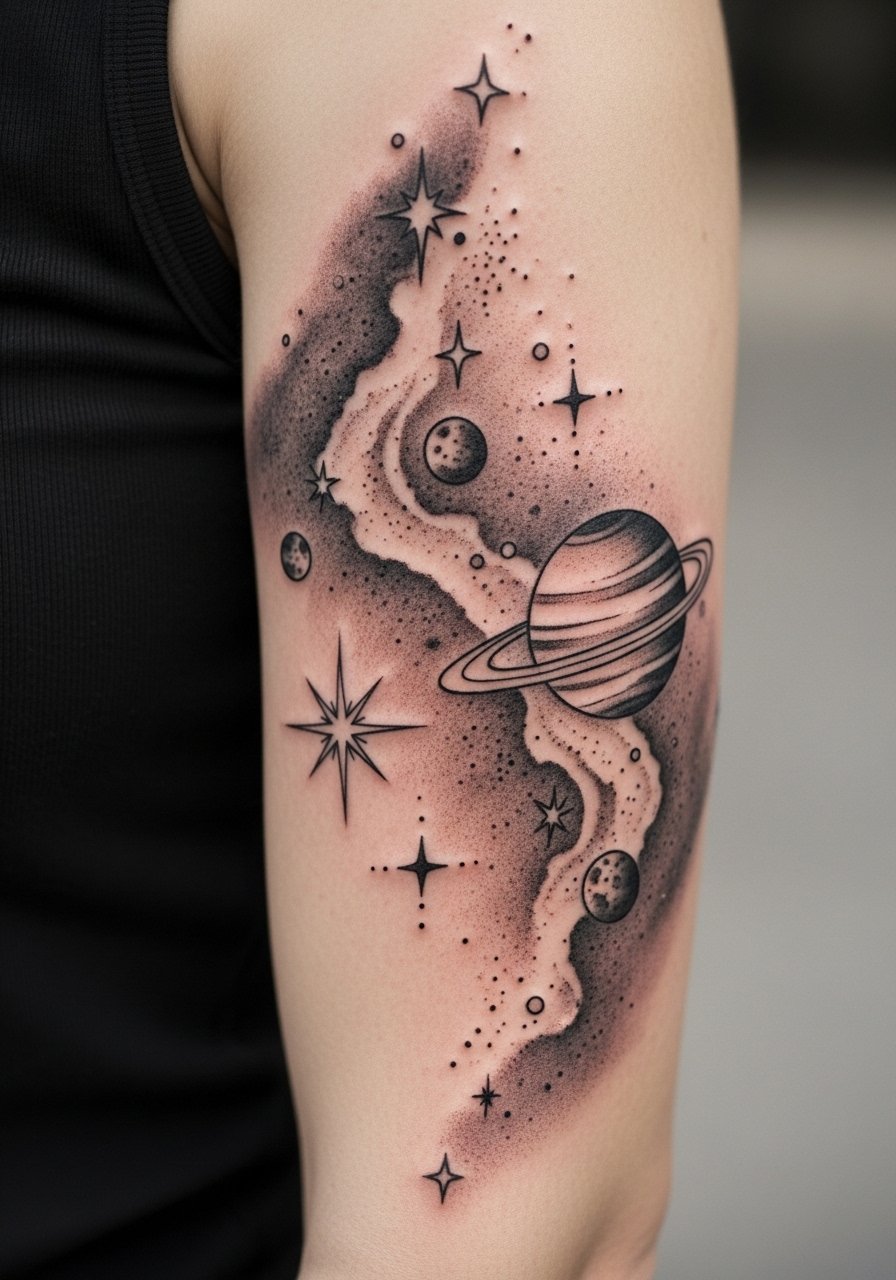
Visual impact lead. For a sleeve that reads as a scene, plan negative space and scaling so each star and planet holds up on its own. Sessions span multiple appointments and can total many hours. In the consultation map out focal points and ask about transition shading so the sleeve breathes. The mistake I see is adding too many tiny elements that blur together. For longevity expect touch-ups at year three for high-contrast edges and to refresh finer dot work.
Tattoo Prep and Aftercare Essentials
After Inked Tattoo Moisturizer. A lightweight lotion many people use during the later healing phase to keep skin supple. Use once scabs have fallen and your artist gives the green light. Good for daily maintenance and reduces itch without heavy residue.
H2Ocean Tattoo Aftercare Gel. A saline-based gel that people often start with in the first few days for gentle cleansing. Use it for light washing and drying rather than heavy rubbing.
Tattoo Goo Aftercare Balm. A balm some choose for the first 48 hours to protect fresh ink. Apply sparingly to avoid suffocating the tattoo.
Fragrance-free gentle foaming cleanser. Generic descriptor. Use for daily cleaning during the first week to remove sweat and debris without stripping oils.
Medical-grade second skin bandage, 6-inch roll. Generic descriptor. Helpful for large or high-friction areas during the first 24 to 72 hours if your artist recommends occlusion.
Lightweight fragrance-free balm. Generic descriptor. Good for ongoing moisturizing after the initial healing phase and for seasonal dryness.
Aquaphor Healing Ointment. A single mainstream option included sparingly. Some artists like it for short-term protection in the first couple of days. If you use it, apply thinly and only when recommended by your artist.
Every tattoo is different. Always follow your artist's specific aftercare instructions. Consult a dermatologist if you have skin concerns or unusual healing issues.
Frequently Asked Questions
Q: Will a fine line North Star on the wrist blur quickly?
A: It depends on scale and spacing. Fine line on the wrist can blur if the design is too small, so ask for slightly bolder line weight and wider spacing around the points. Plan for a touch-up around year one or two if you want the crispest look long term.
Q: Are stipple-shaded thigh stars better than stipple on the ribs?
A: From what I have seen, stippling on the thigh holds texture better because the skin is thicker and less mobile. Rib stippling can soften faster because of expansion when you breathe. If you want stipple on the ribs, ask your artist to space dots a bit looser to avoid patchiness.
Q: How often do finger and knuckle star tattoos need touch-ups?
A: Expect more frequent touch-ups than other placements. Fingers and knuckles see constant washing and abrasion so a touch-up within six to twelve months is common. If you want fewer sessions, choose bolder lines and accept a chunkier aesthetic.
Q: For a sternum star, what should I tell my artist during the consultation?
A: Tell them how much negative space you prefer and whether you sleep on your stomach. Mention any planned chest workouts that could affect healing. Ask about session splitting and a recommended touch-up window to keep dot work clear.
Q: Is occlusive aftercare like Saniderm better than open-air with ointment?
A: Artists split into two camps on that. One camp prefers occlusive dressings for the first 24 to 72 hours to reduce scabbing and exposure. The other camp prefers open-air healing with a light ointment to allow the skin to breathe. Ask your artist where they stand and follow their protocol for the best outcome.
Q: Will bright neon colors for a retro star show on darker skin tones?
A: Bright colors can look vibrant on darker skin if heavily saturated and applied by an artist experienced with color work on deeper tones. Discuss pigment choices and expect a possible color boost session after initial healing to reach the look you want.
Q: When should I schedule a touch-up for a bold blackwork chest star?
A: For dense blackwork most people see excellent retention, but a touch-up around year two is a reasonable plan if you want perfect saturation. Factors like sun exposure, sweat, and skin care habits influence timing, so check in with your artist after the one-year mark.
