
Fresh 3D optical tricks can read perfectly in a studio photo and still look crisp on skin years later, but only if you match scale, contrast, and placement to how your body actually moves. Small single-needle versions often look razor-sharp on a feed and then soften into fuzz in high-friction zones. I walk through 23 illusions with placement notes, what to ask for in the consult, and how to dress for the session so the stencil lands where it should.
1. Zipper Reveal on Inner Forearm
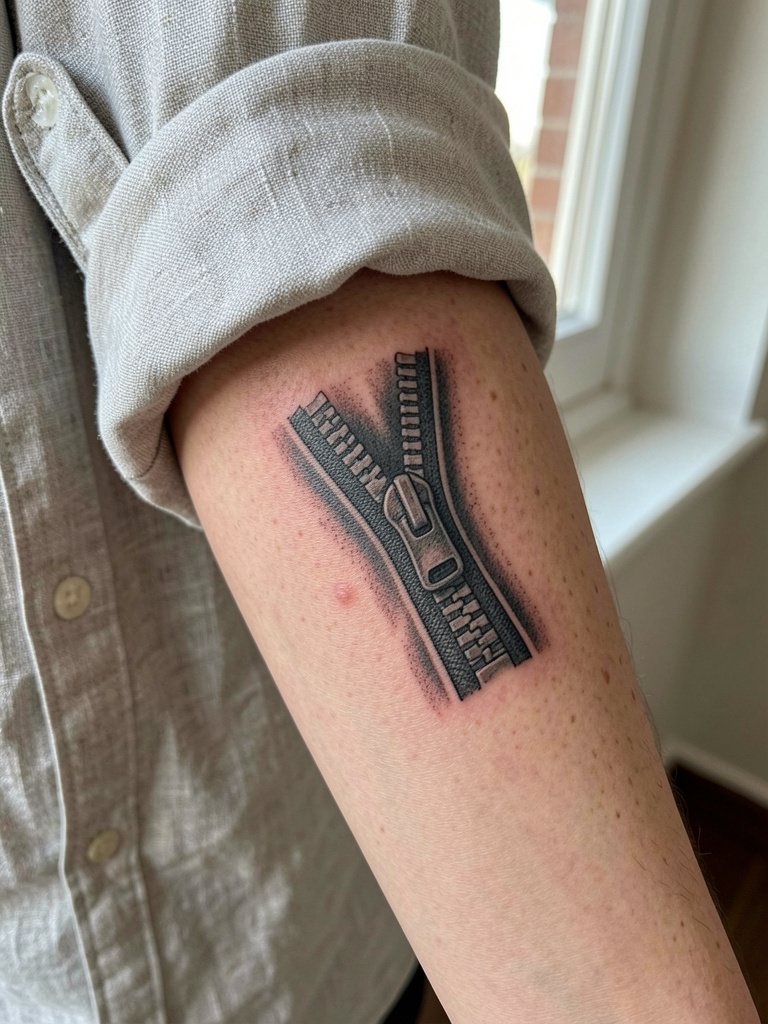
A zipper tattoo on the inner forearm reads best when sized to let the teeth and shadow breathe. I usually recommend a medium scale so the shadow holds over time and the linework avoids blowout near the wrist crease. In the consult bring a close-up reference that shows tooth size and shadow contrast so the artist can map how the zipper follows the forearm curve. Expect one session for a small version and a longer session if you want fabric texture added. For the appointment wear a linen button down shirt with sleeves you can easily roll up so the artist has clear, unobstructed access.
2. Spider Emerging from Skin on Forearm
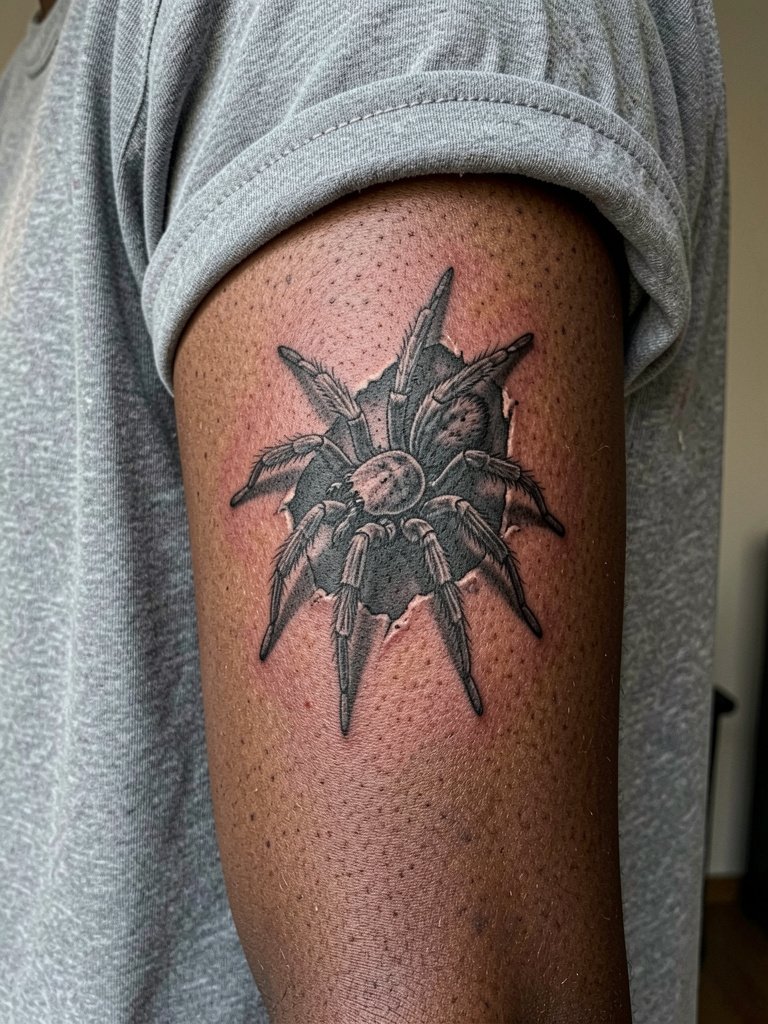
The classic "spider popping out" works because of crisp shadow and the legs' cast shadows. Ask for heavy contrast between the spider body and the surrounding negative space so the depth trick persists after healing. A common mistake is insisting on ultra-fine legs on a wrist-scale piece; those tend to blur. For session comfort, skip bracelets on the tattoo arm and wear a plain crew neck tee so clothes do not rub the fresh ink while you dress after the appointment. Expect one to two sessions depending on realism level.
3. Cyborg Skin Break on Outer Upper Arm
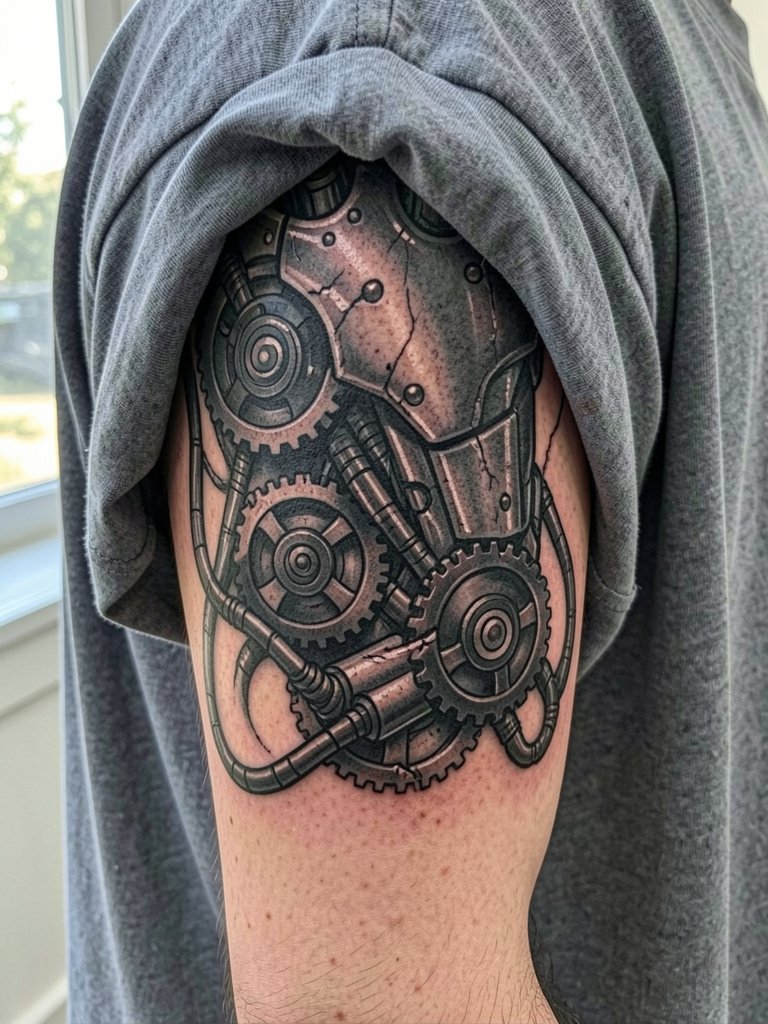
Cyborg panels rely on saturated black, layered shading, and crisp negative space. For this placement pick an artist experienced in biomech because the outer upper arm is forgiving for large detail yet needs pattern flow to wrap the muscle. Tell the artist how much curvature you want the plates to follow so the illusion still reads when you bend the arm. This piece can take multiple sessions, and touch-ups are common where small white highlights are used. For showing it off, try an oversized tee shirt or sleeveless hoodie that lets you push the sleeve up and reveal the panel.
4. Torn-Fabric Skin Rip on Ribcage
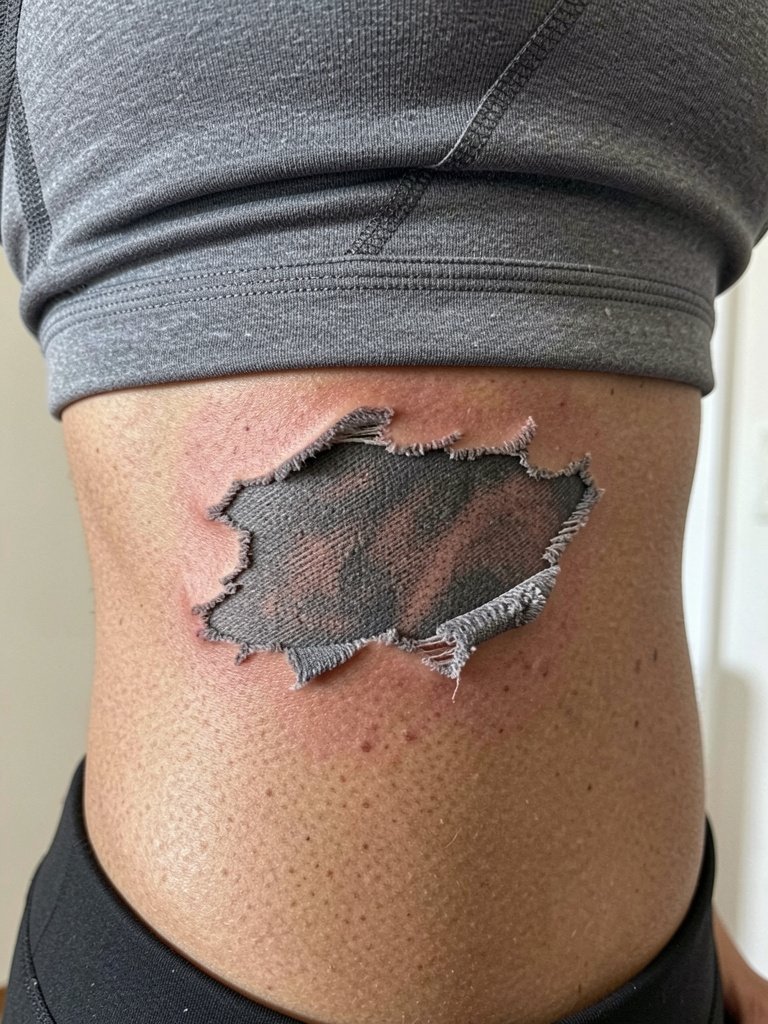
Ribcage pieces can look killer but the surface moves with breathing and clothing, so spacing and slightly bolder shadowing make the illusion age better. Anticipate higher pain and longer session splits on the ribs. A frequent mistake is choosing extremely thin stipple for the torn edge on ribs; that detail softens quickly. If you plan a ribcage tattoo, wear a loose sports bra or a button-front top so the artist can expose the area without tugging fabric. Expect two sessions for a medium torn-skin piece and plan for a touch-up if you want the highest contrast to last.
5. 3D Nail Puncture on Shoulder
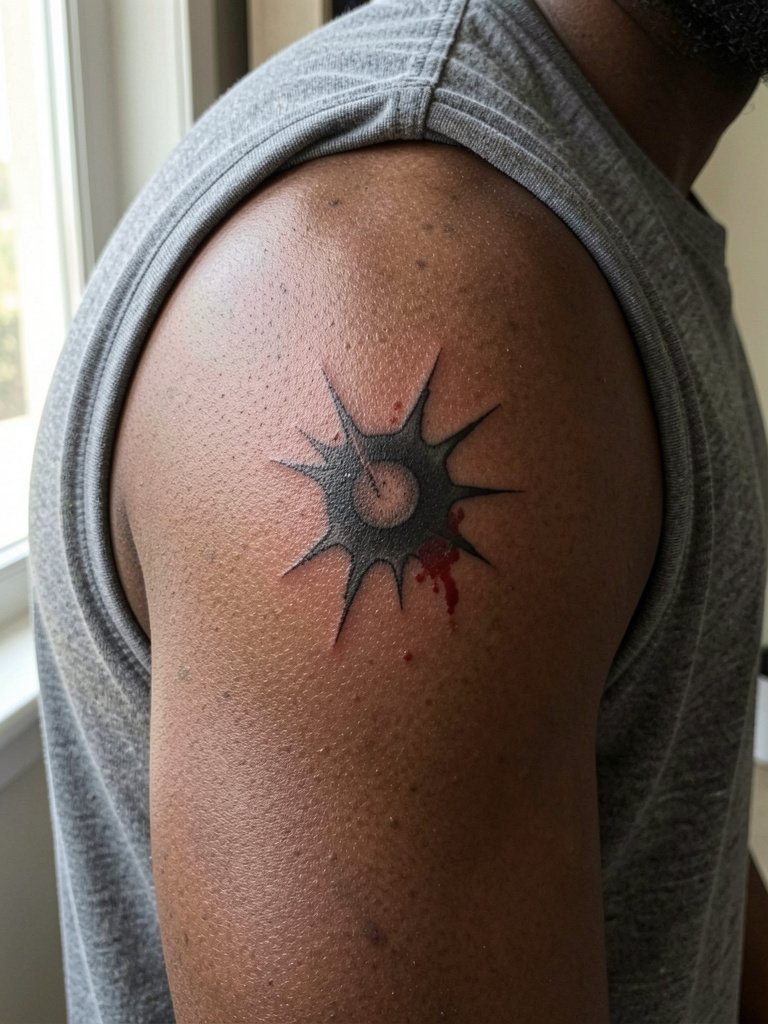
A nail-puncture trick sells on sharp highlights and aggressive cast shadow. On the shoulder the surface is thick so fine white highlights hold a little longer than on wrists. Tell the artist you want a hair heavier lineweight than the reference so the puncture still reads after six months. For the session wear a sleeveless muscle tee so the stencil sits flat and you do not have to tug fabric off the area repeatedly. One session usually suffices for a small to medium shoulder puncture.
6. Animal Peeking Out on Outer Forearm
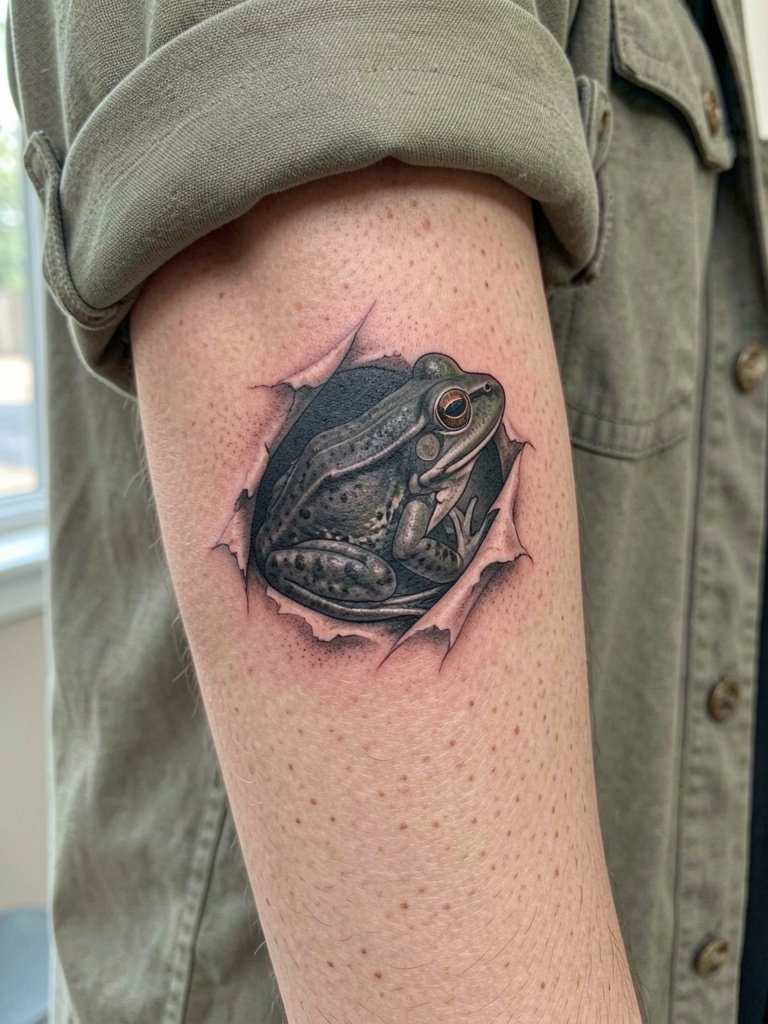
Micro-realism animals read as dimensional when the shading is layered and the pupil catch is crisp. A common error is insisting on lots of tiny texture at wrist scale, which often blurs. Ask for reference photos of healed micro-realism so you can judge how the artist spaces dots and stipple shading. For daily wear pick a neutral sleeve or a rolled-cuff shirt so the animal stays the focal point when you gesture. Expect a one to two session timeline depending on color accents.
Studio Day Picks
The first six ideas call for clear stencil placement and session prep, so a few small items make the chair day smoother.
- Stencil transfer paper kit. Lets you and your artist preview linework placement on curved forearm or rib surfaces before needle hits skin.
- Tattoo numbing cream. Applied per product instructions eases the discomfort for ribs and sternum sessions without affecting linework when used correctly.
- Thin protective film roll. Useful for covering small forearm and wrist pieces during the first 24 hours when friction from sleeves can rub fresh ink.
- Fragrance free gentle body wash. Mild cleansers reduce irritation during showers and do not strip the healing scab prematurely.
- Aquaphor healing ointment. A thin ointment layer for the first few days controls cracking on high-contrast black and gray work.
7. Tarantula Realism on Calf
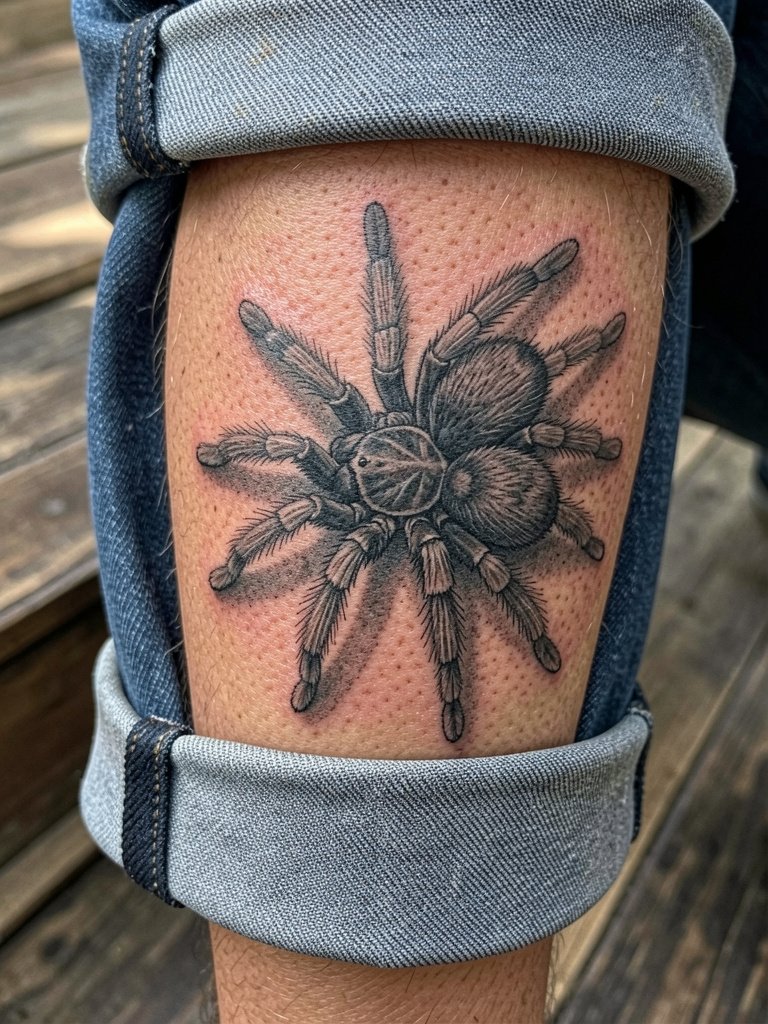
A calf gives room for leg articulation and a real sense of movement for spider legs and shadow. Plan for one to three sessions depending on size. The unique risk here is friction from long pants during early healing, so wear shorts or cuff your jeans for two weeks. For summer showing-off pair with cuffed straight leg jeans or shorts to let the full leg pose be visible when you walk. Ask how the artist will anchor the shadow so the legs do not flatten over time.
8. Robot Face on Shoulder
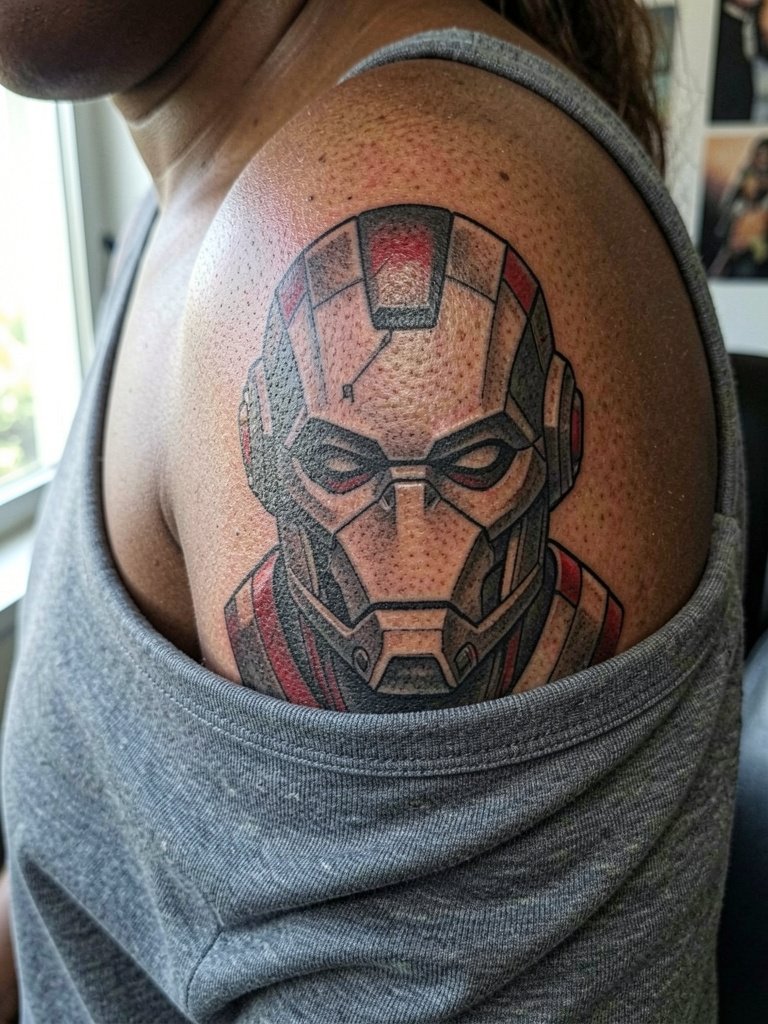
A robotic face blends neo-traditional forms with high-contrast shading to read as three dimensional. On the shoulder the curvature helps the illusion wrap and read from angles. Bring references showing both full shoulder shots and close-ups so the artist can plan how highlights will settle. For showing it off try an off shoulder top that exposes the upper arm without constant strap interference. Multiple sessions may be needed if you want color accents.
9. Exposed Machine Panel on Thigh
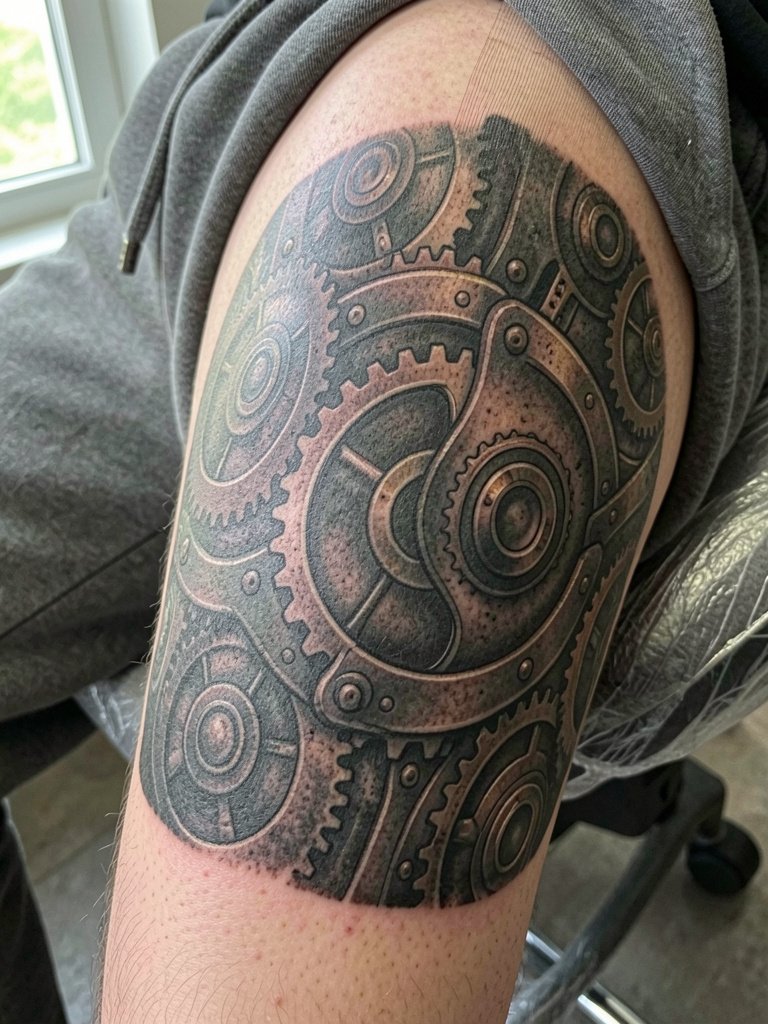
Thighs take large-scale biomech well because the surface is broad and tends to age more predictably than thin areas. A common mistake is trying to compress too much detail into a small thigh patch. Instead allow plates and seams to breathe so the negative space reads as depth later. For the session wear joggers you can roll up easily and choose loose fabrics after the appointment. Expect three or more sessions for complex exposed-hardware pieces and plan for a touch-up where tiny metallic accents settle.
10. Optical Hole or Void on Ribcage
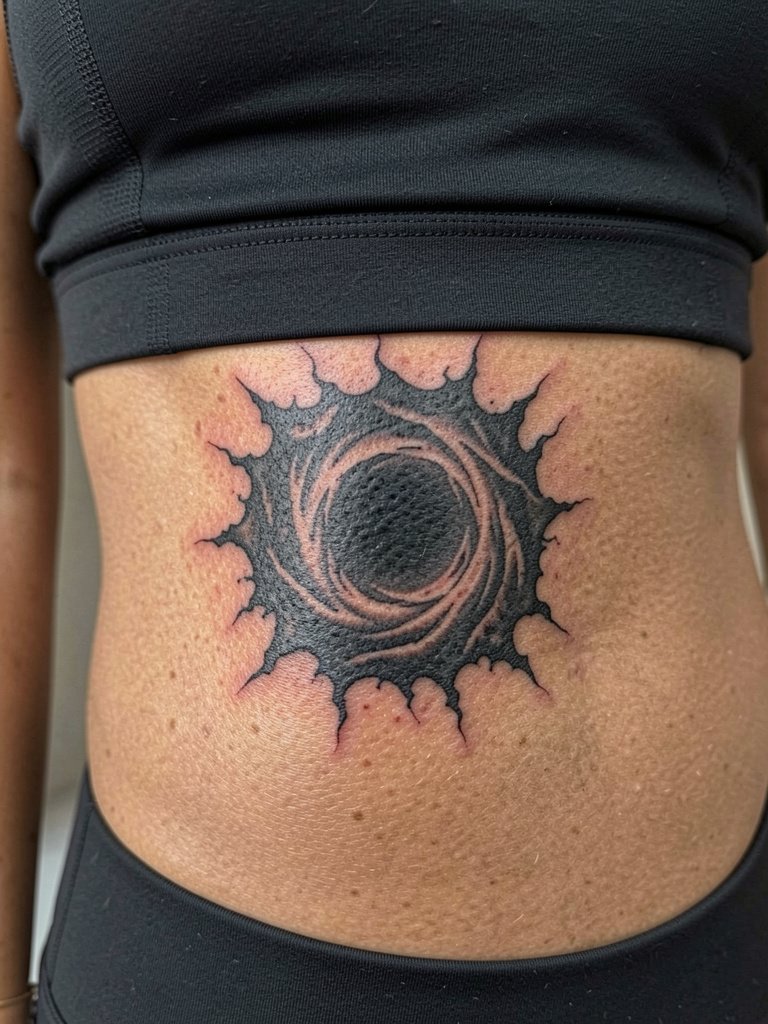
Negative space voids rely on pure black saturation and crisp edges to look like portals. On the ribcage you must balance surrounding shading to keep the hole effect intact. One mistake I see is soft gray gradients that read as flat wash after healing. For session wear a loose sports bra so the artist can access the side torso without tugging at fabric. Because these rely on dense black, schedule a touch-up if any fade shows after the first year.
11. Popped Bubble or Cracked Skin on Wrist
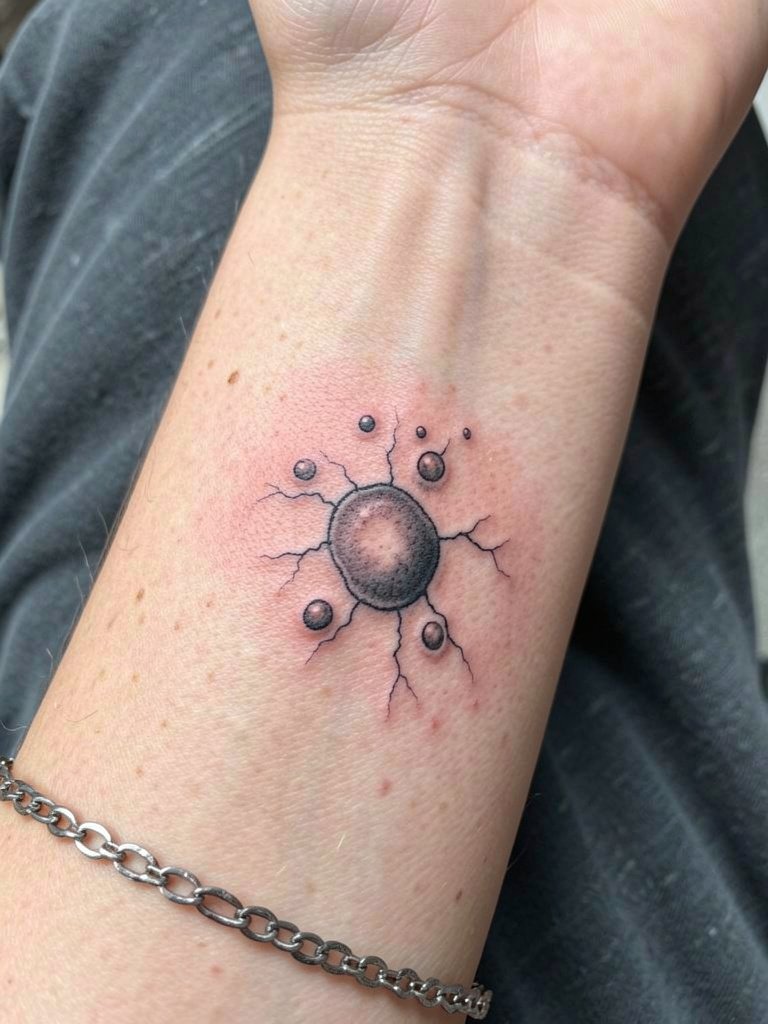
Small textural illusions like cracked skin do well on low-motion wrists but the area suffers from constant washing and jewelry. Plan slightly bolder shading than a photo reference if you want the bubble to remain legible at year two. For the appointment remove watches and bracelets and consider wearing a shirt with sleeves that do not rub the wrist. A tiny wrist piece usually finishes in a single session and may only need a touch-up if daily friction softens crisp edges.
12. 3D Heart or Symbol Below the Clavicle
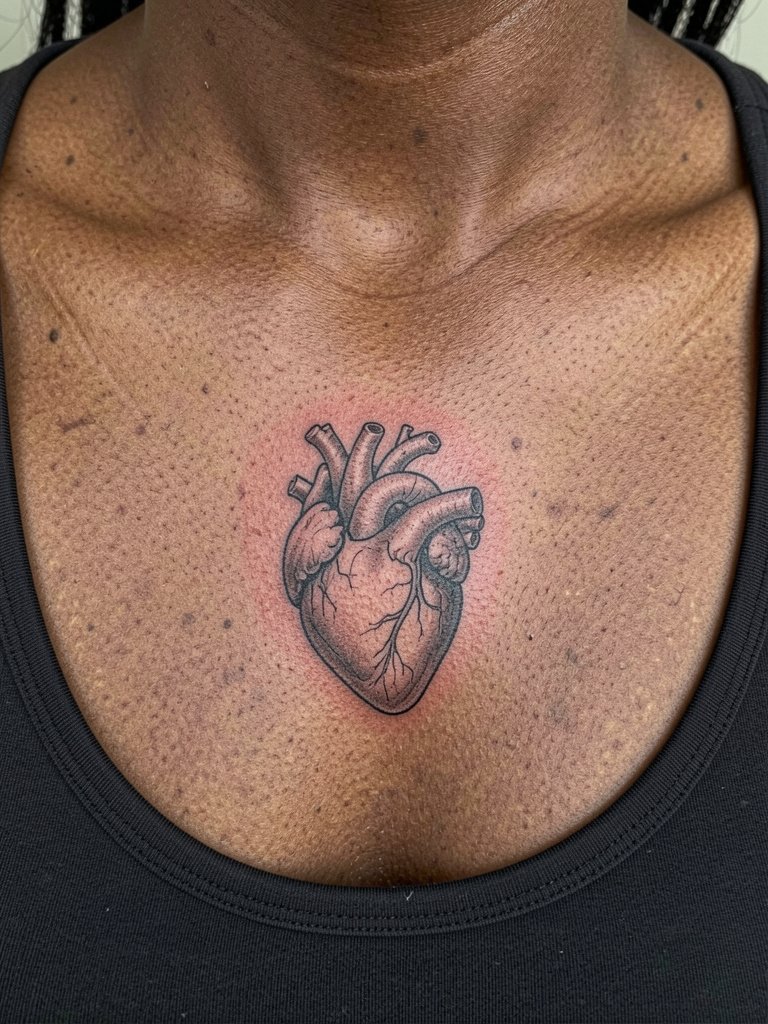
The clavicle area flatters small 3D symbols because the bone edge gives a natural anchor for cast shadow. If you want a delicate heart, ask the artist to show healed examples on similar skin tone and placement so you can judge lineweight. Wear a scoop neck top to the session so the collarbone is exposed without adjusting fabric. Small chest pieces usually finish in one session and need careful aftercare since clothing can rub the area.
13. Chalk-Art Street-Style on Calf
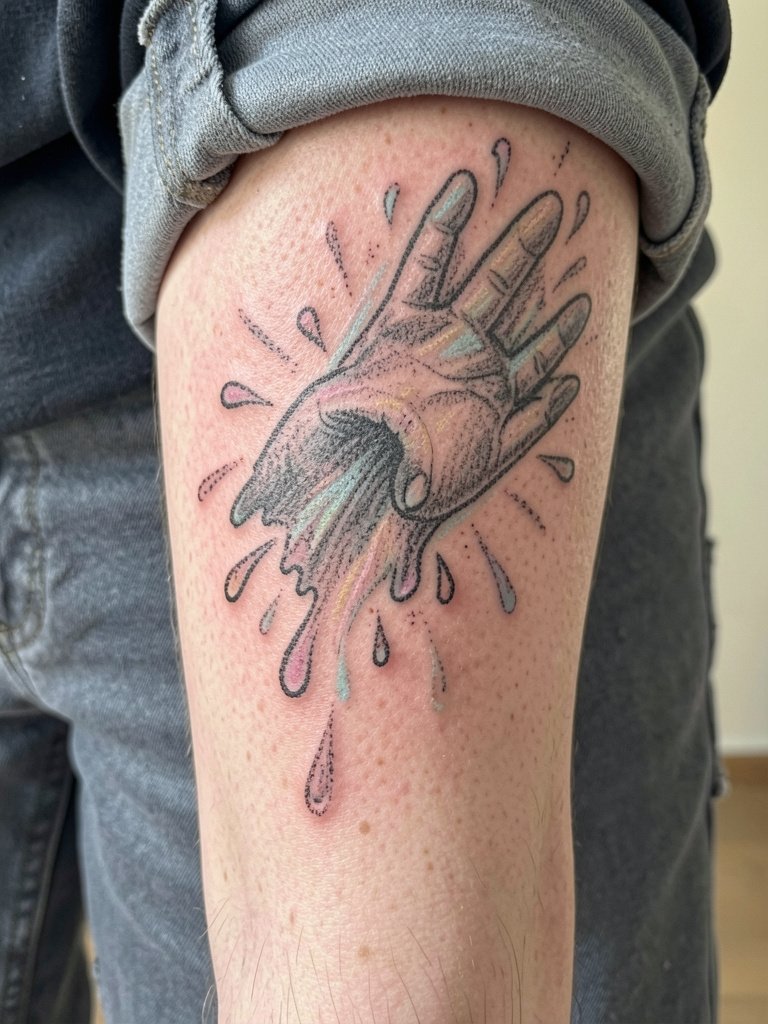
Chalk-art illusions translate the street trick into a softer, slightly stylized tattoo. On the calf the layered pen-and-smudge look survives if the artist uses slightly bolder outlines and controlled stipple shading. Ask for healed photos with similar pigment so you can see how pastels fade on skin tone you match. For show-off pairing wear cuffed straight leg jeans or shorts so the visual "spill" reads when you walk. One to two sessions usually covers this style.
14. Patchwork Illusion Panel on Shoulder
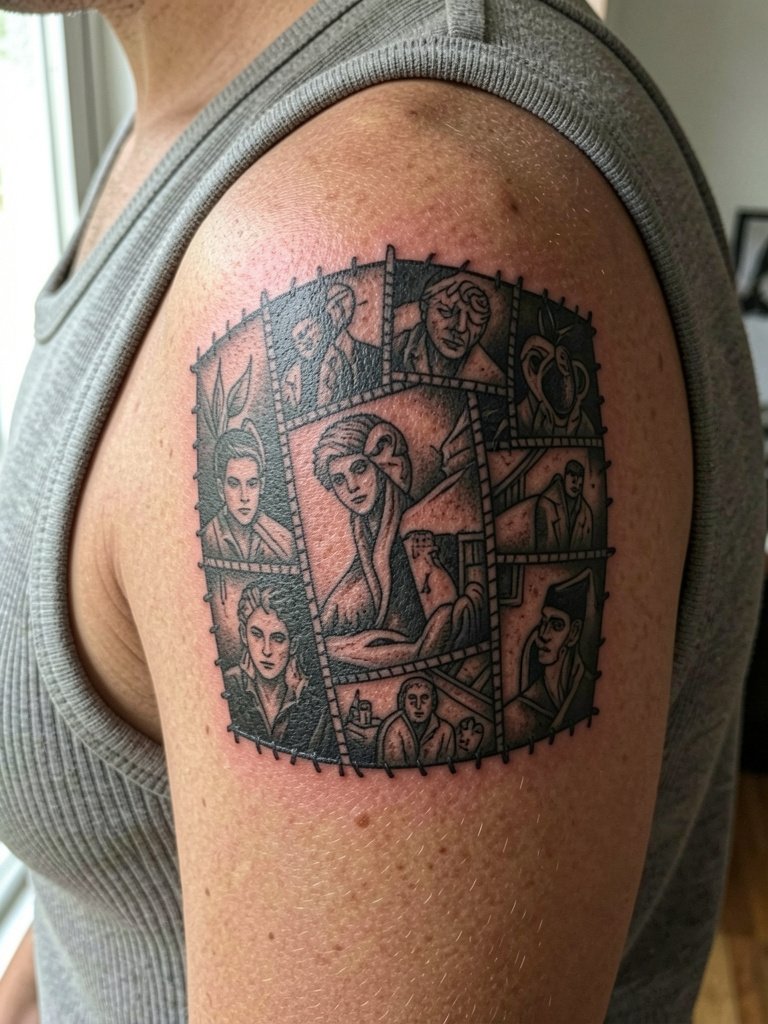
Patchwork lets you build an illusion sleeve over time while keeping negative space between components so each panel stays crisp. The shoulder is an ideal staging area for initial components because it provides a visible anchor. A common mistake is placing panels too close together early on, which makes future shading merge. For daily looks try an ribbed tank top that frames the patchwork without straps rubbing the ink. Each small panel is often done in its own session so you can evaluate healed results before expanding.
15. Minimal 3D Cutout on Ankle
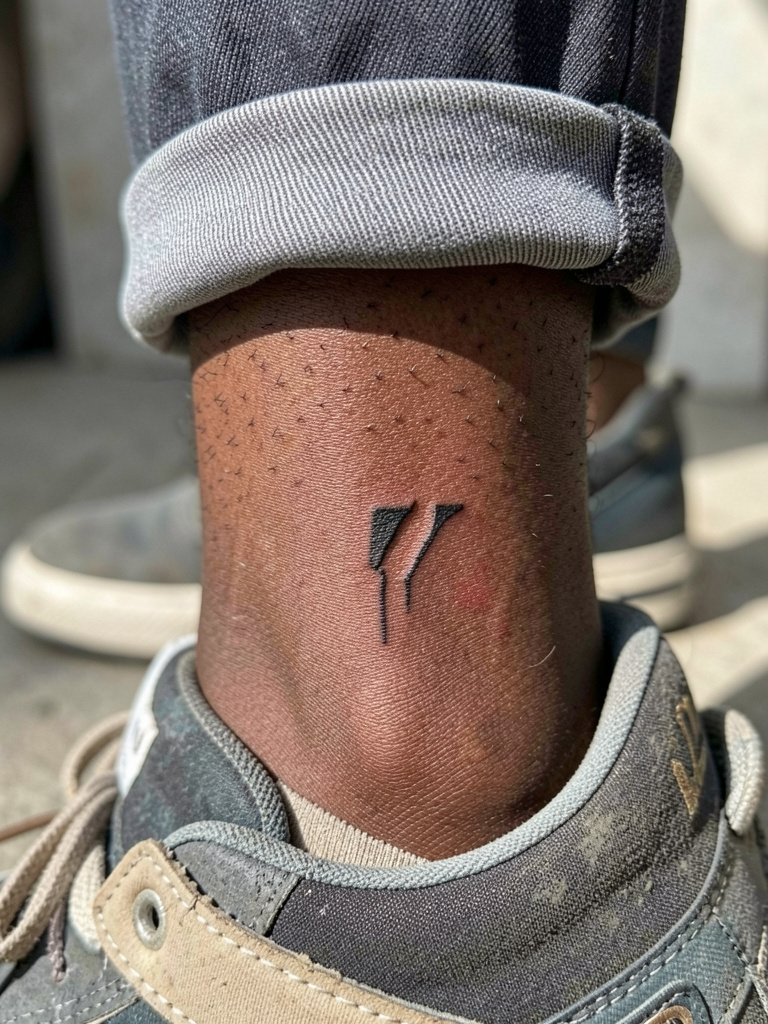
Minimal cutouts are tempting for first-timers, but a debate exists about whether single-needle minimal work holds over years. One camp says fine line cutouts can stay crisp if scaled slightly larger and placed away from friction zones. The other camp argues that the ankle and wrist are too active for ultra-thin edges and that the effect blurs within a few years. If you lean into minimal, ask for a slightly heavier contour so the cutout still reads at two and five years. For session wear low-profile shoes and roll pant cuffs for easy access.
16. Geometric Cube Pop-Out on Forearm
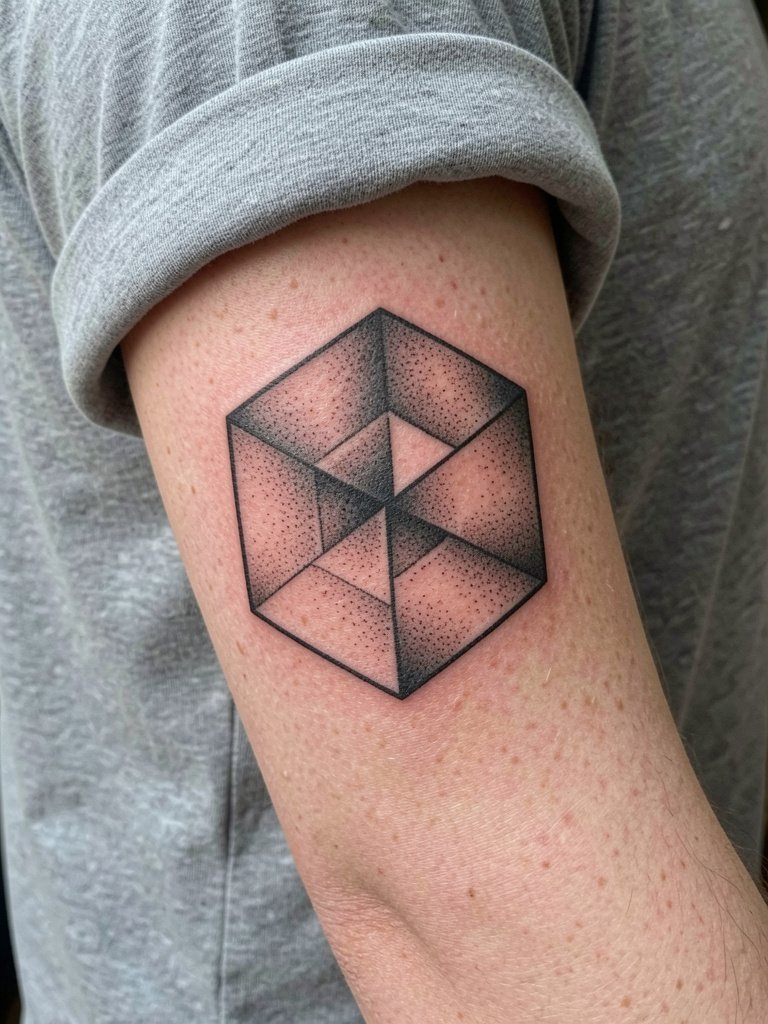
Geometric optical cubes depend on flawless linework and careful spacing to avoid wobble as the skin ages. Ask the artist to show healed work of straight-edge geometry on forearms so you can confirm line stability. A common mistake is using single-needle lines that are too thin for the forearm canvas. For the session wear a plain crew neck tee and avoid bracelets on that arm. One precise session typically does the job.
17. Bone-Peep Rib Illusion
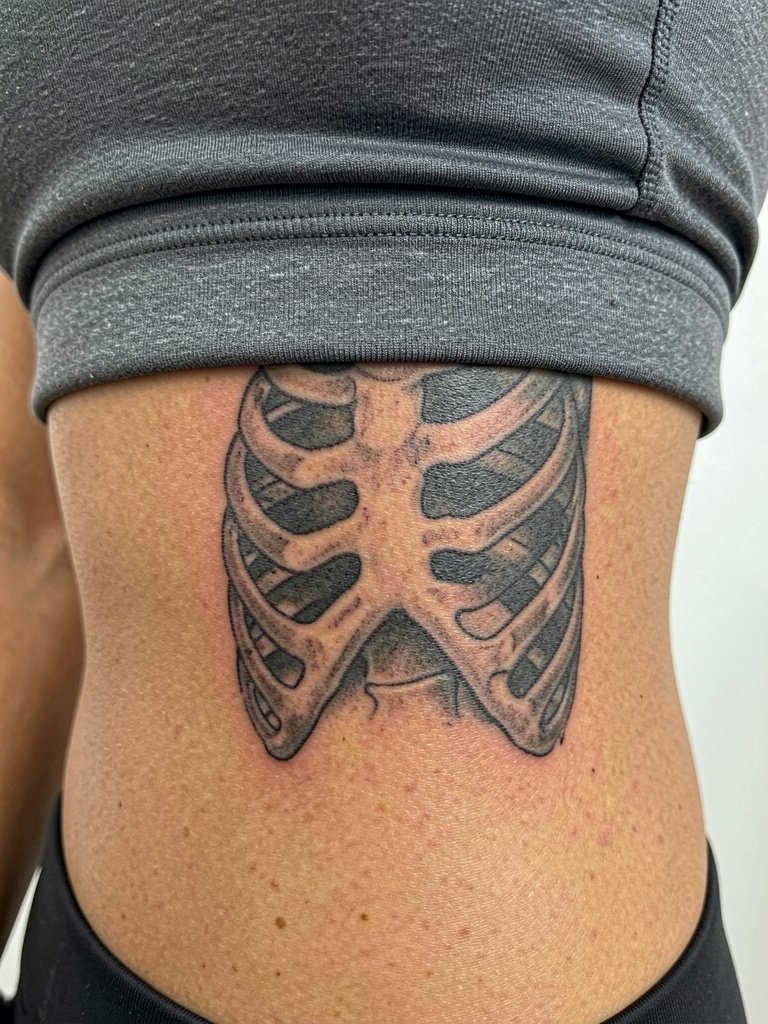
Bone-peek effects need careful anatomical study so the shadow follows rib curvature and does not read flat. I recommend an in-person drawing session where the artist sketches the shadow placement on your breathing motion so the illusion keeps during inhale and exhale. Because ribs are a high-pain zone, plan on breaks and wear a loose top the artist can move aside easily. Expect two sessions and a likely touch-up for shading that settles unevenly.
18. Hole with Floating Object on Lower Back
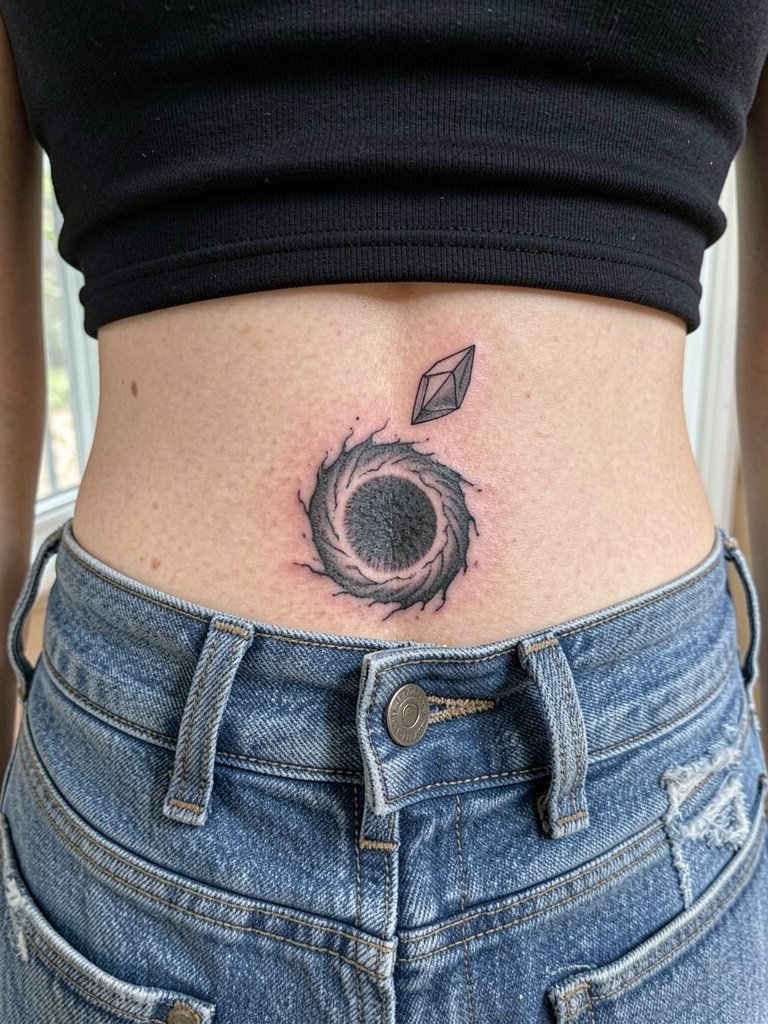
Lower-back portals read well when the surrounding saturation is dense and the negative space stays clean. The key error is inviting too many fine interior details that flatten once healed. For session wear low-rise jeans and a cropped tank so the artist can access the area without pulling fabric. Because the lower back can shift with posture, ask for a mock stencil photo so you can confirm placement before the needle. This typically fits into one longer session.
19. Barbed Wire Peeling Illusion on Forearm
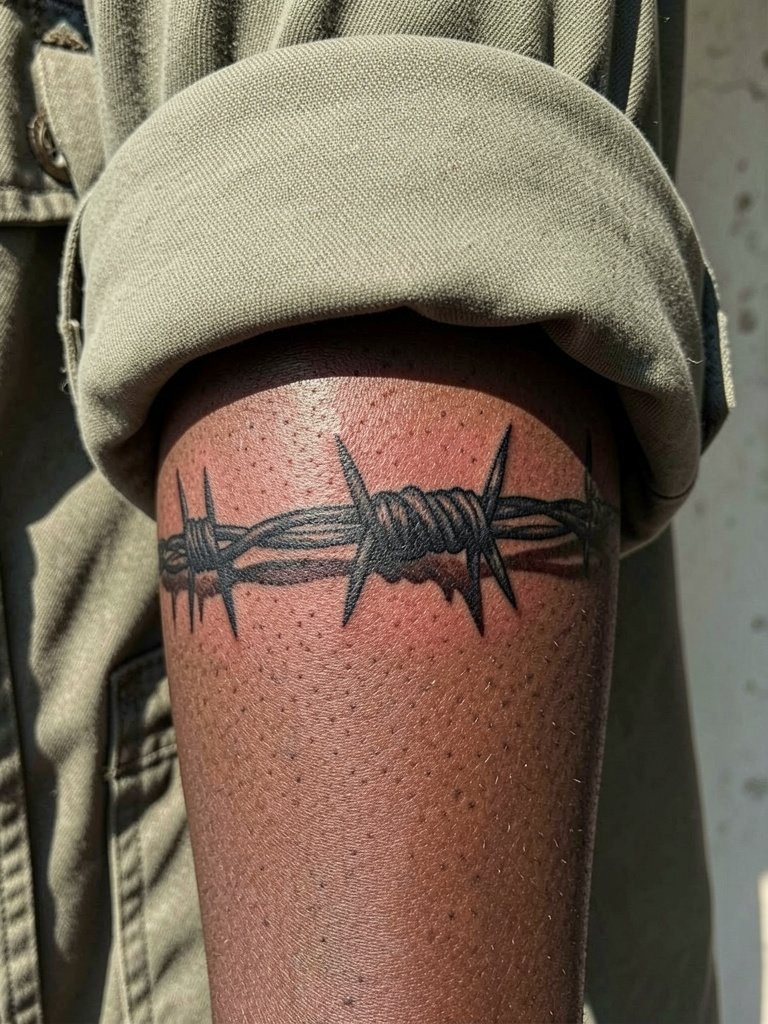
Barbed-wire illusions need saturated blacks and clear spacing to avoid merging into a single dark band after a few years. Avoid ultra-thin internal barbs at wrist scale. For showing-off wear sleeves you can push up or an oversized tee shirt so the forearm becomes the focal area without competing prints. Expect one longer session and a touch-up if the thin barbs lose definition.
20. Keyhole Reveal on Inner Thigh
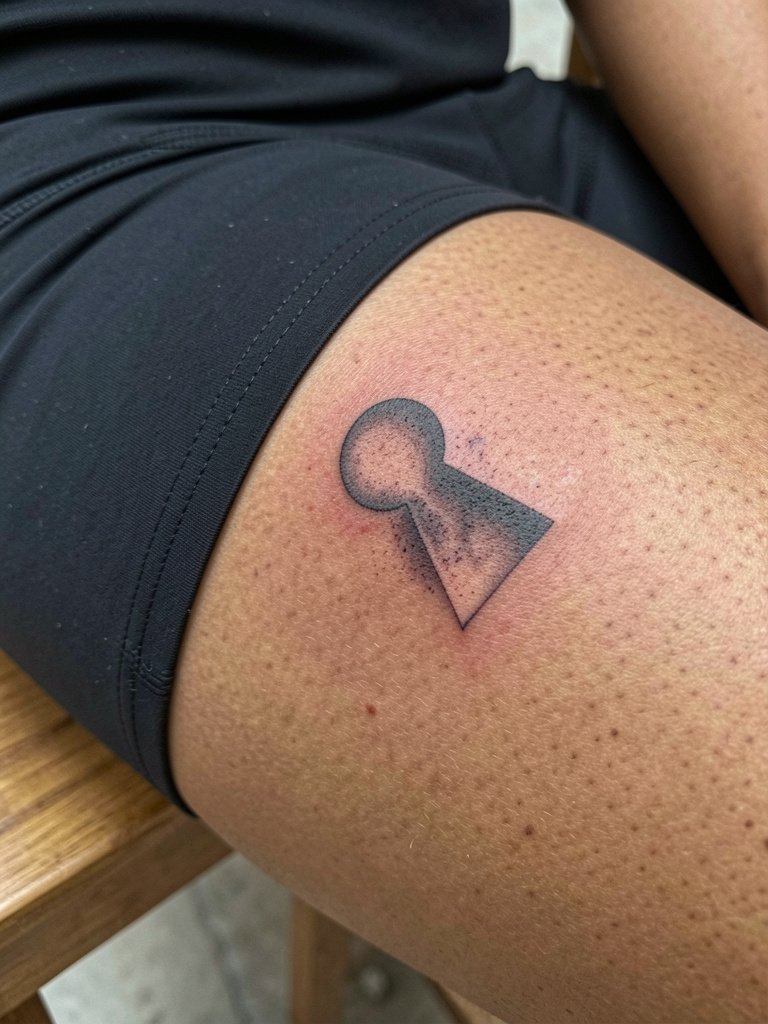
Inner-thigh illusions gain dramatic depth if you avoid busy detail and let the shadow read. The risk here is friction from clothing and proximity to sweat, so session wear should be modest athletic shorts the artist can move aside. For festival or show-off outfits, high-waisted bottoms with a cropped top help reveal the piece selectively. One careful session and strict aftercare keep the edge crisp.
21. Tiny Portal Micro-Tattoo on Ankle
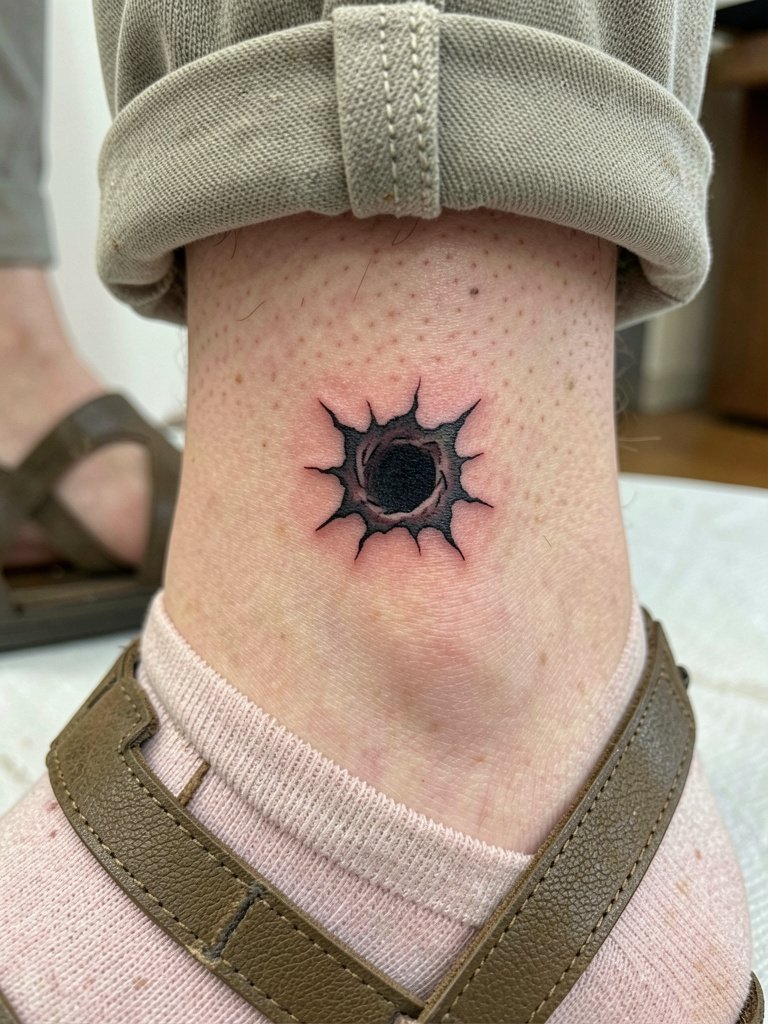
Micro-portals are sleek but spark a strong debate about small illusion longevity. One camp argues tiny portals can work if the lineweight is slightly beefed up and placed away from ankle seams. The opposing camp warns that ankles and feet face too much abrasion and frequent washing, which softens fine edgework quickly. If you choose a micro portal, plan on a touch-up around year one and avoid tight boots during the first month. For footwear pair with strappy sandals so the ankle reads clearly in warm weather.
22. Stitched Patch with Floating Bolt on Shoulder Blade
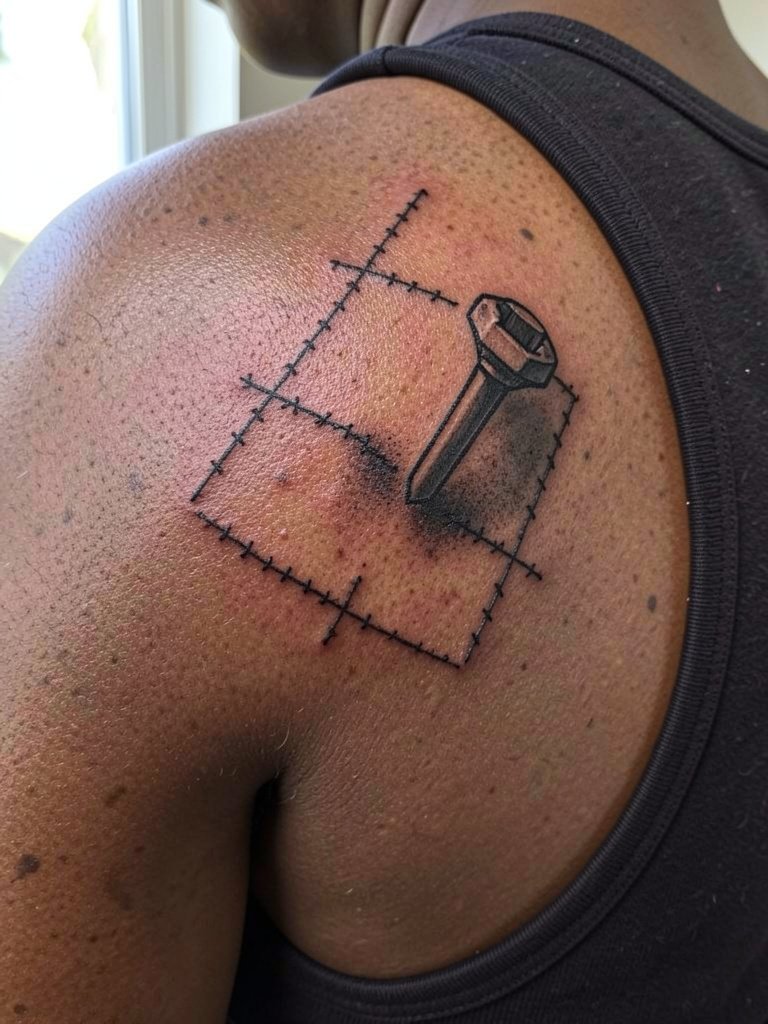
Stitched patch illusions play off texture and shadow and look great on shoulder blades where clothing often frames the design. Make sure the stitch spacing is wide enough so the thread detail does not merge with nearby shading. For session wear a racerback tank top so the artist can access the shoulder-blade area without tugging fabric. One to two sessions are typical depending on added bolt details.
23. Anamorphic Staircase or Escher Trick on Forearm
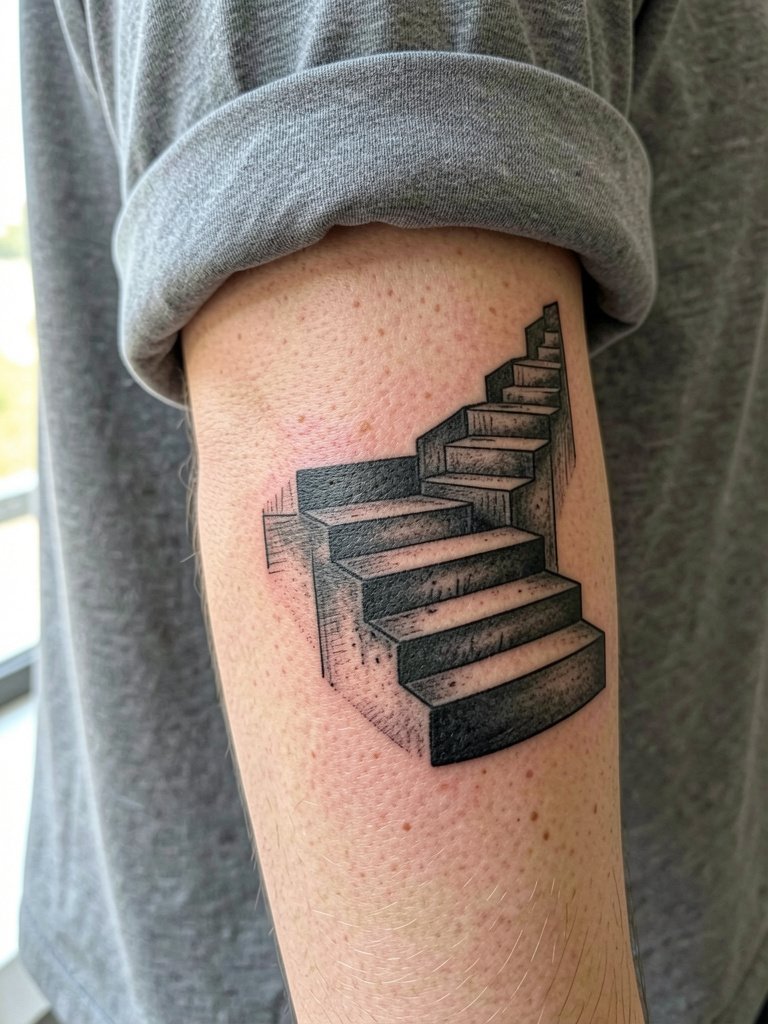
Anamorphic and Escher-style tricks demand exact perspective and clean linework so the optical flip reads at arm width. The main mistake is trusting quick flash pieces for complex perspective. Schedule an in-person design review and ask to see large healed geometry pieces from the artist so you can judge how their linework settles. For the session choose a shirt you can roll up and avoid bracelets so the forearm stays unobstructed. These pieces are best done in a longer planning session followed by one or two tattoo sessions.
Frequently Asked Questions
Q: How much does a 3D optical illusion tattoo usually cost?
A: Expect cost ranges rather than fixed prices. Small wrist or ankle micro-illusions typically fall into a lower range, medium forearm or calf pieces sit in a mid range, and large biomech or ribcage jobs can move into a higher range because of multiple sessions and heavy shading. Tip your artist's hourly rate at a customary level and budget for a possible one-year touch-up.
Q: Which placements actually keep the 3D effect longer?
A: Flat, low-friction surfaces like the outer upper arm, calf, and thigh tend to hold crisp shading and linework best. High-movement or high-friction zones such as the wrist, ankle, and ribcage can blur faster unless the design is scaled and spaced with that in mind. I recommend asking for healed photos taken a year or more after the session so you can see how similar placements aged.
Q: Where should I look to find artists who post healed optical illusion portfolios?
A: Search platform tags like #3dtattoo, #opticalillusiontattoo, #blackandgraytattoo, and #biomechtattoo with your city name on Instagram and TikTok. Use Reddit threads in r/tattoos and r/tattooadvice to spot real healed examples and pricing experiences. Pinterest is a good starting point for motifs but always cross-check against healed photos before booking.
Q: How do I choose between black and gray versus selective color for an illusion?
A: Black and gray generally wins for longevity because contrast creates the depth trick. Selective color can enhance a metallic or wound element if used sparingly, but it introduces fade variables. If you want color accents, ask the artist to limit saturation to small areas so the illusion remains readable as the pigments shift with time.
Q: What should I wear to a ribcage or inner arm session?
A: For ribcage work wear a loose sports bra or a button-front top in its normal worn state so the artist can expose the area without tugging. For inner upper arm pieces bring a sleeveless or easily rolled shirt that leaves the medial bicep clear. Comfortable, non-restrictive clothing makes the session smoother and prevents unnecessary friction on the fresh stencil.
Q: How often do 3D illusion tattoos need touch-ups?
A: Many illusions need at least one touch-up within the first year to restore crisp highlights and thin shadows. Dense blackwork pieces may hold longer, while micro-detail and single-needle elements are the most likely to require a retouch. Plan for a realistic touch-up timeline during booking so the artist can set expectations.
Q: Are there design choices that work better on darker skin tones?
A: High-contrast approaches and bolder contours read more reliably across darker tones, while extremely thin white highlights can be less visible. When you book, request healed examples on similar skin to yours so you can choose lineweight, saturation, and highlight strategies that will read well in daily life.
