
Someone I know spent months deciding on a tiny white design only to realize the hard part was predicting how it would heal and age on their skin. White ink behaves differently from black, and choices like placement, line spacing, and aftercare change the outcome more than the initial sketch. Read on for 12 healed white ink ideas that first timers can actually live with, plus specific things to tell your artist and realistic expectations for the first few years.
1. Minimalist Geometric Shapes on the Collarbone
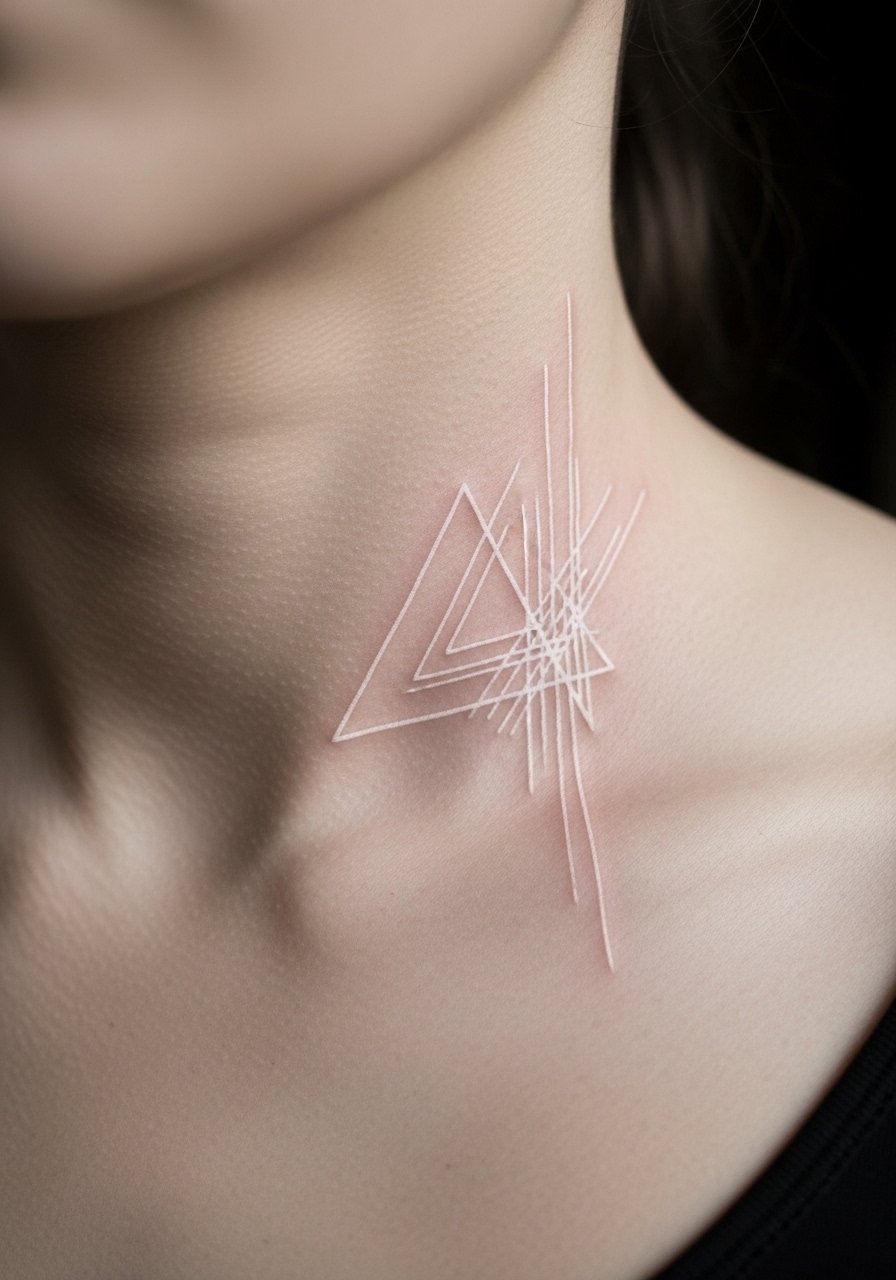
Someone I know picked this for its subtle placement and it stayed discreet without looking like a scar. Tell your artist you want spaced linework and modest needle depth so the shapes do not blur together over time. Collarbone sits on thin skin so expect a 2 out of 10 pain level and a short single session. Most people see crisp edges at six months, a softer glow at two years, and faint outlines by year five unless you schedule annual touch-ups. Common mistake is asking for ultra-thin lines that need more saturation than the area allows. Ask for reference photos showing healed collarbone work rather than fresh stencil photos.
2. Simple Script on the Inner Wrist

Wrist text heals softly and reads like a personal mark rather than a bold statement. Warning: inner wrist loses pigment faster because it sees sun and friction from sleeves. When you consult, request slightly heavier letterforms than the sketch so the letters stay legible once healed. Pain is low to moderate and a micro session often suffices. Expect clear lettering at six months and gradual softening at 12 to 18 months. The biggest error is asking for tiny cursive that disappears. If you want longevity, discuss a light gray underlay to increase contrast without losing the white look.
3. Symbolic Mandala on the Shoulder Blade

Mandala patterns use dot work and stipple shading to create texture that survives healing better than solid fill. Artists split on visibility across skin tones. One camp says mandalas pop on darker complexions because of contrast. The other camp argues fine white detail can vanish on pale skin. Tell your artist you want layered dot work with slightly larger negative space so the pattern holds at two and five years. Shoulder blade tolerates longer sessions and usually needs two passes for depth. Respect the mandala's cultural origins by choosing adapted motifs rather than direct sacred symbols unless you have cultural ties.
4. Fine Line Floral Outline on the Ribcage

Fair warning: the ribcage is a 7 out of 10 on most pain scales, but the vertical stretch and natural breathing movement make it a distinctive canvas. In my experience fine line here can blur if lines are too tight. One common approach that holds up is slightly thicker contour lines with negative space inside petals. Expect puffiness during week one, then a softer glow by six months. Many clients schedule a touch-up after the initial healing to restore lost crispness. The mistake I see most is asking for dense detail in a small area without planning for a second session.
5. Micro-Realism Portrait Accent on the Forearm

Micro-realism uses white ink for highlights that give an ethereal lift to portraits rather than full images in white. When you sit with your artist, show healed reference photos and ask for layered passes to build subtle saturation. Forearm sessions are longer but tolerable at a 4 out of 10 pain level. Expect highlights to be most visible at six months and to soften by two years unless refreshed. A frequent mistake is treating white as a standalone portrait color. It works best as accent over soft gray shading or as a tiny standalone designed to embrace fading.
6. Neo-Traditional Star Cluster on the Ankle

Ankle pieces have whimsical motion with clothing and footwear rubbing the area, so anticipate frequent touch-ups. Small clusters age into faint, scar-like marks that many first timers prefer for low commitment. The ankle fades faster than forearm and usually needs a top-up within 12 to 18 months. When you consult, ask for slightly bolder star centers and a hint of pale gray to maintain contrast without losing the white aesthetic. Expect light swelling the first week and brisk healing after. Avoid asking for micro dots placed too close together as they can merge while settling.
7. Blackwork Hybrid Moon Phase on the Inner Thigh

This hybrid technique uses white ink over a black base to create glowing moons that read against darker skin. It requires multiple appointments and patience for saturation. One controversy is whether white over black holds long term. Some artists support it because contrast preserves visibility. Others worry about ink migration and yellowing. In practice, the inner thigh protects the piece from sun, which helps. Plan for two to three sessions, and budget time for touch-ups at year one. Thigh skin accepts saturation well but bruising and swelling can be more pronounced during sessions.
8. Watercolor Dot Work on a Finger

Finger tattoos are notorious for rapid fading and frequent touch-ups. White ink on fingers ages into a whisper within months unless you accept that as the intended result. If you want it to last, ask for micro dot spacing and plan for quarterly refreshes for the first year. The session is quick but the trade-off is maintenance. A common mistake is expecting a finger tattoo to be permanent without follow-up. If career considerations matter, remember that finger pieces are very visible and may influence hiring in some industries.
9. Small Crescent Behind the Ear
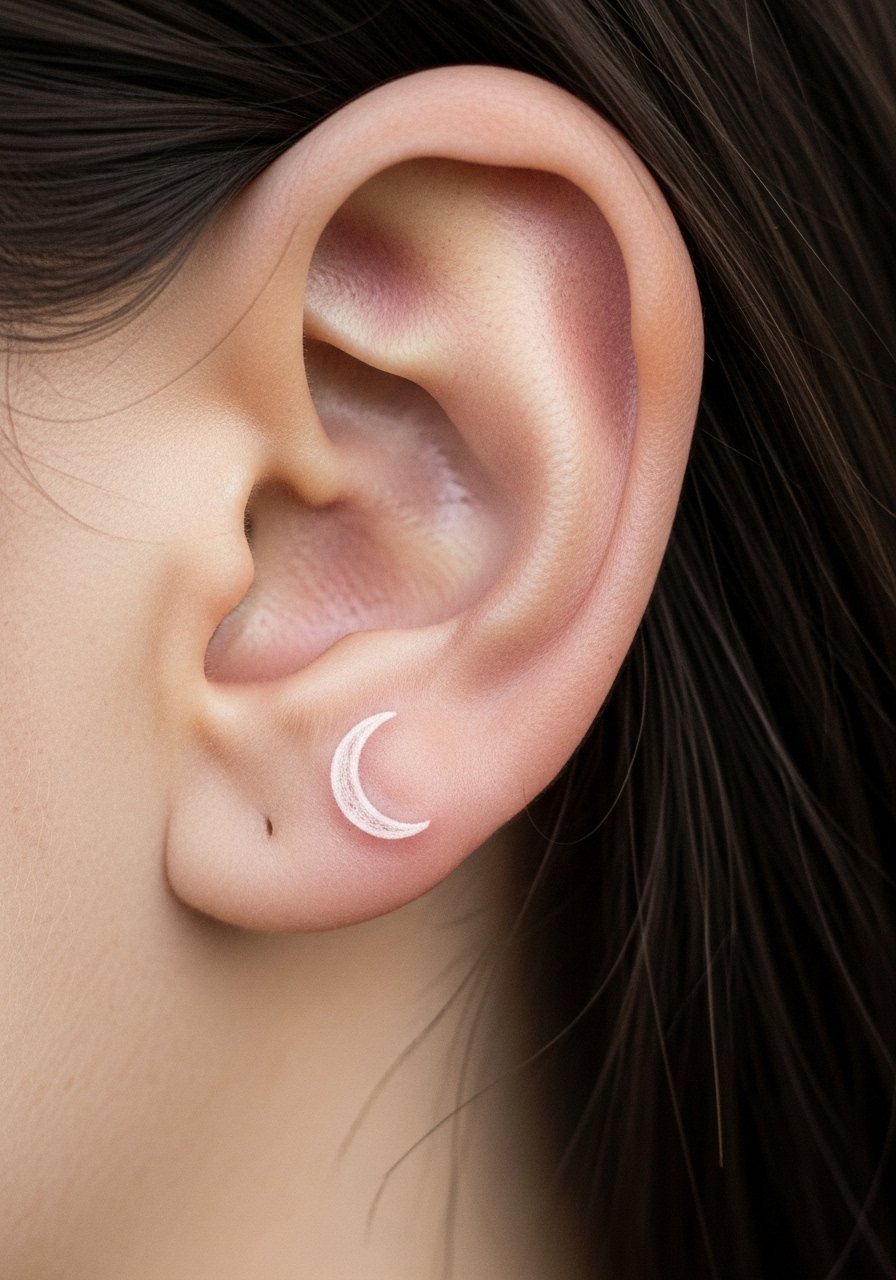
Behind-ear pieces heal fast and read as private since they are usually hidden. This placement counts as neck-adjacent so find an artist experienced with delicate curves near cartilage. Sessions are brief and pain is mild, but ink there can blur if the linework is too close to the hairline. Expect crispness at six months and a softening after a year. A good consultation includes a hair-moving test so the artist can judge how the piece will sit with movement. If you plan to wear short hair, think about visibility and long-term maintenance.
10. Neo-Minimal Compass on the Lower Back

Lower back tattoos usually avoid the high-friction zones that speed fading. This placement works well for slightly larger minimalist motifs that still keep the white subtle. Ask for a balanced mix of thin contours and slightly heavier internal marks so the compass keeps shape after two years. Sessions are moderate in length and pain hovers at five out of 10. A mistake I often see is going too tiny on a curved area. Allow the design some breathing room and discuss how the piece sits with clothing and waistbands.
11. Tiny Constellation on the Upper Arm

Upper arm offers forgiving skin and low friction, which helps white ink hold longer. Constellations use dot work and slight negative space to create a readable pattern even as pigment softens. Ask for slightly larger star points than the sketch and a touch of micro gray in connecting lines for longevity. Session time is short and pain is low. At two years you should still see a soft pattern. The common error is packing stars too densely which leads to a muddied look after a few years.
12. Fine Line Floral Accent on the Sternum

Sternum and chest placements are intimate and can be more sensitive during sessions. If you choose this spot, book a practitioner who has experience with chest curvature and breathing-related movement. Fine line can blur if lines are too close, so request slightly wider spacing and plan for a touch-up after initial healing. Expect notable puffiness during the first week and a slow settle over three to six months. Also consider how clothing and necklaces will rub the area during healing. The reward is a central, personal design that softens gracefully if you want low-commitment fading.
Tattoo Prep and Aftercare Essentials
Start prep at least 48 hours before your appointment. Hydrate, sleep well, avoid alcohol and heavy sun exposure. During the first week treat the area like an open wound. Use a mild soap to clean gently, pat dry, and apply a thin layer of a recommended dressing or balm. Expect puffiness early and plan for touch-ups at 12 to 18 months depending on placement.
Shopping list
- Fragrance-free gentle foaming cleanser. Use daily during the first week to remove ointment residue and sweat without irritating freshly tattooed skin.
- Lightweight fragrance-free moisturizing lotion. Apply thinly after day four while the tattoo transitions from scab to healed surface.
- Medical-grade second skin bandage, small sheets. Great for the first 24 to 48 hours when you want a sterile barrier that reduces rubbing from clothes.
- Zinc oxide mineral sunscreen stick. Long term sun protection is essential for white ink to avoid yellowing and loss of contrast.
- Non-scented occlusive balm for touch-ups. Use sparingly during the first week to keep the area hydrated without clogging.
- Soft breathable bandage wrap, 6-inch roll. Handy for areas that catch on clothing or during sleep to avoid rubbing.
- Aquaphor Healing Ointment. A mainstream option that some artists still recommend for the first 48 hours before switching to a lighter lotion.
Every tattoo is different. Always follow your artist's specific aftercare instructions. Consult a dermatologist if you have skin concerns or unusual healing issues.
Frequently Asked Questions
Q: Will white ink fade faster on pale skin than on darker skin?
A: Artists disagree and both camps have valid points. One group says pale skin offers less melanin interference so white outlines sit cleaner. The opposing view notes white can appear near-invisible on very pale skin once healed. From what I've seen, placement and spacing matter more than skin tone. If visibility is a priority, ask for subtle gray shading under the white or pick placements that get less sun.
Q: How soon should I schedule a touch-up after the initial white ink session?
A: Many people book a touch-up around two to eight weeks after the first session once the skin has fully healed. For saturation-hungry placements like shoulders or thighs you may need a second appointment during the same visit plan. Long-term, expect touch-ups every 12 to 18 months if you want the piece to stay crisp.
Q: Do white ink pieces on ribs and sternum blur more often than on arms?
A: Yes, movement and skin stretch increase the risk of line softening on ribs and sternum. Two camps debate whether technique or the skin type is the culprit. Ask your artist where they stand before booking. If you love fine line in those spots, request slightly wider spacing and plan for a follow-up touch-up.
Q: What aftercare makes a real difference for preventing yellowing or scar-like fading?
A: Sun protection is the biggest habit that helps. A zinc oxide mineral sunscreen stick applied whenever the area sees daylight prevents discoloration. Gentle cleansing and light fragrance-free moisturizer after the first week help too. Avoid harsh exfoliation on the tattooed area for months.
Q: Are there placements where white ink is a poor choice for first timers?
A: Fingers and palms are higher maintenance and often not the best starting point if you want low upkeep. If you pick a finger, accept the likelihood of multiple touch-ups. For career-sensitive placements like hands and face, weigh visibility and professional considerations before committing.
