
Someone I know spent months saving reference shots before their first geometric piece. The problem was not the number of images. It was knowing which design and size would actually keep its clarity on curved skin. Below are twelve fine-line and blackwork ideas that women keep asking about this year, with placement tips, what to tell your artist, and realistic healing and touch-up timelines.
1. Flower of Life Mandala on Outer Forearm

Someone I saw get this on their forearm used it as a way to test dot work at a modest scale. The outer forearm gives enough flat surface that dot density reads well. Tell your artist you want consistent spacing between the circles and a modest negative-space border so the motif does not blur into a band after two years. Common mistake is asking for ultra-fine dots in a 1.5-inch diameter. That shrinks the detail and invites early fading. Expect a one to two hour session with mild to moderate pain and a likely touch-up at year two for restored saturation.
2. Metatron’s Cube Center-Chest Sternum Piece

Fair warning, the sternum can be sensitive while you sit. The geometry here benefits from bold outlines that anchor the complex interlocking forms. Artists split on fine line at this spot. One camp says the movement of breathing stretches fine lines and they blur faster. The other camp says the key is slightly deeper line depth and room between intersections. In a consultation, ask which approach they use and to show healed photos on chest placements. Plan for a two to three hour session and expect touch-ups at year three if you choose a finer execution.
3. Sri Yantra Vertical Thigh Design
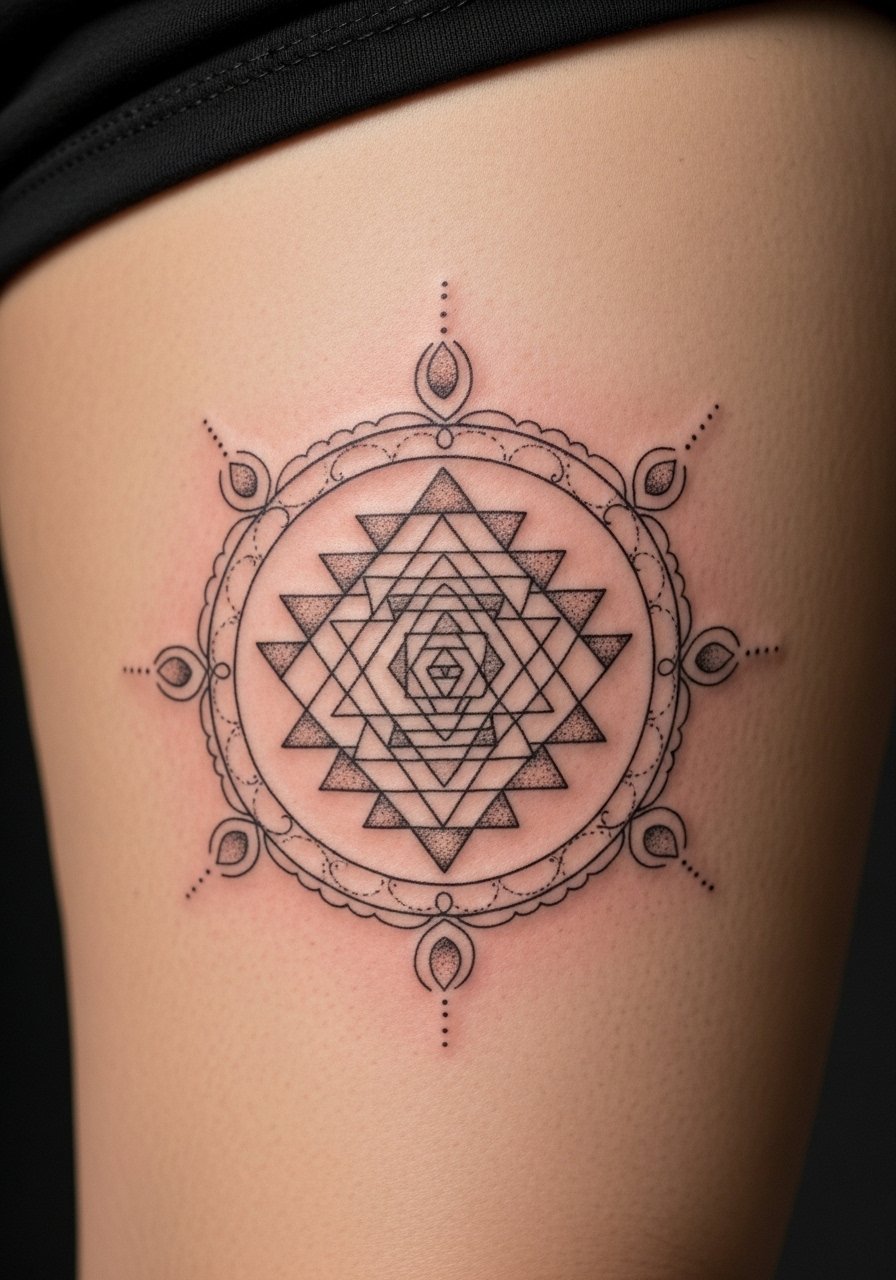
The outer thigh takes ink well and is forgiving of larger compositions. This vertical orientation looks like it flows with the leg and can be partially hidden by clothing. If you want the lines to remain crisp, request slightly thicker contour lines around the central triangles and finer interior lines. A common mistake is compressing a full Sri Yantra into too small an area. Expect two sessions of moderate pain and a touch-up window around year two if you like very delicate interior lines. Note the design has Hindu origins, so mention that to your artist if you prefer a respectful adaptation rather than a direct religious copy.
4. Seed of Life Micro Wrist Tattoo

The inner wrist is public and heals quickly but it also rubs against sleeves constantly. For a 2-inch Seed of Life choose a dot work approach with slightly larger dots and a thin outer halo of negative space. Say this at consultation and ask for the stencil to be placed slightly off-center so the piece sits with wrist movement. Typical session time is under an hour. Expect touch-ups sooner than on the forearm because daily friction and sun exposure reduce saturation faster.
5. Fibonacci Spiral Along the Ribs
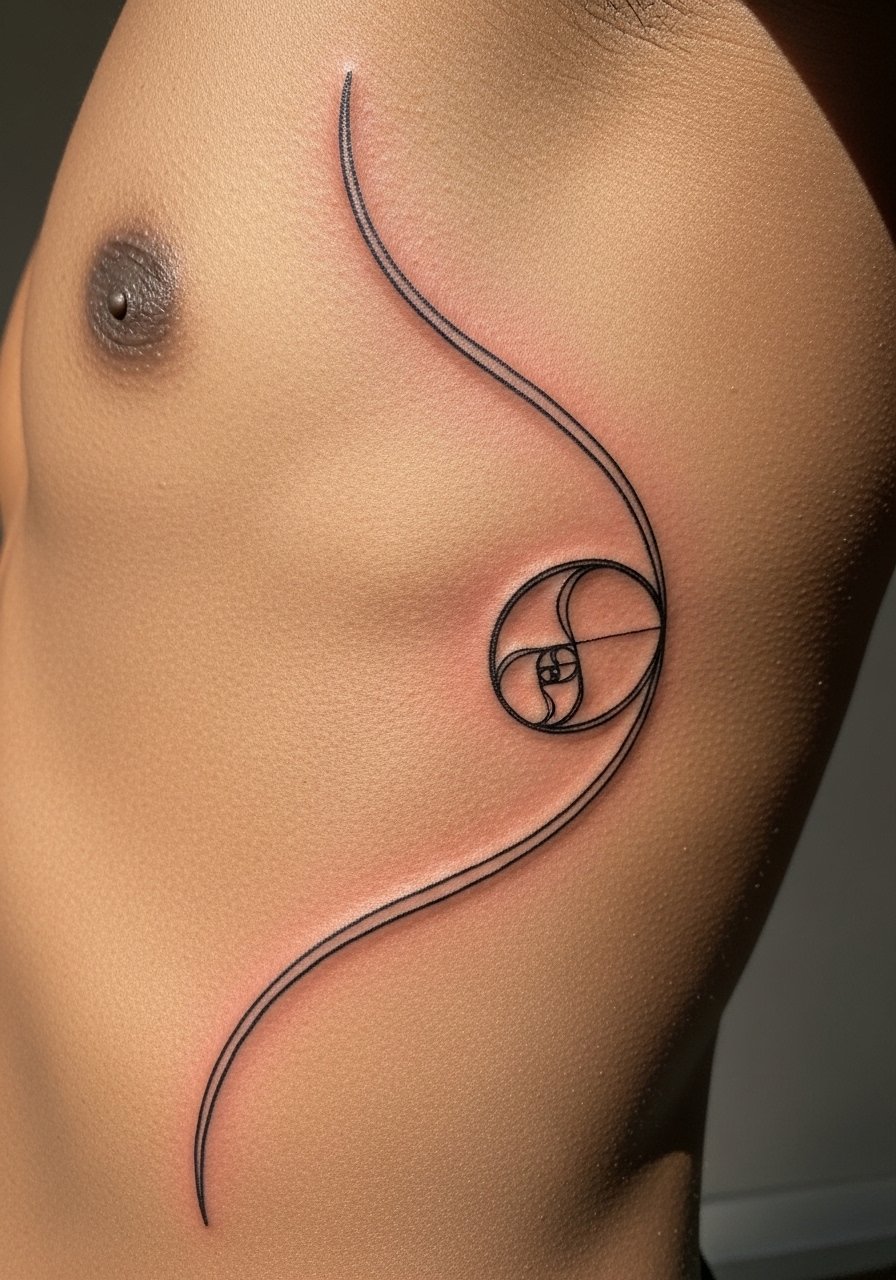
Fair warning, the ribcage rates high on most pain charts. The reward is a curve that lives with the body, which makes this mathematically driven spiral feel alive. Artists debate fine line here. One group warns that the skin movement causes thin lines to blur within one to two years. The other group says with correct spacing and slightly heavier linework the spiral keeps definition longer. Tell your artist you want the curve to follow your musculature and to leave breathing room between turns. Sessions usually run longer and you should budget for a touch-up at year two to three.
6. Fruit of Life Upper Back Panel

Large back panels allow you to build complexity over multiple sessions. This design benefits from layered dot density so the forms appear multidimensional. A common mistake is trying to complete a full upper-back Fruit of Life in one marathon session. Plan four to six sessions with staggered healing time. Tell your artist you want staged saturation so they can assess healed contrast before adding depth. Expect low to moderate pain, and a realistic touch-up decades out if you maintain sun protection.
7. Hexagon Repeat Along the Collarbone

Collarbones are shallow and can be unforgiving for tiny details. The hexagon motif reads best with slightly thicker outlines and a deliberate gap between repeating tiles. Mention during consultation that you want negative space between shapes to avoid the look of a smudged band over time. Sessions are short. Pain can spike over bone contacts. Keep in mind some jobs still frown on visible collarbone work, so think about placement relative to your wardrobe.
8. Star of David Within a Circle on Upper Shoulder

Shoulder placements let the piece peek from sleeves and read well in motion. If the symbol has personal or communal meaning for you, tell your artist whether you want a literal rendering or a stylized approach. A common error is overscaling the circle so it bulges over the shoulder cap. Ask for a mockup in motion before inking. Expect two to three sessions and modest pain. If cultural considerations apply, note your intent so the final piece respects origin and context.
9. Cube of Metatron Building a Forearm Sleeve Start
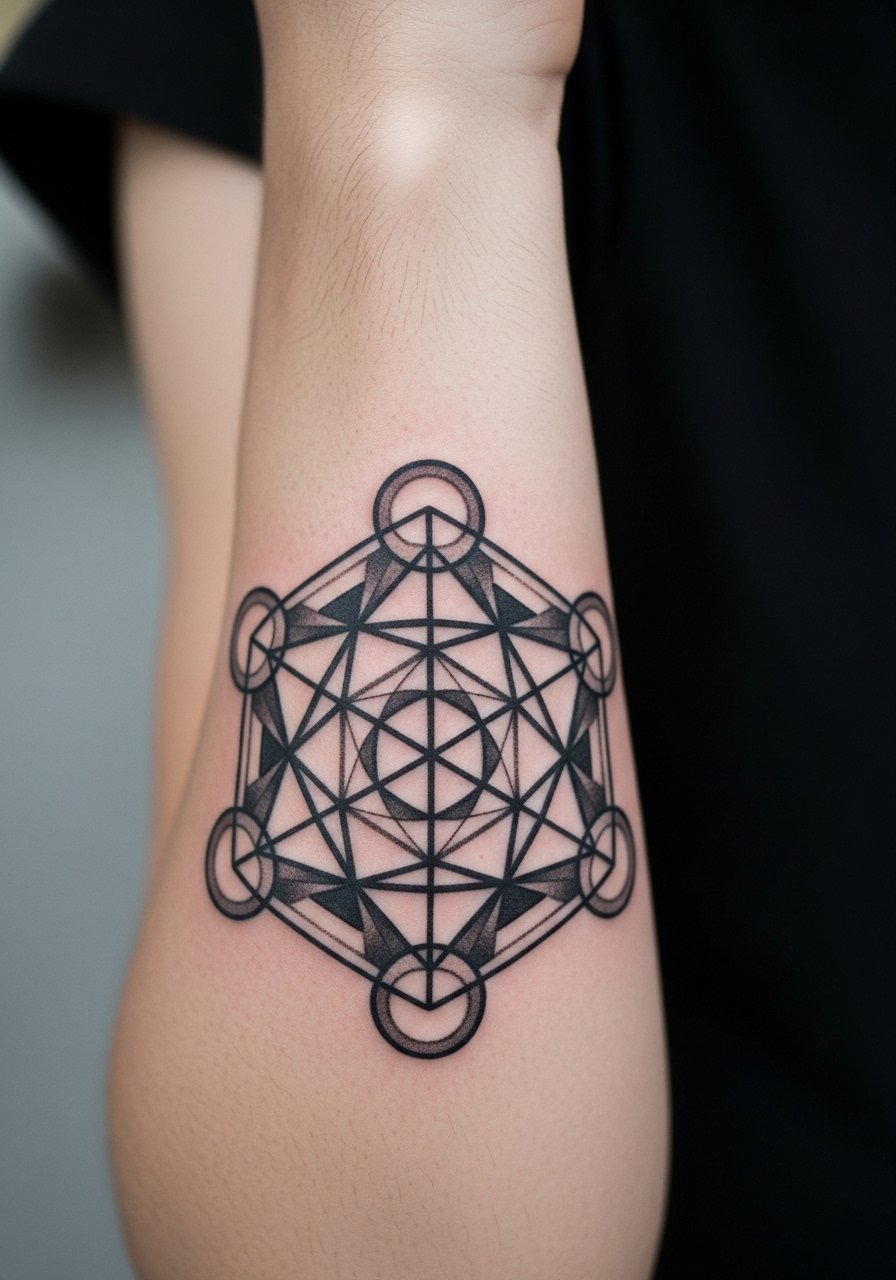
This is a good sleeve-start piece because it stacks well into other geometric elements. Tell your artist you want the cube to act as an anchor and to leave connective negative space for future additions. The mistake I see most is asking for maximum density right away, which makes blending future motifs awkward. Sessions will be multiple and can run from one to three hours each. Blowout risk is lower on the forearm than on softer areas but still ask the artist to preview needle depth and line spacing.
10. Triangle-in-Circle Minimal Ankle Mark

Ankle tattoos are an easy way to try a compact geometric idea. The triangle-in-circle works as a minimalist symbol and usually fits a single short session. Common mistake is choosing lines that are too close together for a small canvas. Ask for a slightly thicker ring and a faint gap between triangle points and circle edge. Pain is brief but sharp near bone. Expect to revisit the linework at year two if you wear sandals and frequently expose the area to sun.
11. Dotwork Mandala Centered on the Chest

A central chest mandala makes an immediate statement and plays with symmetry across the pectoral curve. Because breasts and chest change with weight and time, ask your artist to align the design with fixed landmarks like the sternum and collarbone. Many people request overly fine inner mandala rings, which blur faster. I recommend slightly bolder inner rings and careful stipple spacing. This project usually takes multiple sessions and will need a touch-up around year three if you prefer very delicate inner shading.
12. Platonic Solids Cluster on the Pectoral

This spot highlights three-dimensional solids that sit well on the pectoral curvature. It reads like a scientific motif and works best with controlled shadow and crisp line edges. During consult, request mockups showing how the shapes shift with flex. A common mistake is squeezing too many solids into a small patch so the eye has no resting point. Expect one to two sessions with moderate pain. Touch-ups are uncommon but possible if you want the micro shading refreshed.
Tattoo Prep and Aftercare Essentials

Below are the kit items I recommend for first timers and for experienced ink owners who prefer geometric work. Because Section 9b did not list many brand names, I focused on product types tattooed people actually ask about. Each item links to an Amazon search so you can compare sizes. One mainstream option appears in this list as a common studio recommendation.
Healing and aftercare essentials
Fragrance-free moisturizing balm for tattoo use. Use this after the initial scab phase to keep the skin supple and to avoid clogged pores. Apply a thin layer twice daily once the wound has closed.
Medical-grade occlusive bandage, second skin style. Use for the first 24 to 48 hours if your studio recommends occlusive healing. Some artists favor this and others prefer dry healing, so ask your artist first.
Gentle ph-balanced foaming cleanser. Clean the area gently with lukewarm water and pat dry. Avoid scrubbing.
Lightweight fragrance-free balm for daytime wear. This is good for daytime moisture without leaving a greasy finish that attracts lint.
Silicone scar sheet or thin silicone gel. Useful weeks after healing to help level raised lines if you are prone to hypertrophic scarring.
Alcohol-free sunblock stick for tattoos. UV exposure is the number one thing that reduces crisp linework over years. Carry one for moments outdoors.
Replacement bandage strips for friction-prone spots. Use if your tattoo rubs against clothing during the first week.
Saniderm or equivalent medical-grade adhesive bandage. Many studios offer this as their studio aftercare option. If you choose this route, follow the artist's timeline exactly and monitor for trapped moisture.
Every tattoo is different. Always follow your artist's specific aftercare instructions. Consult a dermatologist if you have skin concerns or unusual healing issues.
Frequently Asked Questions
Q: Will fine line mandalas blur faster on ribs and chests than on forearms?
A: Yes, from what I've seen fine line holds better on flatter, less flexible areas like the forearm. Ribs and chests move with breathing and can stretch ink as it heals. If you want a mandala there, ask for slightly heavier primary outlines and more negative space between rings to preserve clarity.
Q: How should I choose between dot work and blackwork for a large back panel?
A: Dot work reads as three-dimensional when layered carefully and it allows subtle shading. Blackwork gives stronger contrast and usually lasts longer with less need for early touch-ups. Think about how visible you want the piece at a distance and mention that to your artist during booking.
Q: If my artist recommends second-skin but I prefer dry healing, who is right?
A: Artists are split on this. One camp says second-skin reduces infection and keeps lines crisp. The other camp worries it traps moisture around tight linework. It depends on the studio's protocol and your skin type. Ask your artist why they prefer their method and follow their plan for best results.
Q: For a small wrist Seed of Life, how soon should I plan a touch-up?
A: Expect to revisit the piece at around year one to two if you want the dot density refreshed. The wrist faces constant sun and friction which fades micro dot work faster than on the forearm.
Q: Where do I look to find an artist who nails geometric precision without named recommendations?
A: Use style-specific hashtags and local tags, check portfolio grids for healed photos, and filter directories for dot work or blackwork. From my experience, asking to see healed work on curved placements matters more than follower count.
Q: Do Platonic solids age differently on moving areas like the pectoral versus flat areas?
A: Yes, movement changes how micro shading ages. On the pectoral you will see softening at edges over time from flexing. On flatter areas the three-dimensional illusion stays crisper. Ask your artist for placement mockups while you flex so you can preview the effect.
Q: Is there a realistic schedule for touch-ups on detailed geometric sleeves?
A: Plan on a touch-up window between year two and year four depending on sun exposure and how tight the initial linework was. Periodic touch-ups every few years keep saturation consistent without needing major rework.
